Keith Black
-
Posts
6,728 -
Joined
-
Last visited
Content Type
Profiles
Forums
Gallery
Events
Everything posted by Keith Black
-
 I'm really at a loss for words to describe how much I look forward to this journey, press on Mr Keith.
 -
And I pondered that object for years always wondering but never knowing till now. Thank you, Eberhard. I would have great, if not impossible, difficulty in replicating the sailcloth ventilator. Even more difficult is determining what is being ventilated. The third set of photos in my post #802 is the only photo showing the forecastle deck. I've never known what was shown just forward of the 60 pound Parrott rifle. being so blurred I ignored it but now I'm thinking that's a companionway which would make sense and be reason for the sailcloth ventilator. Edit.....Impossible means giving it your best shot and if you fail, then the task maybe impossible. It's not a companionway forward of the 60 pounder, it's a hatch which fed ammunition to the Parrott. I wondered how they got shell and powder up ladders to the forecastle deck, they didn't, it was via a hatch. I looked for companionway stanchions and couldn't see any so it has to be a hatch. I'll have to move the bitts forward a tad but I'll get a hatch in there. Then I'll give it my best shot to model the sailcloth ventilator. It must be rare as nothing comes up when sailcloth ventilator or canvas ventilator is Googled. I owe it to Eberhard for the discovery and knowing what he was looking at and to the Tennessee for having one deployed to make an honest effort The hatch coaming is higher than the hatches on the main deck which makes sense because of waves breaking over the bow. The hatch cover will need to be partially open for the ventilator.
-
I've run out of words, all I can do is hit the wow emoji.
-
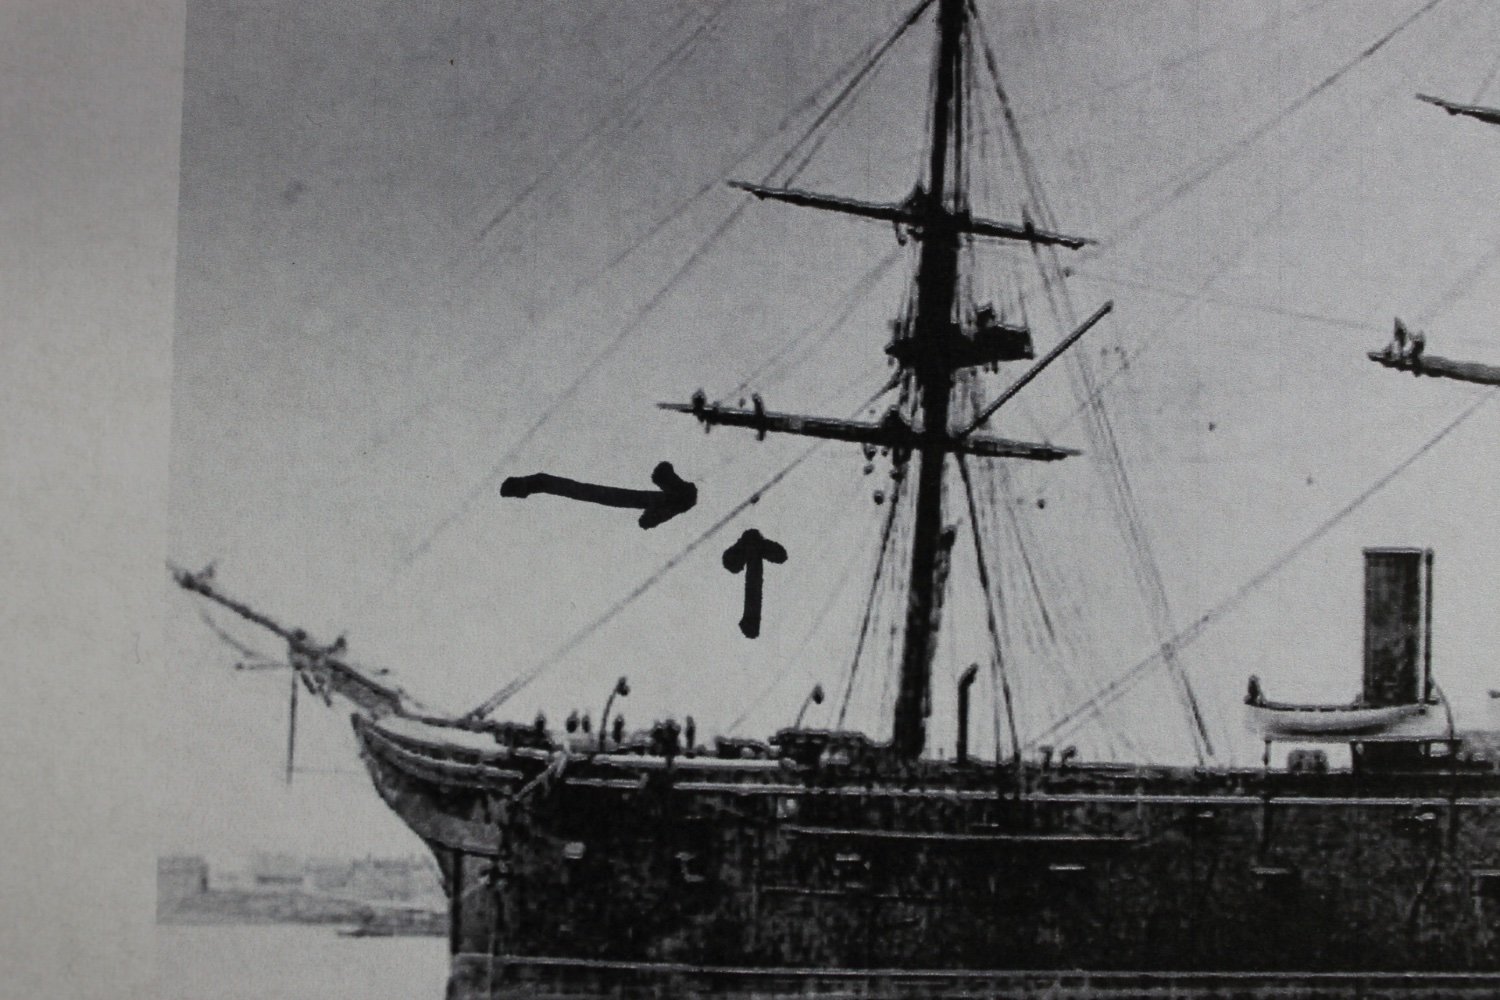
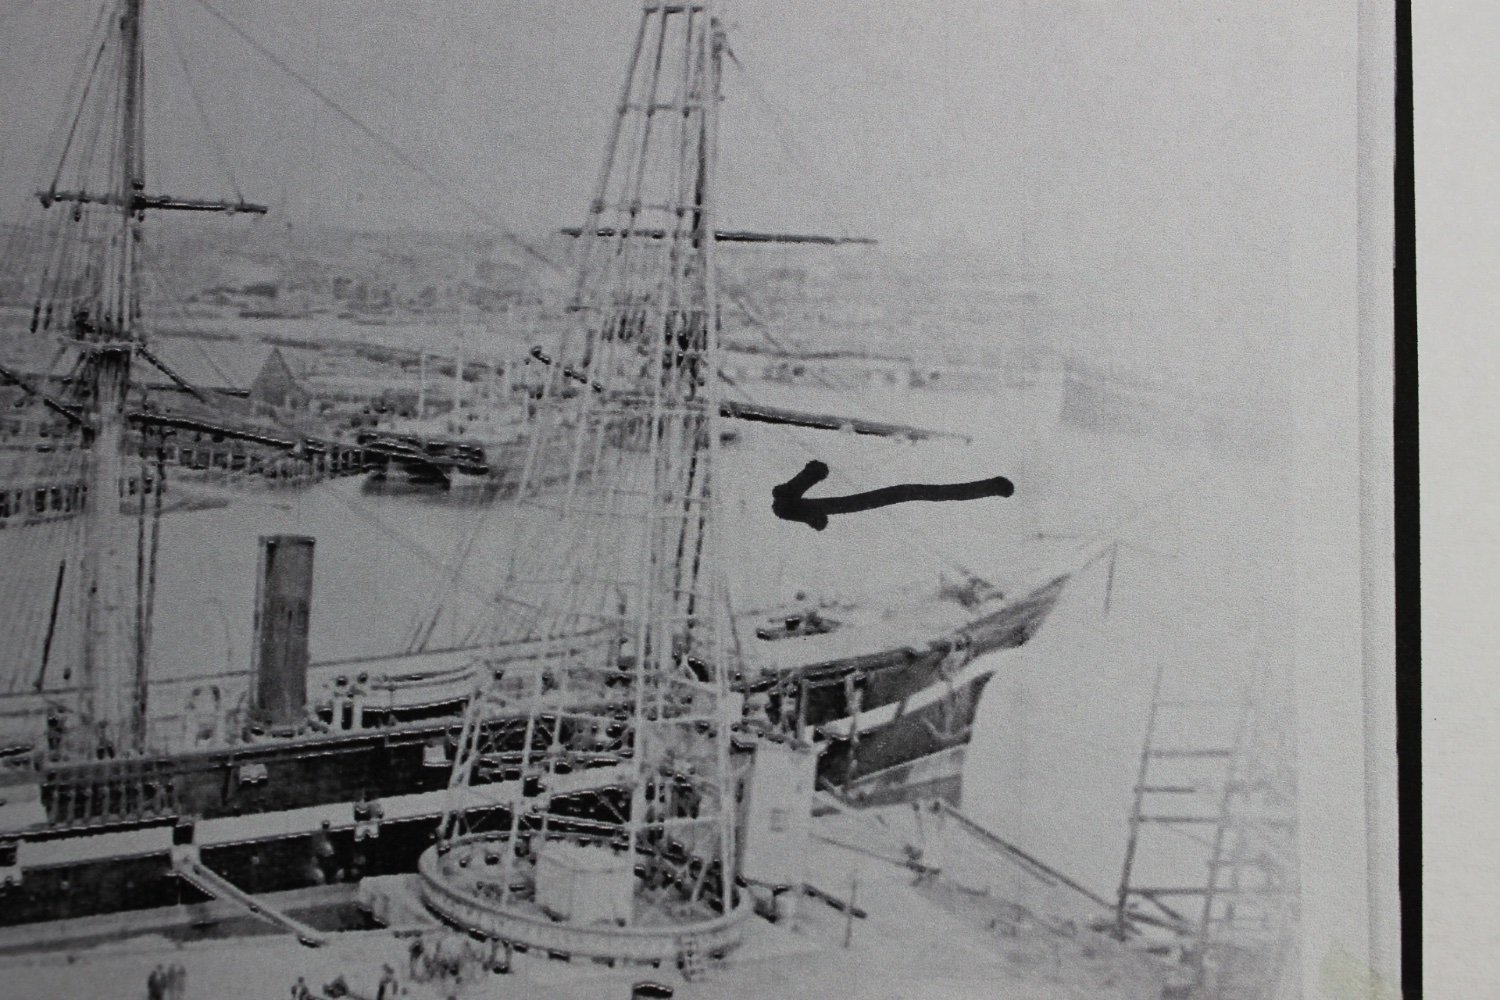
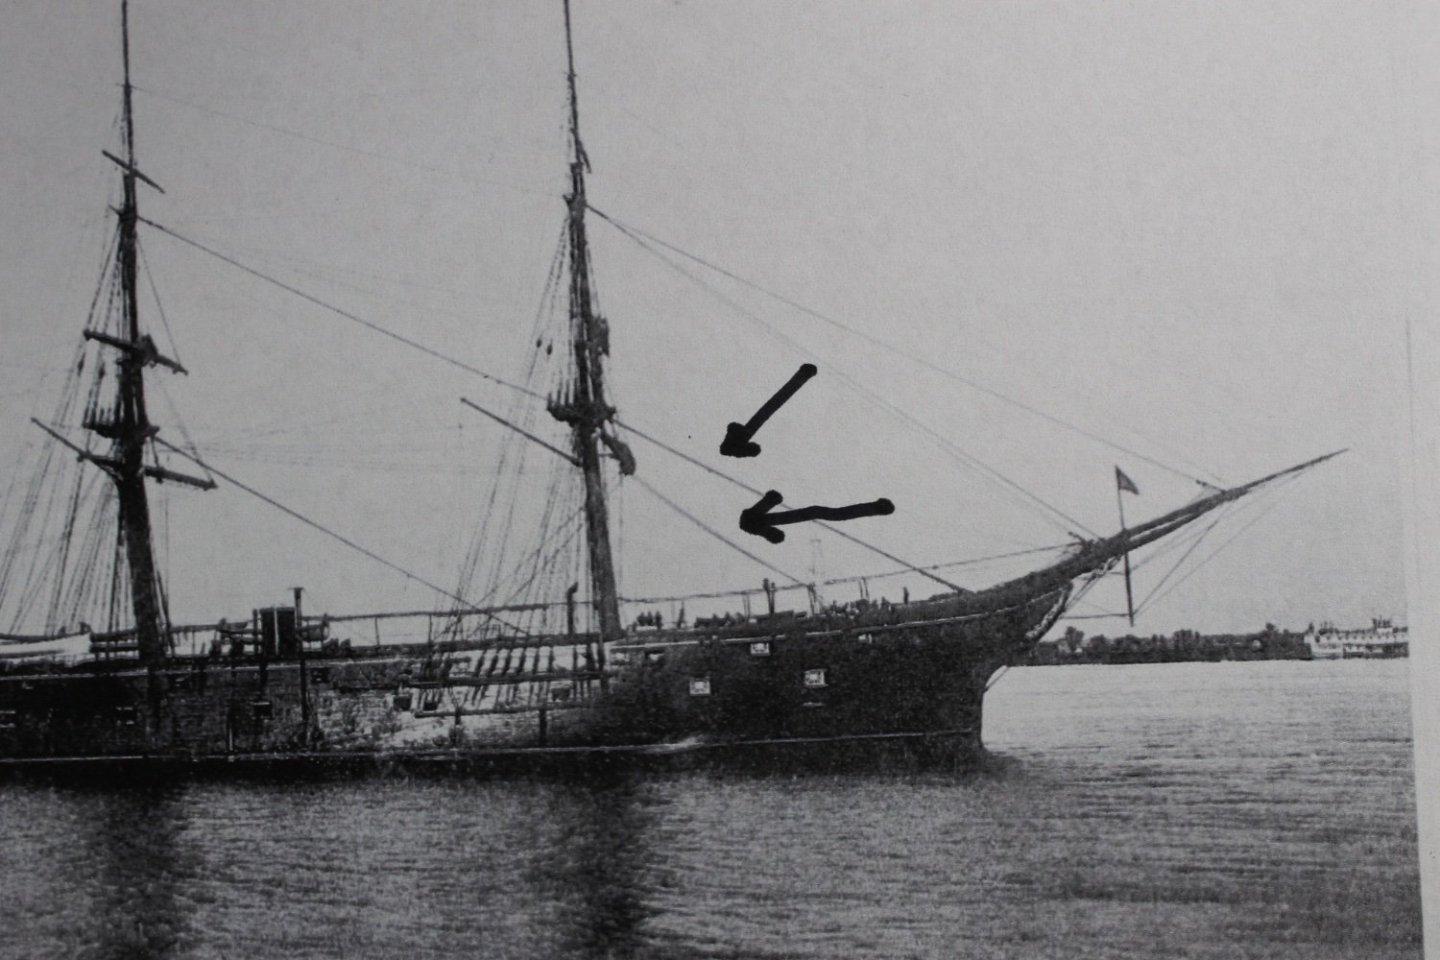
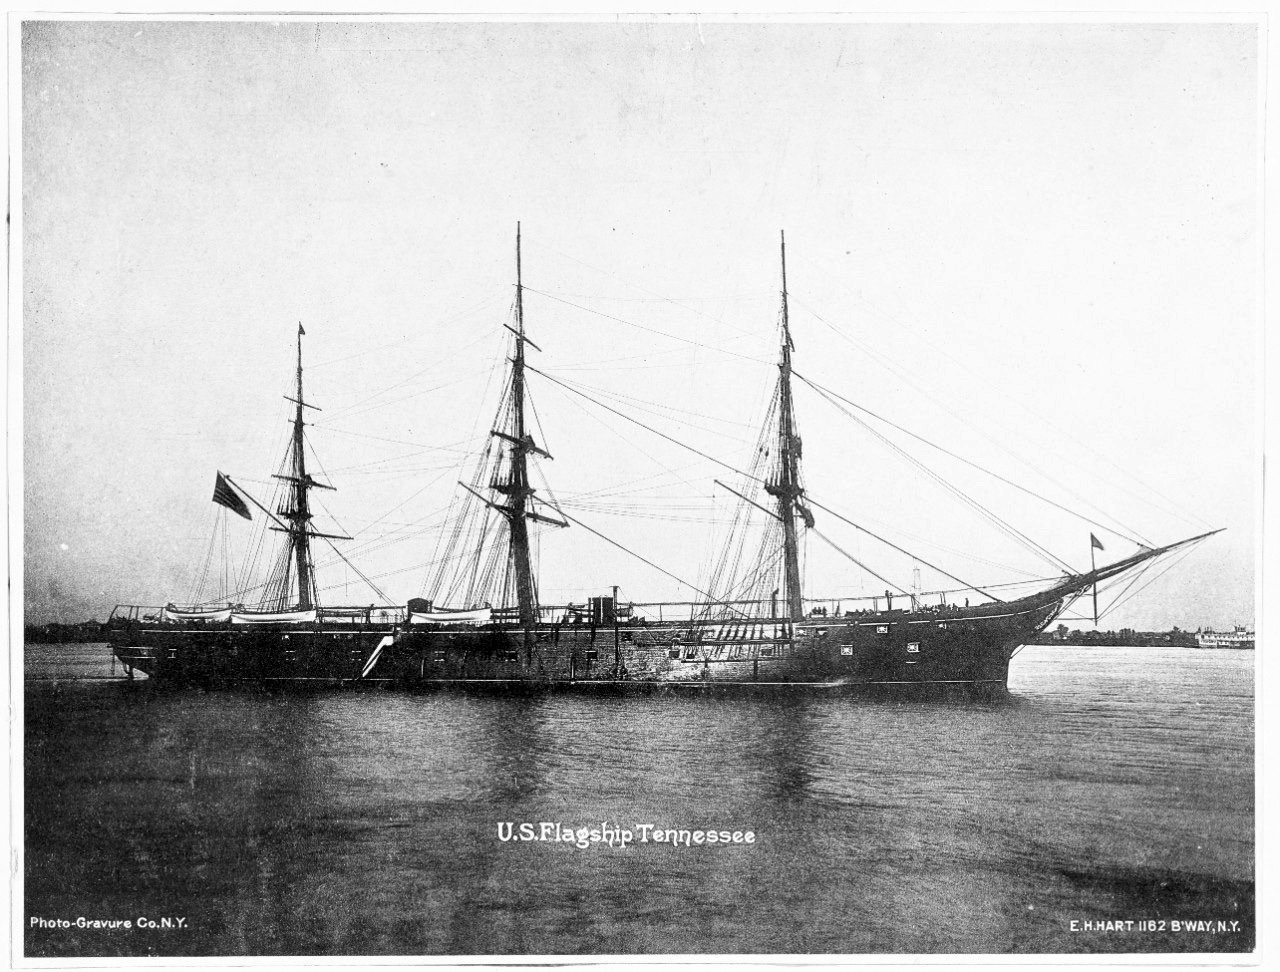
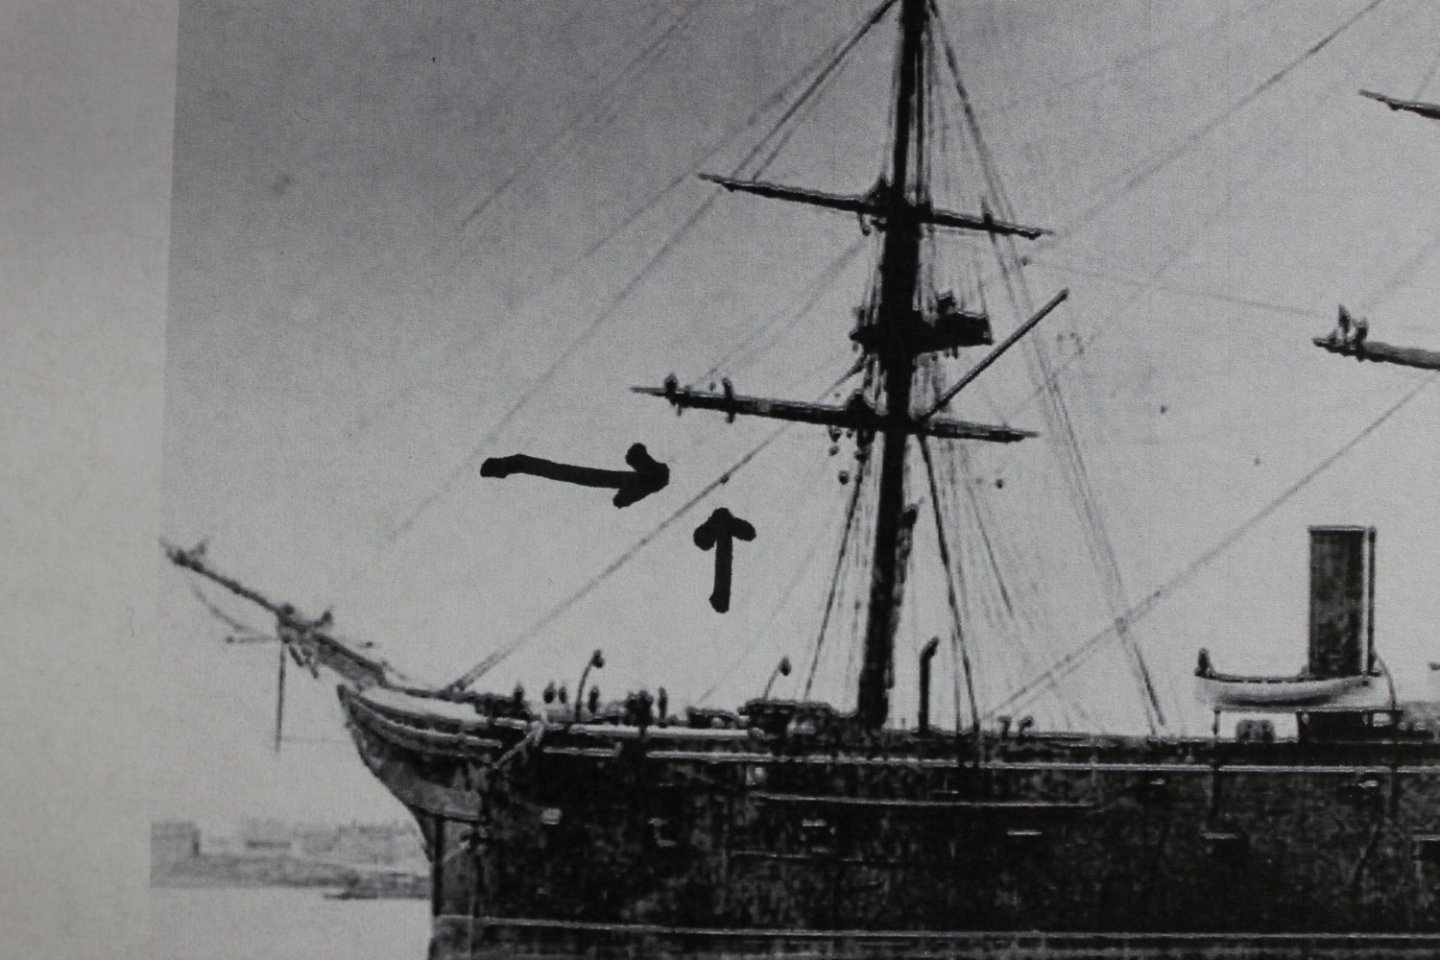
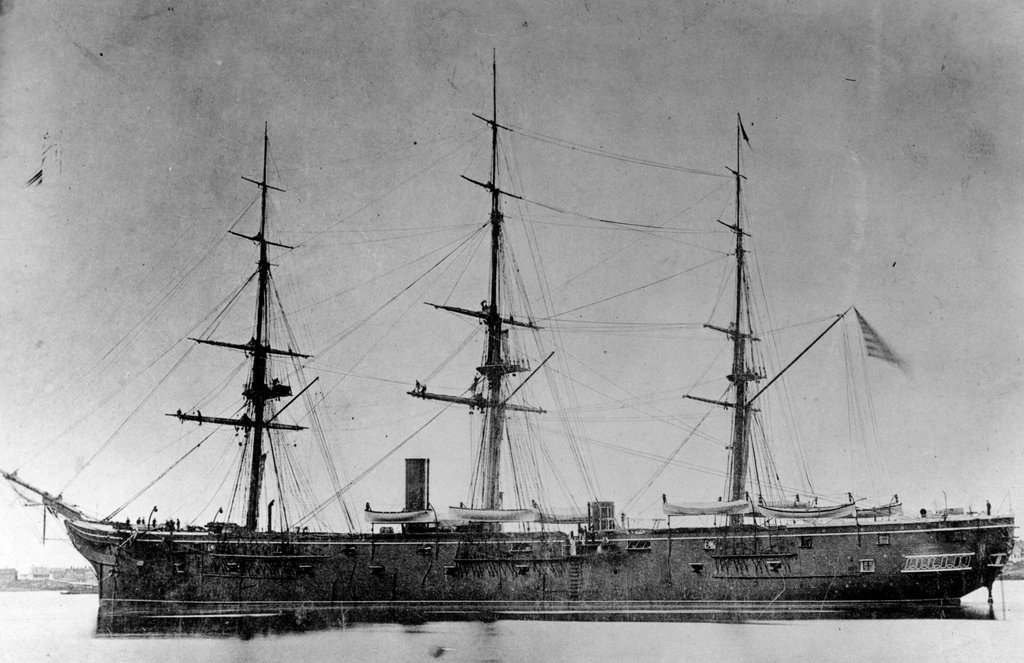
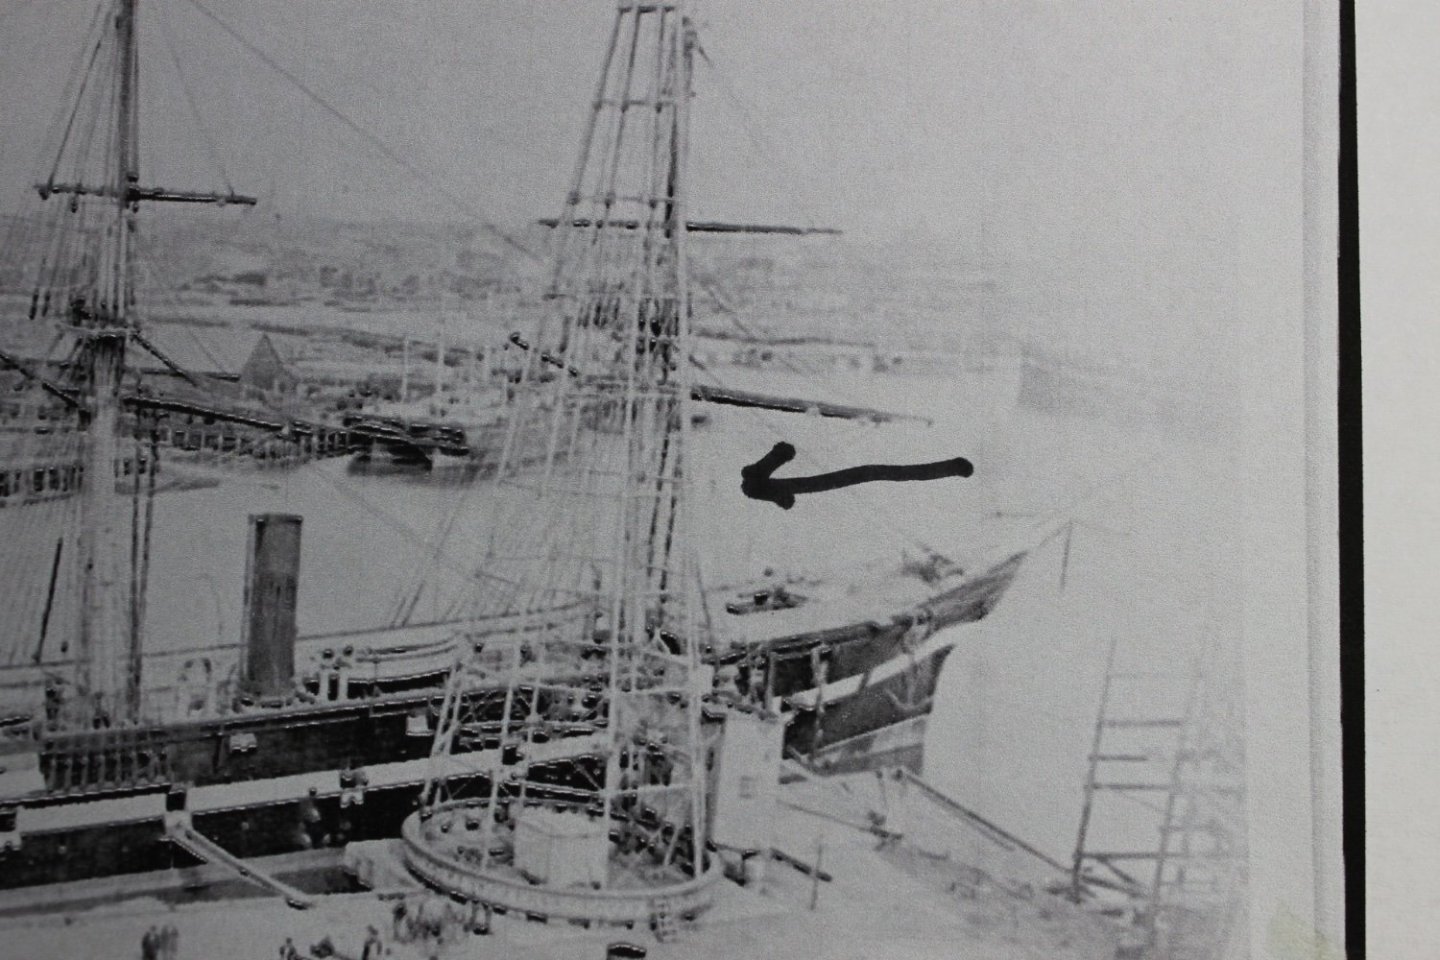
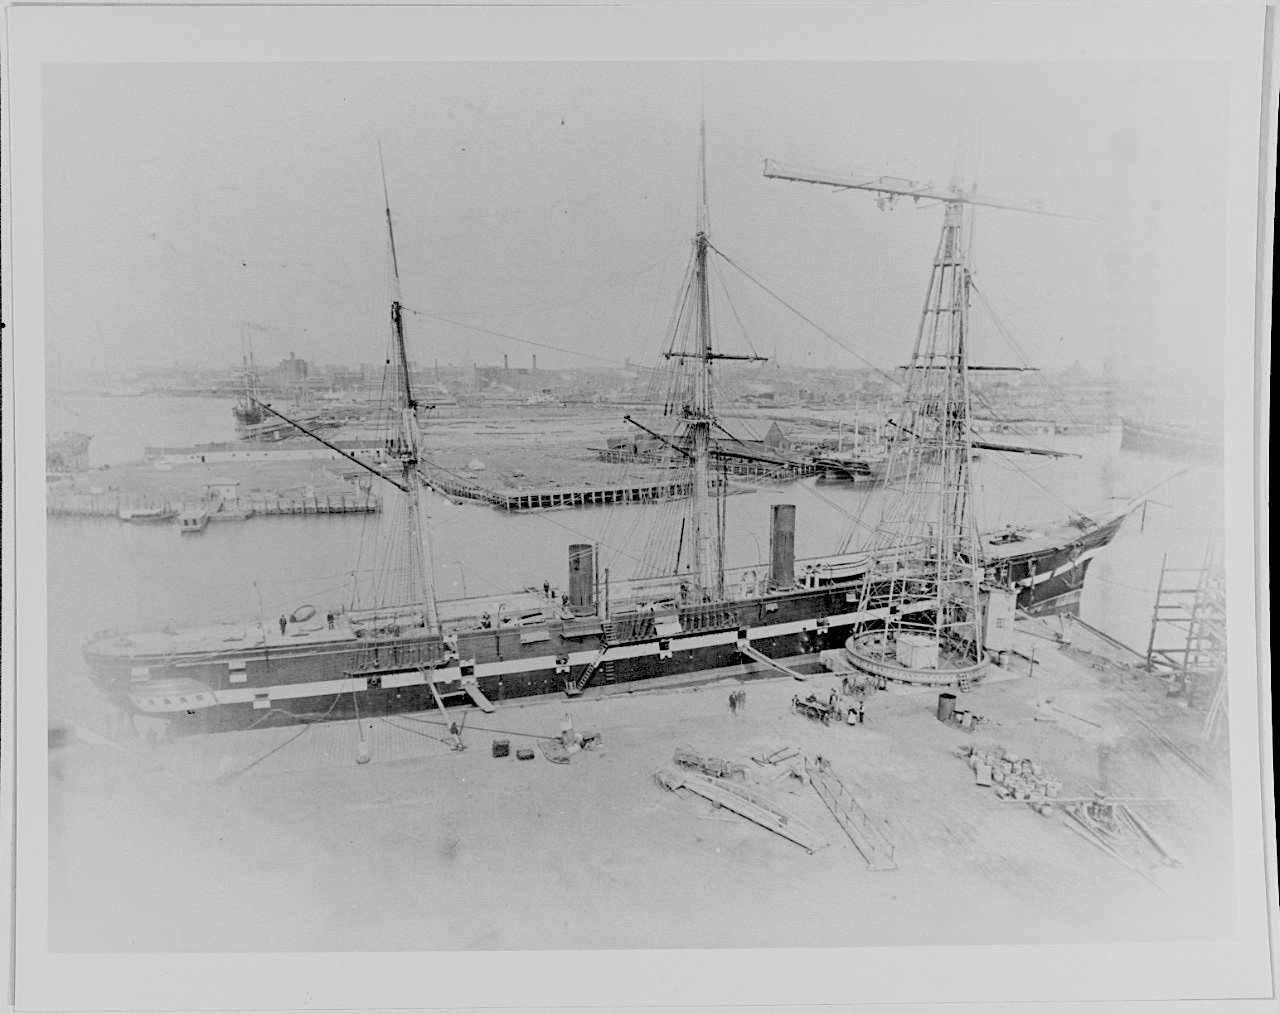
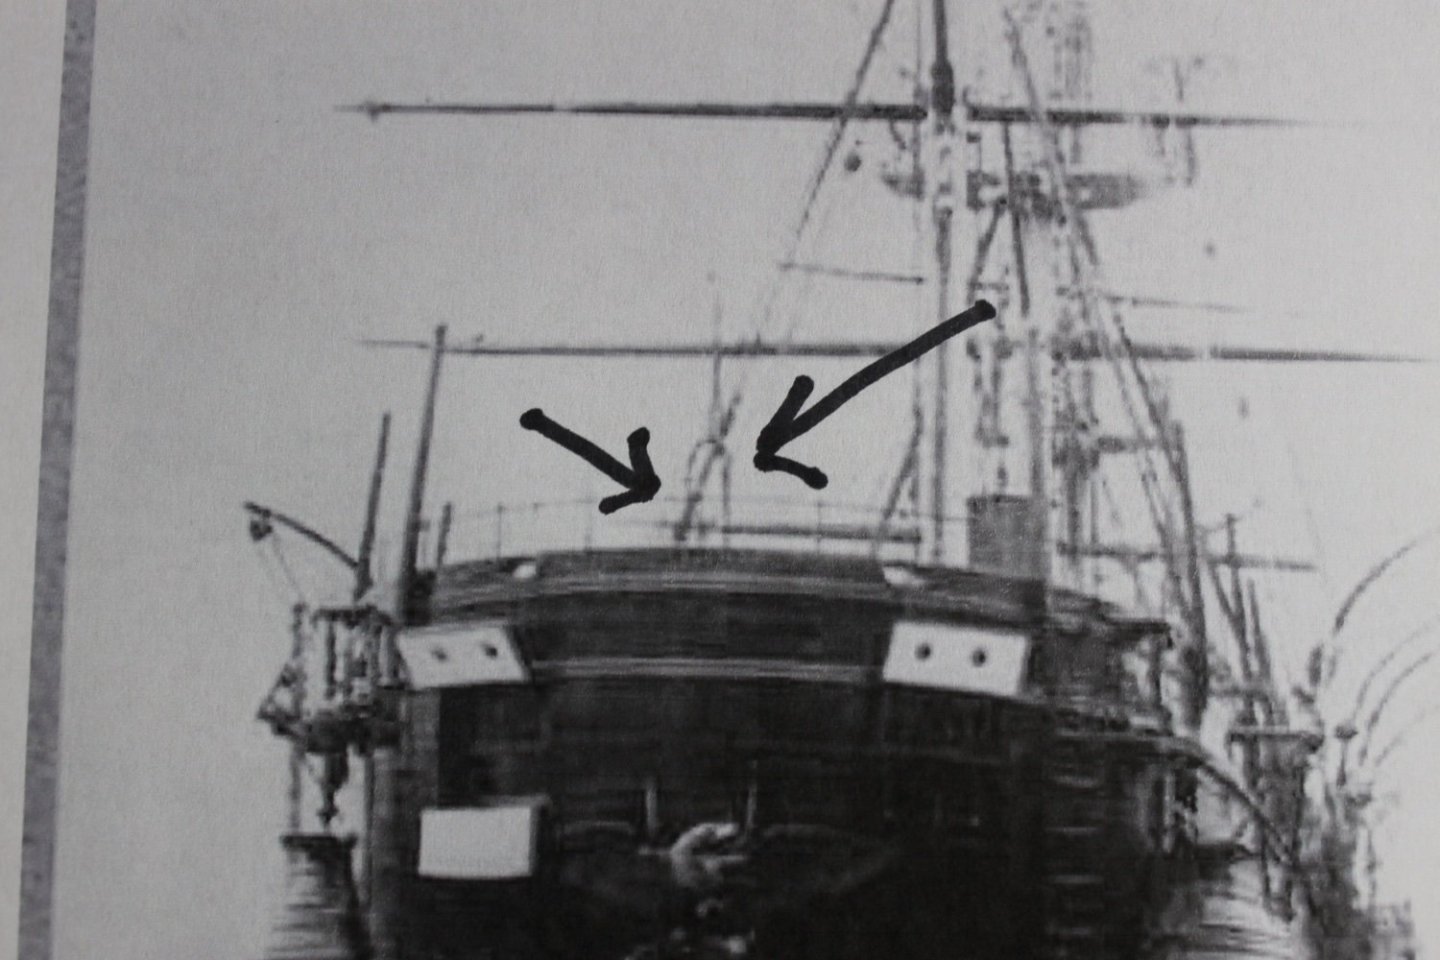
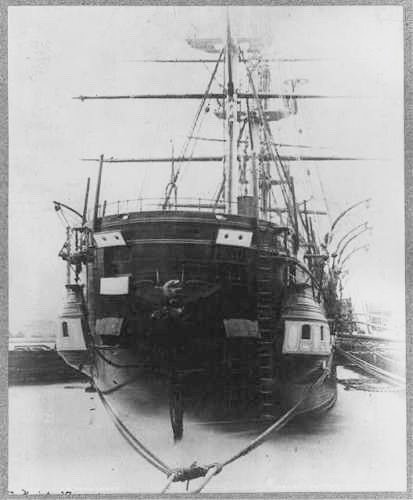
Once I was provided with all the useful information during the lantern discussion I went back over all the Tennessee photos and I'm pretty sure I've located the block for the masthead lantern. When I noticed it I slapped my forehead, smiled, and thought of and thanked each of you. In the below photo I'm pretty sure the top arrow is pointing to the masthead lantern block spliced into the stay. Also, zero to 180 degree vertical lines can be seen leading from the block to the stern castle stanchion railing area which I take to be the lantern guide, lift, and downhaul lines. Maybe the lift and downhaul lines were tied off to the stanchion railing? I can see no reason for a block to be spliced into the stay at that point and for dang sure not the vertical lines for anything other than for the masthead lantern. In the photo below the block is visible but not the lantern guide, lift, or downhaul lines. The below photo may and I say may show the actual lantern? It's in the right location but the photo quality make it a guess. The following photos show??? For years I've looked at this stern view photo and mused as to what the object was between the arrows. Is it possible that it was for the stern lantern? It's the right shape at the top and the lantern could be tied on each side to keep the lantern from twisting. Thoughts please. To find something new after looking at these photos all these years is exciting to say the least. Thank you!
-
How funny is that! No, I was the one expecting to be blocked from your build logs dear friend. Rob, this goes back to Glen's build logs and me always wanting him to add a penguin to his SIB builds and my posting of penguin photos in his build logs. Long running joke between Glen and I. I'm perfectly at ease with all, Rob. Thank you.
-
Rob, please don't feel the need to apologize, push this envelope as far as you guys want or till everyone wants to move on to something else as I have more to add on the subject. Lantern teaser.... I found something in one of the Tennessee photos and it put a big smile on my face, more later.
-
Paul, she's looking great.
-
As is splitting the tire manufactures name with the valve stem. Do you play with cars, Bob? We did till we retired and we could no longer afford the hobby on a fixed income. I do miss it from time to time with the exception of belt buckles.
-
This is not a purest build log. I enjoyed every post as each poster brought something meaningful to the discussion. Again, thank you to everyone for your responses. What great photos, Eberhard. Thank you. In the first photo I can see how the lantern is mounted to the "carrier" (I don't know the correct name) and it looks like it would take ten minutes to disconnect the lantern from the carrier for the lantern to be taken down to the lamp room for refill and maintenance. I will try to replicate the carrier and attach to the lantern i posted a photo of in an earlier post. Those photos answer so many questions, thank you again for posting them.
-
Thank God, you don't know how relieved I am.
-
Clarification and apology. When i said "but I played one on TV" I was completing the sentence from Keith's post "we aren't experts in conservation" pointing the finger at myself only. I should have posted the full sentence "i'm no expert but I played one on TV." I was trying to pun the "I'm not a doctor but I played one on TV" line but I'm afraid I offended Roger and maybe Keith and Johnny as well. I've since deleted the post for it's stupidity and irrelevance to the subject at hand. To Al, I apologize. To any I offended, my most sincere apologies.
-
Ras, I think that's a good idea. The seat turned out well and the whole is looking very nice.
-
When I started down this lantern rabbit hole I didn't realize I needed to pack a lunch, I thought it would be a pretty simple affair. But thanks to those who contributed to the discussion on lantern usage, I've learned their use was far from simple. I now know why lanterns are not included on model ships of this time period. Knowledge is scarce and justification is limited. I may try to figure out how to rig a lantern at the foremast head and let it go at that and blame morning watch tardiness for it still being aloft. I'll need to modify one of the lanterns I have even though its scale size (36 x 18 inches) it too large by a third. But I have other immediate task like rope coils and stropping deadeyes to be detained for a lengthy period of time on something that wouldn't have been there in daytime operations. Thank you again to all for taking the time to add to this discussion and for following along......Keith
-
Thank you, Bob. It's a shame MSW doesn't give you the option of using two emojis because your post required a "thank you" and a wow. edit......Mark just added the needed wow.
-
Roger, wouldn't this tend to completely lift pieces (I'm thinking of the decking) off that are in the process of flaking?
-
Bob, please post photos of your HK lanterns, in fact, please post photos of your entire lantern collection. I'd love to see them.
-
In this case I think using compressed air is too aggressive. For a recently built model, great idea but for a model as old as this with ongoing deterioration a more gentle approach is called for, IMHO.
-
David, the problem with removing a large amount of debris with a moistened Q-tip is that very little debris will stick to the end of the Q-tip so it's a very slow process. Because of the number of bristles in a brush more dust/debris are loaded into the moistened bristles making it a faster process. Hygiene be damned, we give our all for the lumps of wooden bits.
-
I had not considered lighting of the lanterns but it makes sense that they had to be lit below then lifted into place. I don't think the crew was climbing the ratlines with a lit lantern so the crew must have hoisted the lanterns into the tops. This brings more elements into play if one wanted to add them to a model.
-
You're correct, Eberhard. Kerosene for lamps/lanterns use was introduced in the 1860's so the Tennessee would have been using kerosene not whale oil.
-
Eberhard, wouldn't that have been whale oil during that time period? I get taking them down for maintenance but taking them down every morning and running them back up every evening seems unnecessary?
-
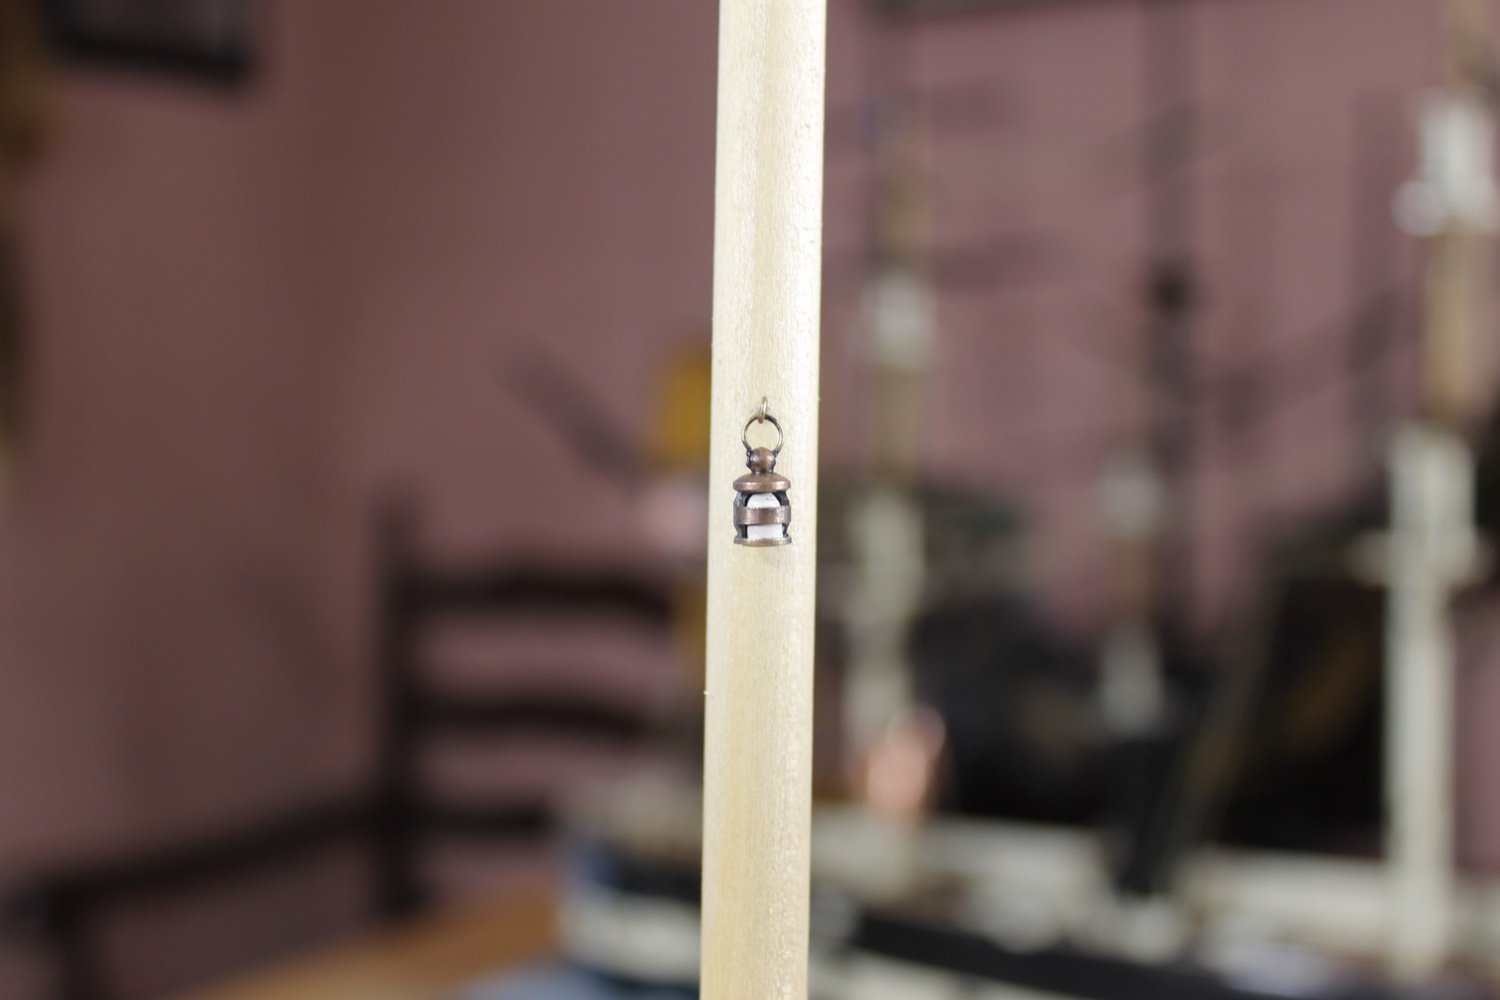
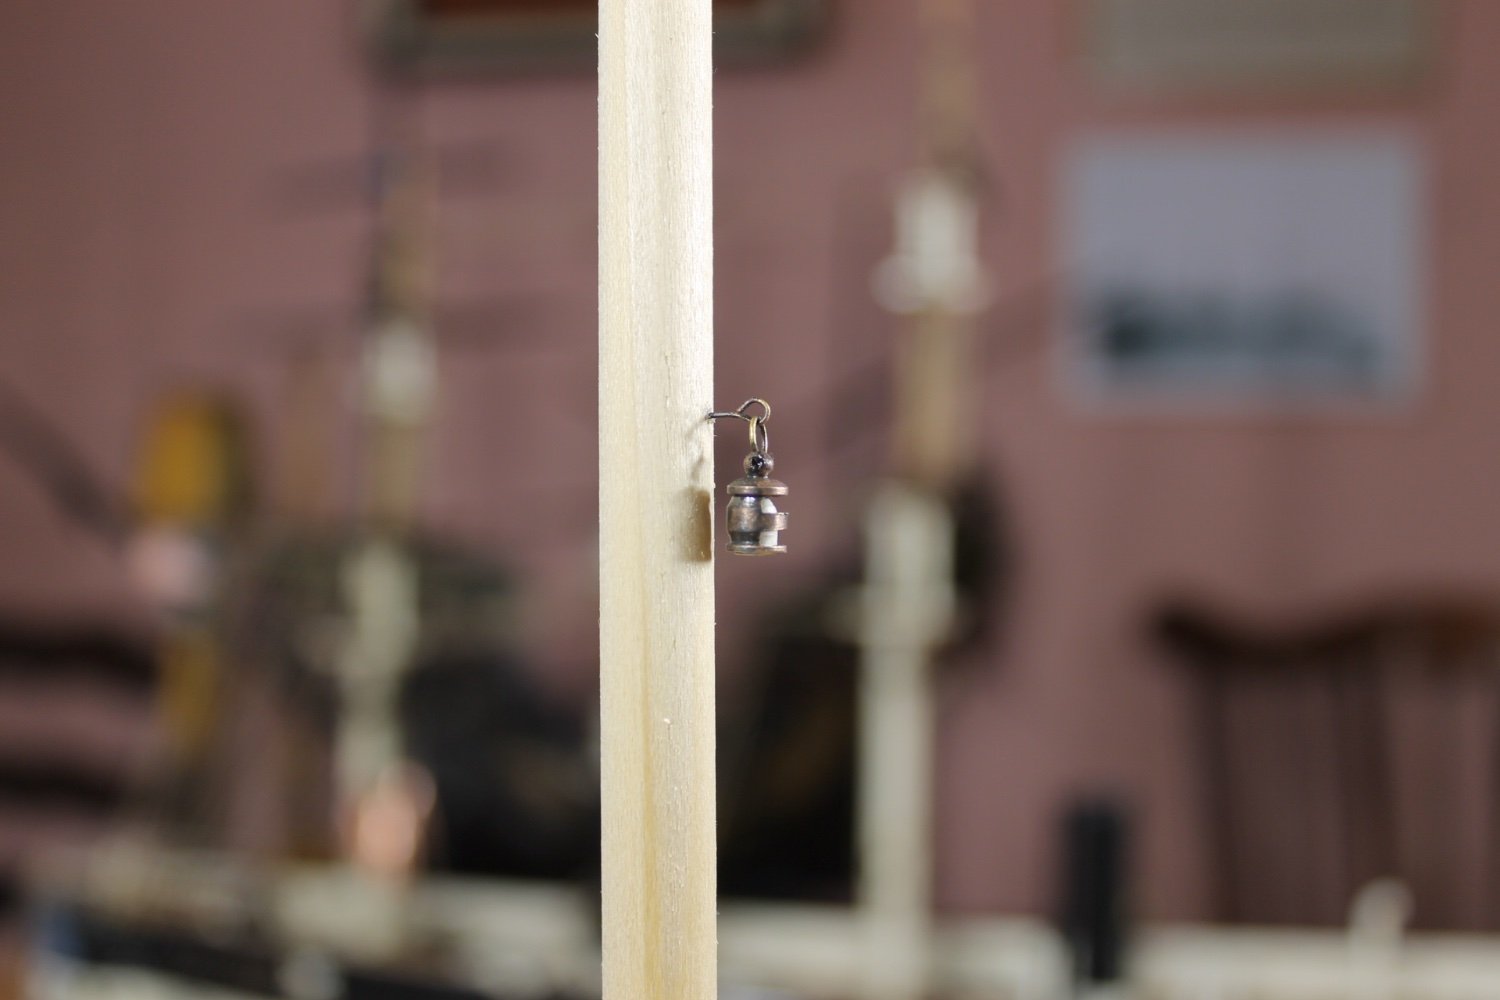
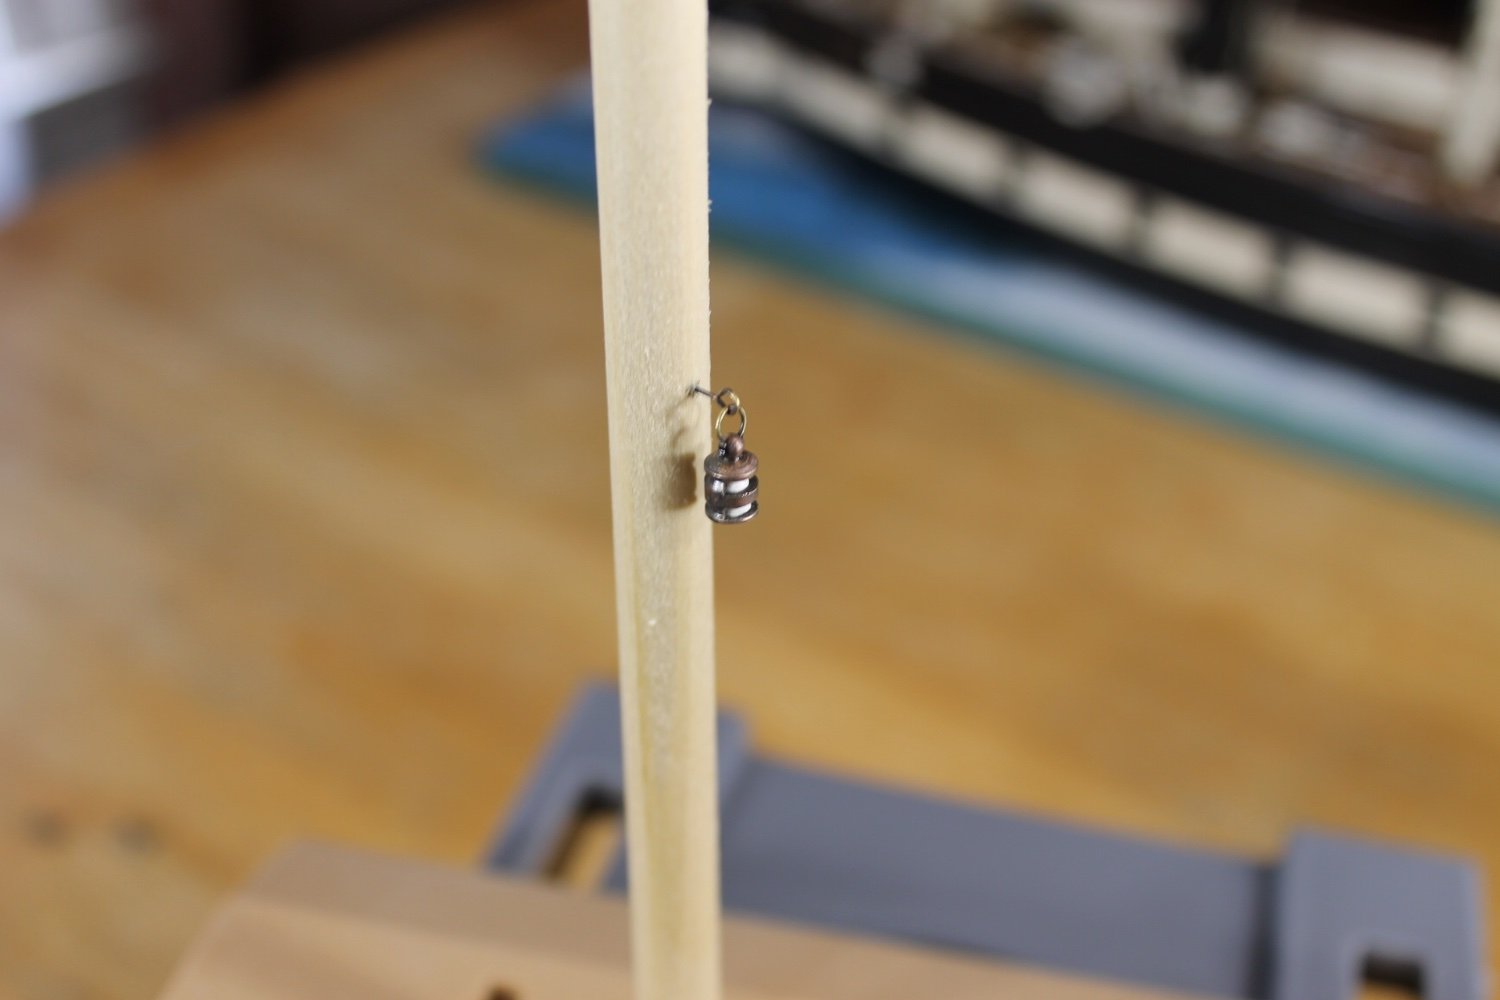
@BANYAN @Javelin @Chief Mark thank you for your kind comments and thank you to all for the likes. @rwiederrich @wefalck @FriedClams thank you Rob, Eberhard, and Gary for the suggestions on how to make rope coils. I think I've found a way to make the 0.02 inch coils where they look a bit more natural and I'll be getting on to making those as soon as I've laid to rest my latest distraction from stropping deadeyes (anything to put off tackling that task ) Going through my stash of odds and ends I discovered six lanterns I got from Cornwall Model Boats in an order about four years ago. They measure 0.03 H x 0.018 D. At the time I didn't know if I would use them but they looked neat so, what the heck. Well, if I am going to use them, I have to add them now while I can still get to the mast tops and mastheads before rigging lines make it impossible. The problem is, I don't know if I can justify doing so. In the Tennessee photos I don't see any lanterns at the mastheads. In one photo maybe, maybe I see one at a mast top. They would be so small in the photos that maybe they can't be seen? Logic would say that they are there, not only for night time navigational reasons but also to provide some light for those working aloft at night. I've searched Google and MSW and have found only vague references for the time period of 1850 to 1900, much more lantern information for the time period after 1900. I haven't found any models in 1850 to 1900 time period with lanterns added. I don't want to add anything fanciful, if they were used I'd like to add them. In the photos attached are the lanterns from Cornwall after being treated to make the shiny brass look like copper (as best I could) and gimbaled at the top. A kneed base would have to added at the bottom of the lantern to keep it from swinging wildly about. The lanterns would be placed on the yard side of the mast with the gimbal being seven to eight feet above the platforms. I've added the globes but more work is required (the bases being one) before the lanterns would be ready to attach. Any thoughts, suggestions, and directions would be greatly appreciated. Thank you for following along.......KB


-
Welcome to MSW, glad to have you aboard.