HOLIDAY DONATION DRIVE - SUPPORT MSW - DO YOUR PART TO KEEP THIS GREAT FORUM GOING! (89 donations so far out of 49,000 members - C'mon guys!)
×


Keith Black
-
Posts
6,644 -
Joined
-
Last visited
Content Type
Profiles
Forums
Gallery
Events
Everything posted by Keith Black
-
 Glen, my friend, you nailed it, ab so lute ly nailed it! Of all your SIB's and their presentations this is by far and away the best. I was a bit worried you wouldn't be able to pull off making the water dynamic enough to match the scene. Obviously I need not have worried, the wave actions you've created brings the whole scene to life and the drop is the pièce de résistance. To say I'm impressed is an understatement, to say I am in awe is getting there. I don't know what you're gonna do for an encore but if you ever beat this, you be the Magic Man.
 -
Denis, I've pulled up a chair to follow your journey as steam era ships are my favorite. Are you going to glass the hull?
-
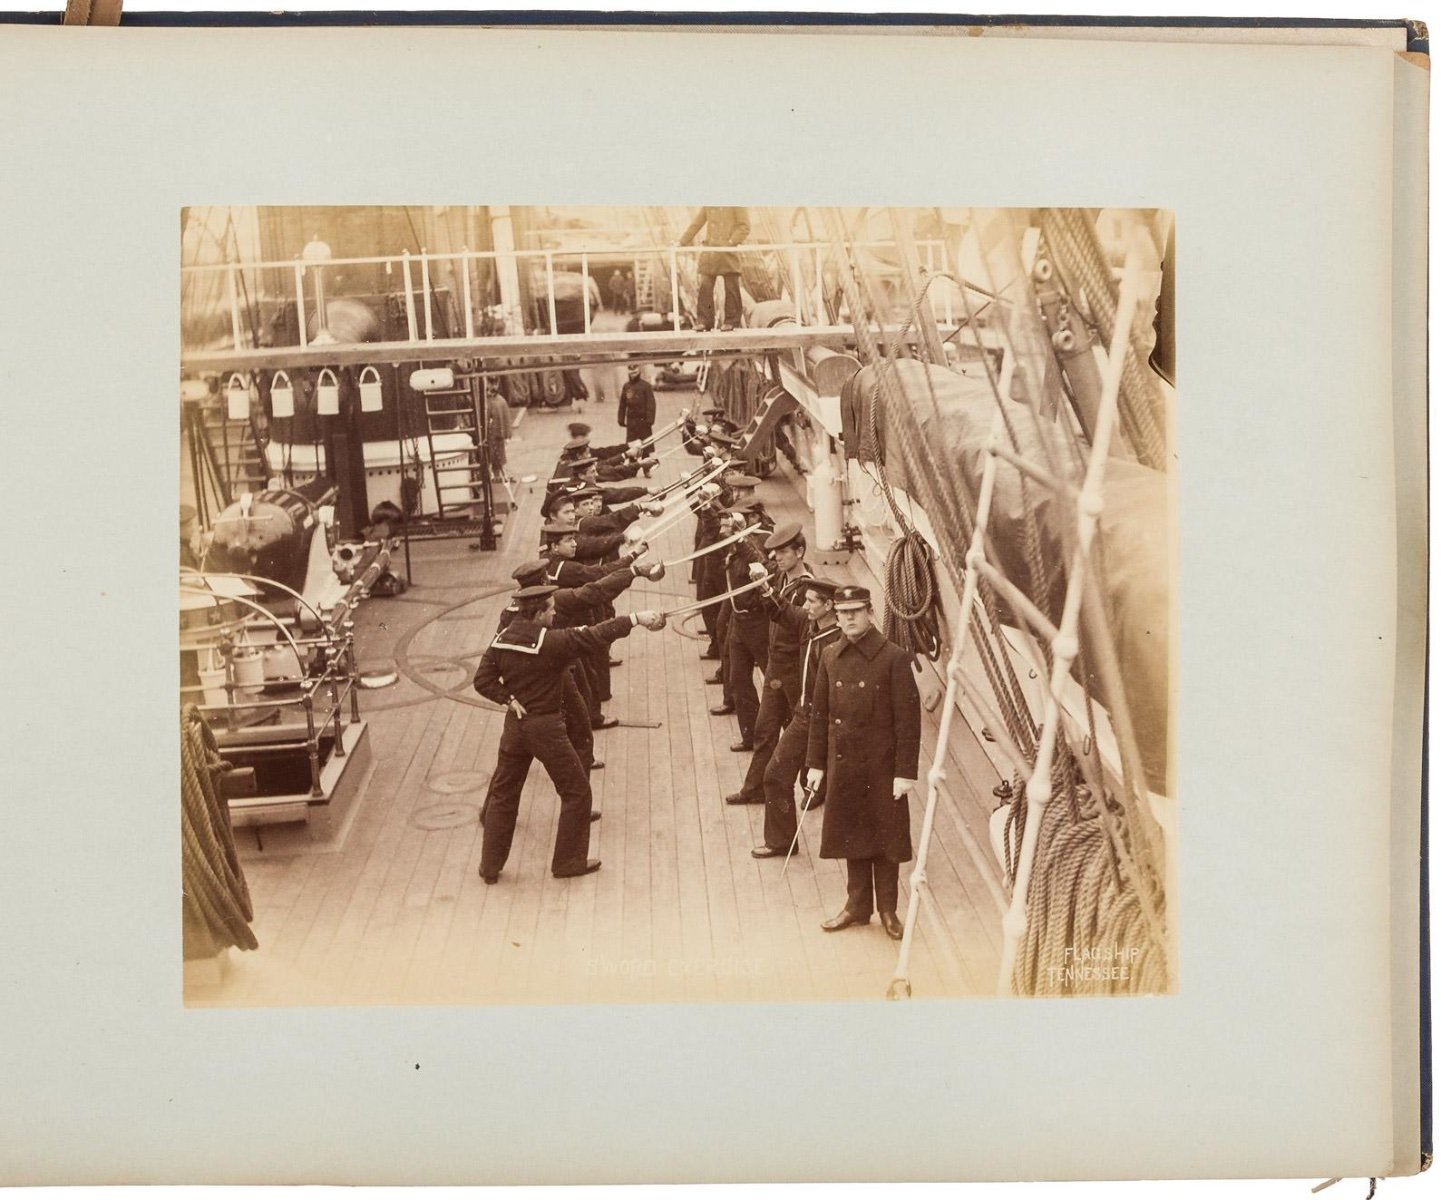
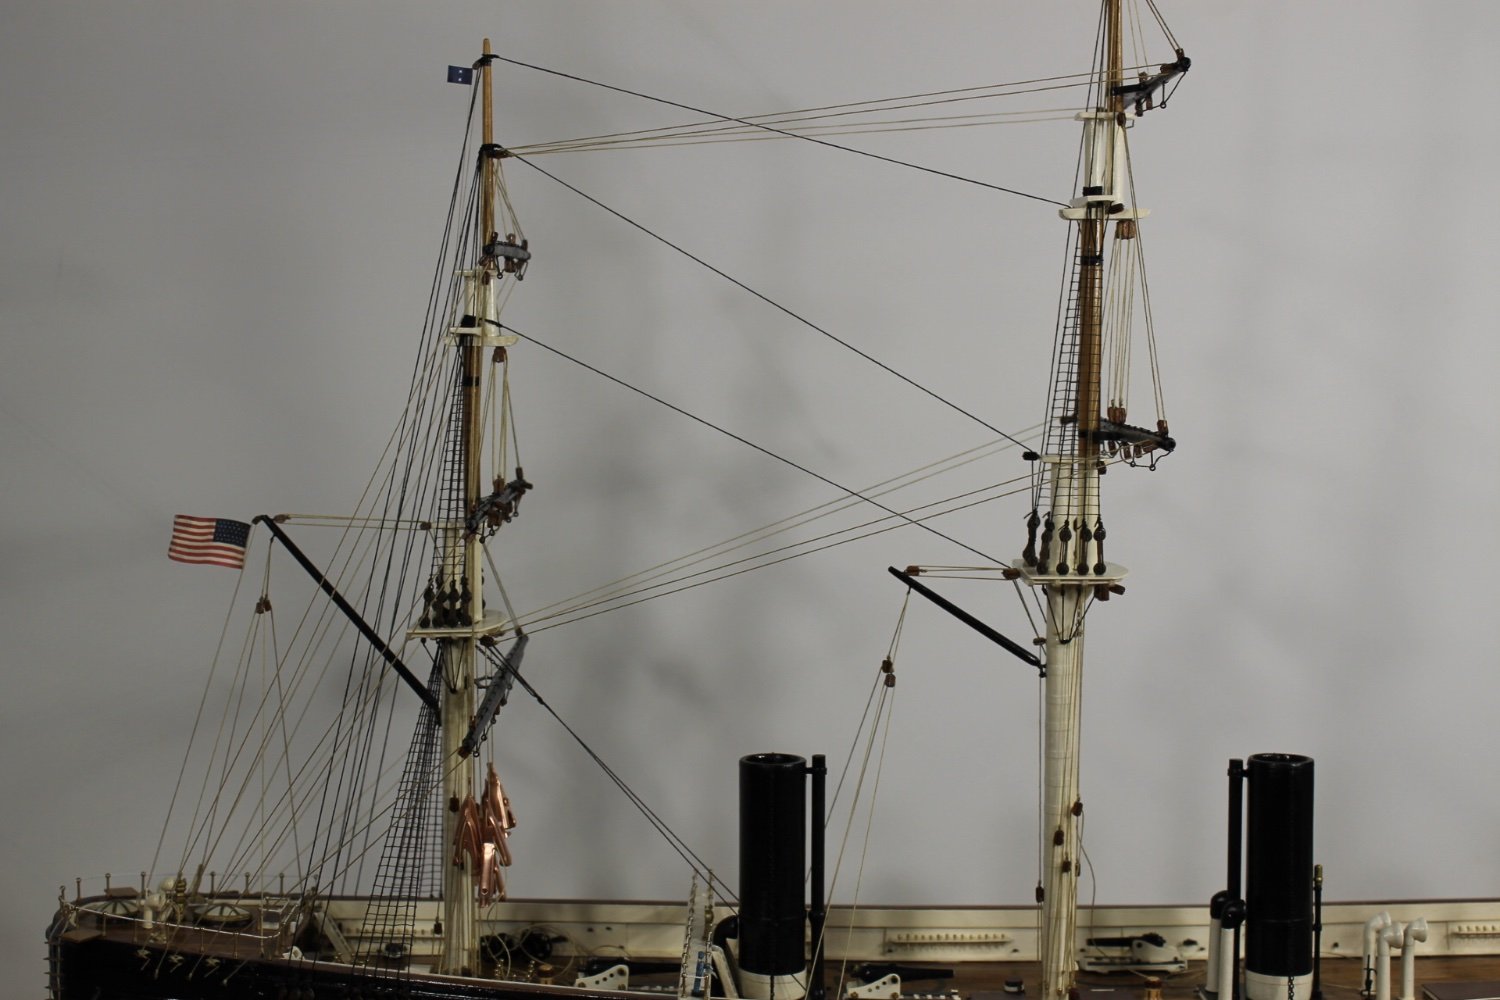
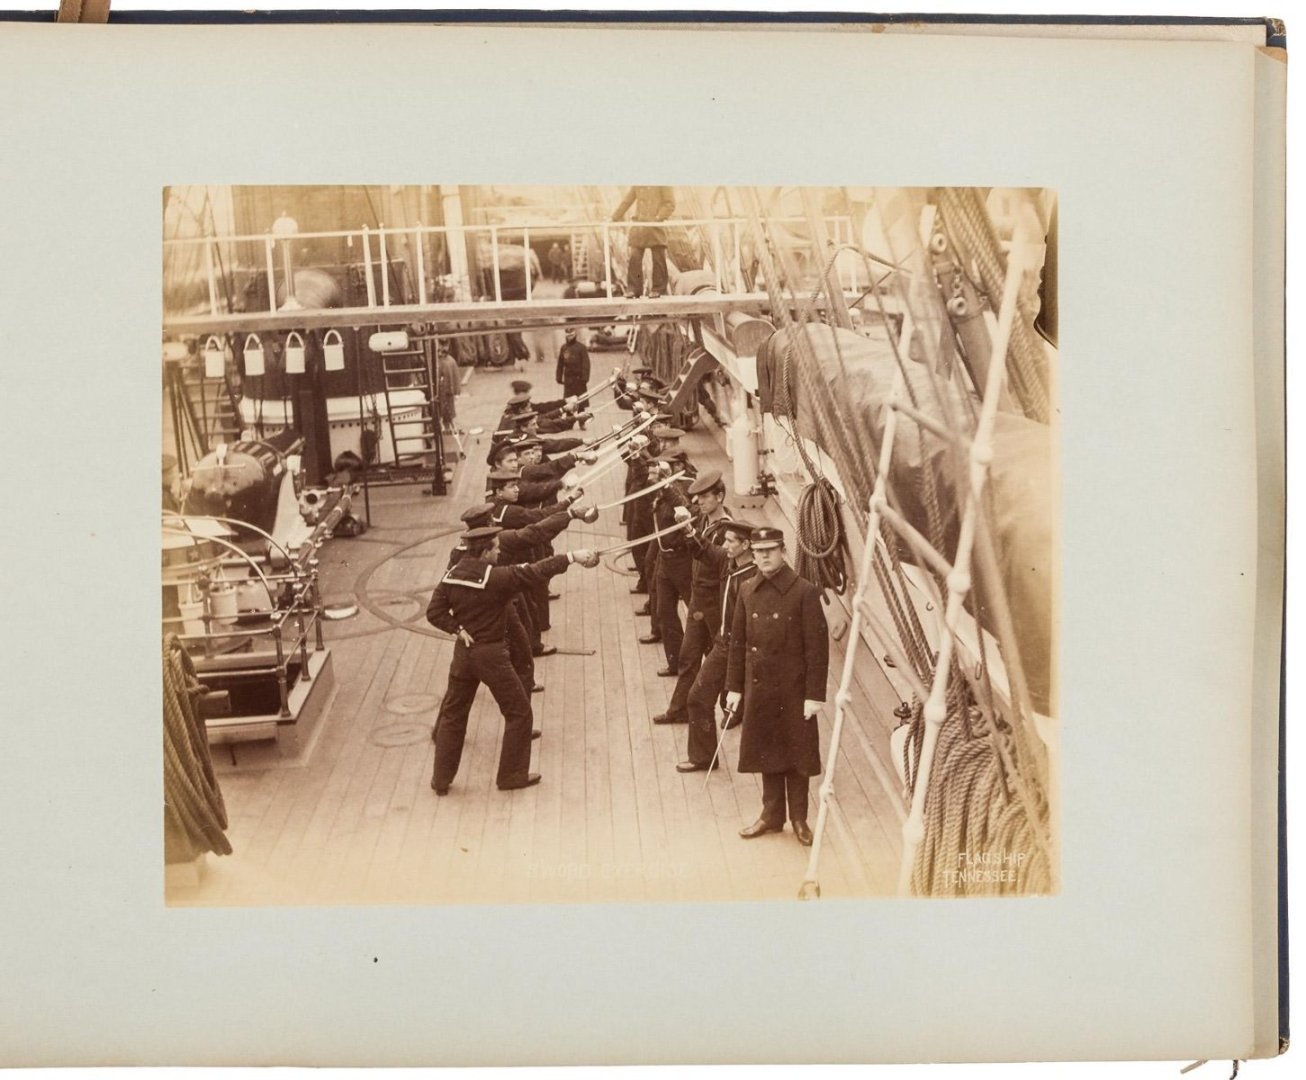
Dave, they're covered openings that lead to the coal bins alongside the boilers below. Each scuttle leads to a particular coal bin. The coal tenders would tie-up alongside the ship they were serving and off load coal via shoots through the scuttle opening. If interested you could visit my Tennessee build, my work on replicating the coal scuttles is post #169. Photo of the Tennessee, you can see the aft coal scuttles at the left feet of the second and third sailors with drawn swords.
-
I've never had great success painting rubber except those times where I've accidentally got paint on rubber and of course it refuses to come off. Ras, in your case I'd keep after it with the paint thinner. There are some eco friendly paint removers that are also gentle on your hands. I think they're all about the same. See the below link on painting rubber. https://resin-expert.com/en/guide/how-to-paint-rubber
-
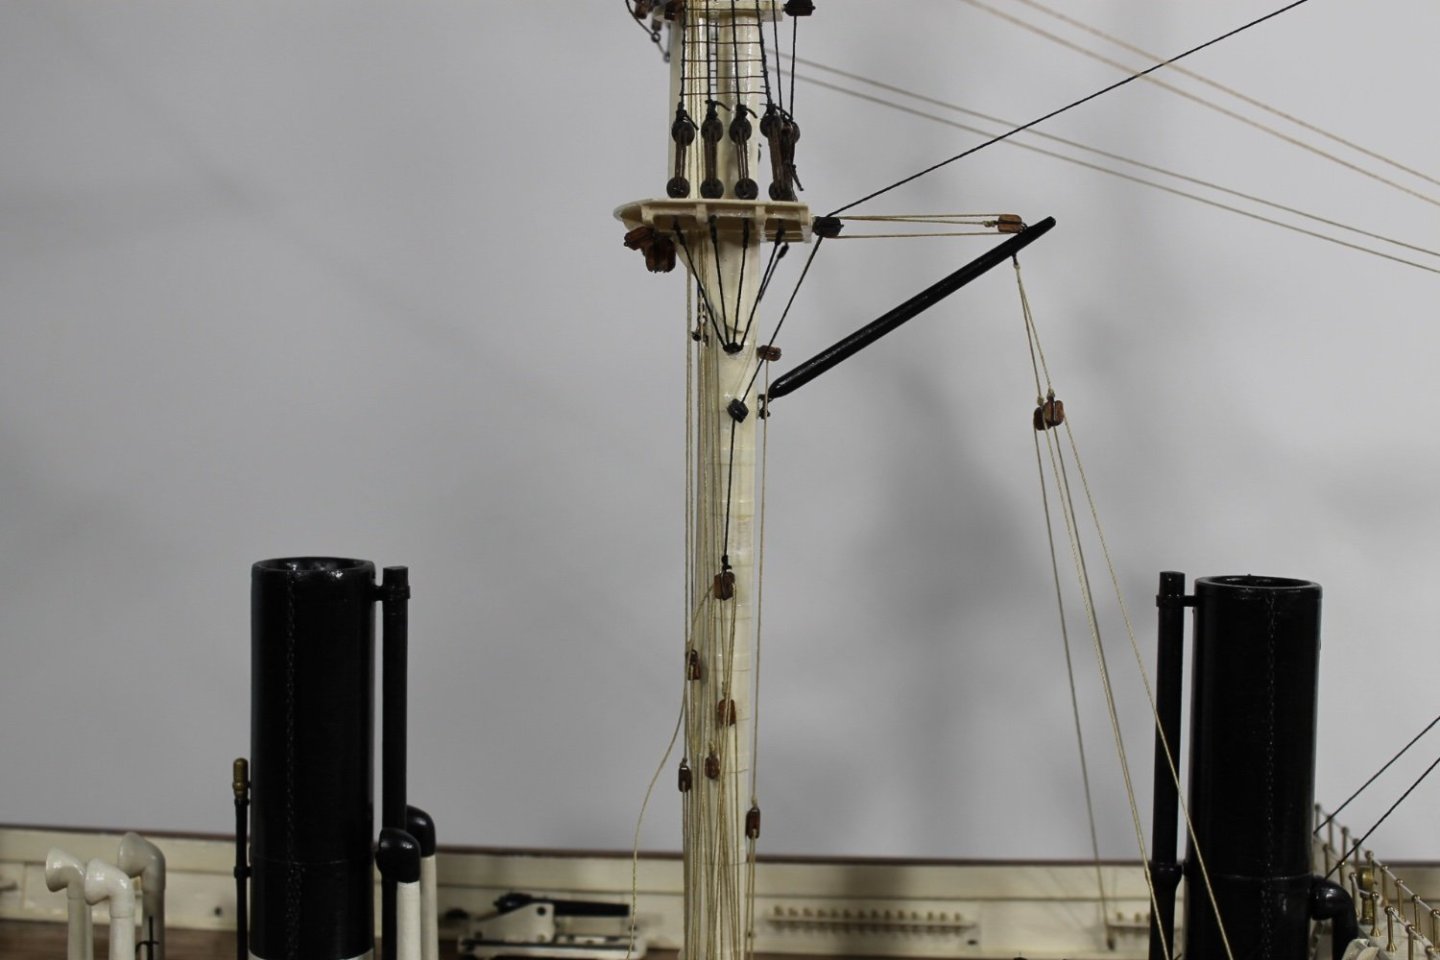
Thank you to all for the likes and for following along. Brian, on the mizzen I mounted the cross jack after the channel shrouds and ratlines were rigged. I'm planning on following that same sequence on the main but as I add rigging to the main I'm beginning to think the top yard's brace lines may interfere when I add the channel shrouds. I may slacken the top's brace lines where I'll have a bit more hand movement freedom as I work and then once the shrouds are run then I'll be able to tie off top's brace lines to the bitts. I didn't have a space issue running the mizzen's channel ratlines and I don't foresee that as an issue on the main. I ran the mizzen to main backstays after running the top and topgallant brace lines. I won't make that same mistake when I rig the fore. Great score on the Workmate! Bob, thank you so very much for saying that but in actuality, you're ahead of me. Because of the 1:120 scale I can cheat because of the simple fact that unless under very close examination one can't see where I've cheated. My blocks are not tied nor are they eyed to the yards or mast, a hole is drilled and then they are glued in place. Because of the scale, you can't really see that's the case. I can't seize line for beans so I cheat. I use a clinch knot to tie lines to blocks and once again, because of the scale, it looks close enough so that I'm able to get away with it. The deadeyes are too small to strop with line and seize as is the normal practice in ship modeling. I cheat, I strop the shroud end of the top deadeye with 28 GA anodized wire leaving a becket where I can attach the shroud line. I run a single shroud line to each pair of deadeyes not a looped seized line for two pair of deadeyes as is the correct way. Once again, due to scale I get away with it. If I were to take on a model at 1:48 or even 1:76 scale I'd have to learn how to rig correctly and I'd also have to get a new left hand because after my stroke in 2017 my ole lefty doesn't work as well as it should. But let me say, I THANK GOD that its works at all! If my left hand had remained paralyzed I couldn't work on model ships or play pool or do work around the house or do much of anything. I thank God almost daily for the use of my left hand and even though my finger dexterity is limited, I do have the ability to get away with a bit of rigging cheating. For me, knowing the correct way has to be good enough. Realistically, I think I'm forever doomed to 1:120 scale because of my physical limitations. And that's how the sausage gets made in my shipyard, Bob. As I said, you're doing better than I.
-
Those are coal scuttles.
-
*Keith chokes back gag reflex, considers all options including joining the French Foreign Legion to escape dining on Slipper Souffle
-
Mark, the Jylland is coming along nicely. Enjoy the time with your family, those together times are far too few.
-
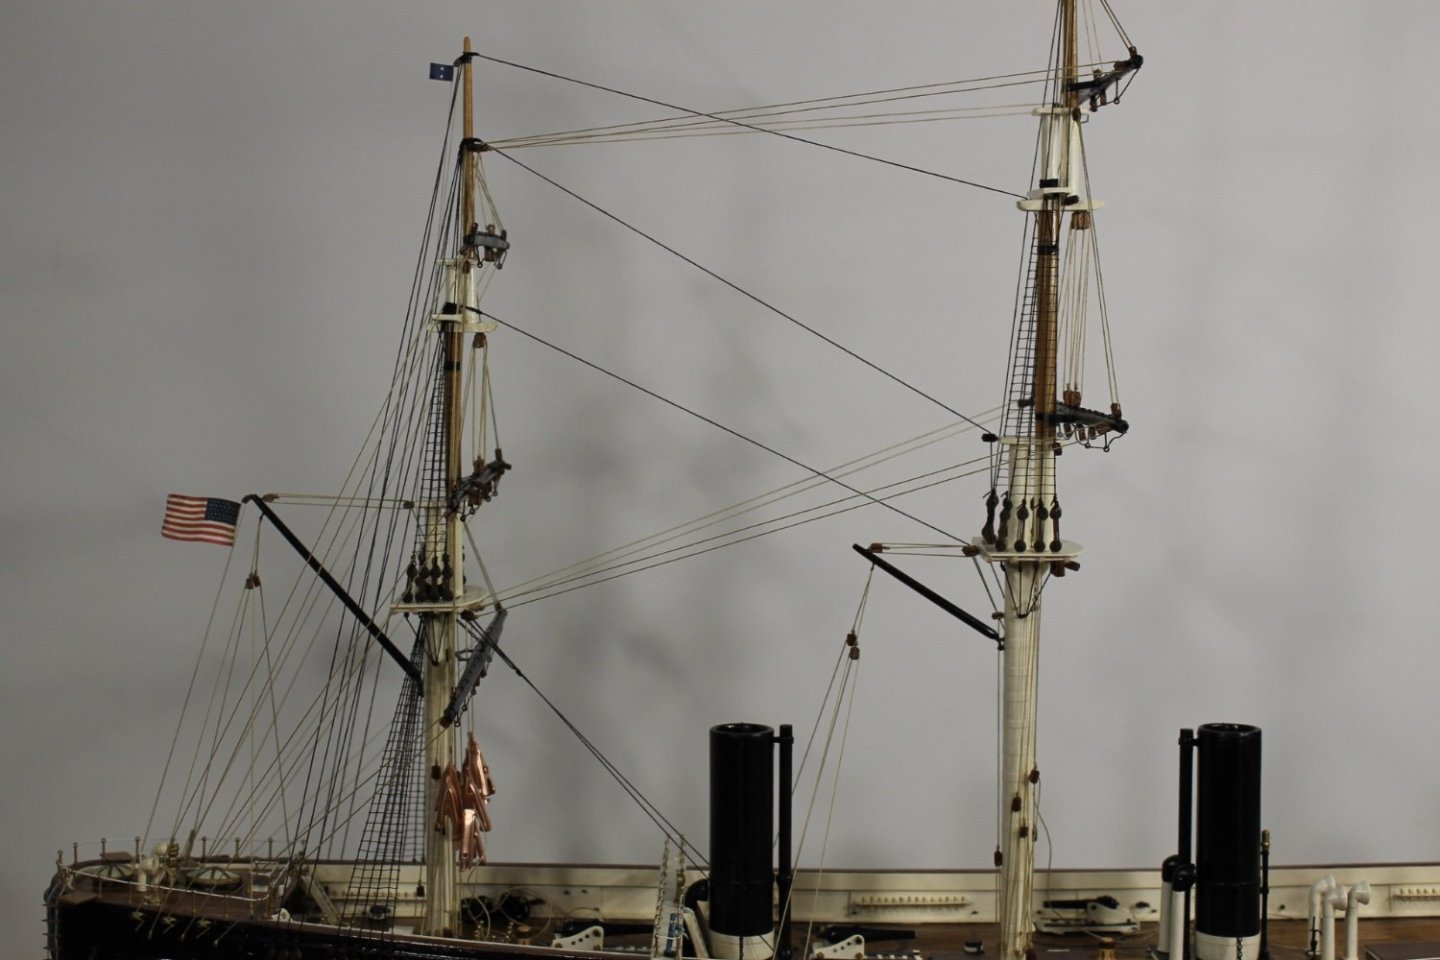
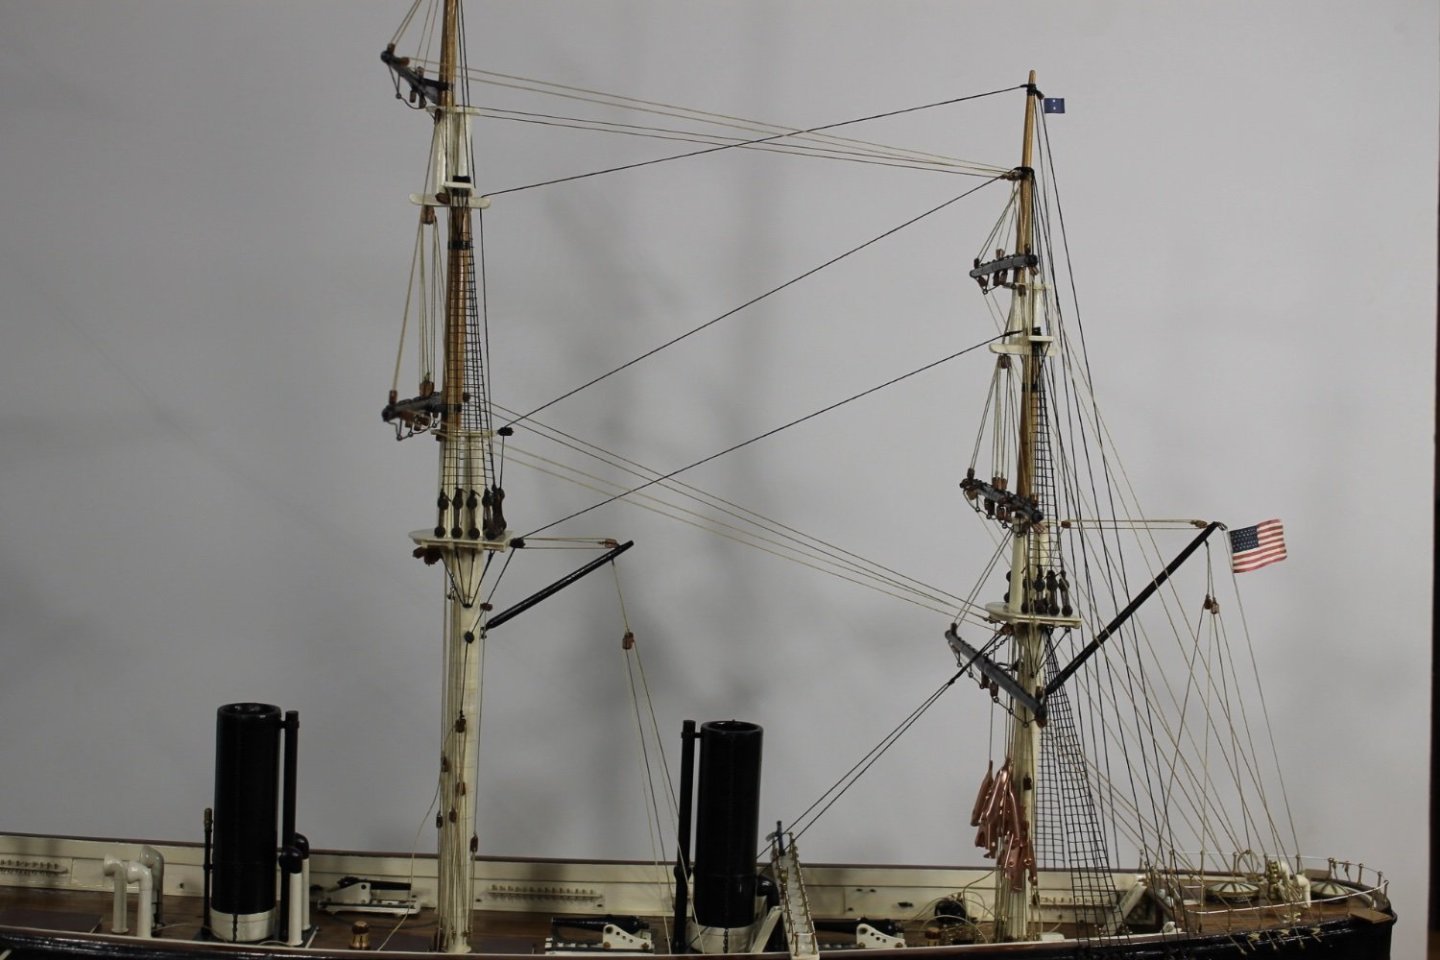
Thank you to Glen, Pat, and Gary for the comments and thank you to all for the likes. The main mast is now permanently installed and rigging has commenced. It's a tight fit for my old fat shaky hands to get between the mast and not tear the yards from their moorings and every line wants to snag on something, I have work to do around the mizzen tying off brace lines and around the main installing blocks for the gun tackle yard lifts and tying them off. Before I knew anything about rigging it was chaos and confusion but now that I at this point in my rigging education I find beauty in the design and geometry. I've learned so much sitting at the feet of those of you here on MSW. There's no way in heck I could have arrived at this point without being able to look over the shoulders of you folks. Thank you. Before I can permanently attach the main's main yard and install the fore mast, I have to strop and lash 28 pairs of channel deadeyes, attach, and run the shroud lines. The tunnel gets ever brighter, thank you to all for following me along on my journey.

-
Ras, dang those instructions! Now I'm gonna have to eat Shipman's slippers.
-
Back in the day gas gauges were not all that common on motor vehicles. I had a 37 MGTA with no reserve tank and no gas gauge. The only way to tell how much gas was in the tank was with a stick. Back then people didn't think that was unusual.
-
Shipman, in post #50 Ras said the instructions show the piping from the little tank going directly to the carburetor. I think what you're seeing as a hand pump is actually a shutoff valve that can be opened if and when the main gas tanks were to run dry and closed when the main tanks are filled, IMHO.
-
Ras, If it feeds directly to the carburetor I'm inclined to believe it's a reserve gas tank.
-
Siggi, they did such a wonderful job they deserve half a day off. Hopefully they don't spend all their wages in the pubs, their wives are gonna need money for the butcher.
-
Andrew, welcome to MSW. Glad to have you aboard.
-
Cute little tank, Ras. Lubrication design was a bit dodgy in the early transpiration years. Like Chevrolets early 235 six cylinder engine with 'splash' rod bearing lubrication system. The oil pressure from the mains entered the oil pan via a tube and connected to a bank of six tubes, one for each rod bearing. As each rod rode upward oil squirted out the tubes and hit a open slotted cover that connected over each rod. The pan's oil tubes had to be targeted using a designed jig that fit on the pan and over the tubes where they could be accurately adjusted where they would shoot straight into the rod cover openings. As I said, dodgy but compared to some British sports cars..........
-
Mark, I don't like cotton because it rots so quickly. That and the fuzzies.
-
Gregory, i've had success eliminating most of the shine by immediately dabbing the CA where applied with a Q-tip. If allowed to dry as is it will shine but it can be painted if you have matching paint and line color.
-
I use Gutermann thread, no problems using CA and it paints and stains, for me. Scott, buy a spool (one spool is cheap) and test it. Always test materials before making any type of commitment for use on rigging. Rigging is too time consuming and difficult to mess around with untested materials, IMHO.
-
I use polyester line because cotton rots.
-
Speaking of Kraken carrots........supposedly this is a real photo of a women holding a carrot that came from her garden....... that ain't right.

- 333 replies
-
- 10
-

-

-

-