Keith Black
-
Posts
6,728 -
Joined
-
Last visited
Content Type
Profiles
Forums
Gallery
Events
Everything posted by Keith Black
-
 Man, that turned out super nice, John. It's going to look fabulous once the buckets are attached.
 -
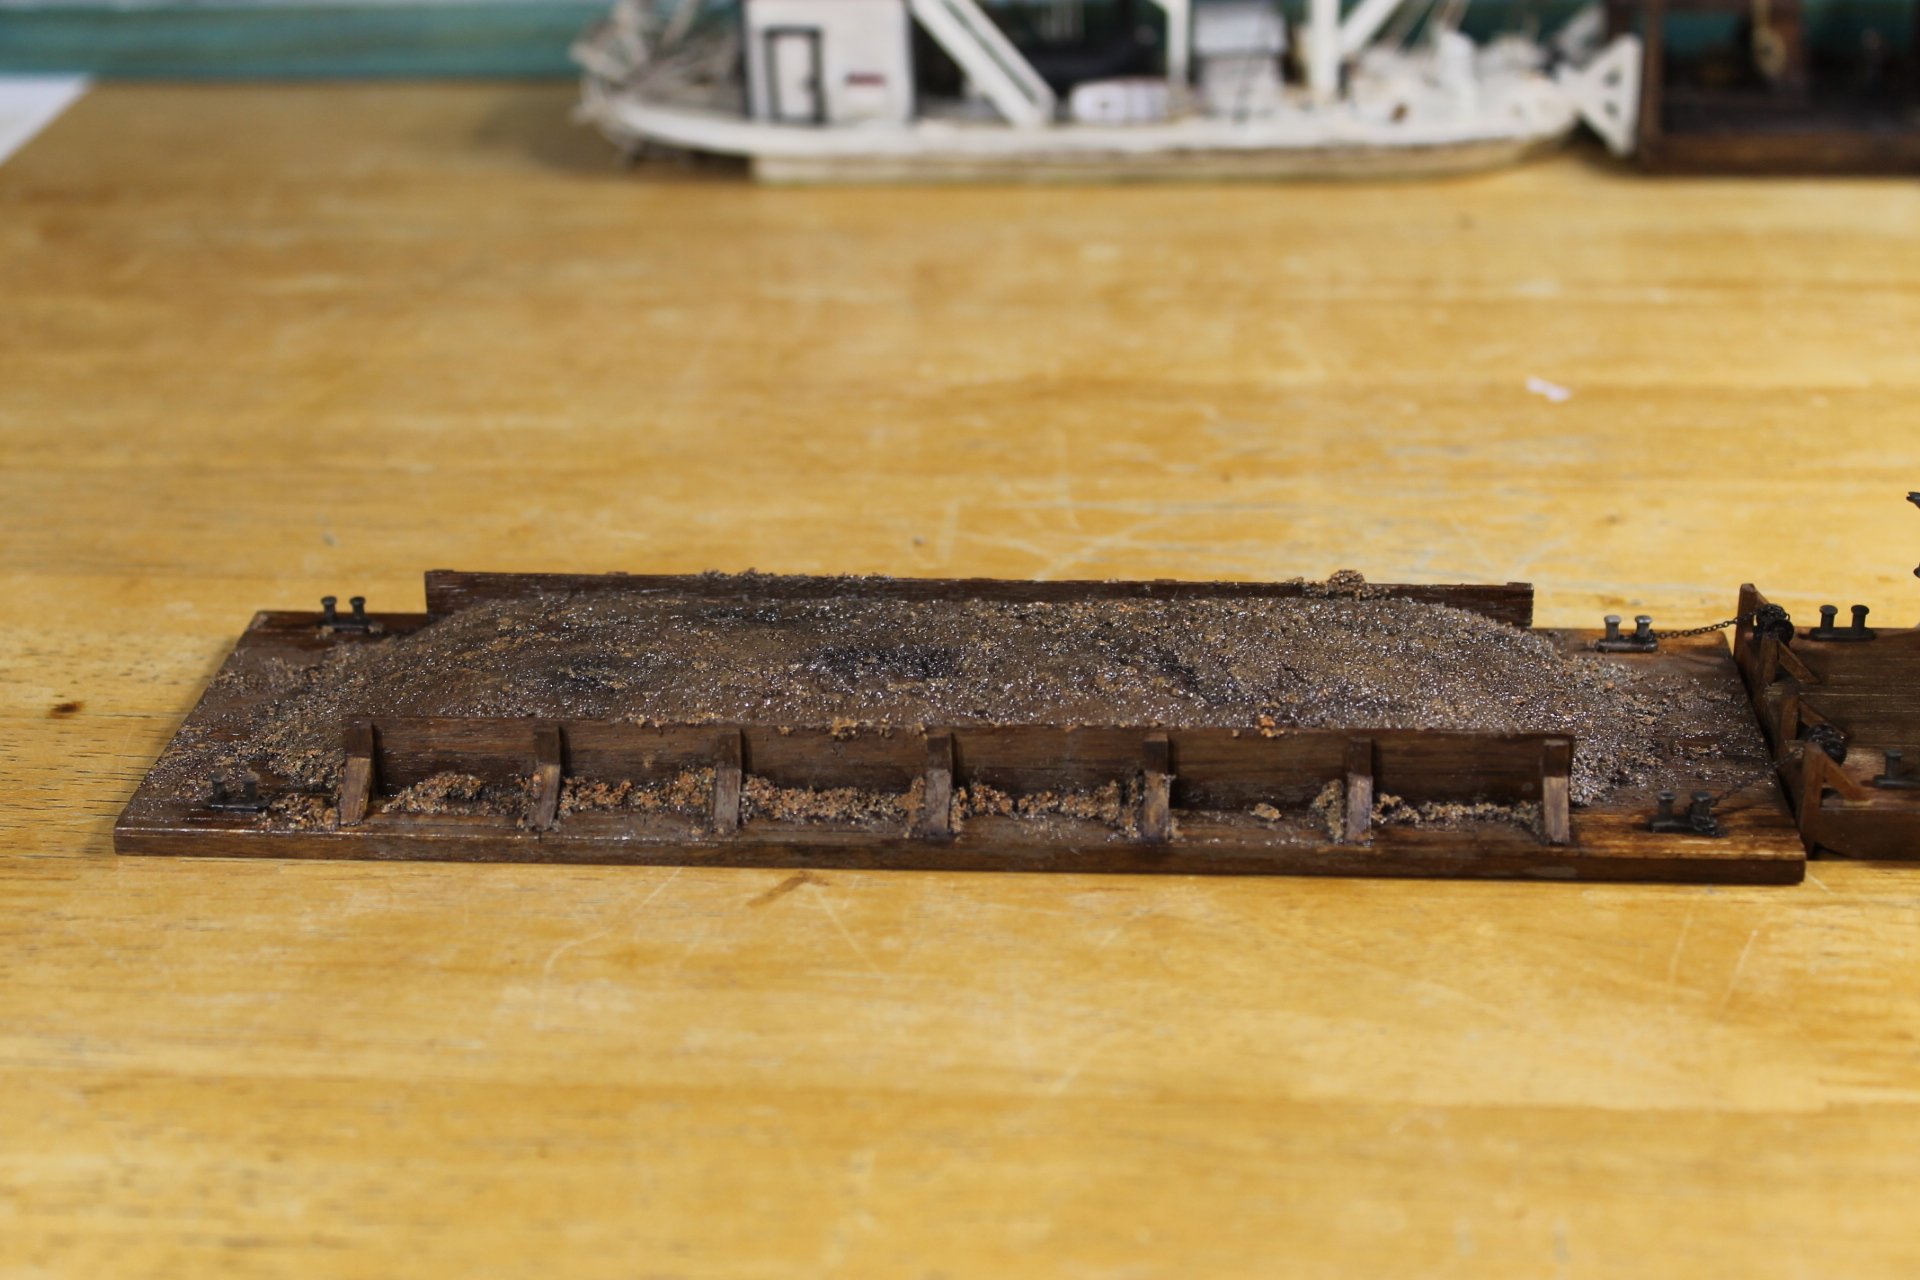
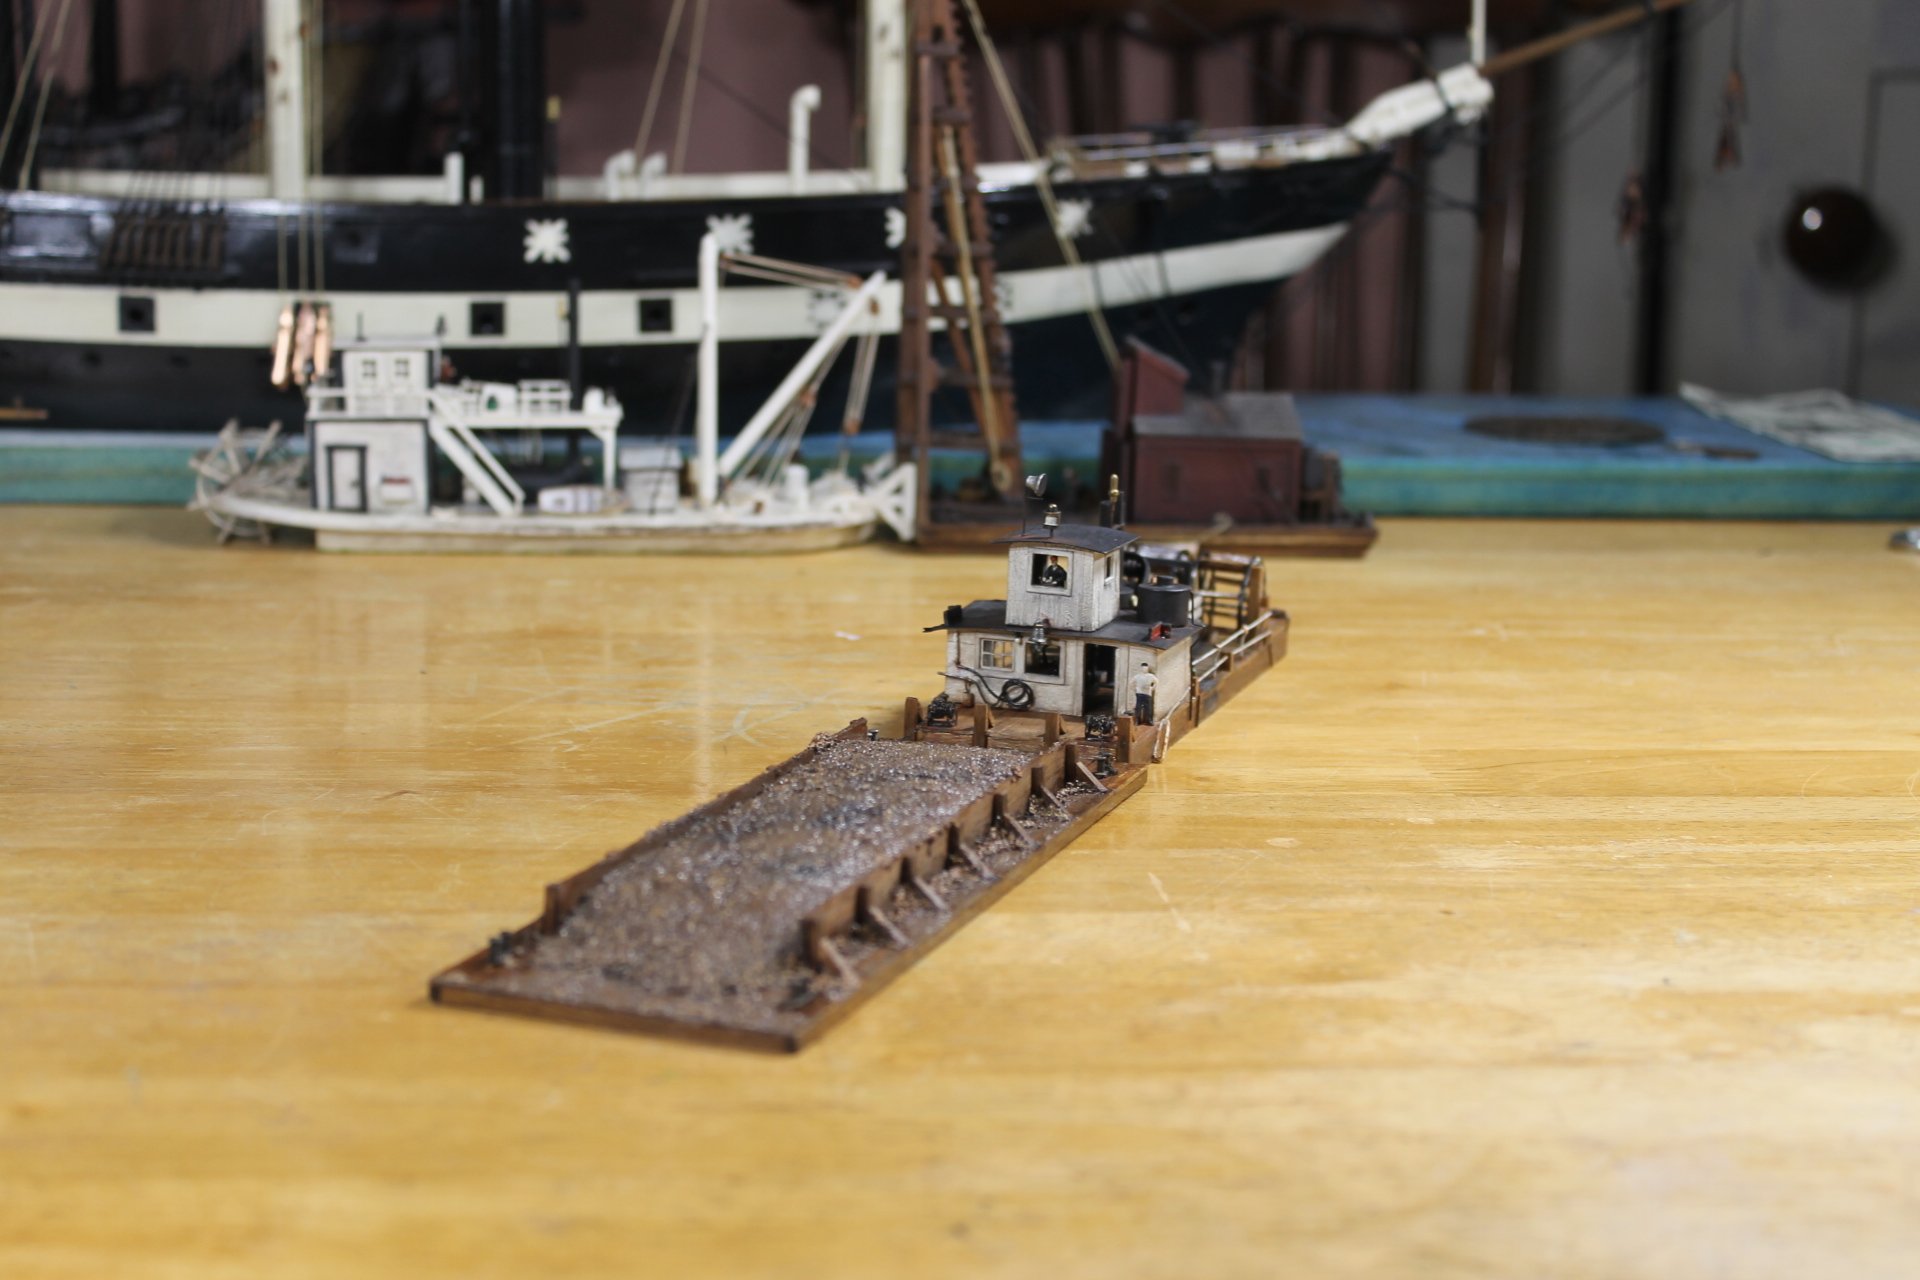
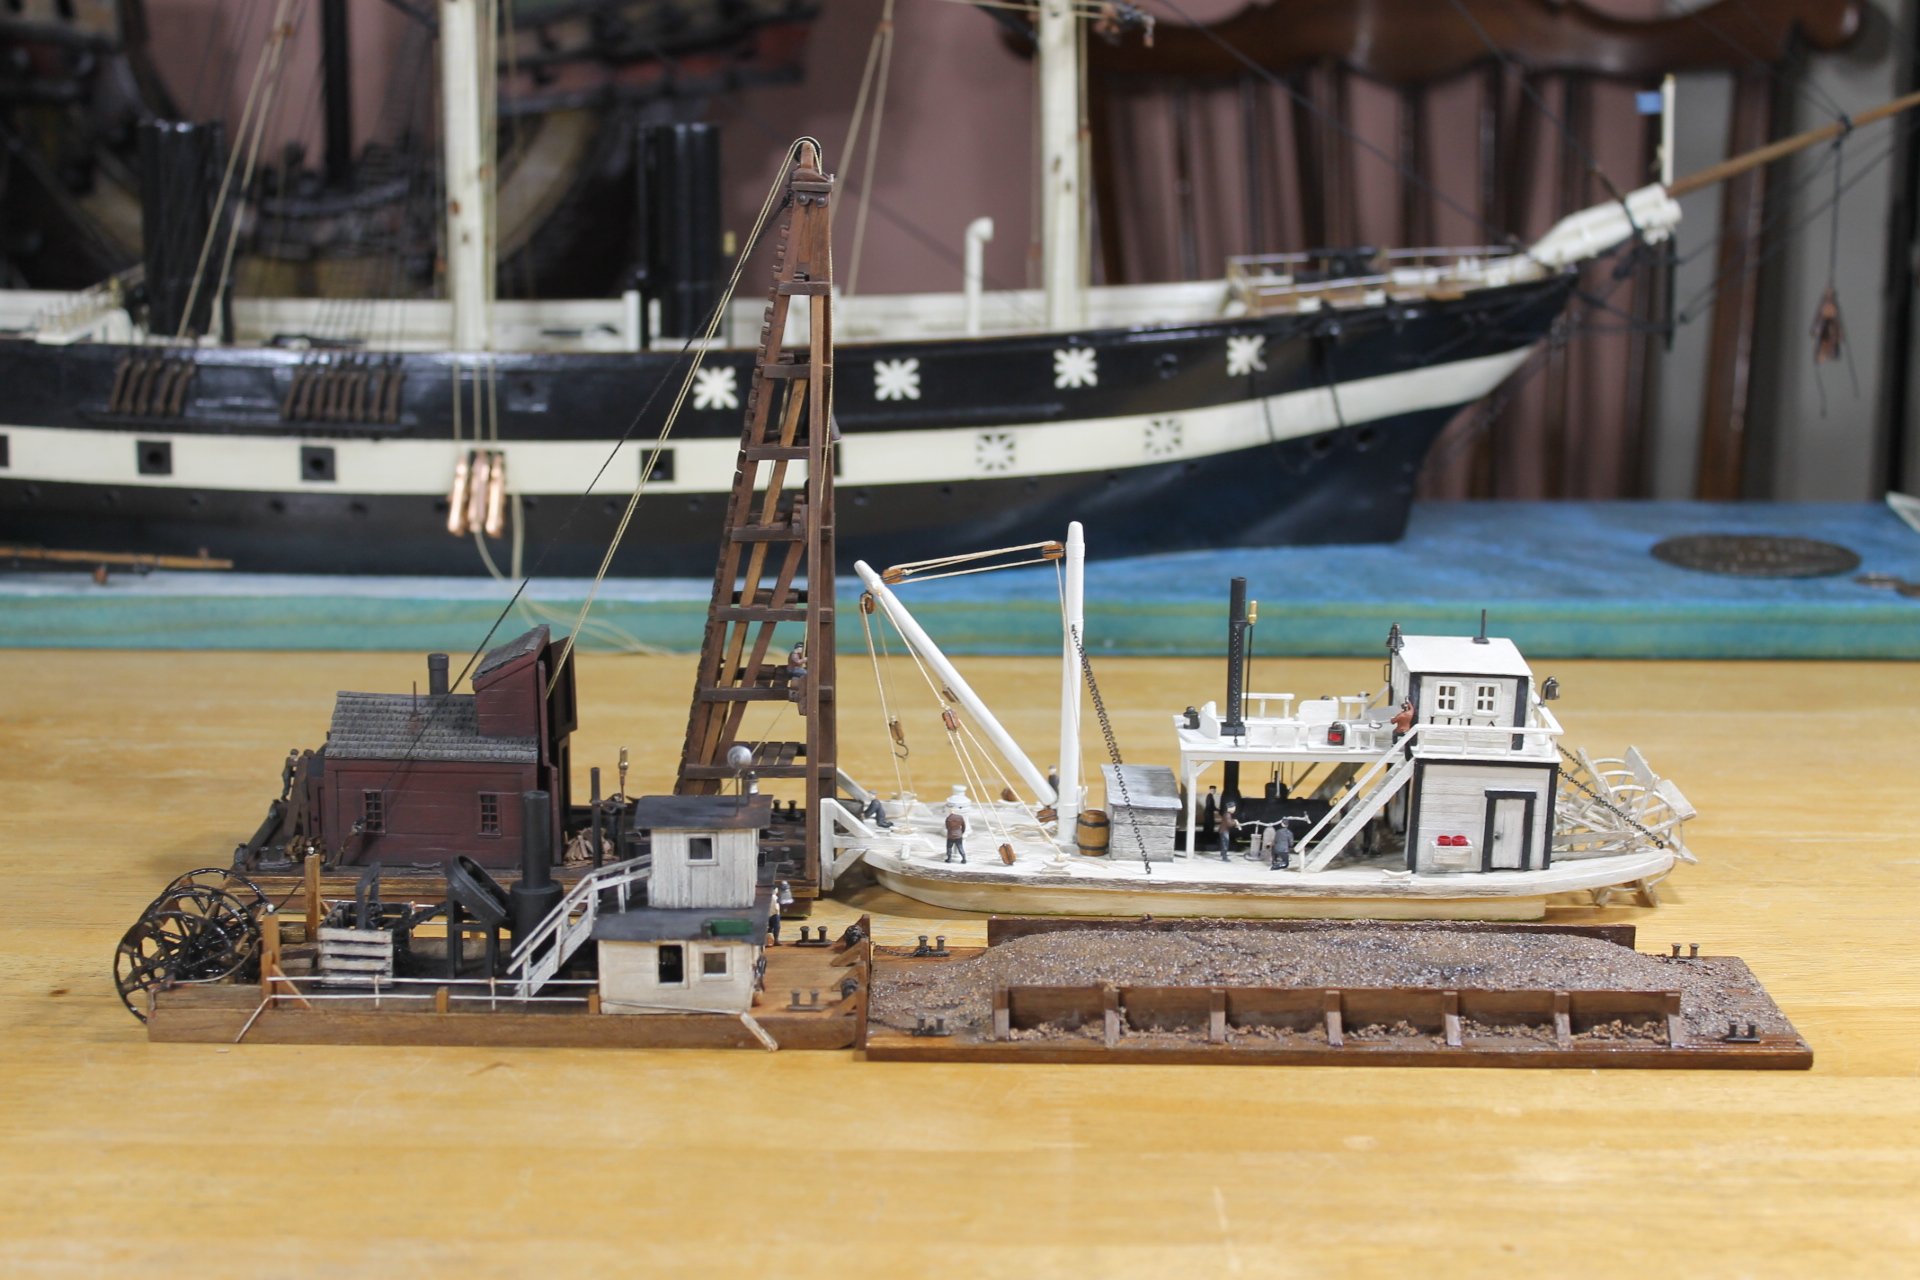
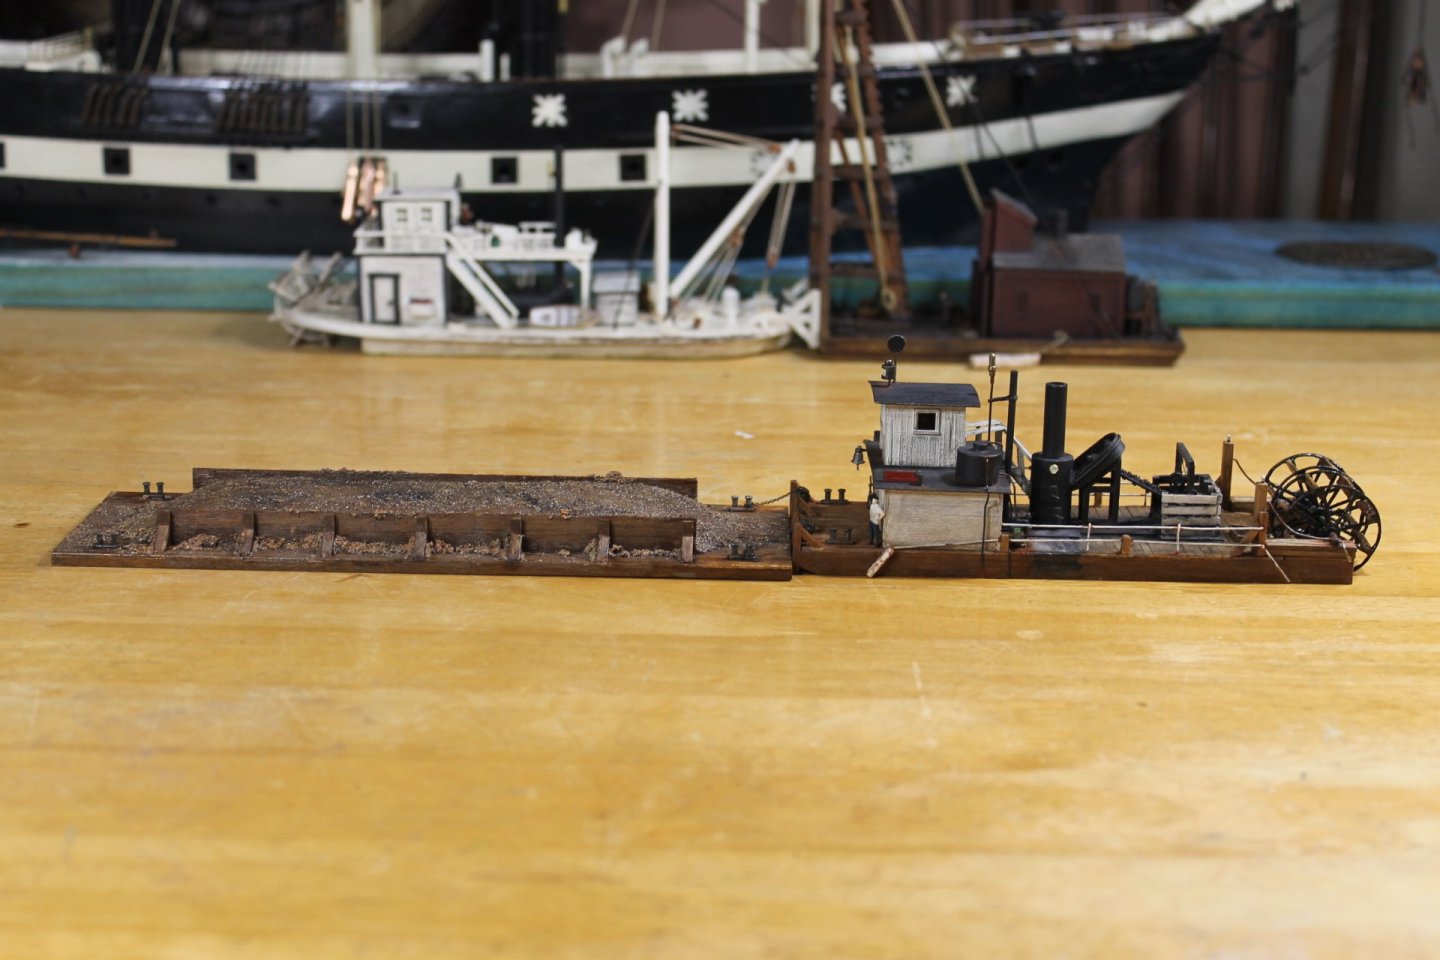
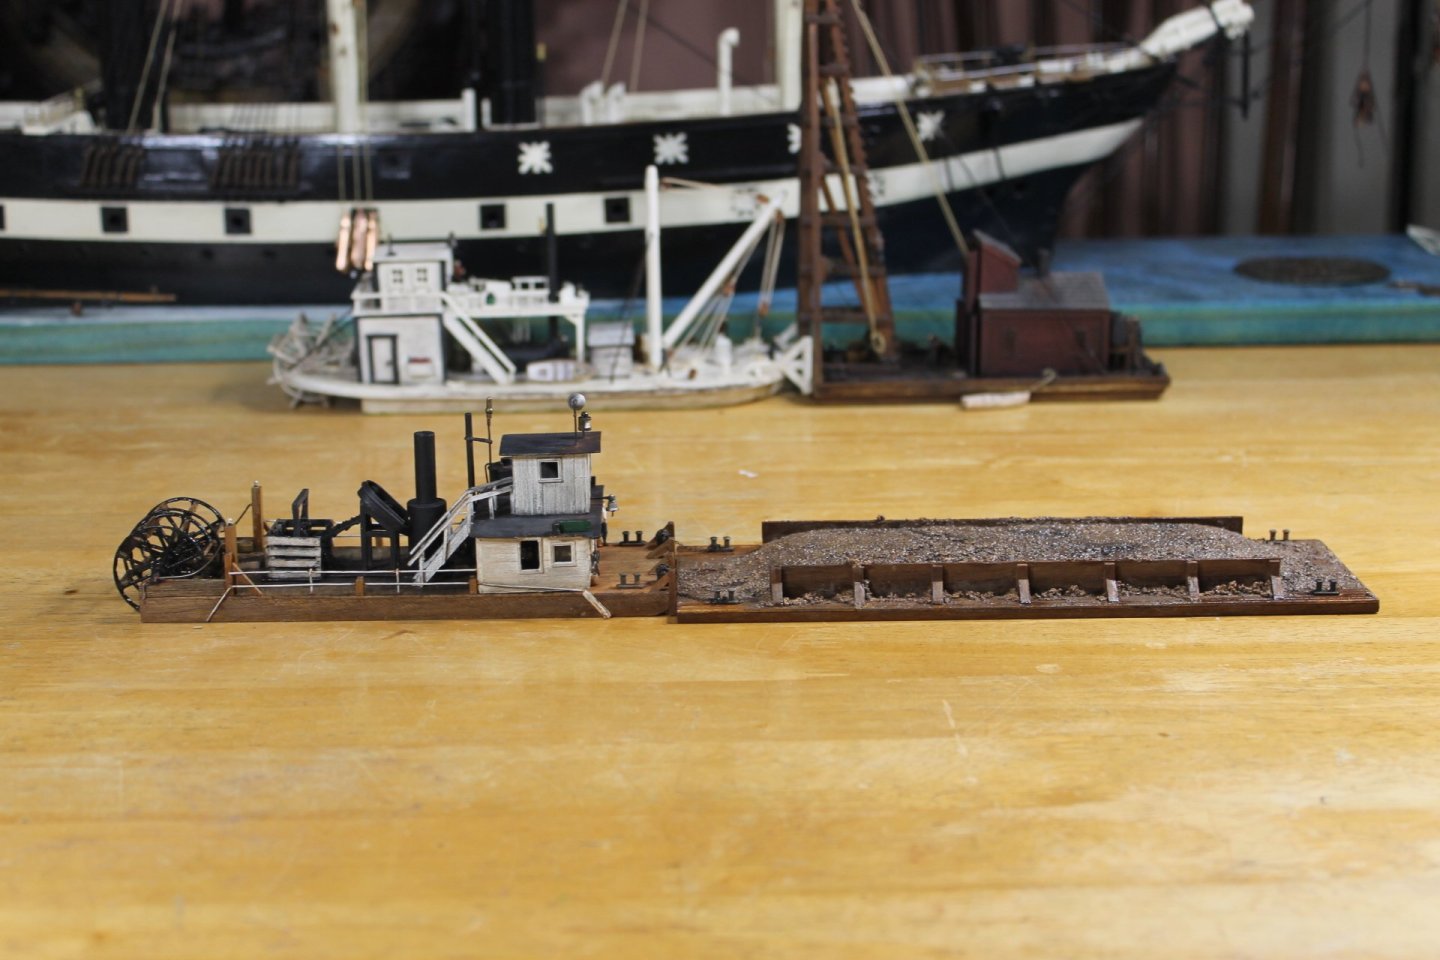
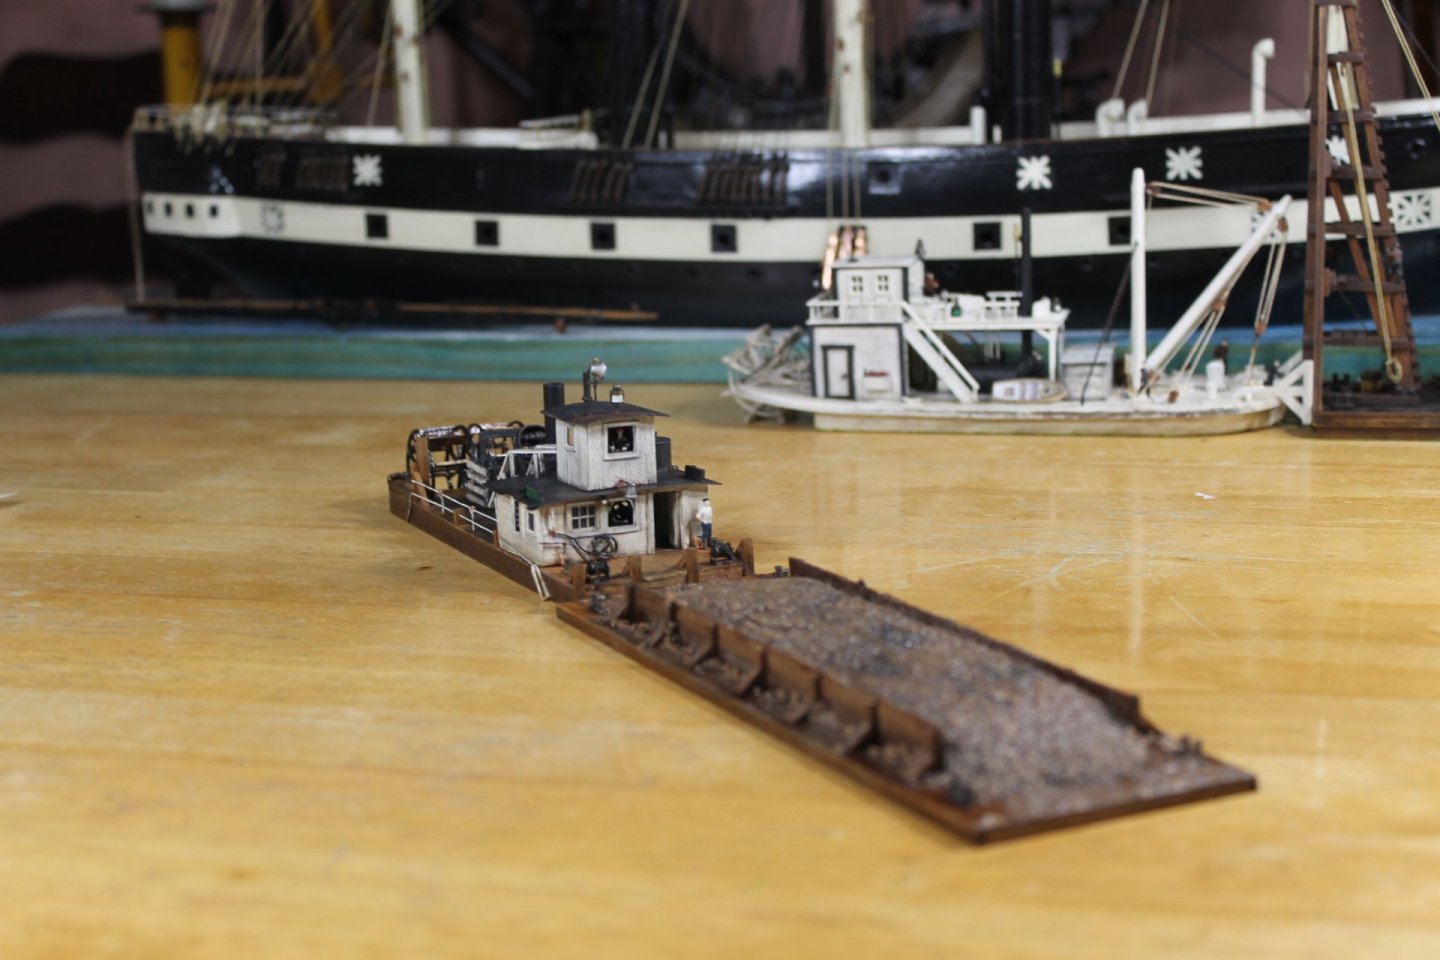
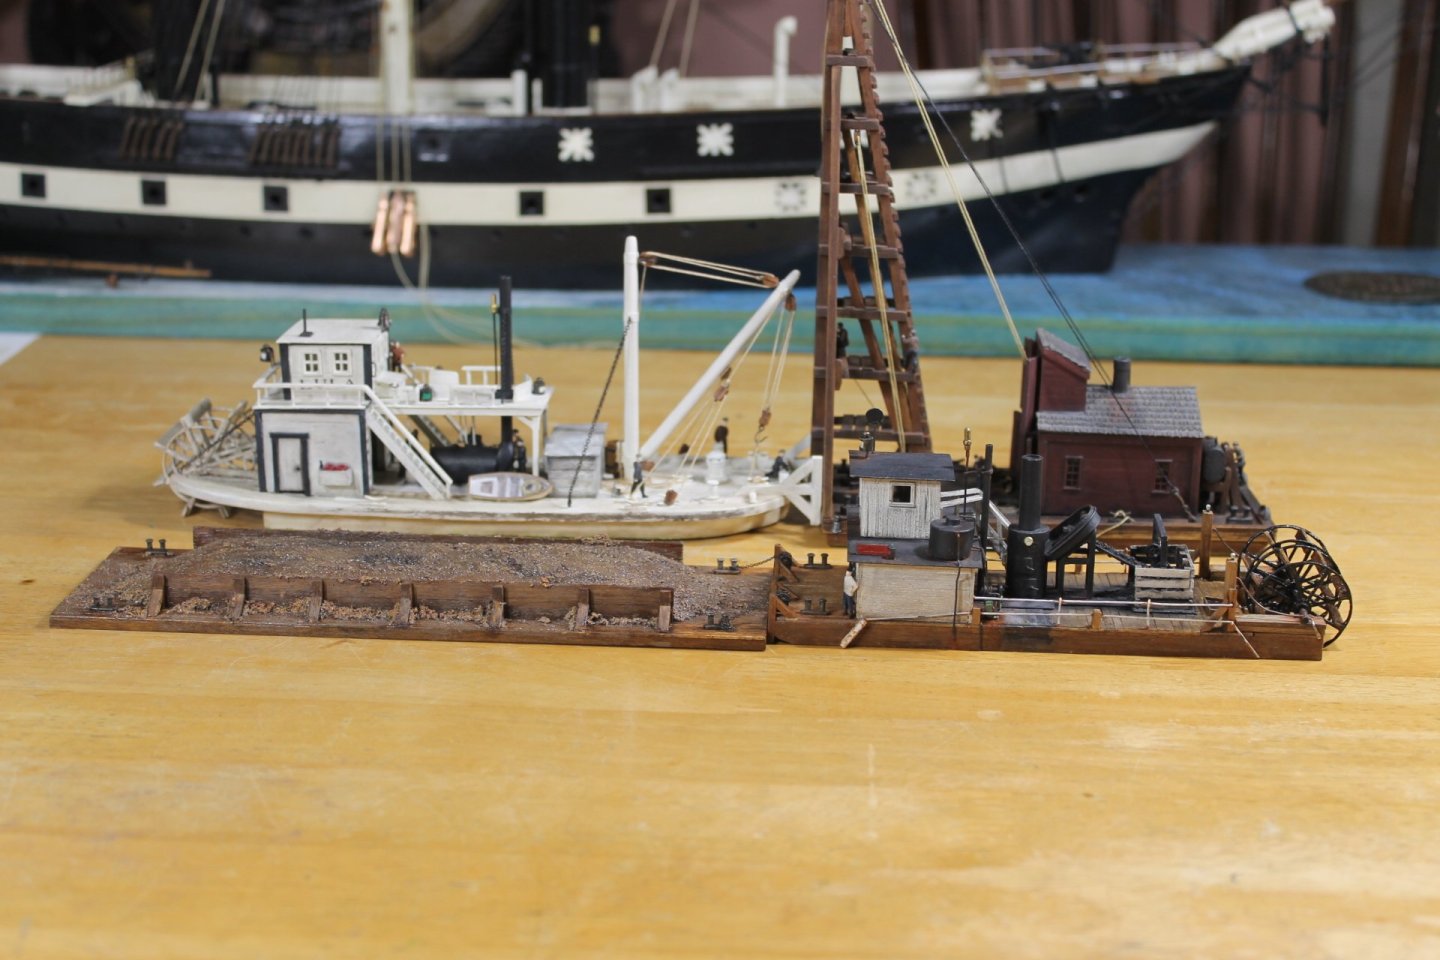
To all of you who have supported me during this build with your comments and likes, thank you. I have enjoyed each of you being part of the journey. TA DA! Tis done. I fought trying to get the color of the dredge material to what I thought it should look like. Eric, you know the Susquehanna better than most, I hope I'm close because it's too late now. It's crazy in that the colors change depending on the light, in fact you see evidence of that in the photos, one to another. I tried making the material at the ends and outside of the side wall look like drying sand while keeping the center of the load looking wetter. I made the barge floating lower due to load and the fact that it's a soggy ole barge, And so this journey ends, I hope you were able to find a smile along the way. Keith ps. I mentioned displaying Lula and the pile driver with the Susquehanna River sternwheeler and barge. Here are a couple of photos showing my thoughts. on that. Note the color of the material in these two photos.


- 457 replies
-
- 21
-

-

-
- sternwheeler
- Hard Coal Navy
- (and 1 more)
-
You be makin' the penguins proud with them ratlines, Bob. 👍
- 261 replies
-
- 2
-

-

-
- Victory Models
- Pegasus
- (and 3 more)
-
Congratulations on completing the Oryol, Phil. She turned out looking amazing.
- 288 replies
-
- 6
-
-
-
- Card
- Pre-Dreadnought
- (and 3 more)
-
News and photos at six! Ken, thank you for sharing. Thank you for posting, Julie.
- 457 replies
-
- 1
-
-
- sternwheeler
- Hard Coal Navy
- (and 1 more)
-
Eberhard, there is a ladder that leads up to the cold box between between the pilothouse and the stack. I think the distance between the PH and the stack is greater than it appears because of the image angle.
-
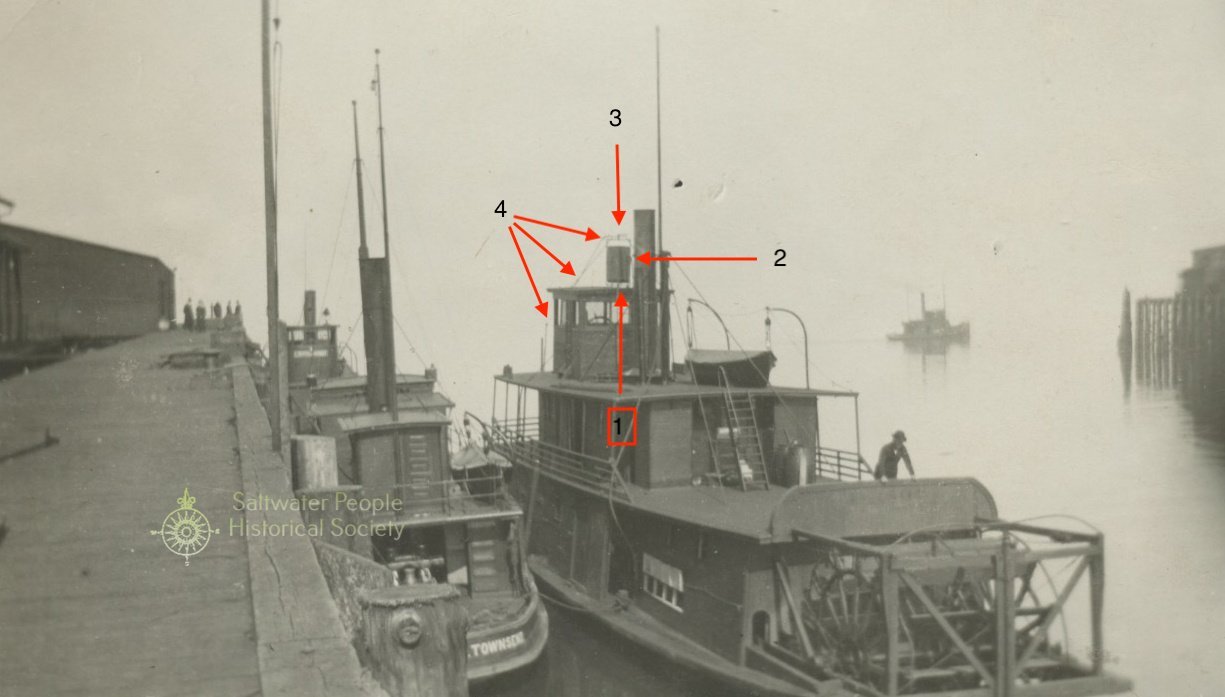
Ken, I think the legs would be too wobbly (1) and short on head room (3) plus the pilothouse its self is three decks high. Eberhard, awfully small for a water tank and the spindly legs wouldn't support a lot of weight. Pat, I think you're spot on. I believe it's a cool safe, cold safe, cold box, food box, or whatever you want to call that item. I've always referred to them as a cold box and will do so henceforth. Ken, Eberhard, and Pat, thank you so very much for posting. The reasons why I think this is a cold box... Item 1. Thin legs that support the cold box elevated off the pilothouse roof for air circulation. Item 2. I think that is a latch. Item 3. Appears to be a nozzle. I think this is for occasionally spraying water into the cold box to help keep food items cool. Item 4. Water pipe leading to the item 3 nozzle coming from the boiler deck, the same deck the galley is located on. The cook would have been the one in charge of controlling when and how much water was applied to the cold box.
-
The planking looks great, Jacques. 👍
-
Congratulations on getting the Revenge into the bottle, Glen. She's a real corker that one, fantastic execution. 👍
- 156 replies
-
- 5
-
-
-
- Queen Annes Revenge
- bottle
- (and 1 more)
-
Good on you, Steve.
-
Adrian, welcome to MSW. Glad to have you aboard.
-
Hello from the Finger Lakes Region of NY state!
Keith Black replied to Rinekar's topic in New member Introductions
Rinekar, welcome to MSW. All the best building the Adder, glad to have you aboard. -
Great post, Paul. The base looks terrific, nice snag. And the planking is looking fantastic. What wood species is the planking?
-
Good looking busy work while waiting for the hull to dry, James. Regarding rigging line..... cotton line stinks, it's fuzzy and its life expectancy is very limited. A lot of builders (including museums when doing rigging restoration work) are using polyester thread. It's almost 100% fuzz free and it has a much much longer shelf life than cotton. I use Gutermann as do many others. You get a couple of kits under your belt and you'll start wondering why your paying high kit prices and scraping 50% of it.
-
James, I'm unfamiliar with Varathane Polyurethane, I have only ever used Minwax Polyurethane. Once upon a time I did the same thing as yourself and tried wiping down with paint thinner and made a dog's lunch of the whole thing, In the end I still had to wait till the poly dried where I could then sand down and start over. Lesson learned......set it aside and wait till it dries. Find something to work on while you twiddle your fingers.
-
Sounds a bit sketchy to me, Patrick. It seems counterintuitive that you'd be able to apply pressure and drill a straight hole? A pin vise is an inexpensive tool designed for the sole purpose of drilling holes.
-
You're more than welcome, James. The double ended pin vise is the best option, IMHO. They allow one to get closer if necessary. And yes, it definitely would have made it a lot easier. When drilling holes for nails you can drill a undersize hole, tap in the nail hoping pressure will keep the nail in place. Personally I like to drill slightly oversize, easily insert the nail with a bit of CA (super glue) on the shake to keep it in place. This is because wood dries out and shrinks and the nail could come loose. Using CA kinda insures the nail won't come out.
-
James, if you have a pin vise you could drill holes where the nails would fit in neatly without hammering. If you don't have a pin vise it is a simple and relatively inexpensive tool that you should have, IMHO. The bottom link is for micro drill bits and included is a pin vise that is absolutely worthless but the drill bits are the ones I buy. https://www.amazon.com/Double-Detachable-Manual-Jewelry-Making/dp/B09NMGSR87/ref=sr_1_59?dib=eyJ2IjoiMSJ9.B22oabypIjH-iebkMfnzPJKL4a1vE532JIJK1jDQB5W2gooxlhfqH39wWAFNZeHkDeShVtejK1vwPqY57H38qn_-yZZTC4QhcHhvfAZ4zAOzZv61P6Hcp3o4WCbd77iPoYIju3j-aZe_R0-s-APT7HCH3_N5M8lGOFEn5ZNRe45zAkjM4VZQPcu7qaGB3-C1iuHI9fPgHLqlyNVNxHBKtBVJDokCexG8CAF4lcGnqKBrcJjFjEVSrGxuVGQXzZgLZHuJPmgdpY_og7DxQXAvar1YjQ8TRZOH9BrsKgr3wUo.vmcSnzUjNyKB76jttn8ZuITxbXpEFAo07LgWqqSykCA&dib_tag=se&hvadid=693388925260&hvdev=c&hvexpln=67&hvlocphy=9052573&hvnetw=g&hvocijid=12088025368565546822--&hvqmt=e&hvrand=12088025368565546822&hvtargid=kwd-436988750327&hydadcr=7499_13183988&keywords=pin+vise+amazon&mcid=6b07454c0cae36ef8775ed1eb0e4fe65&qid=1761378944&sr=8-59 https://www.amazon.com/Carburetor-Numbered-Jewelers-Mini-Pin-Plastic/dp/B0FKN8X949/ref=sr_1_13?crid=15GZPT3FXGCRK&dib=eyJ2IjoiMSJ9.tfi-QX1AoFqRxotiH0RCBQhs9jLI2An9Vwl8Tur4mOTurcnktlFWze0azTOjpCwiQmCXb-hR3HmCE0edGKX-mq8cxP-VMsBXMidh7pC76e1ZqVh8AArbYYk38se2VN868mxo8hv_pP2tV5fJmcjm0Q9wOOFRDYJZVudpnf76899vBqRCezuUeYw4qgs2CMl0z6Bc_Q2rz0HIpvv3pUq_1f1wuC2NEjPoAV-B4UhliMY.zW-Dt9aNDPFb74AtTli_s66MTrMCStxaT7gPjp36RcI&dib_tag=se&keywords=micro+drill+bits&qid=1761379202&sprefix=micro+drill+bits%2Caps%2C108&sr=8-13
-
She looks perfect, Glen. I'm all clinched up, let the fireball insertion commence!

- 156 replies
-
- 9
-
-
-
- Queen Annes Revenge
- bottle
- (and 1 more)
-
My condolences on your dad's passing, James. I know and appreciate the need/desire to connect with him. Having said that, welcome to MSW. Glad to have you aboard and all the best to you as you start your ship modeling journey. Keith
-
Thank you, Keith. I can't wait till the material dries where I can start playing with pastels and poly. Thank you, Eberhard. Ken threw that "culm" fastball right past me as well, I had to Google that unfamiliar word for the meaning. Thank you again, Ken.
- 457 replies
-
- 3
-
-
-
- sternwheeler
- Hard Coal Navy
- (and 1 more)