MORE HANDBOOKS ARE ON THEIR WAY! We will let you know when they get here.
×


Keith Black
-
Posts
6,256 -
Joined
-
Last visited
Content Type
Profiles
Forums
Gallery
Events
Everything posted by Keith Black
-
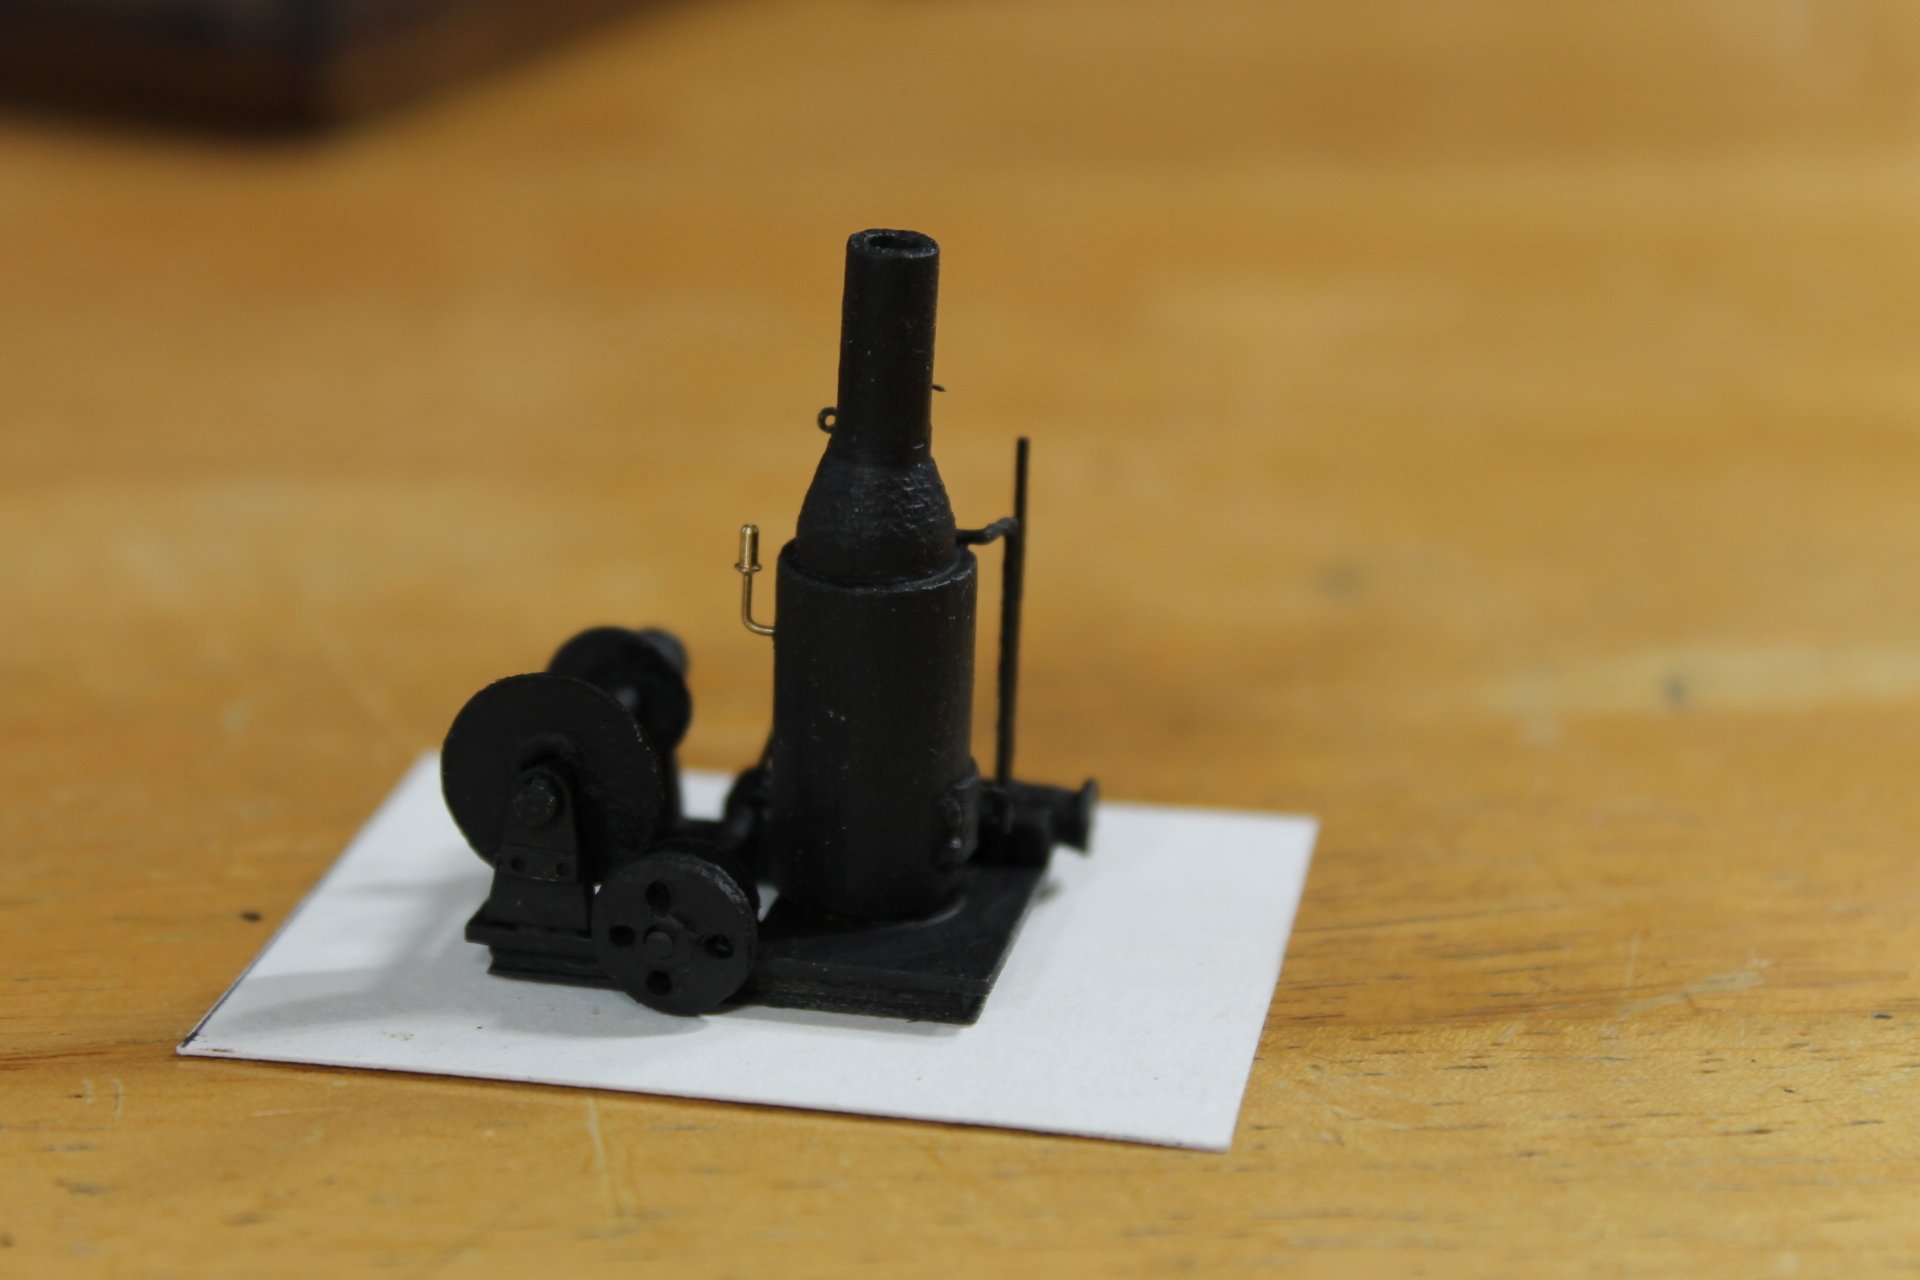
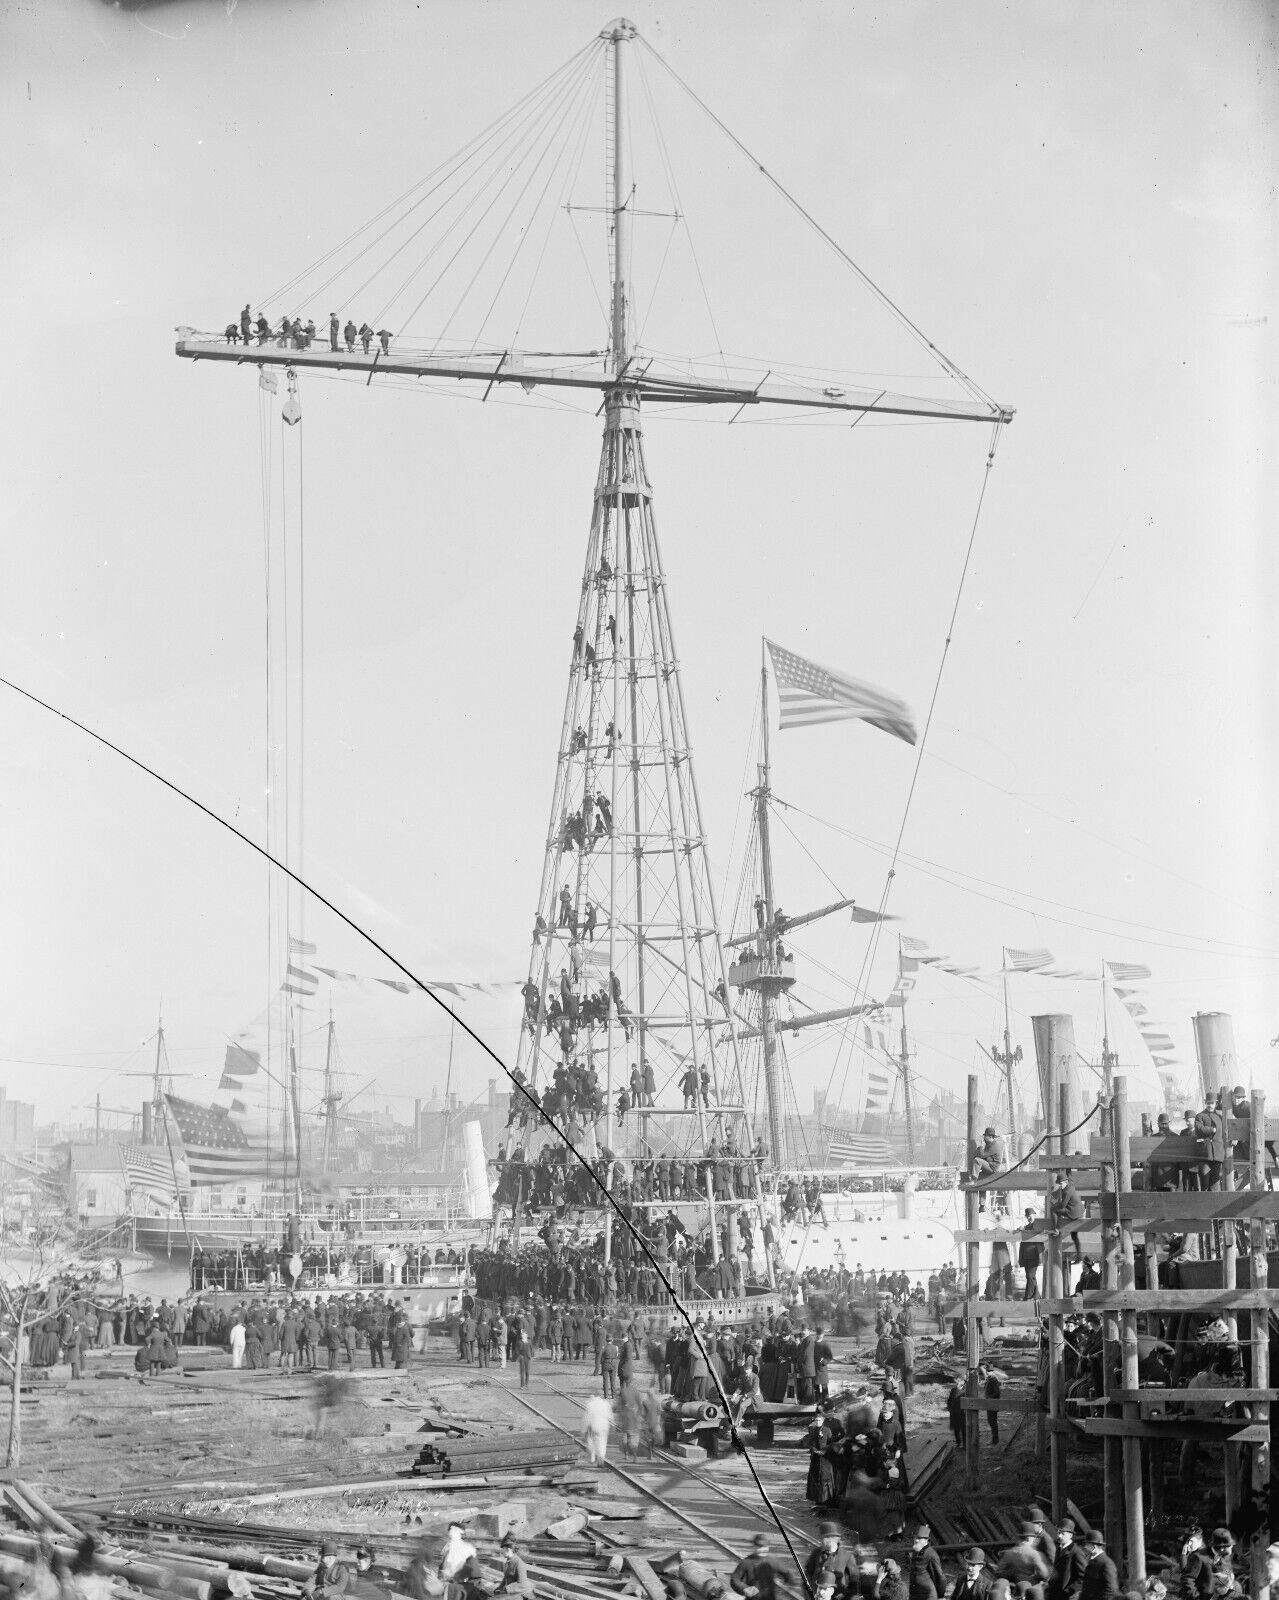
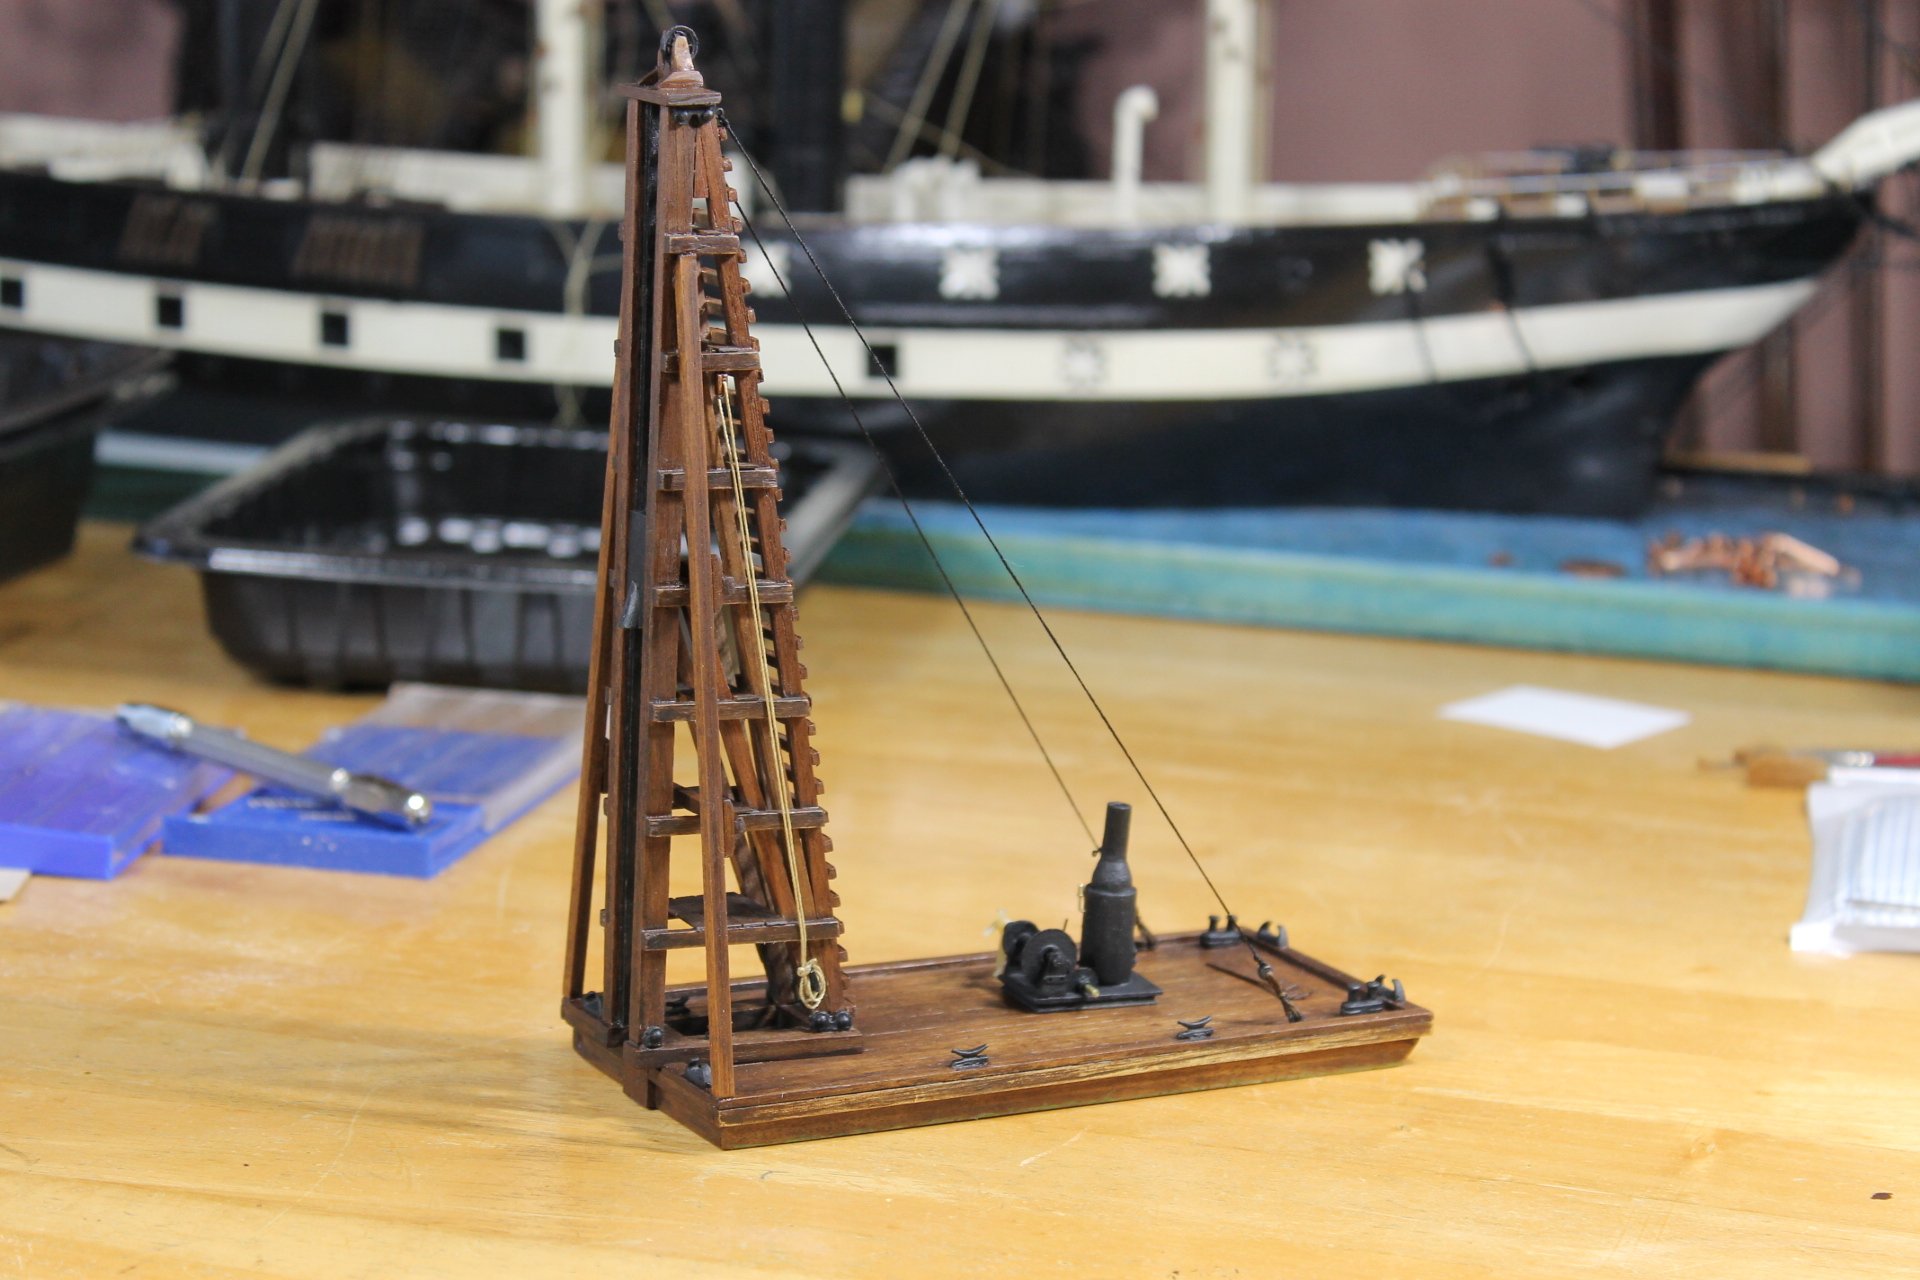
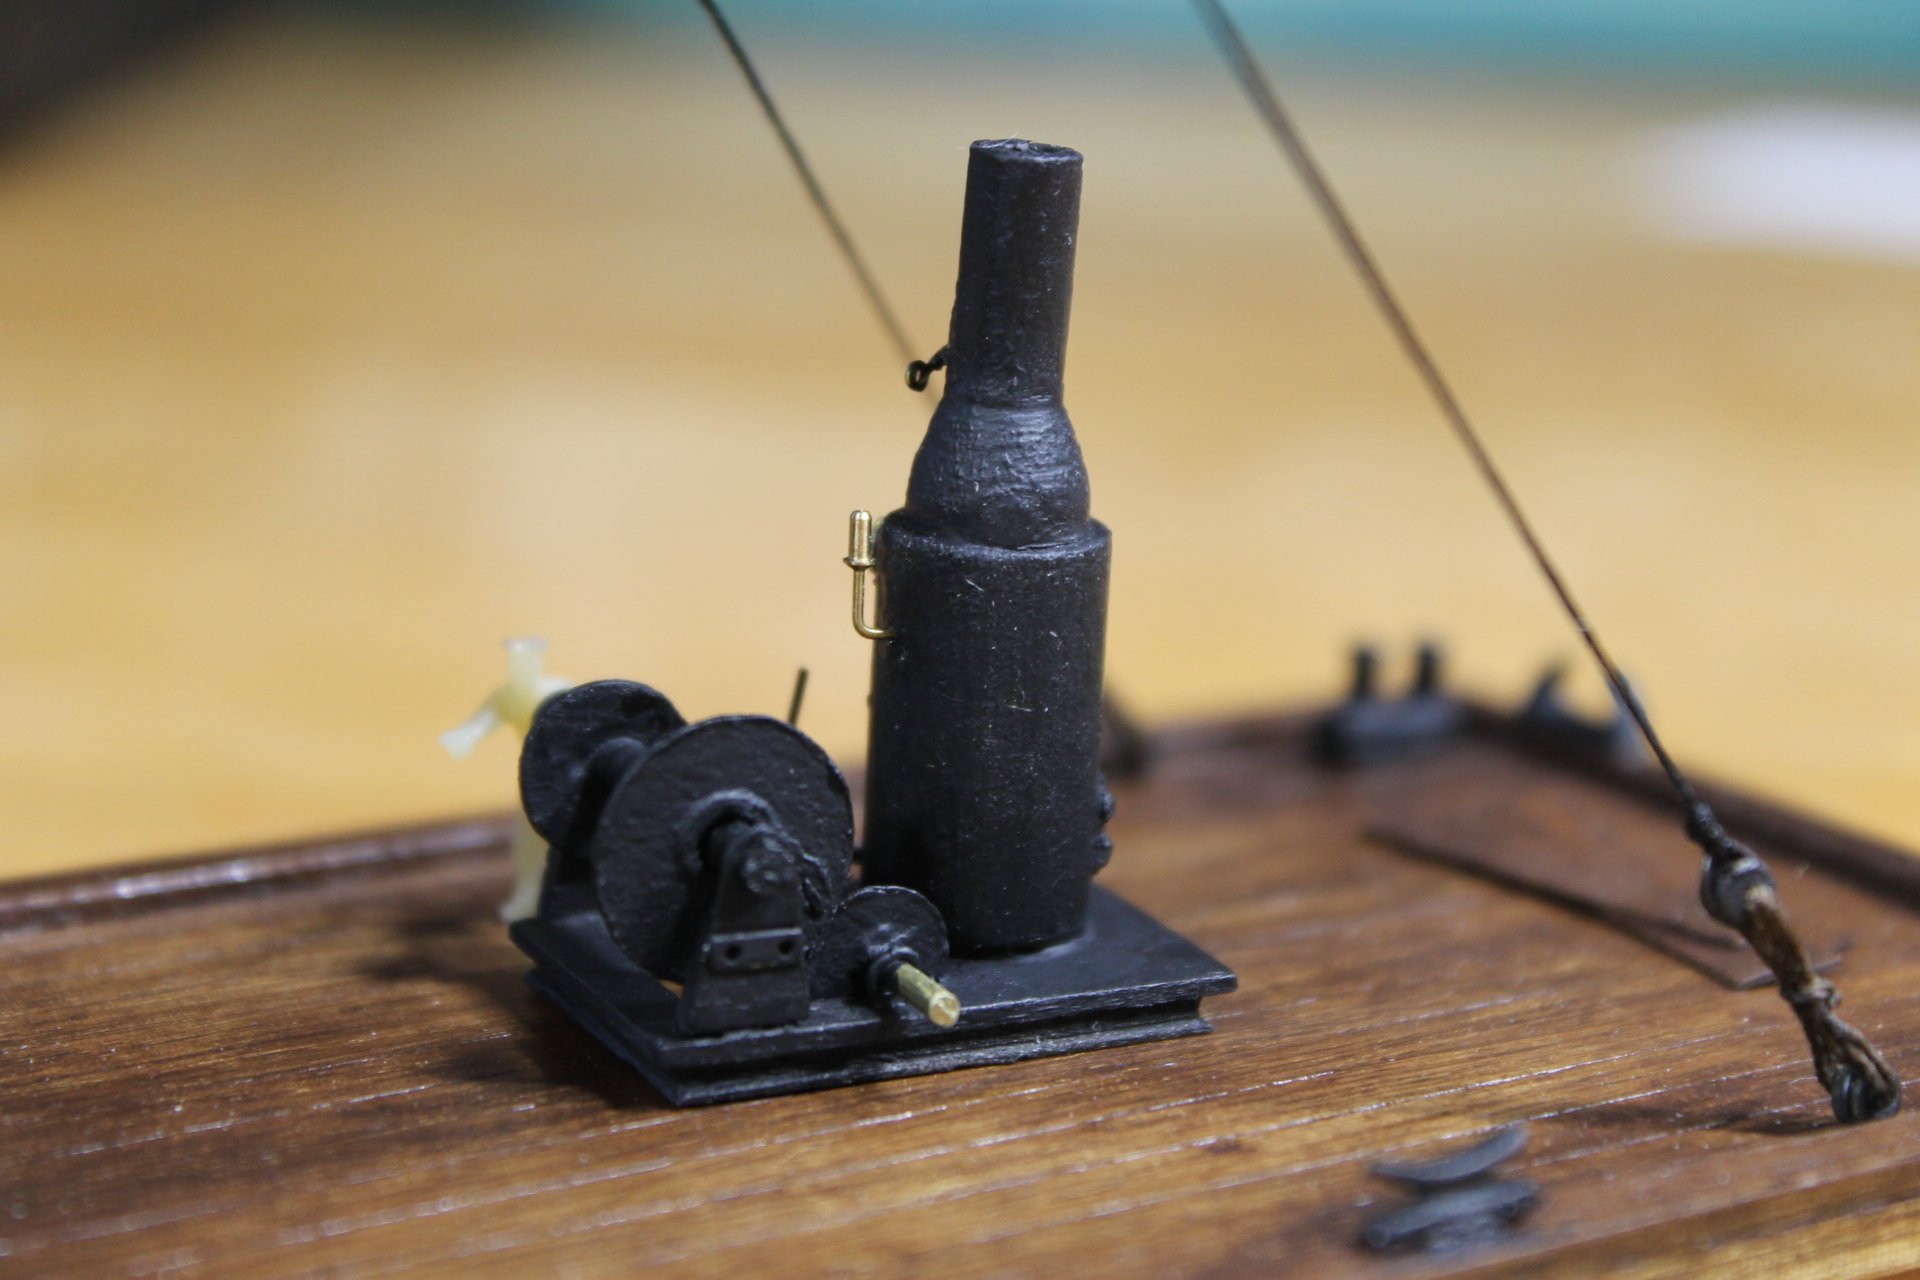
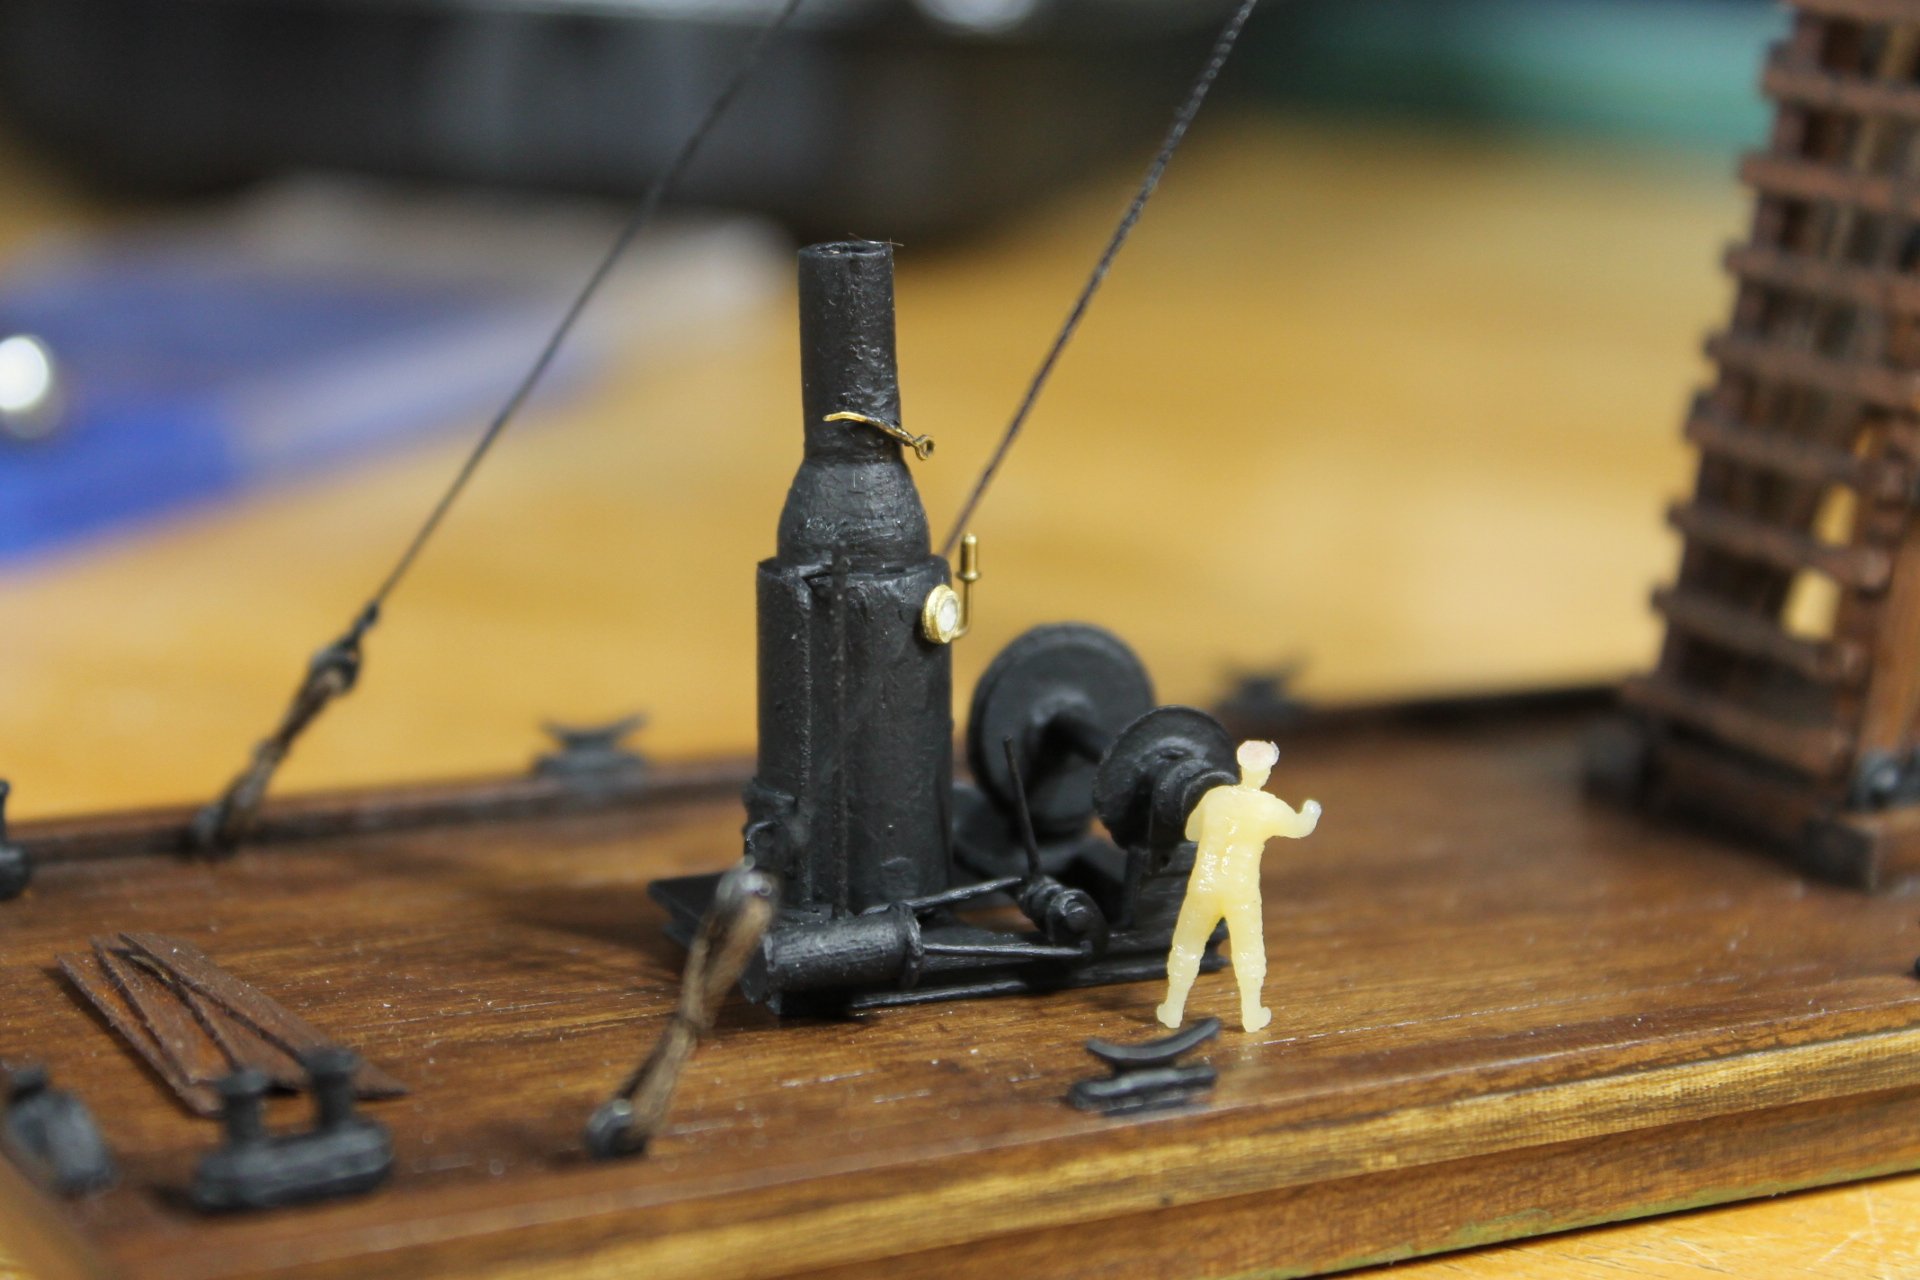
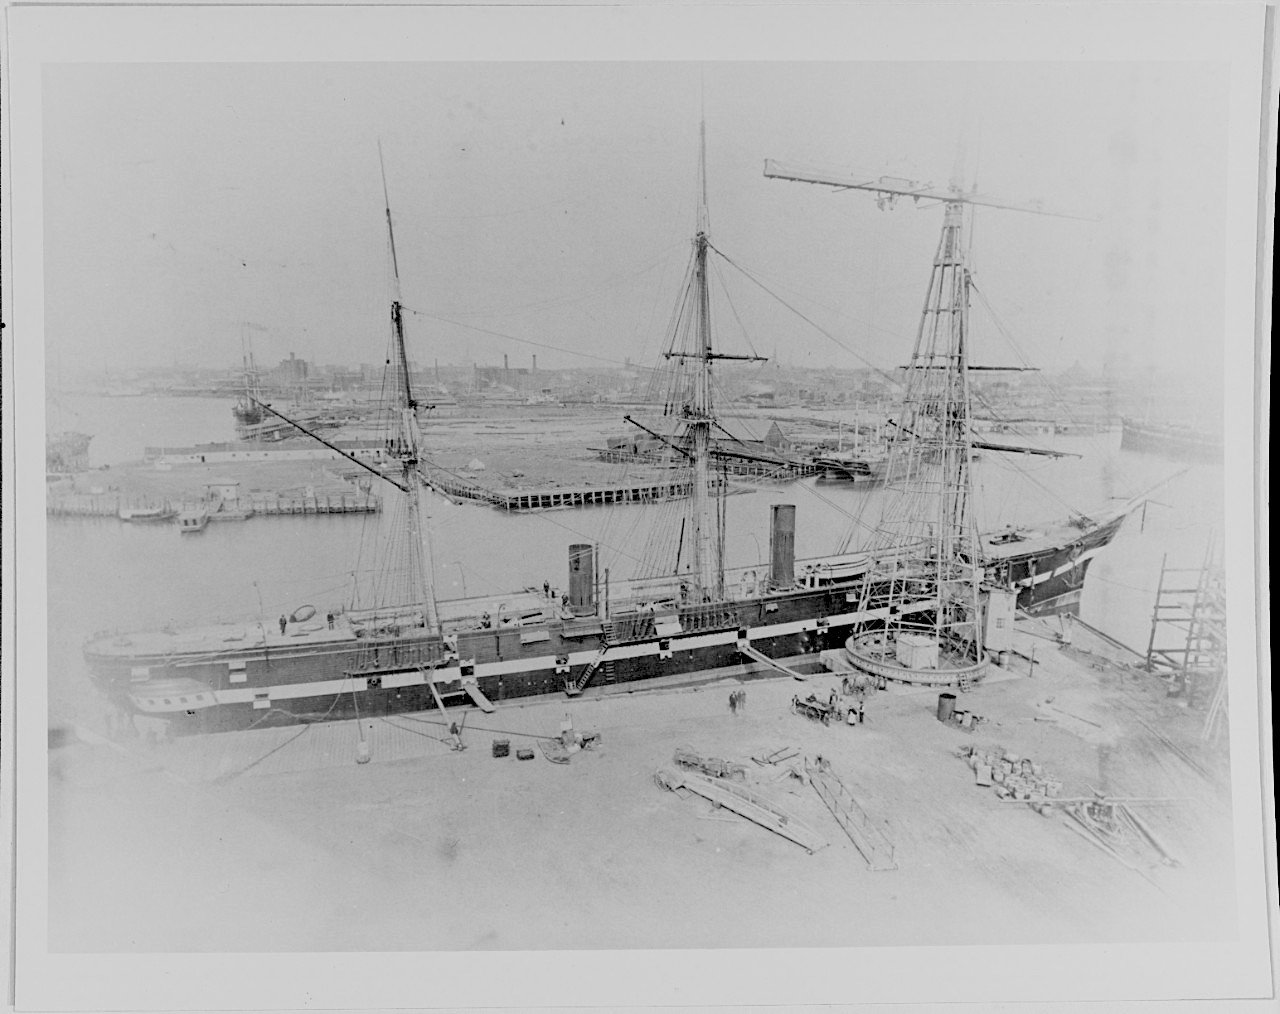
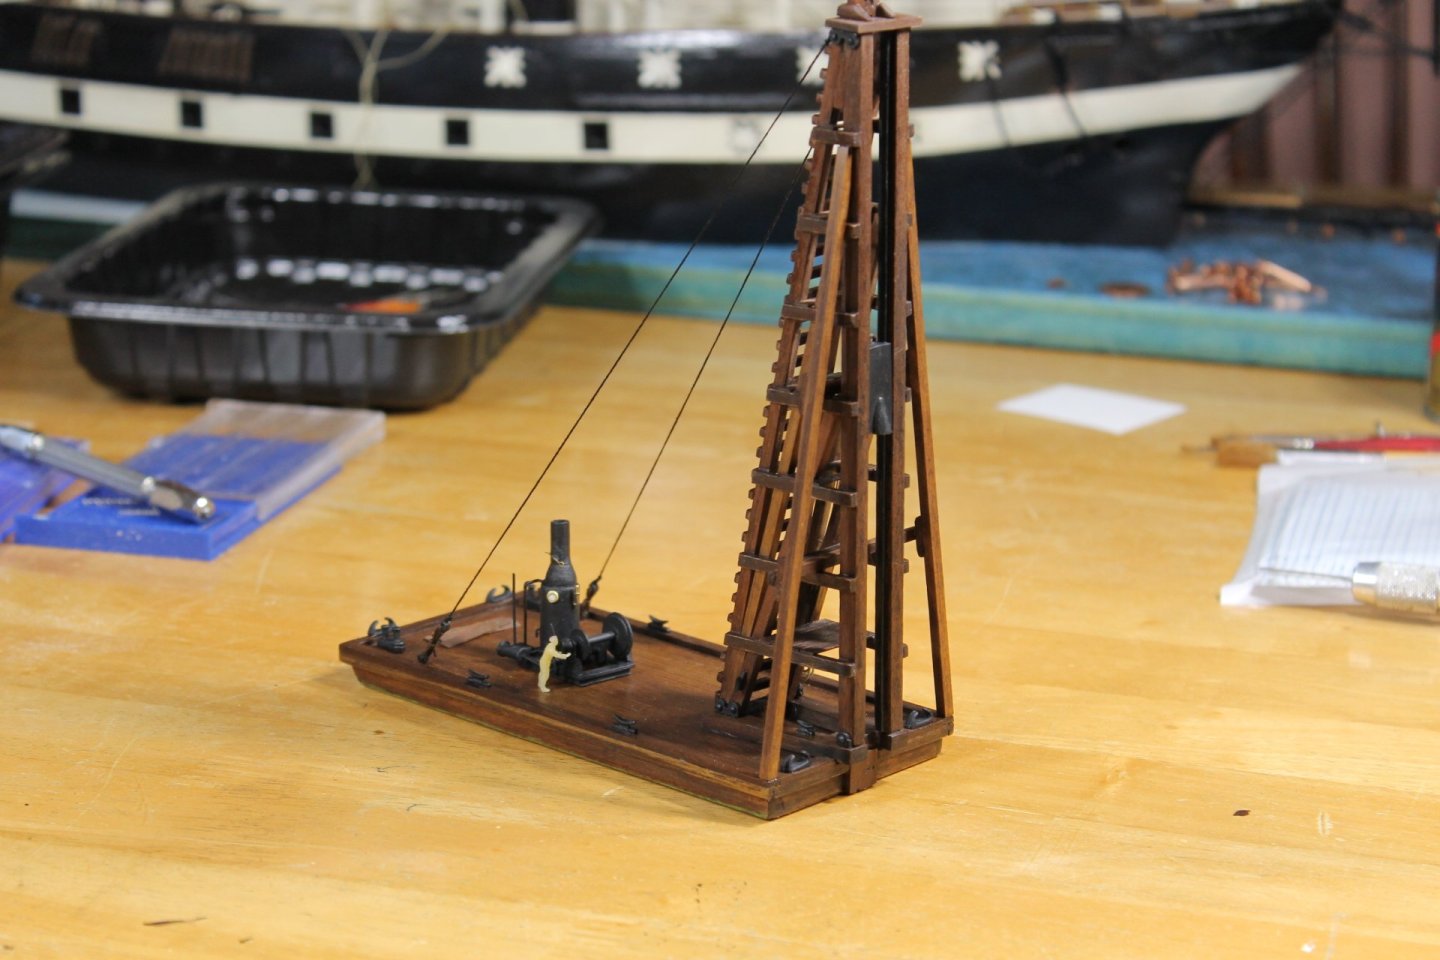
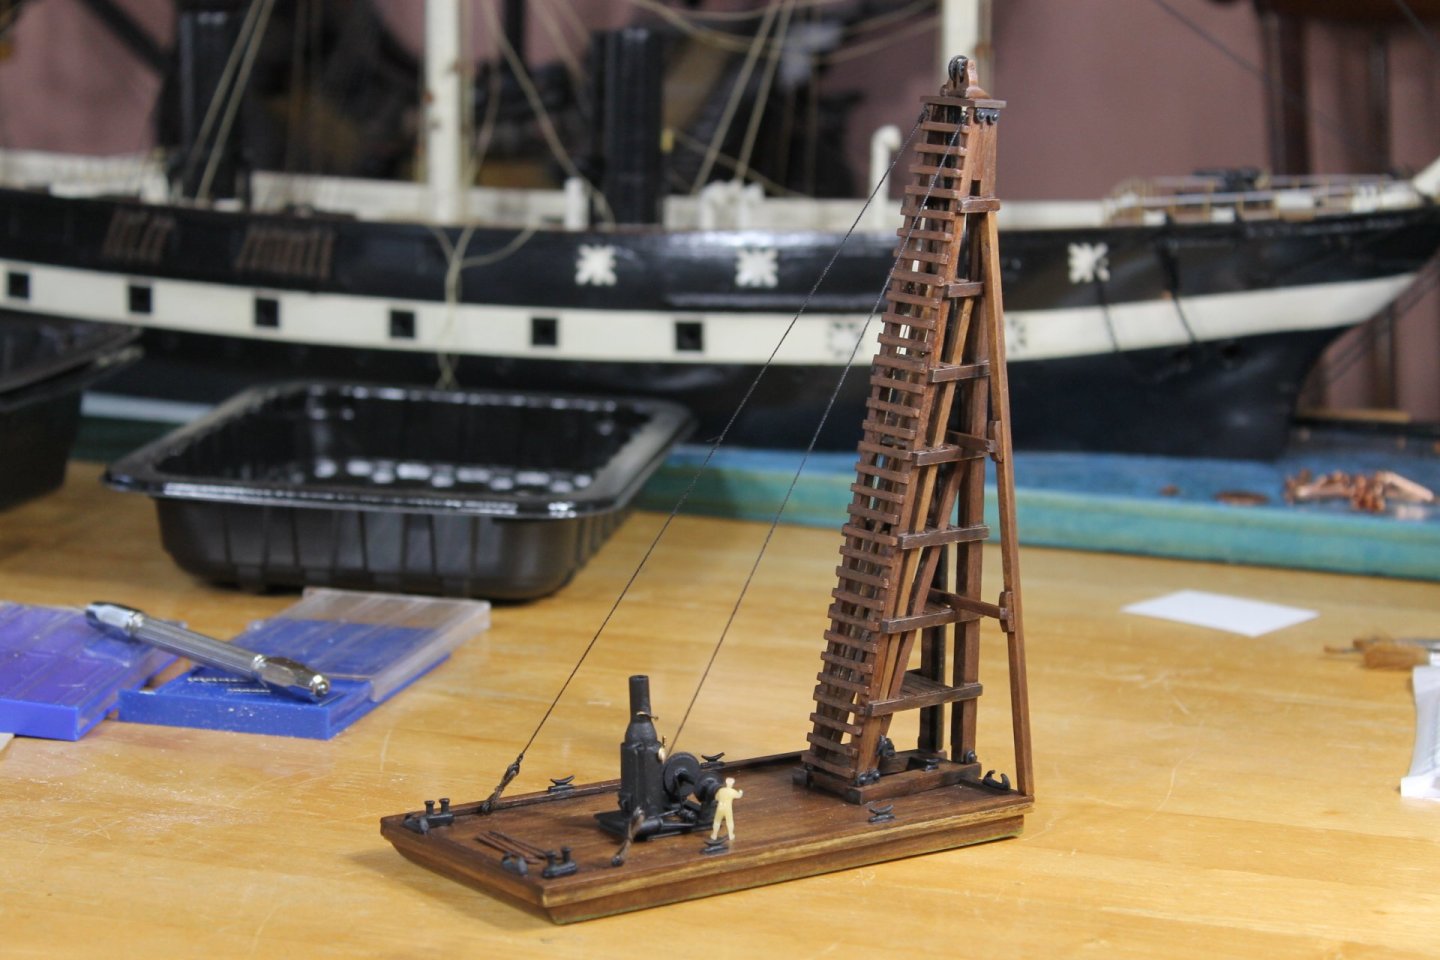
 Thank you everybody for the likes and for following along. Keith, as much as I like ya, I don't trust your ability to come up with a plan to increase my modeling years. Besides, I've a long nap just up ahead. Tom, I normally get into my chair for the night between 11pm and 1am so stretching it out a couple of hours isn't a biggie though I will say, I slept most of yesterday. And no, Keith, it did not improve my looks any whatsoever! I feed the Donkey the onions. Let's see how many of you good folk get that reference. Thank you, Brian. God has truly blessed me with the health and eyesight that I have at age 77. First, I want apologize for the quality of the following photos. I think there's too much light coming in from the window which is counterintuitive? That or the camera, like all of us, has it's good days and bad days. I made the flywheel this morning, got it installed and painted and with that, the Donkey engine is done with the exception of loading the drum with line and installing the Donkeyman. I finally found his position from which to operate the engine and it's perfect! His left hand is on the control lever and he's gesturing caution with his right hand. Once he's painted he'll get attached and I can then permanently fix the engine to the barge deck. I've mentioned a long term project I have in mind that includes this pile driver and the future help boat/tug, Lula. Provided the Lord allows me the time, I want to build a dock diorama based on the Brooklyn Navy Yard location that consist of a finished dock with a wooden dock crane, warehouse fronts, and maybe a skid driver doing repair work. Another part of the diorama would be a new dock under construction that features this driver and the future help boat. Those early dock cranes fascinate the heck out me and I would love the opportunity to build one. The whole diorama project is something I hope I'm able to accomplish and would be a fitting project to end on. Launching of the USS Maine at the Brooklyn Navy Yard in 1889. This dock crane is very similar to the dock crane pictured next to the USS Tennessee in 1869. a Thank you to each of you for stopping by and being part of this journey. Keith
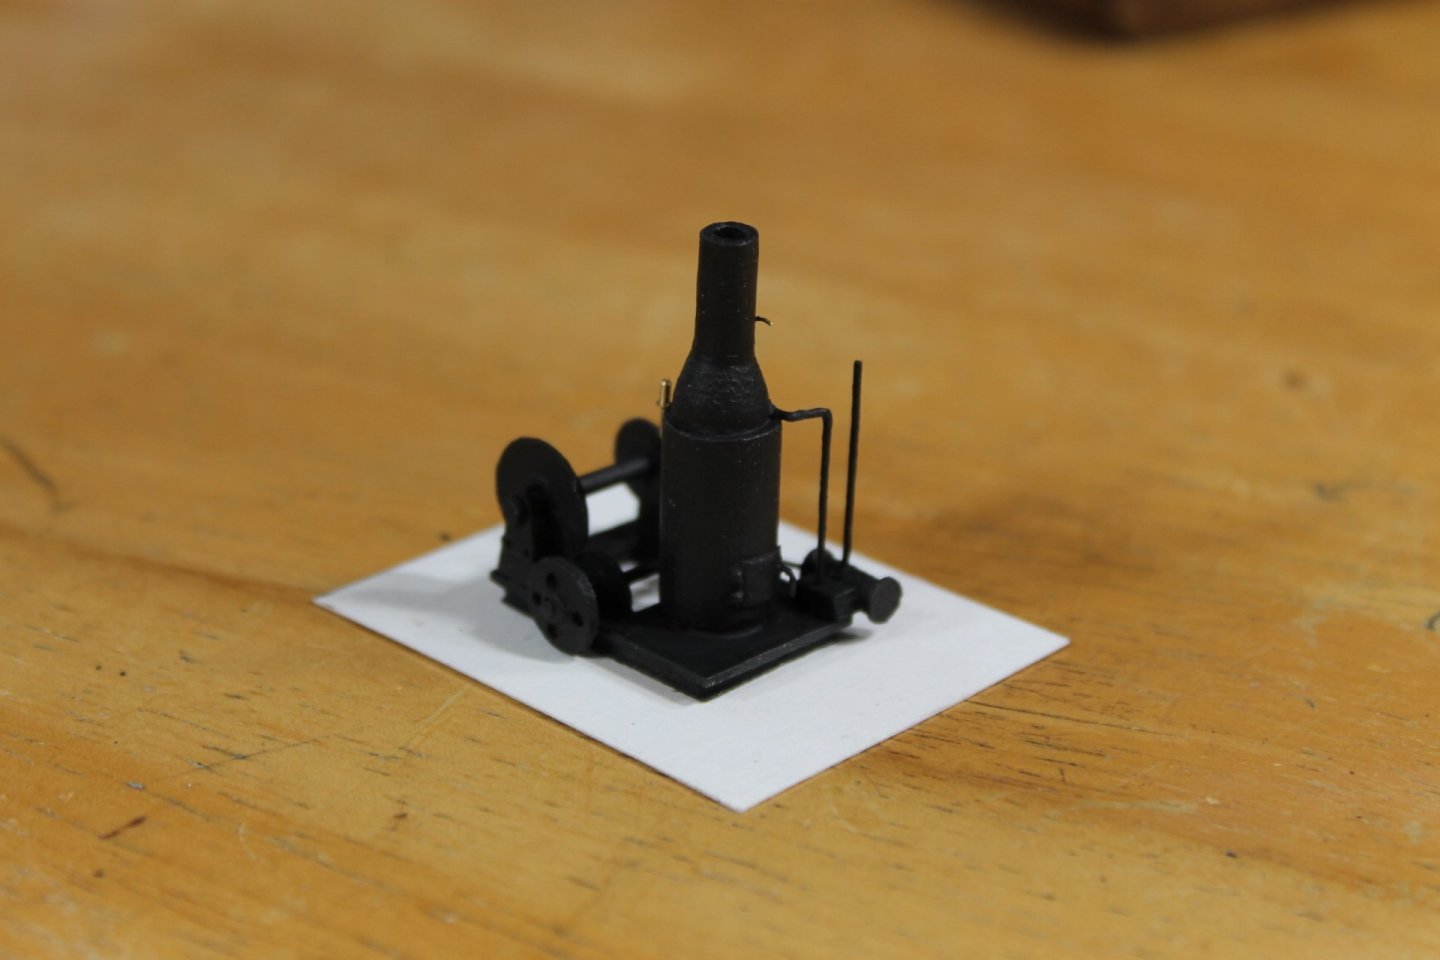


-
Beautiful work as always, Keith.
-
Thank you to all for the likes and for taking the time to follow along. Don't tarry. In my youth I had many bottle projects but as I remember the only momentum was downward. Too funny, Tom. Thank you, Bob. It is a joy when the work flows effortlessly and time ceases to exist. I said I'd have the engine finished by today, I worked till 3 AM this morning trying to get everything done but alas, not to be. I still have the flywheel to make. Flywheels are neat objects and some foundries made them works of art. As the left side of the engine is pretty boring I want to take my time and try to make a nice flywheel. The Steam Donkey isn't fixed to the deck so I can't spool up the drum with line, that will make a huge difference in appearance. It won't be hard to spool the drum as the drum shaft turns so it's just a matter of winding on line. As I said, the left side is pretty plain. Drive shaft less flywheel. The viewer has to imagine teeth on the drive gear and the drum's bull gear. i'm pretty cagey but I ain't that cagey. Close up photos are so critical but I look at it this way, there's lots of tooth for the pastels. Thank you to each of you for being part of this journey. Keith


-
Fantastic work, George. I work at 1:120 so I understand the issues you have working at 1:144. You did an excellent job selecting the blocks for their placement due to size.
-
Close up photos always show our errors. Sometimes i take close ups photos just for me where I can see what i need to work on. For a first layer i think it looks great, Simon.
-
Beautiful planking job, George.
-
Gunboat Philadelphia 1776 by tmj
Keith Black replied to tmj's topic in - Build logs for subjects built 1751 - 1800
Very nice, Tom. -
Gunboat Philadelphia 1776 by tmj
Keith Black replied to tmj's topic in - Build logs for subjects built 1751 - 1800
Tom, looks like you 'nailed' it. -
Rob, unfortunately Chris doesn't offer ship's boats in the scale and time period the Tennessee requires. Shapeways also offered figures in 1:120 scale. Other than Shapeways, I've been unable find another source for naval figures in 1:120 scale from the 1870 to 1890 time period.
-
I was going to purchase ship's boats from Shapeways, they offered exactly what i needed for the Tennessee. The boats were expensive but I thought they well worth the price because of the quality. Unfortunately Shapeways filed for bankruptcy this past July. Shapeways didn't print anything themselves, they offered items printed by independents that Shapeways then marketed on their web sight. This has left a void in the marketplace that as of now is going unfilled.
-
Bob, the waterline does look better. What color are your blocks?
- 207 replies
-
- 2
-

-

-
- vanguard models
- Duchess of Kingston
- (and 1 more)
-
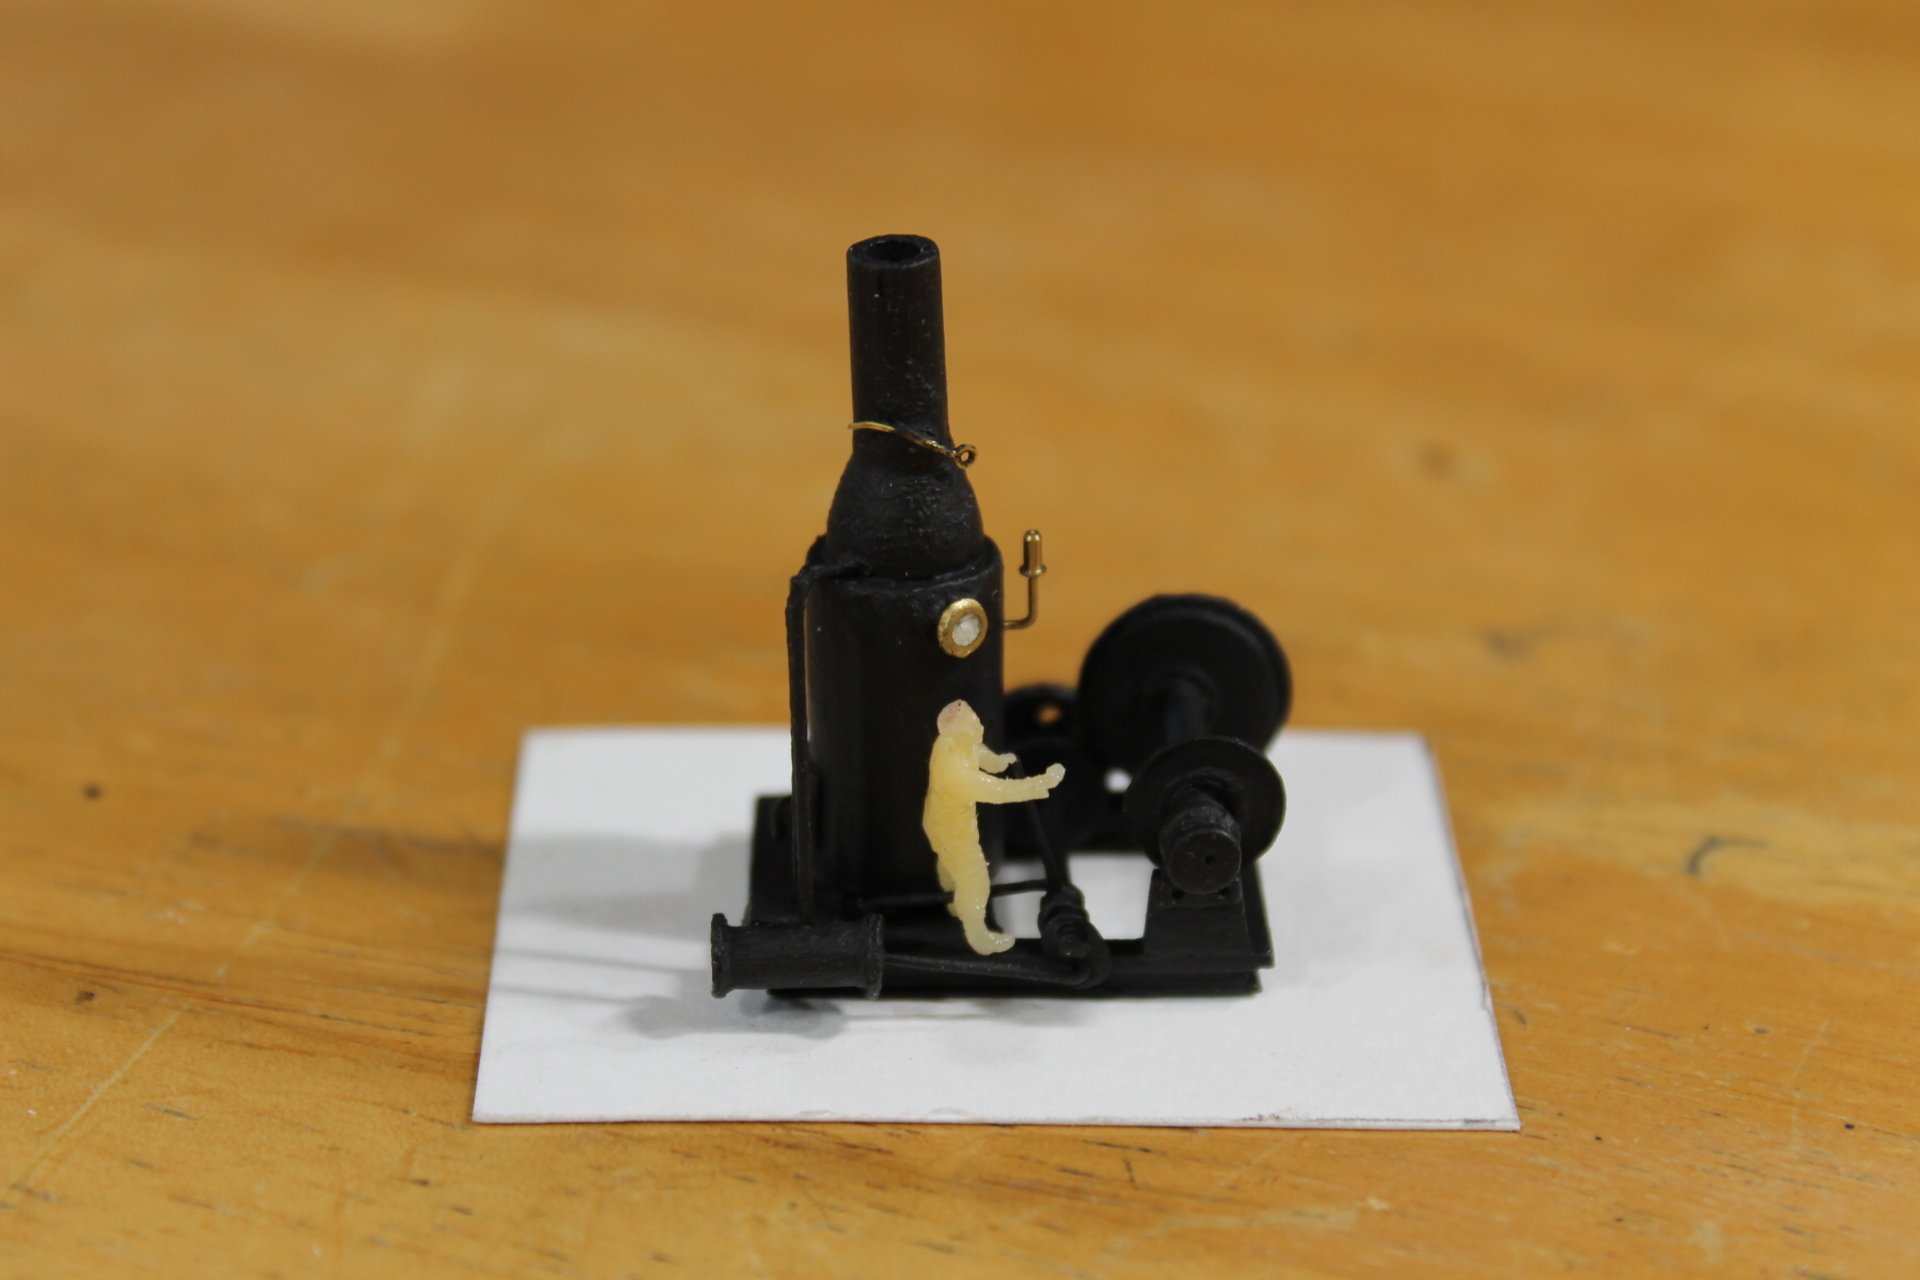
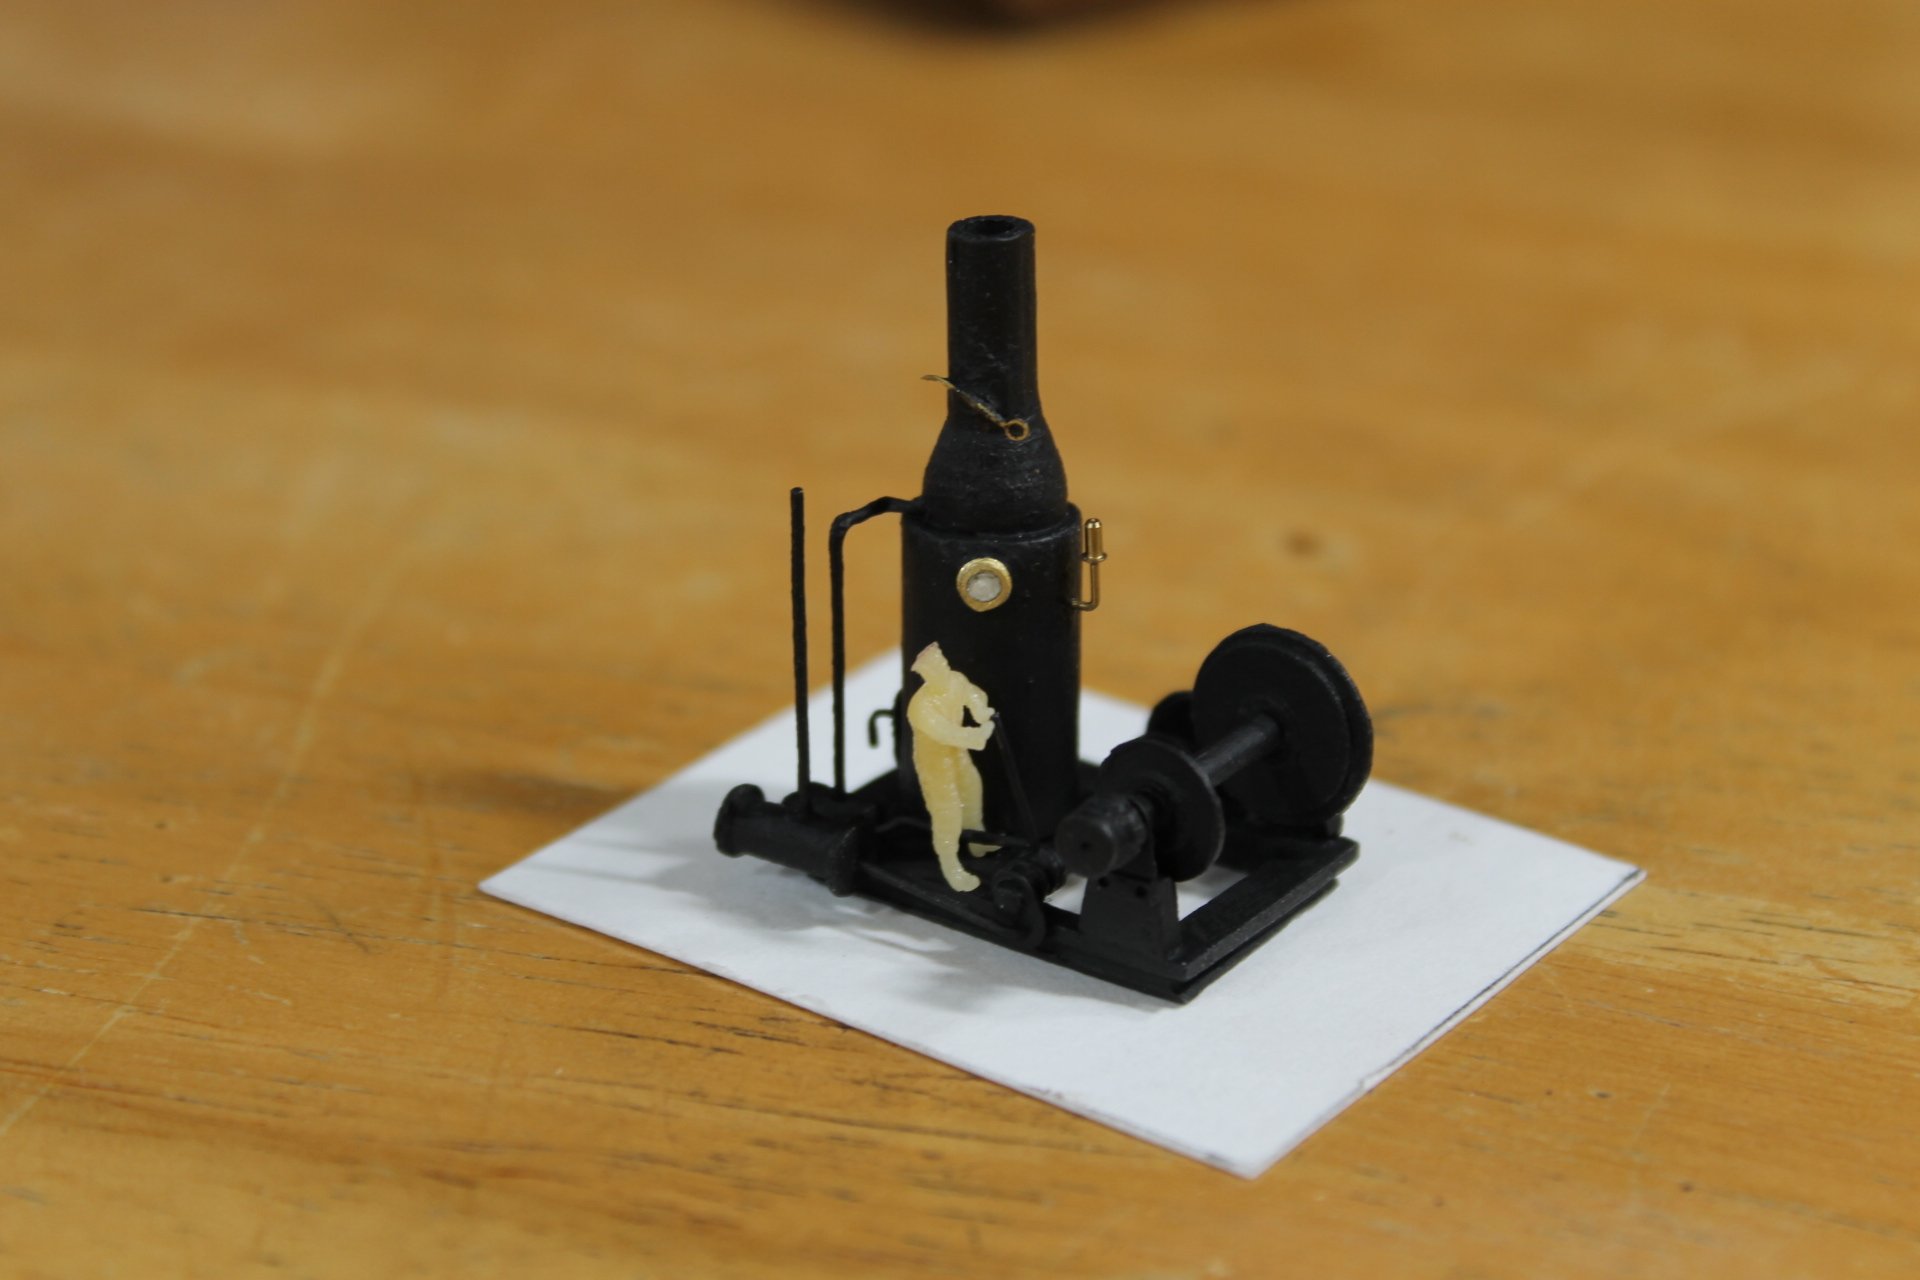
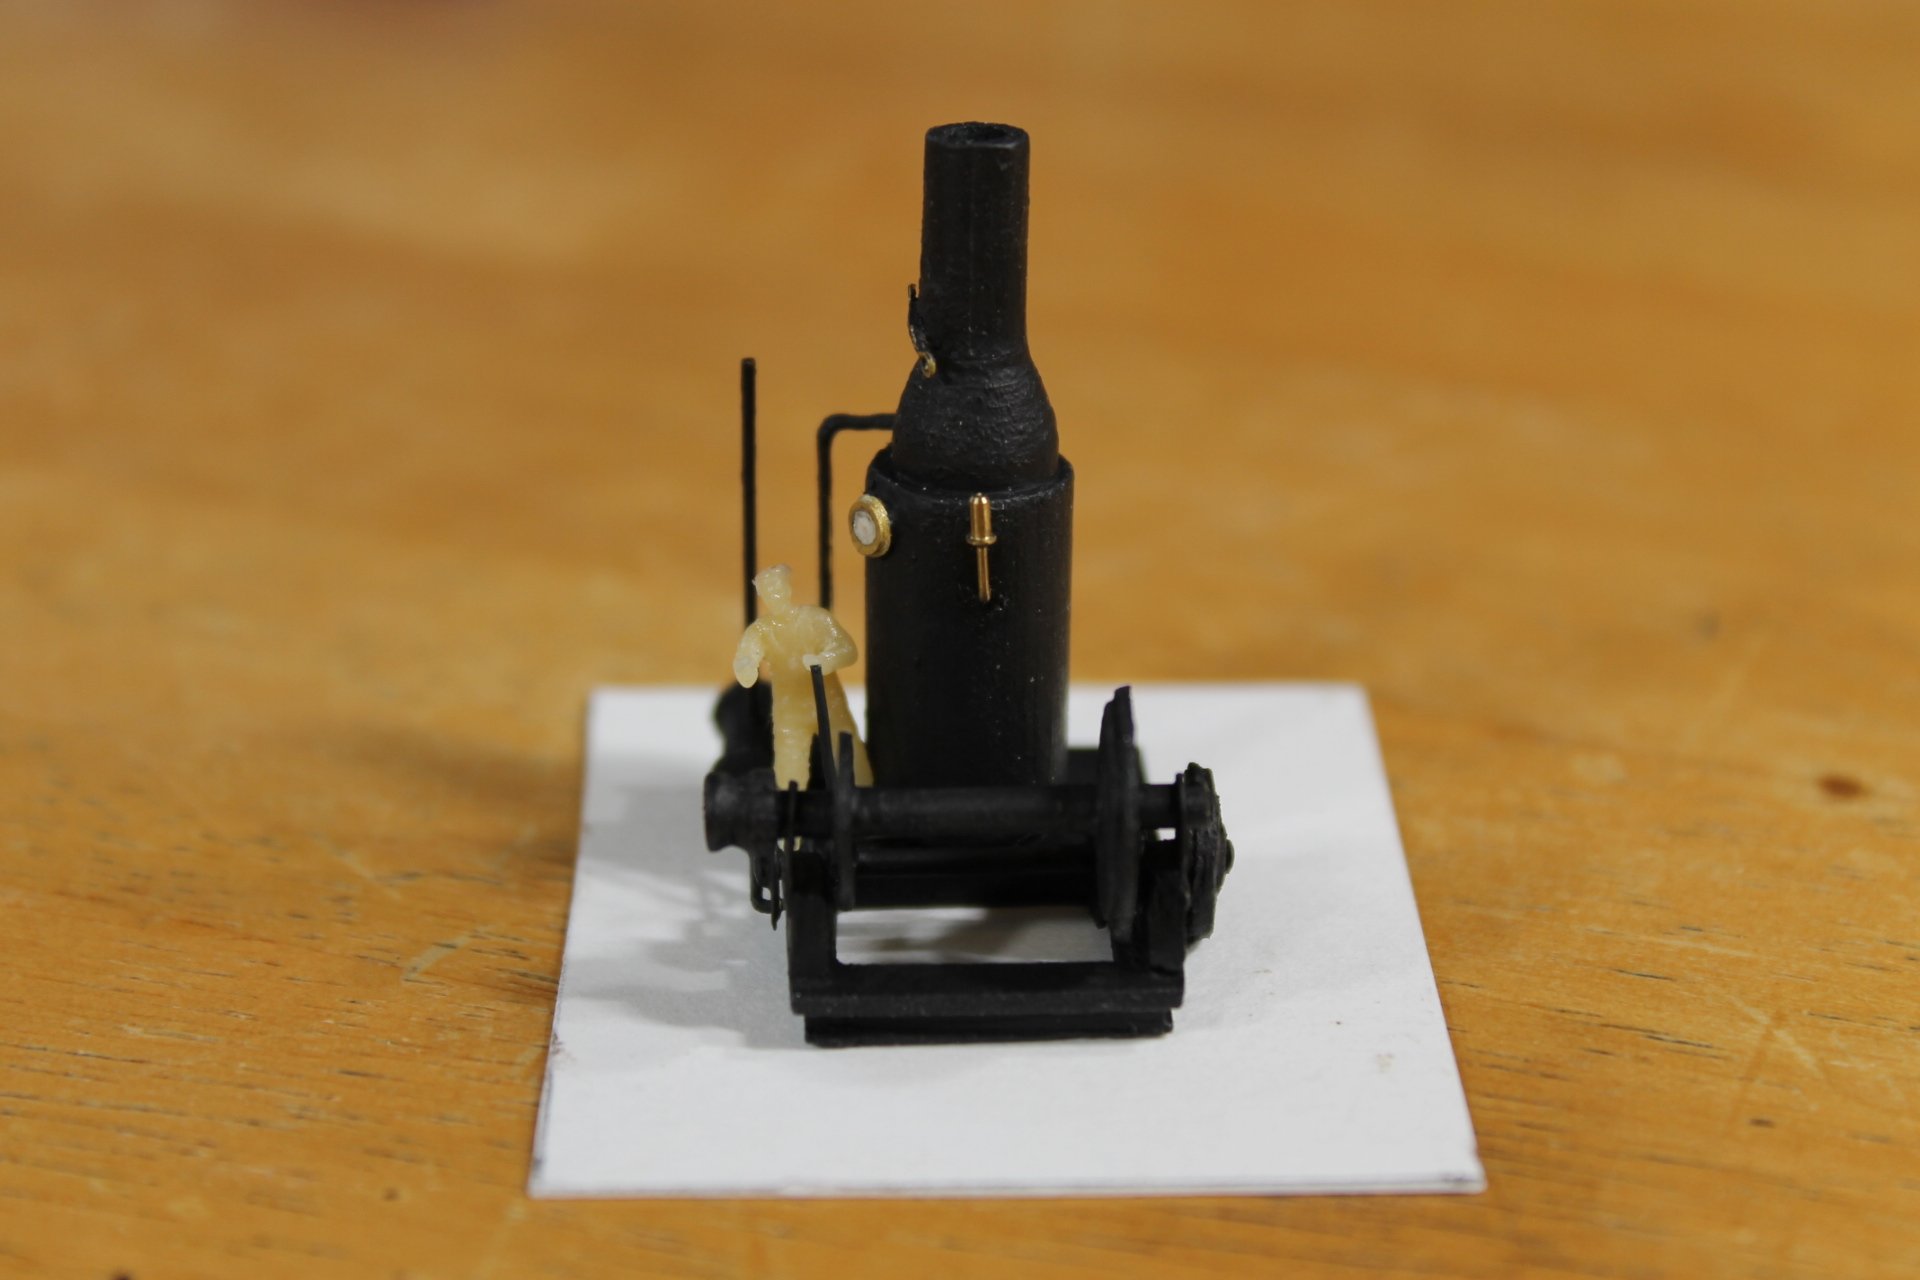
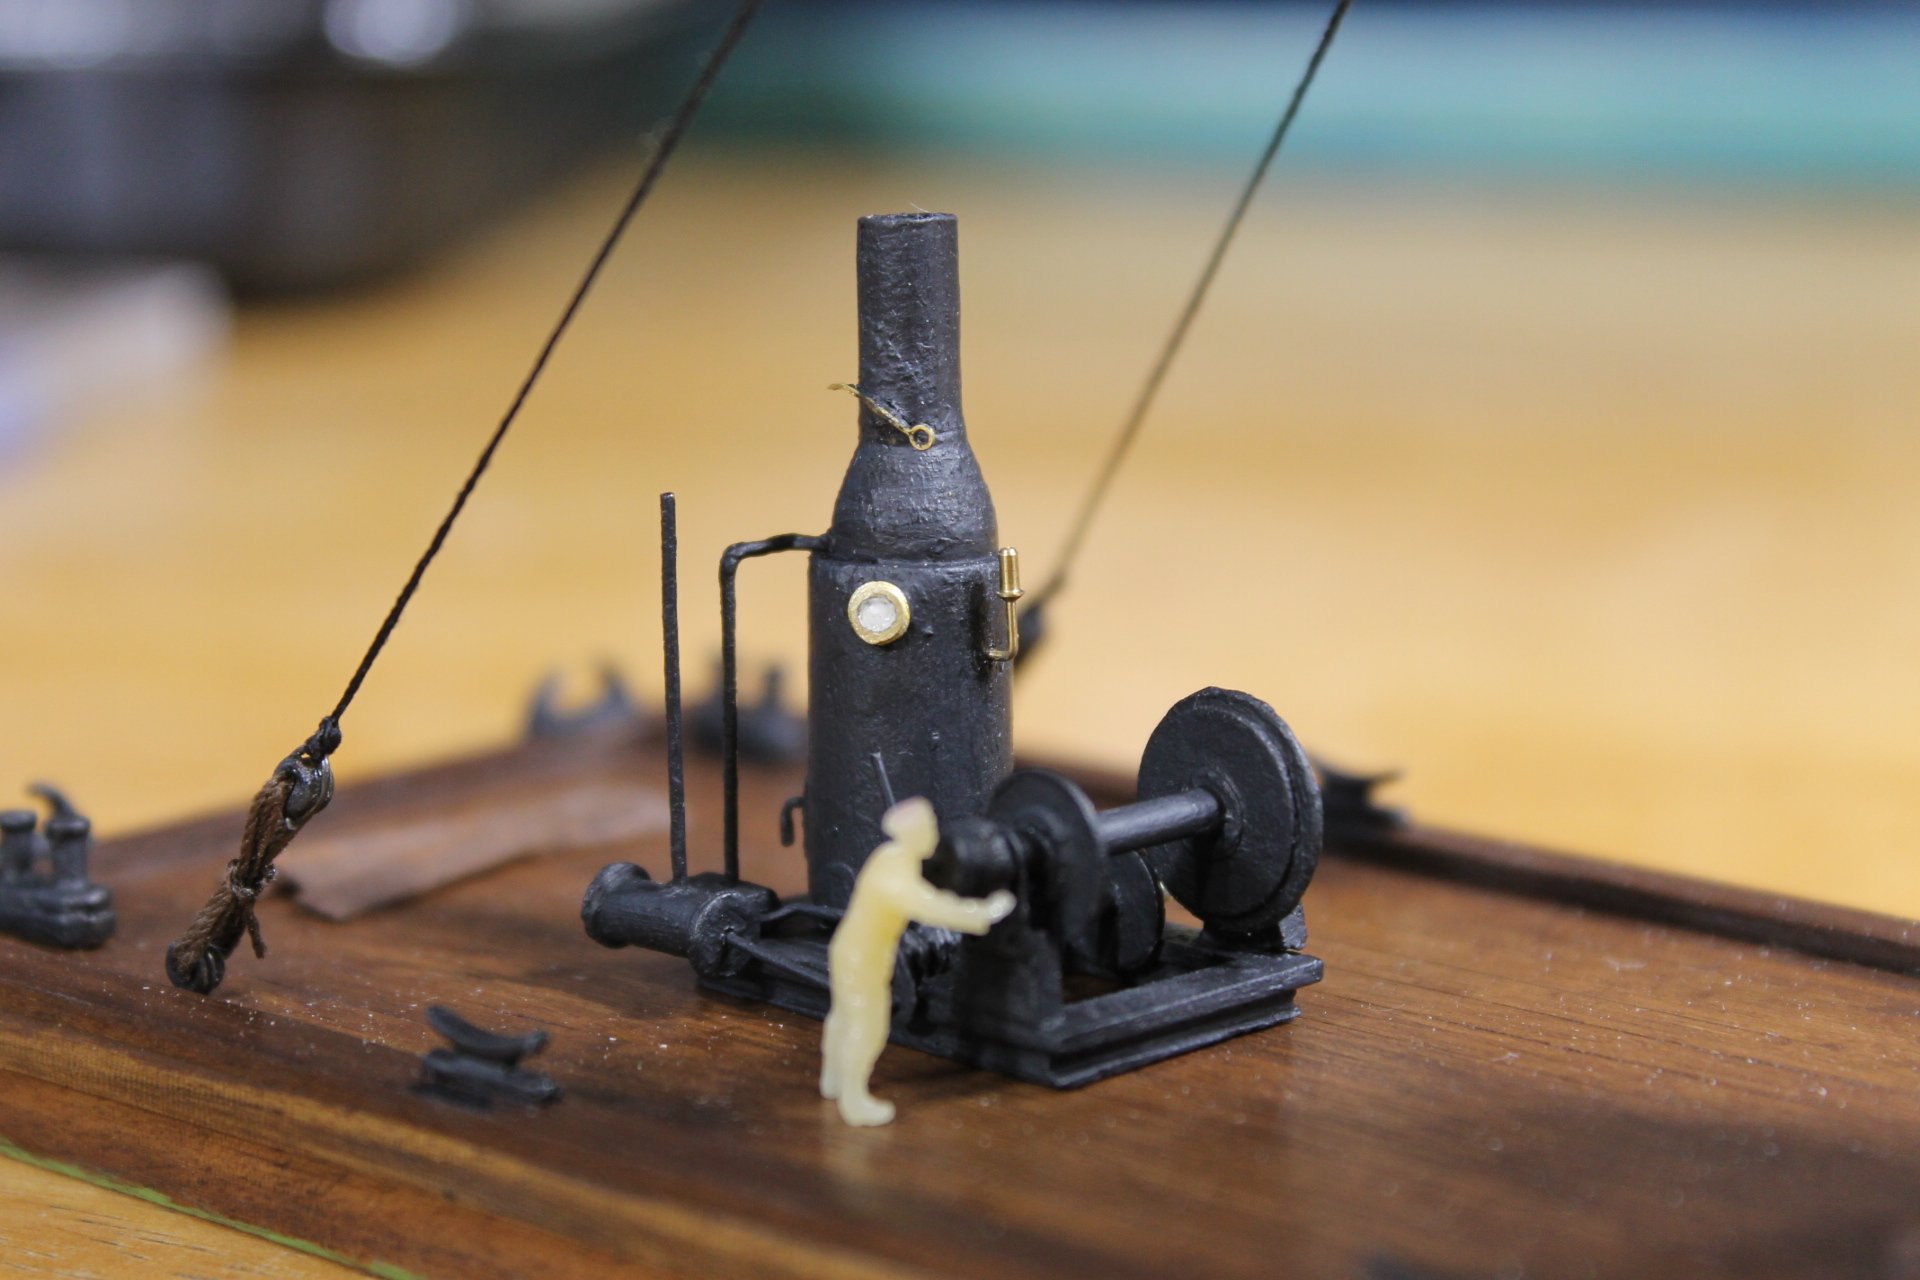
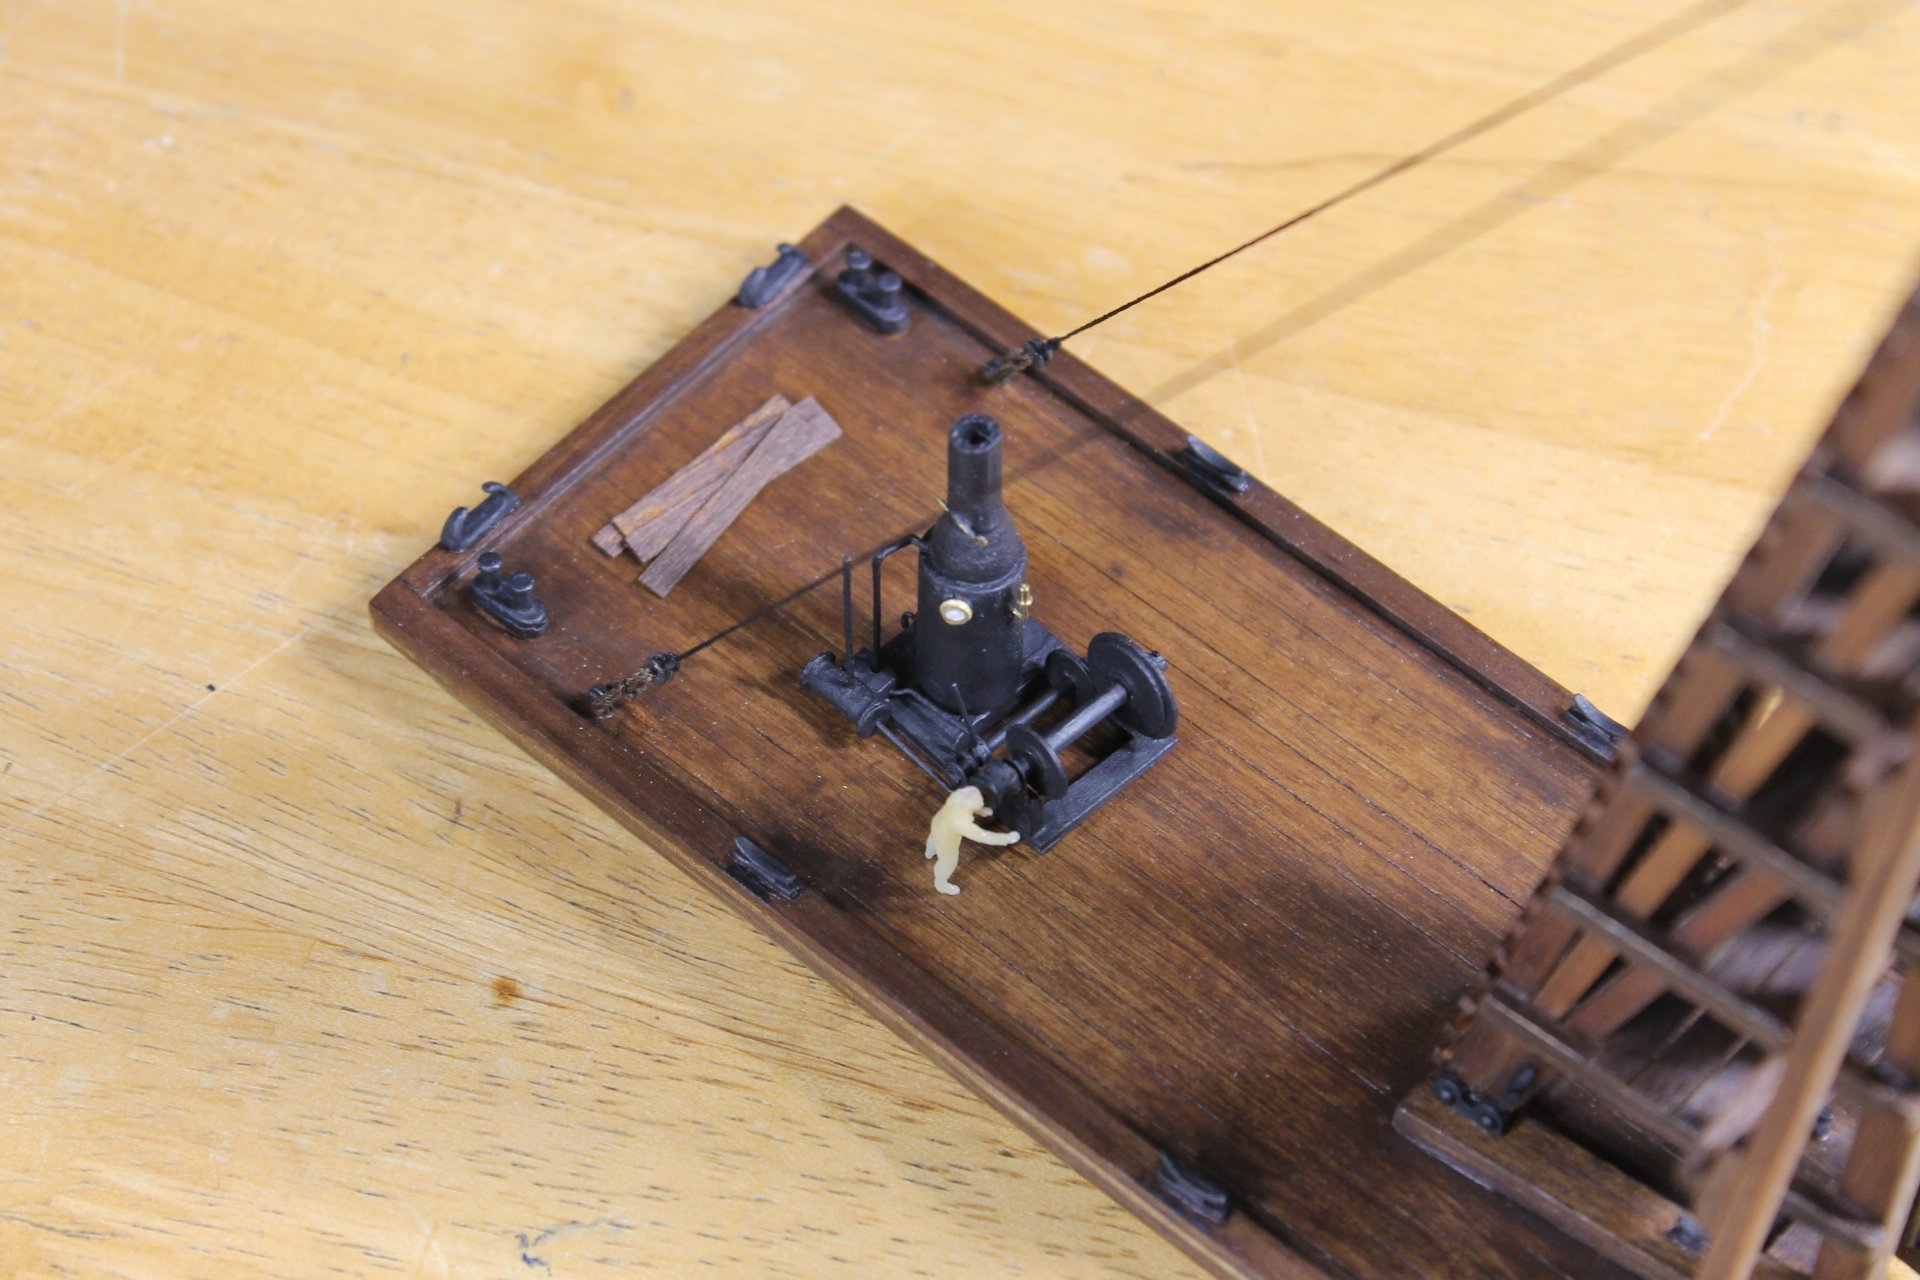
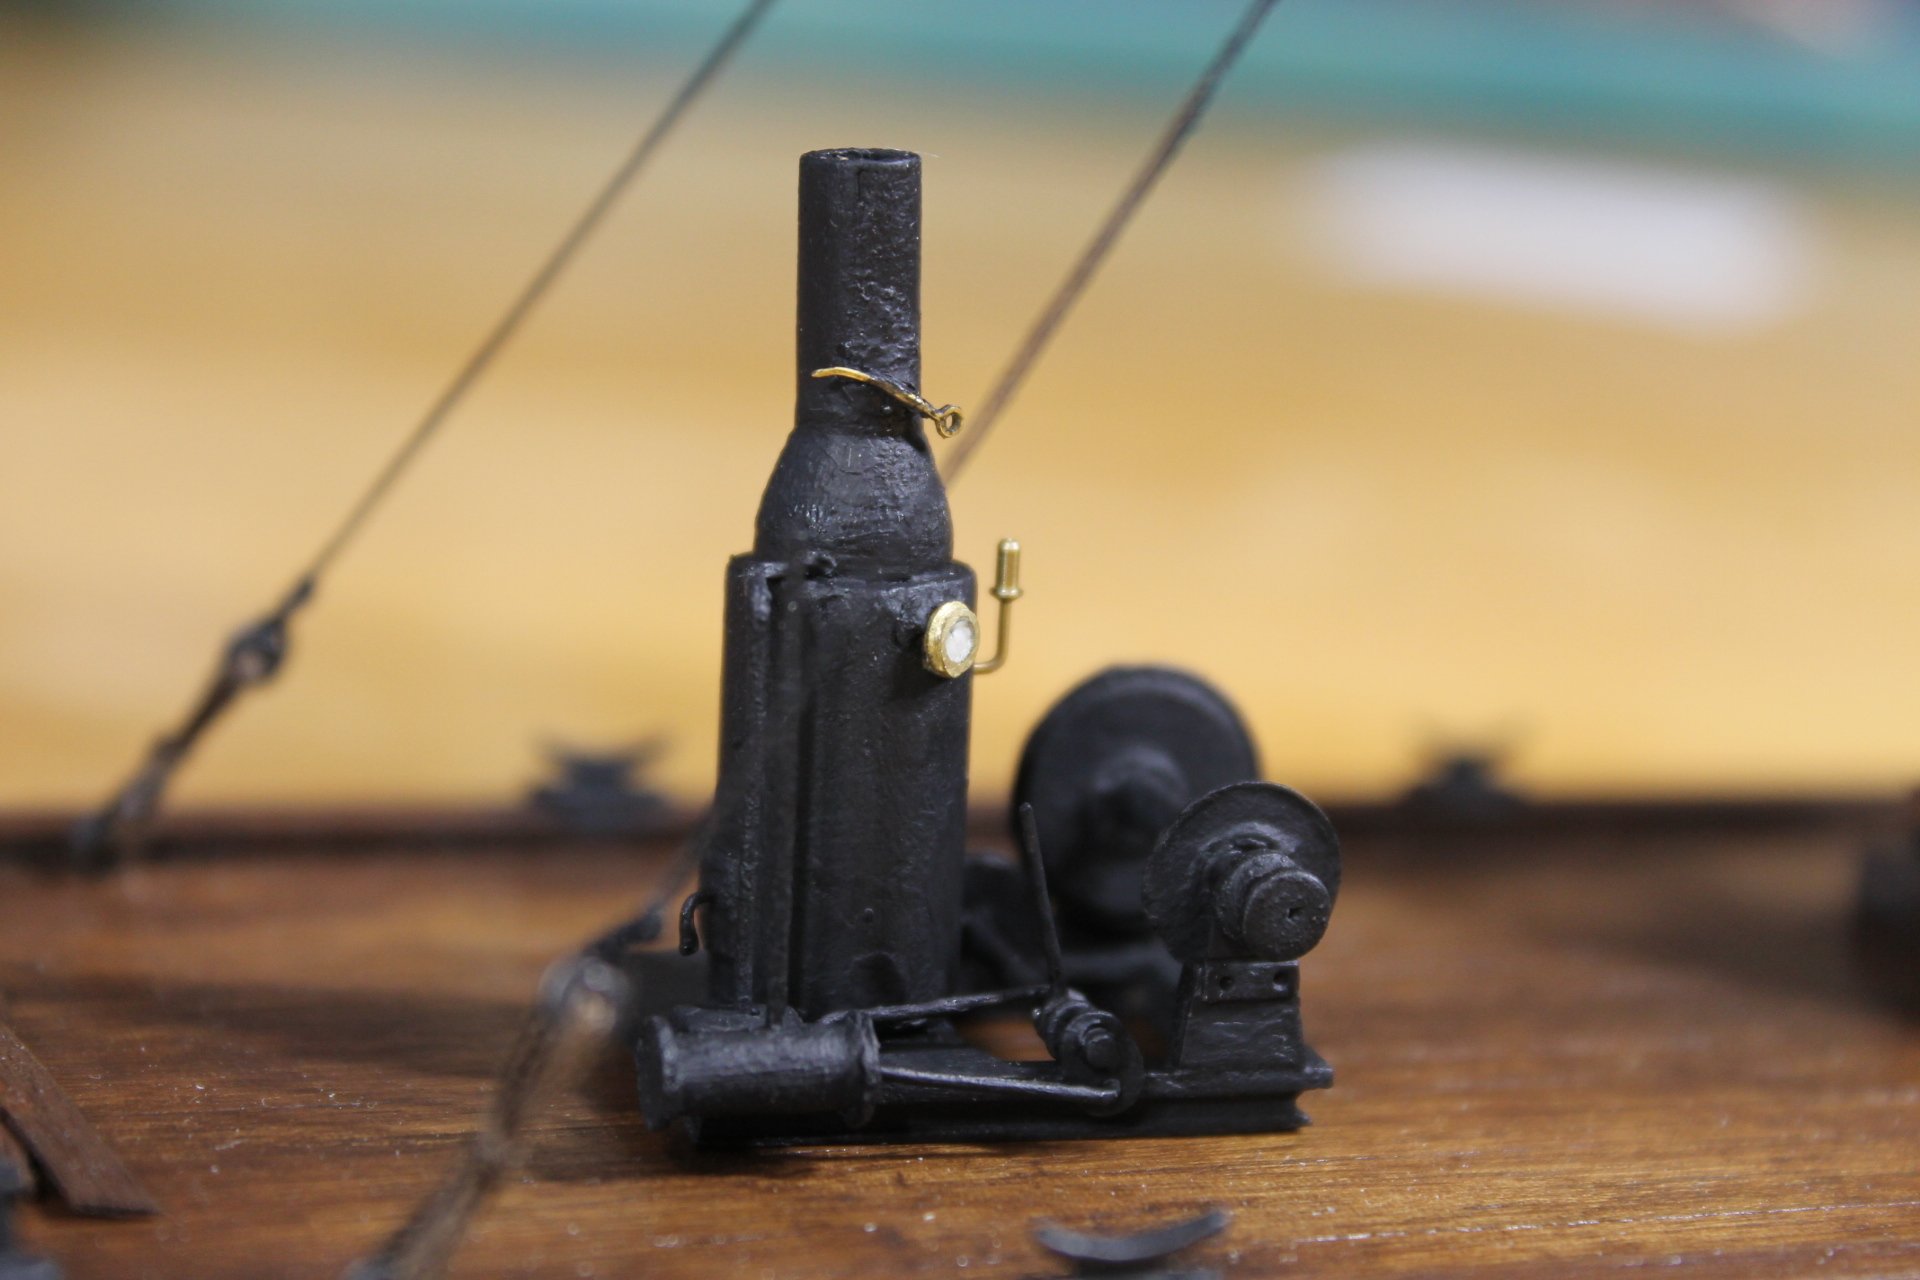
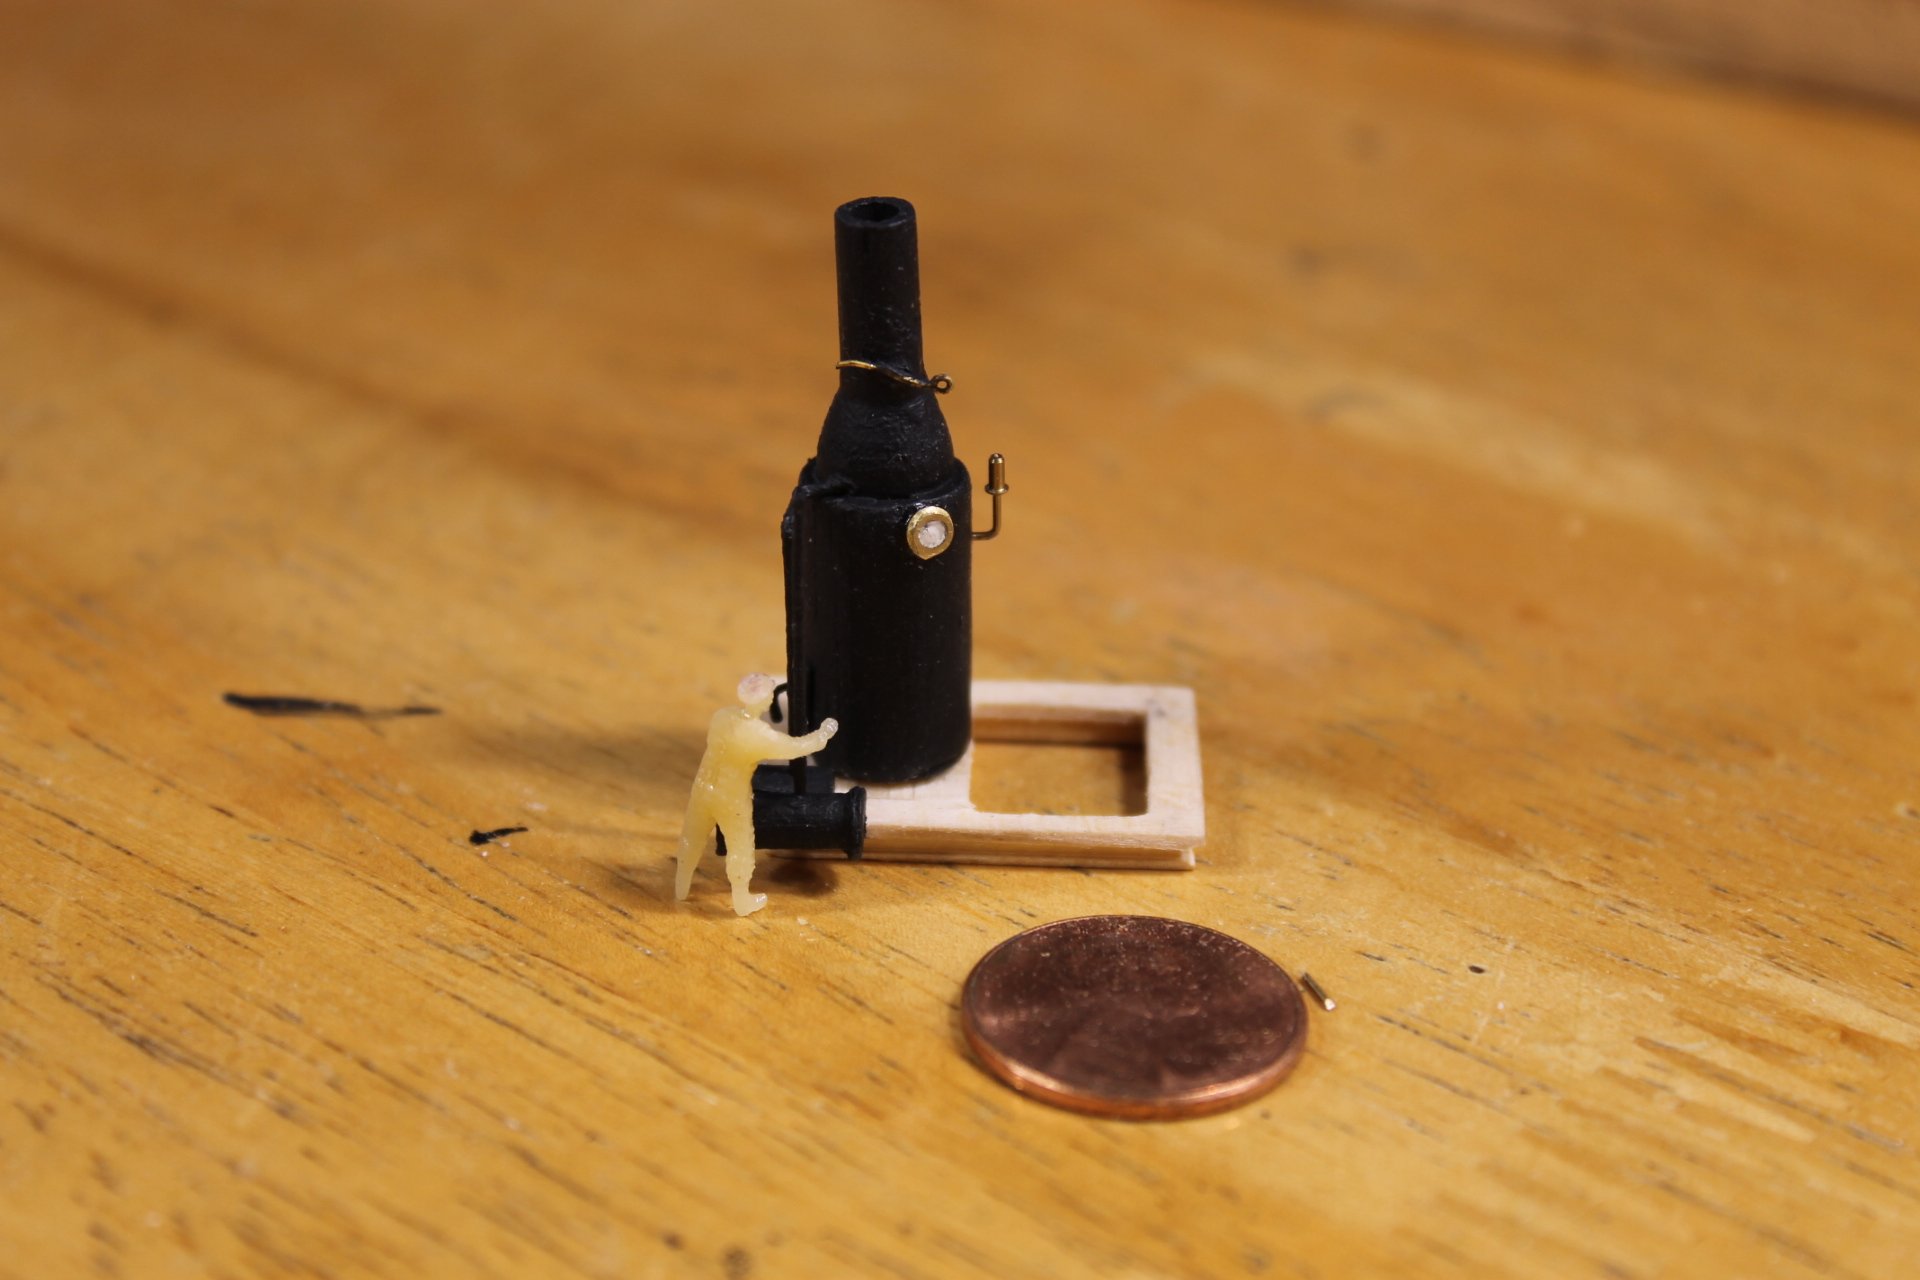
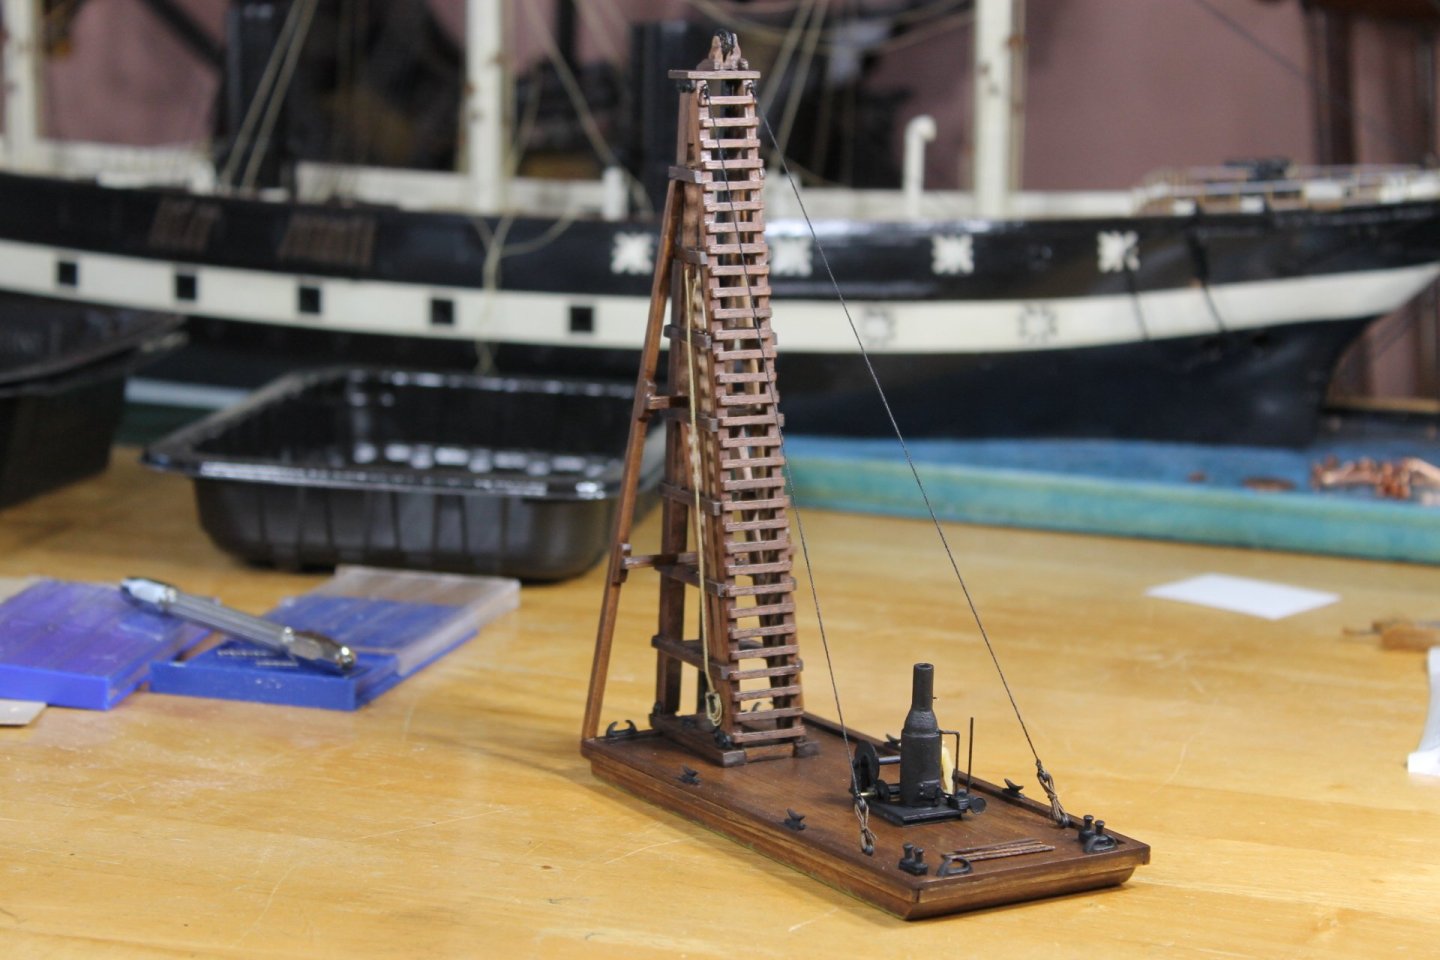
Thank you to everyone for the likes. Thank you, Dan and Keith. When I picked up the wood from Dan I shared a vision that's a long term project. With a limited amount of time (a few more years, hopefully) I don't see duplicating pile drivers unless, maybe, once the main project is completed and I still have time I might consider building a skid driver as it would fit in with the overall scheme. Once this build is completed I'll share my vision with everyone. I added a flue damper, whistle, and pressure gauge. The figure next to the boiler shows how large the boiler actually is to scale while the US penny shows how small this is in real life. I think the cylinder is too large but that ship has sailed, it is what it is. I have the other components pretty mostly done and should have the engine completed by Sunday. Yesterday, I was sorting through my metal bits collected over the years and finding those bits that would work on the engine. My wee brain was working faster than my fingers could keep up and I found myself jumping from one piece to the next, It was counter productive but I felt good about the build, the ideas were flowing fast and I could clearly envision the necessary steps needed to make it all work. It was a fun day at the worktable. Thank you everyone for taking the time to follow along. Keith

-
Halò from the Highlands of Scotland.
Keith Black replied to Highlander's topic in New member Introductions
Welcome to MSW. Glad to have you aboard. -
Gunboat Philadelphia 1776 by tmj
Keith Black replied to tmj's topic in - Build logs for subjects built 1751 - 1800
They look like 0.042 inch deadeyes. -
Congratulations on getting the planking done, Simon.
-
A screwdriver, a couple of monkey wrenches, some gasket material, and a can of black paint would have fixed anything. Thank you, Tom. Thank you, Eberhard. In the next photo I post I'll add one of the figures next to the engine to give a better sense of size. Thank you, Pat. How the engine turns out will be the deciding factor on how much visibility inside the shed there'll be. If it turns out well I may get some pointers from Gay, @FriedClams to help me add one oil lamp light inside the shed. Of course if you add lighting inside the shed I'd want to add a bench, tools etc etc. The shed would then become the focal point of the project and I think I want to avoid that. IMHO a equal blend would serve the model best. Thank you to everyone for the likes and for following along. Keith
-
Congratulations, great build.
-
Same here because there's less chance of creating slack in the lines going from stern to bow, IMHO.
-
These days poly is the only way to fly. The one caveat is poly stretches but you can pre stretch to avoid the issue.
-
Sounds like something Mark Taylor would say.
- 207 replies
-
- 2
-
-
- vanguard models
- Duchess of Kingston
- (and 1 more)
-
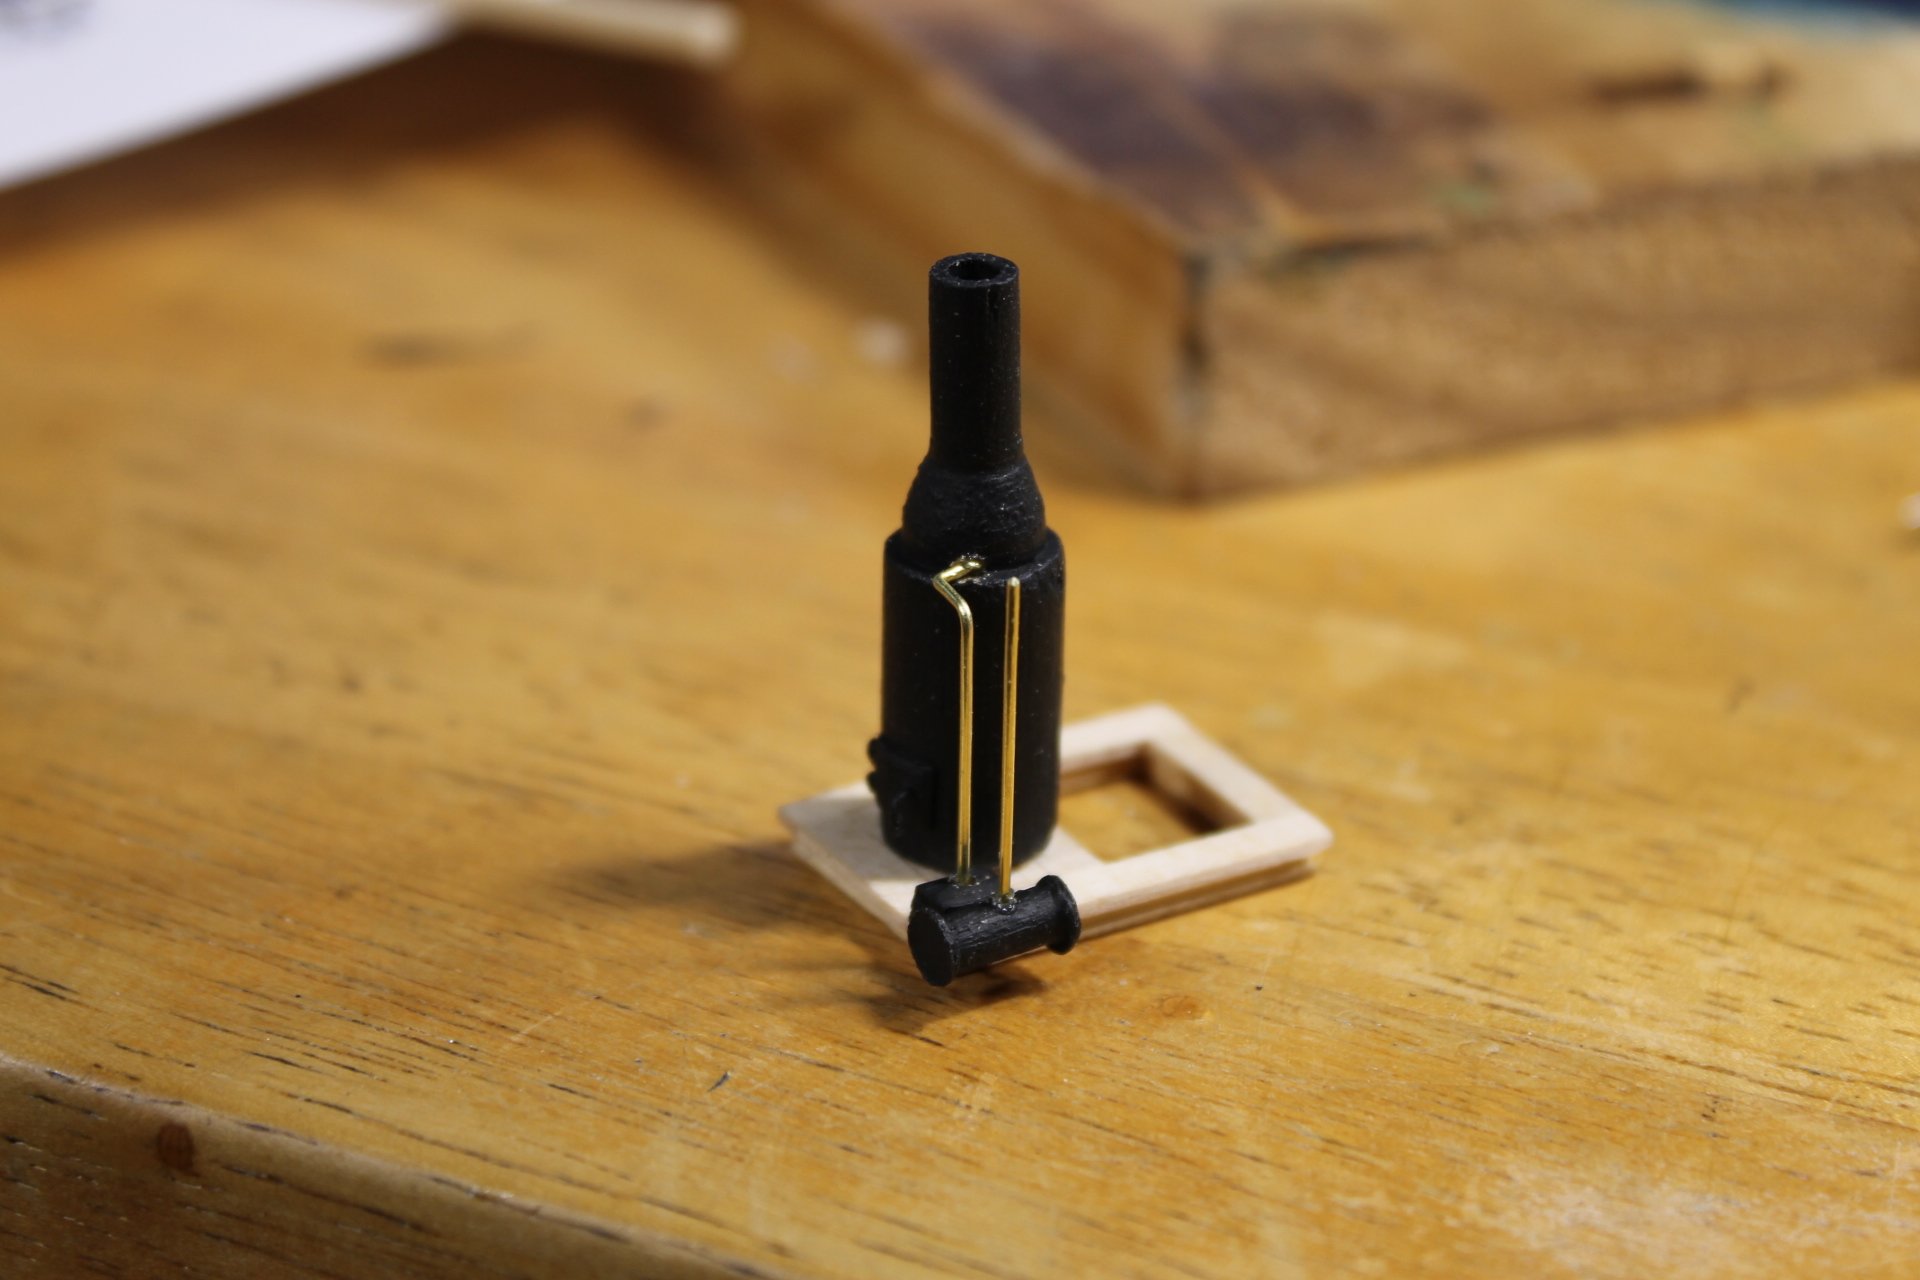
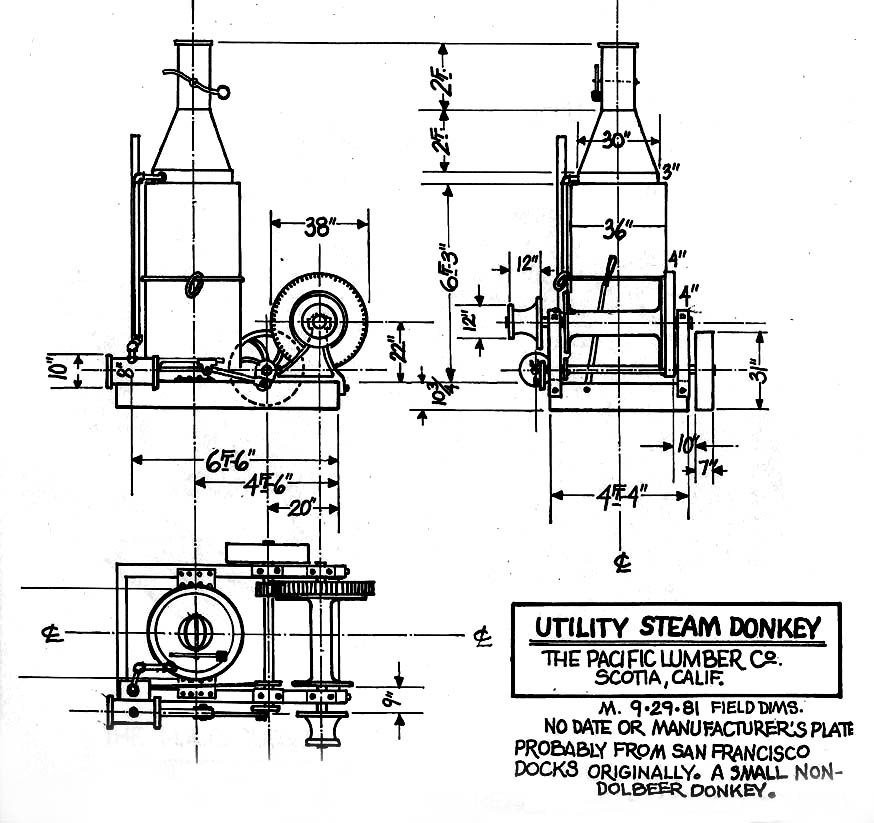
Thank you to everyone for the likes and for following along. Thank you, Glen. Thank you, Keith Thank you, Phil. Tom, thank you for having faith in these ole fingers. They're being tested on the Steam Donkey. Thank you, Gary. Thank you, Rick. Thank you, Brian. Today I started on the Donkey engine in earnest. As I mentioned in an earlier post the boiler is a bit oversized. I did so intentionally as the whole engine assembly needs to be oversized to give myself a legitimate chance of making the engine pieces. The frame rails are wider than the drawing to provide more glueing surface and measures 1.0 inches x 0.60 inches. I'm oversized approximately 0.15 inches in width and 0.30 in length. I got the frame, valve chest, cylinder, steam supply, and steam exhaust lines made today. The lines are 22 gauge brass wire, I'll leave the frame unpainted till the very end so as not to interfere with glueing. With the exception of the frame all the pieces need some attention; valve chest and cylinder both need to be cleaned up around where the wire is inserted and another coat of paint, the top of steam exhaust line needs to dressed and both lines need to be painted. This is a challenging/fun part of this build. It gets covered with the engine shed and depending on how well I do on the engine, either the shed doors will be wide open or just a crack. I attached the engine plan at the start of the log but have attached again here since we're at this stage of the build. It's pool league tomorrow so it'll be a couple of days before the next post. I want to thank each and everyone of you for inspiring me to put a shine on this ugly duck. Keith

-
Amazing work on the fairleads and thank you Roel for the shift information and the fairlead comparisons. Your experience brings this build log to life.
-
That turned out swell, Chris. No evidence of the issues encountered in post #49.
- 146 replies
-
- 7
-
-
- Speeljacht
- Seahorse
- (and 2 more)