Keith Black
-
Posts
6,705 -
Joined
-
Last visited
Content Type
Profiles
Forums
Gallery
Events
Everything posted by Keith Black
-
 No problem, Eric. How very kind of you for the offer, Eric. I may not do the barge and canal boat and if I do the signs would need to be close to the window sizes. Should I decide to build the barge I'll revisit this with you in a PM. Thank you again.
 -
I have a sheet in route from Woodland Scenics that I ordered yesterday, Eric. As I mentioned to Bob, they're not exact but they'll be hundreds of times better than what I could do by hand. As far as the windows go, you're correct, Eric. The windows could be treated any number of different ways and we'll leave it at that. Thank you, Eberhard, Eric, Bob, and Geordie for you input.
-
Great googly moogly, Bob. You and bowsprits are like a divorce attorney and weddings.
- 261 replies
-
- 7
-

-

-
- Victory Models
- Pegasus
- (and 3 more)
-
I've never printed my own, have thought about it but never attempted it, Eberhard. Geordie, I think every junkyard in Pittsburgh was Engel's oyster.
-
I've got some letter transfers coming that will work but they aren't exact, Bob. i've never done the mod-lodge thing so I'm a bit leery about trying to learn a new skill though that's a bit lame.
-
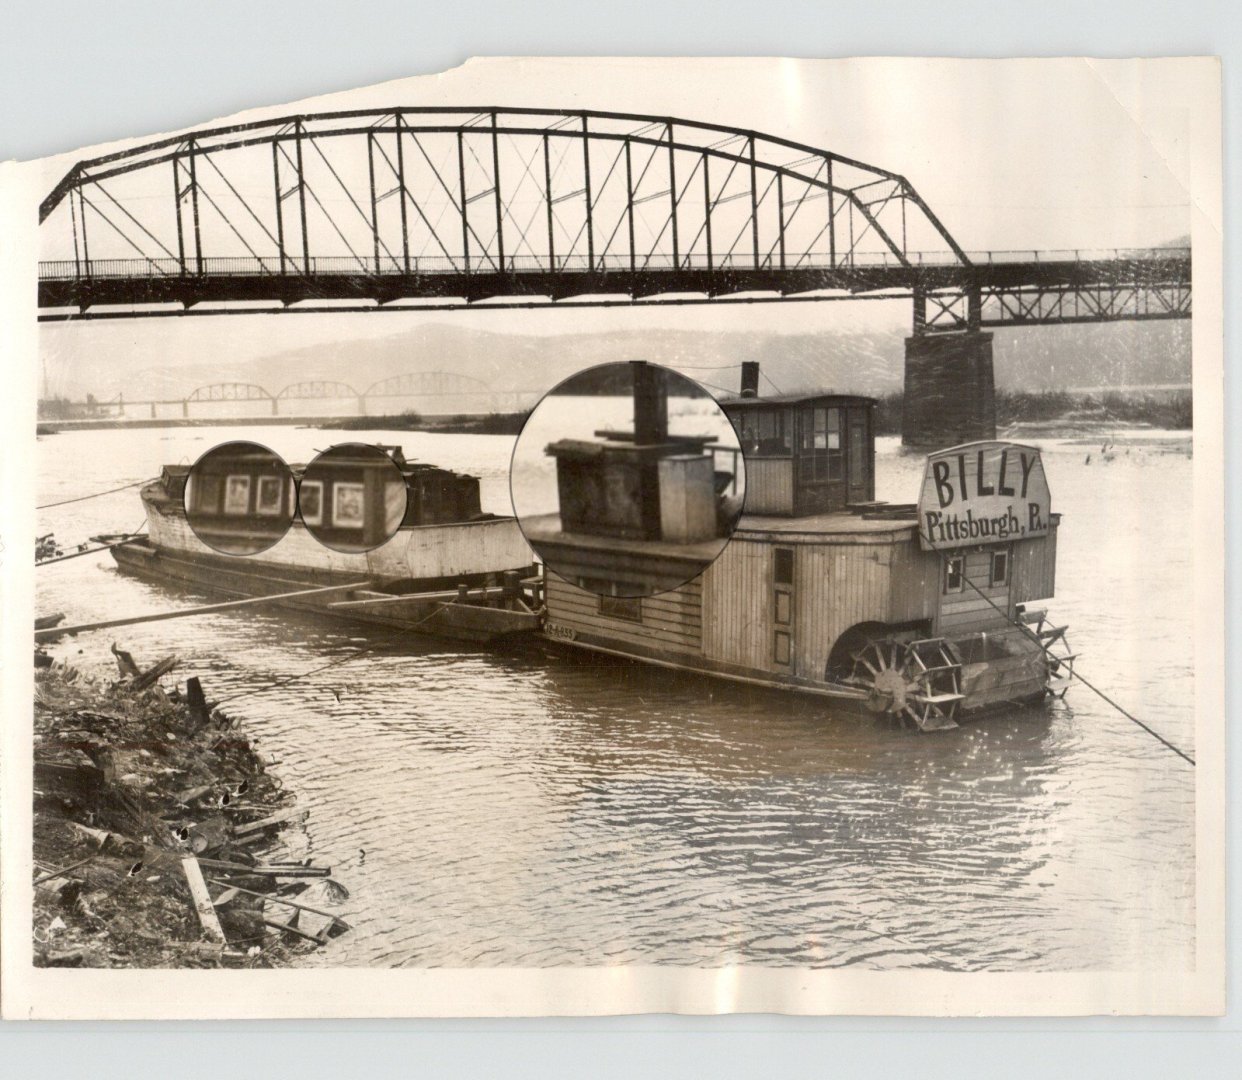
The type of signs is unimportant, it's, are they signs? Yes they are, Eric. But going back to the press wright up, Engel's boat had been damaged in a flood and Billy was his ticket to getting the boat down south to make repairs. It looks to me like they are signs put in as temporary replacements for damaged windows. I think ole Engel was a scavenger so putting in signs as a temporary fix seems plausible. They don't look like like curtains to me, Eberhard? They could be but the window shades in Billy's windows are plain Jane.
-
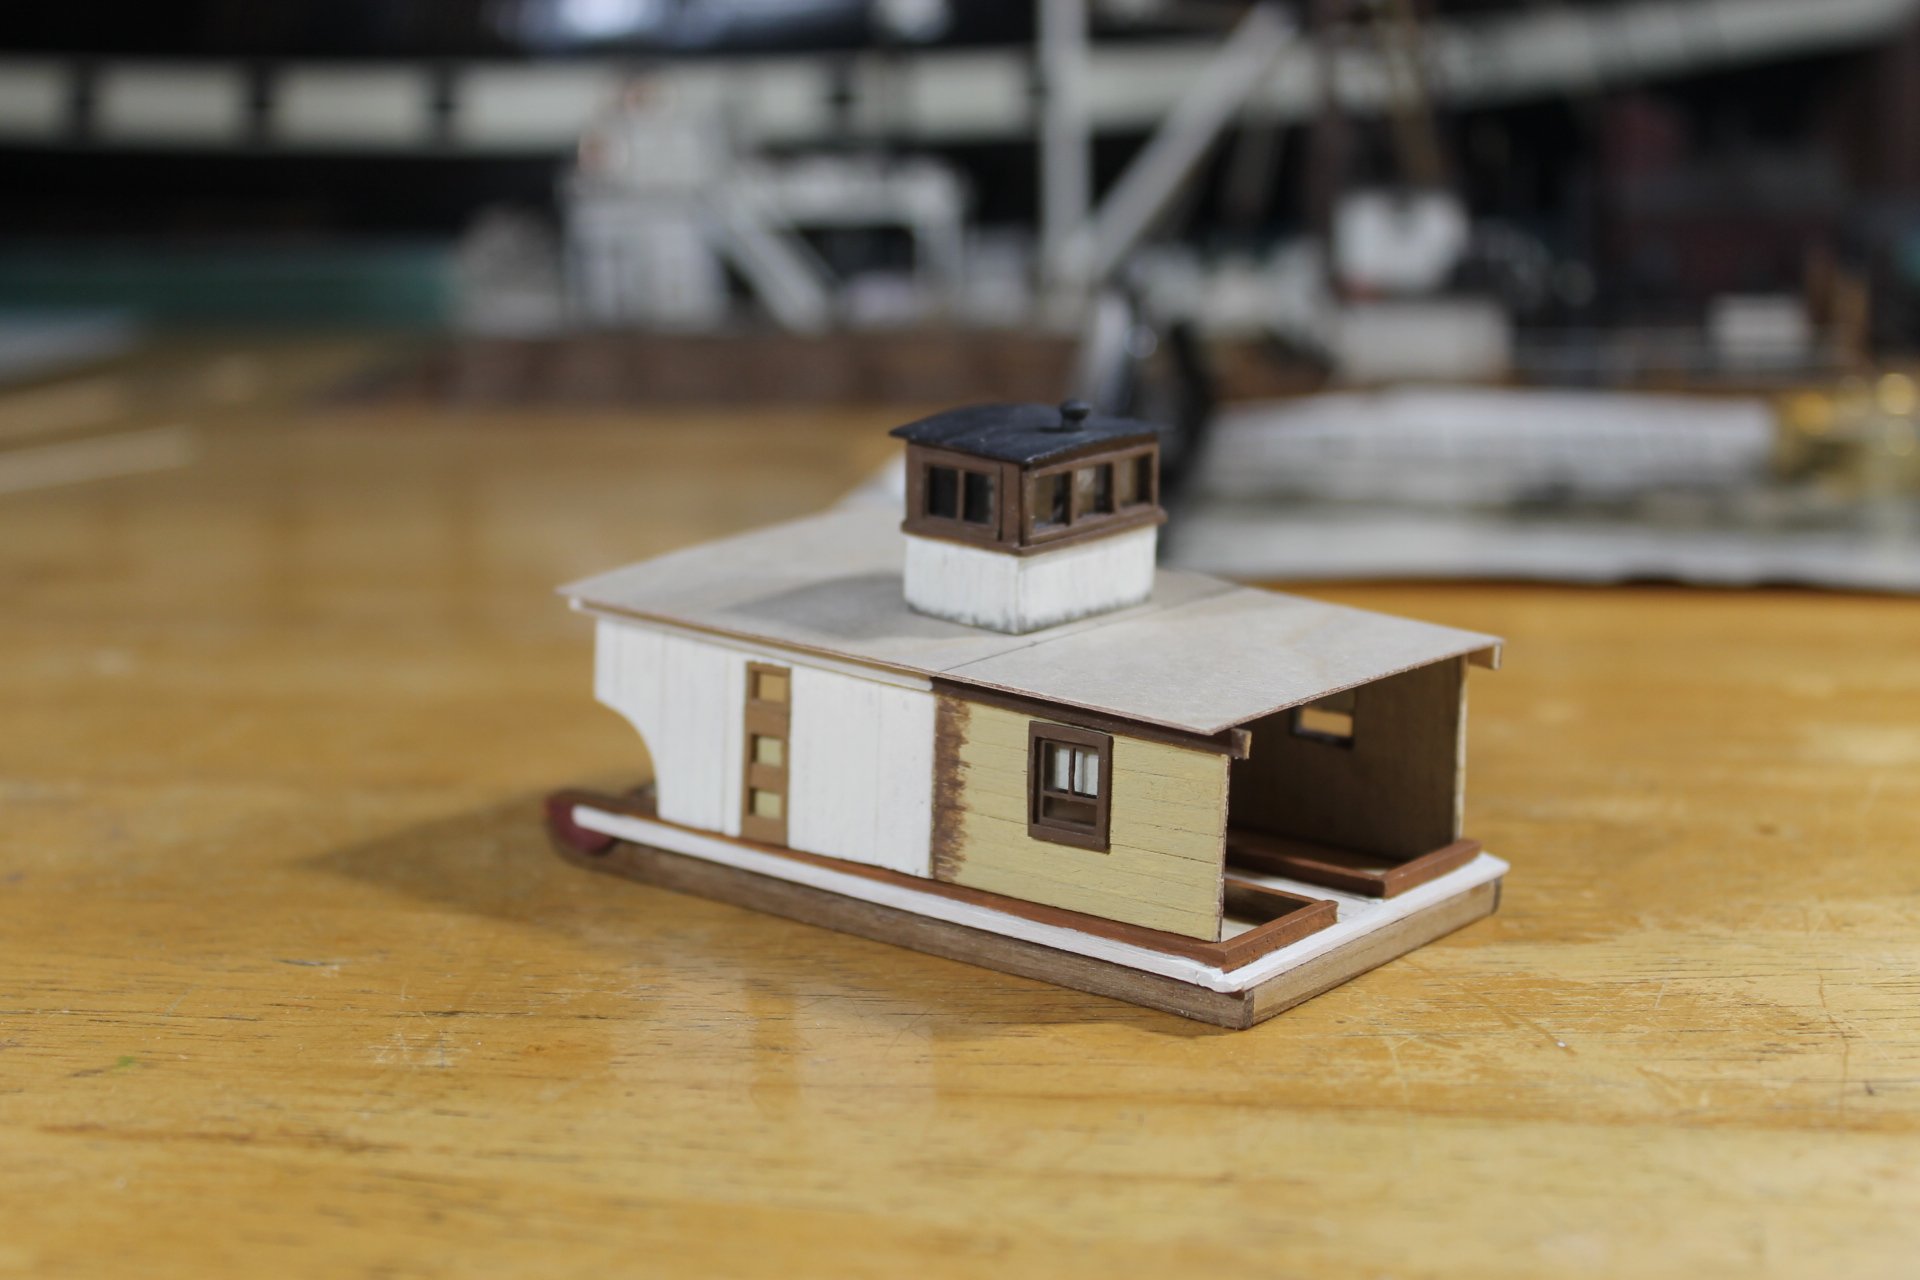
Thanks to everyone for the likes and comments. The stern is starting to take shape. I set the windows about 0.05" too high but I'll have to live with it. Billy's name board's width is okay but the height needs to be lowered about two feet. It's easily removable and made so as i'll need to remove it to add the lettering. I'm a pretty good painter but I can't do lettering for beans. Attach, remove rinse and repeat is all part of the process on the stern as it is so complicated. Question....... in the enlarged loops, are those heavy cardboard or porcelain signs? I"m not going to try and replicate them, it's just a question to satisfy my curiosity. Thank you. Thank you to all for being part of the journey. Keith

-
It's good to see you back working on the Cecilie, John. Are you still working in view of museum visitors?
-
Eli, welcome to MSW. Nice job on the Endurance, glad to have you aboard.
-
Thank you very much, Steve.
-
Thank you, James. Yes, I do, I am truly blessed.
-
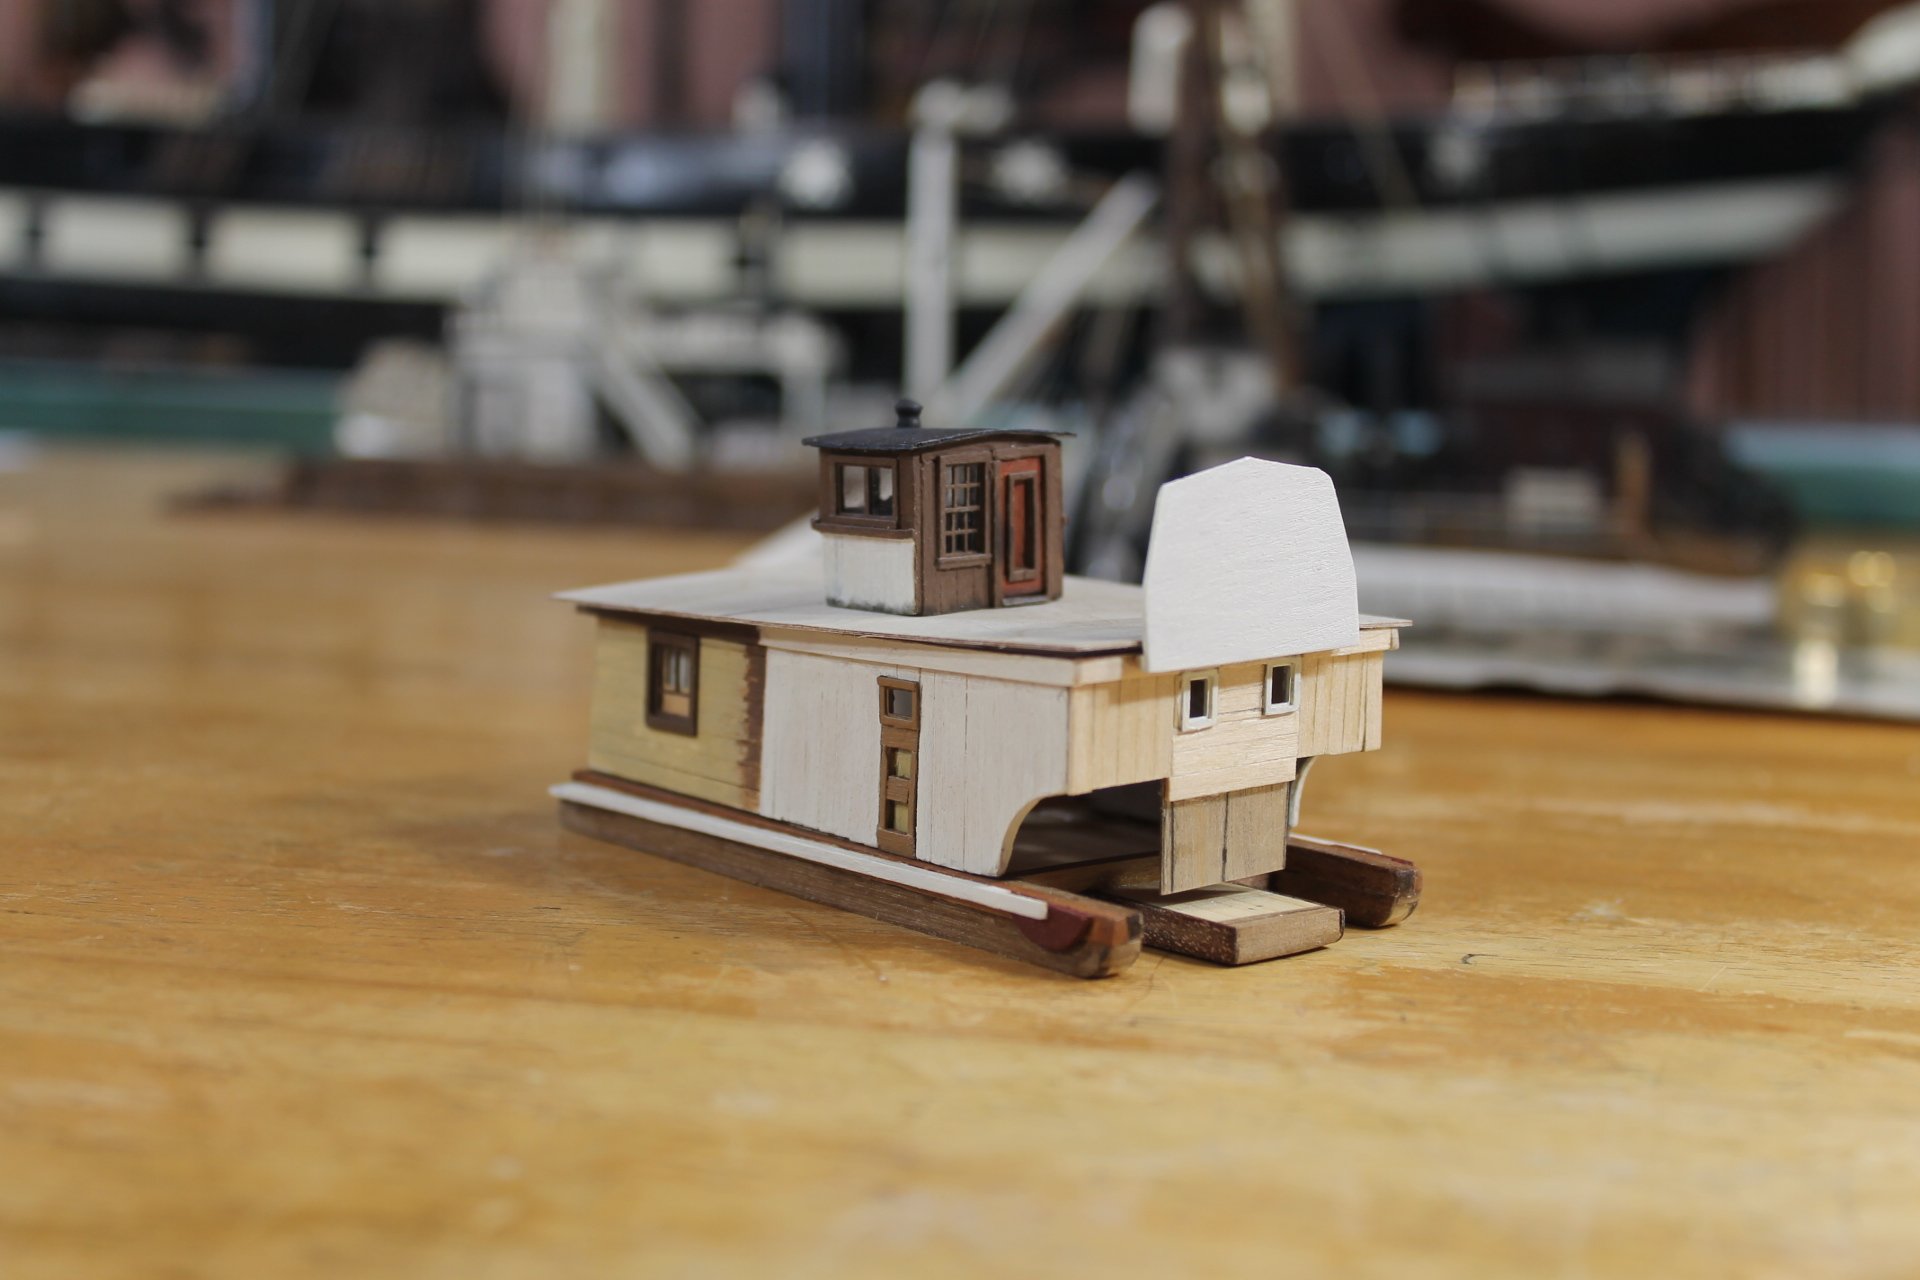
Thank you for the likes and for your kind comments. Both sides are finished. Nothing is glued in place as the ends need to be finished first. The boiler deck is loosely placed where the wheelhouse can be sat on top. The overall proportions seem/feel right so it's full steam ahead. The starboard side is tilted inward. Because Billy's starboard side is a mystery I treated both the same. Thank you for your support and for following along. Keith

-
Nice addition, Eric. 👍
-
Congratulations, Roel. For one who works in small scale I'm gobsmacked by the amount of clean detail you've achieved, really phenomenal.
-
Welcome to MSW. We lived in Egegik, Alaska for nine years. My wife is 50% Aleut and Egegik was where my wife's mother was born. Glad to have you aboard.
-
Gorgeous micro work, Keith. Simply beautiful.
-
Rulers messing up seems to be a thing these days.
-
She's a little beauty, hats off, Roel.
-
Thank you, Paul.
-
Thank you very much, Phil.
-
Thank you for the likes and comments. I repainted the door, it was much too dark. I also raised the shade a tad so the muntin would show up better. Before After Thank you for following along. Keith


-
Thank you, Bob. What have you got up your sleeve now? Thank you, John. I'm still trying to decide if Billy's was by design or accident, Keith. Thank you very much, Steve. I agree, Eberhard. Thank you kindly, Eric.
-
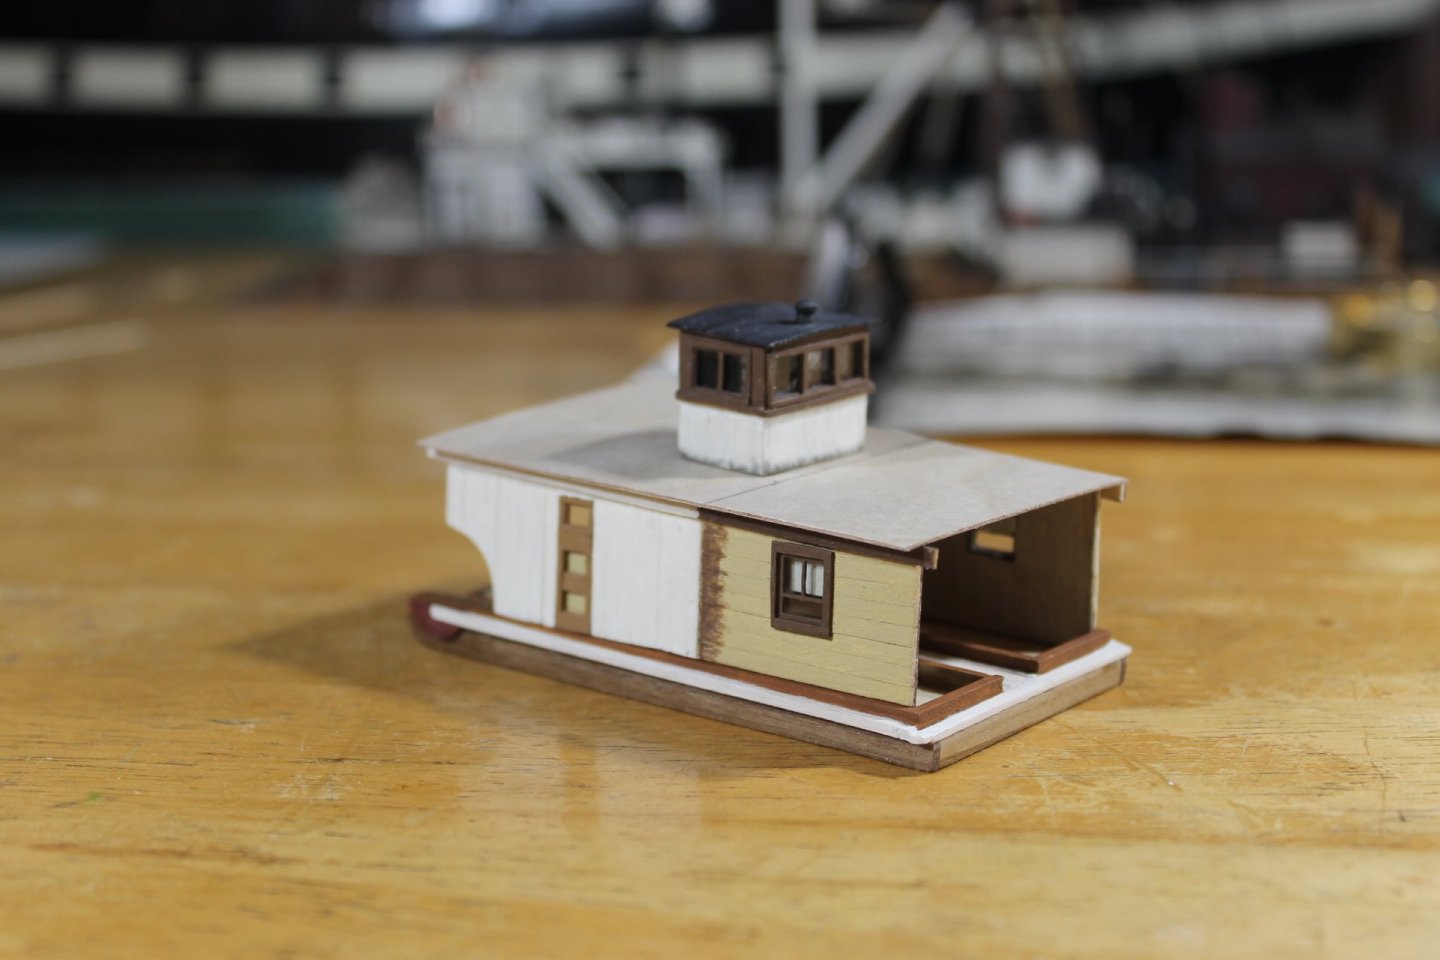
Thank you to everyone for the comments and likes. The port side wall is built and painted. I bashed a six pane window to make the two over one window, added glazing and a shade per Billy's photo. I guessed at the colors the best I could by studying the press photo Weathering will do wonders but I'll wait till Billy is completed. Billy is going to be colorful. Thank you for your support and for following along. Keith