


jfhealey
-
Posts
325 -
Joined
-
Last visited
Content Type
Profiles
Forums
Gallery
Events
Posts posted by jfhealey
-
-
Thank you everyone for your kind remarks and likes.
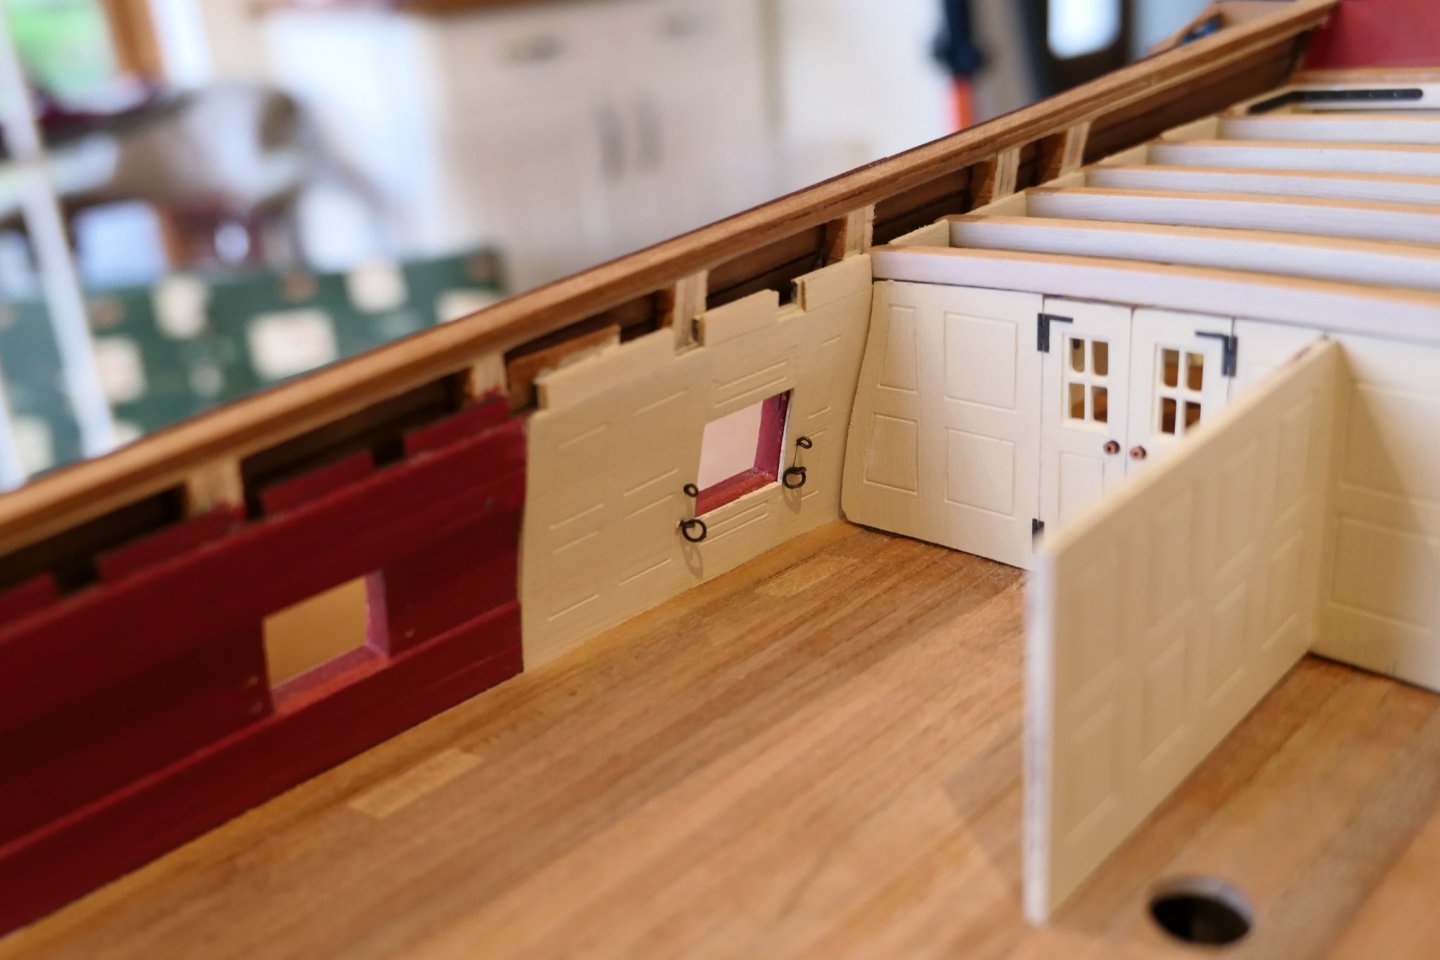
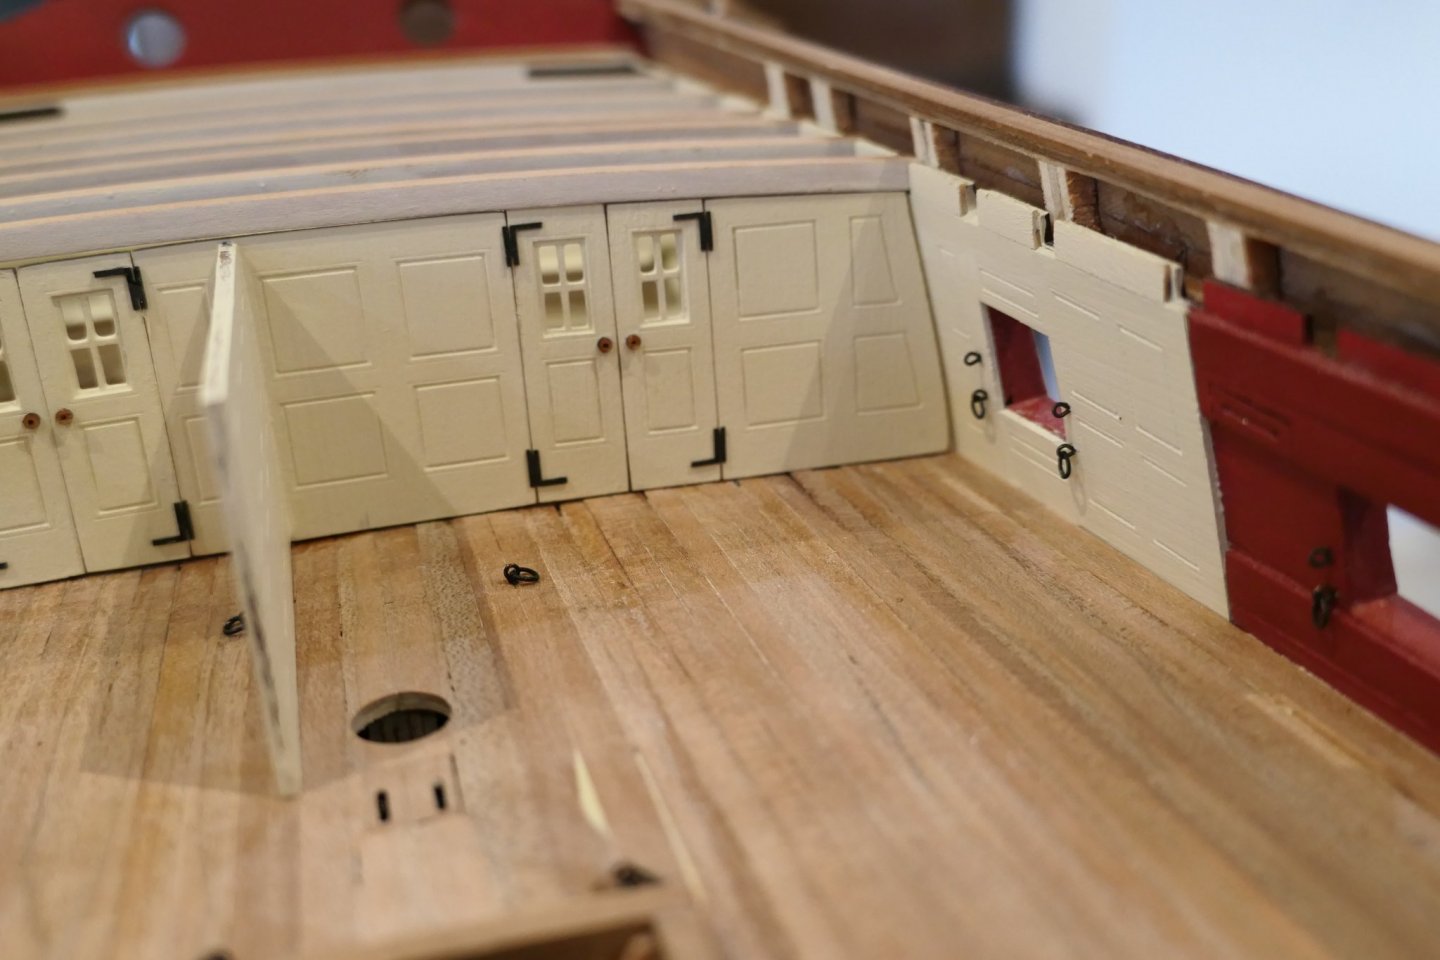
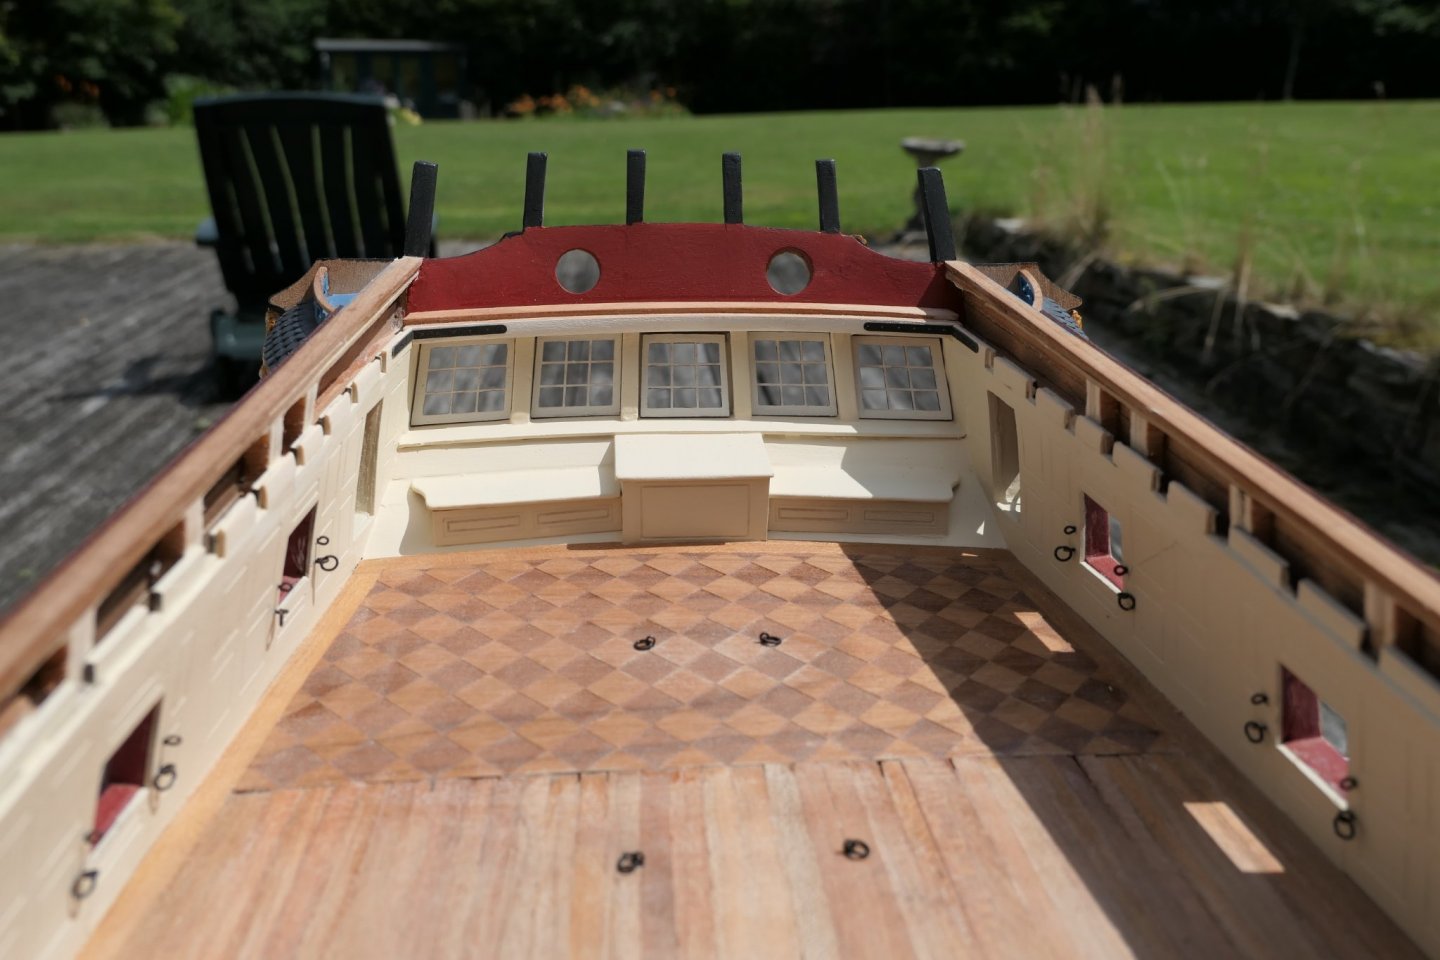
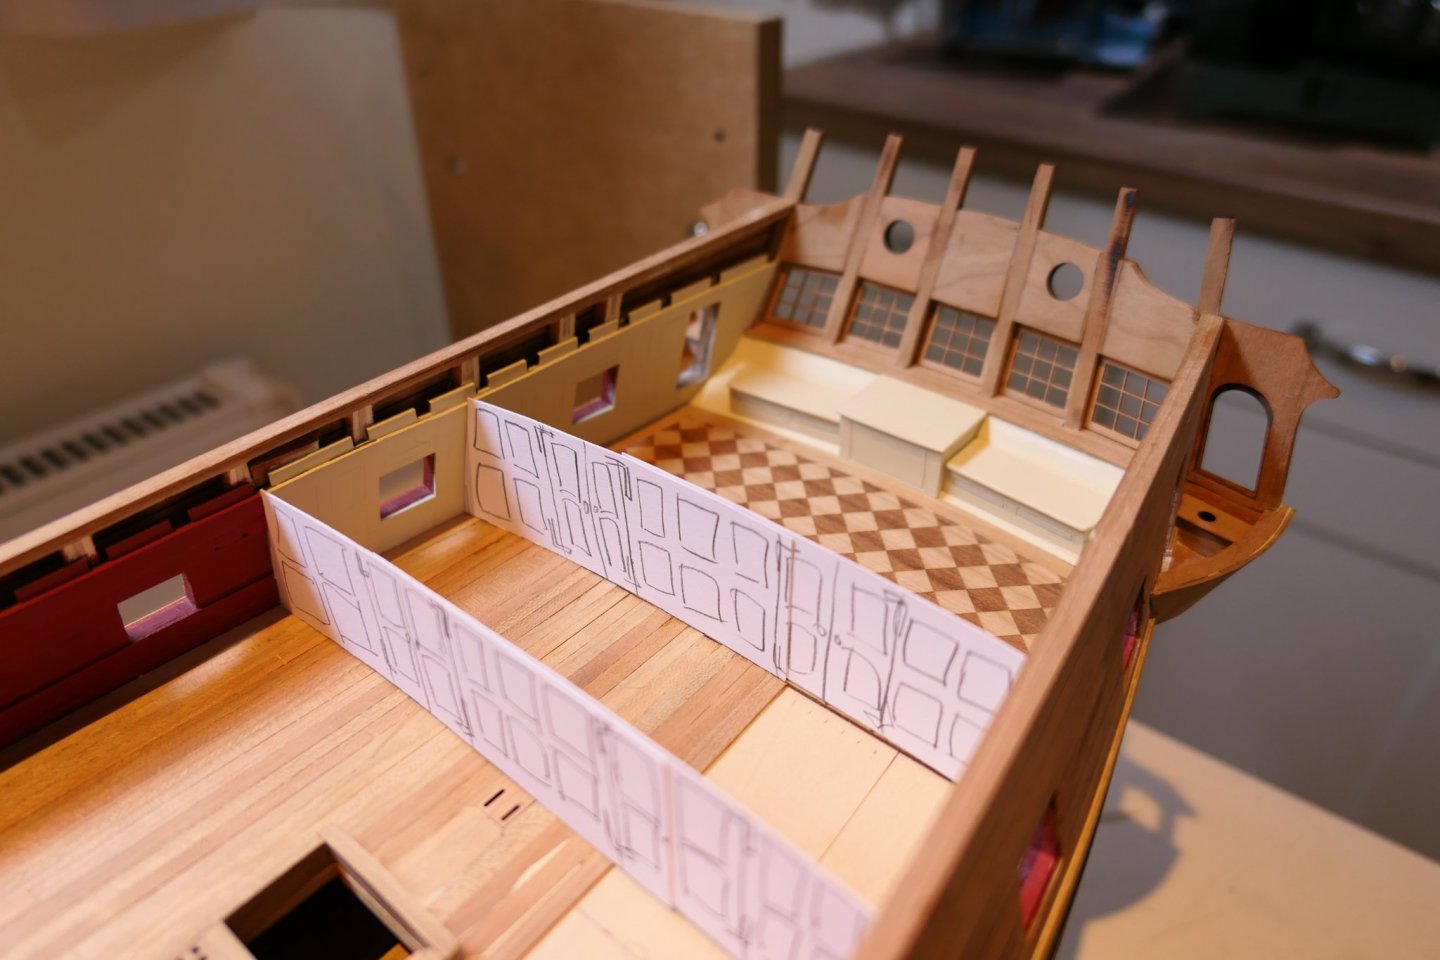
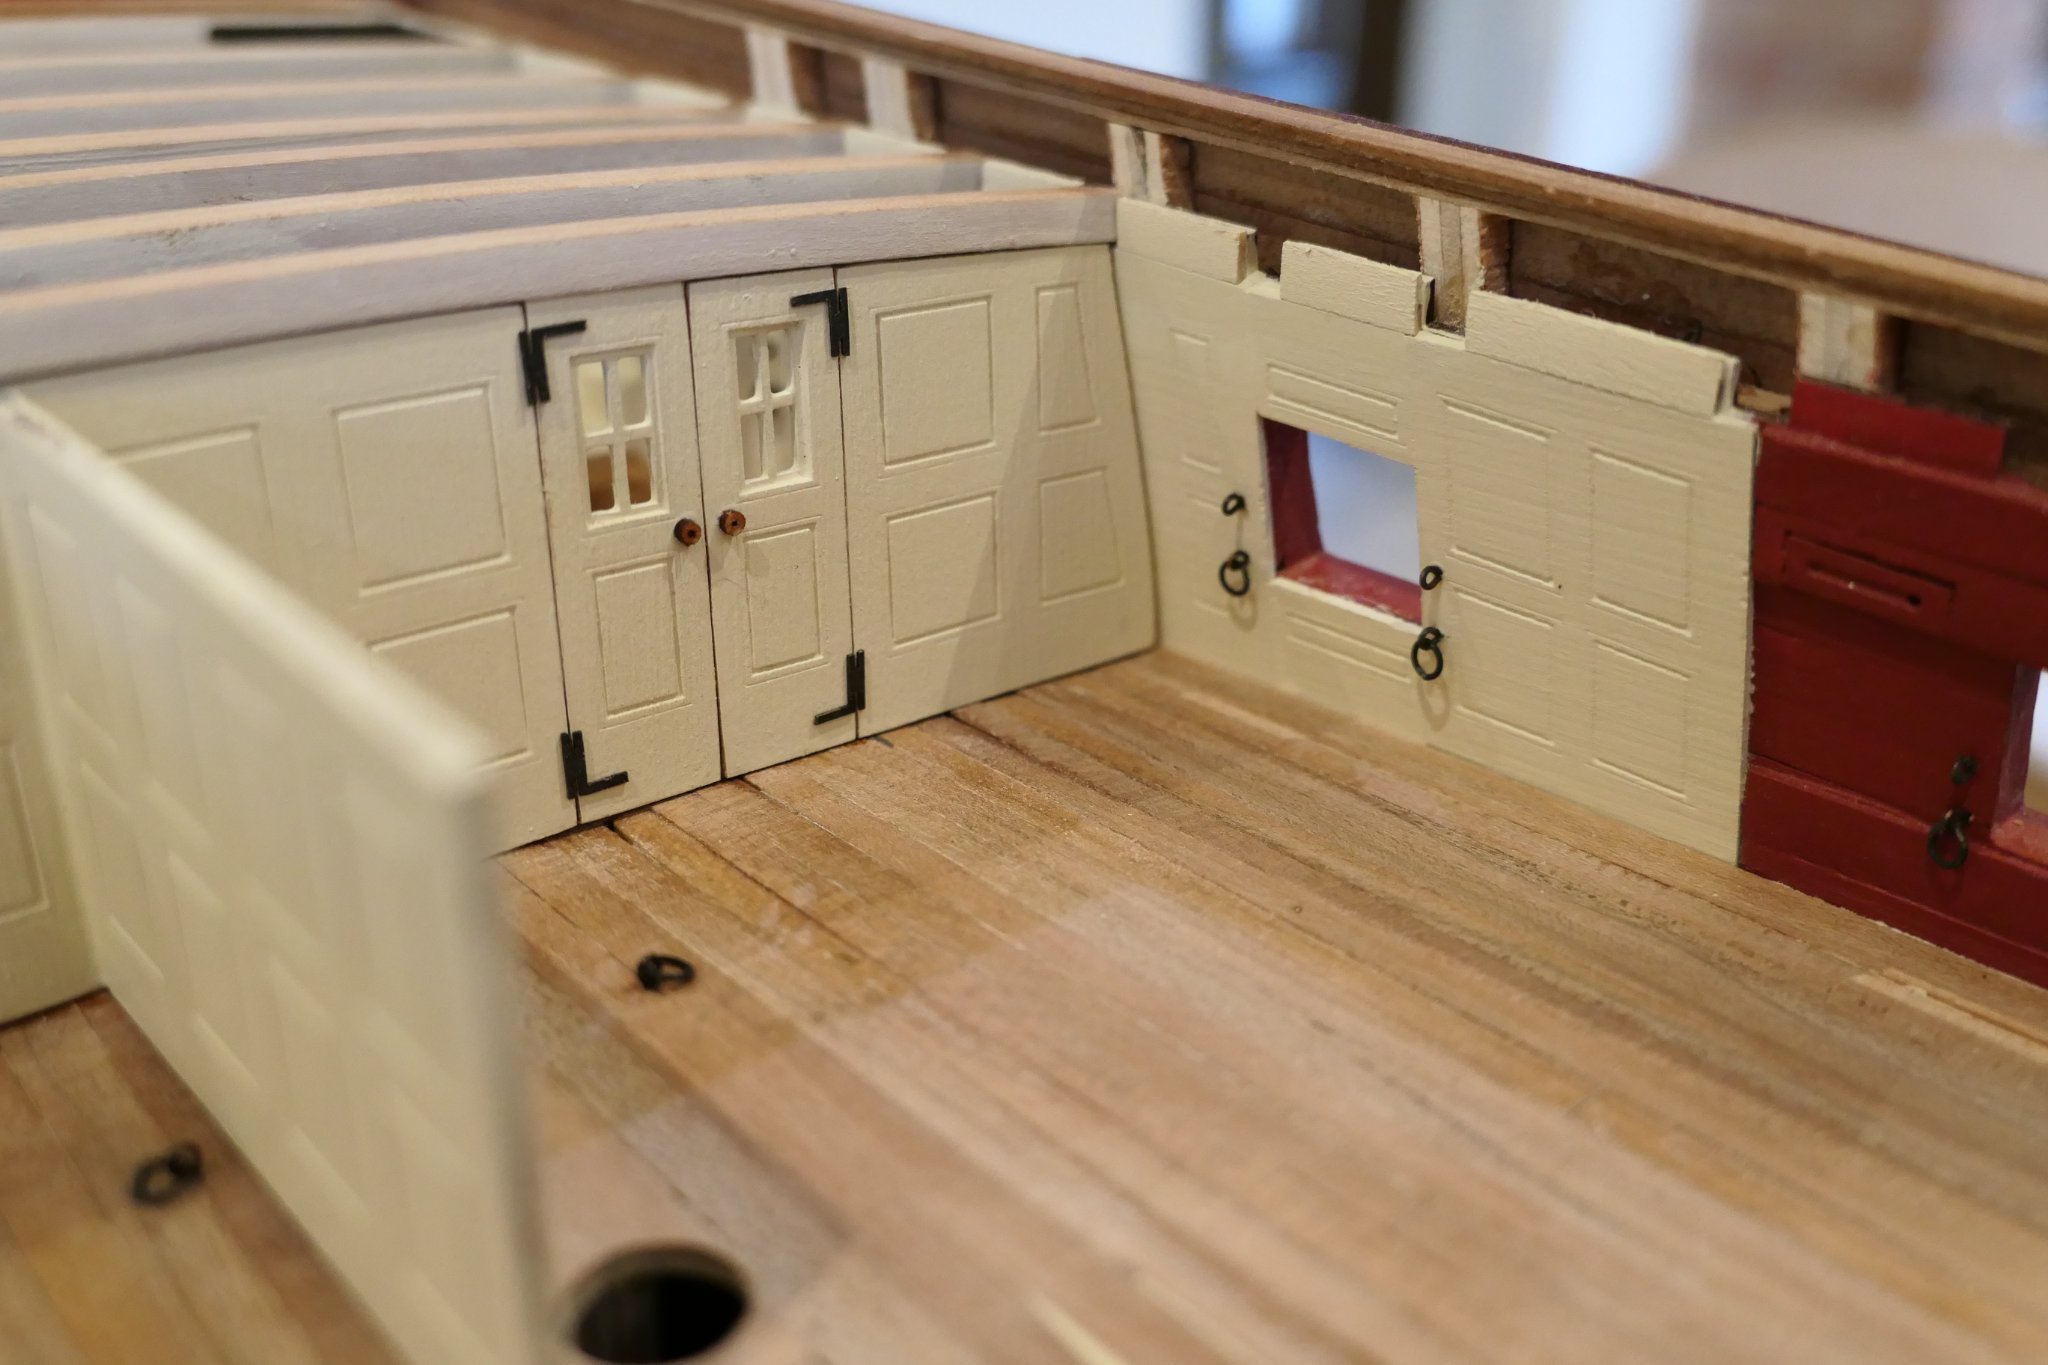
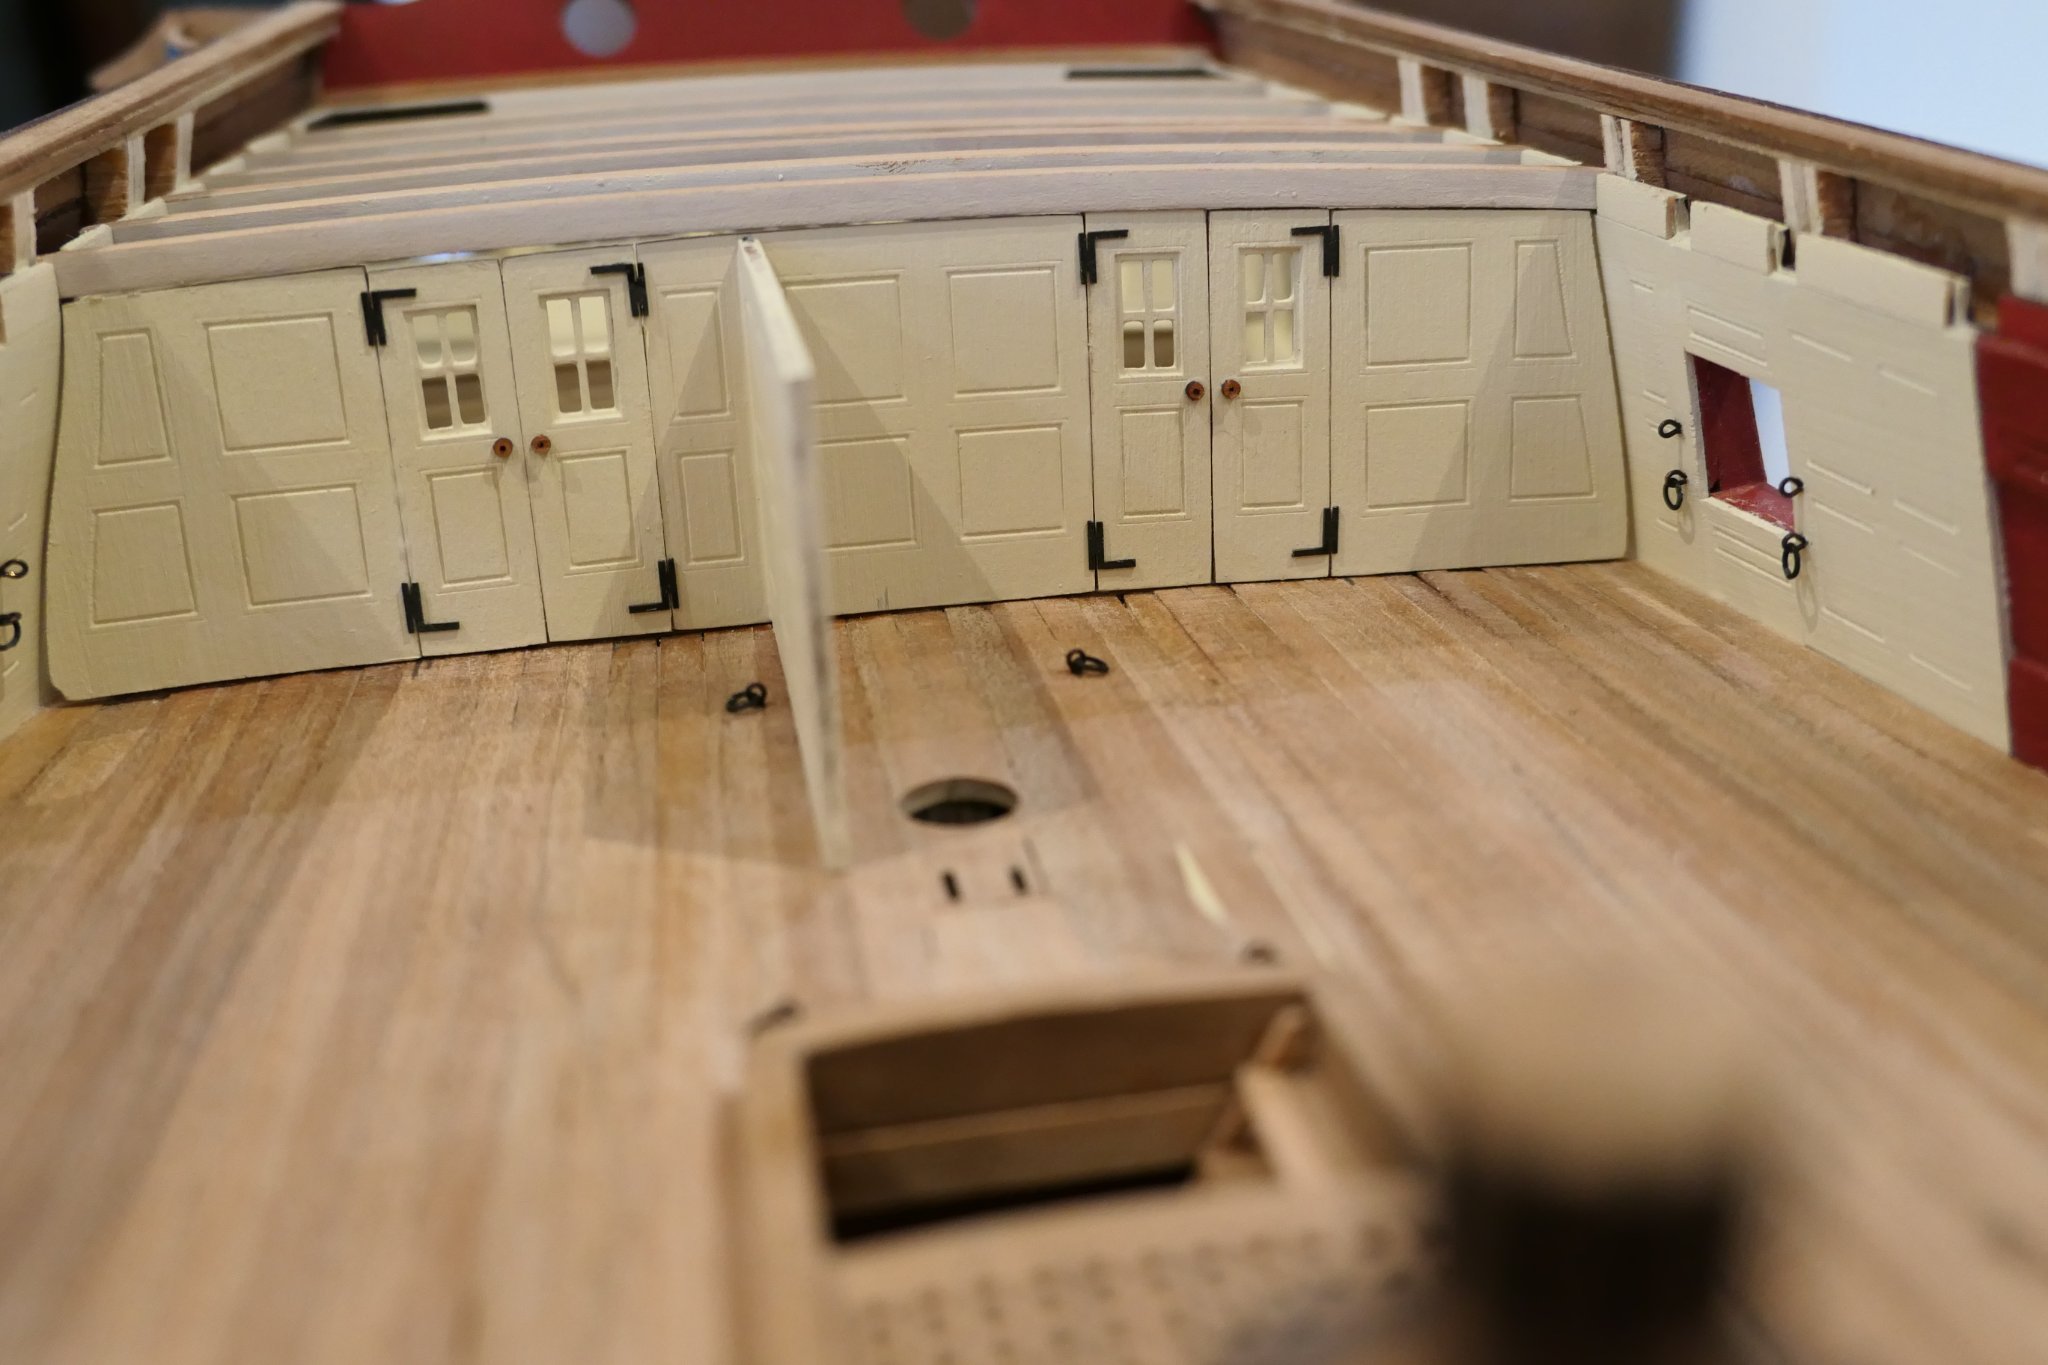
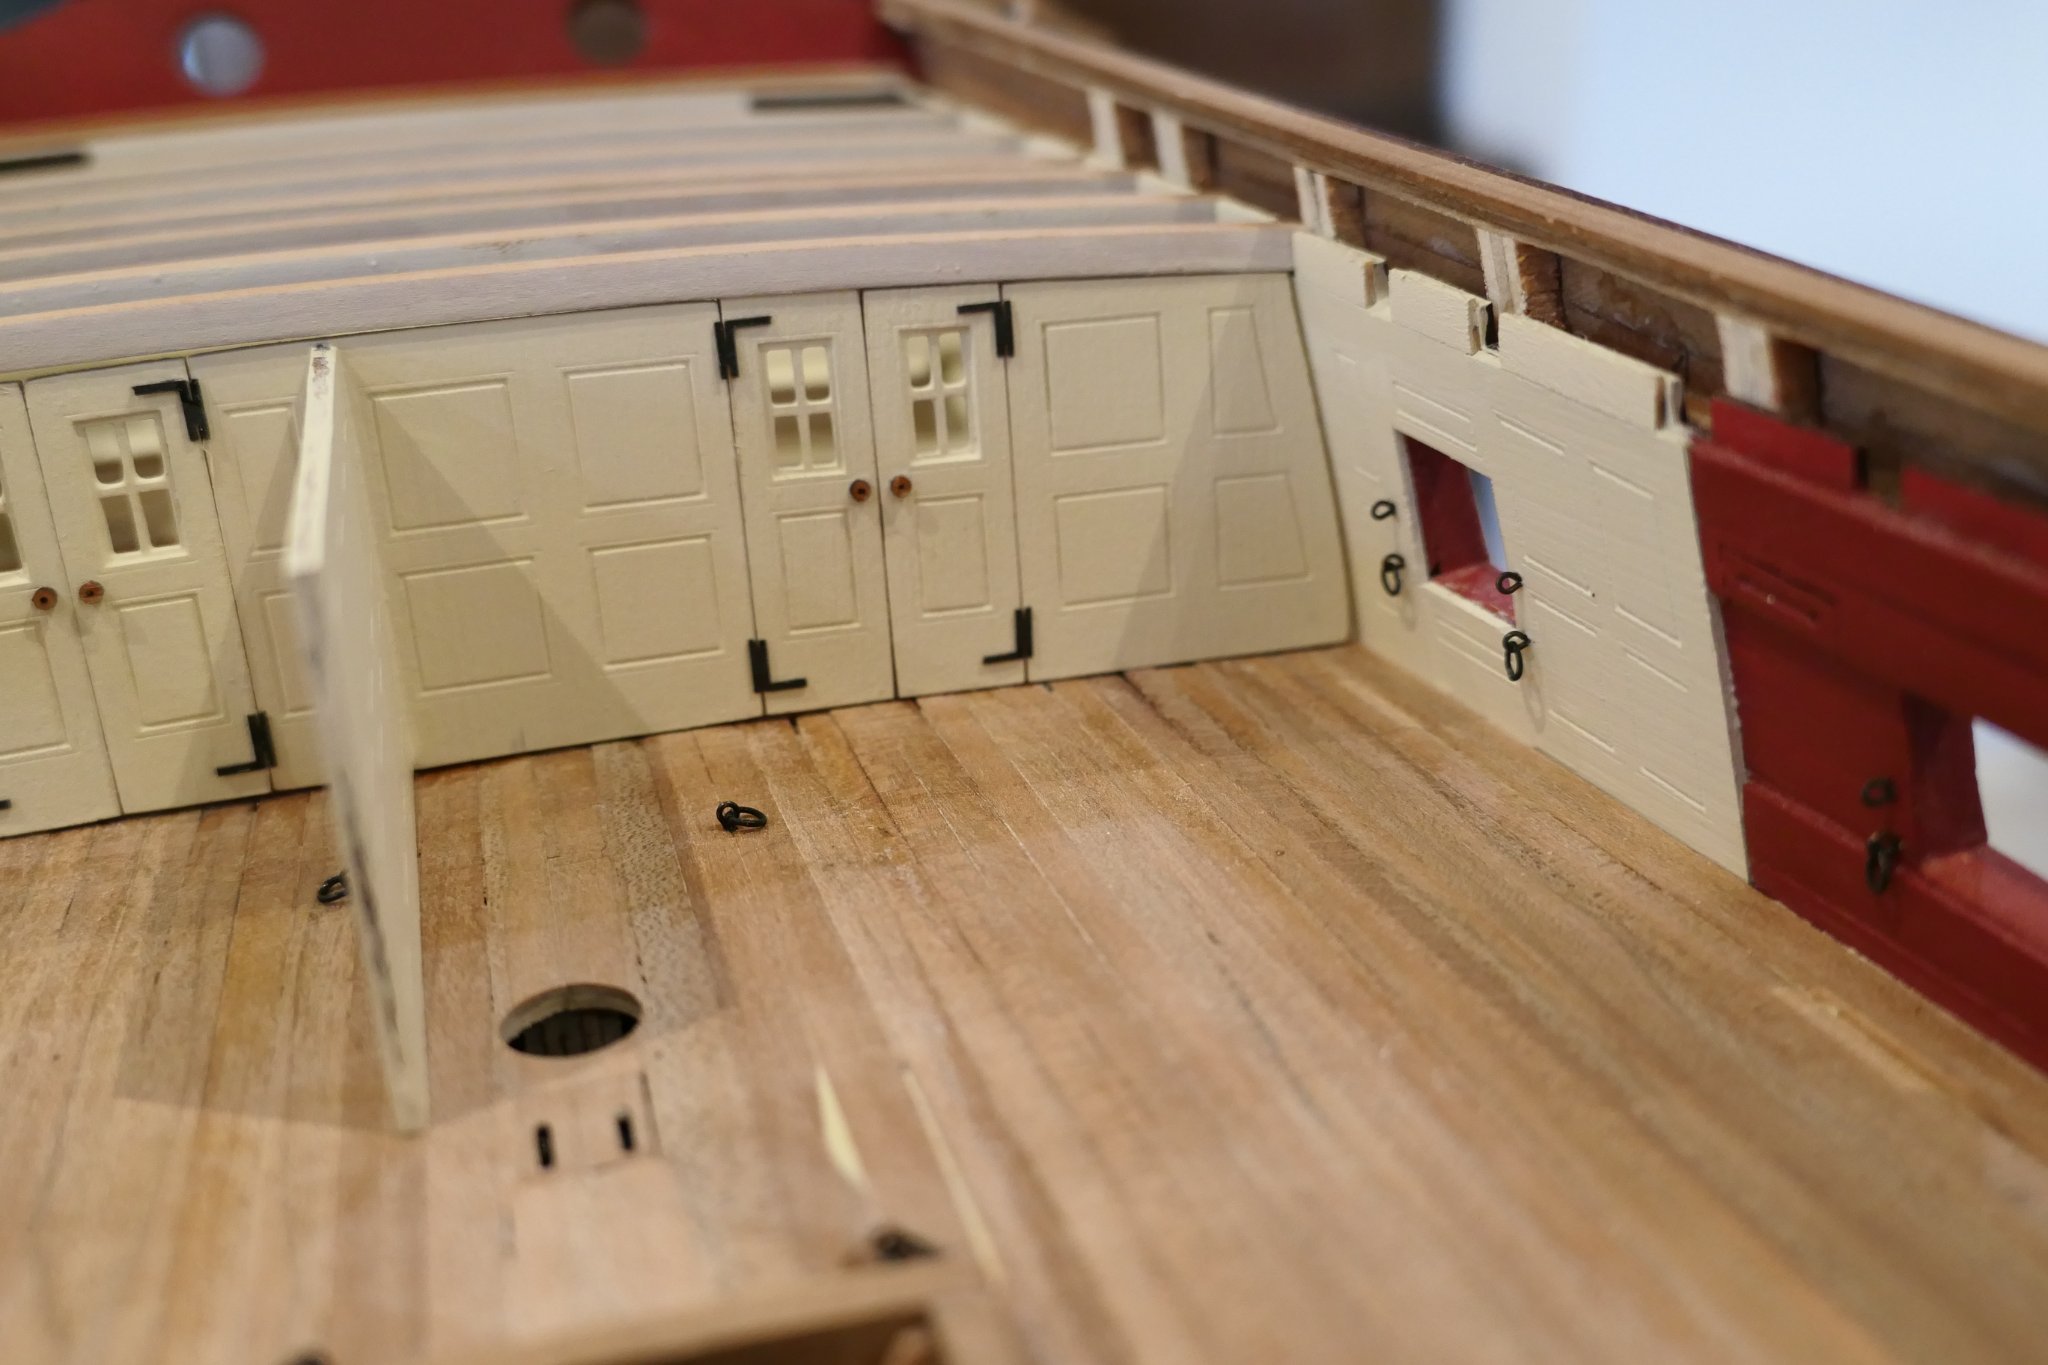
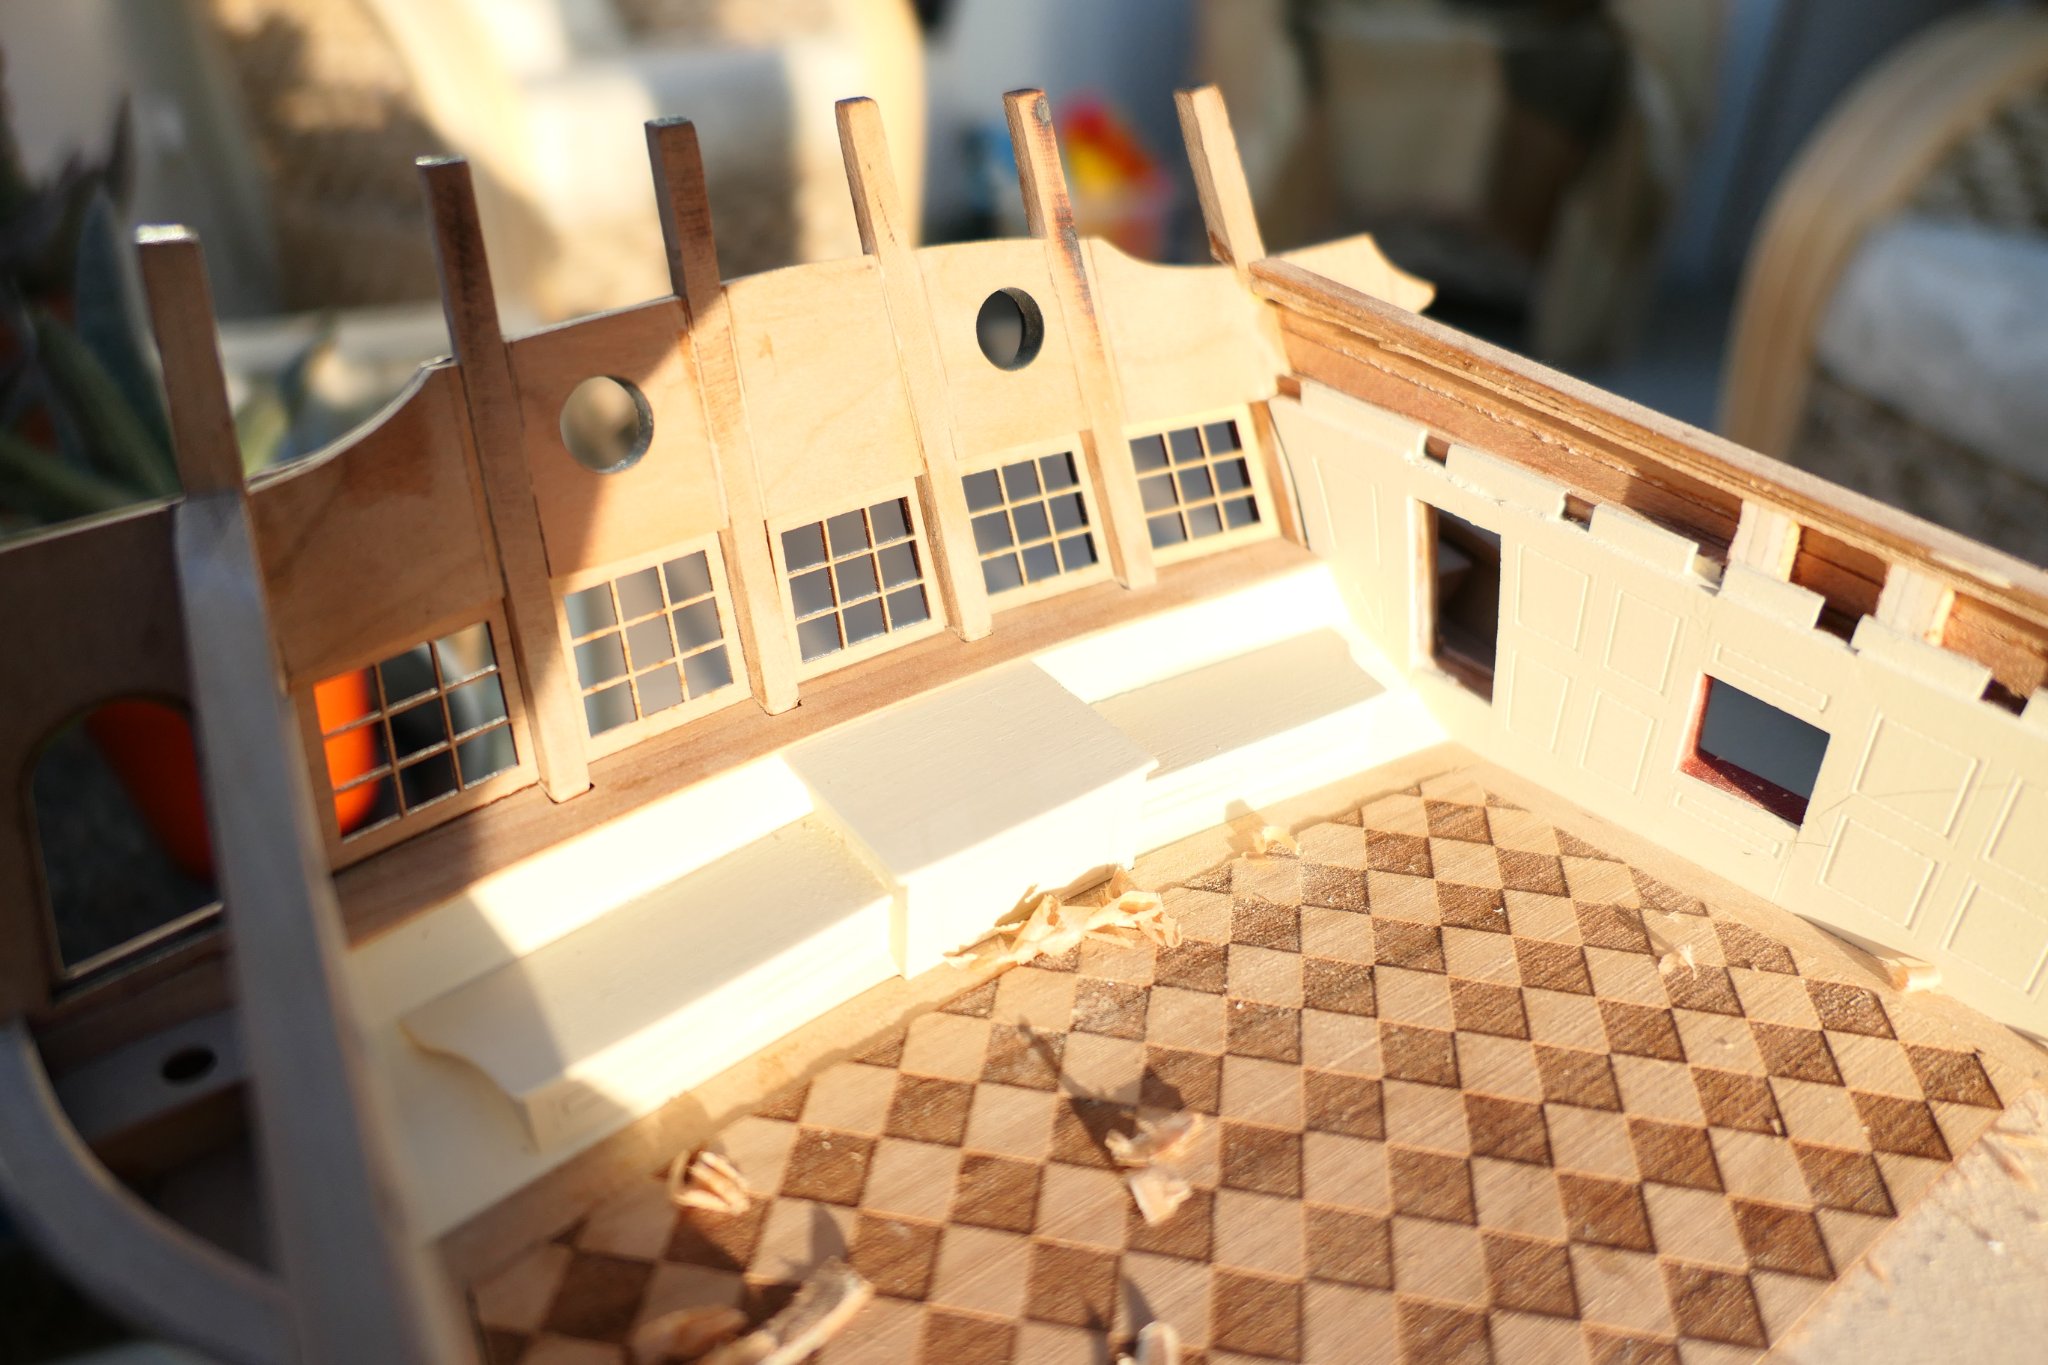
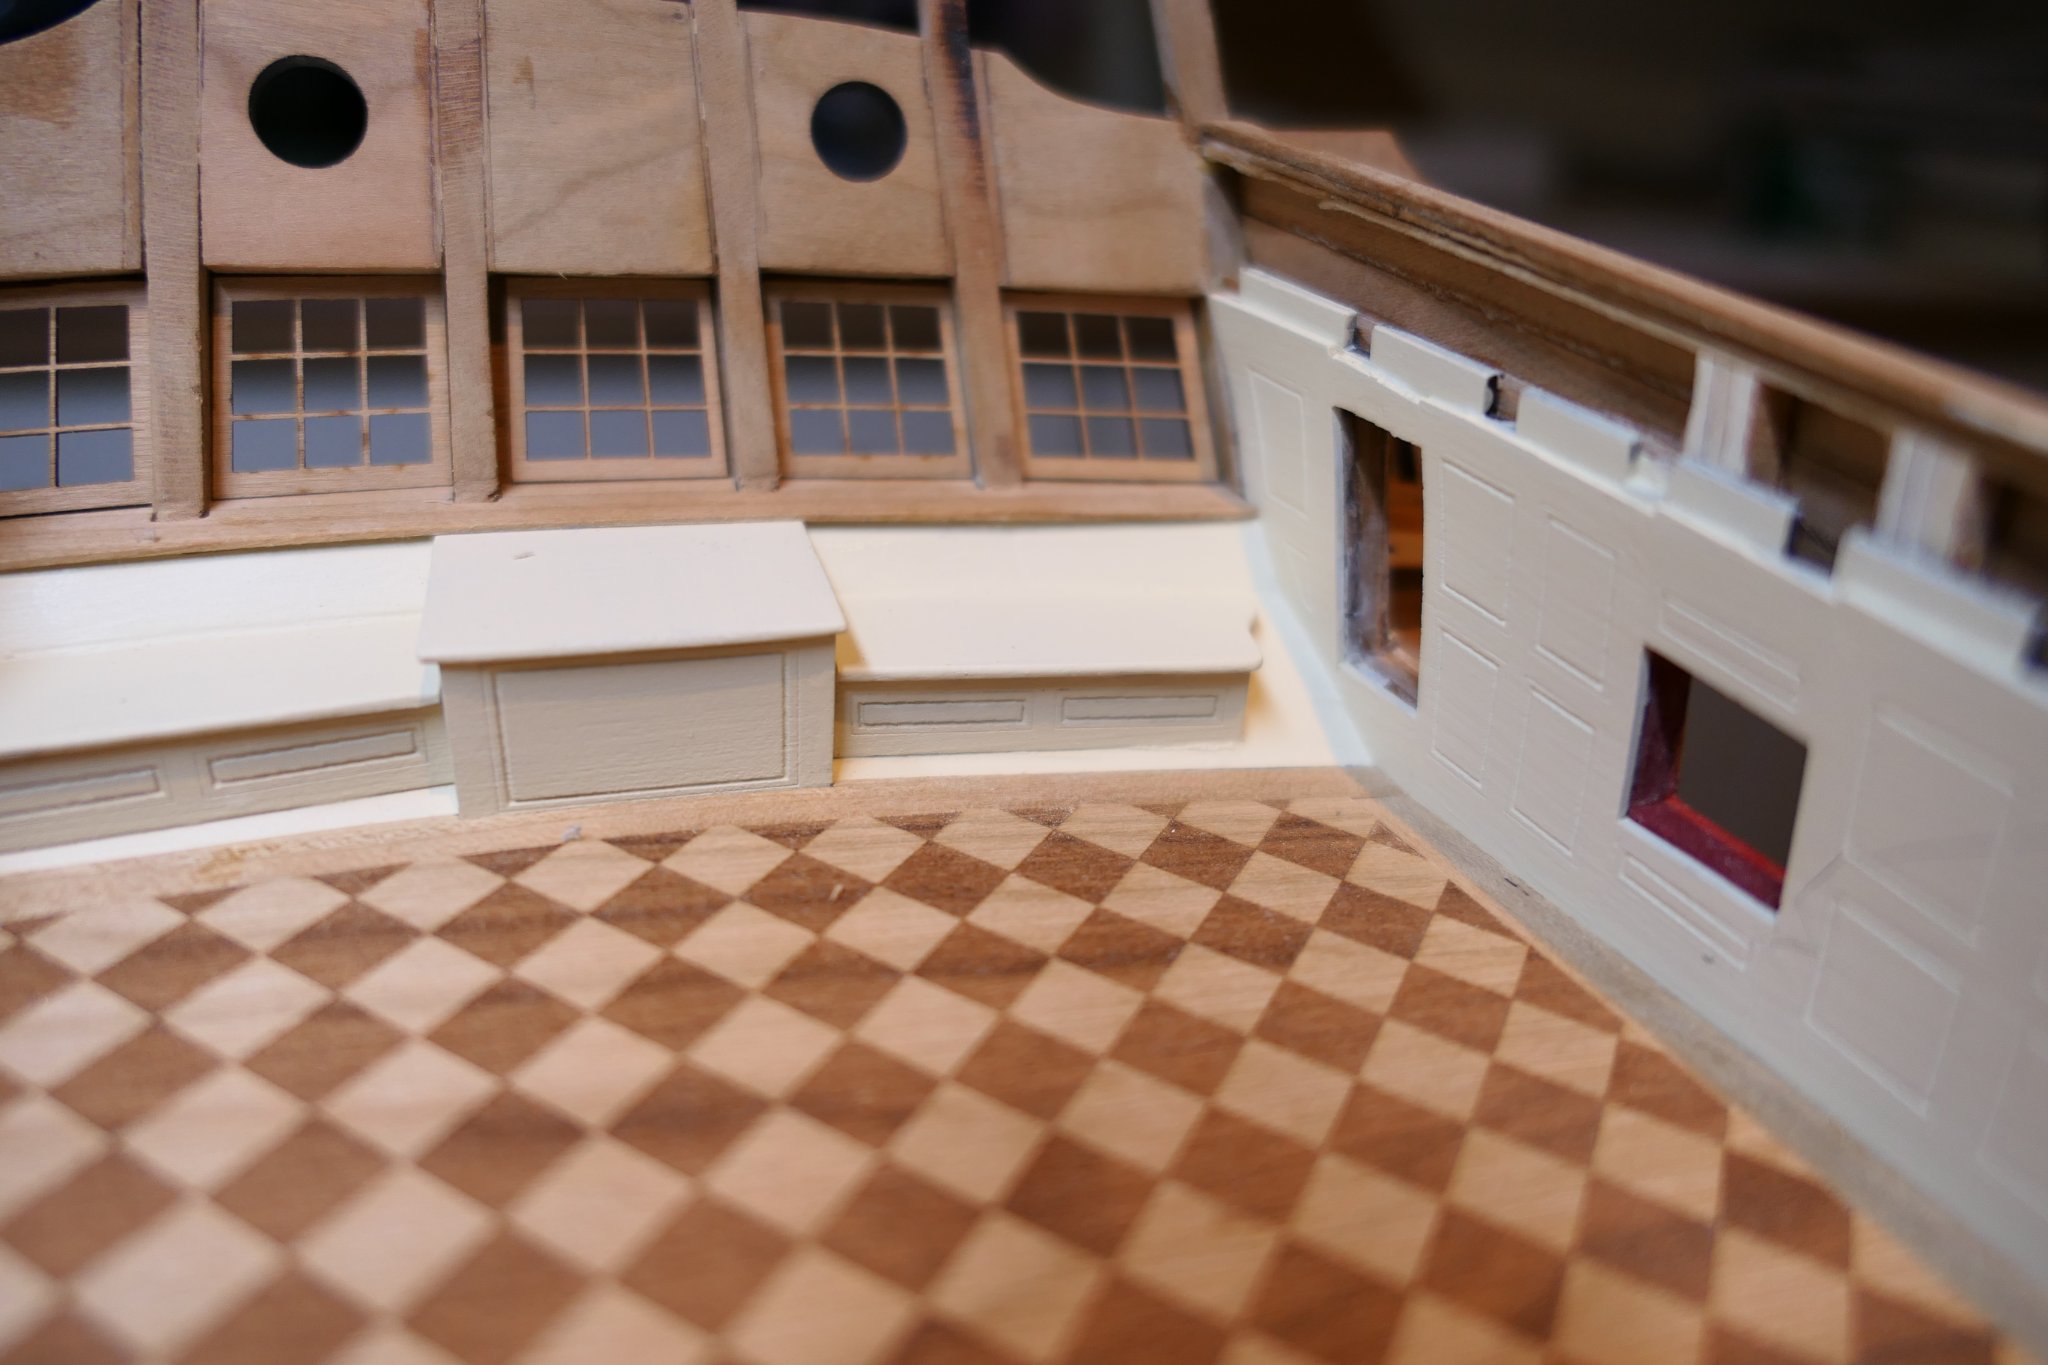
I finished the aft bulkhead over the weekend. Nothing is glued in yet.
Looking at the pictures reminds me that I never put in the waterways.
Canons next - I intend to rig the canons. I'm mindful of NZ Reg's reckoning of 2 hours per canon for rigging. That should keep me quiet for a while but semi-retirement beckons from the end of September so all being well I'll have a bit of time on my hands.


- Chuck, CaptMorgan, Matt D and 12 others
-
 15
15
-
Good afternoon everyone from a lovely sunny Cornwall.
Thank you everyone for your comments and likes!
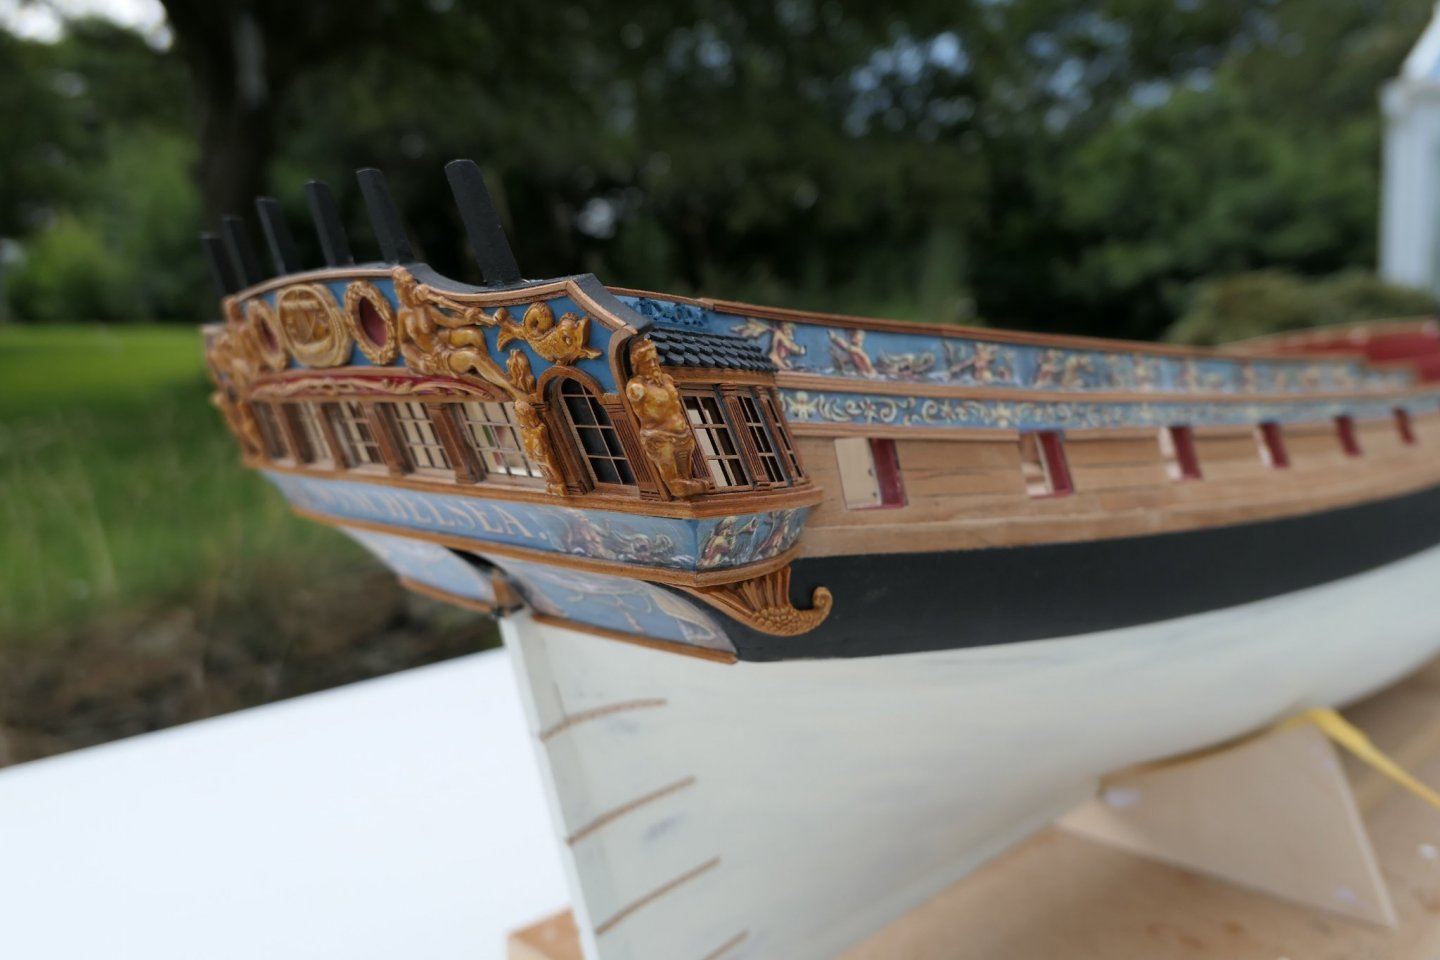
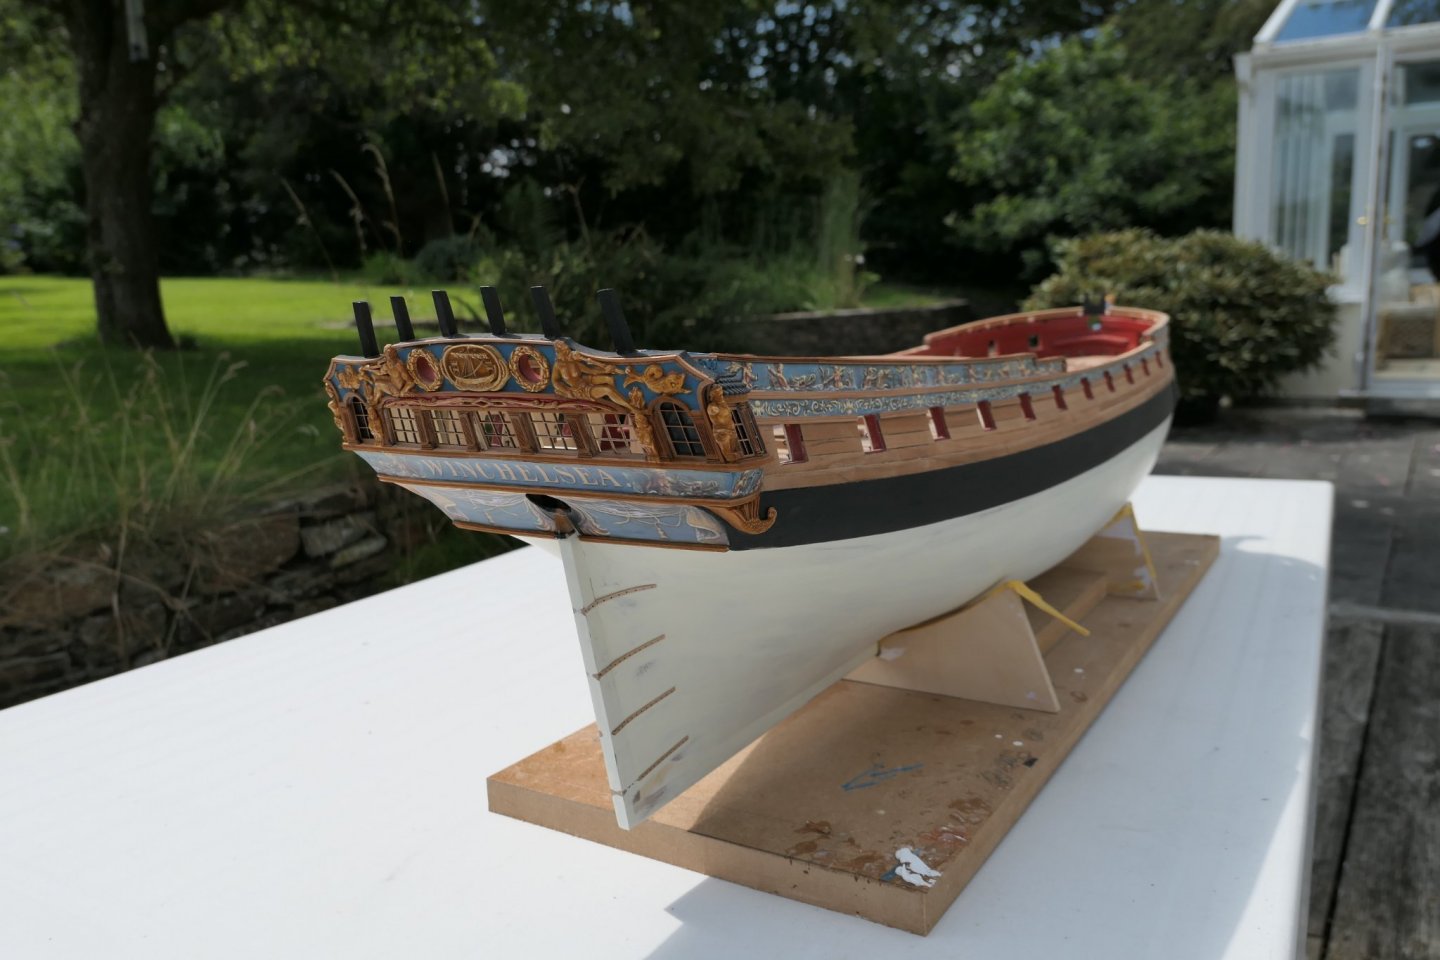
Greg - the blue colour is Tamiya flat blue with a squirt of Vallejo Andrea blue. I just mixed away until it looked about right. I think the colour differences are pretty forgiving. One of the advantages of blue paint is that you can underpaint the areas covered by the friezes so no bare wood shows and also colour the cut edges of the paper so you don't get a white border.
I didn't use a pencil to simulate the tarred edges to the deck planking as Chuck observed above. That was an idiotic oversight I very much regret but there is nothing I can do about it now. Never mind.
Things are moving on on wet days. One mishap was breaking off the rudder. I suspect I won't be the last. Chuck very kindly supplied some replacement hinges so those will go on soon. I intend the rudder should be removable for the time being. I think I may have read that on Mike's log.
.thumb.JPG.8d0bbc38278416b106a782de4bd8064e.JPG)
.thumb.JPG.dbe8df6d7ad345227276ed27002e7caf.JPG)
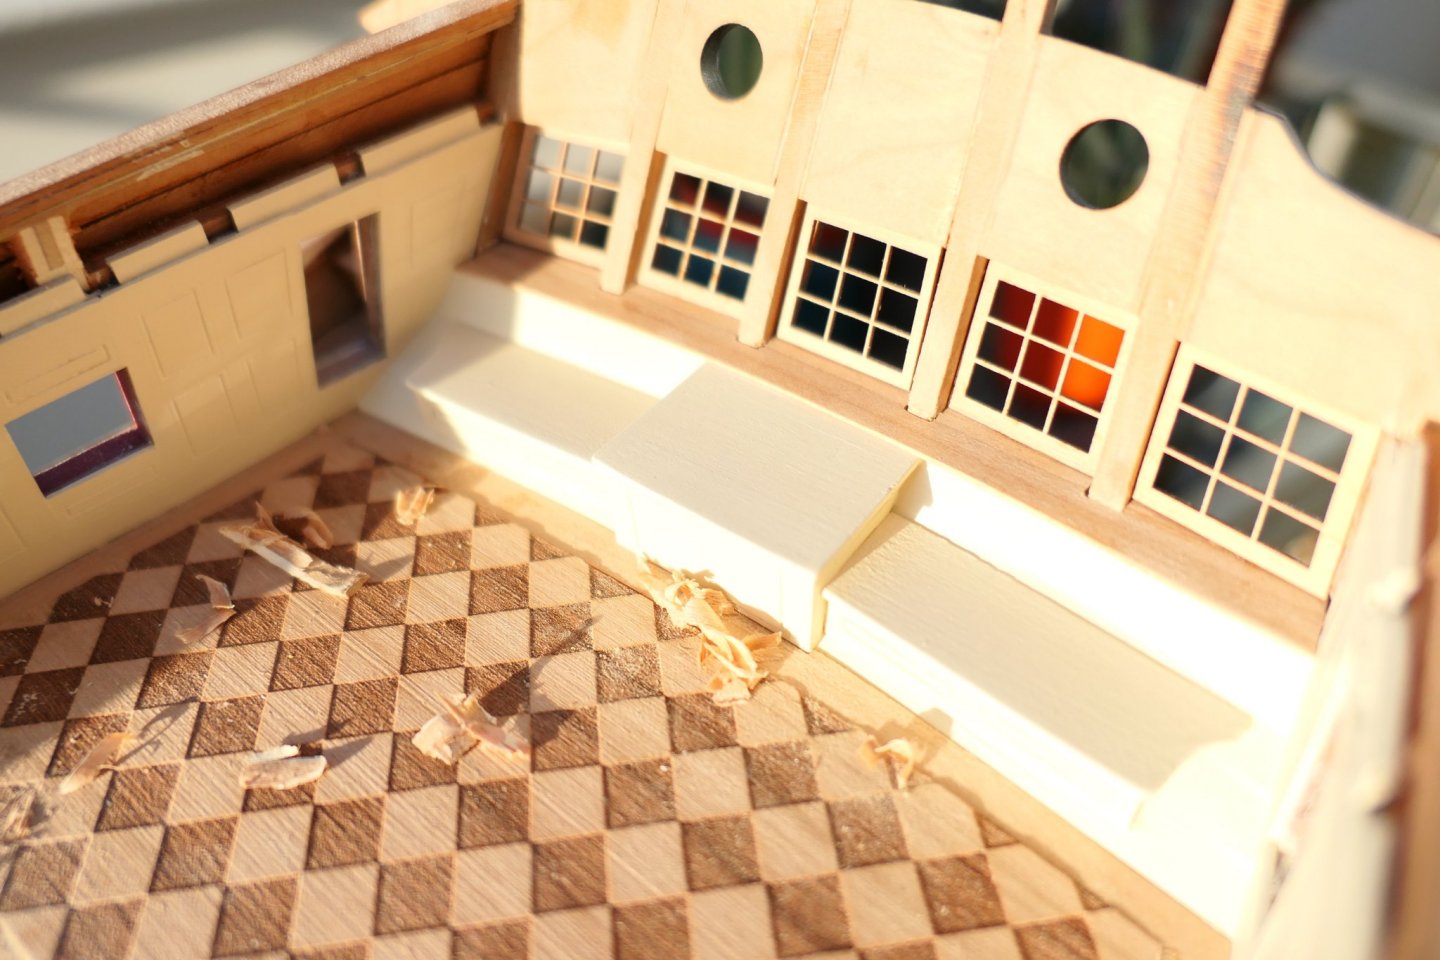
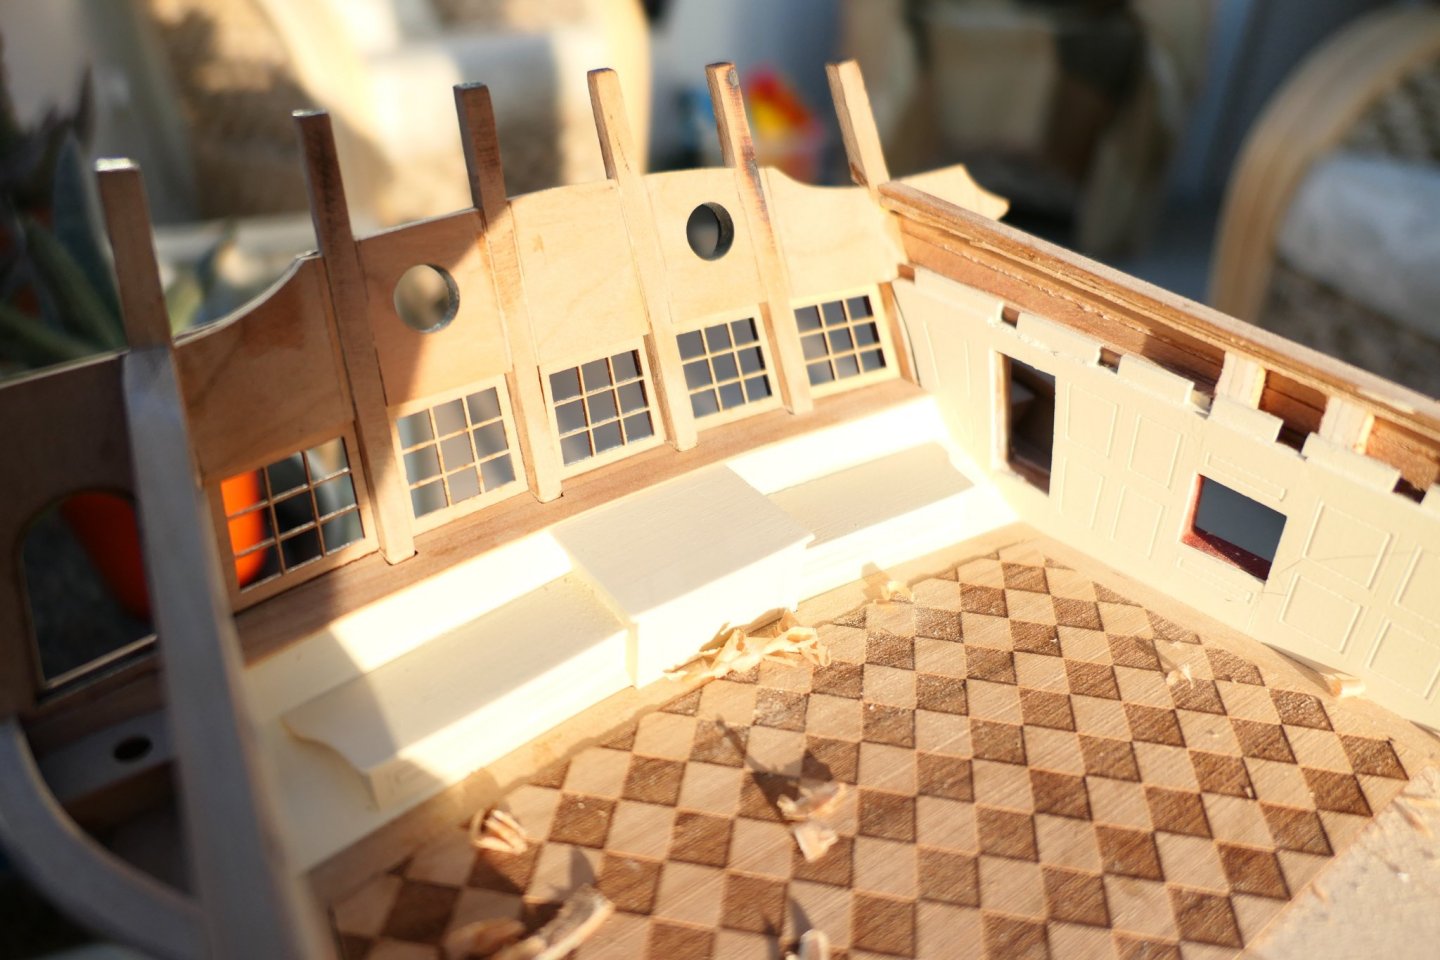
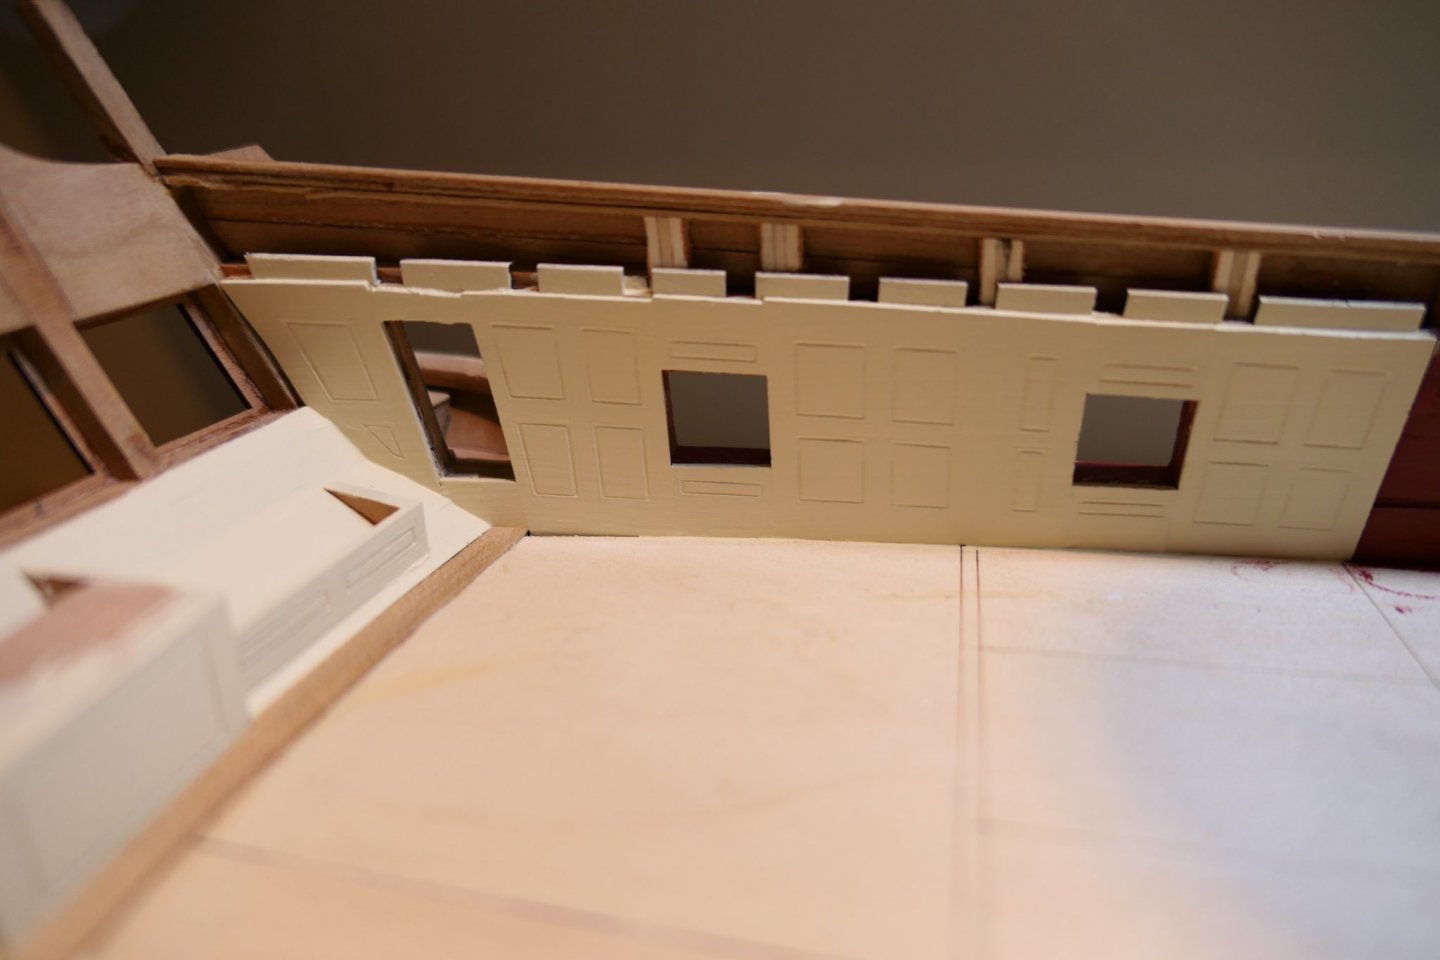
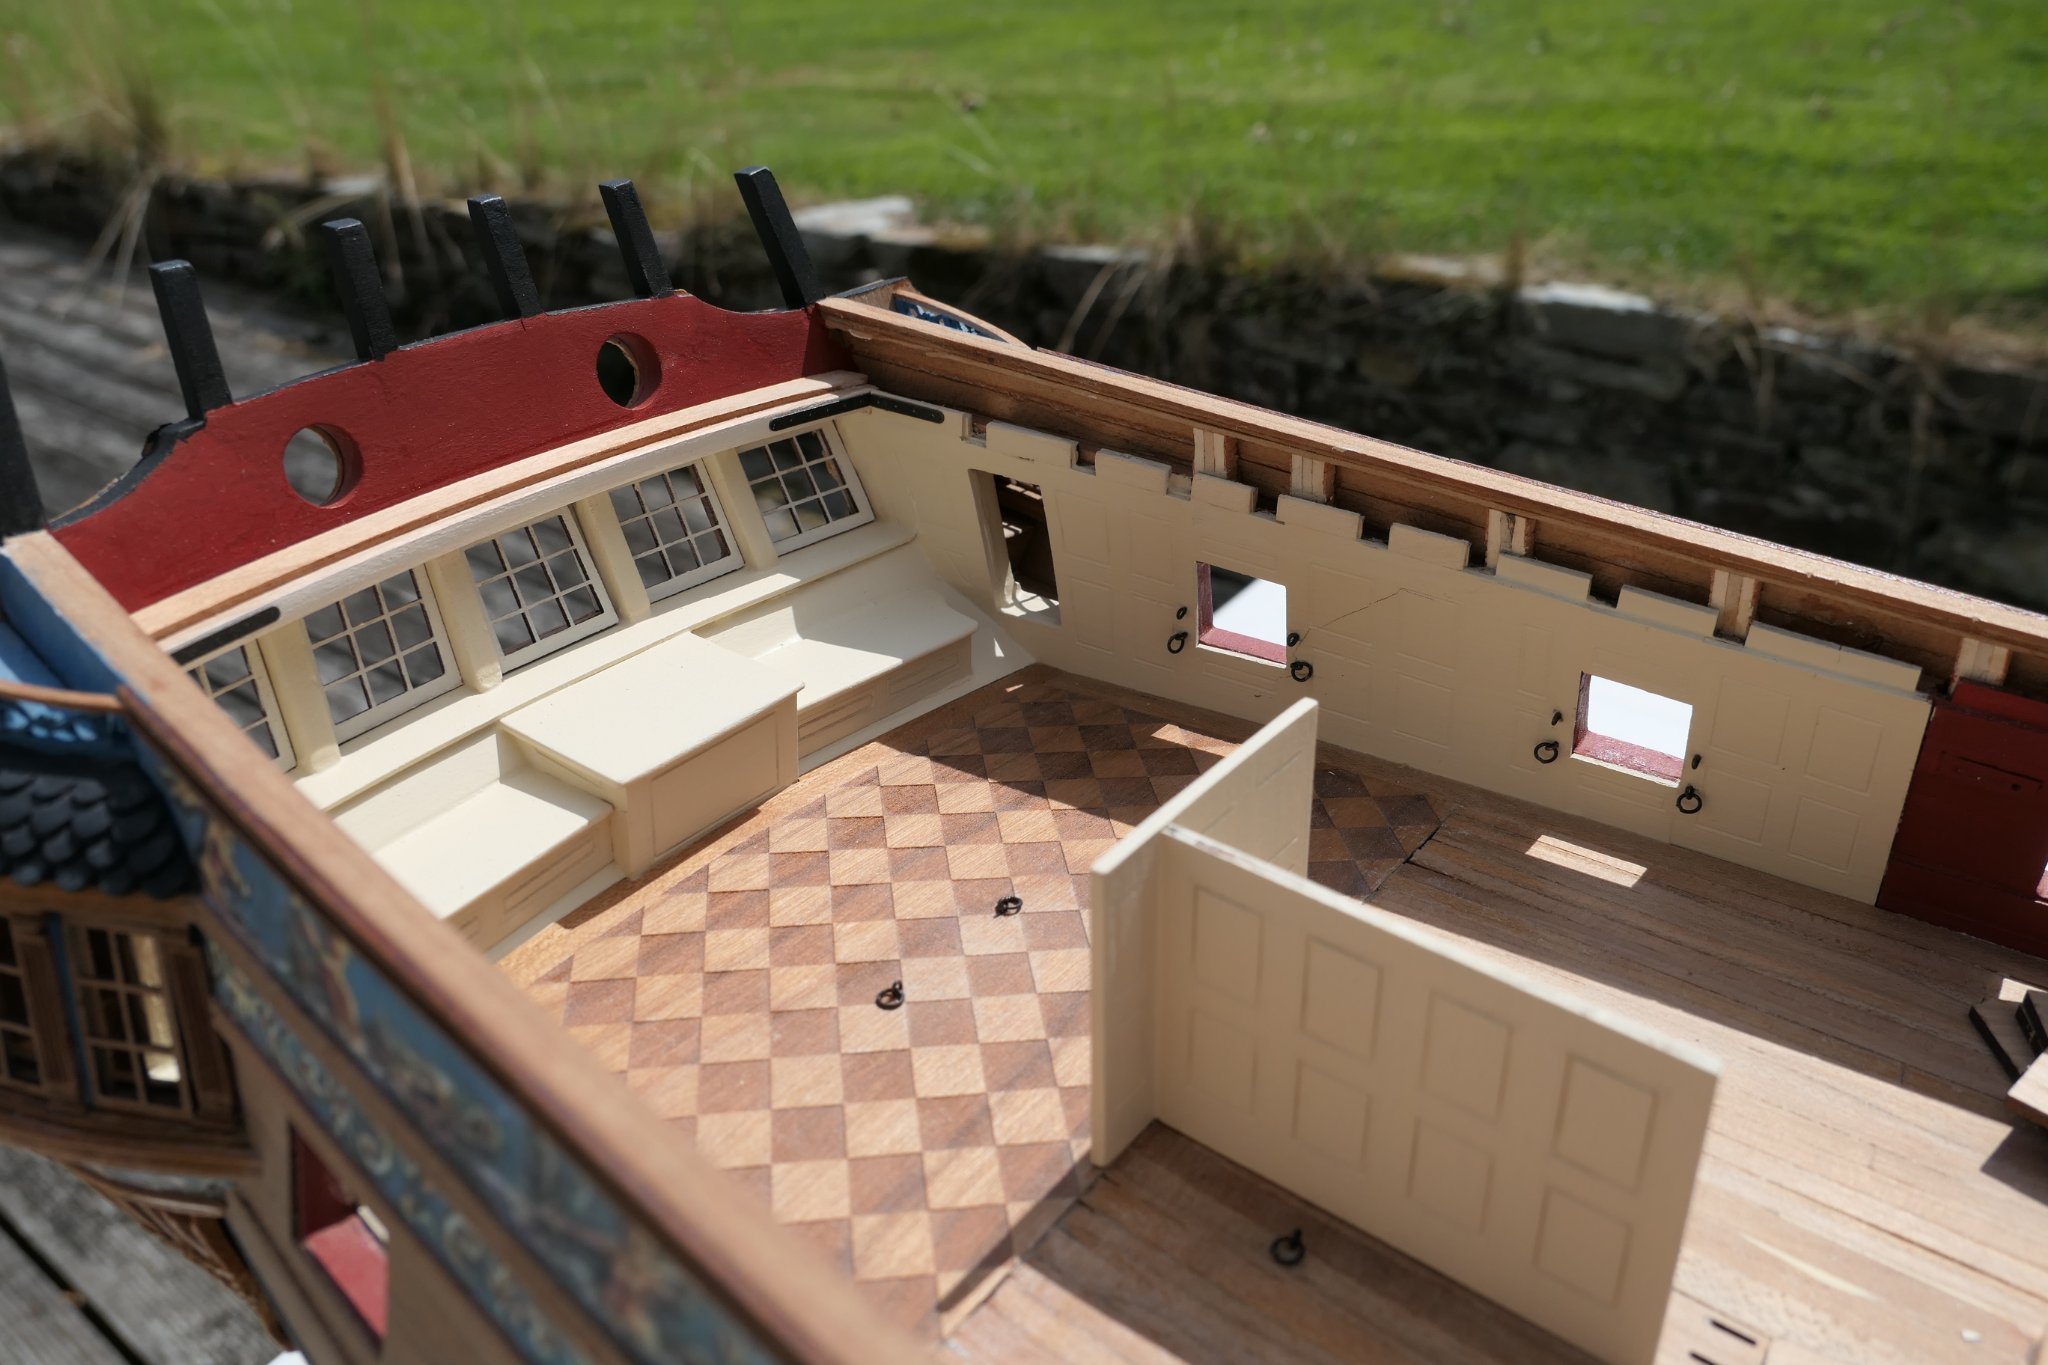
I clearly didn't sand my roof tiles thin enough and I can't get the hang of scraping profiles but the windows fit nicely.
.thumb.JPG.c76aa6ff2d39851729bdf778945b5e01.JPG)
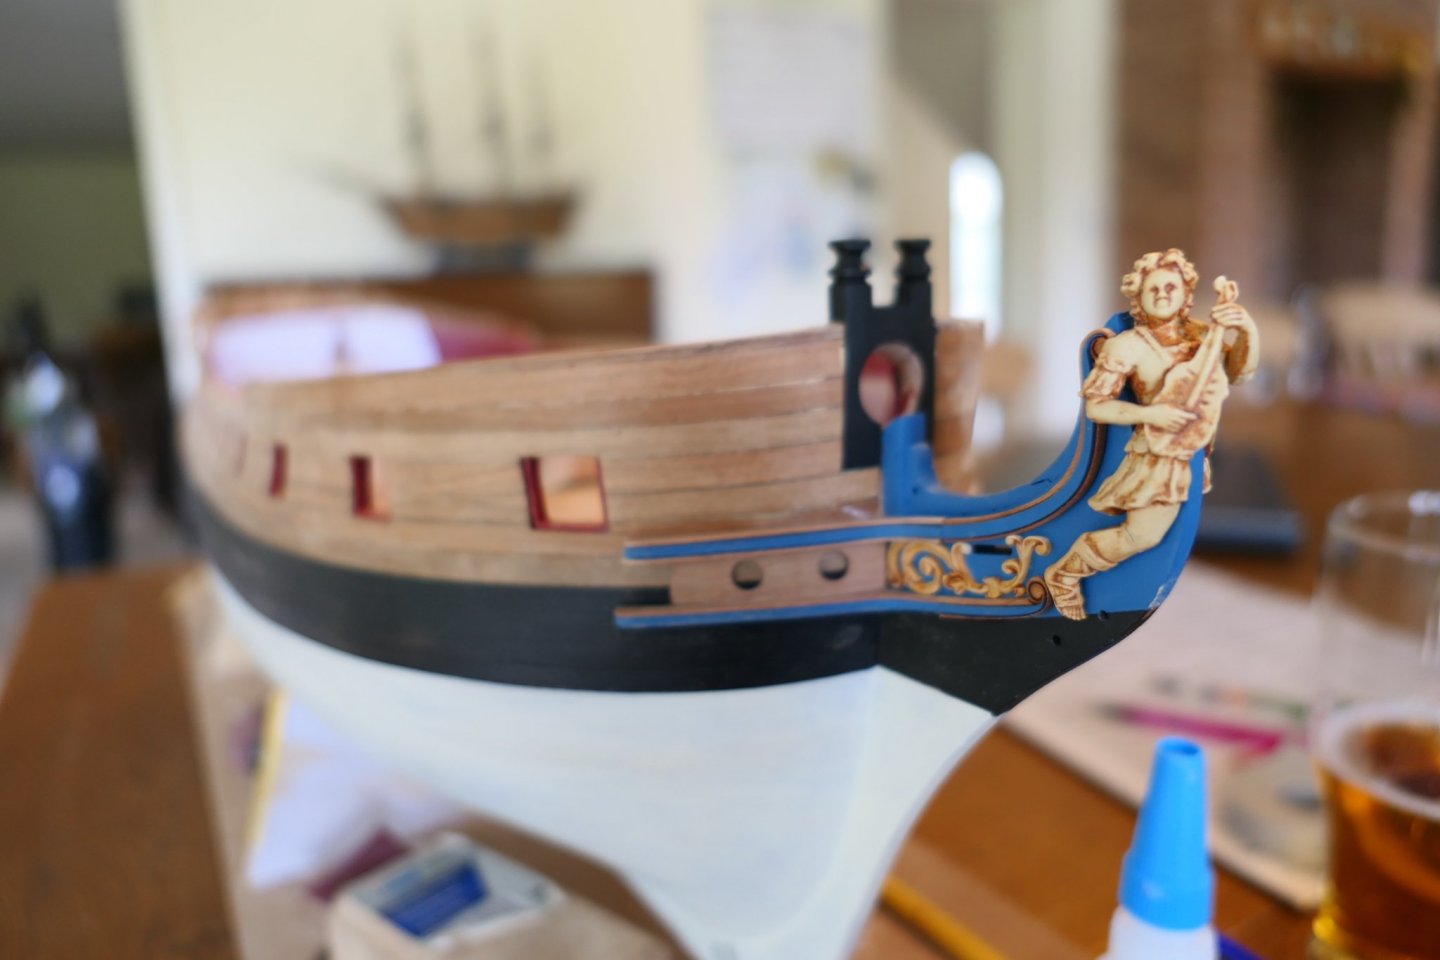
I can't get hold of fruitwood gel here in the Uk. I drybrushed the resin figures with raw sienna oil paint and wiped it off with a kitchen towel between coats. Not everyone's taste I suspect but I like it.
.thumb.JPG.2829e44276796f4736d5faf7553f5eee.JPG)
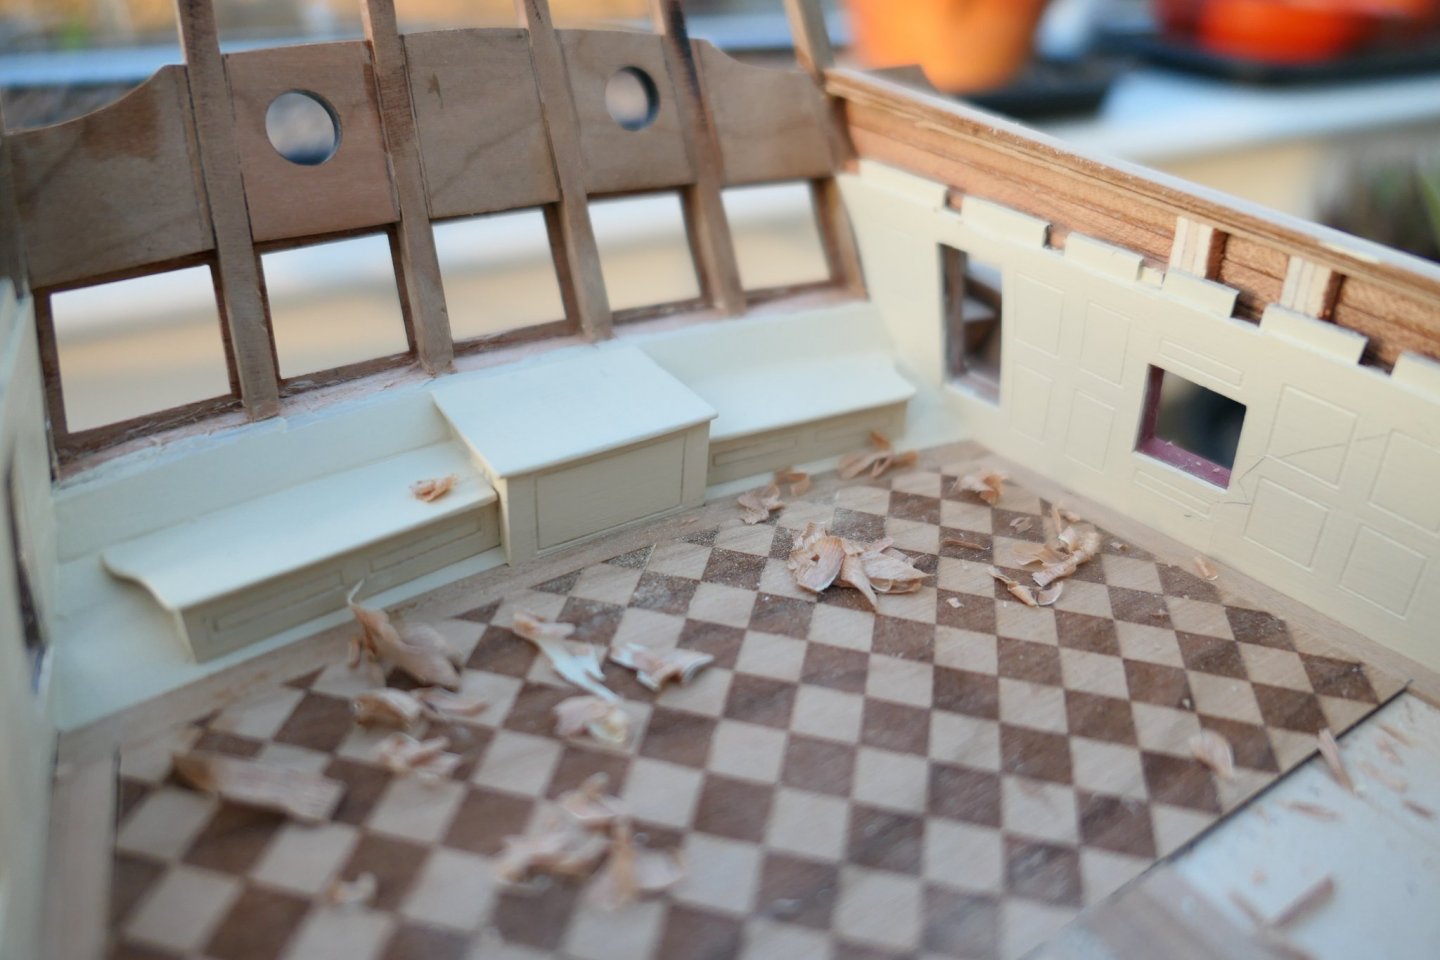
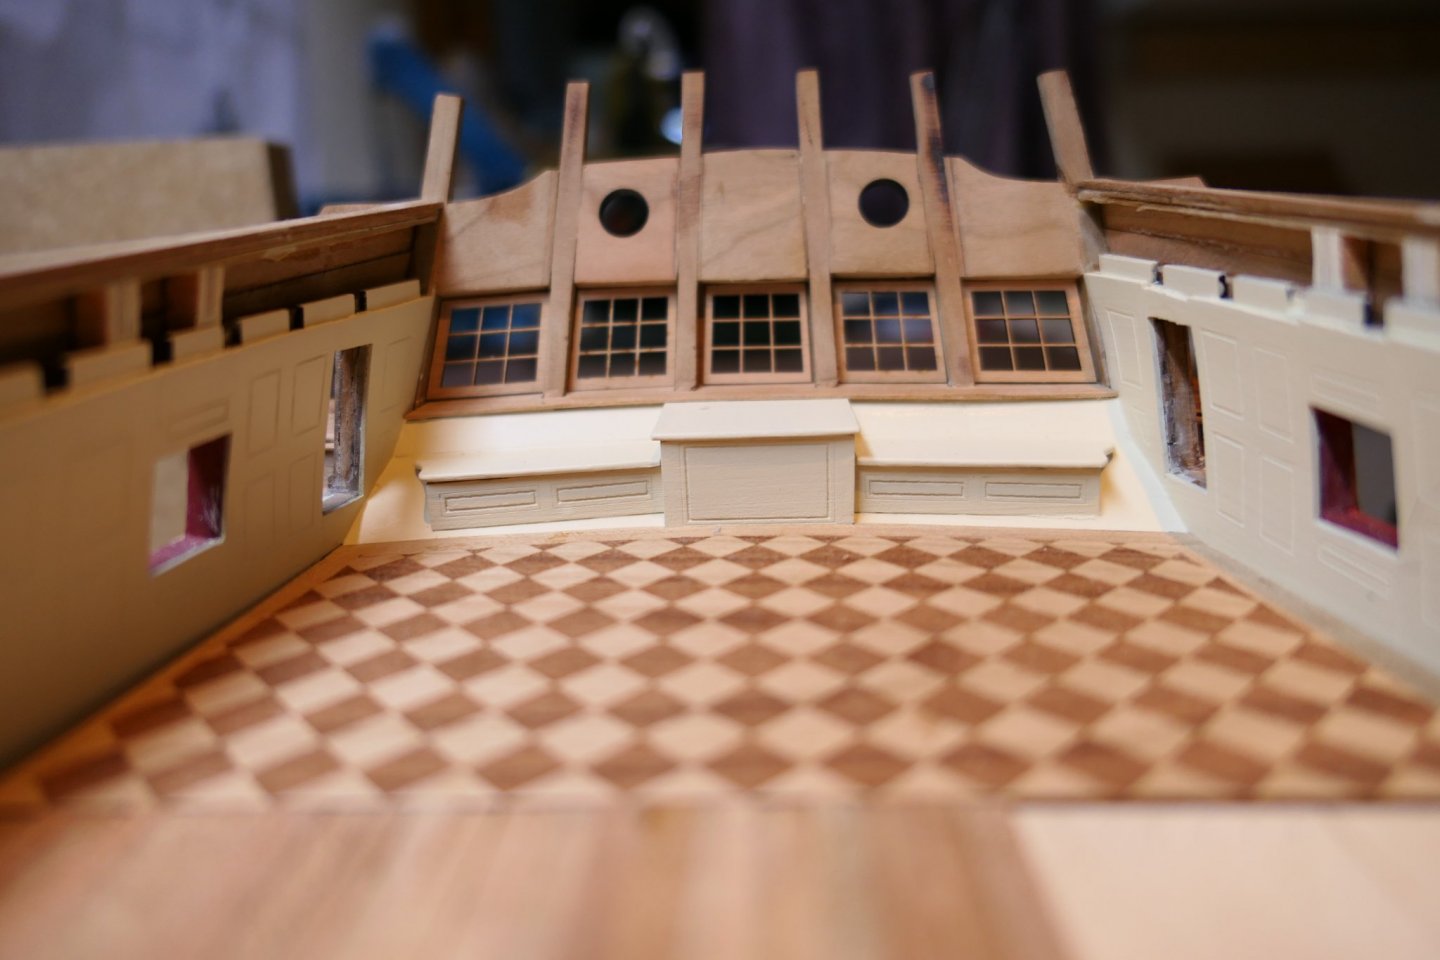
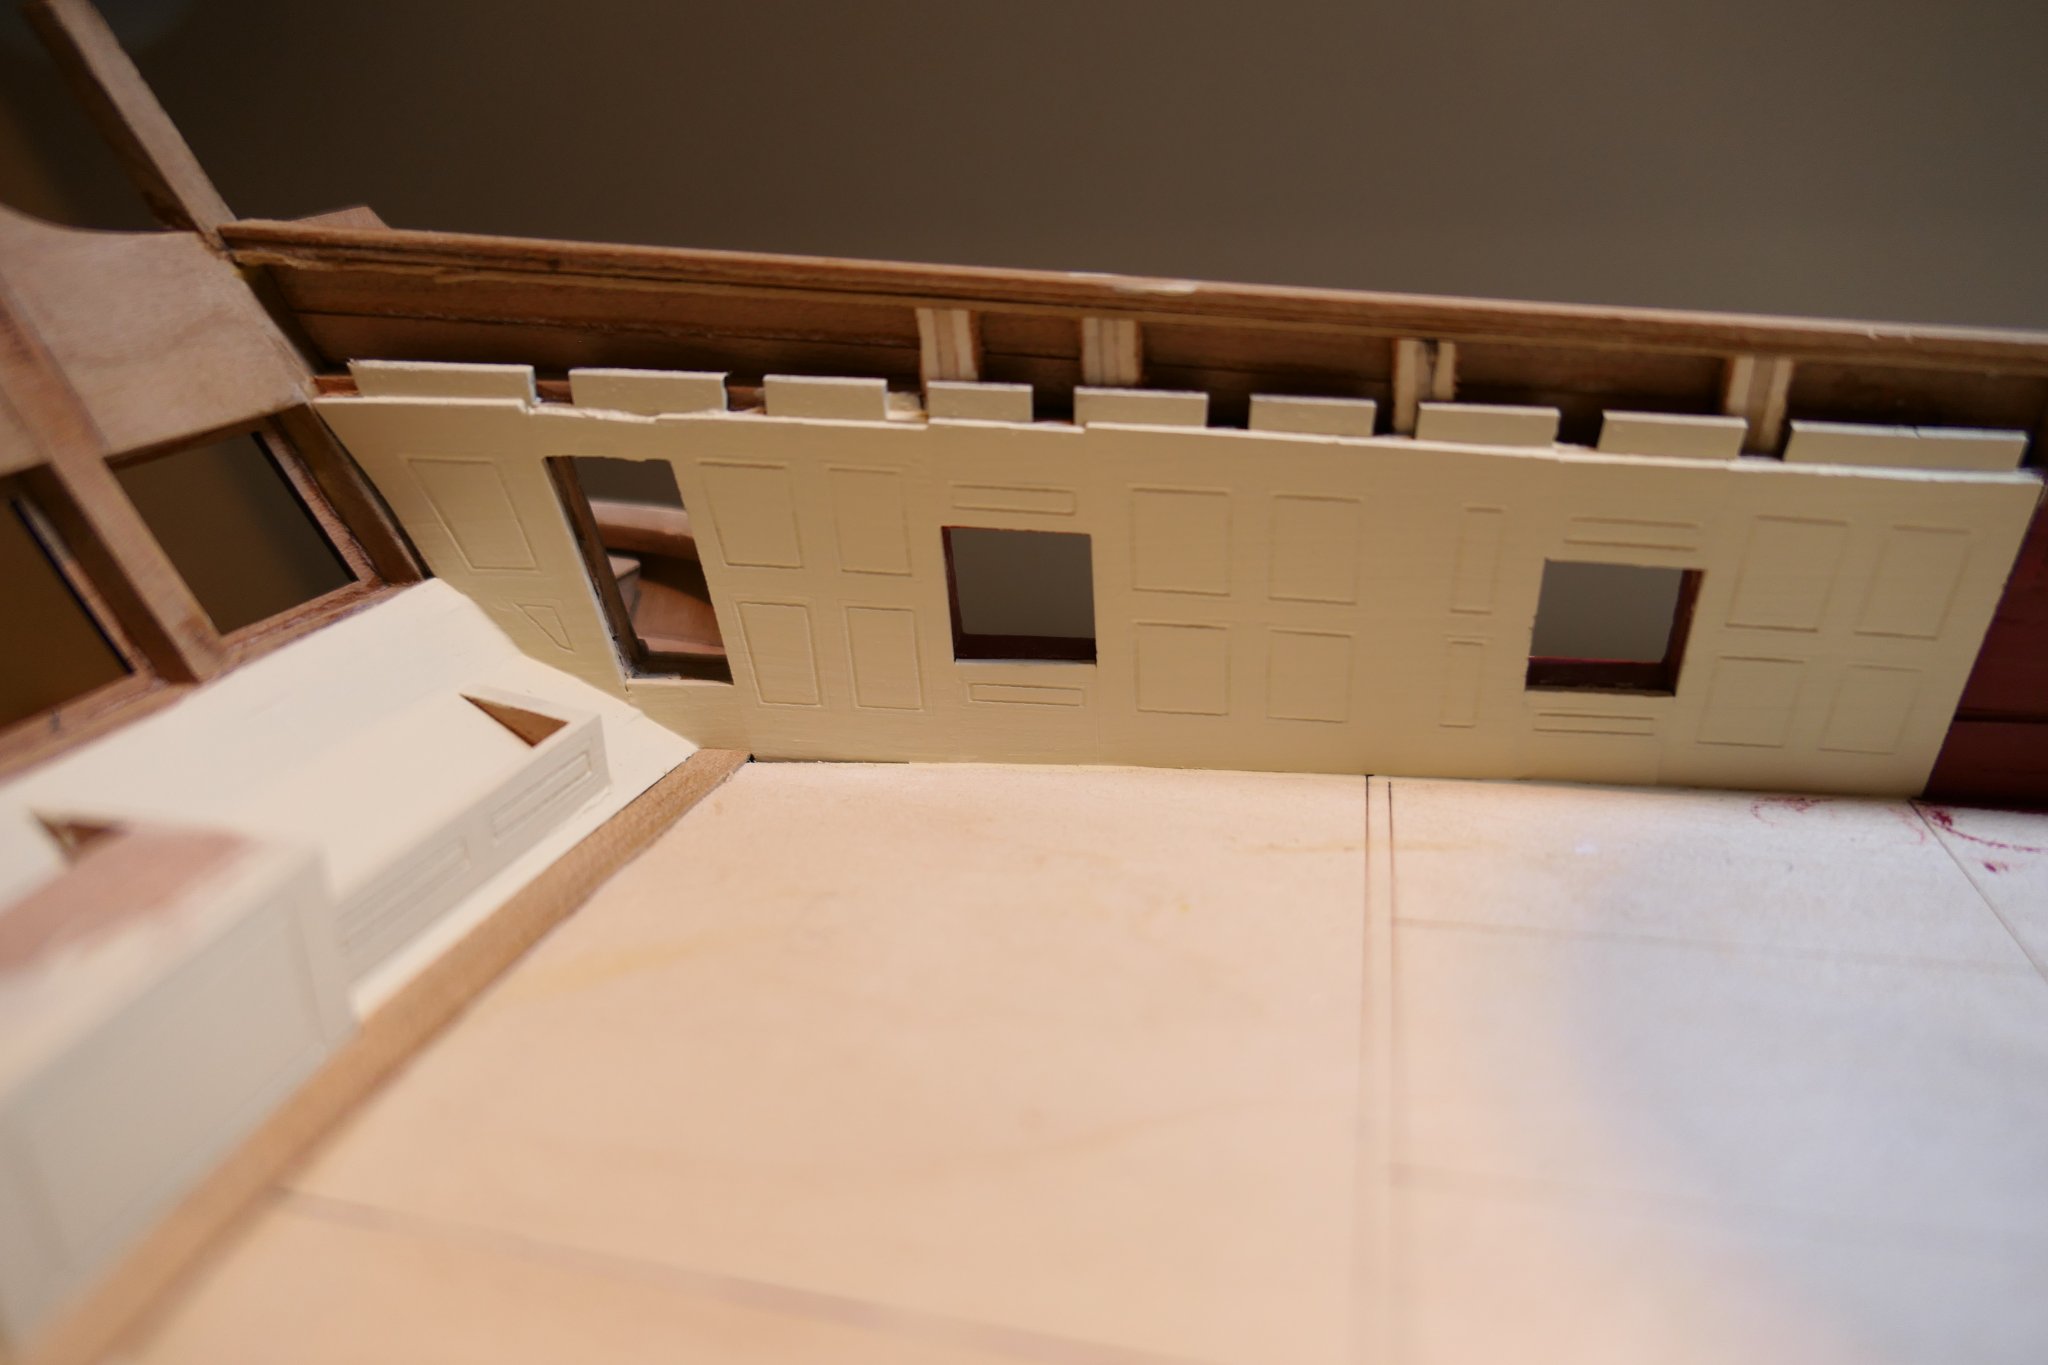
The interior is underway. I painted the windows white on the inside. The panelling is ivory.
.thumb.JPG.a37443171c98e278bce8d8ee14783da0.JPG)
I found it easier to glue together the centre part of the aft bulkhead and the cabin divider.

.thumb.JPG.b10dcbbbc6159bae3a0a268849a891b7.JPG)
-
Hi Steve. Removing the rudder is a really good idea. I didn't - and in a careless moment, pulling the boat towards me, I heard a crunch and ended up with the rudder in my hands. Fortunately Chuck is sending me replacement hinges along with my chapter 7 parts but I wish I'd been more careful.
All the best
Fred
- FrankWouts and CaptMorgan
-
2
-
This is looking superb Bob.
Surely after going to all that trouble rigging the canons (I plan to do the same) you will rig the ship's wheel? As to the bit below the quaterdeck you may not see it but you'll know its there. You could regret it if you leave it out Bob!
All the best
Fred
- FrankWouts and Wacom
-
2
-
Nicely done indeed! That looks like the product of hours and hours of very patient work. You must be delighted with how your Winnie is coming along.
All the best
Fred -
Keep it up Rusty. This is going to be a fantastic model - one to be really proud of - when you are done.
Fred
- Rustyj and FrankWouts
-
2
-
Brilliant work JJ - though those bolts an the mast partners definitely had too many shredded wheats for breakfast!
Fred
- scrubbyj427, bdgiantman2 and FrankWouts
-
2
-
 1
1
-
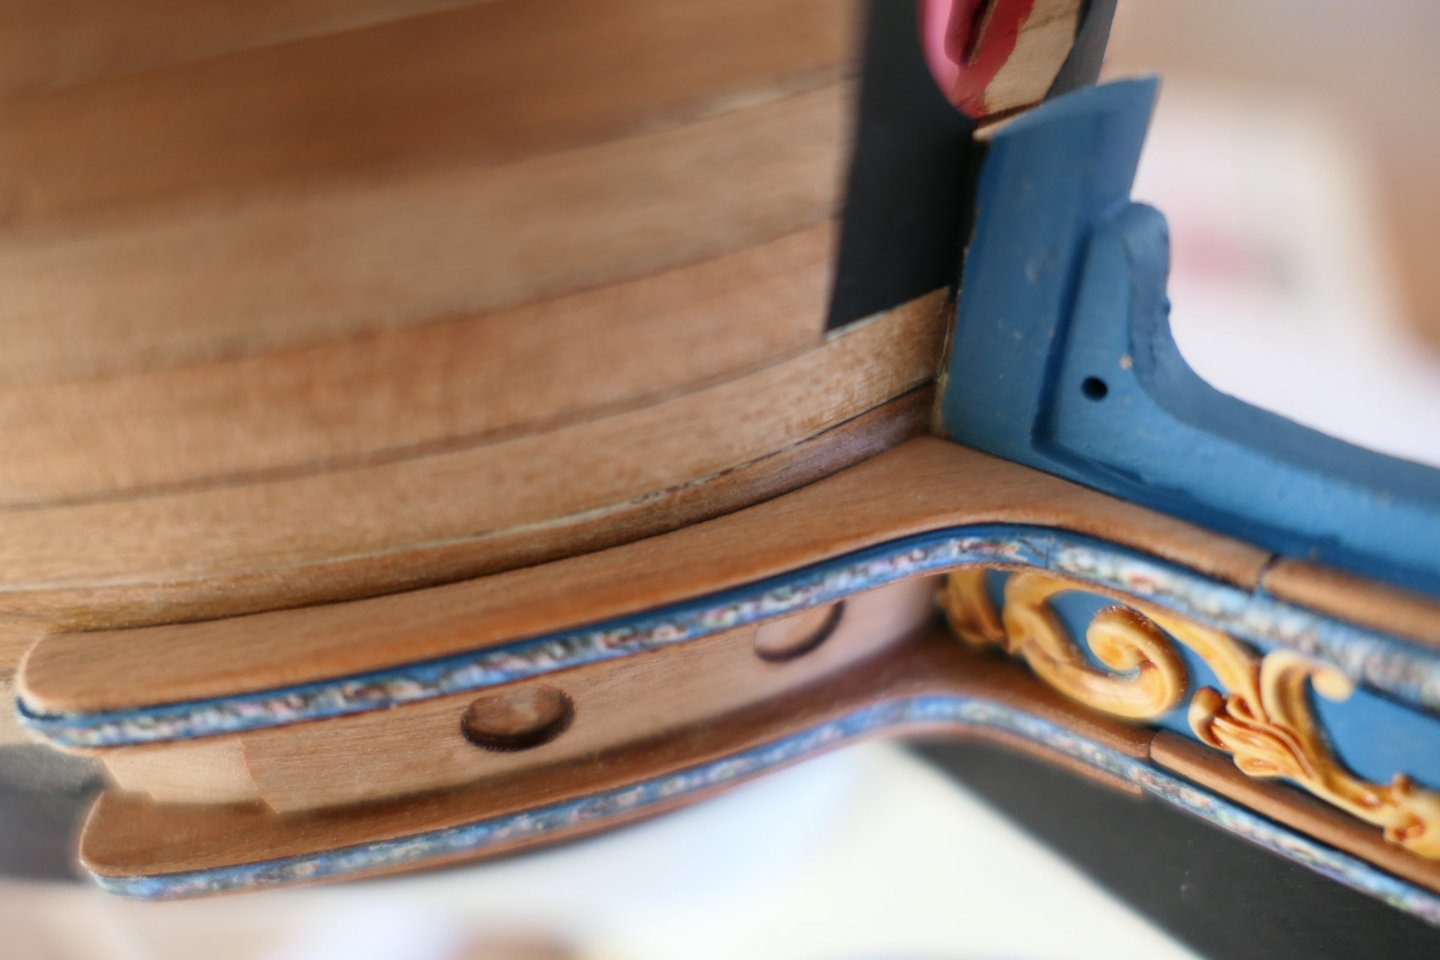
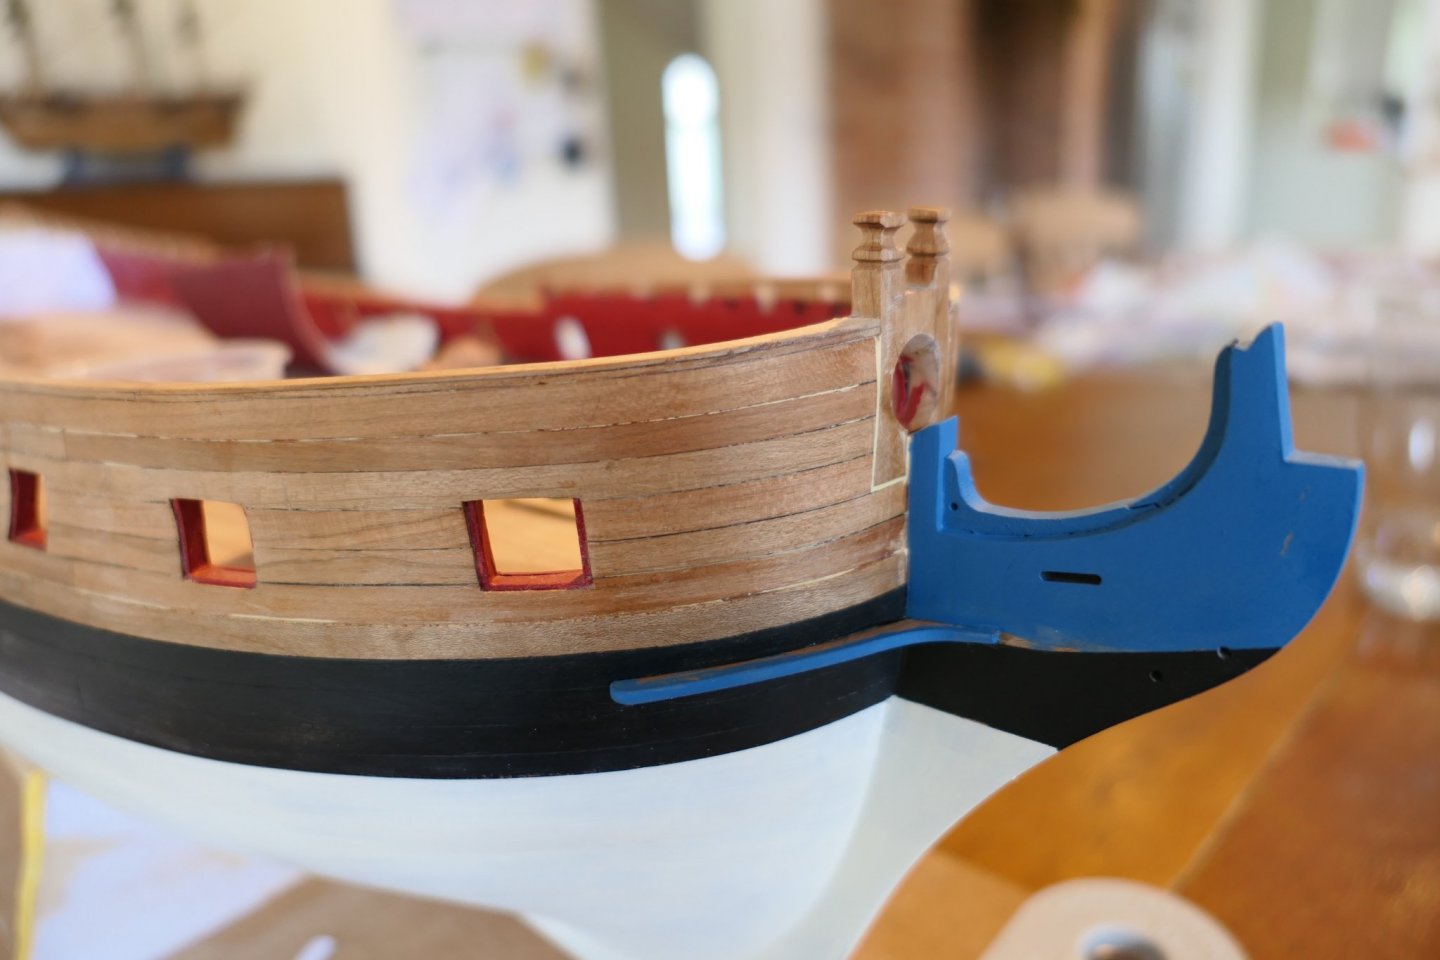
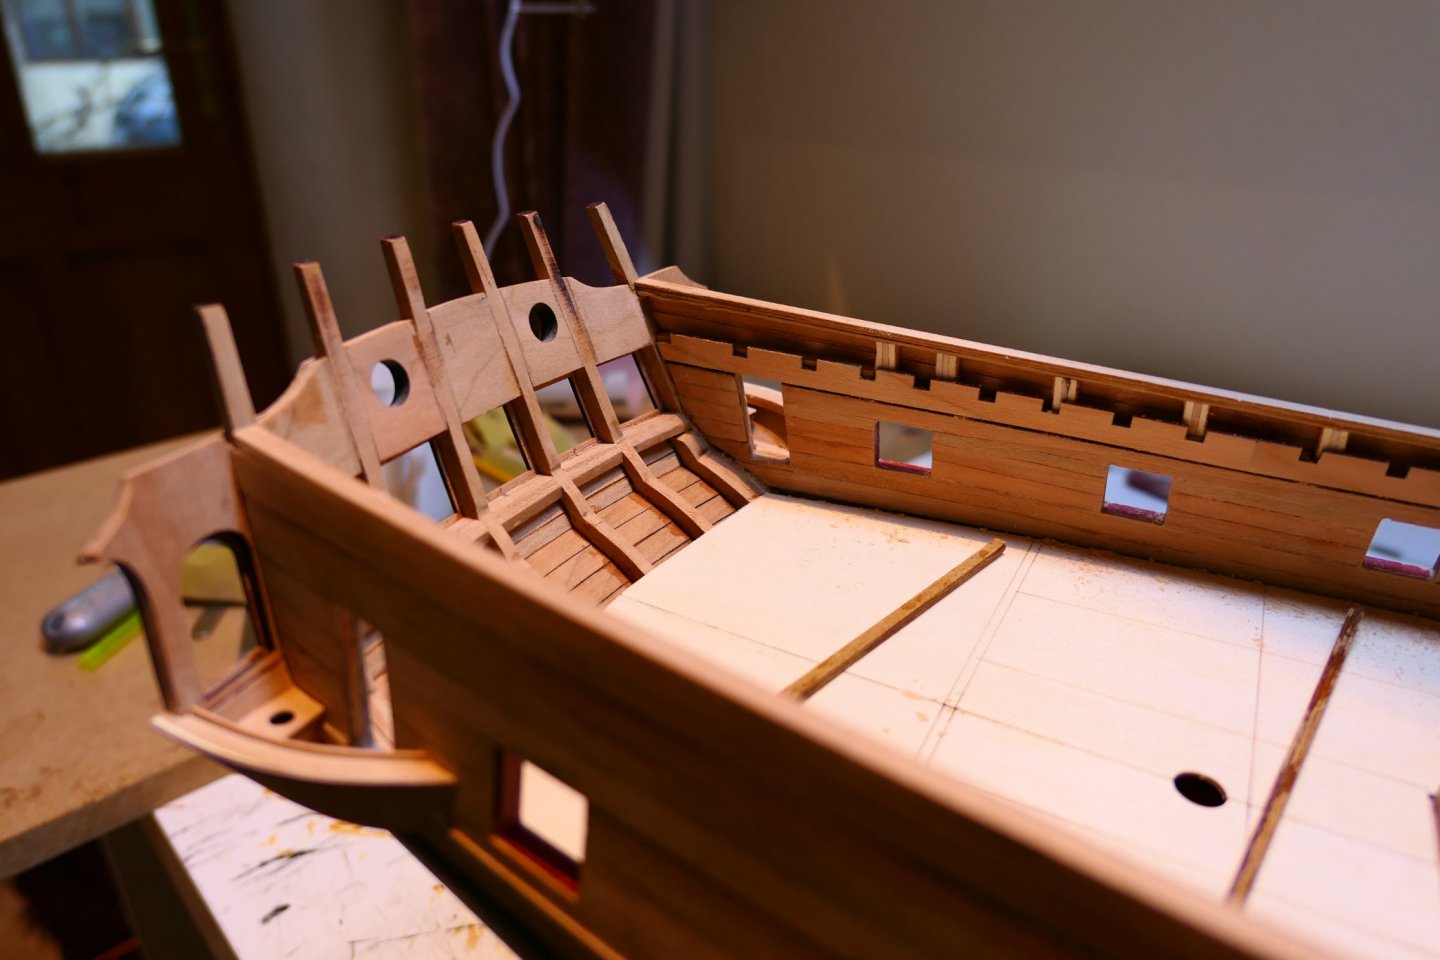
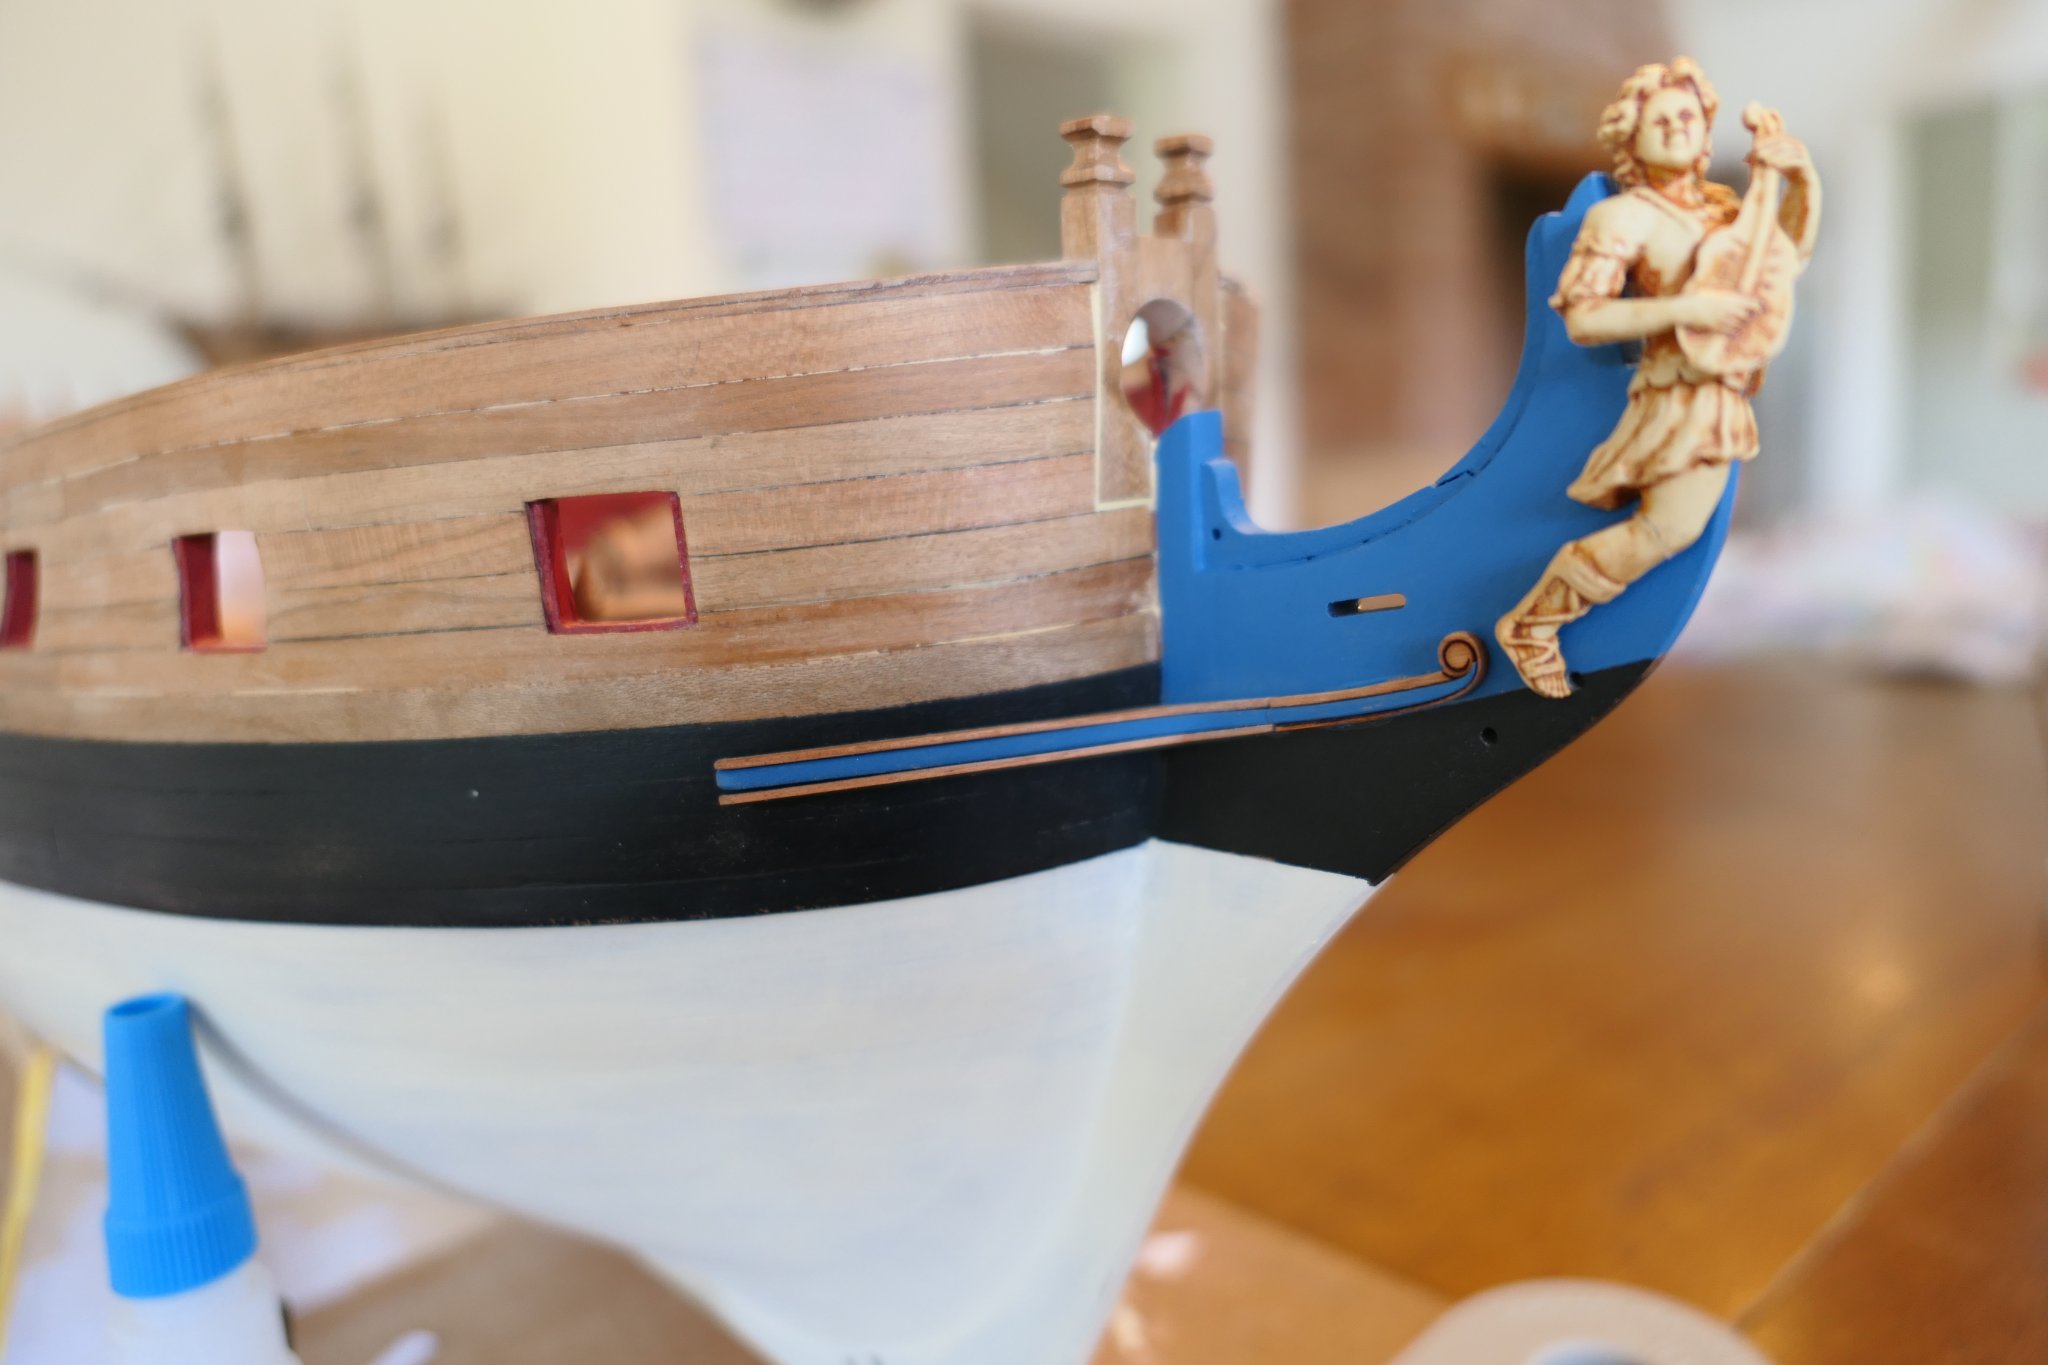
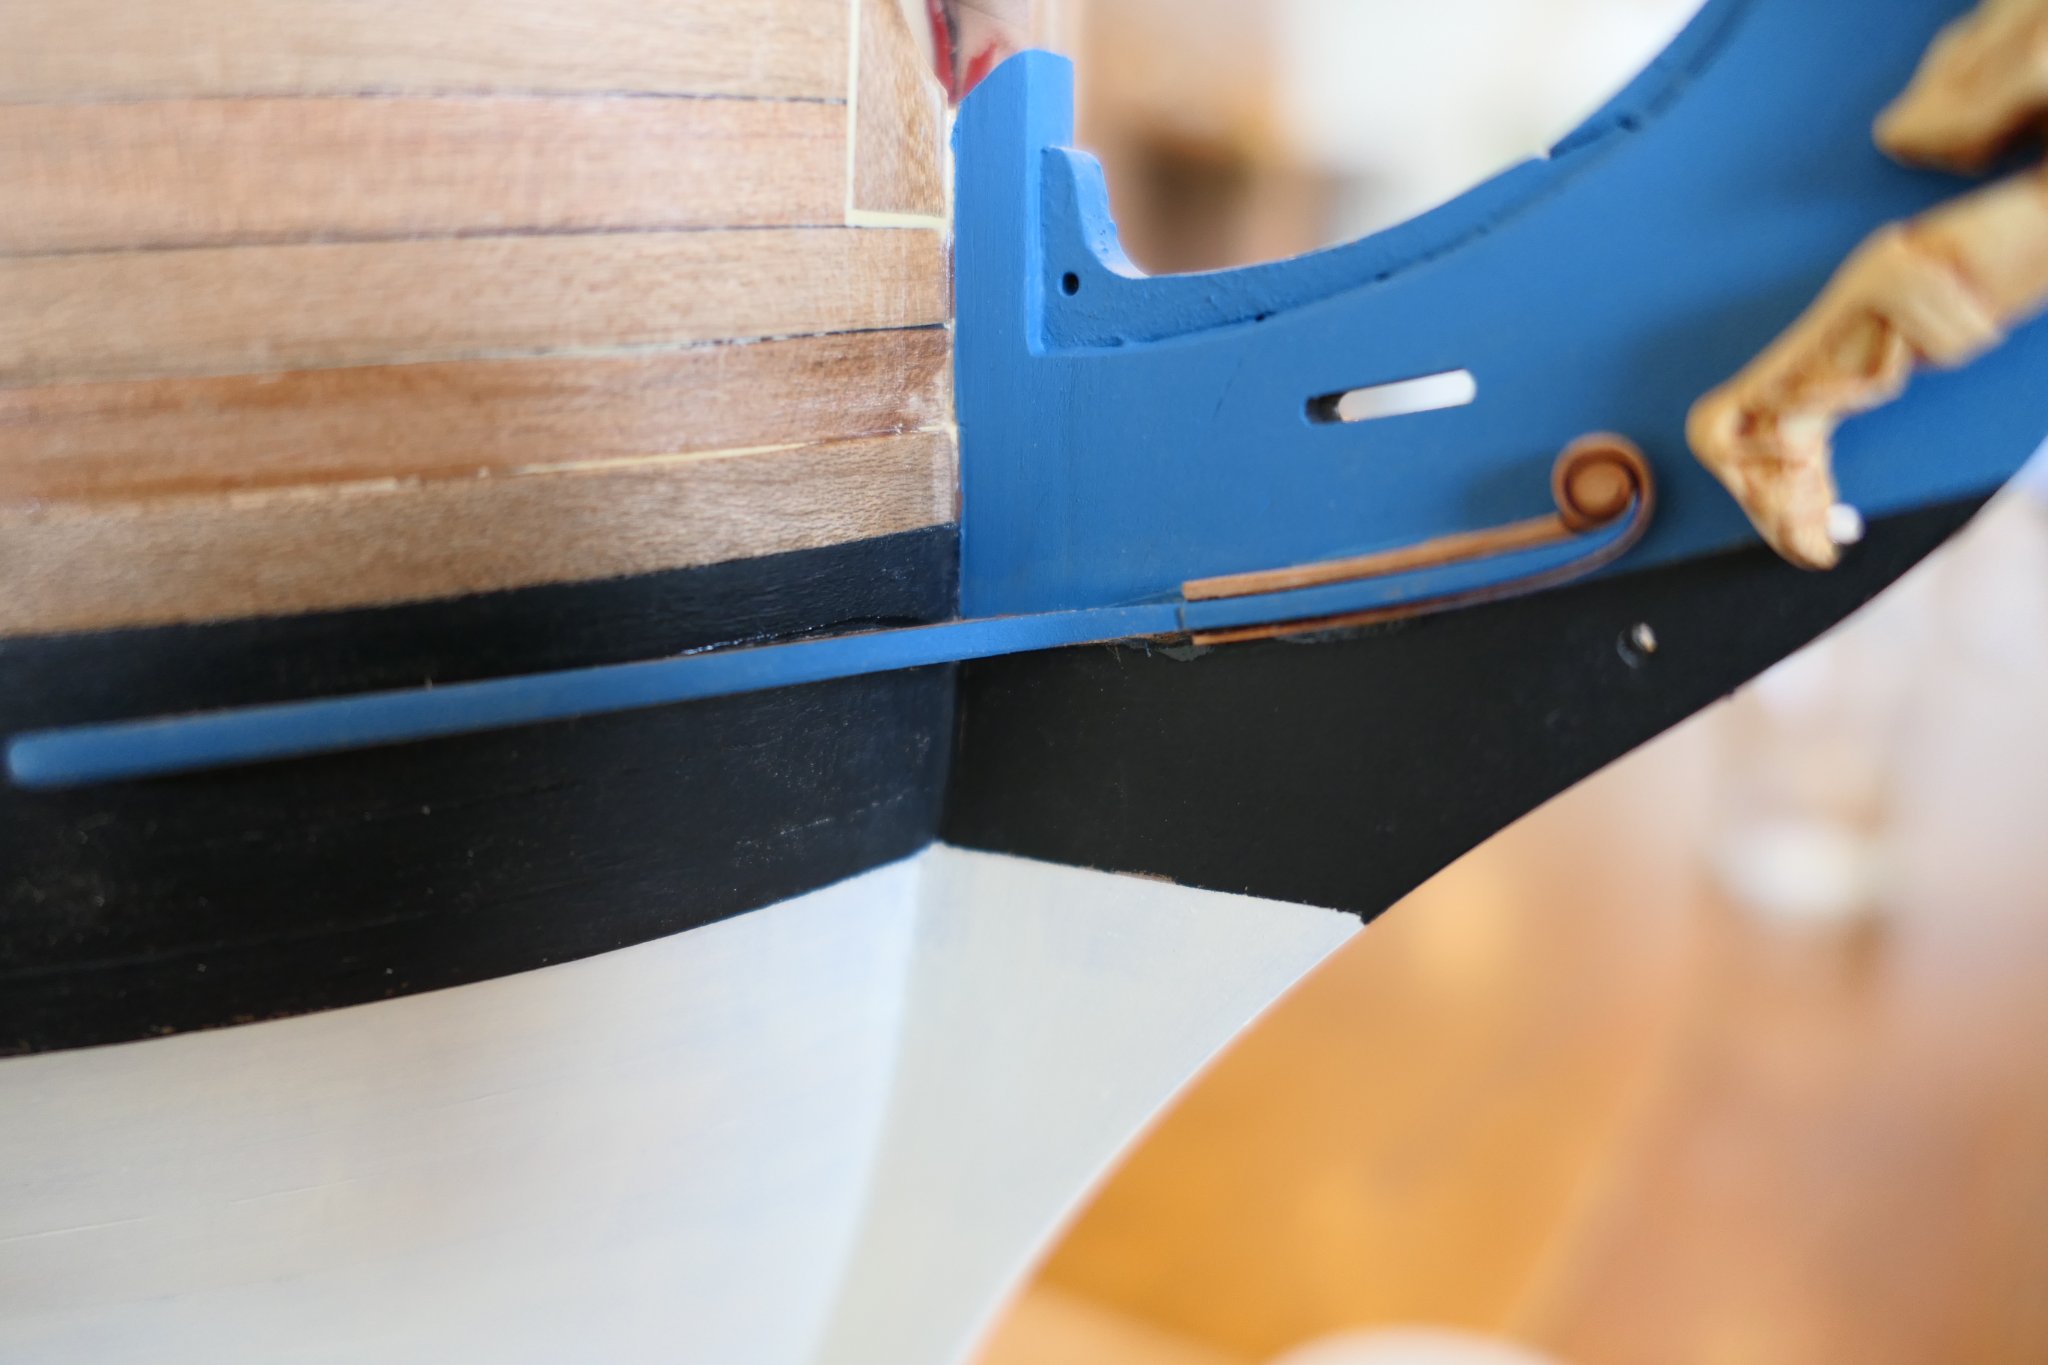
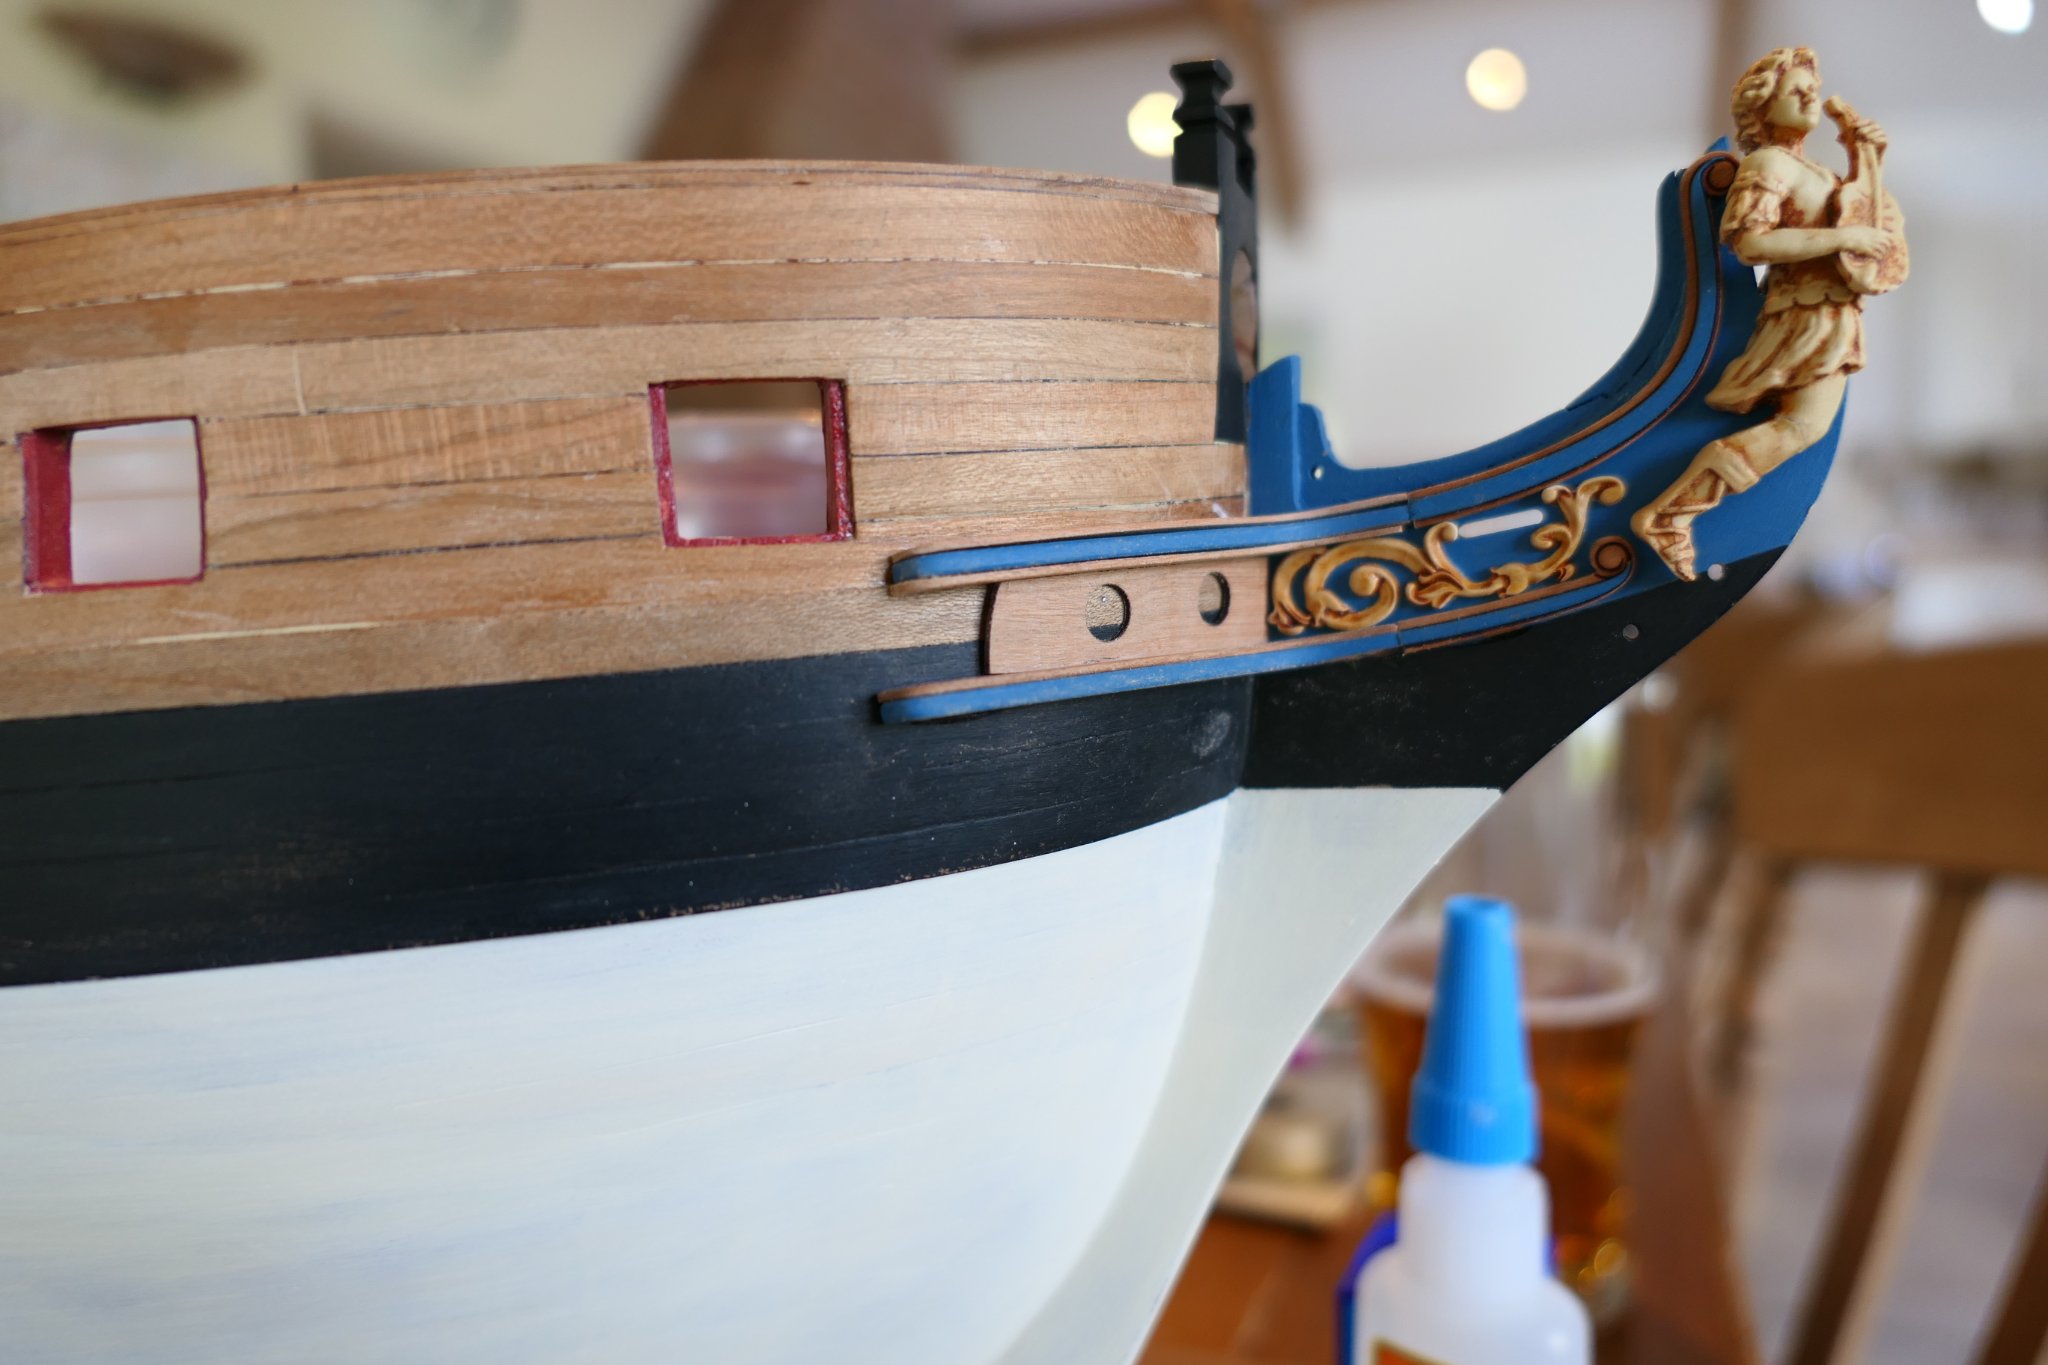
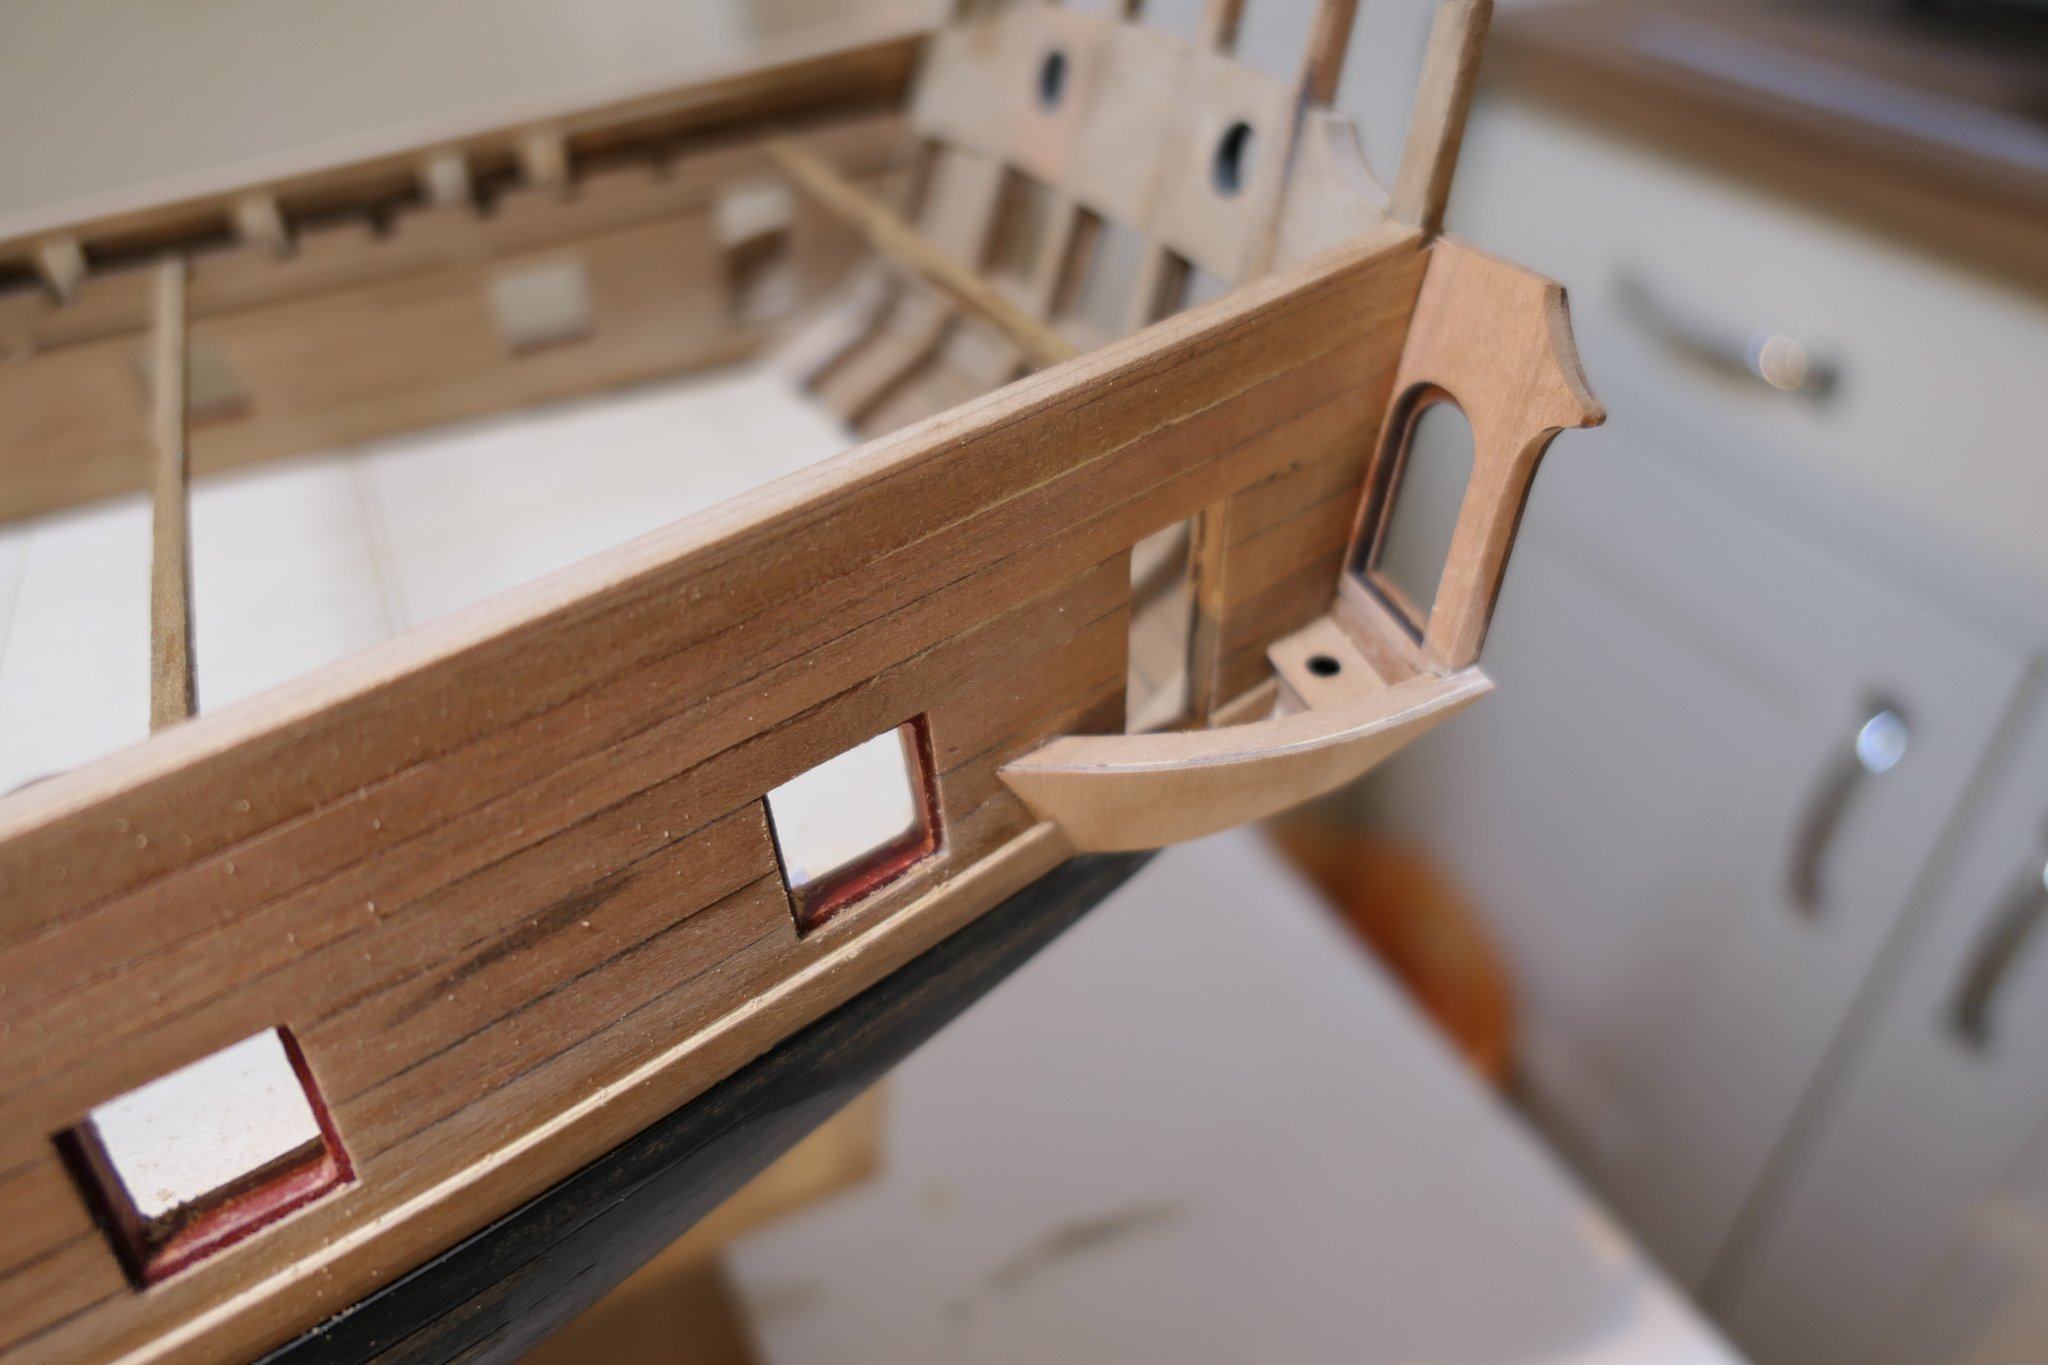
I had a go at the cheeks and hair brackets and I'm very pleased with the outcome.
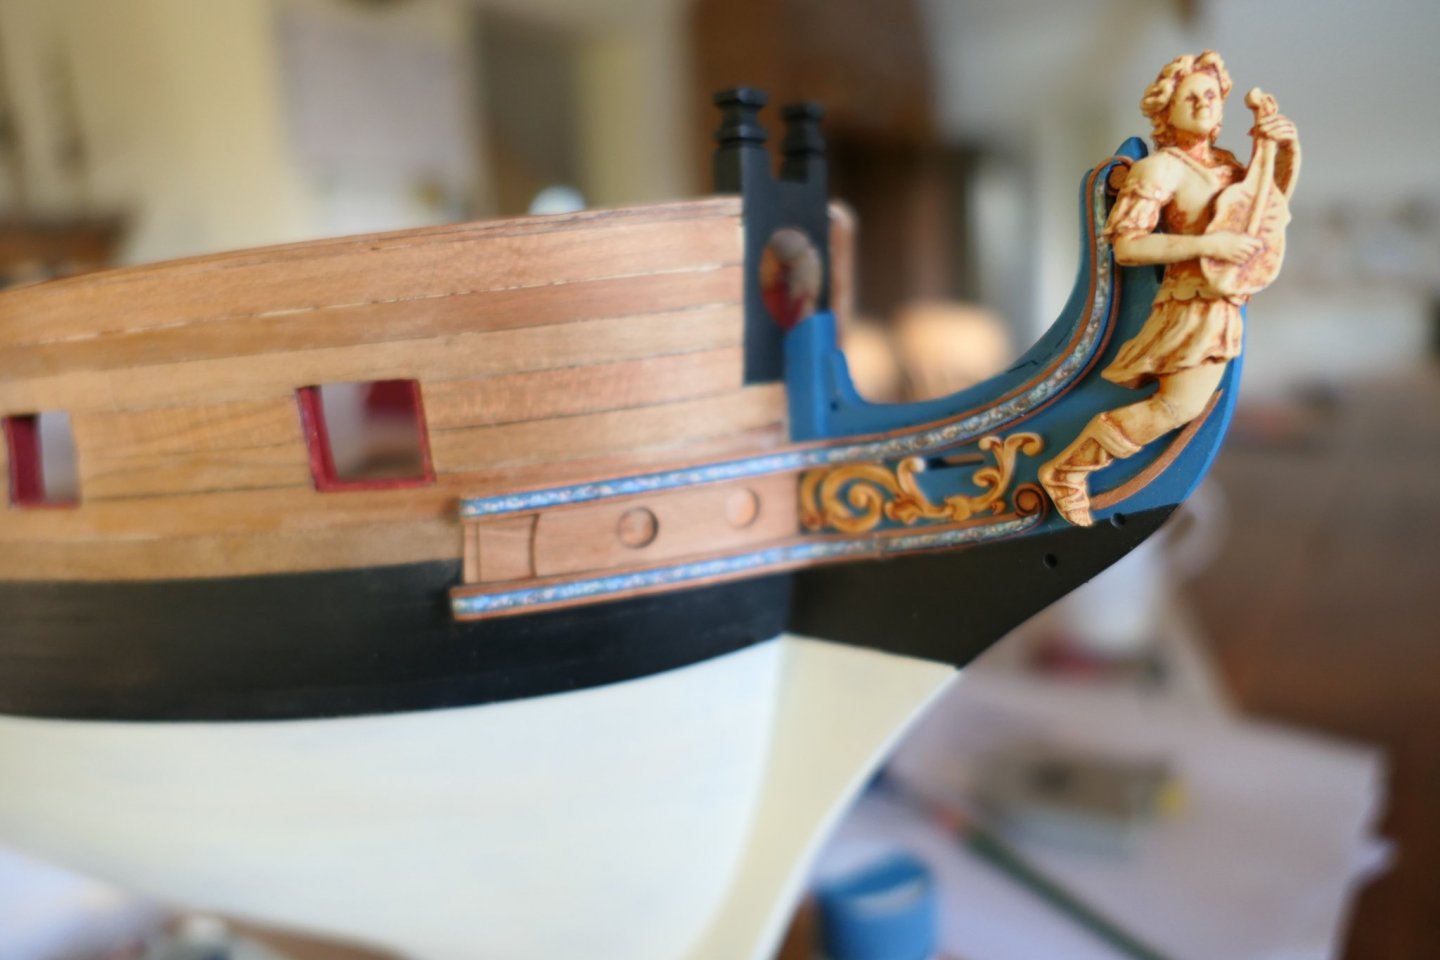

Rather than make up the cheeks off the ship I started with the middle section and fixed it in position with the hair bracket. The top and bottom sections of the cheek are not yet glued in.


Then the top cheek and hair bracket. I wish I'd started with the top bracket as that must (I think) line up with the top of the stem. I put my bottom cheek a couple of millimetres too high and got very cramped for space to fit the resin moulding - but I got it in with a bit of filing. I' wasn't sure if the resin piece above the gammoning hole was a casting sprue or meant to be there. I cut it out as I needed the space but I suspect that's incorrect.
Here the hawse hole piece is not glued in.

Then I glued on the friezes. The advantage (as I see it) of not fixing the top and bottom sections of the cheeks is that the friezes can easily be manipulated into position and pressed to follow the bevelled edges of the middle section very easily between thumb and forefinger. Painting the section first also disguises any mismatch between the wood and the paper. I "painted" or coloured the cut white edges of the friezes before glueing so I'd have no white paper showing.
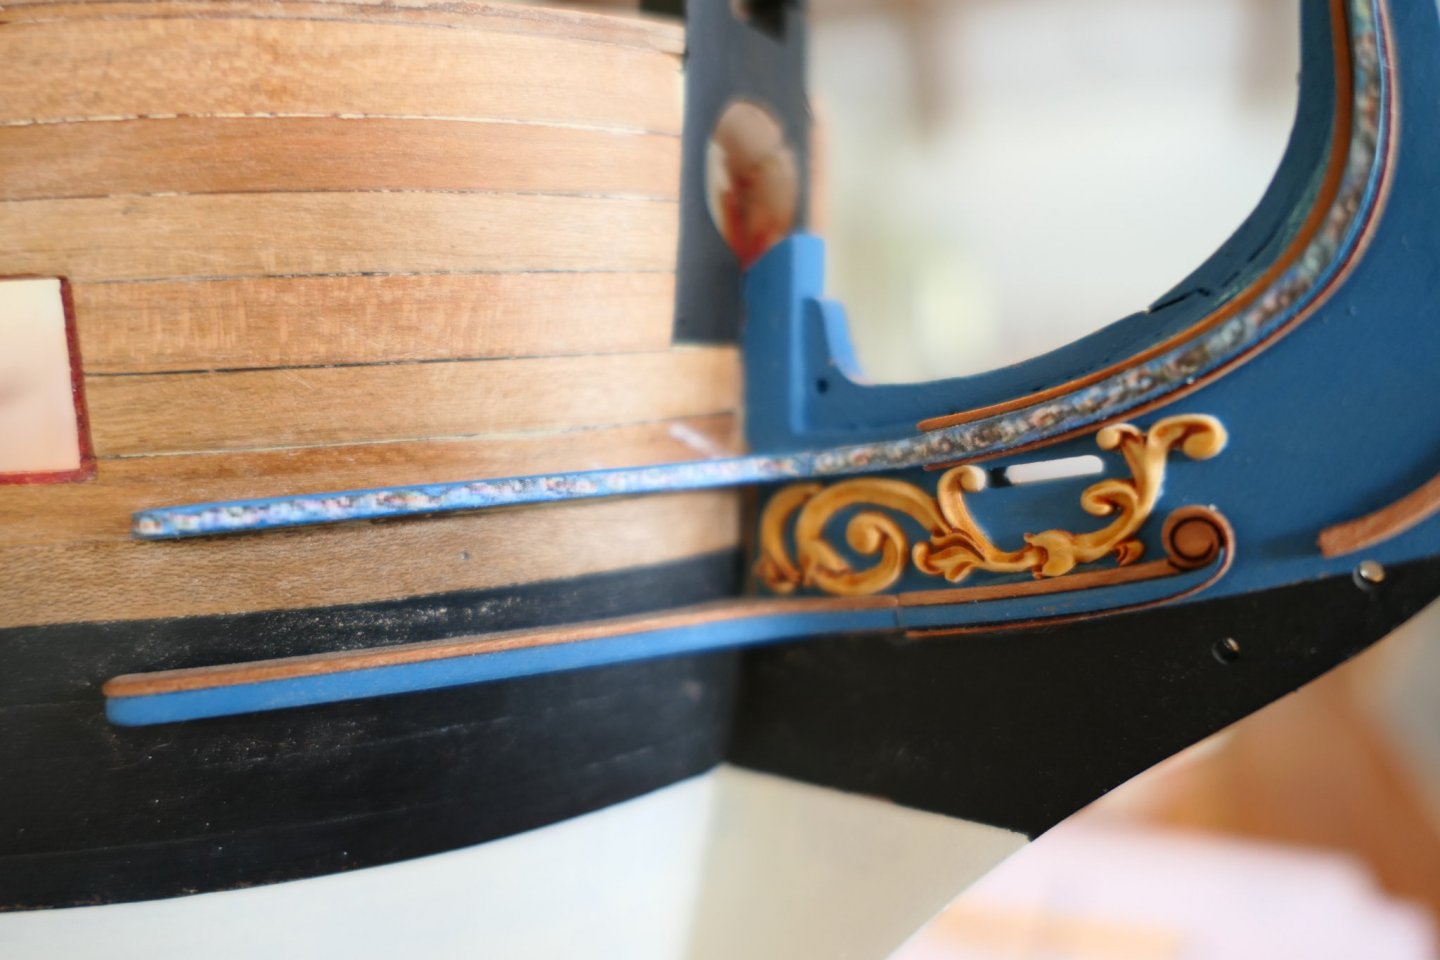
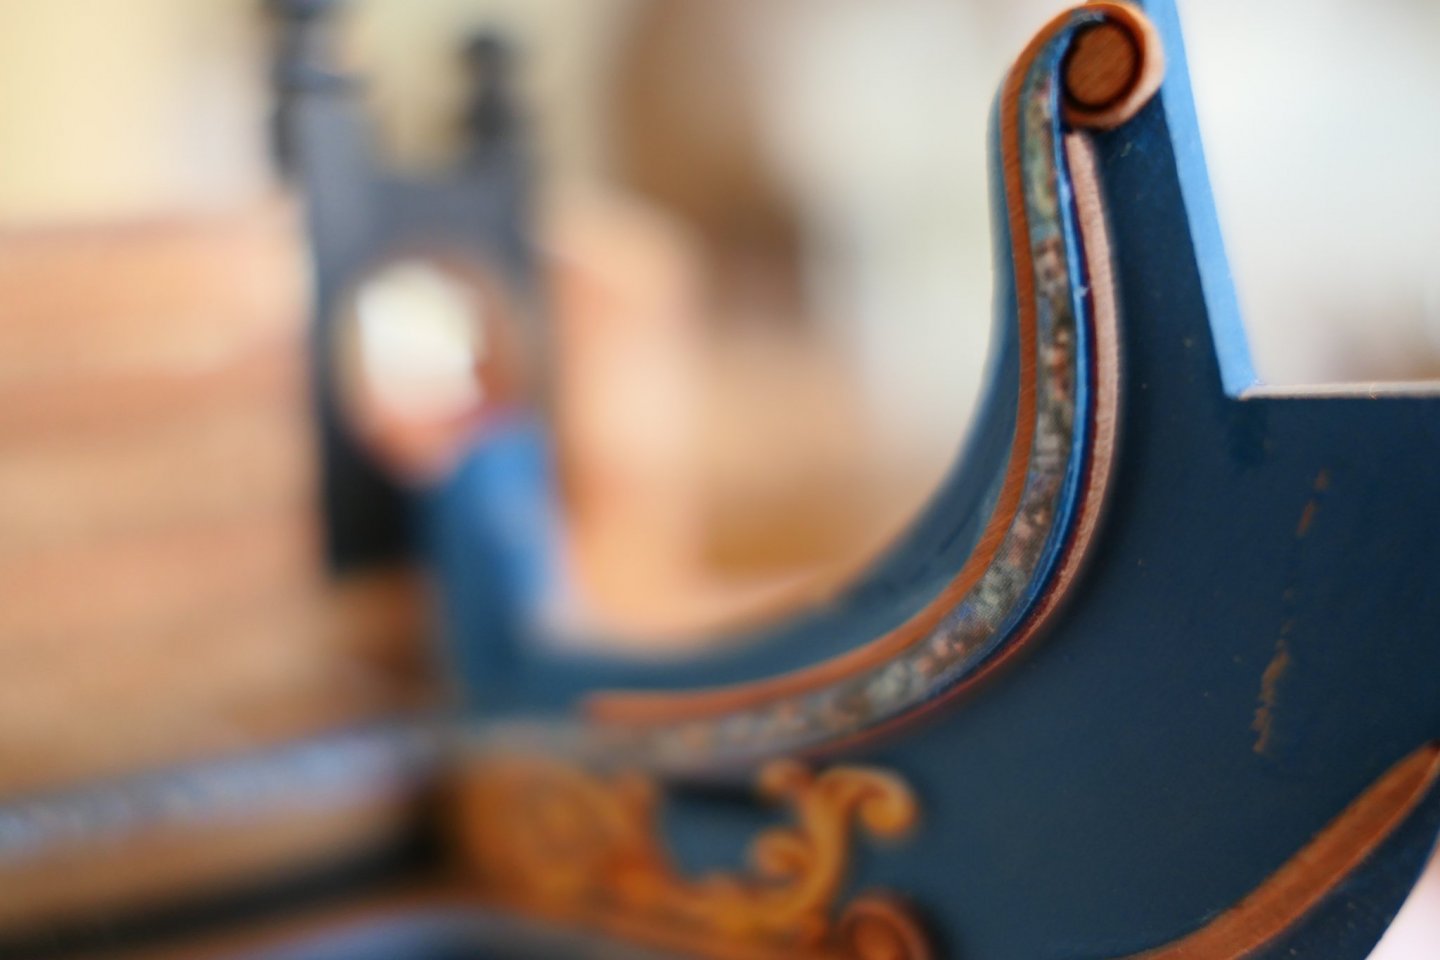
And here is the result. Far from perfect but I'm very happy. The joints between the cheeks and the brackets could have been tighter but I guess much of this will be disguised by the gallery (is that the correct terminology?).
Now for the other side.
The precision of the laser cutting, incidentally, is a marvel.

- oneslim, Rustyj, Ryland Craze and 9 others
-
12
-
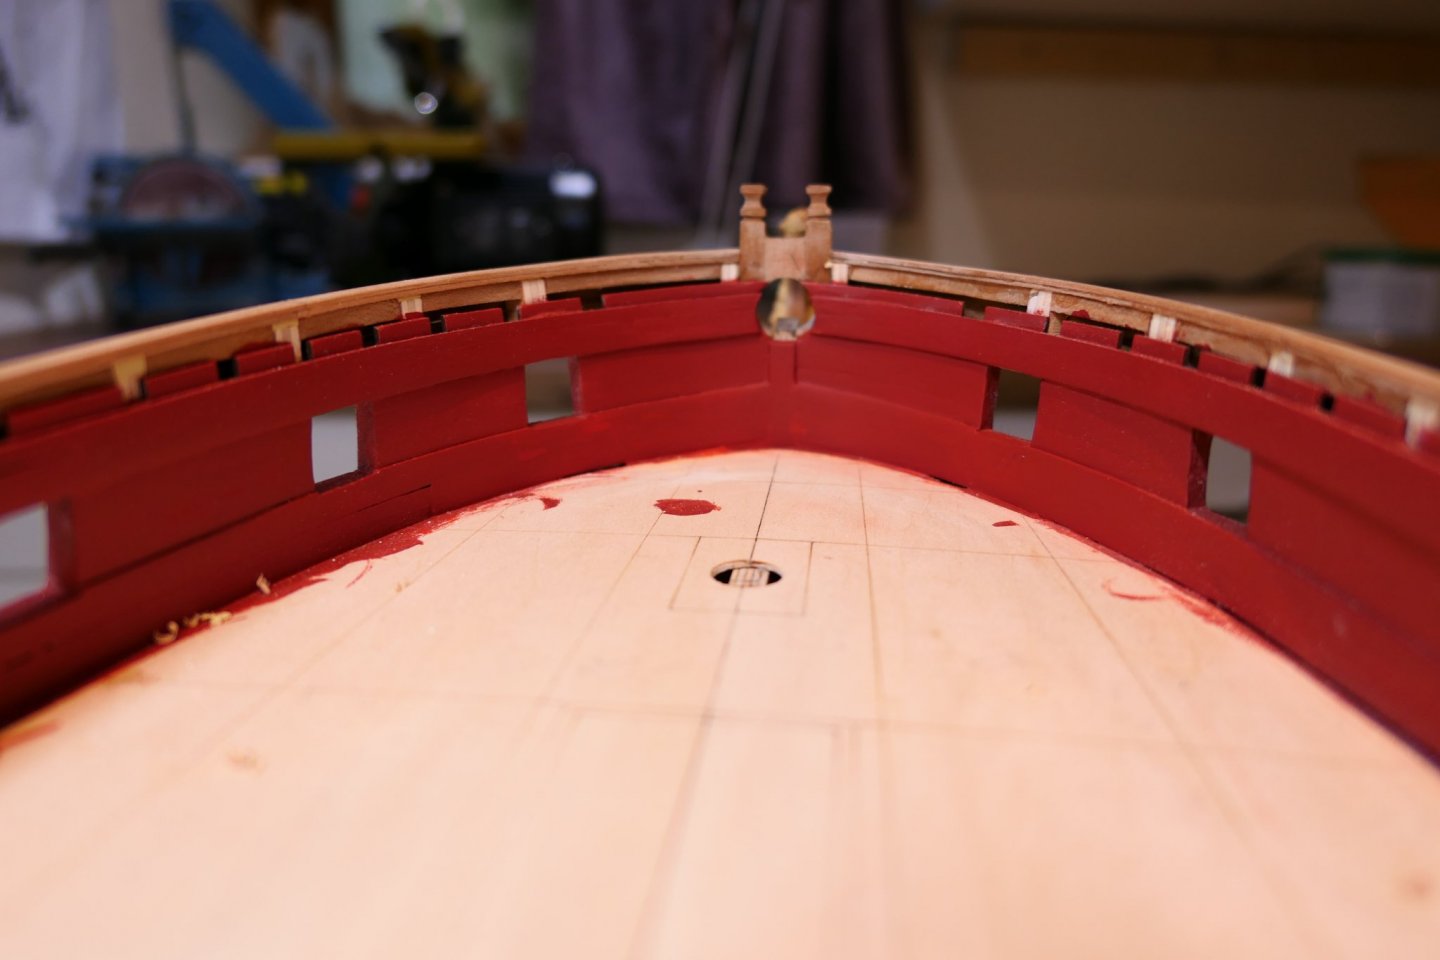
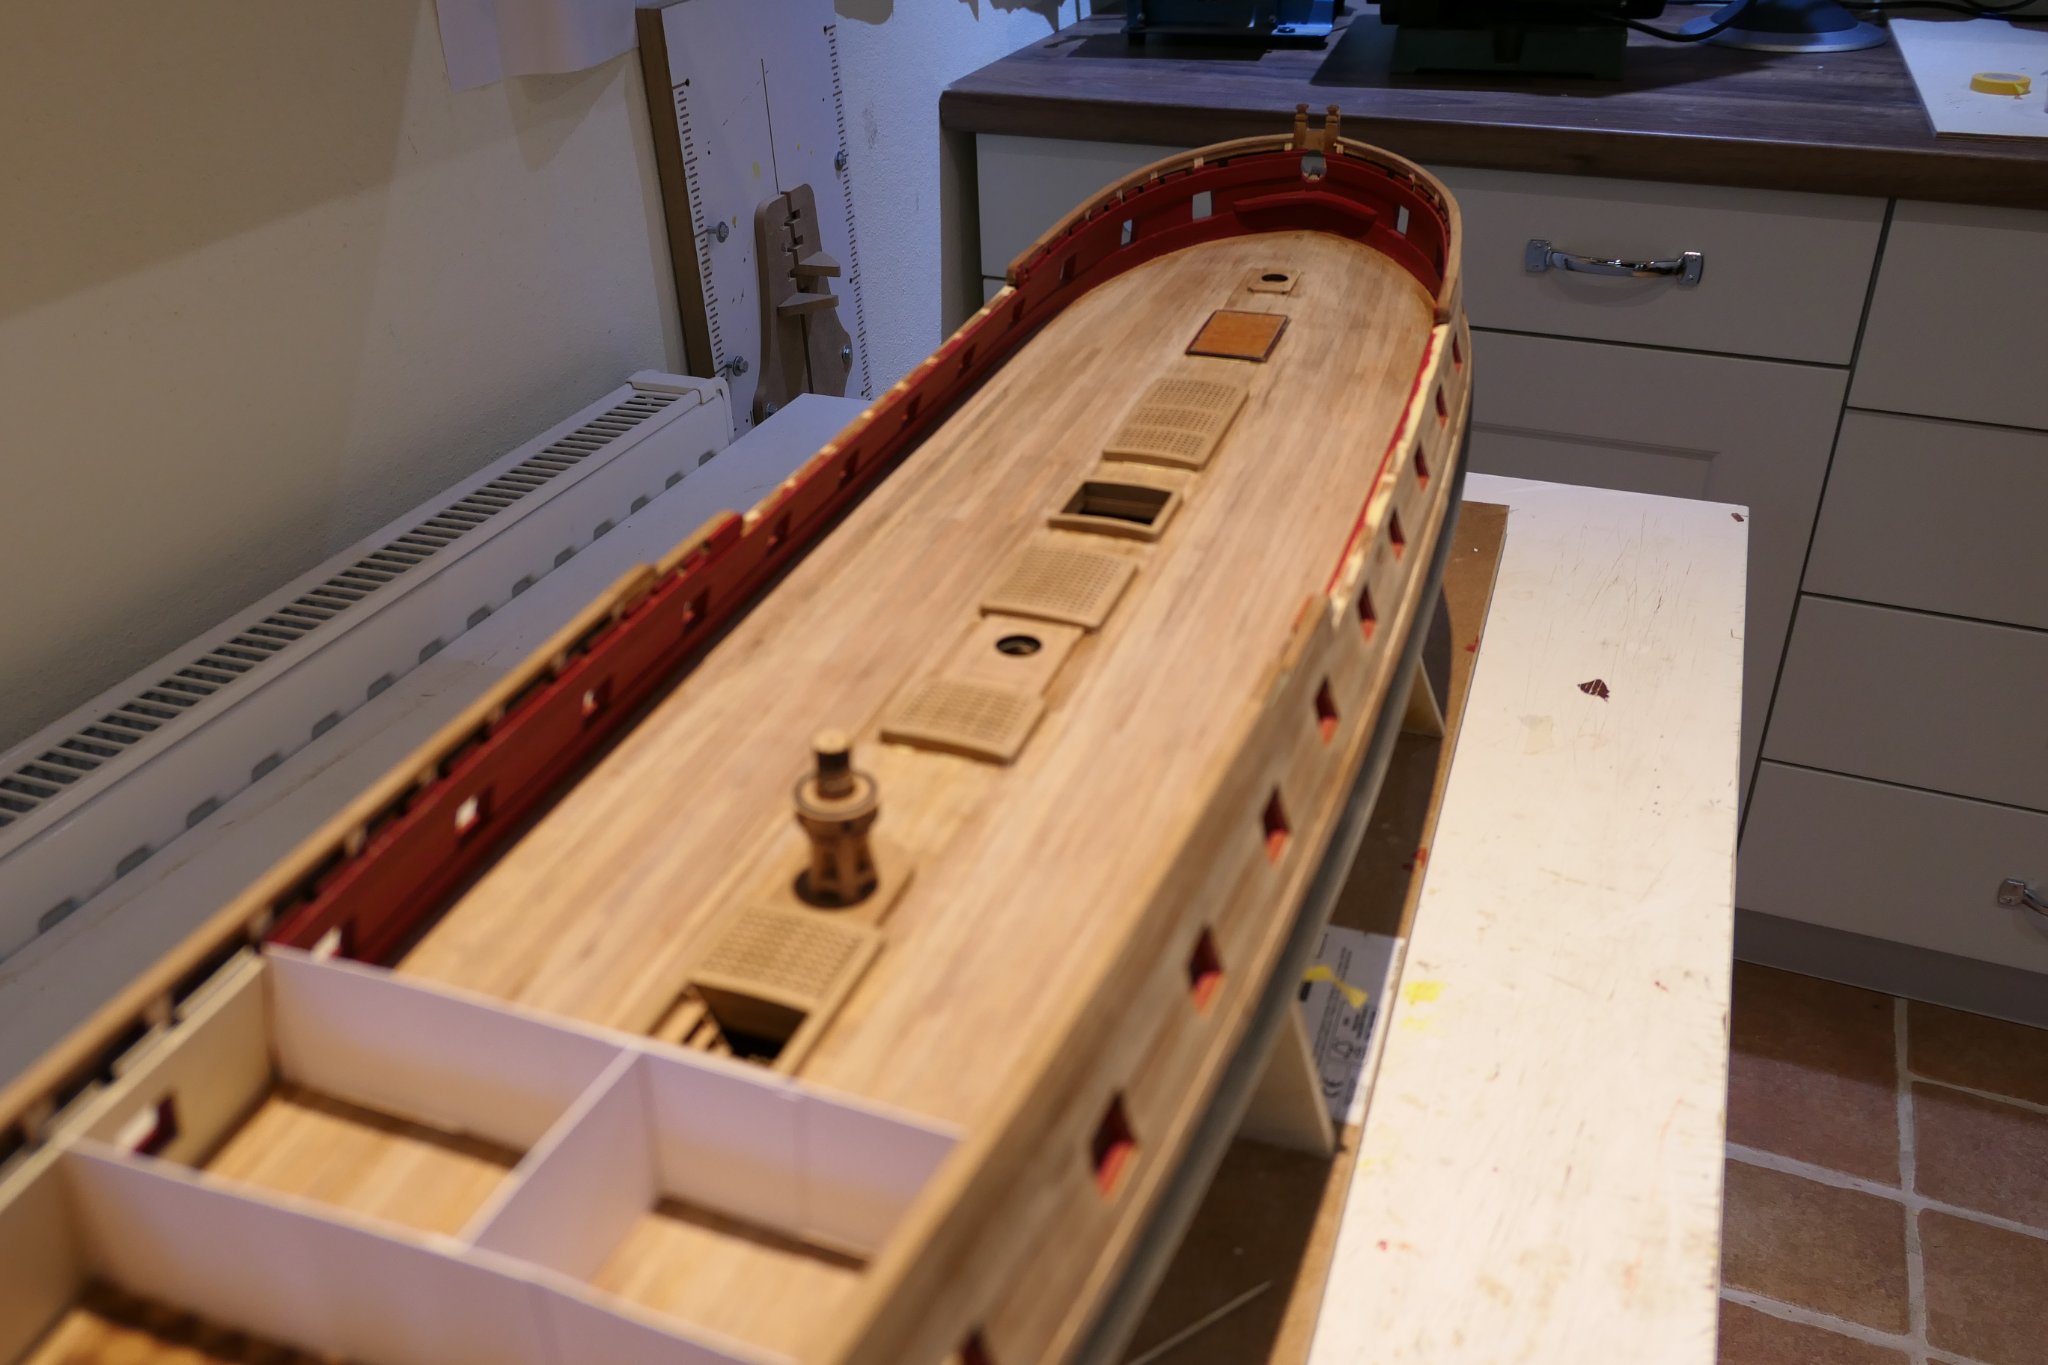
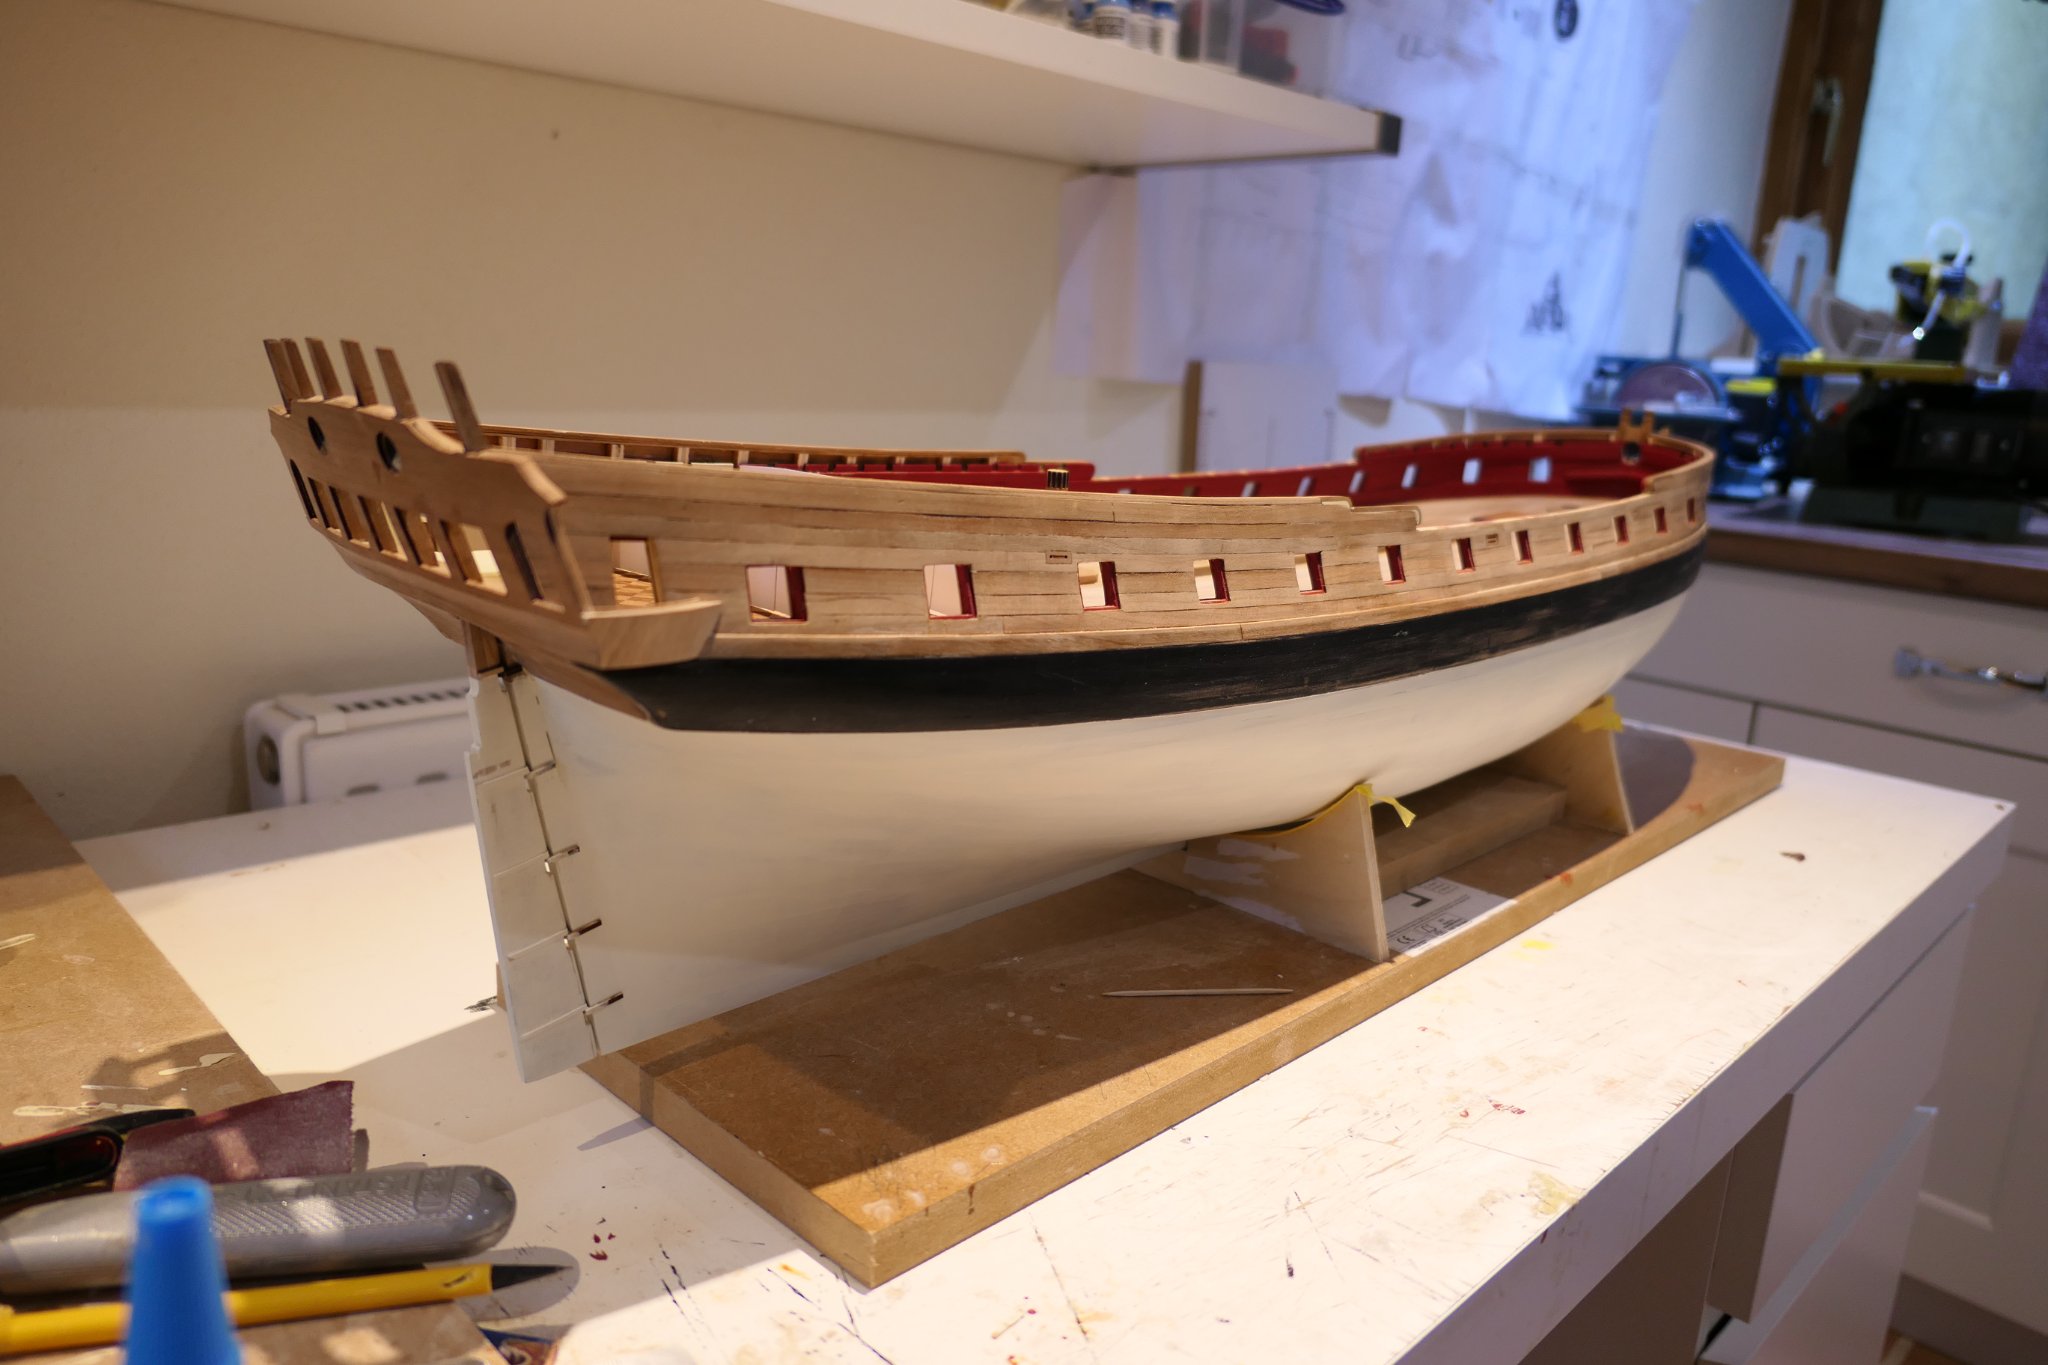
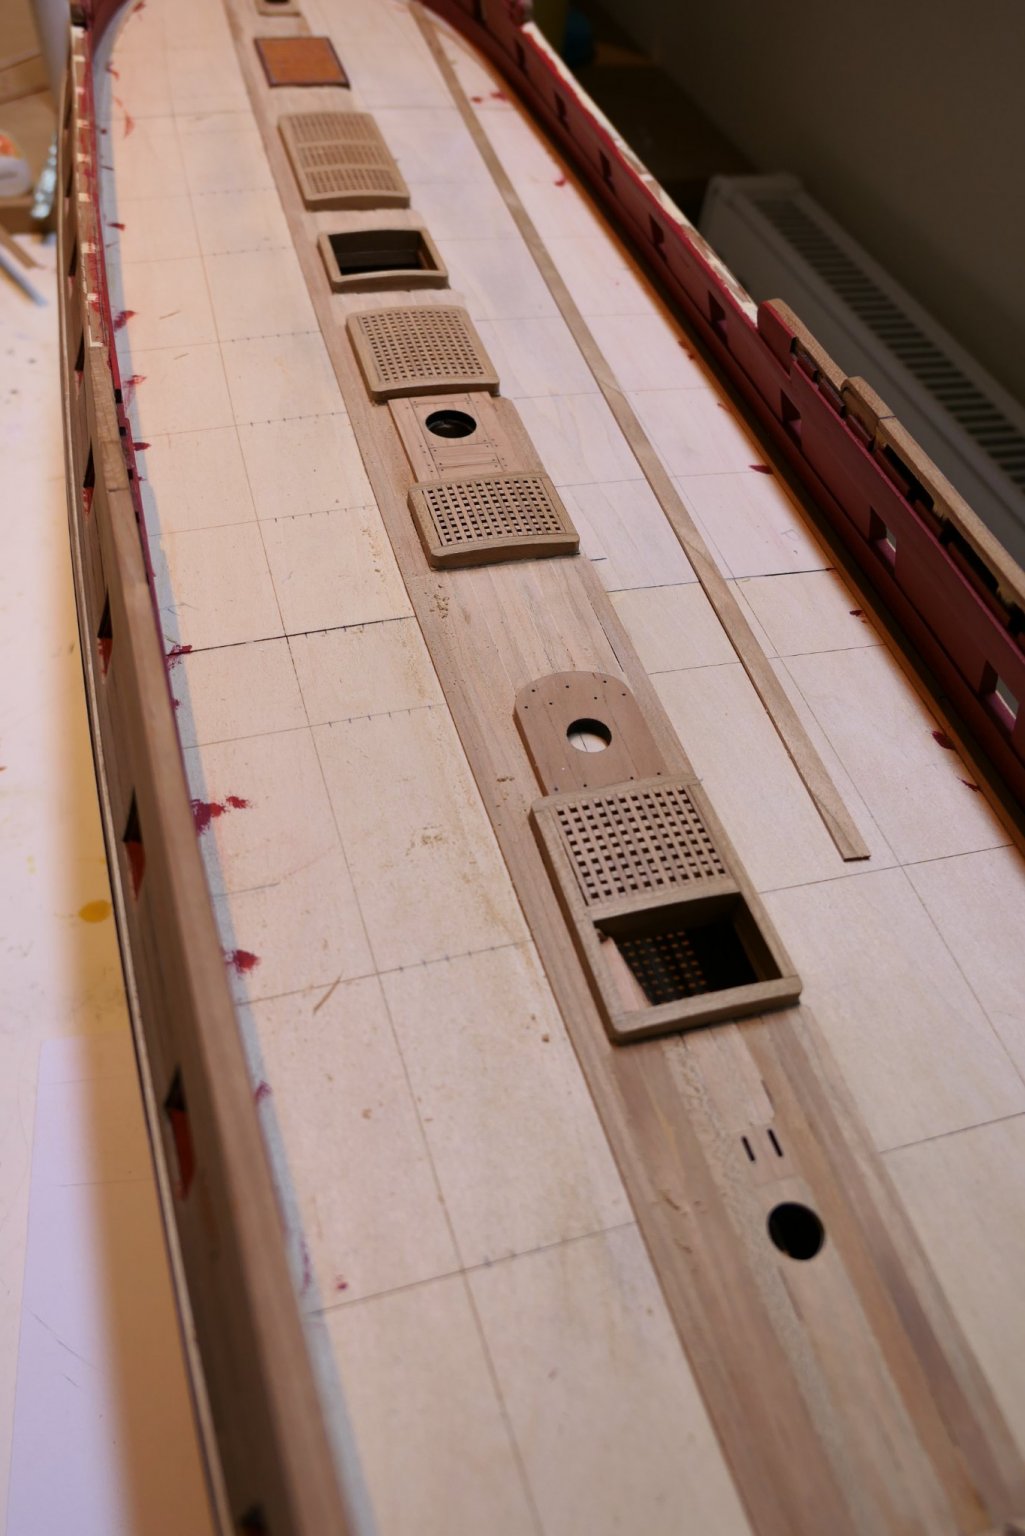
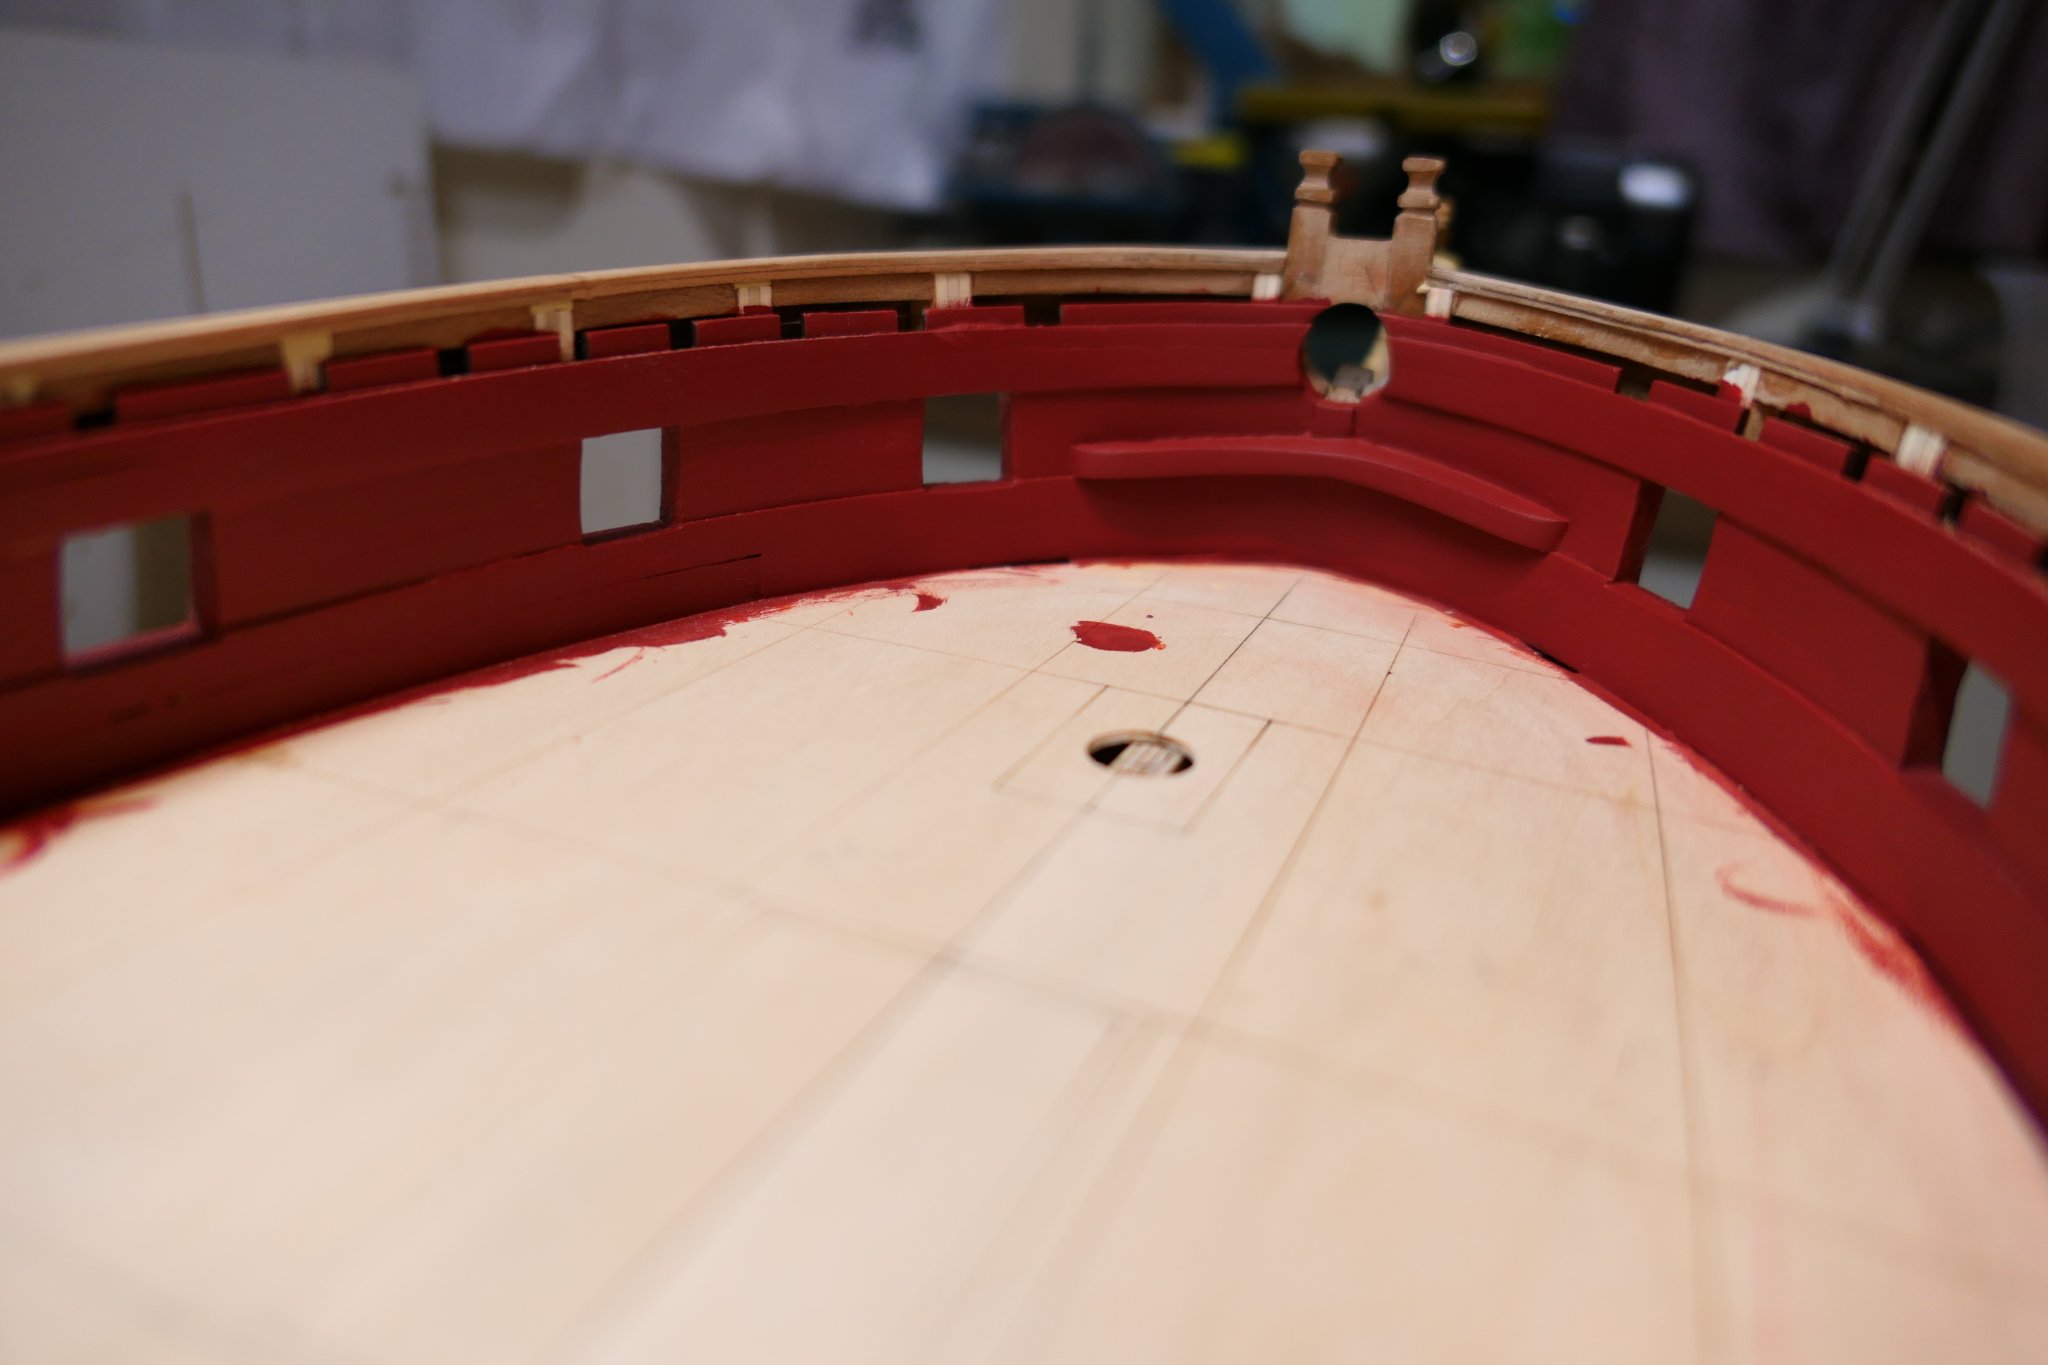
The deck is finally complete. That seems like the last major constructional step.
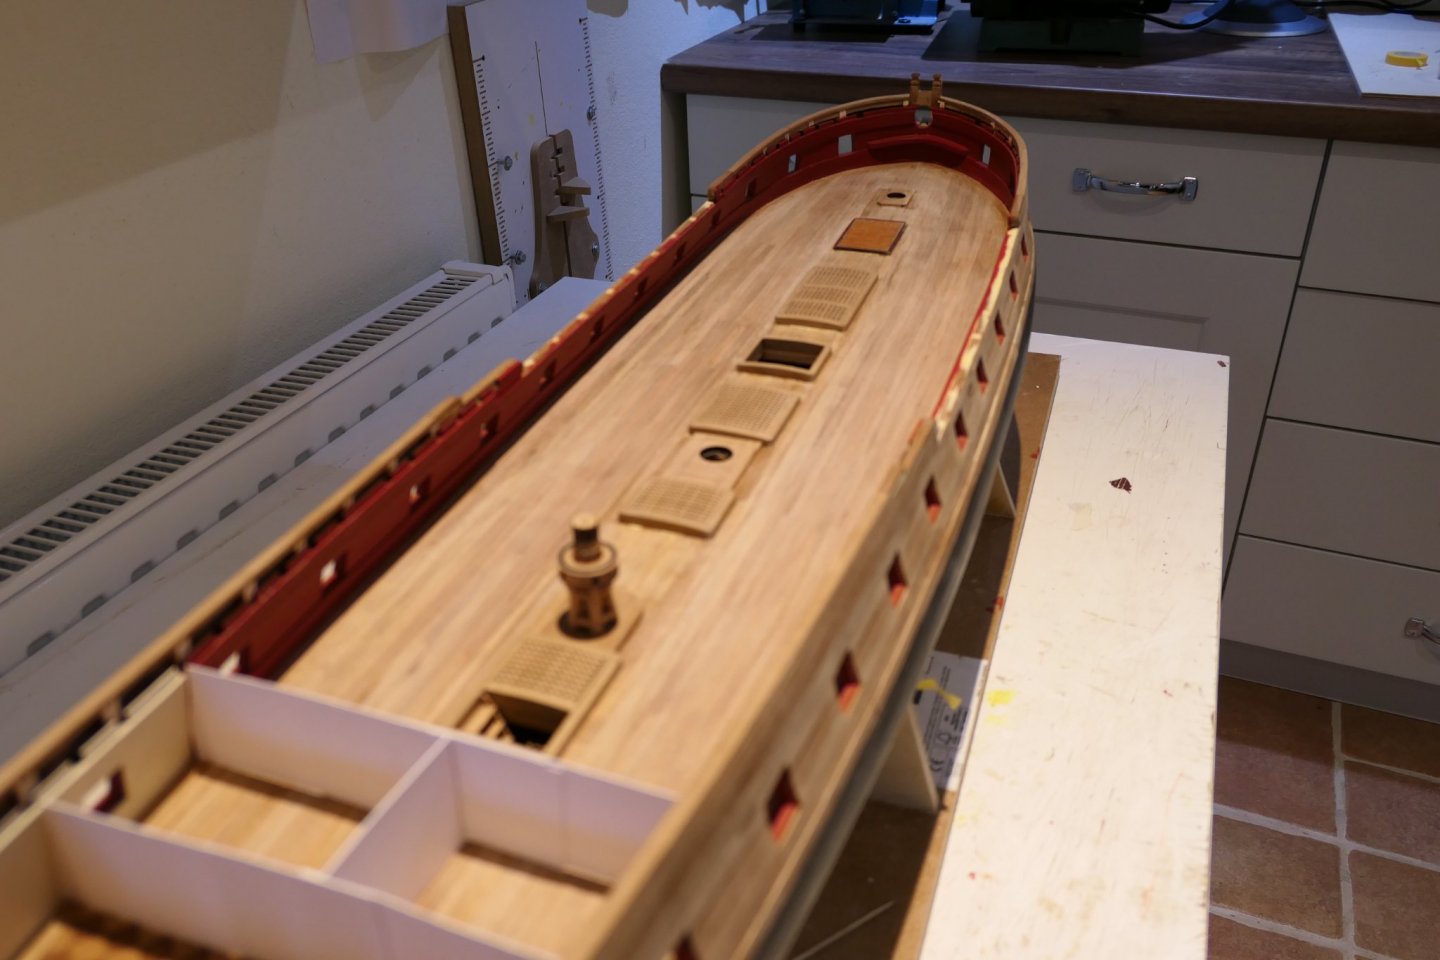
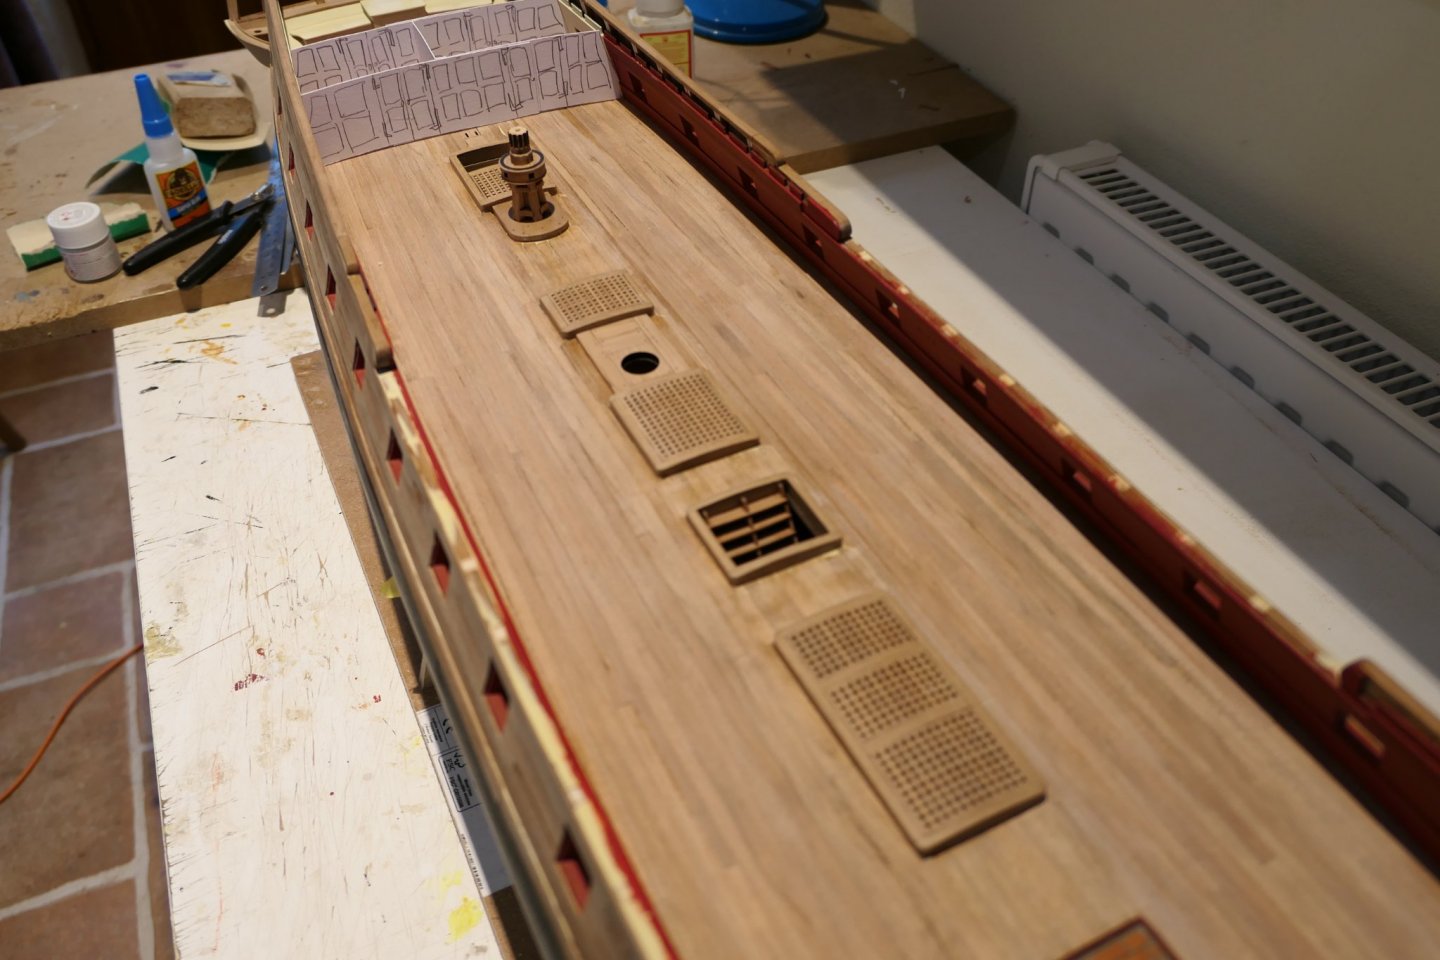
It turned out reasonably well. Here is my first attempt at a scarf joint: not perfect but I'm happy enough.
.thumb.JPG.a9836afb184e4ba0f11c460e712848c4.JPG)
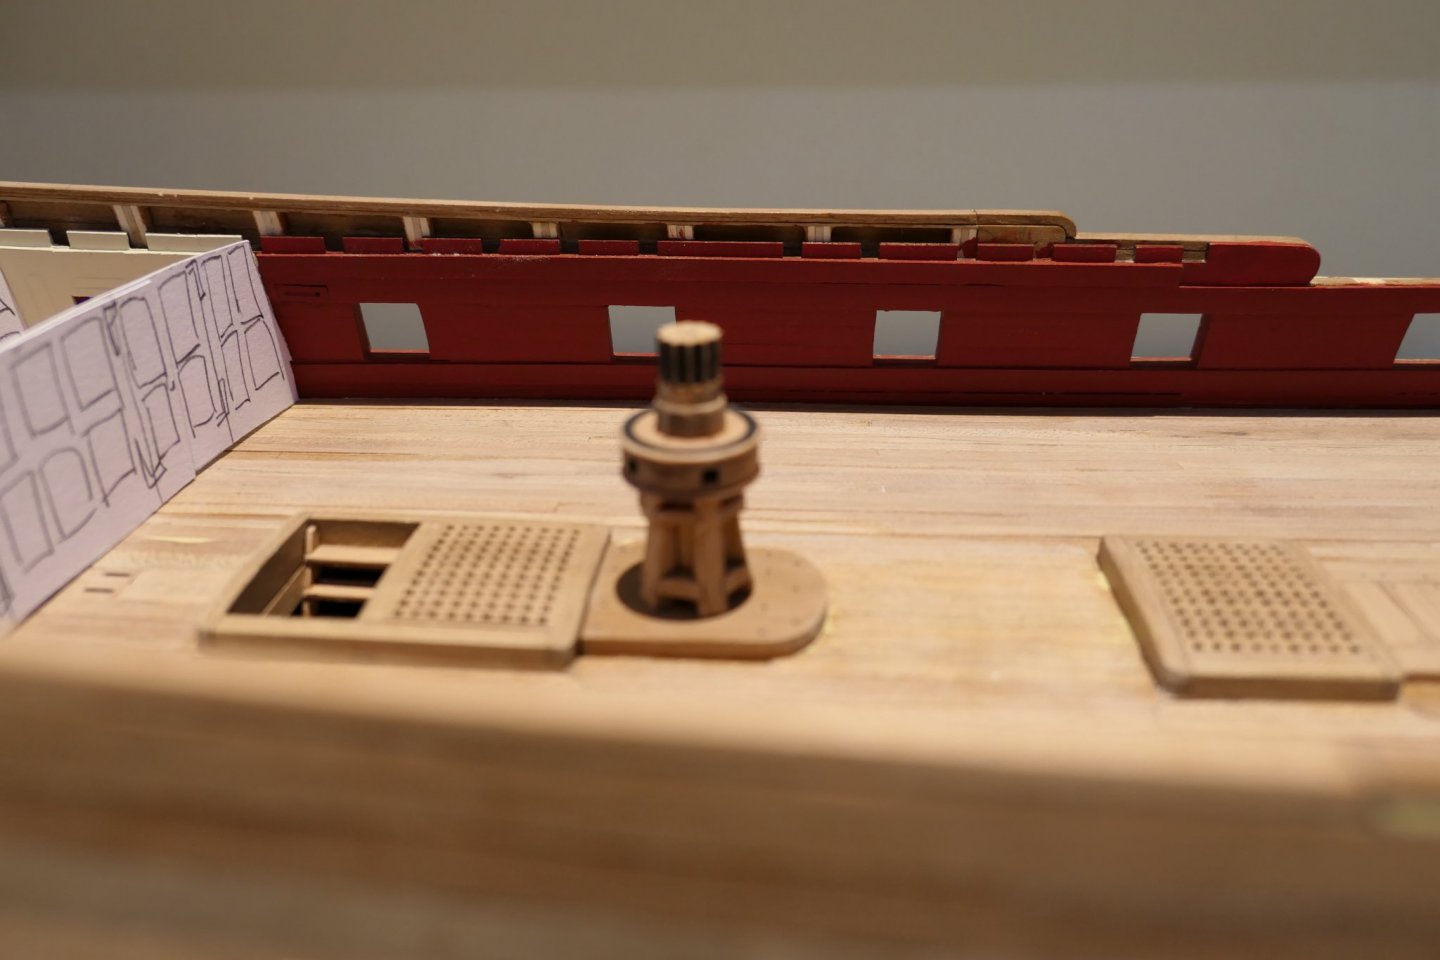
Here is the capstan. I can't believe so many are taking Chuck's lead and sloshing red paint it! I guess what to me is a little masterpiece ( Chuck's contribution not mine) is the everyday to the master.
Unfortunately I dropped it at the moment of completion and broke off the central stick which may make positioning the upper section a tiny bit more tricky – but nothing serious.
.thumb.JPG.92824739992ed748d2e80a6e9af1f106.JPG)
.thumb.JPG.1e32d7fec2794cc00789d806552f8c2c.JPG)
.thumb.JPG.b6d602d40b19a76353d9acf1352780ea.JPG)
I took Chuck's advice regarding painting the hull right up to the wales rather than the waterline. I think it looks much better. And I've made a start on the rudder. Shame that's got to be painted but no choice really.
.thumb.JPG.43ad3be675cc34151ca80c2de784376a.JPG)
.thumb.JPG.140649a52289f0bdcfd5a153648401d6.JPG)

- FrankWouts, rafine, Wacom and 11 others
-
14
-
You must be delighted with how your Winnie is coming along, Bob. It is looking fantastic.
All the best
Fred
-
On my first Winnie I made an awful job of the planking below the wales where it twists up to meet the underside of the transom. I found it a lot easier second time round after studying other logs. Yours has come out really well. You are well on your way to a fine ship.
All the best
Fred
-
That's looking very good, Frank. I noticed, though, that you have all the marks for positioning the wales facing aft. I thought the marks faced aft on the bulkheads from midships back and forward on the bulkheads from mid ships forward. It might be worth checking the instructions unless, of course, you were only positioning the bulkheads to get your first look at how big this model is!
All the best
Fred
-
This is looking fantastic, Matt. Like you I couldn't resist doing the coamings and gratings out of turn. They are superb little kits which look great on their own and even better in situ with planking around.
All the best
Fred
- Edwardkenway, FrankWouts, Saburo and 1 other
-
4
-
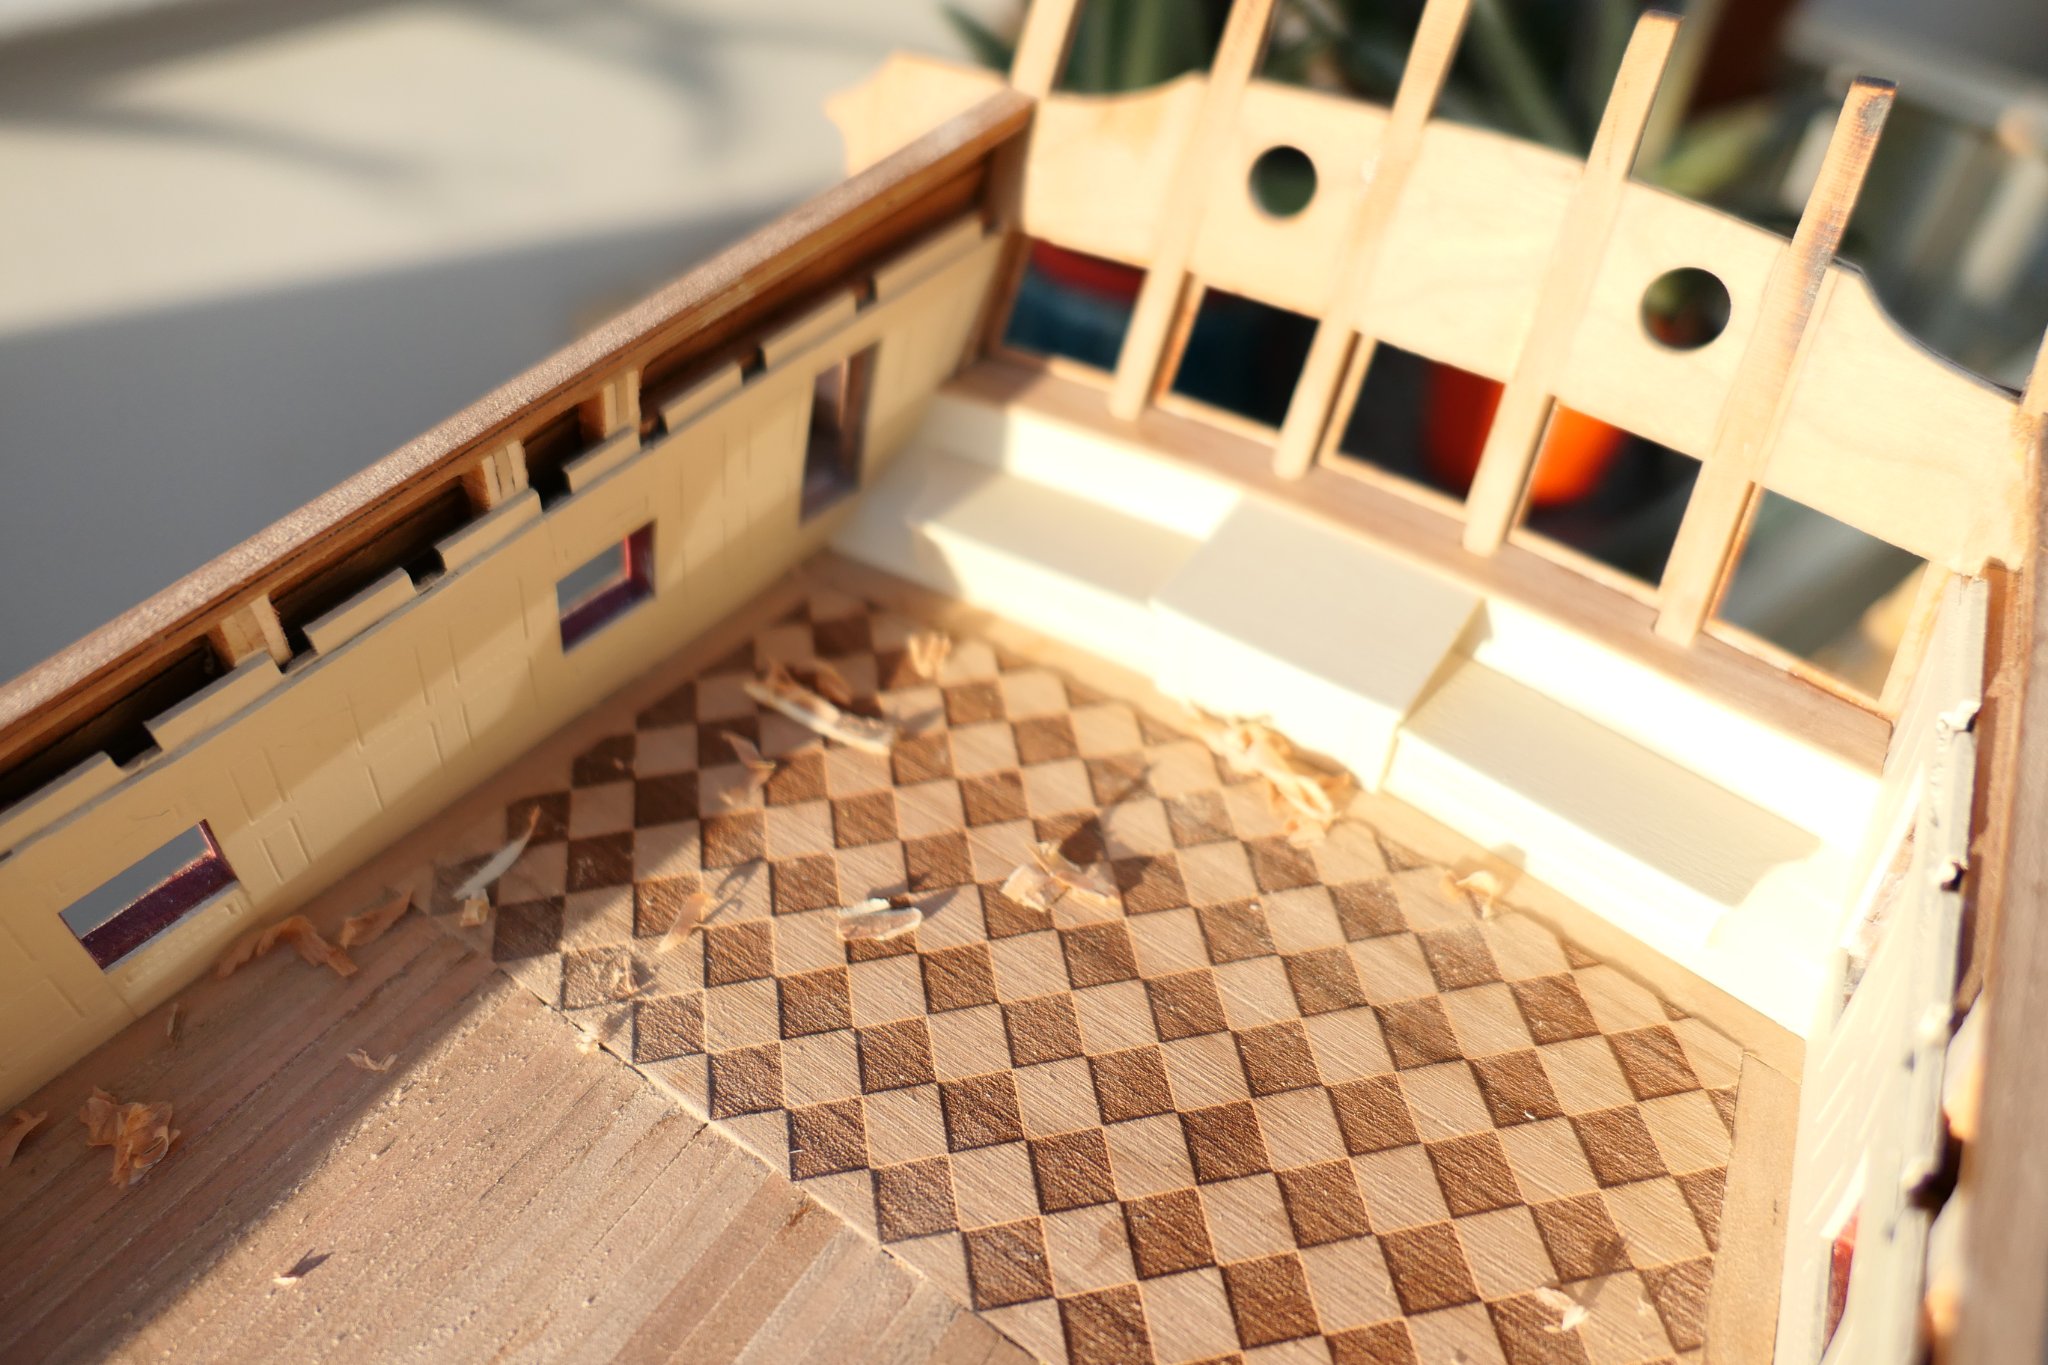
Good morning all.
I have been working on the inside face of the transom. I cut away quite a lot of wood from beneath the window apertures so that I could fit in the cill leaving enough room to move the window frames in and out without having to cut down the frames.


Then I cut and fitted the cill

Incidentally, I recently purchased a new camera. I have not got the foggiest idea how it works yet: hence the out of focus images.

I can't decide whether to paint the windows and the cill. I think probably I shall – leaving the outside of the windows natural.
In an idle moment I spent two minutes cutting the bulkheads in card just to see what the spaces look like only to find this morning that Chuck has now posted the real thing. Don't they look fantastic - Chuck's that is , not mine!
I have completed about half the deck. Completing that is the next job.
Best wishes to all
Fred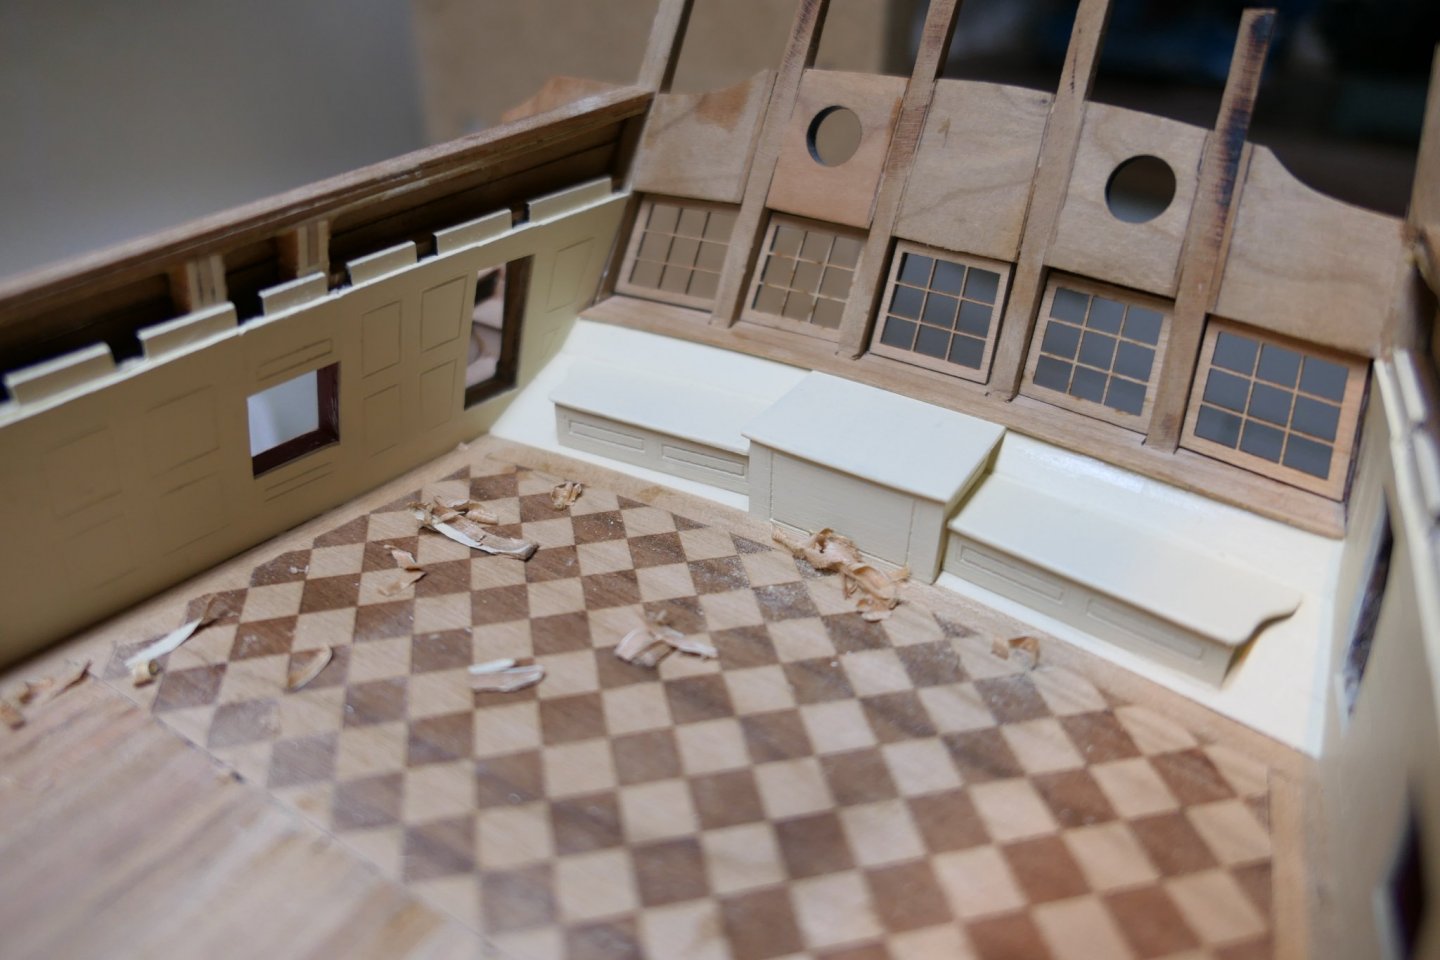
- Kurt Bainum, Rustyj, FrankWouts and 7 others
-
10
-
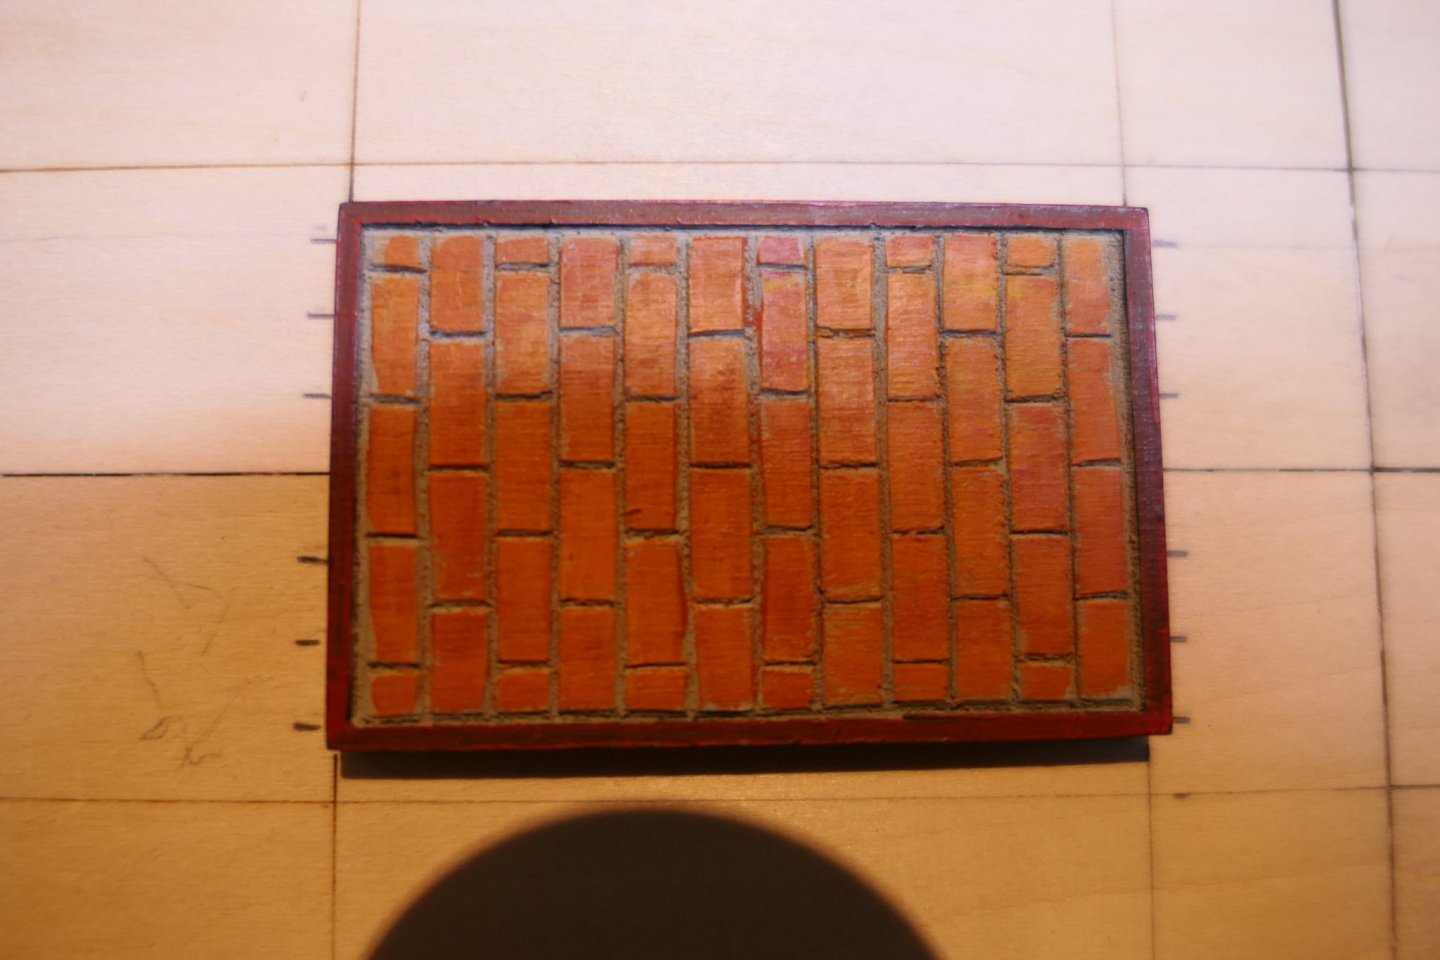
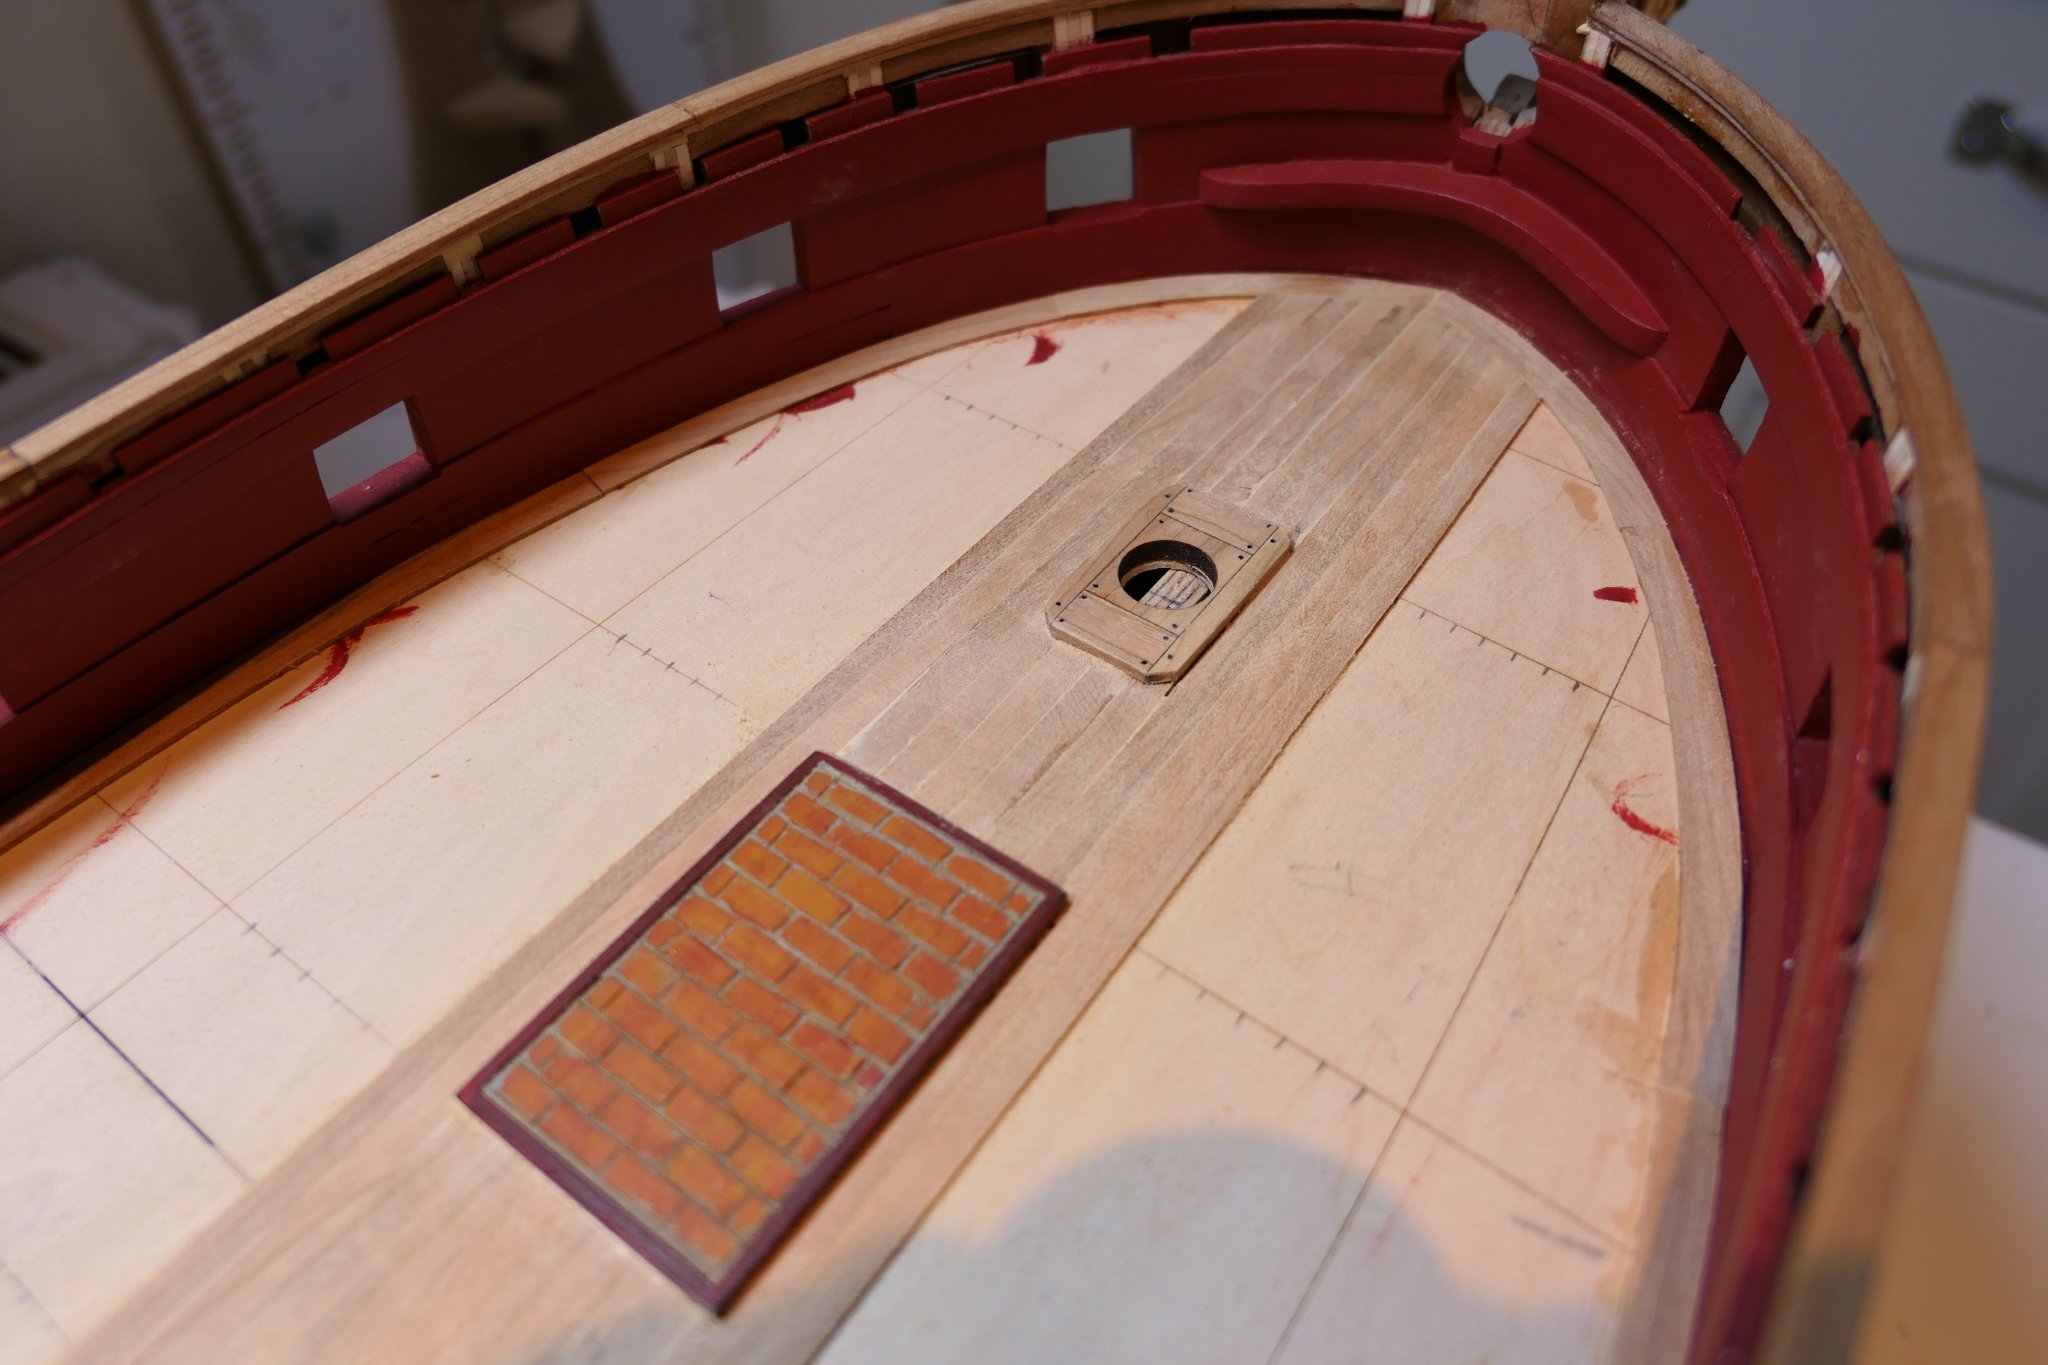
Ah-ha. Just a little encouragement. That's what I wanted to hear. Thanks JJ. I'll keep the bricks.
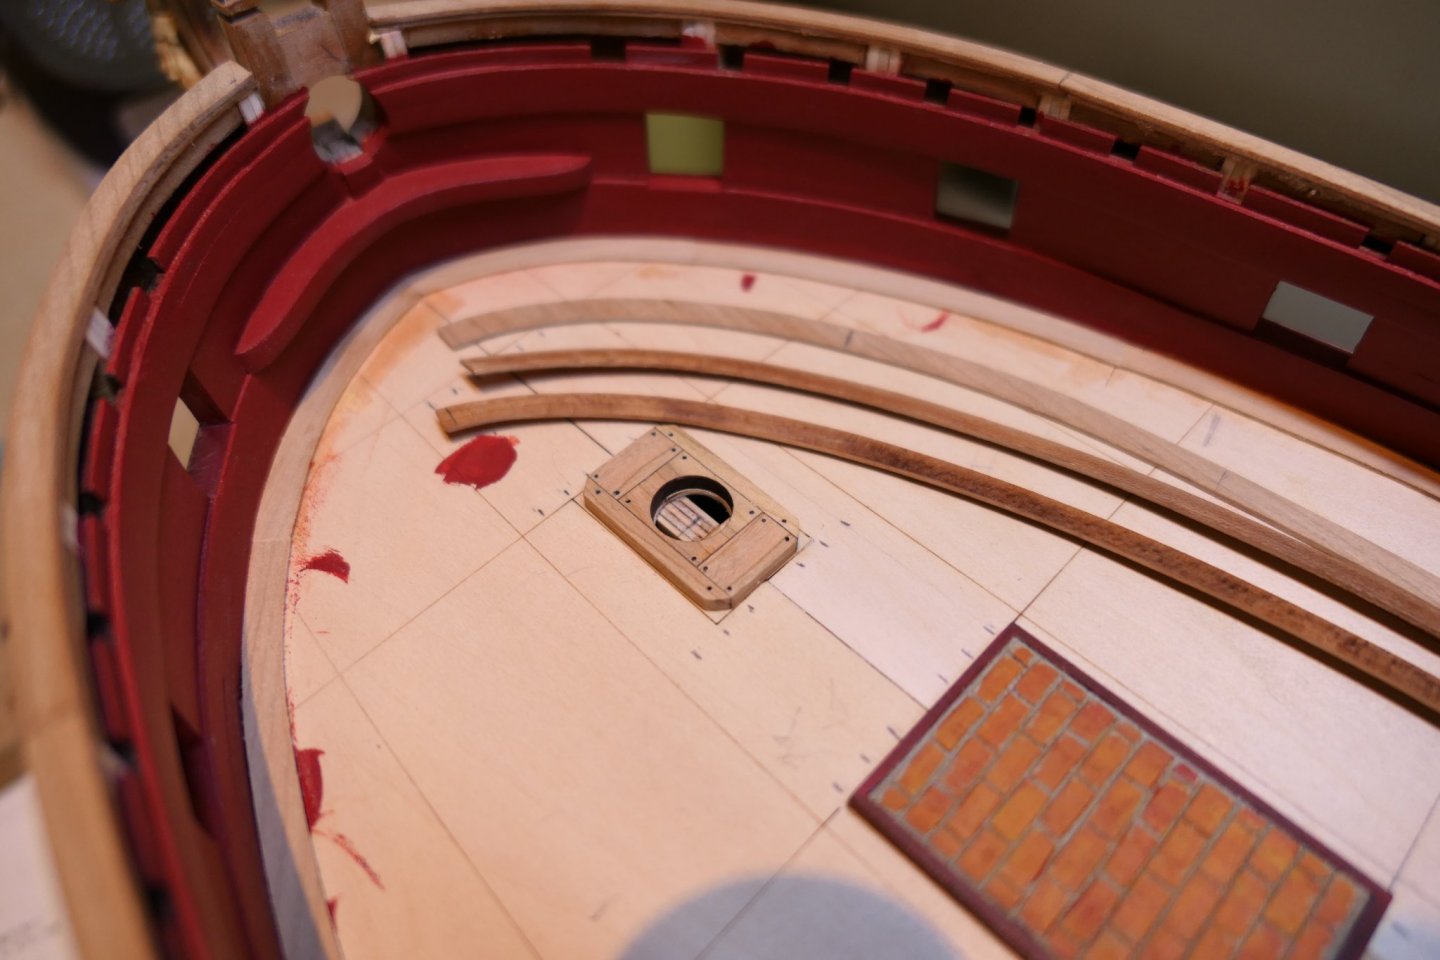
On a quite unrelated topic: the chapter 5 instructions suggest a single plank down the centre line of the deck. The plans show two planks one either side of the centre line. I guess either is correct. I went for one either side.
- FrankWouts, Matt D and scrubbyj427
-
3
-
Thank you chaps.
JJ - I'm so sorry I missed your question regarding the panelling. No - I didn't use any weathering powder or fancy paint techniques ( I don't know any) to emphasise the laser etched lines. They are plenty deep enough to take 4 or 5 coats of paint and still retain definition. As to the stove base I used a sharp blade at 45 degrees to soften, without being too precious about it, the very straight laser cut lines and then dry brushed on the brick colour after first painting the grey mortar colour. But I think I might paint them slate grey now - see Chuck's comments above.
- scrubbyj427 and FrankWouts
-
2
-
Good evening everyone.
So many new builders starting off it's hard to keep up. It's a fantastic project. Good luck everyone!
I went for a rustic brick finish on the base for the stove.
I've started the deck planking. It feels like a really big step. When its done the majority of the "construction" bits - the plywood - that need to be concealed will be concealed.
The "tabs" are tricky and nowhere near perfect but they are as good as I could have hoped for and I'm pleased.


I can't make up my mind about painting the comings. On balance i think I prefer them natural (too late to change my mind now anyway) though it may not be historically accurate and it is undeniably a lot of bare wood.

For the margin planks I tried edge bending (It's asking a bit much I found), cutting from a single piece and cutting three pieces to make up the curve - so as to follow the grain. I went with the last.


- Rustyj, Matt D, FrankWouts and 8 others
-
11
-
Good morning Chuck
I understand that you may discontinue the production of rope in the not too distant future. I would like to rig the cannons on my Winchelsea but have little idea what I need in terms of rope – if available – and blocks (size or quantity). To that end would you consider putting together a shopping list necessary to complete chapter 6 or perhaps even a Winchelsea rigged cannons pack comprising cannons, carriages, rope and blocks?
Fred
- Jorge Diaz O and FrankWouts
-
2
-
Thank you Tom. Model shipbuilding is a hobby I have taken up only comparatively recently and I am conscious, first, that I have so much to learn, and secondly, that if I do something twice generally turns out better second time. I'm not quite at the point of abandoning W2 and starting W3 but I do think about it from time to time. I'm determined to make the best possible job that I can of the Winchelsea. The trouble is (a) the more experience I gained, "making the best possible job" is a moving target and (b) I look at everyone else's logs and think "if only....".
I am intrigued, incidentally, Tom by your unique approach to the Winchelsea build and I shall follow your blog with keen interest.
In the meantime...........

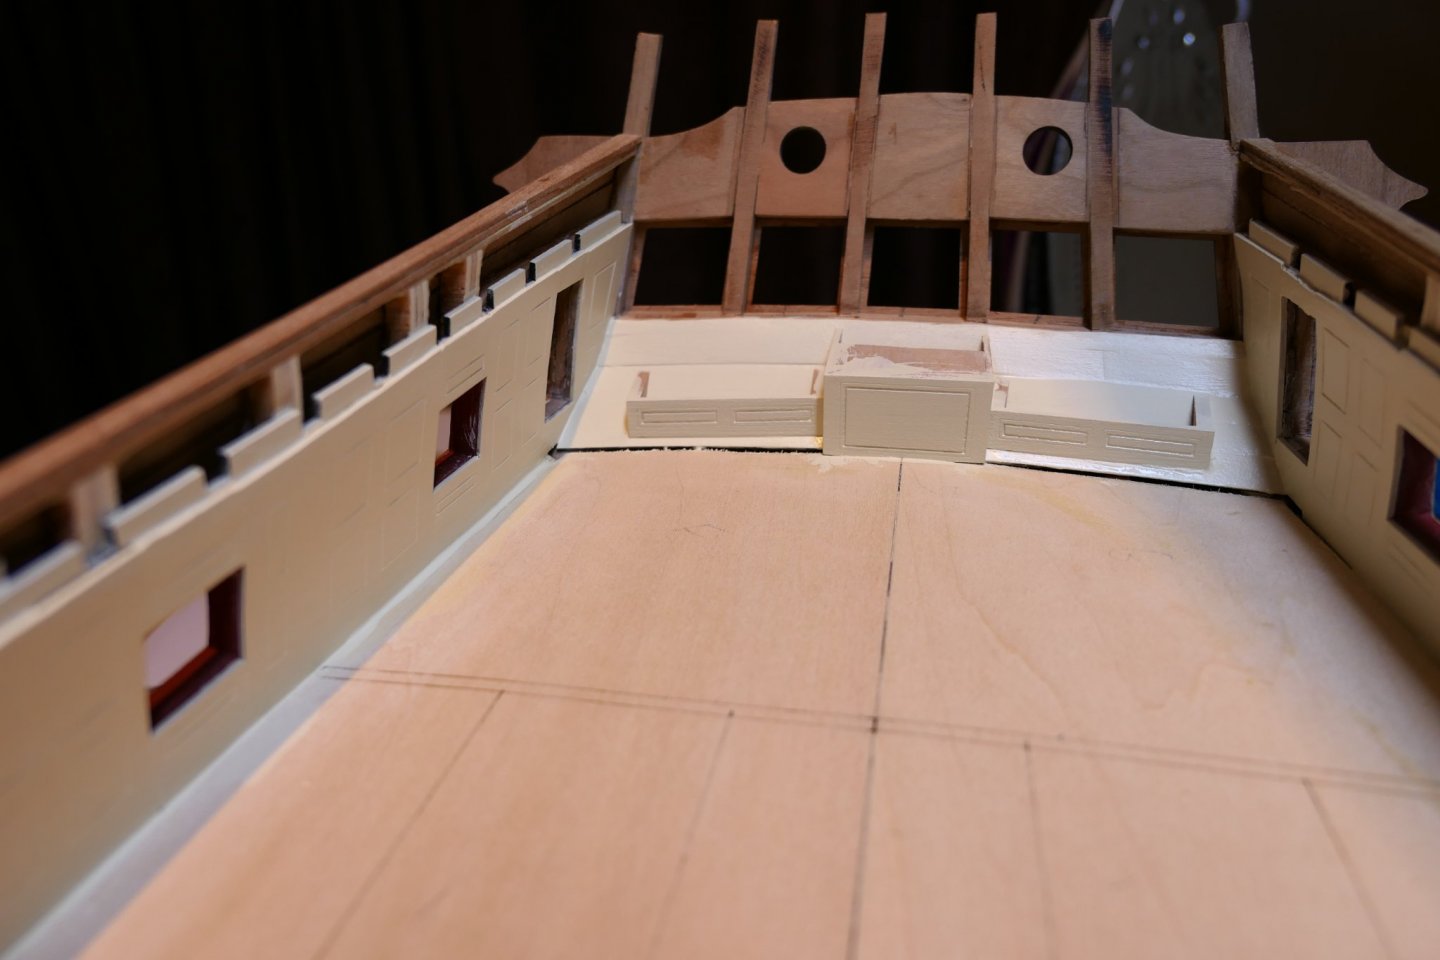
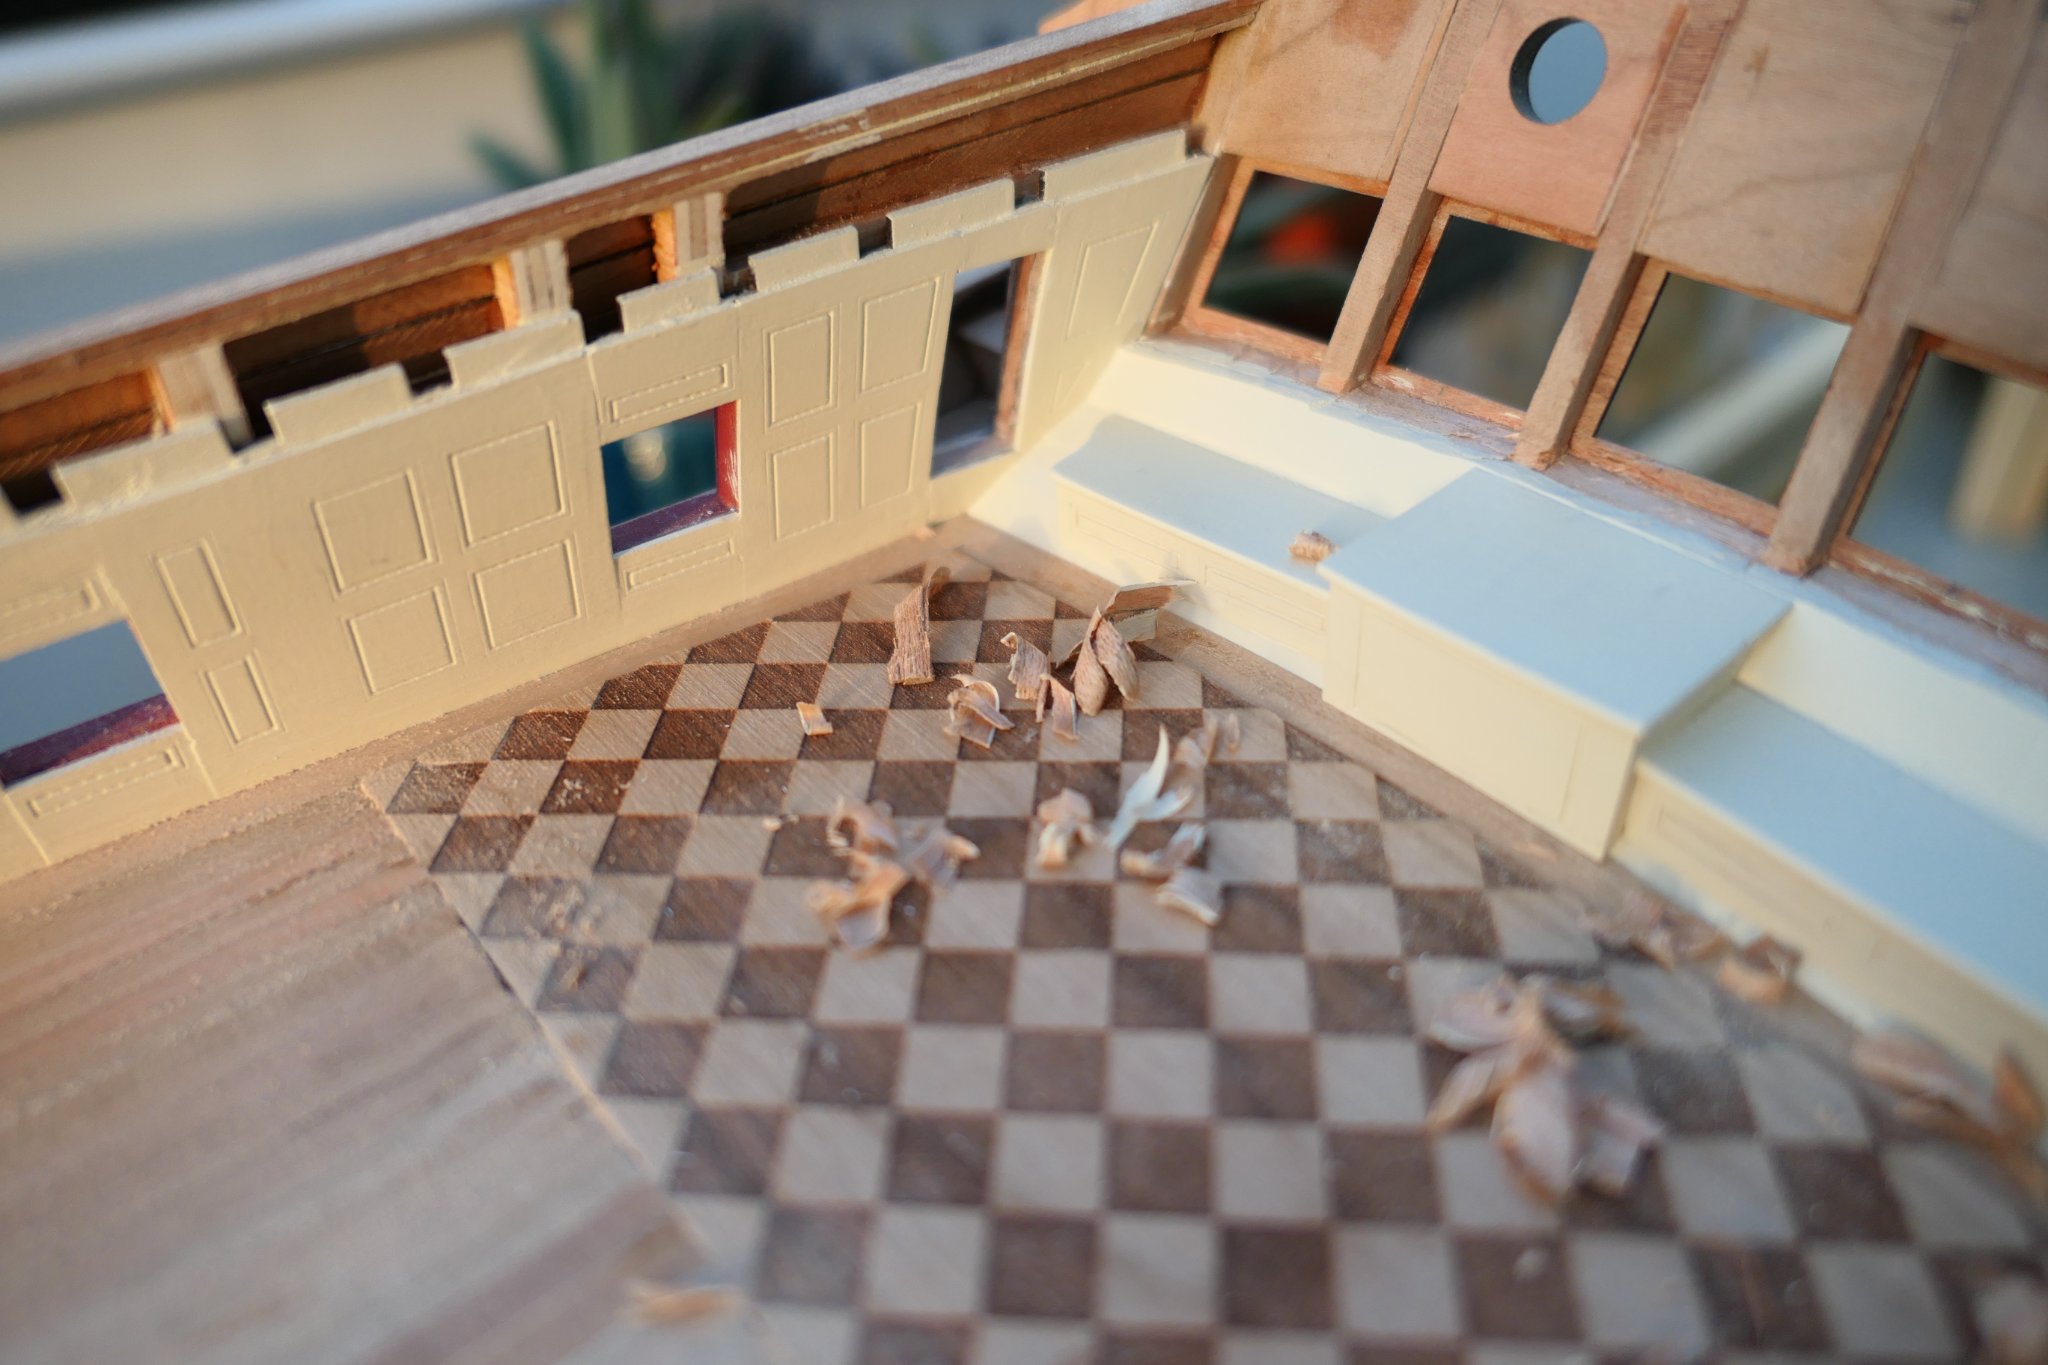
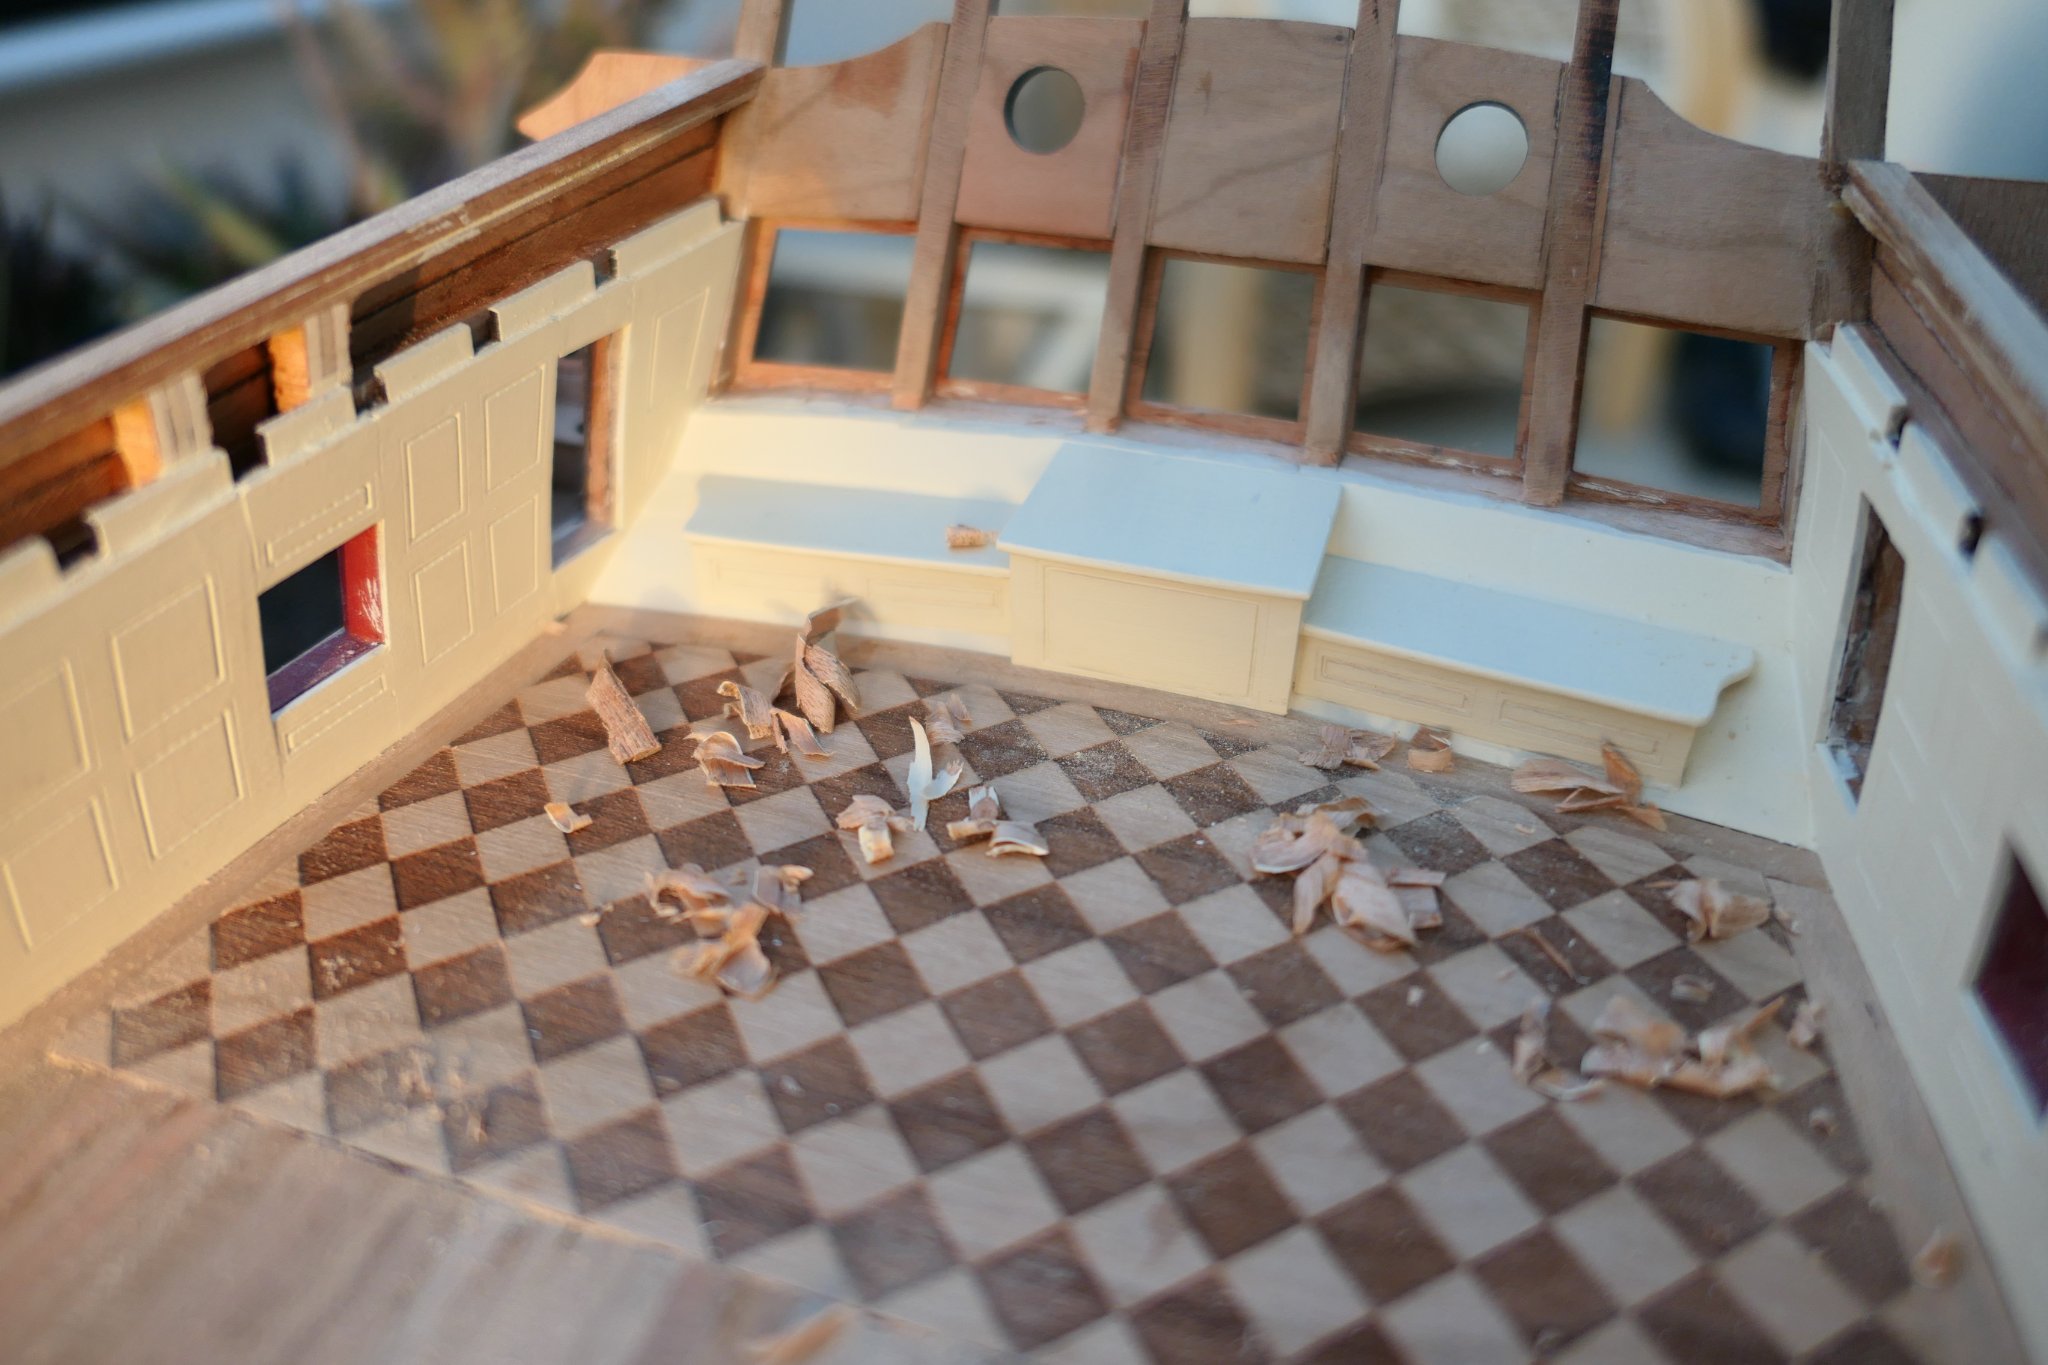
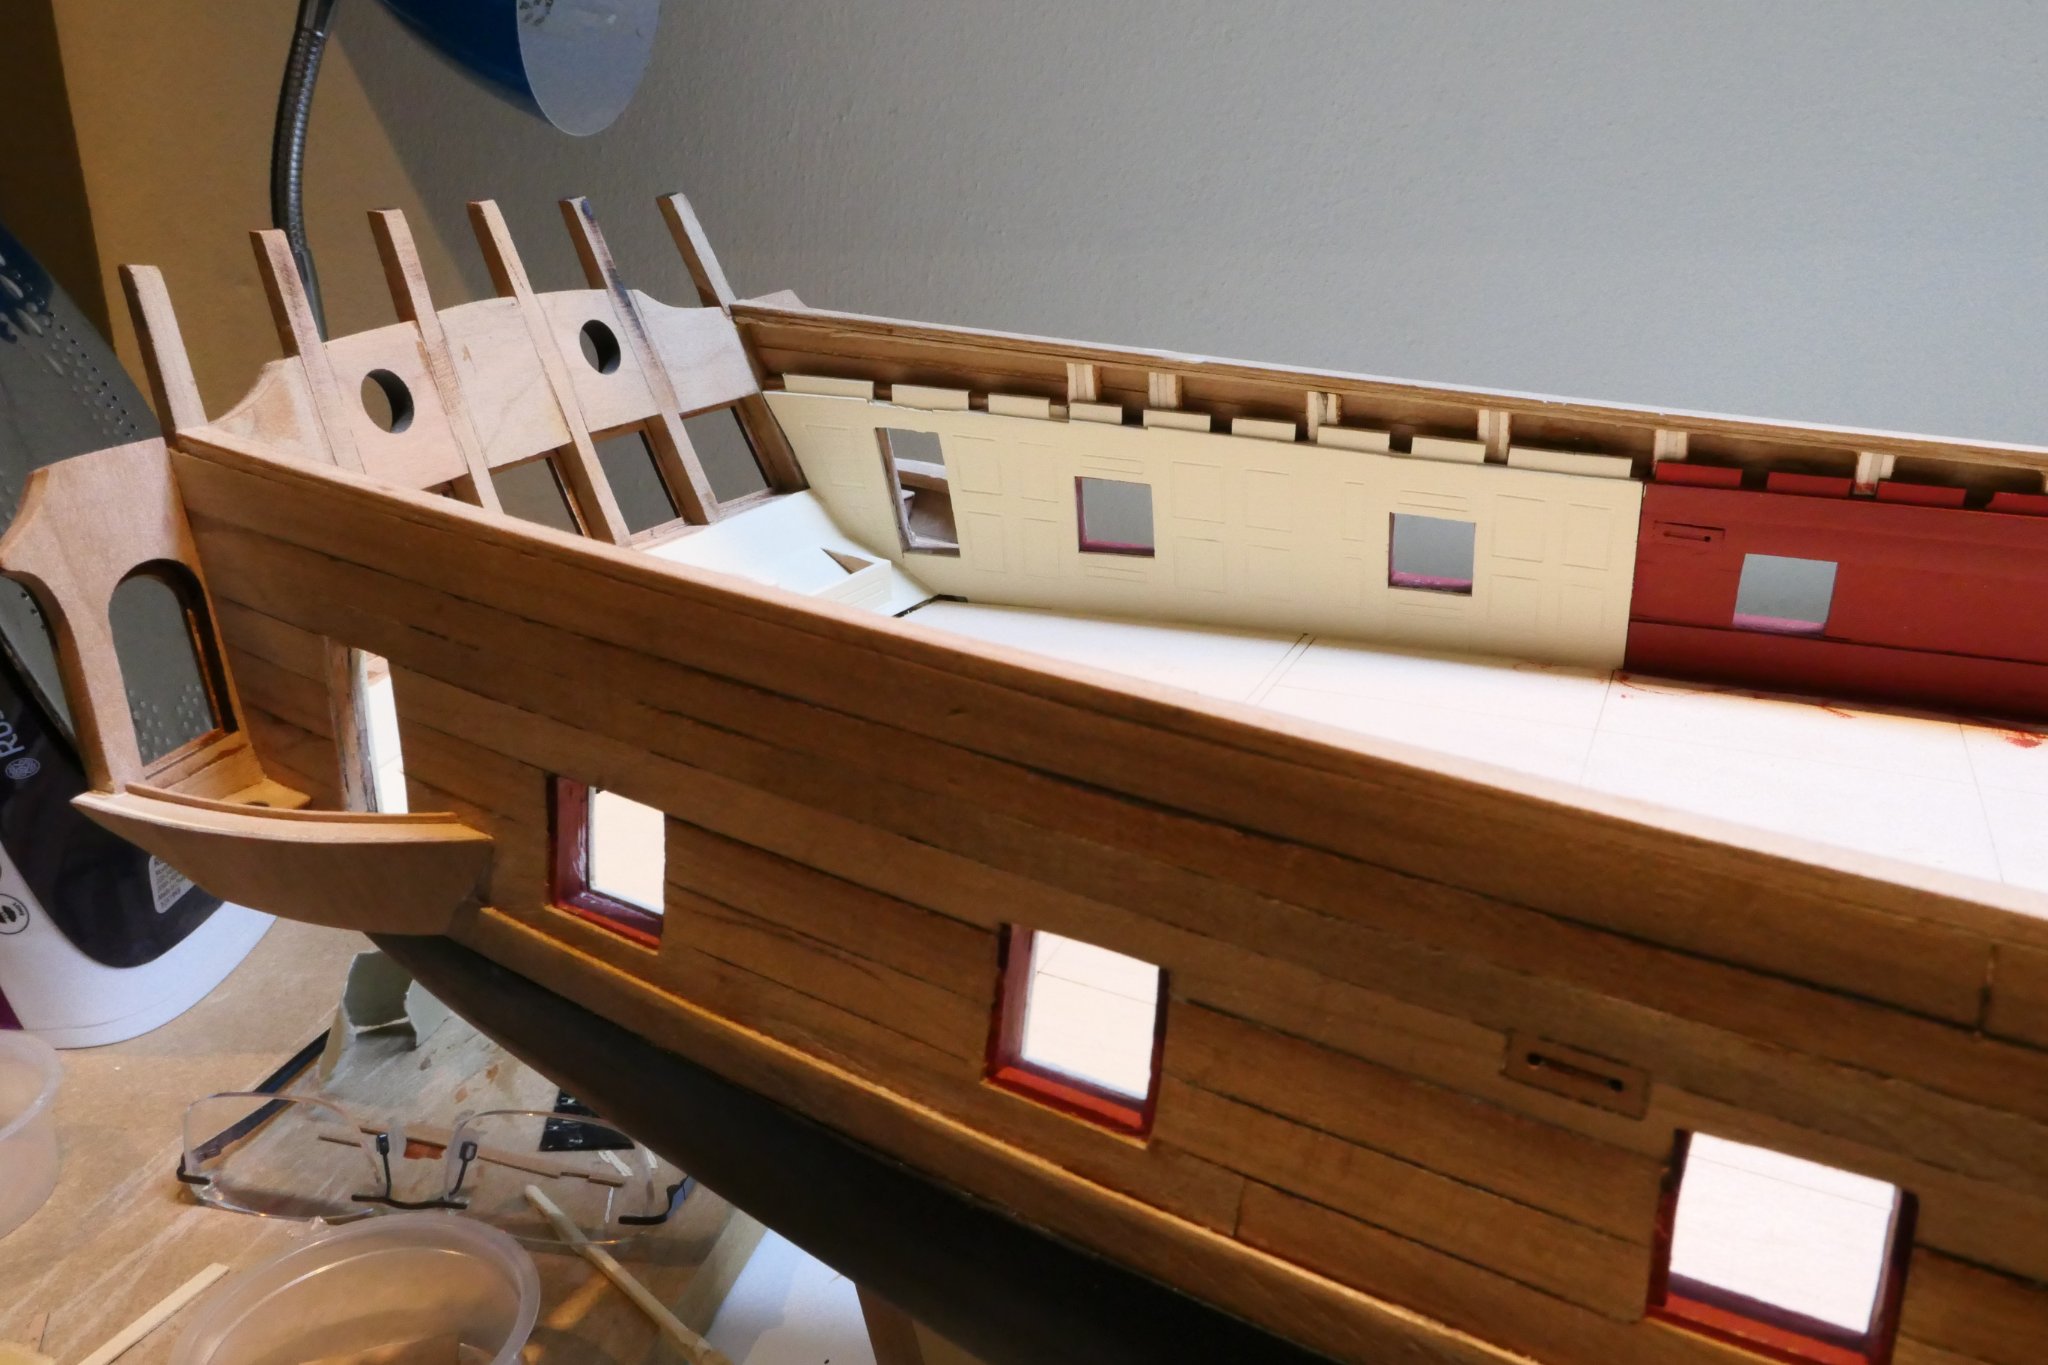
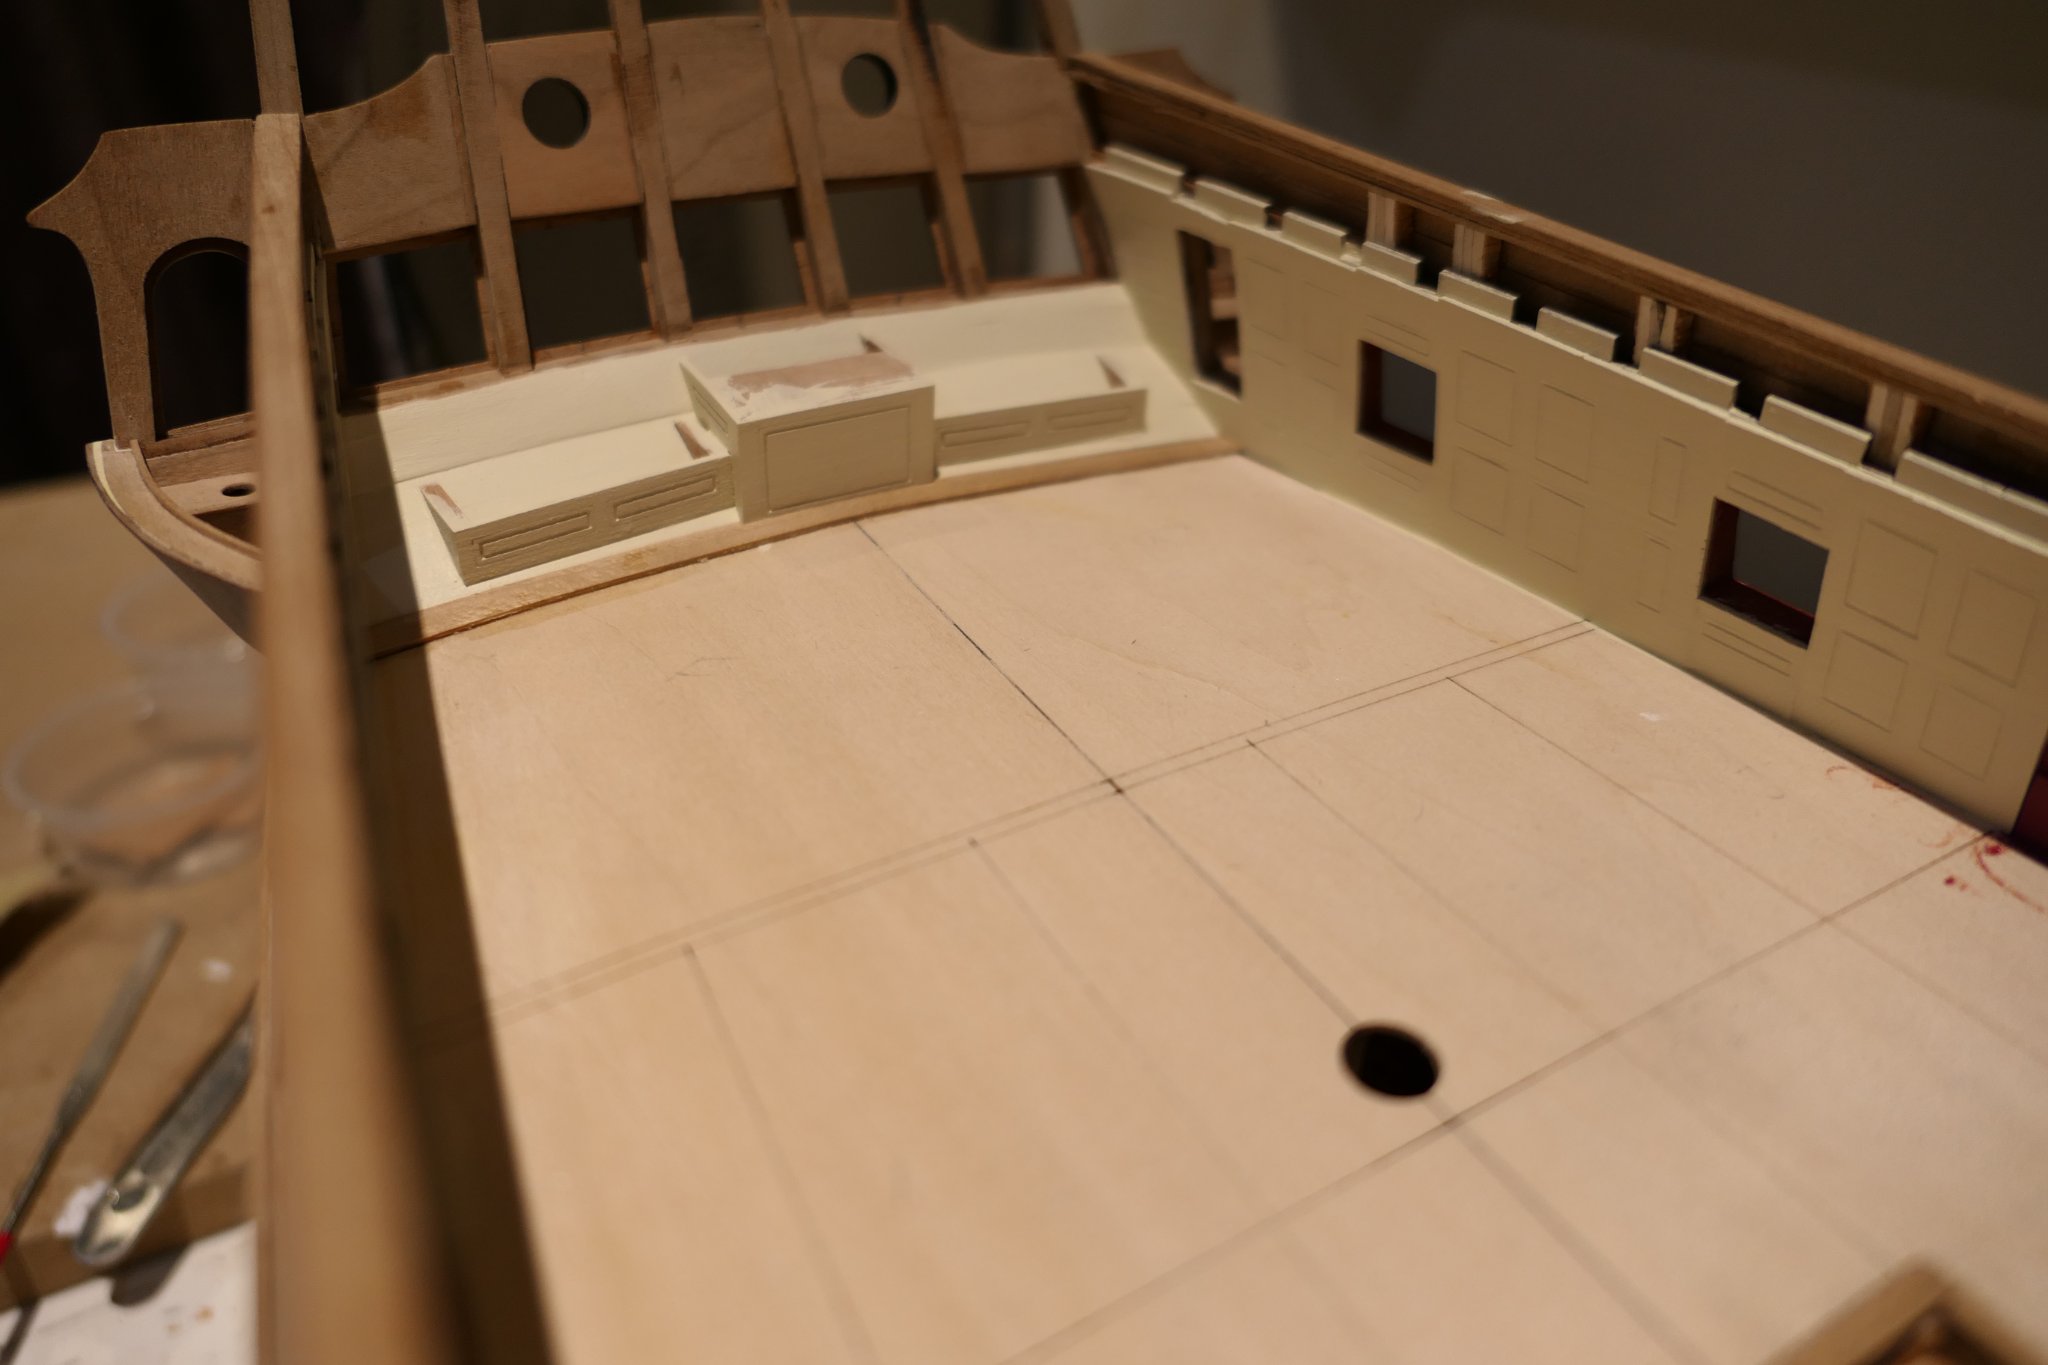
I'm not completely convinced by the painted panelling – but I cannot believe it would not have been painted. Surely there would is a modern fad?!
One advantage, of course, of painting the panelling is that you can use a little bit of filler to make good the seams. And paint can cover a multitude of modelling sins.
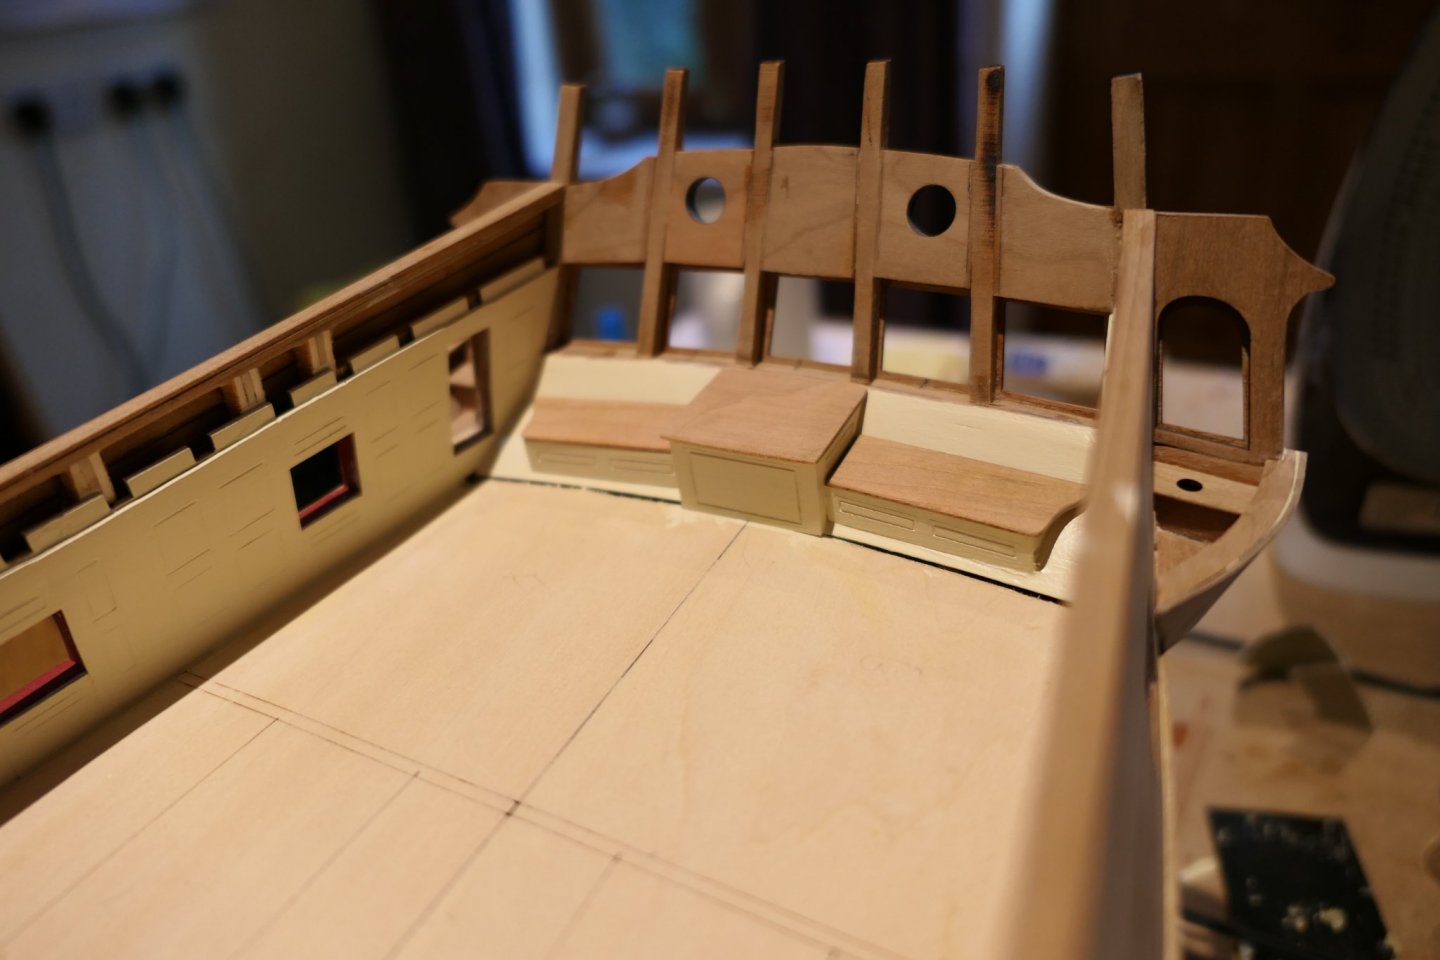
I do not like the unpainted bench seats and rudder trunk top. I'll paint those but I wonder if the bench seats should have hinged locker tops and whether the rudder trunk should also have an access hatch. Any thoughts, anyone?
The inside planking is pretty much done.

I made up one of the lovely Chapter 5 ladders. Here it is
Decking next.
All the best everyone
Fred
- FrankWouts, wyz, rafine and 8 others
-
11
-
Good evening Bob. Could I ask your thoughts about margin planks, in particular at the bow. I will shortly be starting work on the deck of my W2. I cut one pair of margin planks from a sheet of cherry with the scroll saw. I edge bent another pair from 8mm wide strips. It is pretty extreme edge bending and they buckled a little bit but not so much that I cannot glue them down flat. I could not edge bend to a perfect curve and had to sand down to an overall width of 6mm. They – the edge bent pair – would fit pretty satisfactorily. The pair I cut from a sheet of cherry fit well, too - but the grain, of course, does not follow the curve. I guess – and it is a complete guess – that the original shipwrights would have cut the margin plank from a bough of timber that was naturally curved.
On balance I think I prefer the edge bent pair but I would have liked them a little wider than 6mm.
What did you do? Your decking looks pretty good to me.
All the best
Fred
-
I reckon what with your slight regression - I hope you found a fix - and your lighting deviation (which looks fantastic - I'm looking forward to seeing that when you've got the quarter deck and foc'sle in place - I'm catching you up. My inner planking and spirketting are nearly in. I'll get the paint pot out this weekend.
All the best
Fred
- FrankWouts and scrubbyj427
-
2
-
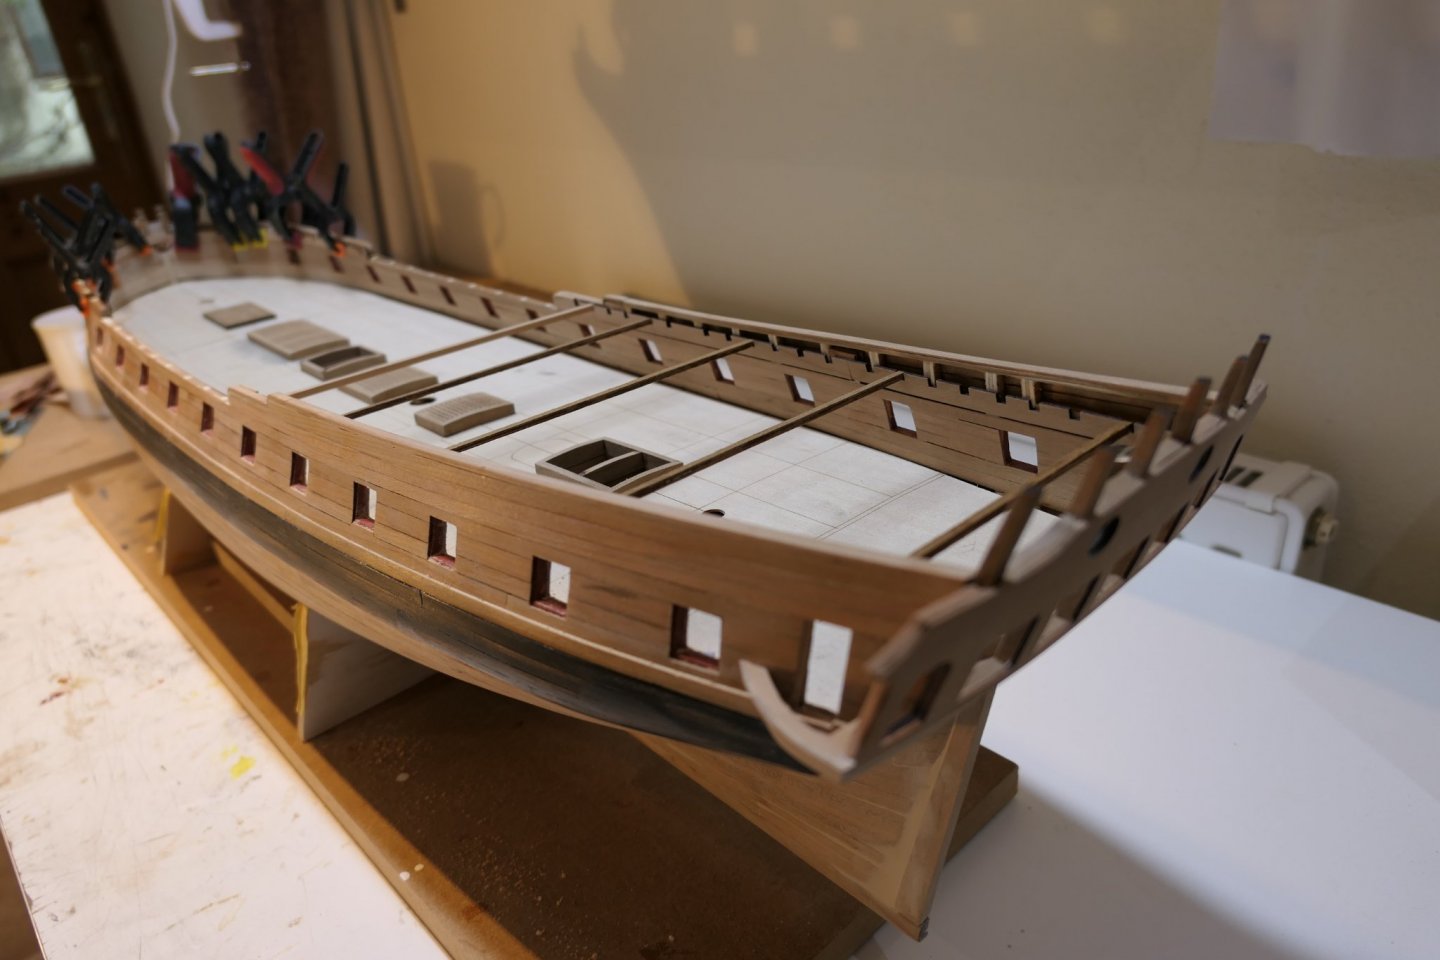
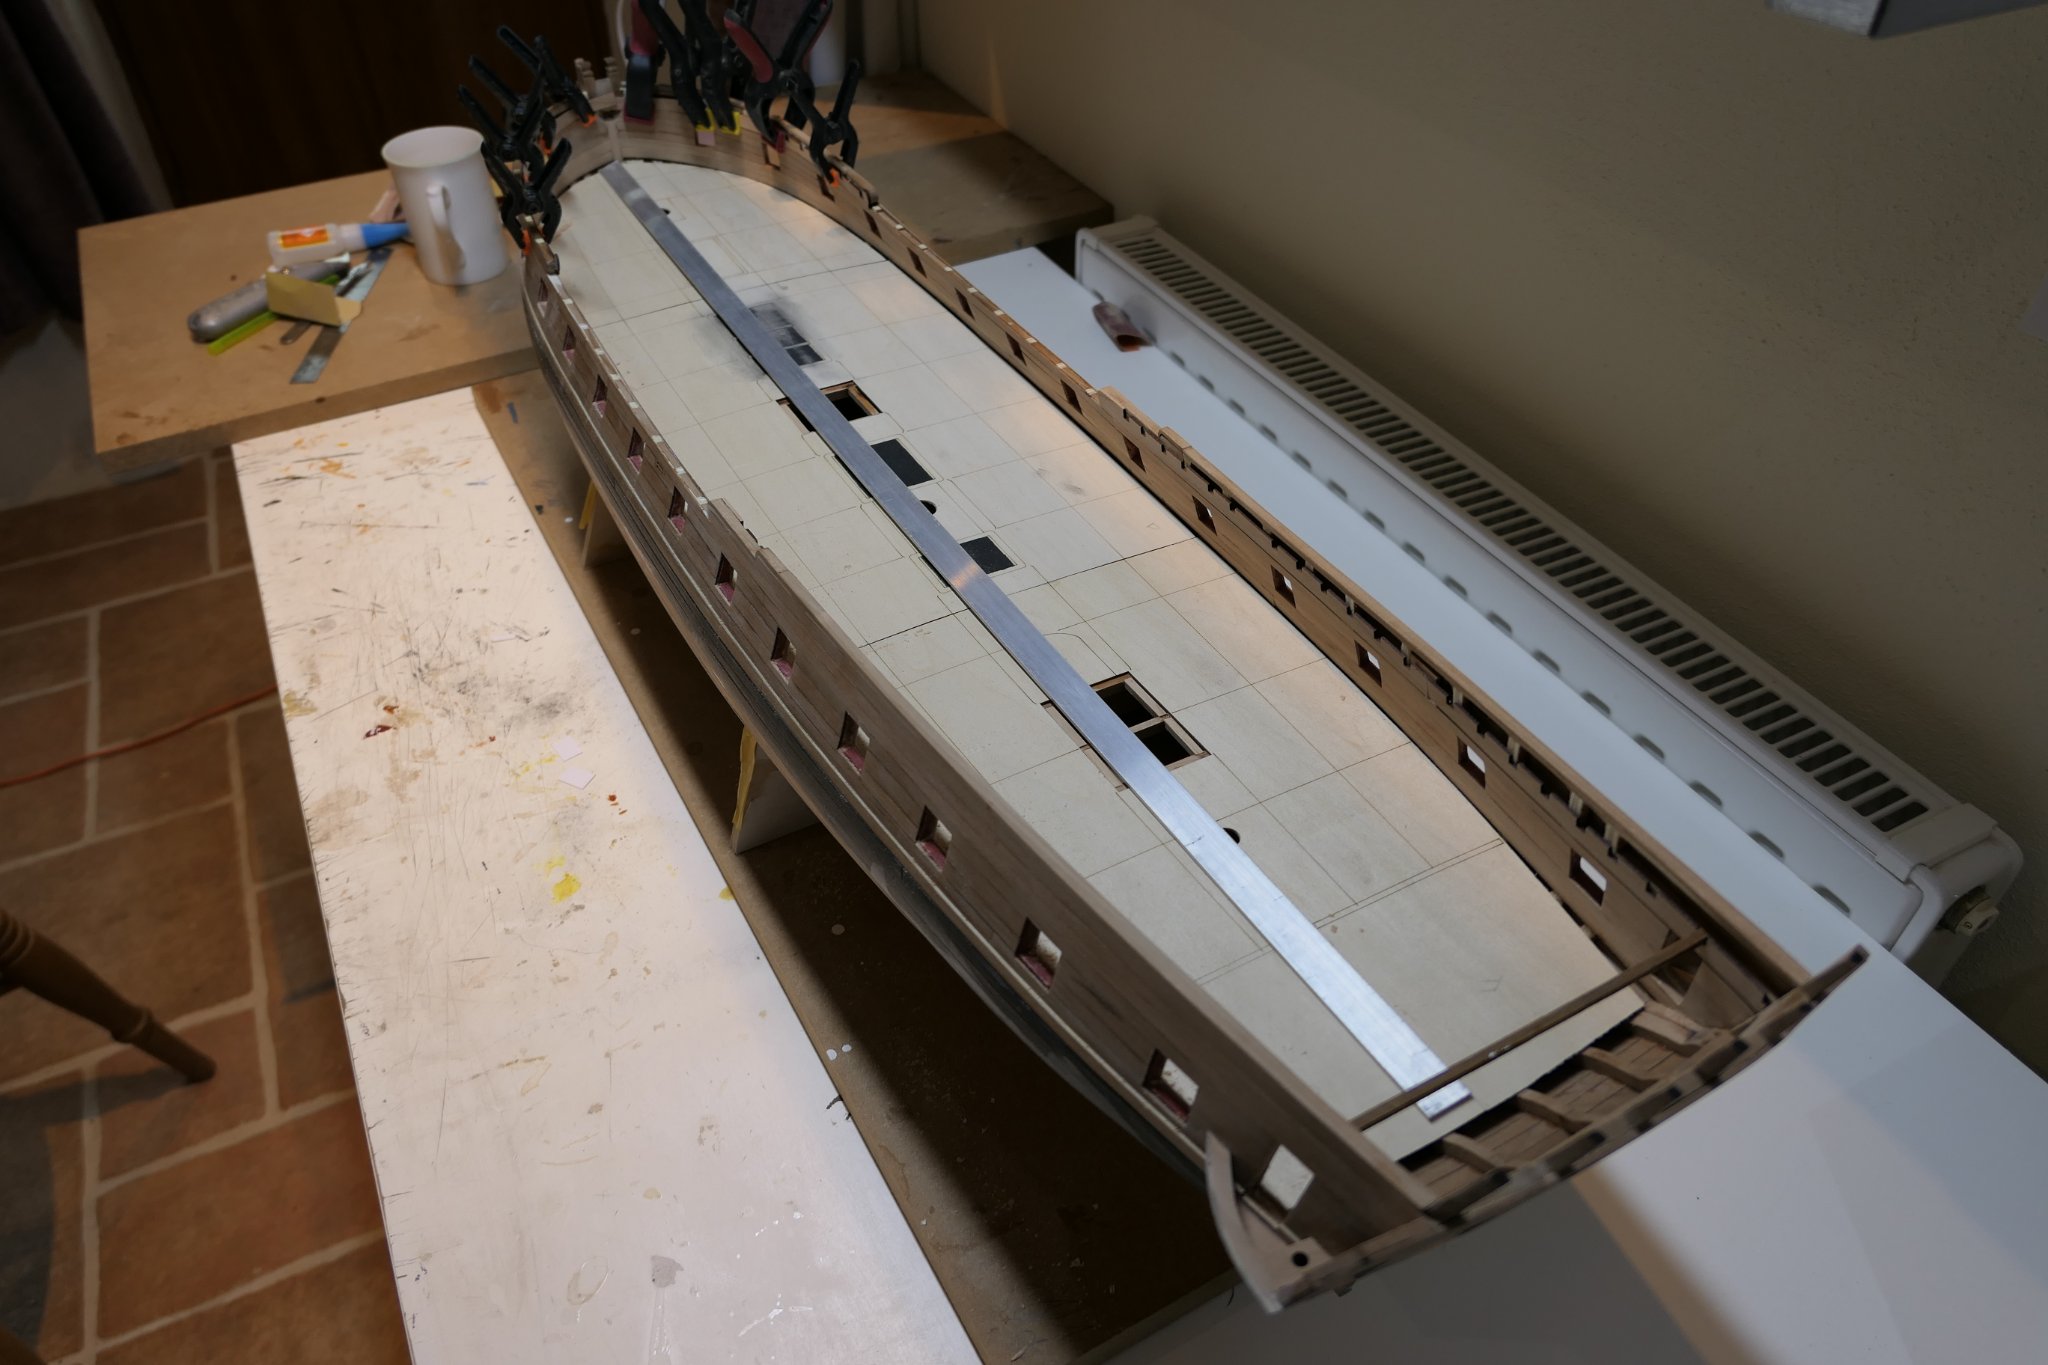
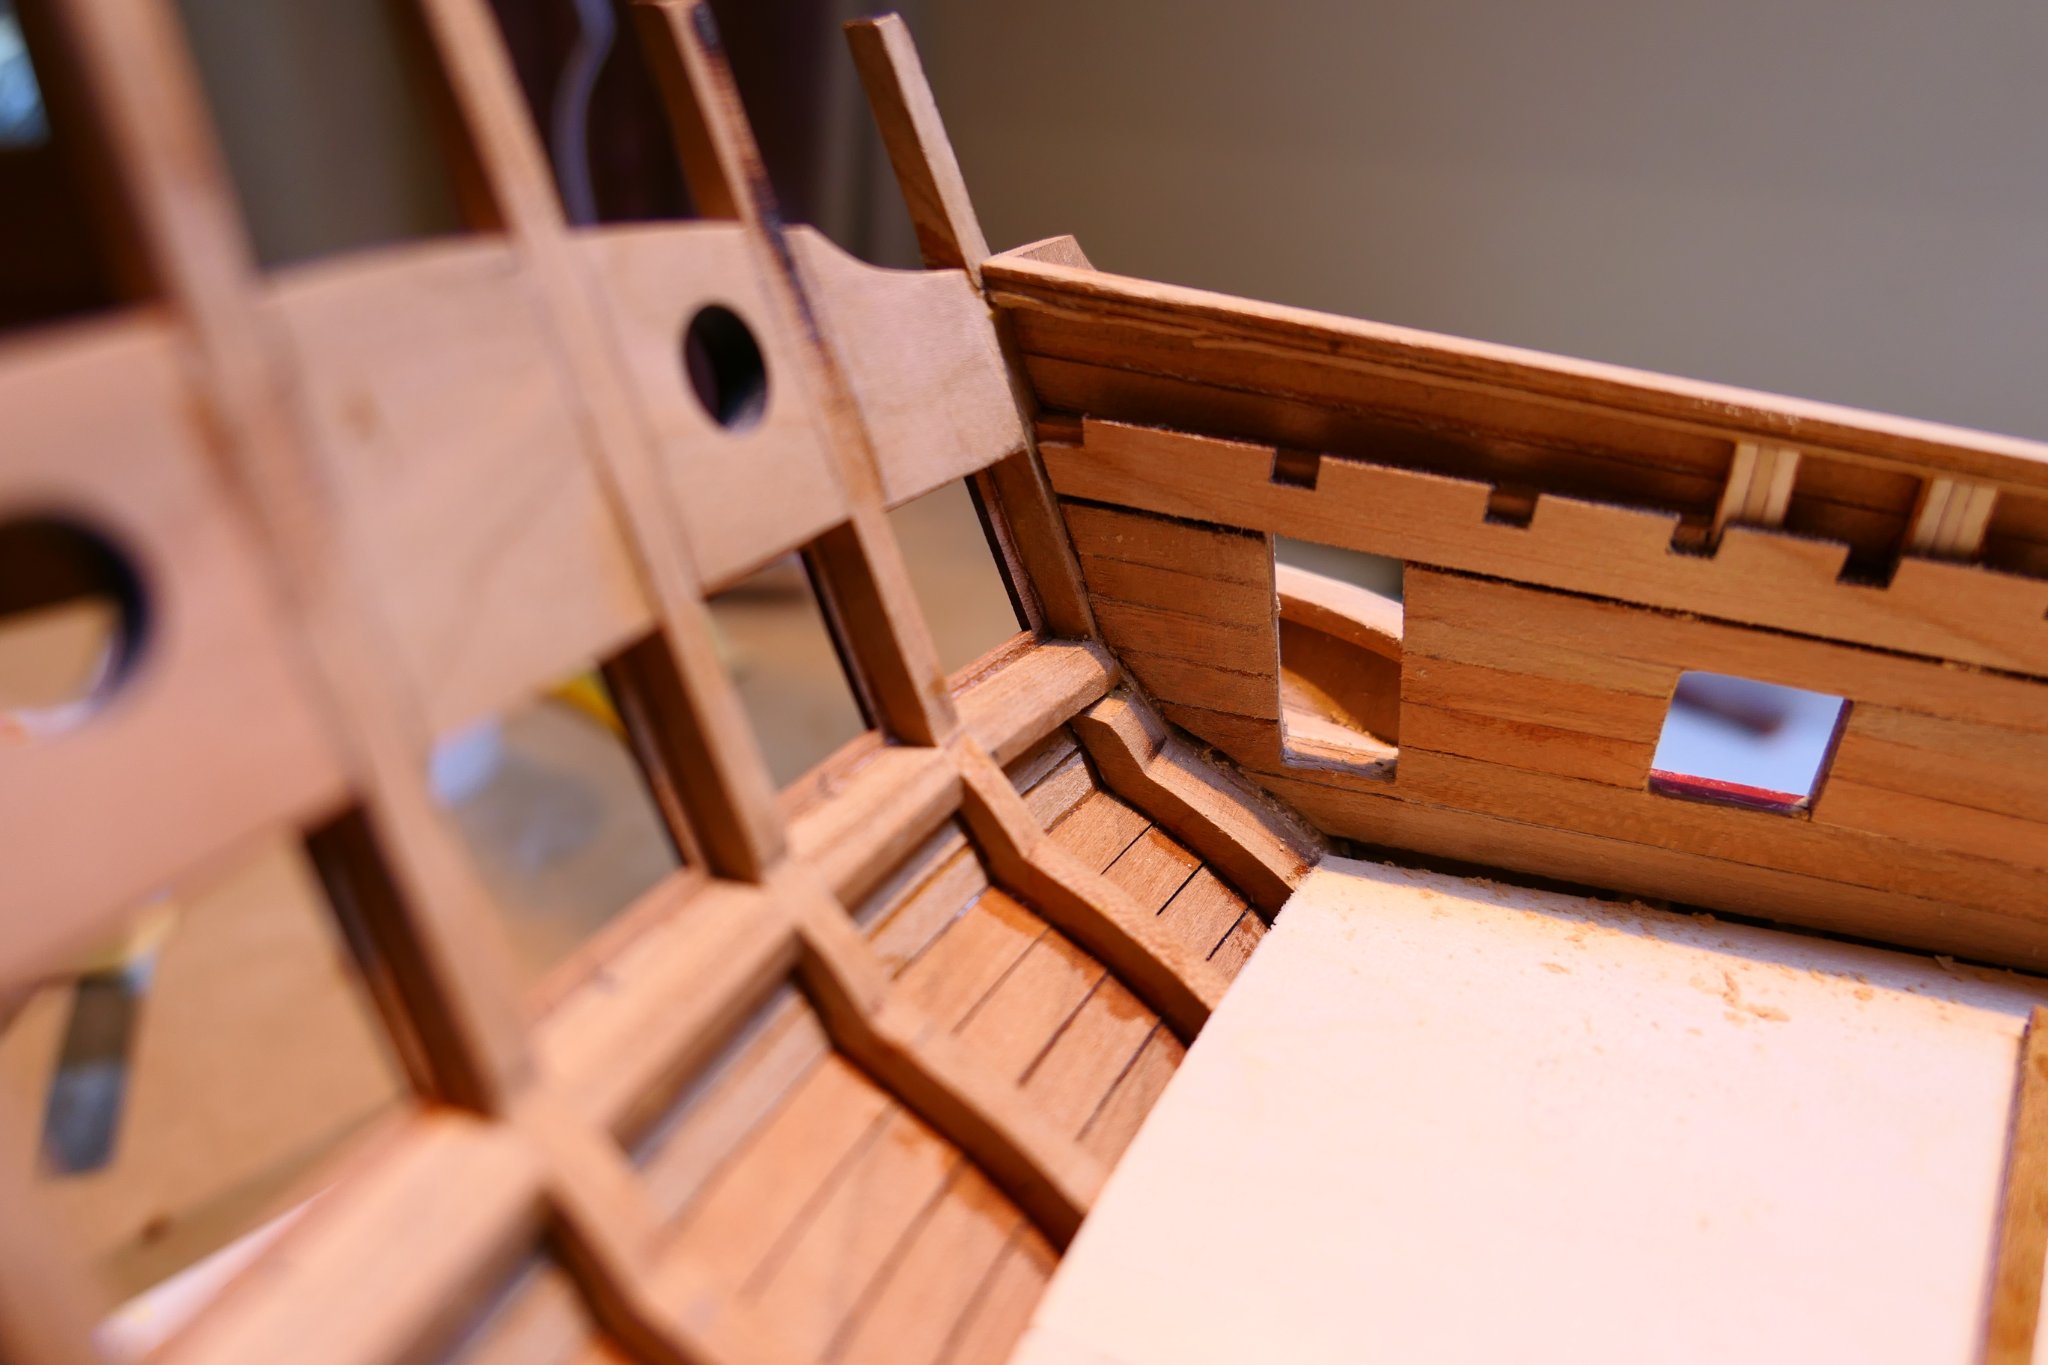
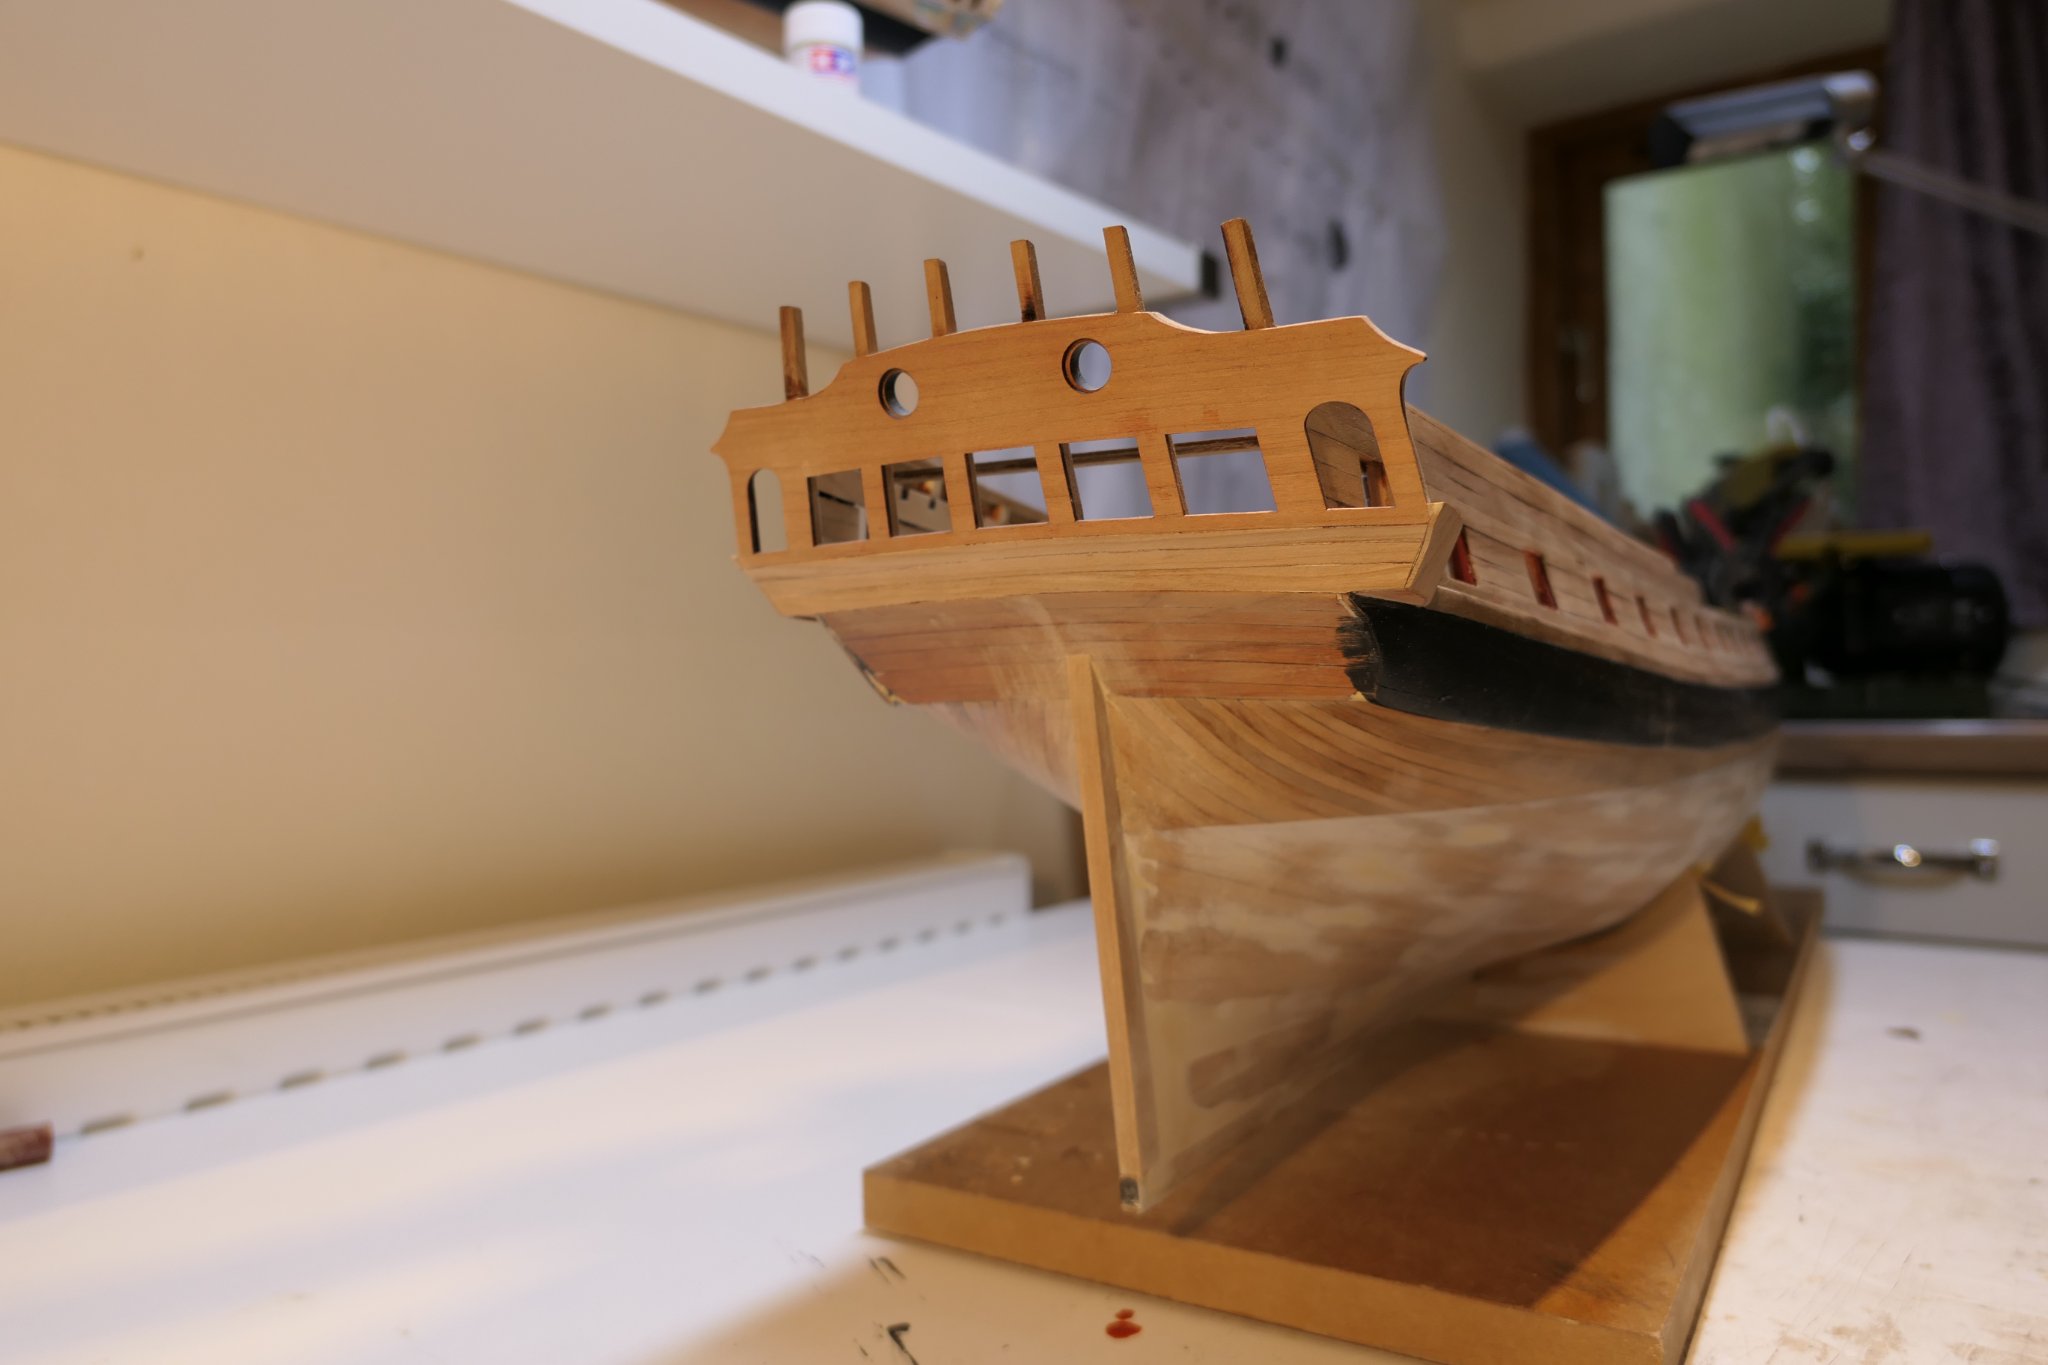
The shells of the quarter galleries went in uneventfully.

.thumb.JPG.cdf20cb94662eb3dbc293e97888b0322.JPG)
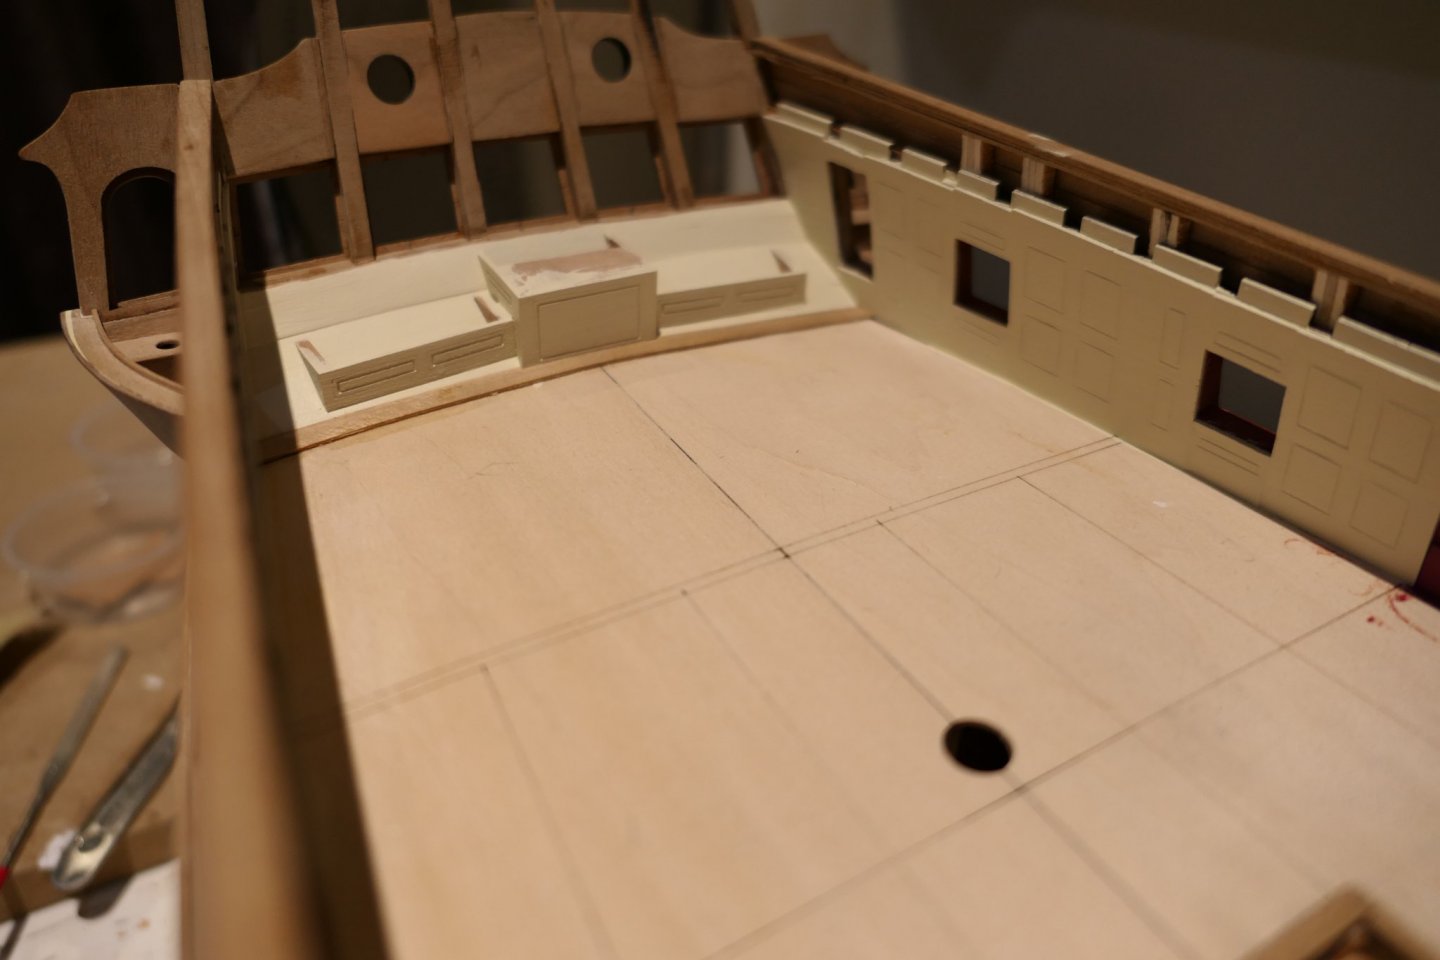
I bought a length of aluminium bar from my local DIY store and clamped it down to the bulkheads to give me a really good straight edge centre line before fixing the false decks.

The deck clamps end up where they are supposed to but only by leaving a small gap to the inner planking - no matter, that will be covered up with the panelling. I am not sure whether to paint the panelling. I suspect it should be painted – A pastel green or blue, perhaps, or ivory ( paint, that is, not the real thing like Matthias).

I used some small sticks as temporary deck beams to make sure the deck clamps were level and square with their opposite number.
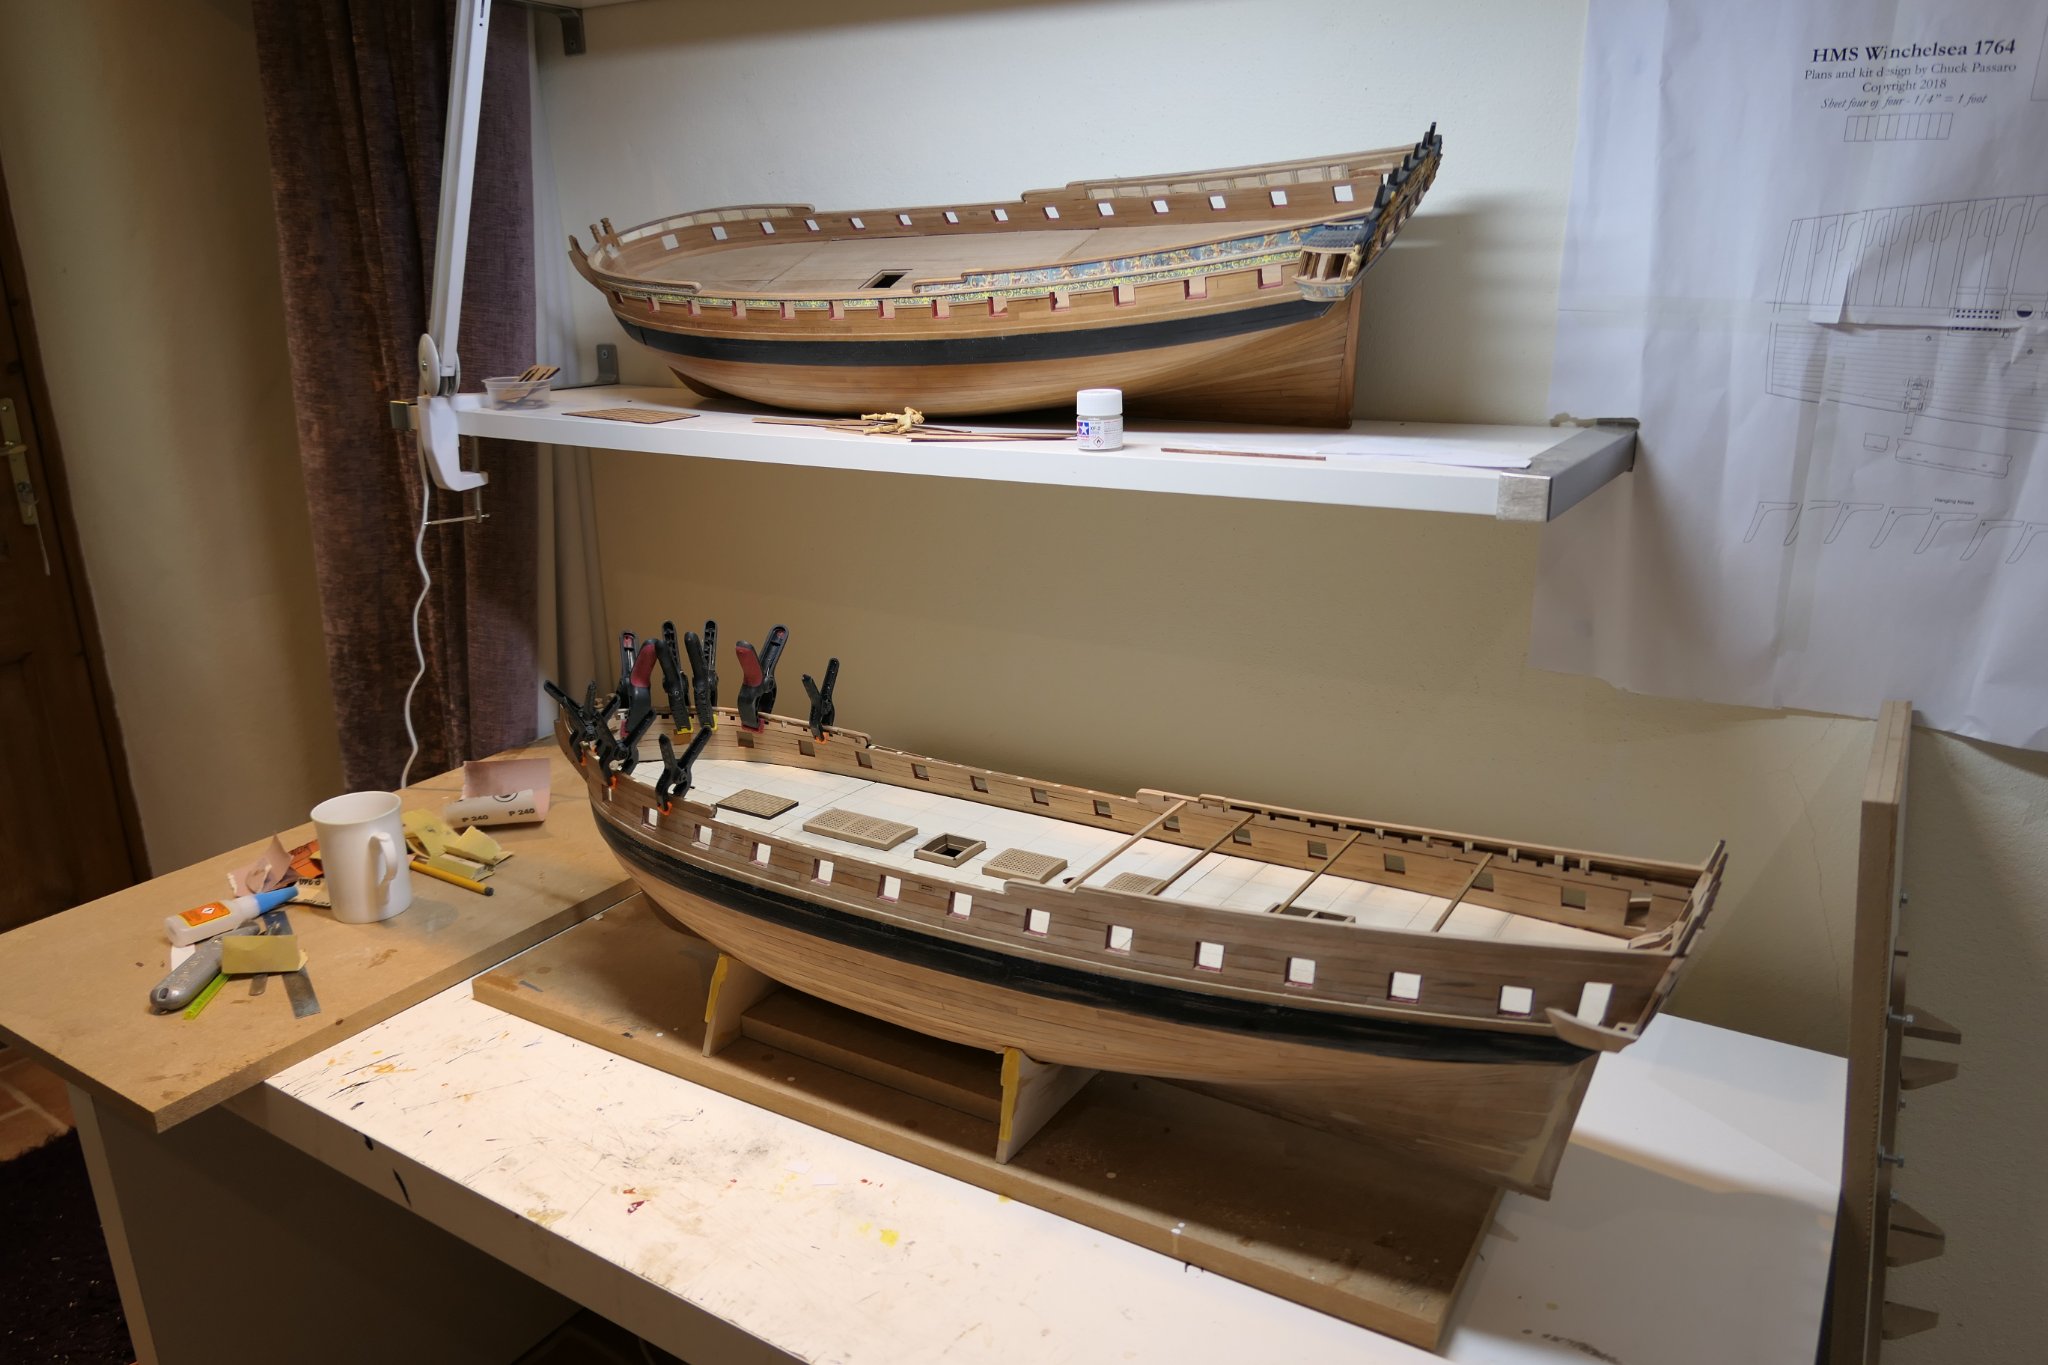
I'm still undecided about the painted hull. I'm leaning towards following Chuck's advice to paint all the way up to the underside of the wales but it seems a shame to cover up wood. I'll leave it for a while.
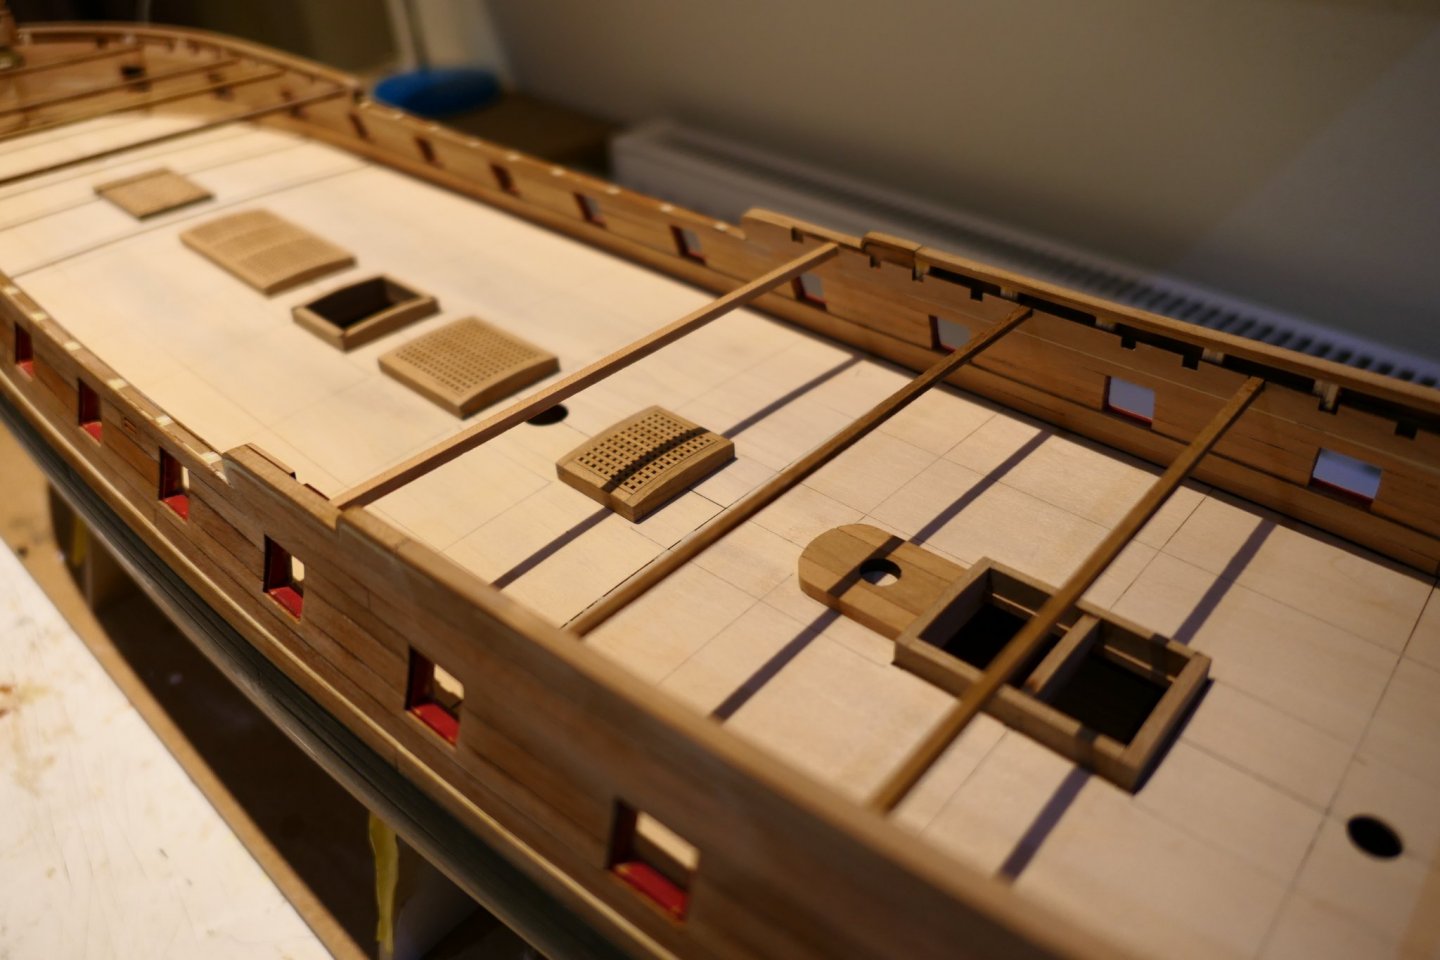
.thumb.JPG.21508889147f6c10ea74e1383c0bc203.JPG)
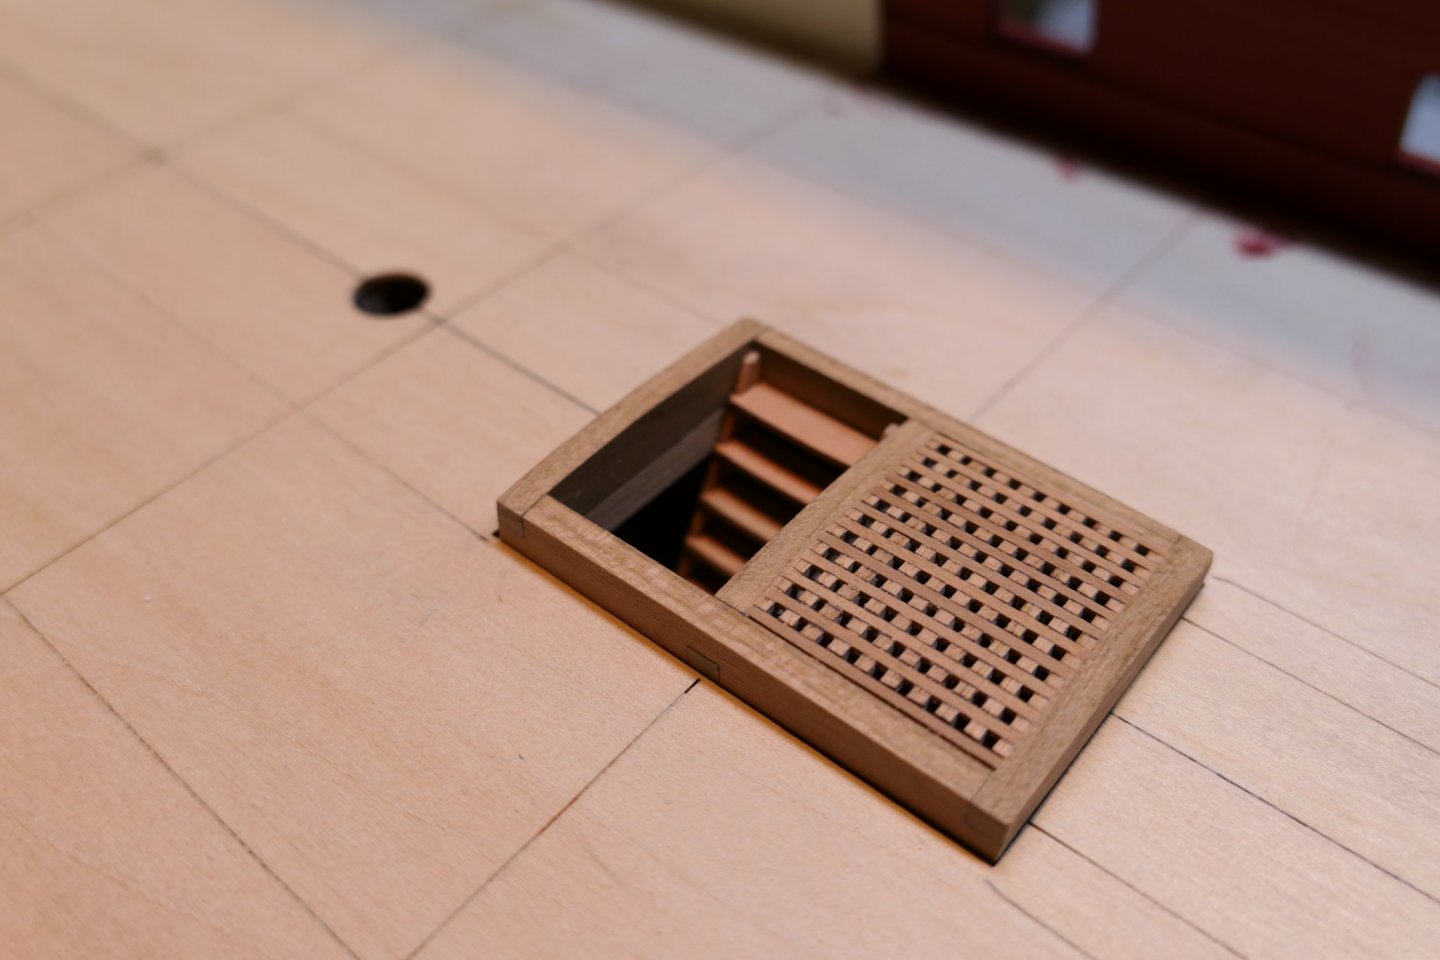
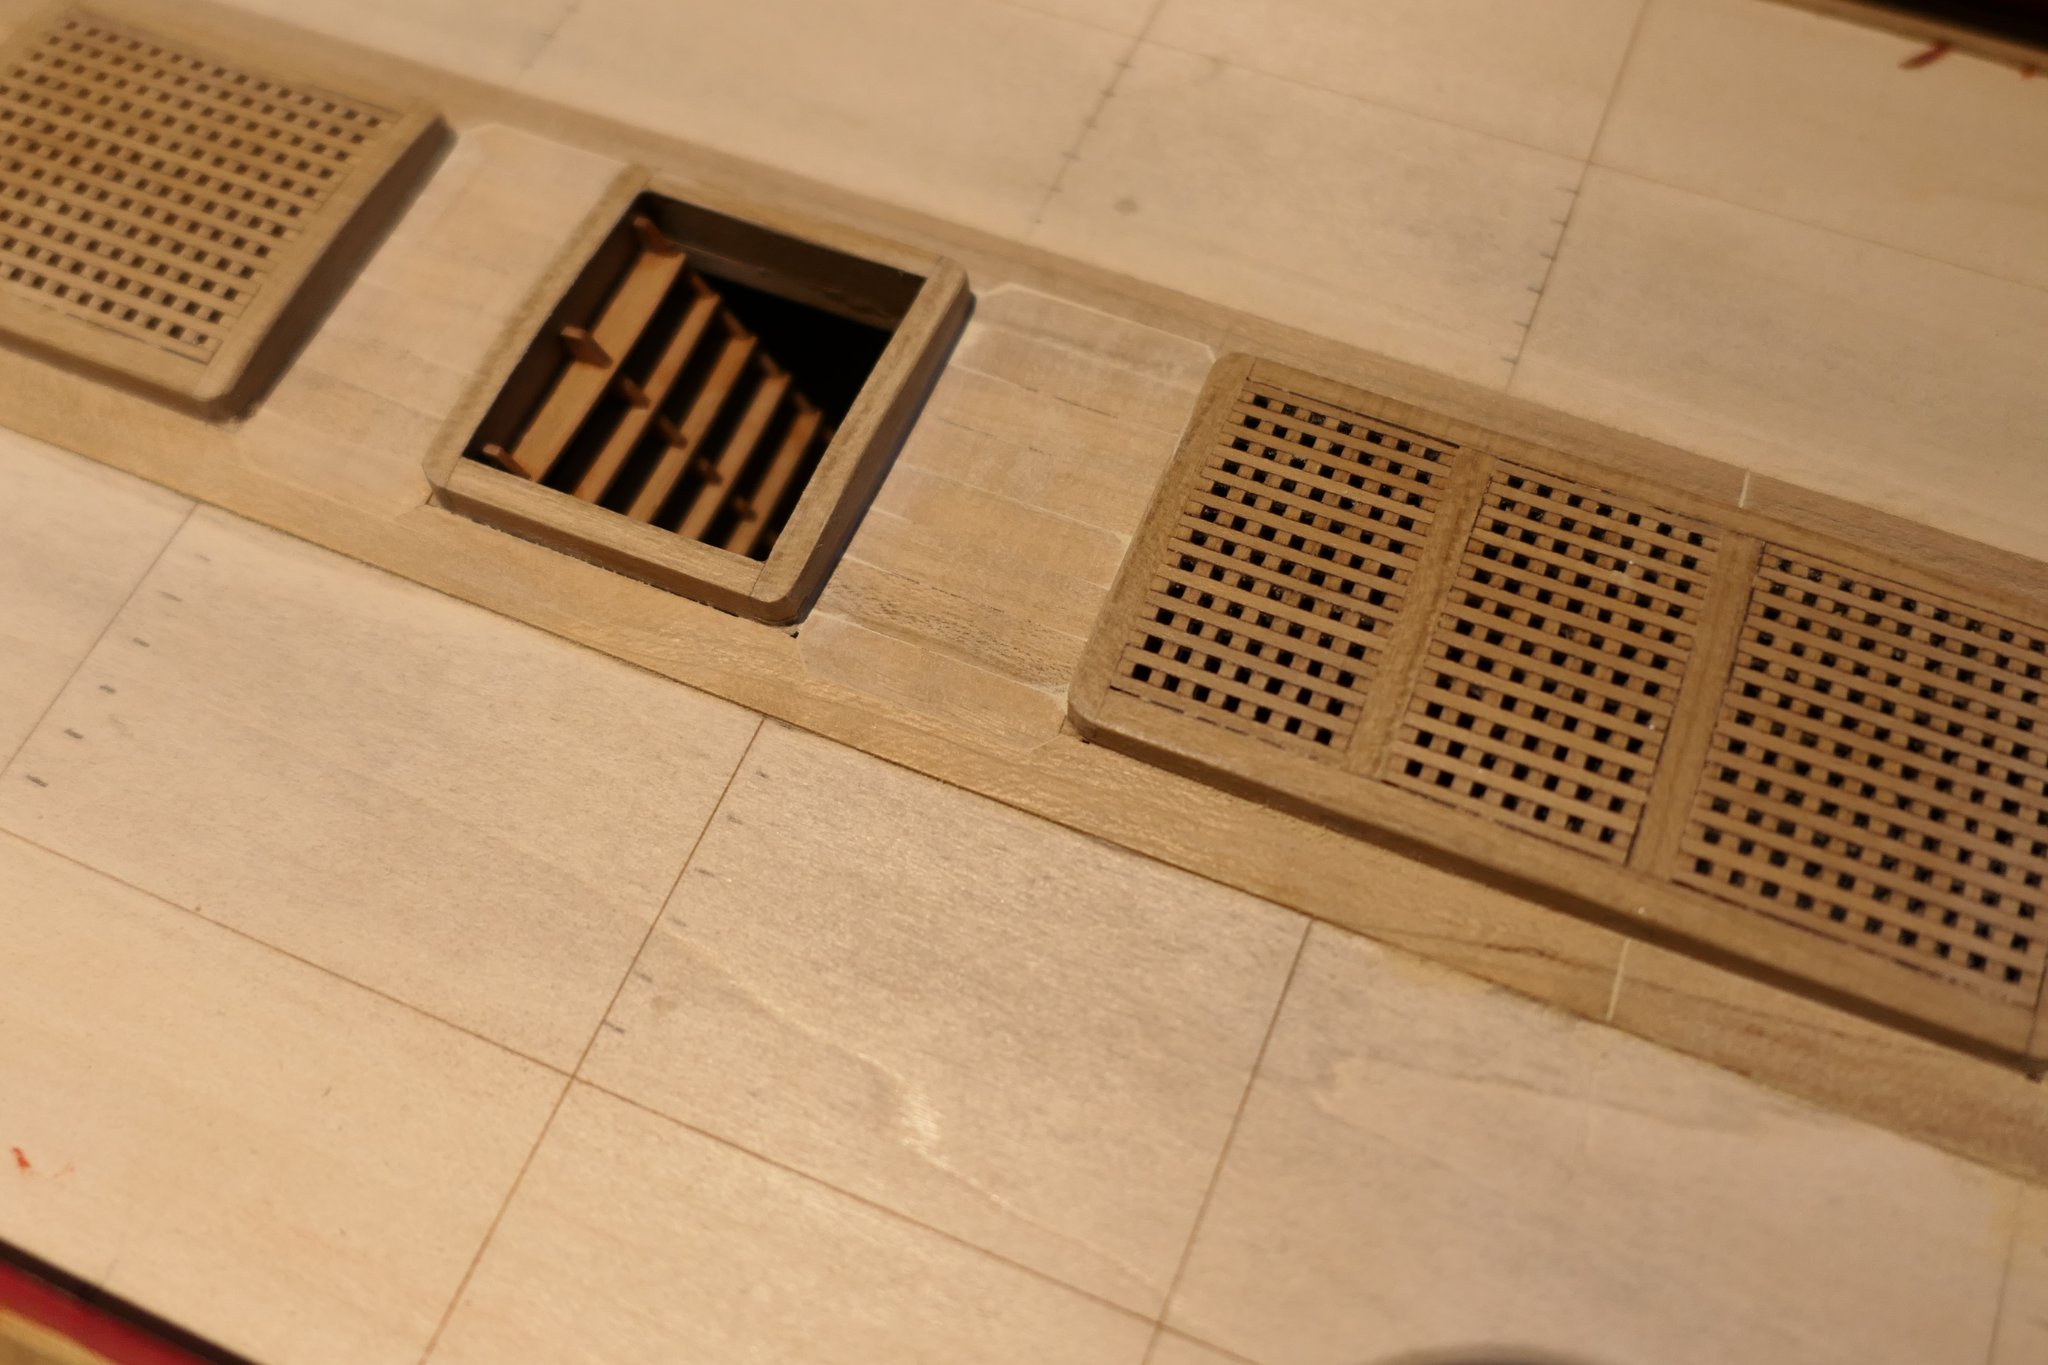
And here is one of those lovely Syren grating kits not yet glued nor the corners rounded off. I can't bring myself to paint these.
.thumb.JPG.3e24578f7208b47c316c83fcd8346c82.JPG)
This is looking scruffy but should clean up really nicely and is so much better than W1.

And finally here is poor old W1 looking rather forlorn and abandoned (which it is).
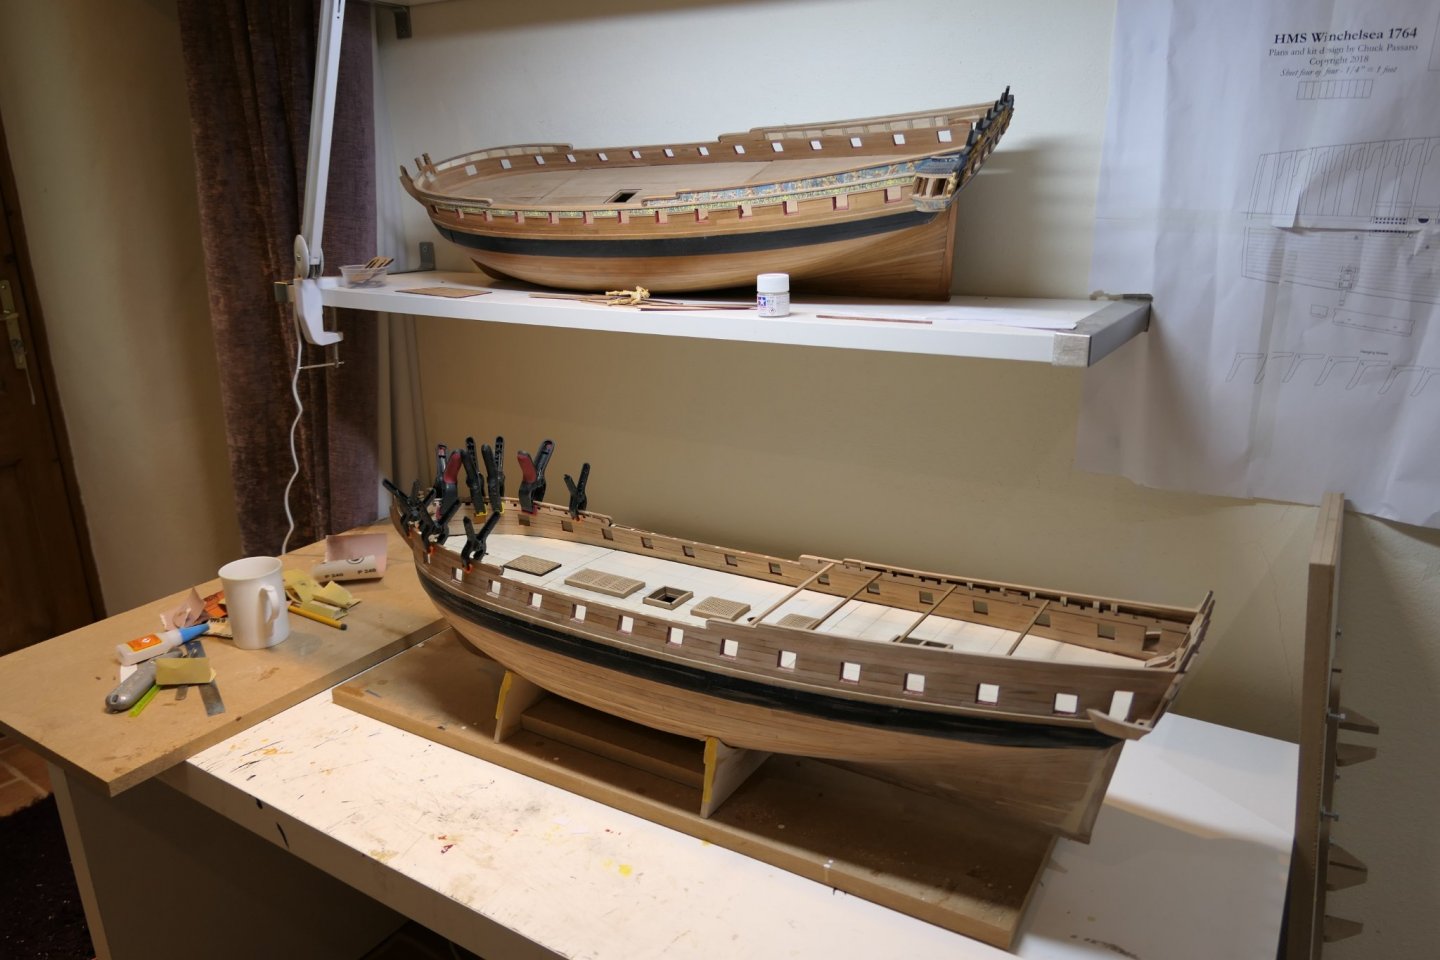
.thumb.JPG.18360a3d5cedb78f7206ac42fbf98277.JPG)
- Edwardkenway, Matt D, Gregory and 7 others
-
10
-
That is looking superb Matthias. Really well done.
Fred
-
Thank you Chuck - will do
Fred

.JPG.76da451a806570b9daf987d37bb4afe9.JPG)


.JPG.2a3aabe2f04b44f9eb351fb8bc606e68.JPG)
.JPG.c5988ab6a0ef24080f34c24d1b36e7ab.JPG)
.JPG.50dcc432349807cd95ce21a3018951cc.JPG)

.JPG.ac4490bed396e320826e7e079fe9ce37.JPG)
.JPG.e40c4089f71167b2ec63f99046d42c06.JPG)


.JPG.652c68a61858874ee9ee125b0dfb9d9d.JPG)
.JPG.a8c58c8ee51213c8e6618fd633d76362.JPG)
.JPG.e96e96c4937d73642c22b789ed4822c8.JPG)
.JPG.25682cb4c7bb4e78b70c535e8be7b807.JPG)

.JPG.2431654886006e0e9b40ca4015c3ed4b.JPG)
.JPG.5bf5f3d37a7c4fecca2ae0950b66a008.JPG)


.JPG.c6a362ed687ae238c76ab737c38b9221.JPG)

.JPG.c4b26c544681f3ea32d97c2a3390e51e.JPG)
.JPG.c893d809d462fe1cd160216d2a1ded90.JPG)
.JPG.26c1956e364c3d8a53a7c4b3cc163bb7.JPG)

HMS Winchelsea by scrubbyj427 - 1:48
in Member Build logs for the HMS Winchelsea
Posted
That's looking great JJ - but those bolt heads on the mast partners haven't got any smaller yet!
Fred