


jfhealey
-
Posts
325 -
Joined
-
Last visited
Content Type
Profiles
Forums
Gallery
Events
Posts posted by jfhealey
-
-
Glenn
I've only now found this build log. I'm going to set aside some time to read it from start to finish. First impressions, looking only at the last page pictures, are that this is essential reading for anyone thinking of building the Cheerful. Which I am: I think I need, if not a break from the Winchelsea, then at least something else I can turn to when I feel I'm losing my way a bit (like now!).
This really is a lovely build. I'm looking forward to my reading .
All the best
Fred Healey.
- JpR62, scrubbyj427, glbarlow and 2 others
-
 5
5
-
As to the breech lines: JJ managed to get 5 or 6 windings beneath the knobbly bit at the back of the barrel (I'm sure I know the name but I'm having a senior moment about it at the moment). I'm seriously impressed with that. I got 1 - and that with a needle and thread. There is much less room there than appears to be the case from JJ's pictures. I shall try harder next time!
My only tip, if you are going to rig your guns, is to rig the bolts to the gun rather than the bulkhead. Fixing the rigged bolt into a pre drilled hole in the bulkhead is the work of a moment. Rigging the breeching rope (or the tackle) to an already fixed in bolt is a nightmare. I know this from experience.
As to the tackle: I'm sure coiled down tackle is authentic. But was it, I wonder, Sunday best for the Captain's inspection? I can't believe (not that I know a thing about it) that ropes were coiled down like that everyday. On a model I guess it's a matter of what you (unless you are a stickler for historical accuracy) like the look of. "Frapping", by a short head, just looks tidier to me. But lots of you have left your guns un-rigged as of course did Chuck - and you can't really argue with that can you?
Other than that I know I have a lot of work to do on my knots and splicing. But for a first go at rigging guns I'm pretty satisfied.
All the best everyone.
Fred
- FrankWouts and scrubbyj427
-
2
-
I don't think those guns could possibly have turned out any better. Really top work! Keep it up for the next twenty five or so.......! They test your patience.
All the best JJ
Fred
-
This is superb. But what, can I ask, are you planning to do with the tops of the bollard timbers? You seem to have followed the plan meticulously in every respect except for those - where you did your own thing from the outset. I suspect you have a plan and I'm intrigued to know what it is.
In passing - I do envy you Americans your "February meet". Lucky fellows to be able to get together.
All the best
Fred Healey
- Edwardkenway and FrankWouts
-
2
-
Thank you bdgiantman.
-
I don't quite know how those last 4 or 5 pictures came to be posted. I'm not on top of the technology here. And thank you Gregory for the speediest of responses!
-
Evening all
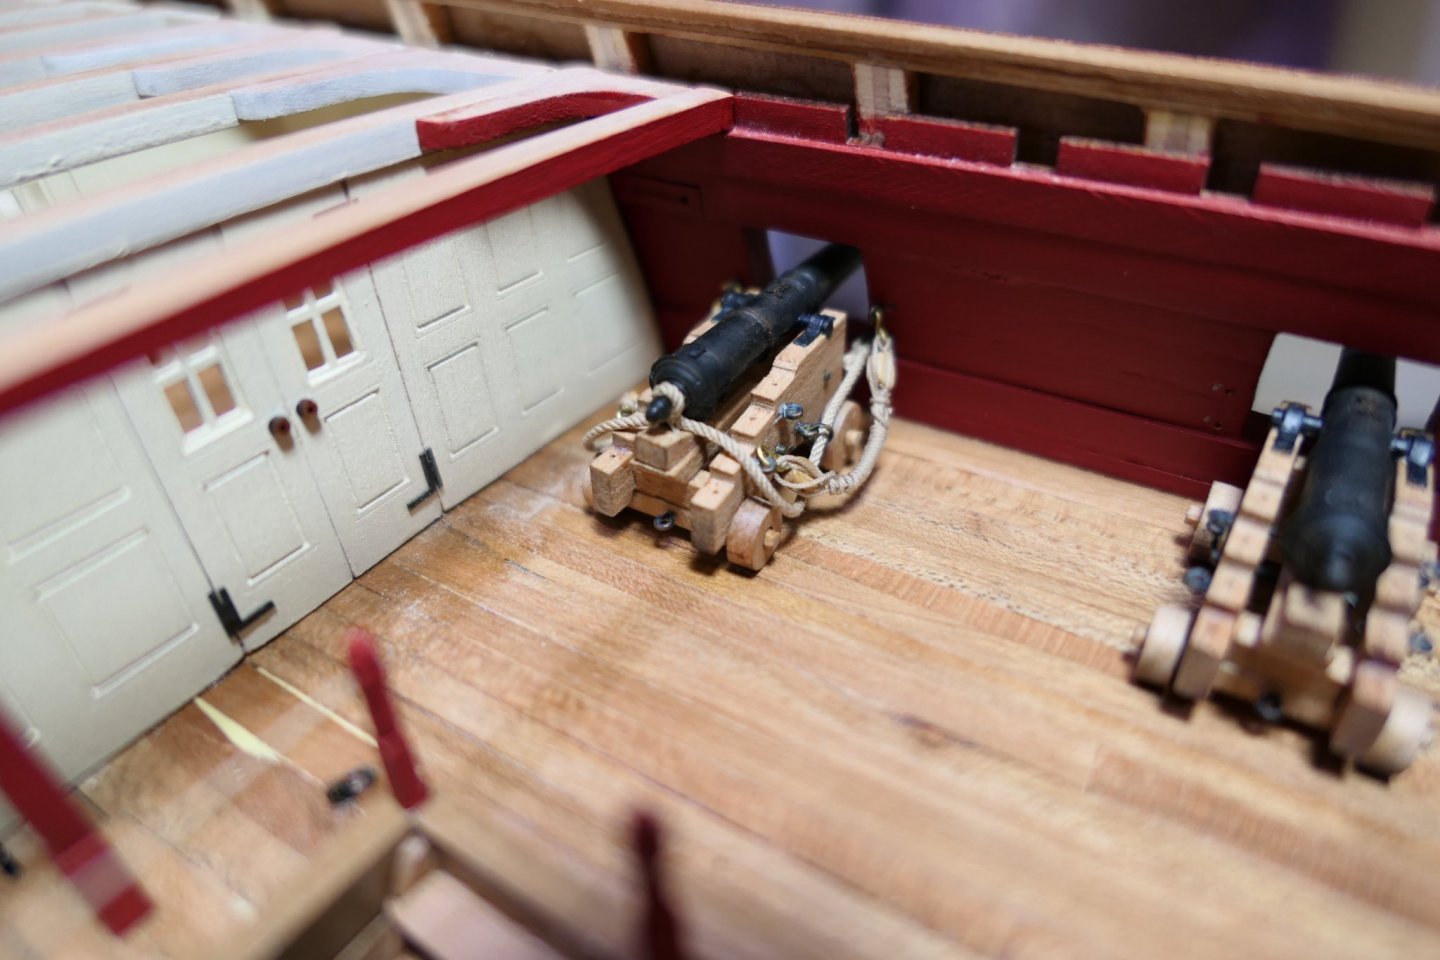
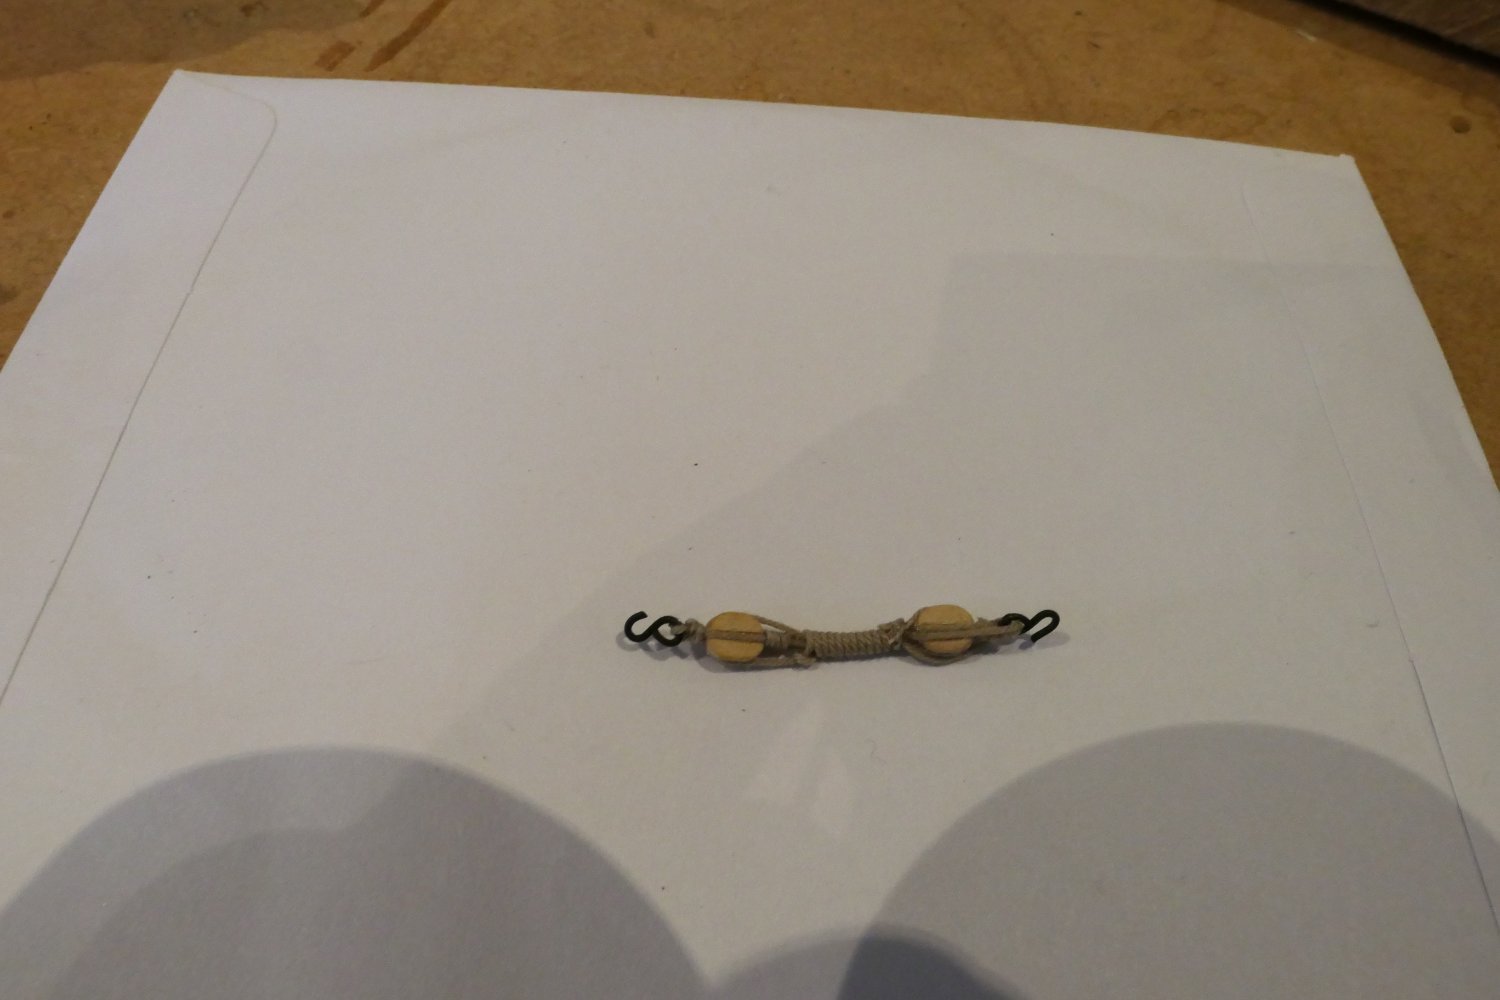
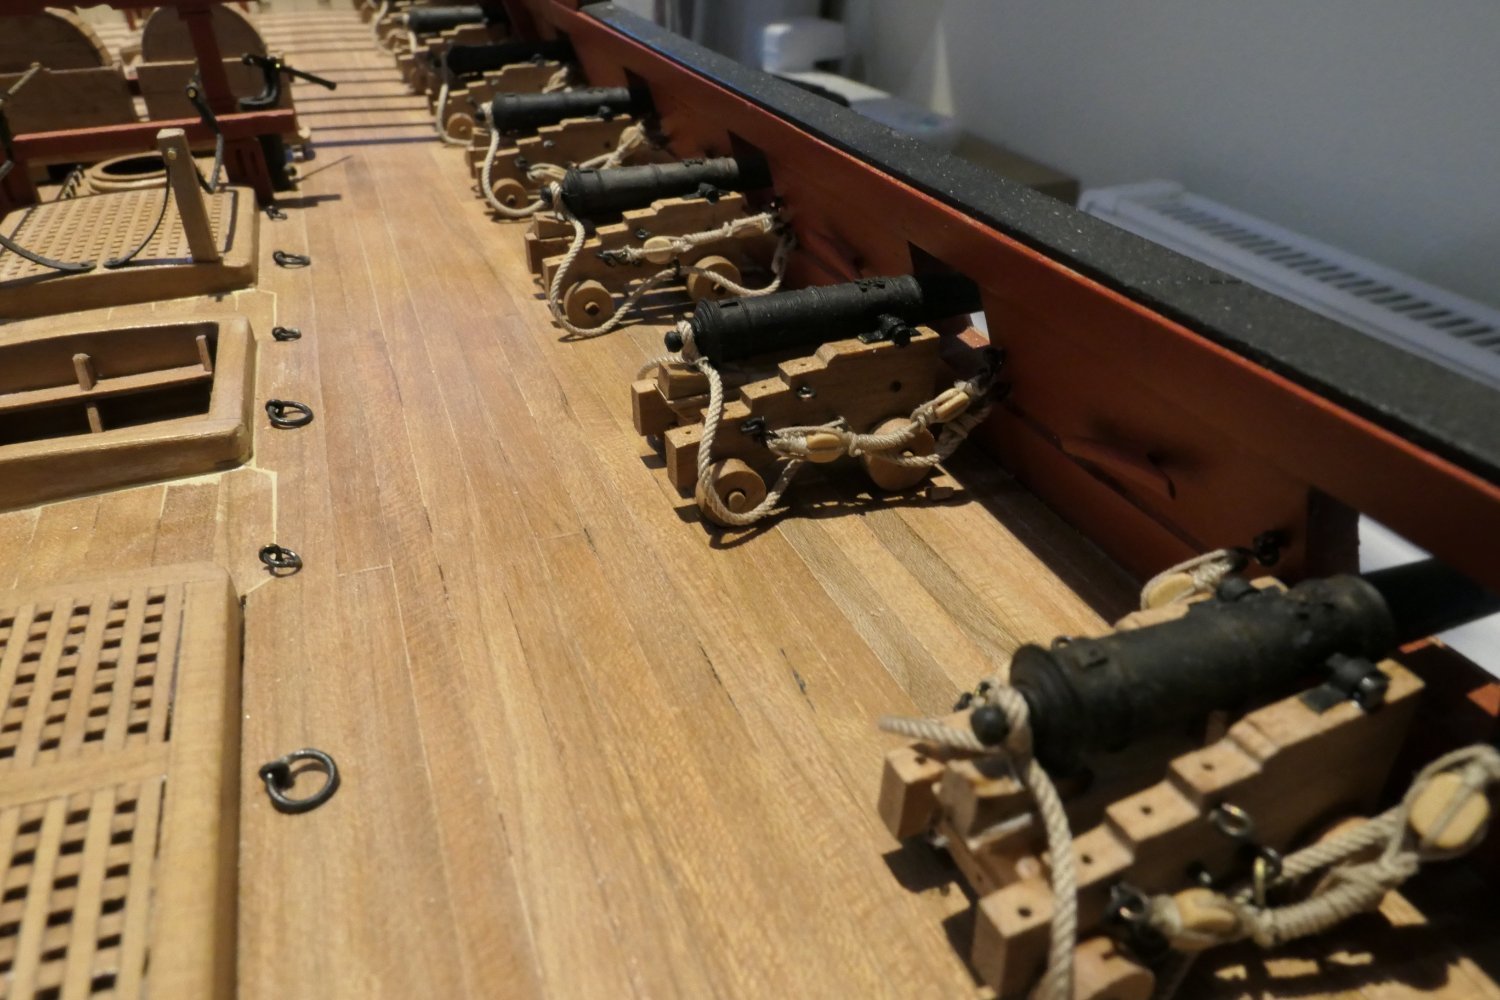
I have - finally - finished rigging the guns. I'm pretty happy for a first go.
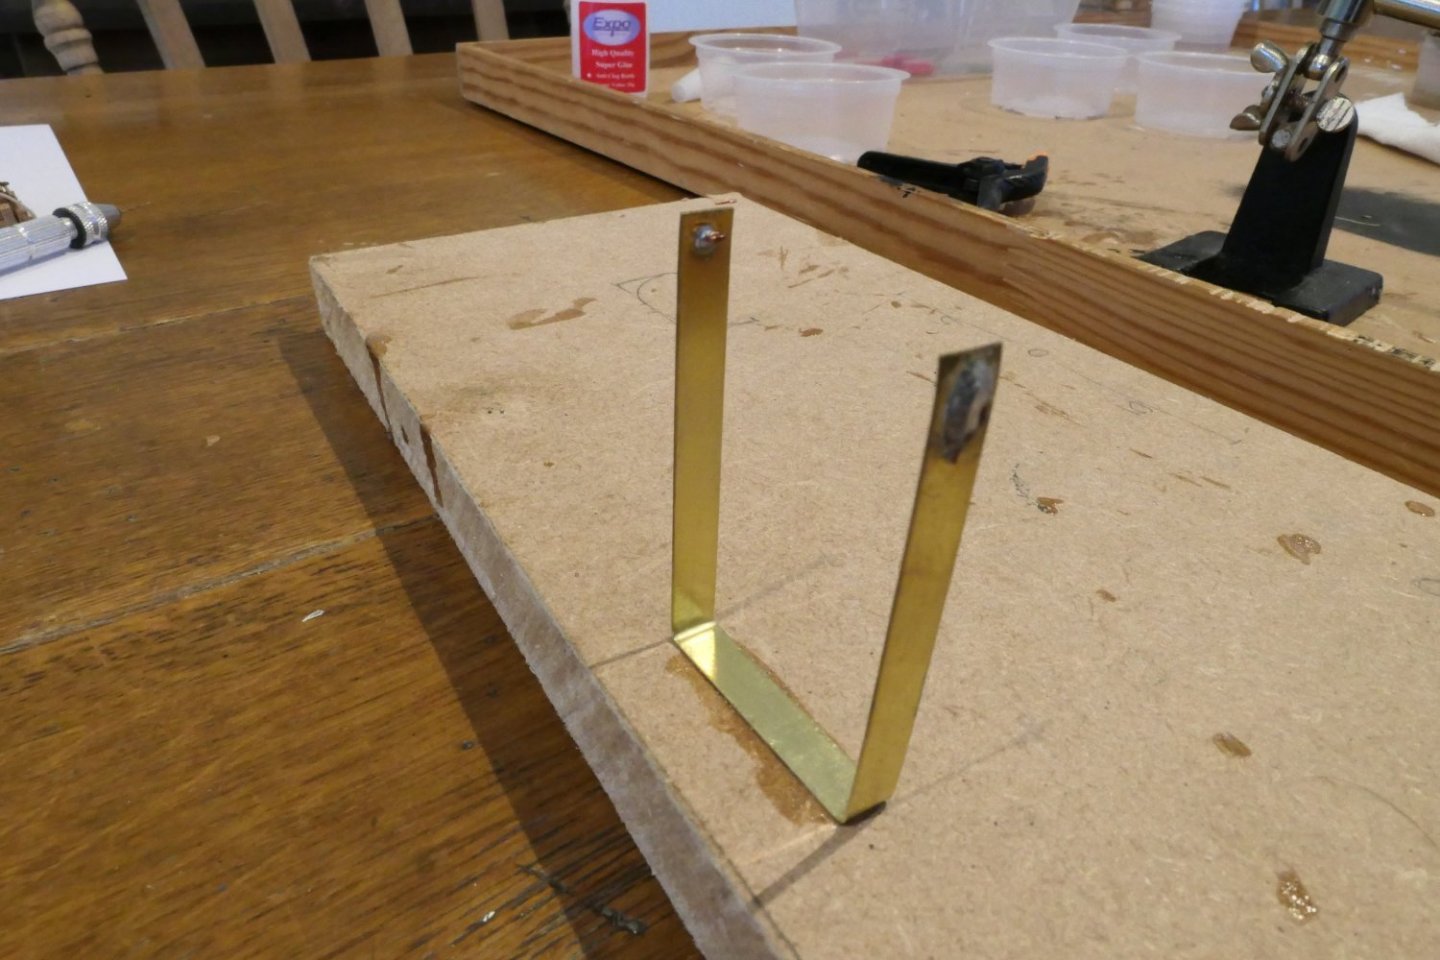
I used Syren 5/32 single blocks, 0.050 Ultra tan rope for the breeching and 0.018 for the tackle. I formed a little "hands free" from brass strip with eyelets soldered near the top. The gap between the eyelets is 3.7mm which produced a "frapped" outhaul tackle which looks about right to my eye.
Here is one end of the tackle.
.thumb.JPG.a8b032c0fa5ca7de807517607437c18a.JPG)
.thumb.JPG.8cc89e0ee704fec22106ce8a4a65a717.JPG)
And this is the other.
.thumb.JPG.cd3127583b55850112bcdc373b7388ae.JPG)
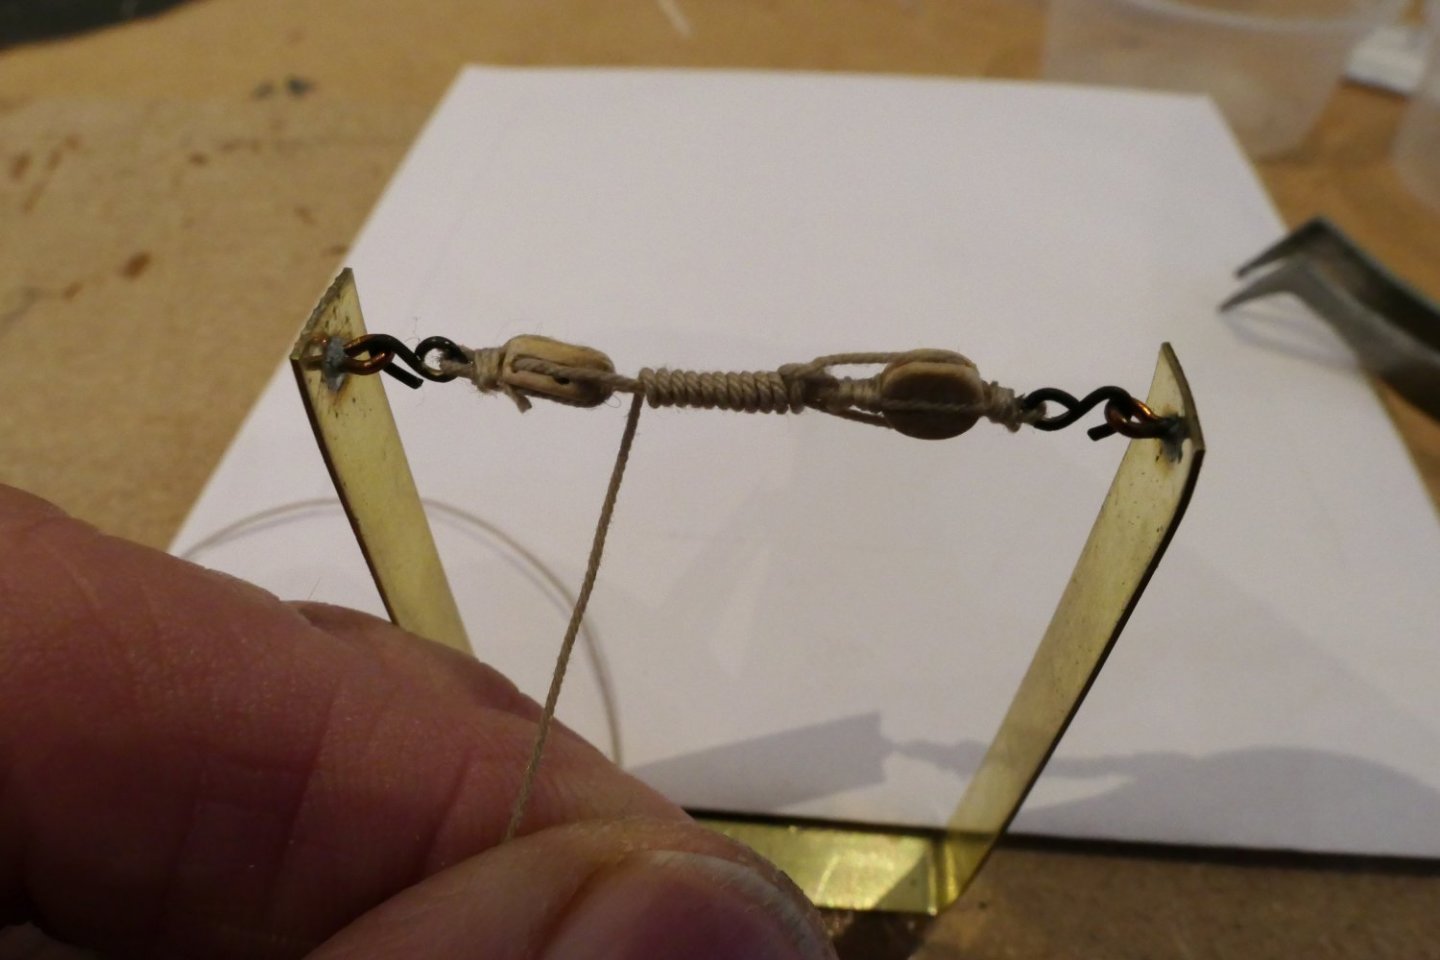
And here they are in the hands free.
.thumb.JPG.3bc026679e1e2c9fa699aa96b54f74c0.JPG)
I put in a simple overhand (?) knot/twist.
.thumb.JPG.ac3184f35de7046733dd9ed3be7976af.JPG)
And start "frapping". The brass strips have sufficient spring to provide a little tension and keep everything in place.
Then push the free end through the eye of the hook.

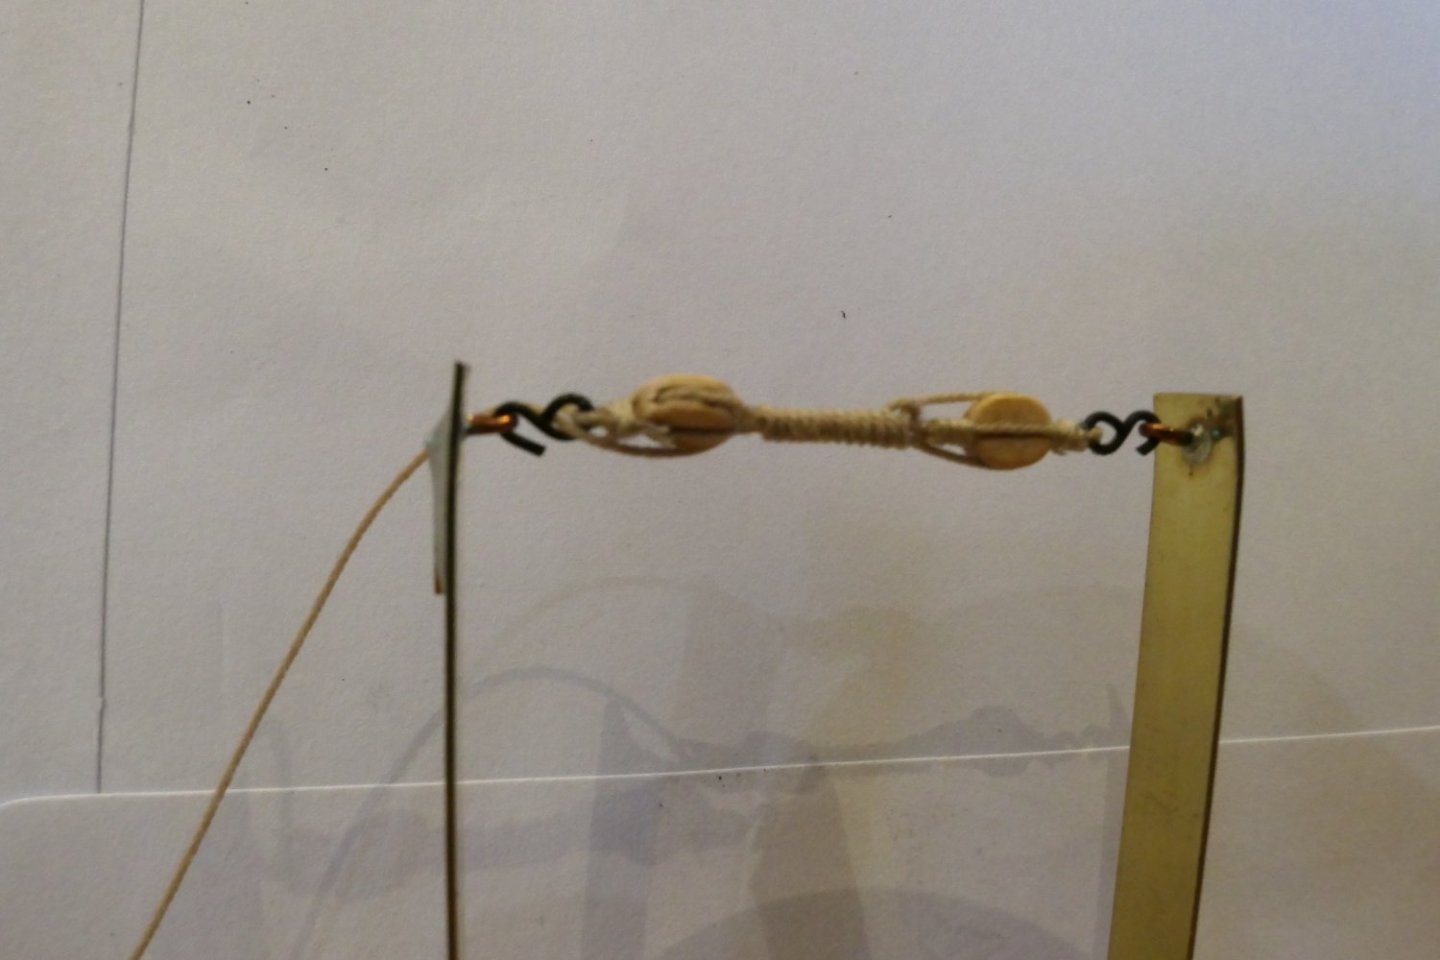
And tie it off.
.thumb.JPG.825ff66d0c102cbad6d4eec679e1954a.JPG)
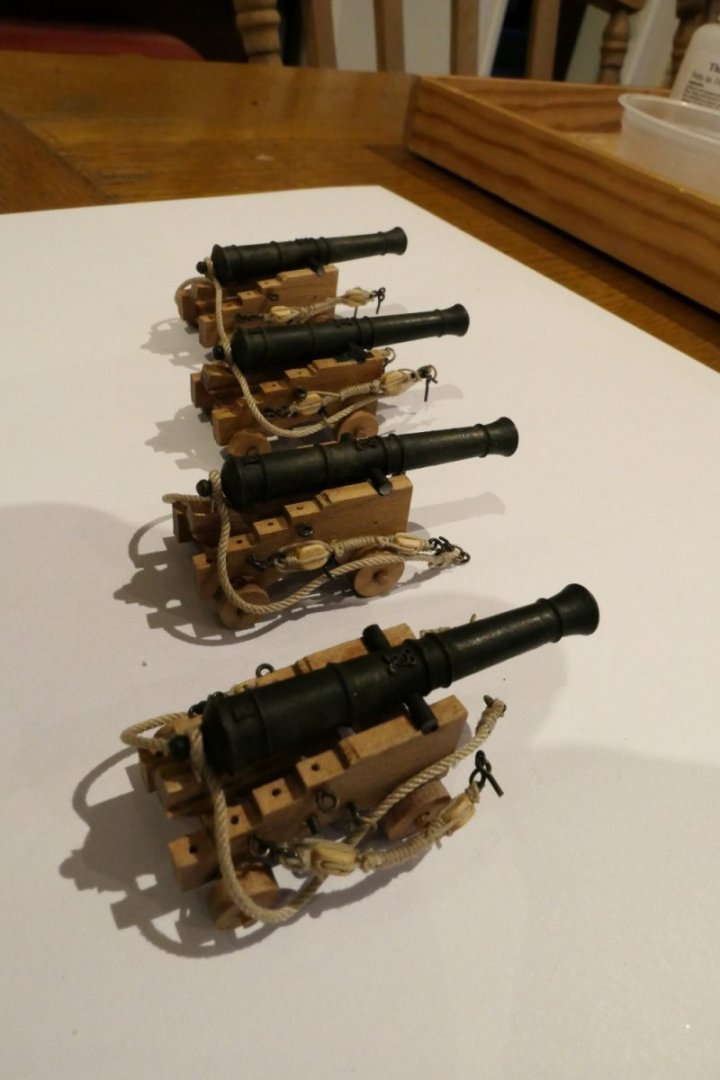
Here are the rigged guns waiting to go on board.
.thumb.JPG.7a6e82fe23dd218f2fe3cda5a4e508df.JPG)
It's a lot easier to fix the ring bolts to the rigging rope rather than the bulwarks. I did not take a picture of the breeching rope but its just tied off underneath the gun barrel.
All the best everyone
Fred


-
Thank you Gregory , Matt and Chuck for your very kind comments and the likes.
Matt - I wondered whether the launch and gangways might cover much of the visible deck - I hope so.
Chuck - like everyone else I can't wait to have a crack at Speedwell. As you say: take everything youv'e learned and move on.
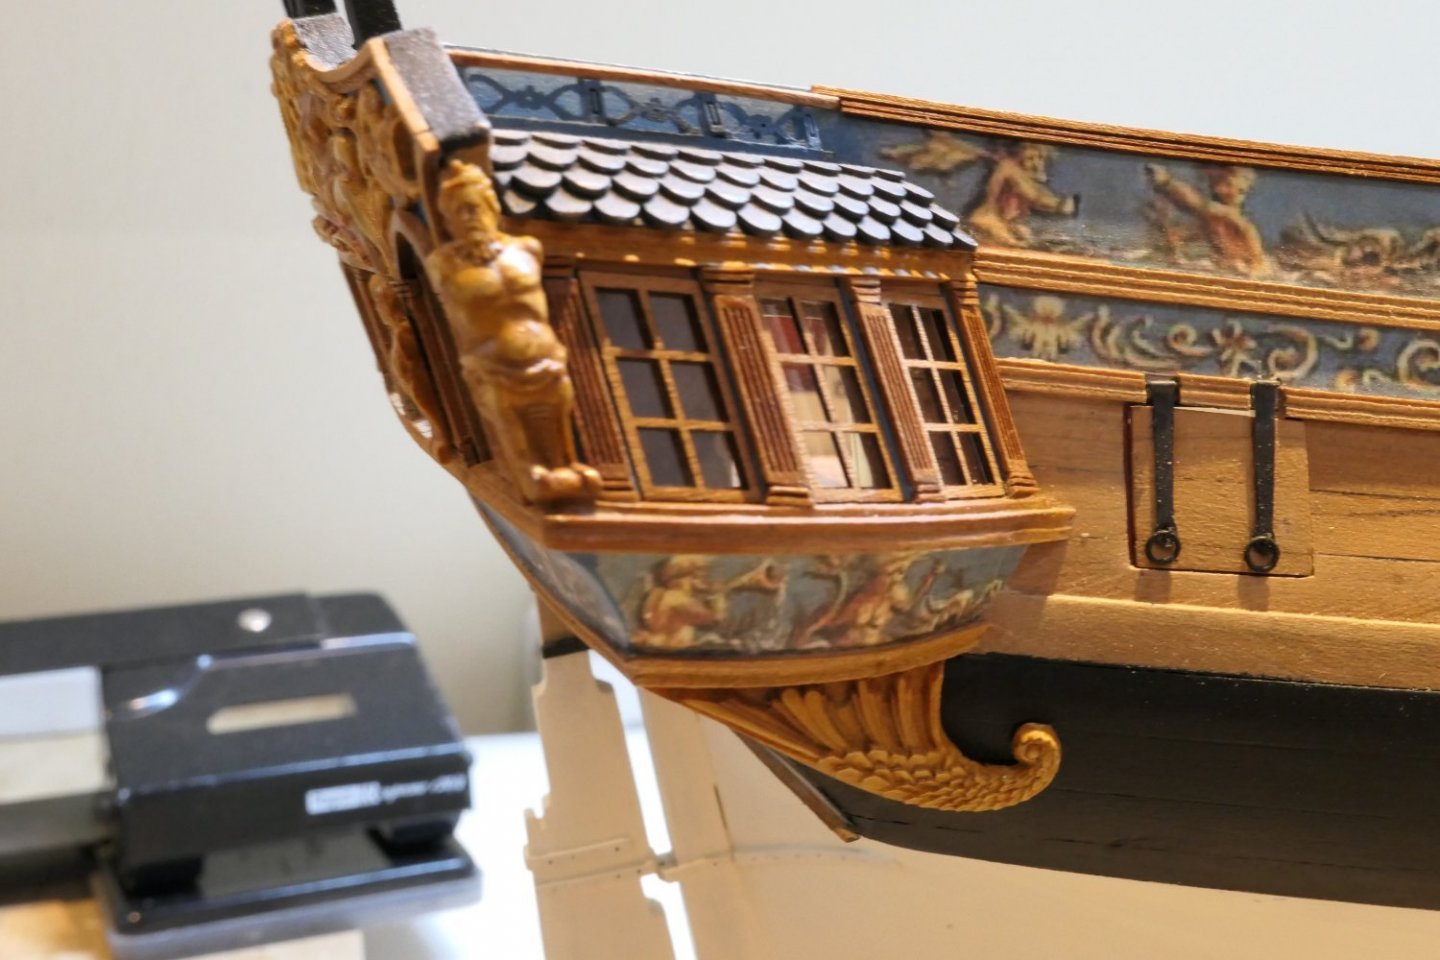
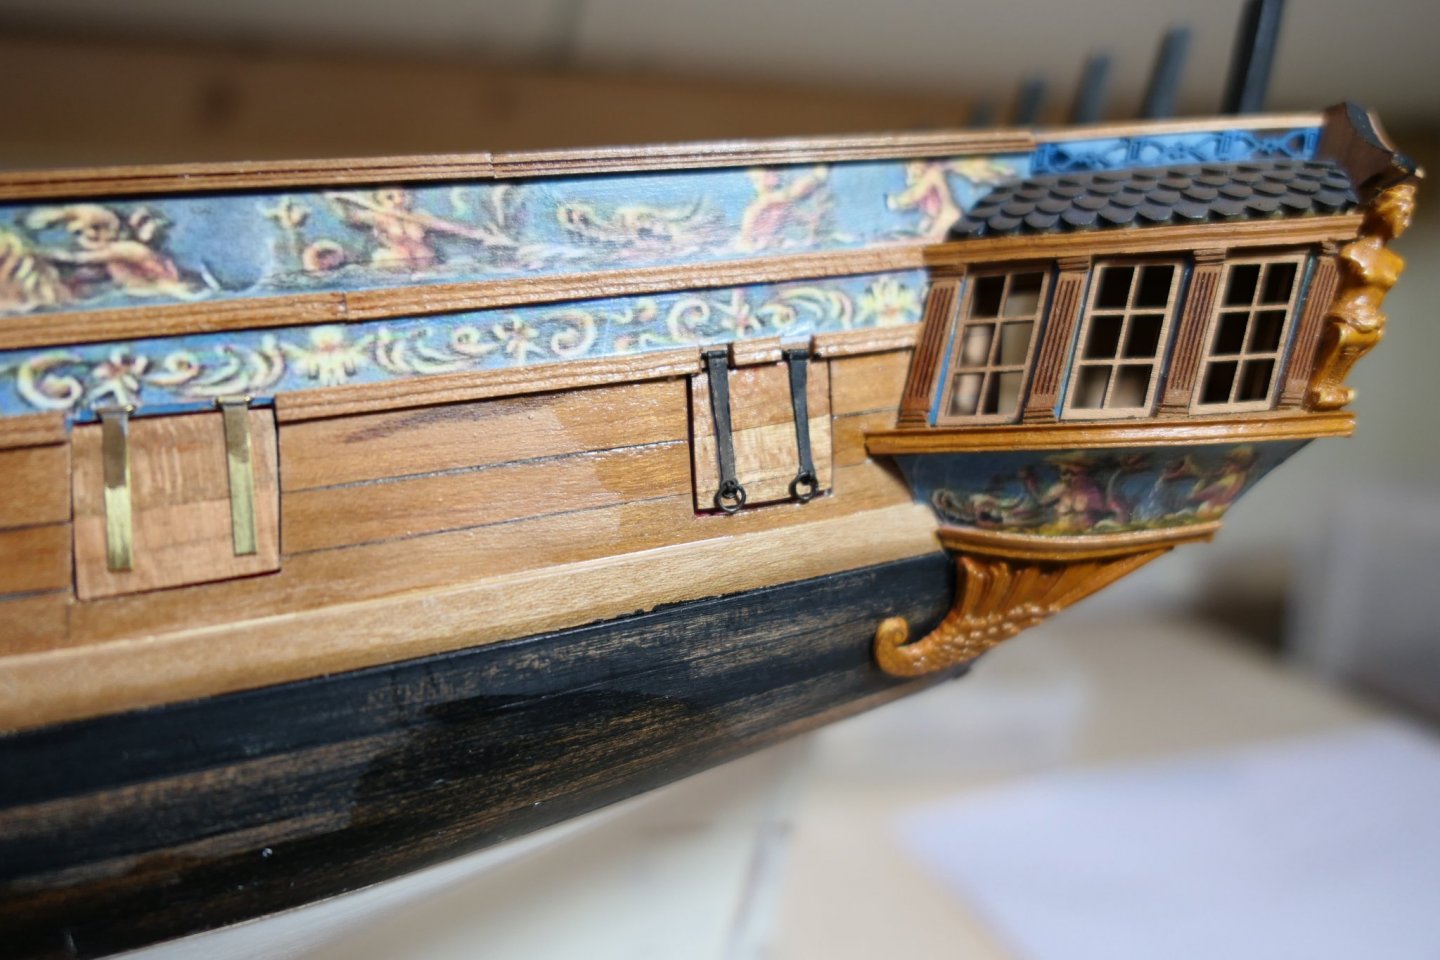
But I still hanker to make the best job I can of your lovely Winchelsea. I'm wondering whether - were I to do it again - I could paint the friezes (I love Siggi's HMS Leopard - really inspirational) and carve the fancy mouldings and have a go at carving the figurehead - and certainly include masts and rigging. Given that I've never done any of those thing before I suspect I'm dreaming of an outcome beyond my ability but I shall have a go. I think I'll make a mast and then review.
- FrankWouts and CiscoH
-
2
-
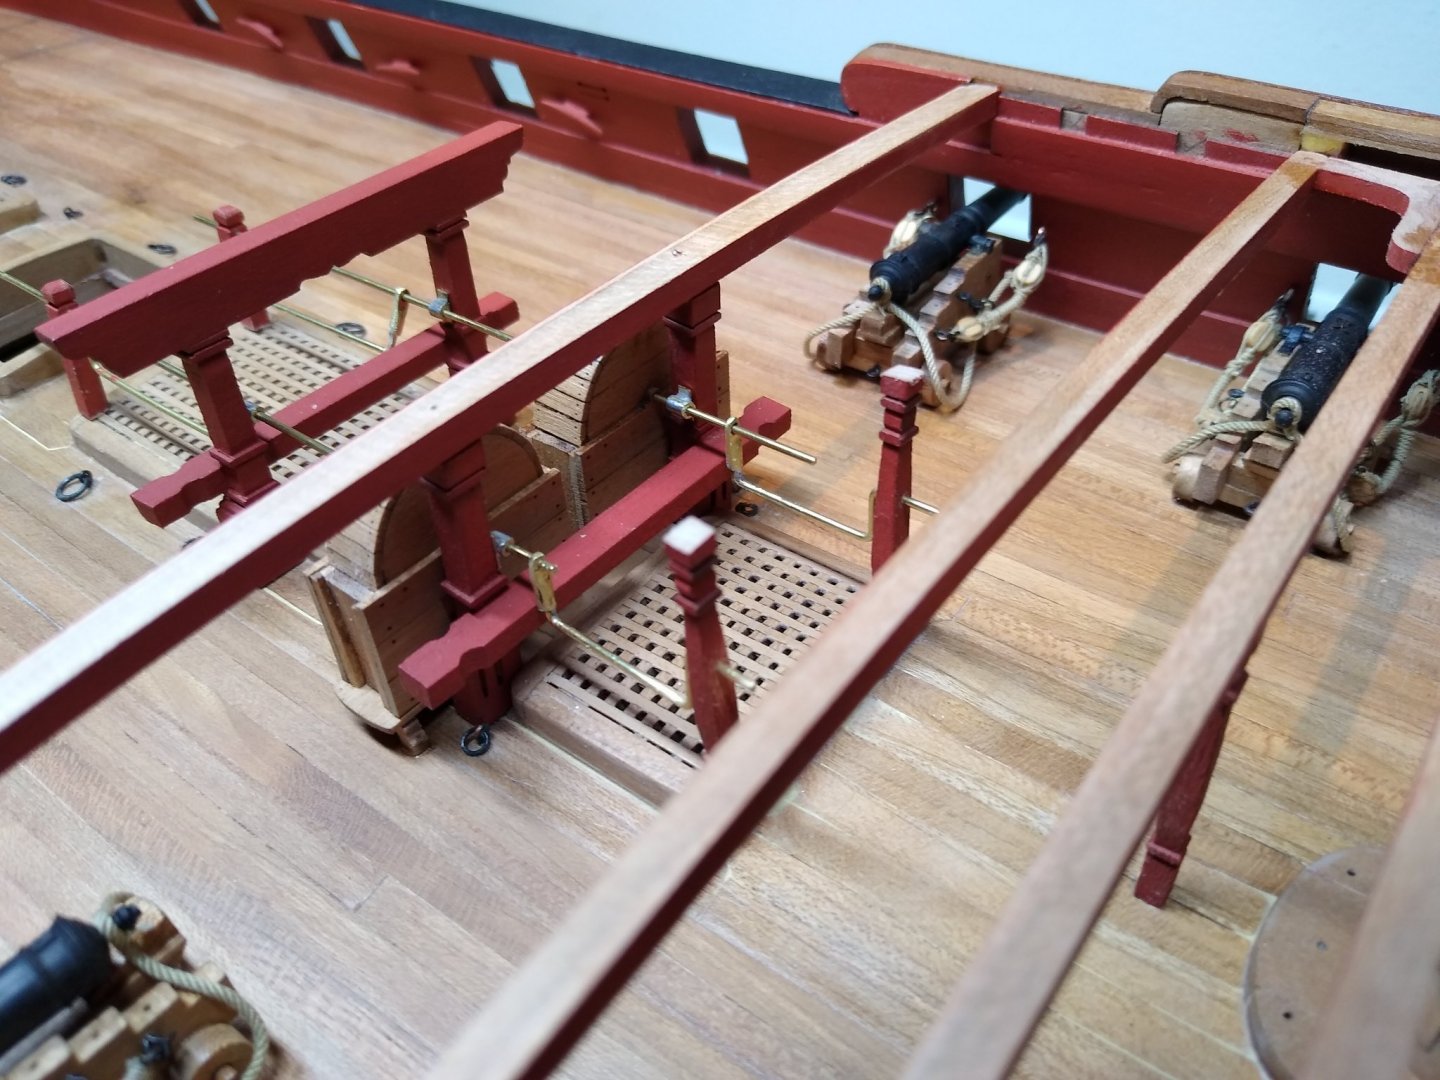
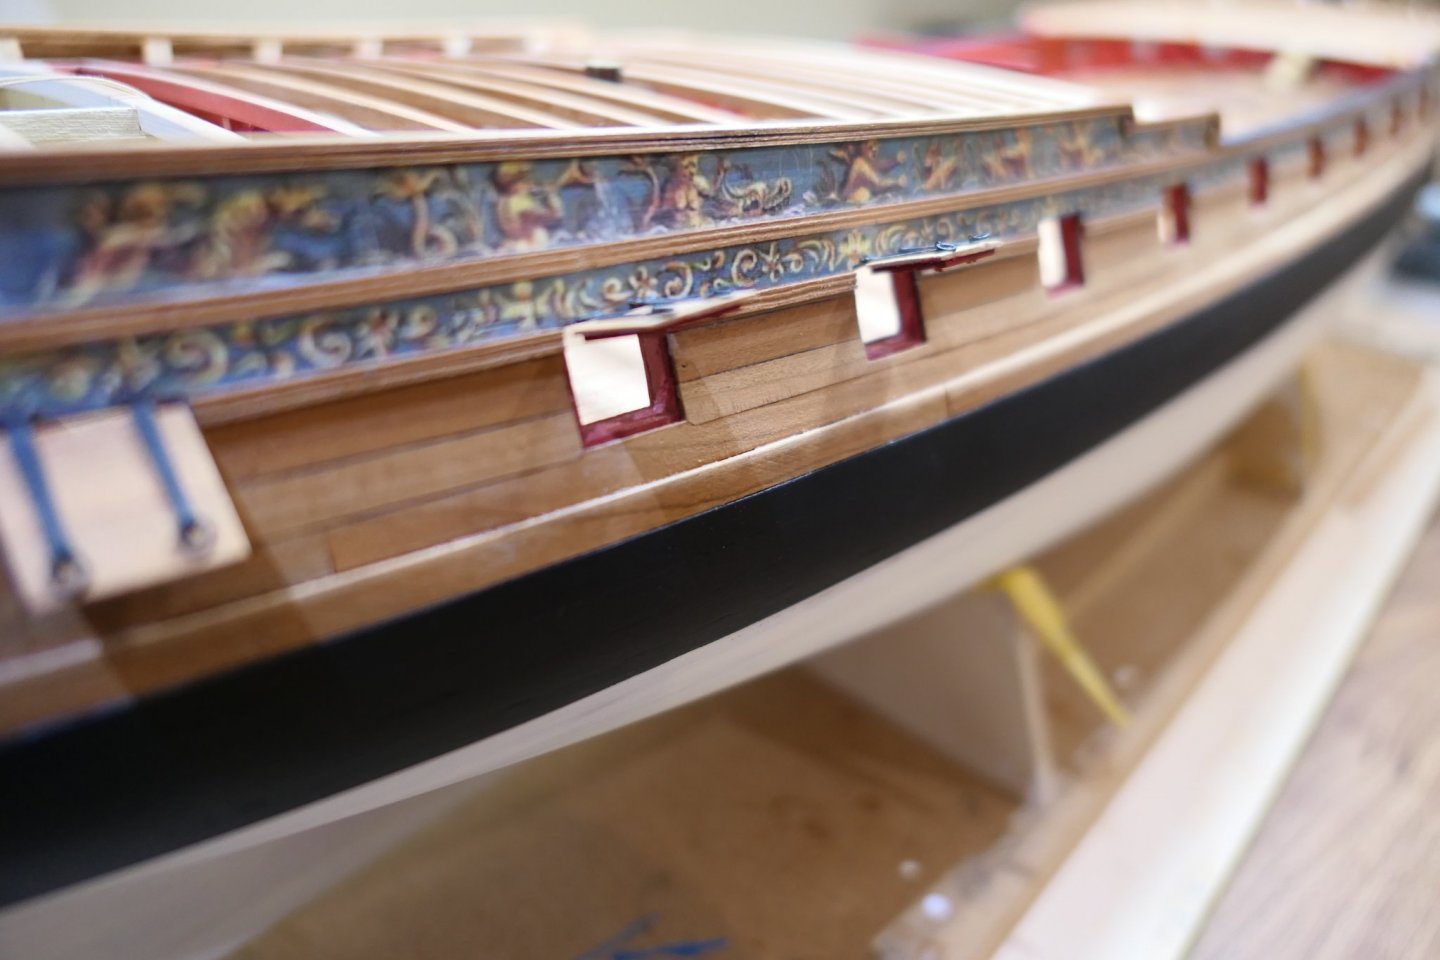
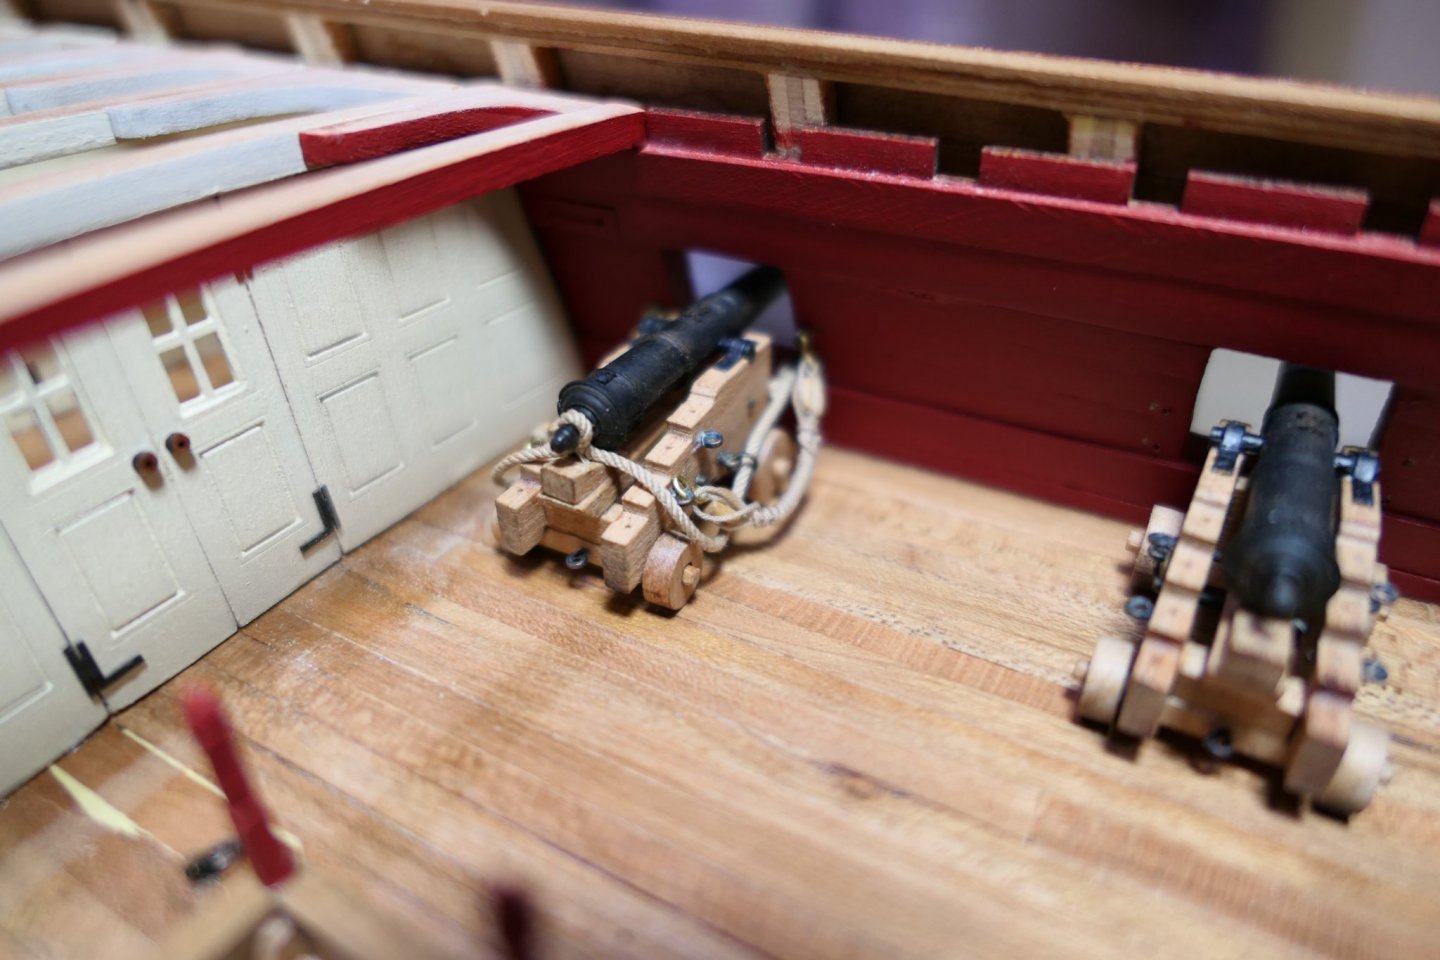
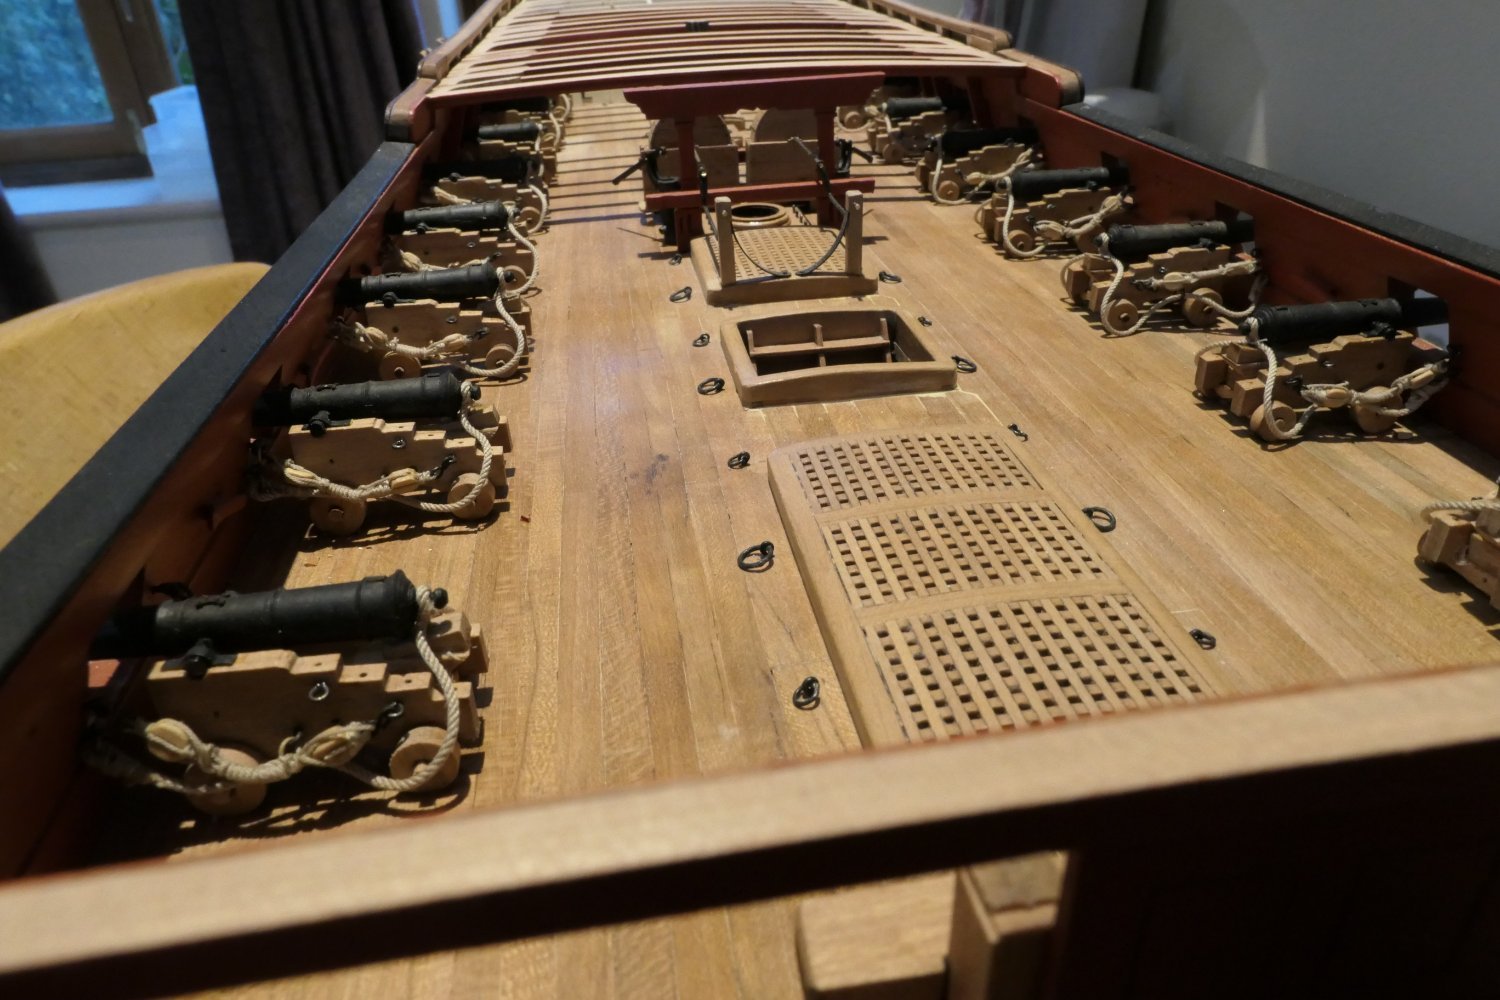
Good afternoon everyone. Thank you for the likes.
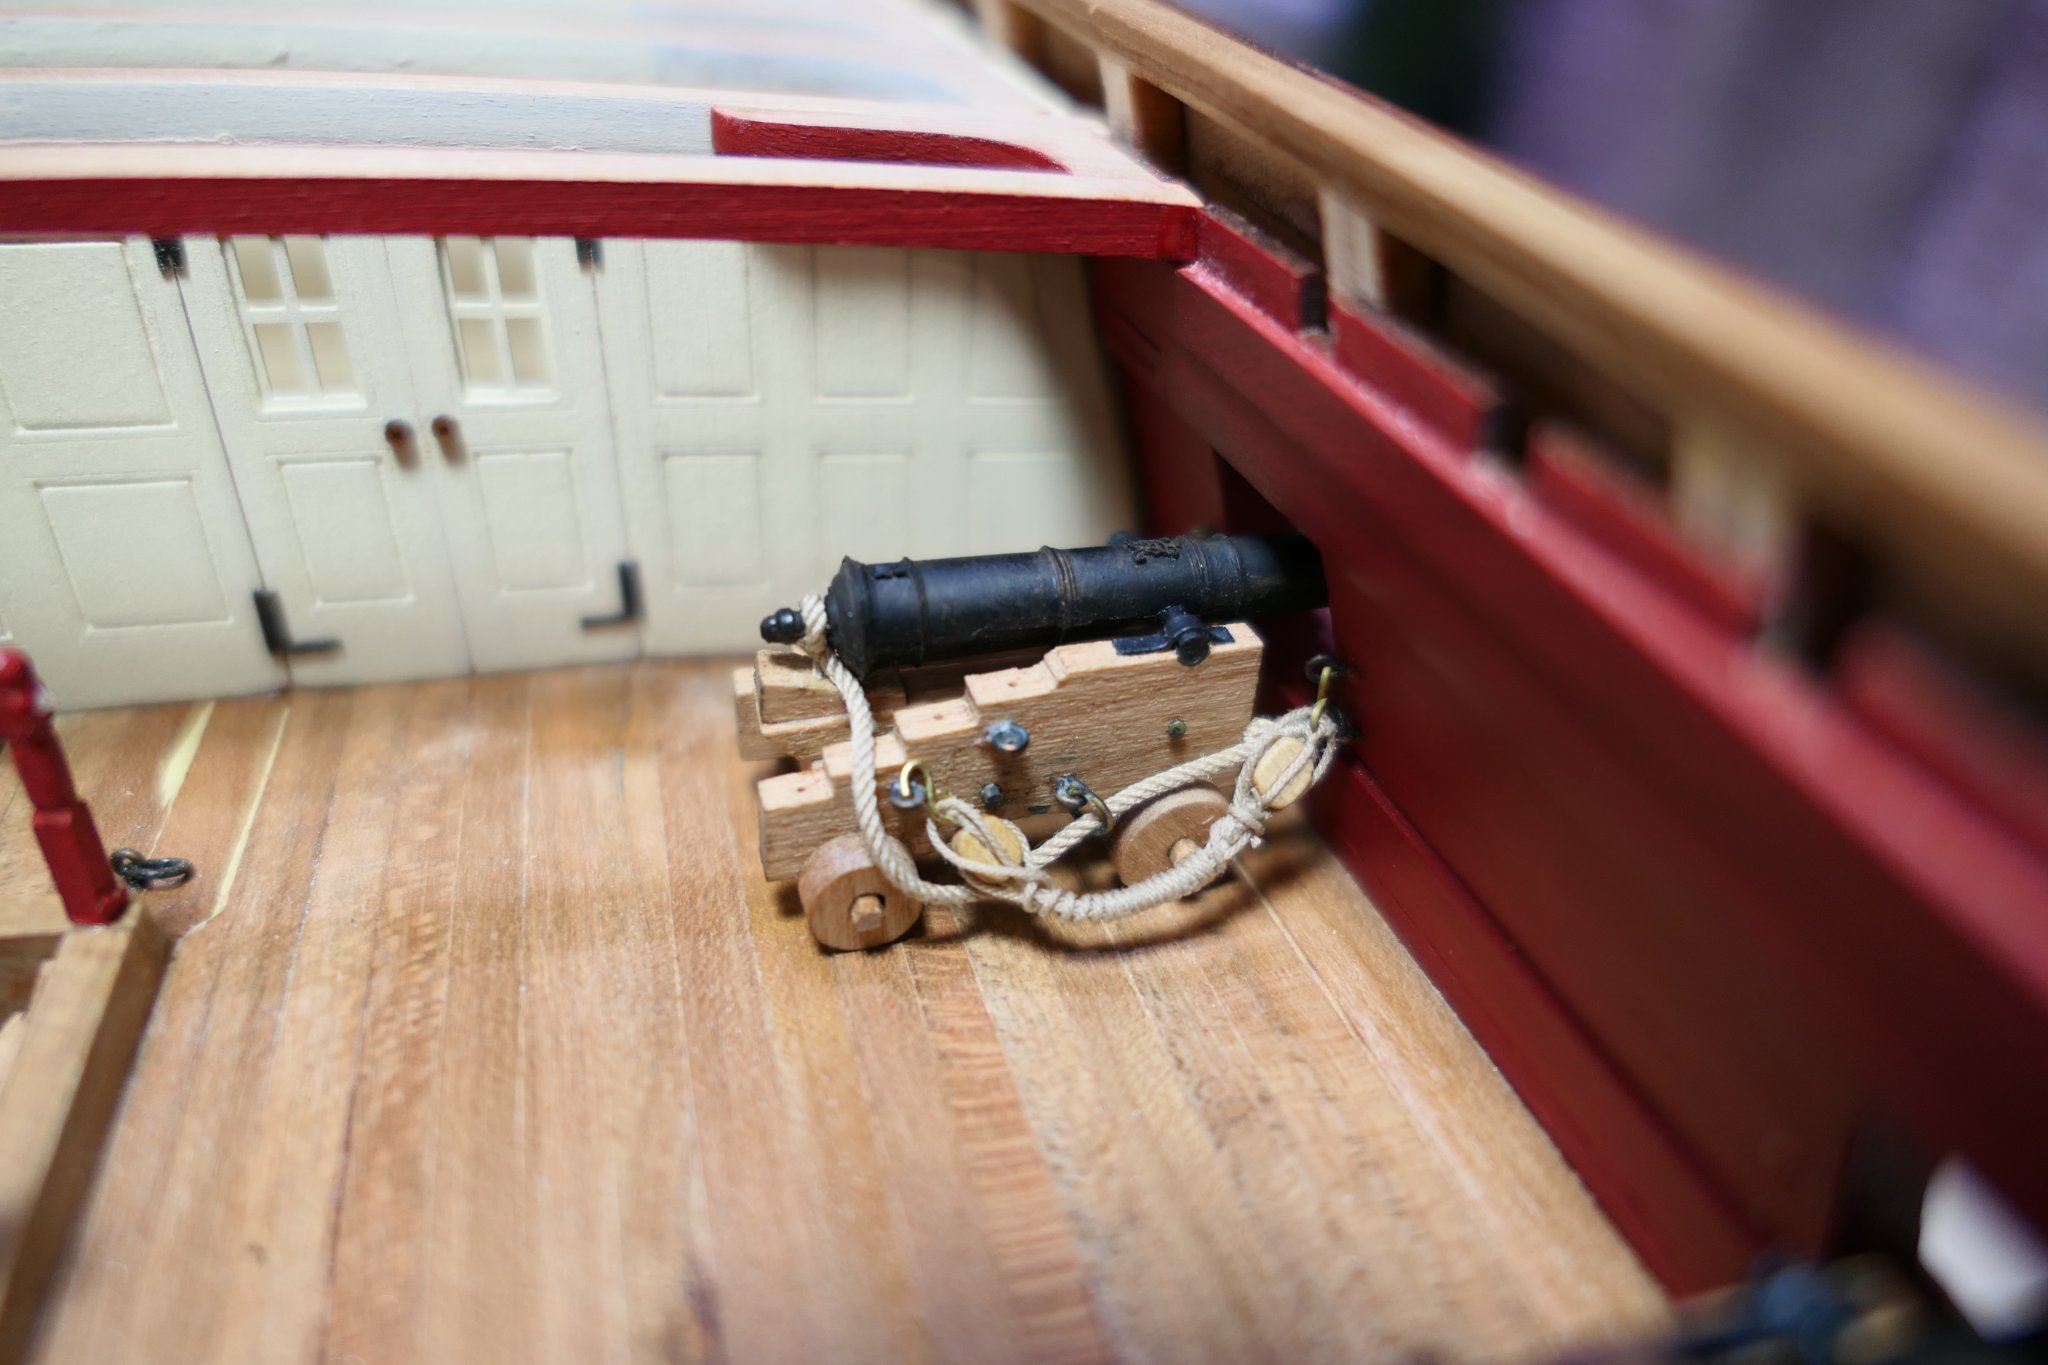
I'm plodding along slowly. Chapter 7 is nearly done and Chapter 8 is well under way. Rigging the guns with Syren Ultra rope took an age but I'm pleased with the outcome. Here are some pictures.
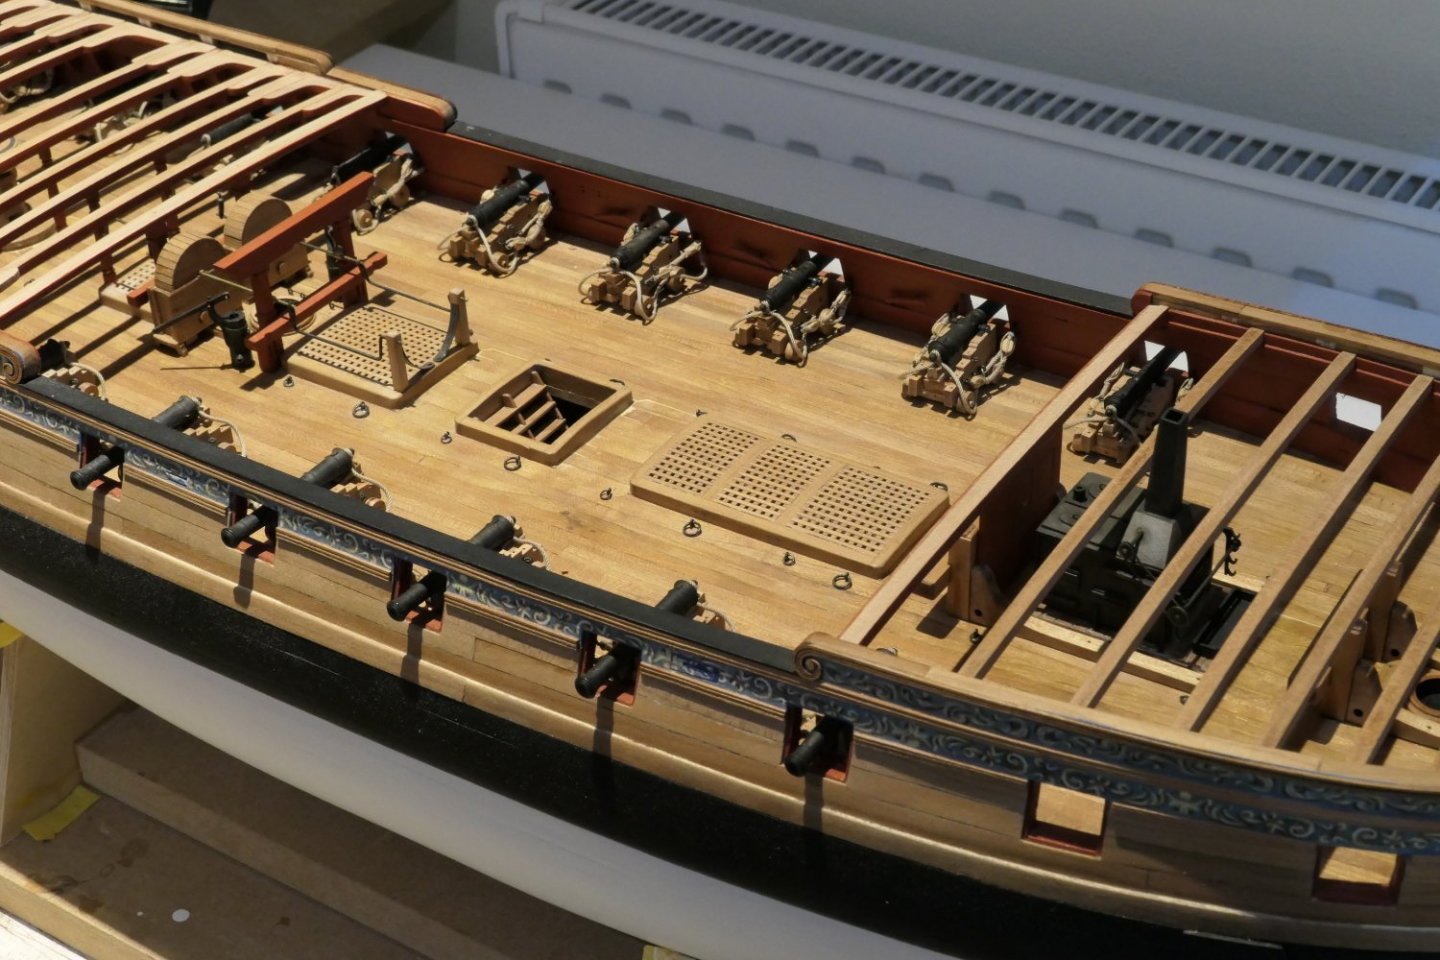


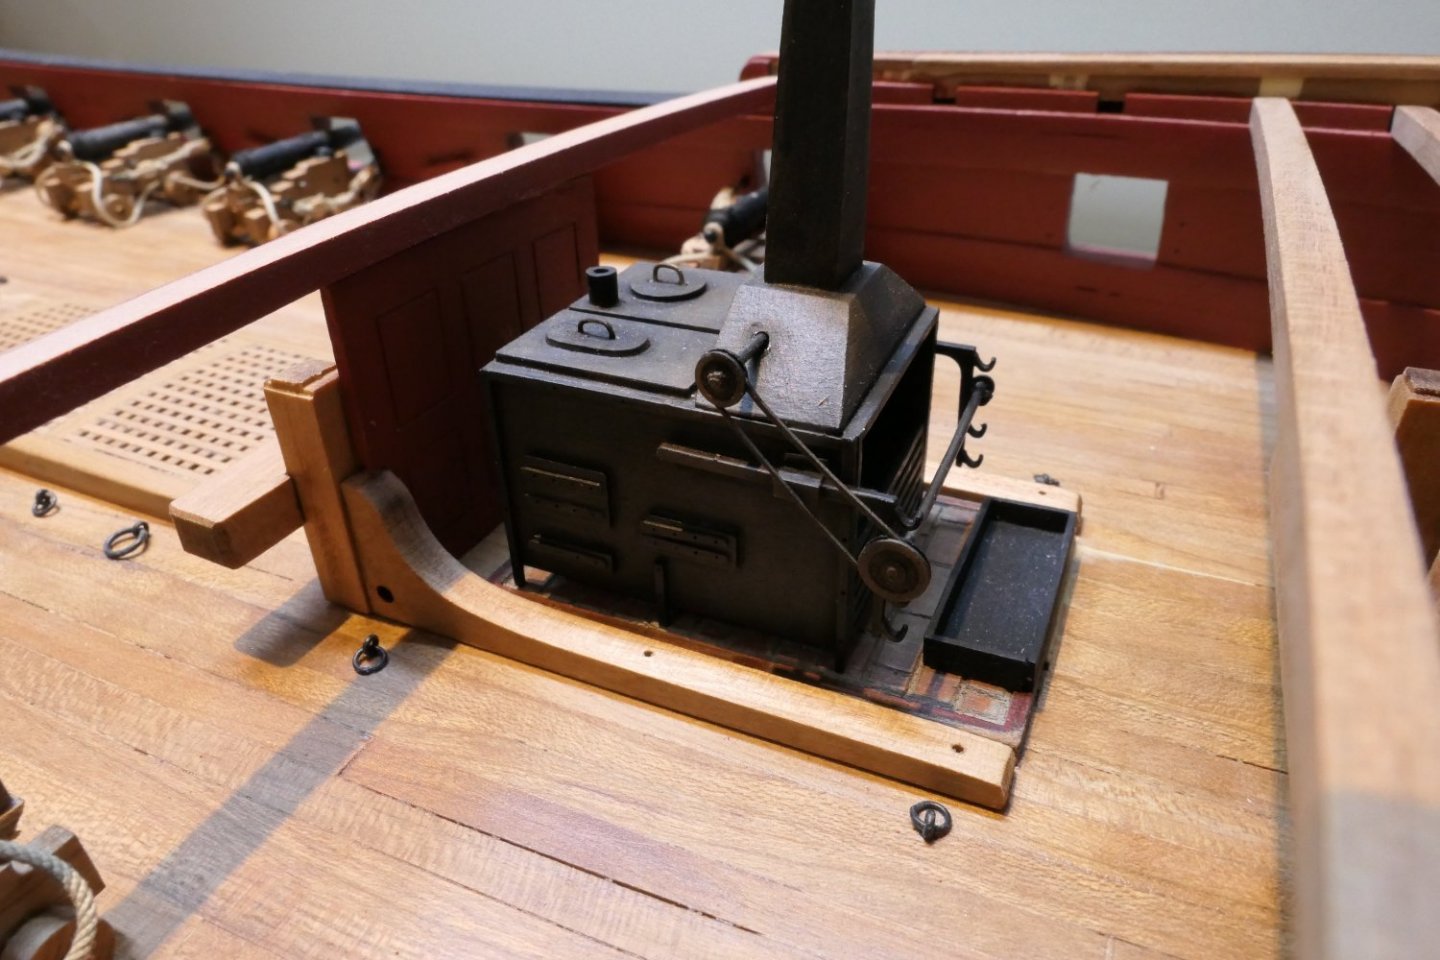
The stove is done.
I've glazed the windows with the supplied acetate (?). I had my doubts how effective it would be but it actually looks jolly good.
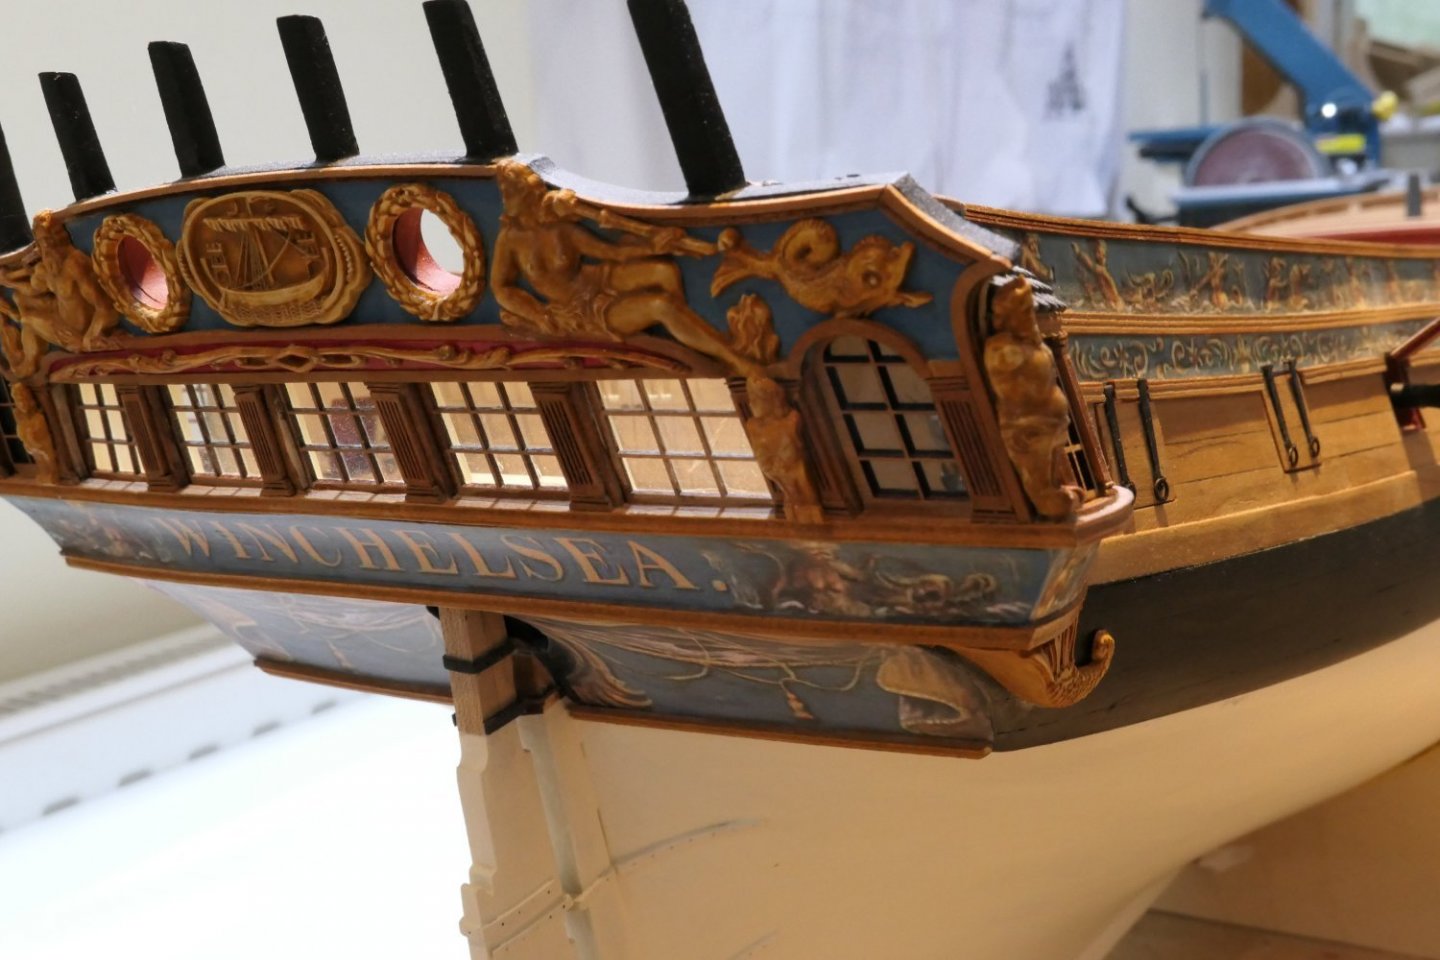
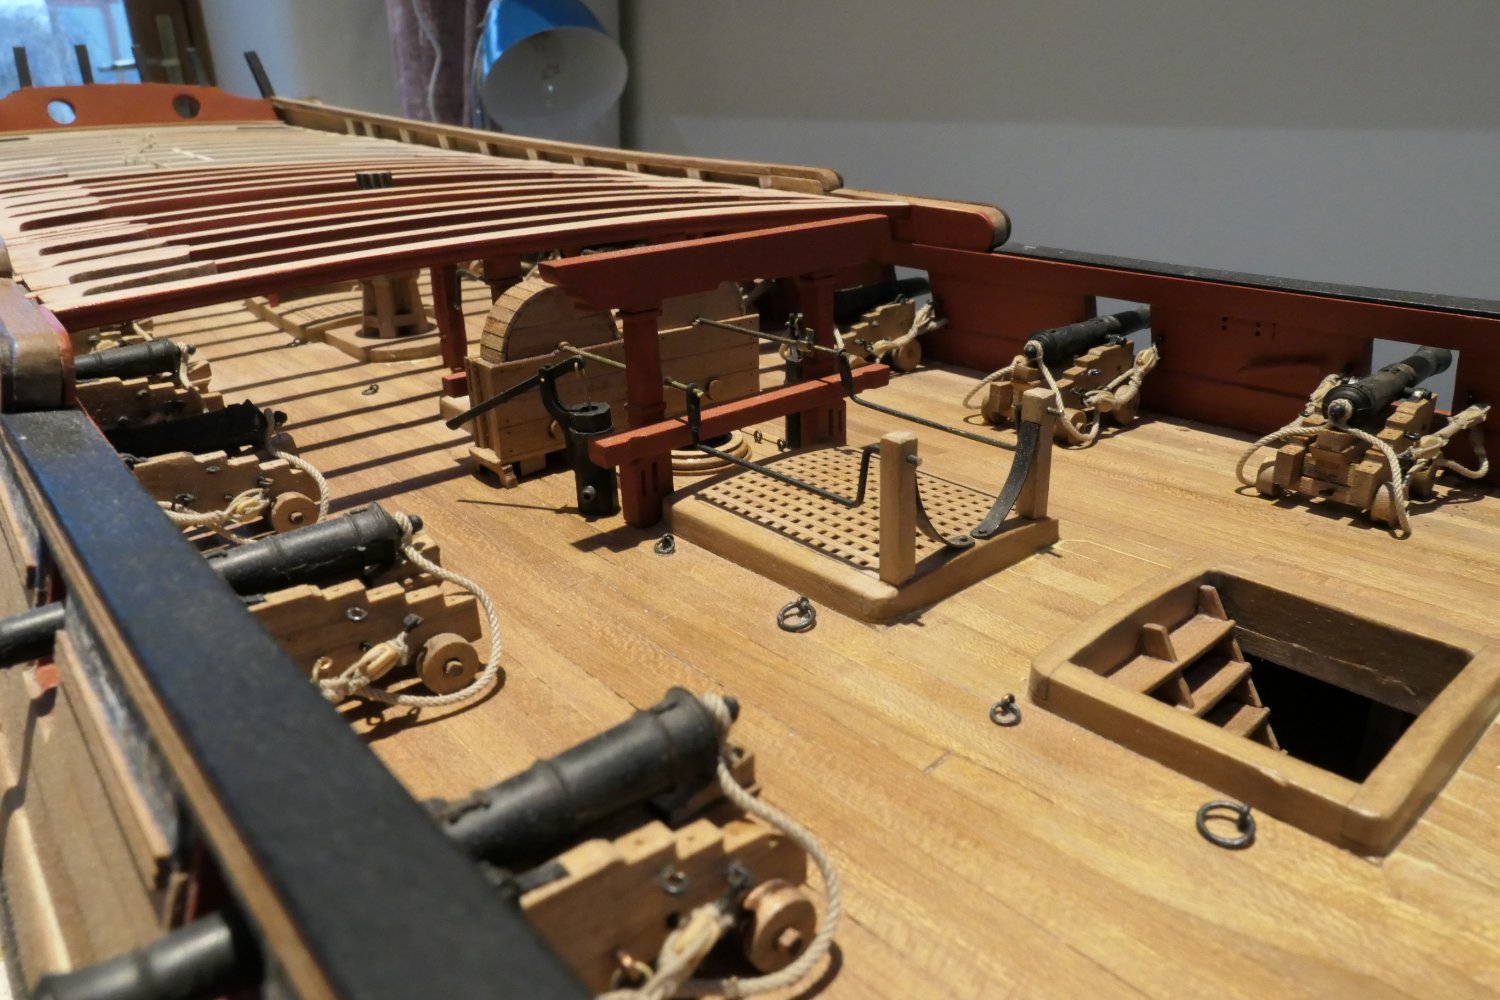
Here are a couple of pictures of the whole.
.thumb.JPG.e5f3e0e7d8e54a8a1ba614e2c1ef1a48.JPG)
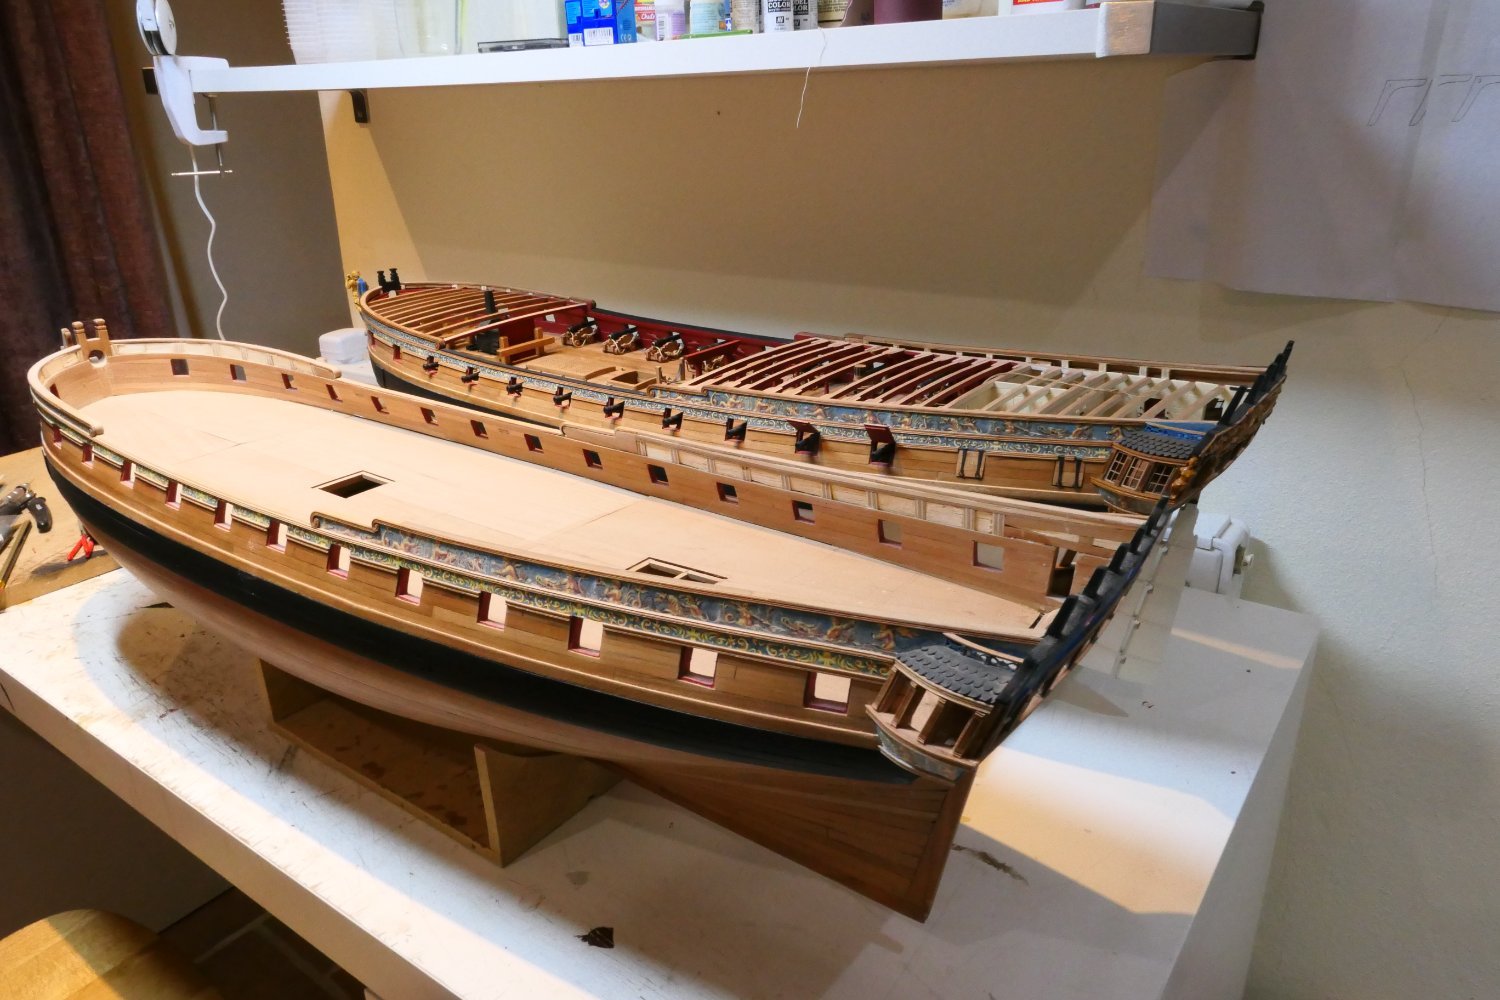
Now seems a good time to take stock. I love everything about it ...... except some of the bits I've done where I have fallen short. That is in part because I'm a relative newcomer - Winchelsea is my third build and its been a sharp learning curve - but in no small measure to the knowledge I've gained reading all the other logs. Model Ship World is a treasure trove of useful learning.
Here is W2 with my long abandoned first attempt. They are, incidentally, the same size. That W2 in the foreground looks bigger is an illusion.
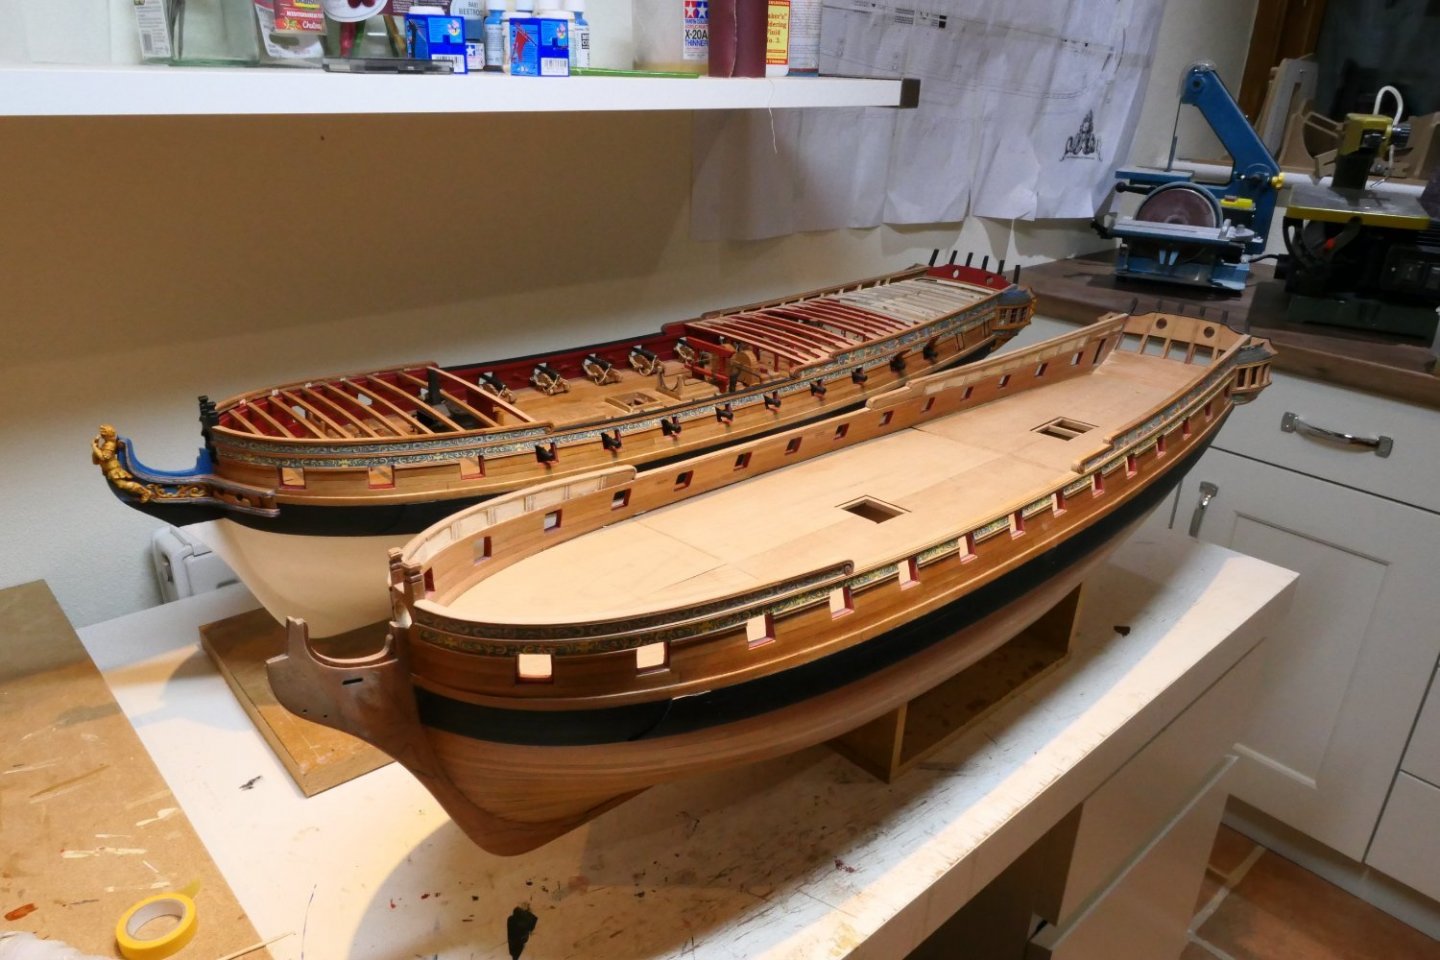
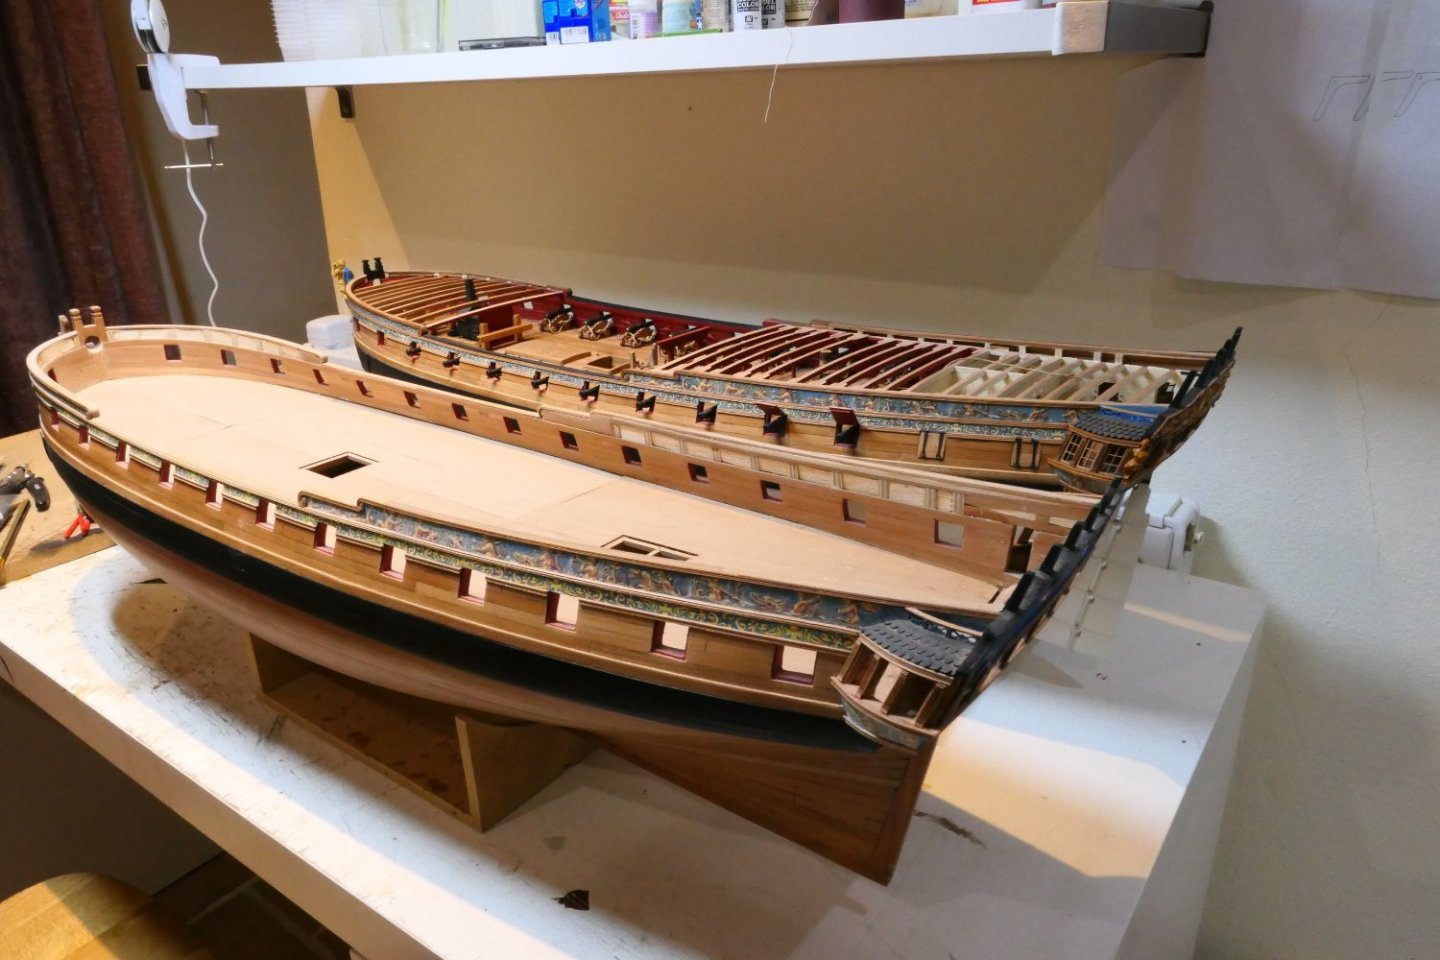
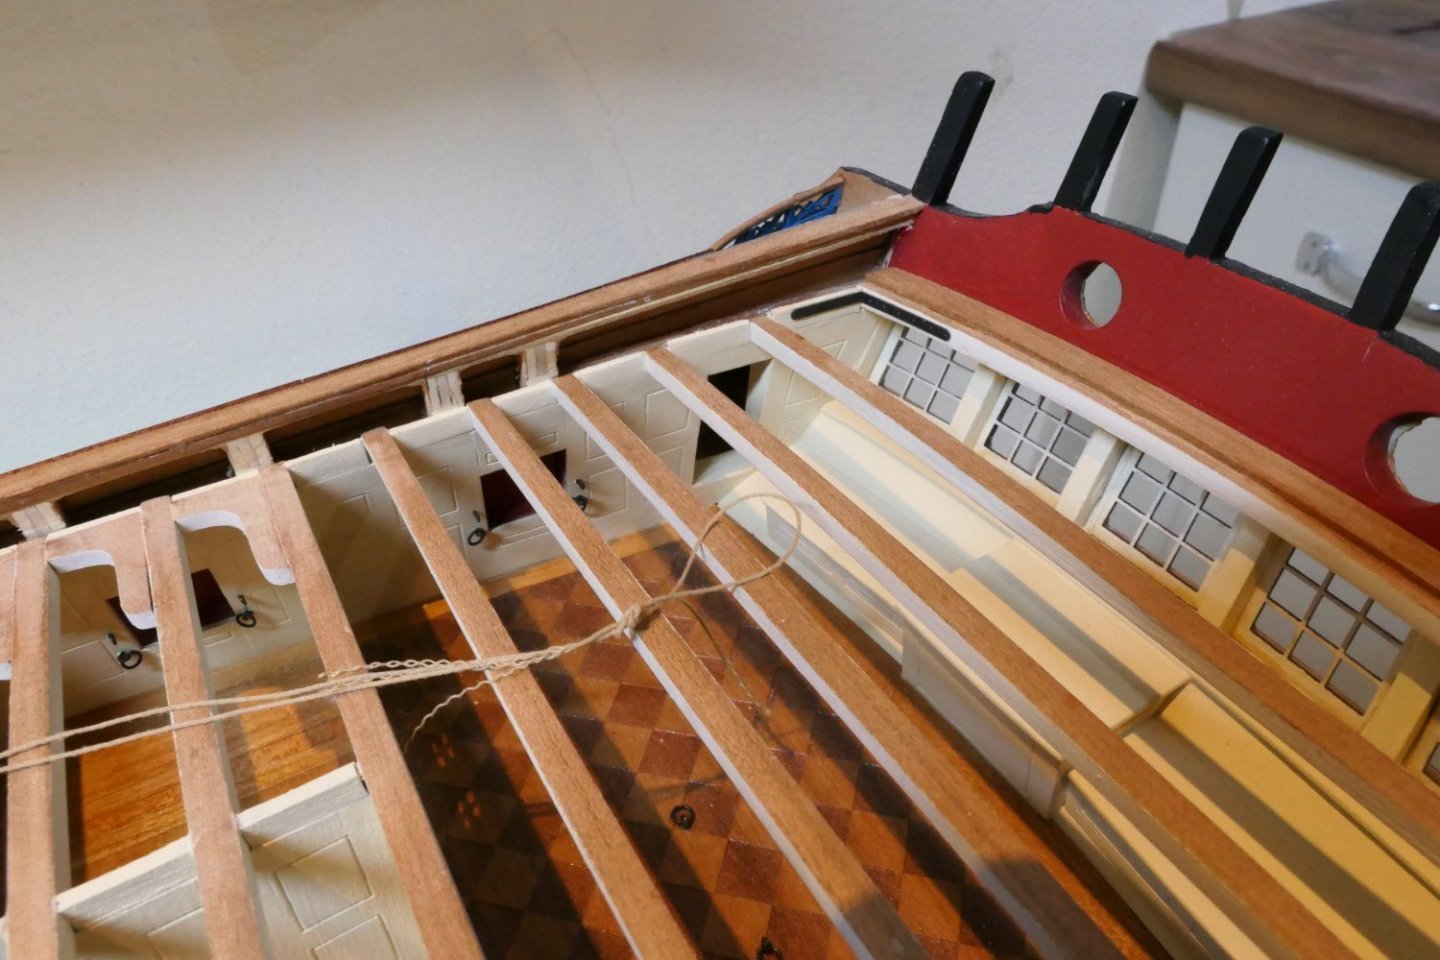
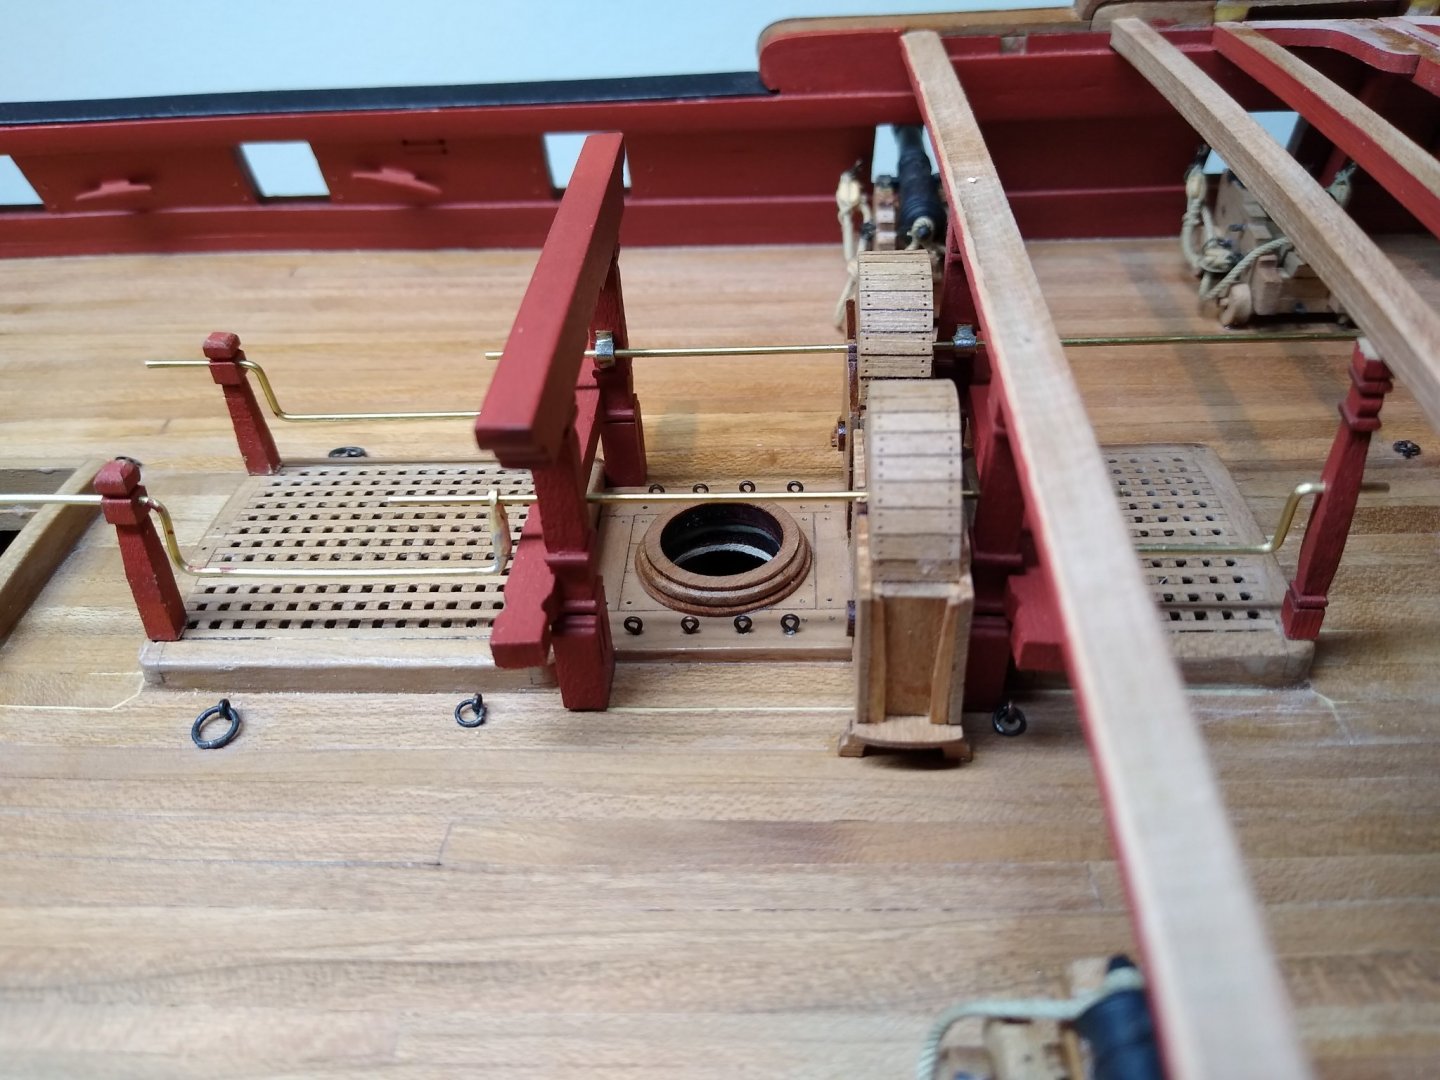
I am becoming increasingly dis-satisfied in particular with the deck. I wonder if a lighter coloured wood - maple? - might have looked better. Omitting the pencilled caulking was a serious mistake. That would have provided some definition to the individual planks. But mostly I just bodged up some gaps that shoudn't have been there in the first place with some mismatched filler. Ugh!!
Look around the hatchway.

The question is what to do about it.
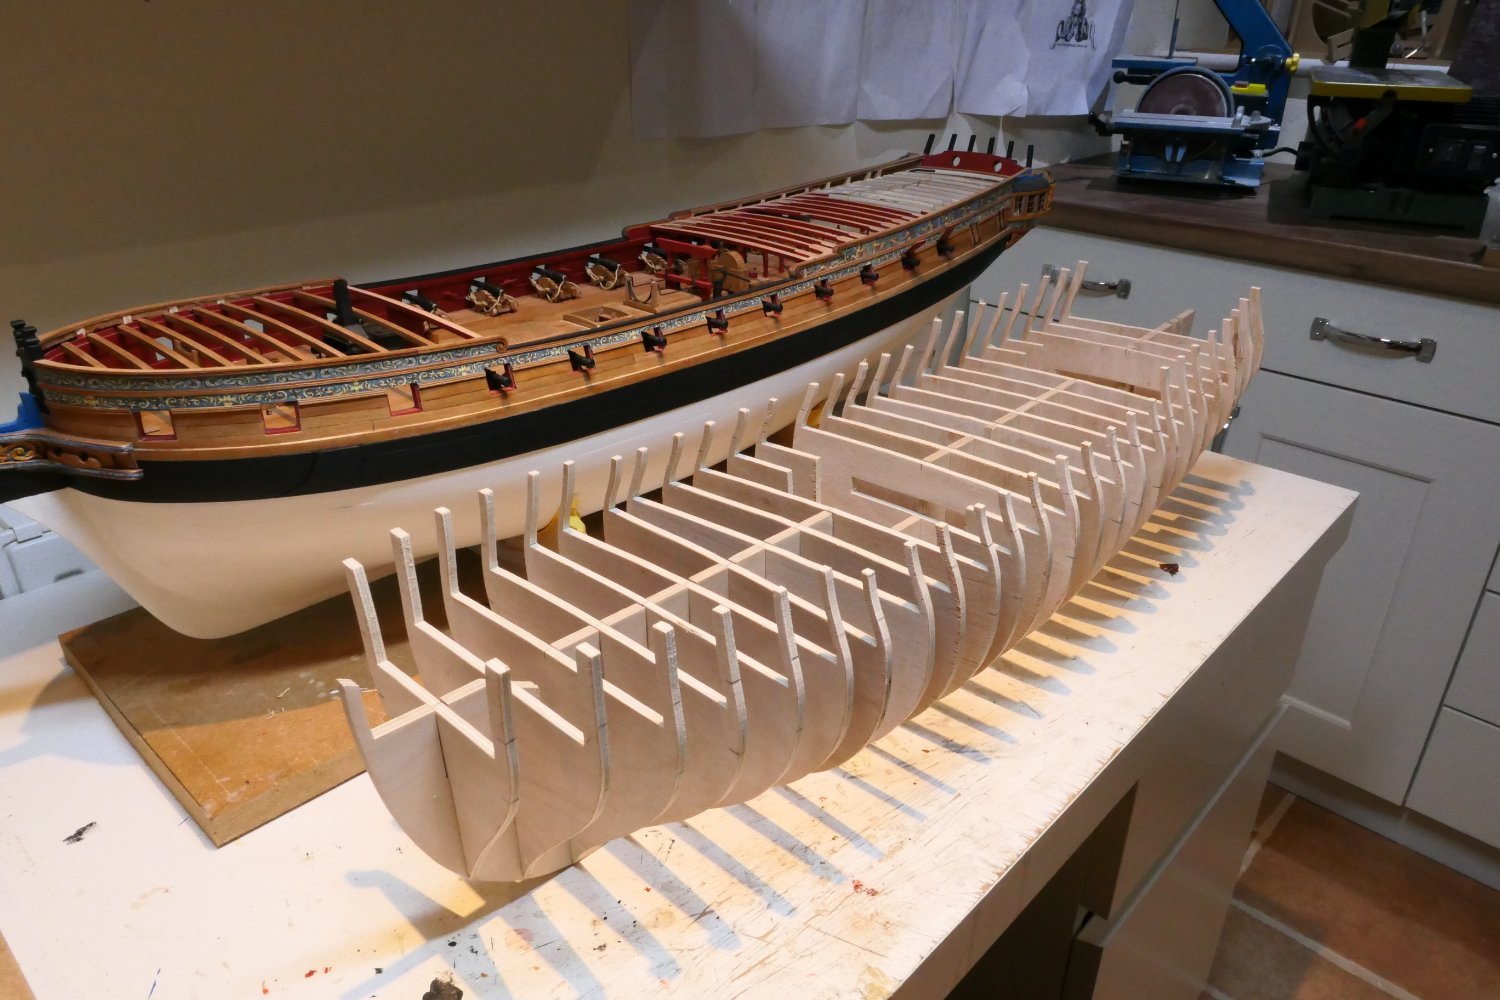
If I had the skills I would scratch build something – but I don't. And there is not really another model on the market that I would prefer to build than this one. I really want to produce a result I can be really proud of without reservations and this one, I fear, will come up short. Here is one possible solution:
.thumb.JPG.8434ae06a8fd02c5bd1e45725aa56809.JPG)
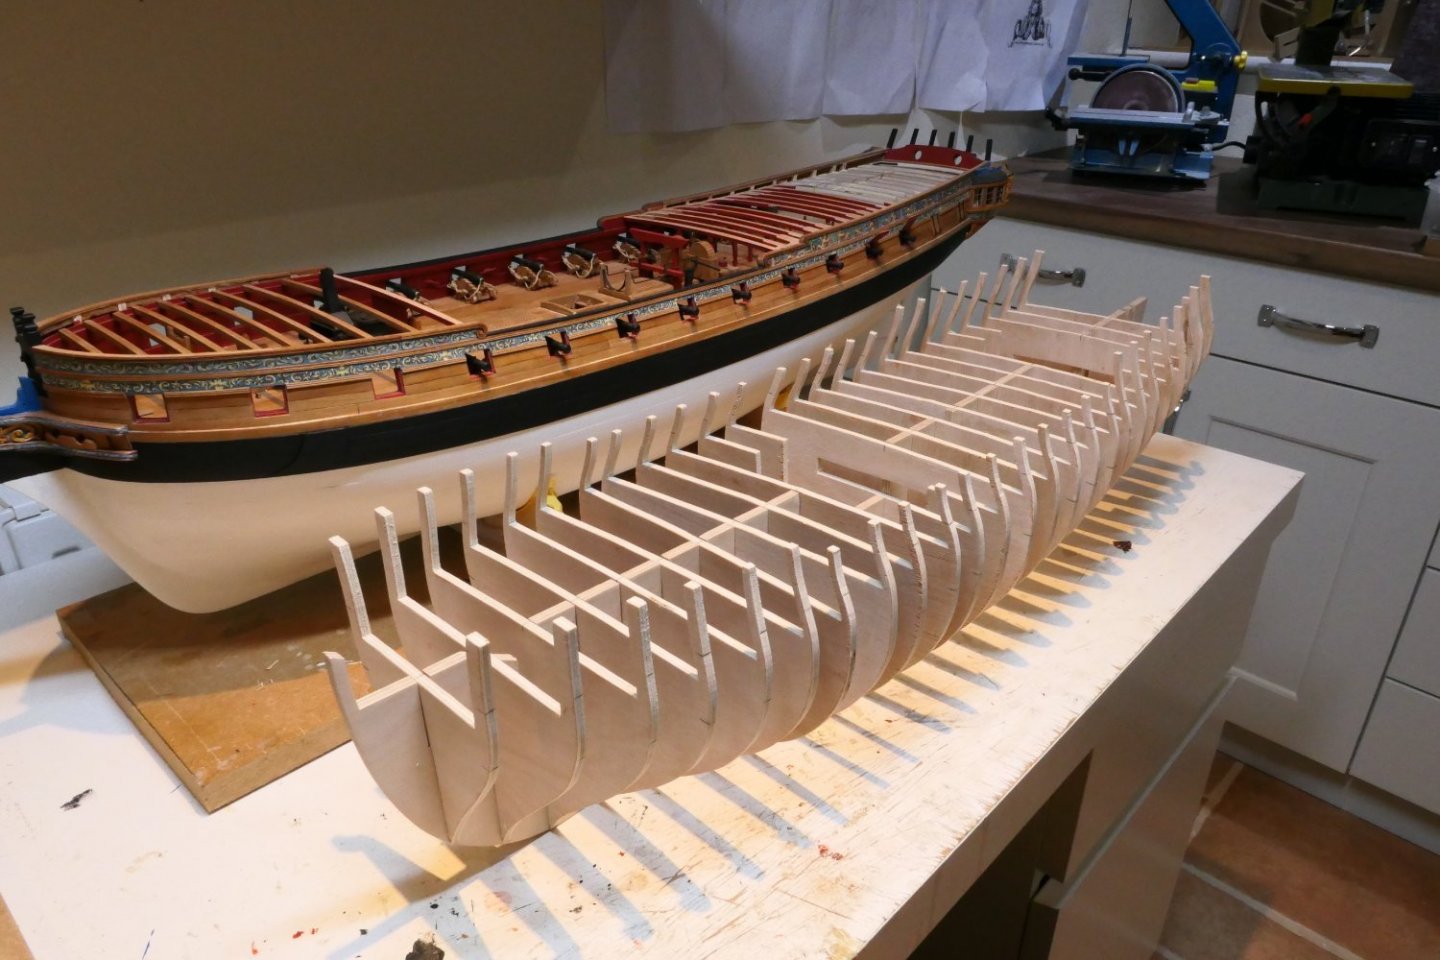
I've got the plywood left over from the big sheet I bought for W1 and a scroll saw. And I really think I can make a better go of it. Just a thought!
Best wishes everyone
Fred

-
Happy Christmas everyone and best wishes for a peaceful and healthy New Year. And Chuck - if you can see your way to that fully framed 1/48 Speedwell I have it on my Christmas present list for next year.
Fred
- FrankWouts, CaptMorgan and scrubbyj427
-
3
-
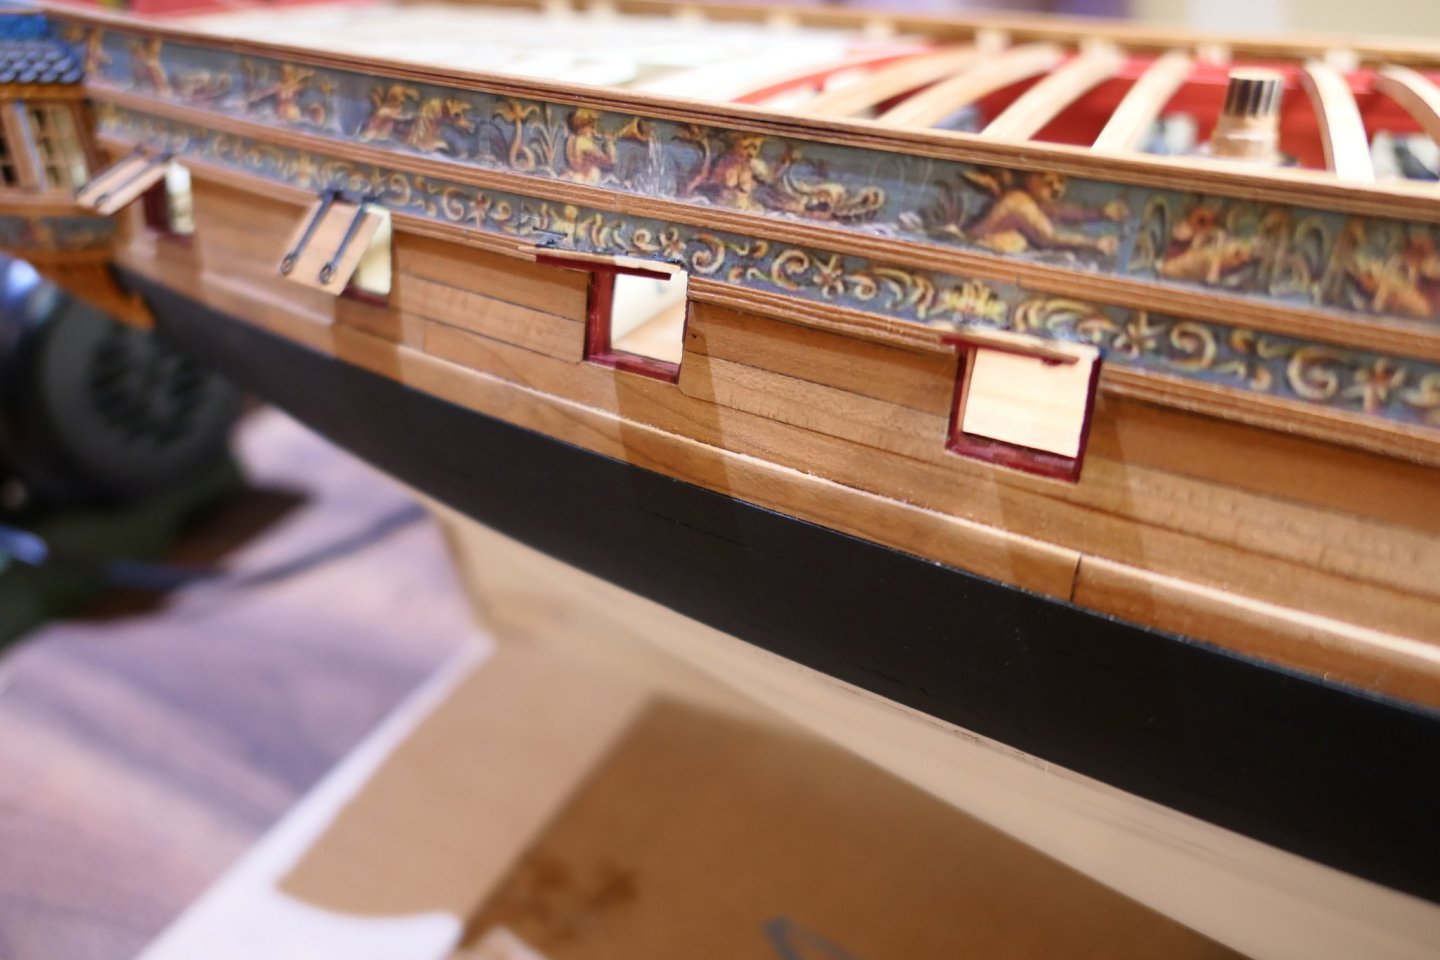
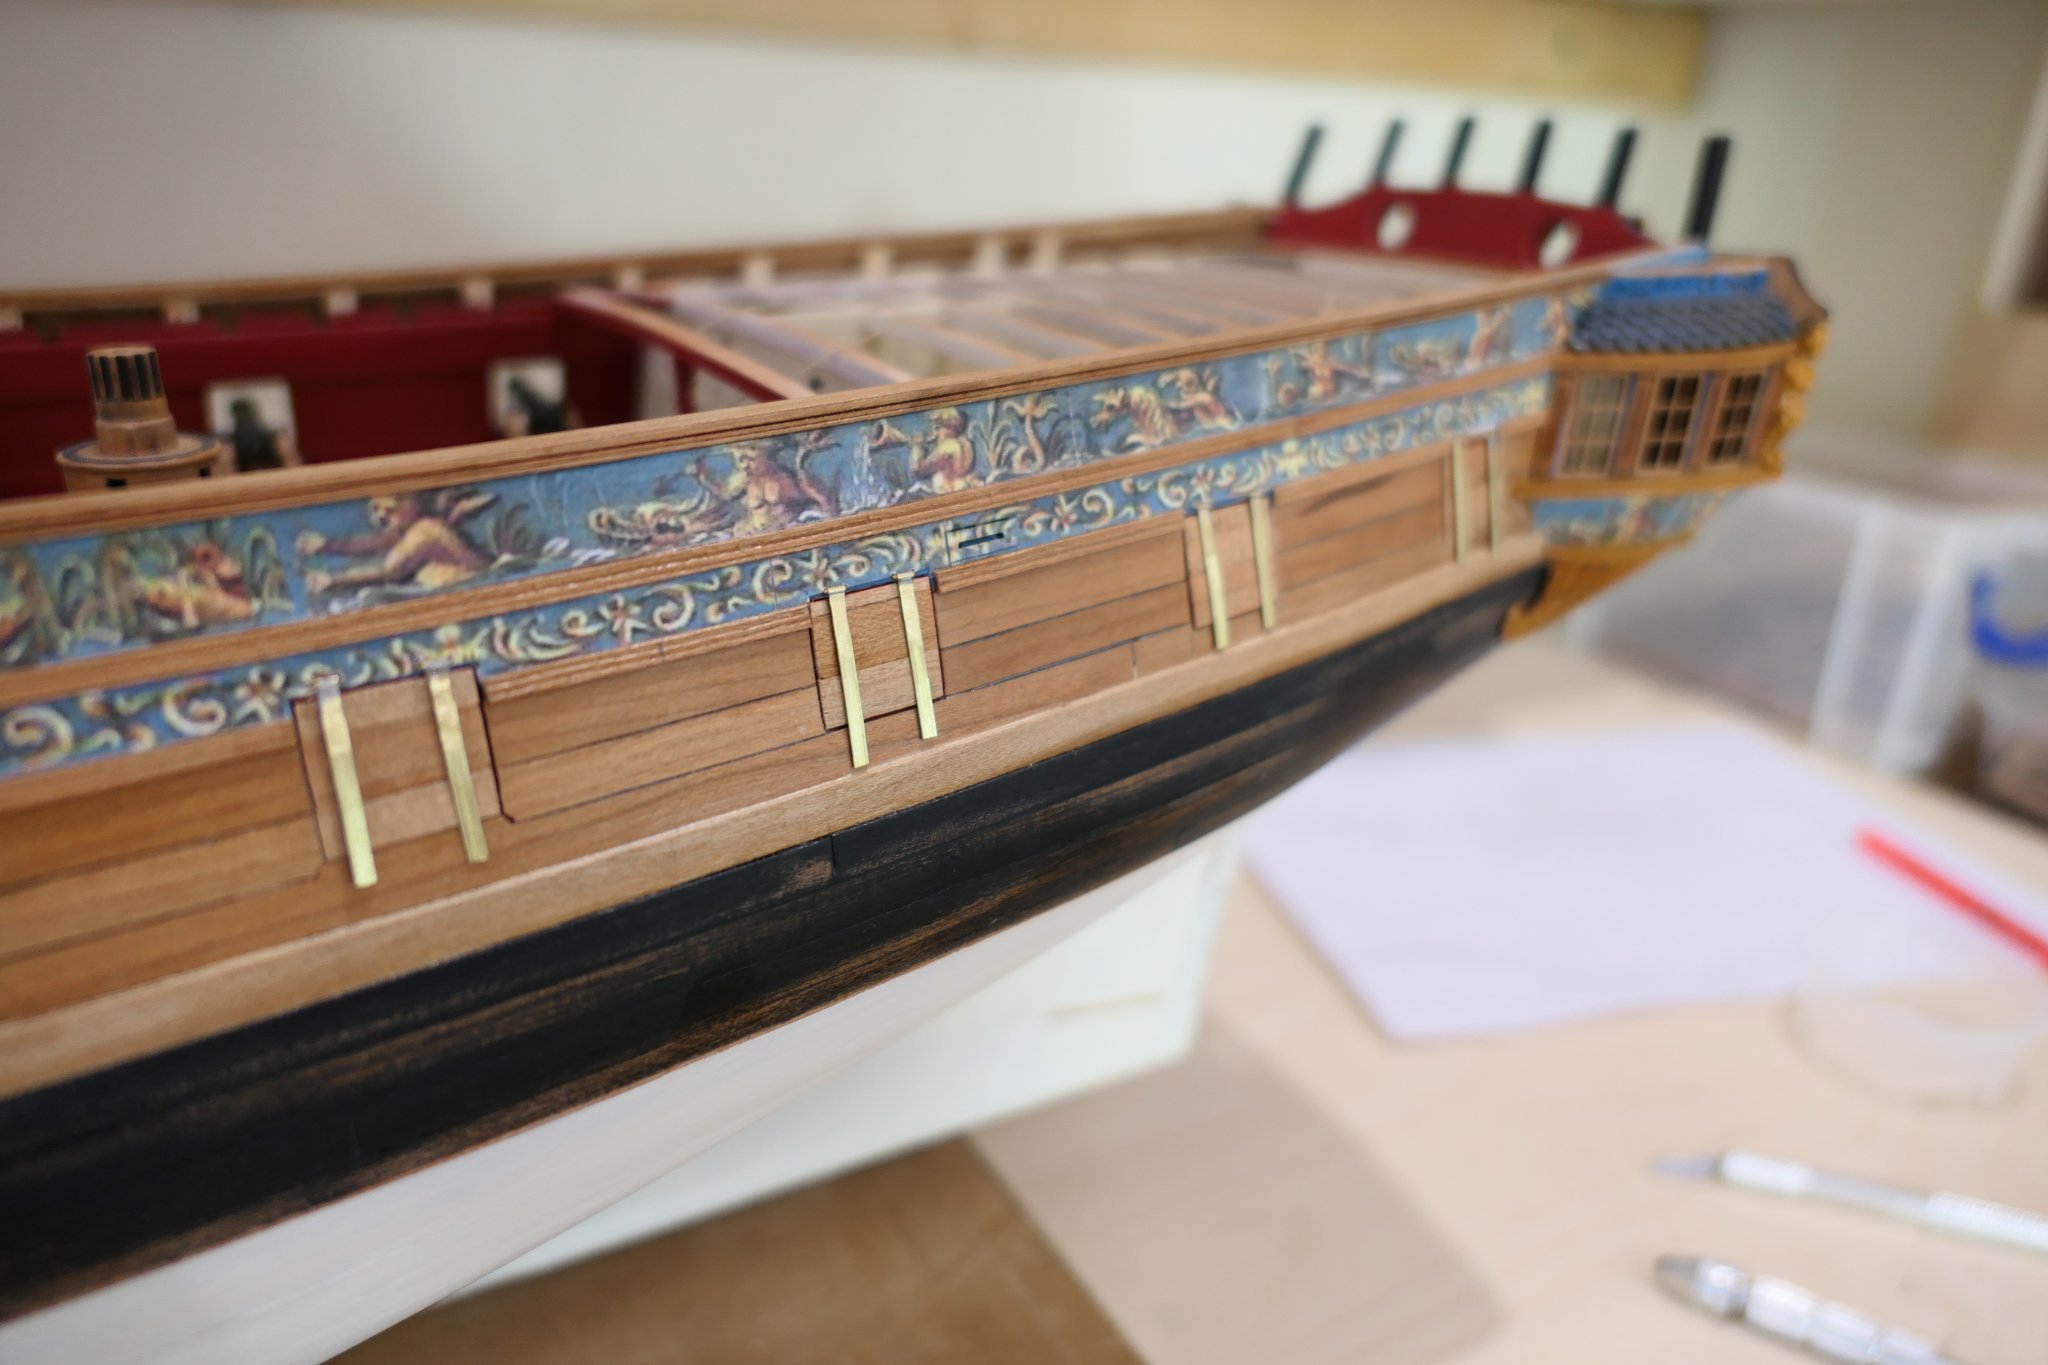
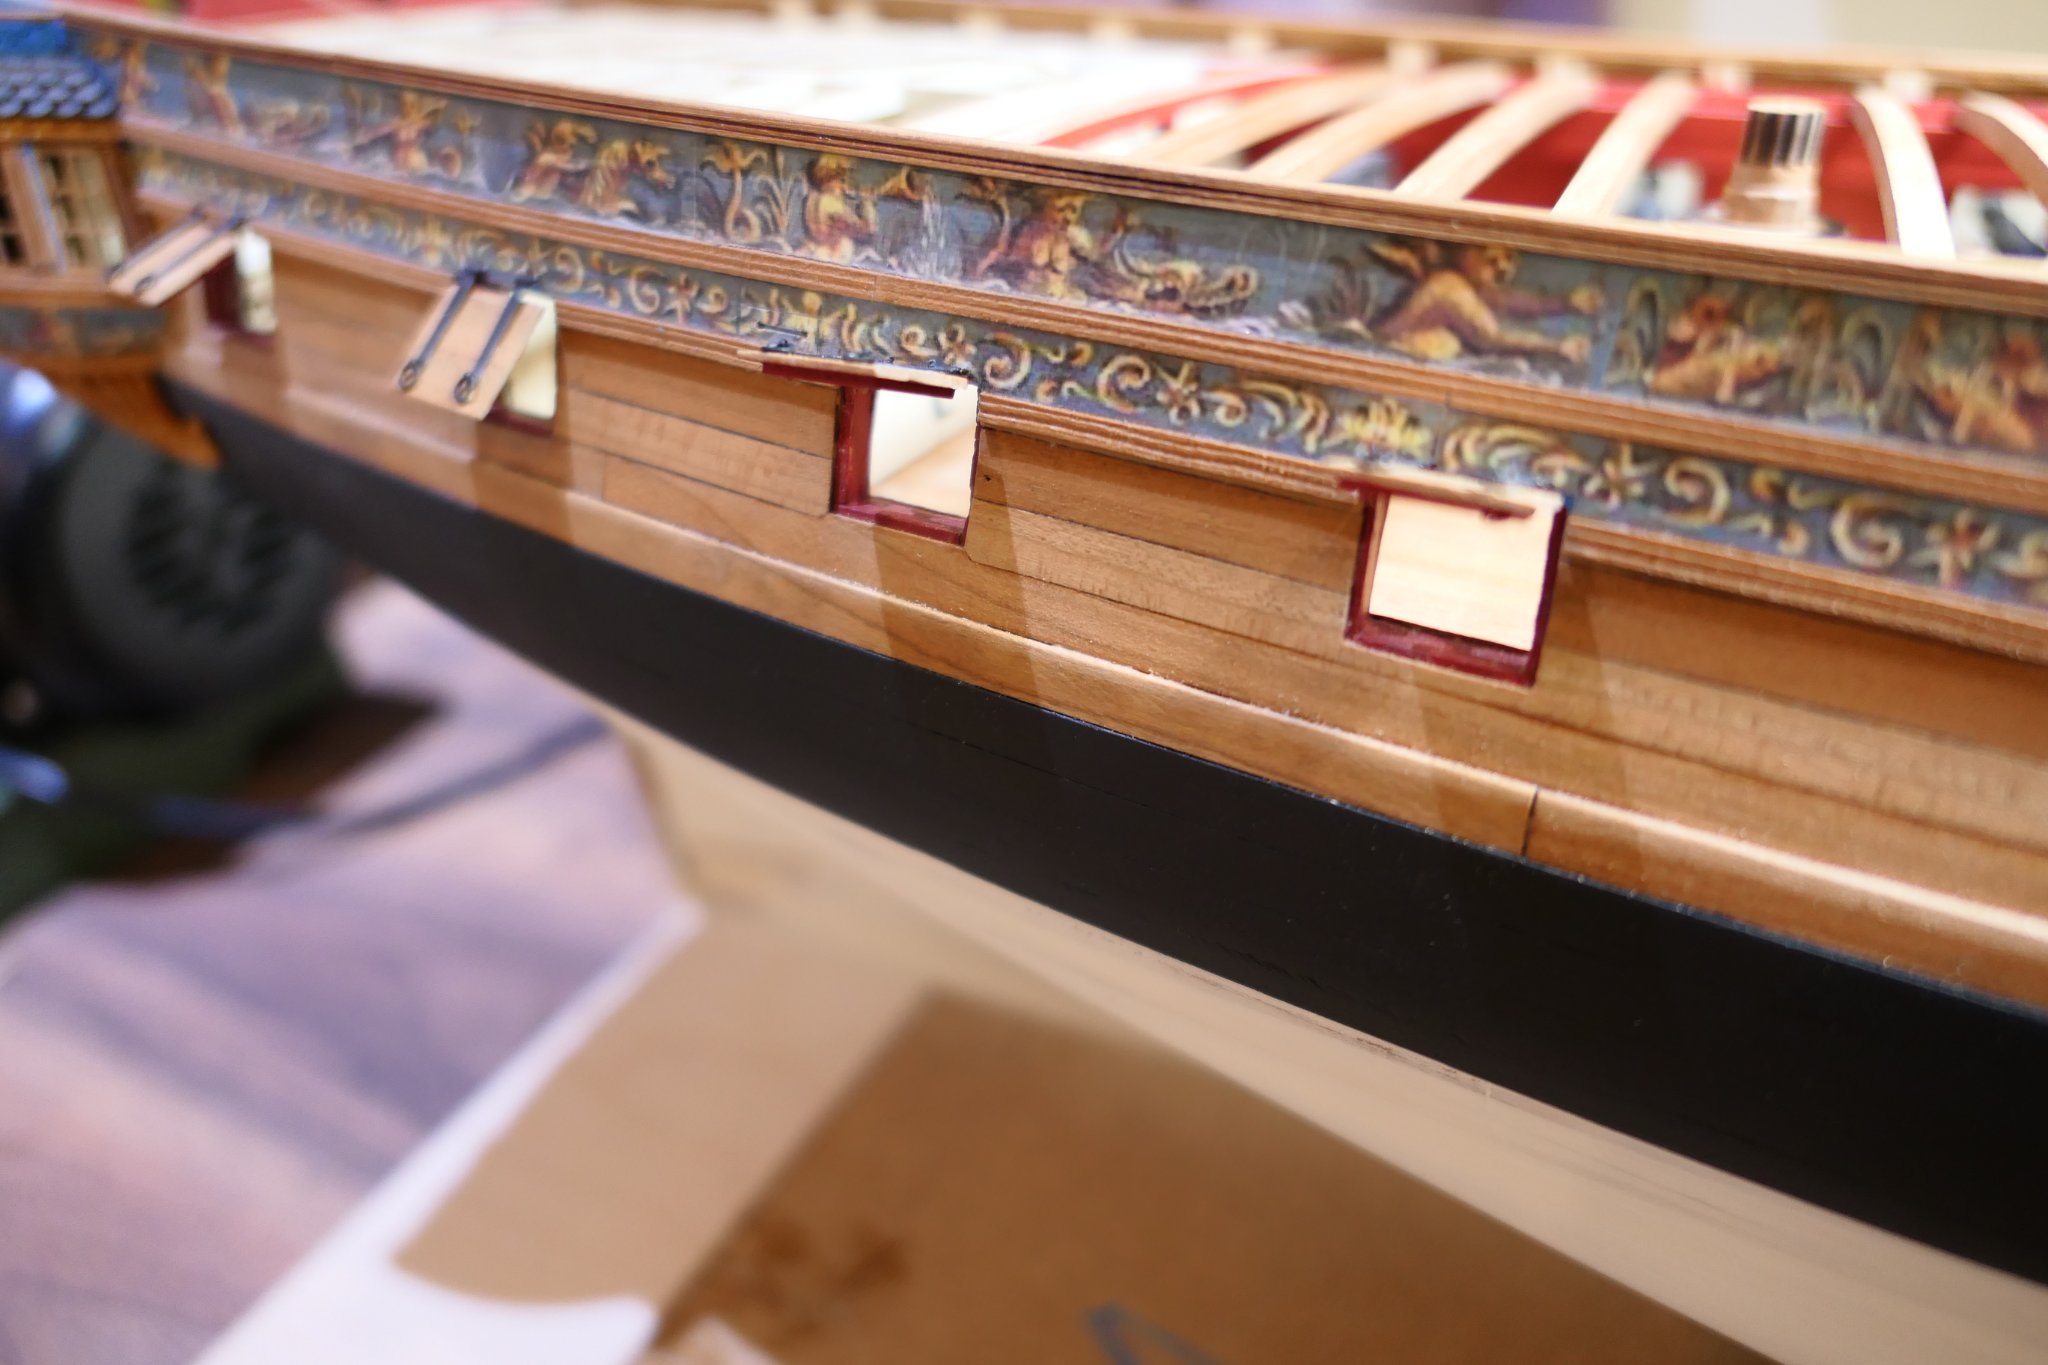
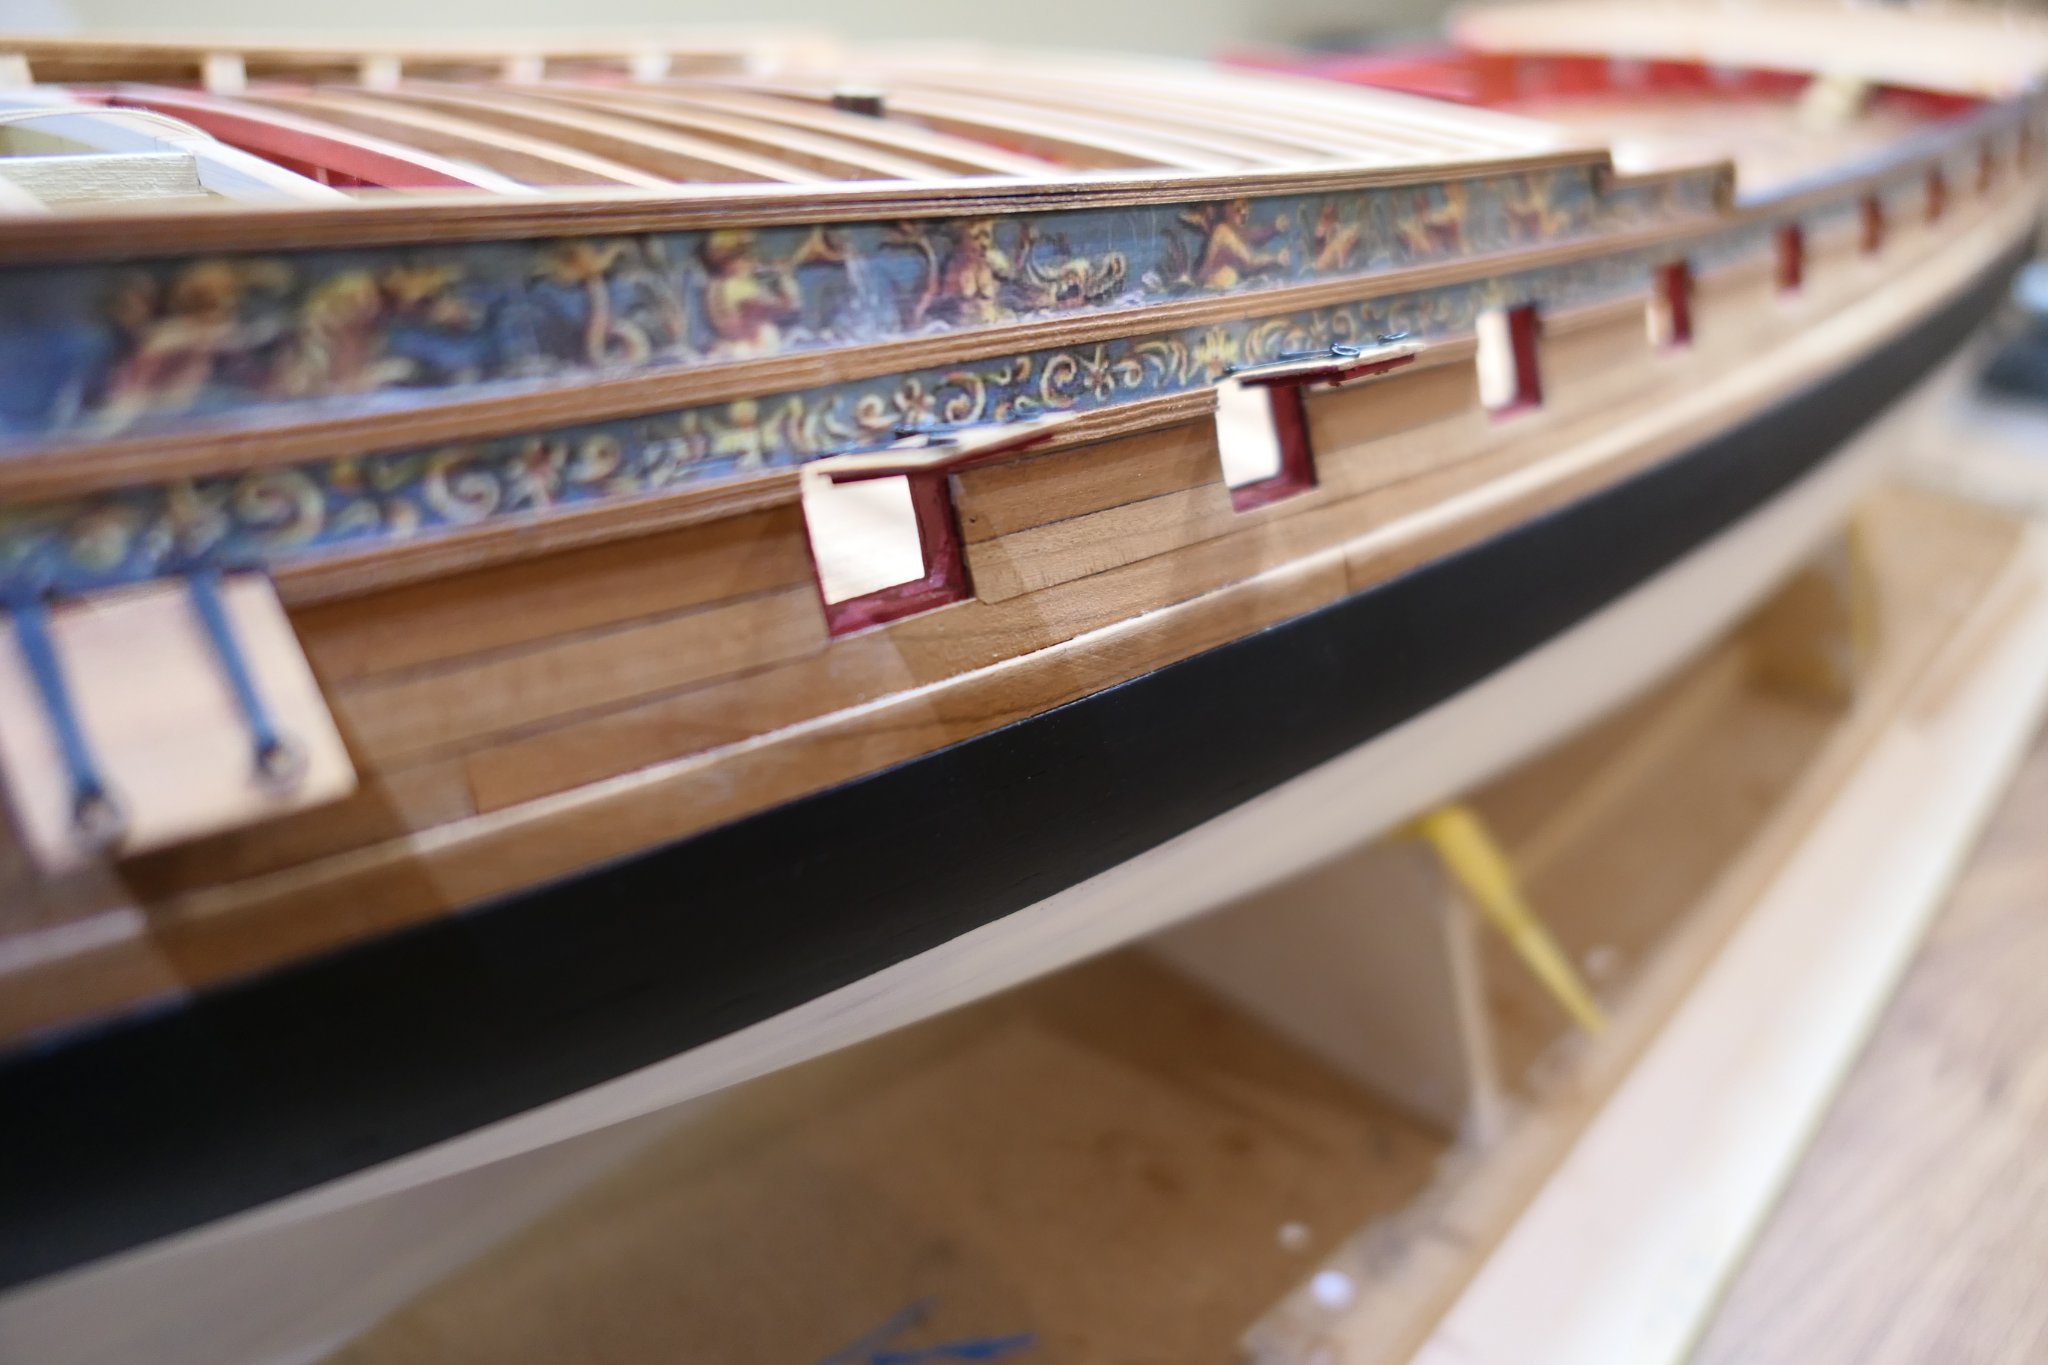
I did exactly what Ben and JJ did ; sanded to the blue line not the green. It is easily fixed with a bit of filler which is hidden by the frieze. Here is a picture of mine. You can see the filler.
.thumb.JPG.3871ad389a50b66216074f9c8ae4478e.jpg.99ea7fd3fbd661abbfd7e5546412f829.jpg)
- Rustyj and FrankWouts
-
2
-
Good morning Reg
Were you able to get your next chapter parts from the US or does the Covid import embargo still apply?
I will shortly be ordering chapter 8 parts and I am very happy to include your order if it helps. I am assuming, of course, that there is no import embargo into NZ from the UK. I intend to place my order in the next week or so. Chuck usually dispatches the same day and packet takes about a week to get here.
The possible downside is that, from time to time, packets from the US are picked out by customs and then subject to import duty and VAT and sometimes a handling charge. That can add about 20 - 25% to the cost. There will also be the onward postal charge to NZ.
I guess about 20% of packets are stopped by customs and subject to charges but there does not seem to be any rhyme or reason to the process.
And I suppose I should quarantine the packet here for 7-10 days before sending it on to satisfy our respective consciences. Let me know if this helps.
All the best
Fred
-
That is looking fantastic. Keep going at that level and you will have a superb Winchelsea.
Fred
-
The level of detail you pack in to 1/4 scale is quite something but just think what you could do with 3/8/or a 1/2. That said, I guess a lot of Speedwell - if that's what it's going to be - builders will want to sit it alongside their Winchelseas at the same scale.
-
Thank you Chuck - I've got them now: I never knew all that stuff was there! I've been working from the Syren website.
As to Speedwell: I'll do my best not to think about it....but!
-
I'll second everyone else's thoughts on a fully framed Speedwell - or whatever else you decide. It sounds fantastic. I appreciate you have the Winchelsea project to finish first but do you have any thoughts on timescale? Whenever - put my name down for one.
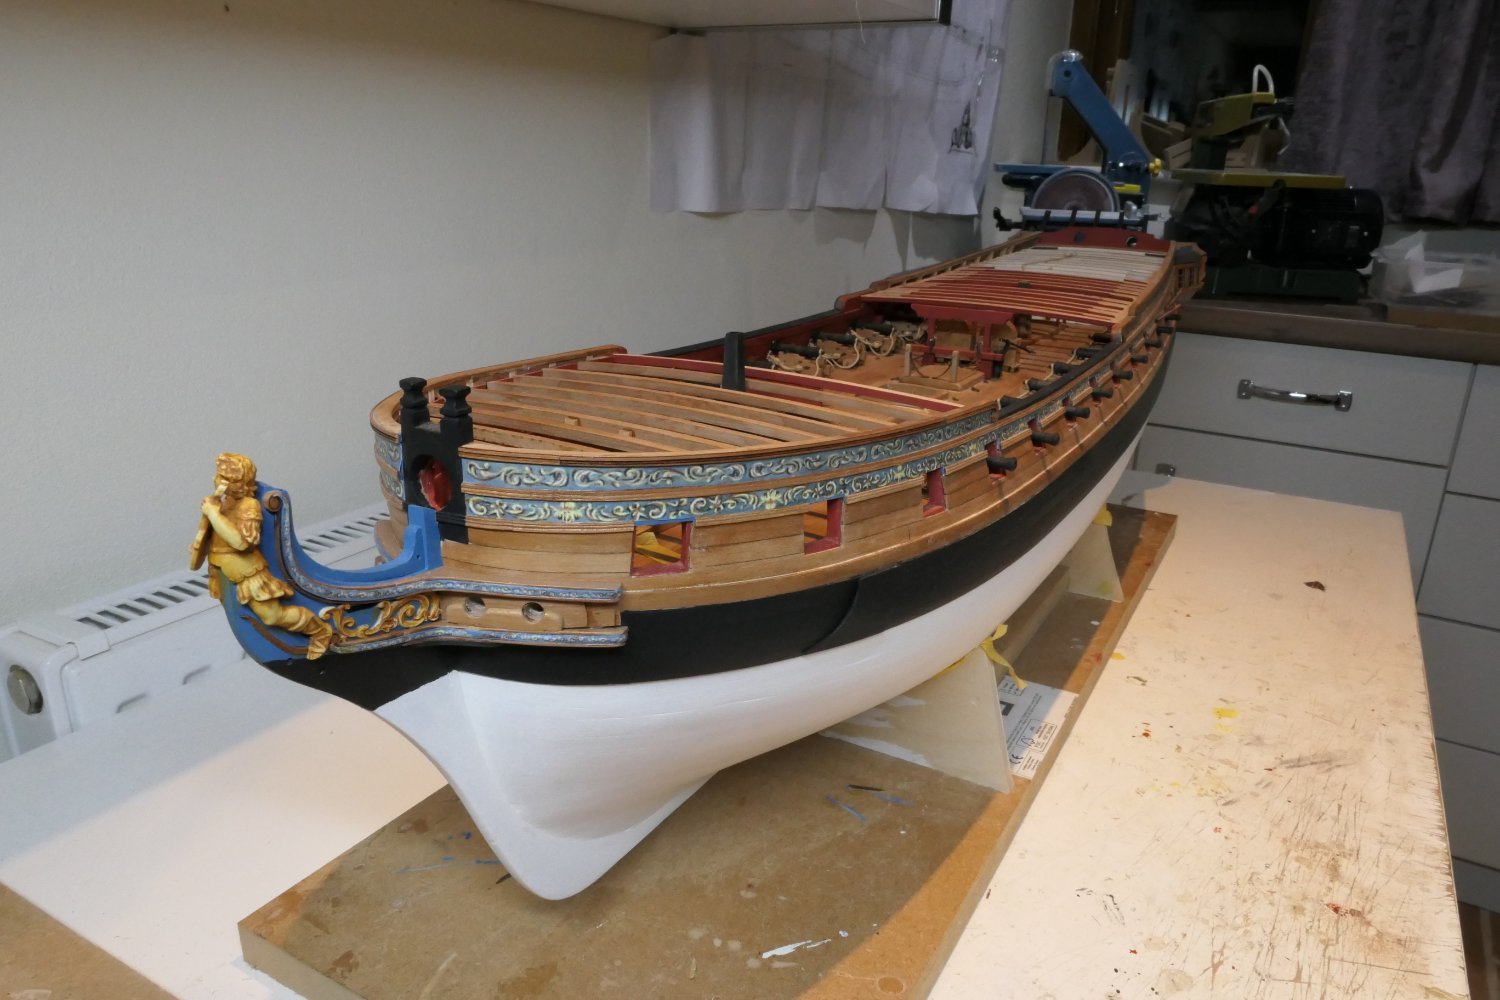
The quarterdeck and fo'csle details on your Winchelsea look superb.
I shall be ordering chapter 8 soon - but where can I find the planking/carling plans for the q'deck and fo'csle? They don't appear to be in the Winnie downloads section unless I'm being very shortsighted.
Alll the best
Fred
-
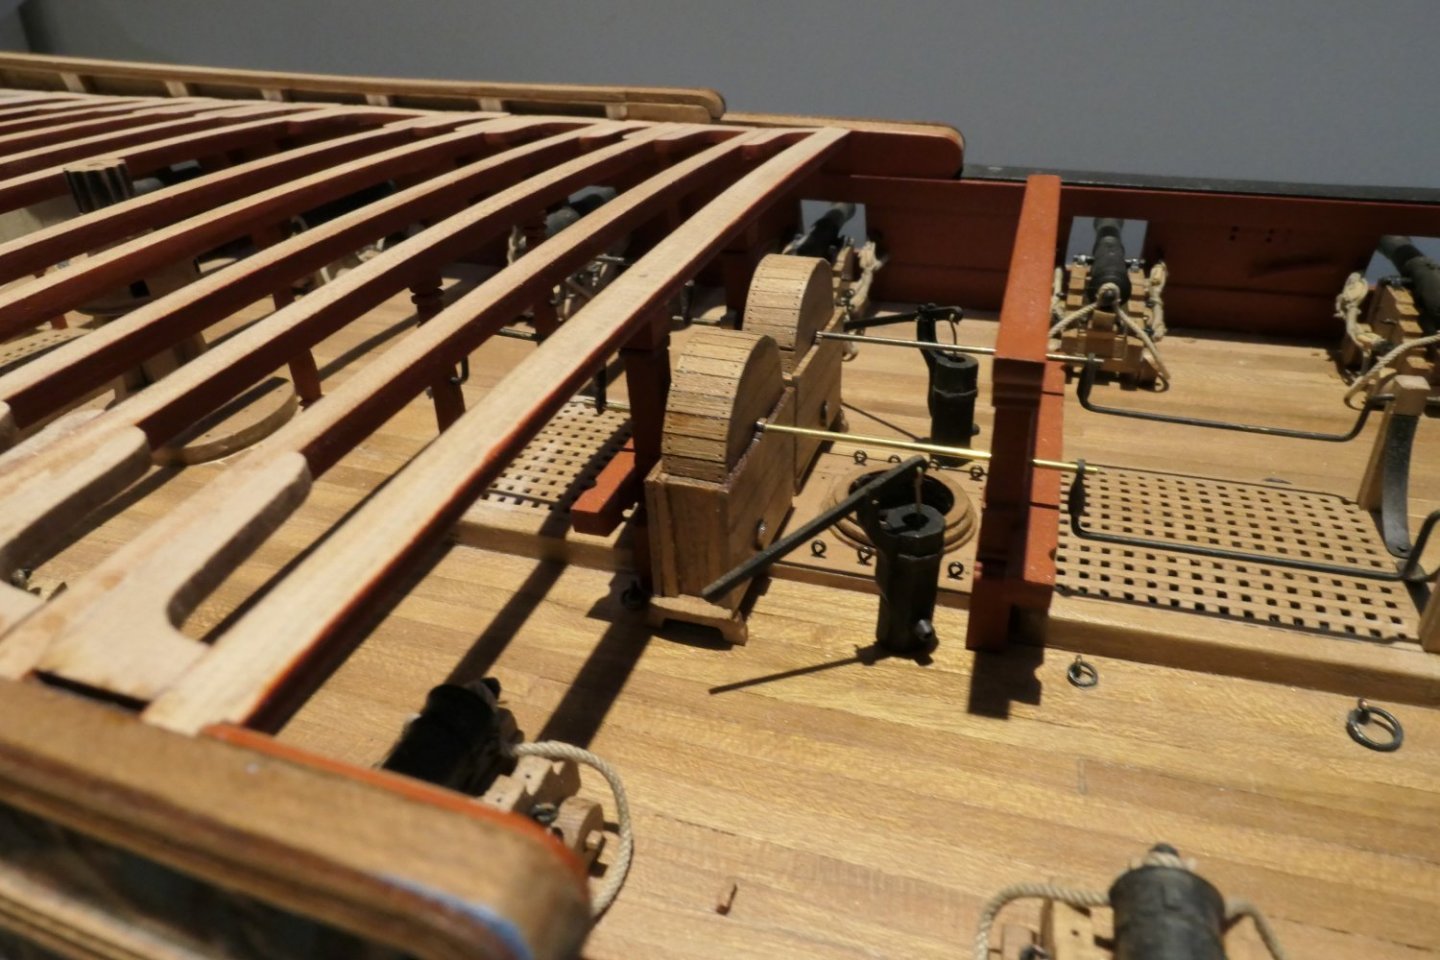
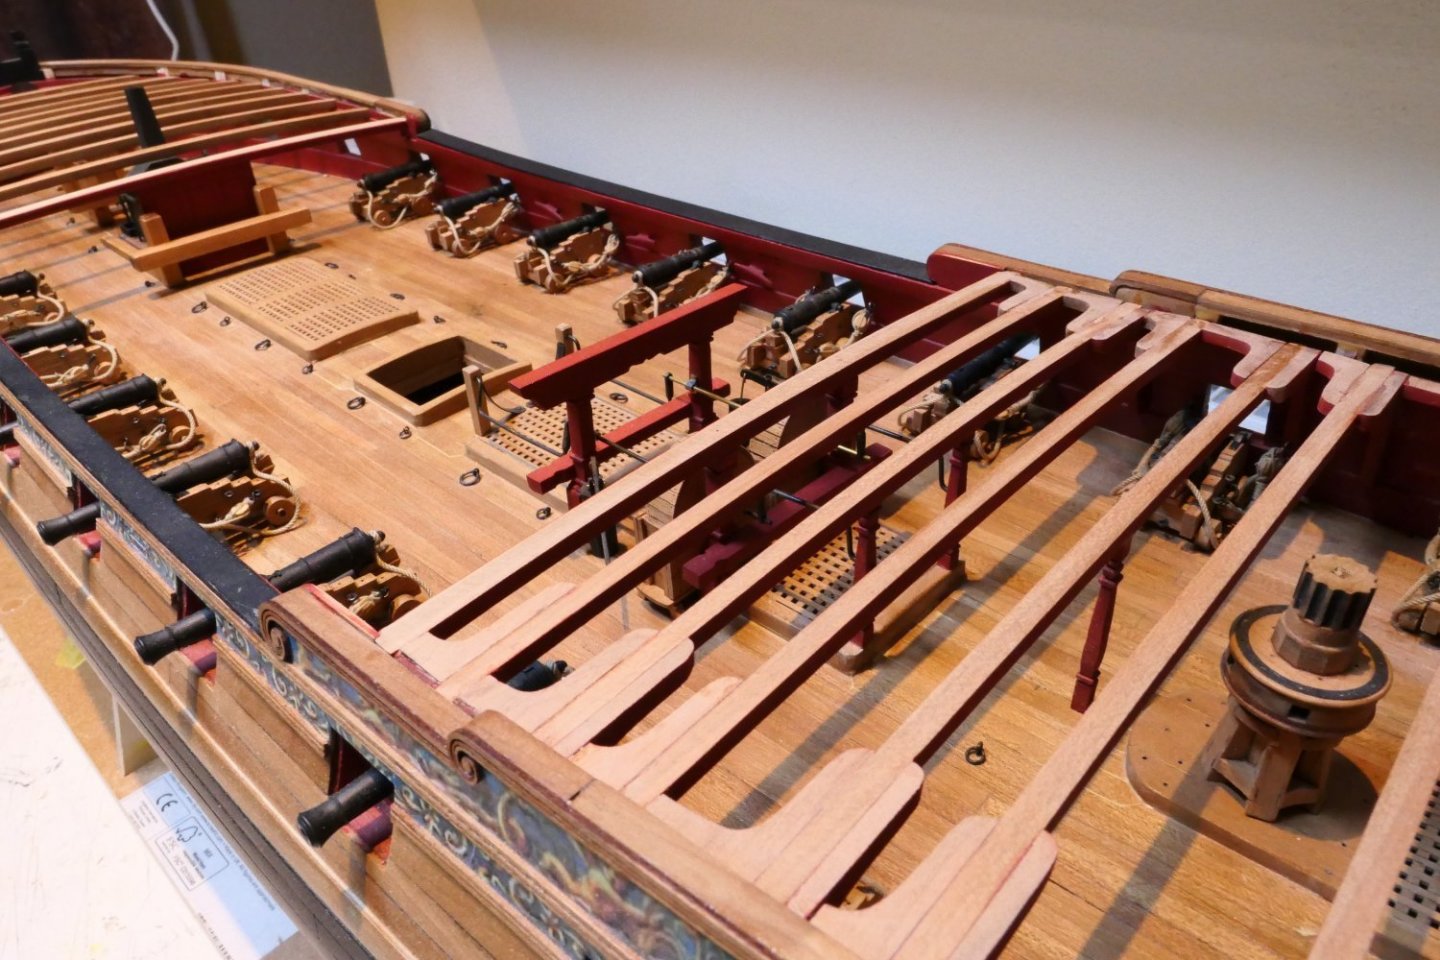
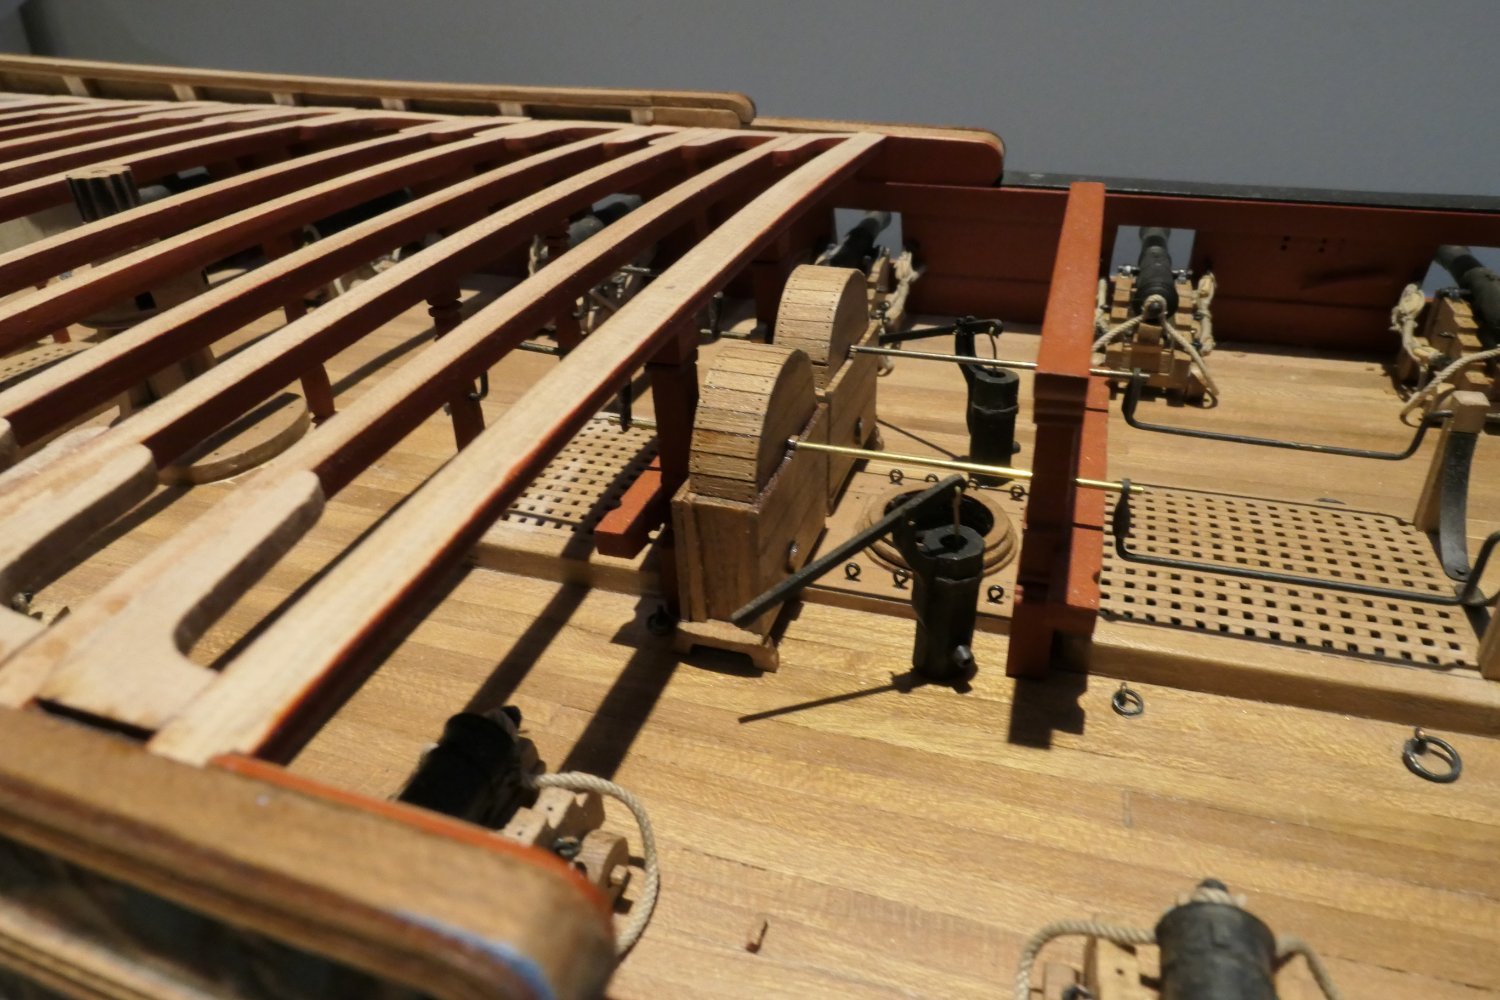
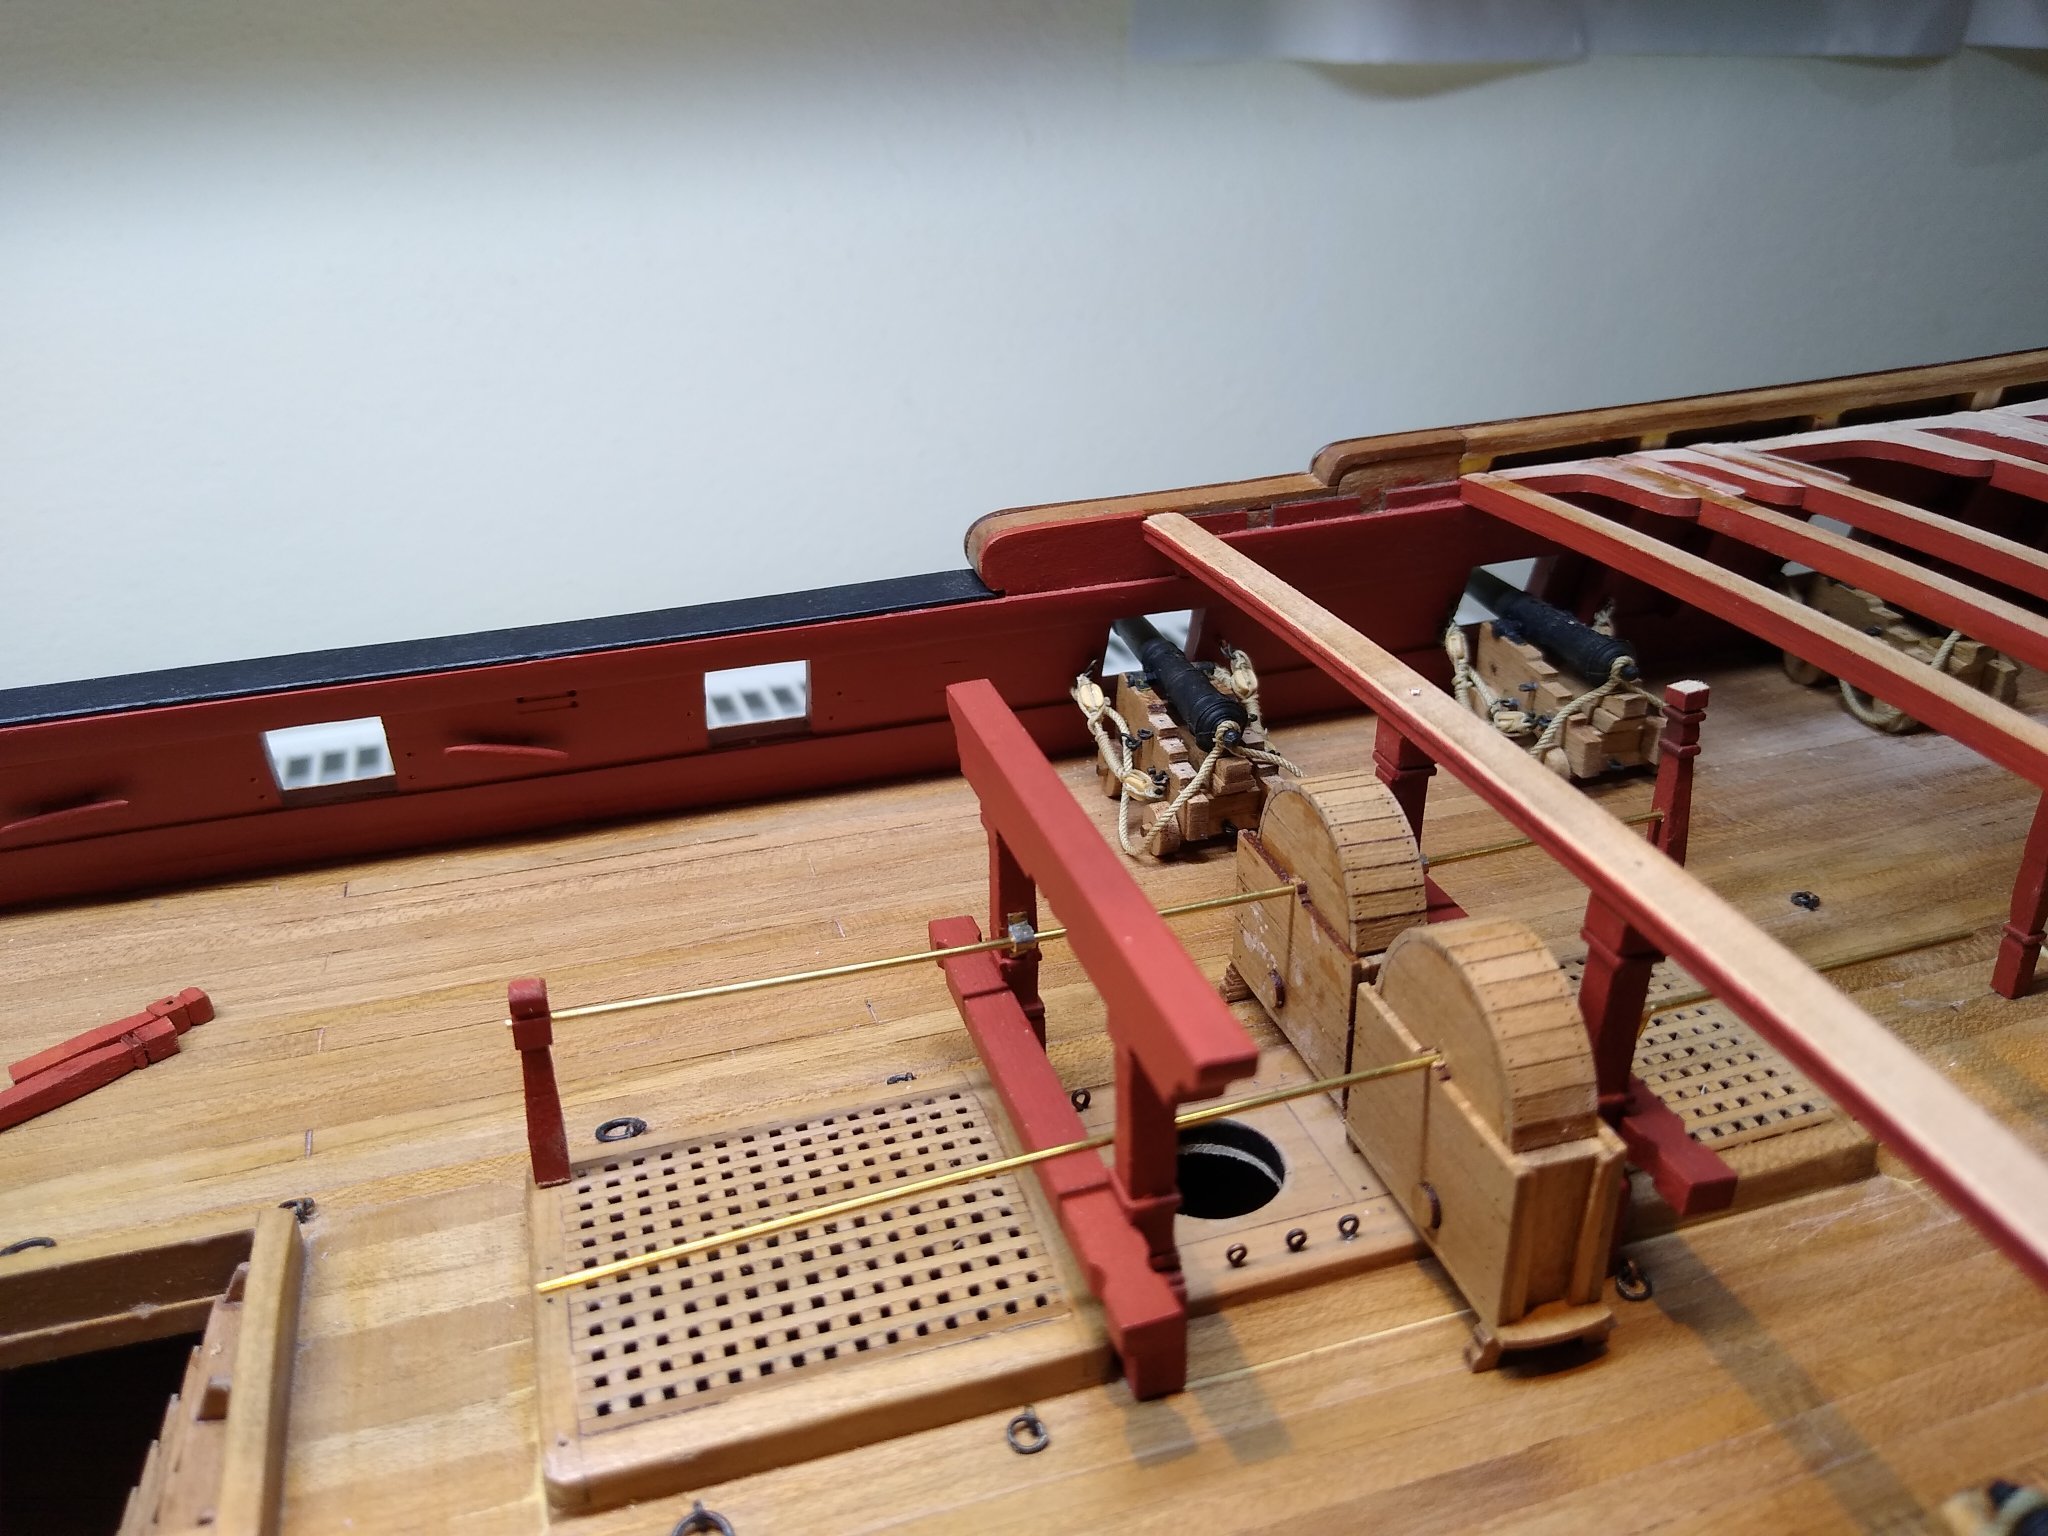
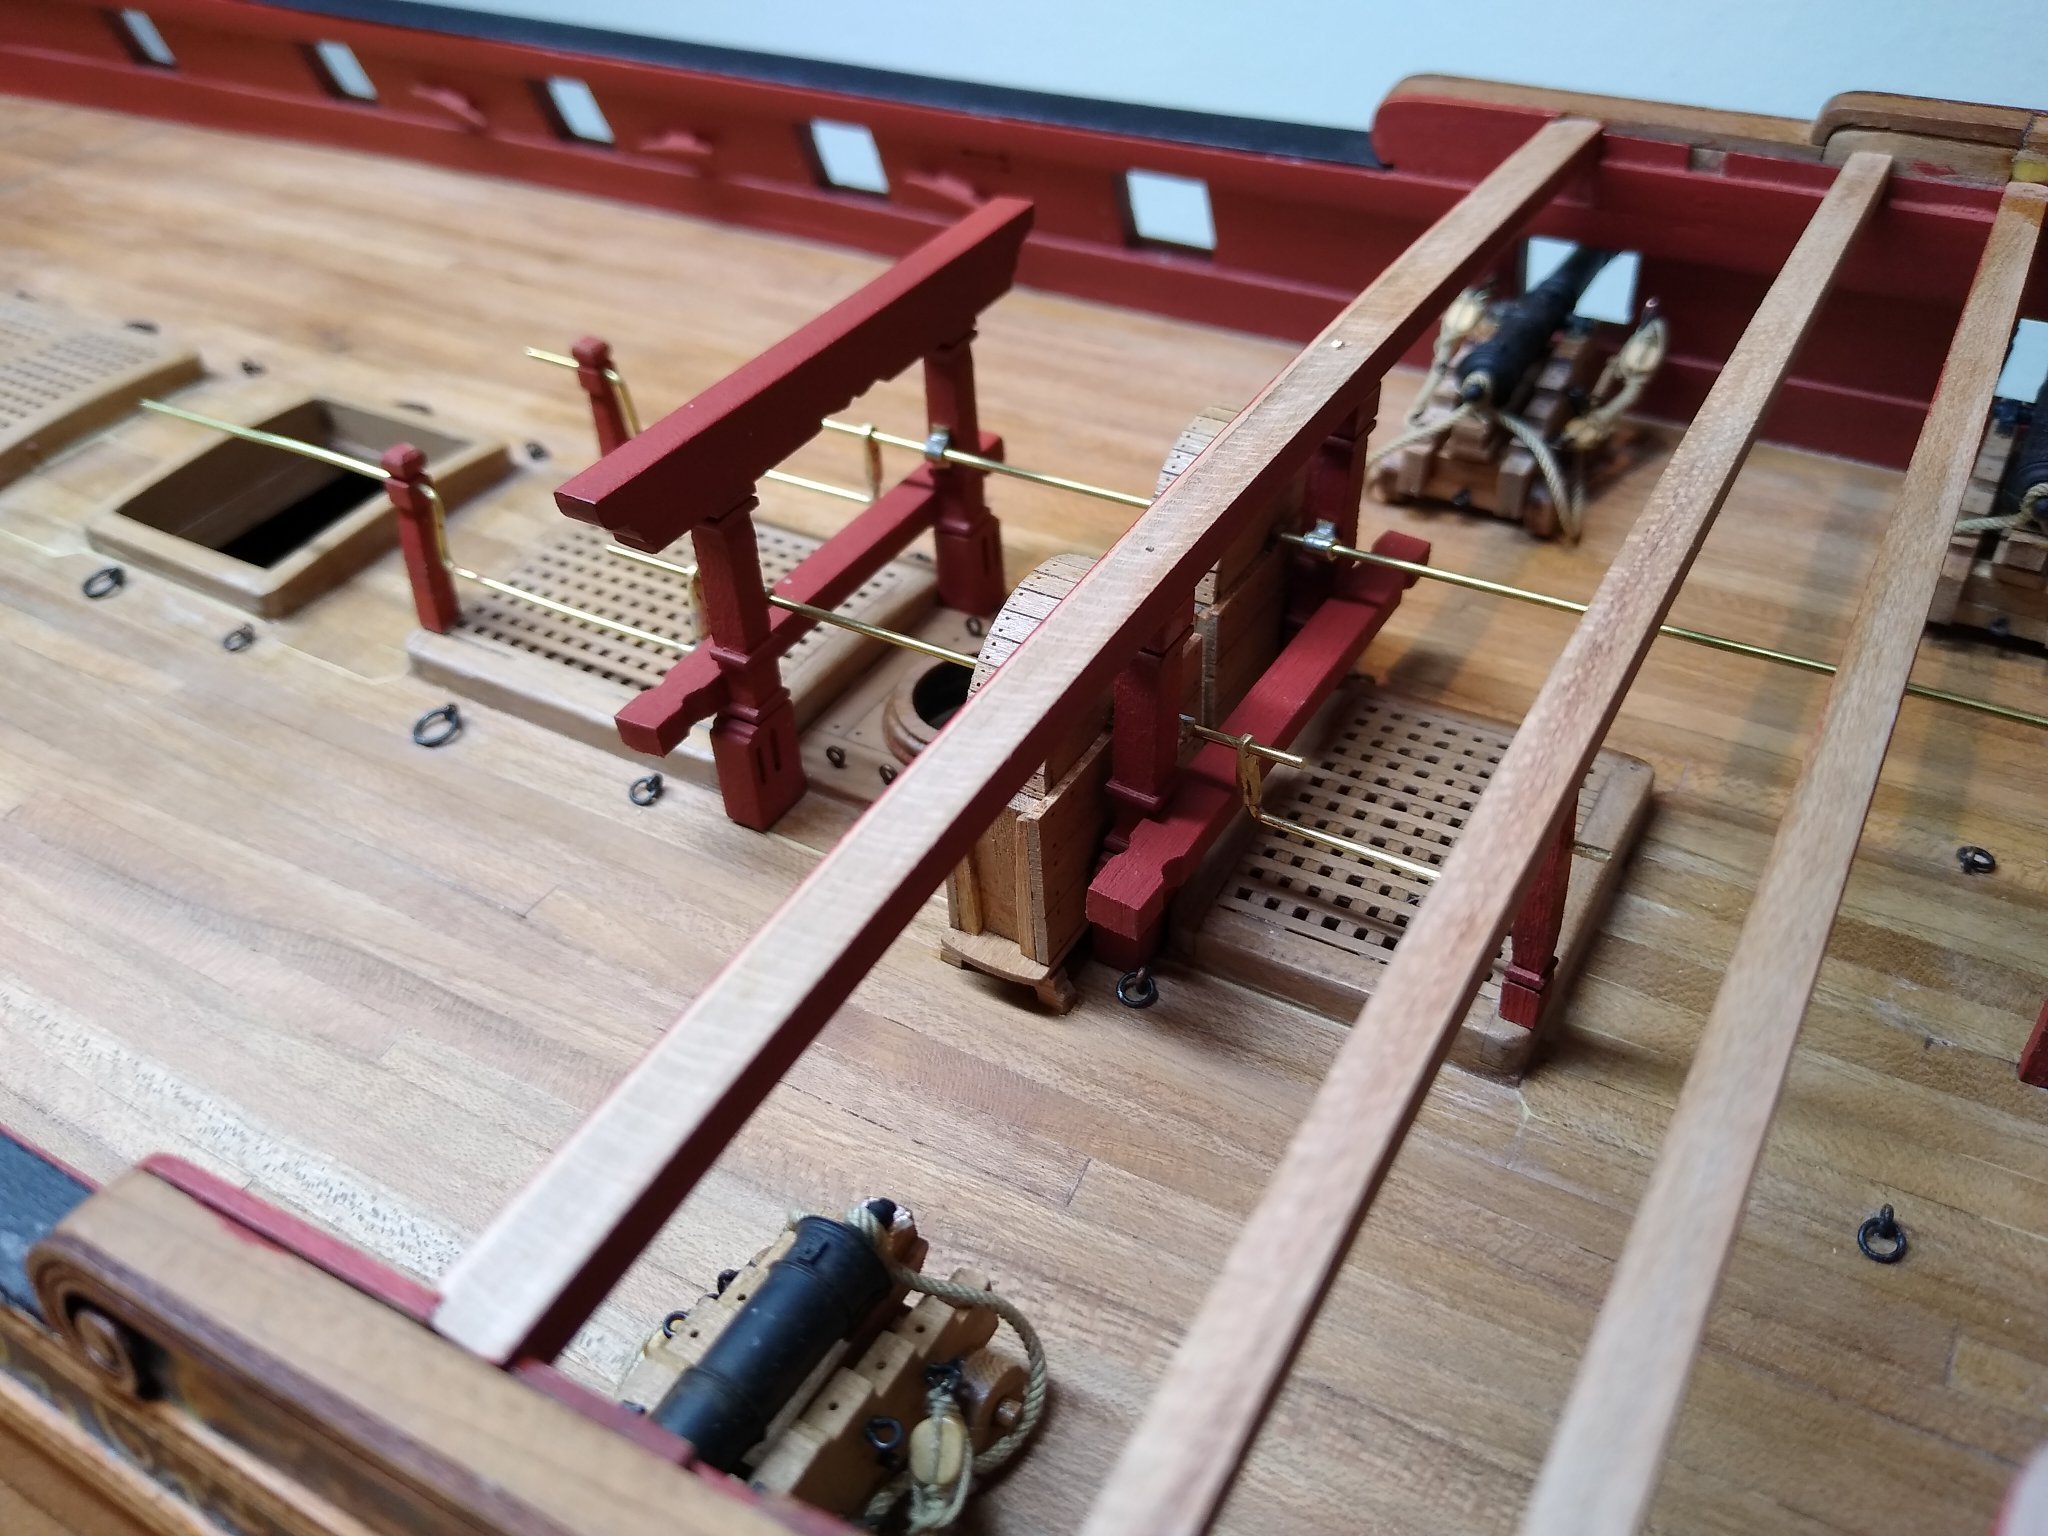
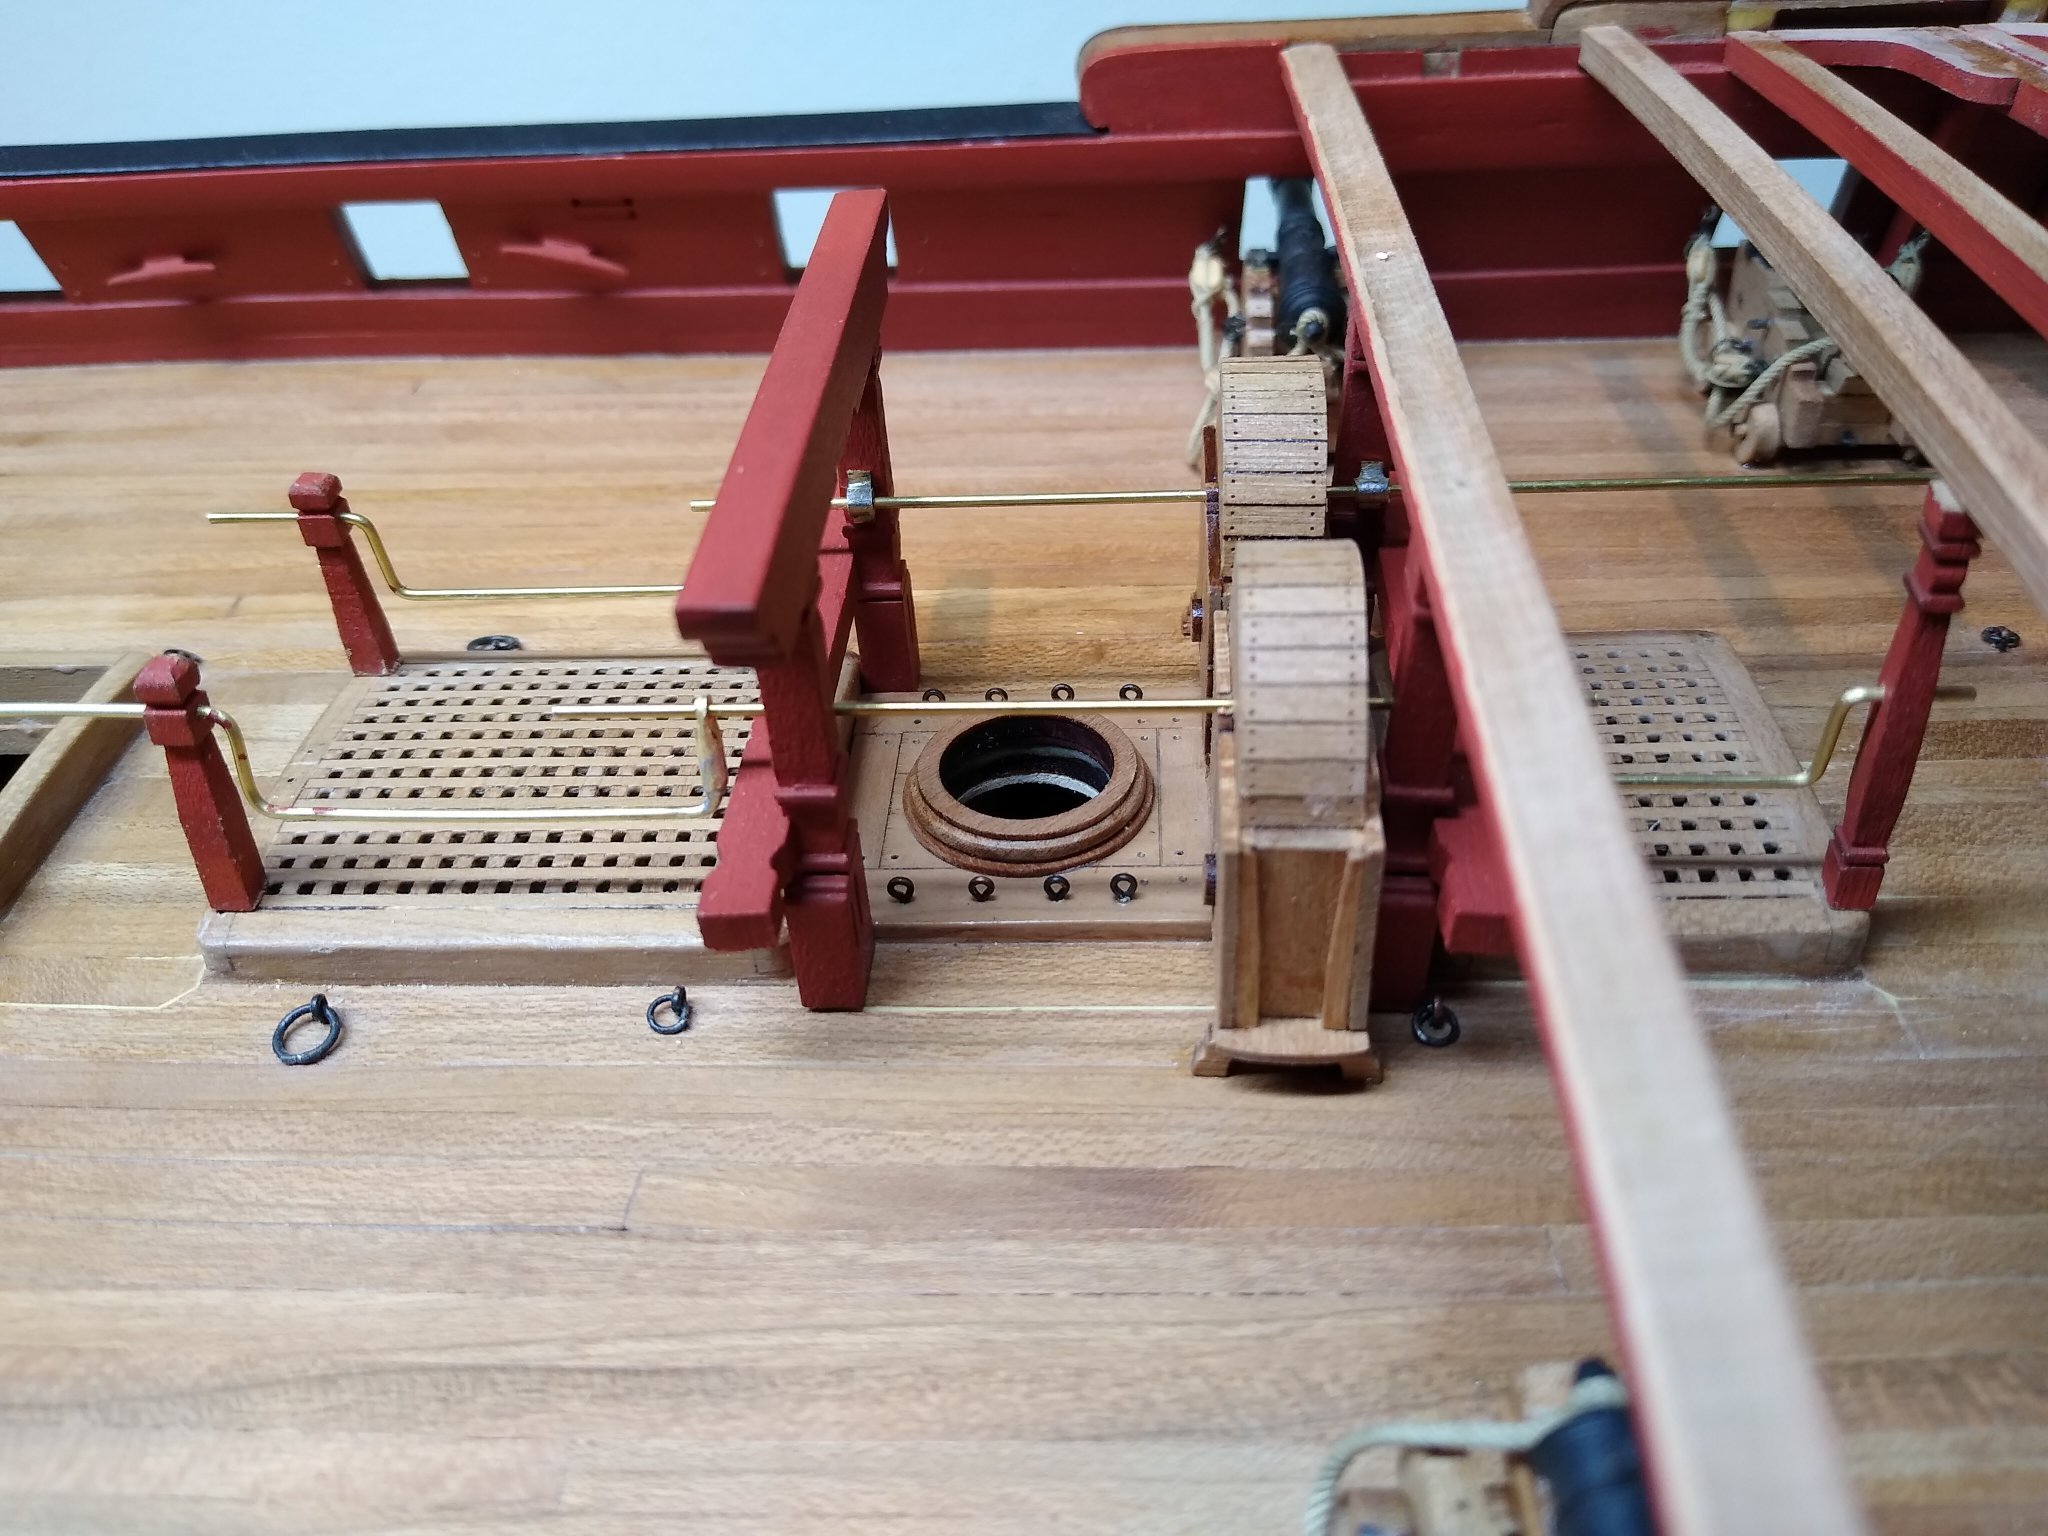
Six guns rigged. The first one took me ages. The sixth about an hour so the remainder are do-able - slow and patient are the watchwords here.
.thumb.jpg.e363d64212cbfb3ad035866c2f4bc5eb.jpg)
I reckoned the boxwood filed rhodings were a bit above my skill level so I used microtubing soldered to brass strip. They are probably a little overscale but they are robust , functional and easy to make.
.jpg.fe71ec3e07831f966add48c9f6dba944.jpg)
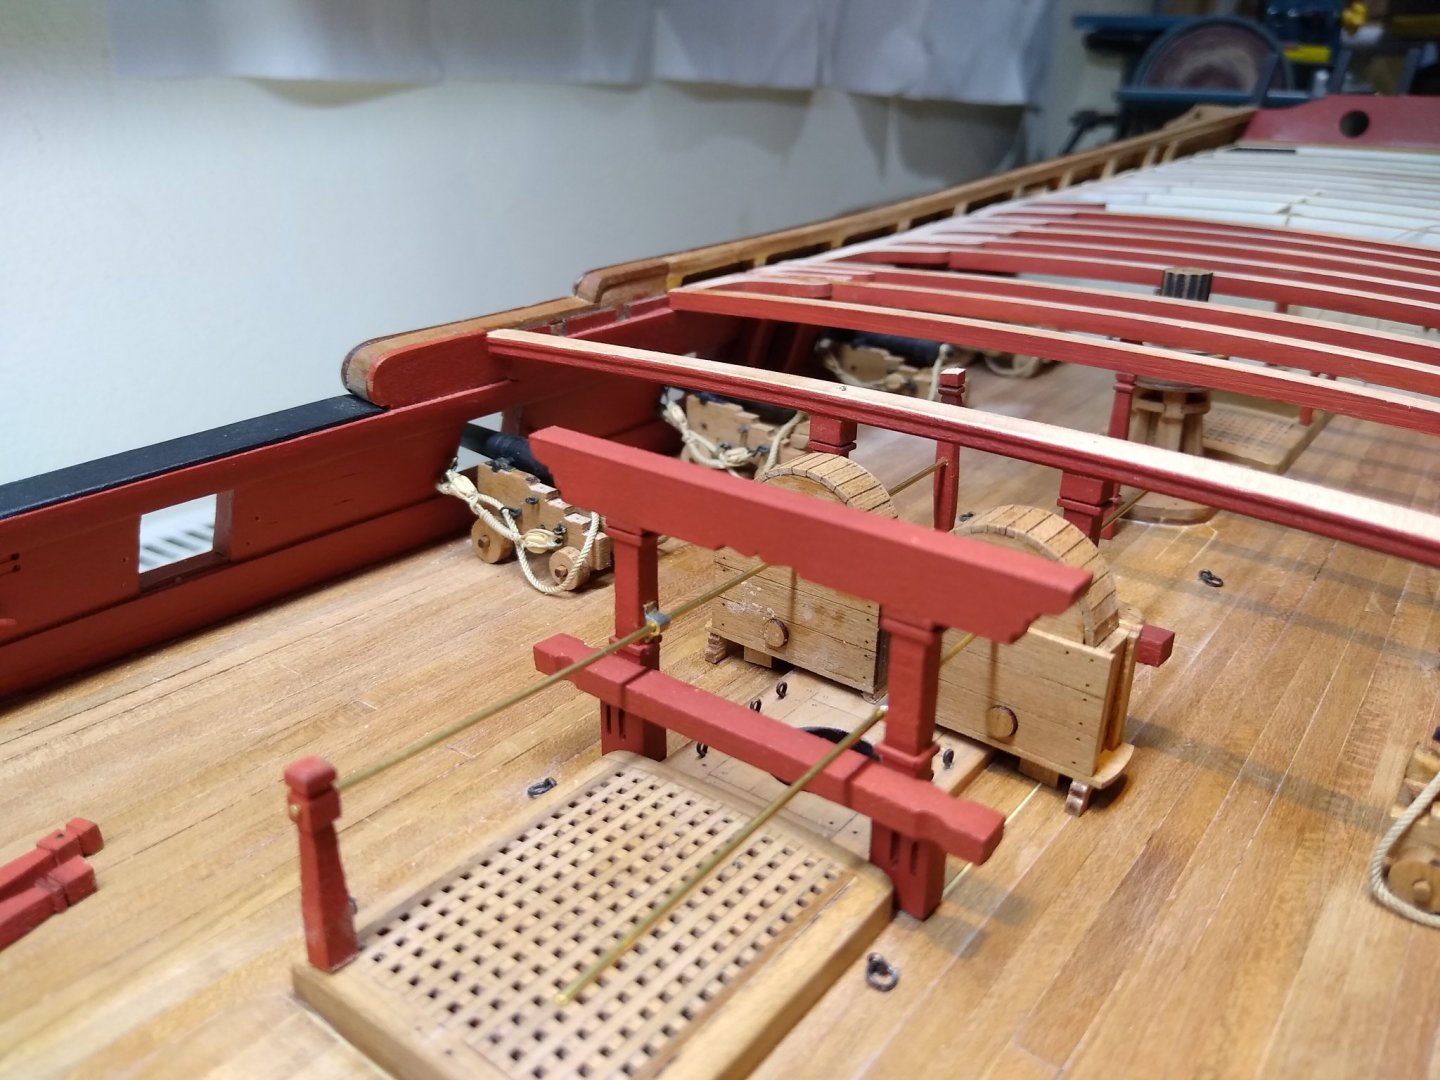


The posts at either end are not yet glued down. I'm not at all sure about the wooden posts at the forward end. Should they be steel I wonder? I think I should certainly follow Chuck's simpler design. Every departure I've made from Chuck's instructions so far has come unstuck.
.thumb.jpg.288562c6fa3c9a5227acc1bf2a4bcad5.jpg)
All the best everyone.
Fred

-
Looking wonderful, Matthias. You must be thrilled with the result.
All the best
Fred
-
Chuck - you ask: "Should I design a 10 .... or settle for a quick 4 in results?"
My answer is in two parts. First I completely concur with the responses from my fellow Winnie builders set out above. Secondly I cannot help but feel you had your tongue firmly in your cheek when you posed your question. I suspect shooting for a 4 out of 10 outcome simply isn't in your DNA. You can leave the "that's close enough" approach to the likes of me. I'm constantly taking a deep breath and saying "slow down - take your time" . It's just........well, at least I'm getting better at model building but a way to go yet. Still I'm having fun and really looking forward to the 10 out of 10 tricky bits down the line.
All the best
Fred
- Gregory, FrankWouts and Ryland Craze
-
3
-
That looks wonderful. But I can't help feeling: if that took you a day what hope is there for the likes of me. Hopefully you will turn your marvellous laser cutting skills to the task in hand and we will all produce something passable (and enjoyable to make).
Thank you for this terrific project.
Fred Healey
-
I could not get the hang of forming the gun port hinges with pliers so I soldered some micro tubing on to the hinge strap
.thumb.JPG.faaa7ccc7acdab6f48f3d98d21700de2.JPG)
.thumb.JPG.4dc27e731d302a6b569aa4864090aafc.JPG)

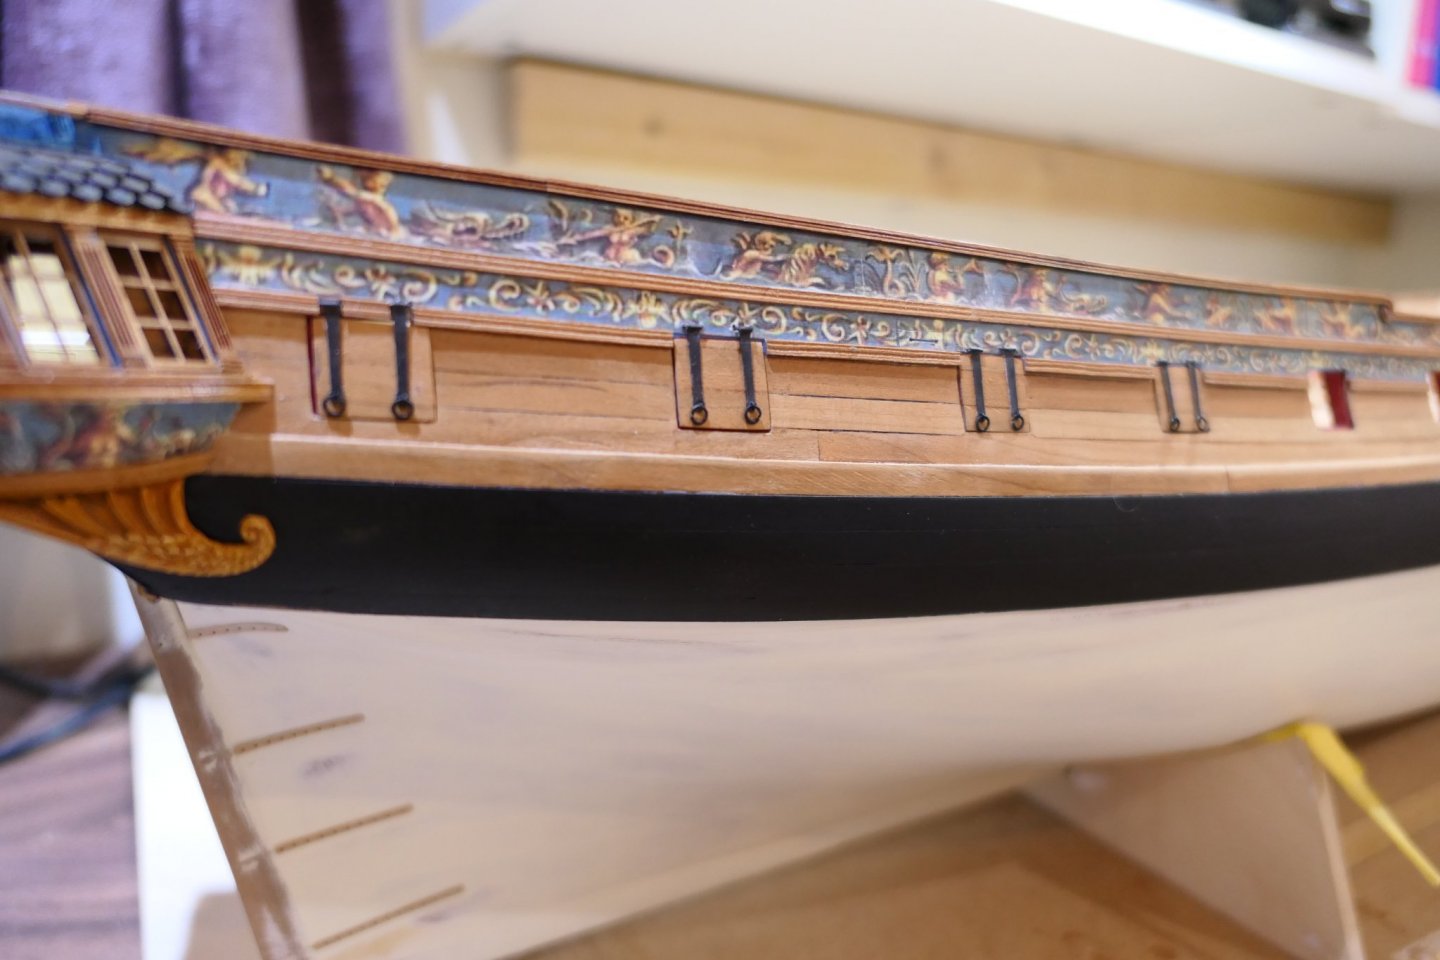
They work well enough as hinges but - there is always a but with my work -the opened gun ports don't line up very attractively.
I don't know whether that is the result of complex geometry (opening a rhomboid shape) or poor execution. A bit of both perhaps. But I can live with it.
.thumb.JPG.3c829e6d77cab12bfef41c8dec2d3065.JPG)
.thumb.JPG.81d0be06a9de67c799ad16daffed8552.JPG)
I trial rigged a canon with Syren ultra rope and blocks.
.thumb.JPG.0f956f4d75394f3d674276d3eb48169e.JPG)
.thumb.JPG.068f389f902a2ca0d7d33fbe5d58def0.JPG)
I believe the boss does not particularly like frapping but I think it looks neat and tidy and for a first attempt I'm really pleased.

Only another twenty something to go. That one took me ages but I think its all quite repeatable so Chapter 8 sometime around 2022 I reckon.
Keep going everyone
Fred
.thumb.JPG.6494cd99dc35bc5ac47e169c905bb0ec.JPG)
- JpR62, CaptMorgan, Rustyj and 9 others
-
12
-
Pleased to see you are back under way. All that careful lining off will pay dividends later on (as others have observed on other logs). I wish I'd done it properly rather than semi-winging it.
Please put up a few more pictures as you go.
All the best
Fred
-
I've got a real problem, Mike, with every post you make and every photo you show. I sit here thinking "If only I were half as good..."! Never mind. I'm really enjoying my build....just as long as I don't look too closely at yours or Chuck's.
Really superb work
Fred
-
Lovely work rigging the guns. I've ordered rigging rope from Syren today so I hope to make a start soon. I prefer the way you've hung the tackles ropes from hooks on the bulwarks rather than coiling it on the deck (that looks a bit Sunday best to my eyes - not that I know anything about it).

.JPG.83f3a4409627d040f38e542f6998b013.JPG)
.JPG.5827fb656f776d70fb0fc06e8c659744.JPG)
.JPG.24512adde2d665bef16f4fb37beef9c9.JPG)
.JPG.857950ef5cf354c5530203fc686fb92a.JPG)
.JPG.bce648362d4939e0a28920a1d6318c45.JPG)

.JPG.4d23434174e9e480bc11894cc079afc4.JPG)
.JPG.01fc31259ed321dd85fc3fbfbc93bfe6.JPG)


.JPG.91ea5075e14576ea58a0d48a2876add0.JPG)


.JPG.73390b9d32b04f347e73d296b6202a7e.JPG)
.jpg.5bae66700e1bae285fe59161d70c176c.jpg)


.jpg.6a63d7edb7d86c6c9229f5d3112b686d.jpg)


.JPG.5f5f5ff4b1c6e898f3aeafd4f9f4433c.JPG)
.JPG.44acc64ce0d0775ce67da5dc64c88eb2.JPG)

.JPG.58c68ba72e6b1cab8c4e6a2e51e5dfd0.JPG)
.JPG.1b50665acc512e4caf46182bd7a3170f.JPG)
.JPG.38736e92f2f09201e9ecb59ef8e2623e.JPG)
.JPG.035310f5eeb1314dcc6f617617e1324a.JPG)


.JPG.4bd33362ca925442cb72643fff19da8d.JPG)

HMS Tiger 1747 by Siggi52 - 1:48 - 60 gun ship from NMM plans
in - Build logs for subjects built 1501 - 1750
Posted
Absolutely wonderful. Your great grandchildren will treasure your Tiger in 100 years time.
All the best
Fred Healey