


jfhealey
-
Posts
325 -
Joined
-
Last visited
Content Type
Profiles
Forums
Gallery
Events
Posts posted by jfhealey
-
-
You are doing a wonderful job JJ. I should think you must be very proud of what you have achieved. A fantastic representation of the Winnie.
All the best
Fred
-
CaptnBirdseye - I shall follow your build log with interest. By the way - if you have not ordered wood from Vahur (Hobbymill EU) before then you have a treat in store. Its beautiful stuff.
Good luck
Fred -
Thank you gentlemen for your very kind thoughts which I greatly appreciate.
Glenn - I have not heard of liquitex until your post above. I see it is available in the UK (unlike wipe on poly which I seems to be the go-to finish on your side of the Atlantic) so I shall give it a try. Does it have adhesive qualities as well as providing a matt finish? At the moment I paint a little matt varnish on to the knots after CA-ing them but it does not completely rescue the mess CA can make.
-
Thanks chaps for your kind remarks. Here is an update on my Cheerful build. The end is in sight for a much enjoyed project.
I hoped the sheer pole would enable me to pull my wonky deadeyes into facing front. Here are the outer two:

And here all four. I'm pleased with the outcome. The sheer pole looks a bit curved in the picture but it is straight enough on the model. Looking at the picture I shouls perhaps have worked a little harder on the Syren deadeyes with fine paper.
And here the lanyards tied off. A bit scruffy but the best I could do.
Starting work on the ratlines. Chuch's instructions say use .12 rope. I tried it and thought .18 looked better. Big mistake and one I cannot undoe without destroying all the rigging done to date and that is a bridge too far for me. Not only do the lines look too thick but the wider diameter rope significantly increases the size of the knots. Irritating - but, oh well, live and learn!
I also dragged in one of the outside shrouds (aft starboard - see below). Not quite kiss of death territory but practice required.


Starting on the backstays
.thumb.jpg.fabf5a21eda5e589eec15cd4569ca40f.jpg)
.thumb.jpg.8fed2e81bed9838d88a4d7073773314a.jpg)
.thumb.jpg.cb4352e88bfaccb4a3ef02049a70d30e.jpg)
I struggle a bit with seizing lines together/to blocks. Cotton thread seems sometimes to take on a determination to go its own way rather than where its wanted. That or just getting too much CA so the knot is a little disfigured. Again more practice required.
Here using the cathead for temporary tightening a line. A lot of this section of rigging requires careful tensioning in particular to keep the yard arm where it shoud be.


Thats all for now. Not much to do and I shall be done. I heartily recommend Cheerful to anyone contemplating a semi scratch build.
All the best
Fred
- scrubbyj427, CiscoH, Edwardkenway and 13 others
-
 12
12
-
 1
1
-
 3
3
-
Cheerful is a great choice. Good luck Rick. I will follow with interest.
Fred
- Ryland Craze and Freebird
-
2
-
Super planking/scarf joints JJ.
-
I'll second "take lots (and lots) of pics". That way folks like me will indeed see how its made. I don't aspire to build at anything like your level, Mike, but I'd love to see how you make things.
-
Inspirational work Glenn
- glbarlow, Dave_E and FrankWouts
-
3
-
Thank you both. All advice very graefully received!
I shall follow this build with great interest, Mike. Please post as many photos of making parts as you feel able to share.
Fred
- FrankWouts, scrubbyj427, mtaylor and 3 others
-
6
-
By way of example of the above: Mike wrote "I added the gammoning knee". How on earth did you make it?
Sorry to be a pain.
Fred
- mtaylor and FrankWouts
-
2
-
Greg - you are a case in point. Another master craftsman with so much knowledge to impart. I have your book "Building the Swan Class Sloop Pegasus" (I didn't realise who DVM 27 was for a long time) and I have read it from cover to cover but there are limitations to the printed page - not least that you can't ask. What I'd love to see is someone walk a beginner like me through each stage of making a part - for example Mike's stem above - with lots of photos. I may never be that good but I'd like to have a go!
Best wishes
Fred
- dvm27, FrankWouts, mtaylor and 2 others
-
5
-
Hi Mike.
I'm certain this will be a wonderful and fascinating build.
Are you, I wonder, prepared to share lots of pictures of your construction work? I'm not asking about the finished product - for example the stem pictured above - but rather how you made it. That's what I'd love to see. I can see photos of a scroll saw and a milling machine (in action - which is great) but I still cannot see how you achieved such an outcome. I get that you paste bits of paper onto wood and cut them out - but, self evidently there is a heck of a lot more to it than that. How , for example, did you achieve such close joints on the curved sections - an oscillating sander perhaps?
I appreciate there is a lot of skill involved but there is a lot of learning in there too. Will you share it?
I'd love to follow if you will.
Best wishes
Fred Healey
- FrankWouts, TBlack, mtaylor and 1 other
-
4
-
Here is a short update on my Cheerful as a very enjoyable build comes towards its conclusion. I have some touching up and tidying up to do and the boom crutches. Otherwise its just the rigging which is well underway. These pictures were taken a couple of weeks ago.


These are where I am now.

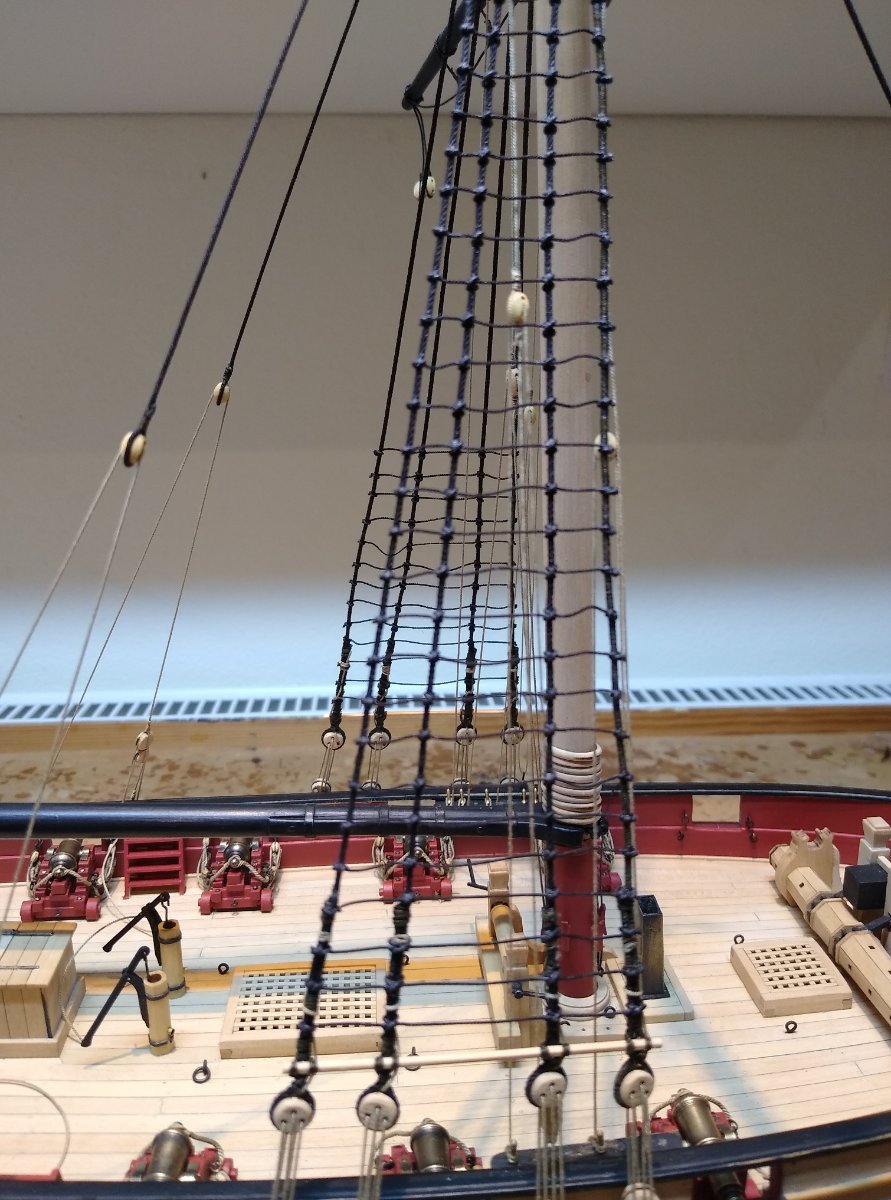
No matter what I do I canot persuade the deadeyes to face front. I'm hoping I can force them to shape up with the sheer pole.

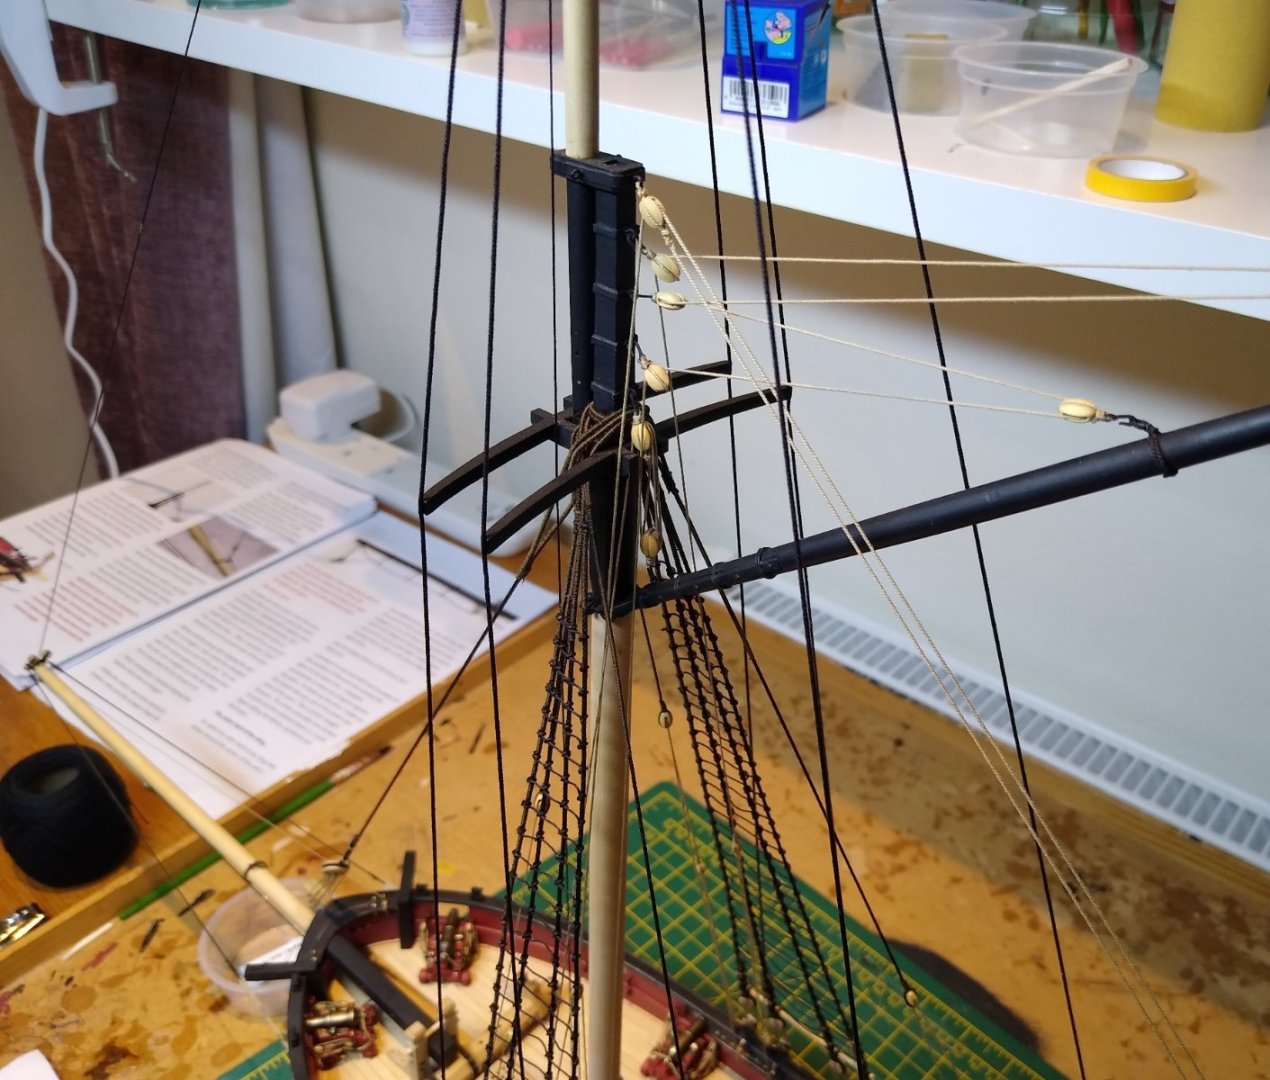
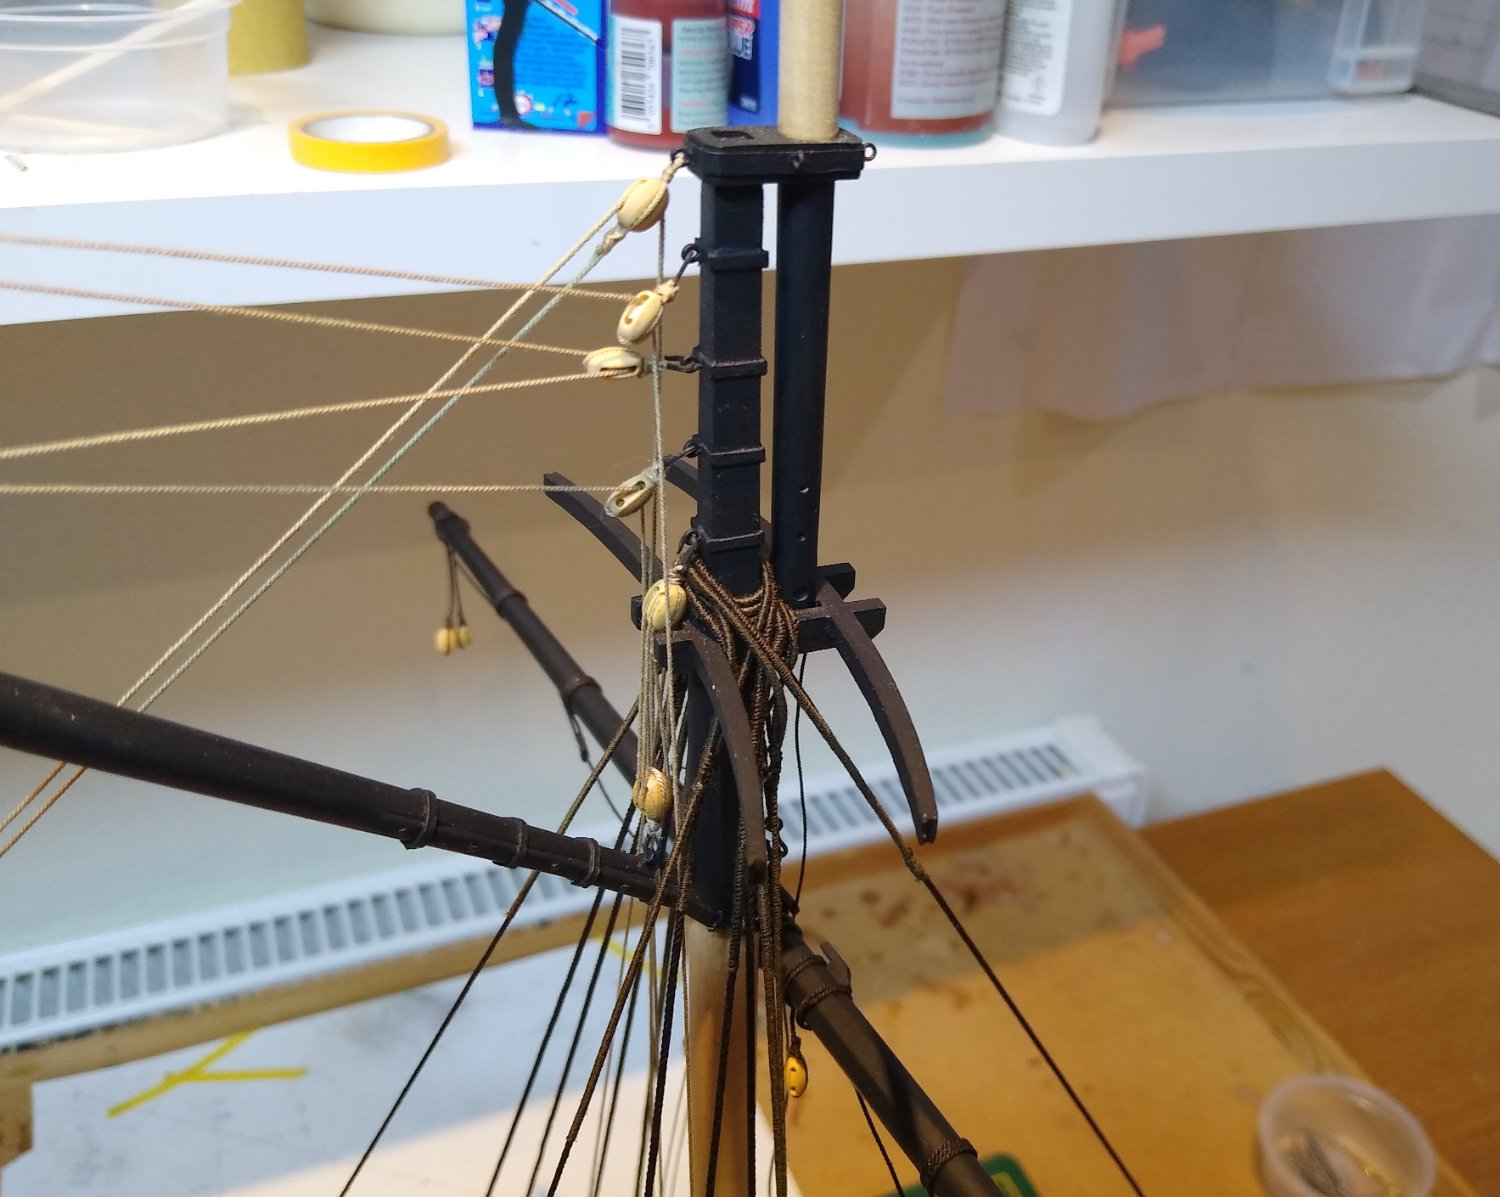
In the picture below you can see there is a mistake. The bottom ring on the mast to which the block for the throat halyard is attached should not be attachedflush to the mast as the four above it are. It should stick out a bit to clear the trees and ropework. Its shown on the plans. I either missed it or did not appreciate the significance. But I can live with it.
The real difficulty I have found with the rigging is in seizing blocks when I can't hold the block in a third hands device eg when the block has to be seized to the mast or a line. I guess its a matter of practice and experience but I need to work on it.
Ratlines today.
Otherwise all is well.
Fred
- KORTES, Paul Le Wol, Edwardkenway and 9 others
-
12
-
I'm looking out of the window here on a bitterly cold late winter morning with the ground white with frost and then looking at the backdrop to your pictures above. Is that for real!!!
Oh, and by the way, the boat in the foreground looks pretty good too.
Best wishes
Fred
-
Yout hard work was certainly worth it Jean-Paul. The deck is looking lovely.
All the best
Fred
- FriedClams and JpR62
-
2
-
-
That (Greg's message above) is a very clever idea. One well worth knowing for future reference.
I should be interested to learn how you get on stripping out the offending planks, Edward.
Fred
- FrankWouts, AJohnson, Edwardkenway and 3 others
-
5
-
1
-
I guess its those three dark planks that are annoying you. The trouble is, I find, that when something like that gets to you, even if you know someone else would see it as a matter of no or little consequence, your eye is drawn to it and you cannot shrug it off. Good luck with whatever you decide to do. I think ripping the offending planks out would be beyond my skill level!
Best wishes
Fred
- scrubbyj427, FrankWouts, Edwardkenway and 2 others
-
4
-
1
-
Absolutely gorgeous
- shipman, Siggi52, Keith Black and 1 other
-
4
-
I just used sanding sealer and rubbed it down with fine wire wool. Its a very forgiving finish requiring no application skill whatsoever.
Best wishes
Fred
- FrankWouts and James G
-
1
-
1
-
One to be very very pleased and proud of, JJ. She is looking superb.
All the best
Fred
- scrubbyj427 and FrankWouts
-
2
-
I'll second Matt's thoughts.
I cut my own bulkheads for Winnie and purchased the Syren set for Cheerful. Buying in gets you off to a flying start but I do (slightly) regret not cutting my own in line with Chuck's "introduction to scratch building" philosophy.
Good luck.
Fred
- James G and FrankWouts
-
1
-
1
-
I have just caught up with this log. I read the first two replies: Greg (dvm 27) wrote: "..You are going to make a beautiful Naiad" and Druxey wrote: ".... a brilliant beginning". They know a thing or two about model ship building, those two, don't they!
Absolutely stunning work.
Very best wishes
Fred
-
Thank you gentlemen for your kind remarks and likes.
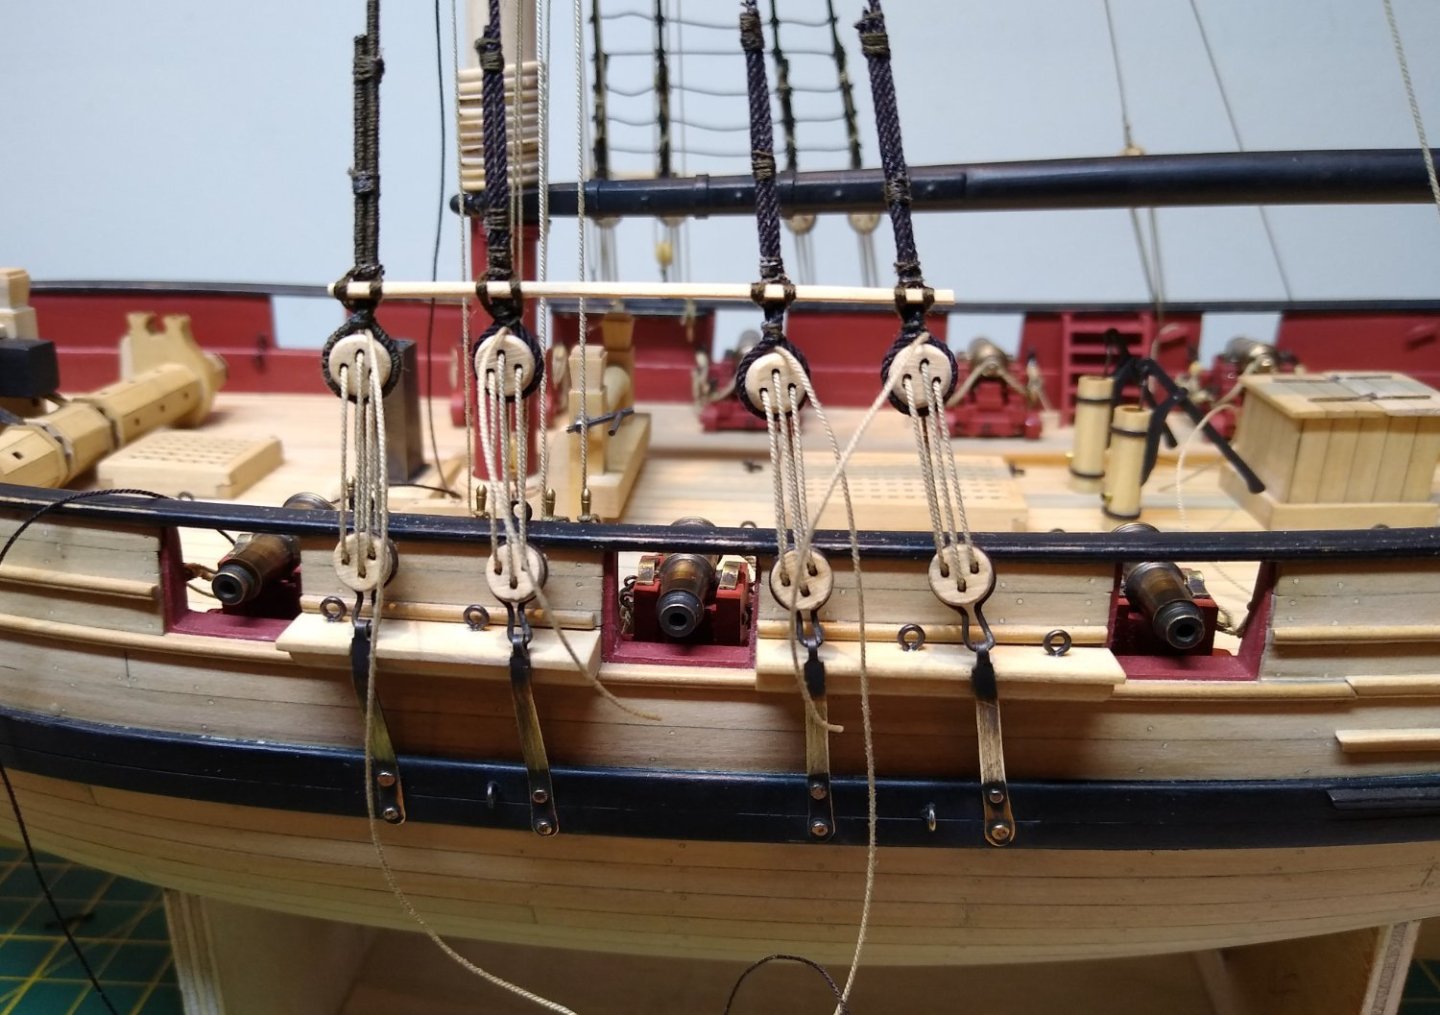
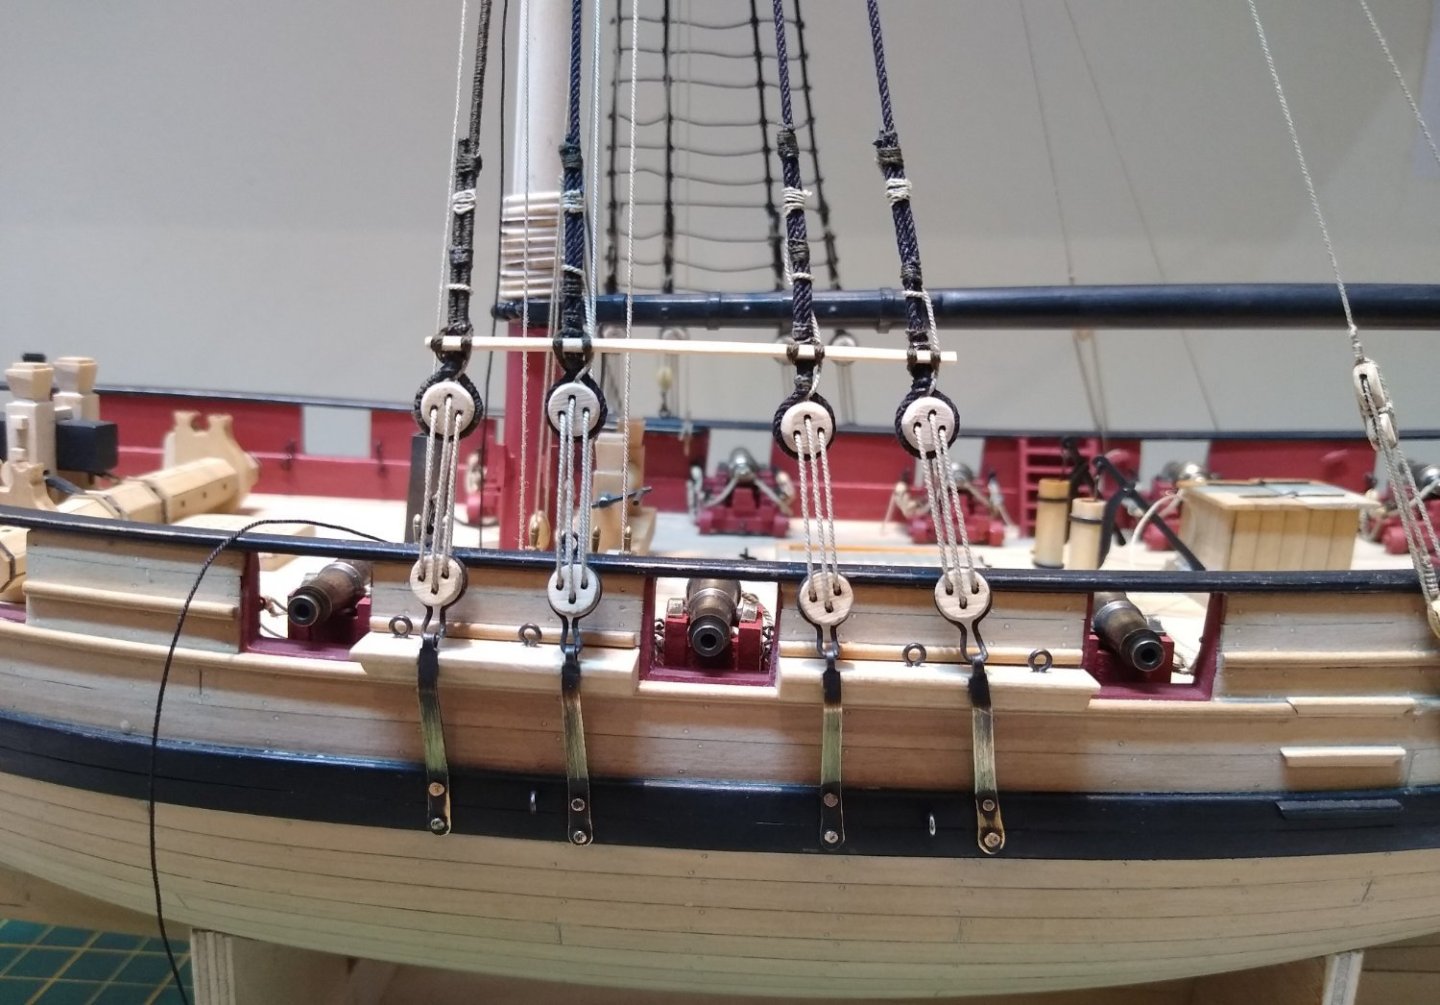
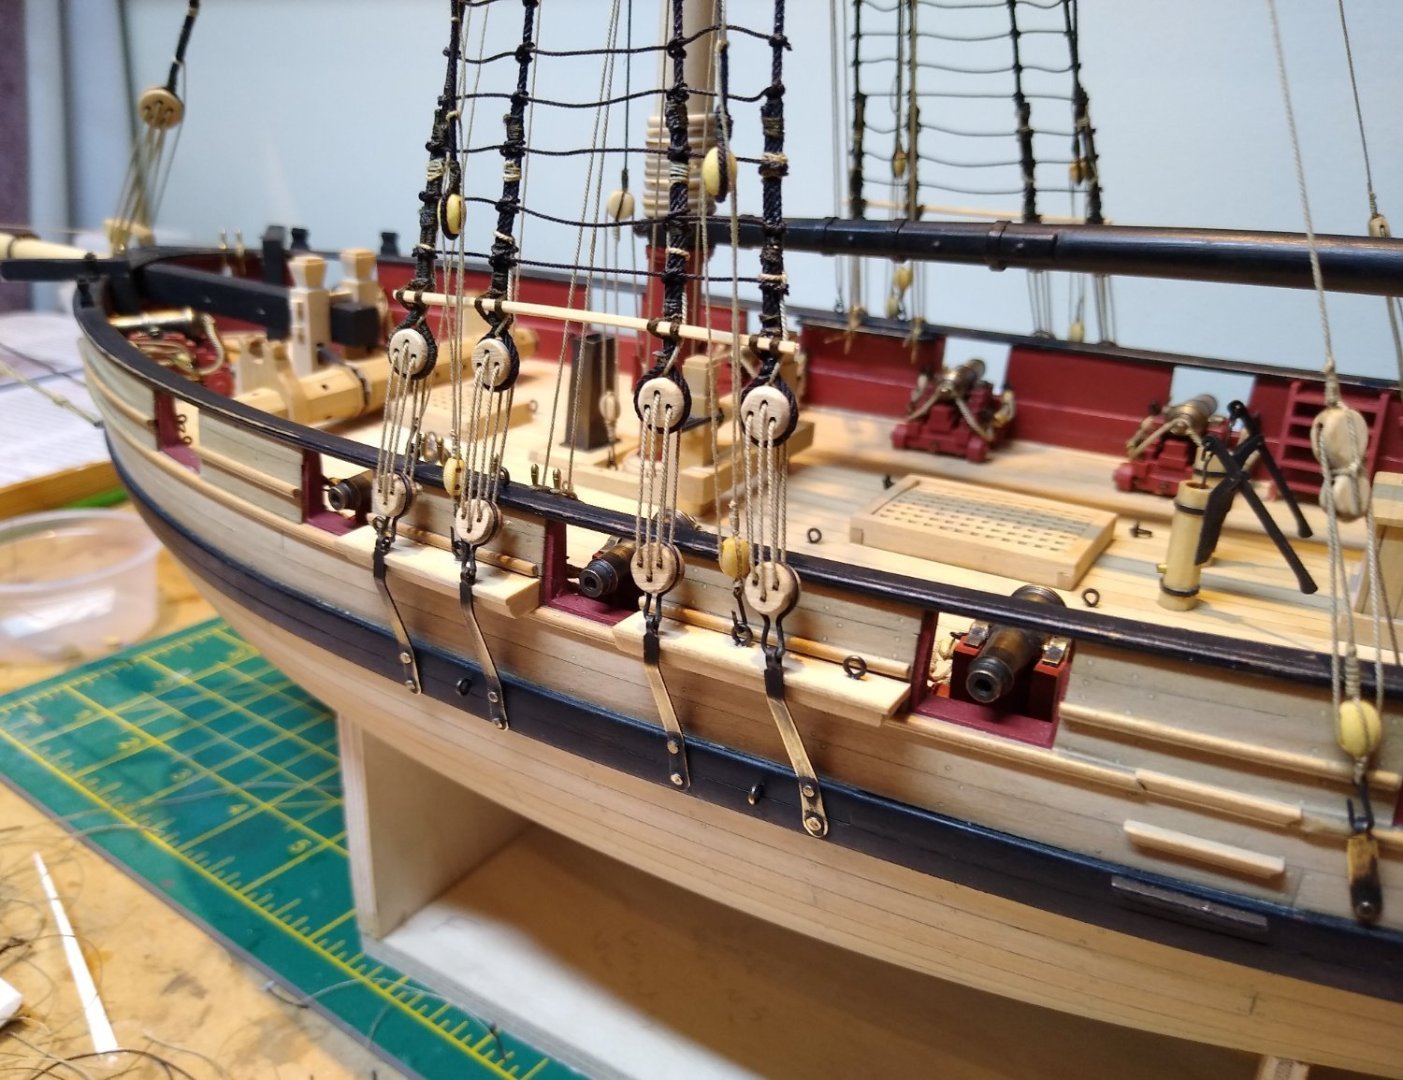
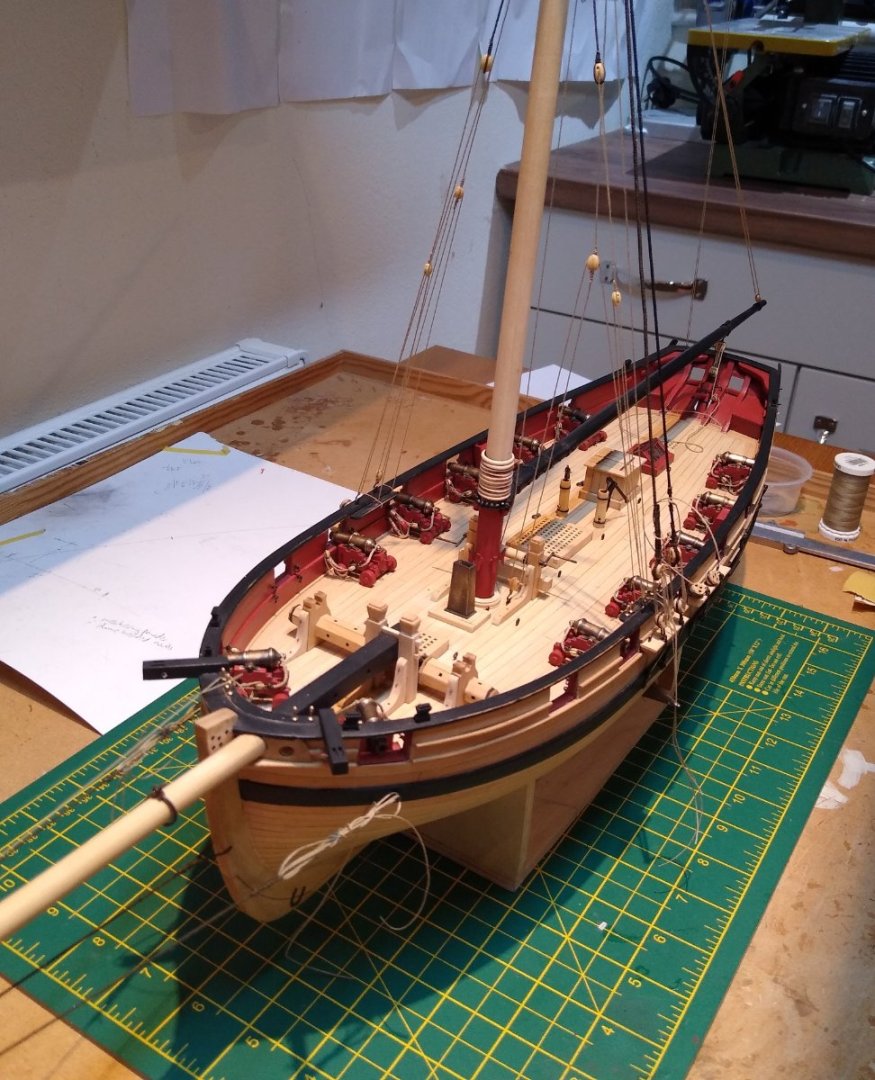
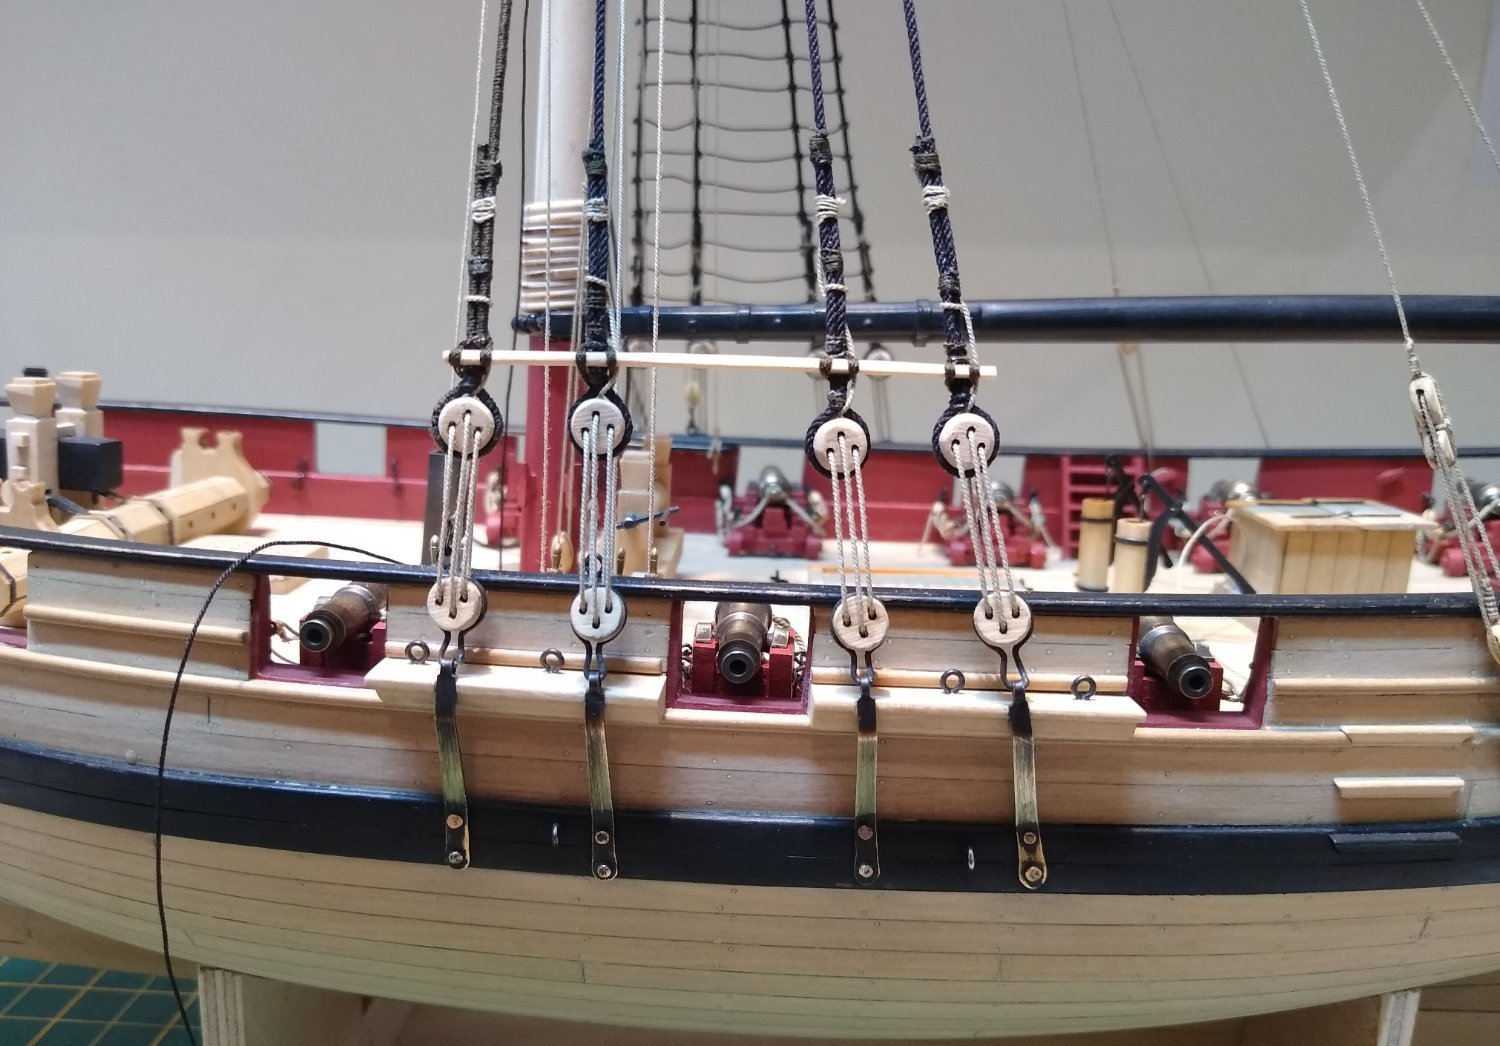
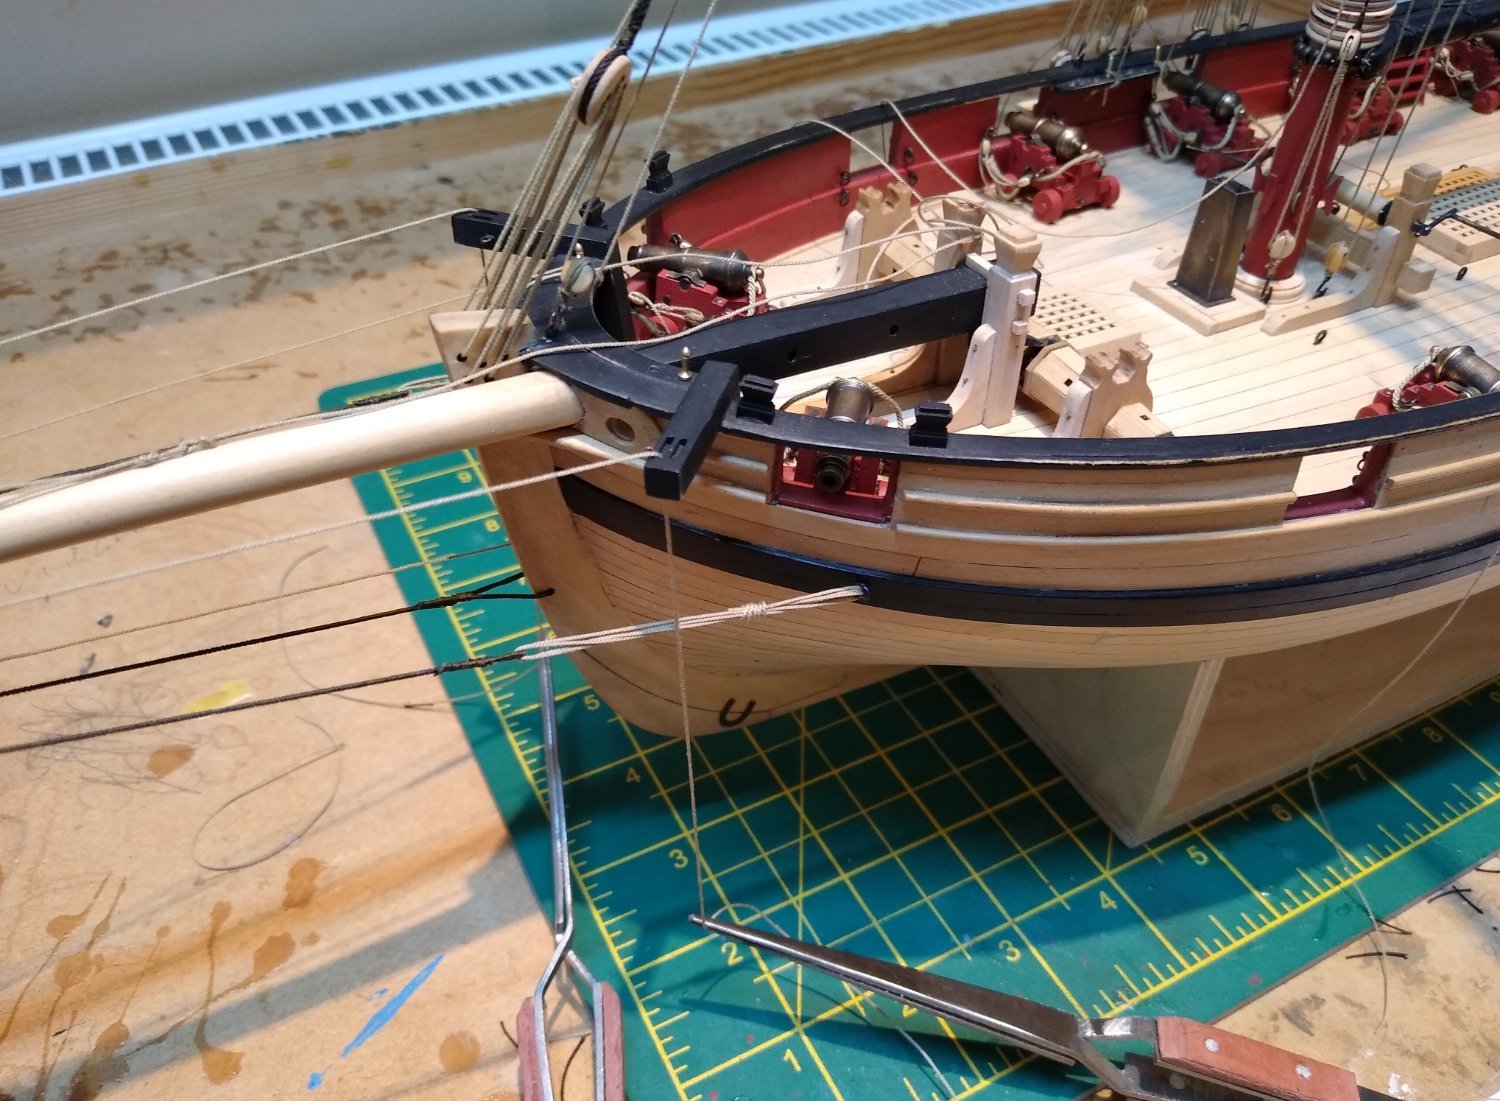
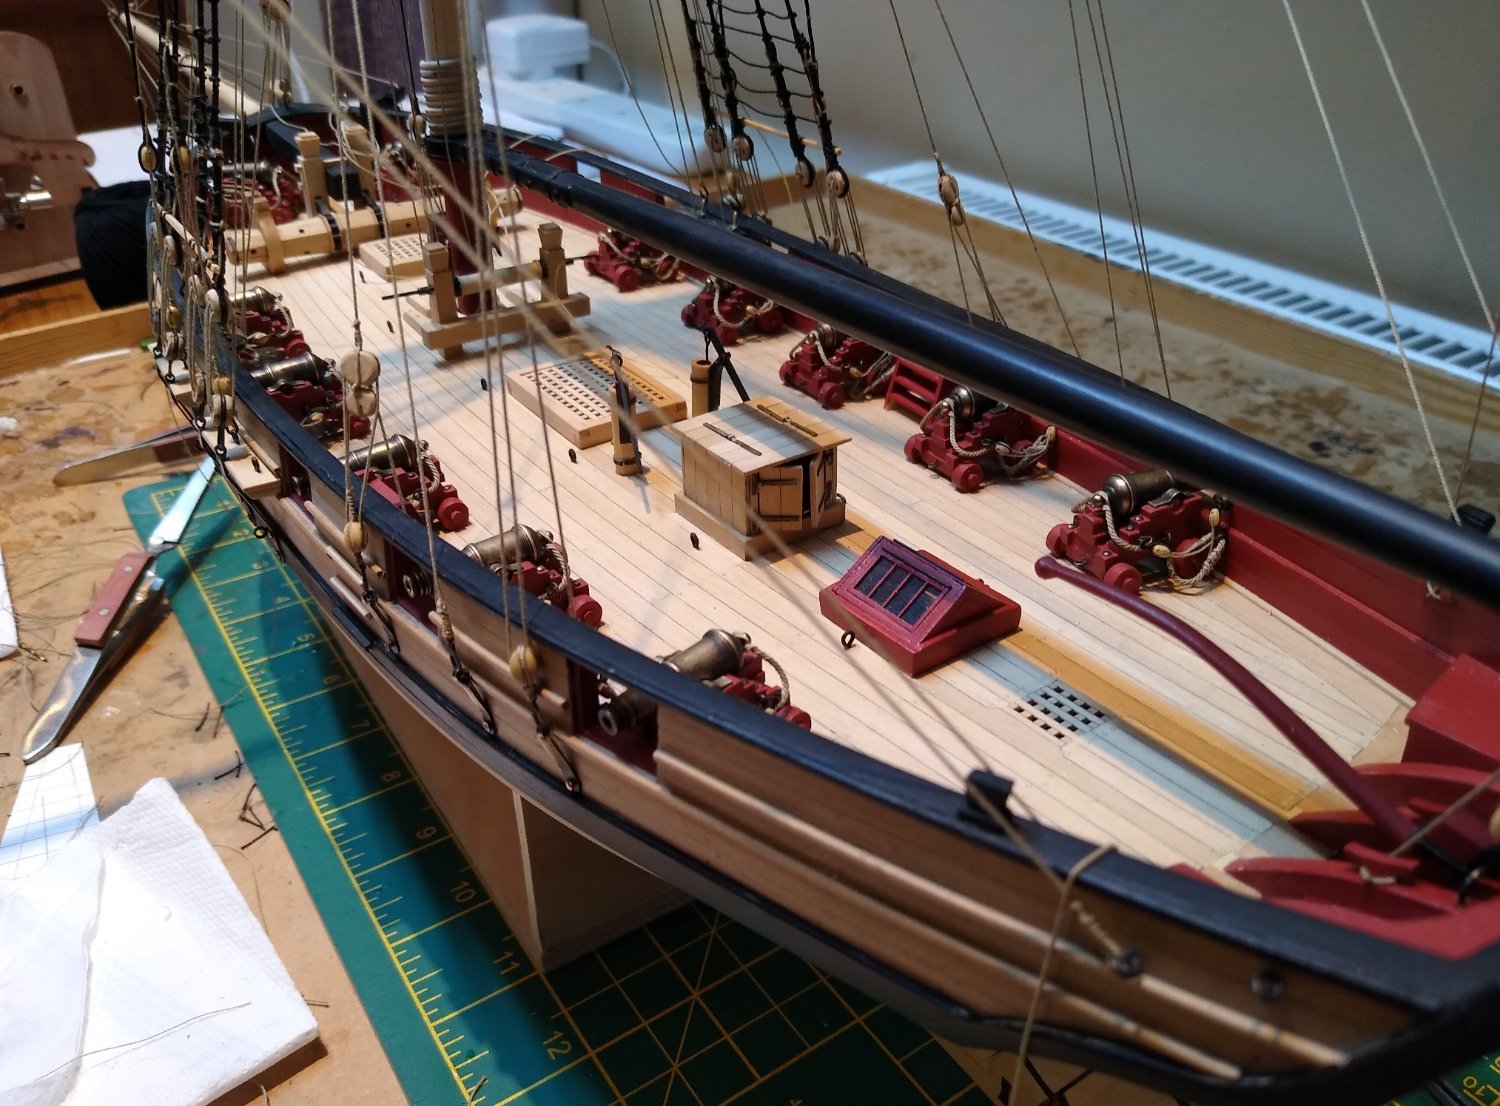
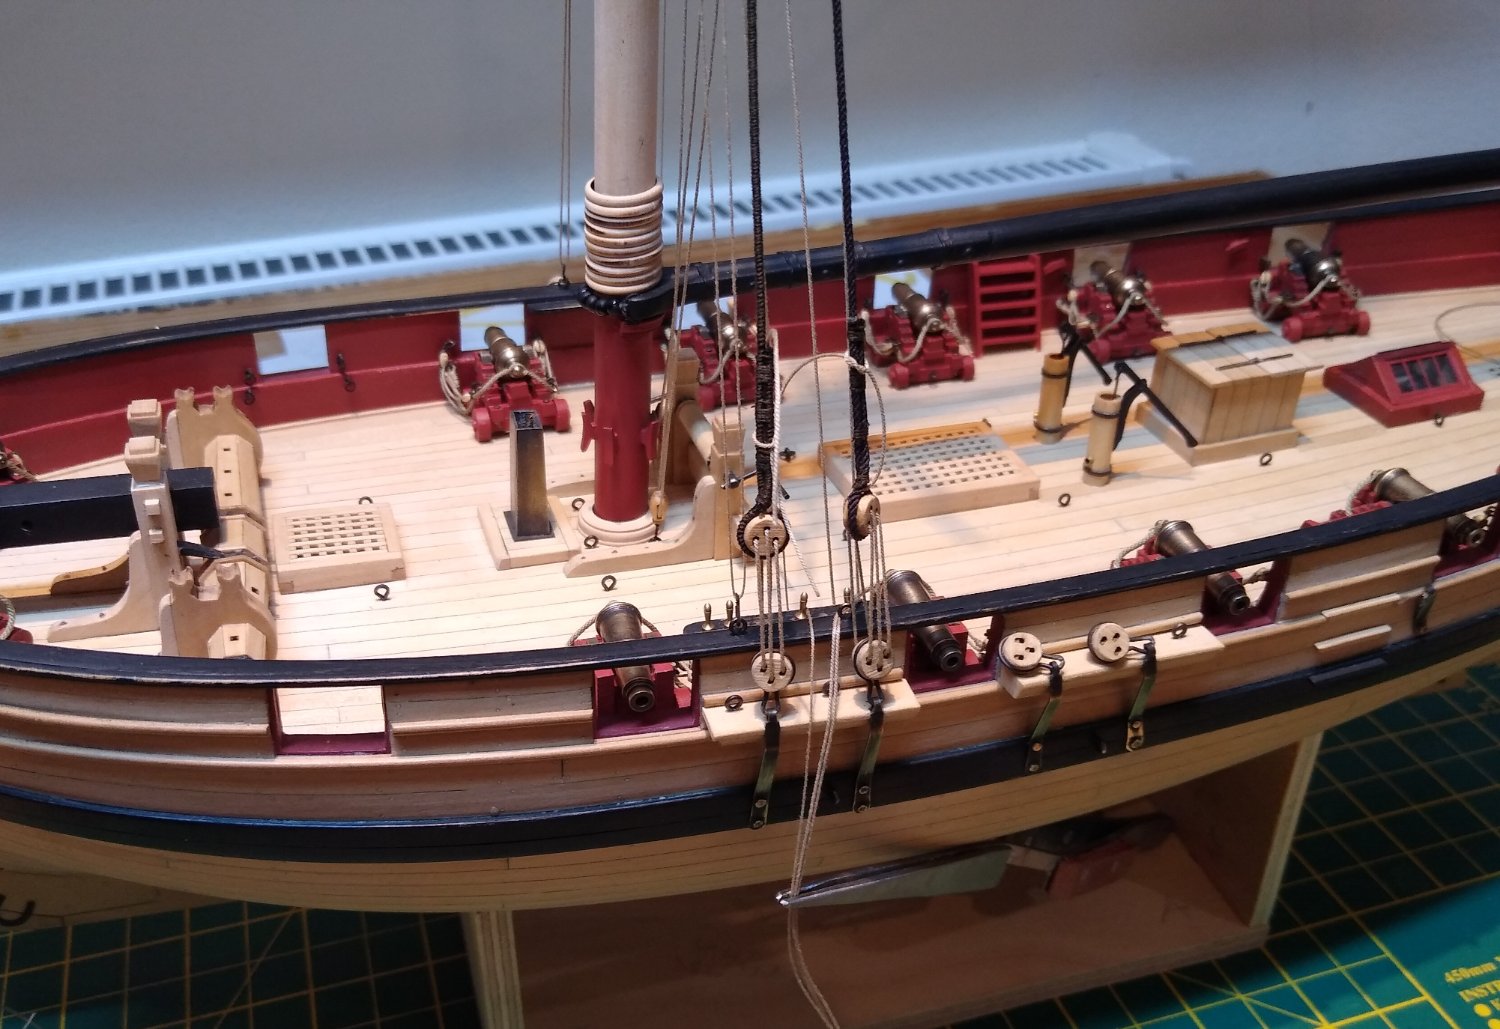
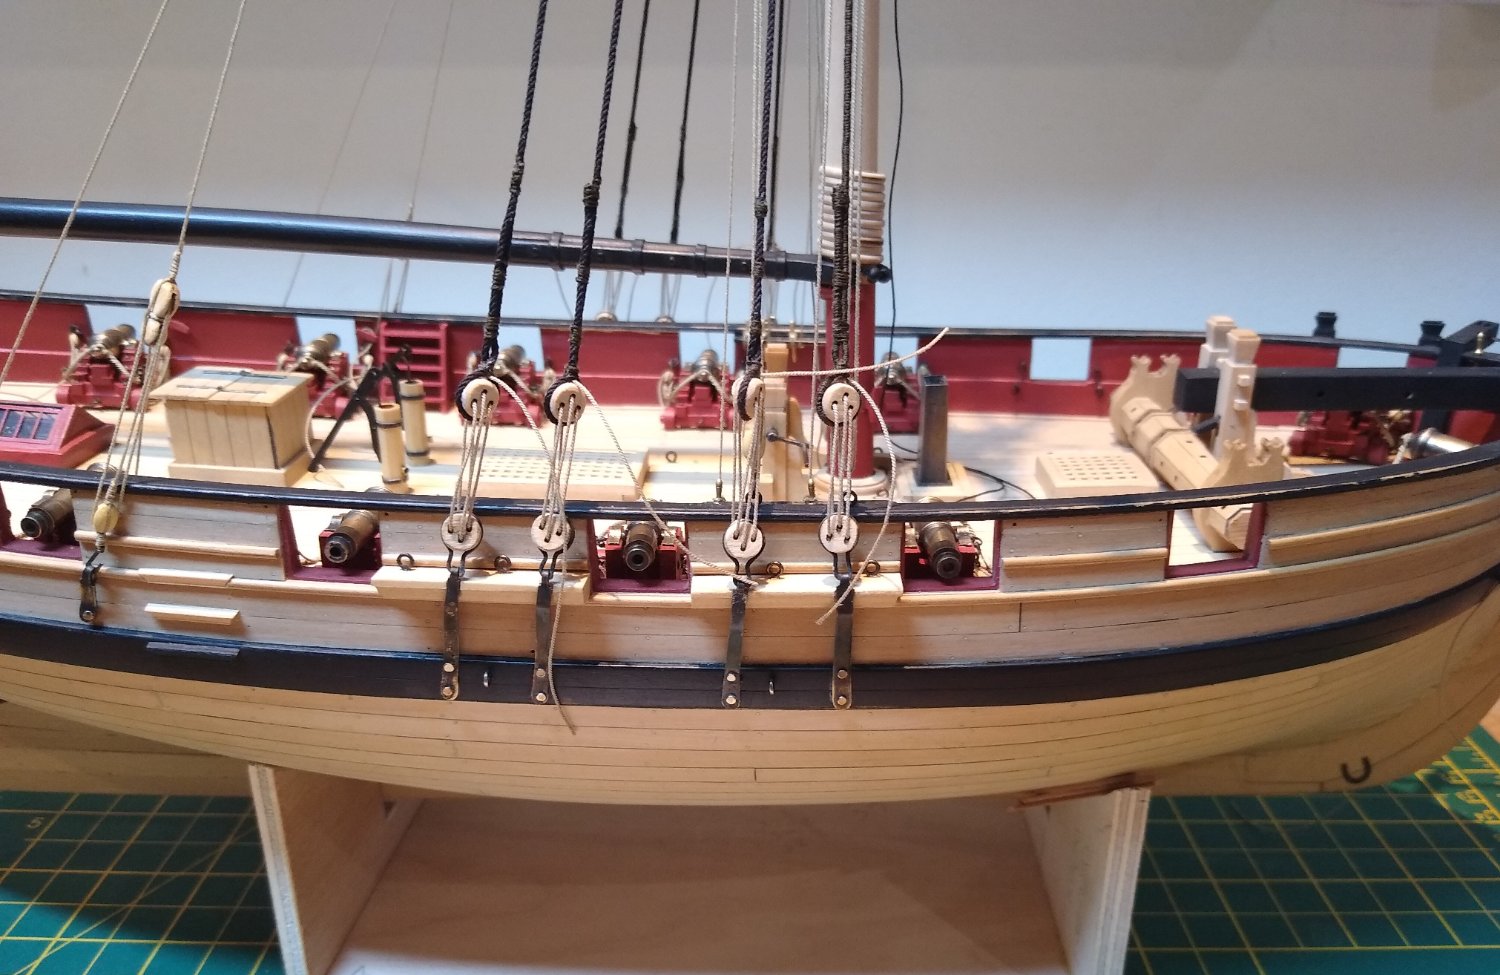
I've rigged all the guns. Not the most exciting job in the world but not the marathon that the Winchelsea presents. I removed the in-haul tackles - I decided the untidiness out-weighed any historical accuracy. I can't make my mind up about rope coils for the free ends of the out-haul tackles. I'll leave a decision for a while. At the moment the free ends are just tucked away beneath the carriages. The sort of approach a teenager takes to tidying his/her room.
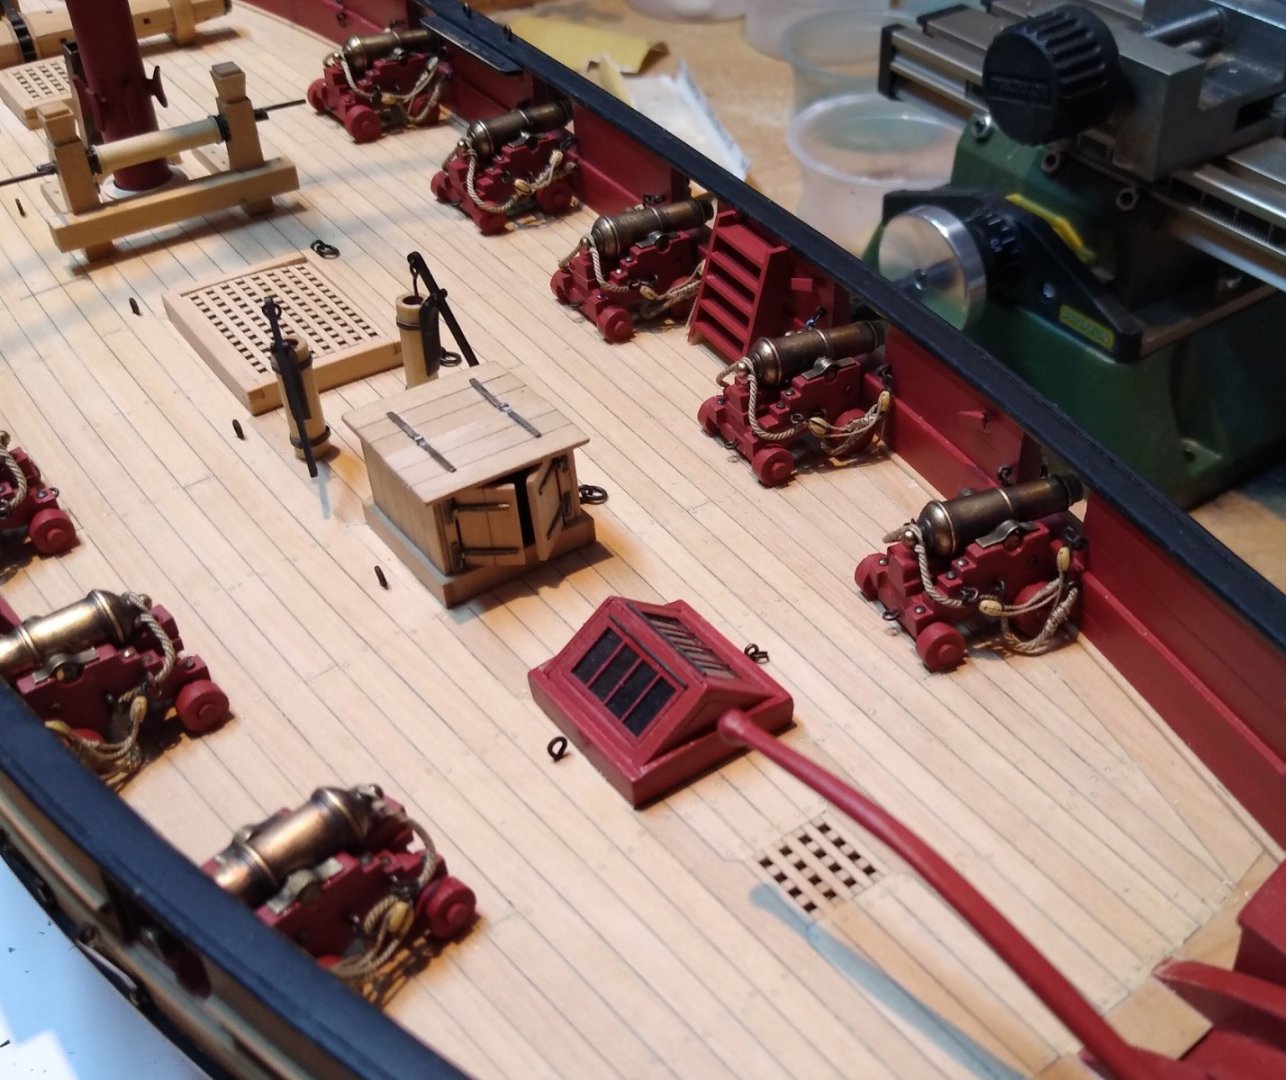
.thumb.jpg.4a8c6a9bbe3b467c6bd620f96b79adc1.jpg)
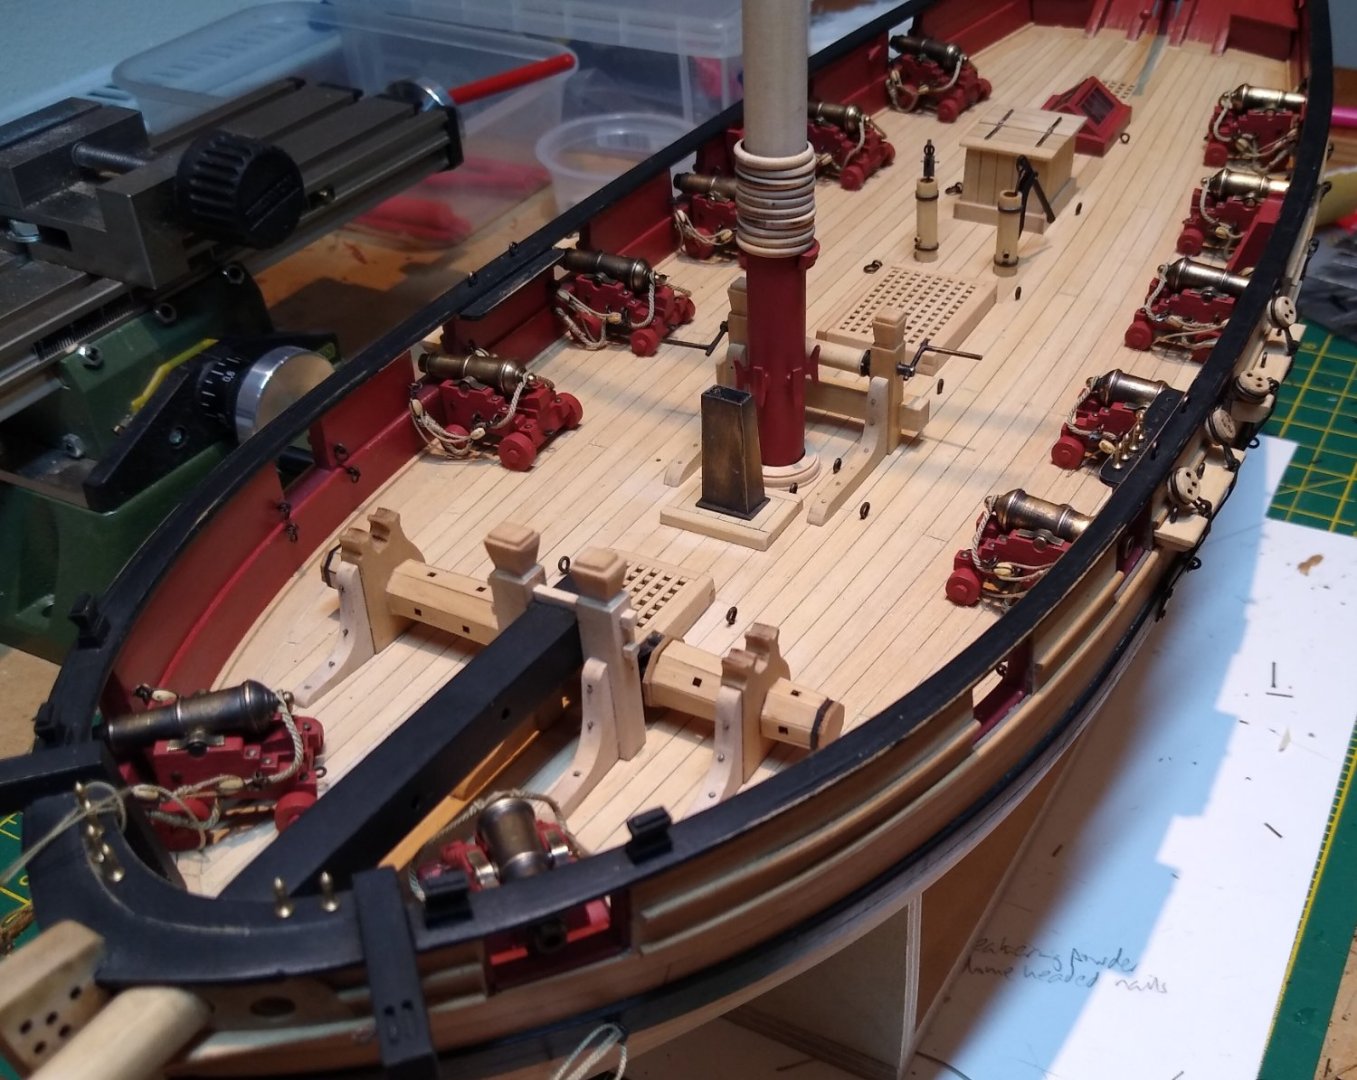
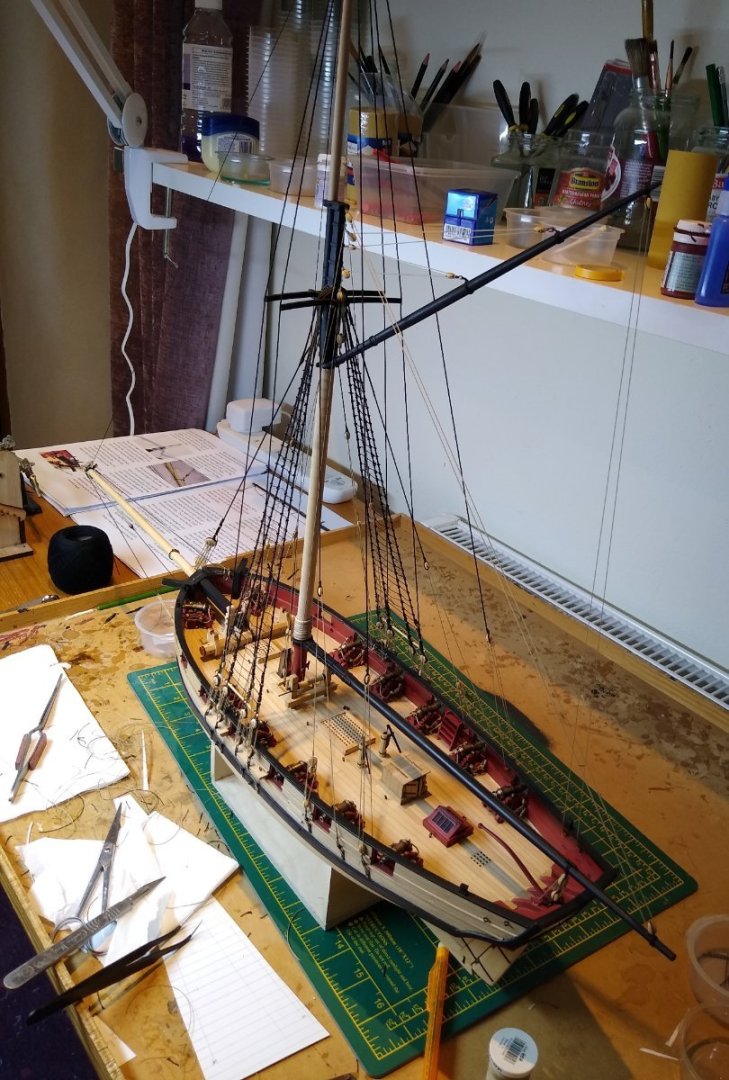
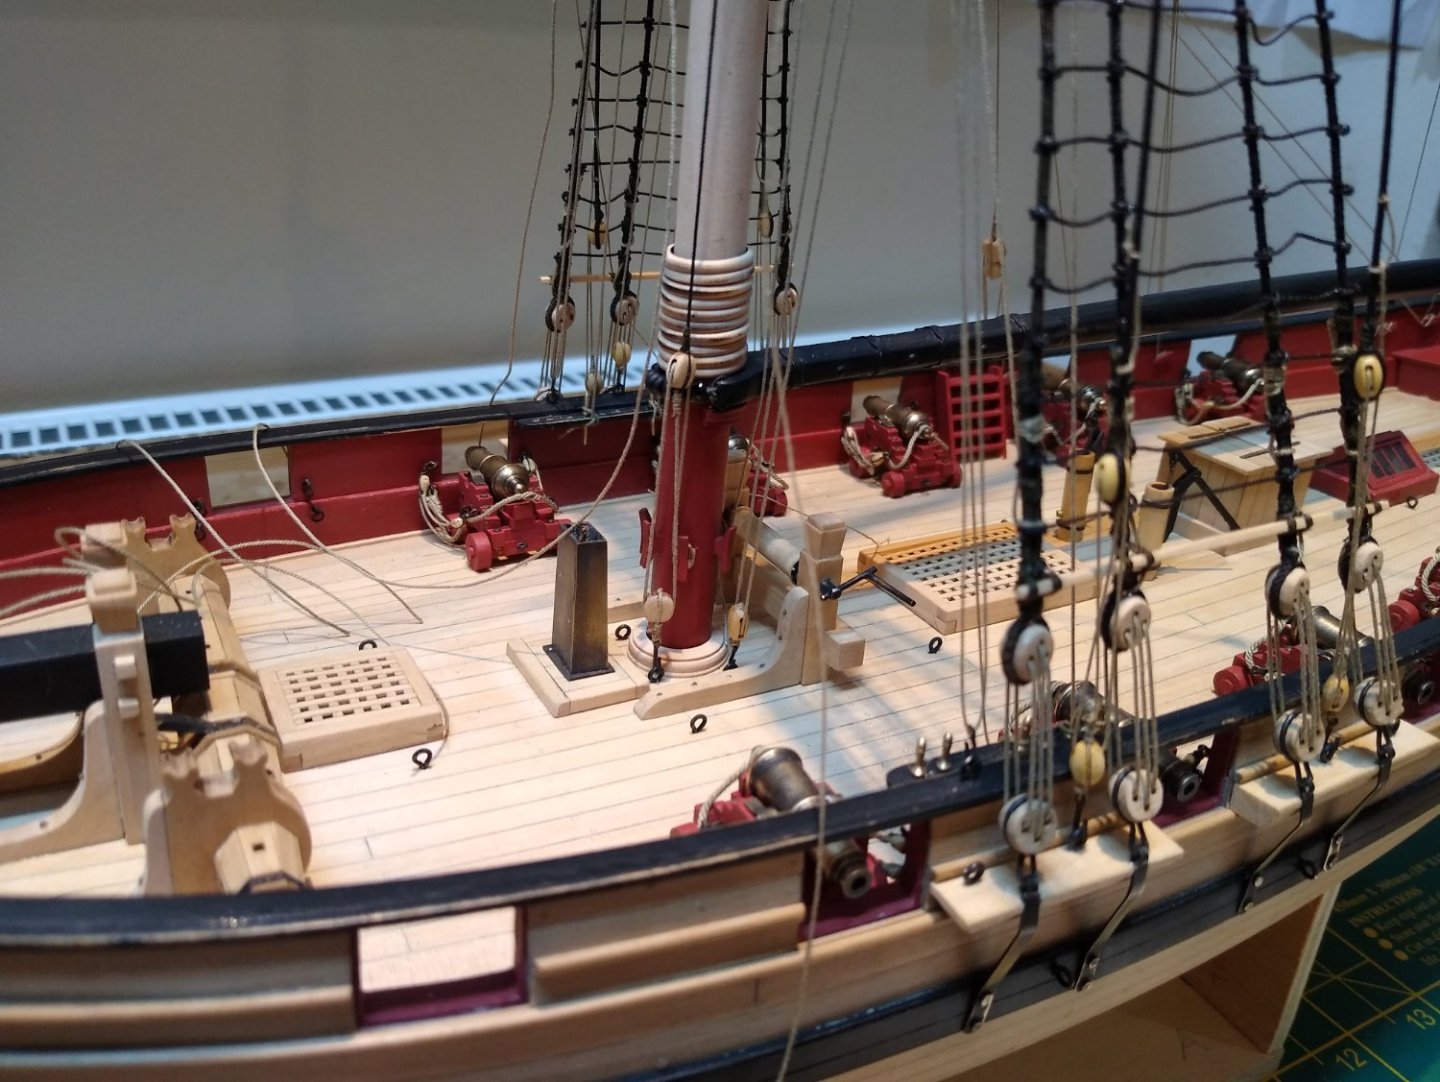
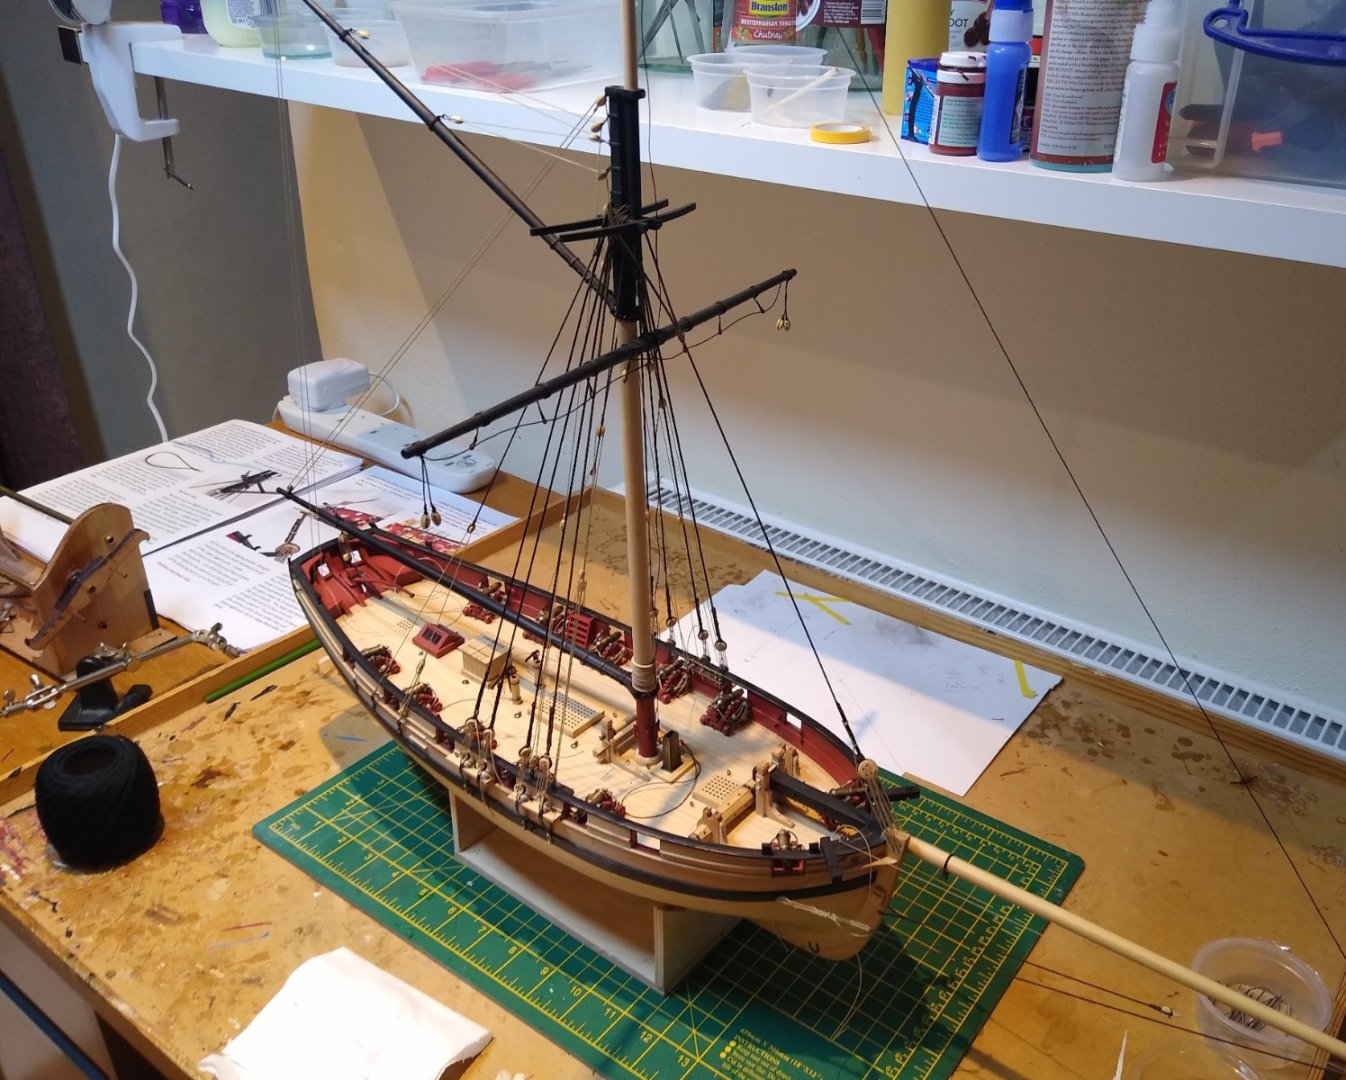
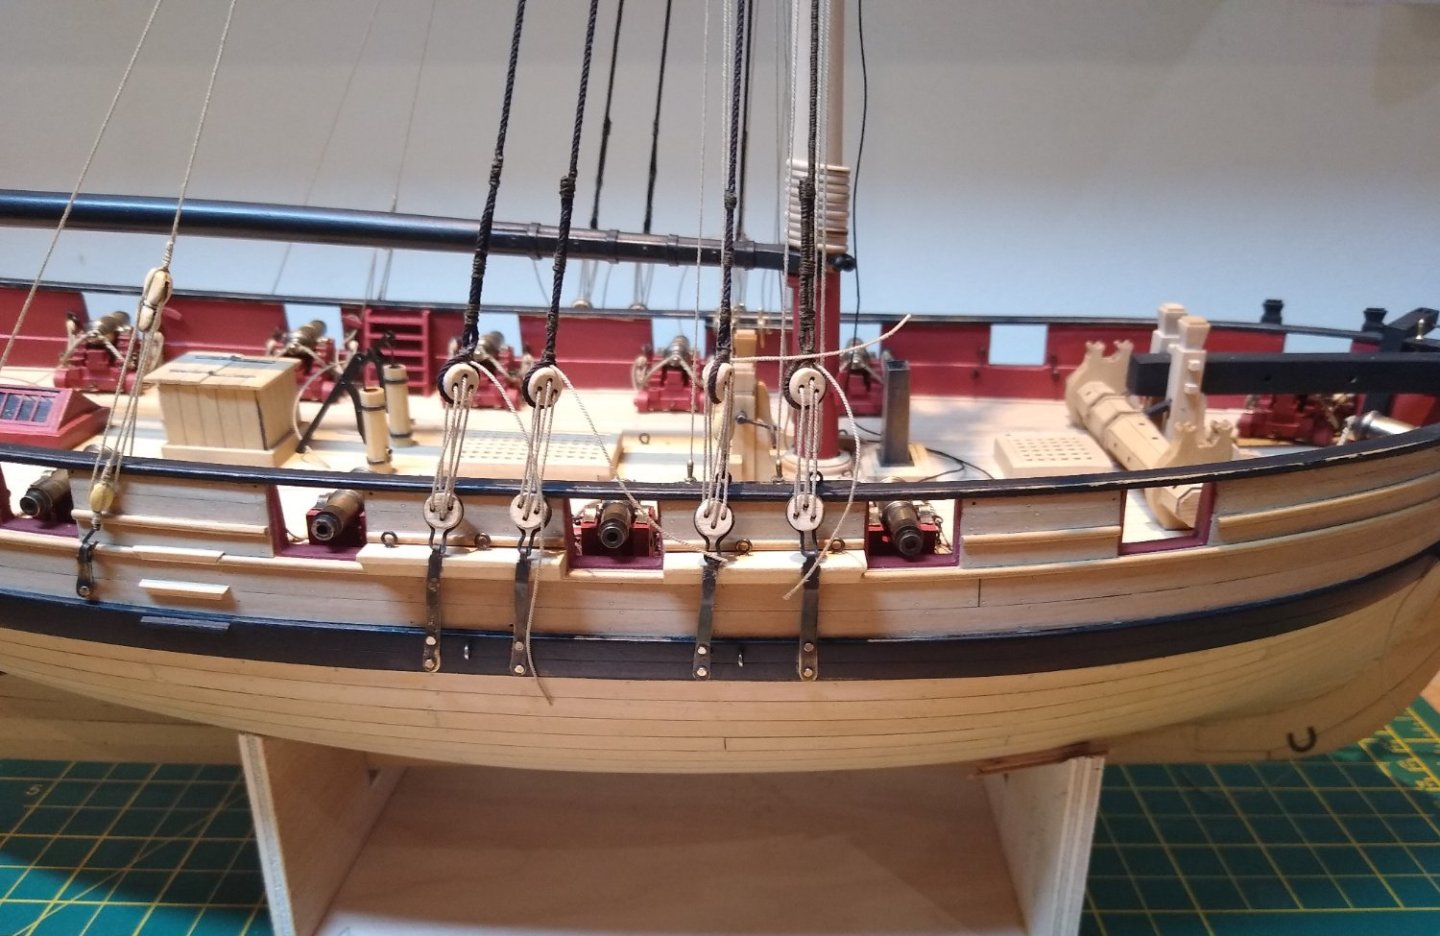
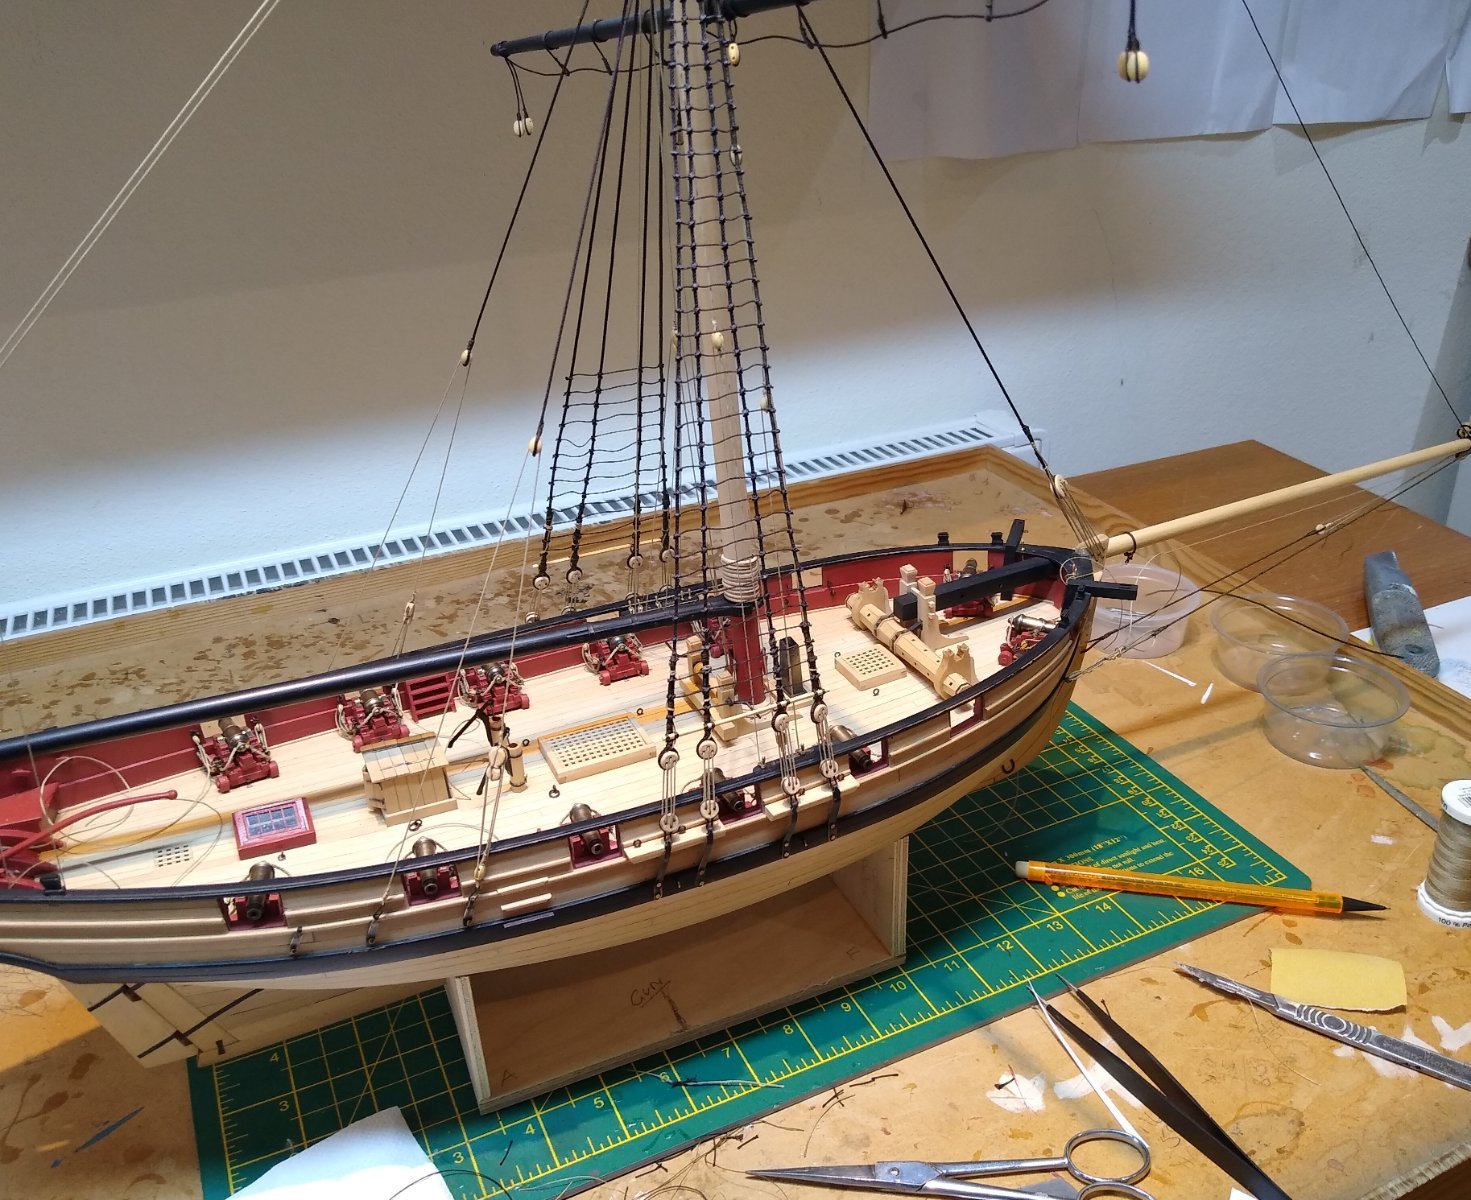
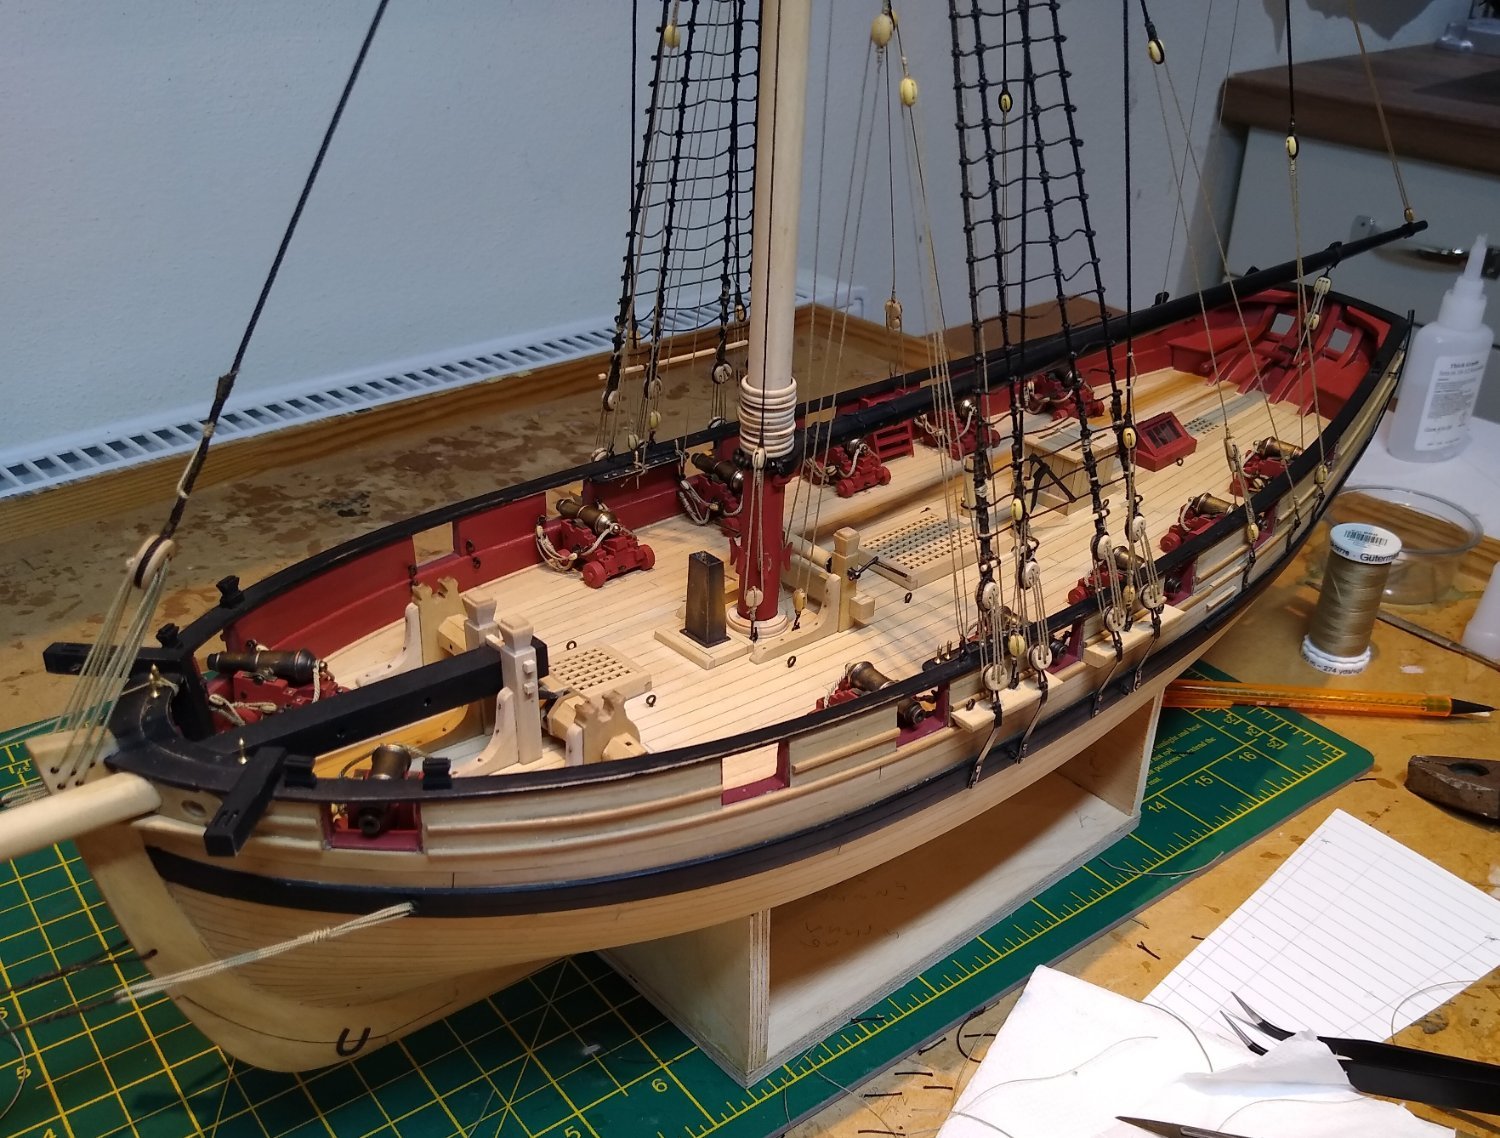
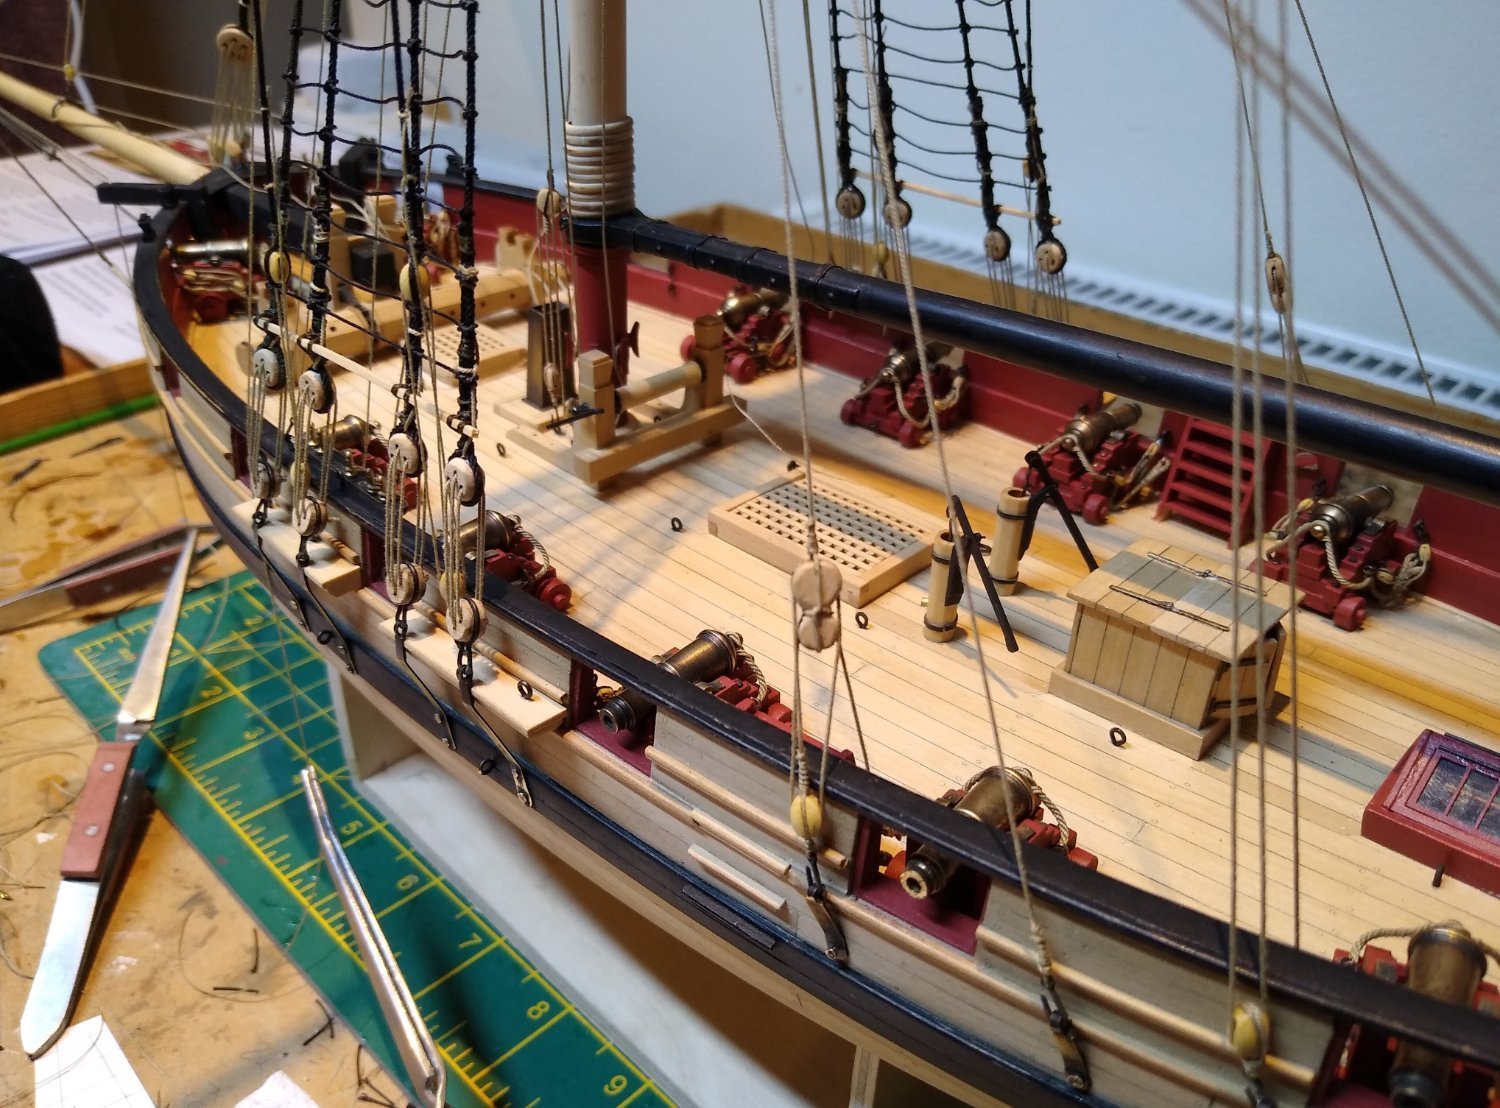
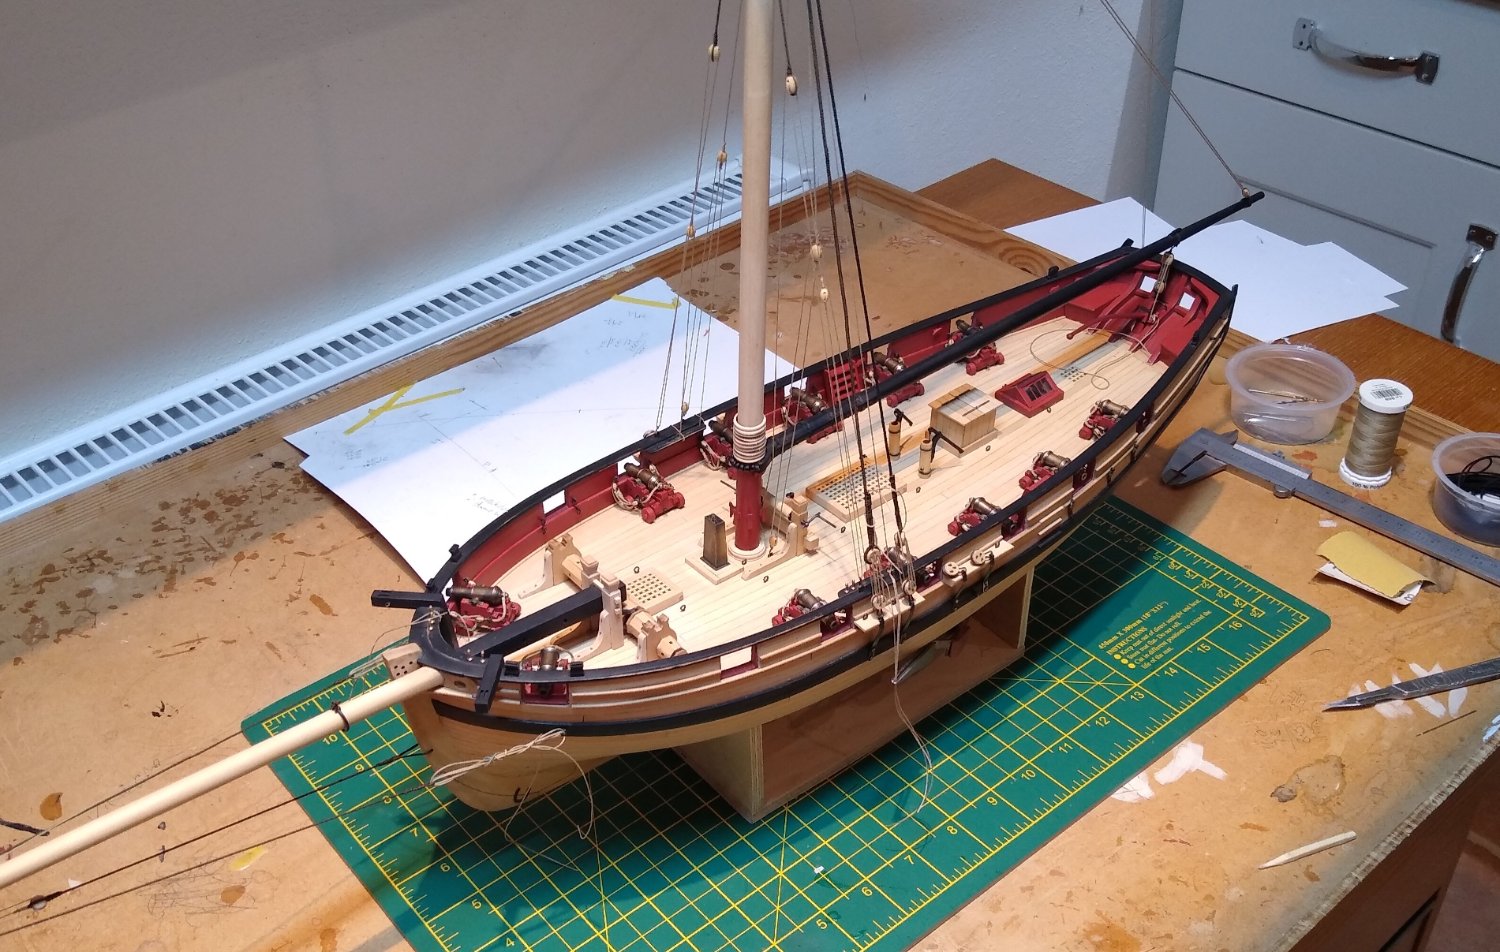
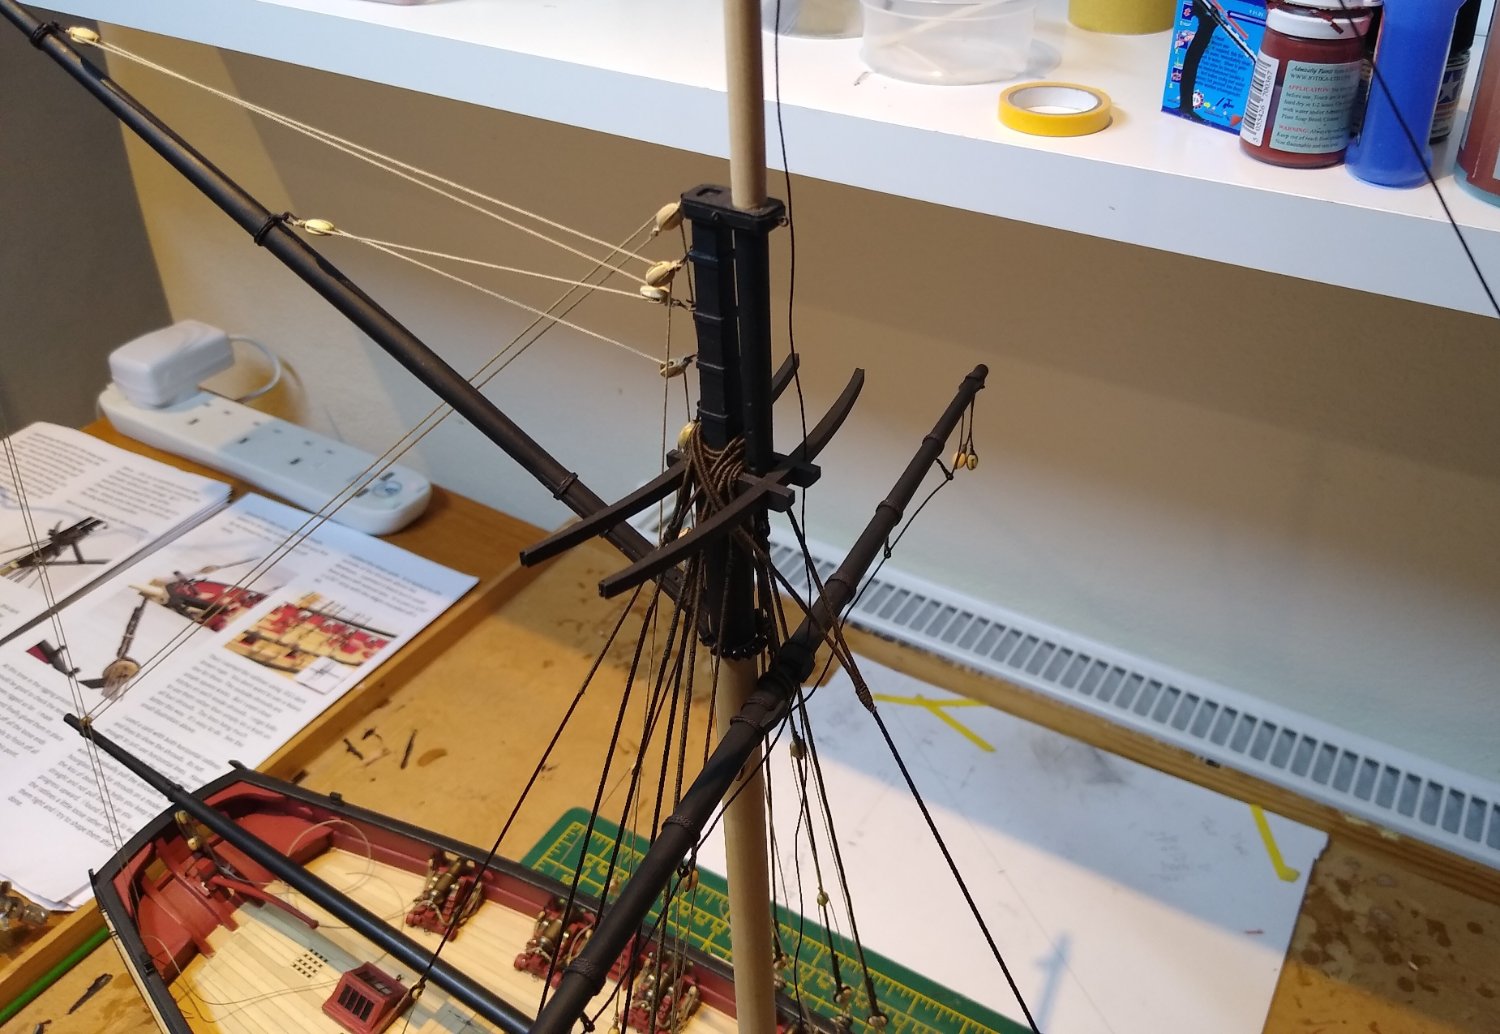
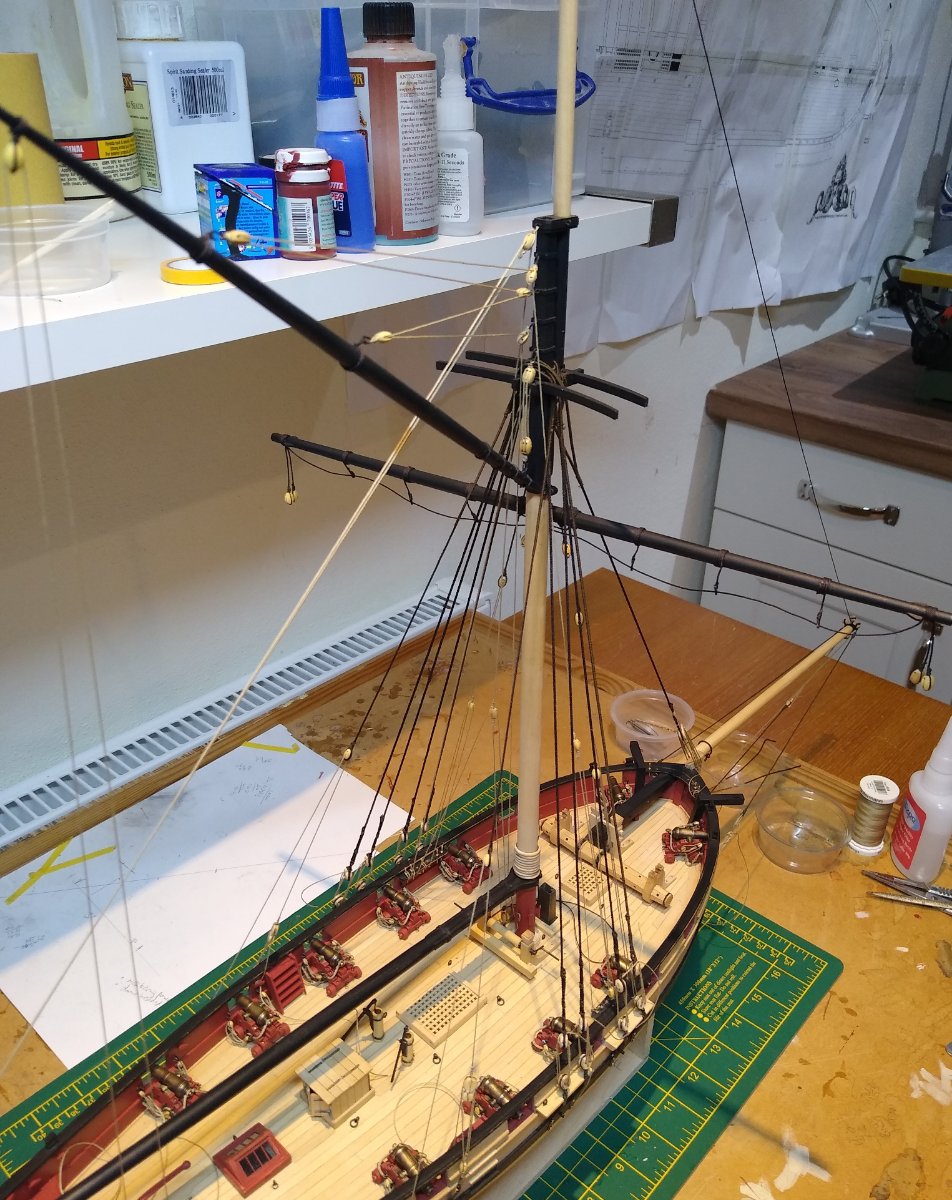
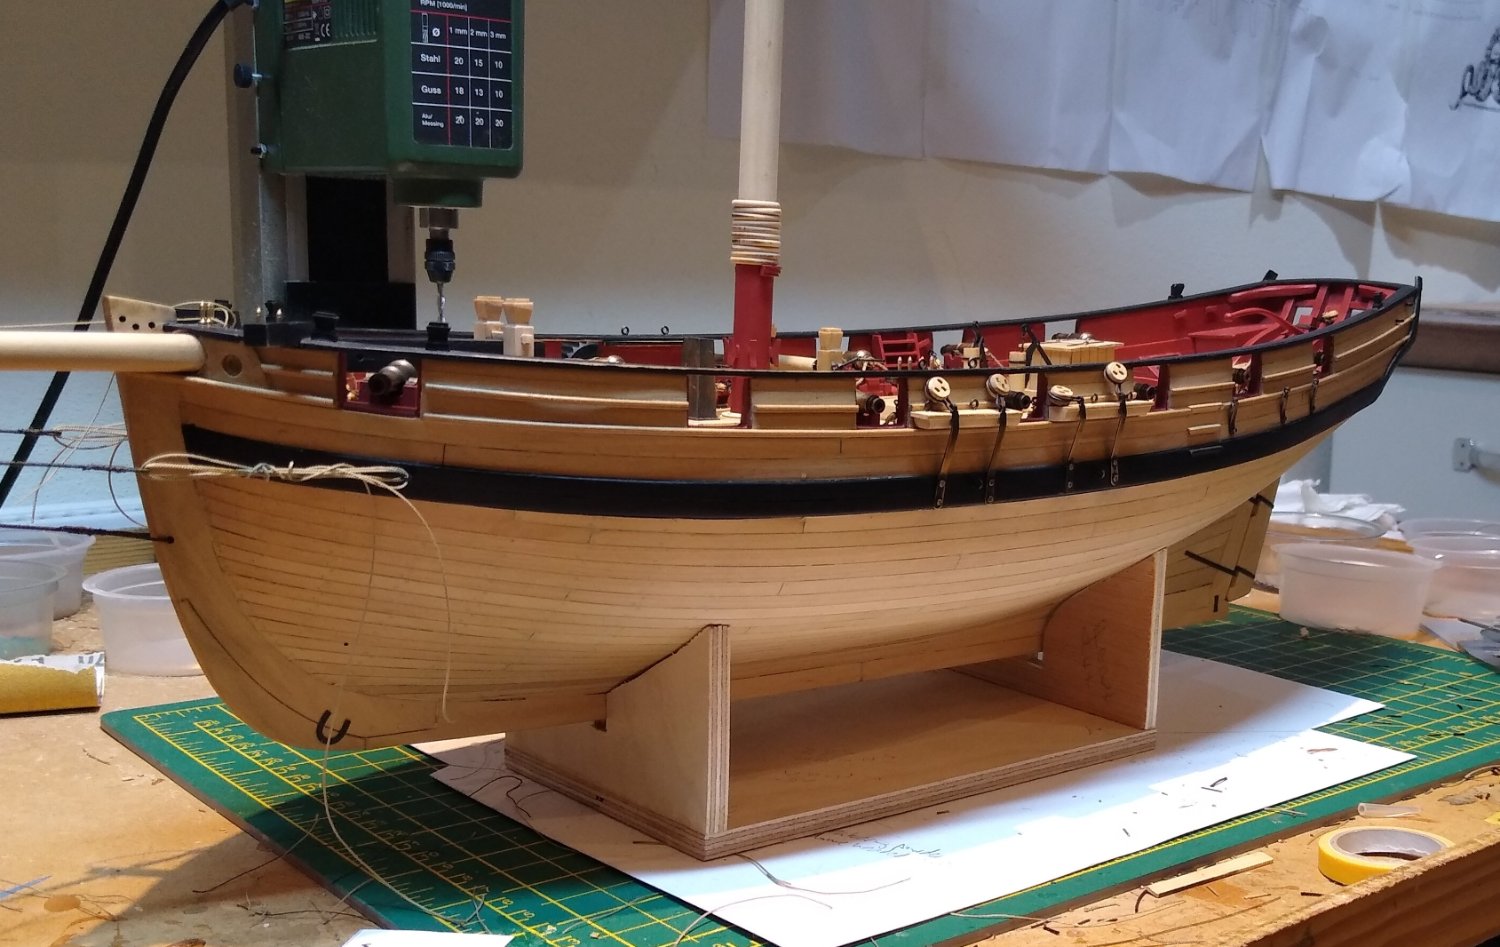
The woodwork and metalwork is pretty much done. I still have the boom crutches to do - I just overlooked them. Here is what she looks like today.
I found some very good brass belaying pins on-line. They come from Canada and knock spots off anything I've seen in Europe. I know they are not wood - but I think turning my own is probably a project too far for me just now: know your limitations! I'll give them a very brief dip in blackening fluid just to take the shine off rather than blacken them and I'm sure they will be fine.

.thumb.jpg.e5dd51bdf7dbed88d9a5e793c8c9ae25.jpg)
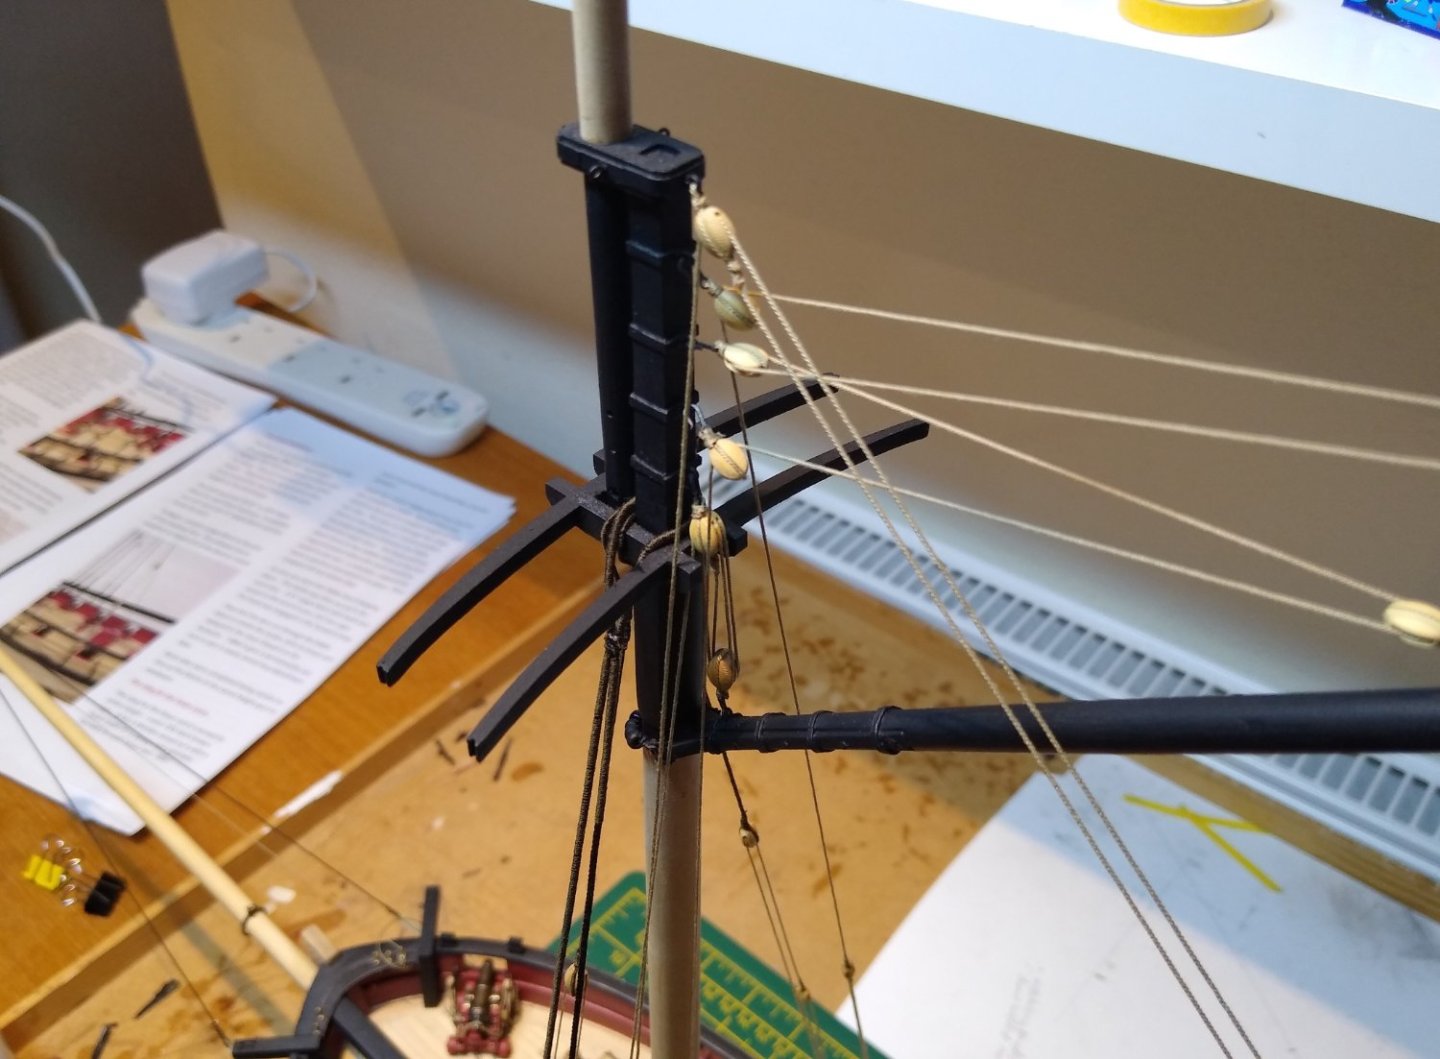
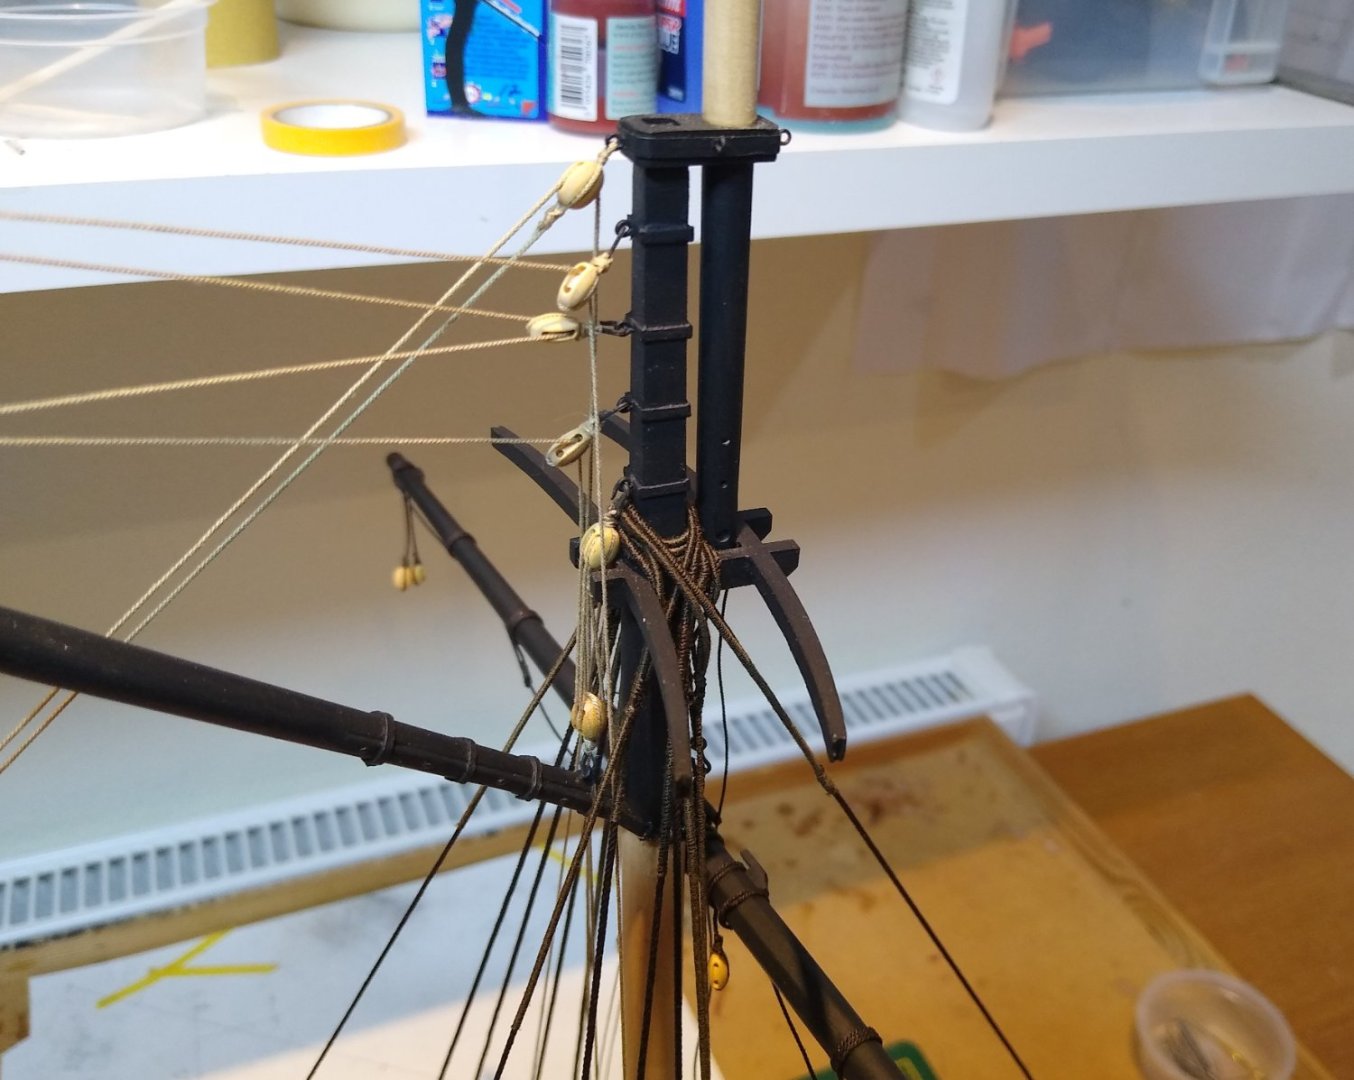
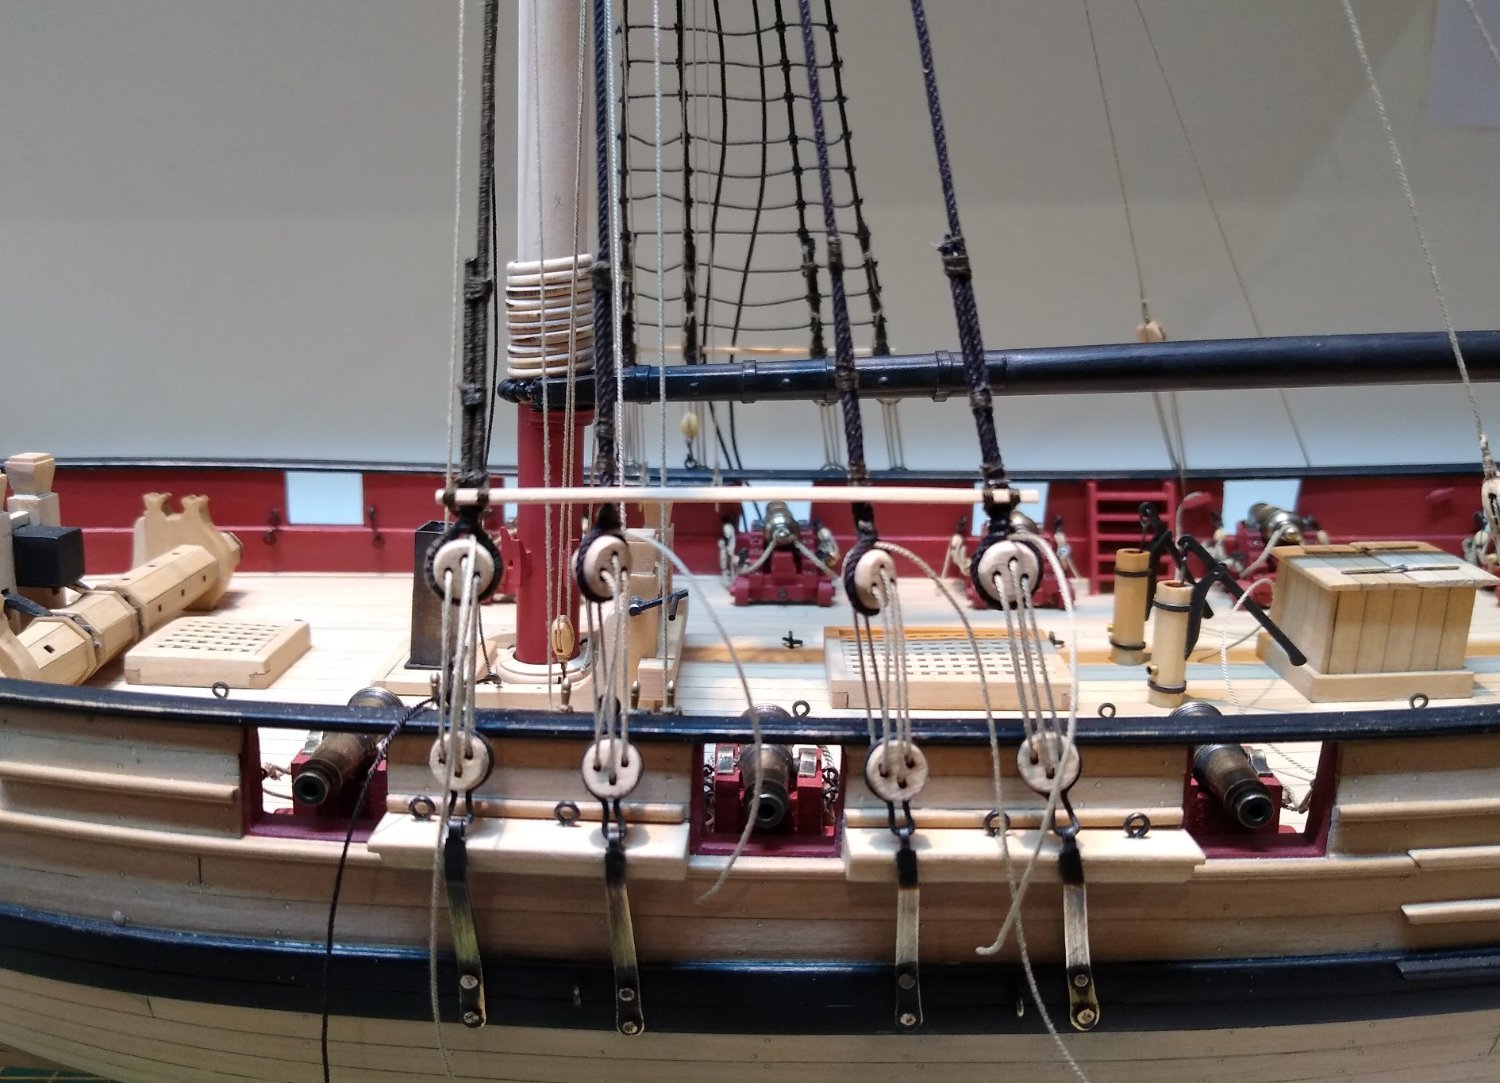
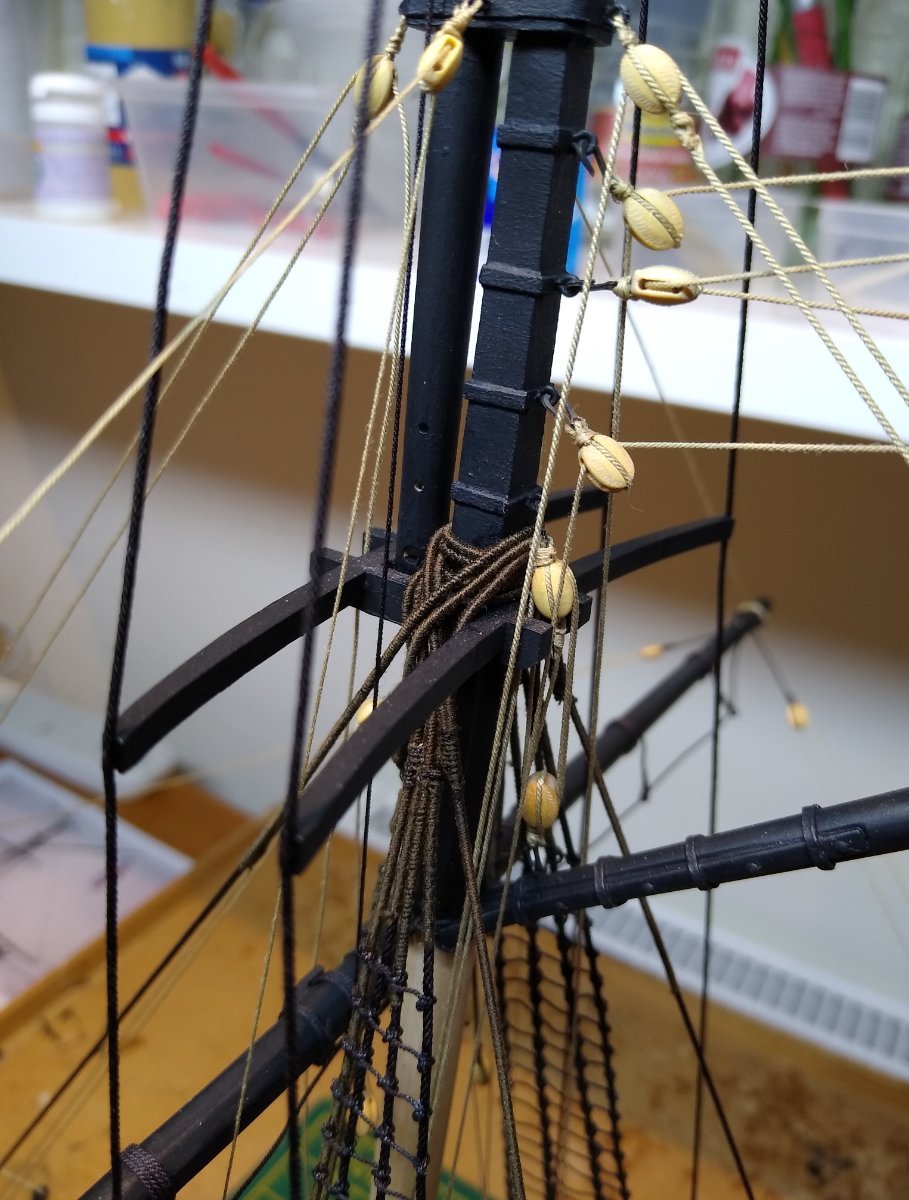
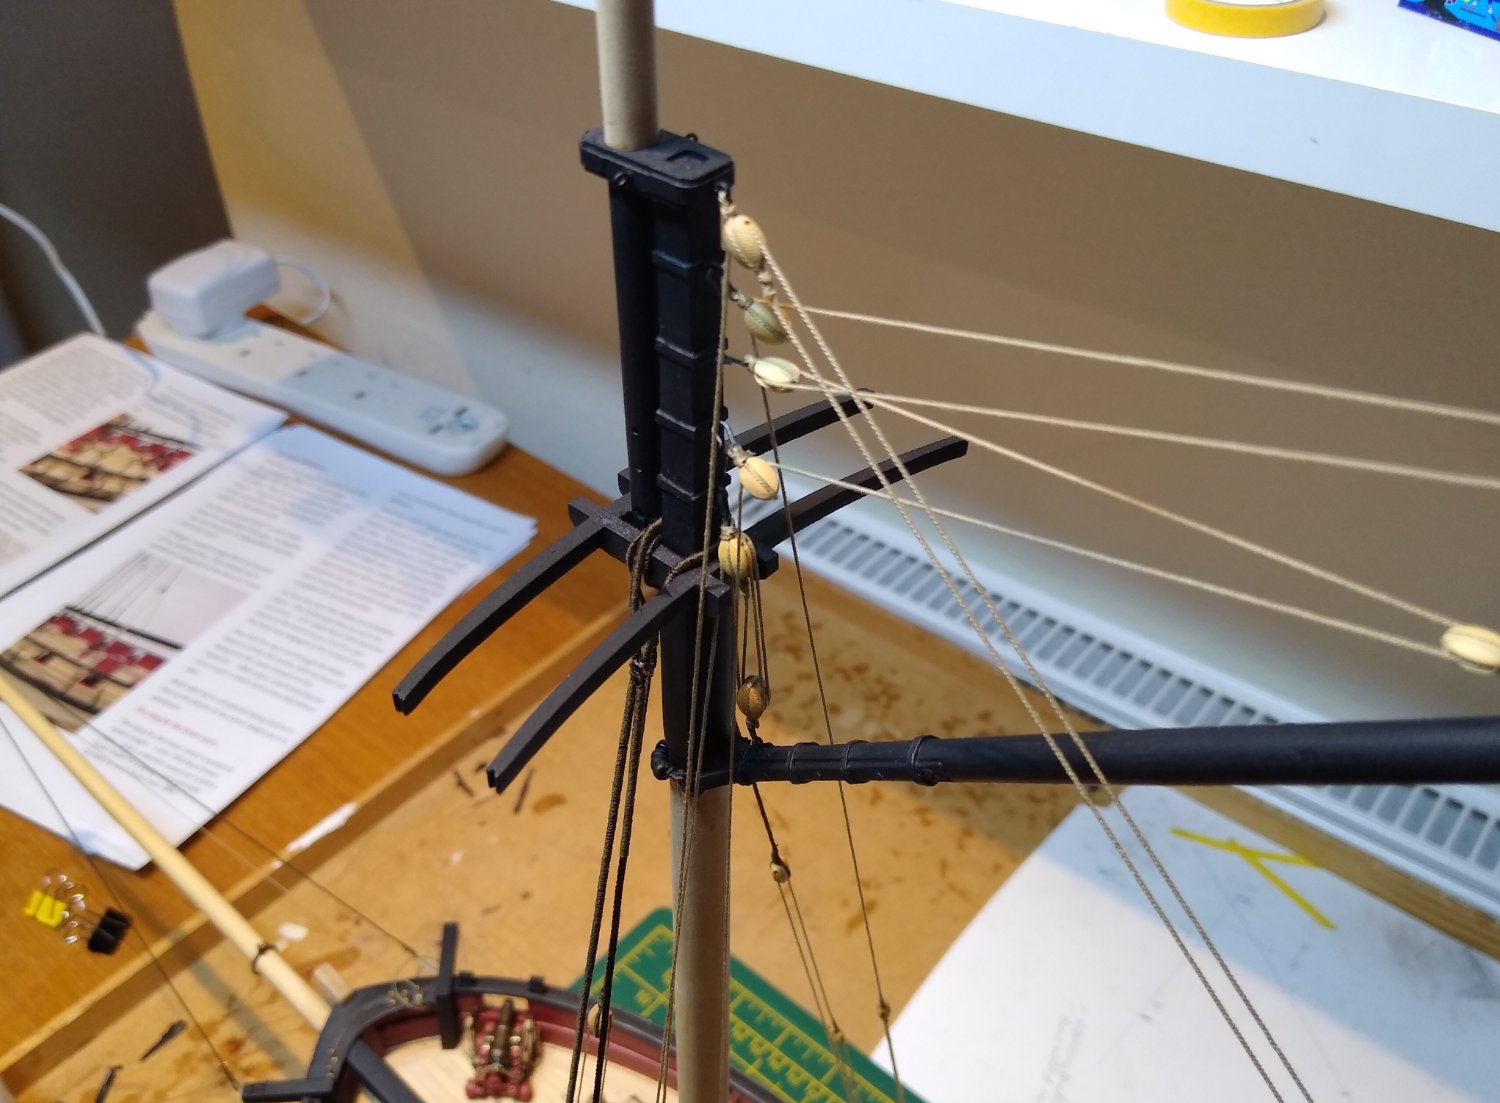
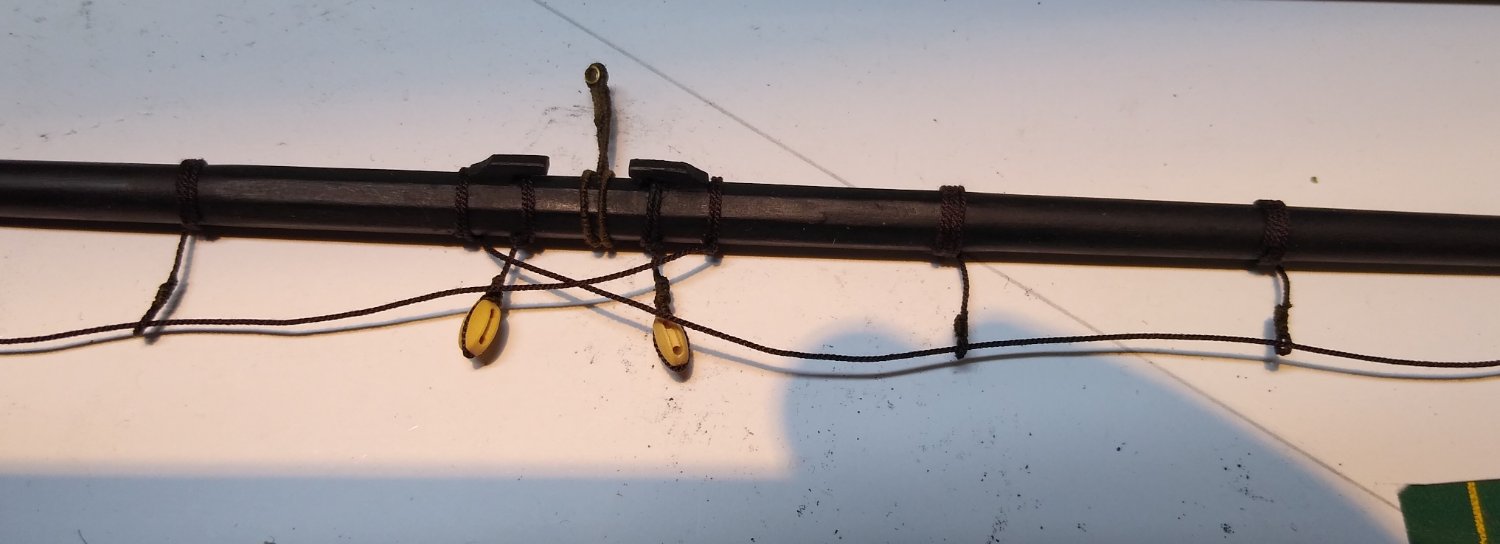
Most of the woodwork for the riggingis done and ready to go (sorry for the appalling pictures).
.thumb.jpg.a58e176078e292dd251de8315603ce7b.jpg)

.thumb.jpg.3ecfbb5062e54ed3af5e913ab34e8cb0.jpg)
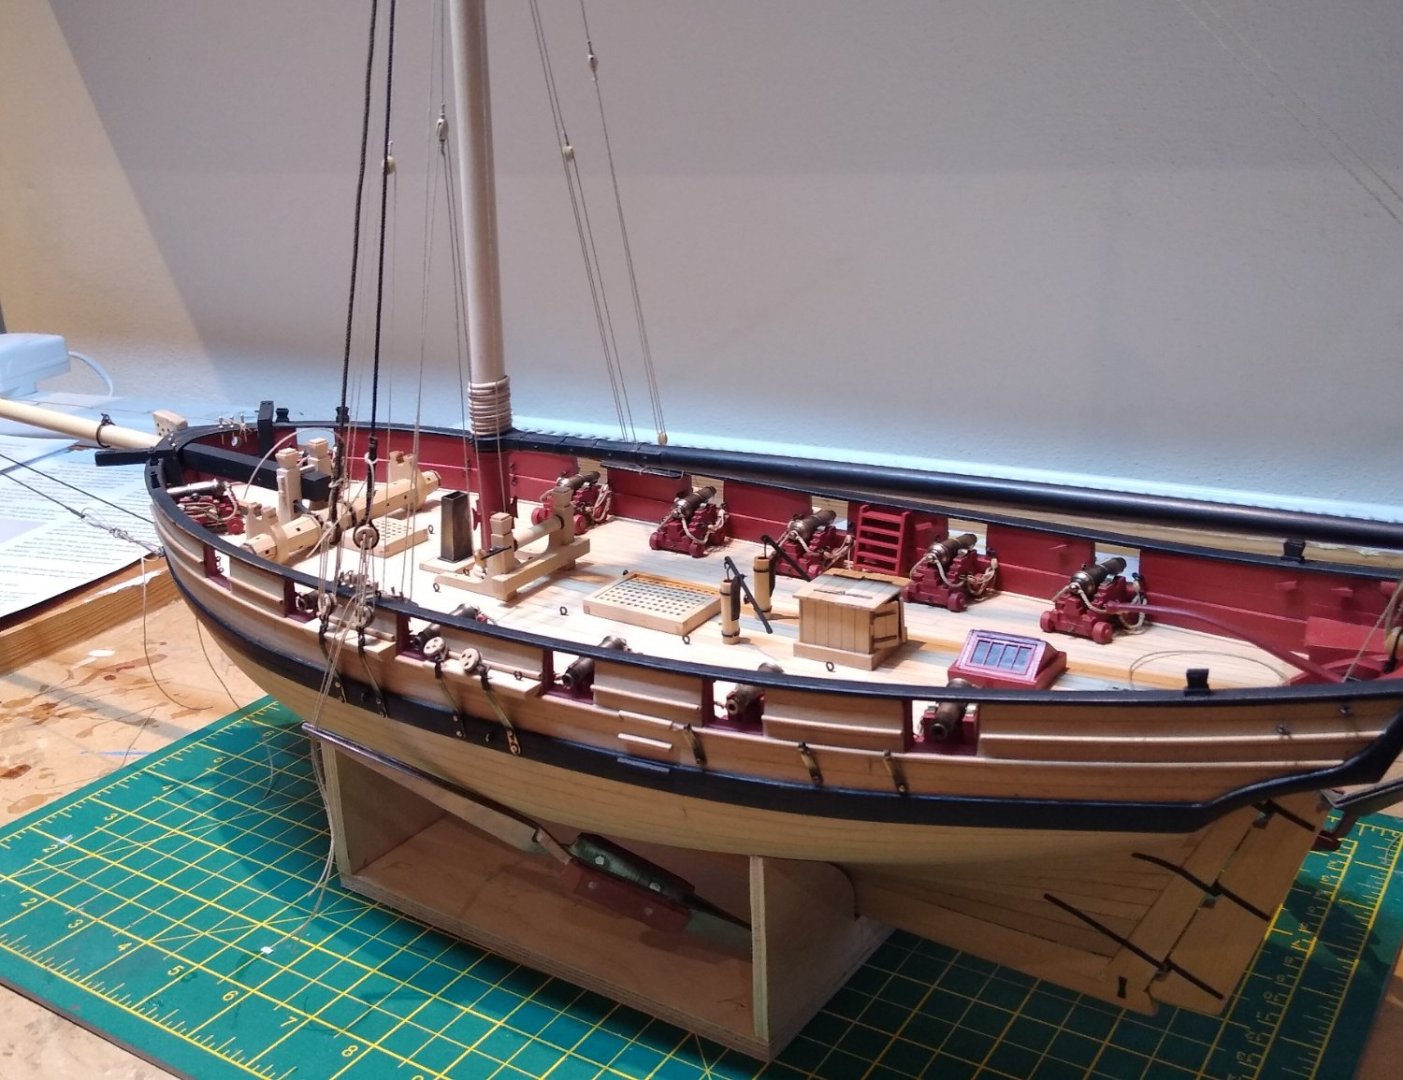
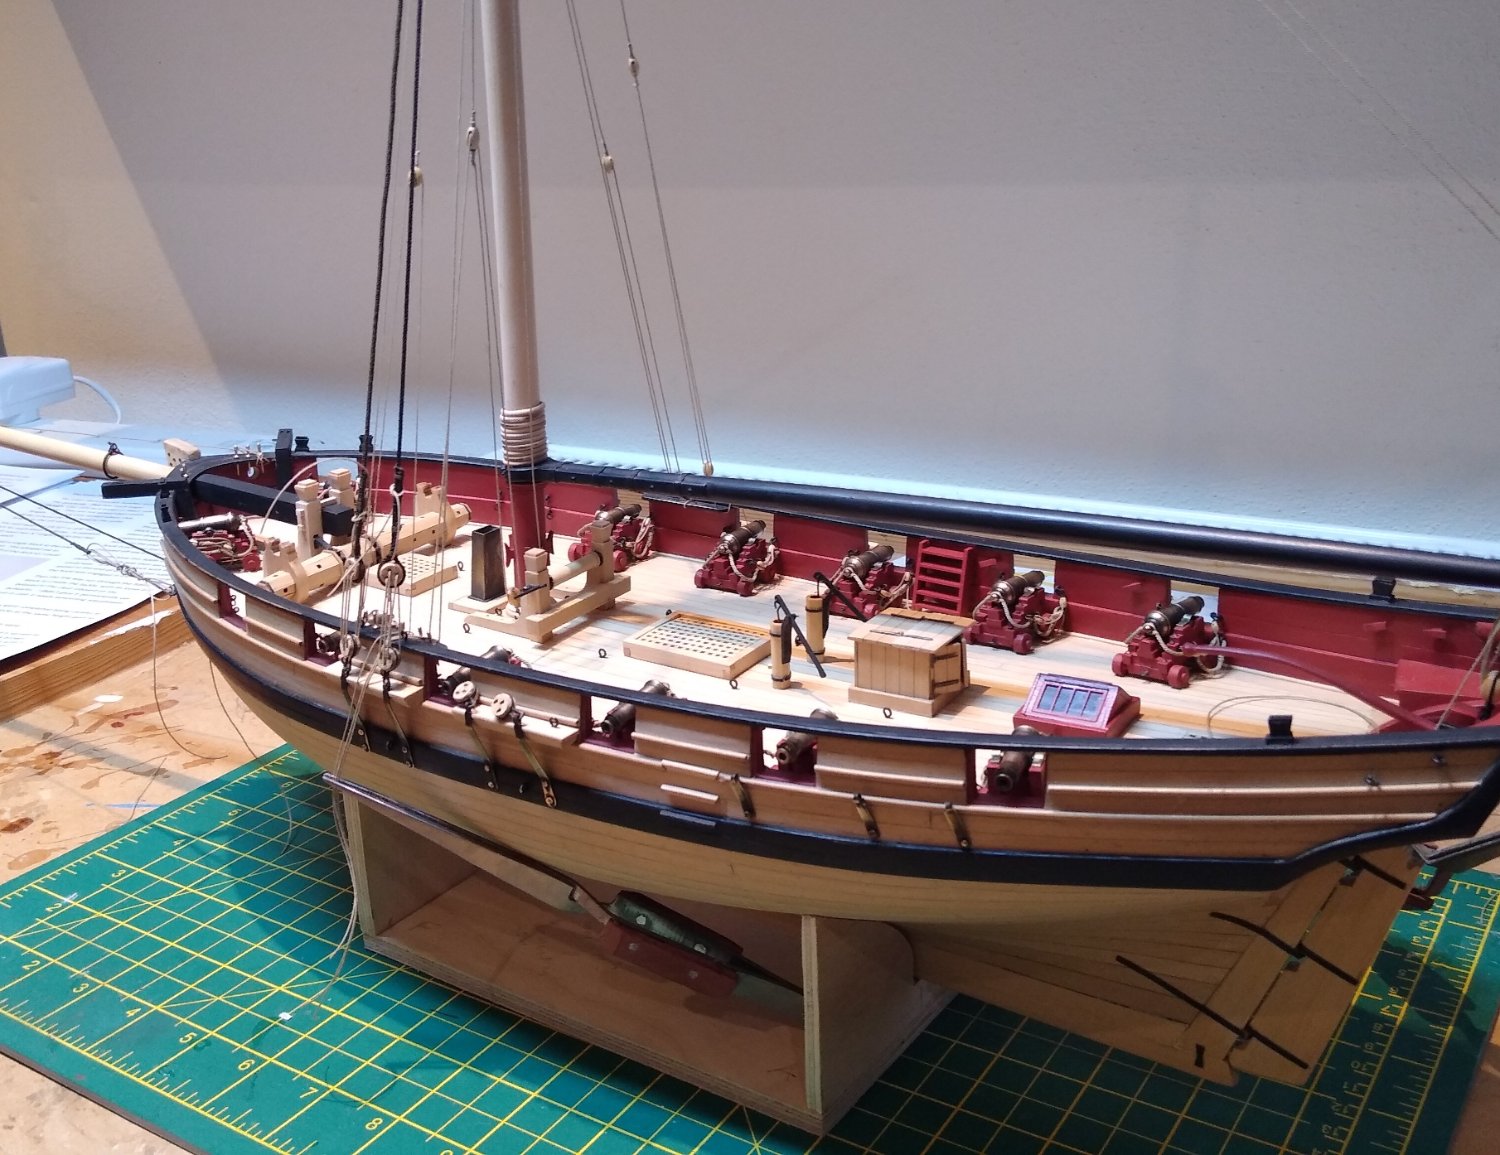
So, just a few knots to tie and then I'm done!
And then I've go to decide what to do with the old monster below.
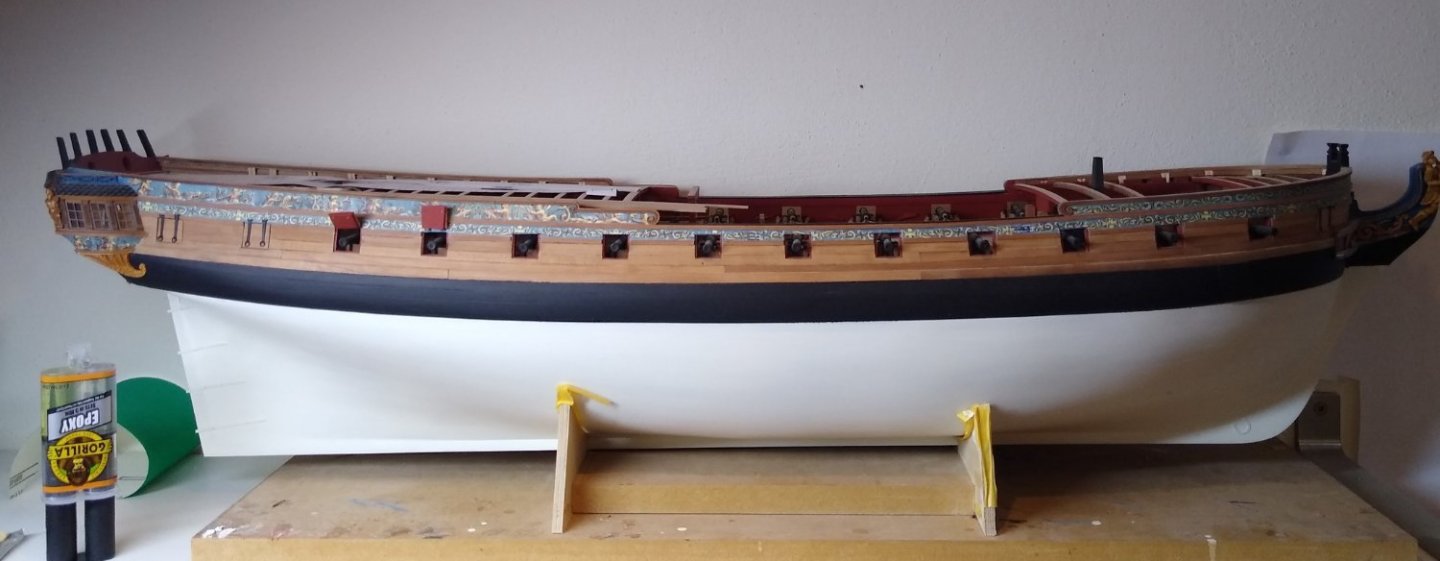
All the best everyone.
Fred
.thumb.jpg.4a96f81aeea55ac4fdebb9c1e21baa5f.jpg)


.jpg.56161b92d5a6d1cff8c9a928d2f7e67e.jpg)
.jpg.14124e374fbc3066870f4e1d9b0e0e8e.jpg)
.jpg.f385314599a0de4937172947f9a4fe07.jpg)


.jpg.896b49f5cafe097a28bf0da981d578d7.jpg)

.jpg.a6528d612f0961c6d5c882460c89e296.jpg)
.jpg.1e1ec65c6a49c298b2840fe9b3f388f2.jpg)
.jpg.a8127b6dde3fe5fe45019e4e3f8a8dac.jpg)

.jpg.683fcea11b7f97899e06c47c98012d28.jpg)
Making a steady rest for the Proxxon DB250 wood lathe
in Modeling tools and Workshop Equipment
Posted
Thank you Tony. That is an interesting addition to a Proxxon DB250. I have one. The principal limitation, from my perspective, is the length of the bed. The hole through the motor section allows for turning longer sections than the bed length but the limitation there is the relatively small diameter of the hole - 11mm or so. I could not, for example, turn the main mast for my Cheerful on the DB250. I ended up sticking it in the chuck of a power drill but precision goes to a degree by the wayside.
Have you thought, I wonder, about extending your device so as to extend the bed length? I know that some Australian users of the DB250 can purchase an extra aluminium extrusion (Proxxon?) that presumably bolts on to the Proxxon bed (not authorised by Proxxon!) but the part does not appear to be available in the UK.
In the meantime I may have a go at your version of Johann's rest which as you say does not require Johann's ability to machine metal - something way beyond my skill level.
All the best
Fred