


jfhealey
-
Posts
359 -
Joined
-
Last visited
Content Type
Profiles
Forums
Gallery
Events
Posts posted by jfhealey
-
-
That (Greg's message above) is a very clever idea. One well worth knowing for future reference.
I should be interested to learn how you get on stripping out the offending planks, Edward.
Fred
- Edwardkenway, Ryland Craze, FriedClams and 3 others
-
 5
5
-
 1
1
-
I guess its those three dark planks that are annoying you. The trouble is, I find, that when something like that gets to you, even if you know someone else would see it as a matter of no or little consequence, your eye is drawn to it and you cannot shrug it off. Good luck with whatever you decide to do. I think ripping the offending planks out would be beyond my skill level!
Best wishes
Fred
- FriedClams, Edwardkenway, scrubbyj427 and 2 others
-
4
-
1
-
Absolutely gorgeous
- Siggi52, Keith Black, shipman and 1 other
-
4
-
I just used sanding sealer and rubbed it down with fine wire wool. Its a very forgiving finish requiring no application skill whatsoever.
Best wishes
Fred
- FrankWouts and James G
-
1
-
1
-
One to be very very pleased and proud of, JJ. She is looking superb.
All the best
Fred
- scrubbyj427 and FrankWouts
-
2
-
I'll second Matt's thoughts.
I cut my own bulkheads for Winnie and purchased the Syren set for Cheerful. Buying in gets you off to a flying start but I do (slightly) regret not cutting my own in line with Chuck's "introduction to scratch building" philosophy.
Good luck.
Fred
- FrankWouts and James G
-
1
-
1
-
I have just caught up with this log. I read the first two replies: Greg (dvm 27) wrote: "..You are going to make a beautiful Naiad" and Druxey wrote: ".... a brilliant beginning". They know a thing or two about model ship building, those two, don't they!
Absolutely stunning work.
Very best wishes
Fred
-
Thank you gentlemen for your kind remarks and likes.
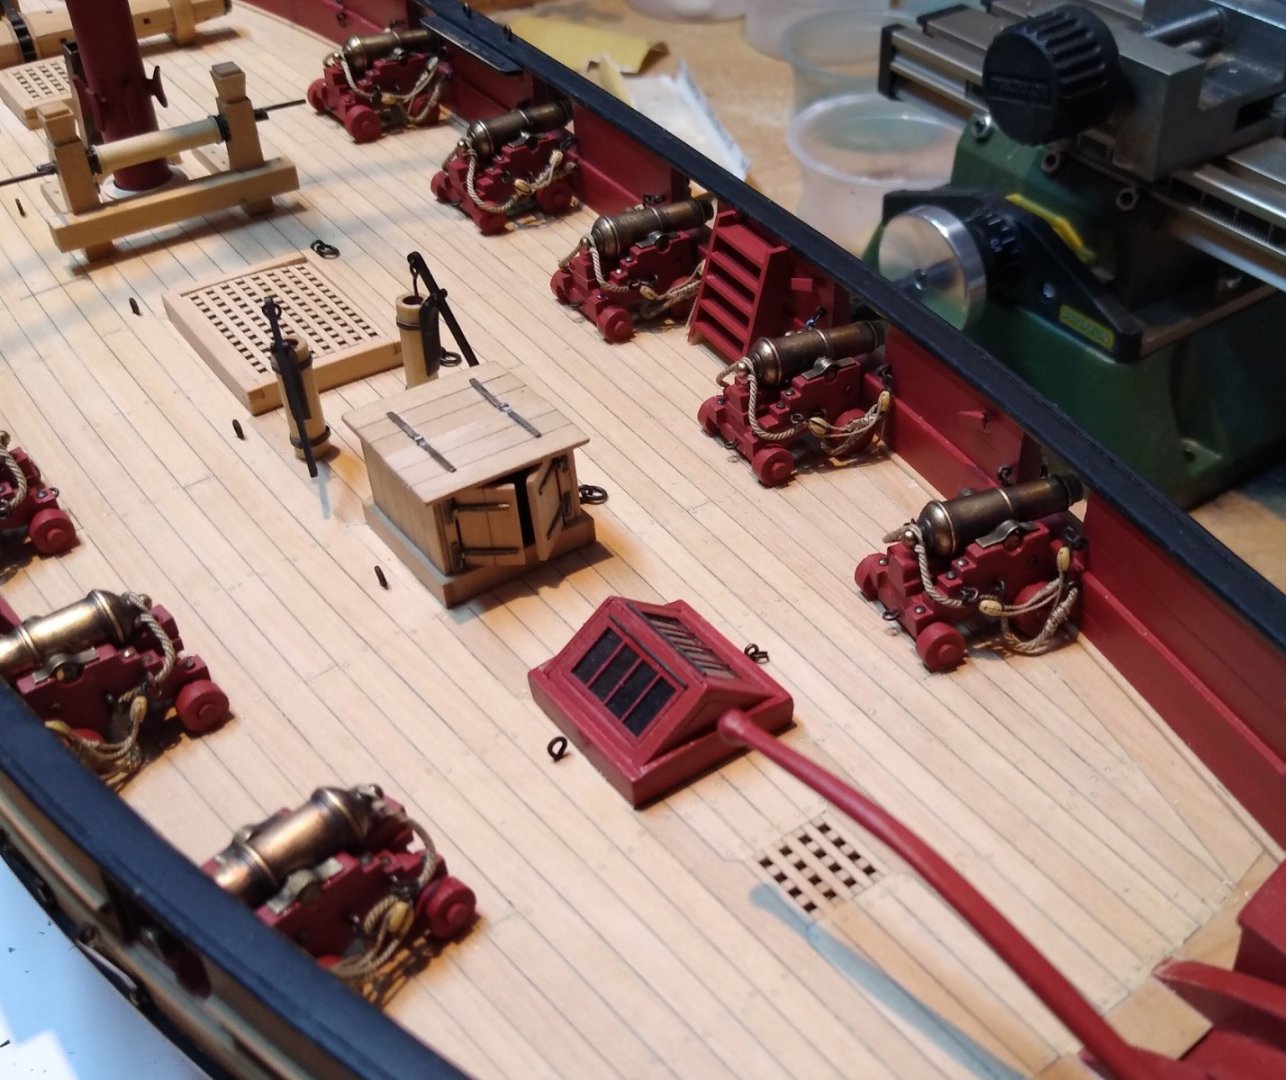
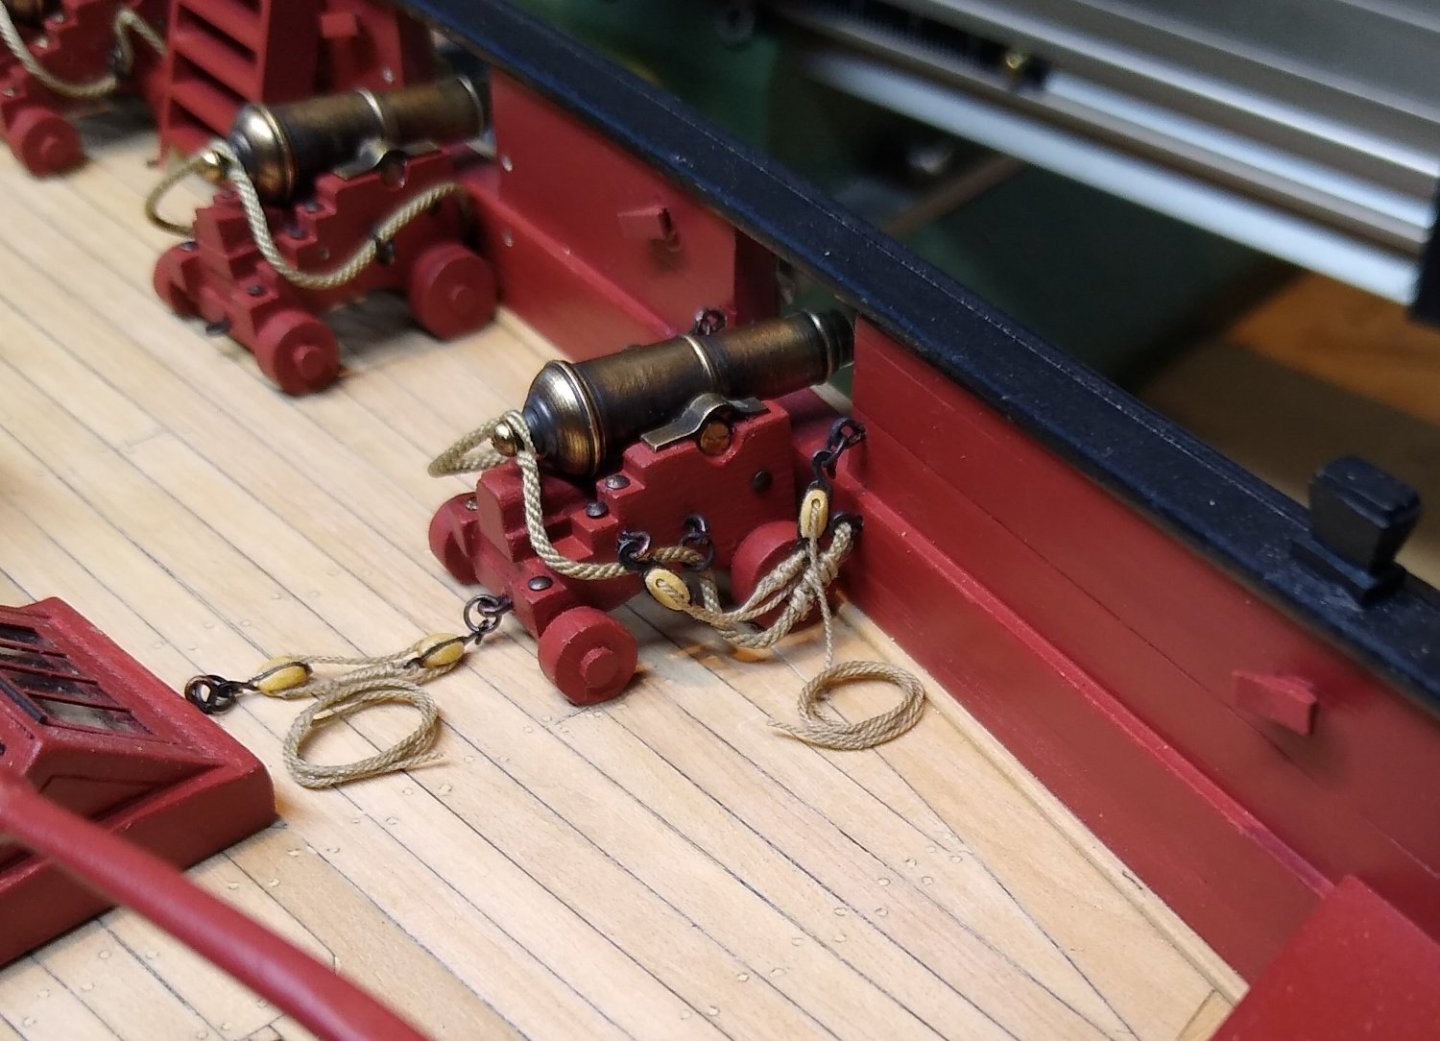
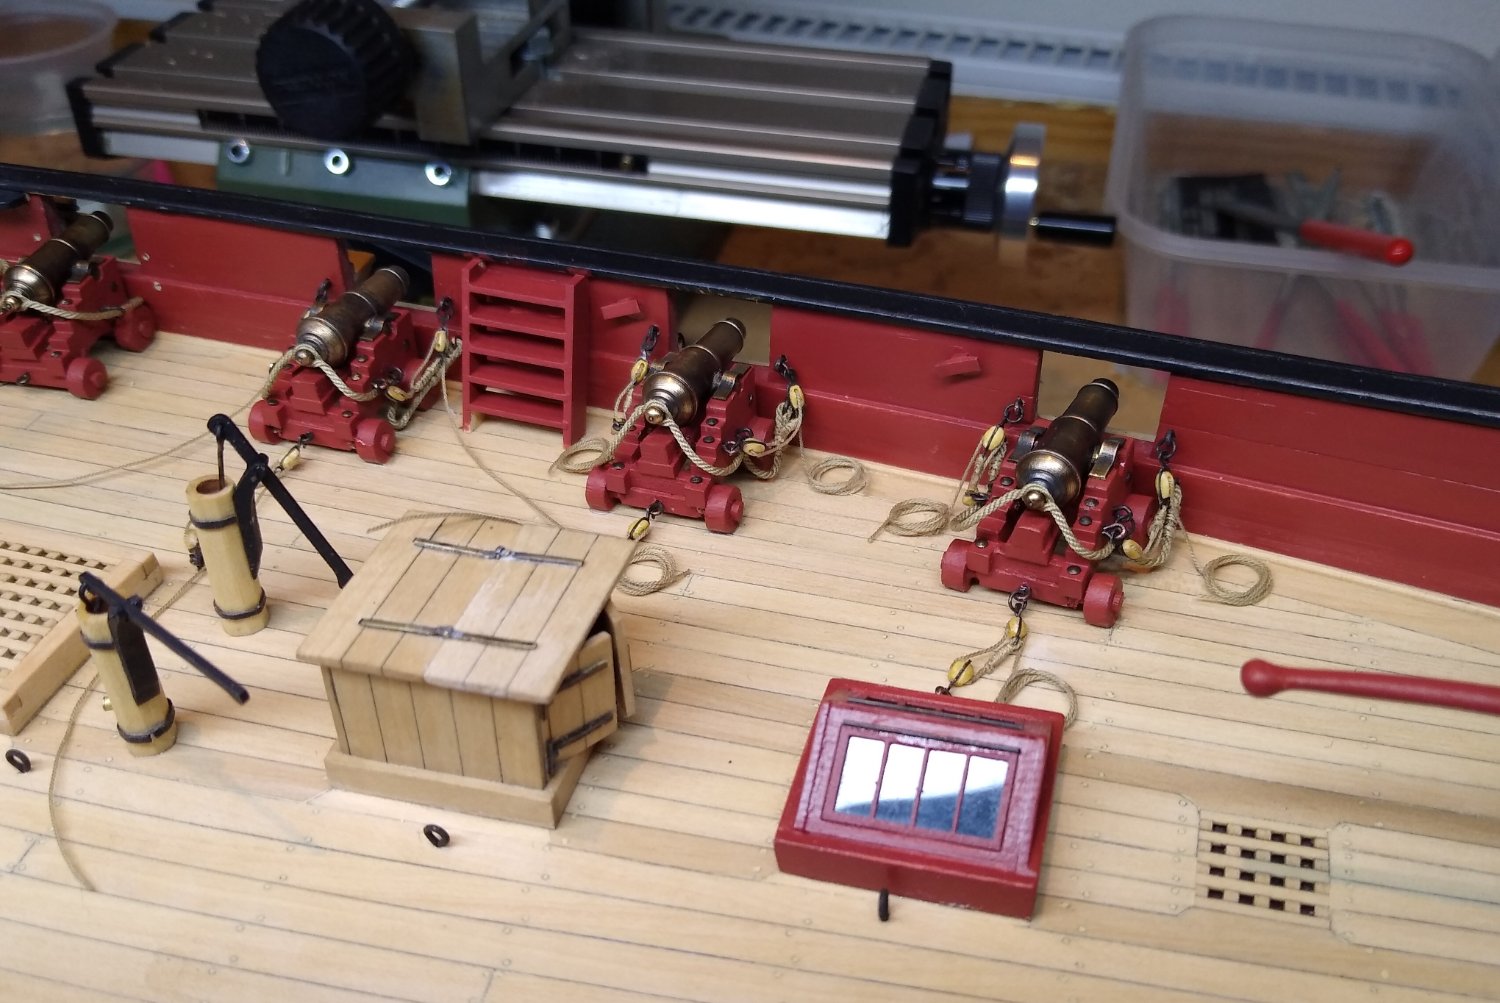
I've rigged all the guns. Not the most exciting job in the world but not the marathon that the Winchelsea presents. I removed the in-haul tackles - I decided the untidiness out-weighed any historical accuracy. I can't make my mind up about rope coils for the free ends of the out-haul tackles. I'll leave a decision for a while. At the moment the free ends are just tucked away beneath the carriages. The sort of approach a teenager takes to tidying his/her room.
.thumb.jpg.4a8c6a9bbe3b467c6bd620f96b79adc1.jpg)
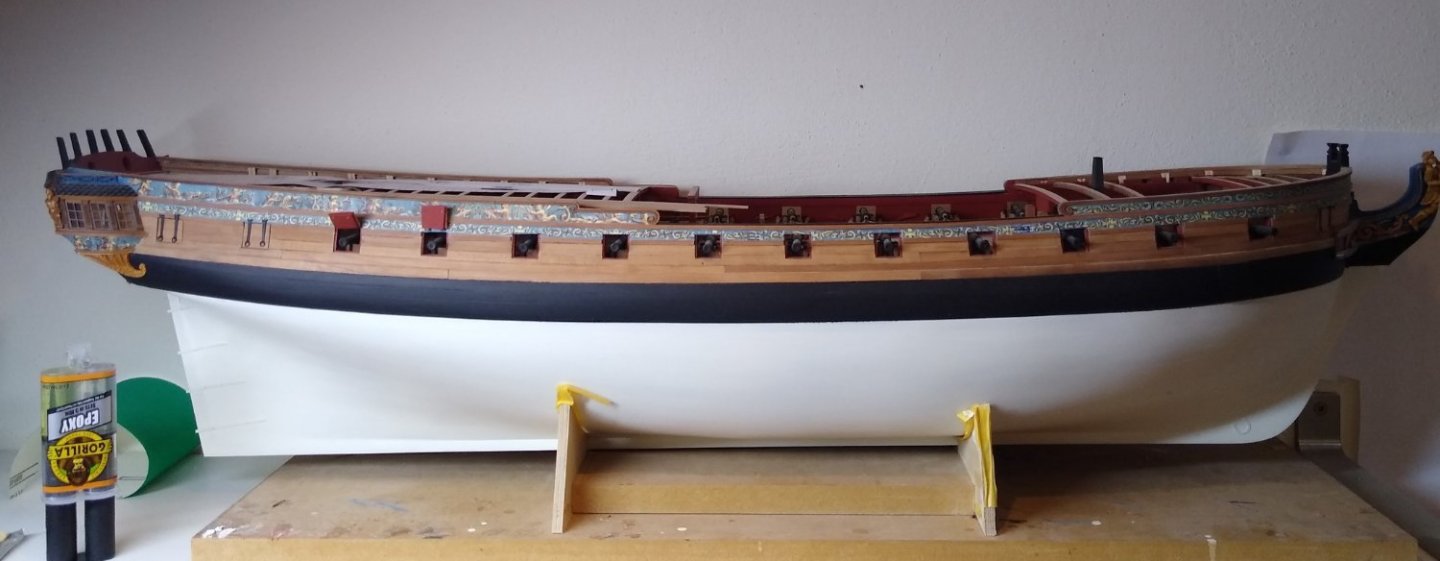
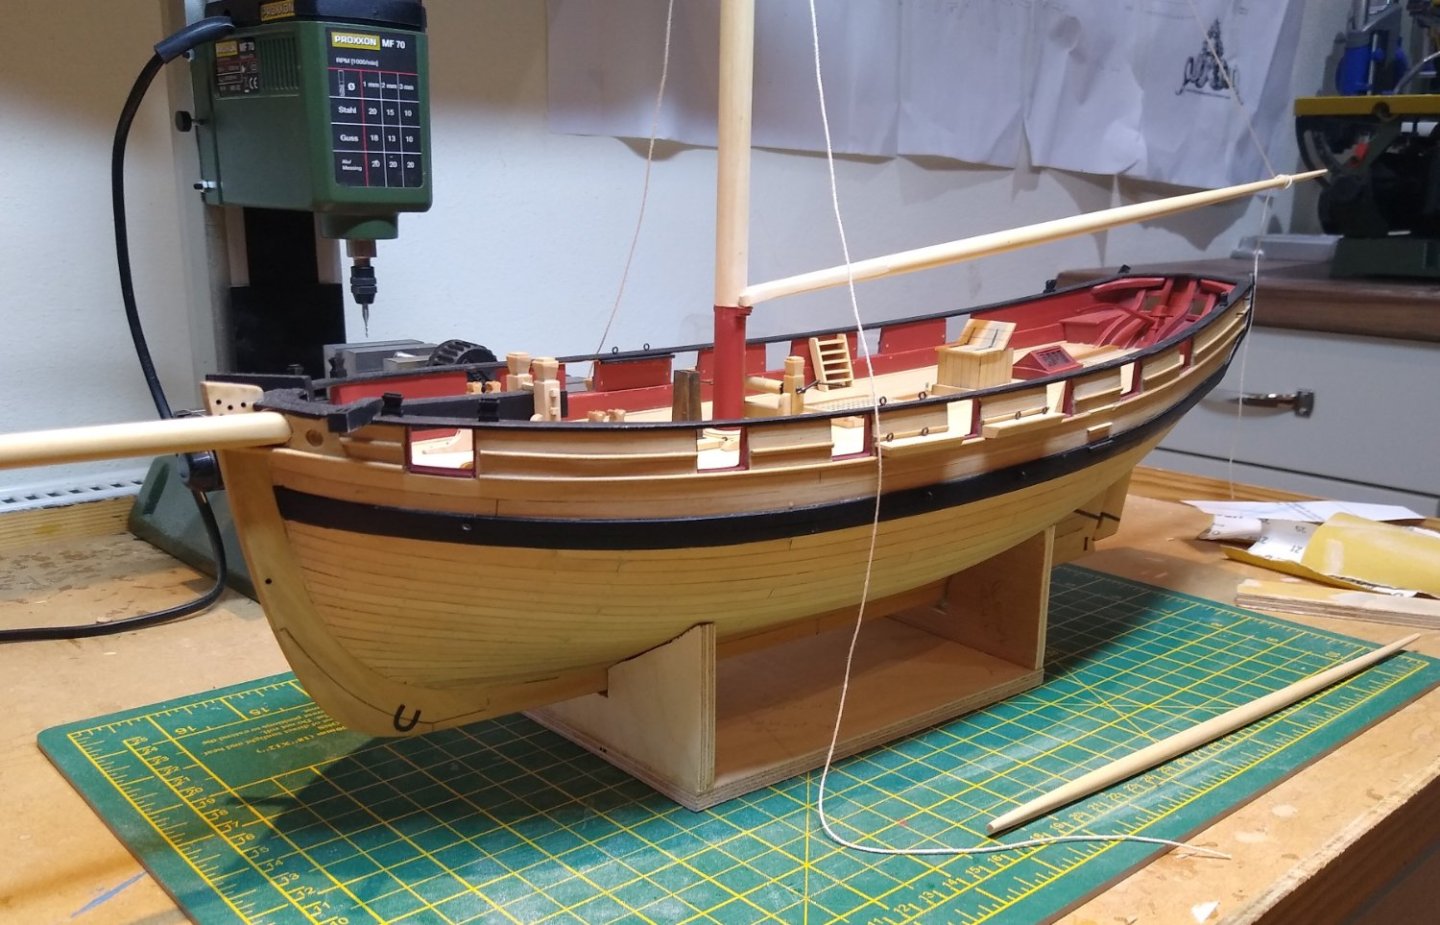
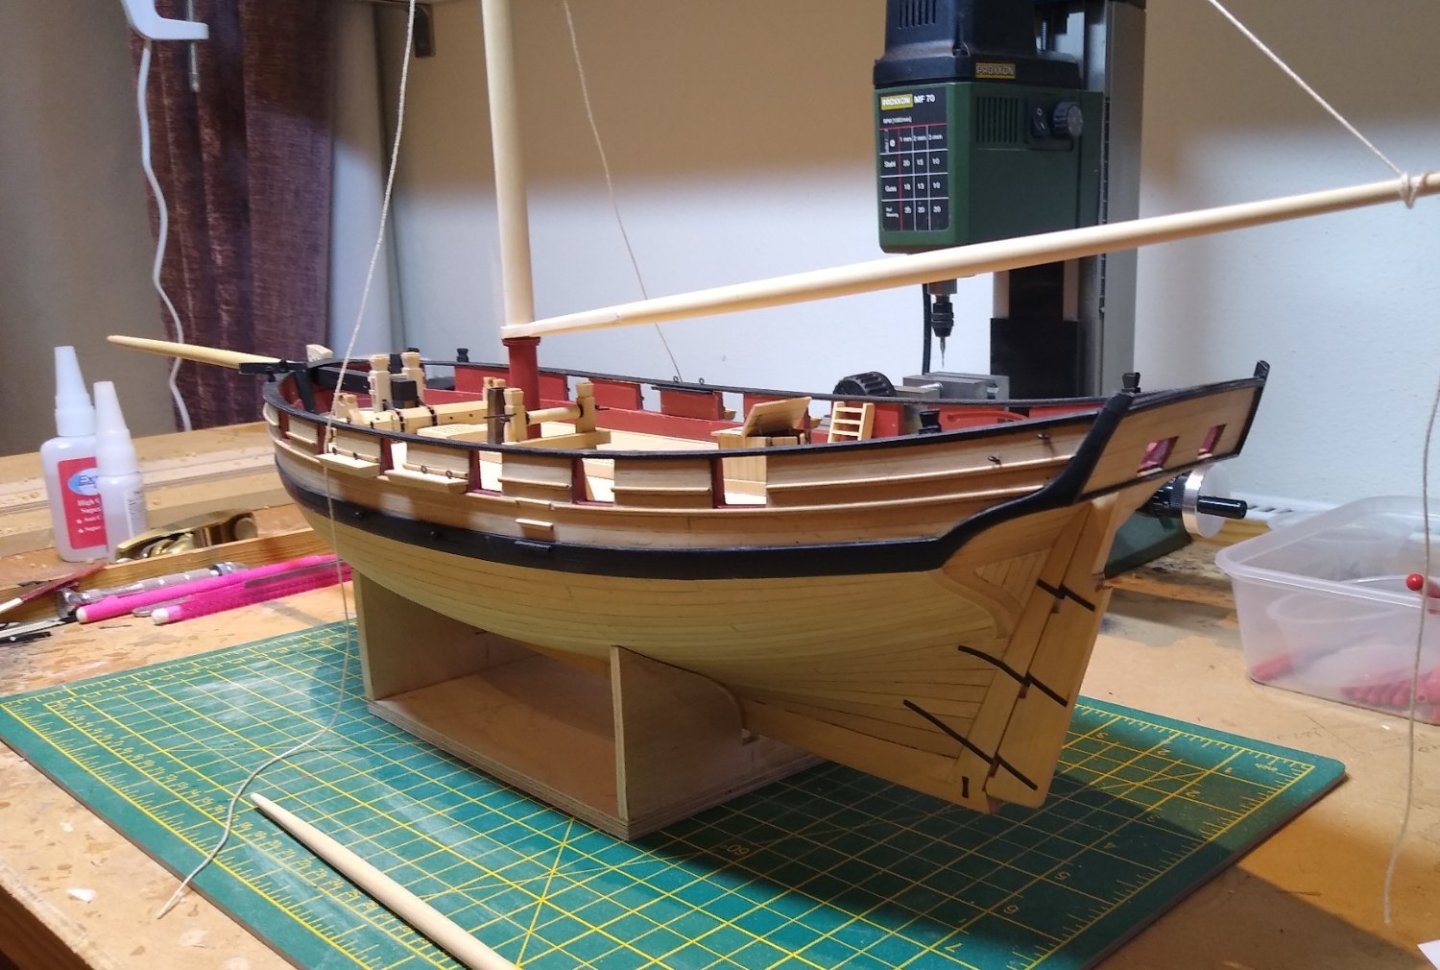
The woodwork and metalwork is pretty much done. I still have the boom crutches to do - I just overlooked them. Here is what she looks like today.
I found some very good brass belaying pins on-line. They come from Canada and knock spots off anything I've seen in Europe. I know they are not wood - but I think turning my own is probably a project too far for me just now: know your limitations! I'll give them a very brief dip in blackening fluid just to take the shine off rather than blacken them and I'm sure they will be fine.

.thumb.jpg.e5dd51bdf7dbed88d9a5e793c8c9ae25.jpg)
Most of the woodwork for the riggingis done and ready to go (sorry for the appalling pictures).
.thumb.jpg.a58e176078e292dd251de8315603ce7b.jpg)

.thumb.jpg.3ecfbb5062e54ed3af5e913ab34e8cb0.jpg)
So, just a few knots to tie and then I'm done!
And then I've go to decide what to do with the old monster below.
All the best everyone.
Fred
.thumb.jpg.4a96f81aeea55ac4fdebb9c1e21baa5f.jpg)
- Prowler901, Ryland Craze, Saburo and 9 others
-
10
-
 2
2
-
-
This is looking lovely.
Beware the rudder however. The boxwood hinges from Syren ( I assume that is what you used) are very fragile and the rudder easily knocked. I broke mine though Chuck very kindly sent me another set.
I suspect the colour difference in the boxwood wreaths will settle down and in time you won't notice it.
All the best
Fred
- cdrusn89 and FrankWouts
-
2
-
Wow. Simply gorgeous.
Fred
- Siggi52, mtaylor, Keith Black and 1 other
-
4
-
Everything looks great and the work on the bowsprit (last picture) a triumph.
All the best
Fred
- Paul Le Wol and Dave_E
-
1
-
1
-
Beautiful (and very patient!) turning, Mattthias.
Best wishes
Fred
-
I'll second Chris' view. This is looking very good indeed.
Fred
- FrankWouts and westwood
-
2
-
Its fascianating to watch what a premier league player (I have no idea where you are based Gary: if you are in the US the premier league, just in case it's an unfamiliar term, is for the absolute top flight soccer players) - your Montague is gorgeous - makes of Winchelsea. I am following this log with keen interest.
Fred
-
What finish are you planning for the cabin walls, Edward? Paint or varnish? Either way they are looking good
Fred
- AJohnson, FriedClams, FrankWouts and 2 others
-
4
-
1
-
Thanks, chaps, for your kind remarks and likes.
I am indeed looking at my Winnie, JJ, and wondering what to do with her. There is a bit of me that wants to start again. I feel I'd make a better job if I did and the Winnie, properly built - there is a bit of a mis-match between how I see her in my mind's eye and how she comes out - is a truly lovely model. I guess thats the frustrating thing that all but the very best model builders must feel.
Anyway, Cheerful is coming along and I'm learning new skills and adding experience and knowledge along the way (and adding usefully to my toolbox). One day, I hope, I'll make the model I'm truly proud of. It may be Winnie 3.
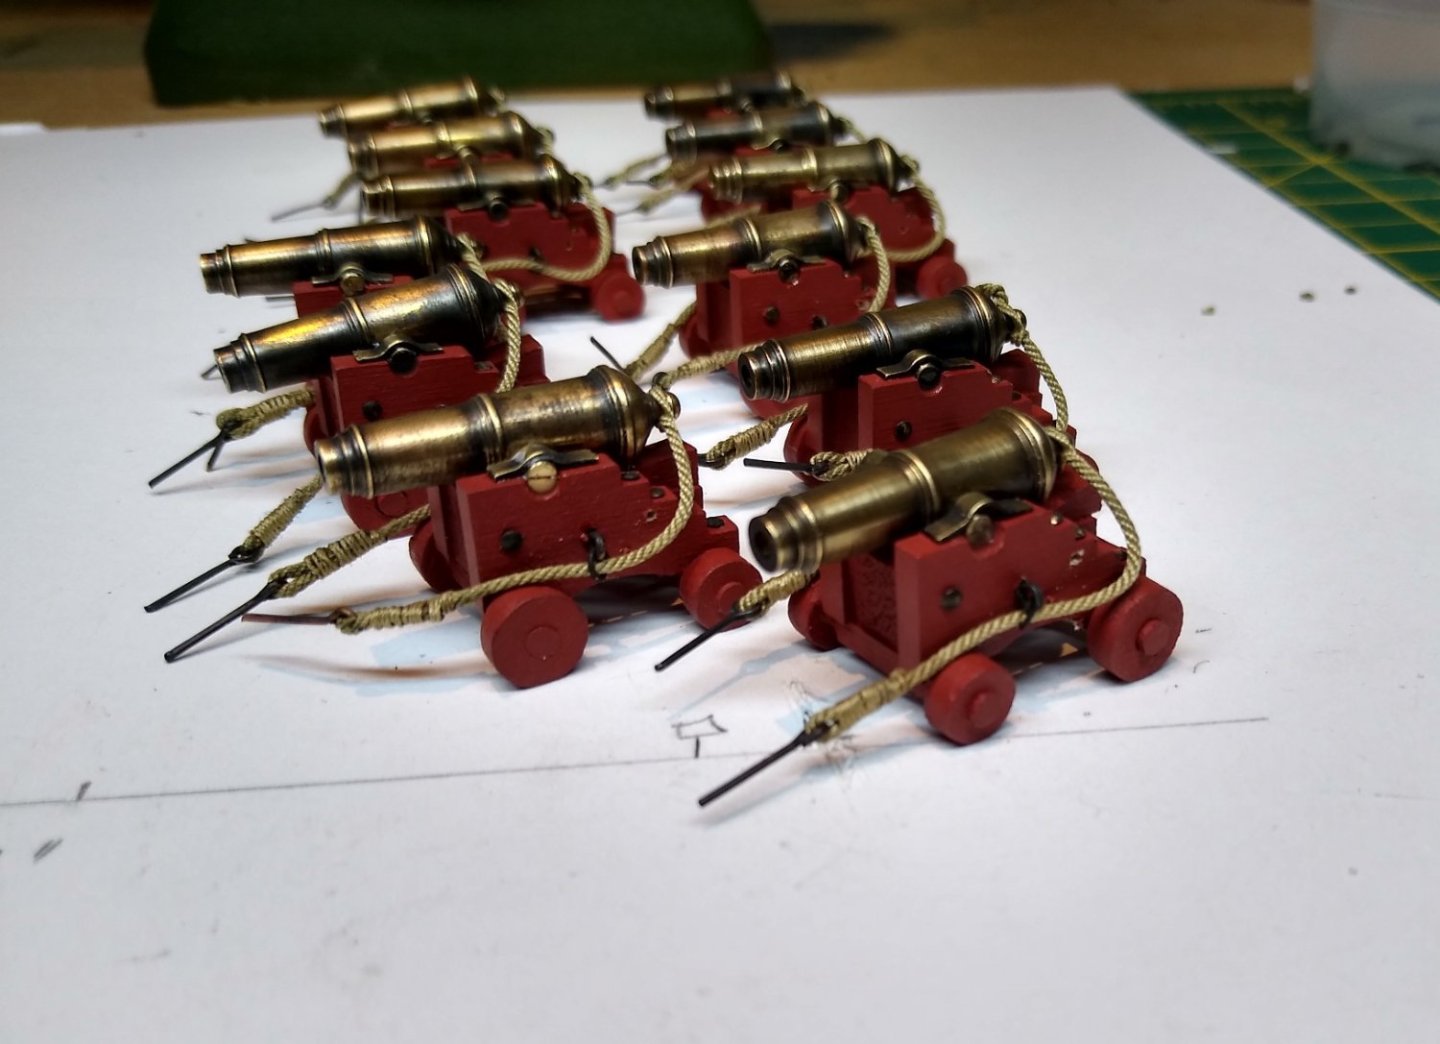
I've completed 3 guns more or less. Only 9 to go. 2 is as much as I can manage in a day.

Best wishes all
Fred
-
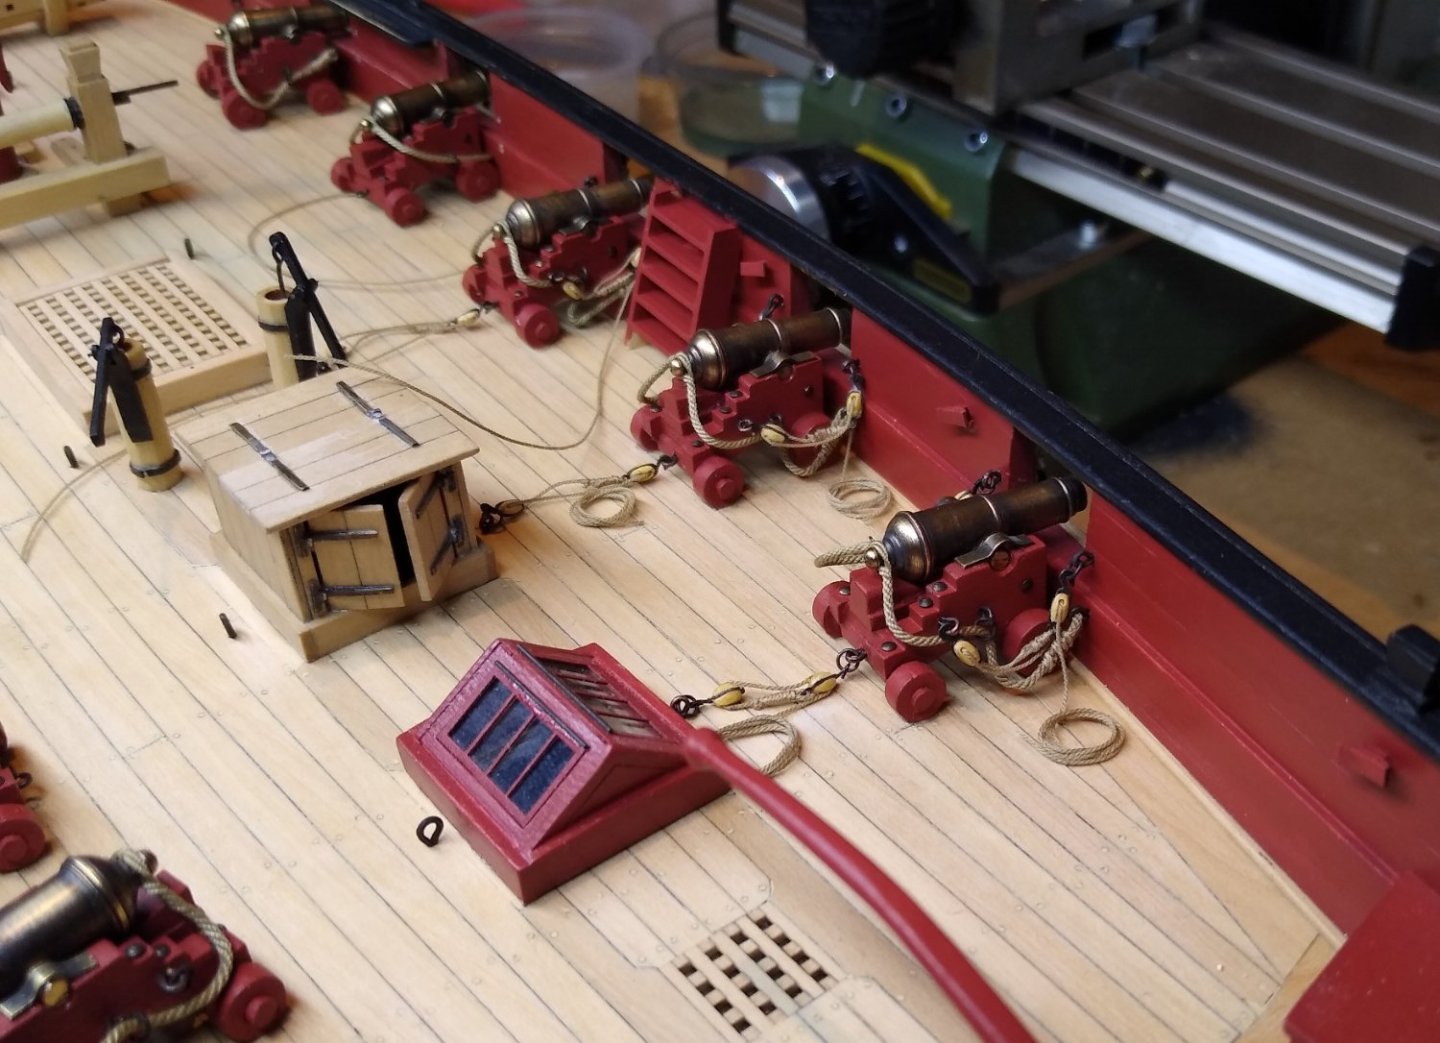
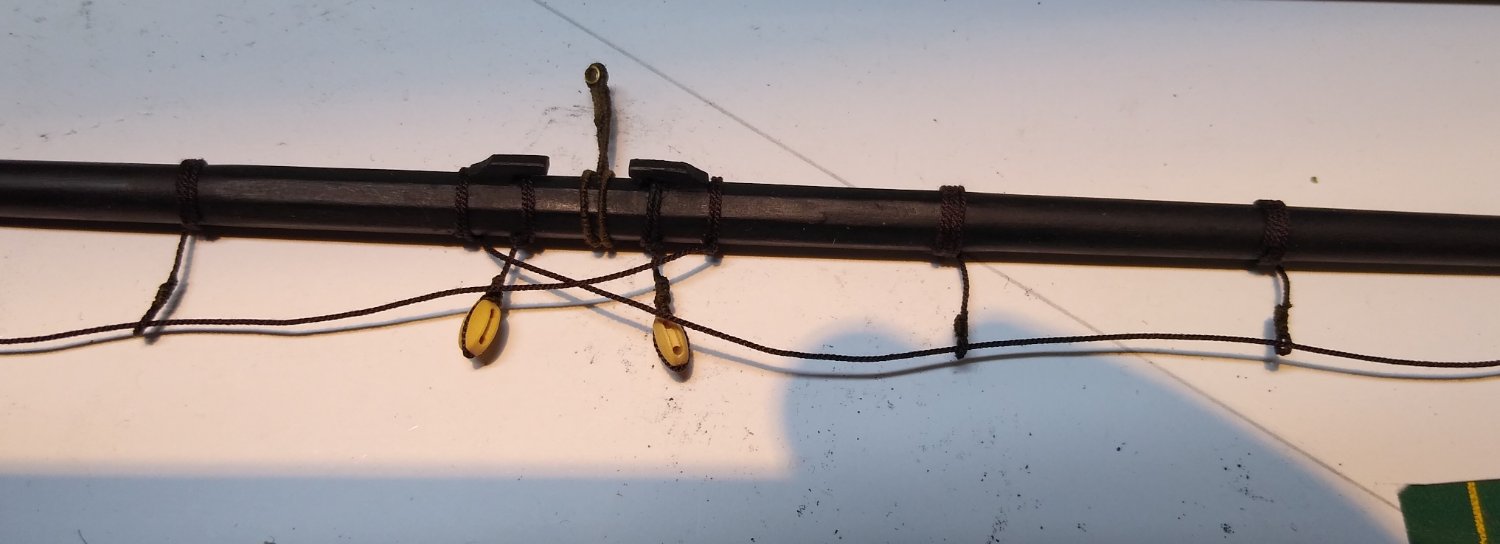
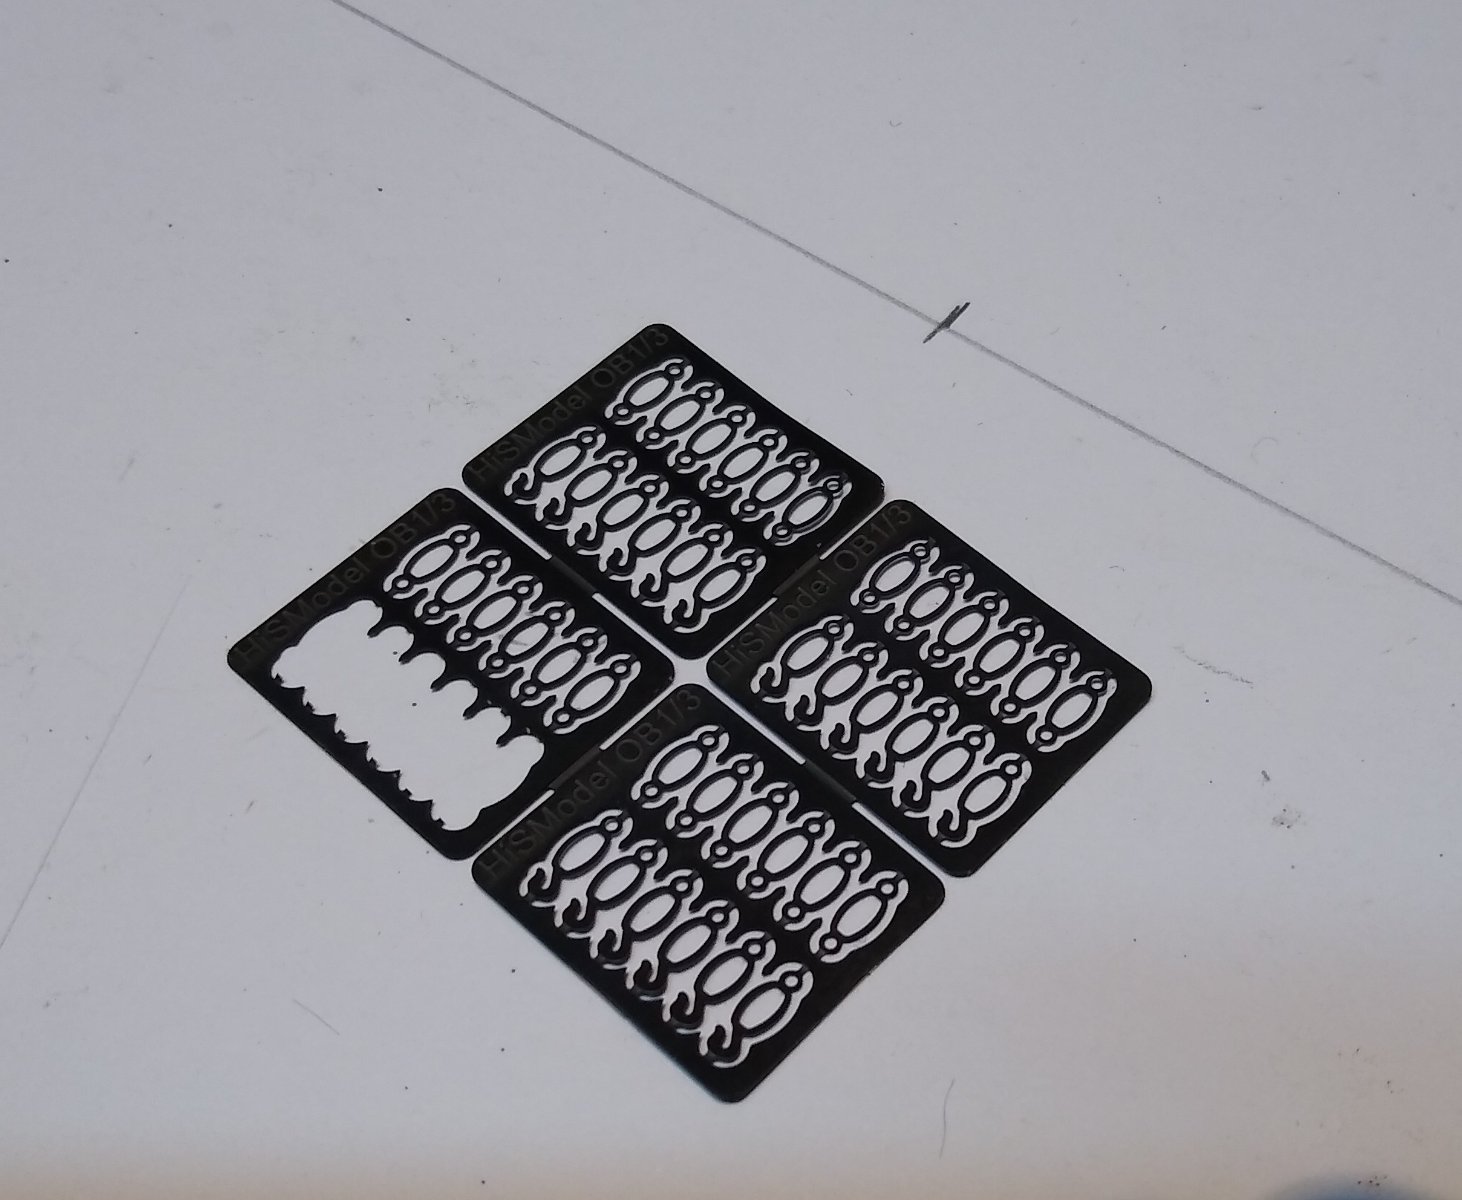
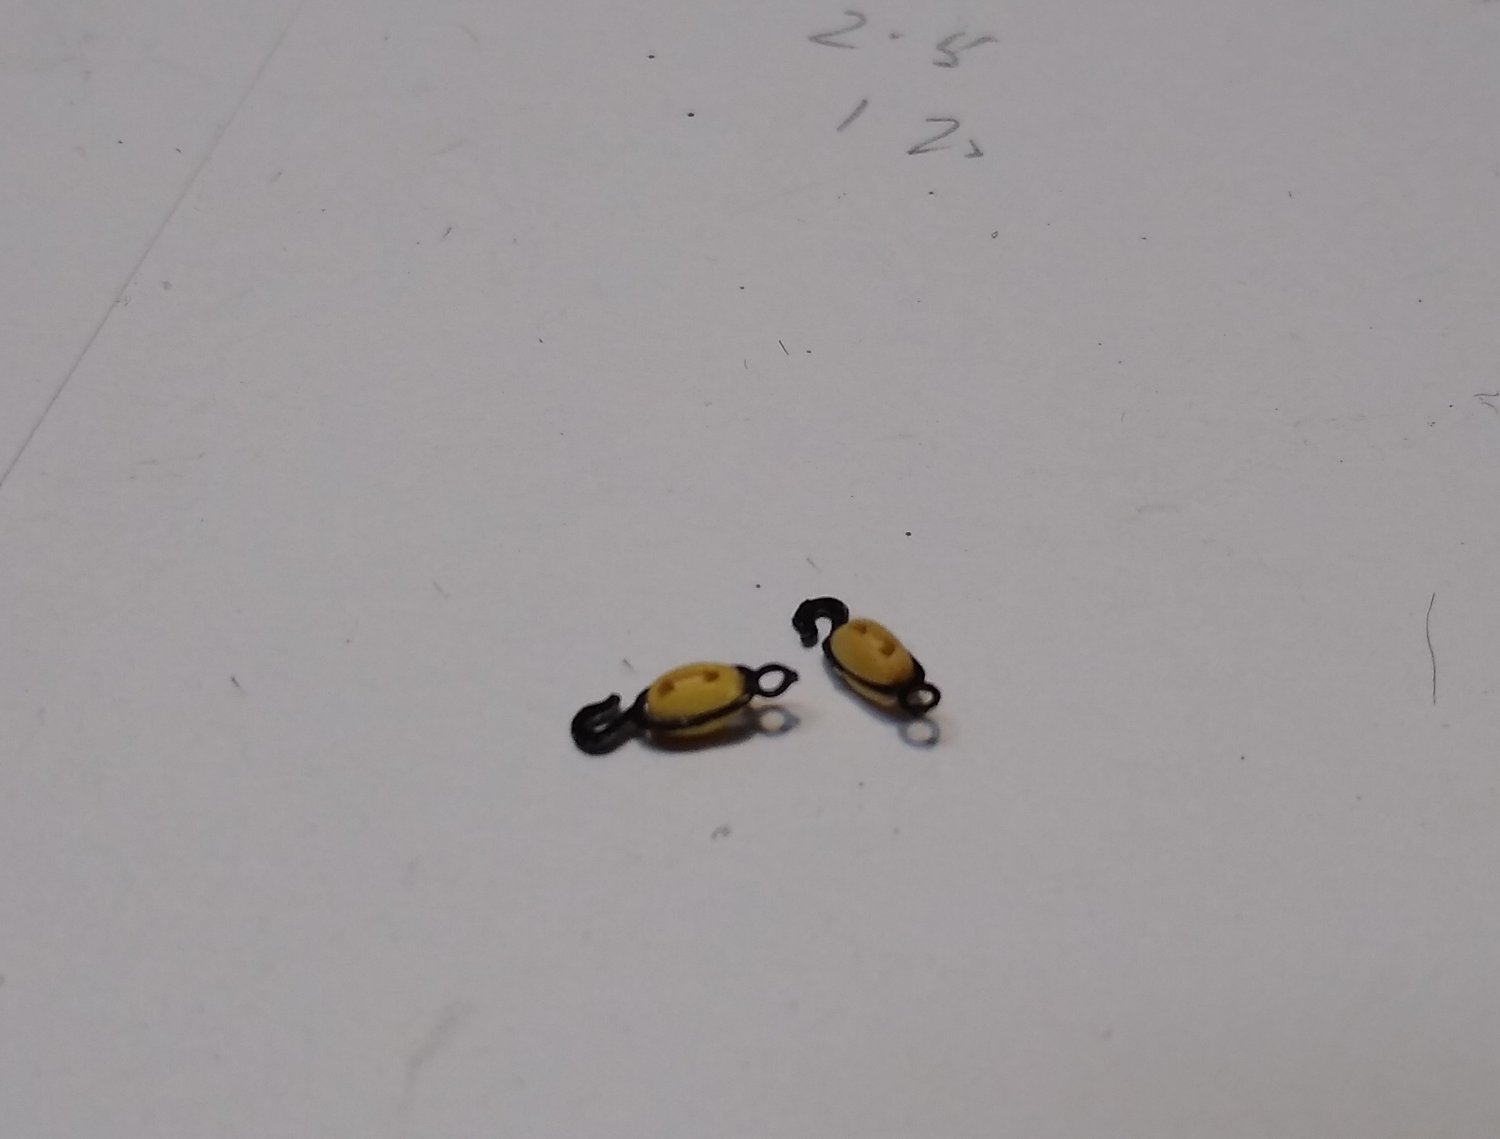
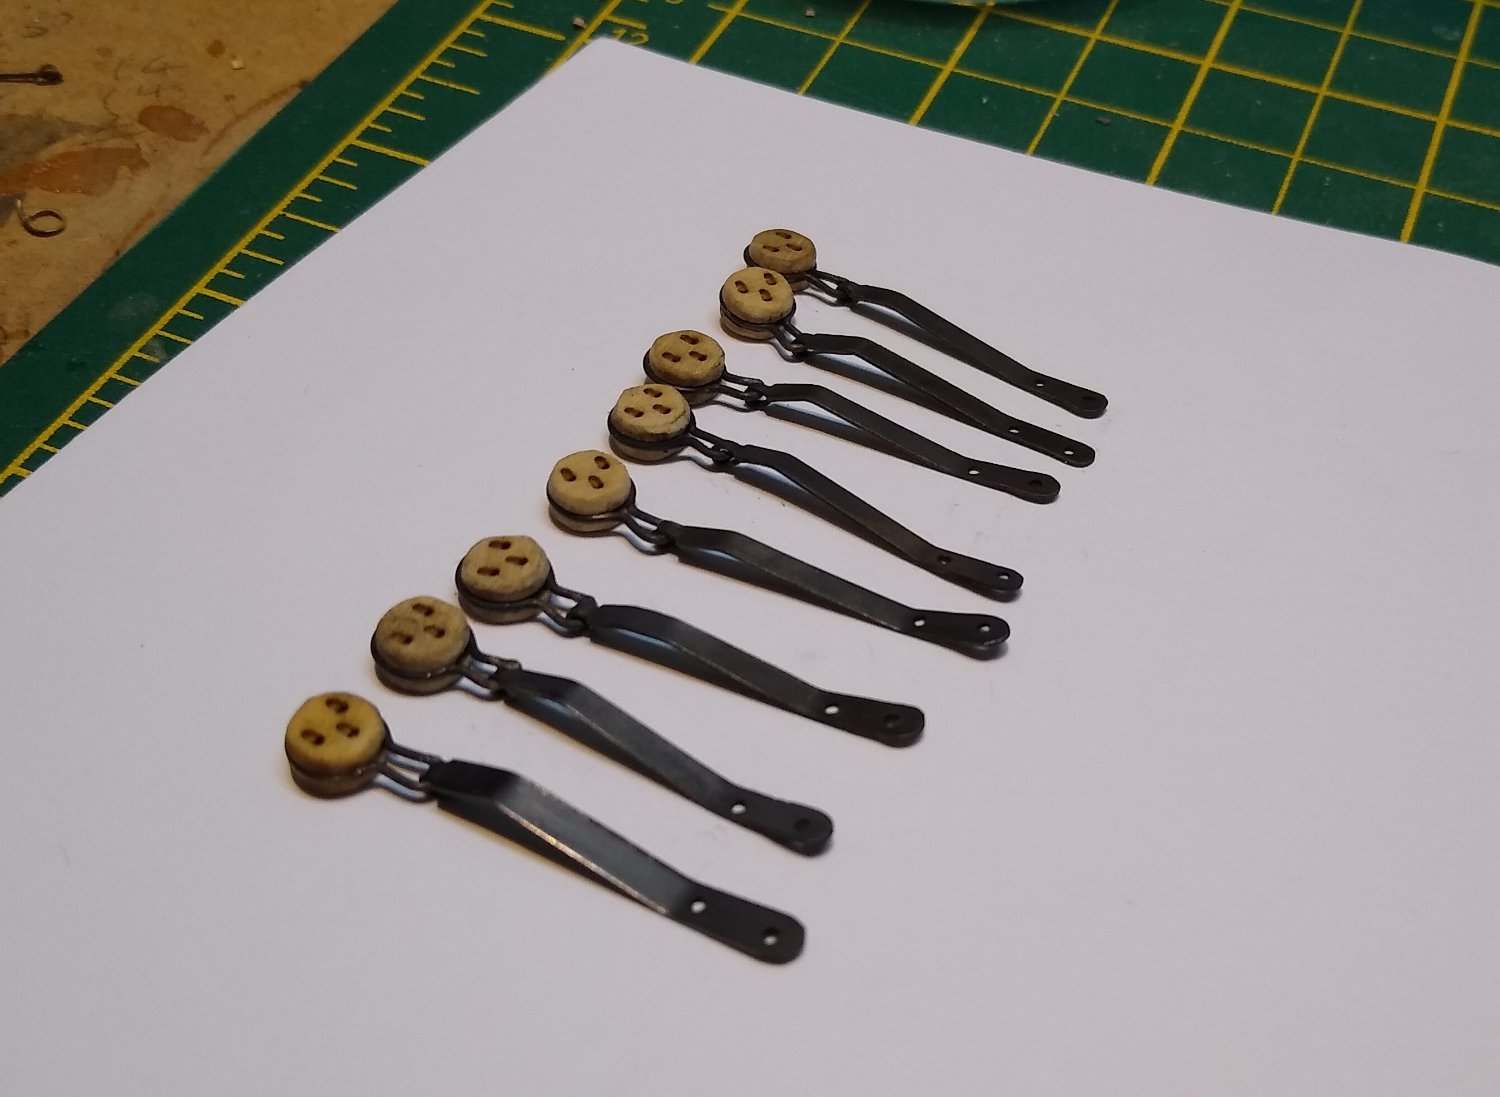
Its time to rig the guns on my Cheerful. I found these hooks from HisModels in the Czech republic. They are tiny but fit the 3mm blocks almost perfectly. They enable the outhaul tackle to be rigged without the space between the blocks being unduly compromised.


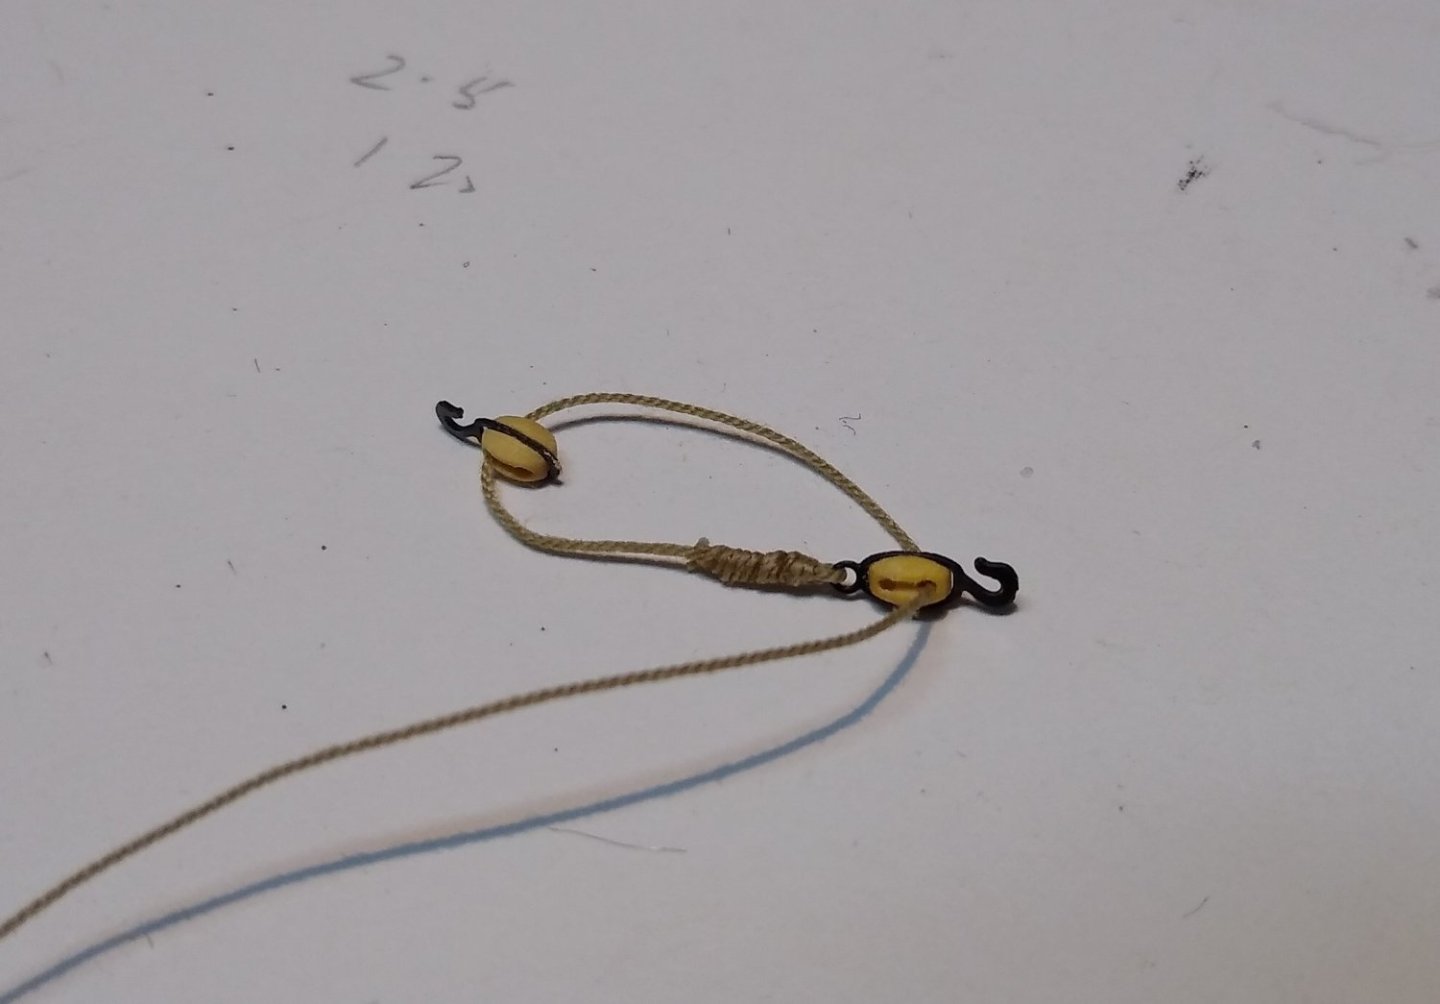
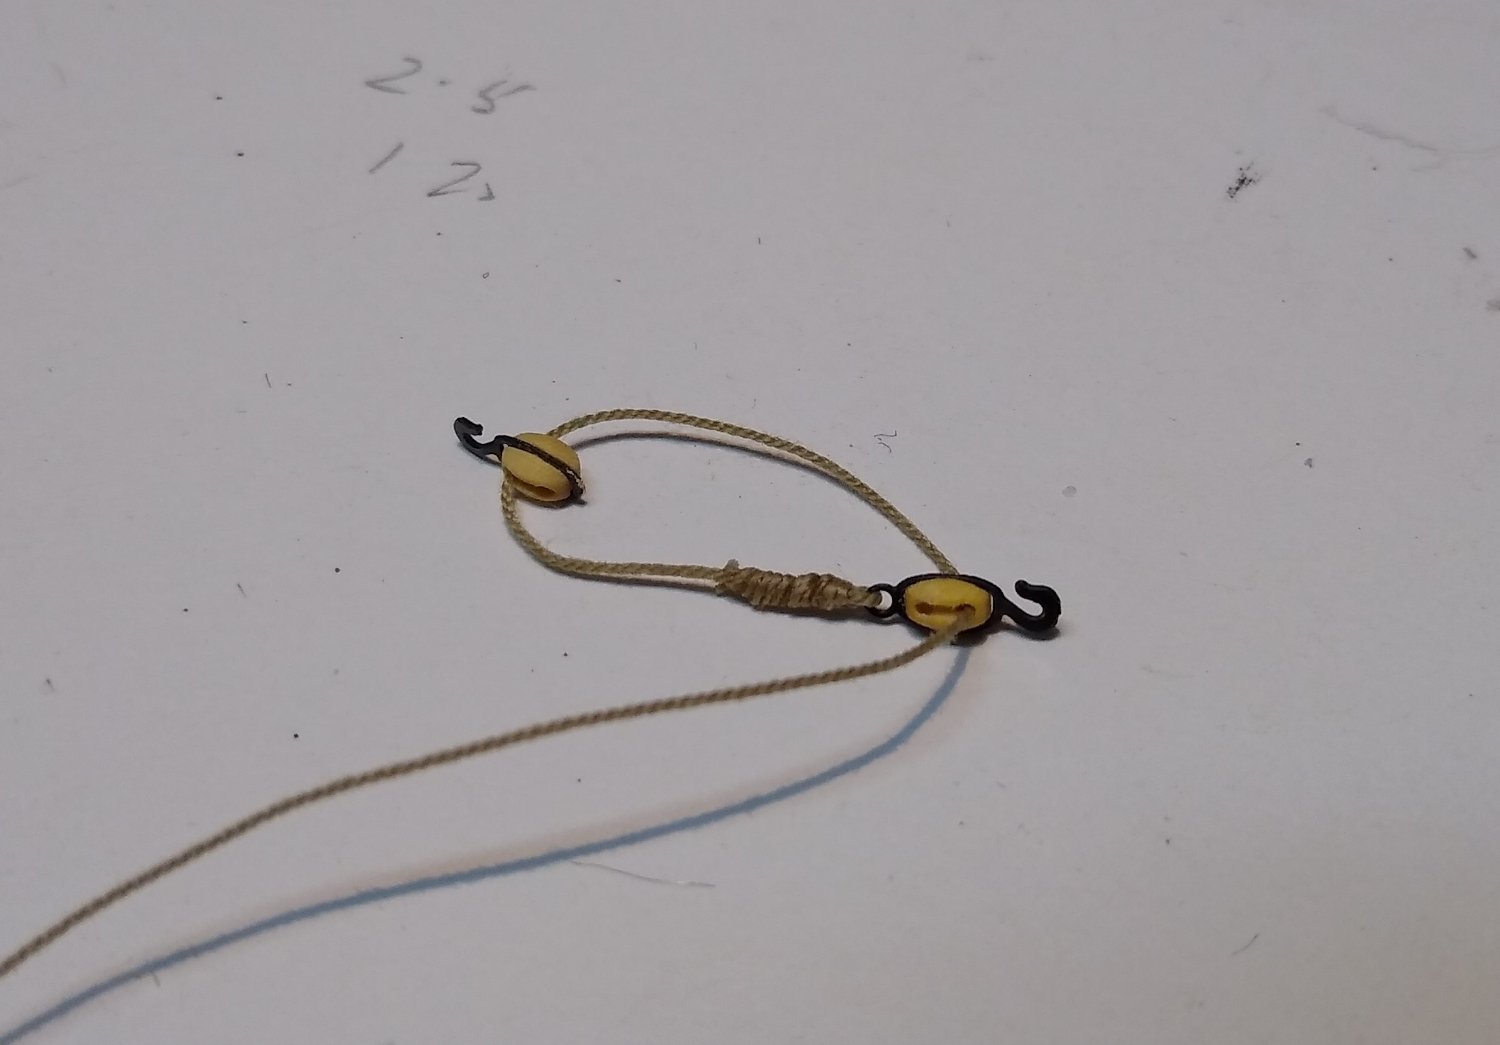
Here are the breeching ropes all done per the instructions and using Syren Ultra rope.
And here the first gun rigged and ready to dry fit.
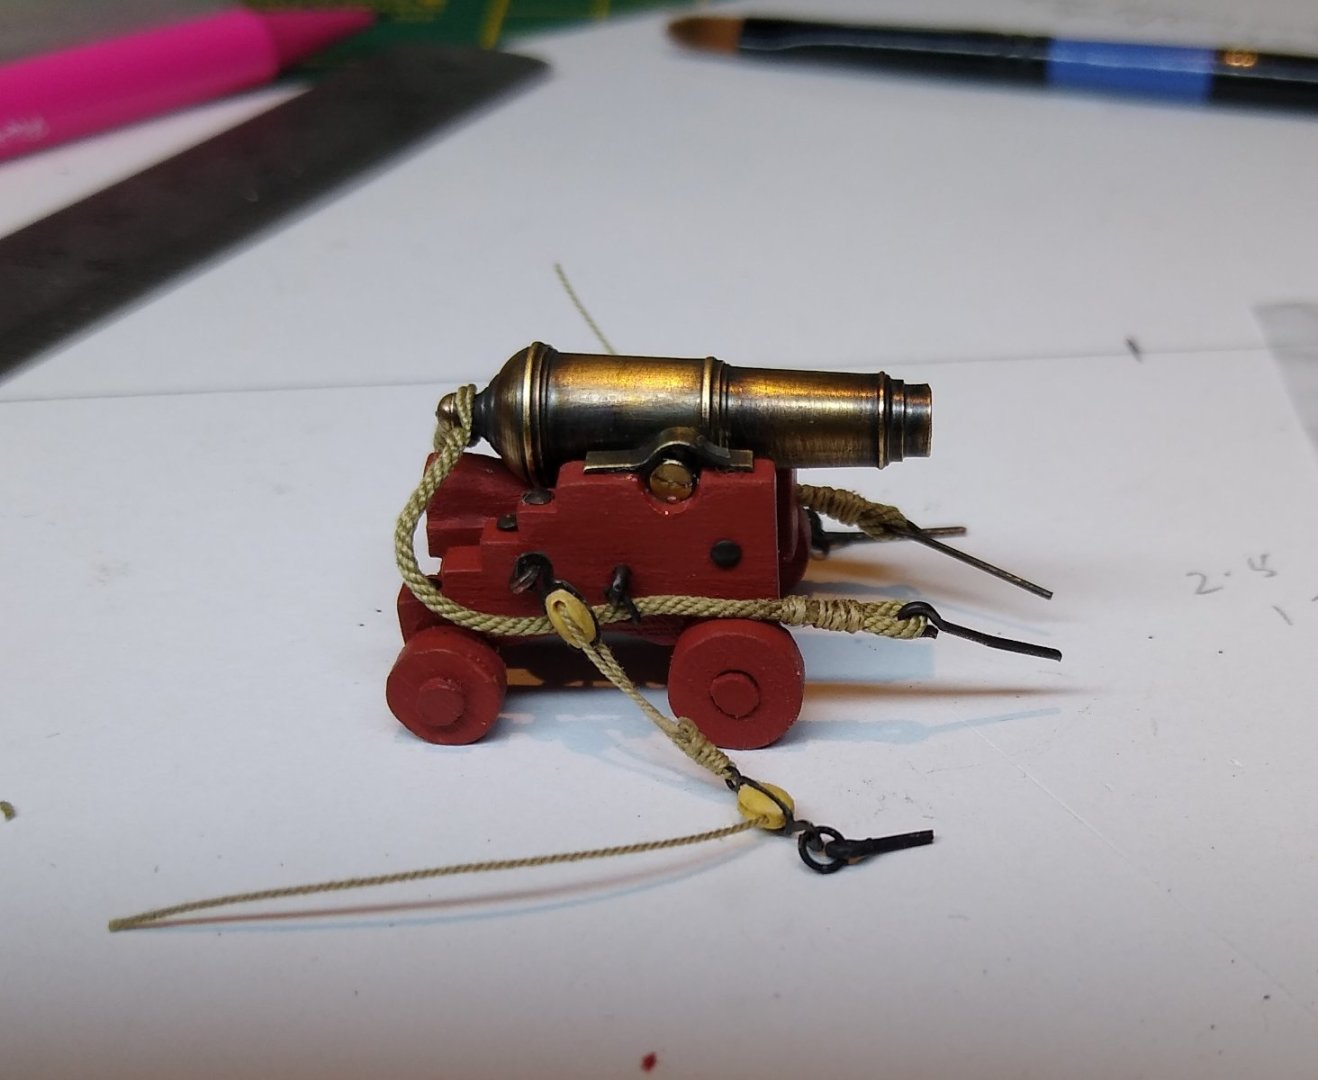
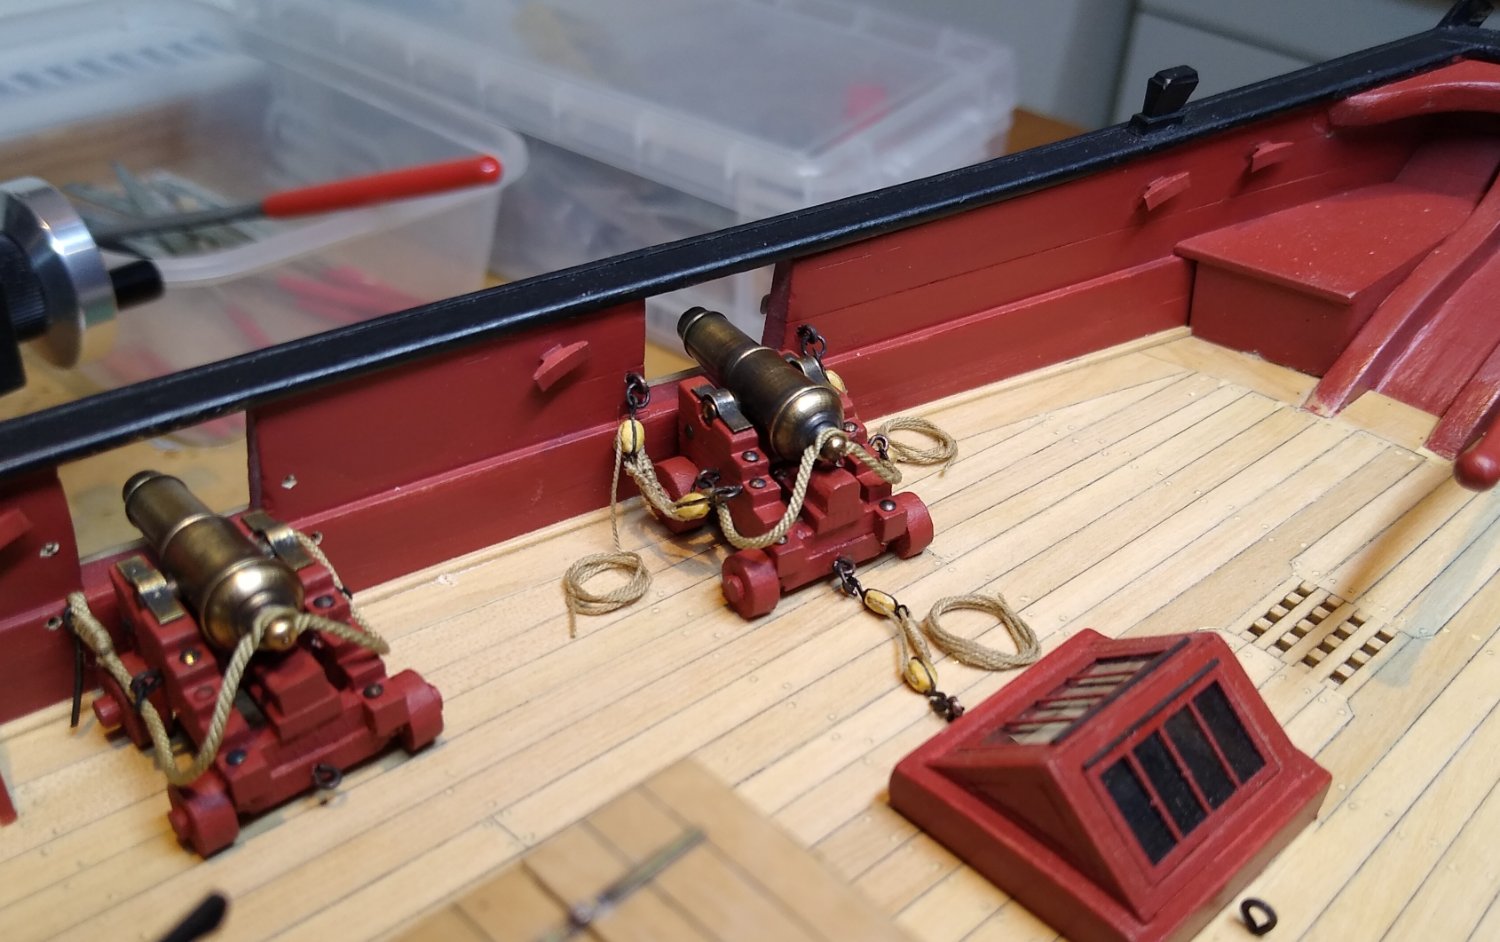
And here fitted. I can see I got the inboard hook upside down. Pictures can be unforgiving but never mind.

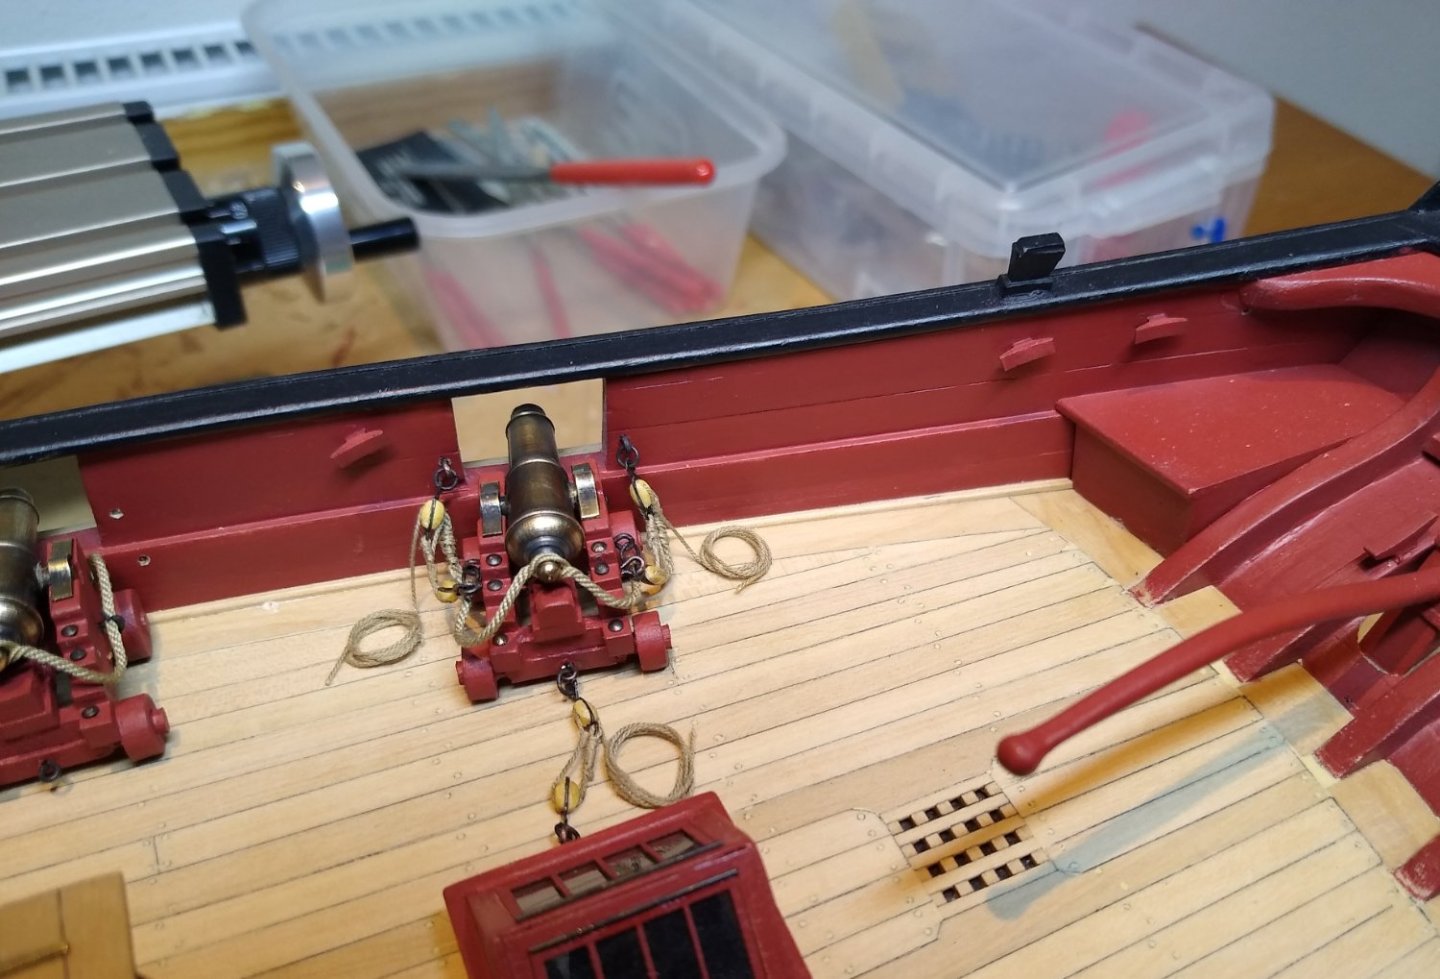
I have not yet glued the rope coils down. I'm undecided how long to leave the rope. I want something that looks like a coil of rope - but these coils would, unfolded, stretch to the far side of the deck and part way back. I will have a play around I think.
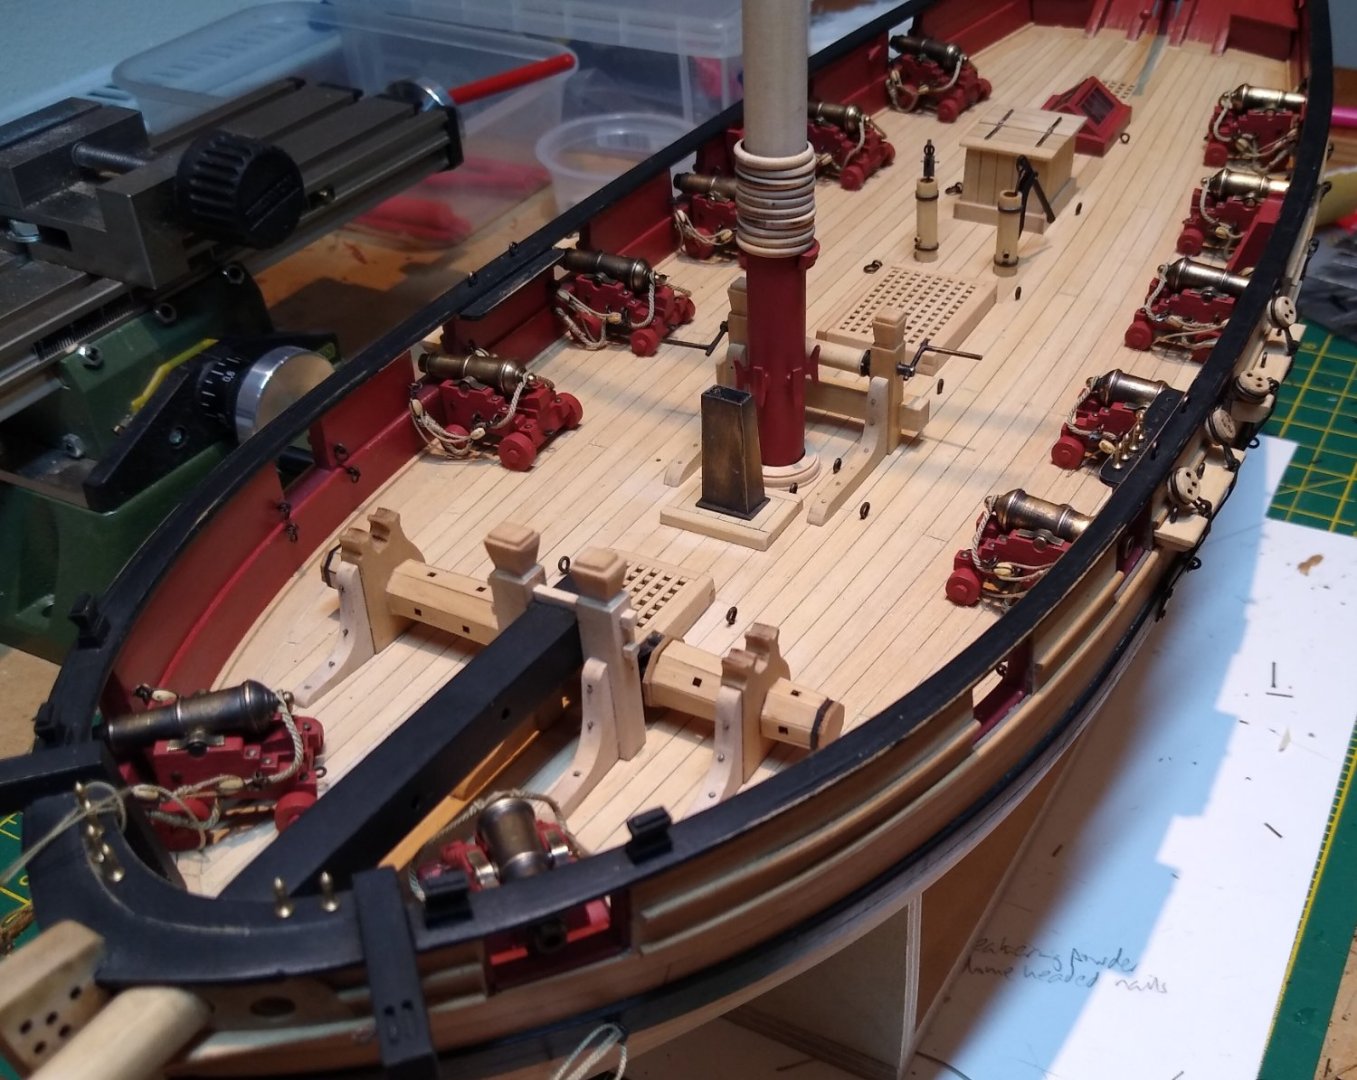
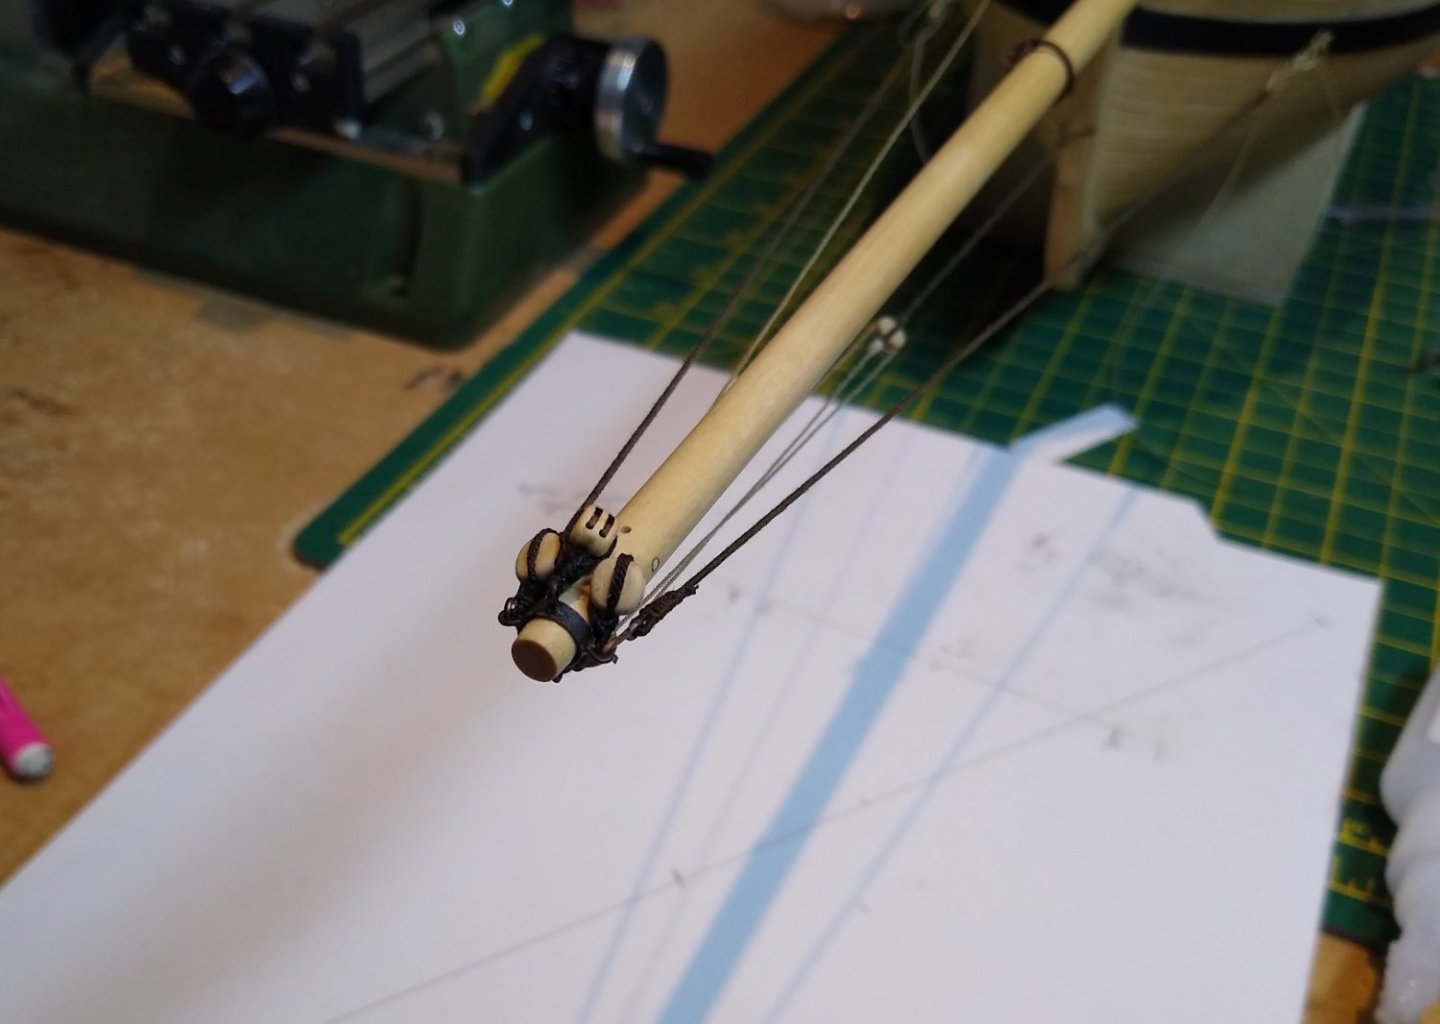
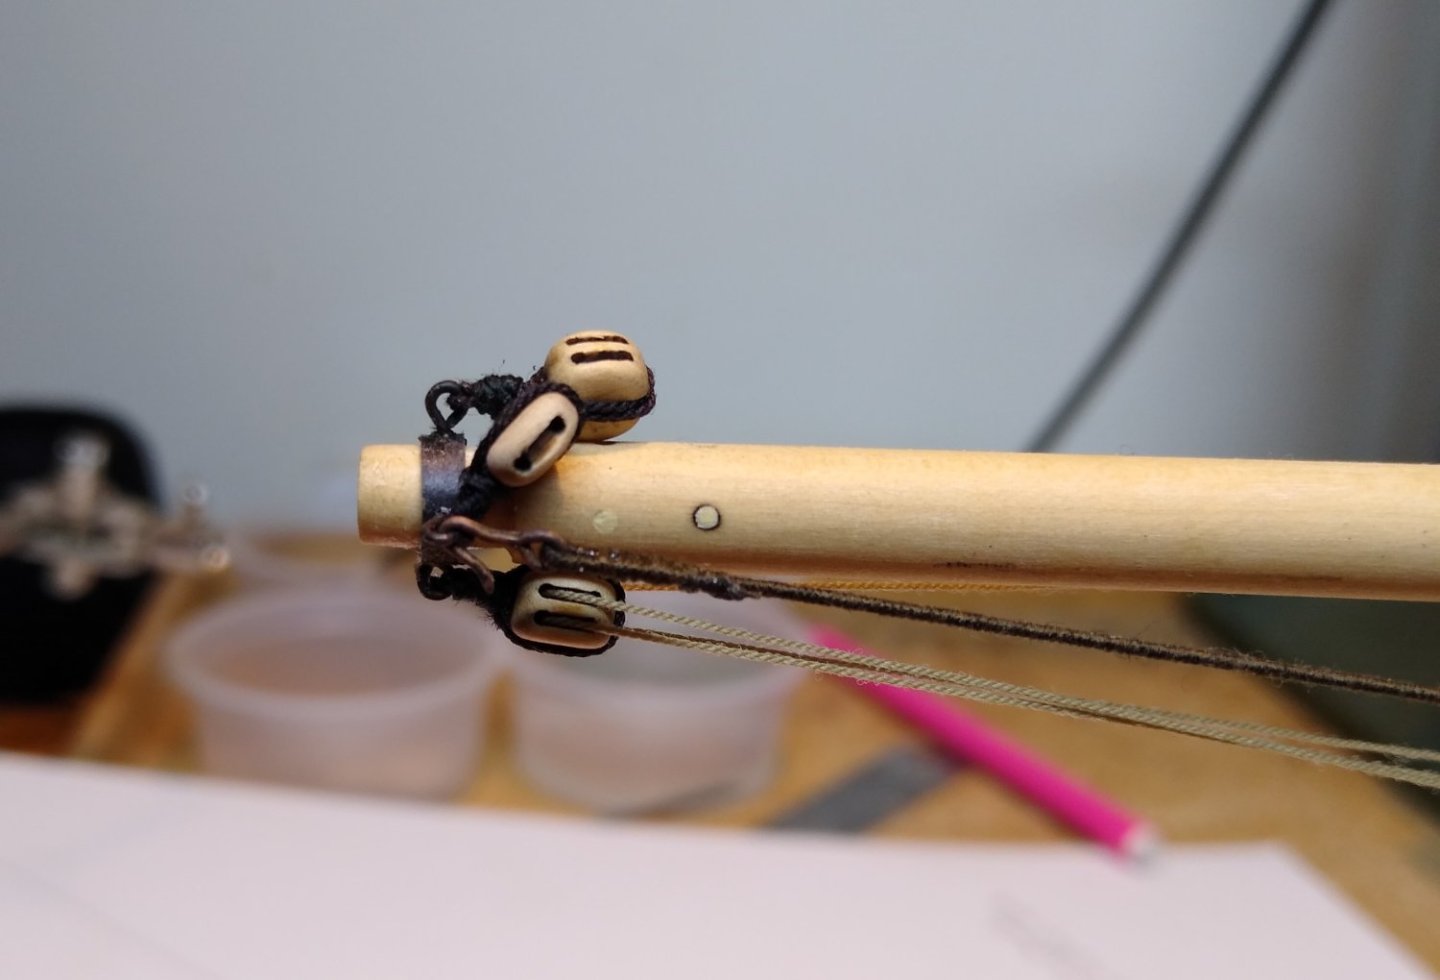
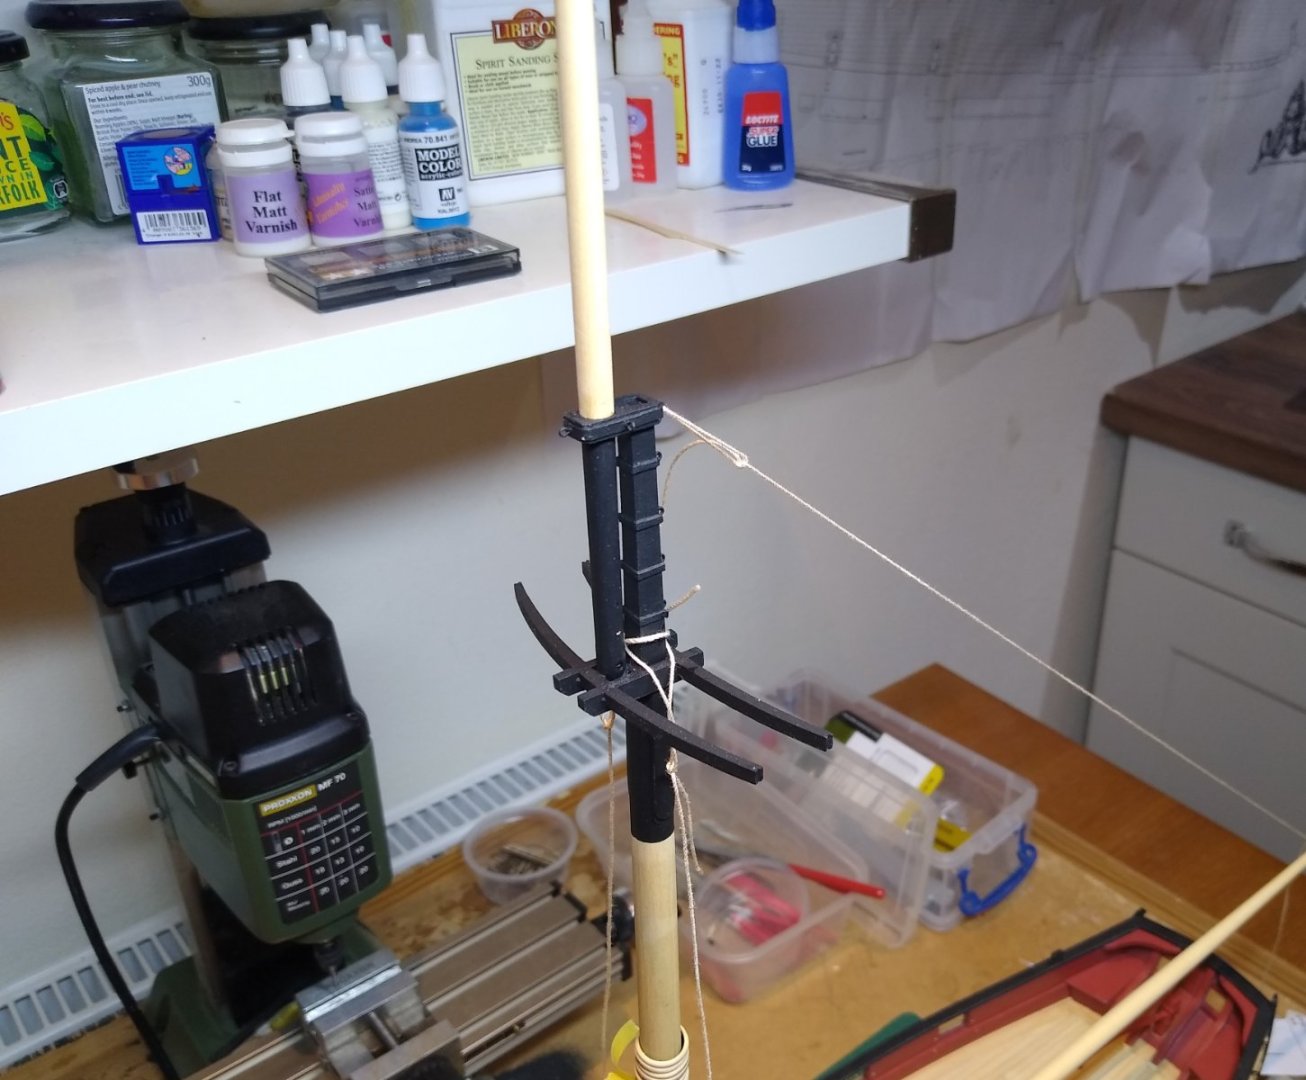
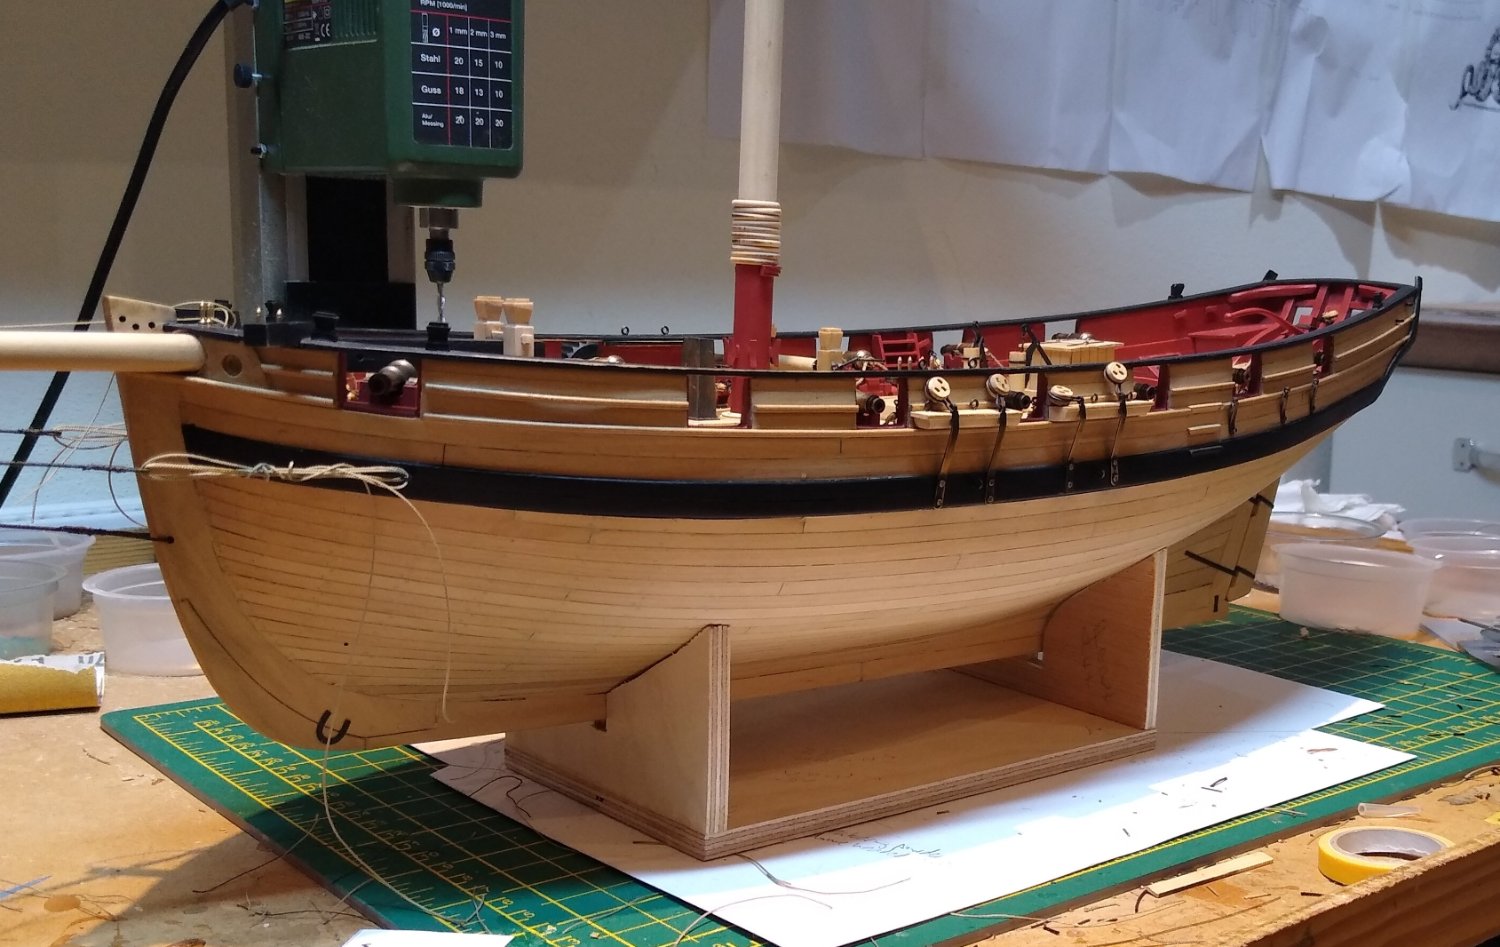
I set up my new Syren serving machine. I took care with the gears but they came out a bit wonky so the machine groans and squeaks but it does a perfectly serviceable job and there is something wonderfully relaxing about serving a rope. For a bit of light relief from the guns I fitted the bowsprit guys and bobstay.
Before turning the square stock for the bowsprit I drilled the holes for the sheeve - unhappily, as you can see, on the wrong face. I don't know why one hole filled reasonably inconspicuously and the other with a great black ring. Never mind.
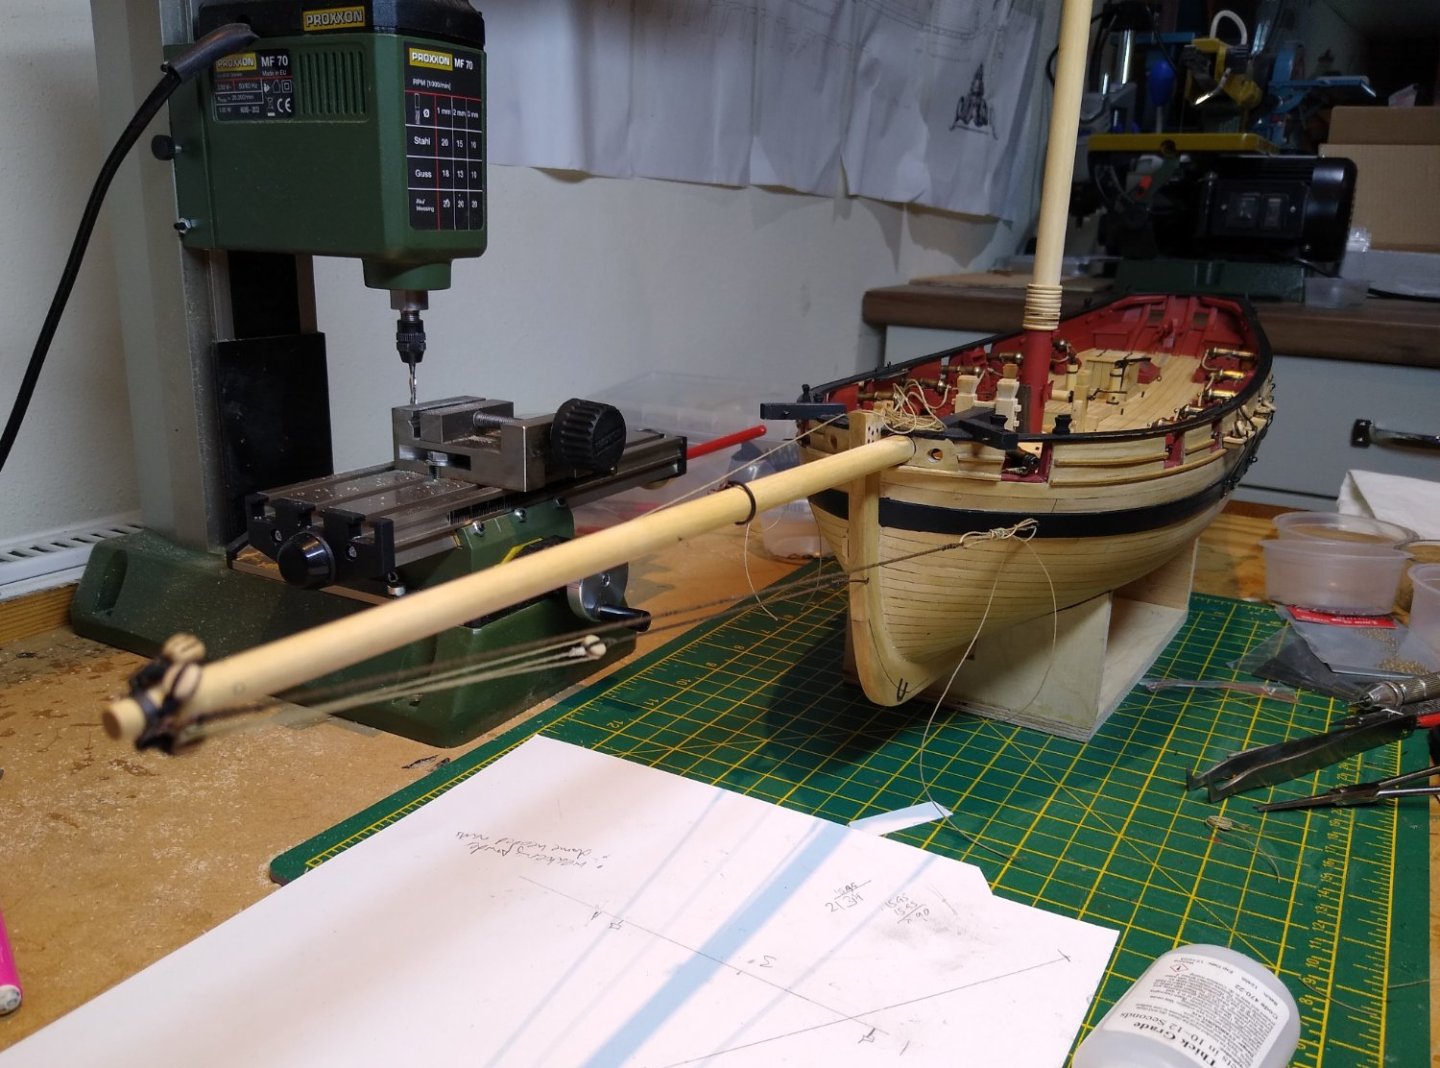
I'm on the home straight I feel.
All the best everyone.
Fred
-
I purchased the Hobbymill EU boxwood package for my Cheerful from Vahur and I cannot praise the quality of the wood and the machining highly enough (and the quantity - Vahur added a number of pieces over and above Chuck's woodlist to ensure I didn't go short as well as samples of his other stock). And Vahur is a very pleasant fellow. Highly recomended!
Fred Healey
-
Thank you Gentlmen for your very kind words which I warmly appreciate.
I'm nearly done with the woodwork and metal work: soon I can turn to the rigging.
The carronade carriages are assembled, painted and ready to rig. I tried painting the brass barrels, blackening them and blackening and lightly buffing them with wire wool and decided I preferred the blackened and buffed look.
The backstays are done and ready to fit.
The elm tree pumps are likewise done and ready to pin and glue to the deck. I can see I made a small error. The outlet pipe and pump handle should be a little closer together: say seperated by one face of the octagon rather than three. It means a small compromise. If I angle the handle out as shown on the plan the outlet would discharge onto the grating. In the result I have to position the pumps further apart than they should be. Its only a small thing and I'm not going to lose any sleep over it . It does show, though, that you have to study the plans like a hawk.
Here are some pictures.
.thumb.jpg.fbdf3cbb2d0a6d7c033a5d4fc27312bd.jpg)
.thumb.jpg.f6ac7786188d8e9791aeaaf564cb3e70.jpg)
.thumb.jpg.b0d82cd46614bd6aef0ee6c658994d83.jpg)
.thumb.jpg.59a2407c94626fb08f298f5c21049400.jpg)
.thumb.jpg.1b0db40eddd4833768532327d4eb2b11.jpg)
.thumb.jpg.60849dd3e3eed27f275cc991456c72cc.jpg)
I hope my next post will feature lots of rope. I'm really looking forward to the rigging.
I wish you all a happy and peaceful New Year.
Fred
-
You are a brave fellow to take on this monster as a first semi-scatch build. I tried and came up second best: though I'm planning to re-start as soon as I have finished Cheerfulno: as to which have you thought of that as a first semi-scratch build? Its just as challenging but not quite the marathon run Winnie is. You build whatever you want to build of course. I absolutely don't mean to interfere and wish you the very best.
Fred
- FrankWouts and Aceso
-
2
-
I love the last photo you posted. The lights look superb - absolutely in scale and creating a real "real ship" atmosphere. I can see the Captain and Lieutenants sitting down and plotting...........
All the best
Fred
- FrankWouts and scrubbyj427
-
2
-
That is a beautifuly executed floor to the captain's cabin and you are absolutely right to say its your Winnie and you get to make it just as you like it. Upon any view its going to be a super build.
All the best
Fred
- Dave_E, FrankWouts and glbarlow
-
3
-
Greetings everyone from Cornwall - and I hope you all had a very happy Christmas.
We hear on the news that half of New York State is under 10' of snow with many houses without power. If you are affected then I hope things are not too bad and that better times are not far away.
I've been plodding on quietly with Cheerful. For anyone yet to build her and thinking of a next project I can highly recommend this lovely little craft beautifully put together by Chuck/Syren. Incidentally I purchased the boxwood from Hobbymill EU: they provide the complete wood package ready cut; and lovely stuff it is. Highly recommended.
Here are some pictures of the present state of play.
I re-cut the bollards with my new mill. Much better than my earlier freehand versions.
.thumb.jpg.1bf6202279dd6abf1f85960c71434fca.jpg)
.thumb.jpg.12b5be1b6ad7b3d9e487df966d69f71f.jpg)
A bit of a shame to paint the mast but I went with the convention/realism in the end.
.thumb.jpg.40f6013deaa8e782e44047513c33e593.jpg)
Mast and spar making. My first go. I followed the regular instructions: 7/10/7, planing down to an octogan and then turning in the chuck of a drill. All came out acceptably well.
.thumb.jpg.74aba8632b029fc47ccb530ac4036f41.jpg)
.thumb.jpg.8c049ef0cc30bf26a4f5937edf89e3cc.jpg)
I decided to turn another mast coat. I cut the other one in two and used it for that bit 5' or so up the mast. I have no idea what it is called.
Full Color 2023 MSW/NRG Calendars Now Available For $12.95 In The NRG Store
.thumb.jpg.f7eb81b8624815cad29ba12a370fa0b5.jpg)
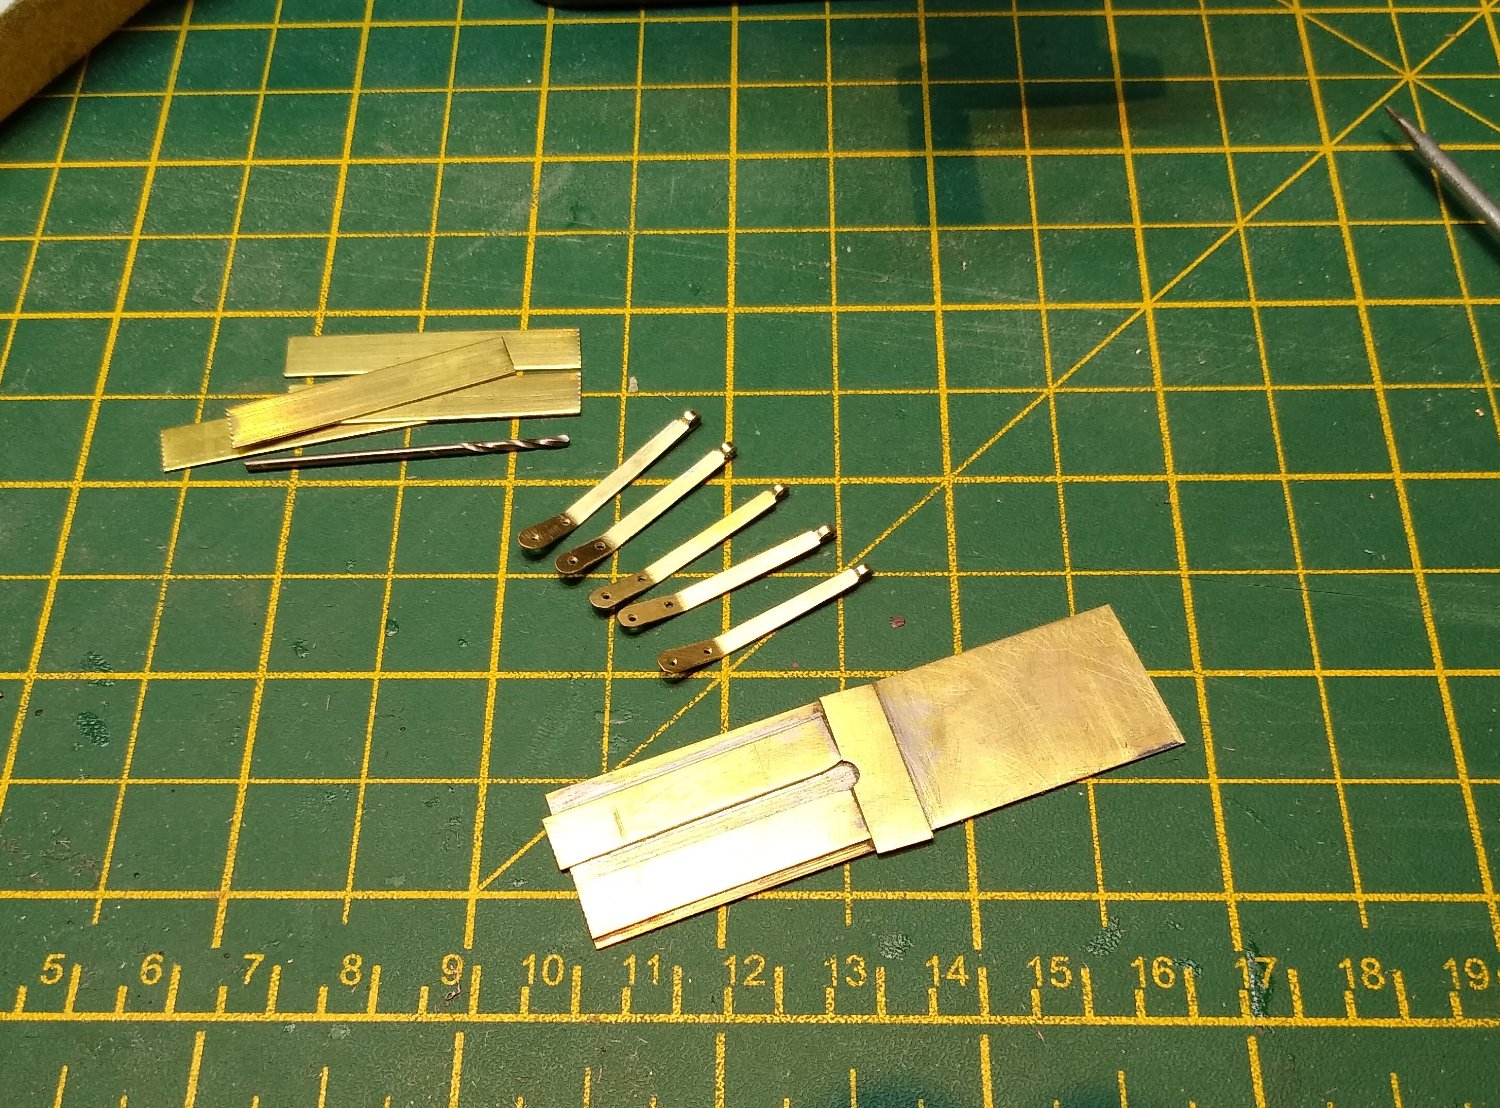
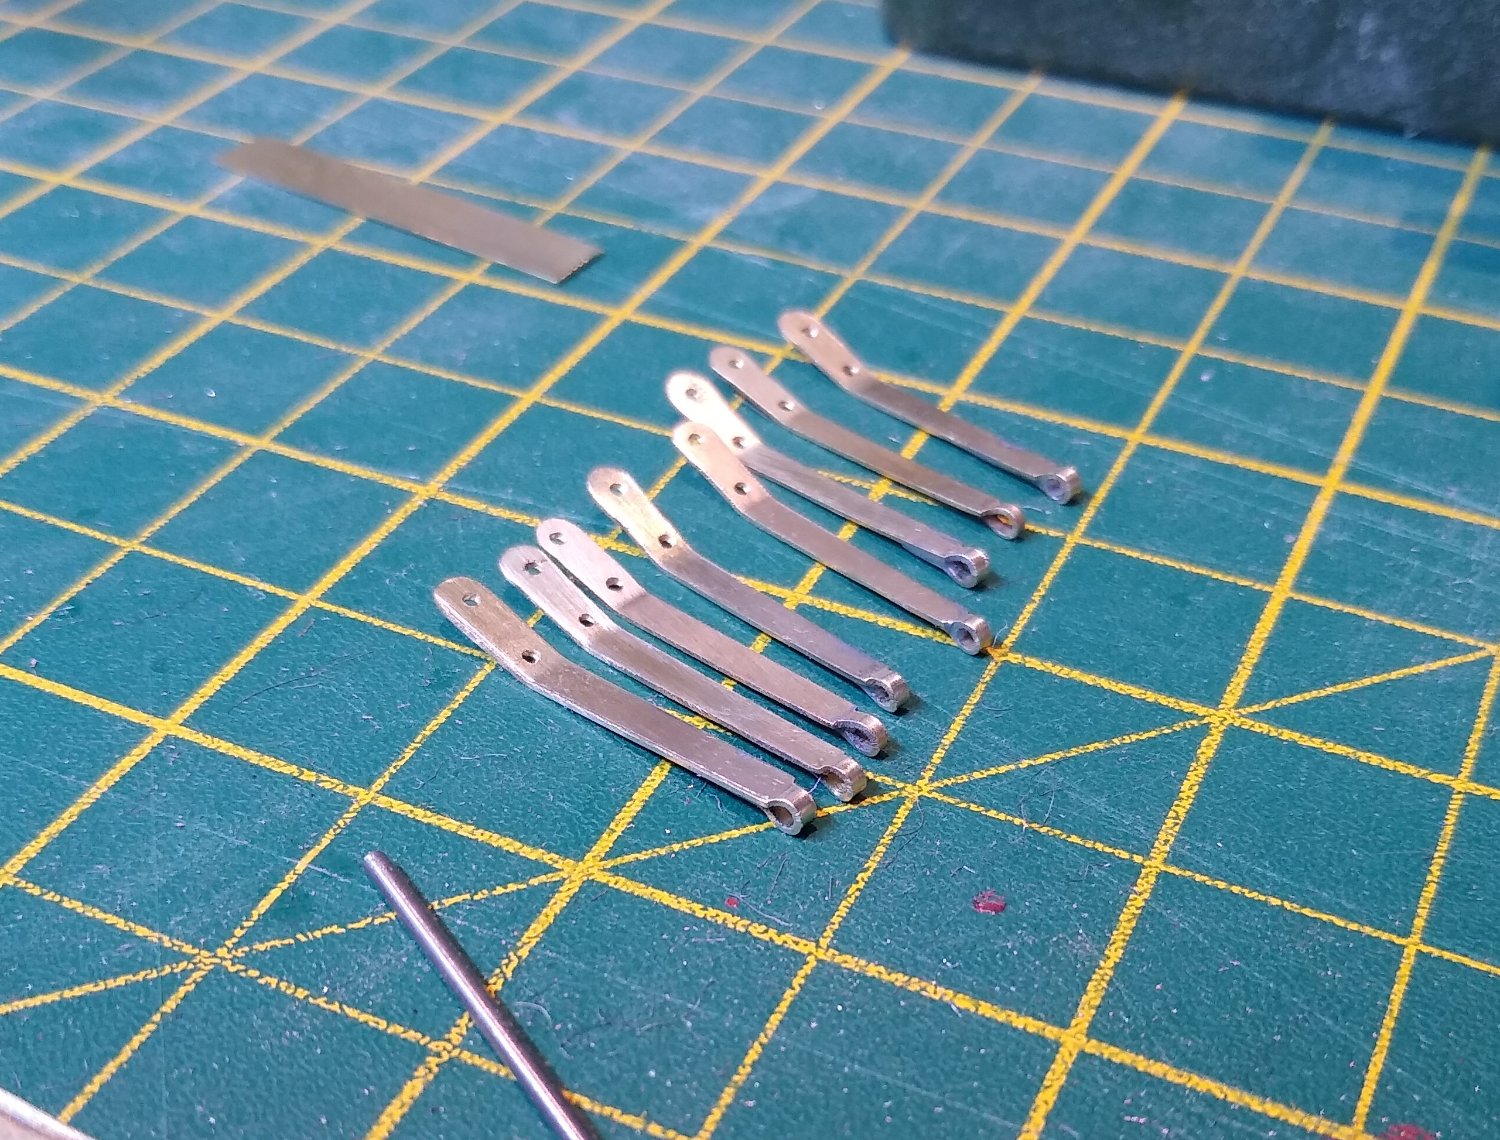
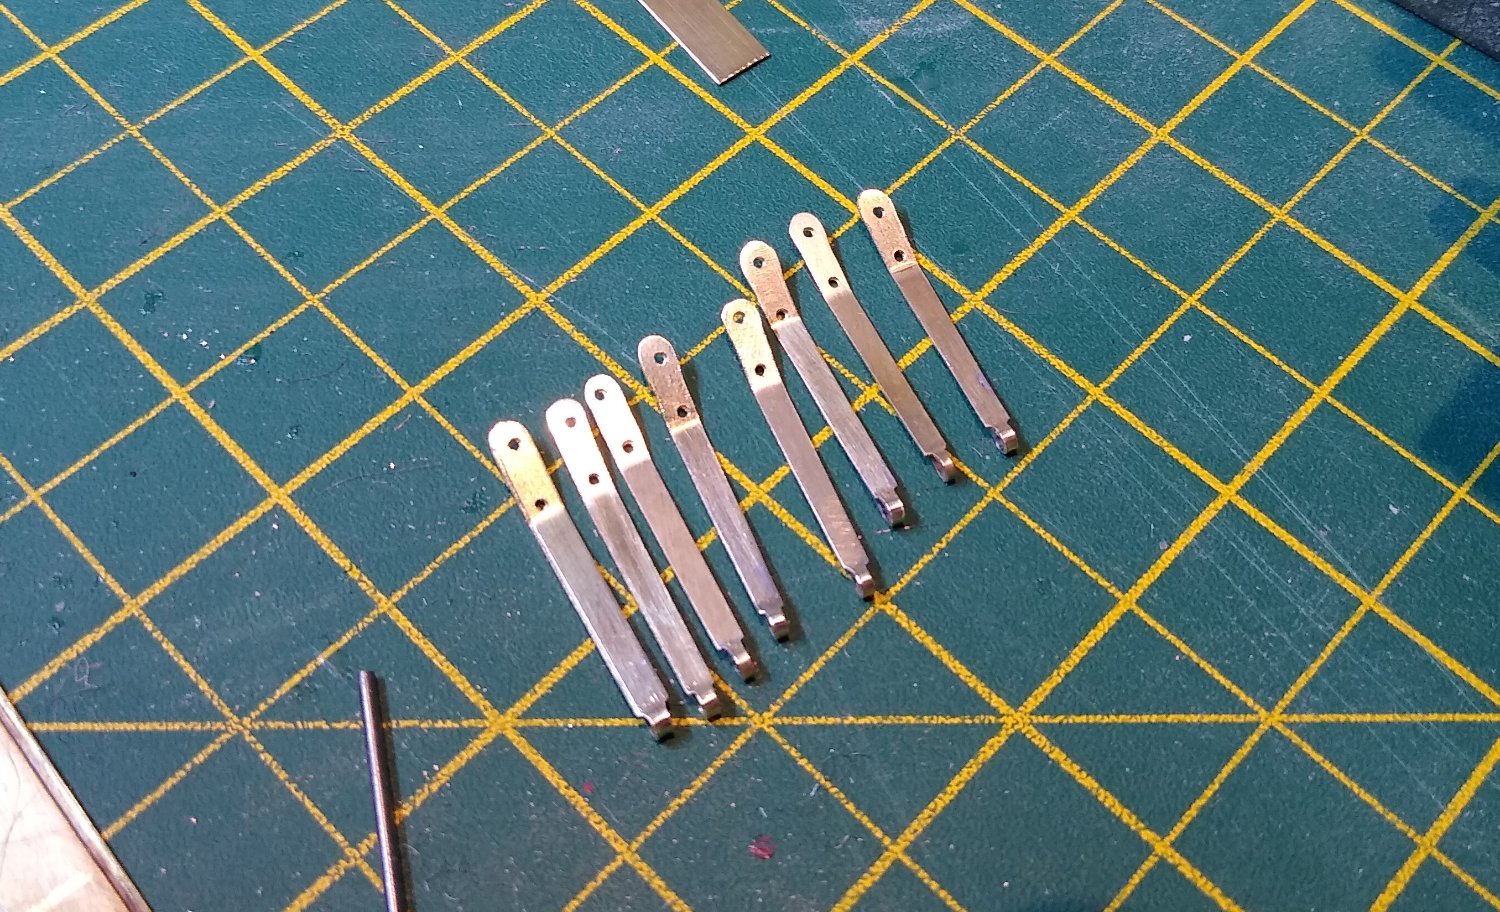
Here are the channels filed down from brass sheet. As ever making one is not too difficult. Making eight reasonably the same is trickier. I made a not quite but nearly jig to help and they are OK

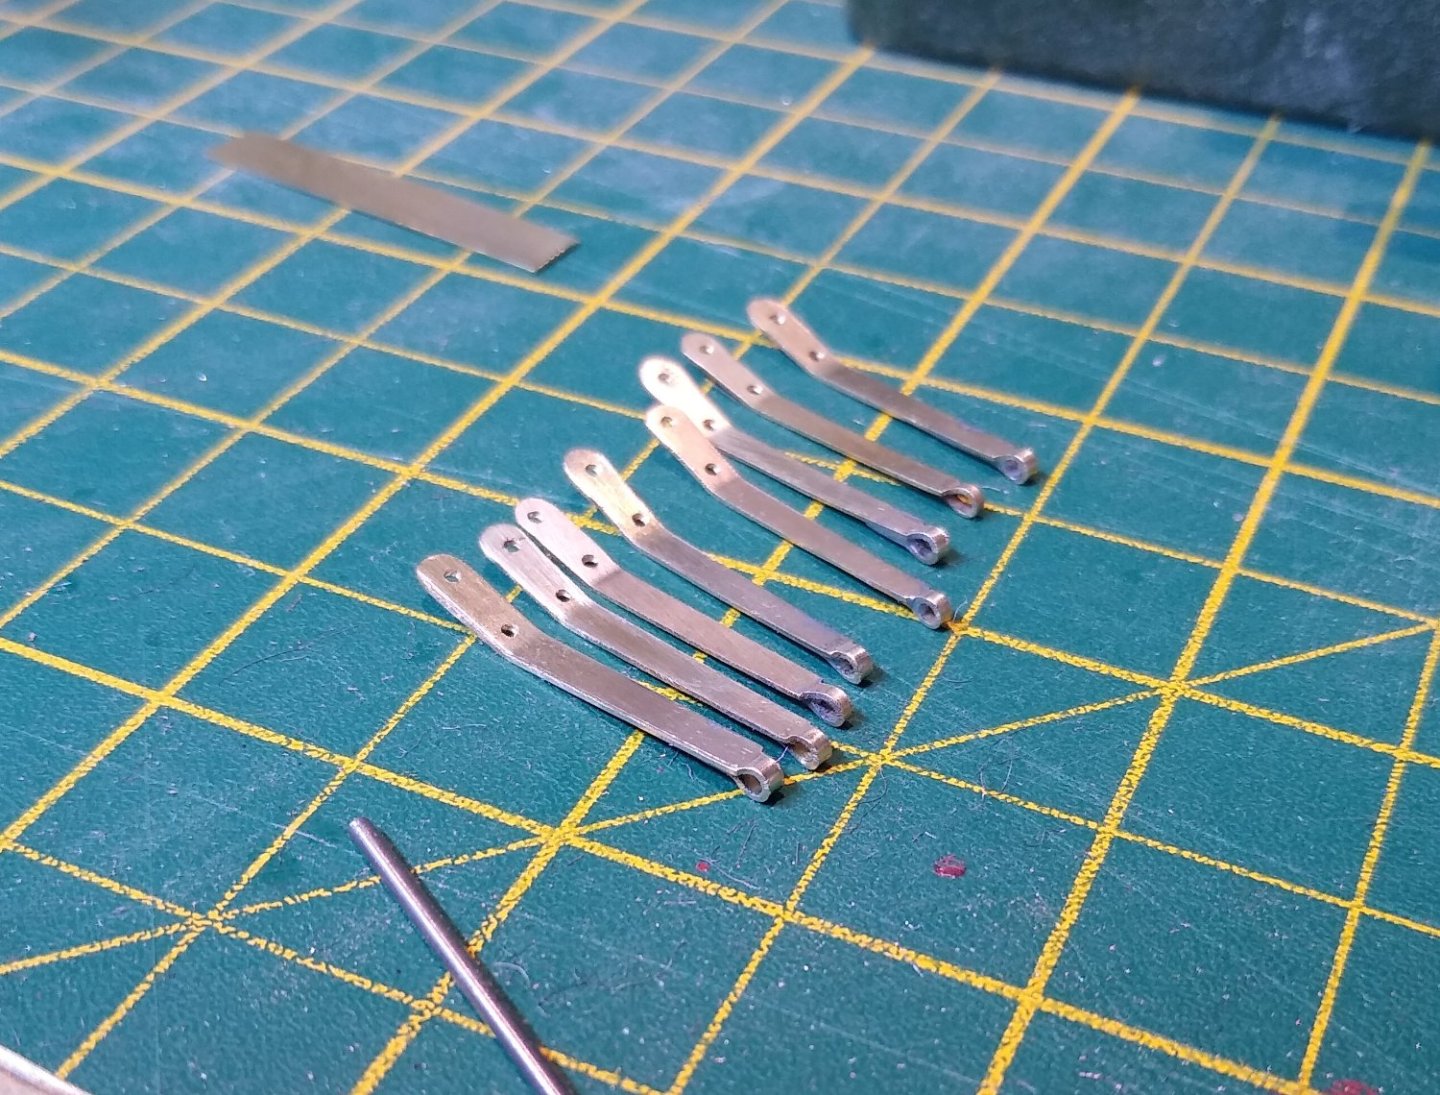
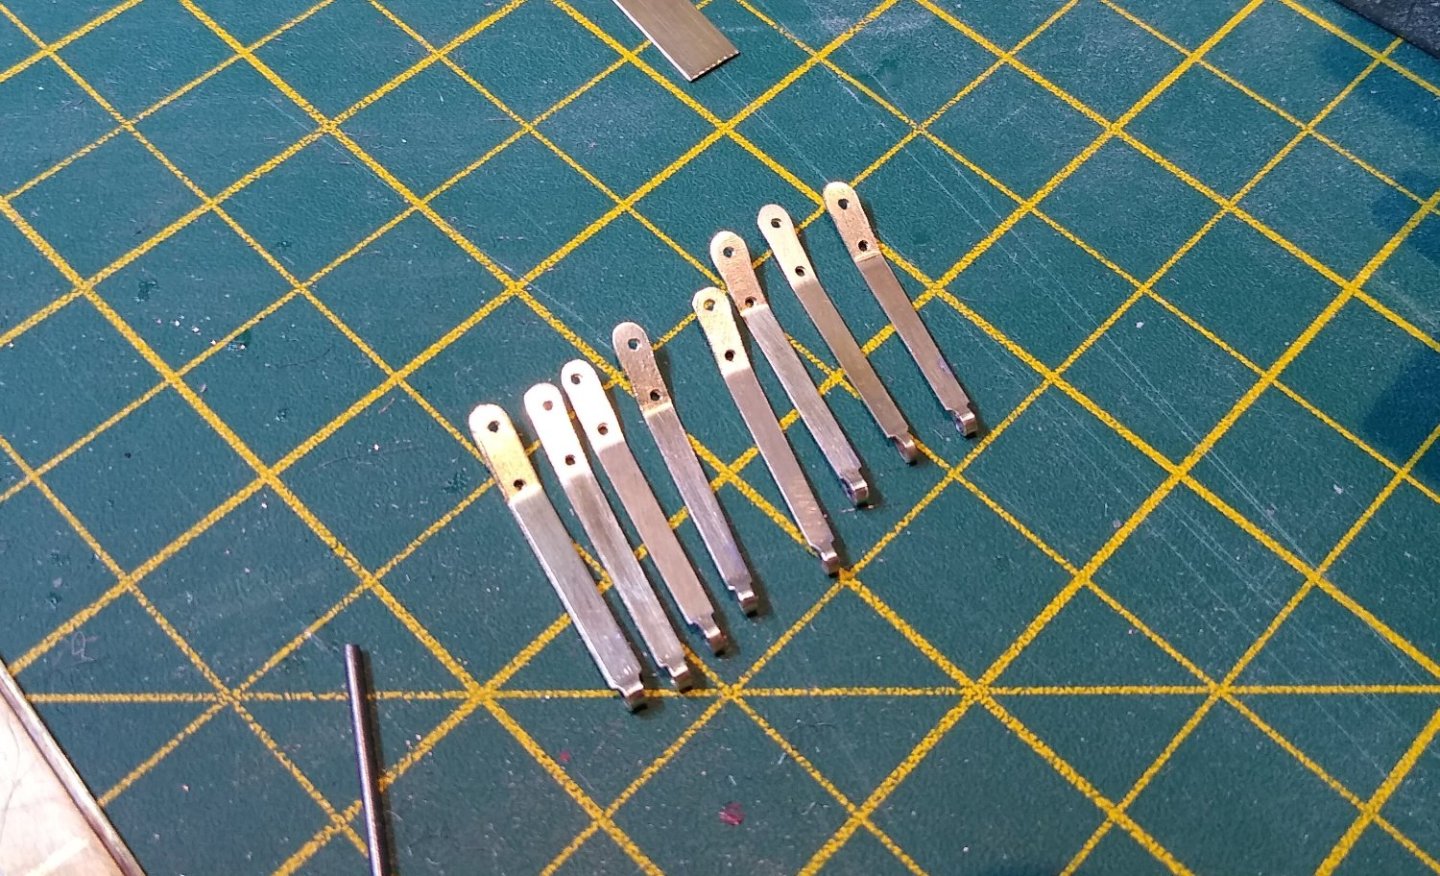


There seem to be a lot of small jobs to do but I hope to start the guns and rigging soon.
Happy New Year All
Fred
- ccoyle, scrubbyj427, Ainars Apalais and 12 others
-
13
-
2

.jpg.896b49f5cafe097a28bf0da981d578d7.jpg)

.jpg.a6528d612f0961c6d5c882460c89e296.jpg)
.jpg.1e1ec65c6a49c298b2840fe9b3f388f2.jpg)
.jpg.a8127b6dde3fe5fe45019e4e3f8a8dac.jpg)

.jpg.683fcea11b7f97899e06c47c98012d28.jpg)


.jpg.72506ea5d11a5d294ff90e4dbb098542.jpg)
.jpg.15599c96b0a58020542f03eb0cfbf49e.jpg)
.jpg.2c1dac9996a0c85ff49dcc4122f0bc2e.jpg)
.jpg.b961719f91343156ac8ce3f5657d249d.jpg)
.jpg.4d19ffc17e0dd9519459b8213286d438.jpg)
.jpg.30a6acdf747b13c1c9f84d76dd1dbf5d.jpg)
.jpg.932fa5541efa1745c6517a9d68be0de7.jpg)
.jpg.13cf56e3c64e23542ad22d0a56b3e6a6.jpg)
.jpg.3a6b57db0ffc69946cf5c3c075270f75.jpg)

.jpg.4f6b43ec6678b847e17494cf43f08705.jpg)
.jpg.67f93d1eb682108922b8f35355fe5aea.jpg)


.jpg.7c8fee91521676ad577ec1074368ebaf.jpg)

Sloop Speedwell 1752 by Chuck - Ketch Rigged Sloop - POF - prototype build
in - Build logs for subjects built 1751 - 1800
Posted
Are you still thinking limited edition or have you come round to the view that 100 kits will leave an awful lot of disappointed would-be Speedwell builders? Then again, I suppose, there is only one of you....
Best wishes
Fred