MORE HANDBOOKS ARE ON THEIR WAY! We will let you know when they get here.
×

Bossman
-
Posts
283 -
Joined
-
Last visited
Content Type
Profiles
Forums
Gallery
Events
Everything posted by Bossman
-
 Kathy, she is a beauty of a model. Nice work!
 -
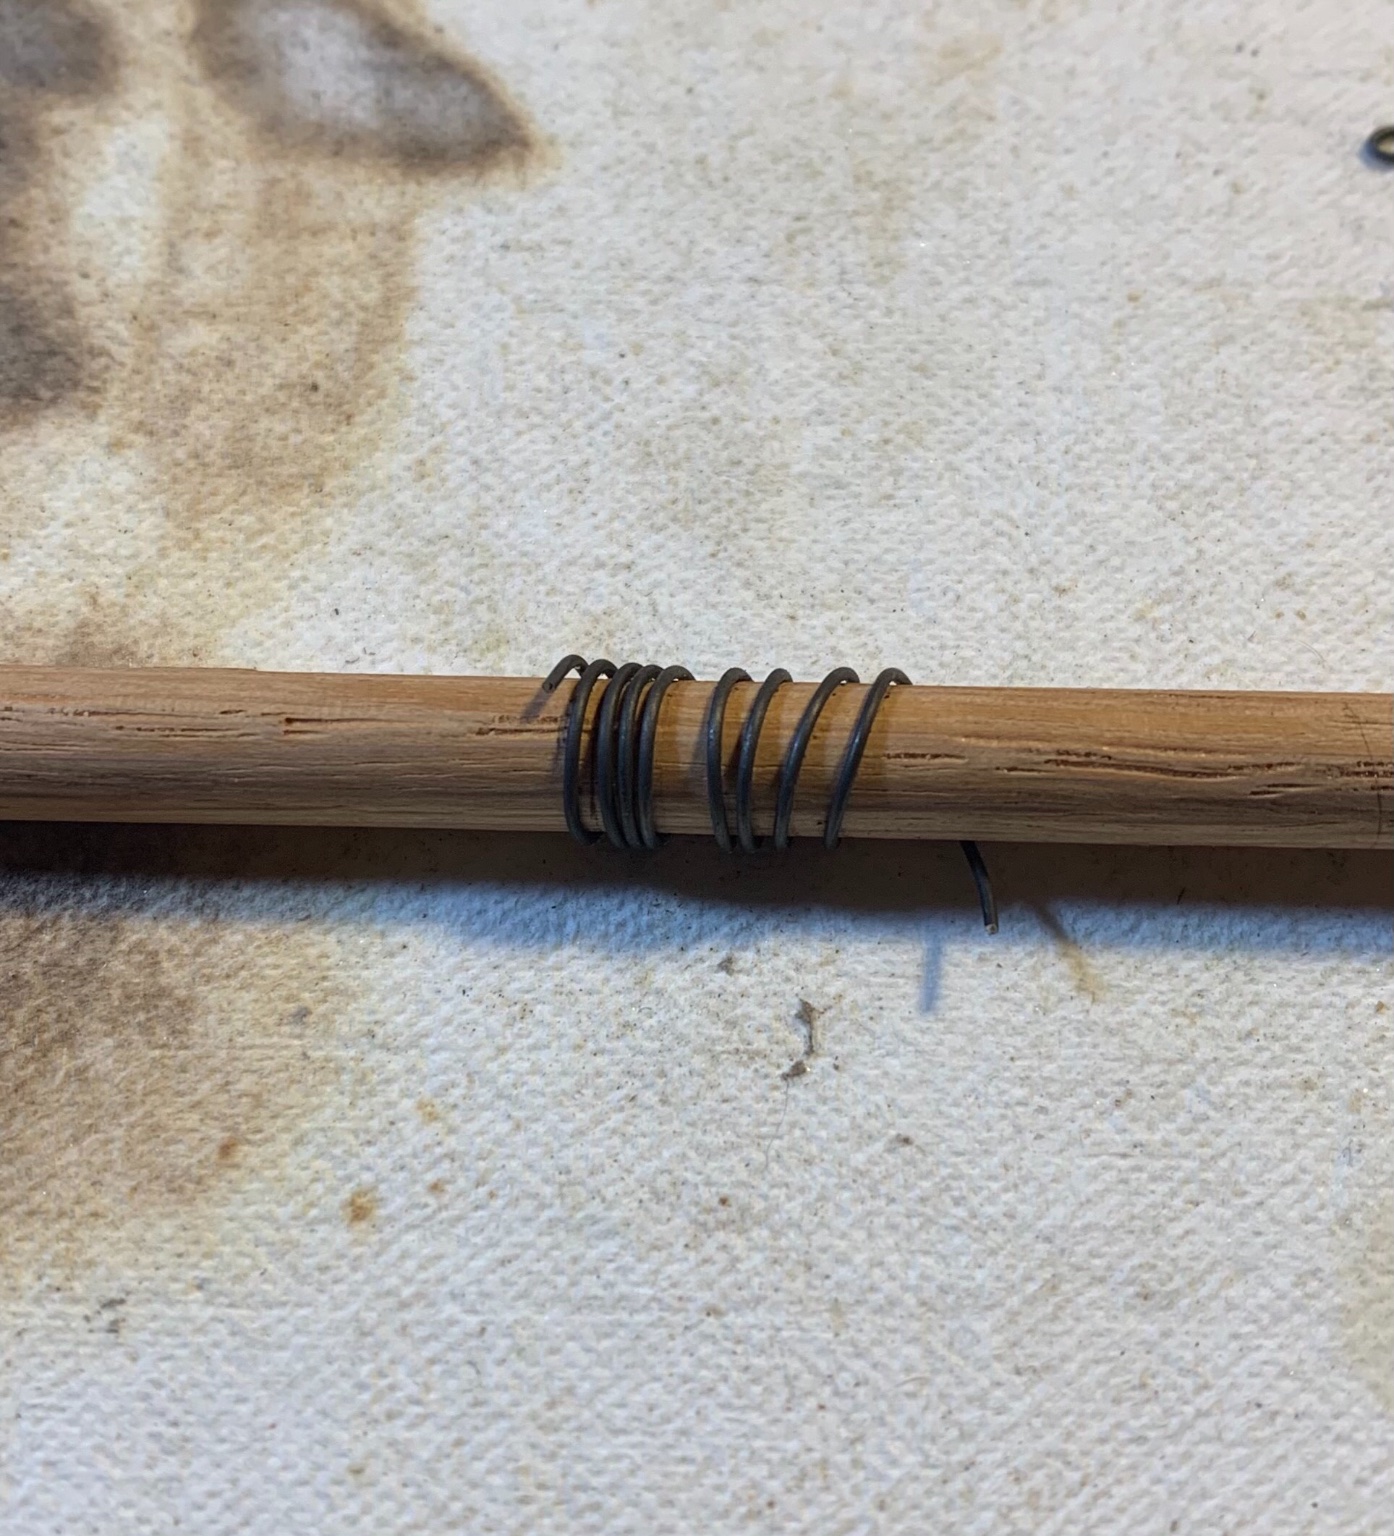
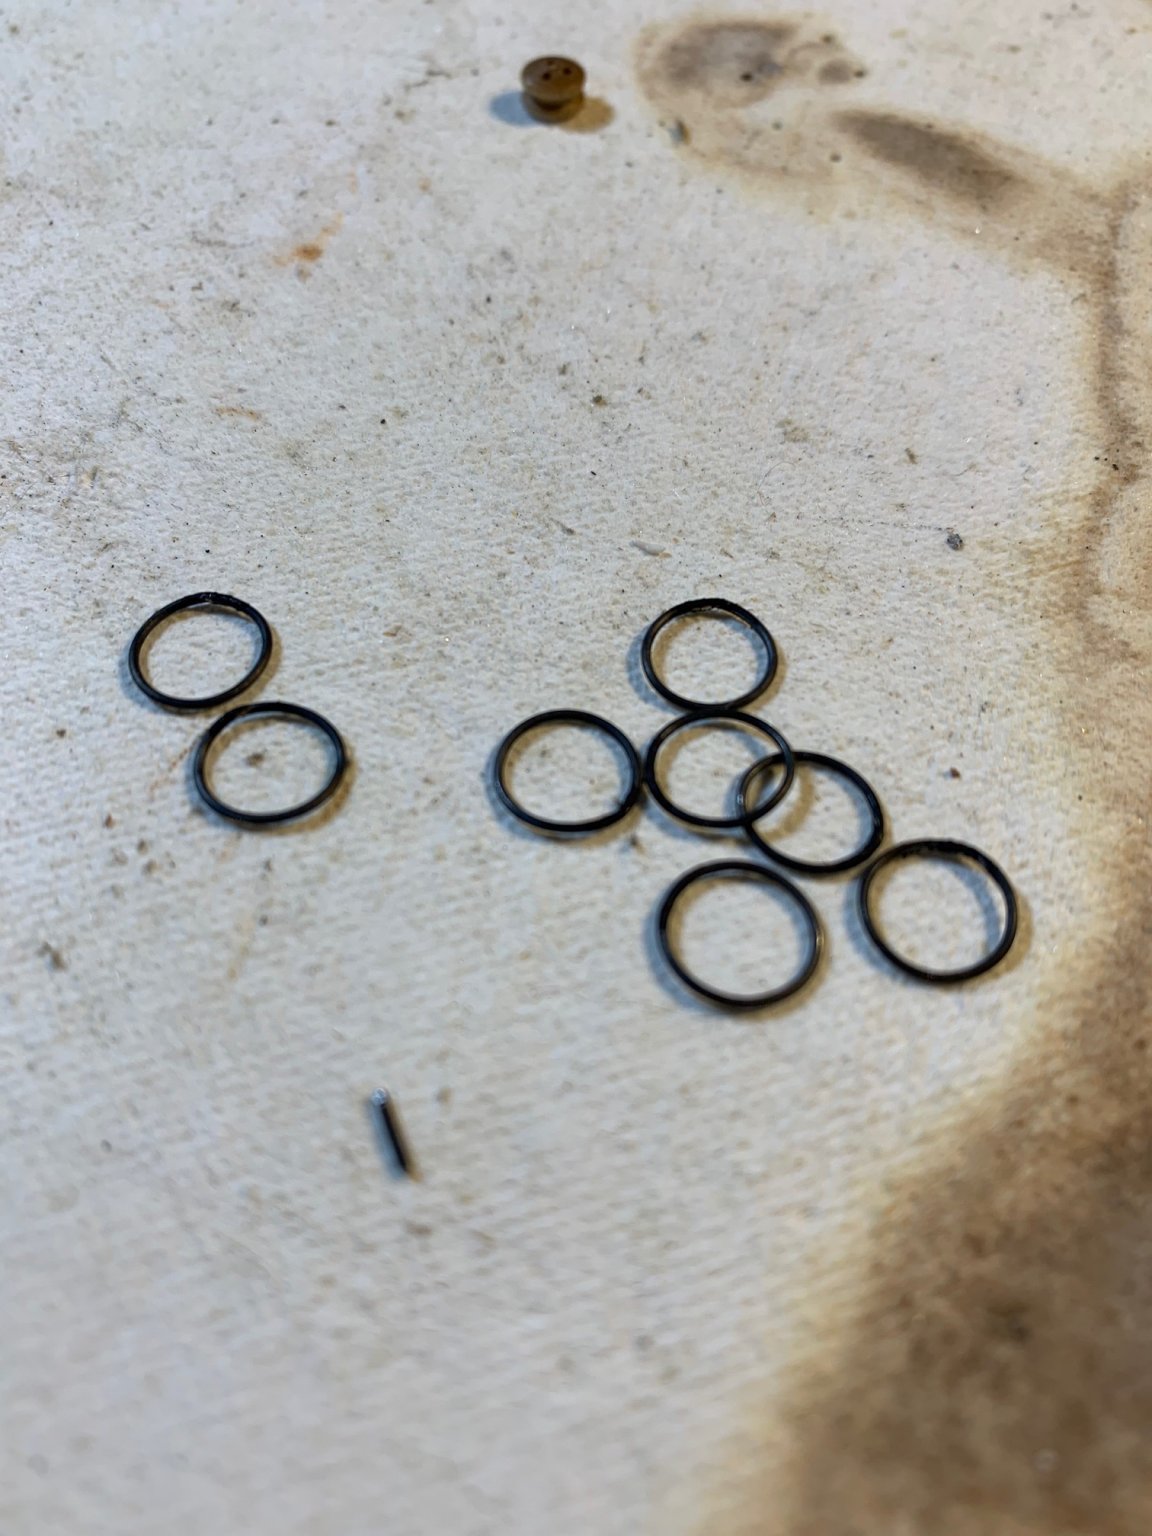
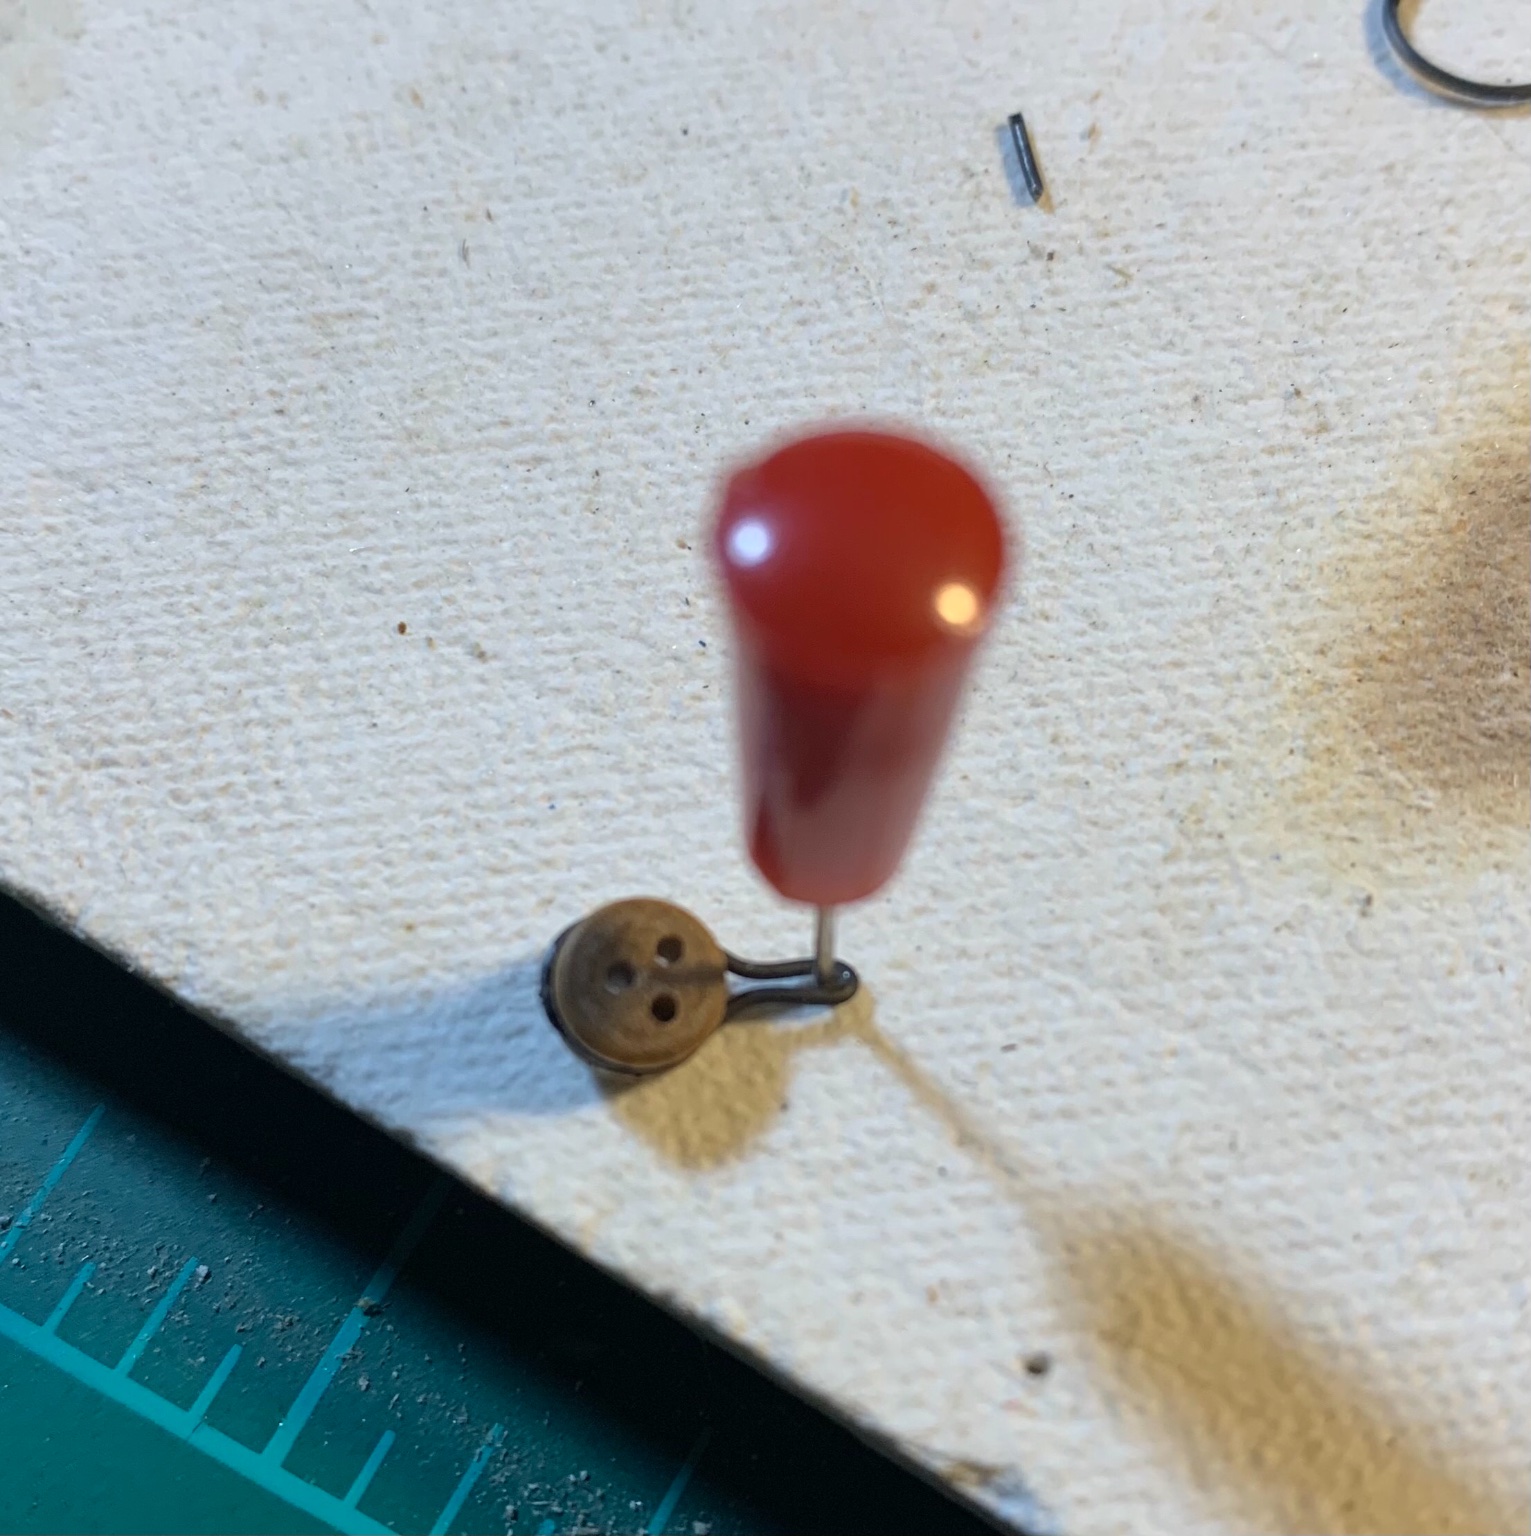
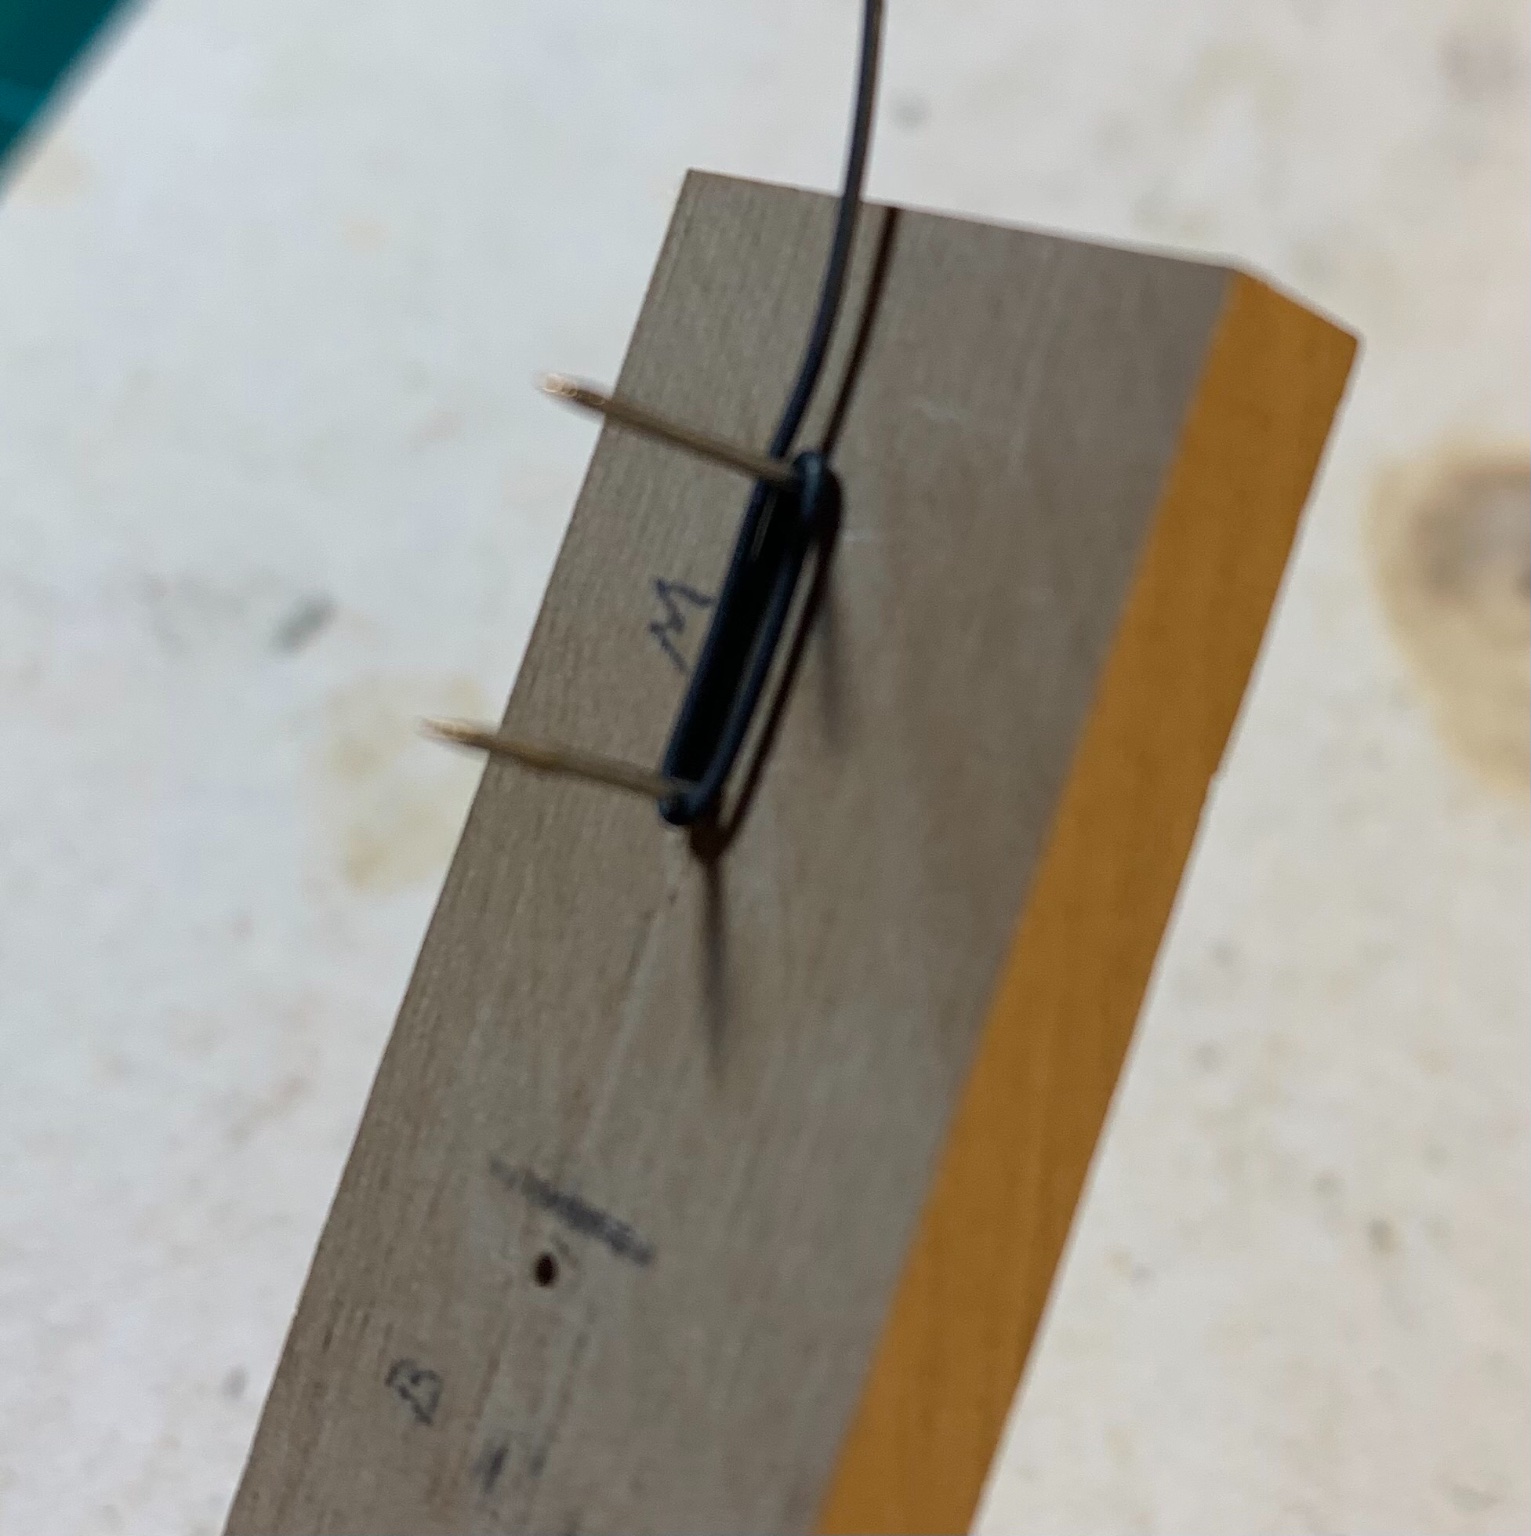
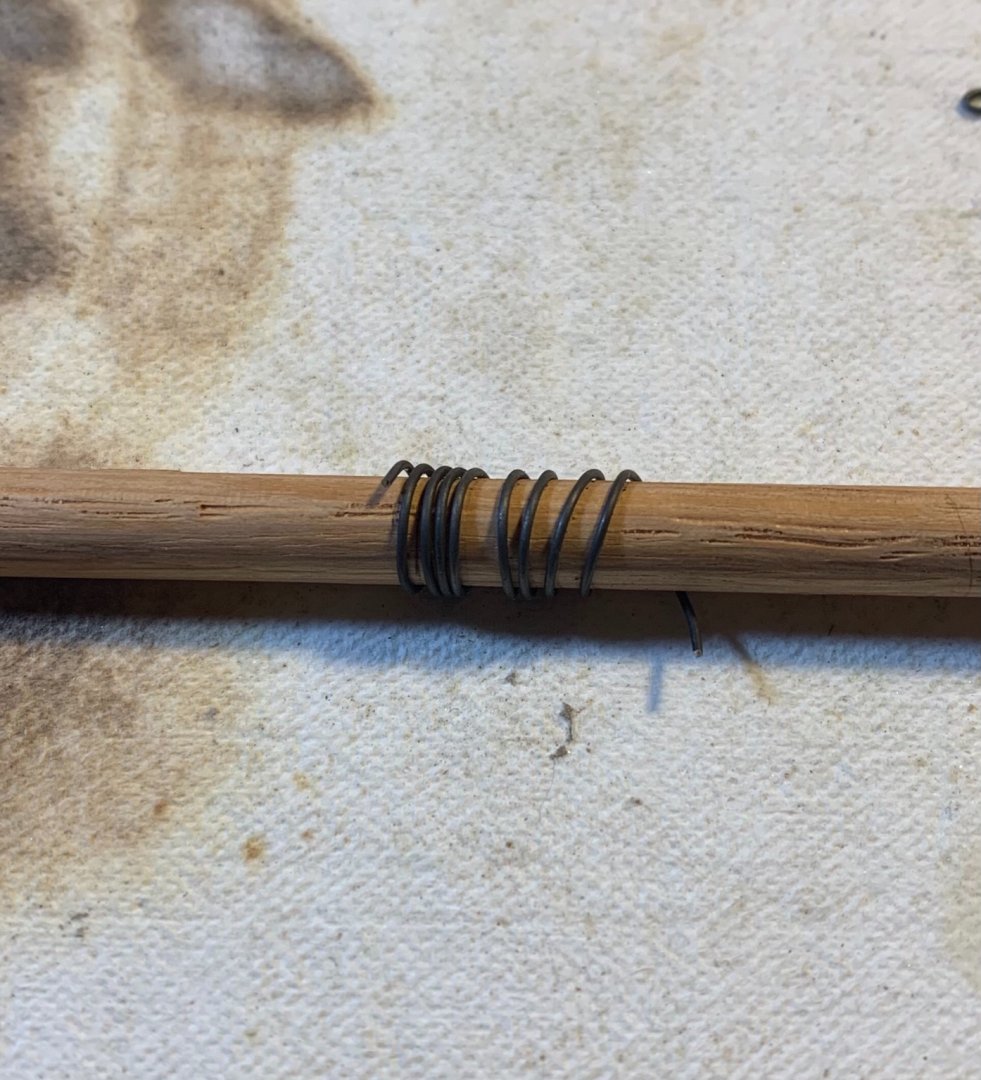
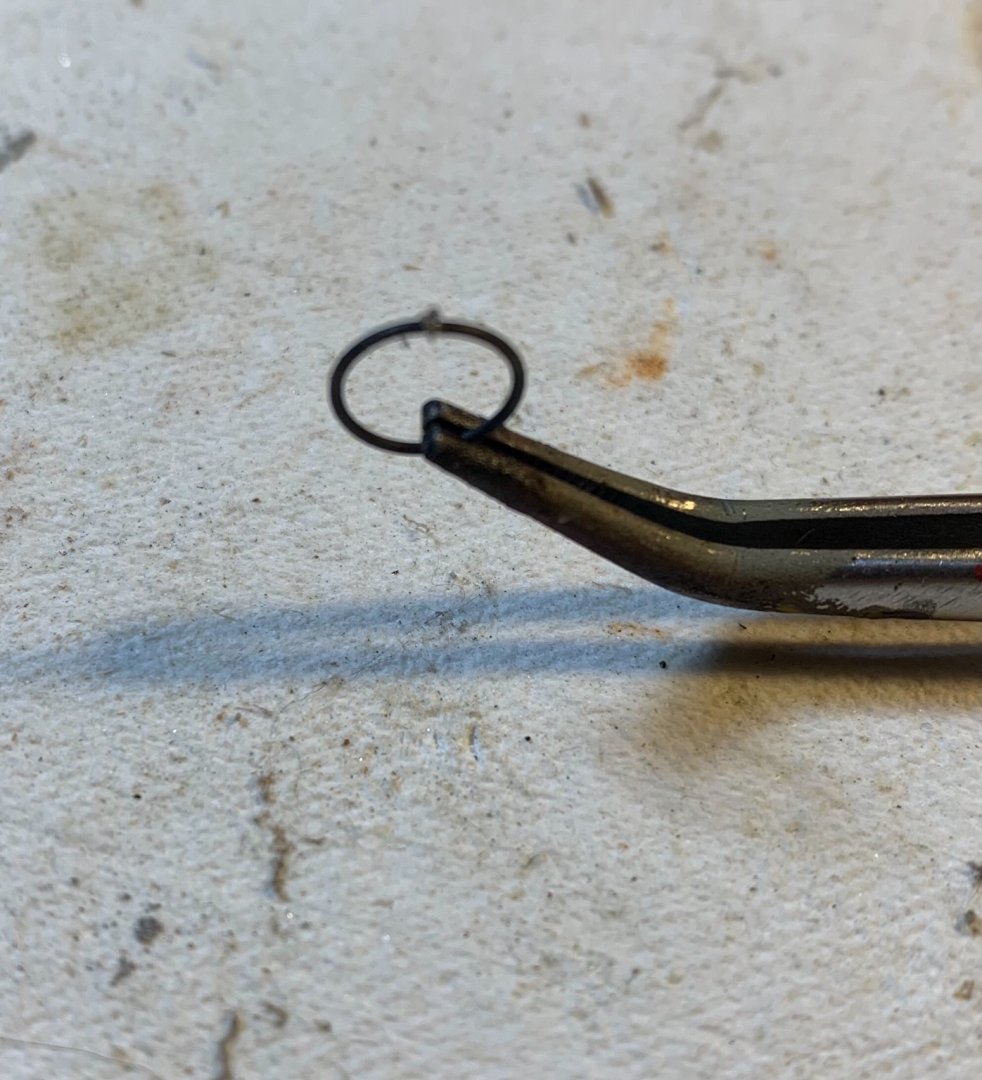
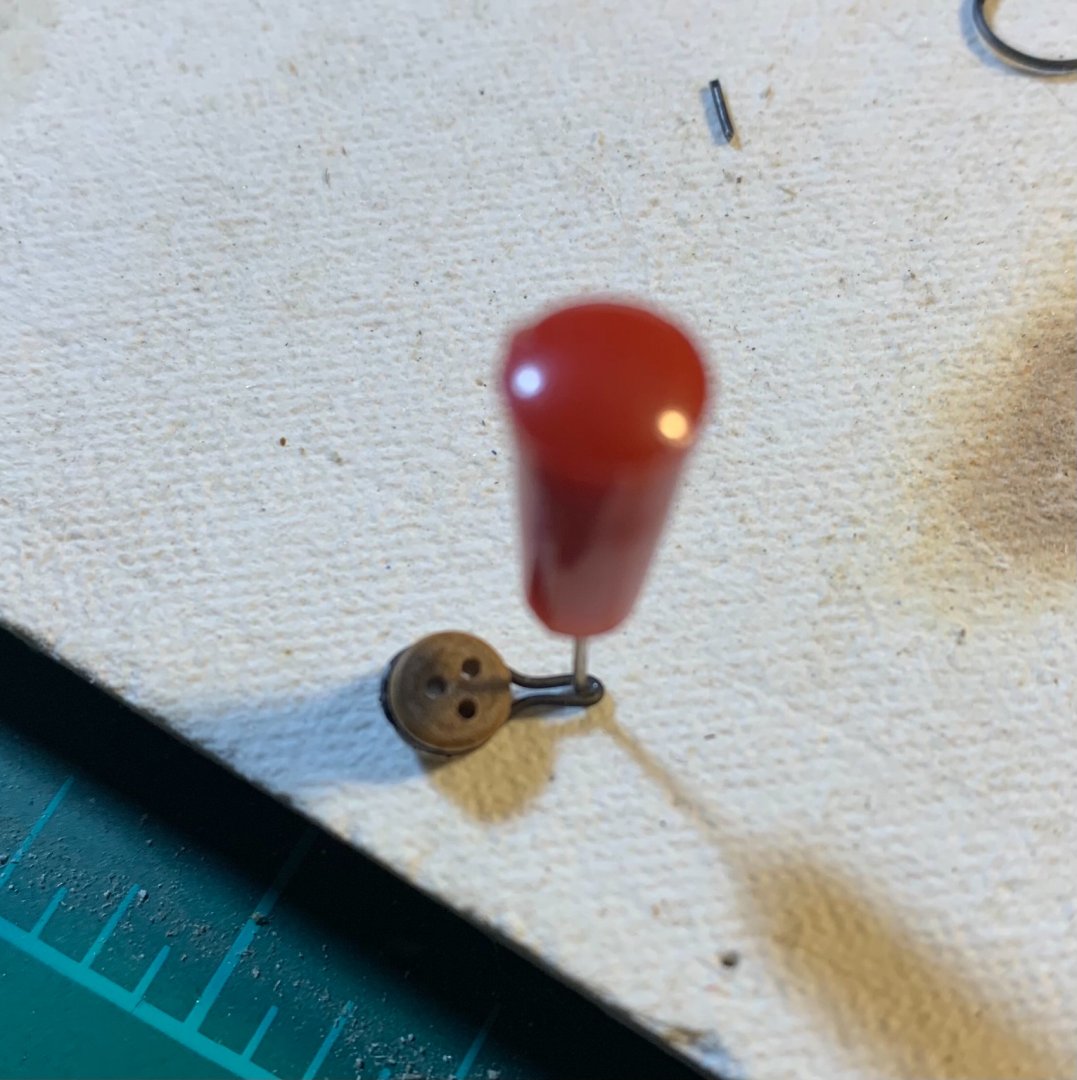
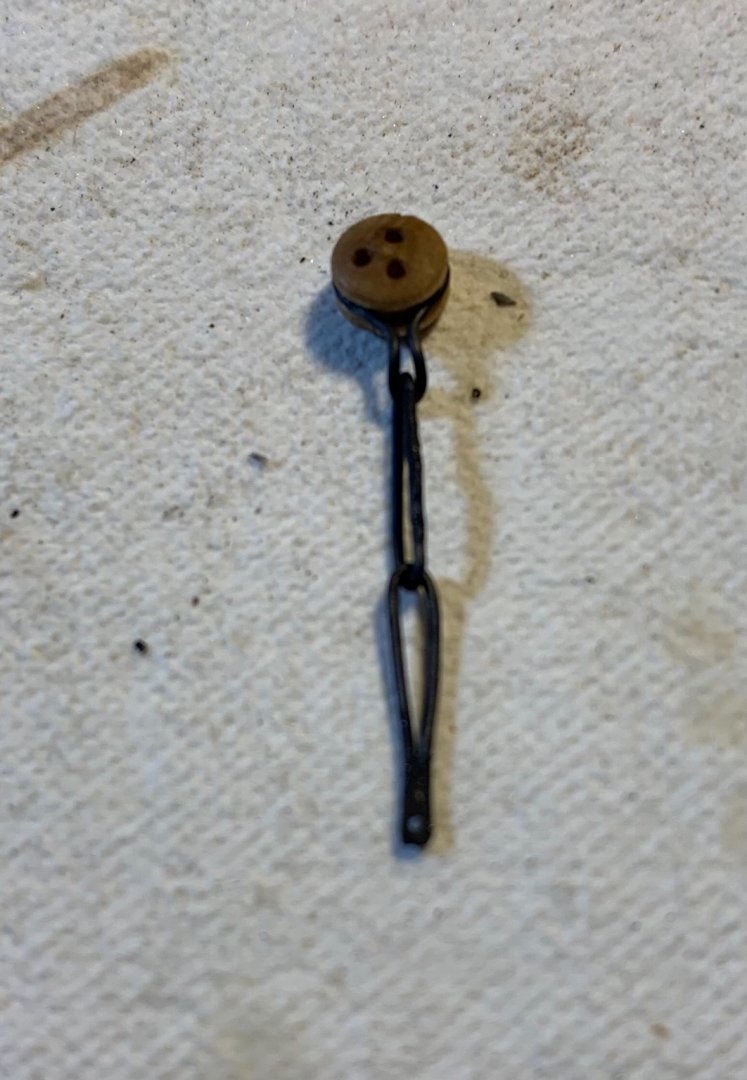
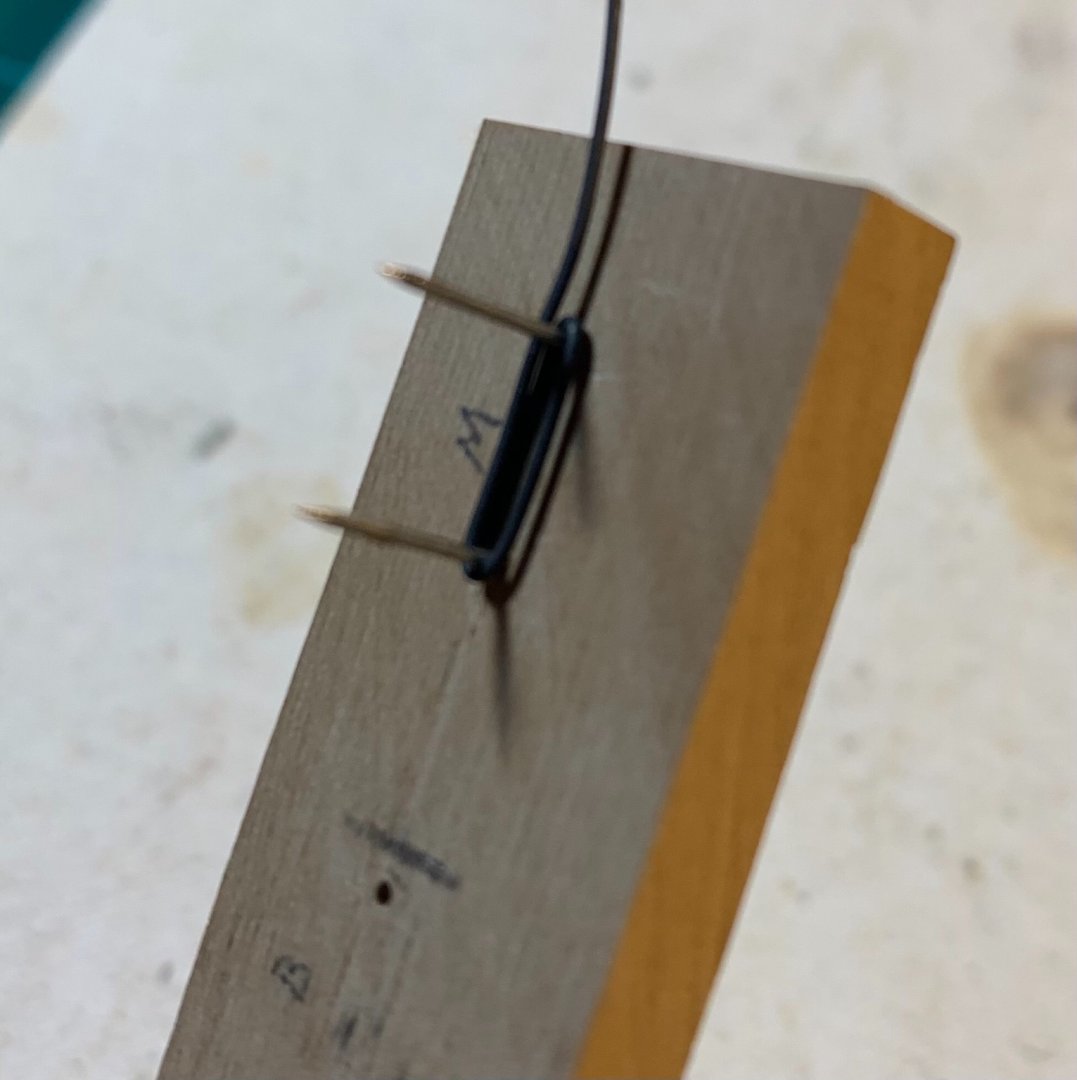
Thanks to all for the likes! They keep the fire going. I have thought for a long time about the photo etch chains provided for this kit. While they will likely be ok, I have decided to go with black annealed wire. There is a tutorial here by Russell Barnes that is very good. I would provide the link but I am technically challenged. If you search it, it will come up. Using his tutorial and the paste he uses, you can achieve a very solid silver soldered joint. I used a 1/4” dowel to make the deadeye rings. The pictures are self explanatory. In the second pic you can see the dab of solder paste on the joint. The joints must be flat with no gap. The middle link is formed between two pins as shown here. This is the final link to be soldered in. The bottom link is formed with both cut ends on the bottom. I then filed the inside bottom edges flat and squeezed together to solder the bottom 1/8”. The end is flattened on a steel bar and the hole for the toe plate drilled. And here is the finished product after touching up with paint.


- 127 replies
-
- 7
-

-
- confederacy
- model shipways
- (and 1 more)
-
Marc, your research and skills are producing a real masterpiece. Beautiful!
- 2,672 replies
-
- 5
-
-
- heller
- soleil royal
- (and 9 more)
-
Bruce, as to fully rigging the cannon I would say it is totally up to you. It does add a few weeks to the total build time. Wether it’s worth it is your call. May I suggest, if you do, spring for some different blocks other than those supplied. I used Syren blocks and was very pleased with them.
-
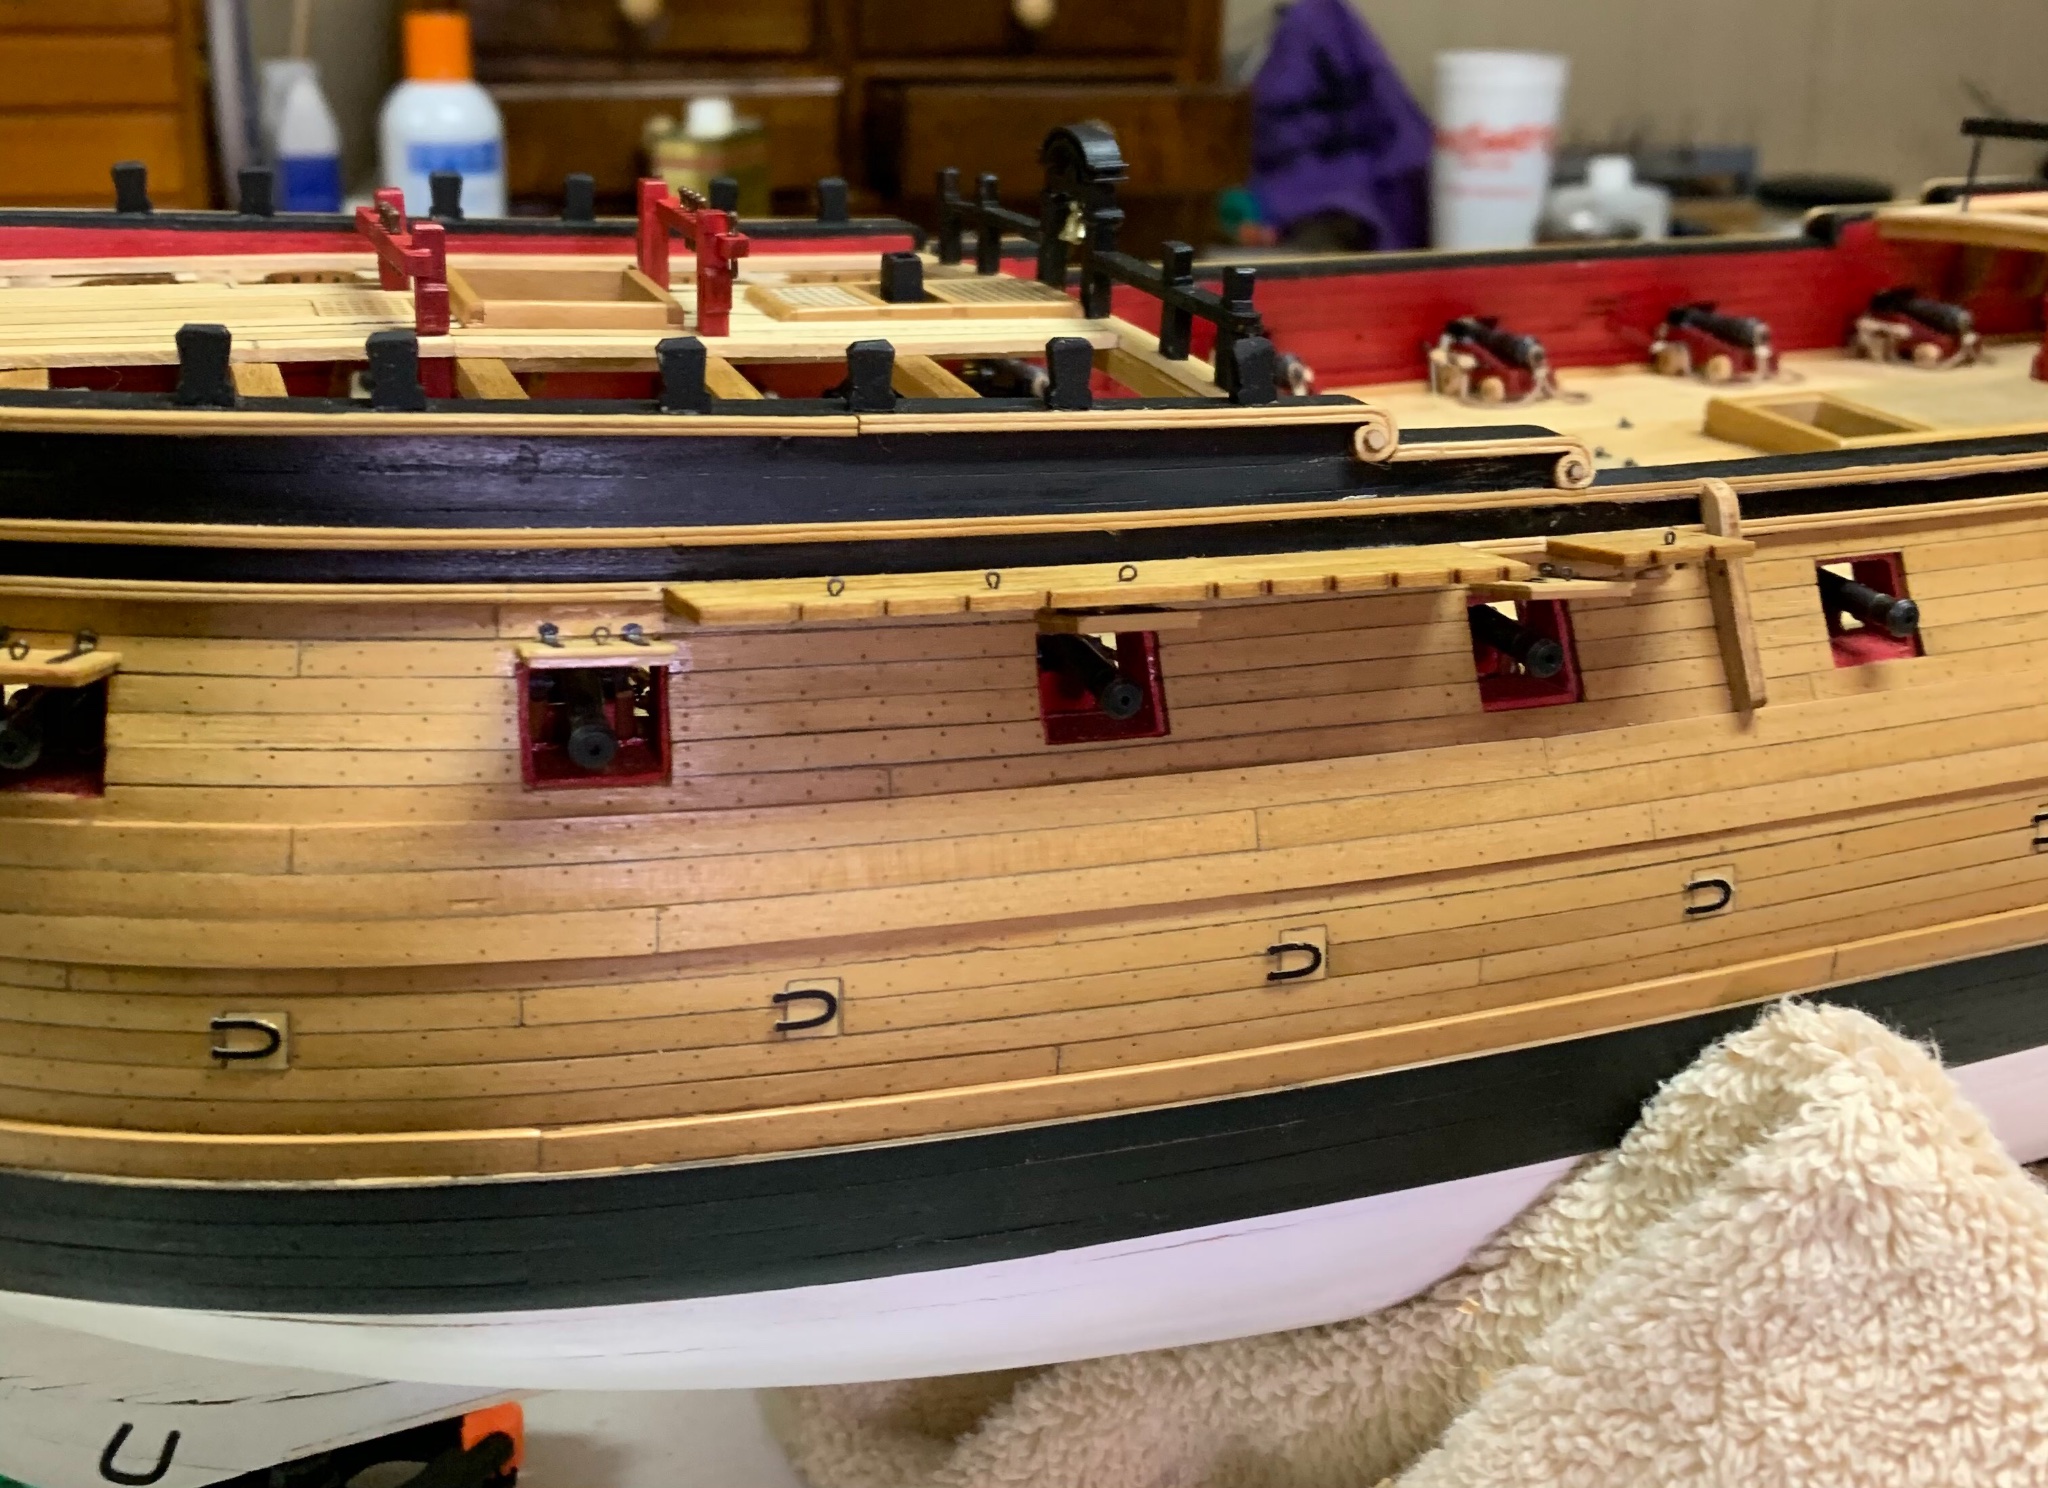
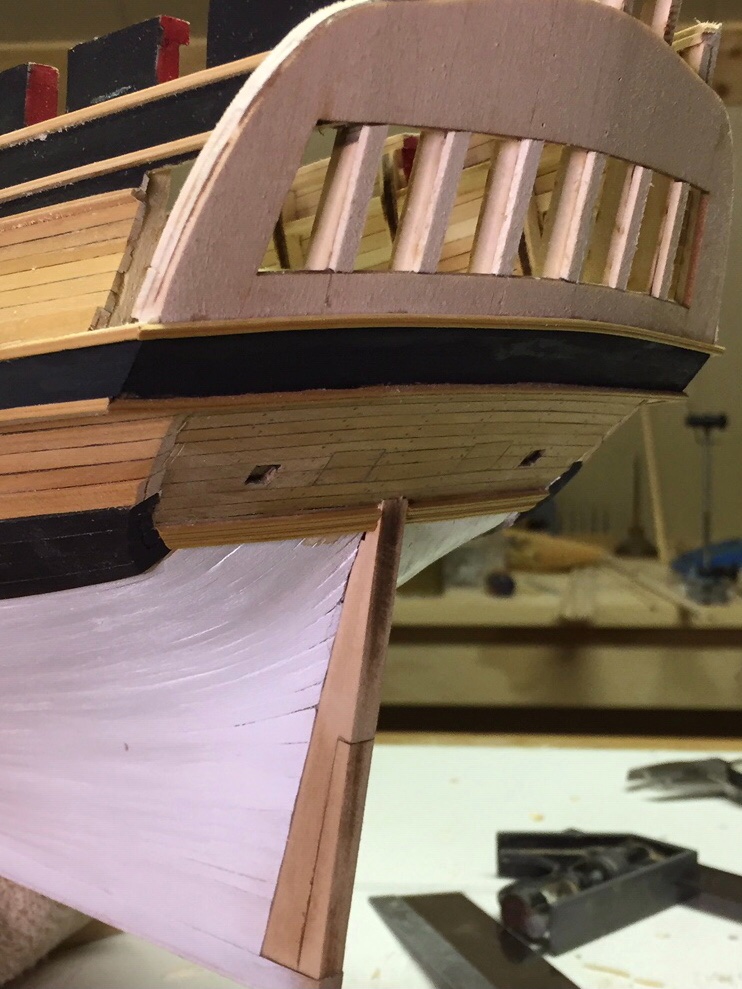
Continuing on the starboard side with gunports and chain wales. I. Will mention that the directions call for leaving the tabs on the hinges to attach the ports. This seems way to fiddly for this child. I used a piece of annealed wire to attach the ports. The stub masts are being built on the side. The parts list for the main mast list a 7/16” dowel for this. The mast partner, if I am using the correct term, has an inside diameter of 1/2”. The plans show the mast being 1/2”. So, a trip to the local hobby store for a 1/2” poplar dowel solved that problem.

- 127 replies
-
- 10
-
-
- confederacy
- model shipways
- (and 1 more)
-
Gary, it looks as though you only have 5 planks above the upper wales if my judgement is right. The upper wales are just below the gunports. Does this pic help?
- 370 replies
-
- 2
-
-
- Model Shipways
- Confederacy
- (and 1 more)
-
Gary, I am away from the shipyard for a few days so can’t look at plans or my ship. Your bottom plank looks correct. It seems I had a similarly quandary. If you check where the quarter gallery pieces go that form the opening, that will be your guide. If the two that form the opening for the window have a plank to attach to, your good to go. I’m going from memory here so take this with a grain of salt, Mark
- 370 replies
-
- 1
-
-
- Model Shipways
- Confederacy
- (and 1 more)
-
How to stain or dye boxwood?
Bossman replied to tkay11's topic in Painting, finishing and weathering products and techniques
Ditto to Minwax. -
Gary, this just came back to me as to “why” I alternated port and starboard a few planks at the time. It helped me make sure gunports and the stern areas were where they should be. On the sweep ports. The horseshoe hinge covers most of it and those ports on the Confederacy “could” have been made in two pieces. No one can prove you incorrect. Mark
- 370 replies
-
- 1
-
-
- Model Shipways
- Confederacy
- (and 1 more)
-
Johnny, your example is the way I have always done them. I’m not positive but I think the rat lines would start above the seized shrouds. Looking good!
-
Gary, I did the wales and blackstrake on both sides. After that I would do 2 or 3 planks on each side.
-
Looks very nice Gary. Once sanded and finished she will look great.
- 370 replies
-
- 1
-
-
- Model Shipways
- Confederacy
- (and 1 more)
-
Thank you Sir! Coming from you, I call that high praise.
- 127 replies
-
- 2
-
-
- confederacy
- model shipways
- (and 1 more)
-
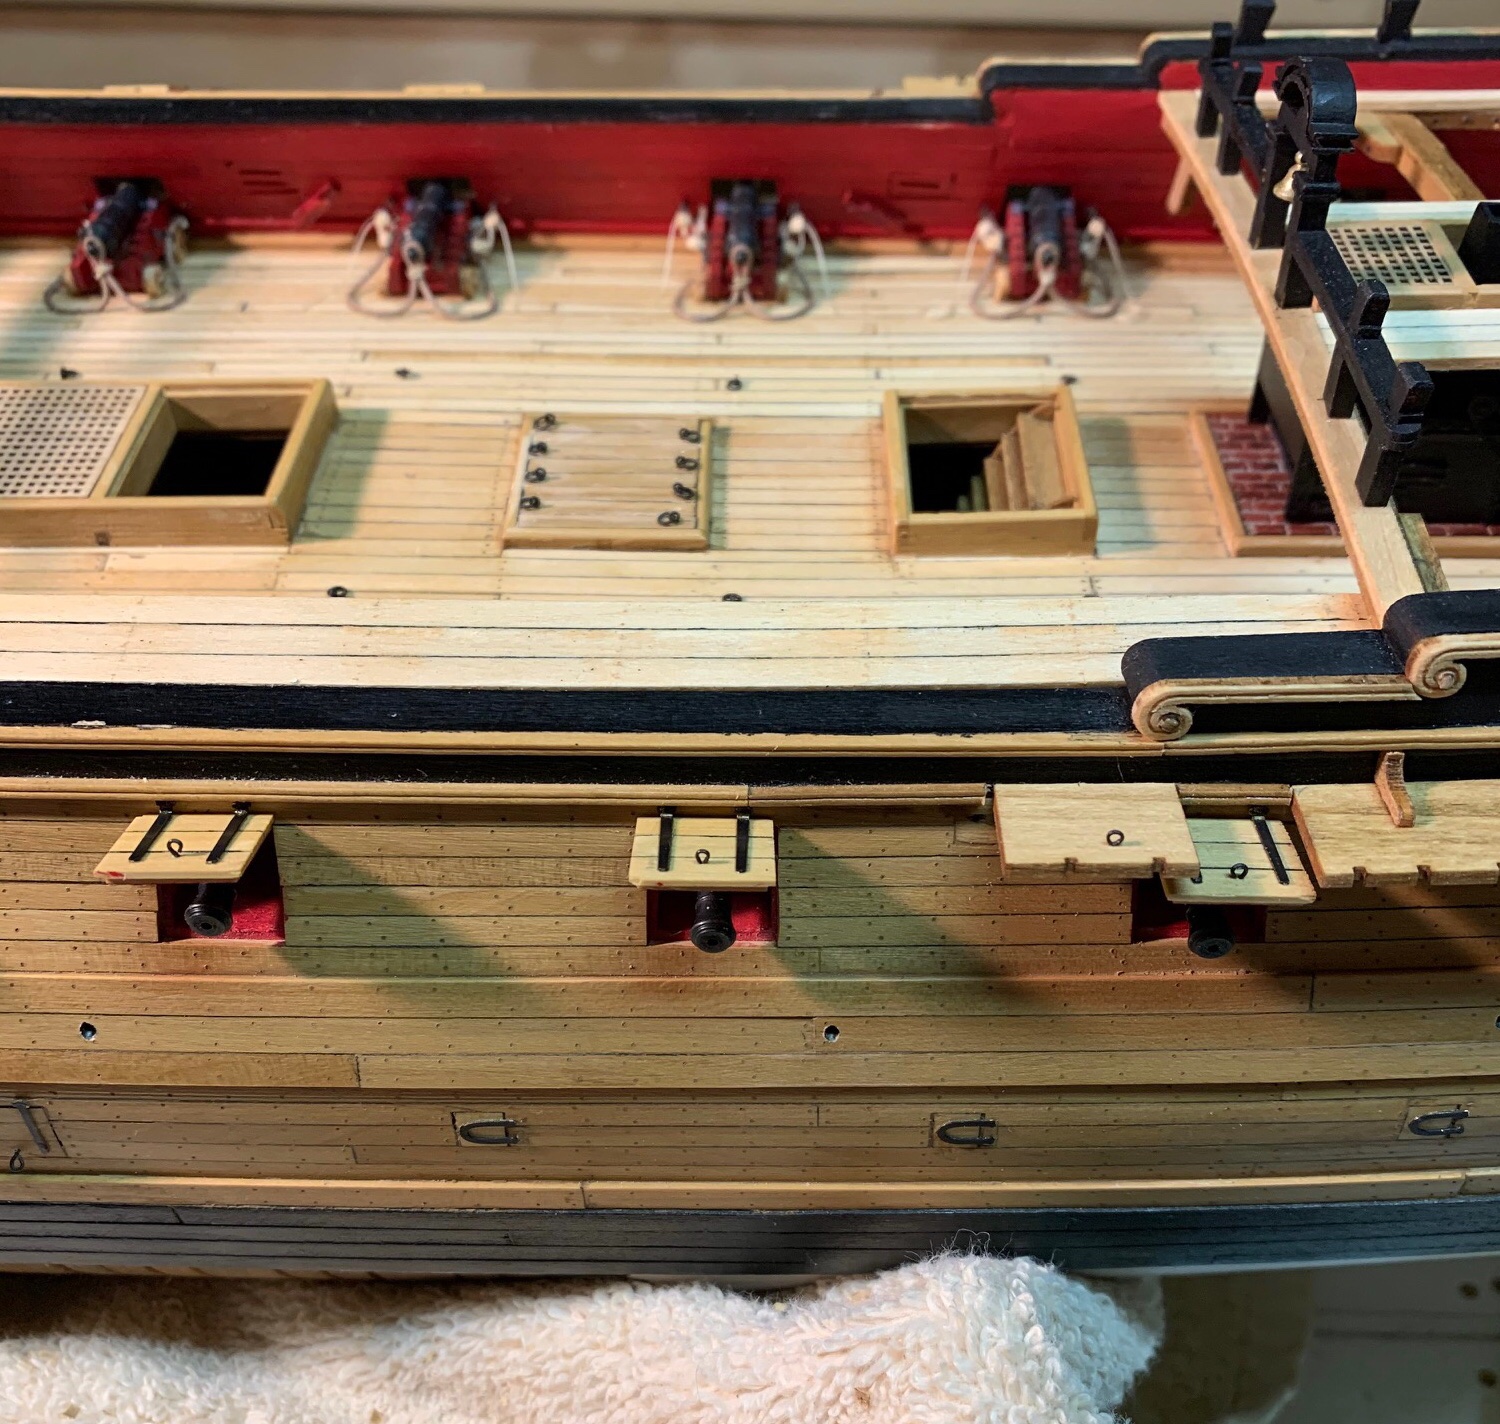
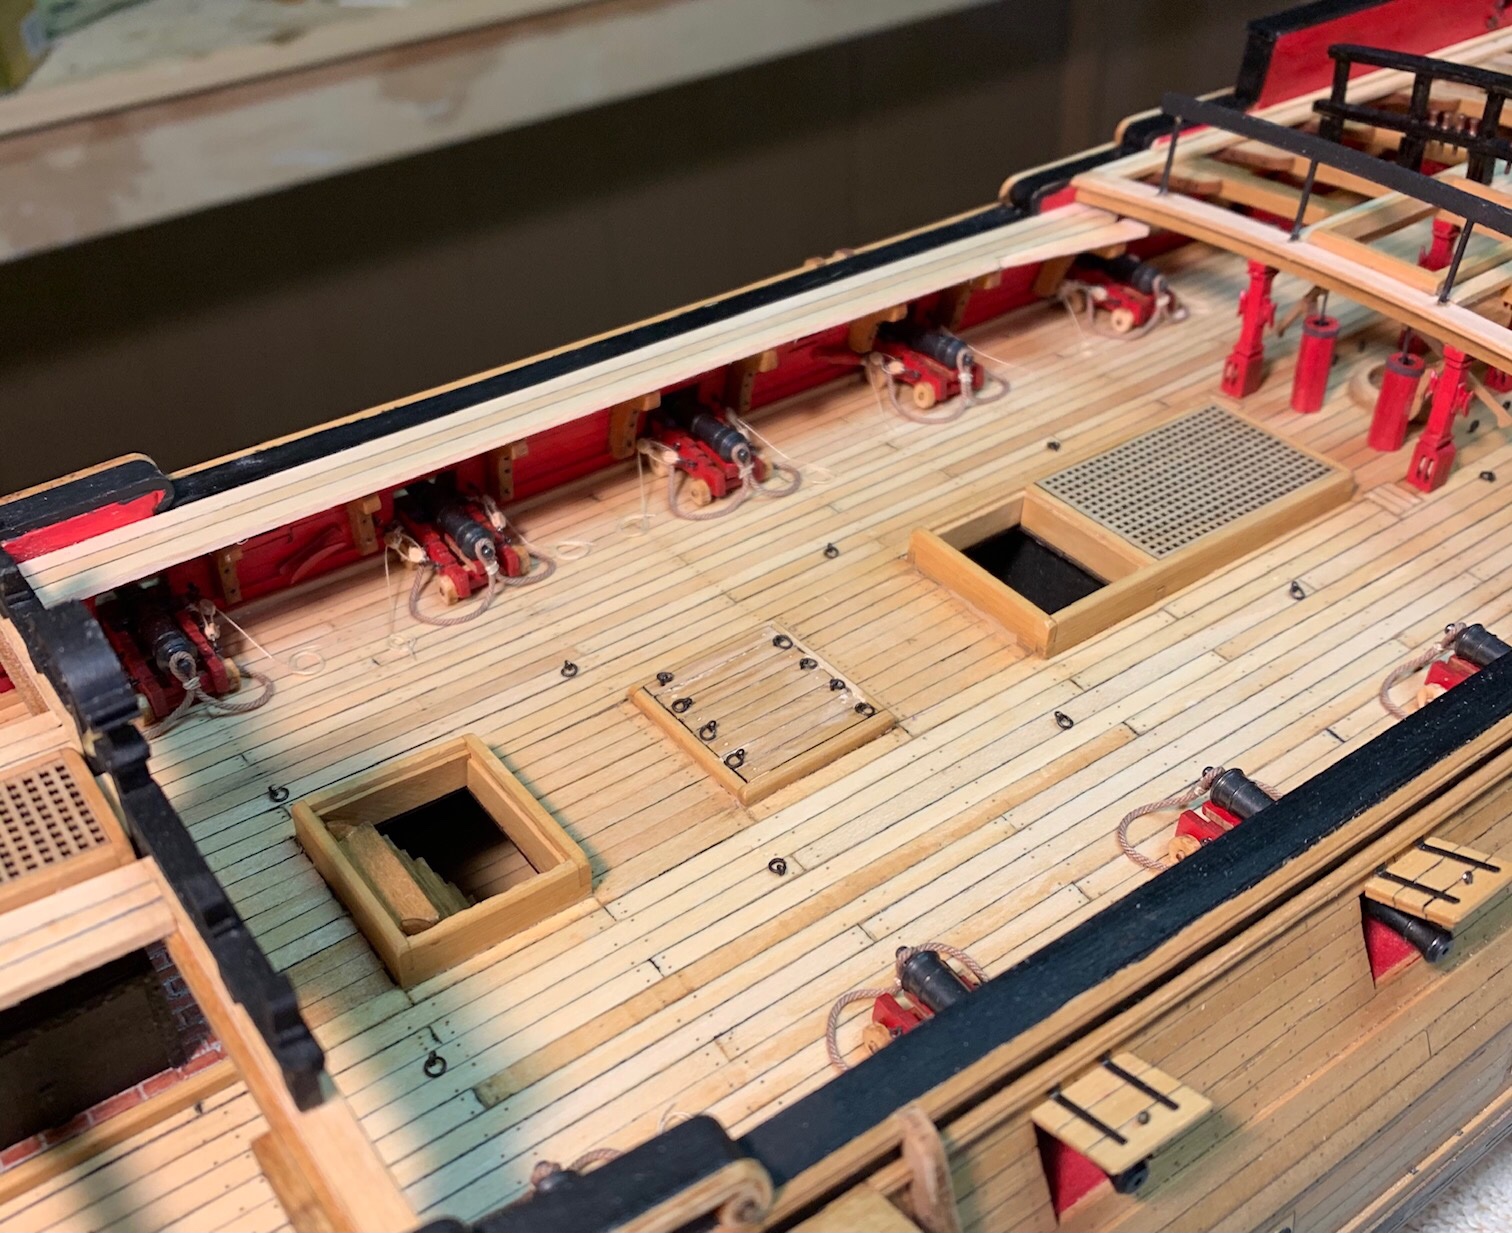
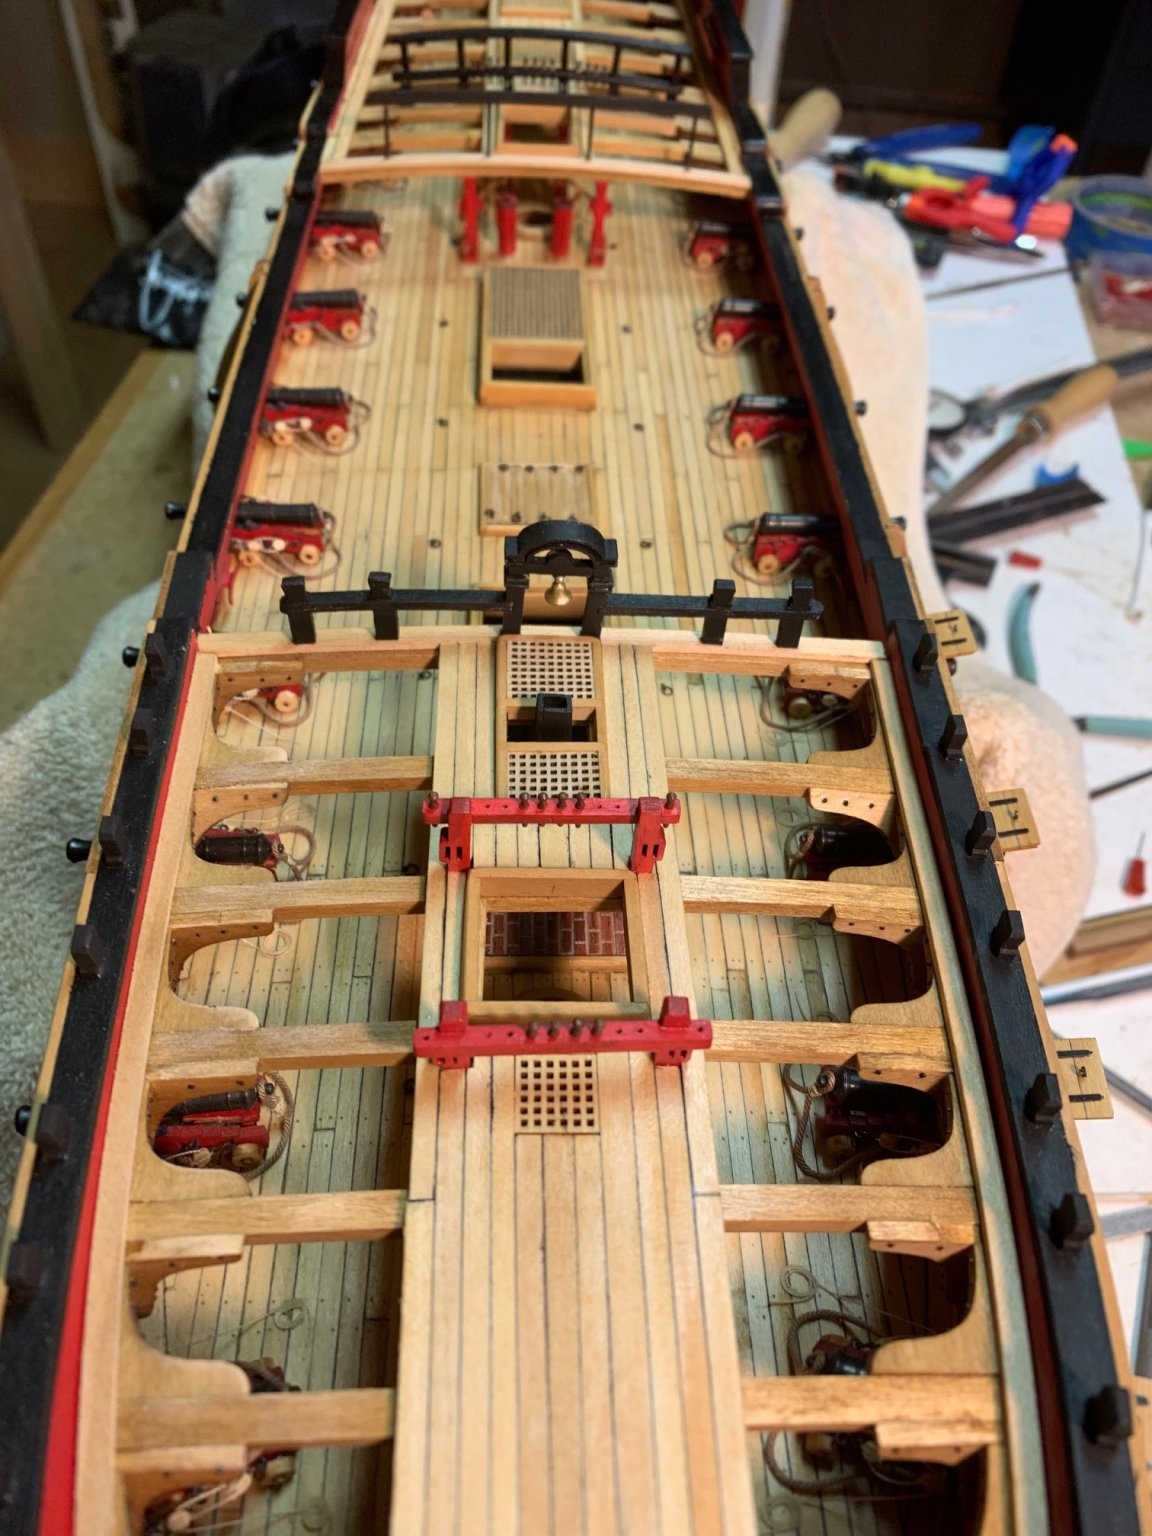
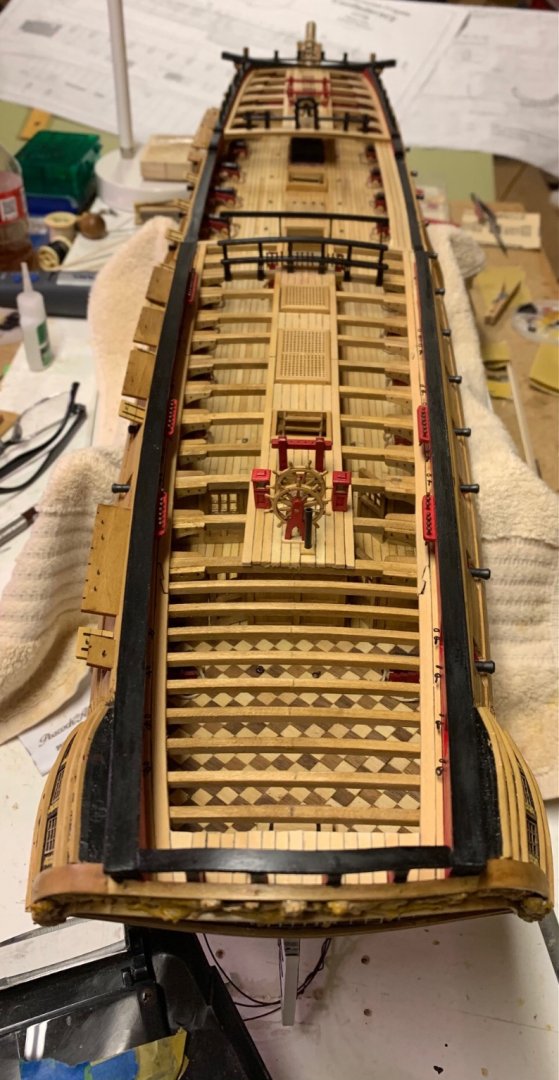
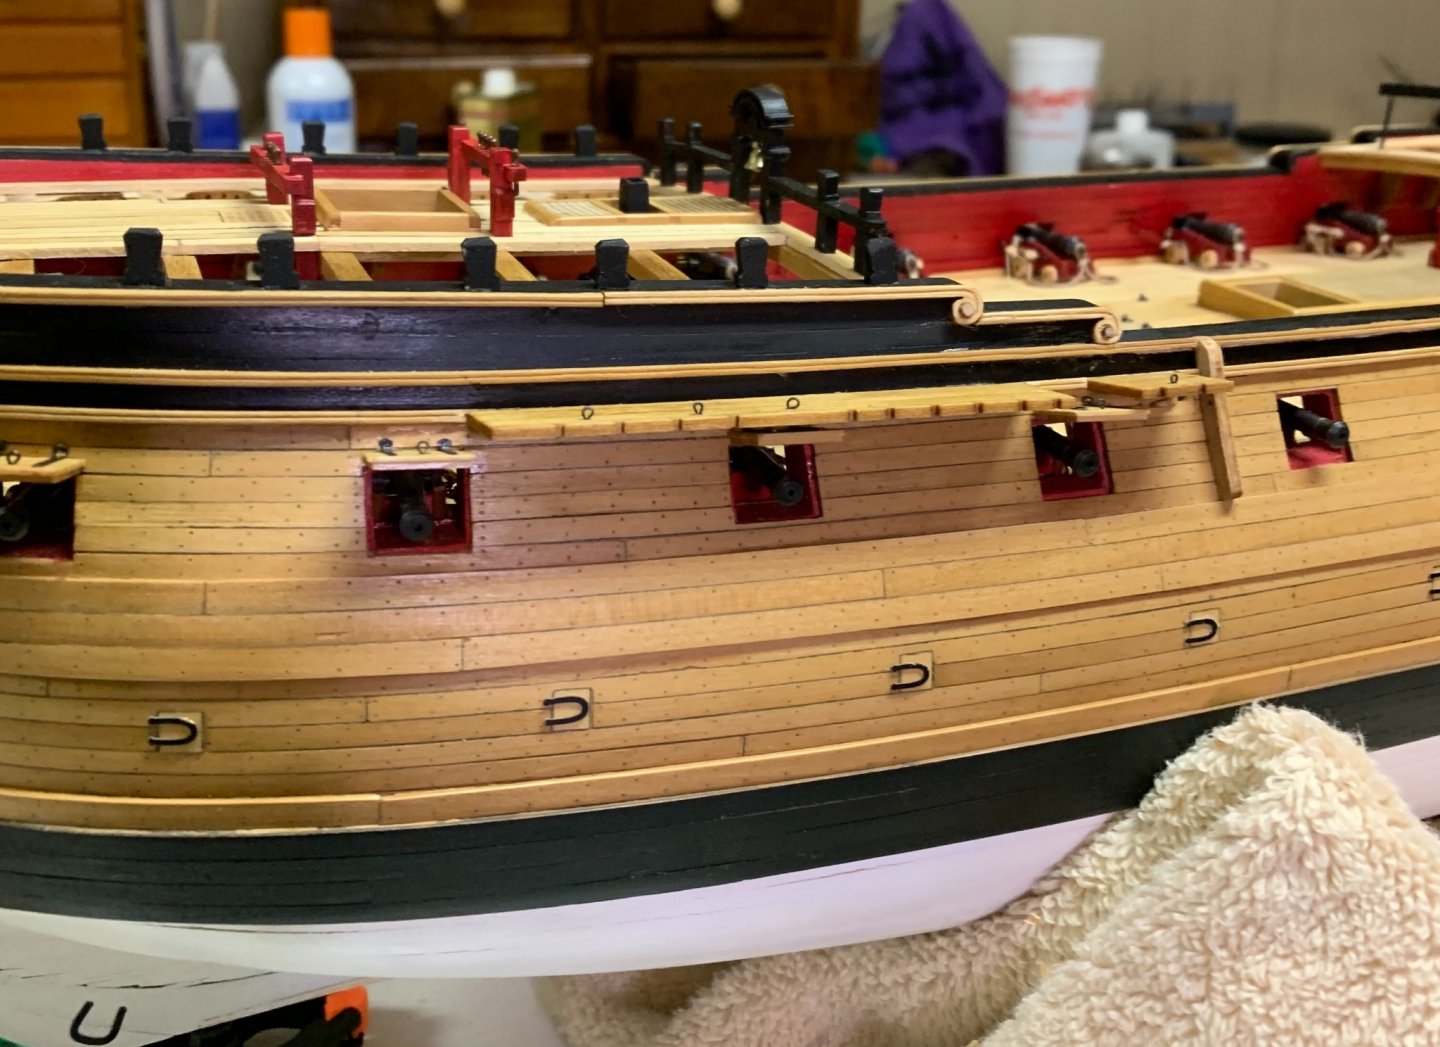
Again, thank you so much for the likes! After gunports and chain wales on one side I have finished the gangway on the other side before turning her around and doing the other. The hanging knees in the waist sit right on top of the spirketting. I don’t know if this is design or I got lucky but it sure made it easy. This all went easier than expected. The knees have the simulated bolts. Now that I am near the finish line on this model, I feel I am qualified to give a quick review. 1. This is NOT a beginner kit. Not saying it can’t be done but for most folks, if you don’t have a few kits under your belt, you are in for some heartache. 2. The plans and instructions are top notch. If followed, the modeller, with skill and patience will have a lot less trouble and “Oh crap” moments. A tip of the hat to Chuck on these two. 3. The laser cut parts were dead on for the most part. I had very little trouble with them. The only trouble I hade was with the main false deck which you can see at the first of my log. 4. The strip wood is basswood and ample quantities were provided to pick the best pieces without running short. The basswood will turn out a nice model if you take your time with finishing. I used my own boxwood for the hull planking. 5. Cast pieces were ok except for the cannons. I would give them a 3 on a scale of 1 to 10. I substituted brass ones from Syren Ship Models. I also substituted the kit blocks for some from Syren also. 6. Brass photo etch was great. Here also, there were ample spares in case you mess a few up. I have been very happy with this kit. It can be turned into a very nice and accurate model.


- 127 replies
-
- 7
-
-
- confederacy
- model shipways
- (and 1 more)
-
Welcome back Darren. Very nice looking models.
-
Gary, good move on the sheaves. I went per instructions and like yours better.
- 370 replies
-
- 1
-
-
- Model Shipways
- Confederacy
- (and 1 more)
-
And now it’s done! Now to do the rest of them without any major damage.
- 127 replies
-
- 6
-
-
- confederacy
- model shipways
- (and 1 more)
-
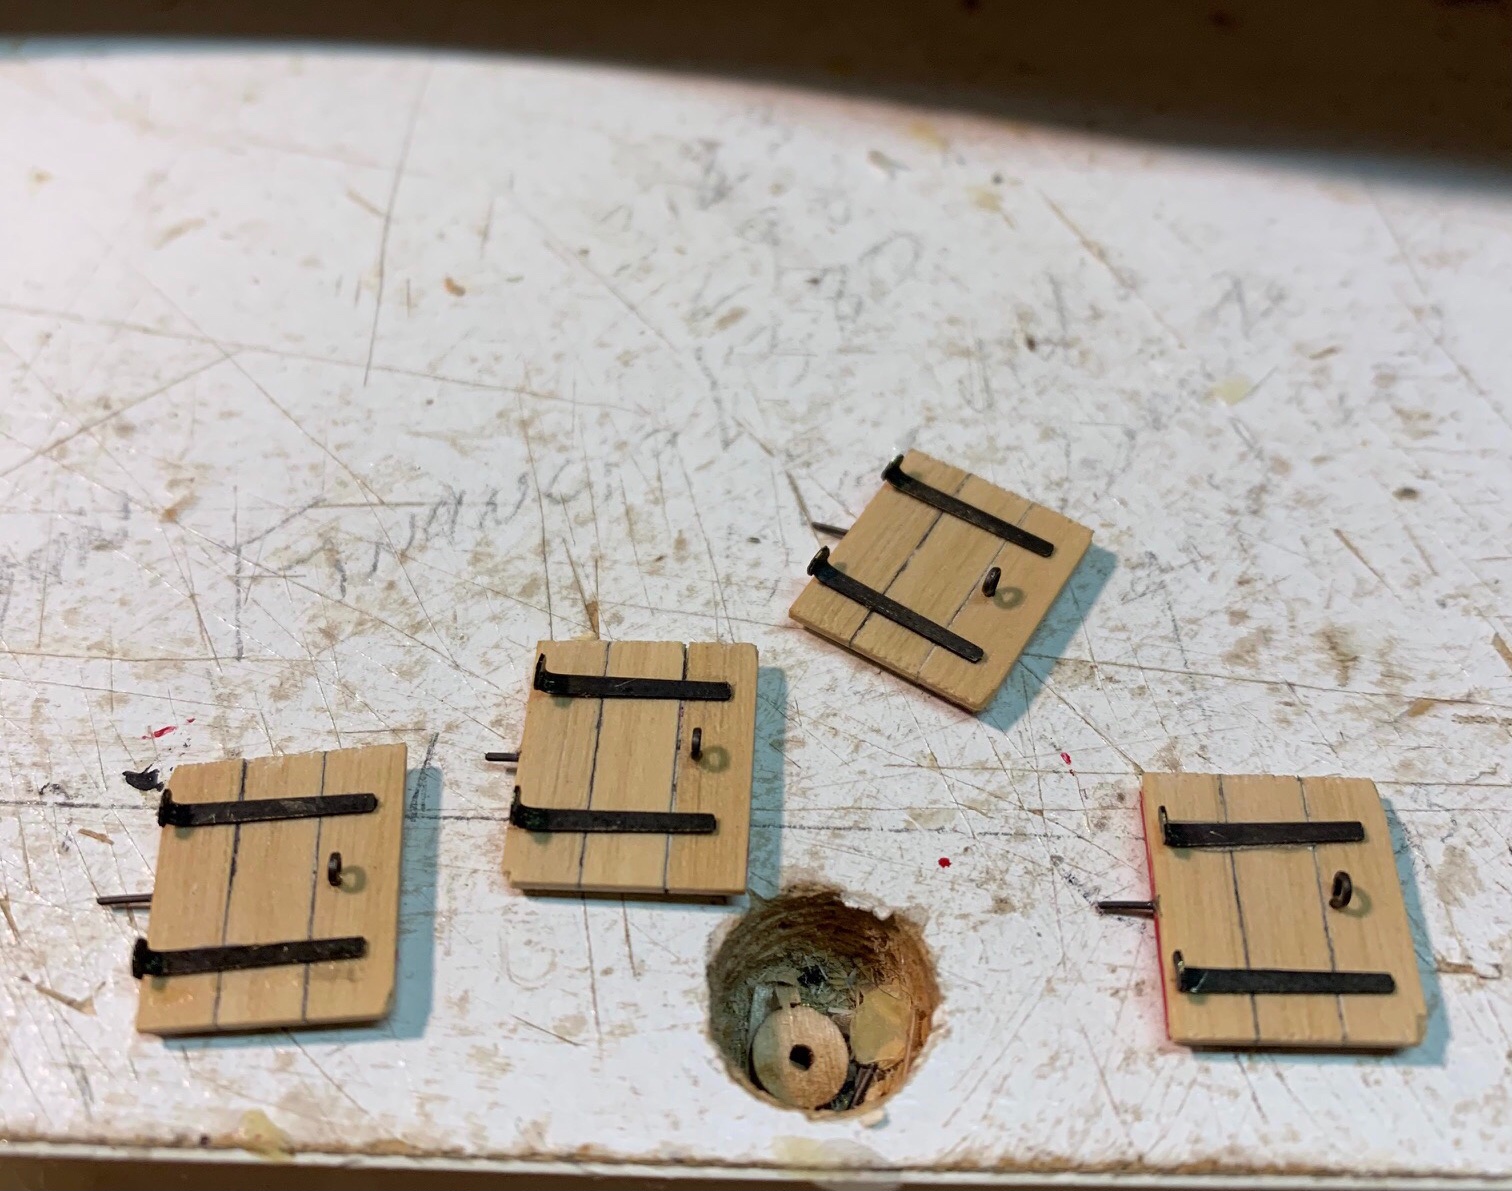
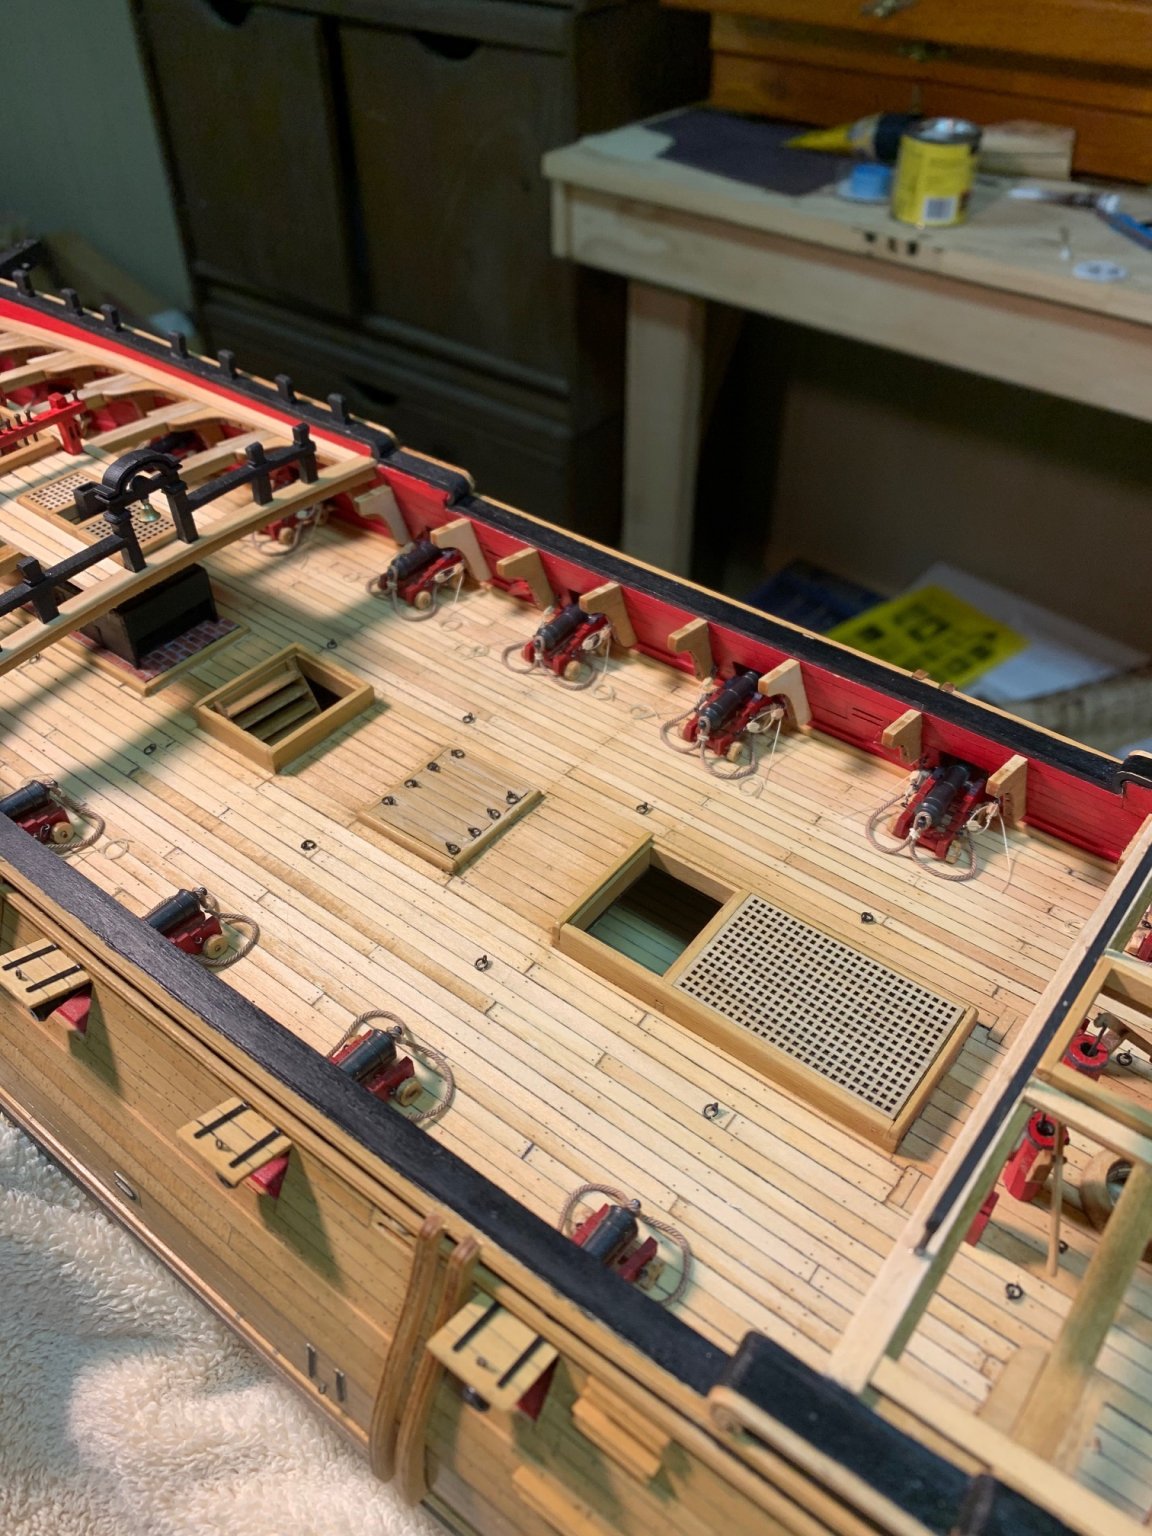
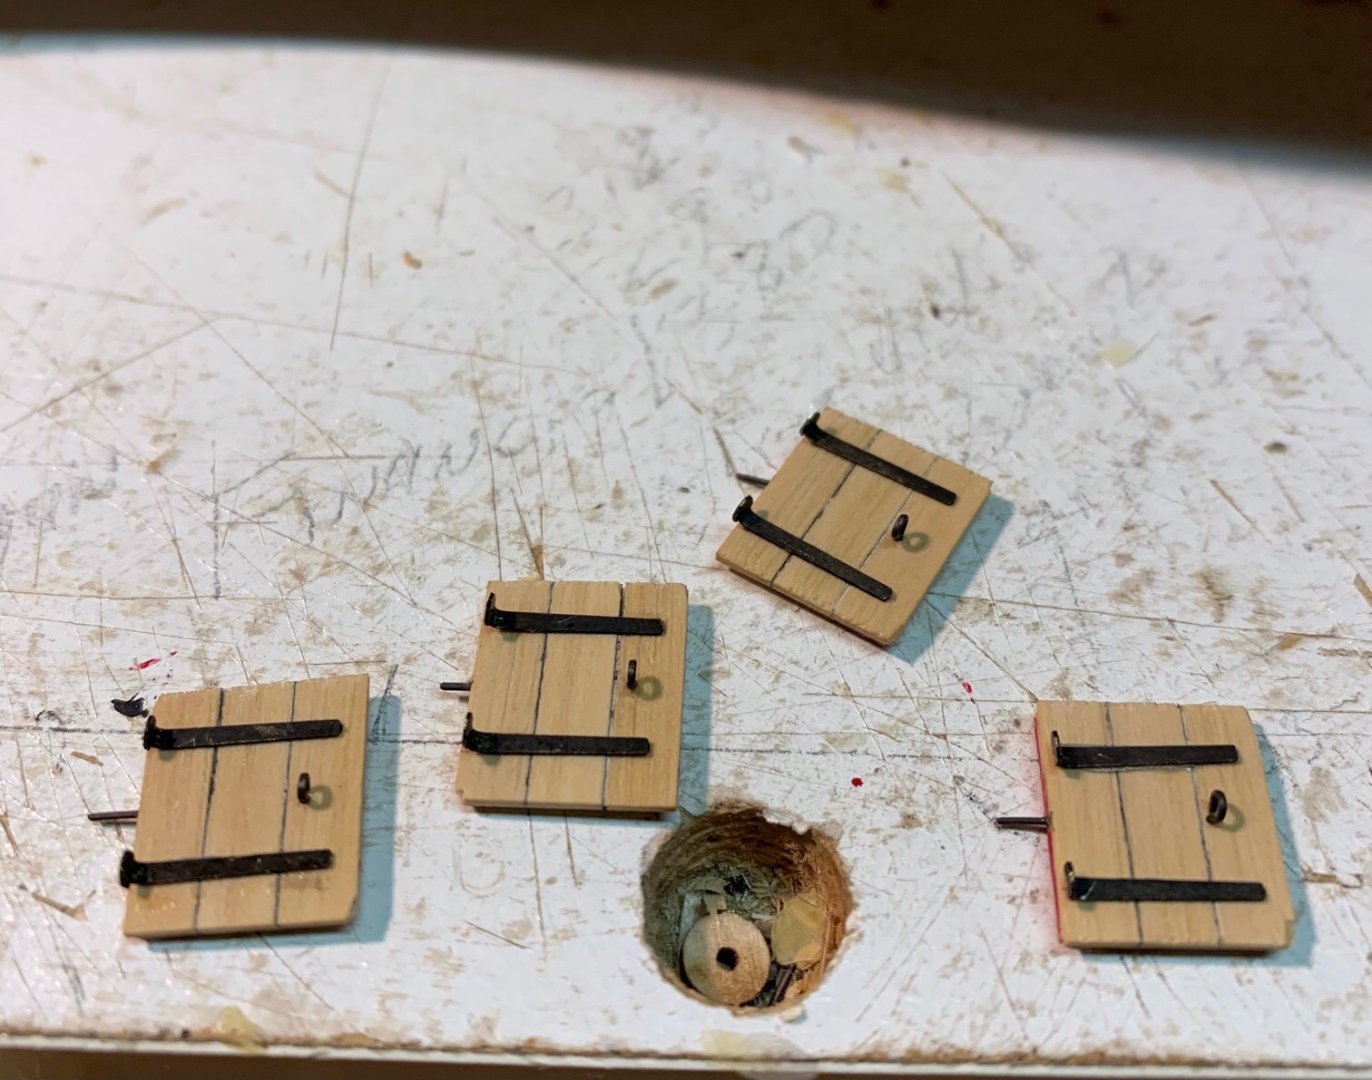
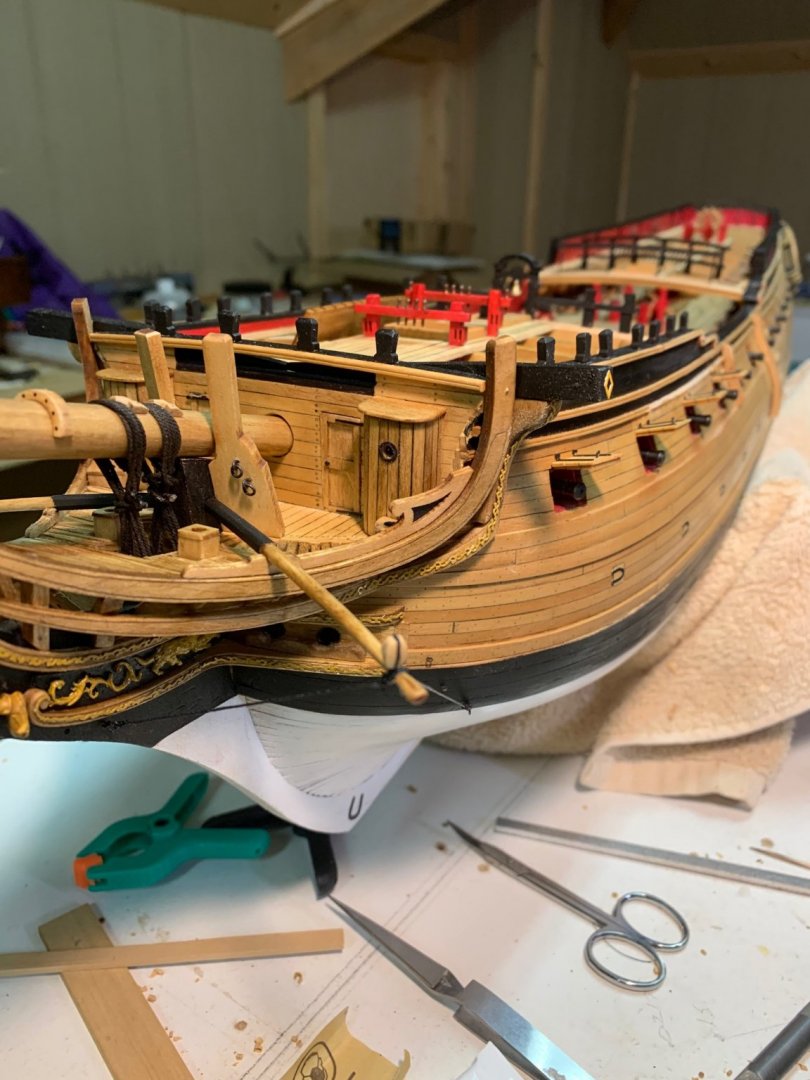
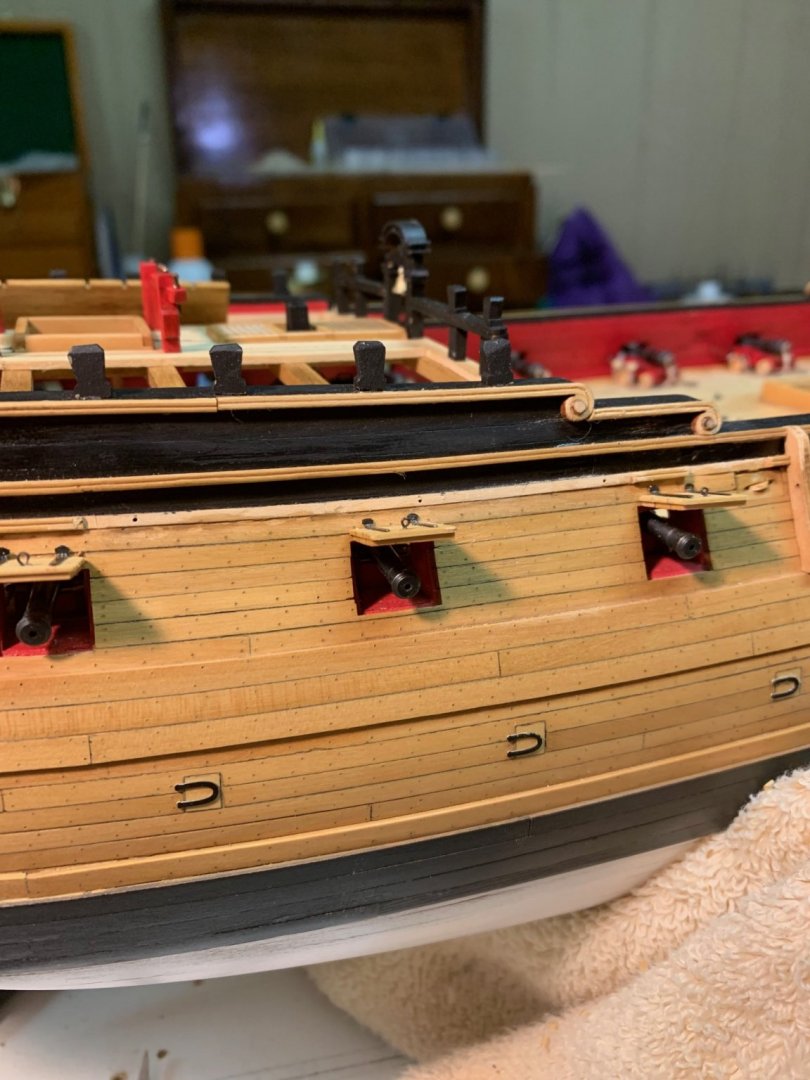
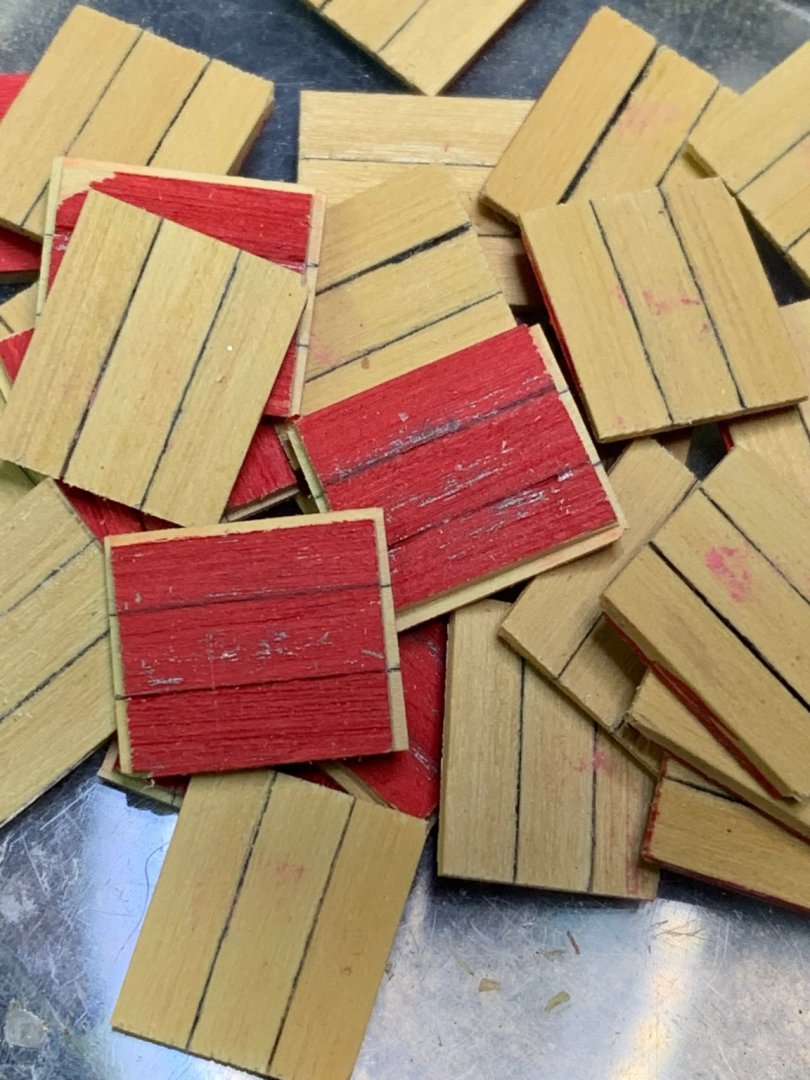
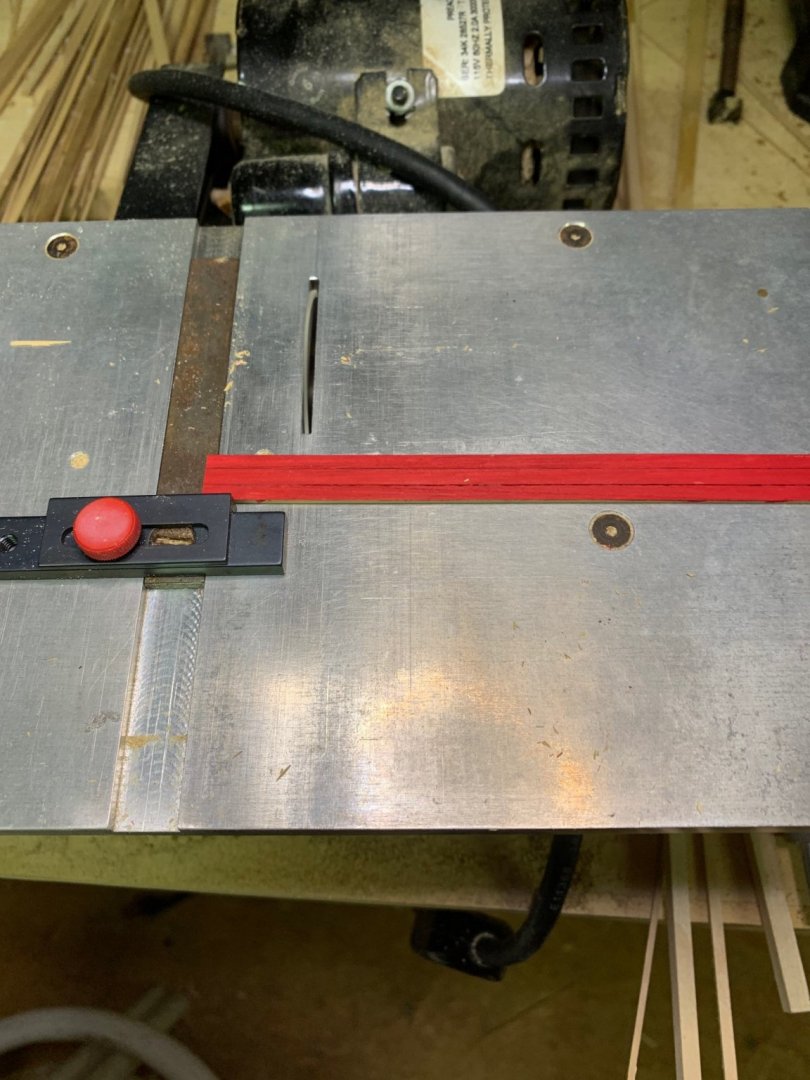
First, a happy New Years all. Hopefully 2021 will be a bit better than the last one. Thanks for all the likes. They are much appreciated. I’ve been busy with other hobbies so time for a little shipyard work and update. I finished the last 6 cannons for the waist and most are rigged. I’m glad to have that chore finished. Also, the boomkins are finished and rigged. For the gunports, I edge glued 3 planks together and painted one side red. Using my old saw I cut to length and then cut the recess around the ports. Attached the hardware and done. Before mounting the gunports I encountered my first, or maybe it’s the third or fourth “oh crap” moment. The chain wales go on the same lines as the fancy molding. I made the fancy molding an integral part of the planking, it’s not glued onto the planking. Therefore, you can’t just cut it, and pop it off. It’s also boxwood so it does not remove as easily as basswood. With chisels sanding sticks, and a few choice adult words, I got the first one down so I can attach the chain wales. Once attached I think most of the damage will disappear. all the best folks, mark


- 127 replies
-
- 5
-
-
- confederacy
- model shipways
- (and 1 more)
-
Gary, you have probably figured this out. After marking your gunport locations, use a jig the same way you did for the lintels and you have the “perfectly vertical” by the tail.
- 370 replies
-
- 1
-
-
- Model Shipways
- Confederacy
- (and 1 more)
-
Bigcreek, your the captain, it’s your ship. If no copper suits you, don’t. If someone questions the accuracy of it, tell them it’s “folk art” and leave it at that.
-
Welcome Zack. Start a log and ask questions. You will find plenty of help.
-
Looking good Bruce!