HOLIDAY DONATION DRIVE - SUPPORT MSW - DO YOUR PART TO KEEP THIS GREAT FORUM GOING! (Only 13 donations so far - C'mon guys!)
×
Bossman
-
Posts
283 -
Joined
-
Last visited
Content Type
Profiles
Forums
Gallery
Events
Everything posted by Bossman
-
 Thank you very much Robert! Your kind words mean a lot. Looking at your Victory build is a real eye opener. Beautiful work Sir! Thanks to all for the likes and encouragement. Before I get to my update, a short dissertation on modelling according to me. I have 3 unfinished ships in the shop from 15 years ago. The reason I quit was I could not match the skill and craftsmanship I saw others doing. I promised myself I would finish this ship and have fun. Mistakes be darned. Wether I lack the skill, get impatient or get in too big a hurry, it is what it is. Build your ship, have fun, if it pleases you, that’s all that counts. I’m almost ready to get to the combings and other quarterdeck fittings before I continue on with the cannons. A few coats of poly and some paint and I will be ready. It does not show well in the pics but before putting on the cap rail, I finished the inboard edge and used a black sharpie to “paint” it. Figured it would make life easier that way. If you deviate from Chucks instruction booklet like I do, read ahead and. Wait! I thought I was supposed to plan ahead anyway. I should have put in the waist cap rail before putting the carved pieces on the fancy moulding. The fix is not perfect but as I said above. Move on and have fun. Tomorrow will be painting and touch up. All the best folks, stay safe, till next time Mark
- 127 replies
-
- 14
-

-
- confederacy
- model shipways
- (and 1 more)
-
Good news for my “Confederacy “. She will have a permanent home at the University of Southern Mississippi new Center for Veterans Affairs building in the US Navy display case. For me, this is a real honour and I am glad she will have a home. I should be 6 more months finishing her and ground breaking on the new building is next month so I can take my time.
- 127 replies
-
- 6
-
-
- confederacy
- model shipways
- (and 1 more)
-
Edward, I’ve tried for years, wether it be wood work, leather work, or model ships to keep a tidy work bench. I have come to the conclusion that some just do not have it in their DNA. Just go with the flow! In the end, it’s what comes off the bench. Not what’s left on it. The cutter is looking great!
-
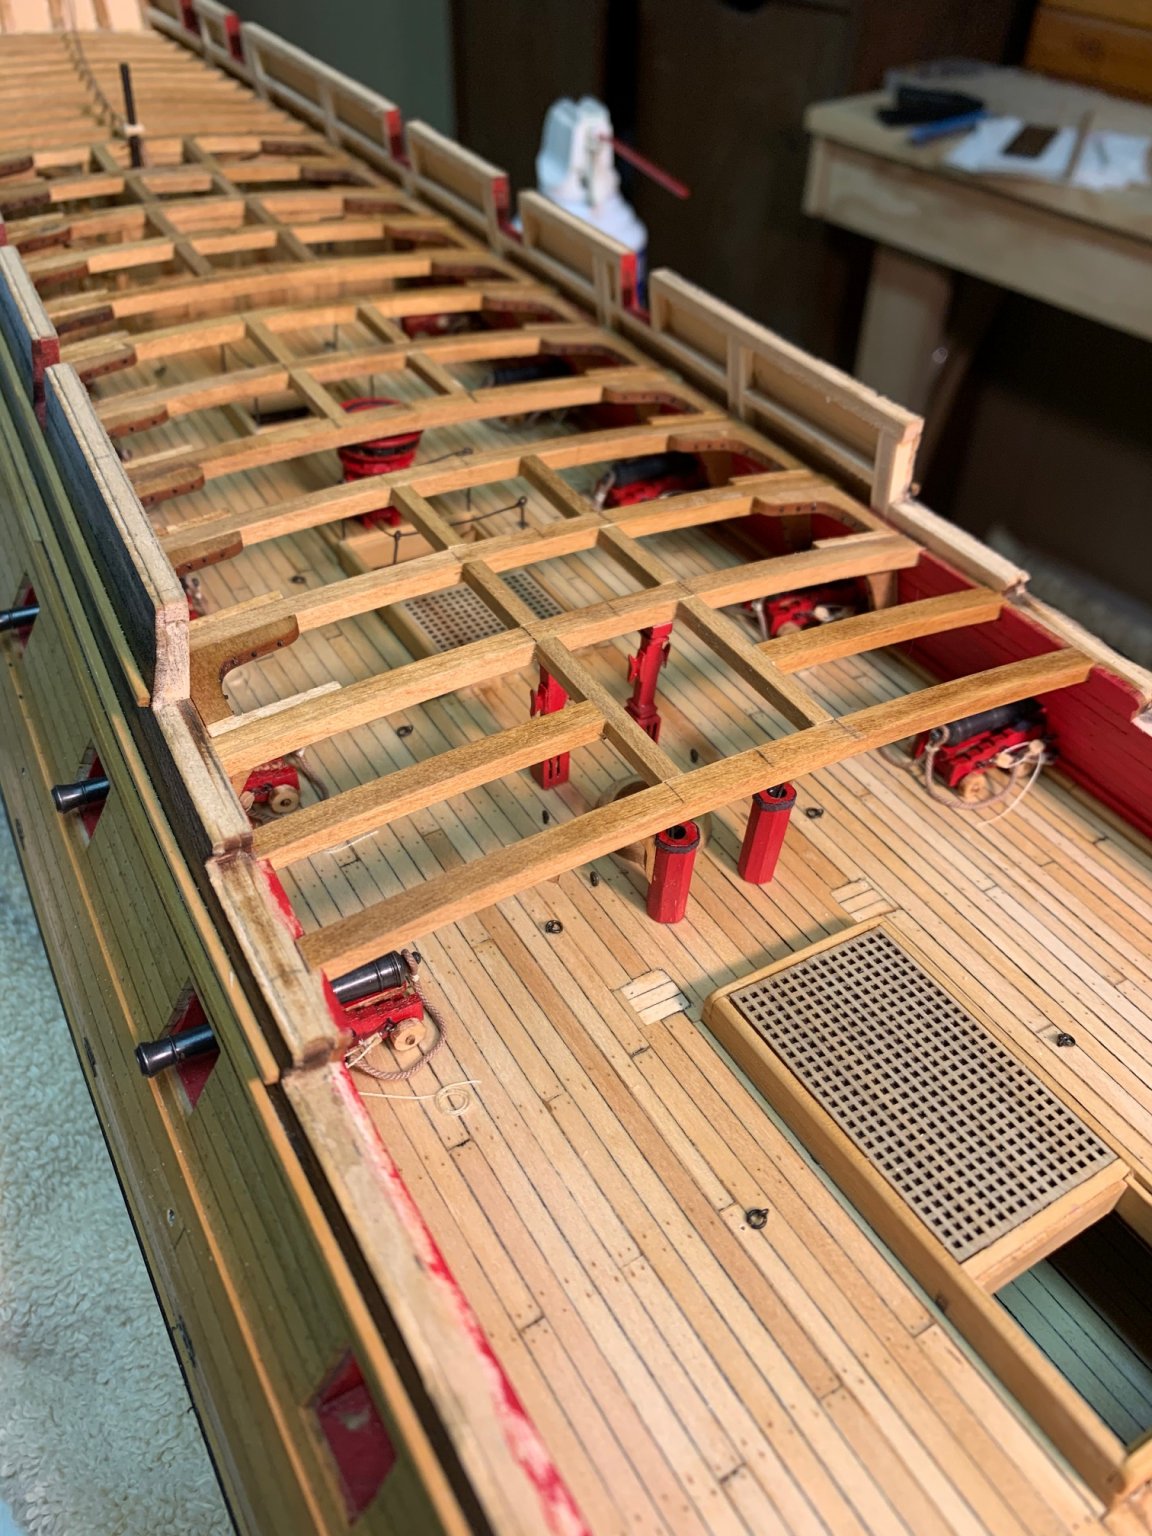
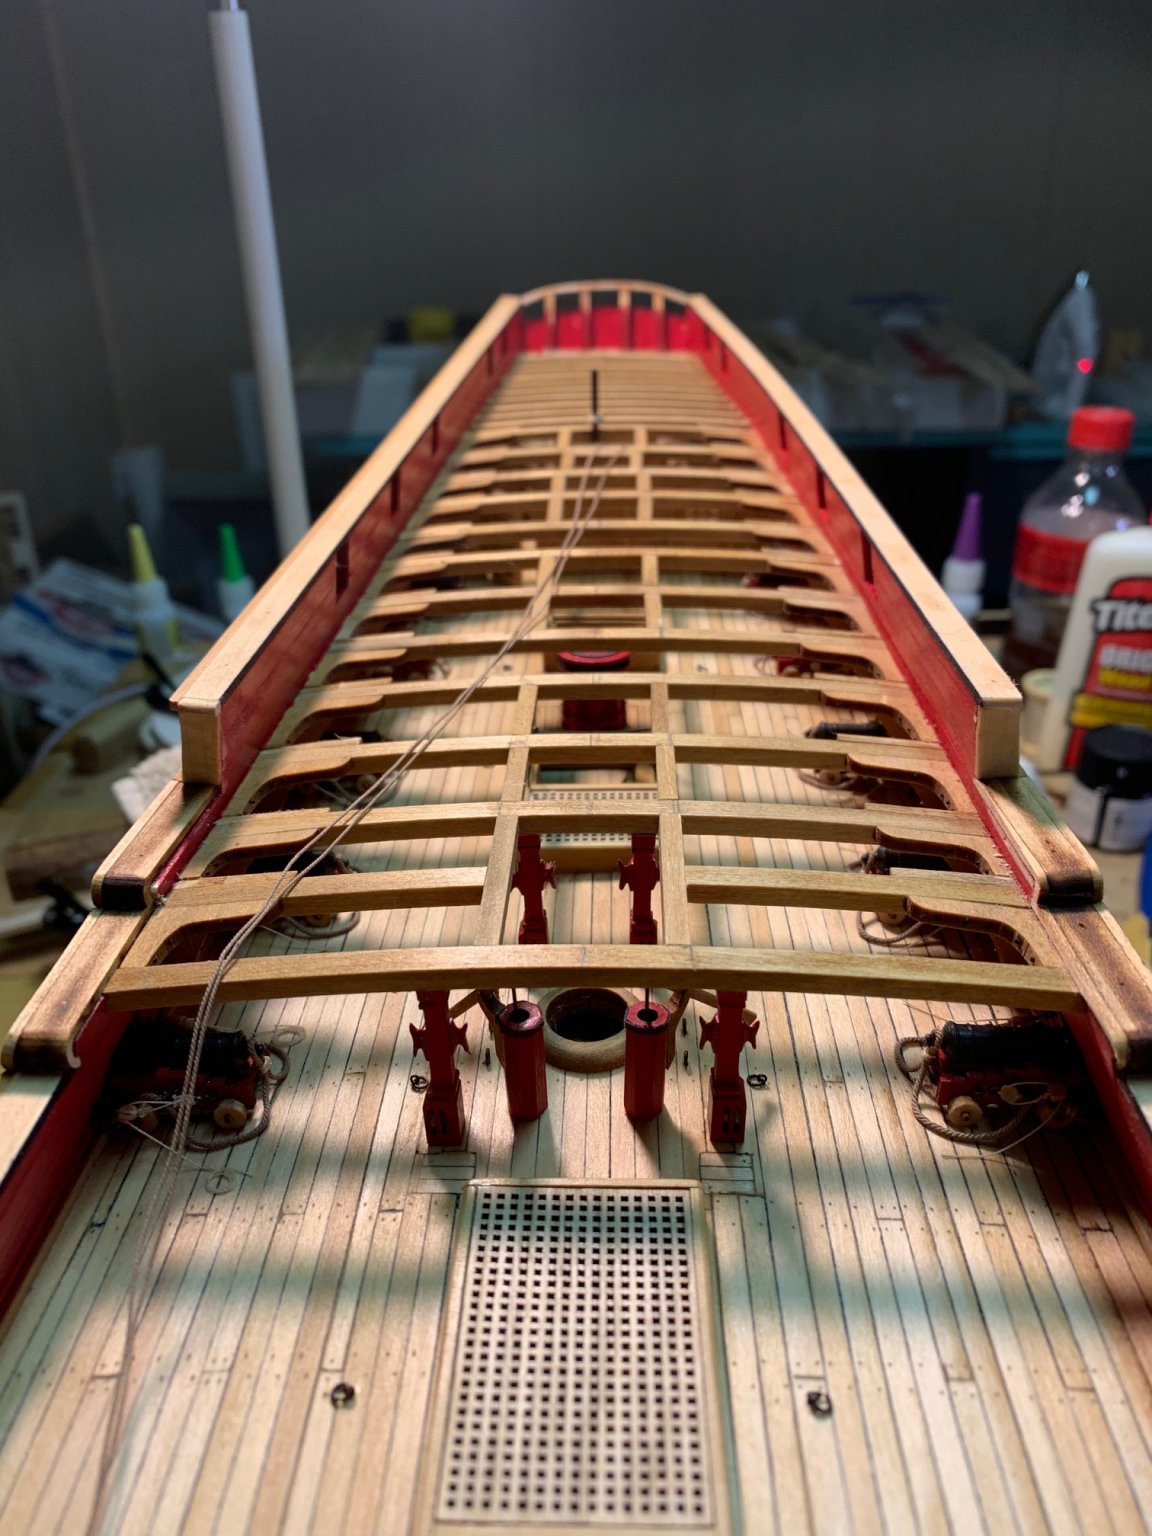
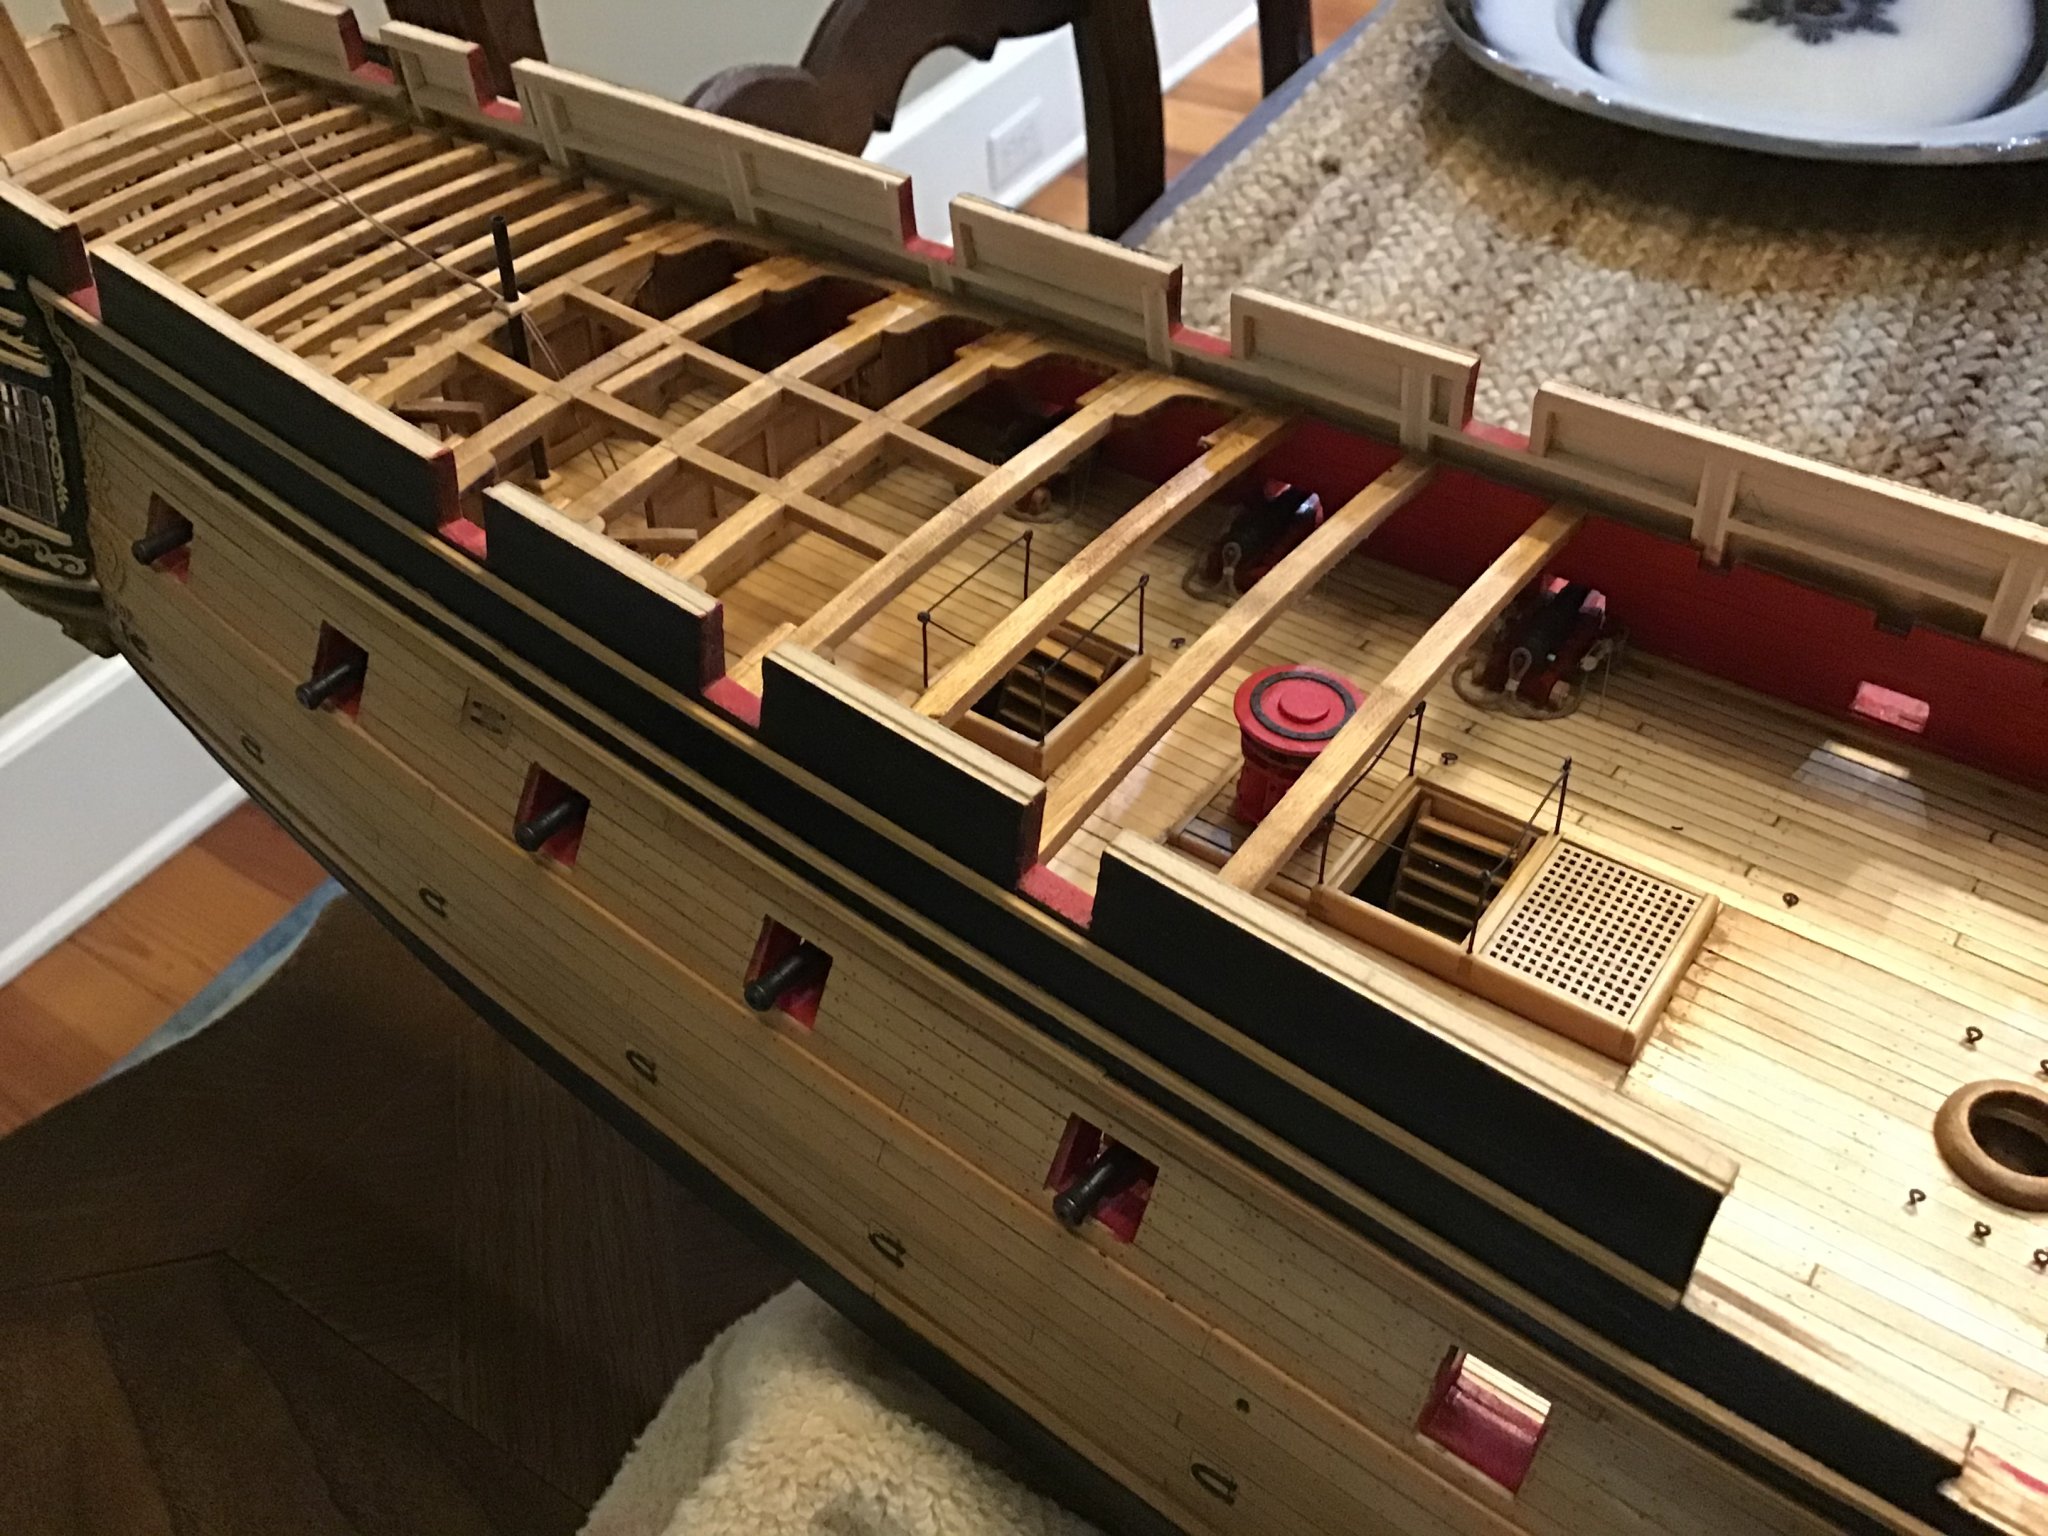
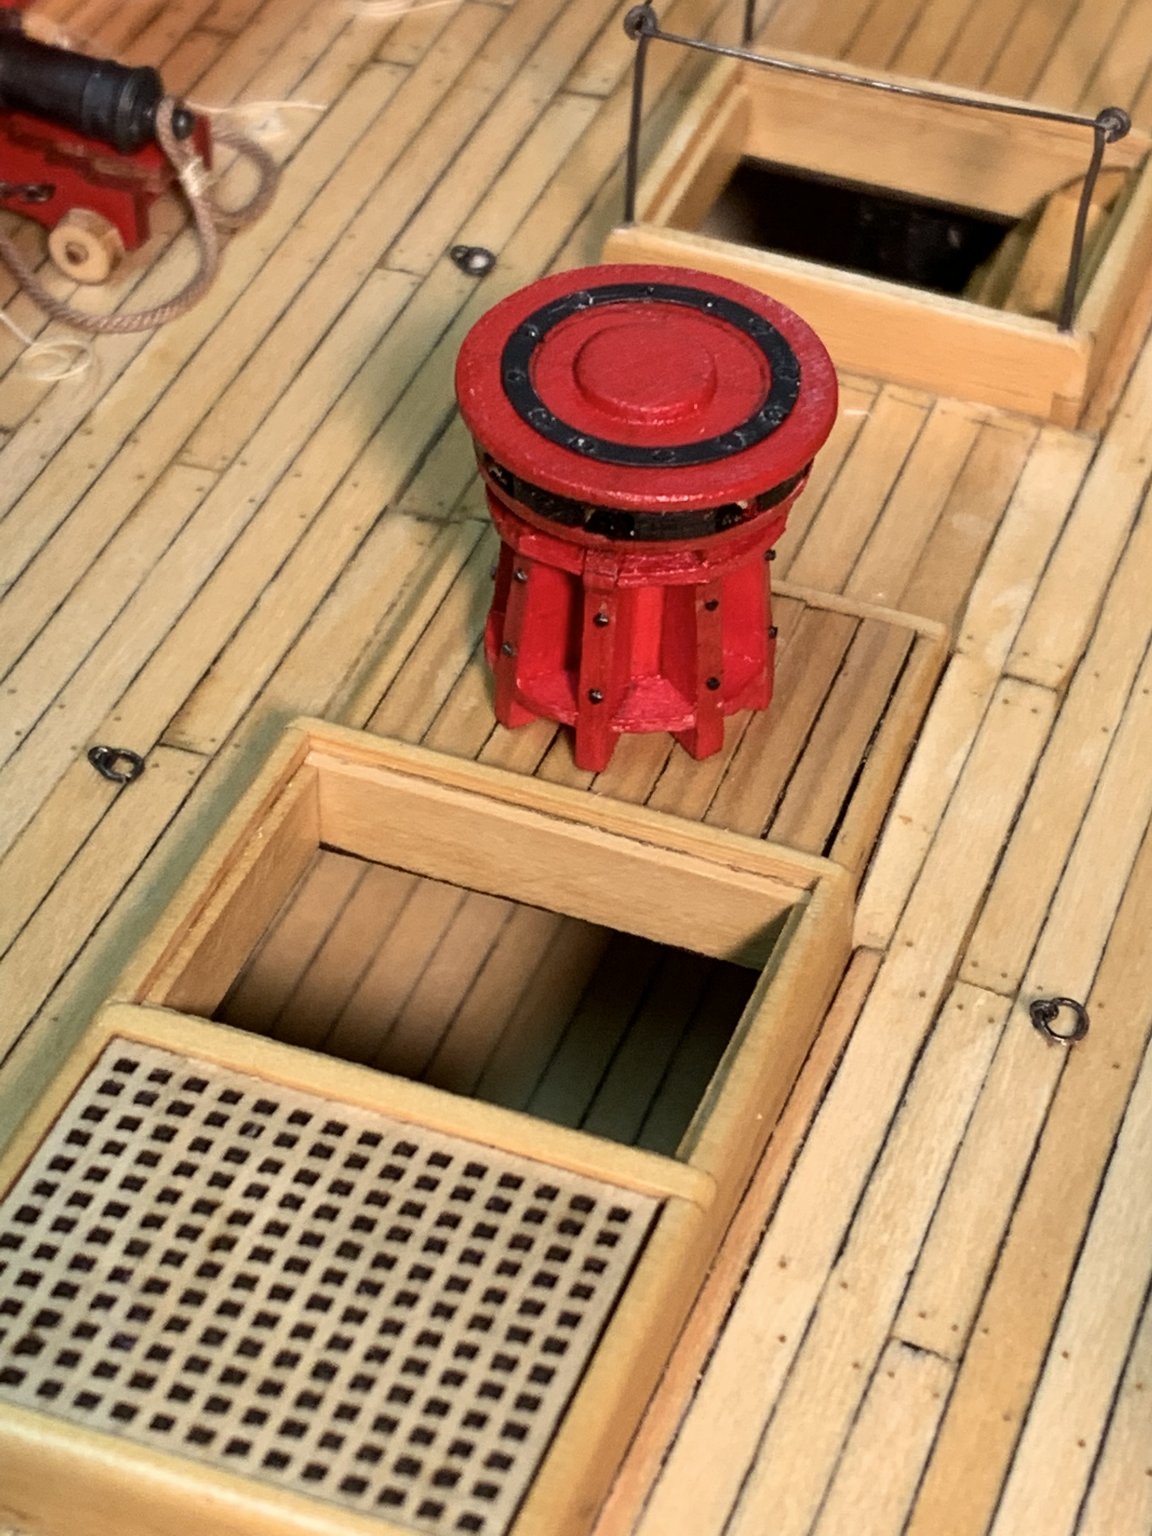
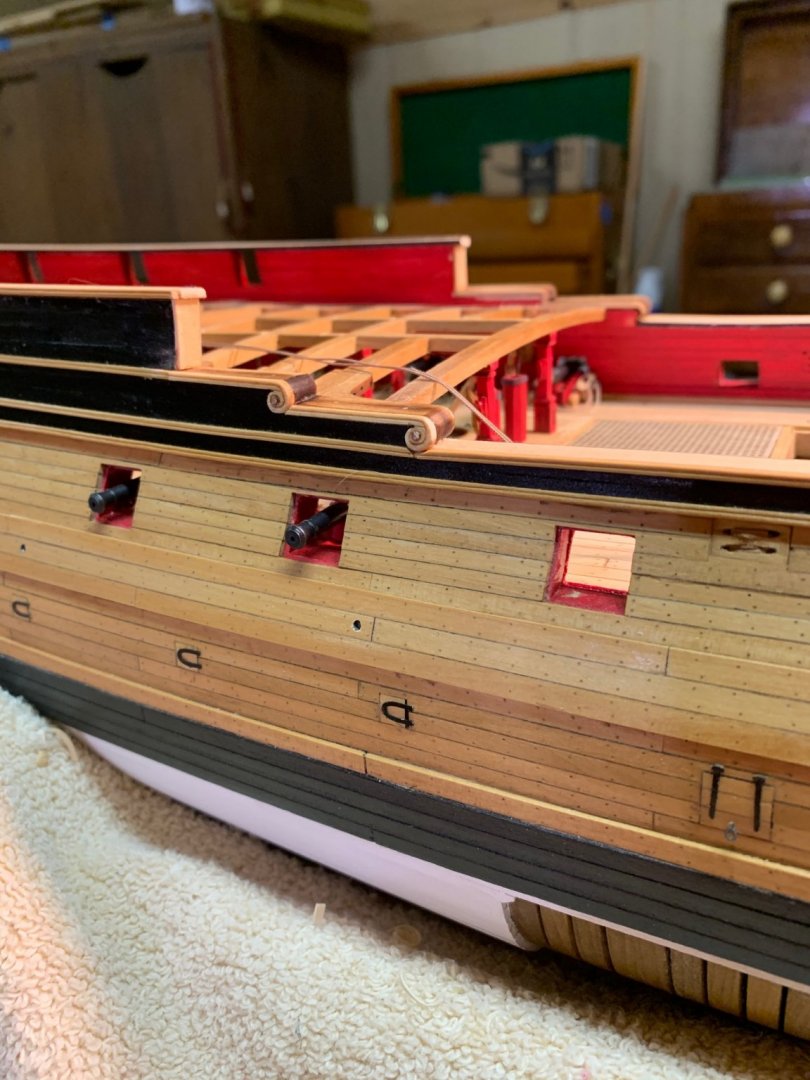
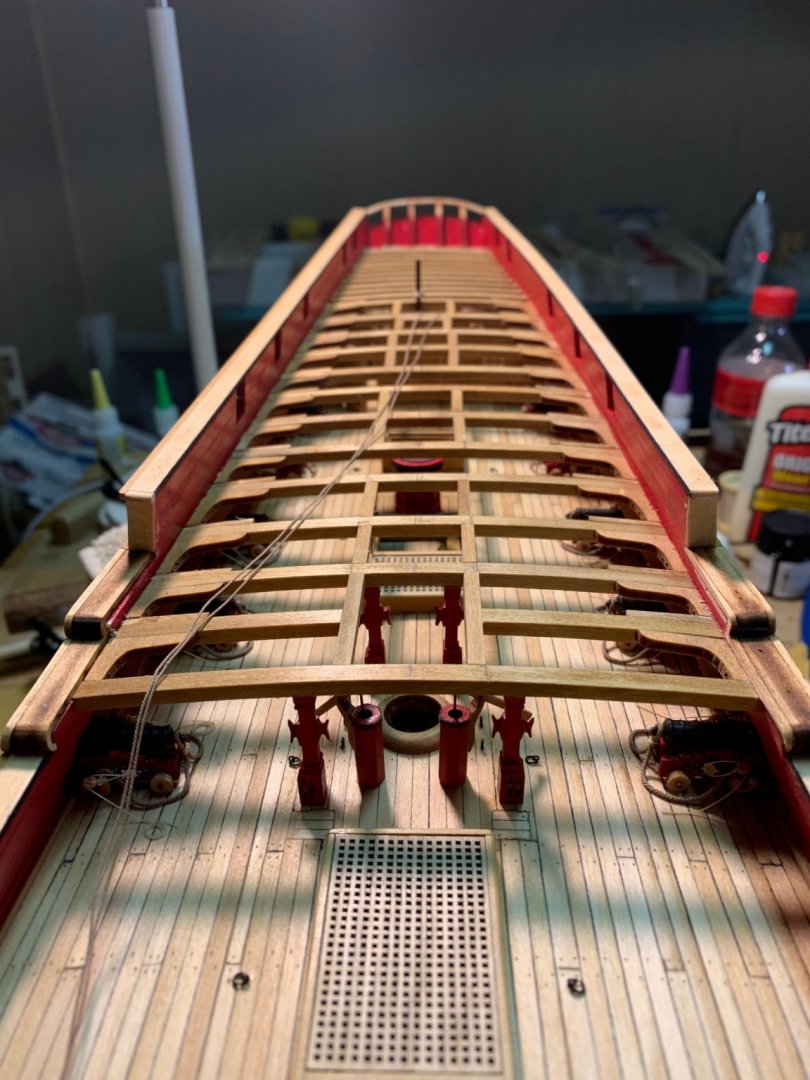
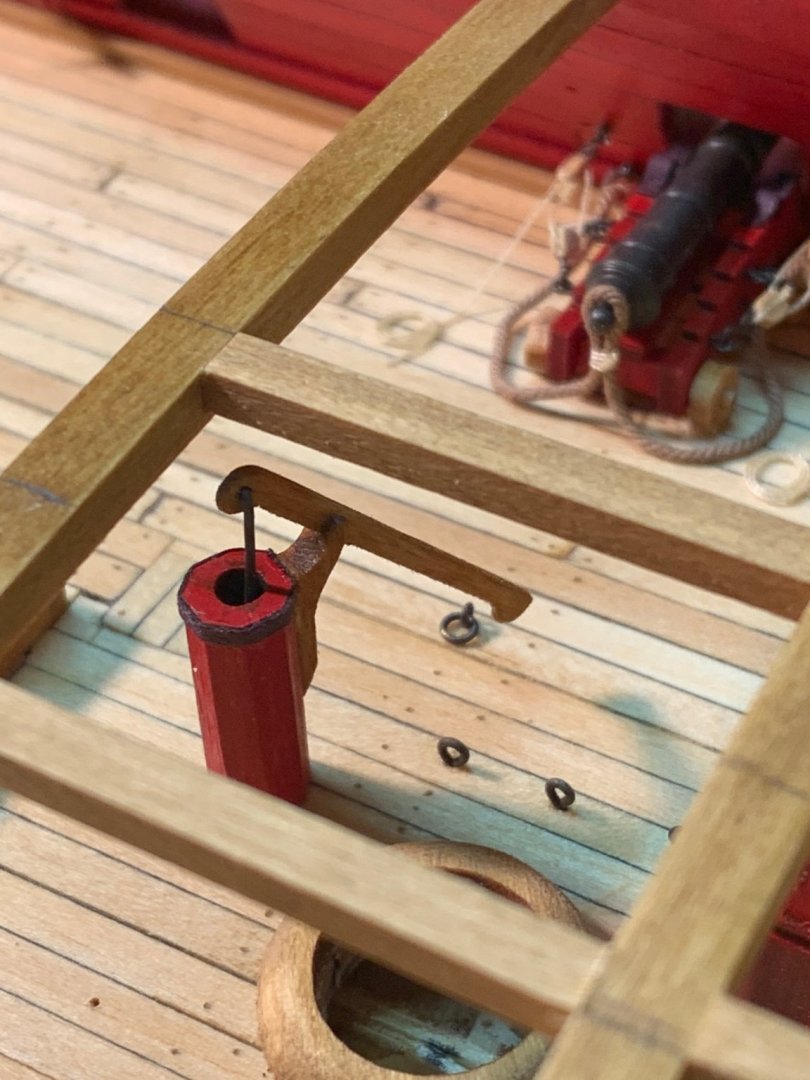
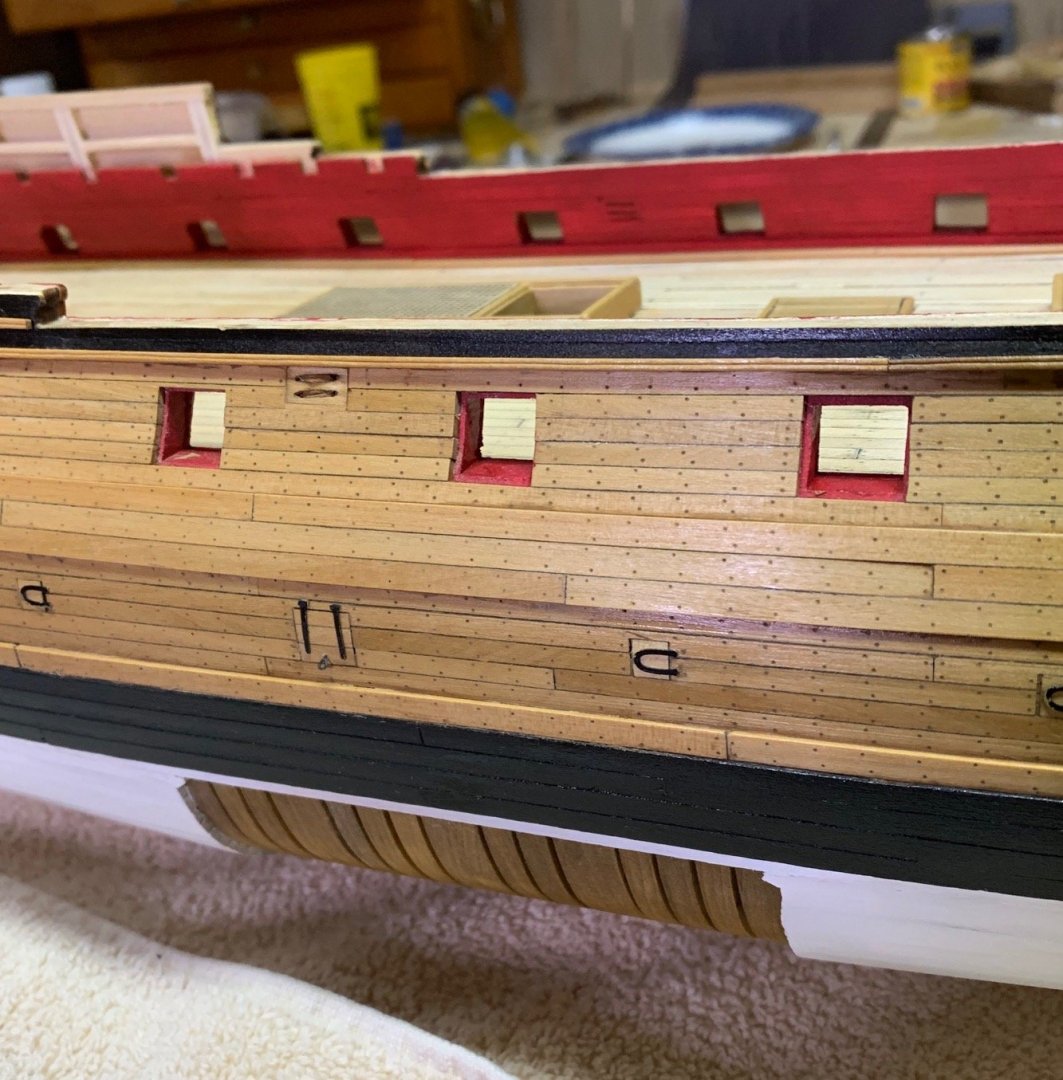
Thanks to all for the likes ladies and gents! A small update from the shipyard. I have finished the quarterdeck beams and all associated deck furniture under them. On to finishing the knees. The pumps were a fun little project in themselves. Once finished it’s back to making cannons. Did I say that I am very tired of making cannons? I did not trouble with sanding the char on the underside of the beams. Just a light go over to smooth. They are invisible anyway. Note on Basswood. If you plan ahead with staining and Poly, or don’t get into a hurry like I do, you can get a good finish with this wood. Once I slowed down and gave the parts 2 or 3 coats, depending on outcome, sanding with 400 grit between coats, I get a lot better finish.

- 127 replies
-
- 11
-
-
- confederacy
- model shipways
- (and 1 more)
-
Robert, an absolute masterpiece. Thank you for your build. Lots of inspiration and ideas.
- 527 replies
-
- 1
-
-
- caldercraft
- victory
- (and 1 more)
-
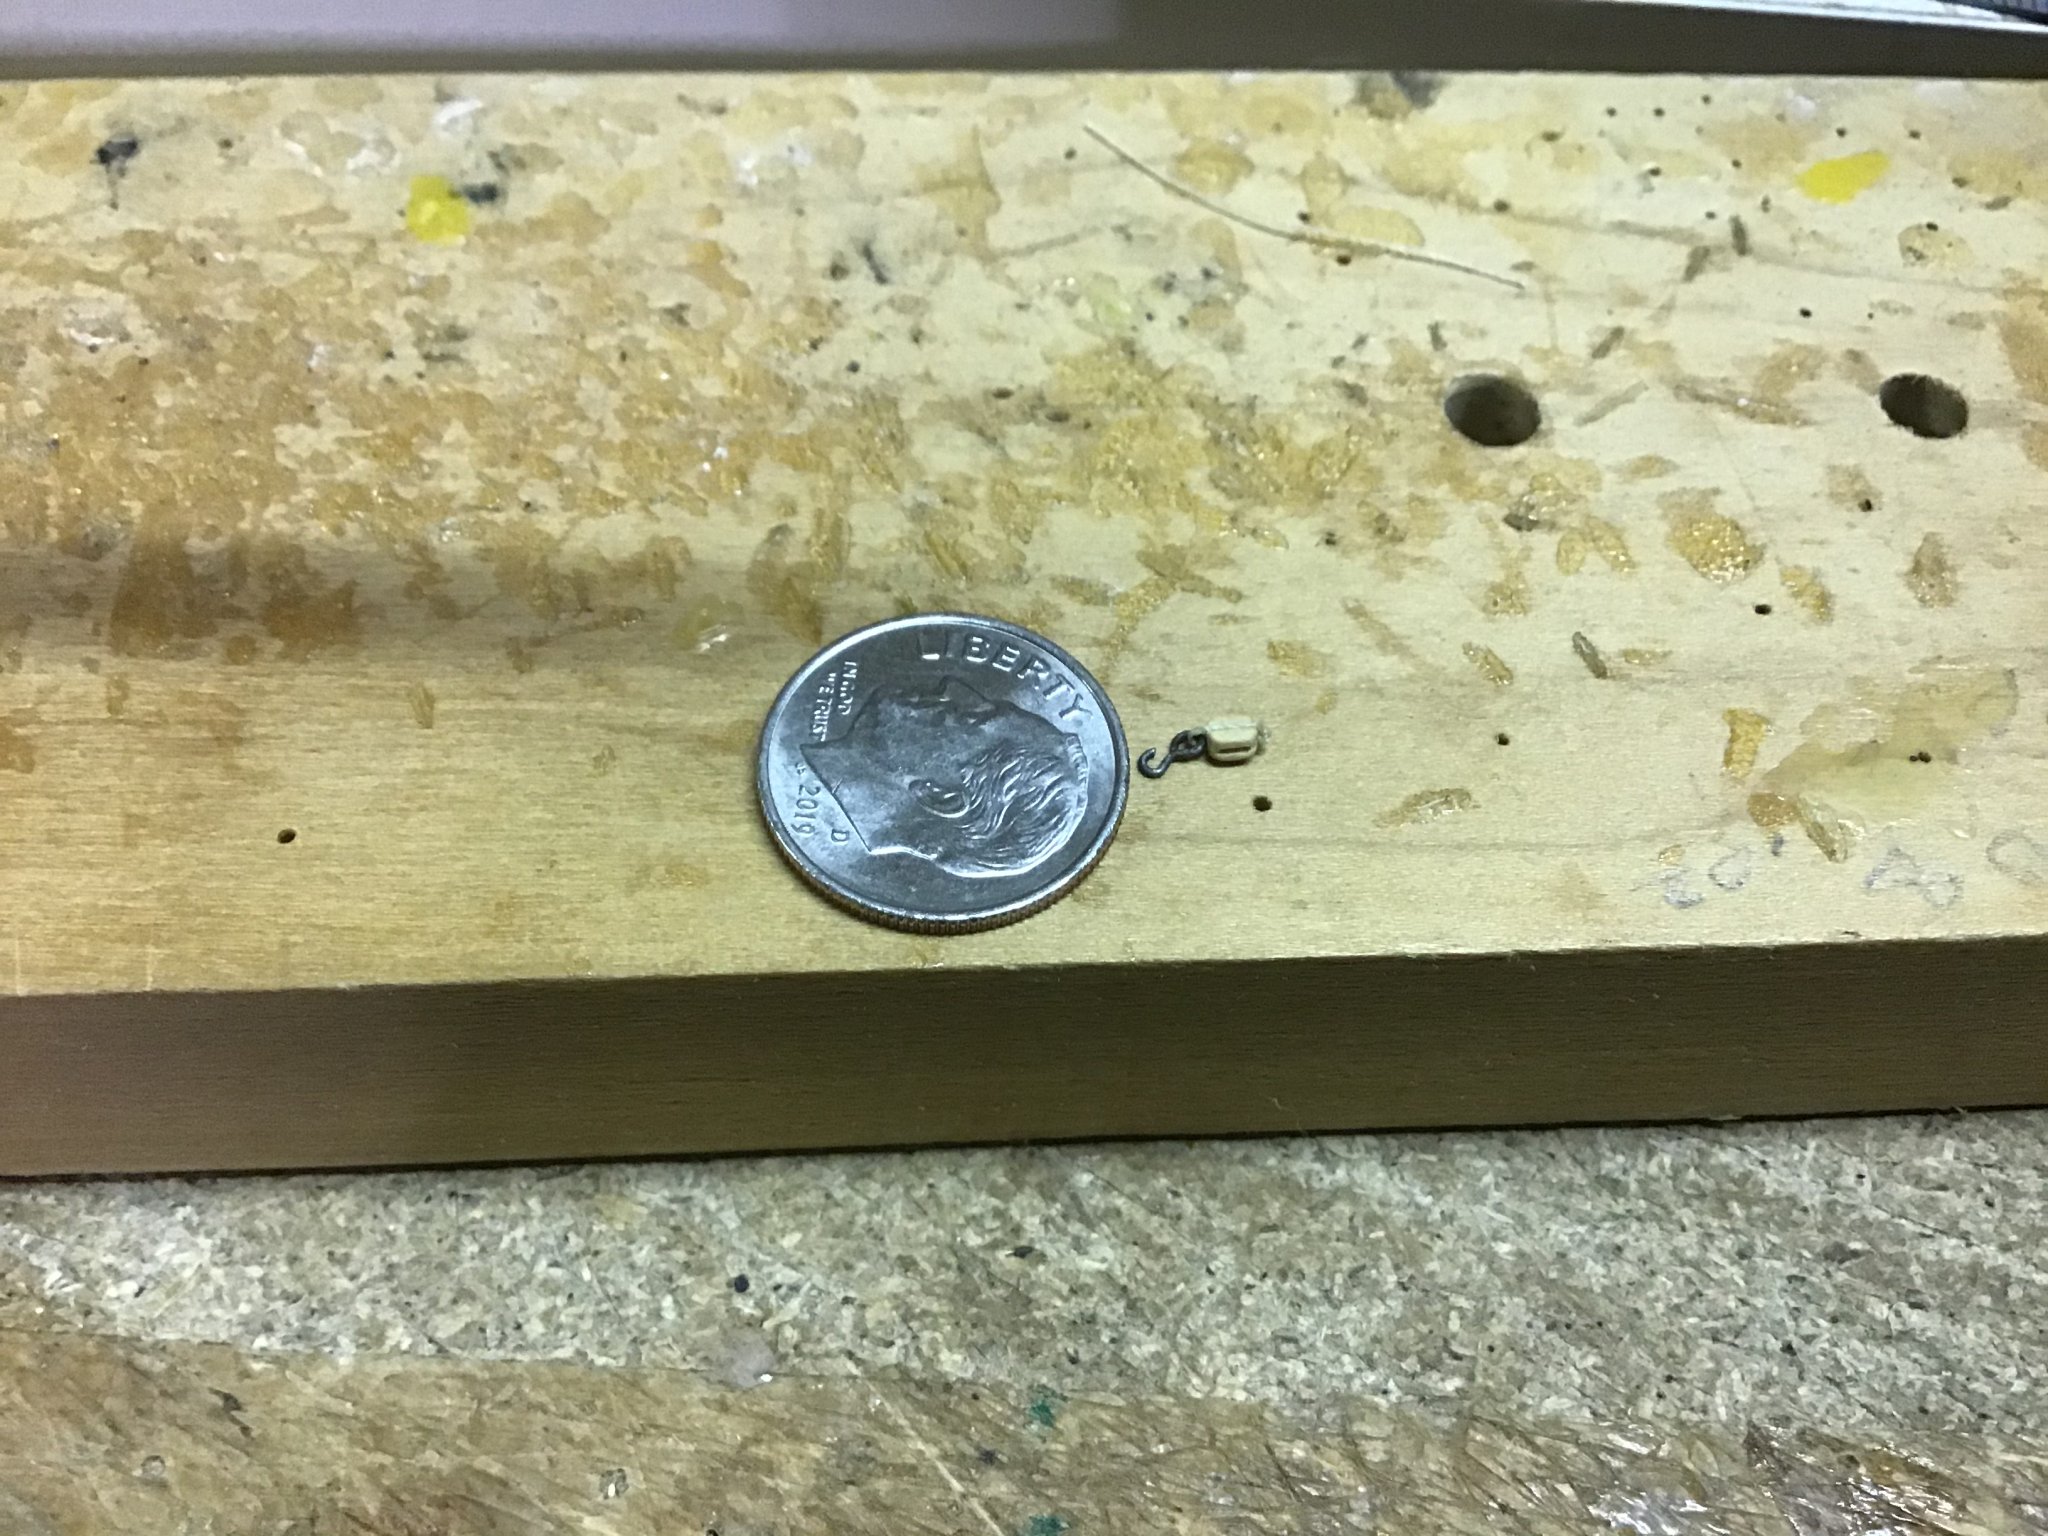
Richard, as others have stated, it can be a bit fiddly. I use a pair of small round nosed pliers with one end filed down to a fine point. You can make very small hooks and rings with them. For hooks, I make the ring, then bend the it back on itself over the eye and snip to make the hook opening. Hope that helps.


-
Henke, I know nothing of coppering a ships bottom but is looks fantastic to me. Nice work!
-
Gaetan, your work is very impressive. Wonderful model.
-
Your work and videos are always a pleasure to watch.
- 358 replies
-
- 1
-
-
- occre
- santisima trinidad
- (and 1 more)
-
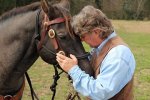
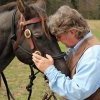
Dwight, she is a Sorrel. Don’t feel bad. I suffer from the same memory problem. The other is a blue roan paint. As for the ship, I will most likely leave her as is. Too many ships, not enough time. Thanks for all the likes folks! Much appreciated.
- 127 replies
-
- 1
-
-
- confederacy
- model shipways
- (and 1 more)
-
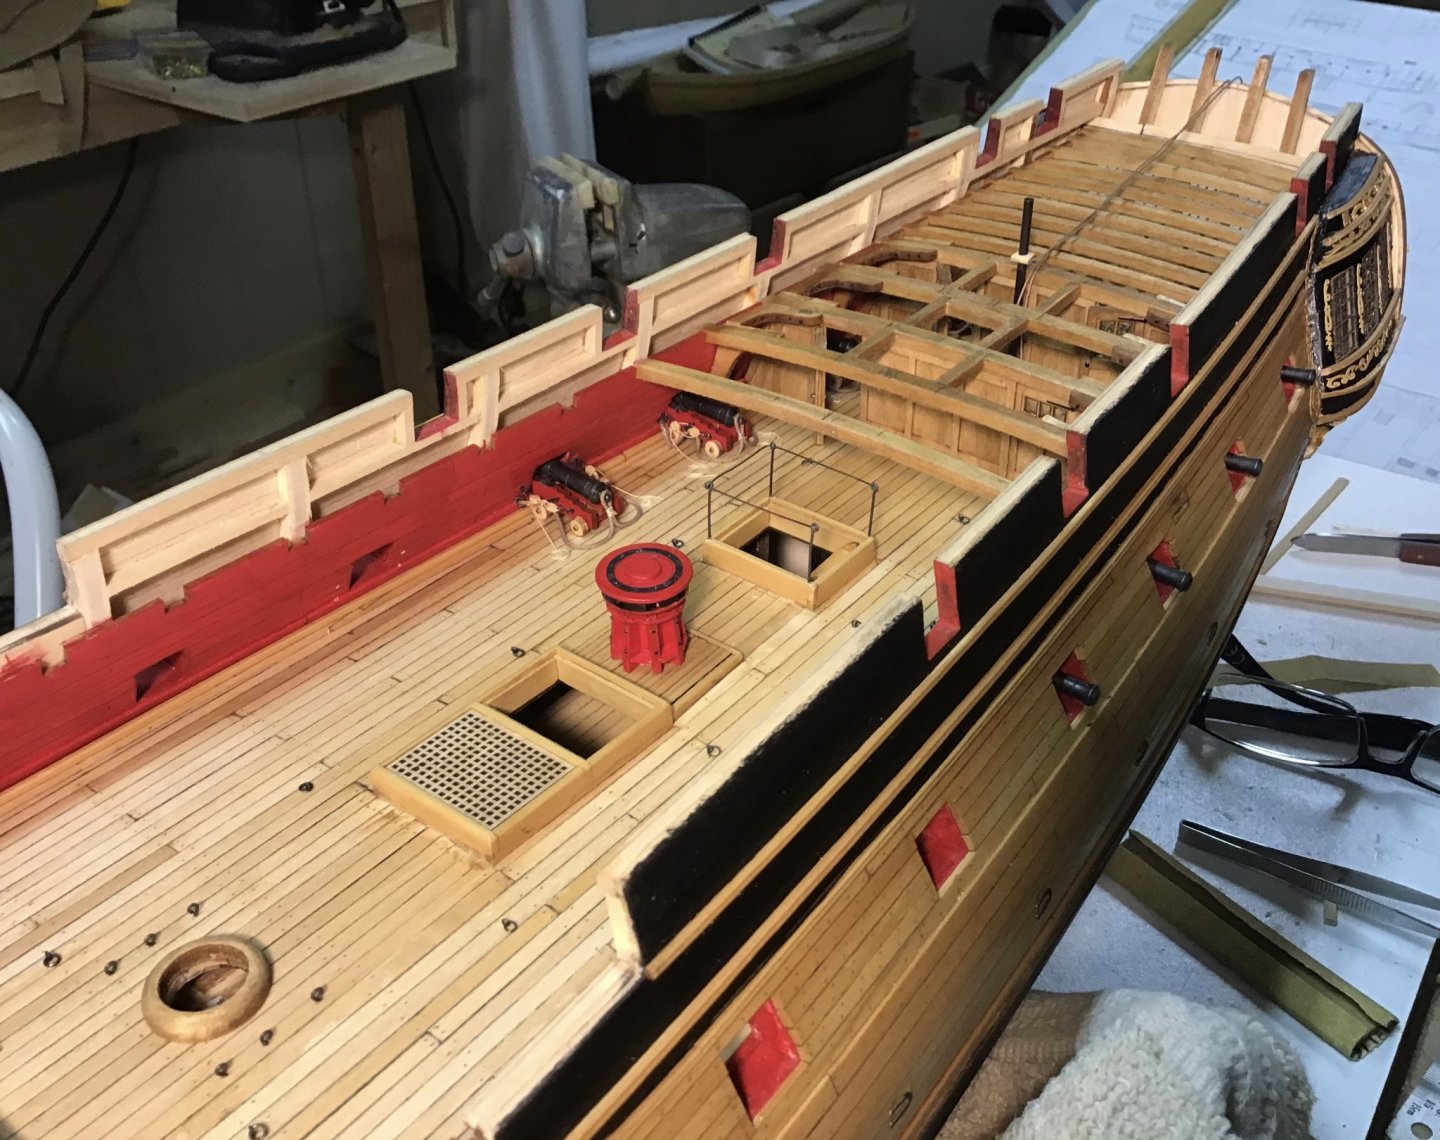
Thank you all for the comments and likes. They are most appreciated. I’ve done a bit of work but it’s slow going. Build and install two opposing cannons, rig the cannons, fit 2 quarterdeck beams, fit and install hanging and lodging knees. Then repeat the process! It’s all pretty straight forward.

- 127 replies
-
- 12
-
-
- confederacy
- model shipways
- (and 1 more)
-
Glen, following with interest as the Cheerful is next on my stocks. Very, very nice work!
- 778 replies
-
- 2
-
-
- cheerful
- Syren Ship Model Company
- (and 1 more)
-
German, welcome aboard. I have spent some time fly fishing in your beautiful country. Very nice memories.
-
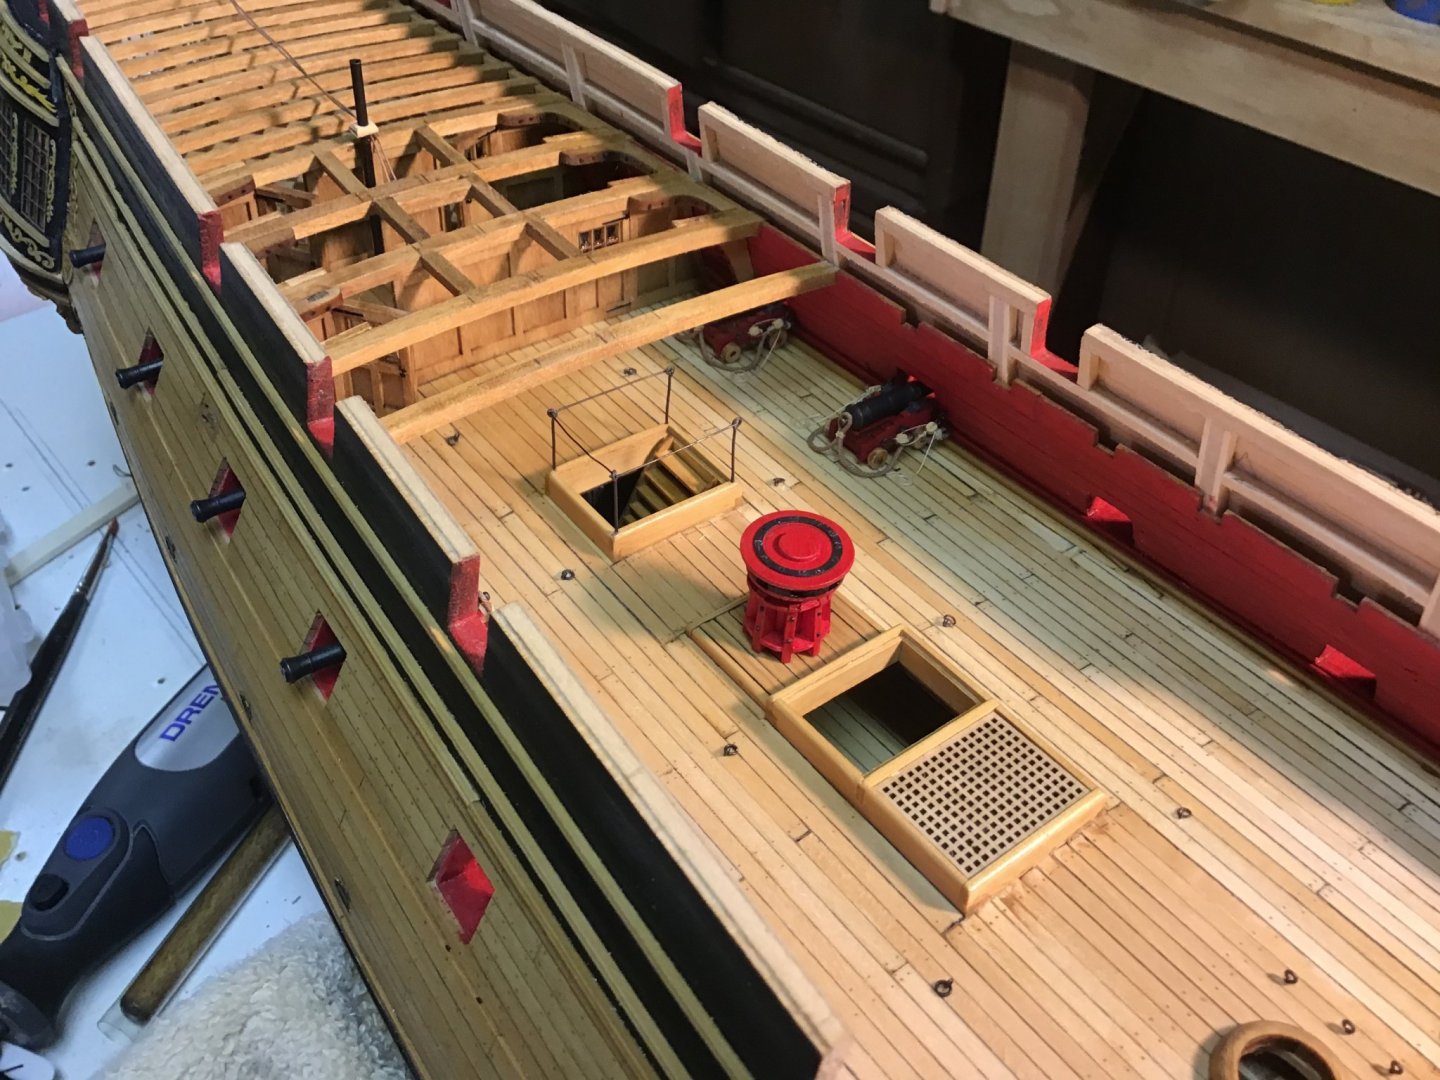
Thank you all for the likes folks. Another update from the shipyard. I know an assembly line method will give you more bang for your time but I can’t work that way. I can make only so many cannons before I have to go on to something else for a while. I have been working from stern to stem the past few weeks. Guns, running tackle, deck beams, carlings and capstan. The capstan is a fiddly sucker. The best way I found to do the pie shaped parts was to cut the angle and use for a template. Minor adjustment is needed unless you are perfect with the upright parts. Excuse my laymen’s terms. As with all of my modelling, I am never totally totally happy with the outcome. But, for us mortals in the group and as Jeremiah Johnson says, “it will do.” m My method for the coils of rope for the running tackle is to glue a piece of painters tape to a flat surface, sticky side up, and coil away with thumb and finger. Once I have a bunch made, brush with a little diluted white glue and let dry. Pick up with an exacto and glue over the end of the glued piece on the deck. The deck beams and carlings are straight forward. Now it’s time to make more cannons!


- 127 replies
-
- 10
-
-
- confederacy
- model shipways
- (and 1 more)
-
Blackening brass
Bossman replied to Bill Hill's topic in Painting, finishing and weathering products and techniques
Thank you Turangi! -
Blackening brass
Bossman replied to Bill Hill's topic in Painting, finishing and weathering products and techniques
Bill, if you search this site for “blackening revisited” you will find an excellent tutorial on this subject. I just used it and if you follow the directions you get perfect results every time. Hope this helps. Wish I knew how to tag the tutorial in this post but I’m a computer dummie. -
Harley, that is very high praise Sir. Thank you very much. I hope I can do the rest of her proud. I did consider a fully rigged ship but as it would add a year or two to the build I’m just not sure at this point. Thank you again for the compliment and generous offer. If I decide to rig her, I will take you up on the offer. Thank you all for the likes. Recognition from peers is always appreciated.
- 127 replies
-
- 3
-
-
- confederacy
- model shipways
- (and 1 more)
-
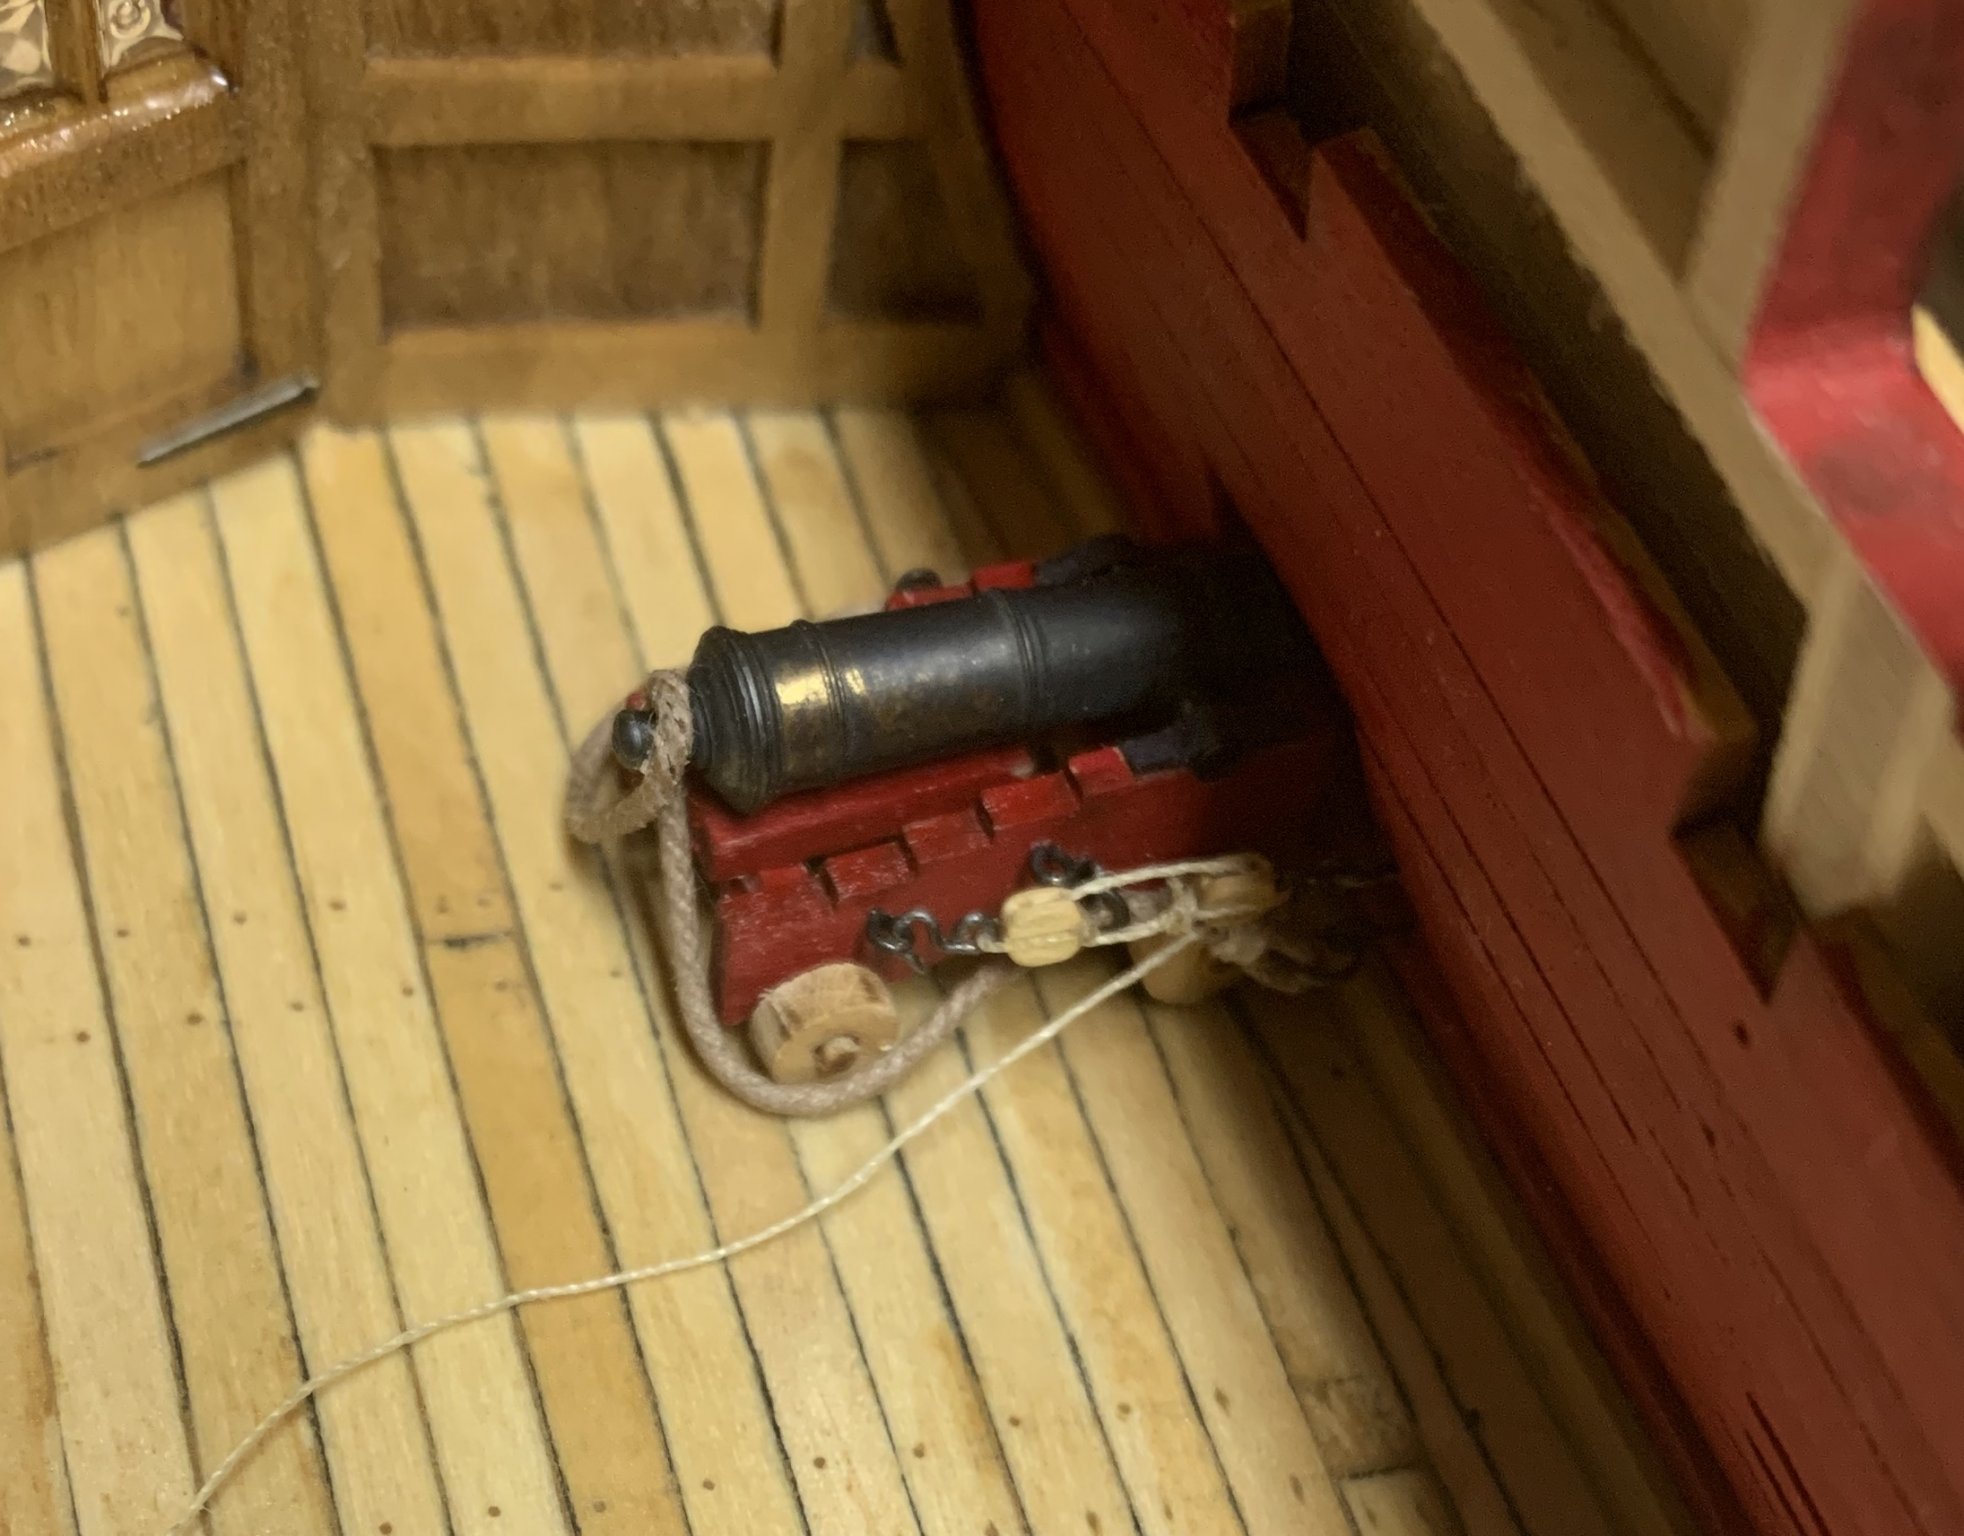
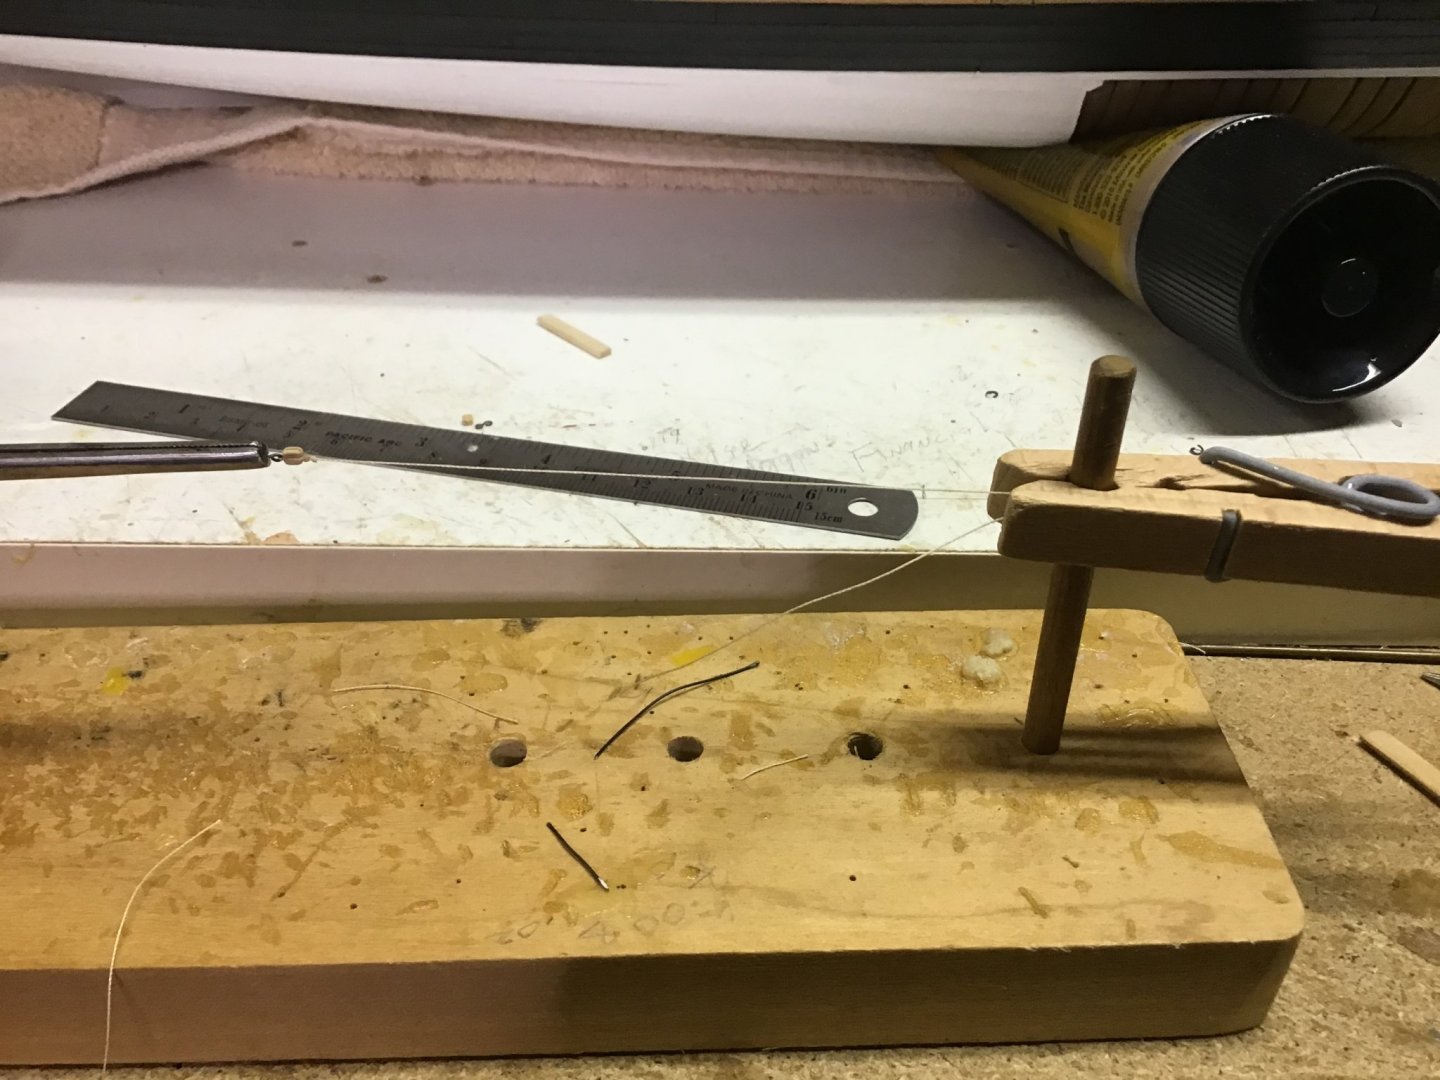
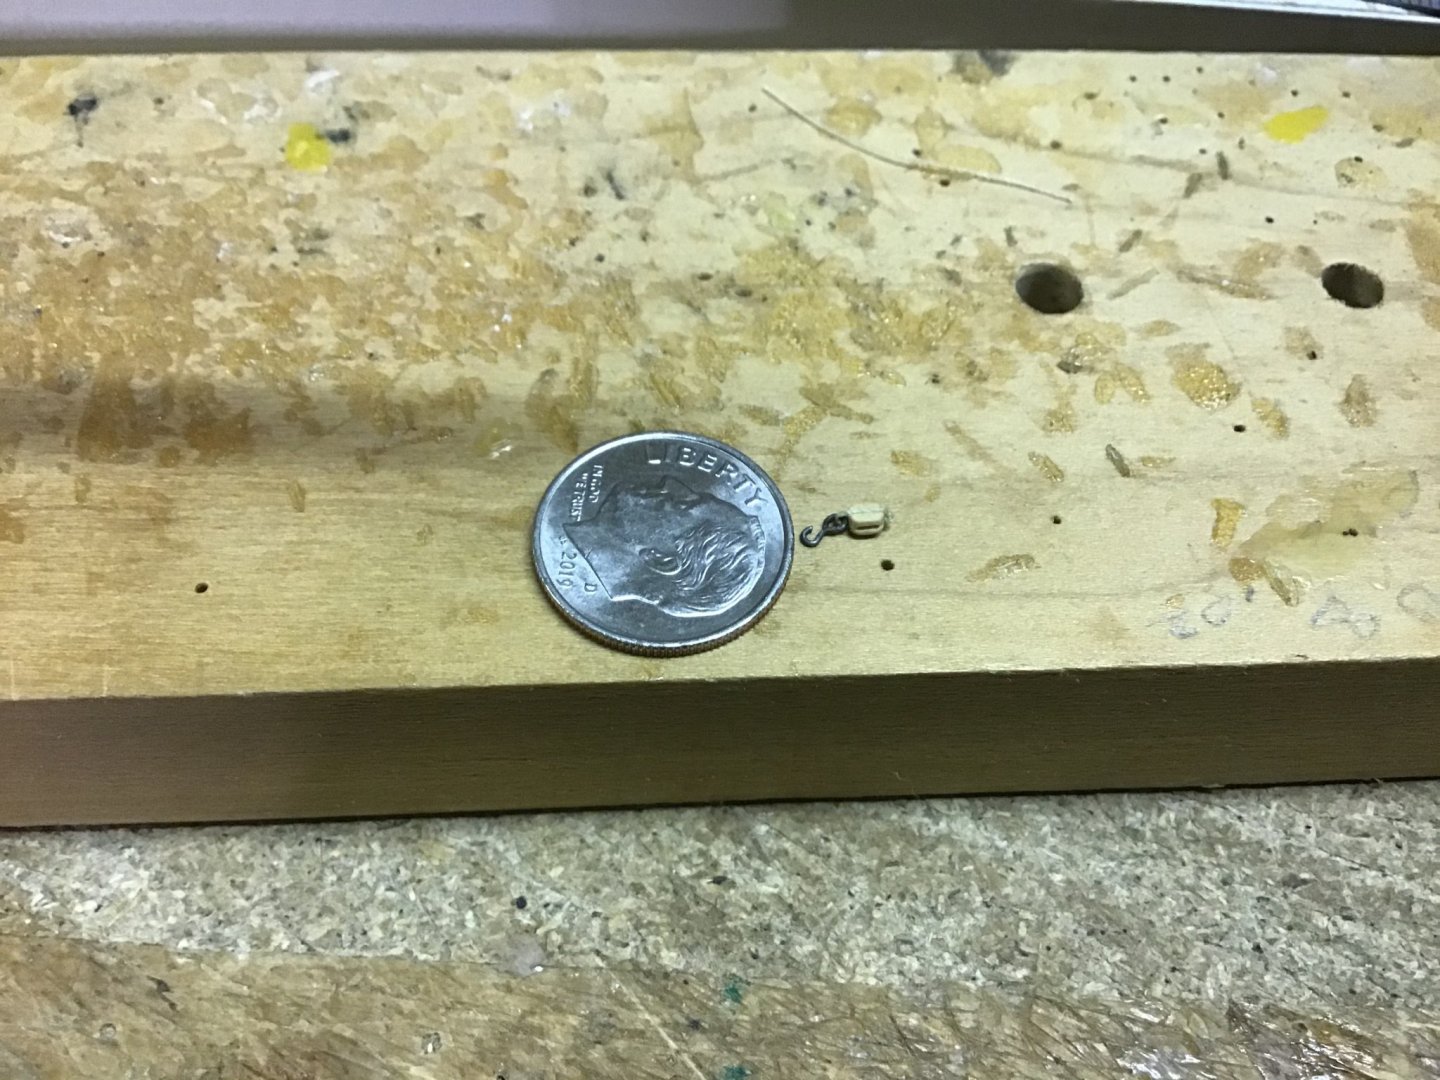
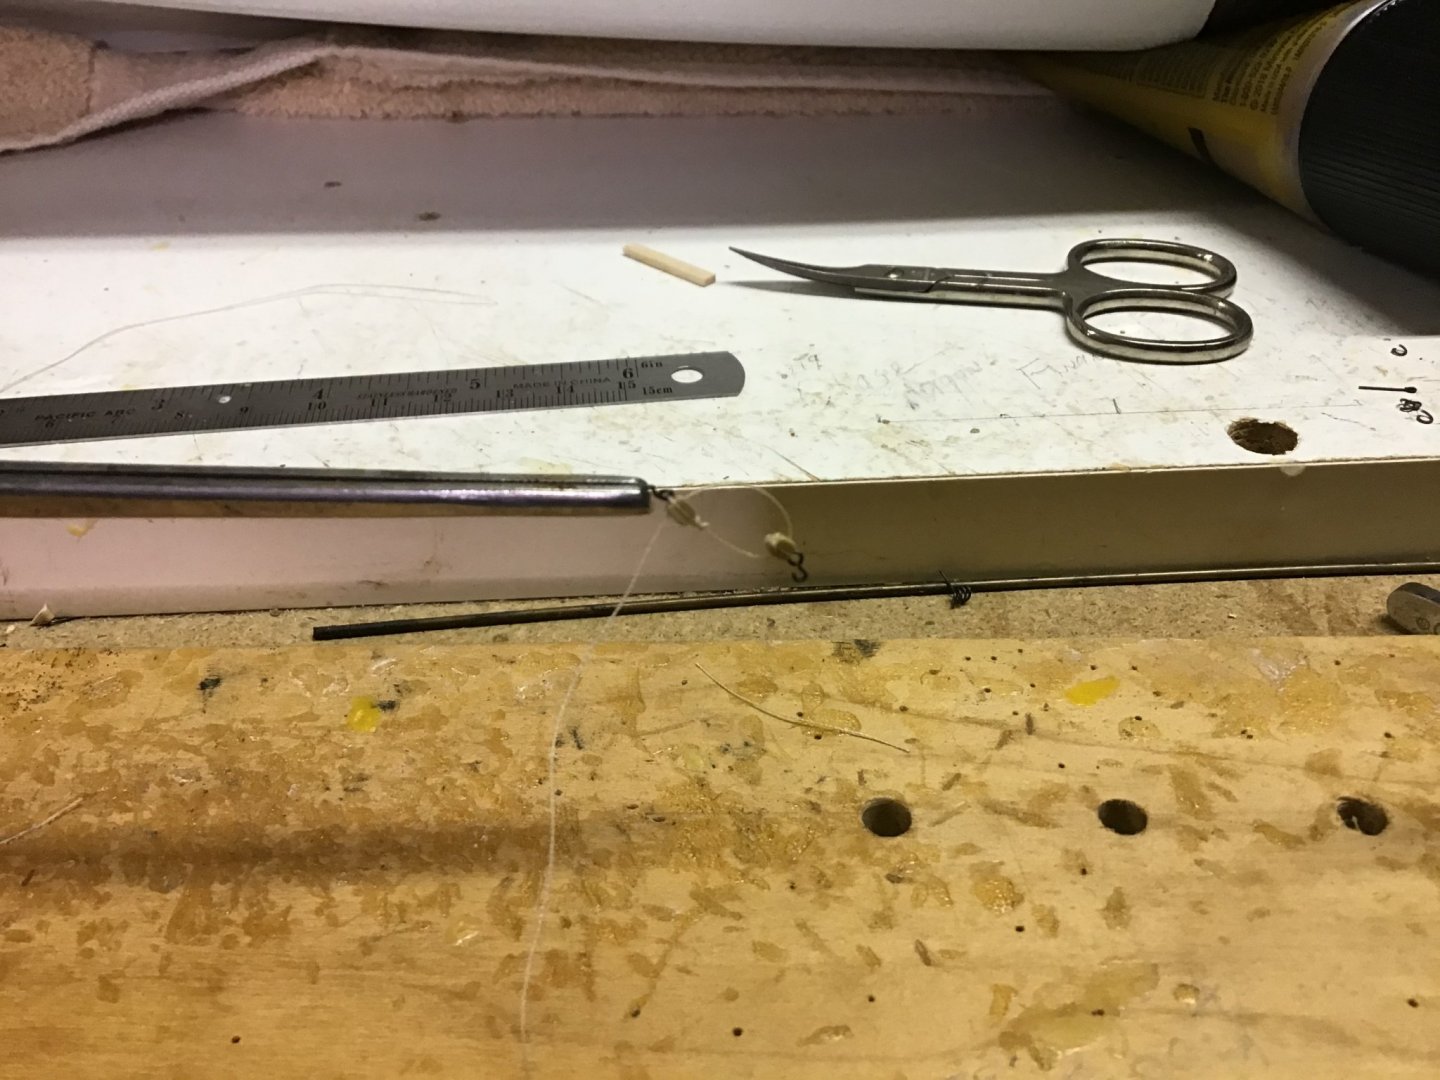
Thank you all for the likes. They keep me going. After much thinking, offerings to the gods and a few choice adult words I decided to rig the running tackle on the guns. I finally found my old jigs for such stuff. The first one is just a long clamp attacked to a board with a dowel. As you can see, the clamp holds your block and a clothes pin holds the free end. The second one shows the completed outhaul tackle. It is much easier with these tiny blocks to put a very small drop of CA in the grove for the thread. I don’t loose as many blocks that way. Once you have it complete, nothing to do but use small tools and the right language to hook the tiny things up. One down and 27 to go. The brass speaking tube is not attached yet as it needs to be blackened

- 127 replies
-
- 11
-
-
- confederacy
- model shipways
- (and 1 more)
-
Roter Löwe 1597 by Ondras71
Bossman replied to Ondras71's topic in - Build logs for subjects built 1501 - 1750
Ondras, absolutely stunning. -
Jonathan, for your first attempt at modelling you are doing an excellent job! Nice work.
-
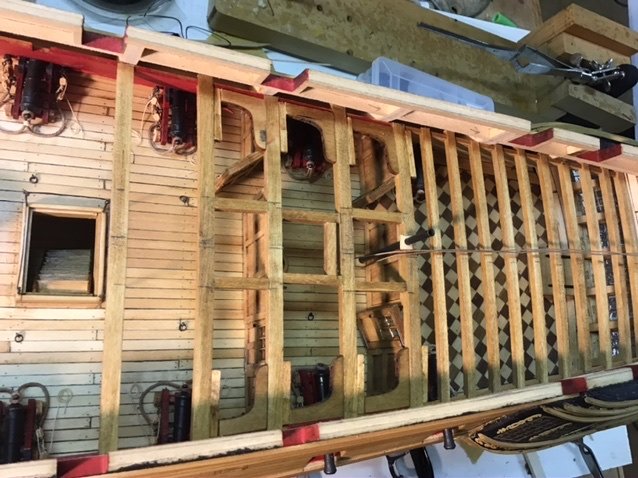
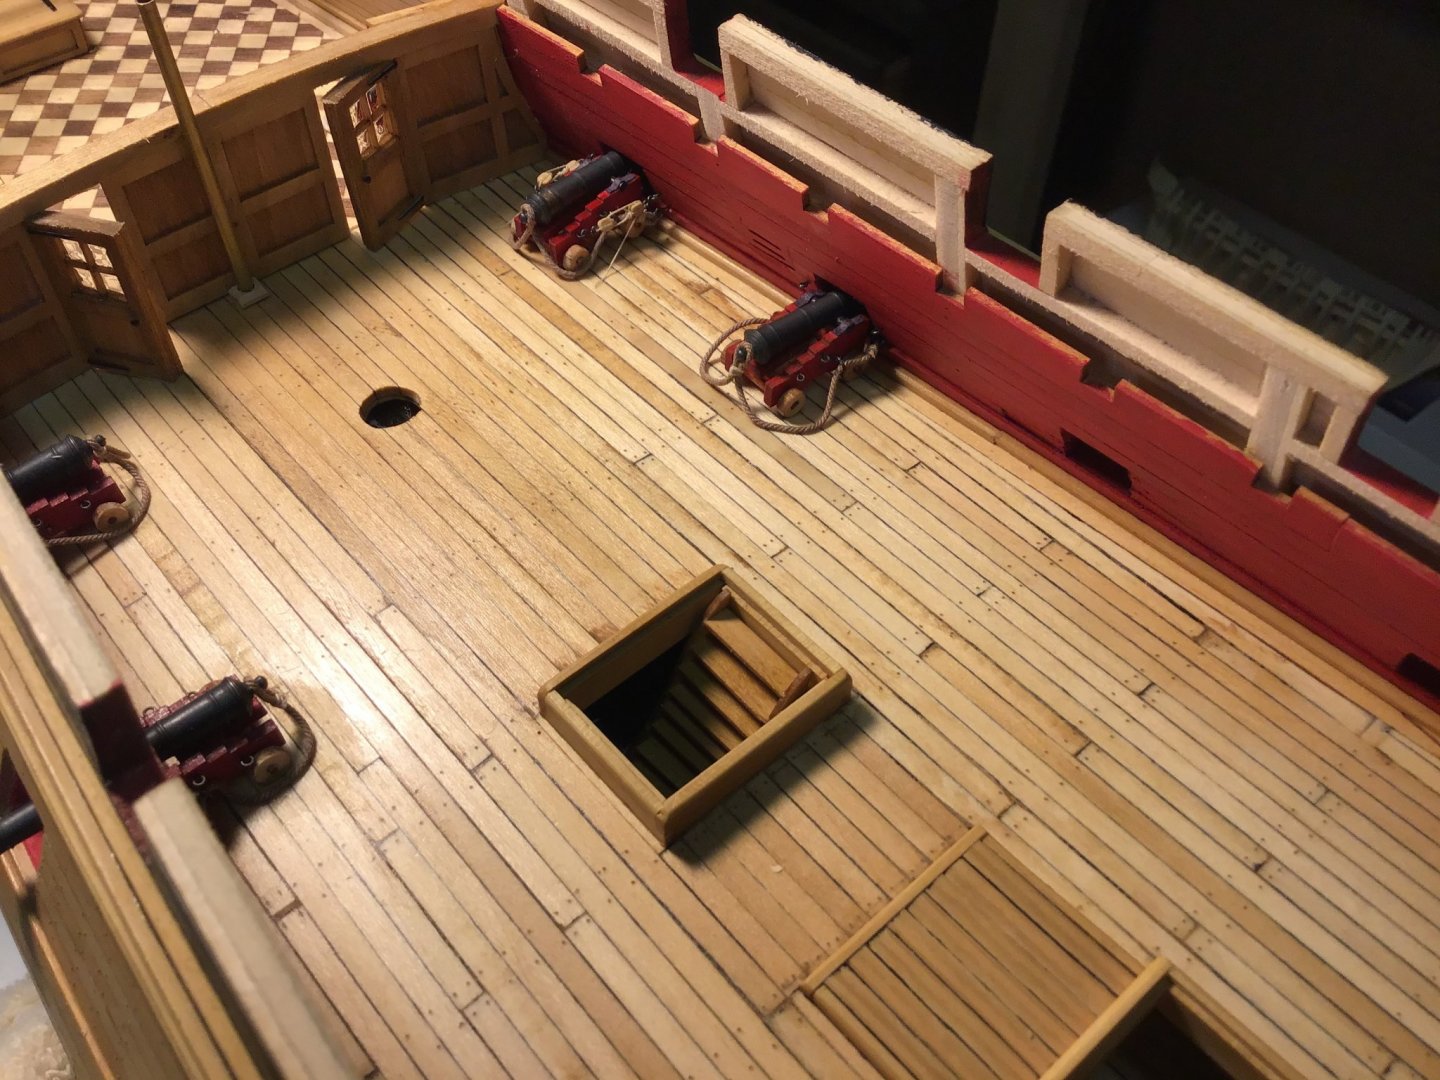
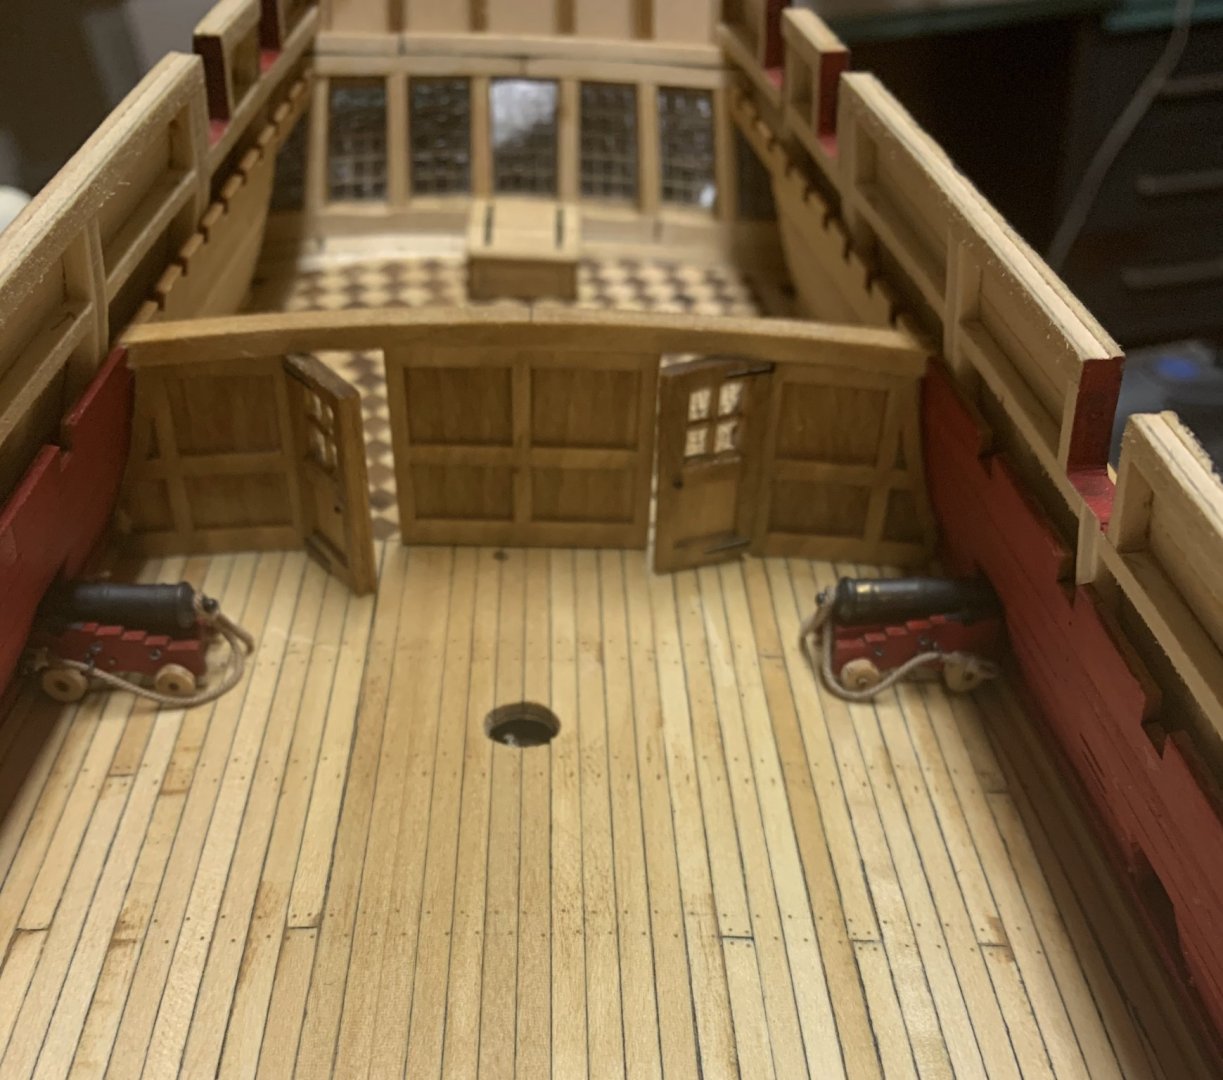
Now to the fun part. At least for me. All the deck furniture and fittings. The first bulkhead is in. Fitting the cannons with the breech rope is being a real pain for some reason. These were rigged and glued, then the breech rope ring bolt was glued into the bulwarks. Trying to hold it and hit the hole is tough with a slight hand tremor. I’ll let you know when I find an easier solution.
- 127 replies
-
- 11
-
-
- confederacy
- model shipways
- (and 1 more)
-
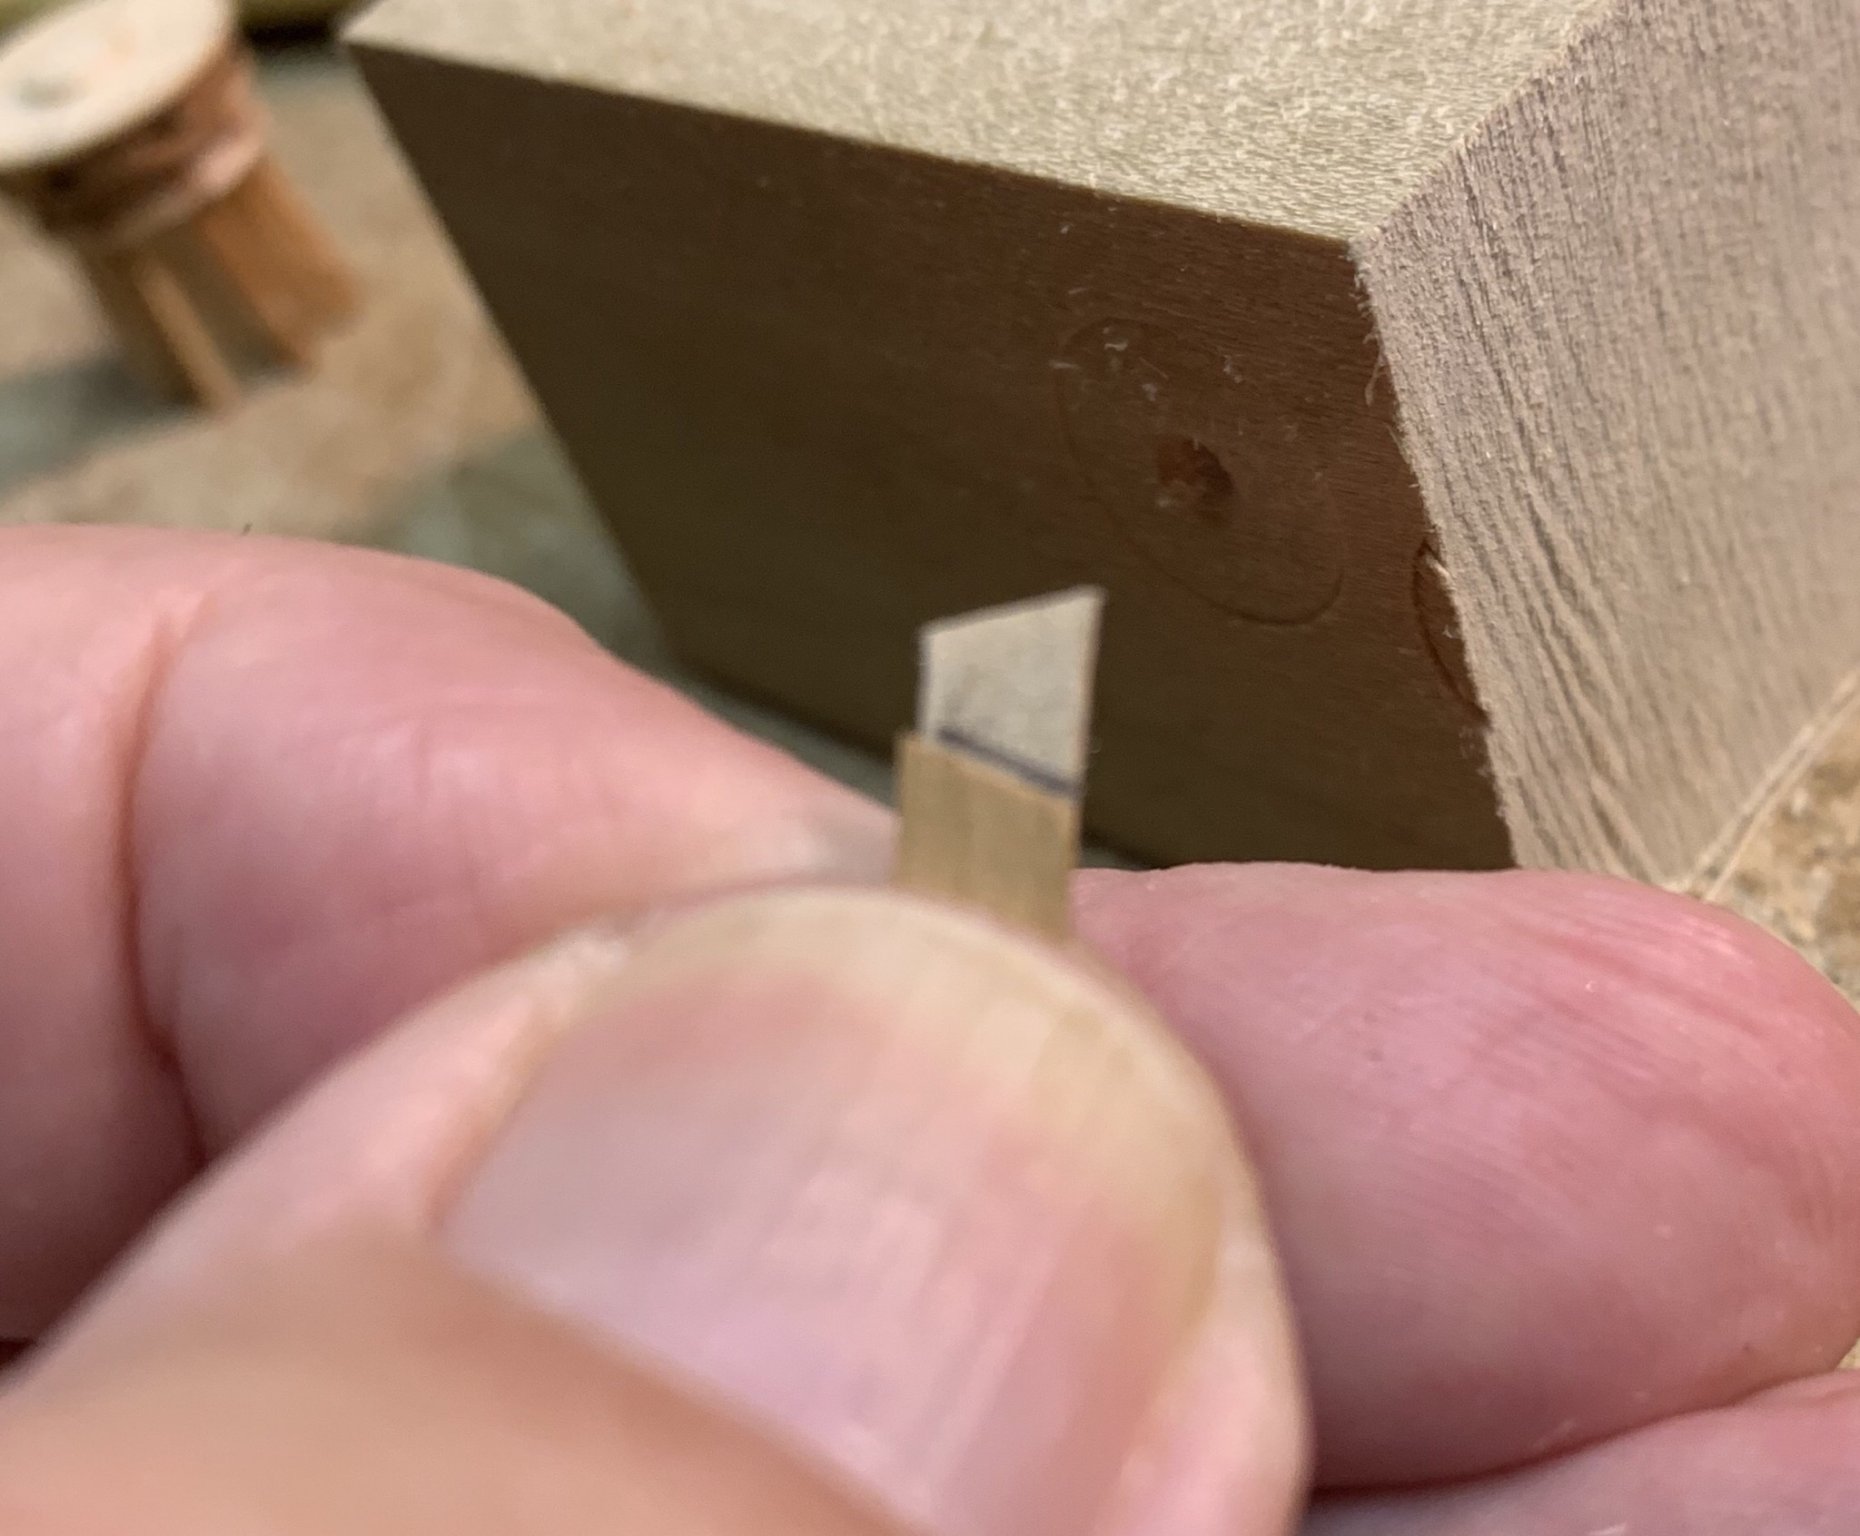
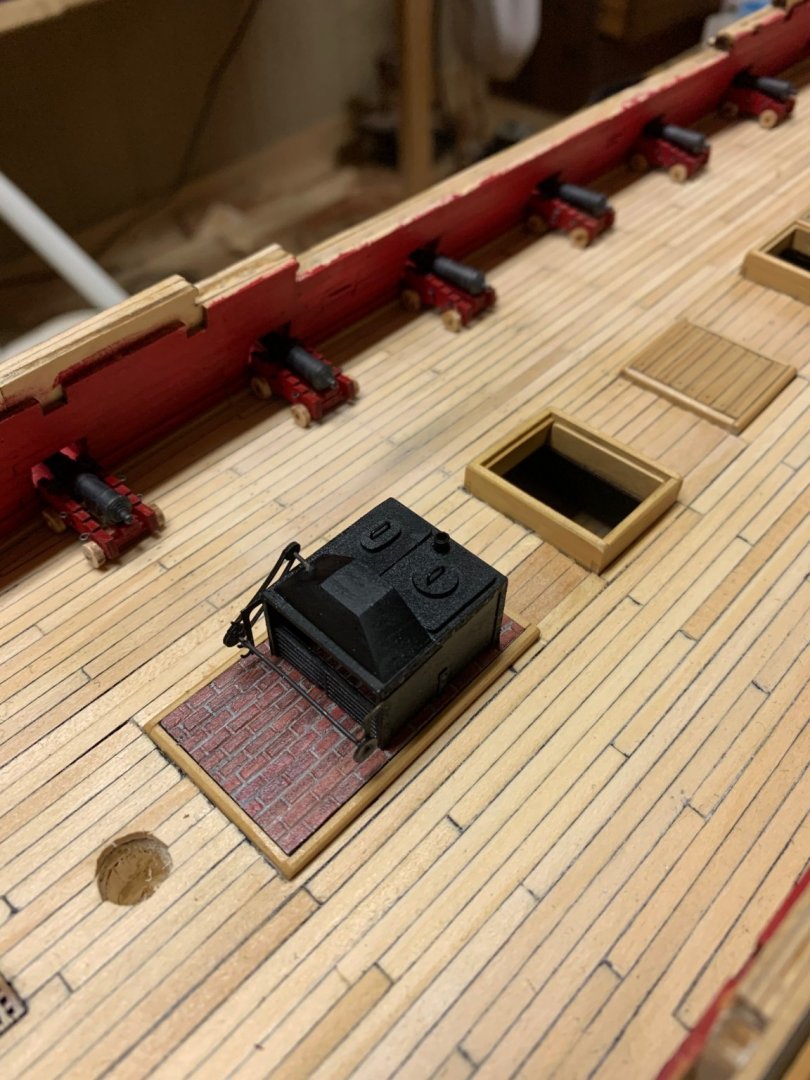
As the temps in the southeast US are way too high for me, I’ve been able to spend a lot of ship time. Not a bad thing. I finished the stove. A note here for others building this ship. The directions say to put the rotisserie arms to the “inside” of the stove. They are clearly on the outside on the plans. I don’t think anyone would notice but there it is. Also, since there were more than 1 photo etch drive for the rotisserie, I used two of them to give it a little more volume or depth. Between treenailing sessions I worked on cannons and other deck furniture to keep my sanity. There may be a better way but the first photo is my jig for the carriage. It works well for me. It has two slots in the bottom for the axles. Finally, I have finished the treenails! I’m not a drinking man but I may have a JB and Coke! The picture was taken just after adding the WOP so they will not be as dark once dry.

- 127 replies
-
- 11
-
-
- confederacy
- model shipways
- (and 1 more)
-
Peter, that is sweet! Excellent work. That’s as good as it gets.
-
Glen, very nice so far. Your craftsmanship is showing.
- 778 replies
-
- 2
-
-
- cheerful
- Syren Ship Model Company
- (and 1 more)