
Bossman
-
Posts
283 -
Joined
-
Last visited
Content Type
Profiles
Forums
Gallery
Events
Everything posted by Bossman
-
 Absolutely stunning!
 -
She is a real gem Glen! Beautiful work.
- 778 replies
-
- 2
-

-
- cheerful
- Syren Ship Model Company
- (and 1 more)
-
Bruce, we are all our worst critics. She looks pretty darn good to me. Once everything is added, a lot of the mistakes will disappear. Good luck on the move.,
-
Roter Löwe 1597 by Ondras71
Bossman replied to Ondras71's topic in - Build logs for subjects built 1501 - 1750
Ondras, your model and the craftsmanship you put into it is an inspiration. Beautiful! -
Gary, very nice work Sir! Once the cannons are mounted and the breech ropes adjusted, a little CA placed on the bottom of the rope where it contacts the deck worked good for me. I use a bent wire for an applicator. My compliments on a very detailed log.
- 370 replies
-
- 1
-
-
- Model Shipways
- Confederacy
- (and 1 more)
-
Paul, I hope you get to 100% soon. She is a beautiful model!
-
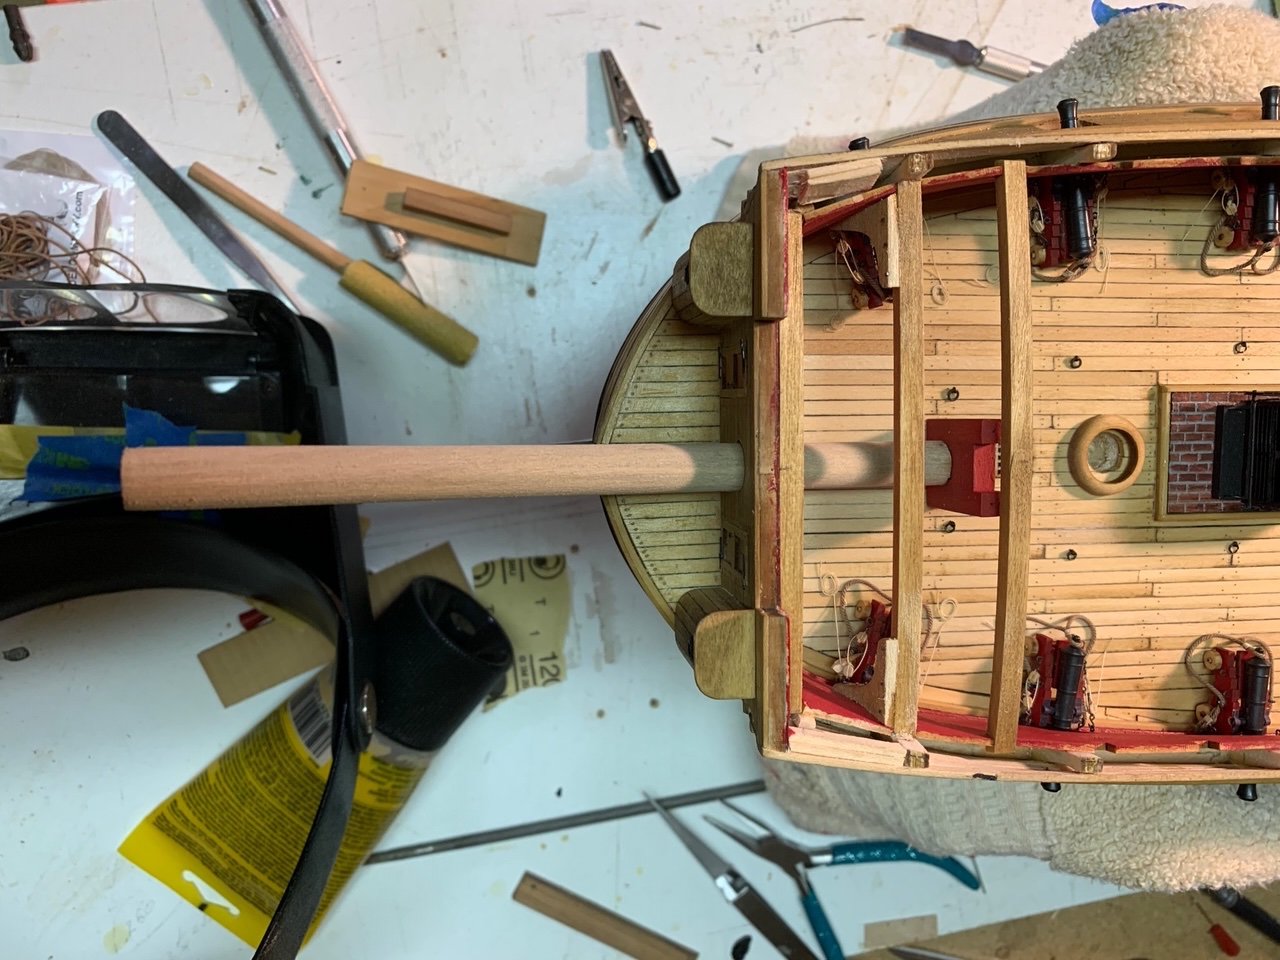
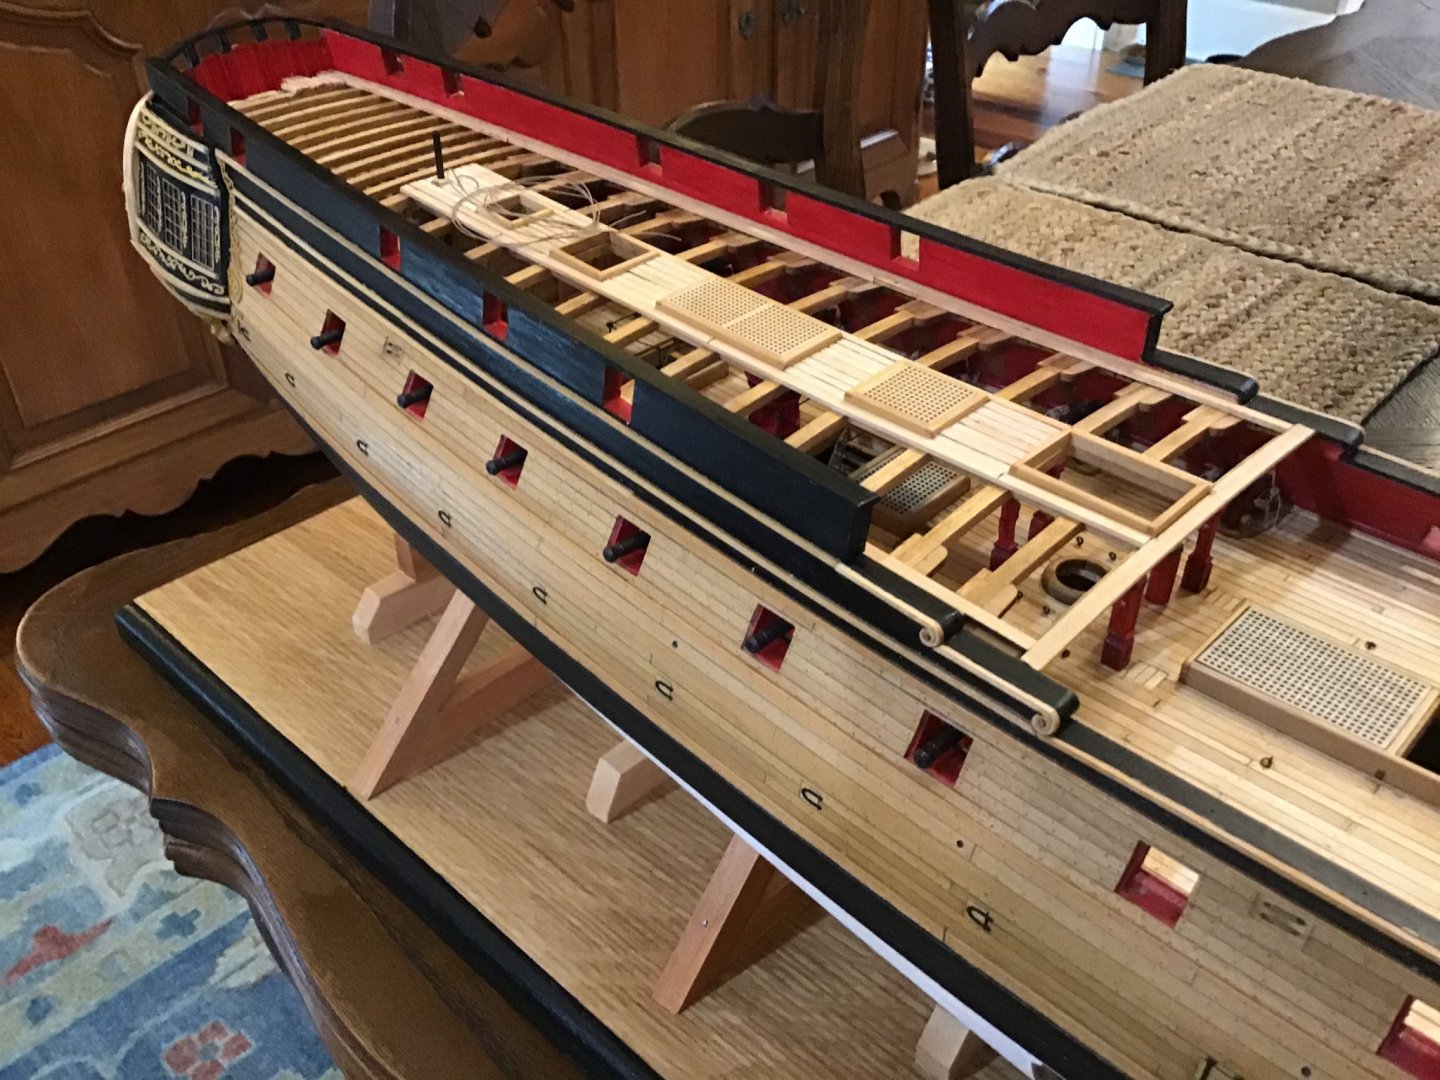
Moving along with the f’castle, I have temporarily fitted the bow sprint. It still need tapering for and aft and the fittings but that will be for permanent installation. At least it is straight and at the right angle! Thank you all for the likes gents!

- 127 replies
-
- 5
-
-
- confederacy
- model shipways
- (and 1 more)
-
Greetings! Long time lurker coming out of the bushes!
Bossman replied to EKE's topic in New member Introductions
Welcome aboard! -
cdr, if you keep your precise methods and craftsmanship through the rest of the build, this is going to be a gem!
- 370 replies
-
- 2
-
-
- Model Shipways
- Confederacy
- (and 1 more)
-
Nice work Sir. She is looking great. Outstanding for a first build!
-
Very nice work! As for the brick work, which looks fine, once the stove and drip pan covers 60 % of it and you are looking down through beams and planking, anything you think “is not nailed” will disappear. I wish the progress on my Confederacy build was behind yours. Your log might have given me the discipline to slow down. You are making a beautiful ship model.
-
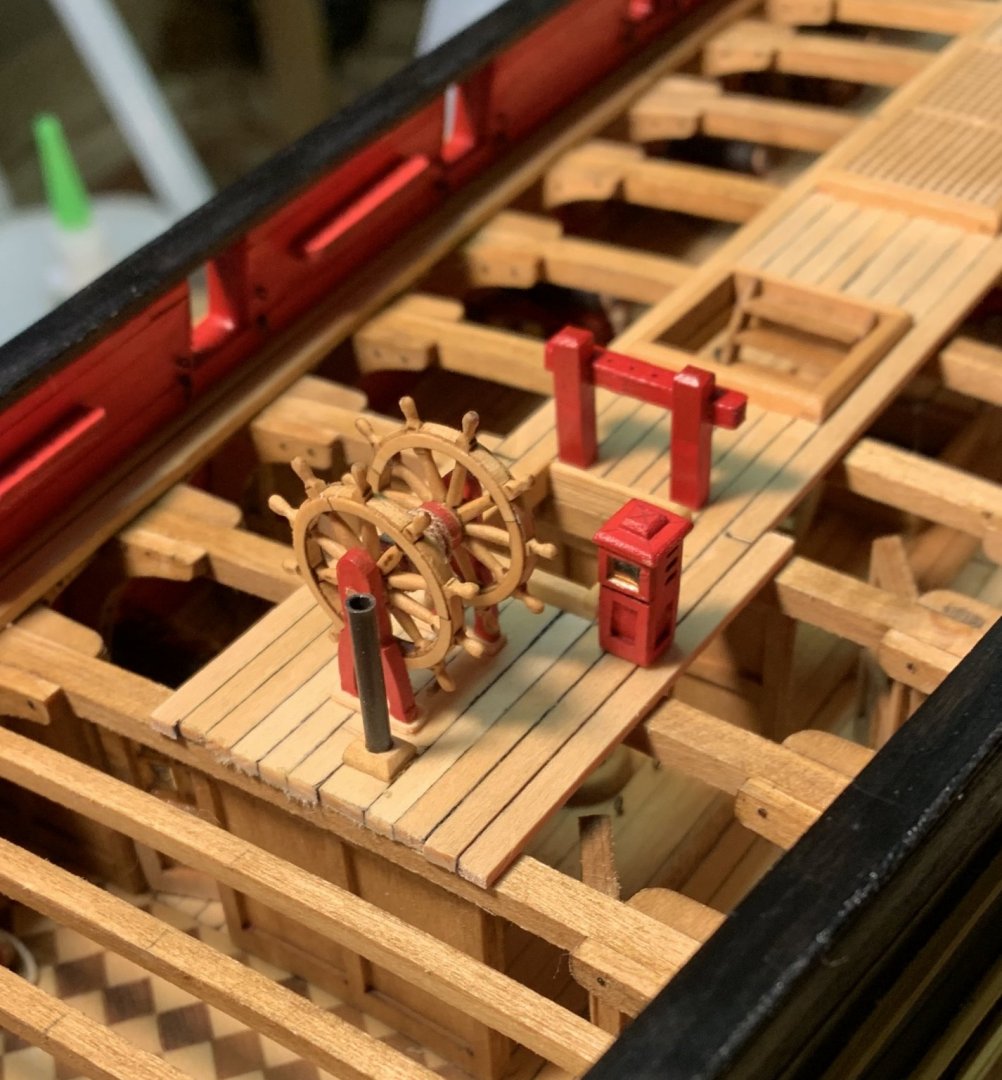
Just a short update folks. I finally finished the two wheels for the Confederacy. The other binnacle is being painted. I can’t say enough good about the wheel kits from Syren. They are top notch and are so much better than the anything I have seen supplied with kits. I am now 9 months into this puppy. Maybe 6 more months and I’ll have her finished. Thank you all for the likes Folks!
- 127 replies
-
- 10
-
-
- confederacy
- model shipways
- (and 1 more)
-
Spike, I have always used the method as you described. You can eyeball keeping everything straight. I would suggest having every line And block attached to every yard before hanging. That keeps working “in the air” to a minimum. Good luck.
-
Doris, all I can say is perfection! Just beautiful!
- 1,035 replies
-
- 4
-
-
- royal katherine
- ship of the line
- (and 1 more)
-
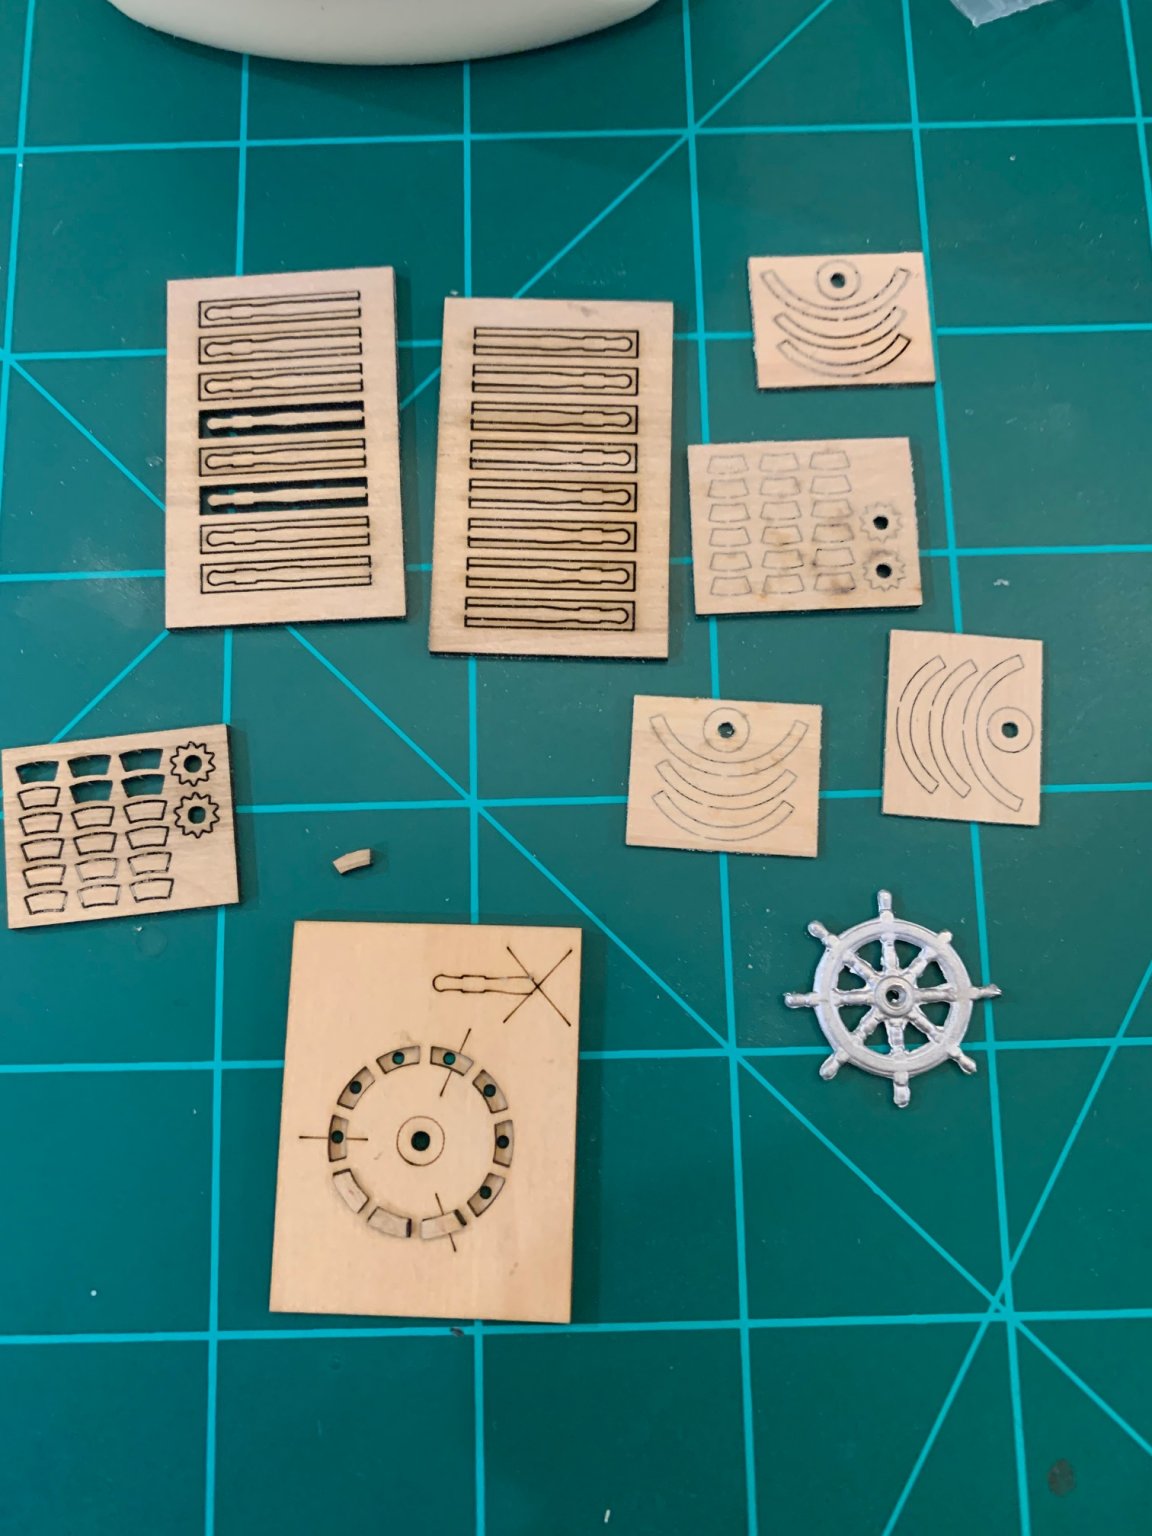
The wheels that come with this kit are under scale and look like 5 miles of bad road. So I ordered 2 wheel “kits” from Syren. They are fantastic. I will not go through the construction as the instructions are on Chuck‘S site. The first photo shows what is in the pack with a few parts in the jig. The second photo shows my 1st build. The second one will look much better. The boxwood is great quality. The jig provided makes construction straight forward. I will not say easy as with this many small parts, it can be a bit troublesome. Did I mention the small parts? I shaped the spokes by hand with the tools in the photo. There also is a generous amount of spares in case you loose or break one. As a mater of fact, since I have two kits, there just may be enough spares for a third! If I don’t lose or break any. Again, now that I have assembled one, the next should be much better. If you want to replace the wheel on your kit I would highly recommend getting one from Syren. For the record, I would not know Chuck if he stopped me on the street.


- 127 replies
-
- 9
-
-
- confederacy
- model shipways
- (and 1 more)
-
Bill, just went through your log. You are doing a fine job. She is a beautiful model!
-
Fantastically craftsmanship Sir.
-
Qakeith, welcome to the forum. A wonderful job Sir! Those old Revell kits bring back lots of great memories. None as nice as building one you and your dad made years ago.
-
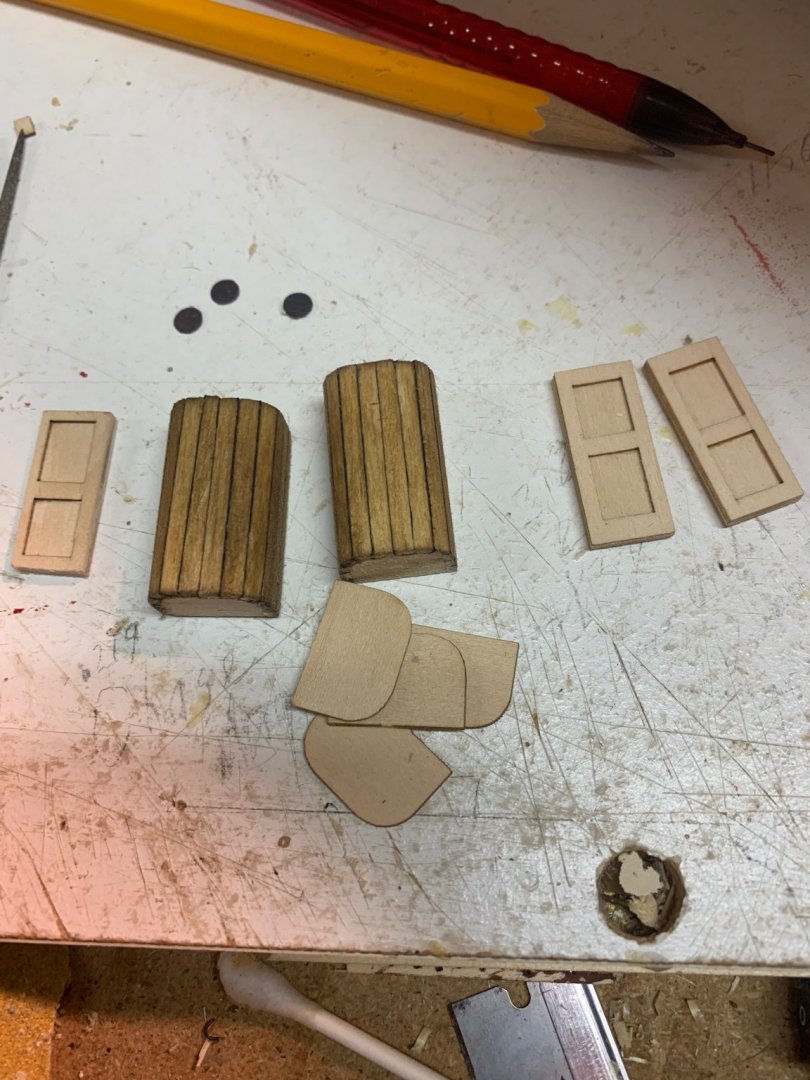
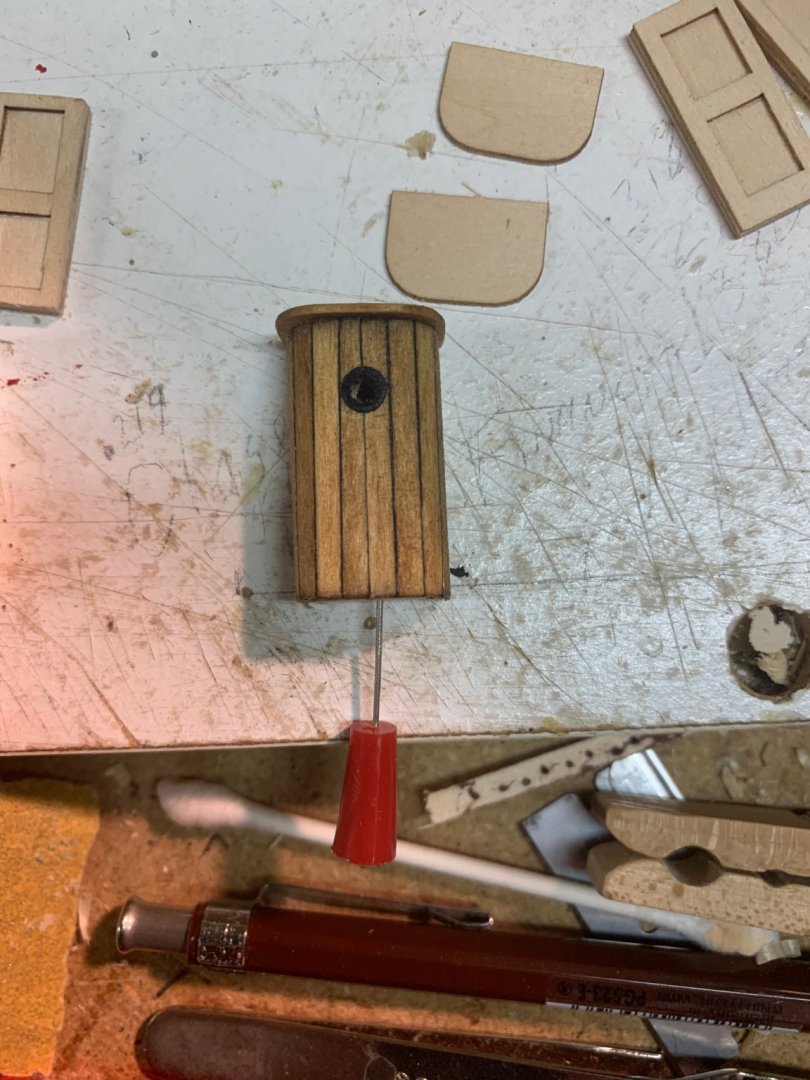
Update on the shipyard activities. I have completed the main and mizzenmast rails. What turned out to be what should have been a routine operation on the main rails went south quick. I had a great plan. Attached the two outside uprights first. Attached the two middle uprights On the deck planking next. I Then pinned a false piece across the top of these So that I could attach the 2 inside uprights at the exact height. Perfect! Boy am I smart. Then when I went to attach the lower cross railing with the belaying pins, something was amiss. It seems I had attached one of the uprights on the wrong side of my reference mark. In trying to remove it, I knocked off on of the others. After an adult conversation with myself, I finally got her completed. T Time to close up the front with the roundhouses and doors. I cut a scrap piece as a jig to insure they were square and true. Planked as usual. They need some hefty bevels on the curves. The plans call for using a piece of wire around the vent hole. My solution was to use my leather hole punch on black construction paper and glue to the finished house. I then drilled out the center with an appropriate size drill. I’m happy with the outcome. Once the poly dries I will clean up the hole a bit. Thank you all for the likes!

- 127 replies
-
- 10
-
-
- confederacy
- model shipways
- (and 1 more)
-
Peter, that’s what my space looks like when it’s tidy! Your Confederacy is looking very nice! Great work. The futures so bright you gotta wear shades.
-
Robert, congratulations on finishing a fine model. She looks great! This one sure brought back some great modelling memories.
- 165 replies
-
- 1
-
-
- english galleon
- revell
- (and 2 more)
-
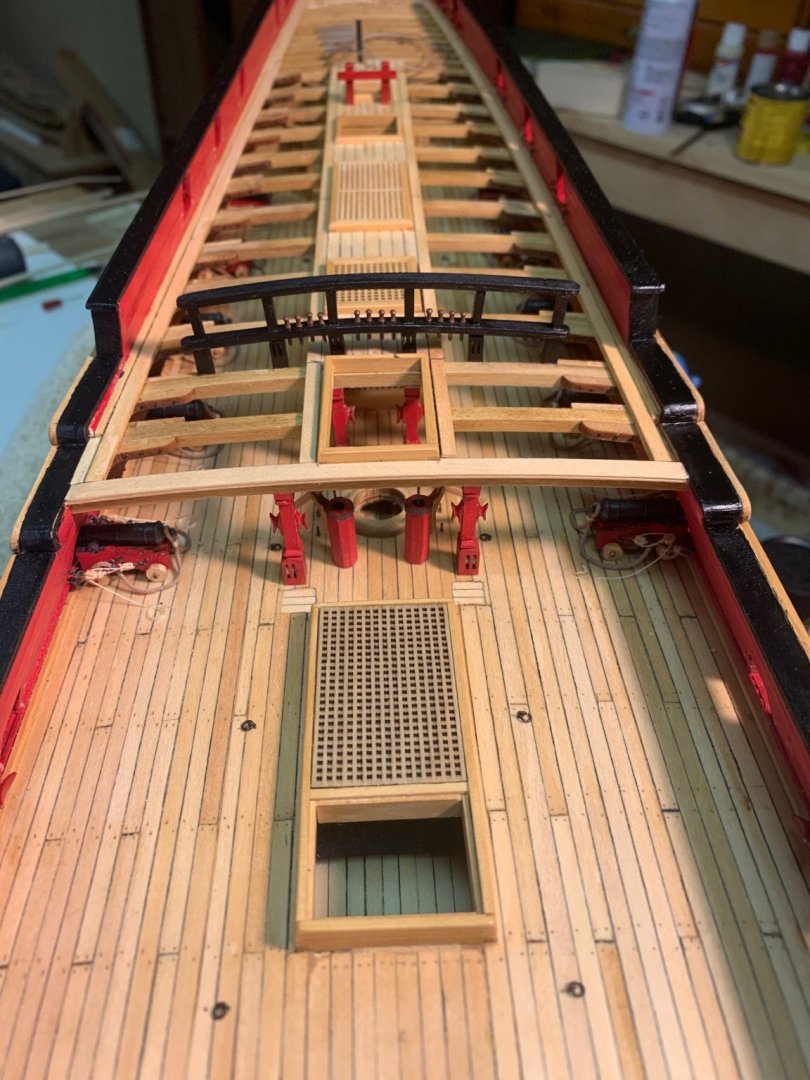
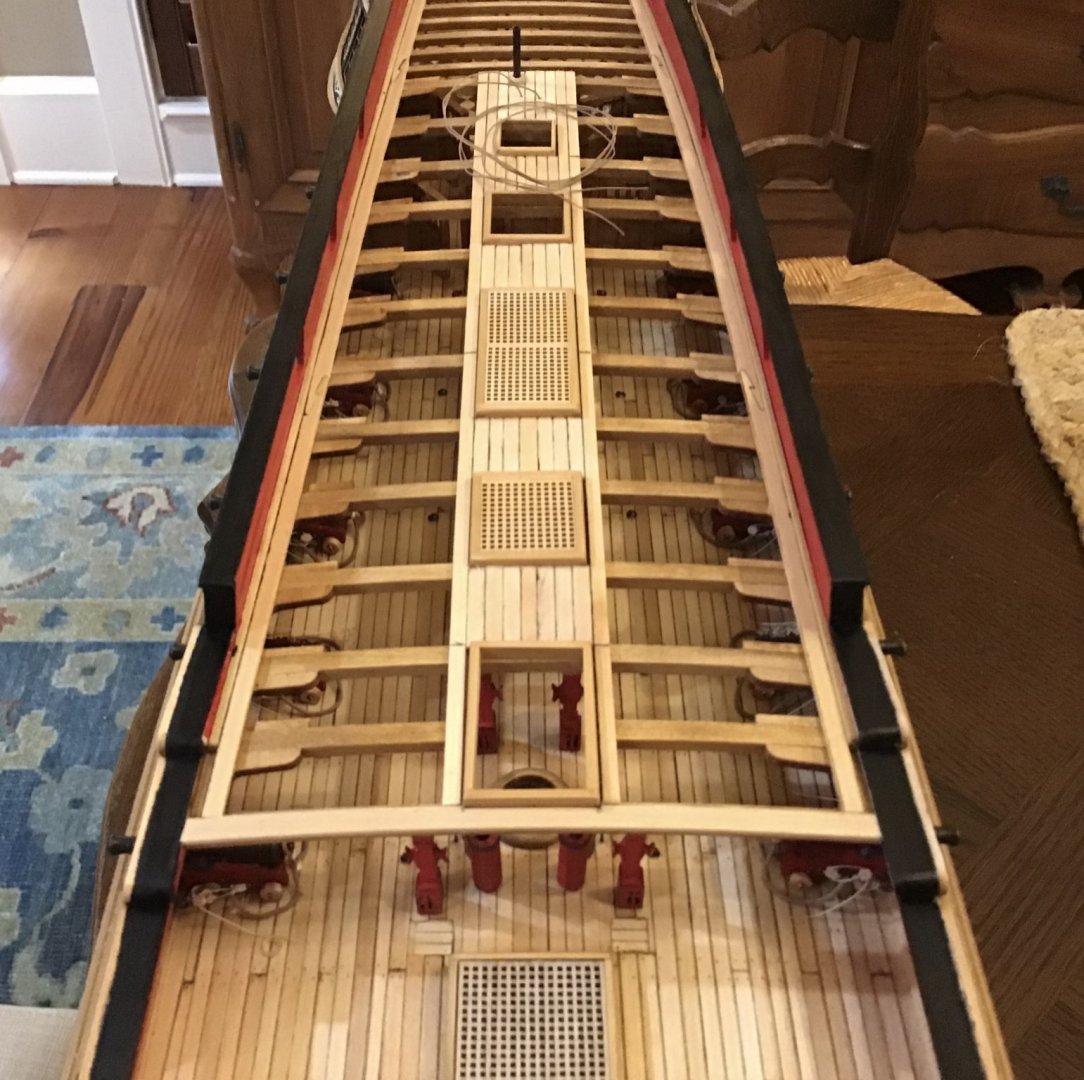
Thank you all for the likes and encouragement folks! The shipyard is in full Swing this week. This is the quarterdeck planking scheme I have chosen for my Confederacy. Though different from the plans, Chucks directions say it is my choice so technically I am following them. Waterways and margin planks on both sides and one plank width past the combings. At present I do not plan on mounting the 6 pounders but may change my mind. If I do there will be planking only under the guns and they will only be mounted on one side, not both. I laid 1 plank, full length on each side of the combings to insure a straight run. I did not do this on the gundeck and it caused problems. I then laid the planks between the combings from the outside in and tweeked the length of the middle plank to fit. Maybe if I was a better modeller, this would be unnecessary, but as my skills stand now, it works. Mark
- 127 replies
-
- 11
-
-
- confederacy
- model shipways
- (and 1 more)
-
Sam, looking forward to the rest of the build. Sounds like a good plan.
-
Removing Laser Burn?
Bossman replied to Shaft's topic in Building, Framing, Planking and plating a ships hull and deck
Shaft, sanding or scraping is my method. As for painting, especially if using a light color, I would sand all the char off or it will not match the rest of the piece. Hope this helps. -
She is looking very nice Bruce. Nice work!