lmagna
-
Posts
5,885 -
Joined
-
Last visited
Content Type
Profiles
Forums
Gallery
Events
Everything posted by lmagna
-
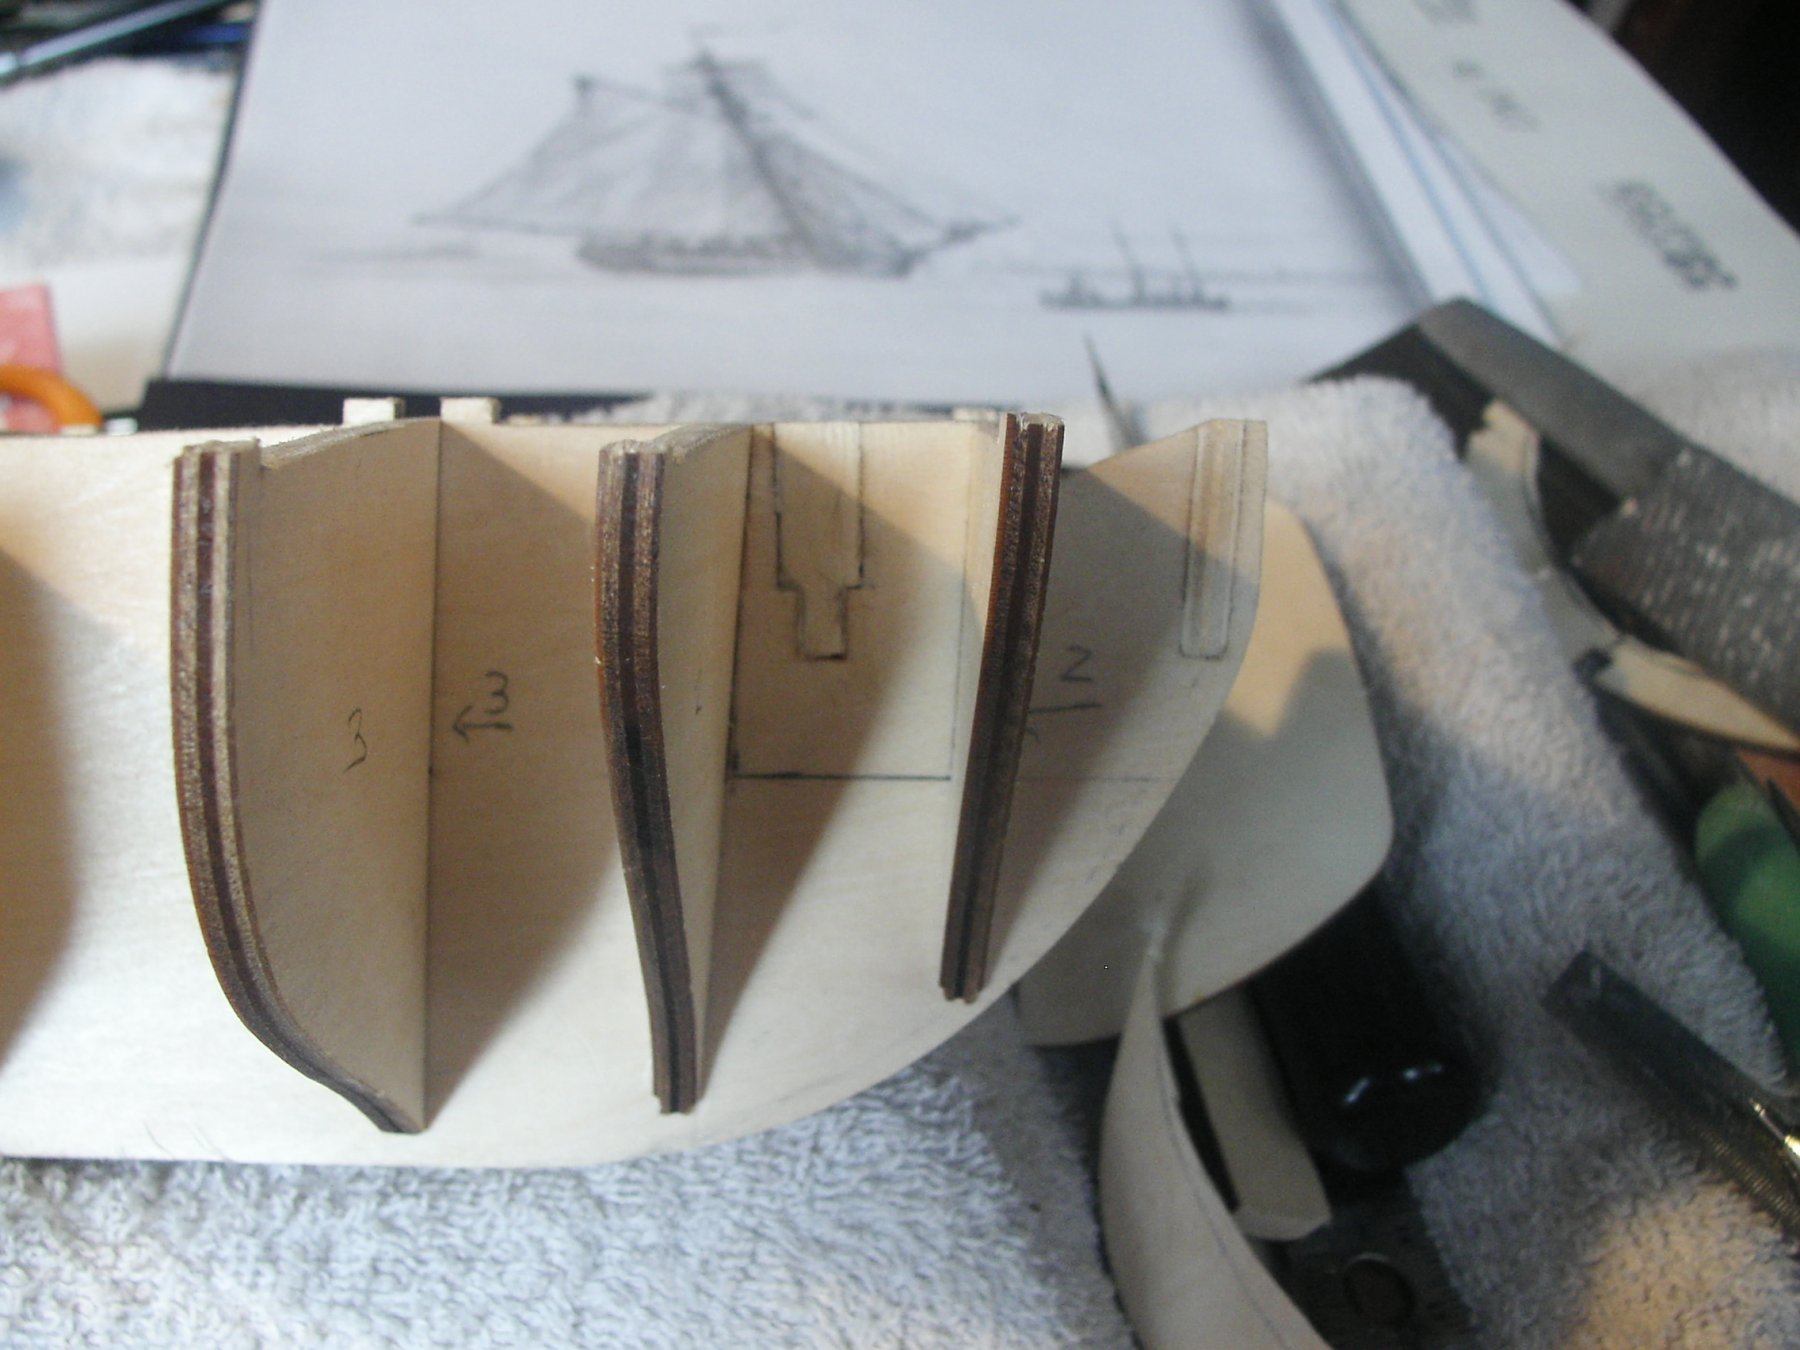
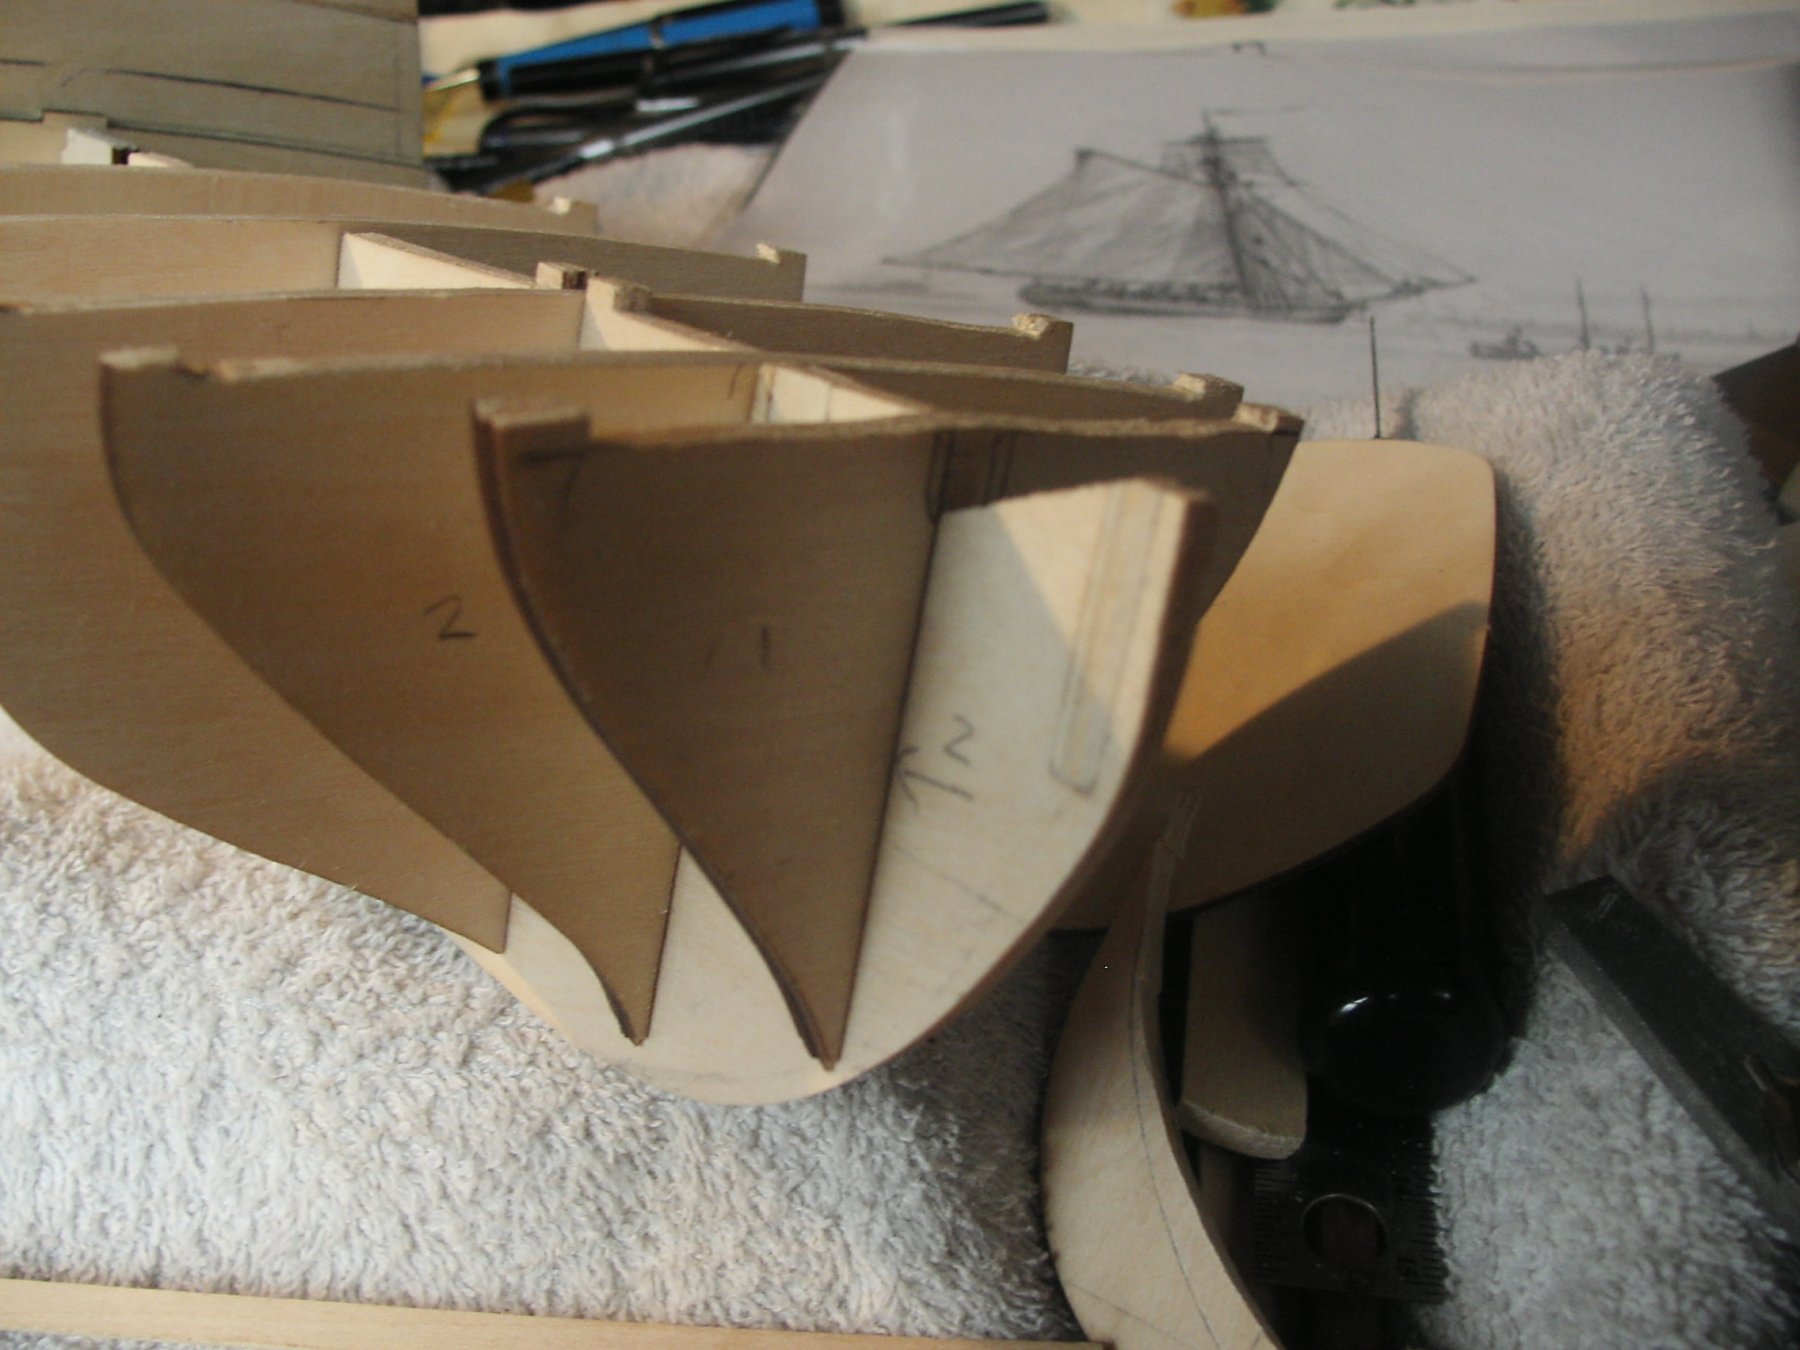
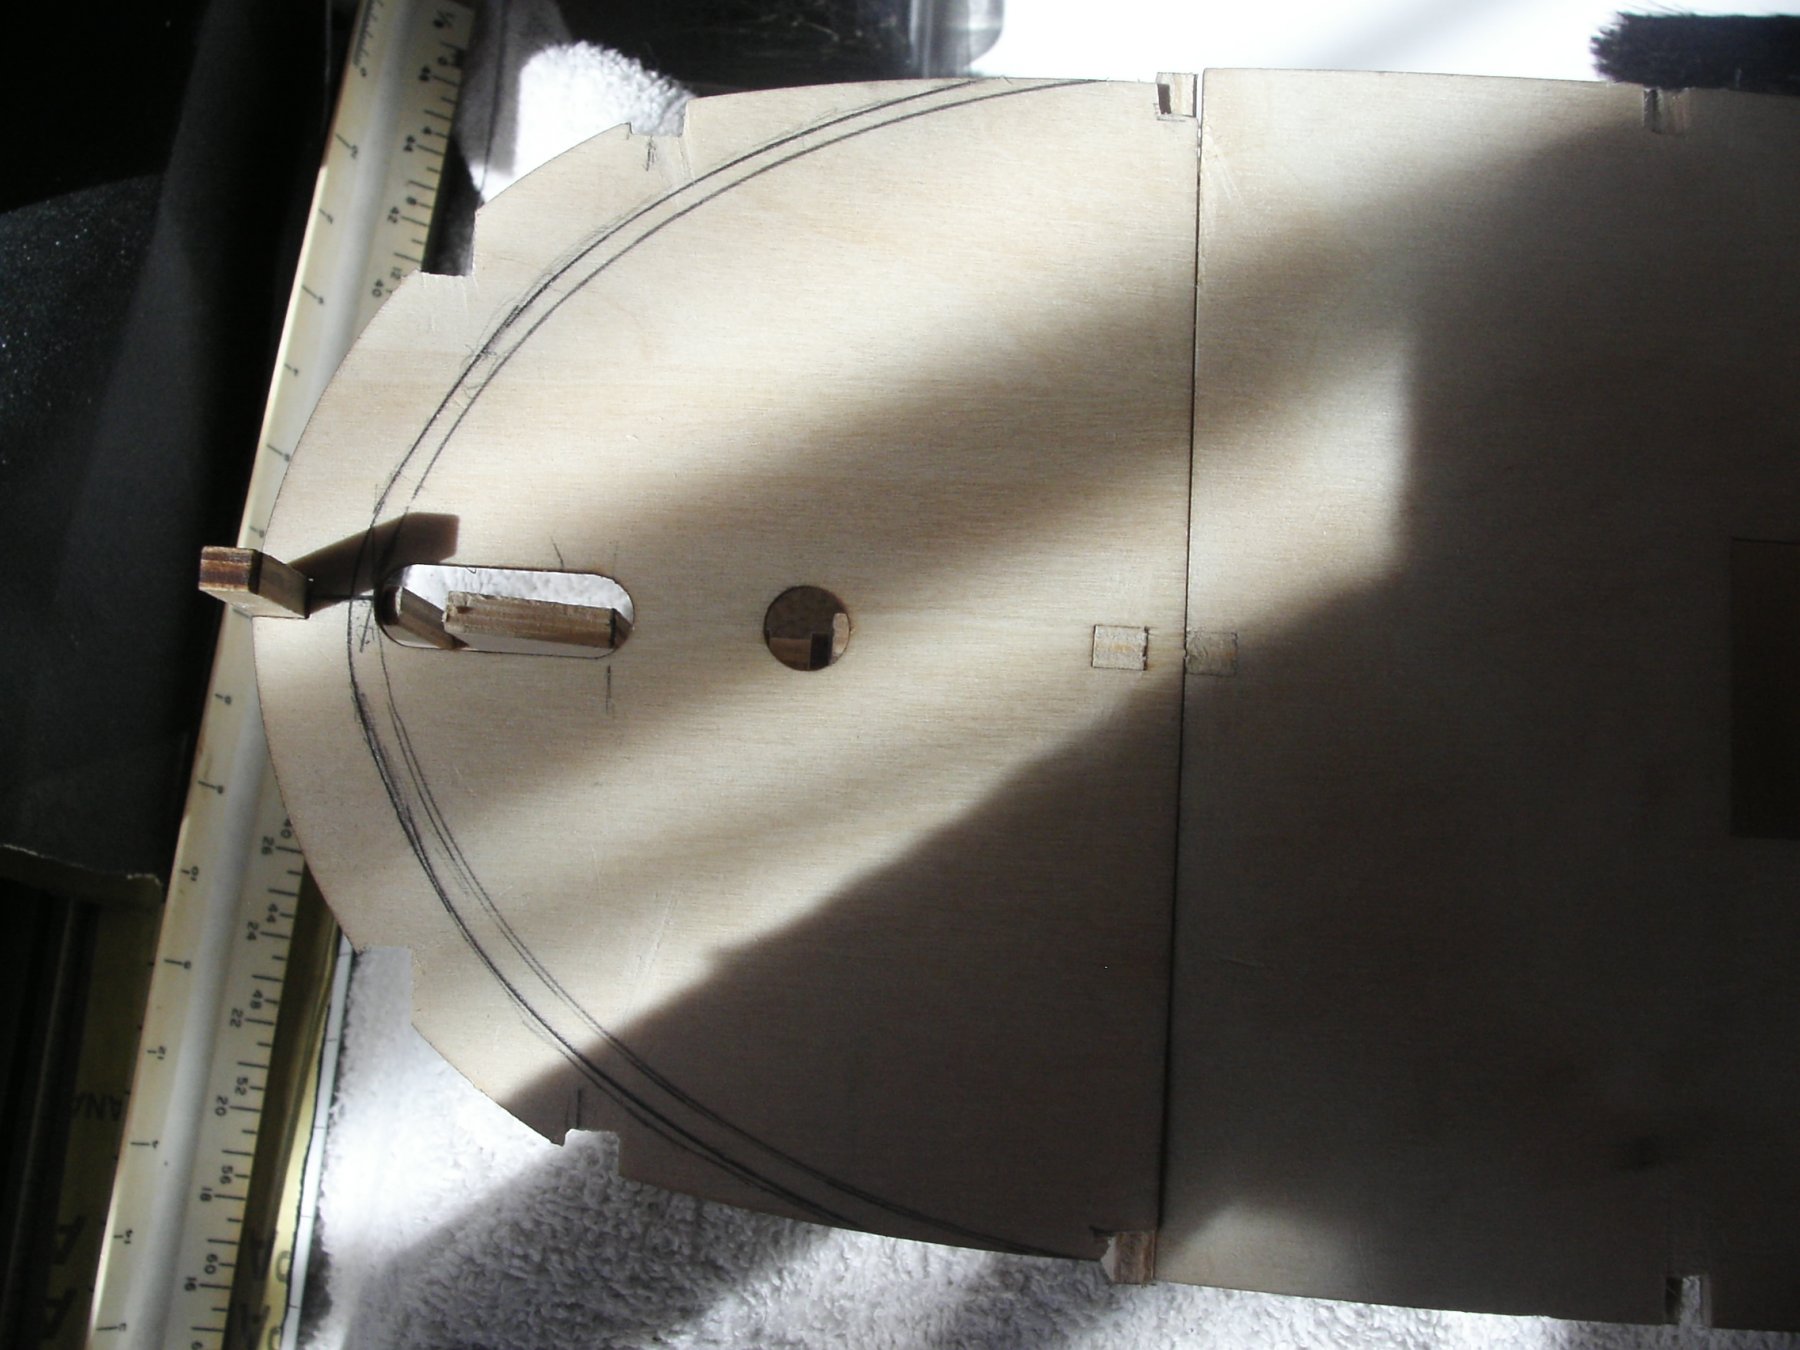
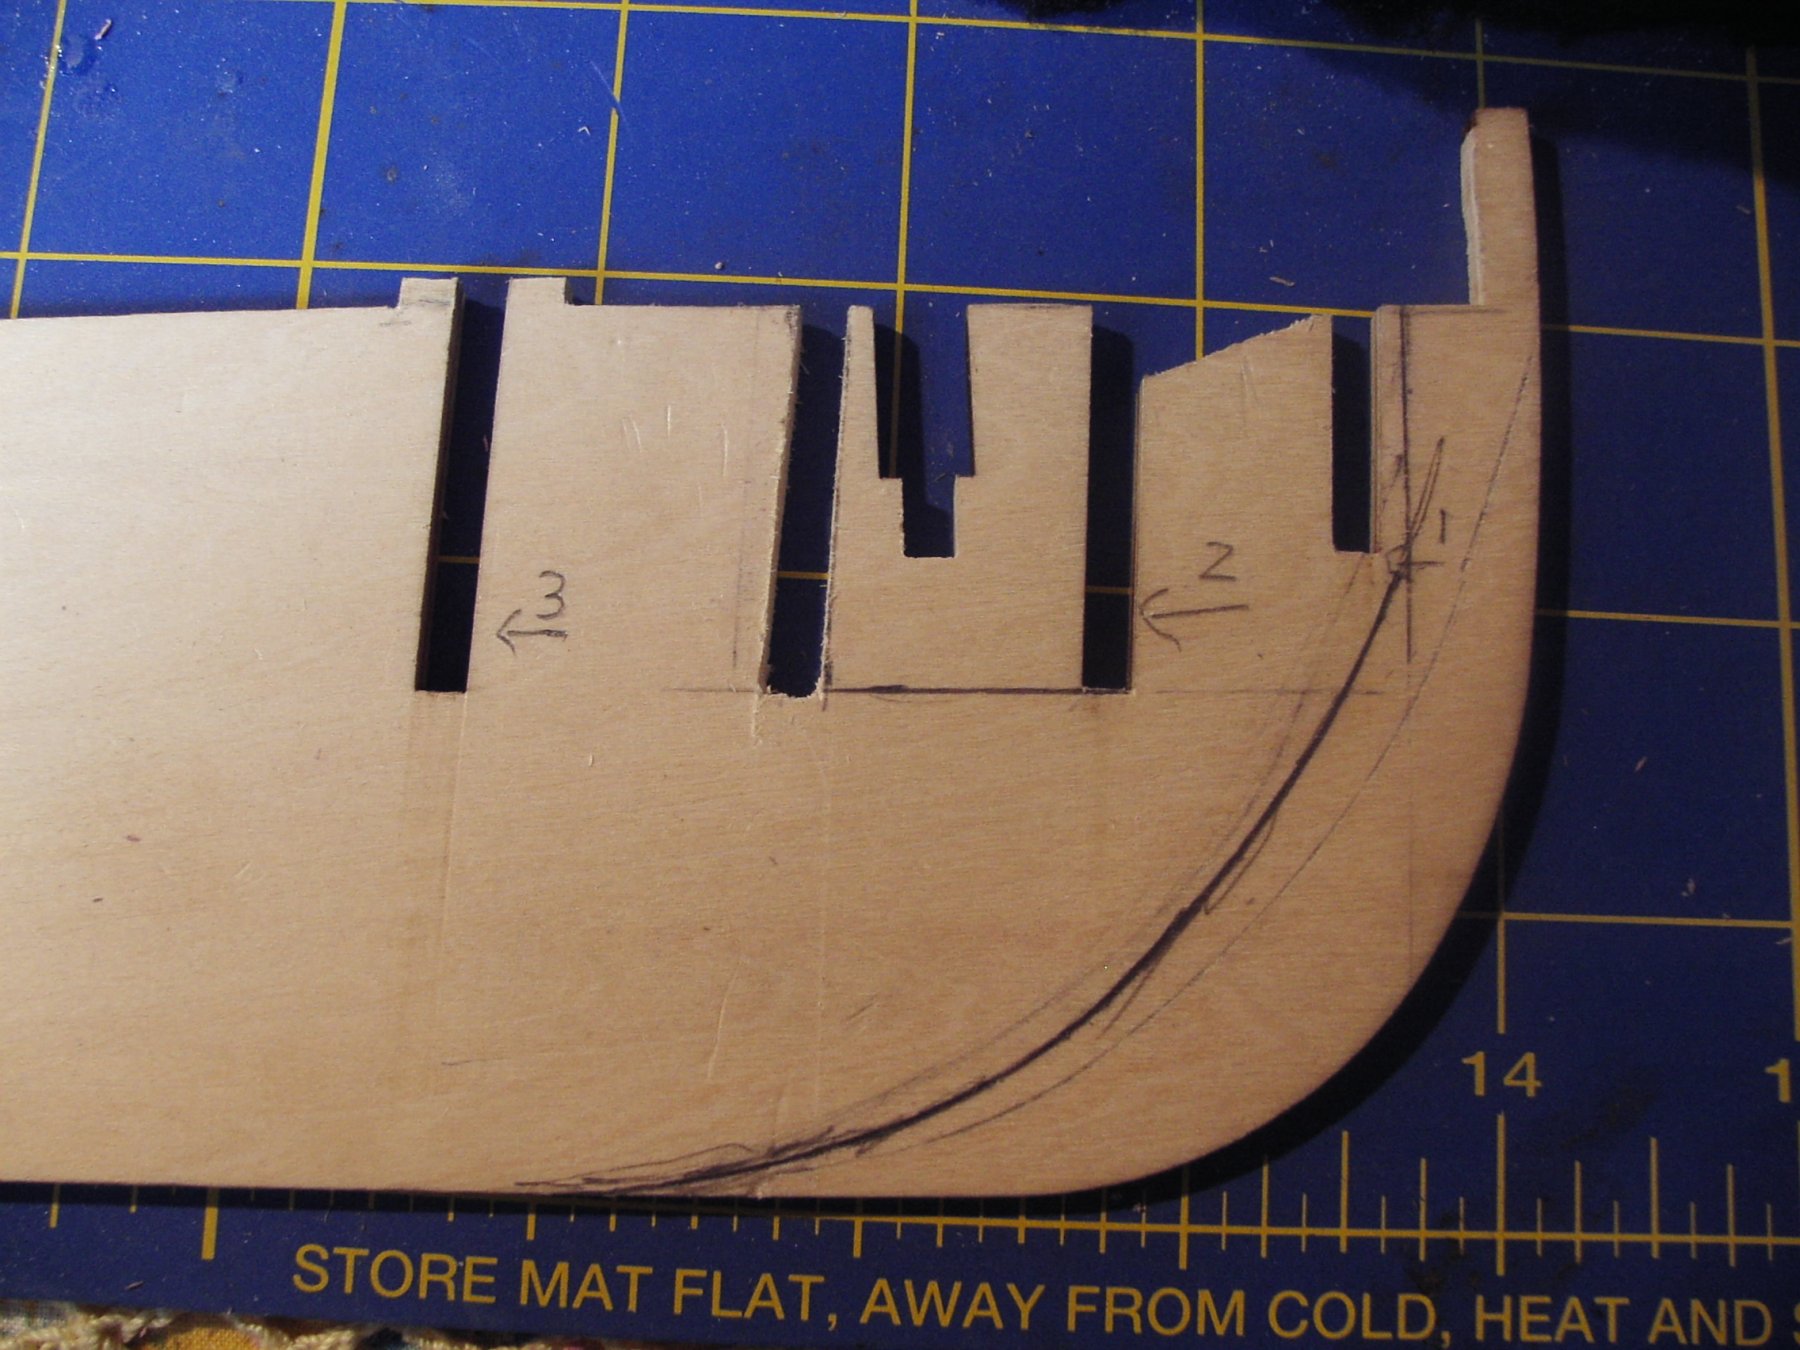
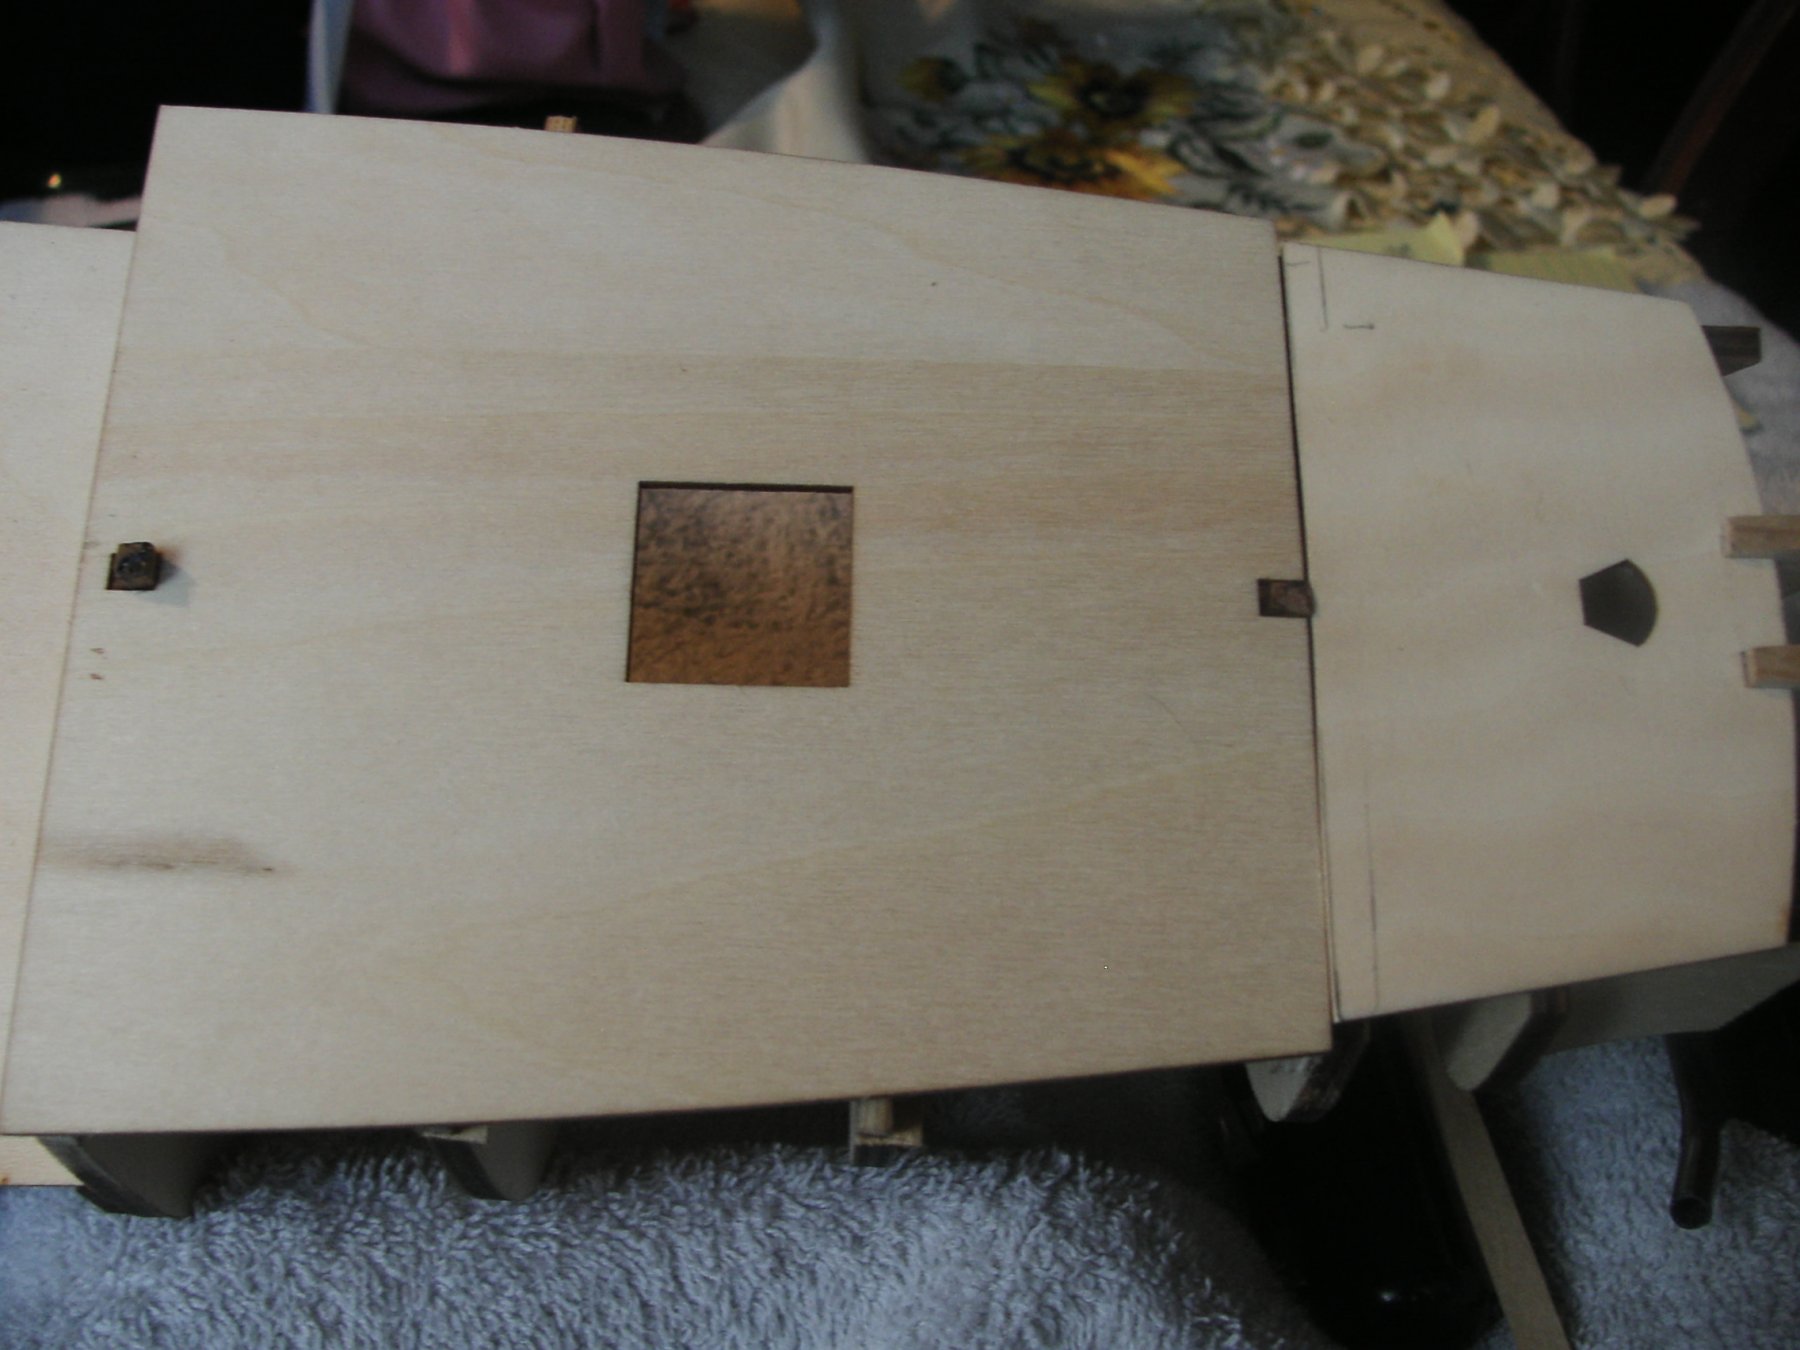
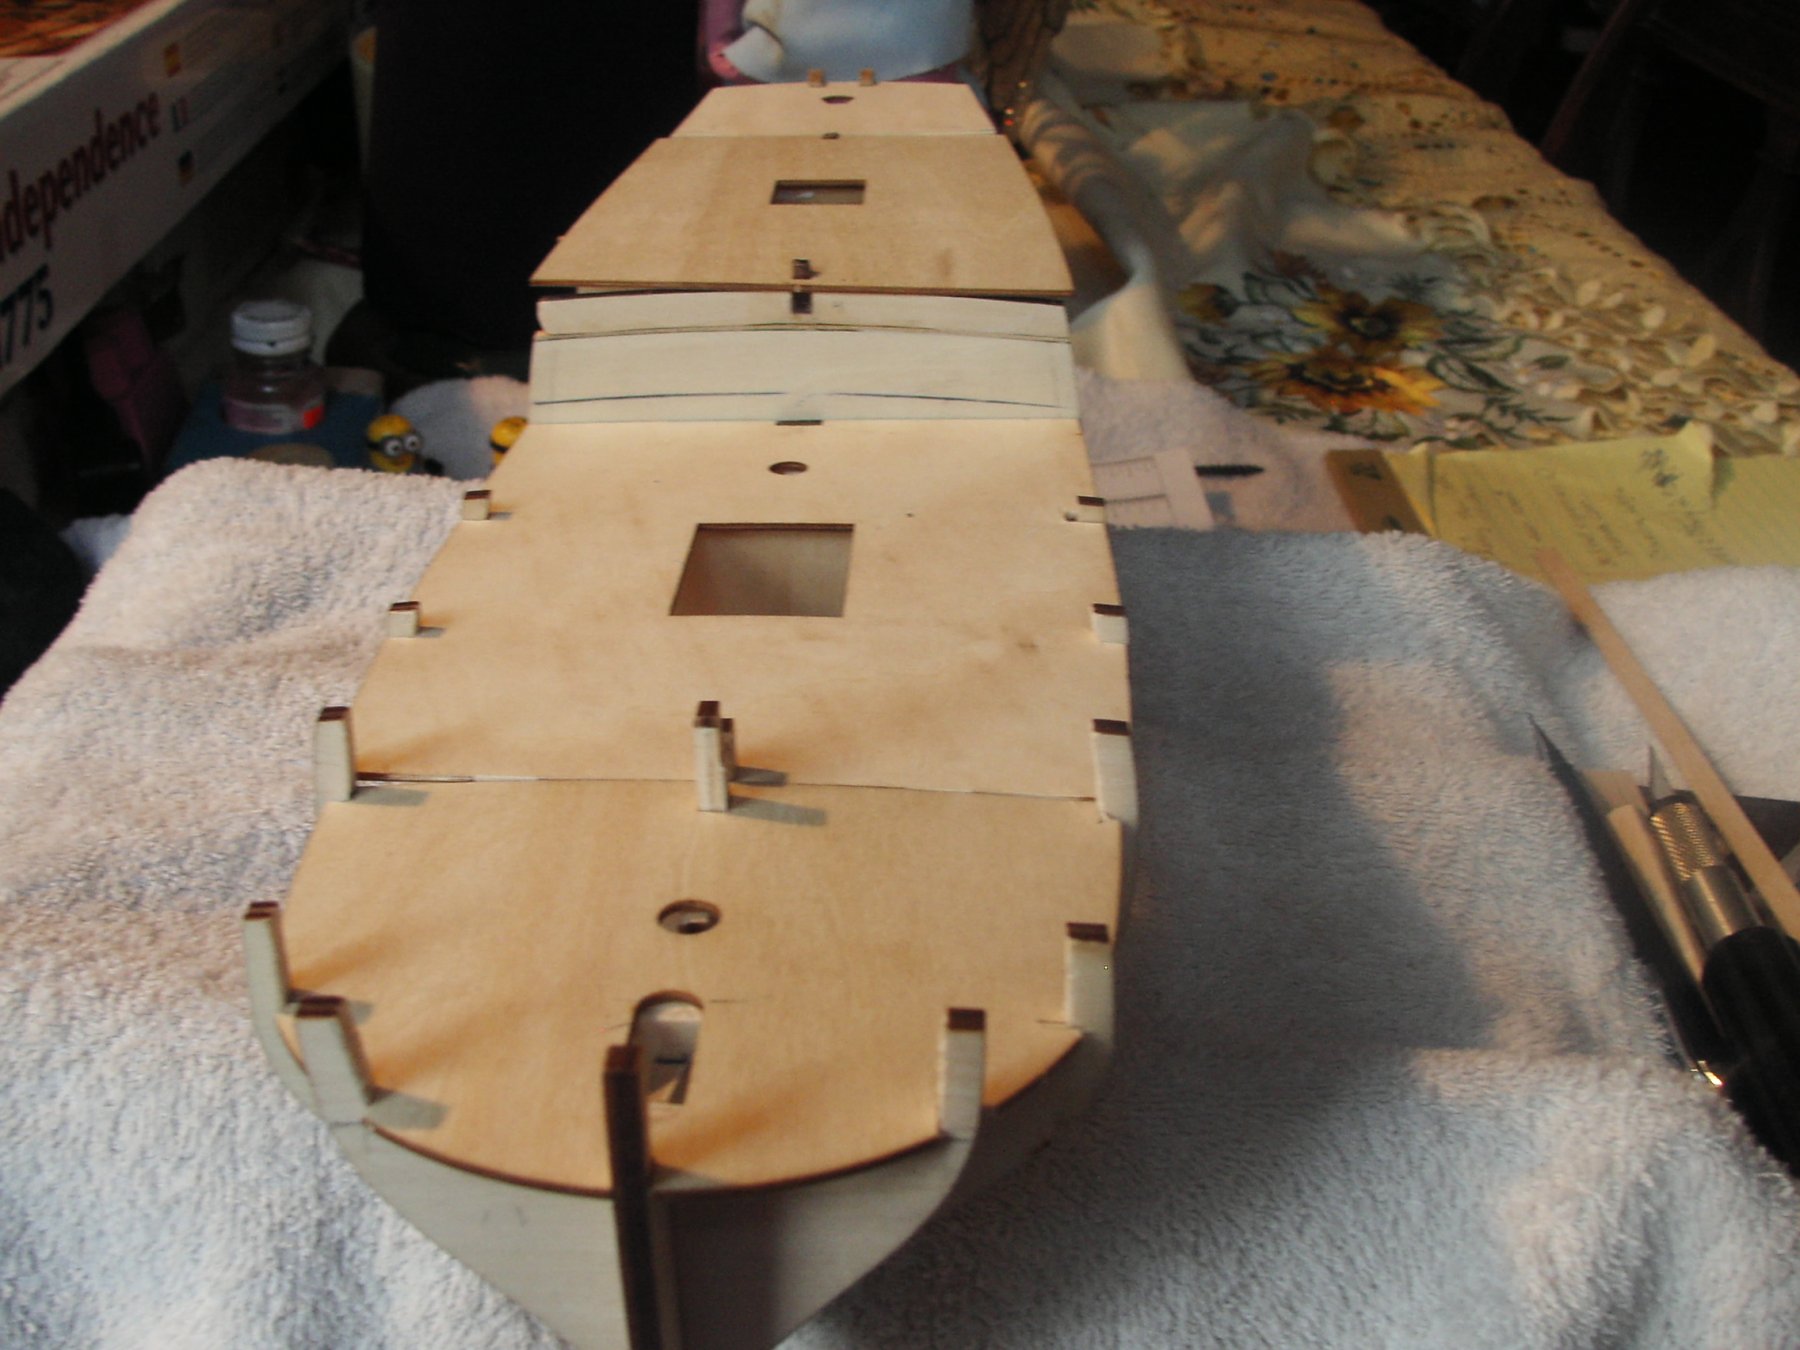
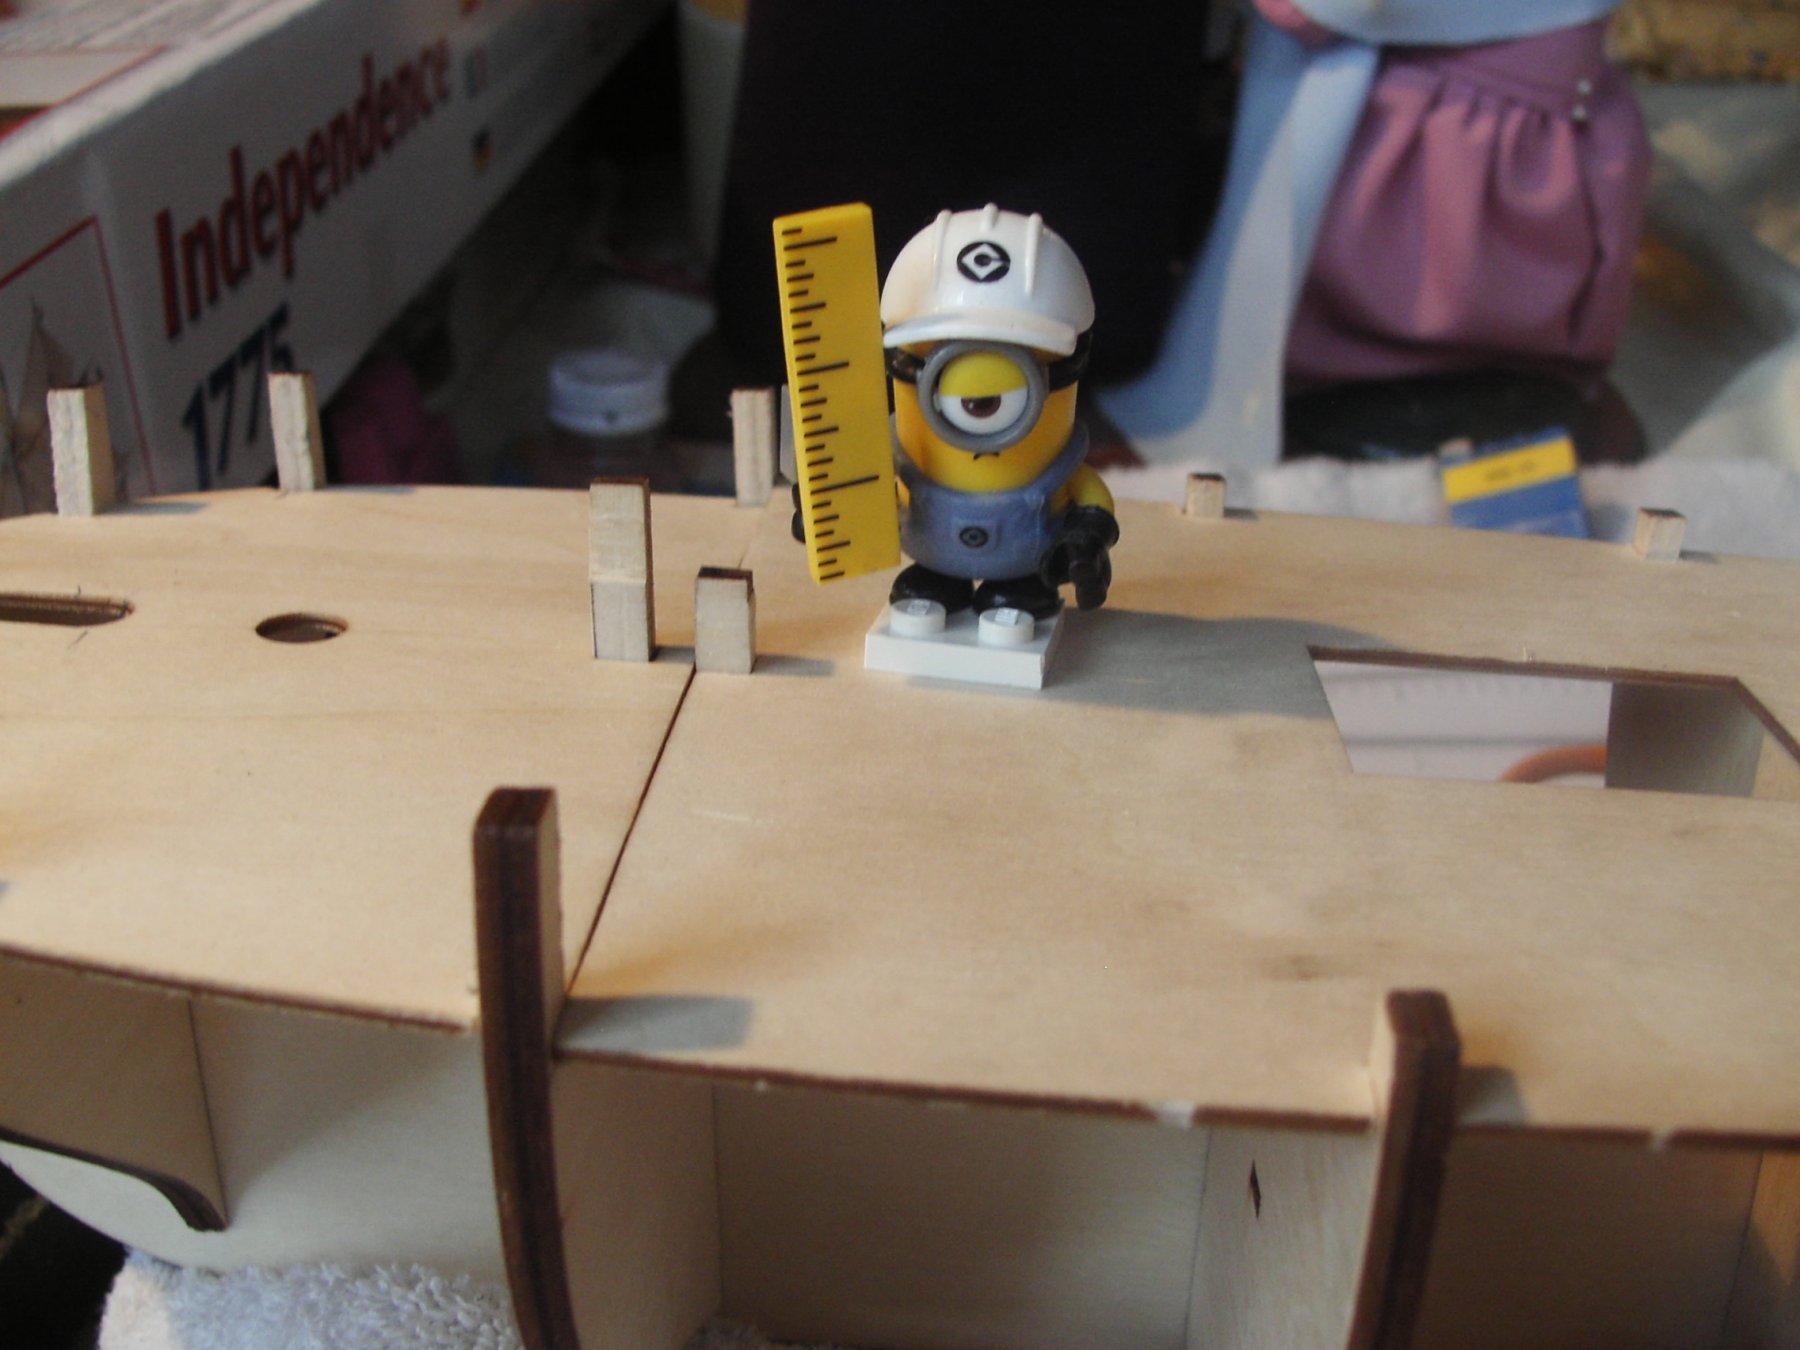
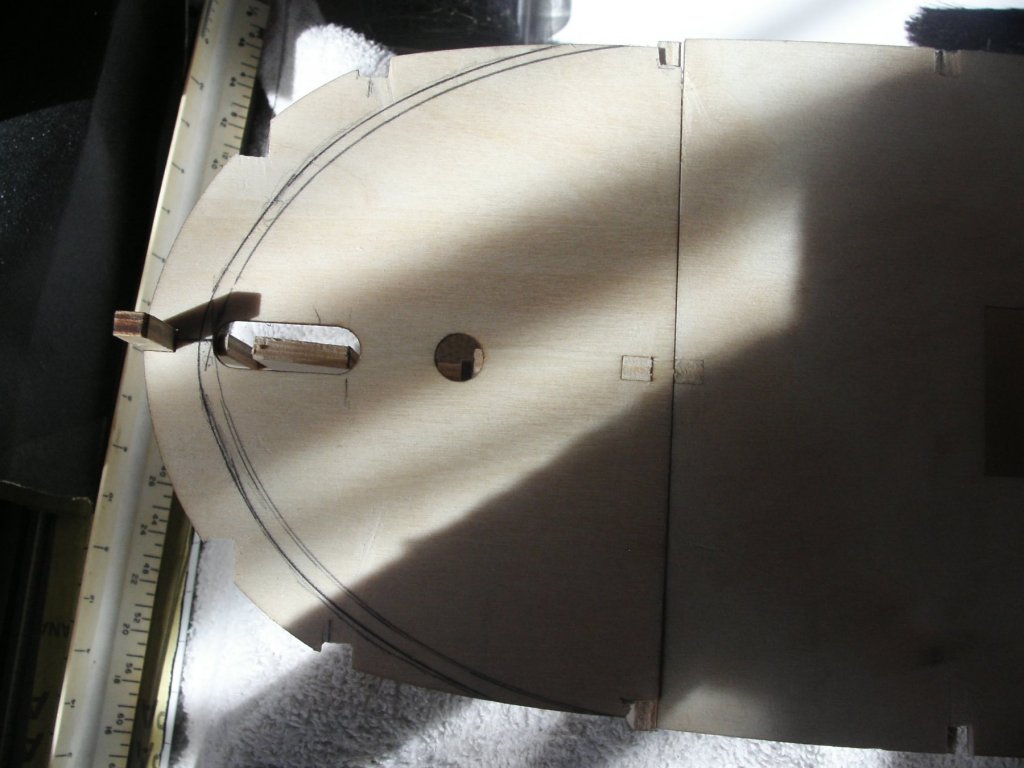
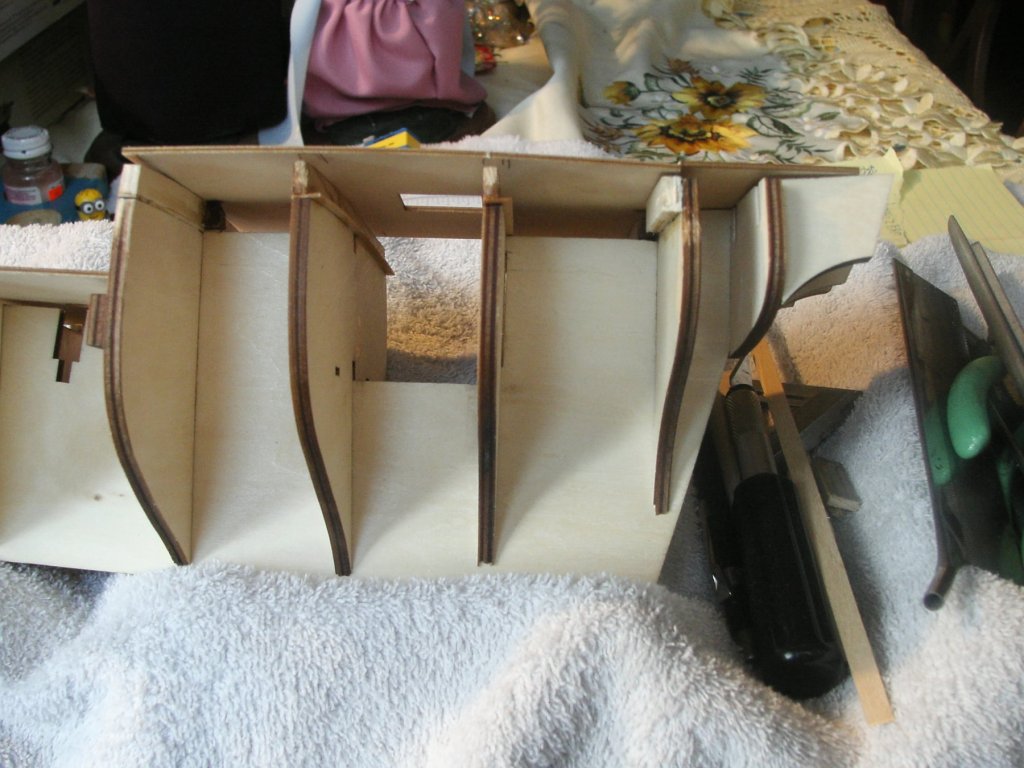
 Modifying bow, moving bulkheads #1,2. and 8. Making fine adjustments to bulkhead # 4 Today I made the big jump and altered the bow shape and shortened the entire ship by another ½”. I also moved #1 bulkhead from position #1 to position #2 on the profile piece. With the new shape I created for the forward main deck this worked out almost perfectly as a new #1 bulkhead location. I could have possibly left out bulkhead #2 as laying a stringer in place as a test seemed OK but the more I thought about it I decided to play it safe and relocate #2 for the added hull strength in the bow. I determined the new location and cut the new #2 slot. Now I was looking at a number of “used-to-be” slots that were now sitting empty! So I took some time and made filler pieces for these empty places and glued them into position. I then did some fine modification of #4 bulkhead for a more accurate fit of the sub-deck. Then it was time to move aft and take a look at bulkhead #8. As I had noticed before this bulkhead was considerably smaller than it should have been in relation to the adjoining bulkheads. After making every measurement I could think of, I decided that the easiest way to deal with it was to move it further toward the stern. This would do two things in my mind. First off it would bring the dimensions of the bulkhead into line with the rest of the hull without need to alter the shape of the bulkhead. Secondly I felt that this method would gave me a better “fudge factor” later in case I was still wrong after I fair the bulkheads for planking. If it ends up too big I only need to slide it slightly forward, if still too small I can either shim the outer surface or cut the profile notch even deeper. Today I moved it aft almost 5mm when I chickened out and stopped! (Next the stern and transom)


-
Hi Mark, Piet and John, glad to see you guys. I think I was needing someone to hold my hand and make me feel better! Mark, I'm not sure that it was AL that made the mistake. After all of the fairly drastic alterations I have made to the hull it is more than likely it will turn out to at least partly be my fault. Additionally the kit could have been off by by say less than .5mm at the original deck level but I raised it by at least 10mm, so that almost invisible amount becomes very noticeable at the new deck level. Piet You are very correct. I ended up using your first method of moving the entire bulkhead further aft and I think it turned out pretty well. You will be able to see in my next update.
-
Isn't that true of almost all of it? I have been following several of the builds where the guys are building with PE parts and to be honest it seems like another world in modeling. I am following your work as I am possibly only a few months behind you in making the same decisions on my build and I can use all the "How it is done" I can get.
-
Great looking hinges. I think you will like them much better than paper when you get them on.
-
I was just joking Piet. Take your time and get your other things taken care of first. See you when you get here.
- 378 replies
-
- 7
-

-
- java
- pacific crossroads
- (and 2 more)
-
Hi Antonio You might go back to brass rod like you used in the hammock frames. Then you could possibly try a finer grain wood sanded smooth for the cap rail. Lou
- 89 replies
-
- 1
-
-
- constitution
- revell
- (and 1 more)
-
Greg Having at last received the PE needed for the Admiral's 1/350th Titanic and seeing how small this stuff really is, your comment strikes fear into the very depths of my soul! It is truly amazing what you are able to accomplish with your builds!
-
As a side note. I received an email from Mystic Seaport Museum today regarding a request for some information and I made over a month ago! They were not able to provide me with the documents I was looking for but did send me a couple of museum links to stuff that I did not have and will come in useful later in the build. Some of it confirms things I already felt were true and as usual also raised a few more questions that I will need to ask about later when I get to that part of the build!
-
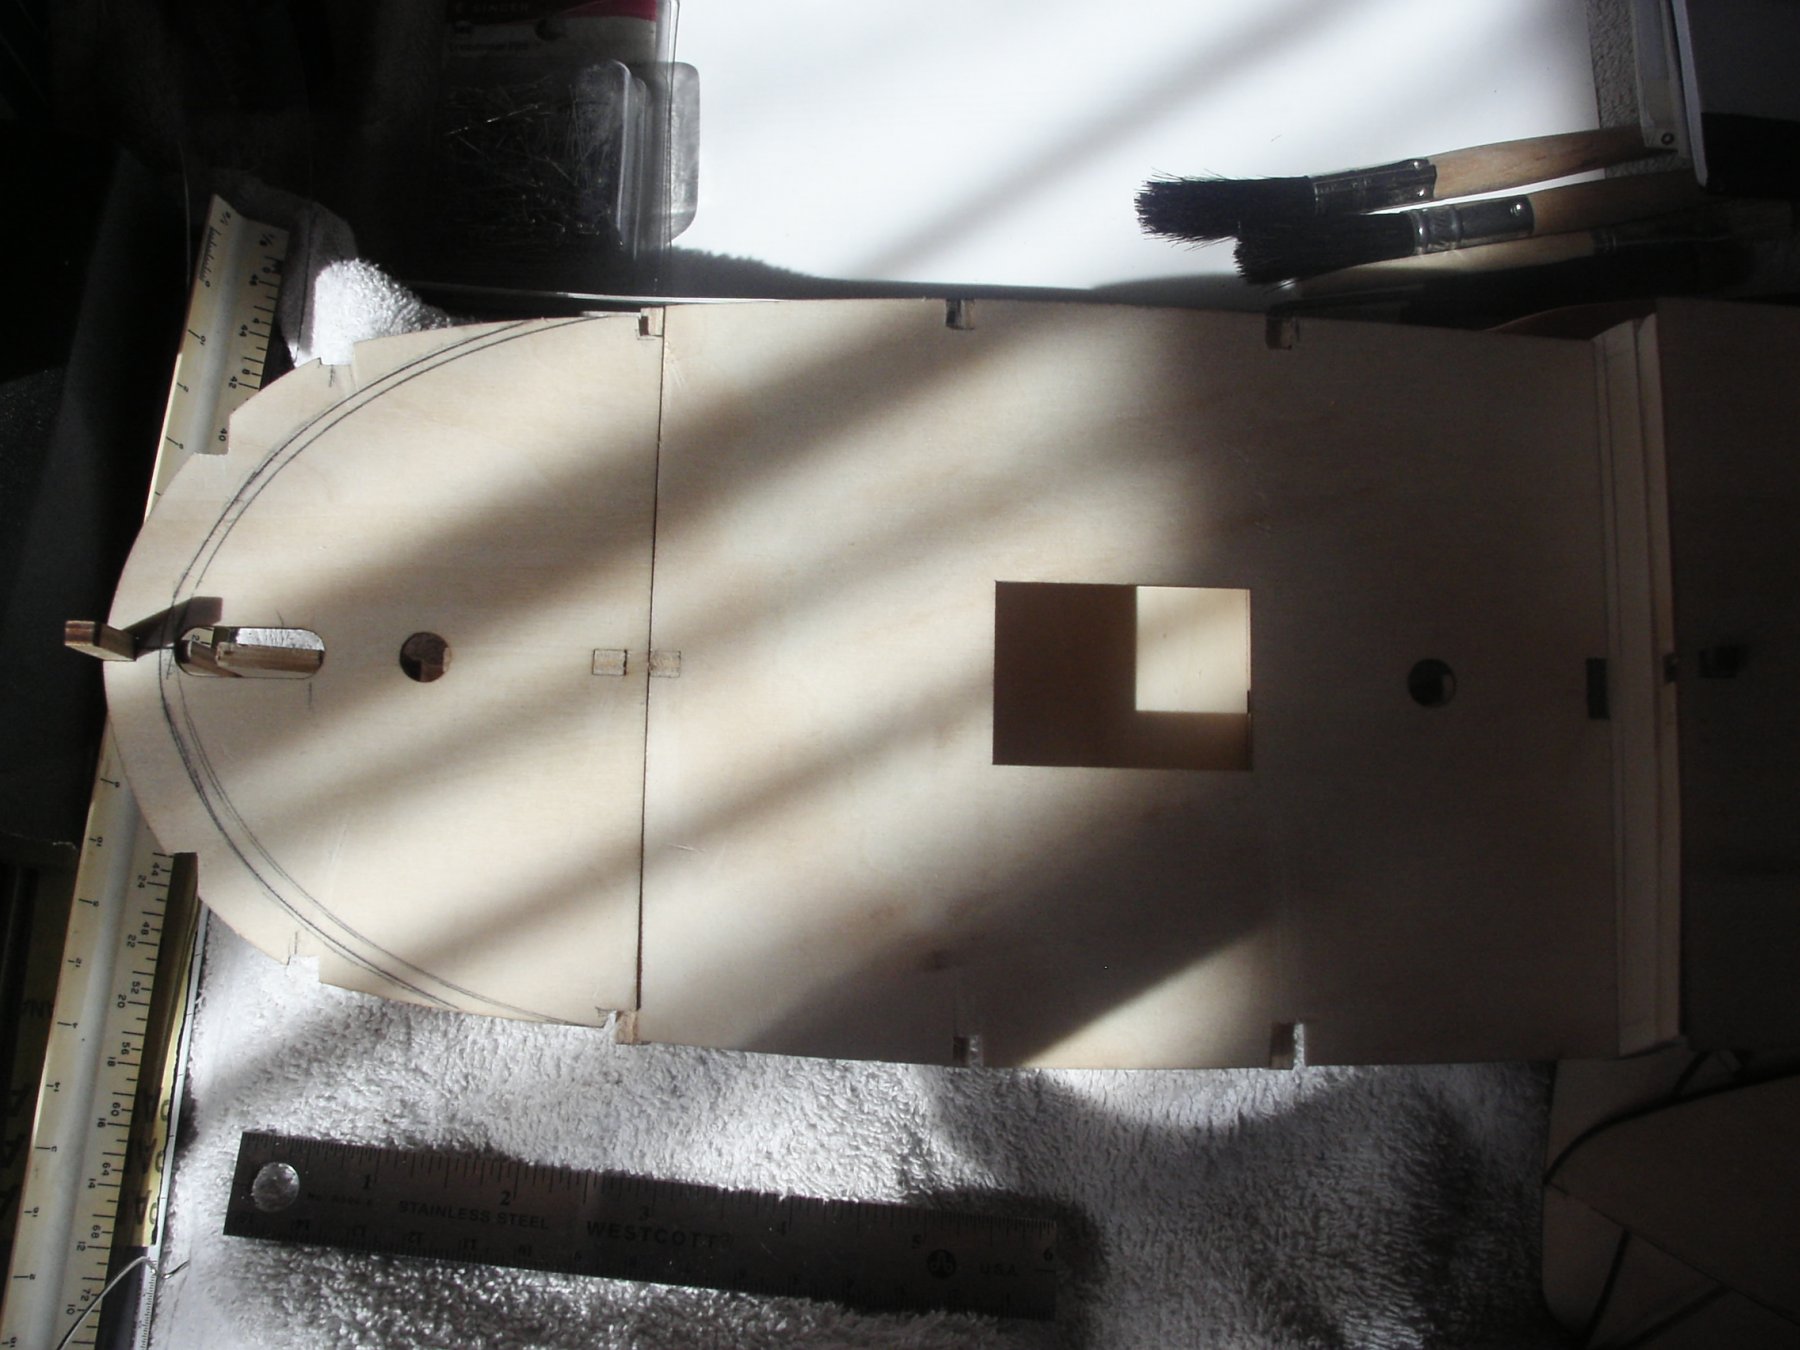
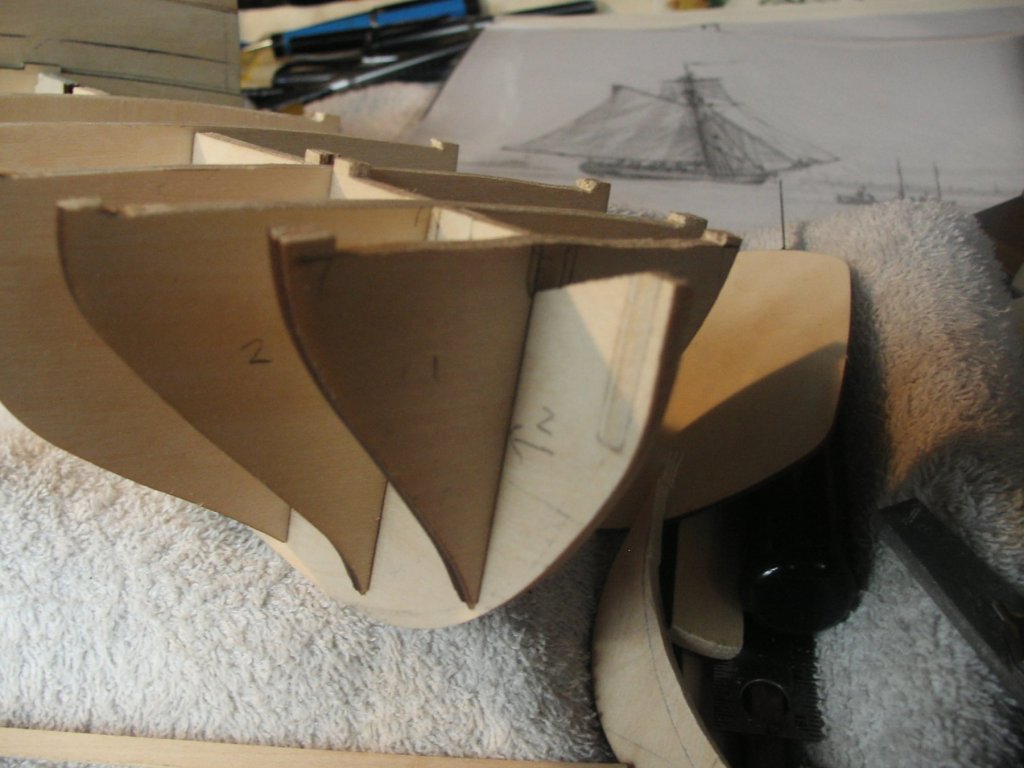
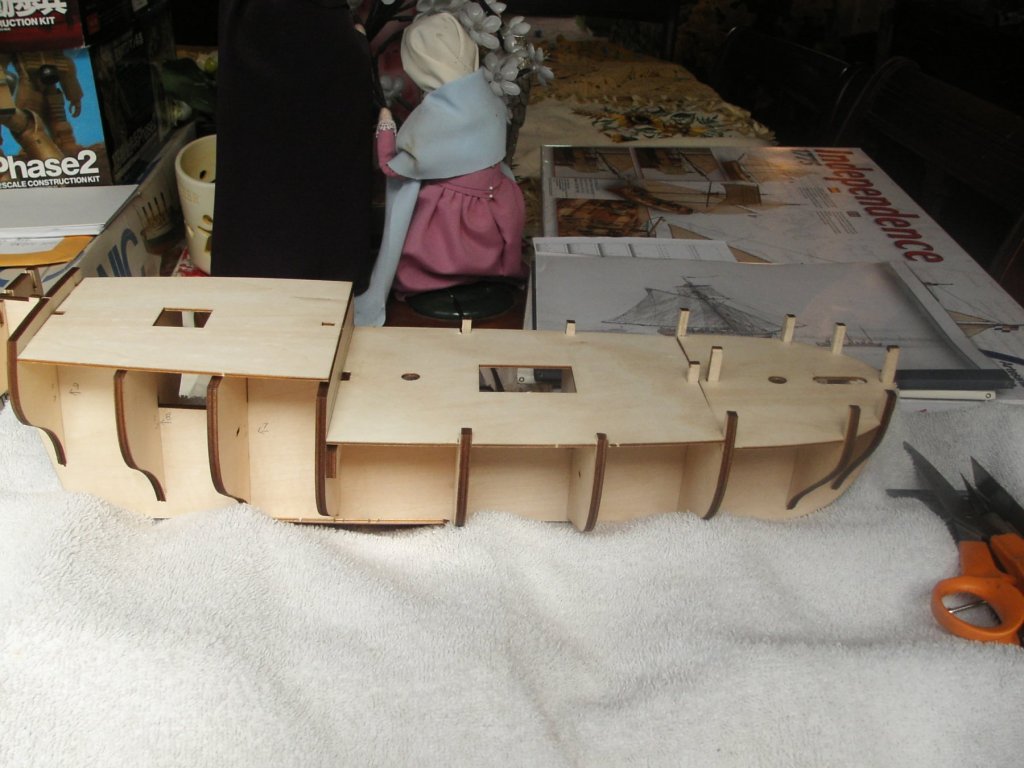
Further refinements, and re-determining main deck length and shape Today was a bit of a mixed day and not much actual cutting took place. My first job was to get the dockyard crew to correct the alignment between former poop sub-deck and the quarter sub-deck. They had been glued together about a pencil mark off and it was driving me crazy! It took two more tries to get it right! The old mark-1 eyeballs must be getting old! In the process of doing this I discovered that #8 bulkhead was WAY off! It was located exactly where it was supposed to be, in the profile slot designed for it, and it is of course laser cut, but it is too narrow and would have to be moved aft by possibly ¼” or more to maintain proper fairing bow to stern. This was determined by using a ships curve, something I had not done before. I will need to look into this some more. I can’t help but think I am missing something and the people at AL would not have been this far off. I then went to the main deck and removed all the posts that I had left when I altered the deck heights. I had originally left them in place with the idea that they would be useful when I added the bulwarks later. It looks like this won’t be the case as I needed the clear area to draw in the new deck length and bow shape. I used the ships curve again and established the new shape and at the same time shortened it by the ½” needed for an overall deck length of 65 feet. I pretty much spent the rest of my time working out the requirements for the #1 and 2 bulkheads that will have to be altered, moved, or both to accommodate the new overall length. Initial tests using paper templates are encouraging even though it was a little hard to be precise without having the use of three or possibly six hands! At this point it looks like I will only have to deal with the alteration of three bulkheads. #8 because of some unknown as yet factory error or mistake on my part, and #1 and 2 that as expected due to the alteration of the bow. I may find out other things later but I am keeping my fingers crossed. (Next, cut and chop!)


-
I agree it's time for a Bar-B-Que, but I think it should be steak! Great work it is hard to believe that what we are looking at is only at 3/16th scale!
-
Looks OK to me as well But I also have had it where I could not see posted pictures that it appeared others could.
- 122 replies
-
- 3
-
-
- tamiya
- King George V
- (and 2 more)
-
Hi Thunder Your's is the second Resolution I have seen finished and they are both beautiful. The other one was done by a guy locally and he converted it to a three masted Sloop of War, as it appears Captain Cook's Resolution was. But as cook's Resolution was also a converted merchant collier of over 450 tons there may be some problems there as well. But you may be right as well There is no reason that the Resolution you speak of was not a ship that had the same lines as the Ferrett or Shark.They may have been a class of sloops on the British navy much like the later Cruizer class of Brigantines. I have never really researched the whole thing further than what Gregory shows in his post above.
- 102 replies
-
- 1
-
-
- speedy
- model shipwright
- (and 1 more)
-
PICTURES PICTURES PICTURES! I can't wait to see the pictures
- 378 replies
-
- 7
-
-
- java
- pacific crossroads
- (and 2 more)
-
Looks like I have at least one person fooled! I can't help but feel that this is just a train wreck waiting to happen! The only reason that it has gone this well is more that this appears to be the perfect model for this bash more than anything I have done so far. John I will never get tired of looking at your providence, and being jealous! Not only is a fantastic model but even if I can build something as nice I will never be able to bring it alive like you did with your figures! There is no way those figures look like they are only 1.5 inches tall!
-
Denis No need to worry about the way the decks look now. They are just sub decks and will be covered over by real planking that when the time comes YOU are going to instruct my shipyard crew on how to do! No one is safe who hangs around here, anyone may be put to work at almost any time1 Hi John Glad to see you as well. I was hoping you would stop by now and then. I still consider you the resident expert on building the model Providence. And YOURS is done, quite an accomplishment. Did you ever get your Marines made? Hi Mark I knew that I could have built from scratch, I have done it in the past, although never a period sailing ship. But the kits are just sitting up there and I hated to see them go to waste, especially when a couple of them were already so close to what i wanted anyway. Time to quit being a hoarder and put one of them to use. At least that is what I keep telling myself! I must admit that some of this build so far is even surprising me on how well it is going. I expected much more bashing to be needed to even get it this far and so far all I have found is one kit discrepancy that would have been there even if I was building it as the Independence. No update today, life kind of got in the way of any real progress. I really do thank everyone for stopping be and commenting and the likes. Makes this more enjoyable.
-
Hi Thunder I am following your build as in some ways it is similar to my Providence build, (A bash using the AL Independence as a base). At one point I was considering the Resolution as a base but even though the Independence is a sloop she is a closer match. I will still be using some features of the Resolution in my build though later on. You are right about Corel though. They are totally lost when it comes to the Resolution. Like you noticed she is more closely related to the Ferret and Shark than any other vessel and is truly not a cutter at all but a sloop. In addition the real Resolution was not a sloop at all but a ship rigged vessel! I suspect Corel was mixed up between the term 'sloop of war' meaning any navel ship with less than twenty guns, and a sloop meaning a single masted fore and aft rigged ship! As coxswain already said, 1/48th and 1/4"= 1' are just two ways of saying the same thing. Your metric equivalent would be 1/50th scale. We have the same problem here with tools. Most things made here are SAE and everything else is metric! Take care
- 102 replies
-
- 1
-
-
- speedy
- model shipwright
- (and 1 more)
-
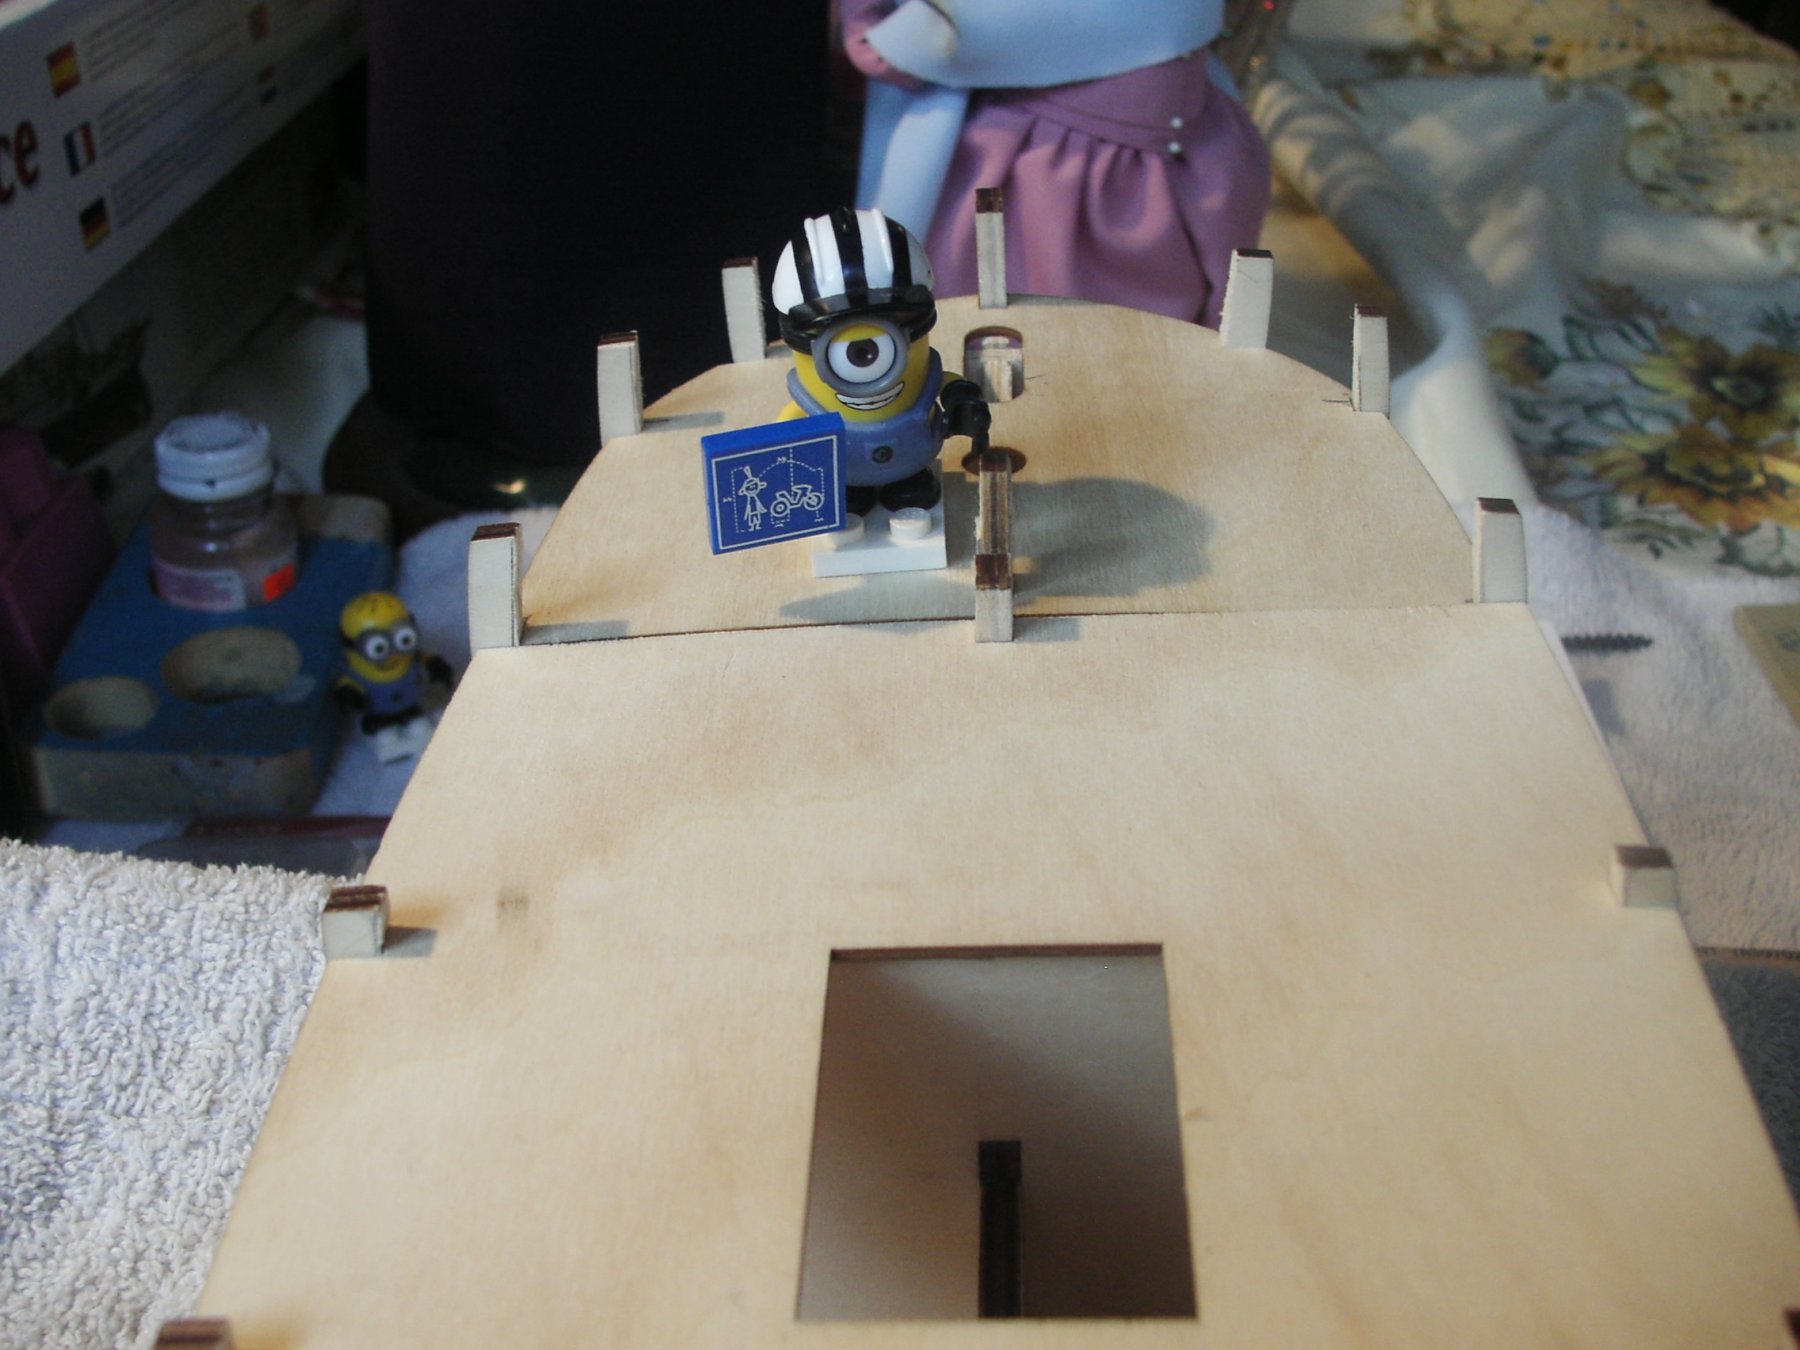
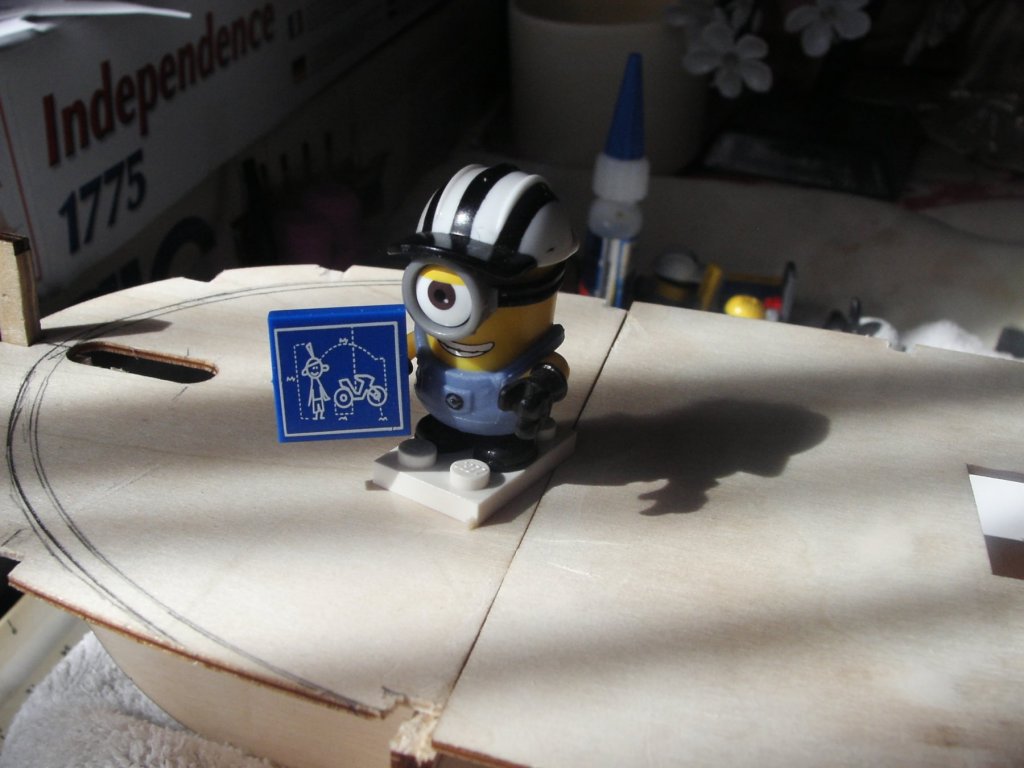
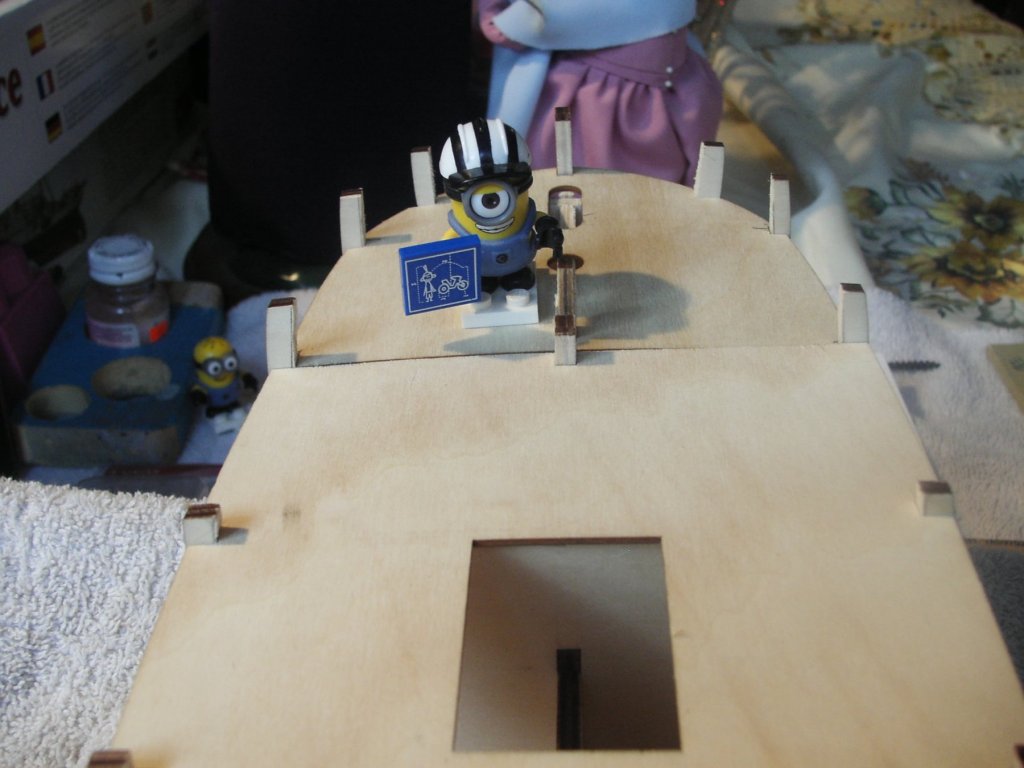
Poop deck and stern alterations Today I shortened the Poop deck area in order to reduce the overall length, and raised the quarterdeck to match the height of the poop deck position. This is now one continuous quarterdeck. This gives me a 5’ rise of the quarter deck over the main deck. Just what I was looking for. Over all at this stage, the main deck is 39 and a half feet long and the quarter deck another 28 feet, for a total of 67.5’, about the same as the replica Providence, but about 2 feet, (1/2”) longer than what I would consider my target of 65 feet. I had to stop and do some consulting with the work crew at this point. The assorted deviations in the described length of the Providence I suppose would allow me to keep it at this length if I wanted. This of course would be the simplest answer. Most references say the ideal length for sloops in general is about 60-65 feet. There were a few sloops built at about 70 feet but were not considered as successful as their shorter cousins as they required an even larger main sail that was correspondingly much harder for the crew to handle. One of the reasons for the schooner rig development was to still have a large sail area without overpowering the crew with a huge individual sail like the American sloops carried. Again I am forced to fall back on the description that the Providence was a fast and good sailing ship and that 65’ would be better. I could go 60’ but I can find no indications that the Providence was that small like so many sources describe the Hannah. Besides at ten cannon and later 12 cannon she needs all the deck she can get! Even now at sixty five feet it gets VERY crowded, even though I must admit that is also partly because of the larger cabin. I considered reducing the cabin length but again what few sources there are say she had a "prominent" quarterdeck that was almost half her length! I can still remove a little in the stern with a couple of more alterations than I wanted to do. And there are still some modifications needed in the bow that could also involve a bit of shortening but that would possibly also involve alterations to the hull that I had not originally intended to make. Not entirely certain what way I will go. I never thought a half inch was all that much before!

-
Thanks Don I personally think at this point it looks like scaffolding for a building, (Option B if this whole thing doesn't work out!) Hopefully in the next week or two it will start to looks a little more like the ship I hope it will become and then will also become more interesting. Thanks for the Complement it does make it a little easier to plug on, ever deeper into the dark side! I Can not help but wonder if I have what it takes to get back into the light.
-
Looks like very nice work. Welcome
-
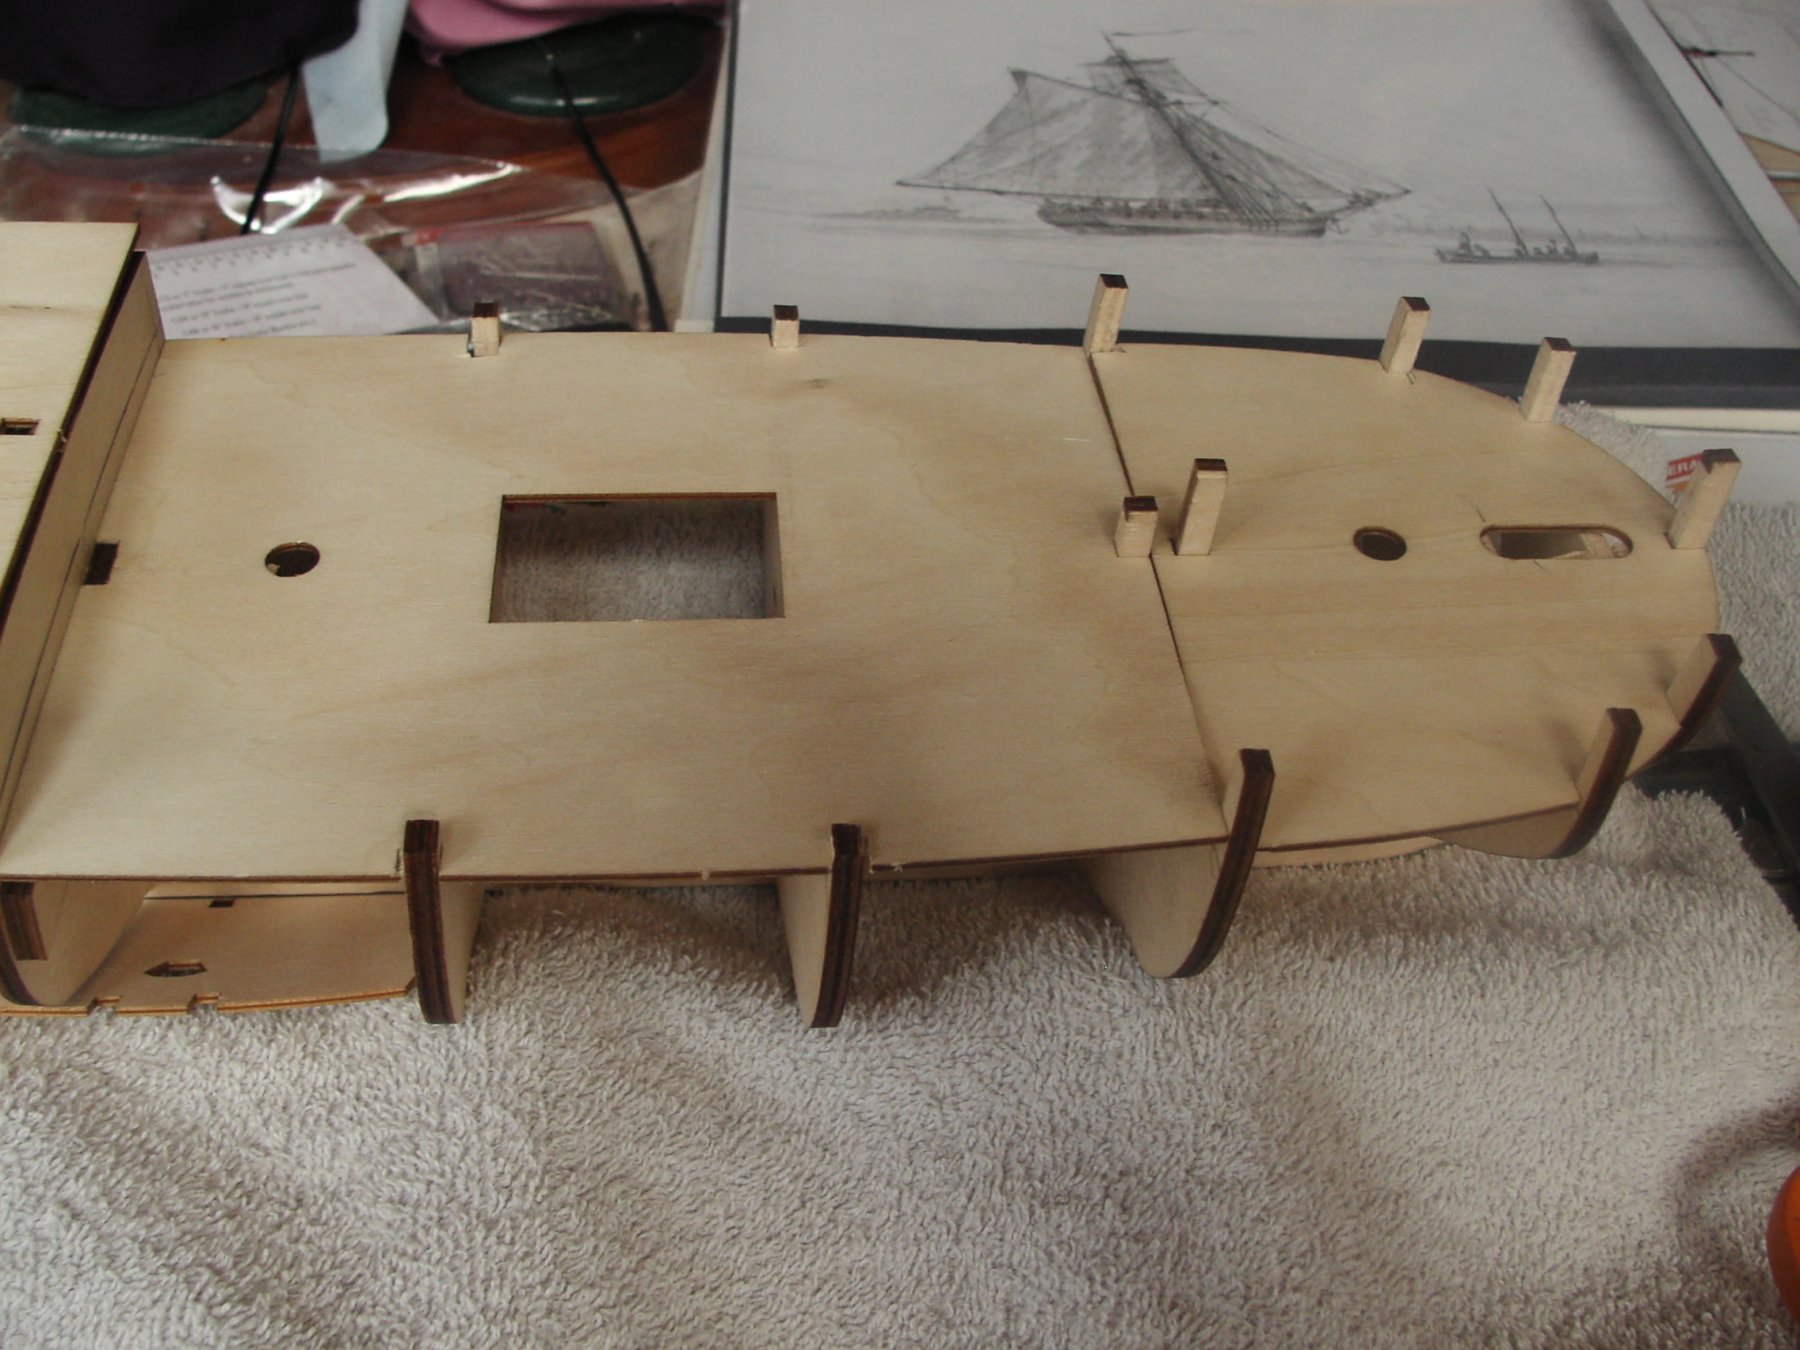
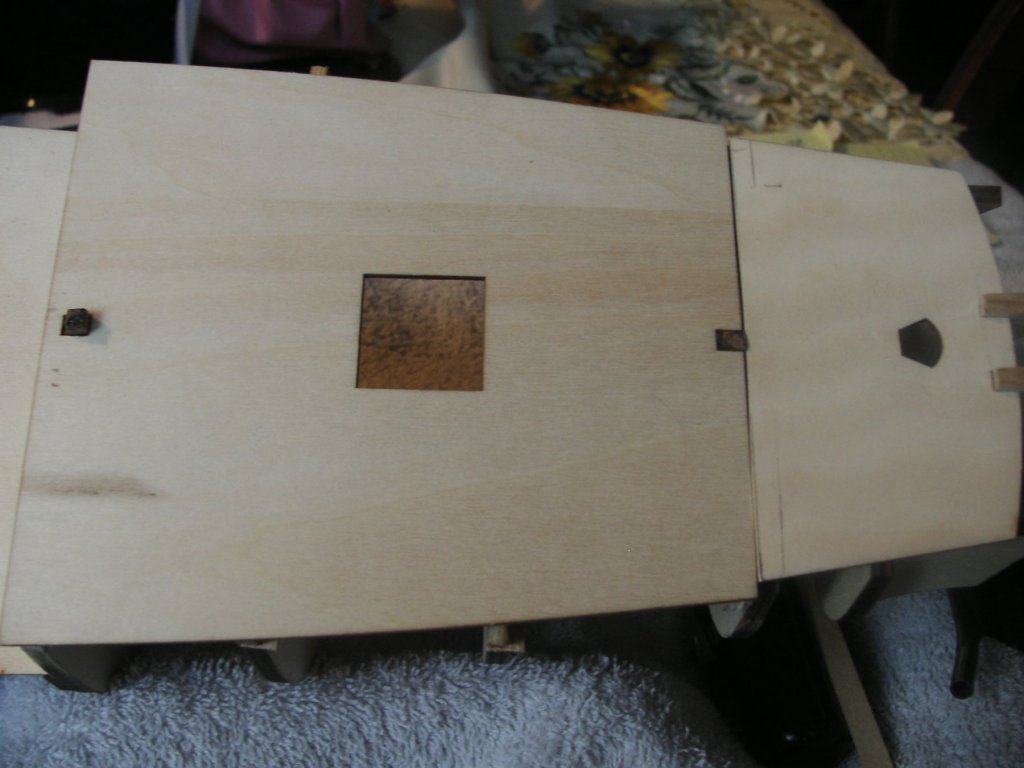
First alterations (Forecastle and Main deck) Today I took everything apart again and started modifying the ship’s hull structure. I lowered the forecastle deck by three and a half scale feet and lowered the main deck to match so I now have one continuous 39.5’ main deck. I then had to notch both the forward and main-false deck pieces to fit in the new locations. This was mostly a test and fit, test and fit procedure until everything was properly located. (Next step: Altering the quarter deck and poop decks)


-
Thanks Denis. Piet, and Mark What do you mean Denis? My PM just talked about your M&M revival, I don't think I said anything about my starting on the Providence. I did some more today I and am almost at the point of needing to do some much more serious stuff that will probably slow me down a bit, but it will need to be done. I am actually posting a few days behind my building but I don't know how long that will continue. At some point I will get to the stuff that I either have never done before, (a lot) or don't know much about, (A lot more). Then I will have to try and get some answers from you people before I can progress. Right now it doesn't look like much but hopefully it will improve.
-
Nice looking kit. Was the well known auction site eBay? Lou
-
Thanks John and donrobinson The only problem with te pictures John was that they were supposed to be in the middle of the text where the big space was! I also have to take responsibilty for the 'not much to see aspect of the pictures. Not to sure what to do about that part either. thanks for stopping in. Lou
-
Tallow historically was more commonly used as a lubricant for steam engines than it probably was for candles. It was one of the few lubricants that handled the steam and heat well. Lou