lmagna
-
Posts
5,885 -
Joined
-
Last visited
Content Type
Profiles
Forums
Gallery
Events
Everything posted by lmagna
-
 Hi moreplovac In the future you might find it easier to just run some tape along the line you want to mask, in this case the wales, and then attach another strip of tape to a large piece of paper with part of the sticky edge exposed. then stick that to the tape you already have in place and wrap the paper around the area you want to protect. I think you will find that much quicker and less likely to pull paint off of other areas of the hull. Great build you have going though. Looking forward to your further progress.
- 360 replies
-
- 1
-

-
- sultana
- model shipways
- (and 1 more)
-
Hi Denis It is good to see your ideas and progress for this kit. It is very lucky it got someone as imaginative as you to see the possible improvements. It will surely be many steps above the out of the box kit that to be honest was little more than a toy at best.
- 171 replies
-
- 5
-
-
- krabbenkutter
- authentic models
- (and 1 more)
-
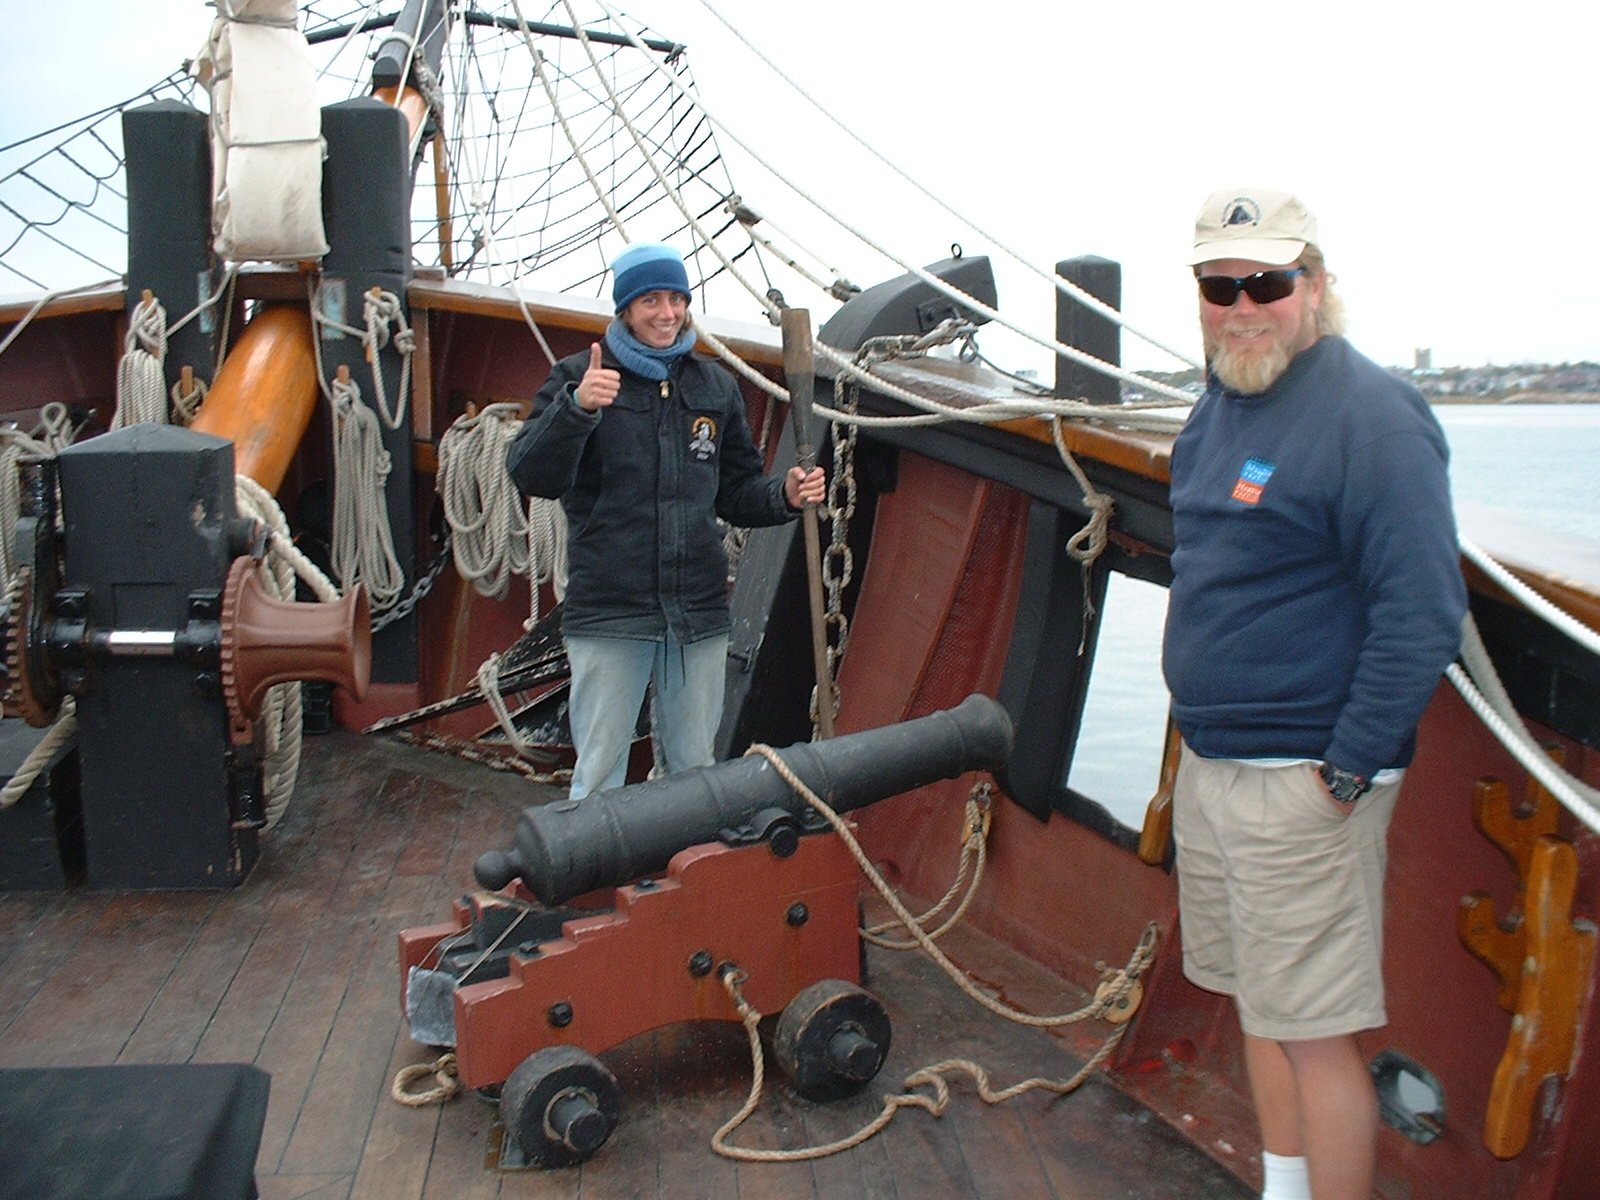
raising and lowering an anchor on a sloop
lmagna replied to timboat's topic in Nautical/Naval History
Hello timboat Here is a picture of the bow area of the replica Providence. If you look to the left side of the picture you will see that she has a modern day electric double drum captstain.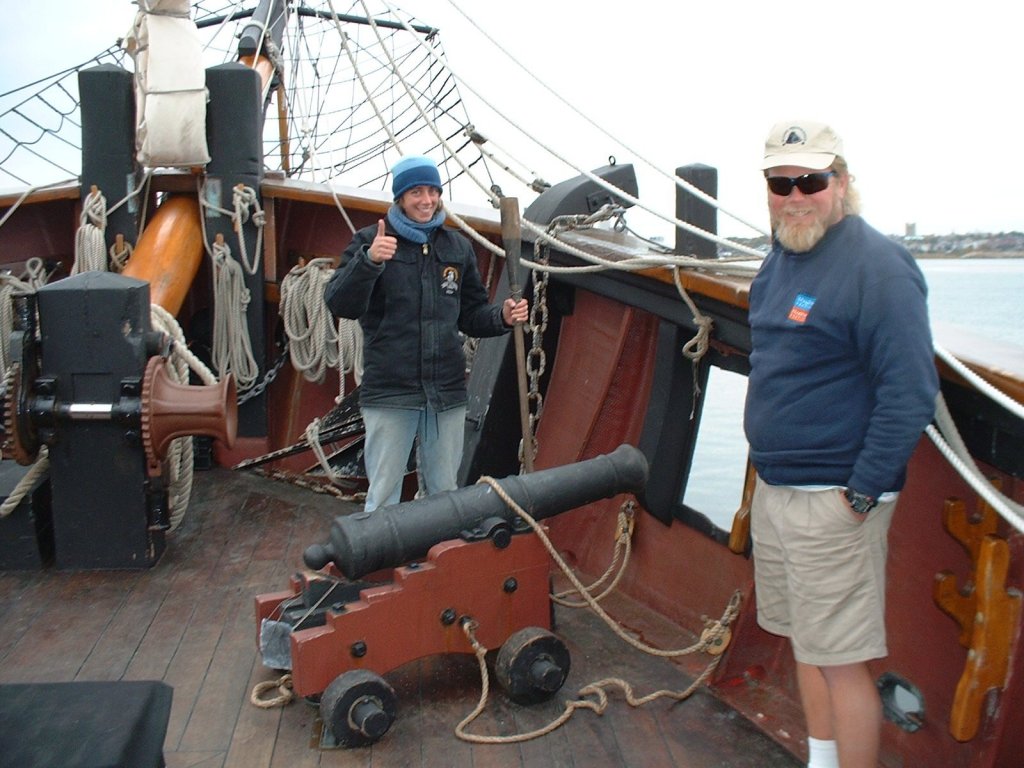
-
In my case it is HER that needs the sense of humor! After all she married me! Congratulations Sam As you are still not back with us giving updates on your Enterprise she must still be with you as well. We are going on 38 years so there is hope for you two as well! It's certainly a different life but a satisfying one as well. Best of luck.
-
Just put your foot down and INFORM her that it's your house too!............................ then set up your blankets in the back yard. I my case I can have anything out that I want...... So long as there is room and I do not have to move one of her things, or if it doesn't clash with what she already has there. Same world different place.
-
Hi Denis There will be plenty of pictures when they start showing something different or unusual. When I wrote the above stuff I took pictures as well on each day, but when I went to compile them with the day-to-day progress, it was even hard for me to tell what was different from the last pictures I had posted. When everything you are doing is removing a millimeter here or half a millimeter there it is hard to make it stand out even in the closer pictures. When you are doing planking or ratlines or even cannons it may be fiddly and even tedious, but at least you can show the progress. "missing parts.......did ninja kitty strike again?!?!?!!" Not before when I posted the above, but when I drilled the new mast hole and fitted the locator piece under the deck I was unable to find the second one! (Remember this was a schooner and had two masts) I took a flashlight and looked everywhere without luck. I found a stick from my normal work area in the other room that she had obviously been playing with but no mast locator! Probably wasted a half an hour! Hi OC Nice to see you here. I have been following both your builds and playing squirrel, stashing away bits here and there that I hope will help me in a short time when I have to start doing the REALLY hard stuff that is completely new to me. (Don't tell Denis, but I do the same with his builds). The Minions are so-so but they work cheap. Besides they give me someone to yell at when things don't go like they should. You don't expect ME to take the blame do you?
-
Wow, 4mm seems like a long way. Usually those kind of bulwarks usually get installed at deck level or on a recess that is almost at deck level. They are going to be hard to reference that far down. I am also surprised at the method they use to cut out the bulwarks Having the curves opposing each other uses up so much wood.
- 171 replies
-
- 7
-
-
- krabbenkutter
- authentic models
- (and 1 more)
-
Correcting stern frame #10 I thought I would just combine several days of progress reports into one post. Fopr the most part they are like the last post kind of boring and again I won't bother with pictures as it all pretty much looks the same. After making a quarterdeck template and a bulkhead template and folding them in half in an attempt to discover why #10 protruded so far to the starboard side. My deck piece after cutting the sides down to match all of the proceeding bulkheads was perfect port to starboard with only a couple of places where the lines did not line up. Less than .5mm or about the thickness of a pencil line! Good enough for me! I then did the same for #10 bulkhead and found that it wasn’t off from the keel either! I was totally at a loss. Eventually I discovered, more by accident than by any insight by me, that if I moved just the stern of the quarterdeck ever so slightly while leaving the forward portion of the deck on its locating pin that I could eliminate almost all of the problem without altering the alignment of the other proceeding bulkheads. Again it was possibly less than .5mm but the shift did wonders. There will be additional work needed when I get everything glued into place and locked down but at least I now have a workable solution that can be planked over. I then went to the stern timbers and spent what amounted to several hours getting them the way I think they should be. Part of the slowness was that I didn’t really understand how this area was designed to be planked and I got it wrong at least three times and had to cut it apart and start over each time to correct for my misunderstanding. It looks a little more ragged than it should due to all the do-overs but it now looks plank able, to me at least. Again there will need to be some fine tuning when the whole thing is glued together and everything is a little more solid. Things are getting a little scarier to me now. I looked in the box today for almost the first time since I started working on this kit, and almost all of the laser cut parts are now missing! About all I have left is a bundle of sticks! I have never planked a period ship before so it looks like soon I will be seeing if I have even a fraction of the skill so many people on this forum show almost every day in their builds! Really intimidating stuff to me! _____________________________________________________________________________________ I finished roughing in the stern and locating #10 bulkhead. I then went to the bow and installed some of the filler pieces that were supplied in the kit. I will probably add additional pieces from scrap also. Virtually all of the bashing for this part of the build is now done. Everything that needs moving, raising, lowering, shortening or reshaping has been done. All that is left is fine tuning and shaping of very fine areas and getting the hull ready for the next step, siding and planking. This process will probably take several days or possibly even longer depending on how much I get to work on it. I doubt I will bother taking pictures or logging it as not only will there be little to see, (Taking off a mm here and a mm there is kind of like watching grass grow!) but will also probably be a bit boring to even read about. So for you people who are following this I will forgo you the pain and just wait for follow-ups until this part is done. I also took time to locate the new position for the mast as of course I am converting a schooner to a sloop. Most real life ships would have been done the other way around in order to reduce the needed crew size and add more sail area at the same time. Using a sample of six sloops and cutters of American and British origin, I measured the mast location on the plans available and converted that to feet. I came up with a maximum distance from the bow of almost 24 feet and a minimum of about 18’. I threw those two numbers out and ended up with three ships at 19.5’, one at 21’, and one at almost 22’, so I opted to locate the mast at 19.5 feet from the bow. I also increased the size of hole in the new location to accommodate a 3/8” diameter mast instead of the smaller diameter schooner masts. Of course the new location just HAD to end up almost right on top of one of the bulkhead locations! Hopefully all this stuff won’t take too long and I will be able to show some before and after pictures in a while. At this point I had spent enough time on the after part of the hull so that almost all of the frames under the quarterdeck were of the right size and even so there was really no reason to spend any more time back there. So I went to the bow and midship area and spent pretty much all my time there. As I had lowered the midship deck about 1/8” and the original forecastle about half an inch, with the exception of bulkheads one and two, all the other bulkheads needed to be narrowed by about 1mm on each side at the new deck level. Bulkheads 1 and 2 had been moved when the bow was shortened and basically required their own fine tuning for proper shape. The other bulkheads 3, 4, and 5 were about 1mm wider in each side than they should have been and were reduced accordingly. I then fared in the whole hull bow to stern and cut the bearding line into the profile strip. Hopefully next will be some before and after views, (Does this angle make me look fat?) and then on to more interesting stuff to read about and see.
-
Oh, by the way I think you may have taken the first pictures of the elusive "Carpet Monster" that was being talked about the other day!
-
Hi John Good to see you back with more pictures of the feather duster! I am a bit surprised at the size in relation to your table, (By the way your table is WAY too clean!) unless your table is really small, the canoe is much larger, or is that longer, than I envisioned. I am still impressed with all the carving you have had to do and the resulting quality. Carving for me is a no-go. Kind of like music and me. I have all the musical talent of an oyster and the only instrument I can play is a radio or CD player! Same with carving, if I was to try this build it really would look like a feather duster! Keep it up, I am looking forward to seeing more.
-
Hi Denis Glad to see that you are interested in building this ship. At least the cost of postage wasn't wasted! You weren't supposed to say where it came from though! If I remember right your comments about the package went something like, "Thought it might be a bomb," and "Thanks for cluttering up MY HOUSE." Looking forward to seeing what you do with it. It's a pretty simplistic kit with very few parts but i'm almost sure you will find someway to spruce it up and make it more authentic.
- 171 replies
-
- 8
-
-
- krabbenkutter
- authentic models
- (and 1 more)
-
Thank you greenstone for showing some of your impressive models and I wish you all the success such fine kits deserve.
- 216 replies
-
- 6
-
-
- masterkorabel
- ships
- (and 3 more)
-
By the time you are done with this build Greg, you will know almost as much as any crew member about the layout and equipment on this ship and be qualified to conduct guided tours!
-
Stern and transom Today I cracked the whip and made the building crew straighten up a few sloppy areas. I attached the two main sub-decks to each other so that they could now be handled as one assembly. I also fared the edges of the sub-quarterdeck to not only match the bulkheads but form a smooth line from amidships to the stern. This only required about 1mm of trimming along each side. So far so good! I then went to the #10 bulkhead that forms the stern and begin work on the required shortening of the false stern timber to conform to the shortened former poop deck. It was at this time that I discovered that the #10 bulkhead is also out of alignment port to starboard! I will have to make some more cardboard template and figure out what happened, just like on bulkhead #8. Hopefully the cure will be simple! Bummer, another sleepless night! Believe it or not I had trouble sleeping last night, partly because of the issue with #8 and what I could do about it! This is VERY unusual for me. While I wake up and have to turn because of other reasons several times a night, I NEVER have trouble sleeping or getting back to sleep! I went ahead and shortened the stern timbers, as whatever is needed to straighten out the bulkhead will not affect their length and angle requirements back there. Not much point in posting pictures as it still looks pretty much like a refugee from a building scaffold but progress is being made. (Next: Troubleshoot and correct #10 bulkhead)
-
Clinker or Carvel it is really looking good and progressing nicely!
-
OC You might try closing down the site and wen you come back they may be there again. That's what happened to me. No idea why,
- 122 replies
-
- 4
-
-
- tamiya
- King George V
- (and 2 more)
-
Now THERE are skills I am well versed in!
-
Now they are back????? Six hours ago they were gone!
- 122 replies
-
- 3
-
-
- tamiya
- King George V
- (and 2 more)
-
Just to let you know KP, this time the pictures didn't show up for me. I suspect it may be MSW as it is the same in Chrome, IE, and Firefox. I am certain that they were there when you posted them, (The the launches set up on the upper deck with PE on them right?). It appears that all the prior pictures are also gone. Very strange.
- 122 replies
-
- 3
-
-
- tamiya
- King George V
- (and 2 more)
-
Put me down for the bow matching the deck as well.
-
Thanks John It really isn't as bad as it looks. The kit is so close to what is needed that everything has surprisingly fallen into place quite well, and each alteration has kind of just presented itself as I got to each point. I'm not enough of an engineer or smart enough to have figured all of this out in advance. Besides who says that the whole thing may not end up as a rowboat? I would at least hope for a viking ship so I can send it to sea and light it on fire if that happens but only time will tell. Some of the scariest stuff for me is still ahead. Stuff that I have never done before that will be WAY beyond my present pay grade. Like I told Don a while back, at this stage it kind of looks like scaffolding for a building, and that could always become plan B! Thanks for the encouragement though it really means a lot to me.
-
Come on Mark! TWO stoves AND an oven on a medium sized fifth rate frigate. It appears that these guys were true Frenchmen and valued their food! I don't think the Victory had that much cooking ability! SUPER SUPER SUPER job on the stoves and those brass hoods look exactly right! Your tenacity truly paid off!
-
I am too. Now it is on to bigger and better things. The whole diorama will truly be a spectacular monument not only to your father but to your abilities.
- 378 replies
-
- 8
-
-
- java
- pacific crossroads
- (and 2 more)