

Zarkon
-
Posts
286 -
Joined
-
Last visited
Content Type
Profiles
Forums
Gallery
Events
Posts posted by Zarkon
-
-
Hello all!
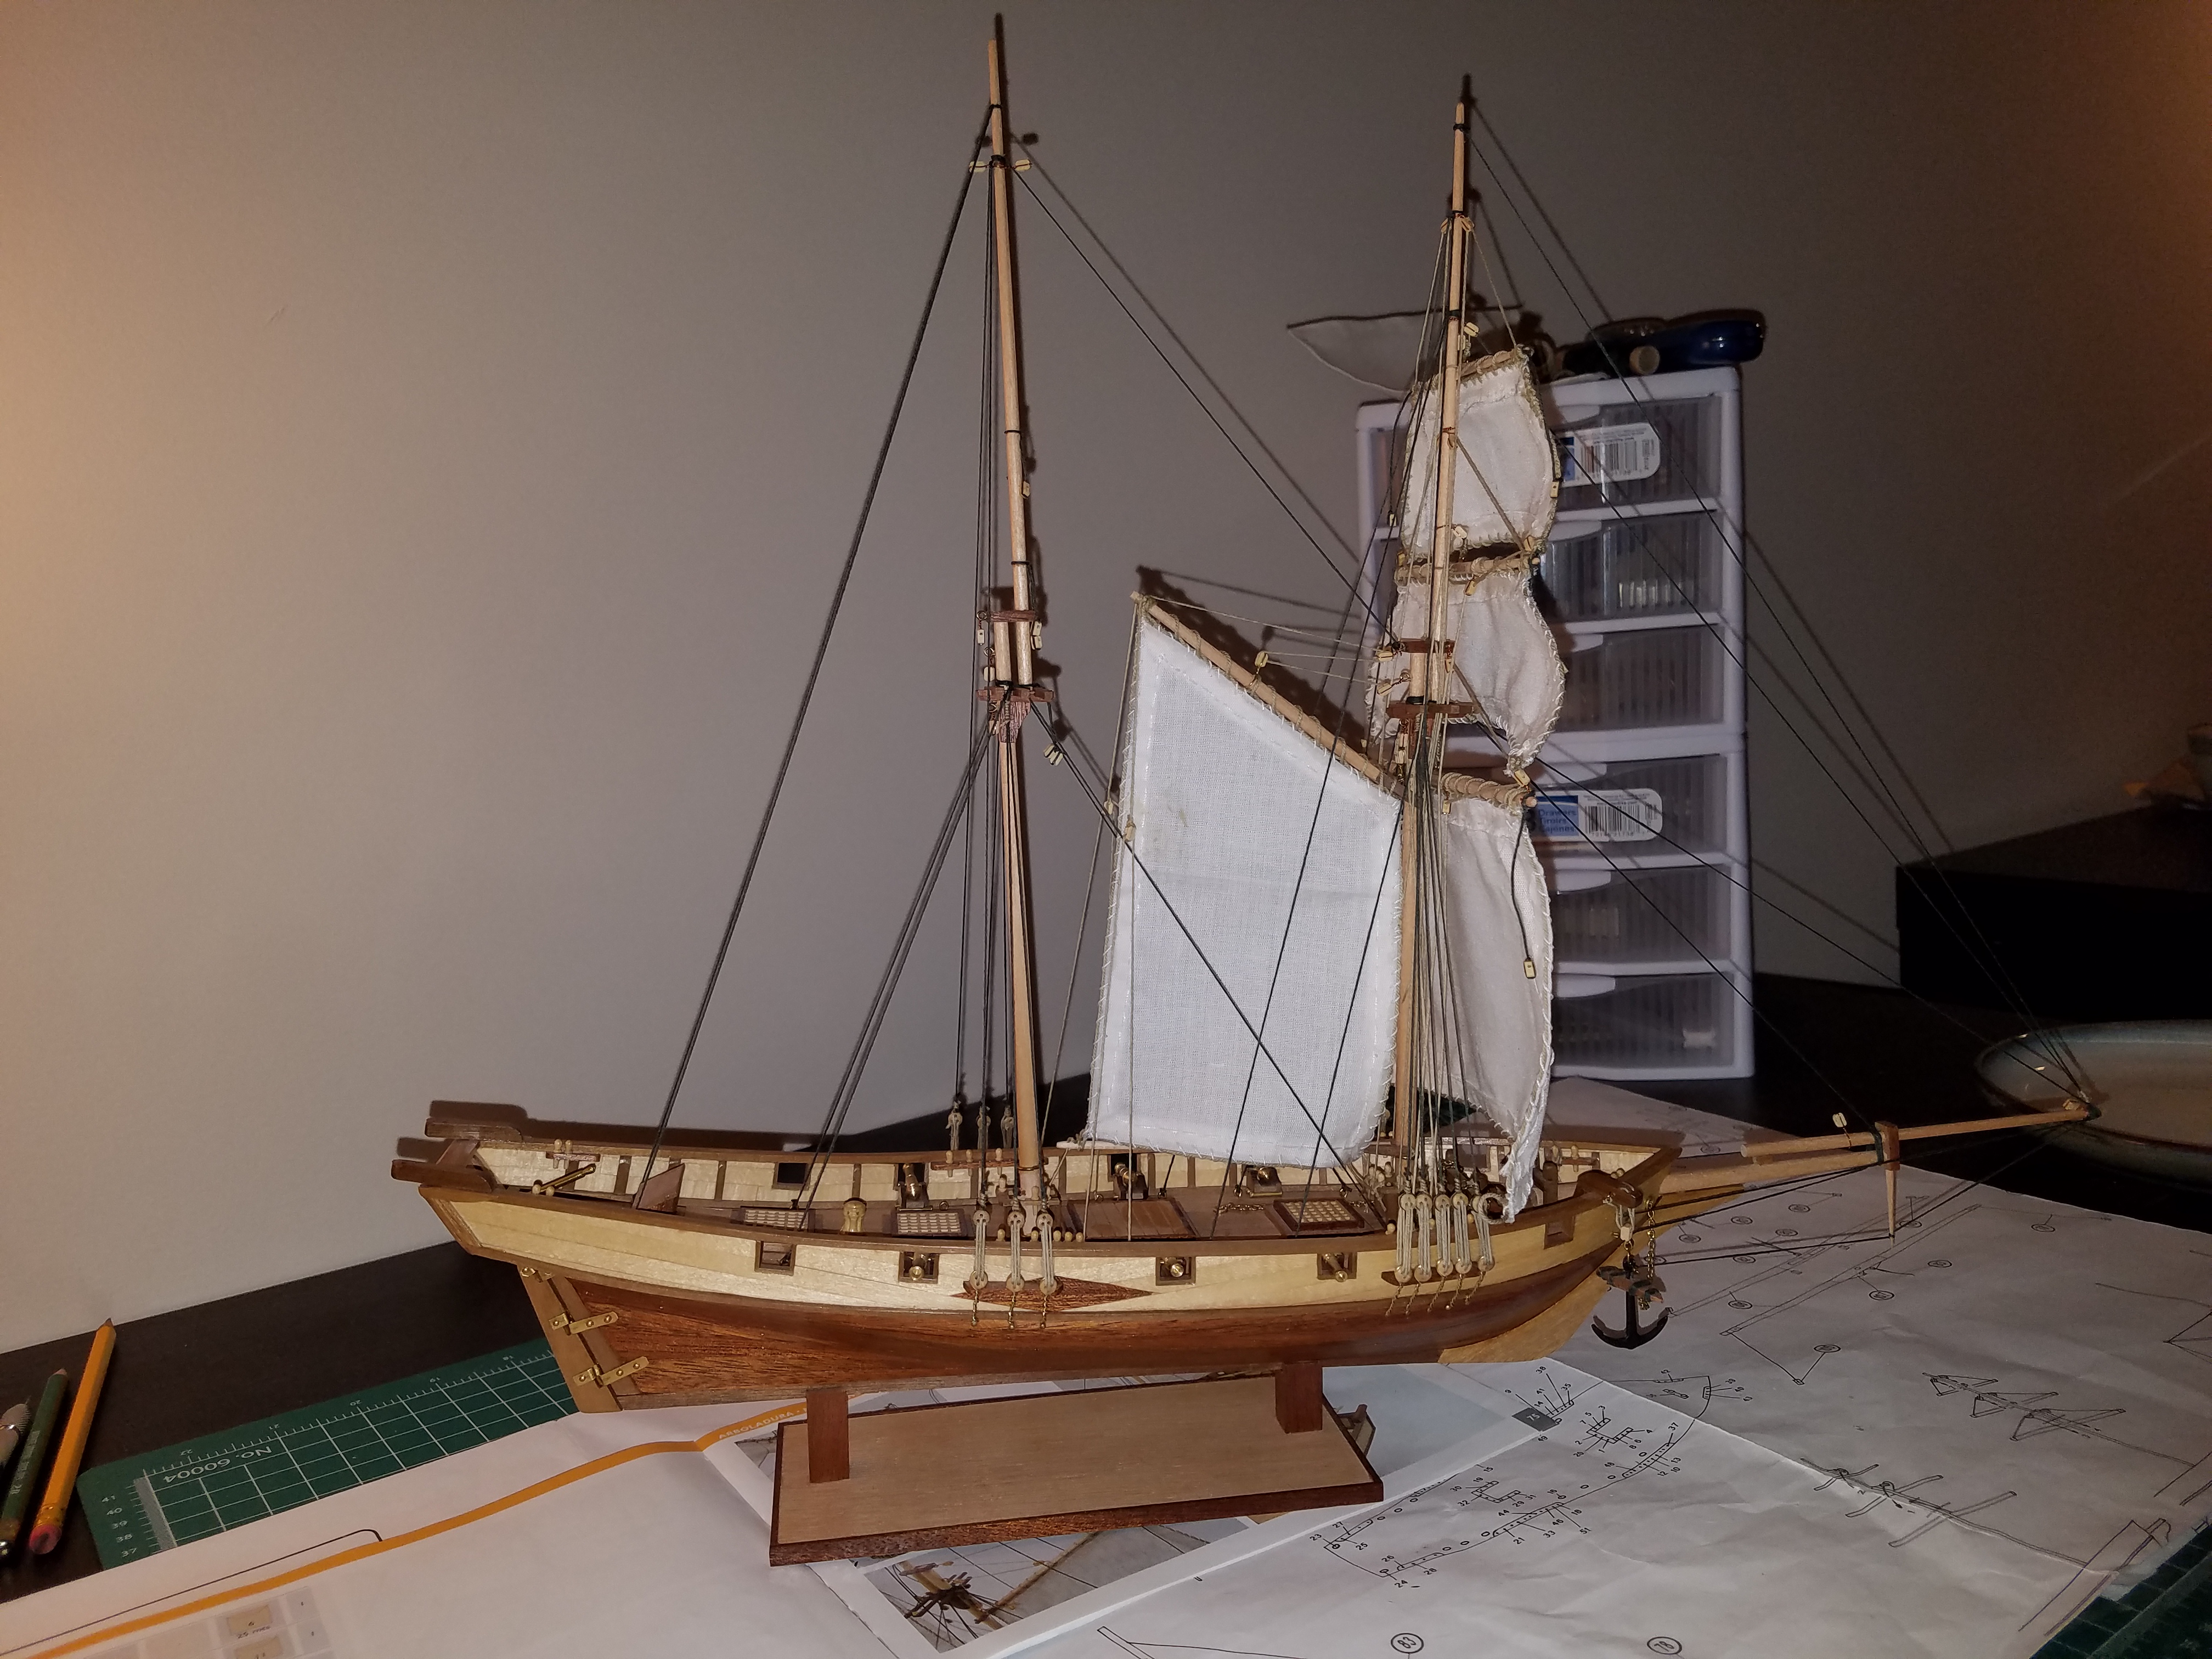
I've been super busy, so not too much time to build. But for an update, I have faired the hull as well as finally added the correct rabbet strip. This should help with planking.
I also have had to create a new stem piece because the one provided wouldn't fit properly with the rabbet added. I debated on making the individual pieces or making it as one piece. I decided on 1 piece because of a few reasons. First, it's small scale, so it would be harder to make all the pieces. Two, this is my first time trying to make a stem out of just a sheet of boxwood. So making one piece would be a good intro into making custom parts with my scroll saw.
This is how it turned out:
I am pretty happy with it! All that is left, is to cut out the holes according to the plans. It is slightly (1%) bigger than the kit supplied stem piece.
Hopefully I will have time to finish it this long weekend.
Thanks!!!
Jeff
- Dutchman and GrandpaPhil
-
 2
2
-
-
Thank you Rick!
I really appreciate your kind words! Your encouragement inspires me to do my best, and beyond!
I hope to be able to sand the hull this weekend. I also hope I will be able to order a small hobby table saw soon because I will need to make my own strips.
This Monday, I have ear surgery. I have had a constant ear infection in both ears for 3 months now. I really hope it will be fixed. So I might not be able to work on her for a few days next week.
Thank you everyone for your kind words and likes!
Jeff
-
Hey all!
I am still working on her, very slowly!
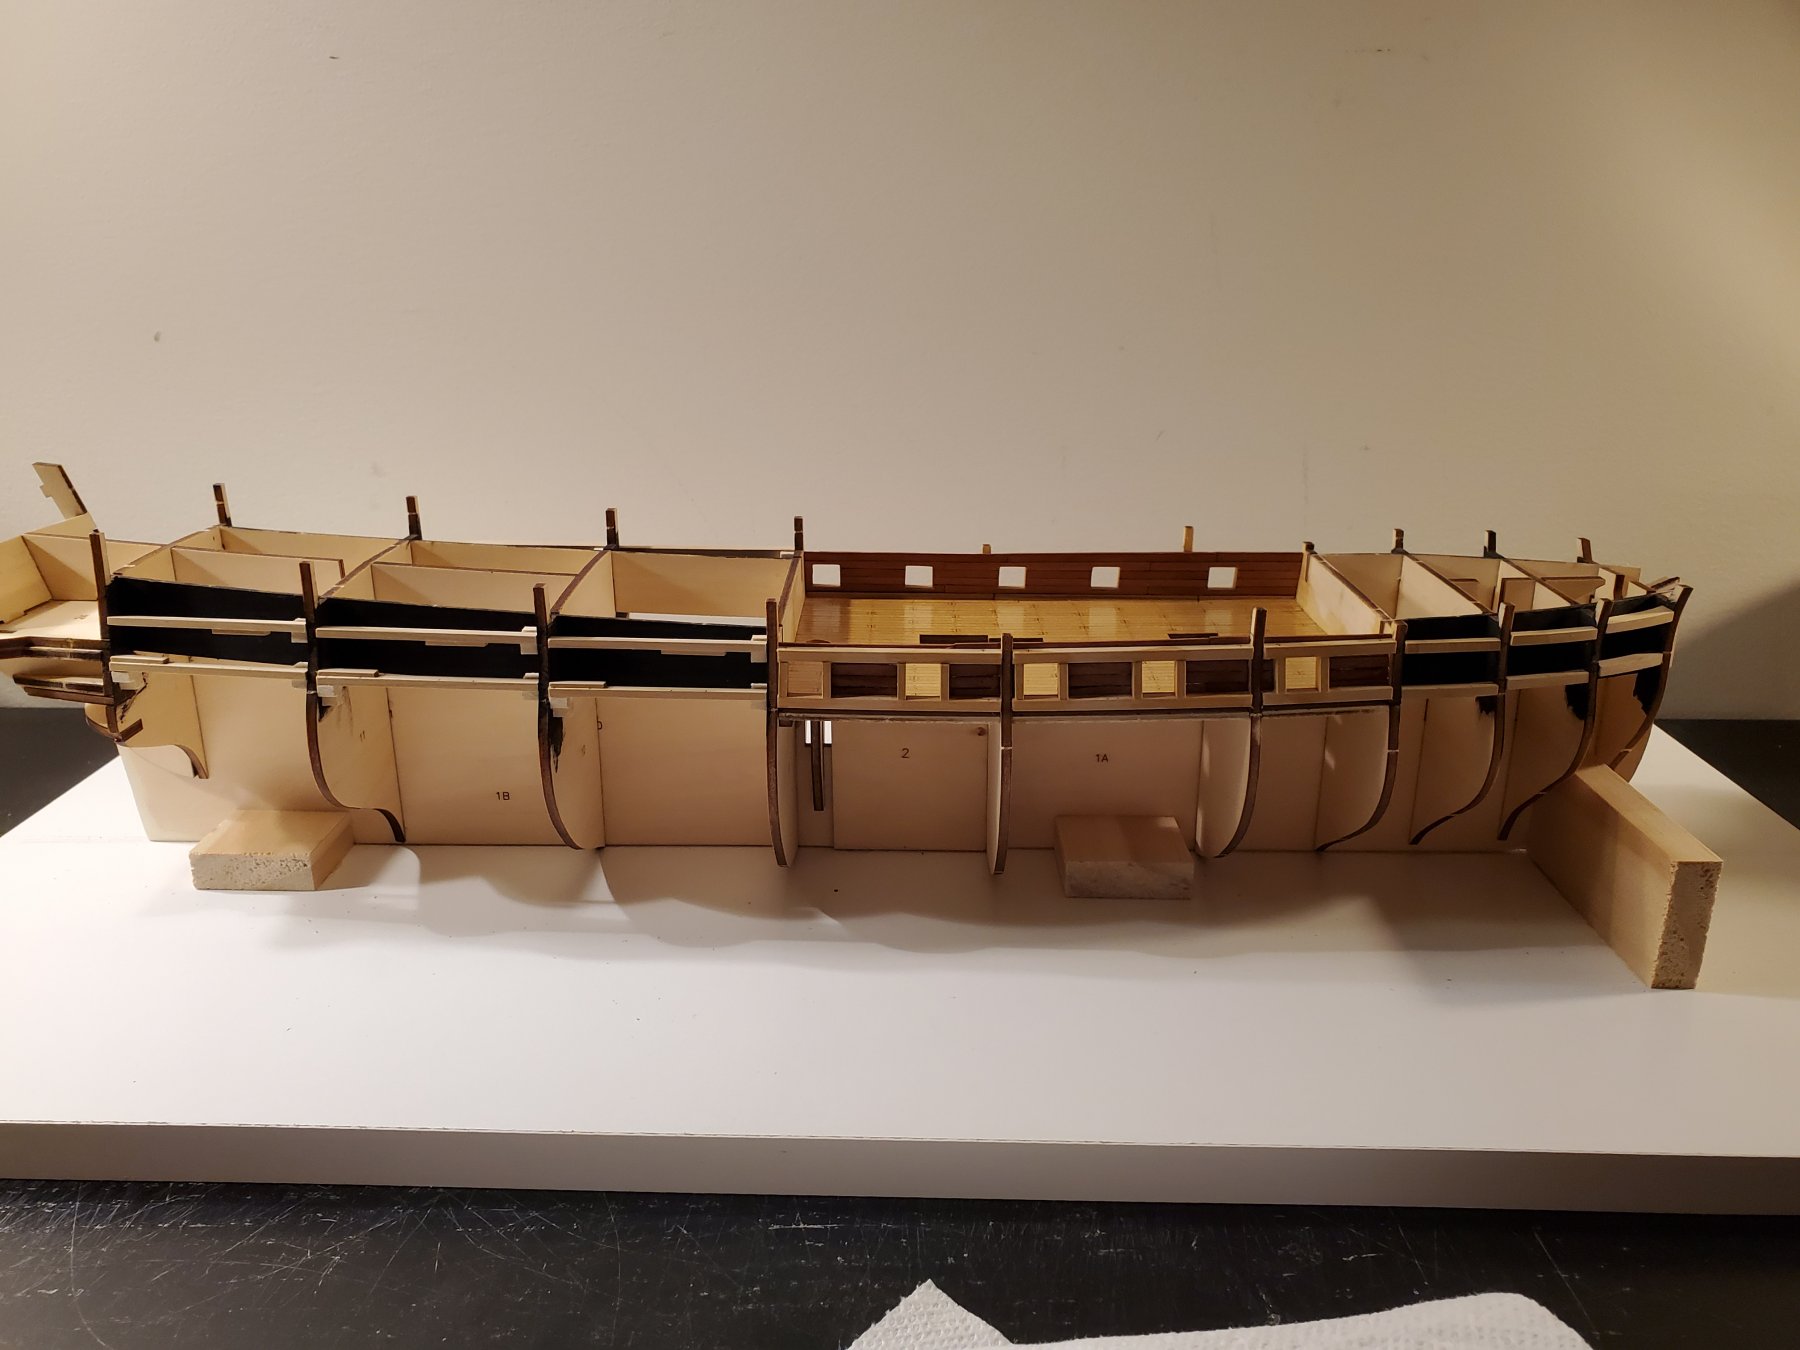
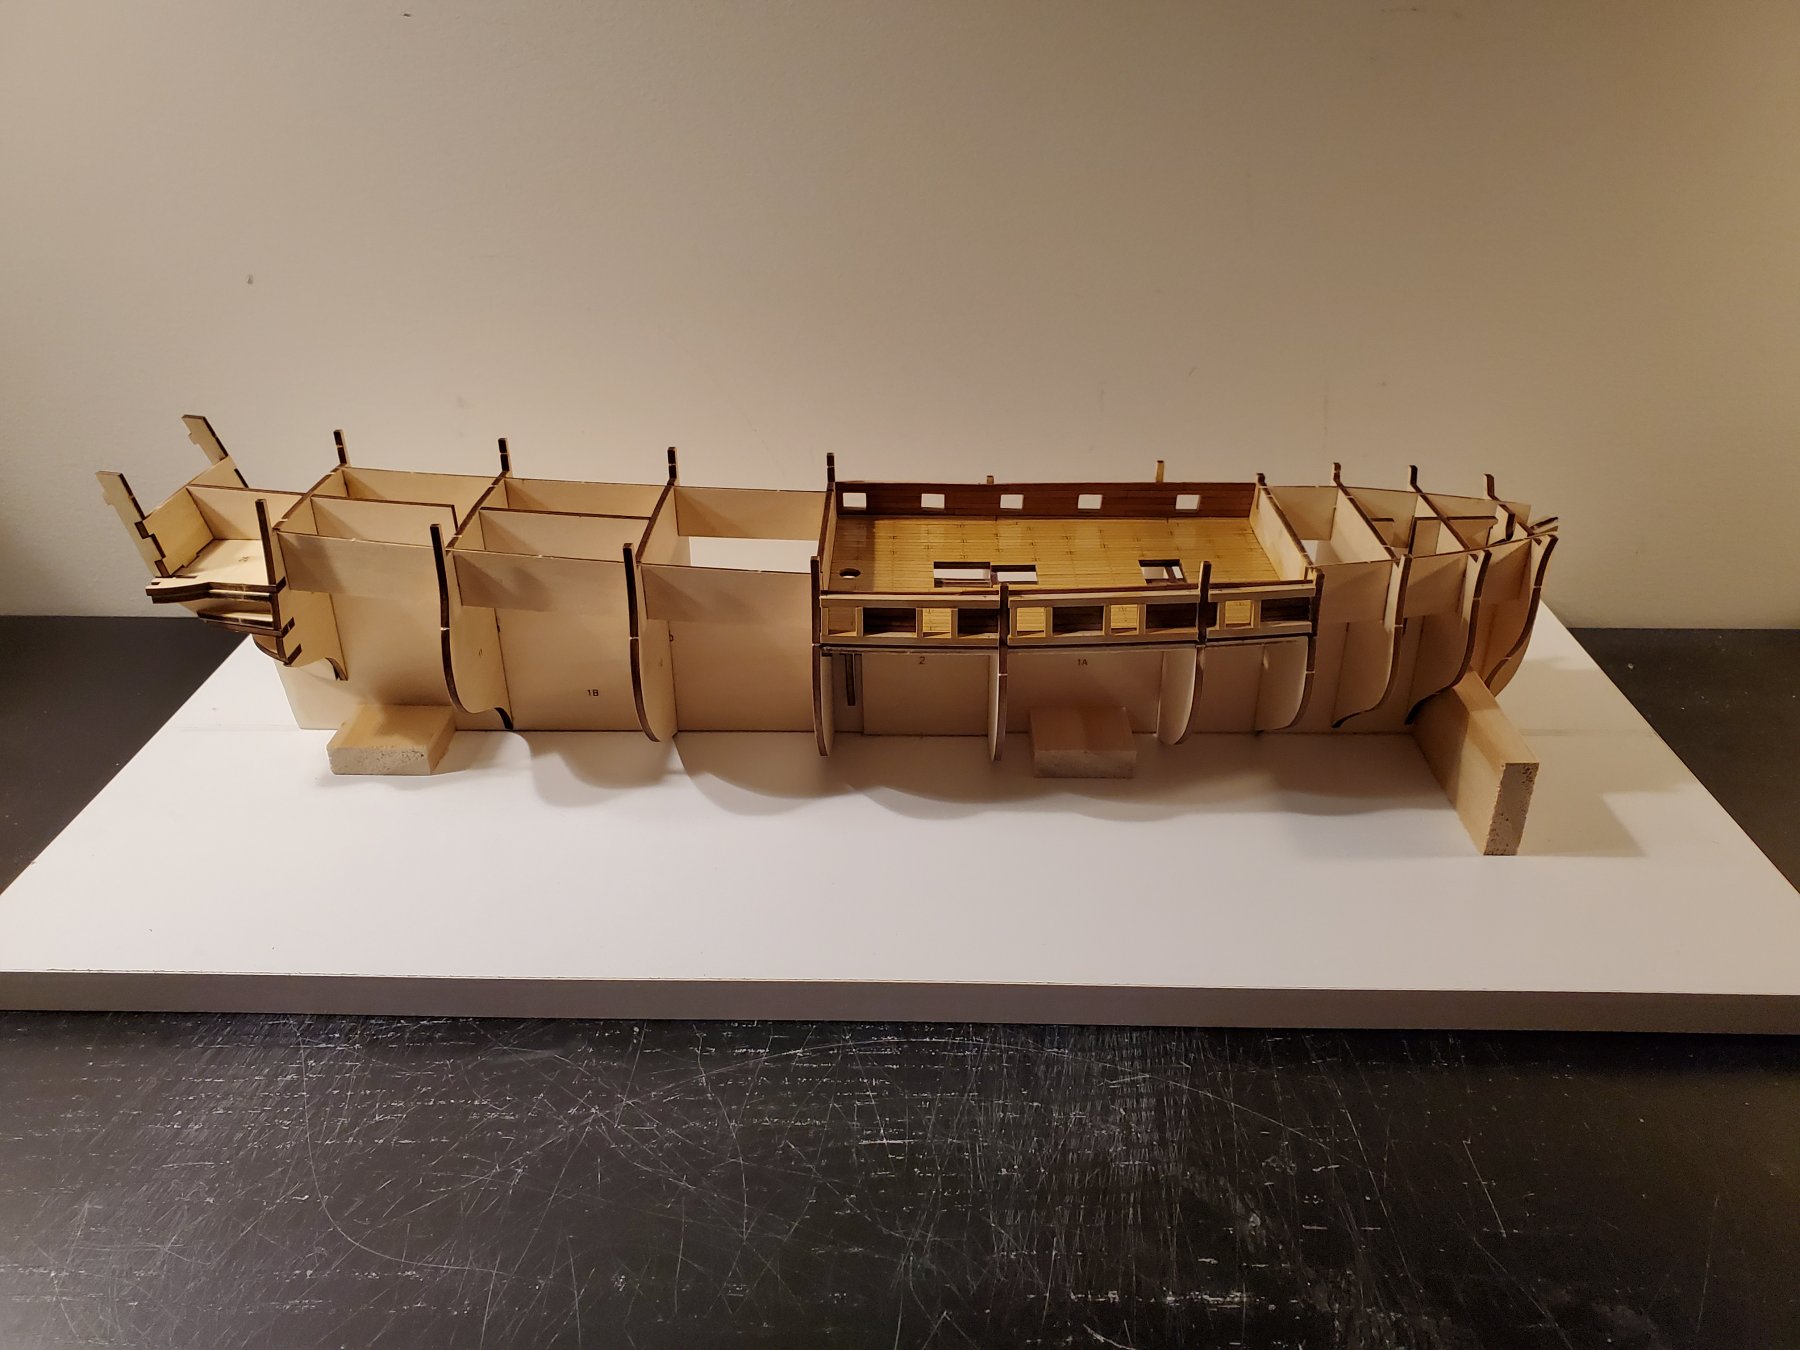
I have added where I want the gunports to be. I also added supports to the horizontal gun ports so they shouldn't break off when sanding. I want to file/ sand the ships frames now. After that, I will add the vertical sides of the gunports then do a final sanding before planking above the Wales.
My only issue is finding the time to do the sanding. I can't do it where I normally build because it's too much dust. I hope I can get to it this week!
Here's to hoping!
Jeff
- Dutchman and GrandpaPhil
-
2
-
Mike,
Thank you for the great reply!
Your thoughts really helped to answer my question. I think I will go with a light colored wood, boxwood/Alaskan Ceder, for the gun deck, and walnut for the lower hull. I will paint the wales black. The wales, I hope, will be the on only thing I will paint.
I would like to check out cherry for my next build as it seems swiss pearl is hard to find in the US right now.
Thank you very much for the help!
Jeff
- mtaylor and Landlubber Mike
-
2
-
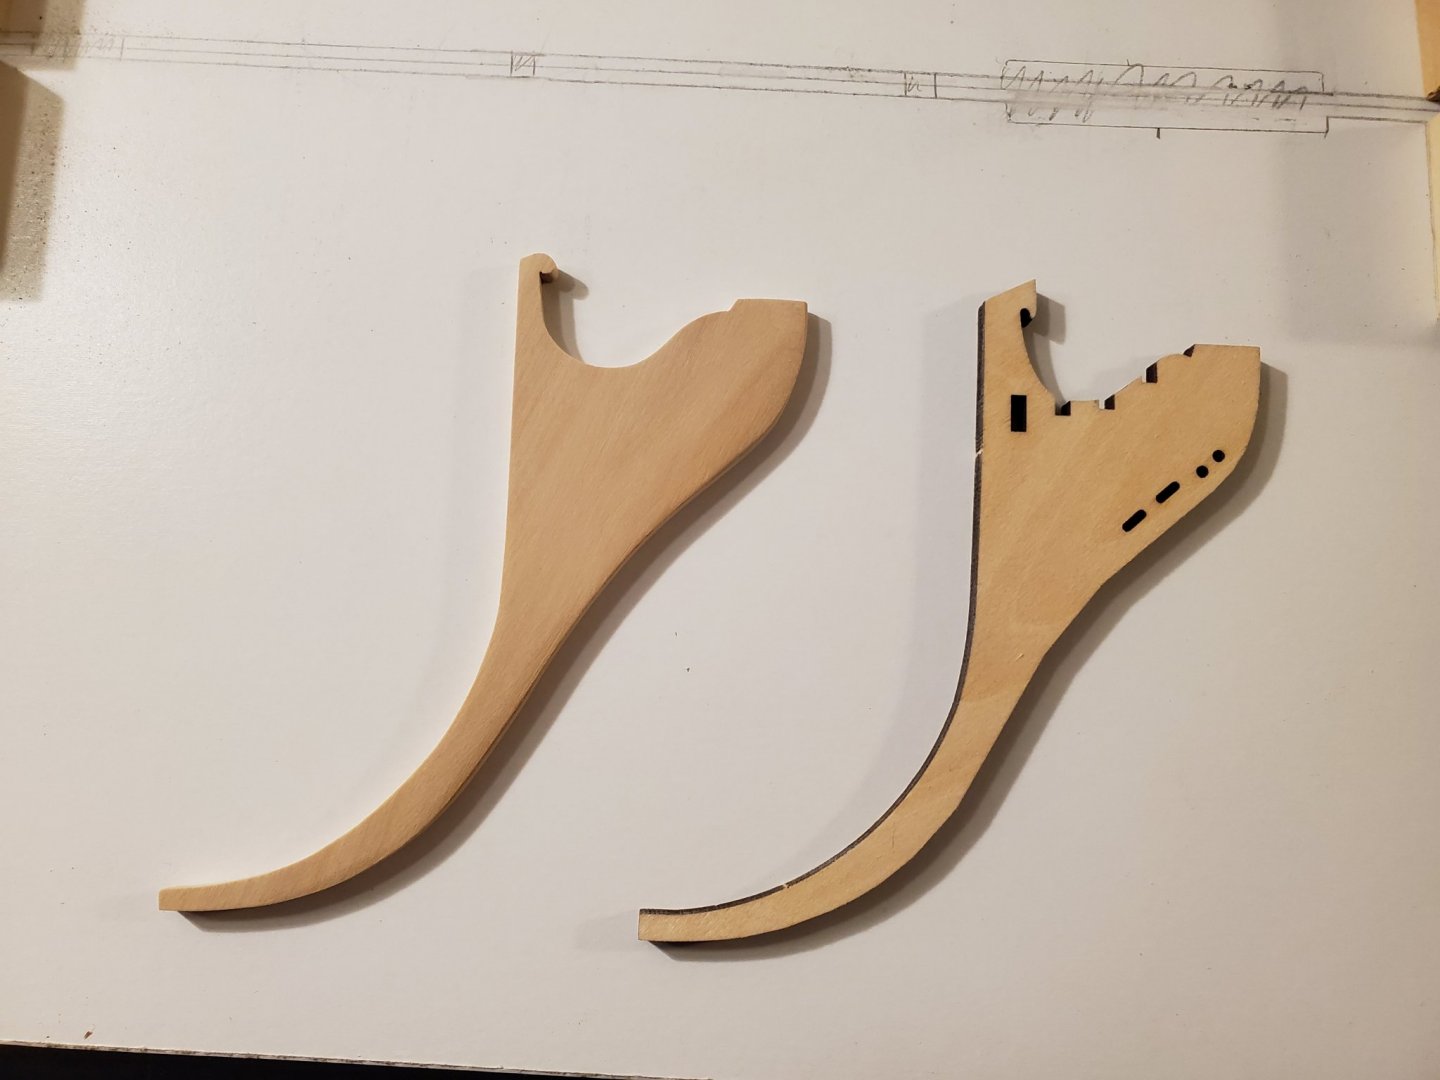
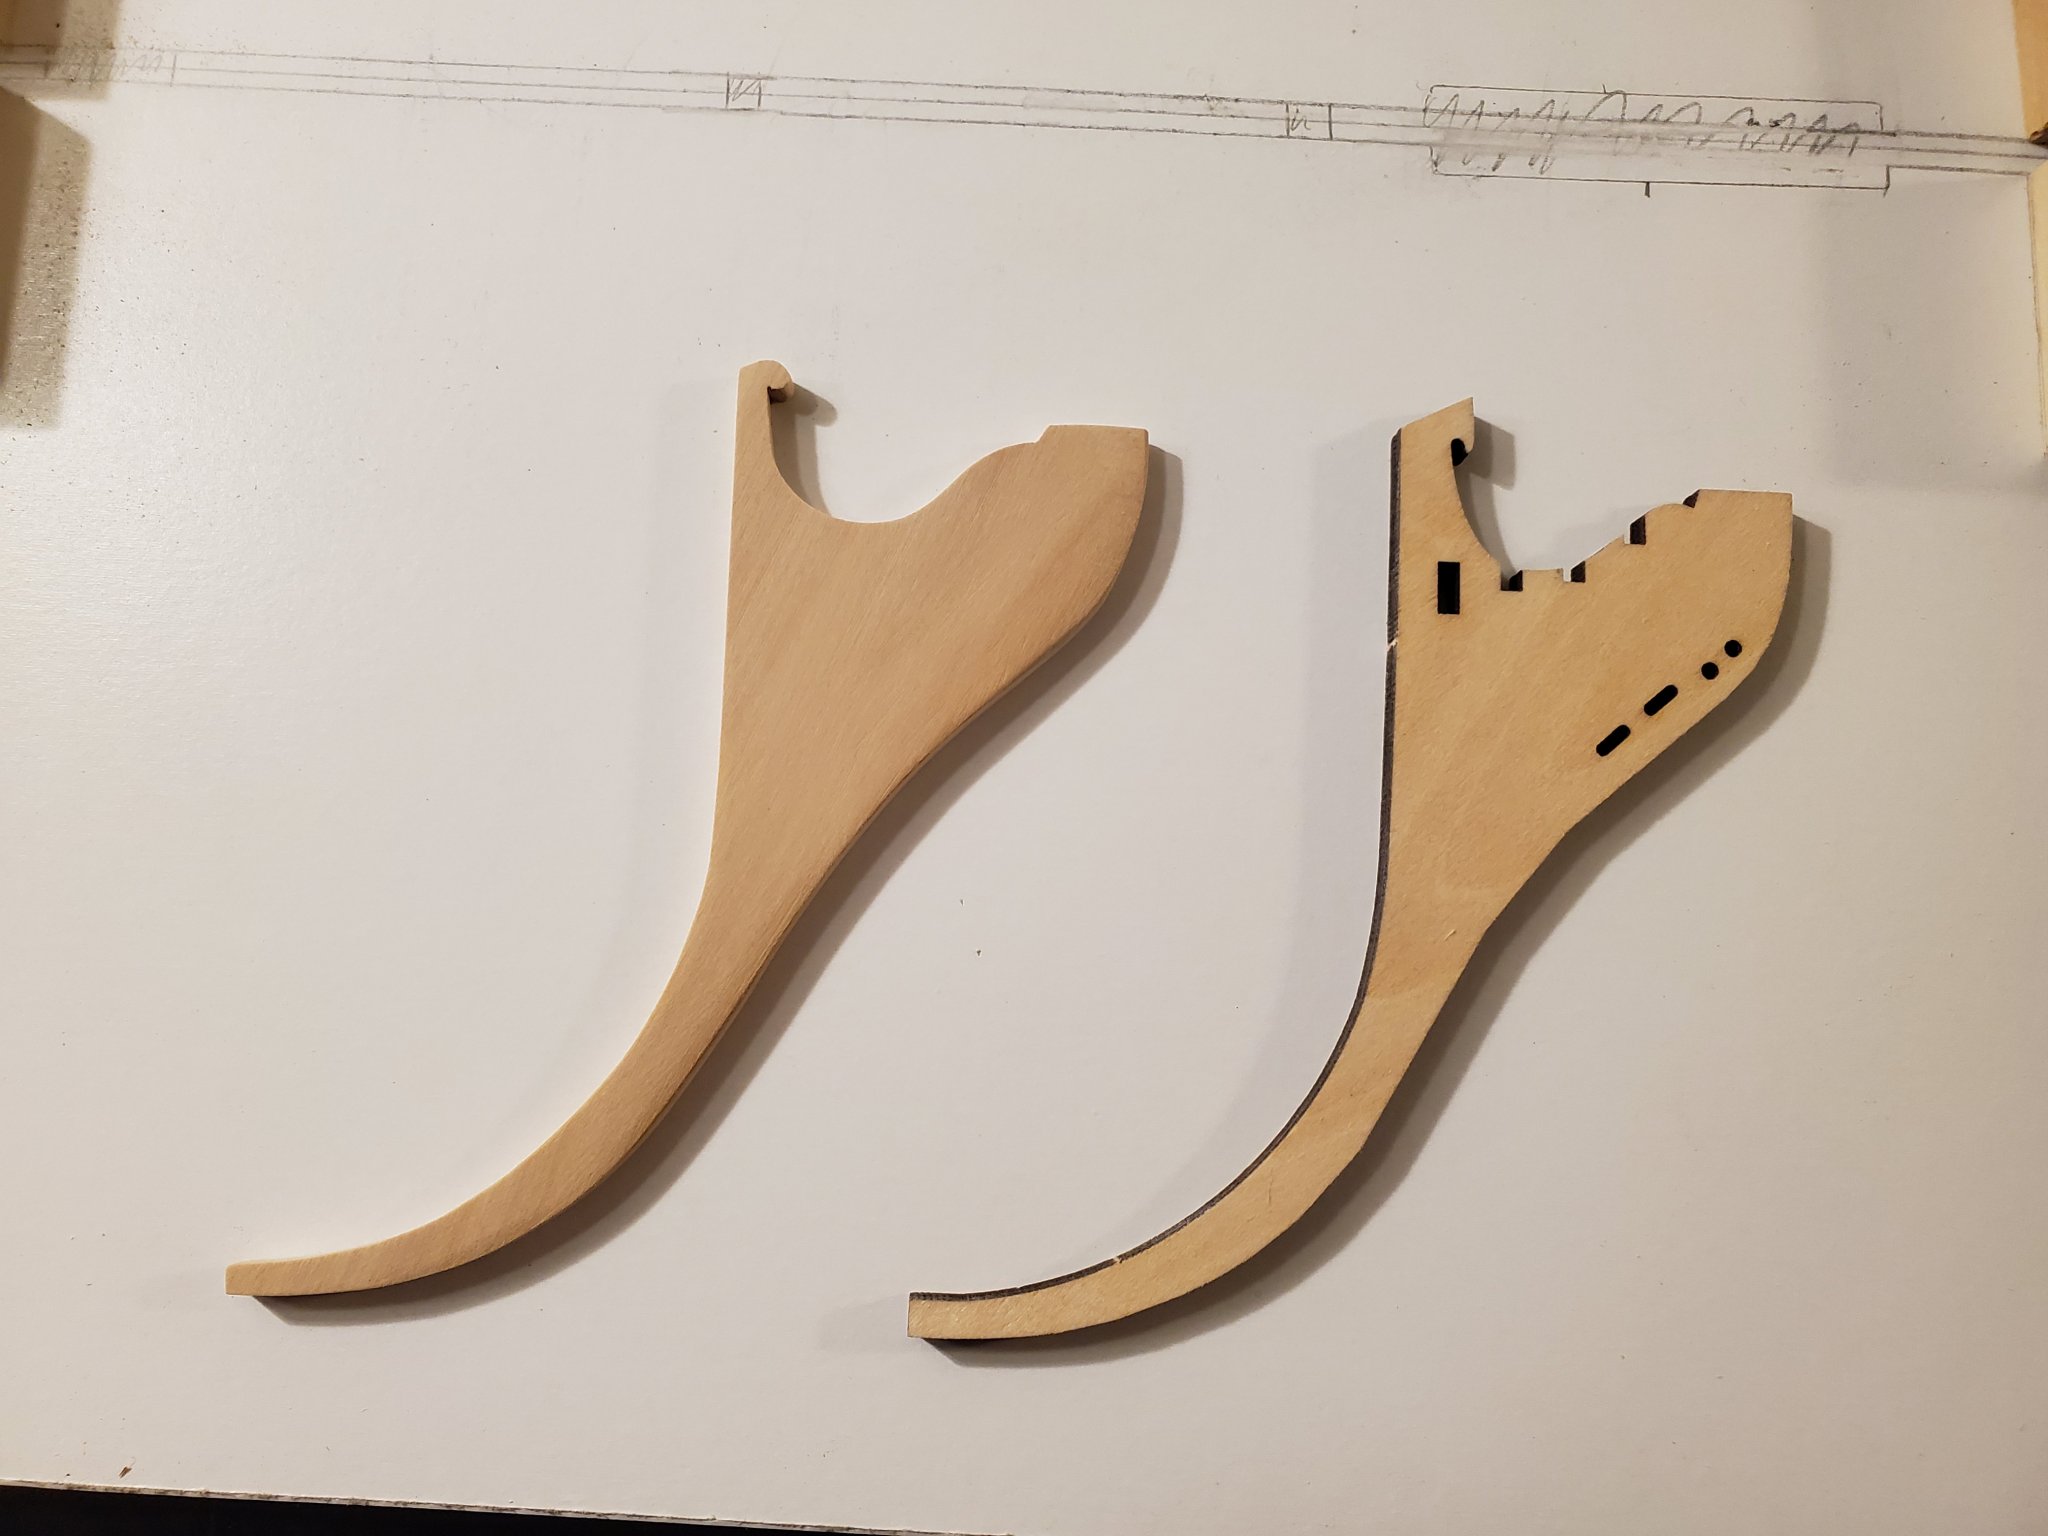
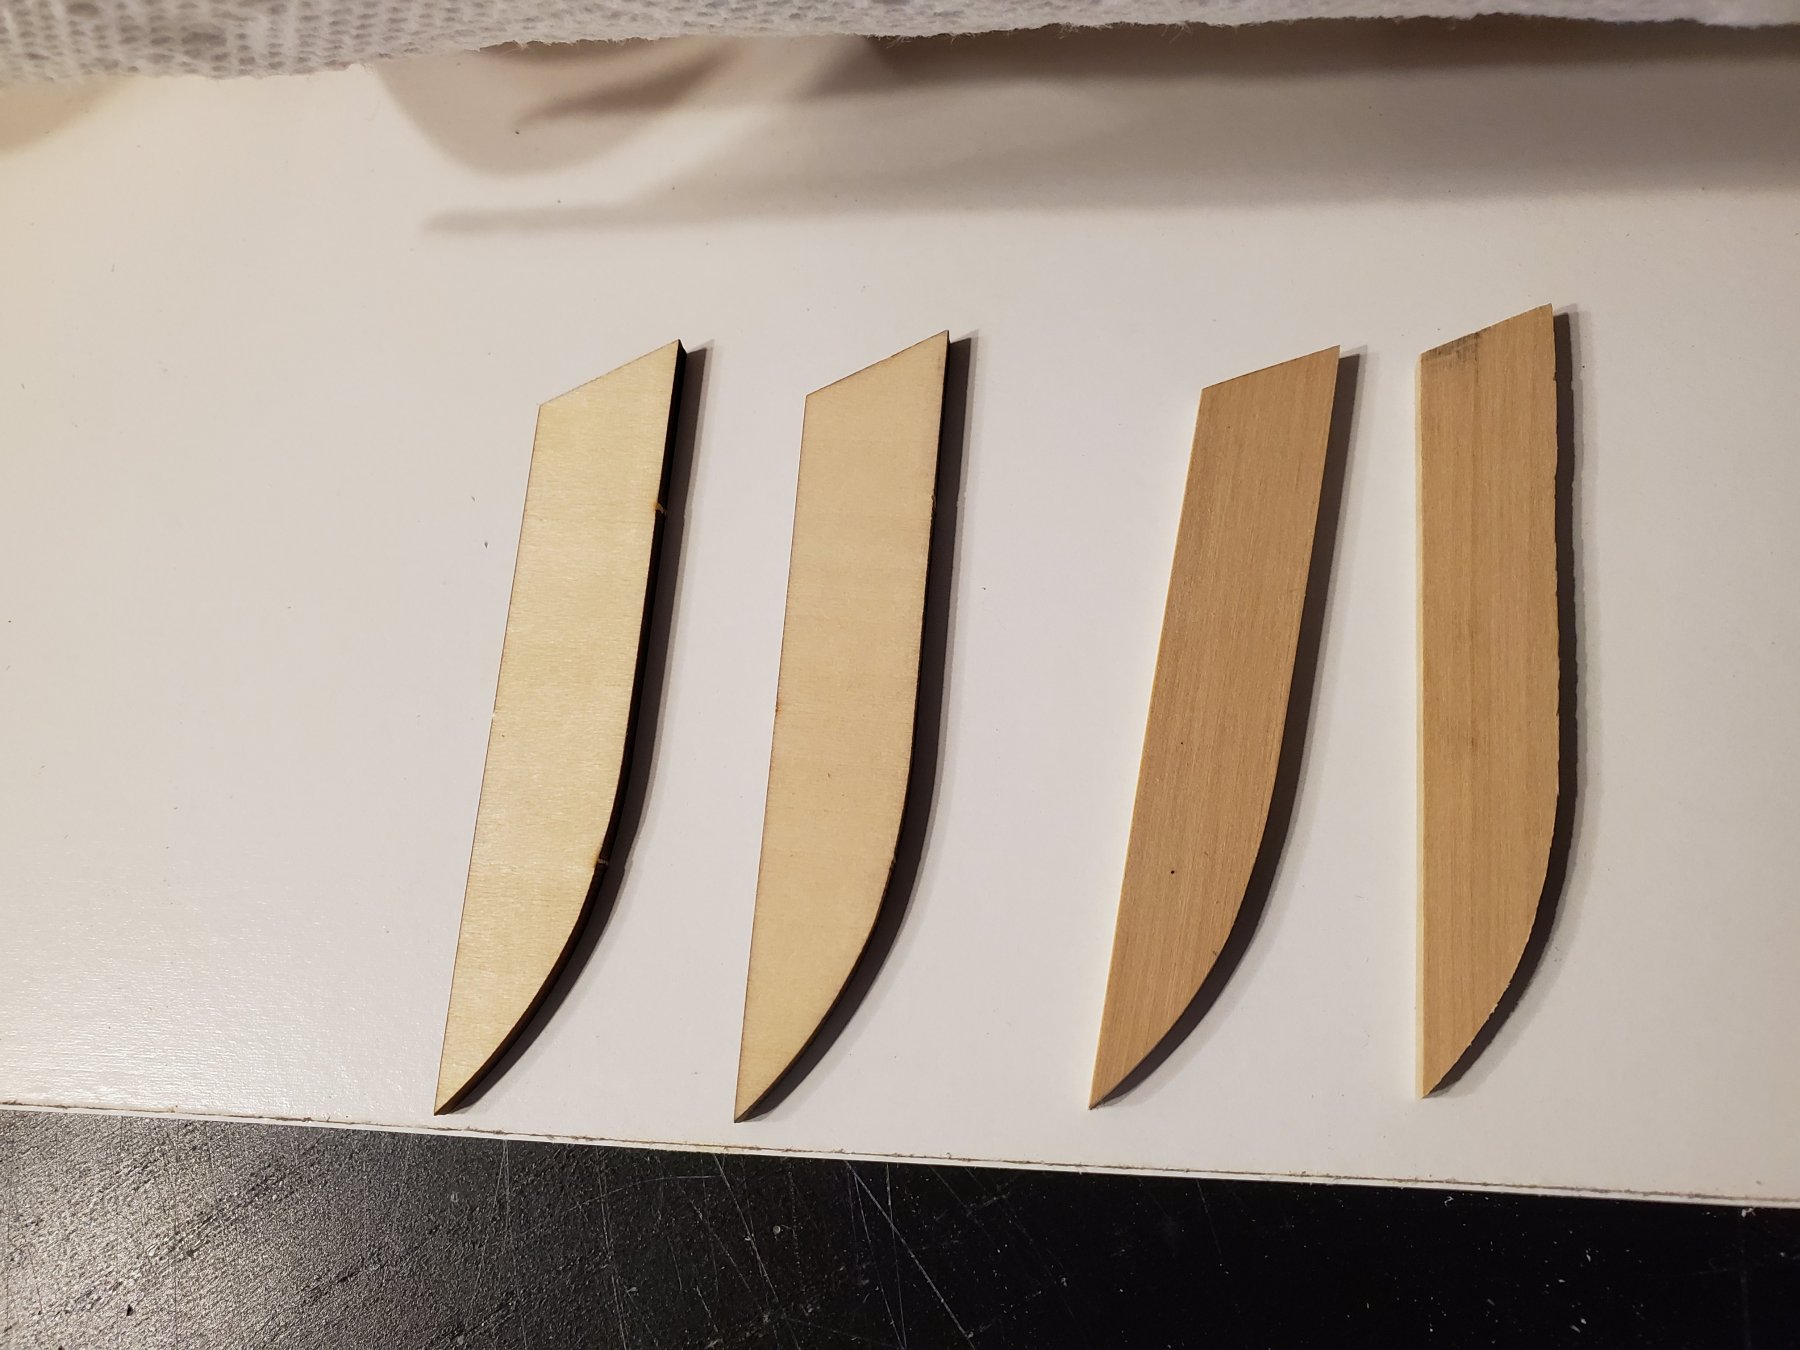
So as I looked through the cd of instructions, I noticed that you dont make the rabbet. I think making one would be helpful for planking, so do add one, I first had to make some custom braces.
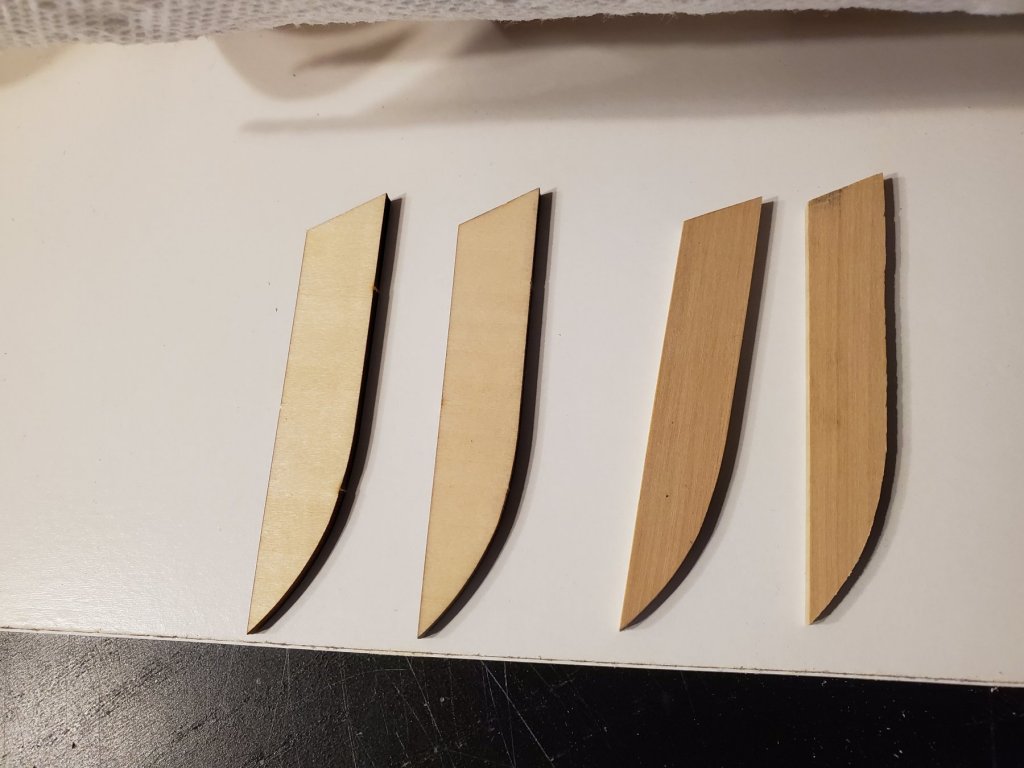
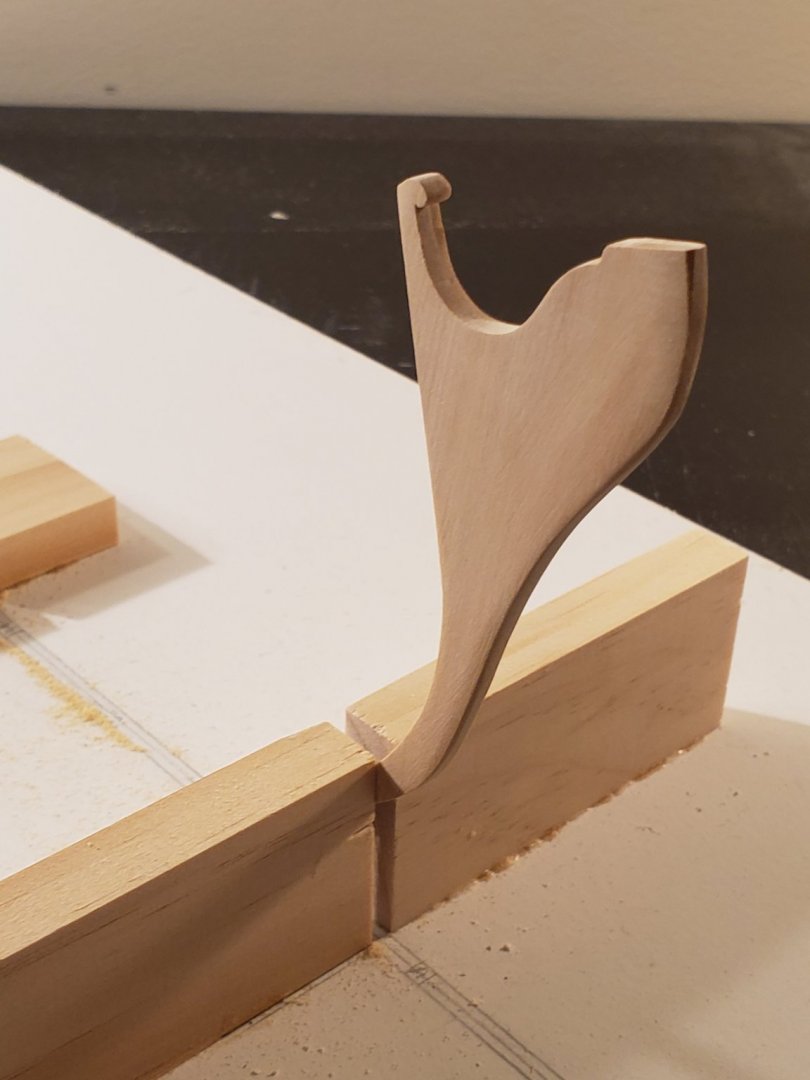
On the left are the bow supports. On the right are mine. I traced the original ones, then, removed 2mm on the curved side. I used my scroll saw to cut both out in their basic shape. Then I hand sanded them down to the correct width. They are made out of boxwood because that's all I have right now! Haha! Here is a pic of the rabbet on the bow.
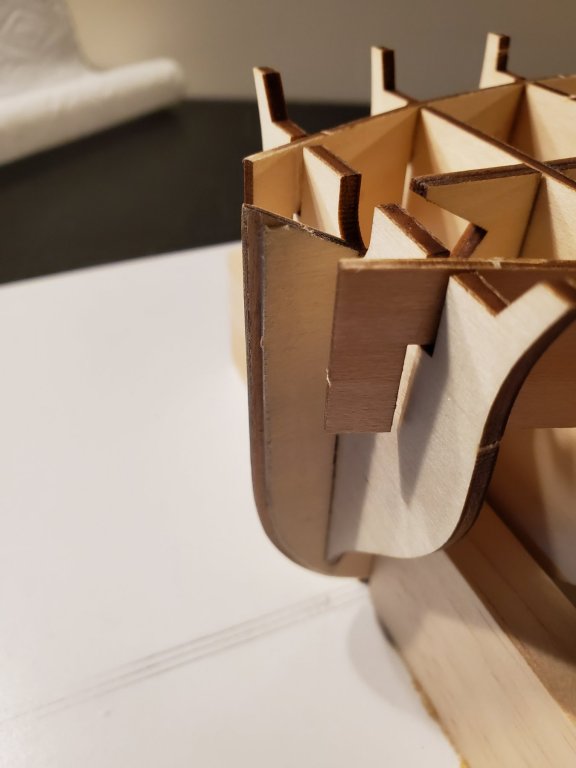
This is my first time doing this, so I was actually pretty impressed at how it turned out!
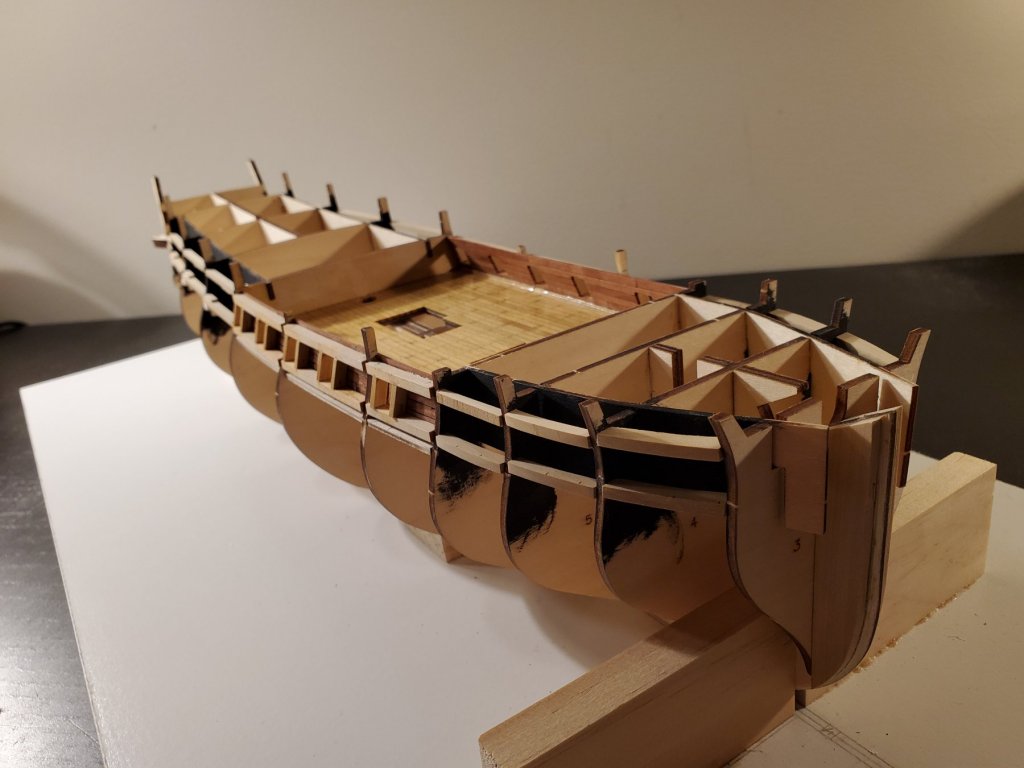
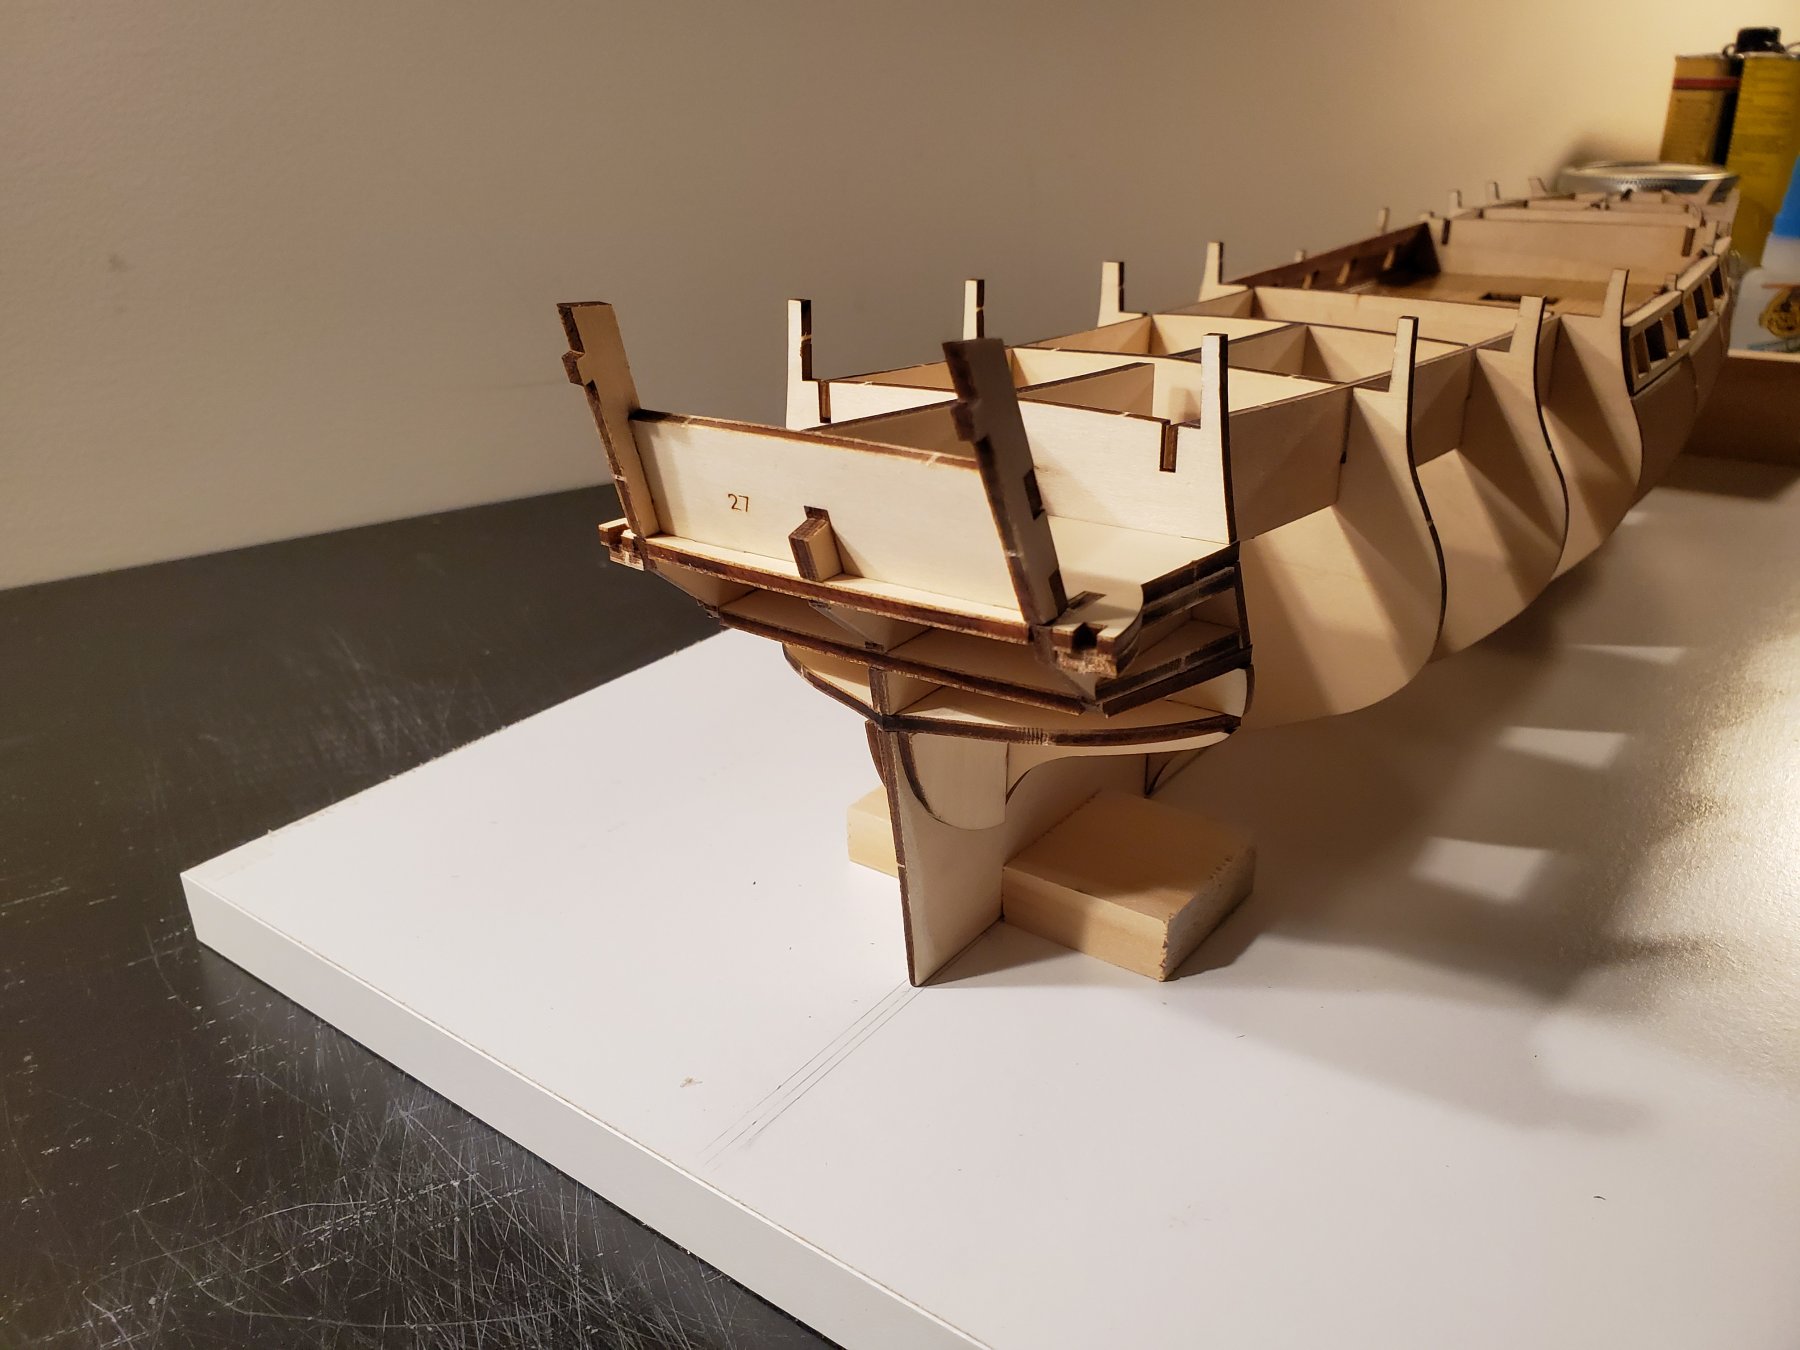
I also added the other supports and stern pieces.
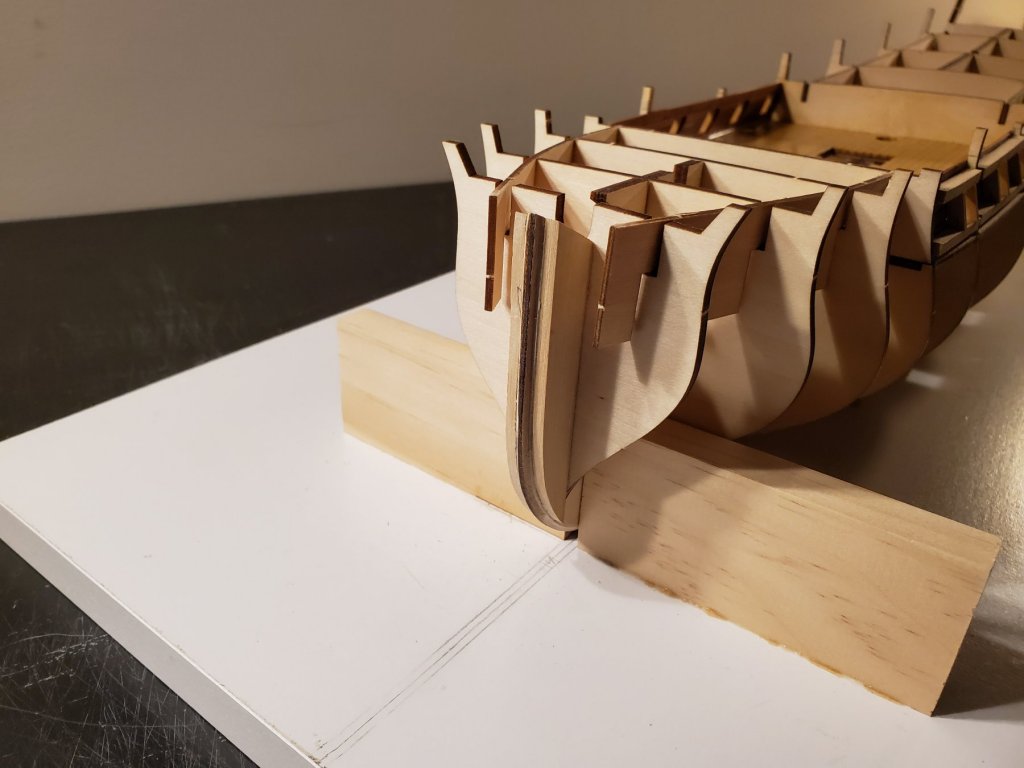
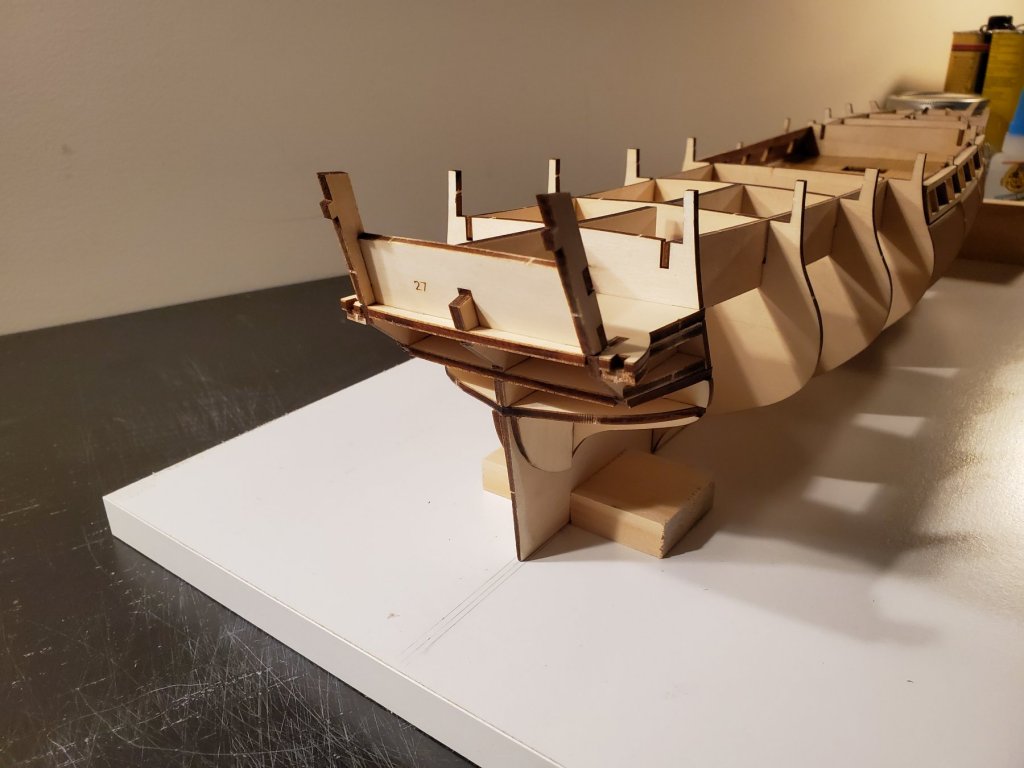
I did NOT add the last pieces of the stern like the instructions say to. They look way too weak to withstand my fileing/sanding the hull.
Next up is to add the rest of the gunport supports. Then I will be sanding/ filing the hul!
Jeff
- GrandpaPhil and Dutchman
-
2
-
20 hours ago, RussR said:
Just keep up the good work, you will get there. Yours looks great so far.
I finished my Hermione the 22nd of this month. I built mine straight out of the box with no mods.
RussR
Thanks RussR!
I looked at your build log and it was very impressive! I only hope I can make mine half as good as yours!
I build very slow because I dont have mich time. But I try my best to work on her every day.
I do agree with you about the instructions. I wish they came printed instead of the CD. I also agree that the scale seems a bit small. I can tell I will have trouble on the smaller parts of this model. But I am enjoying the build so far!
Jeff
-
-
Thanks everyone!!
I finally finished planking the other side. I learned from the first side, and made improvements in my opinion. Tell me if you think this side looks better.

I think it turned out a lot better if you compare these to my previous pics.
I need to figure out a new place to get swiss pearl. I won't have enough to complete the model, but the online store I got this swiss pearl from is now not in business.

I know I said earlier that I may use walnut to plank the bottom part of the hull. But I'm not quite sure now.. I was thinking of using Alaskan Ceder or boxwood for above the wales. But below, not sure if I should use the same wood, or use a dark species. Any opinions are welcome!
Thanks!
Jeff
- GrandpaPhil, RussR and bruce d
-
3
-
Thank you Messis!
I do have a second kit. I did take a hard look over what I had completed, and I was not very happy with the results. I took my first attempt as a huge learning experience. I still have the first attempt model. I did not throw it away. Instead, I look at it thoroughly to see what I messed up on, and figure out how I could do better. Nothing comes to me super easily, and so I usually fumble around, learning along the way!
This time though, I am really taking my time, learning from my mistakes, and making slow but steady progress.
Jeff
-
No problem.
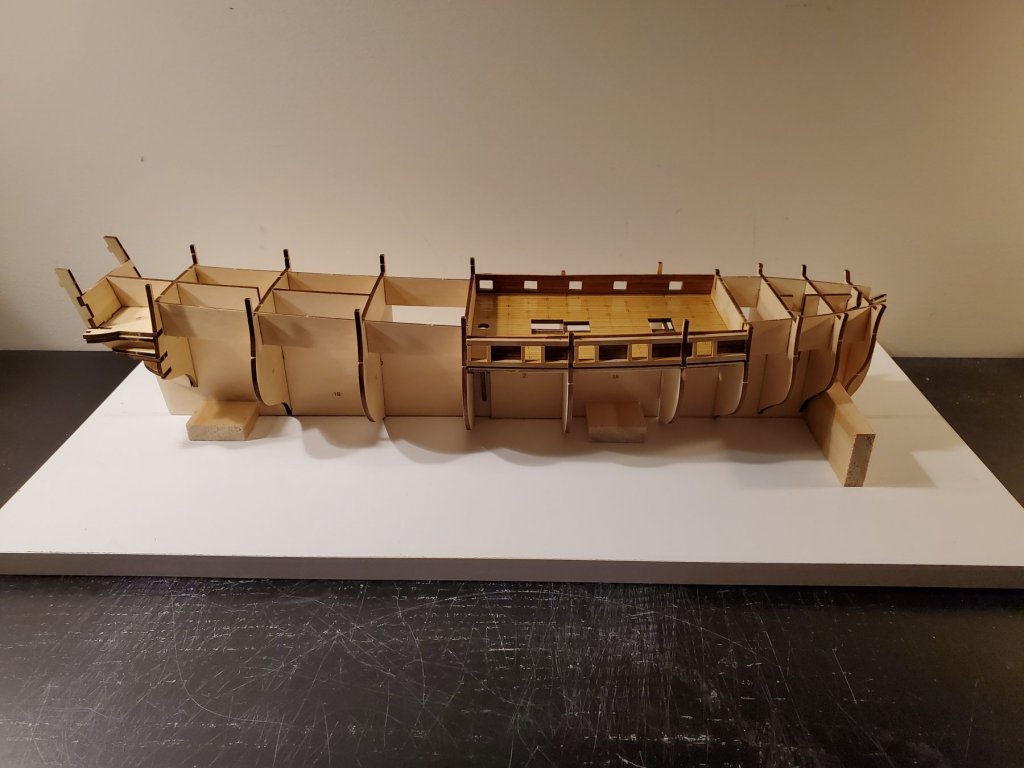
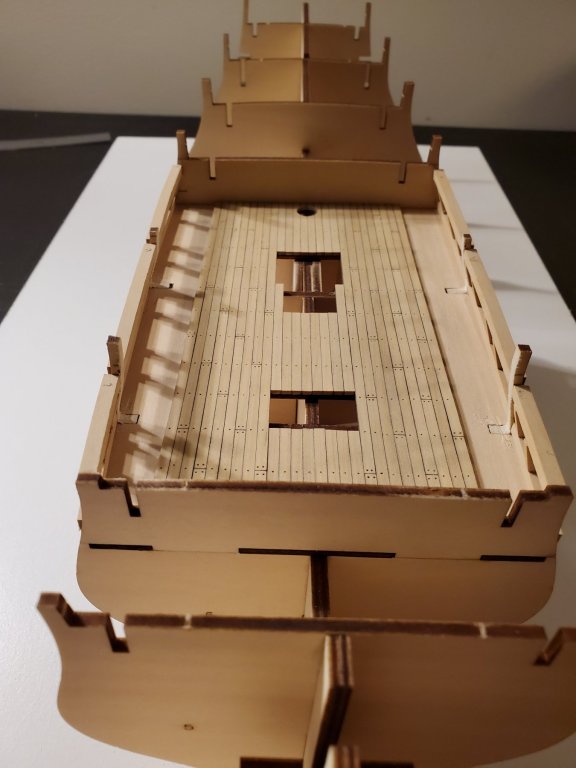
I am early into the build, but I do have something to show at least...

I am currently building the other side to complete this step. As you can see, I have removed the tops of the bulkheads because to me, they stuck out too far and were not very accurate.
I hope this gives you a better idea of what I have so far.
Thanks!
Jeff
-
Hi all!
I am currently building Artesania Latina's L'Hermione kit. I have already replaced the deck planks with boxwood, and using Swiss Pearl for the wall planks that cover the gun ports on the inside of the ship. I am really not into painting the ship as I really like the look of natural wood instead.
I plan on planking the hull above the wales with either boxwood or Alaskan ceder. I haven't decided yet. I hear both choices are excellent. My question concerns what to use for below the wales. I am split between either continuing with a light color (boxwood or Alaskan Ceder), or use a darker colored wood to give the ship a more of a 2 toned appearance. I cannot decide because I am not sure what kind of dark colored wood is good (and looks good) for hull planking.
So, what dark colored wood species are good for hull planking? Also, where would a good place online to get some if I decide to go that route? I do not have the means to mill my own wood
. Lastly, what are your thoughts of keeping the hull fully planked in a light colored wood (boxwood, Alaskan Ceder), or having a 2 tone top light, bottom dark color scheme?
Thanks for your opinions!!
Jeff
-
I finally finished one side! The gun ports are a little bigger than they should be... but I am okay with that!


I think it turned out pretty well for my first time doing this. All this isnt in the kit so I am proud of myself for having it turn out so well! It does look really shiney, but the tung oil is still drying. It won't be this shiney after it dries.
Now to compare to the first model attempt of this kit.
I know it's not the best of pictures, but I think it's quite an improvement!
I am not truly satisfied how it came out. I know I can get the joints to sit better. And I can make the planks sit together better too. But I know I am still learning, so the next side will turn out better! We shall see if this us true.
I don't have the correct width strips for this. So I had to take my 4.5mm wide swiss pearl strips and cut them to be 3mm instead. So each plank took quite a while to make. I will make some adjustments to the gun ports on the other side so the planks can sit better. I will also do other small modifications to see if I can get a better result.
Thanks everyone for the likes!!
Jeff
-
Just a quick update. I decided to plank the inside of the hull first. I will make the knees later after I plank the hull. I decided this because I didn't want the knees to break off during the fairing and planking of the hull.
Here is what I have done so far. Each piece usually takes me about 30 min to make. Since I have 1-2 hours I can dedicated to the ship, it's slow going.

Thanks for the likes!!!
Jeff
- goetzi73, BLACK VIKING, GrandpaPhil and 2 others
-
5
-
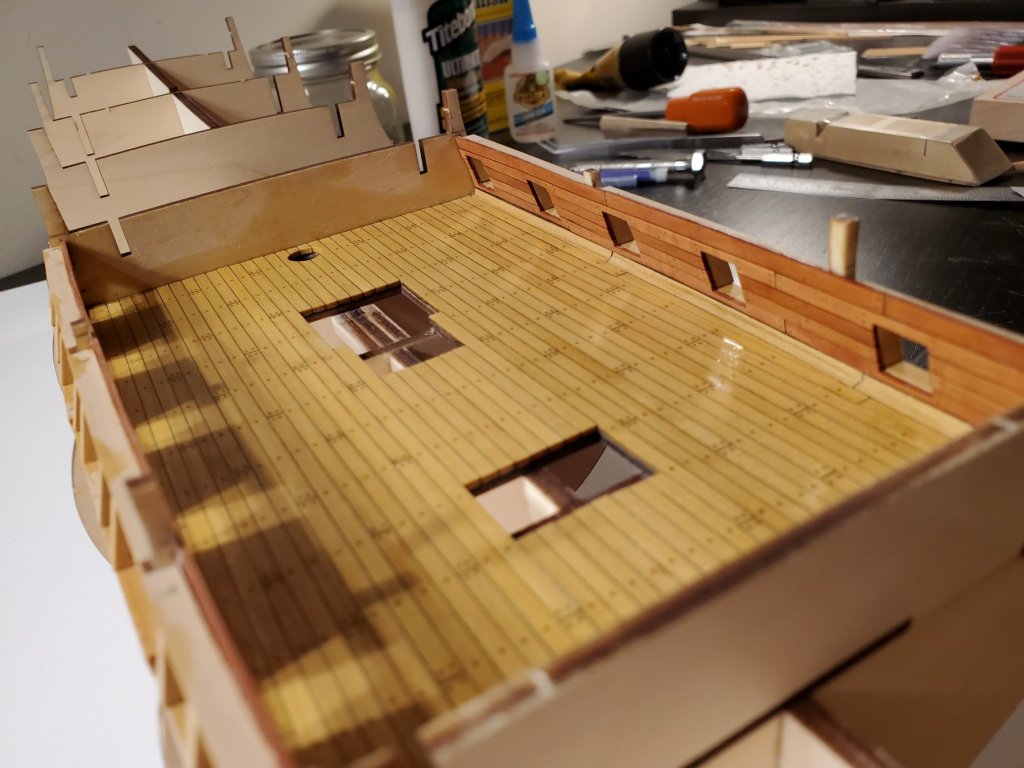
Thanks for the likes!
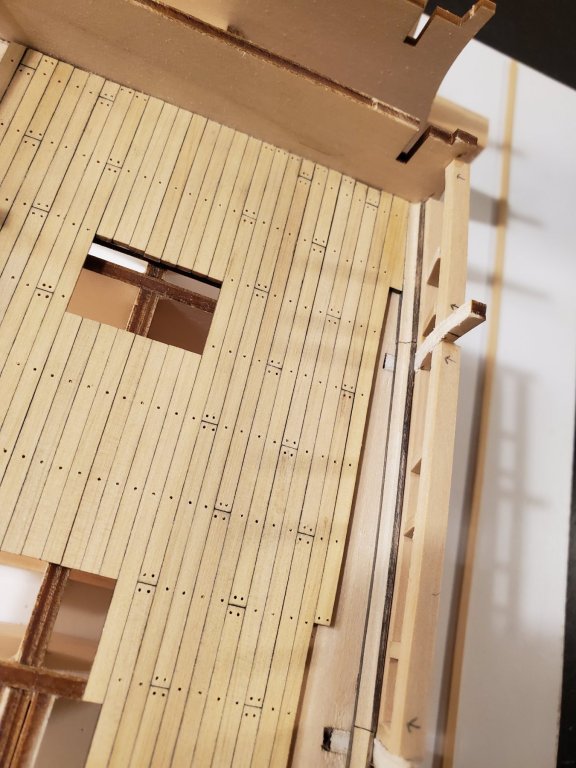
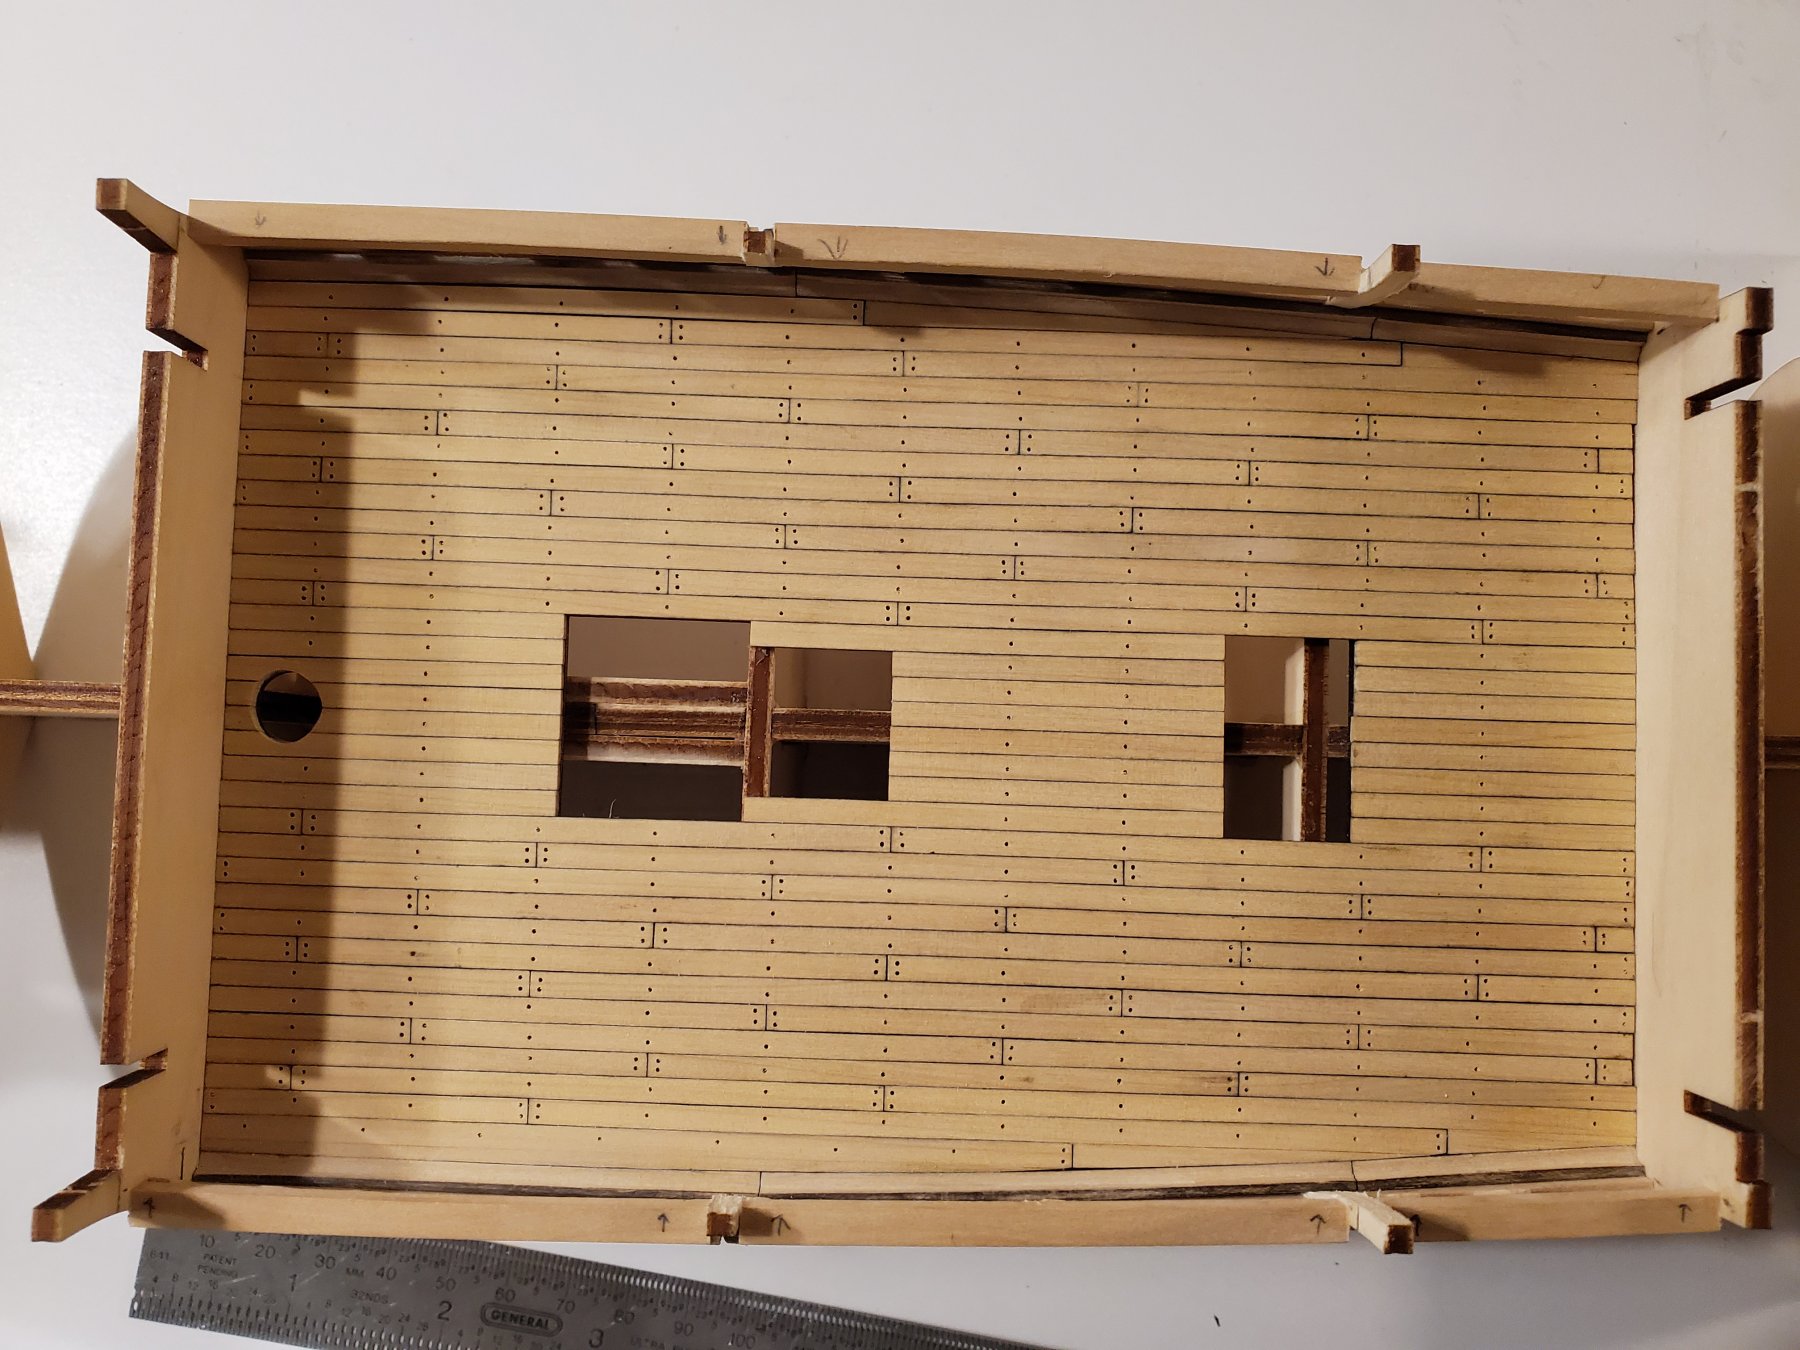
I added the tree nails and sanded down the entire deck:

Then, I added 1 application of Tung Oil Finish:
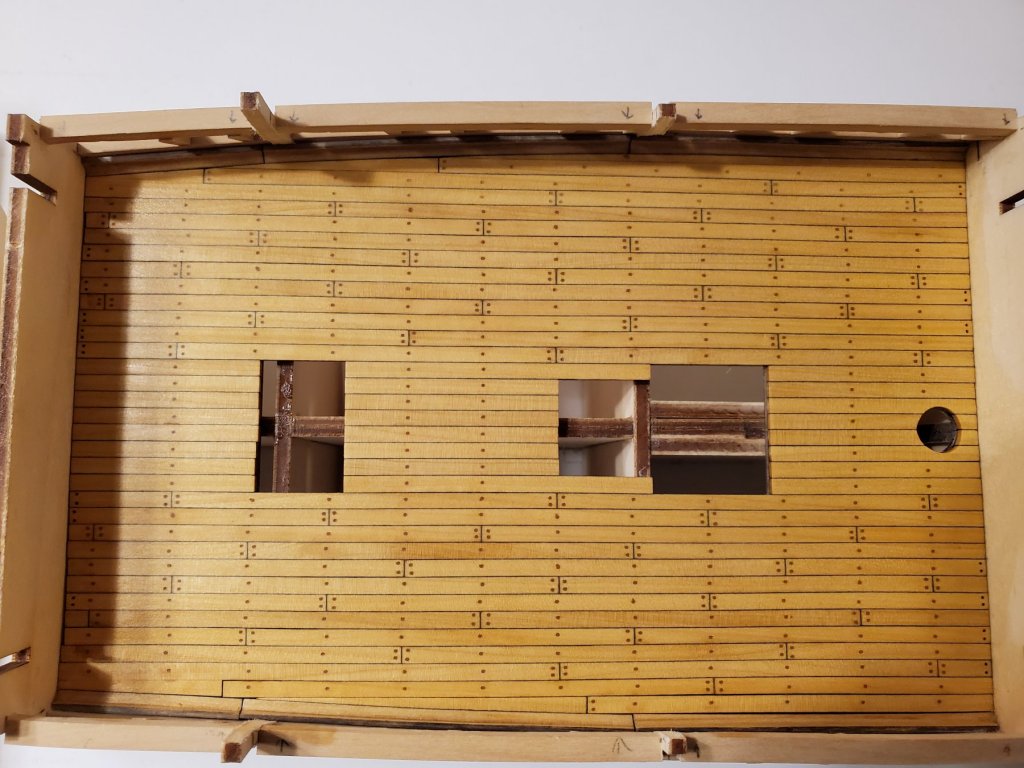


WOW! What a difference! I like the finish a lot!
Next up will be adding the 4 Walkways Knees on both sides to support the deck that sits above. Then, I will add the inside hull planks around the gunports.
Jeff
-
This will be a very fun build! I'll pull up a seat! I hope there is room in the front row..
- mtaylor and GrandpaPhil
-
2
-
Hmm.. I can't edit out that last pic. It keeps putting it back in. Oh well!
-
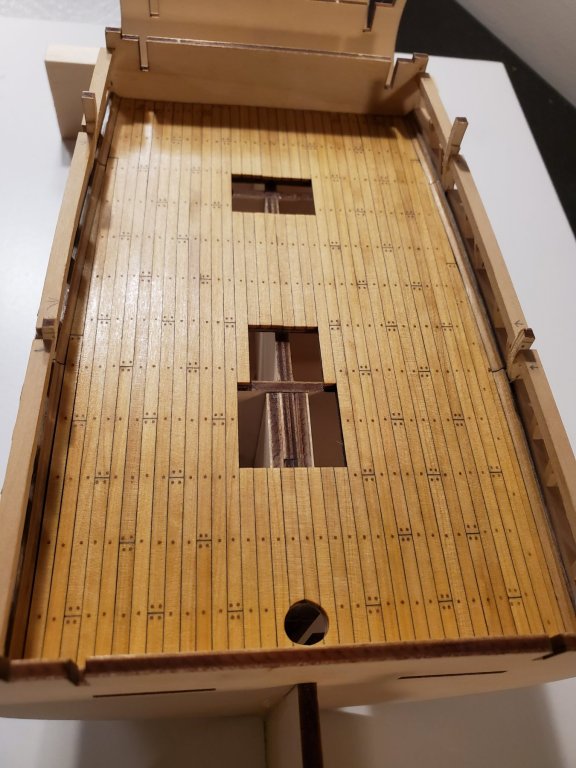
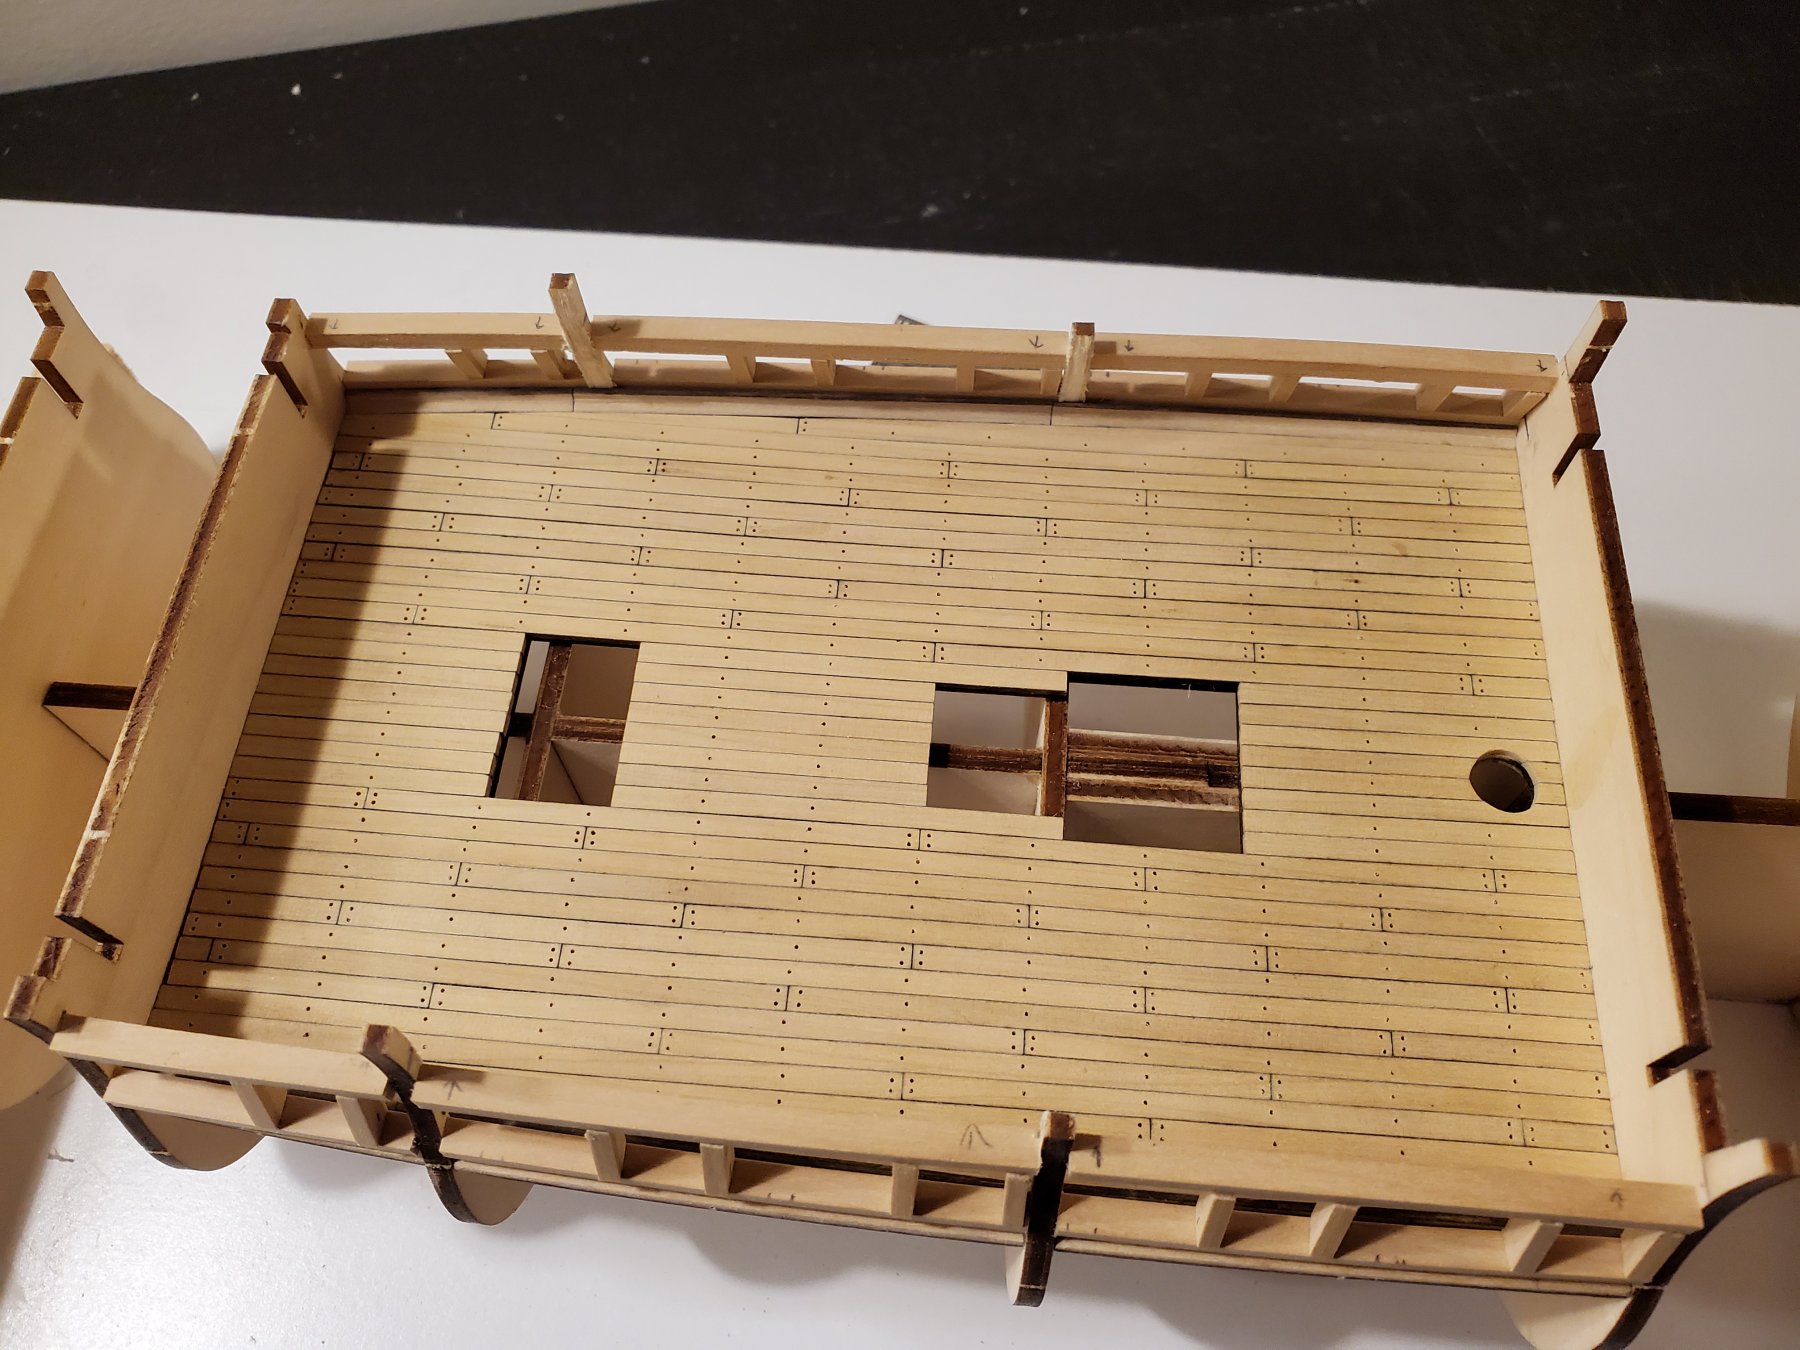
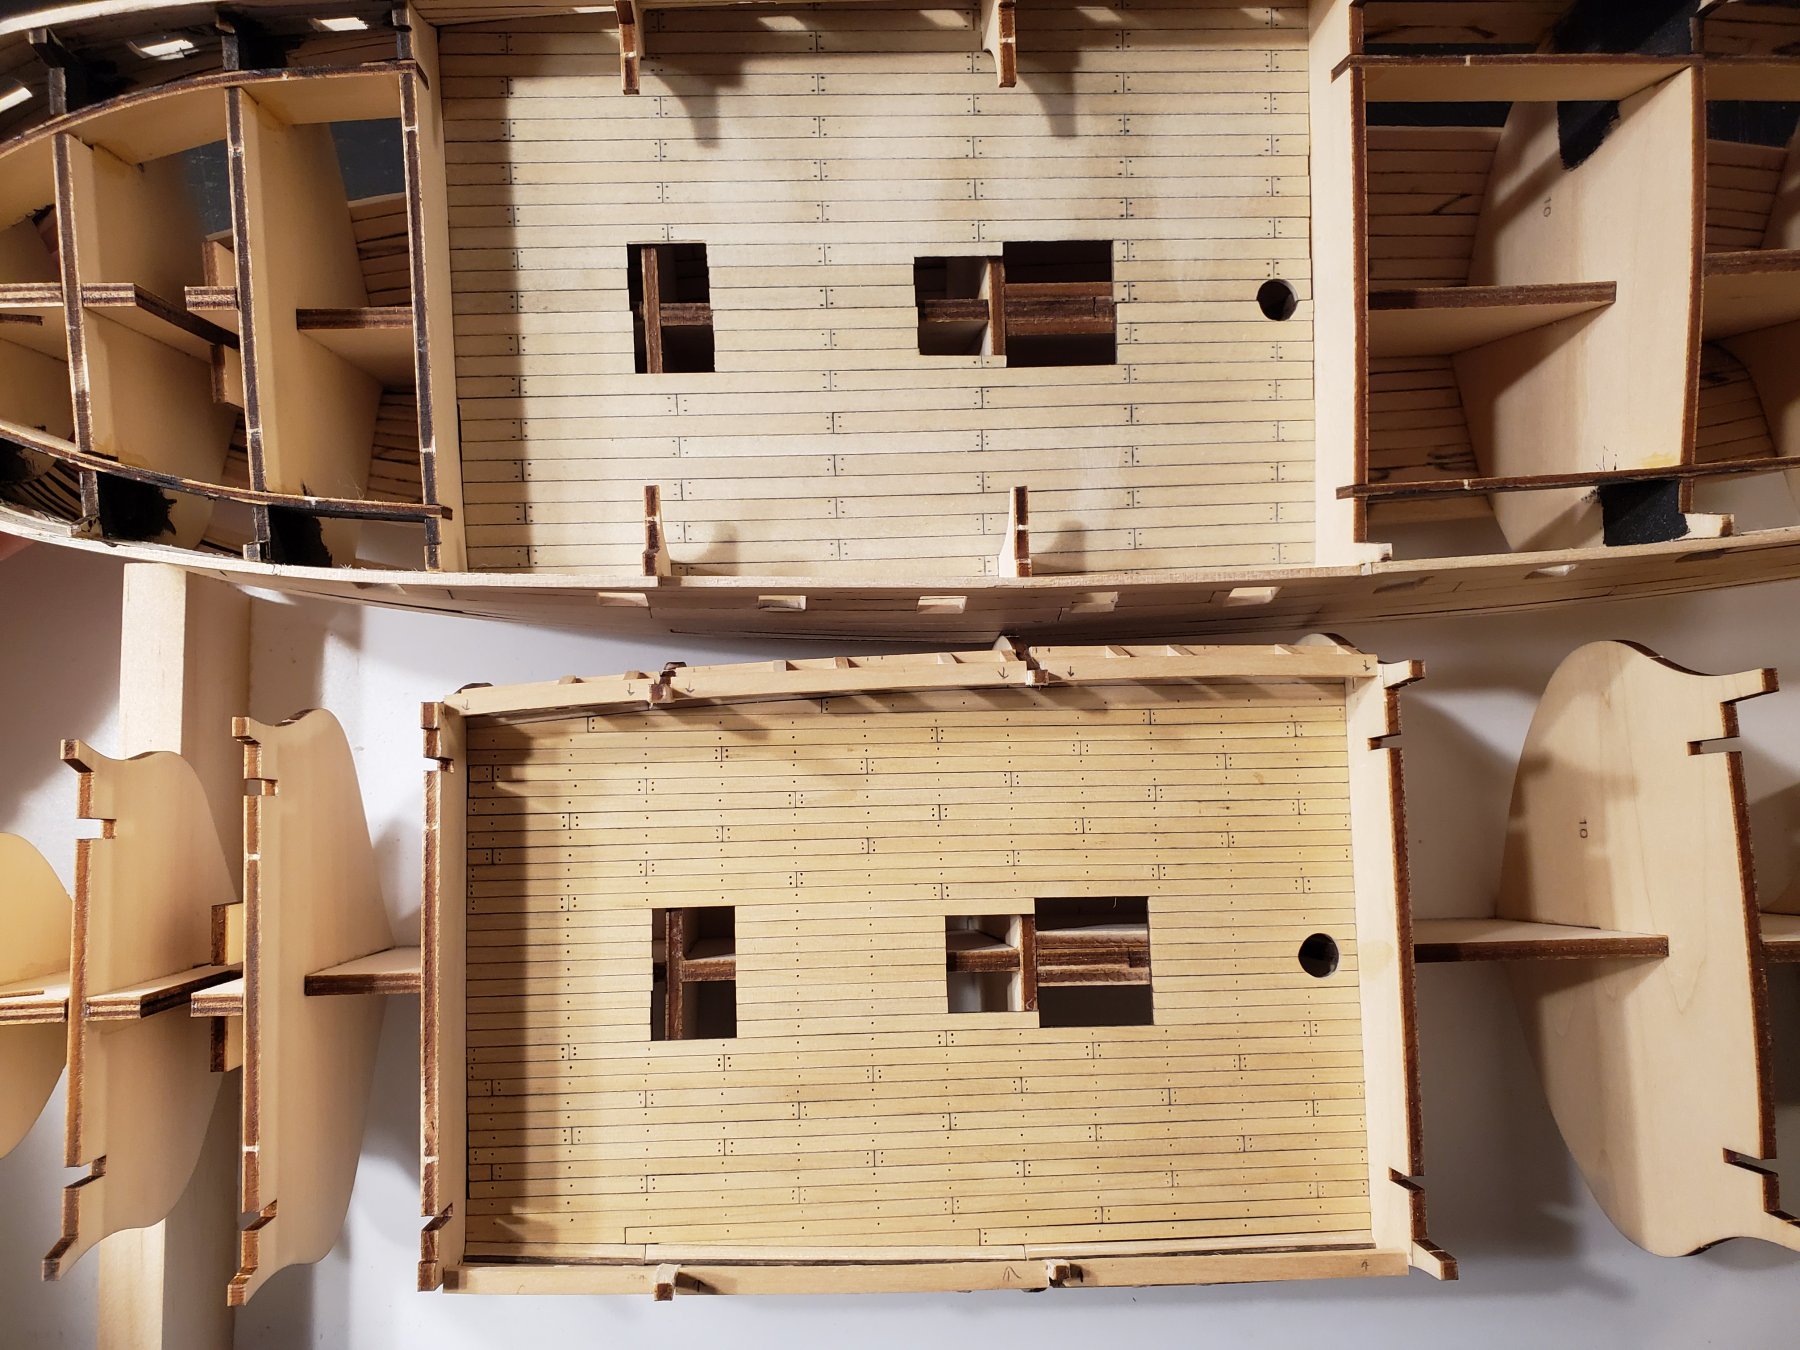
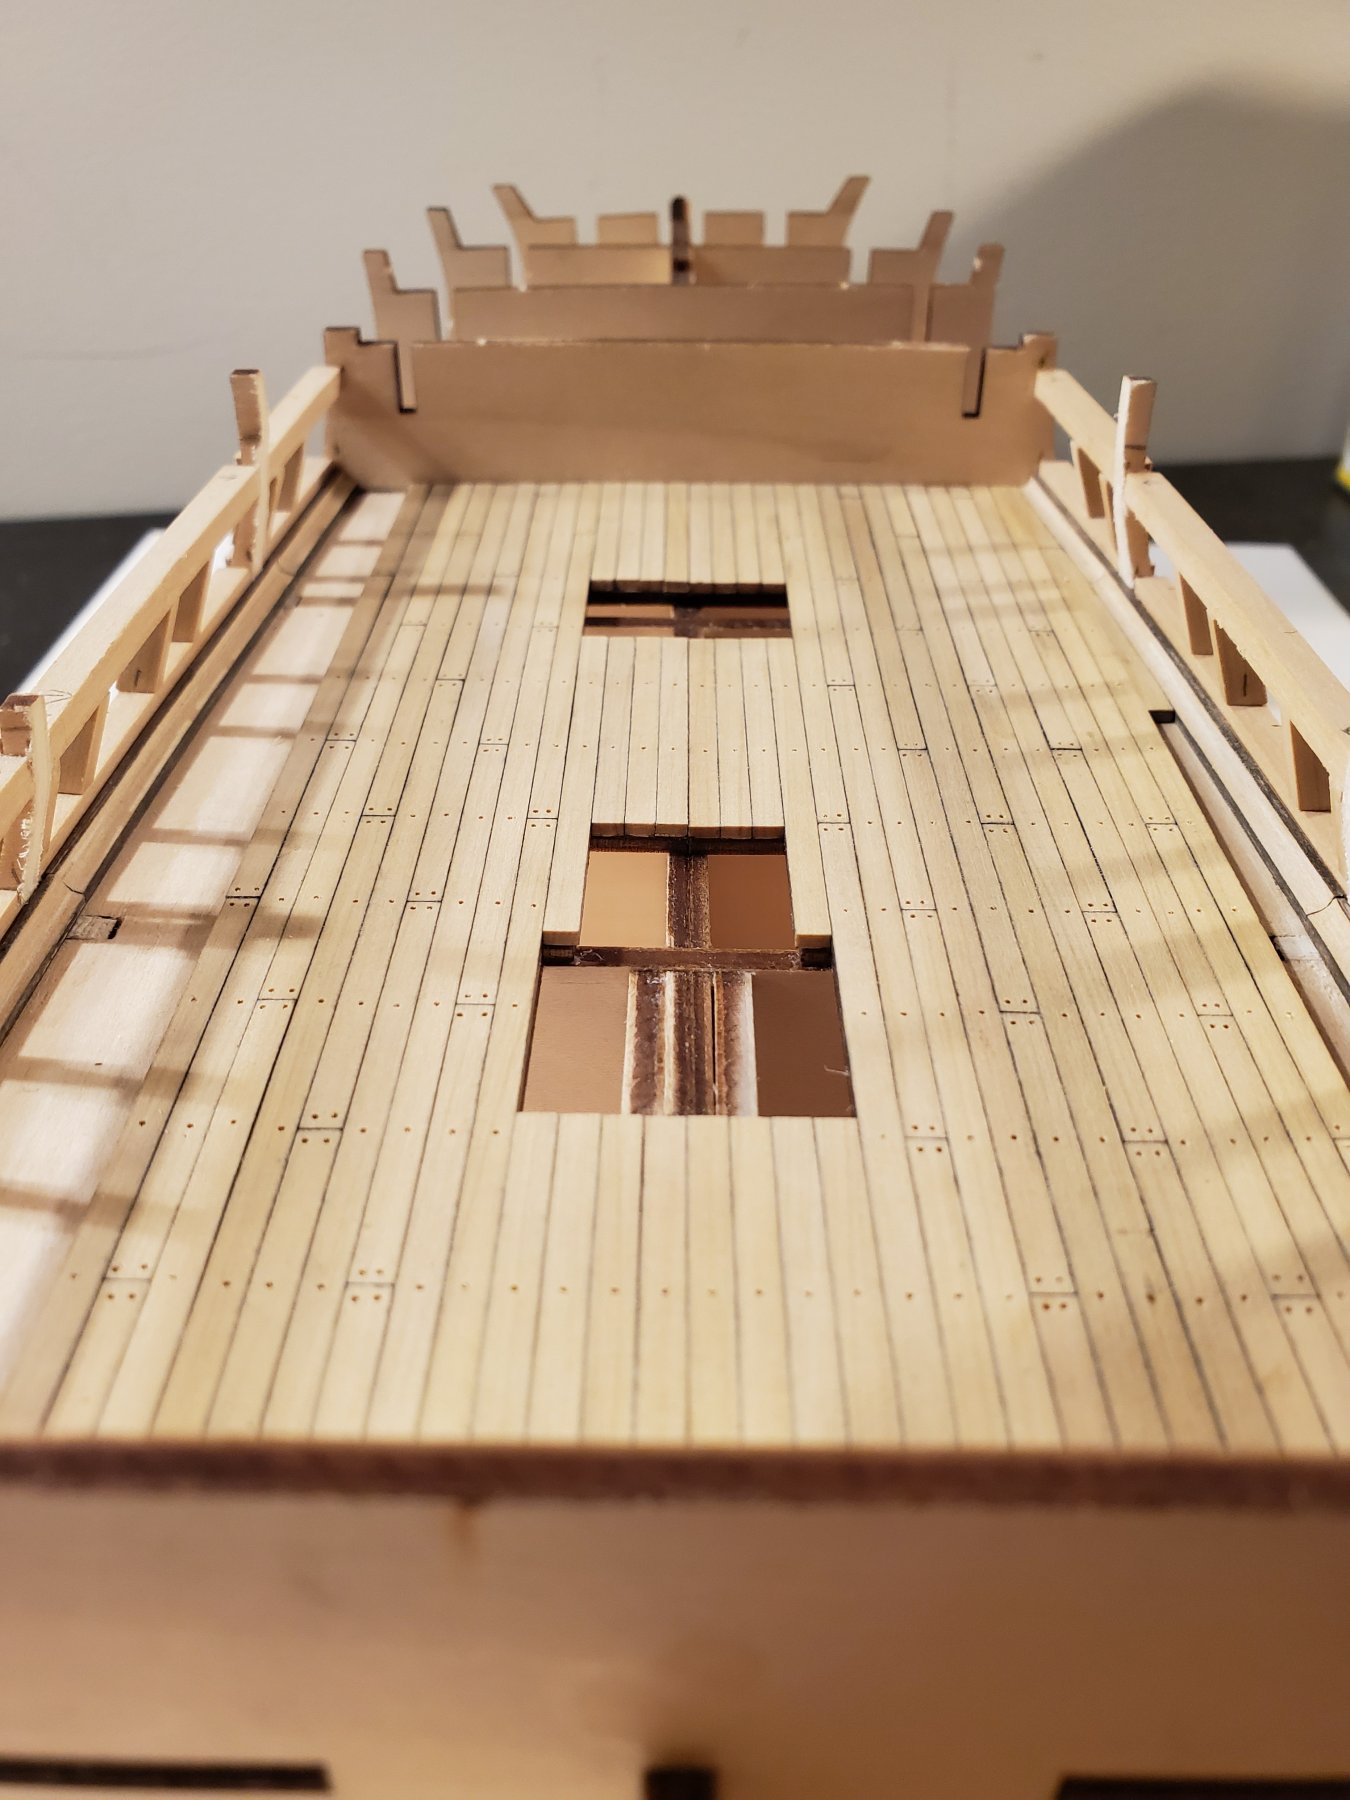
I finally finished placing the planks on the second deck!!!! Whew!!! That took quite a while but I am happy with it. The following are pictures of the second deck without the treenials and without any sanding yet. The last pic compares my first attempt of the second deck with what I just finished.


You might have to zoom in on the comparison photo to really see the difference. I personally like my current builder's second deck better!
Thanks!
Jeff

- GrandpaPhil, Dutchman, bruce d and 1 other
-
4
-
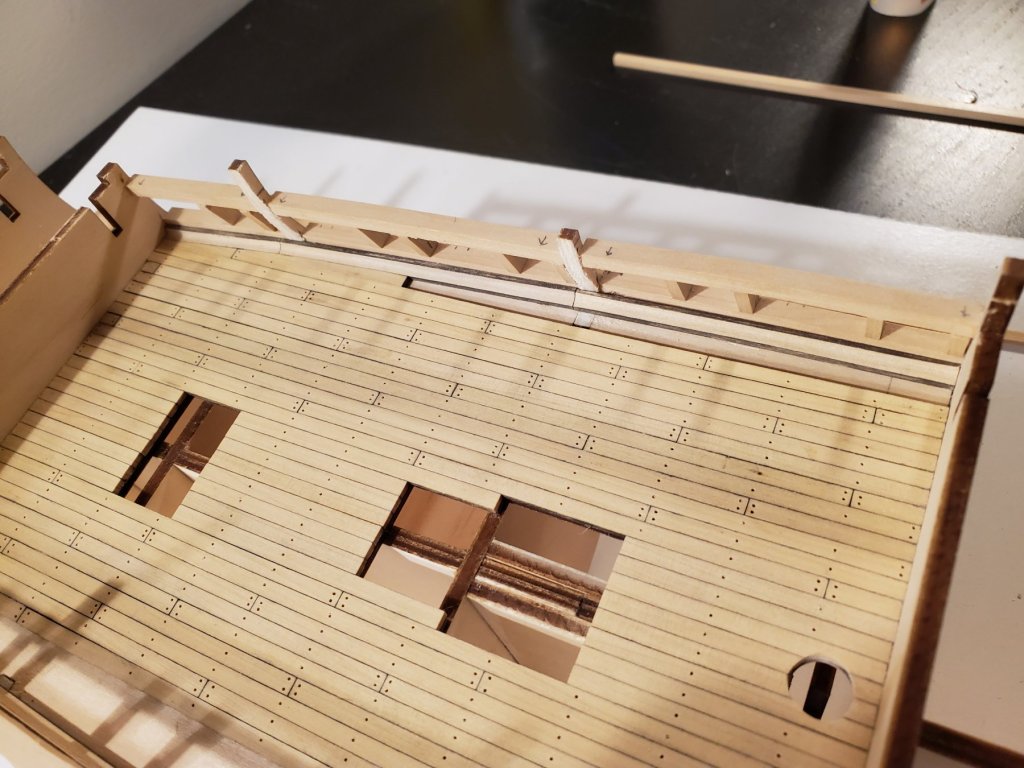
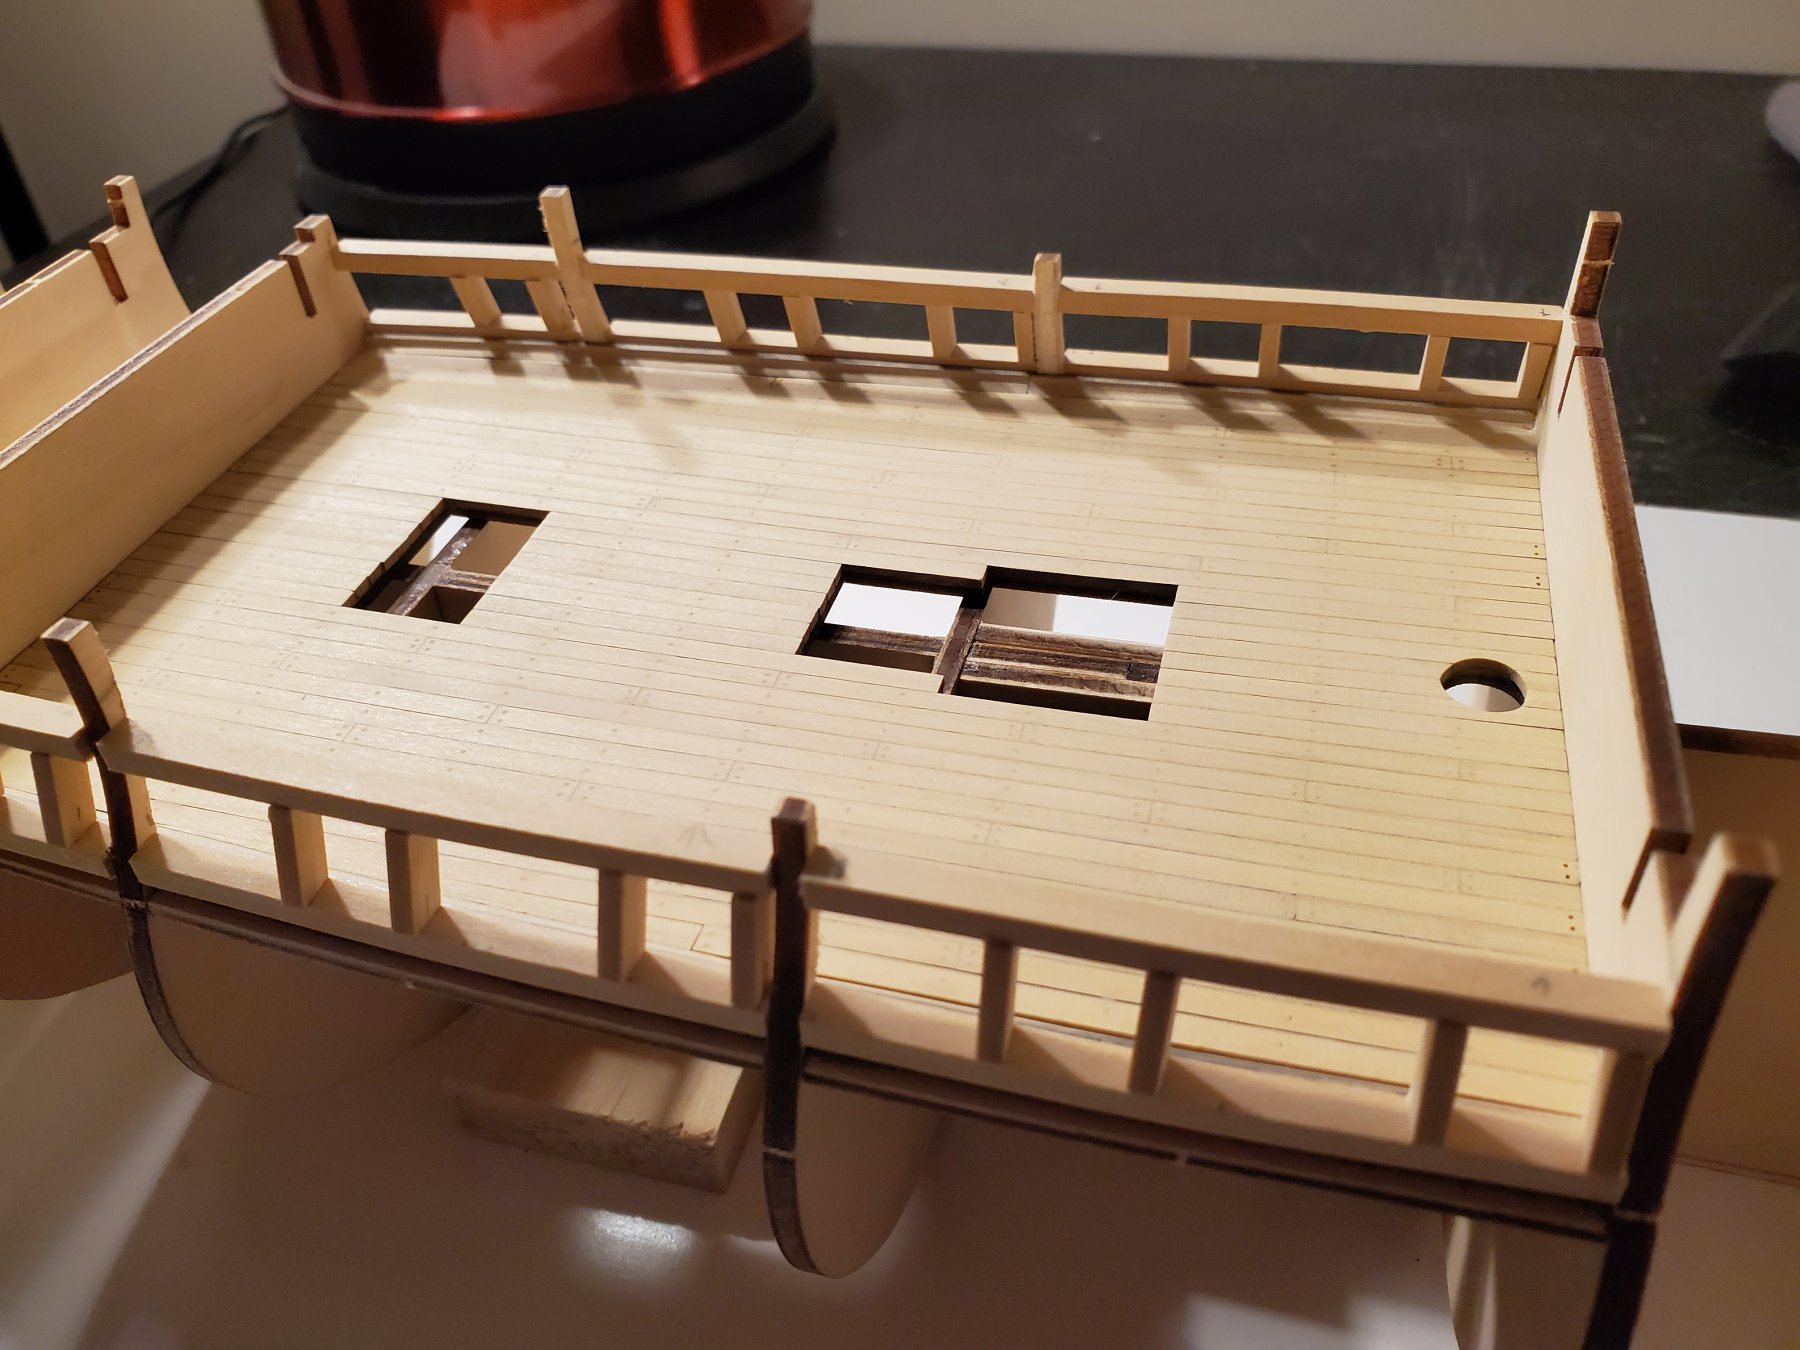
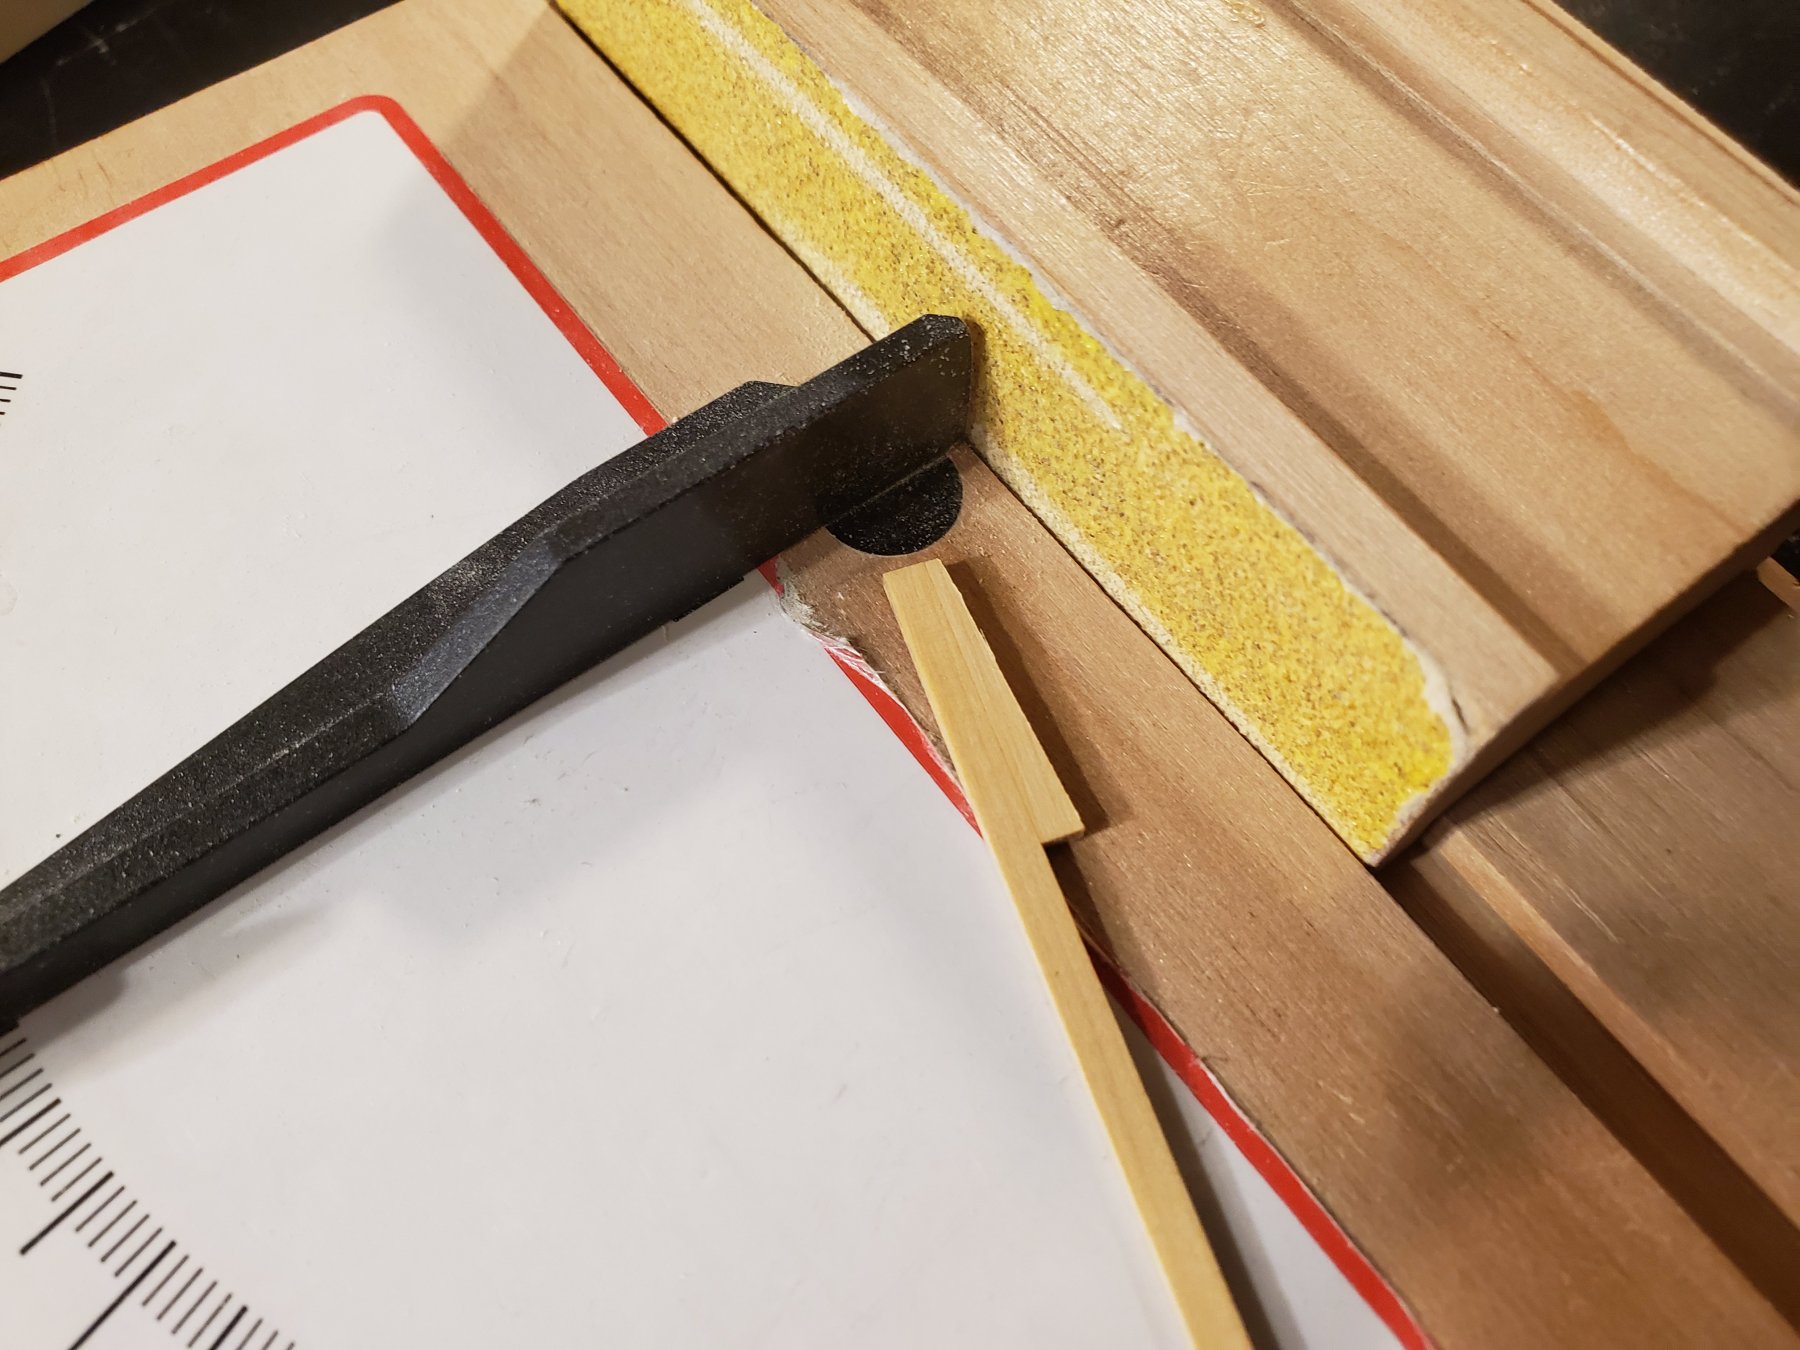
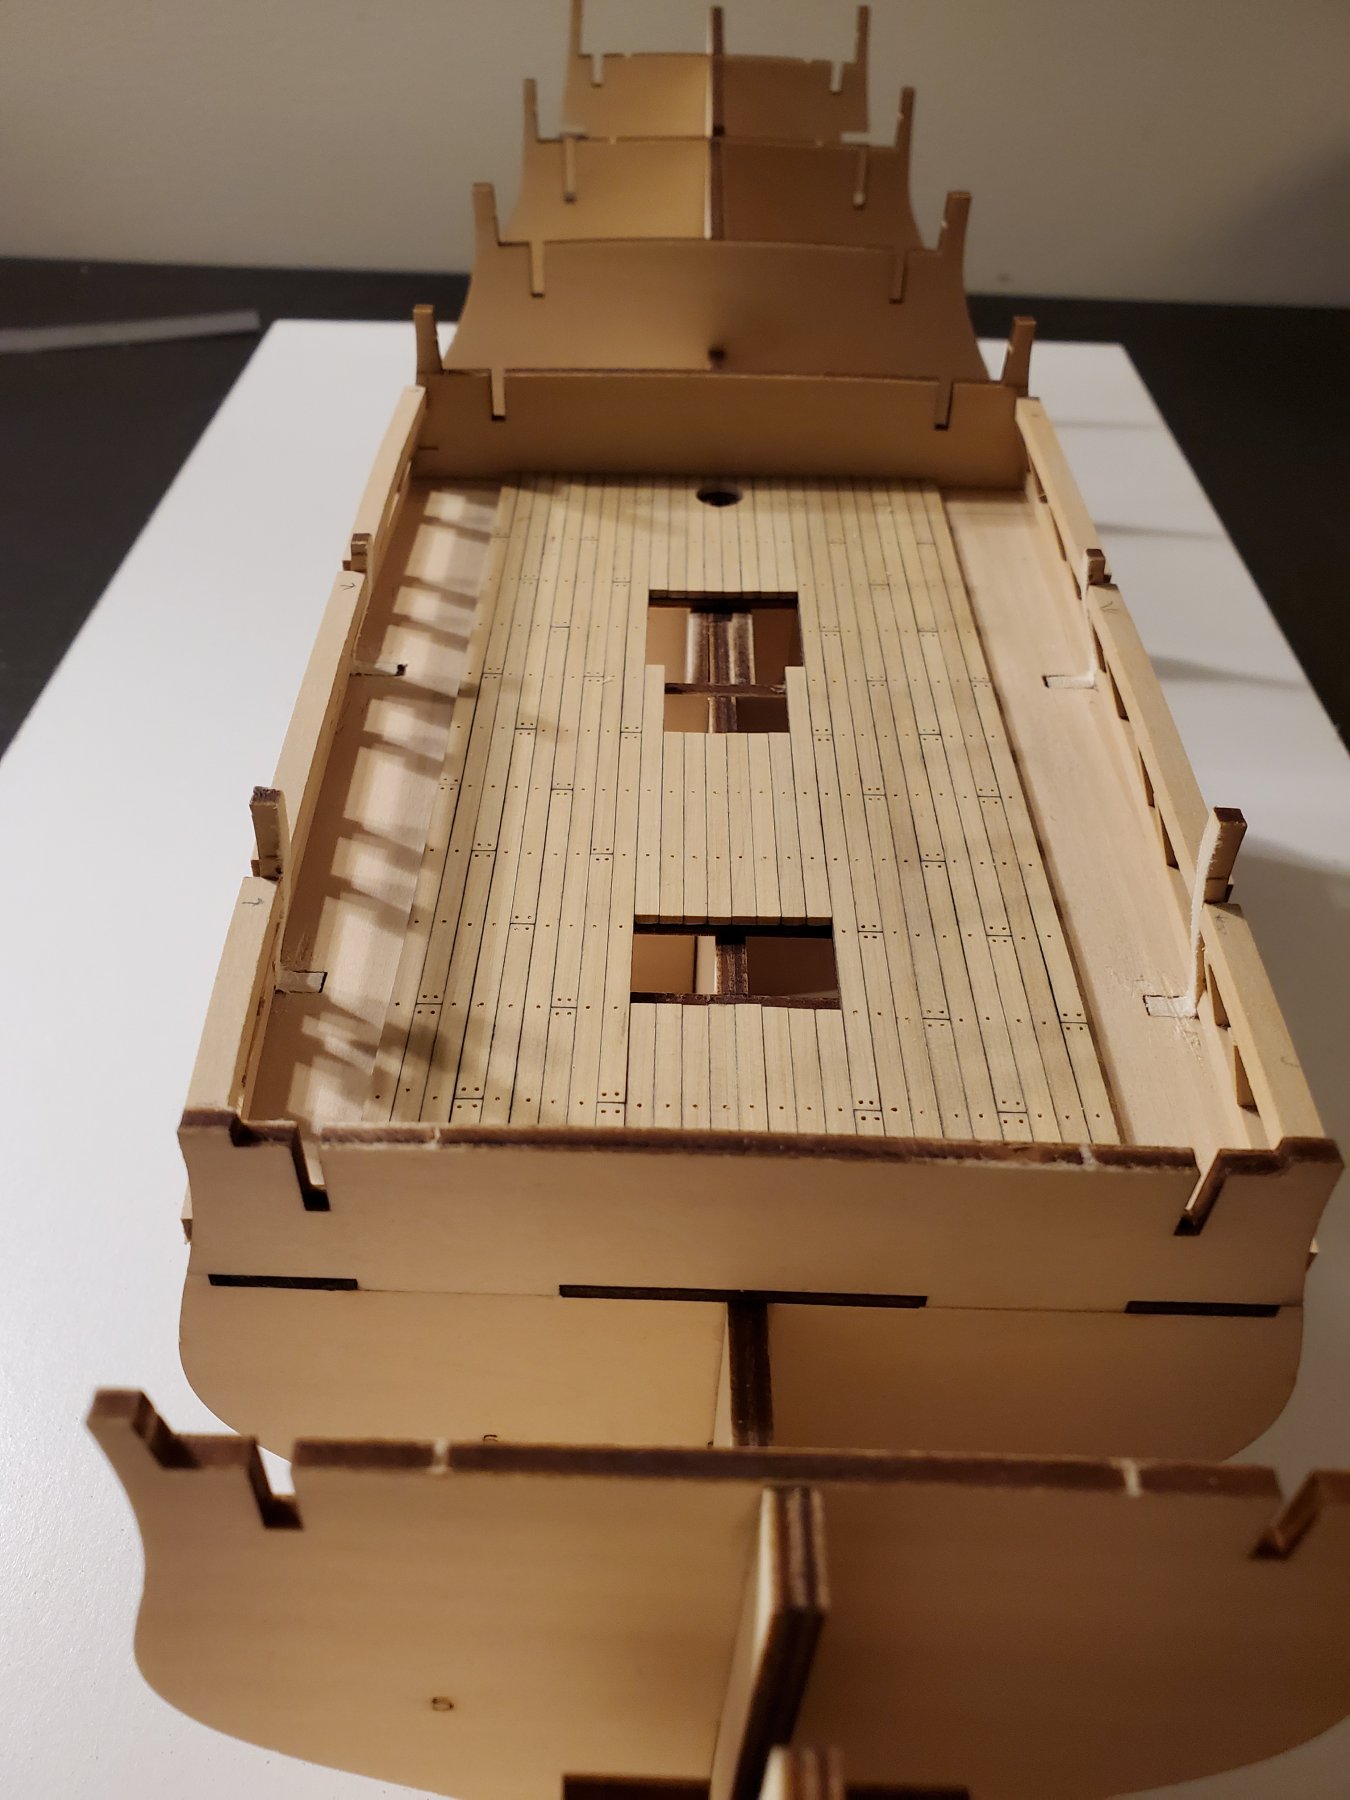
Thank you Messis! And thank everyone for the likes! I finished the waterways:

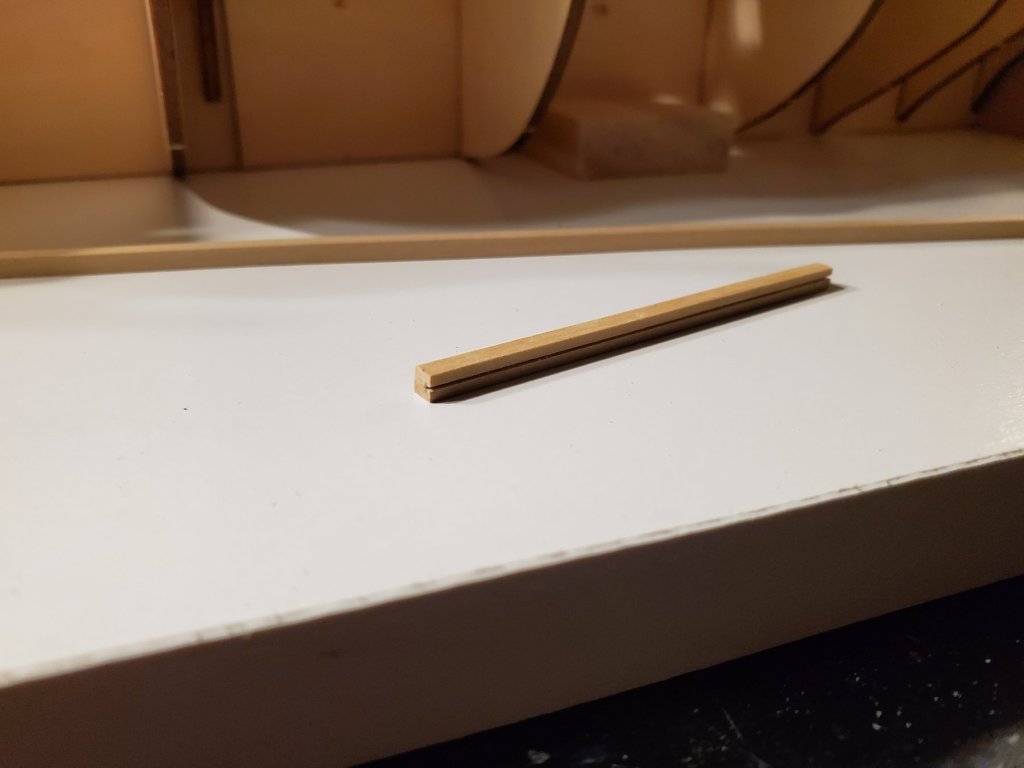
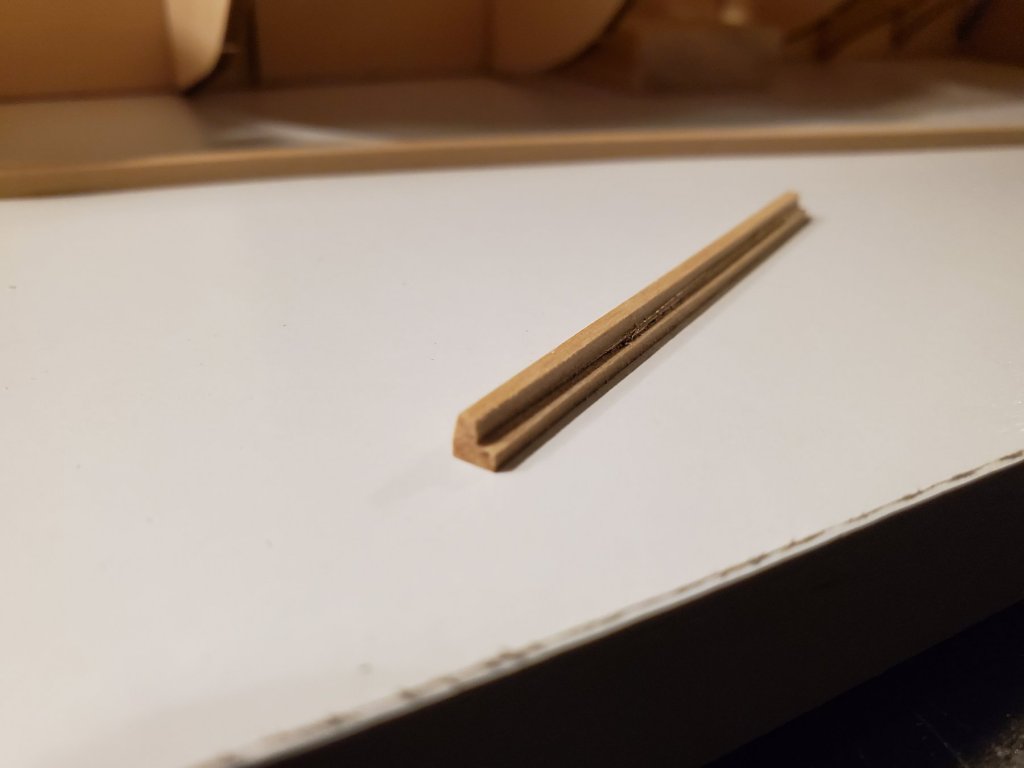
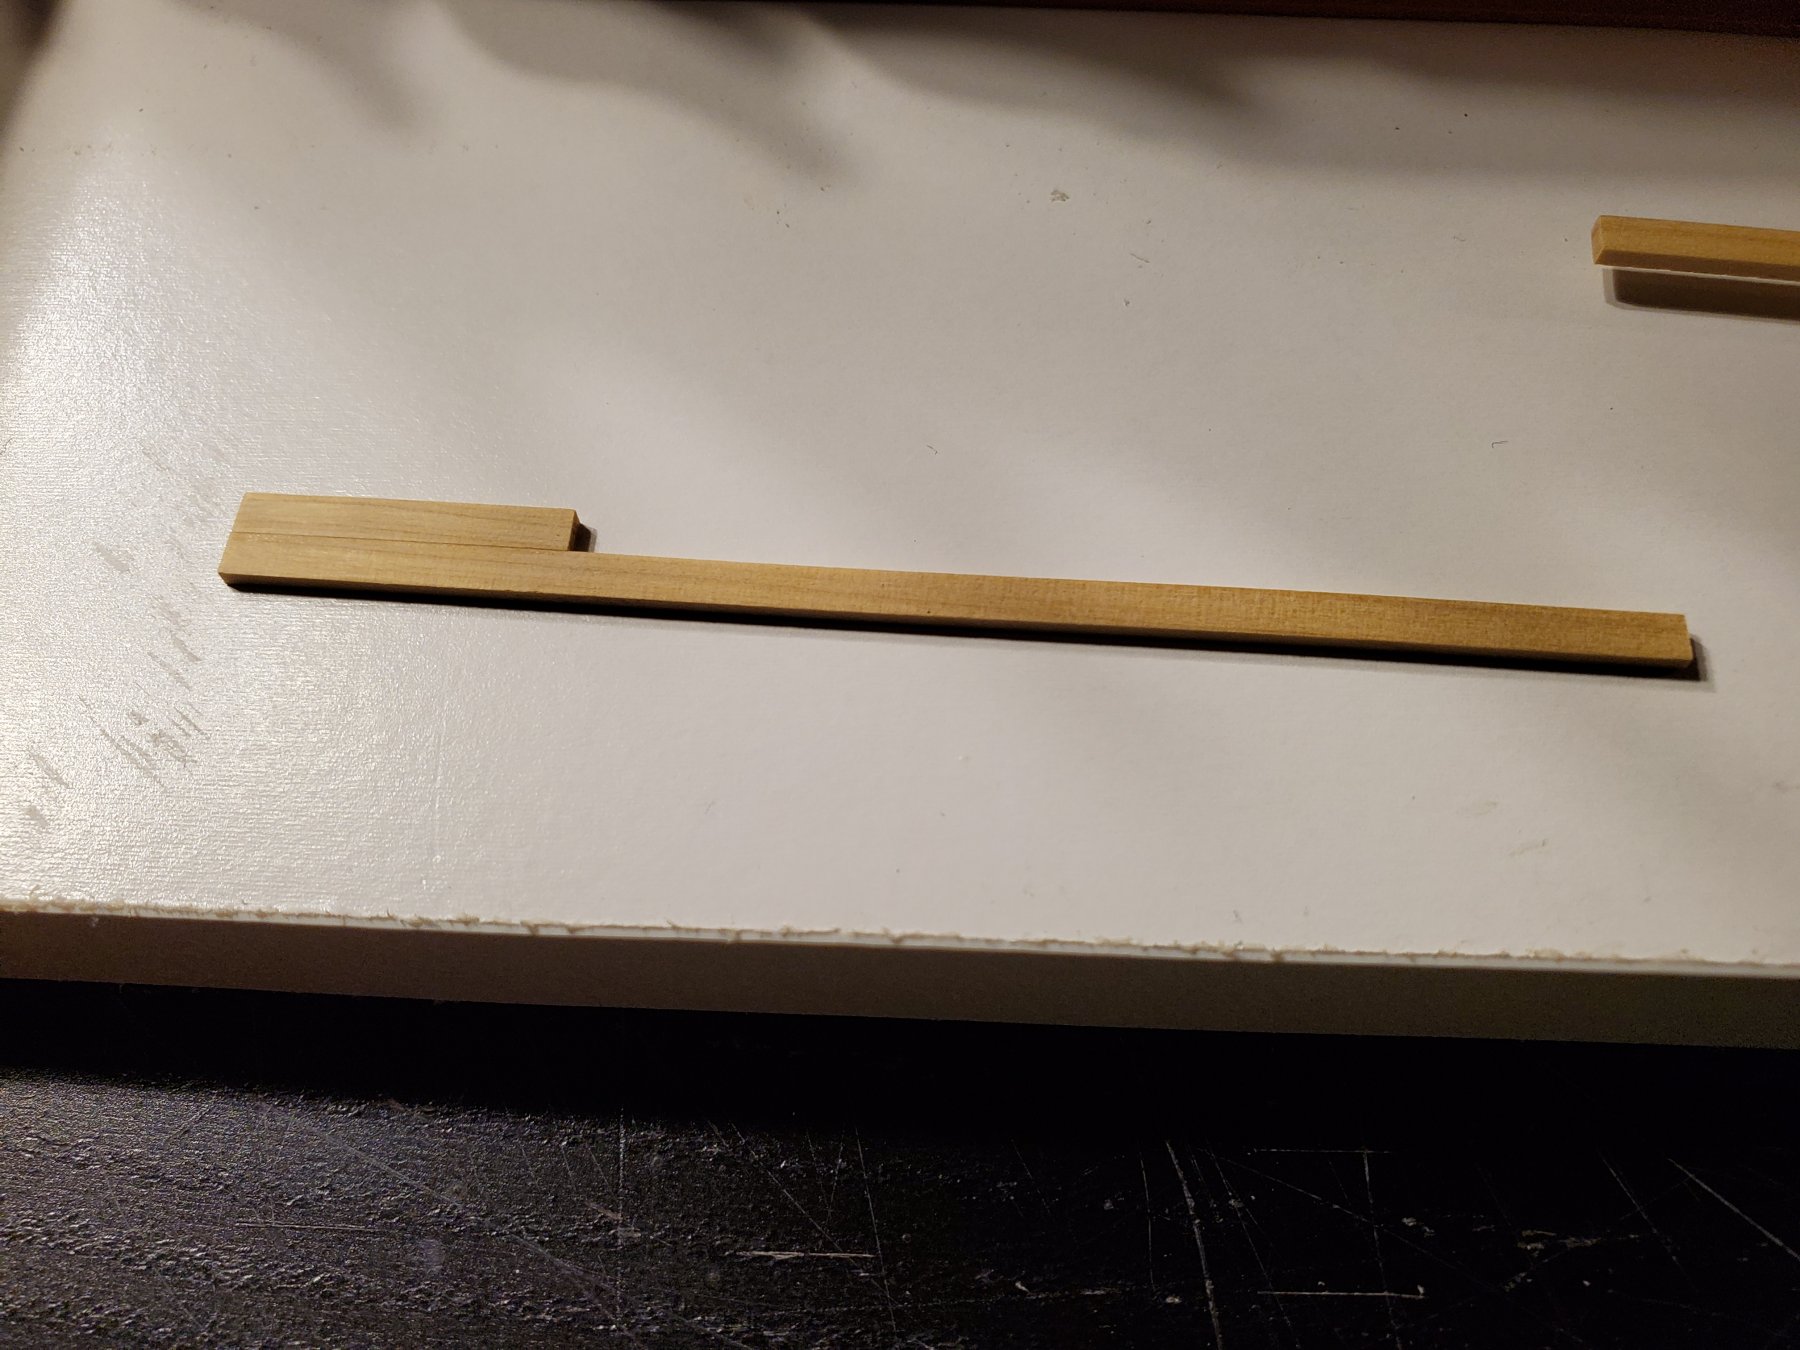
I now need to finally finish planking the second deck. To do this, I realized after looking at the plans and how much space I have left to plank, I will need planks that are appropriately 4.5mm wide near the waterways. The boxwood strips I have are 3mm wide.
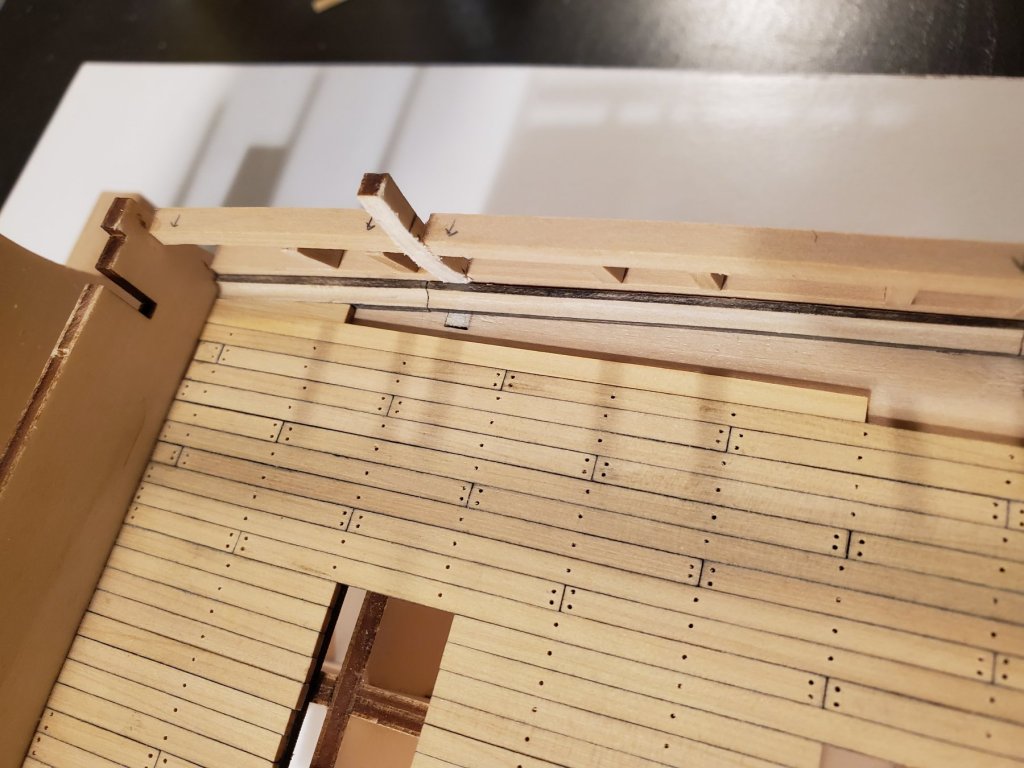
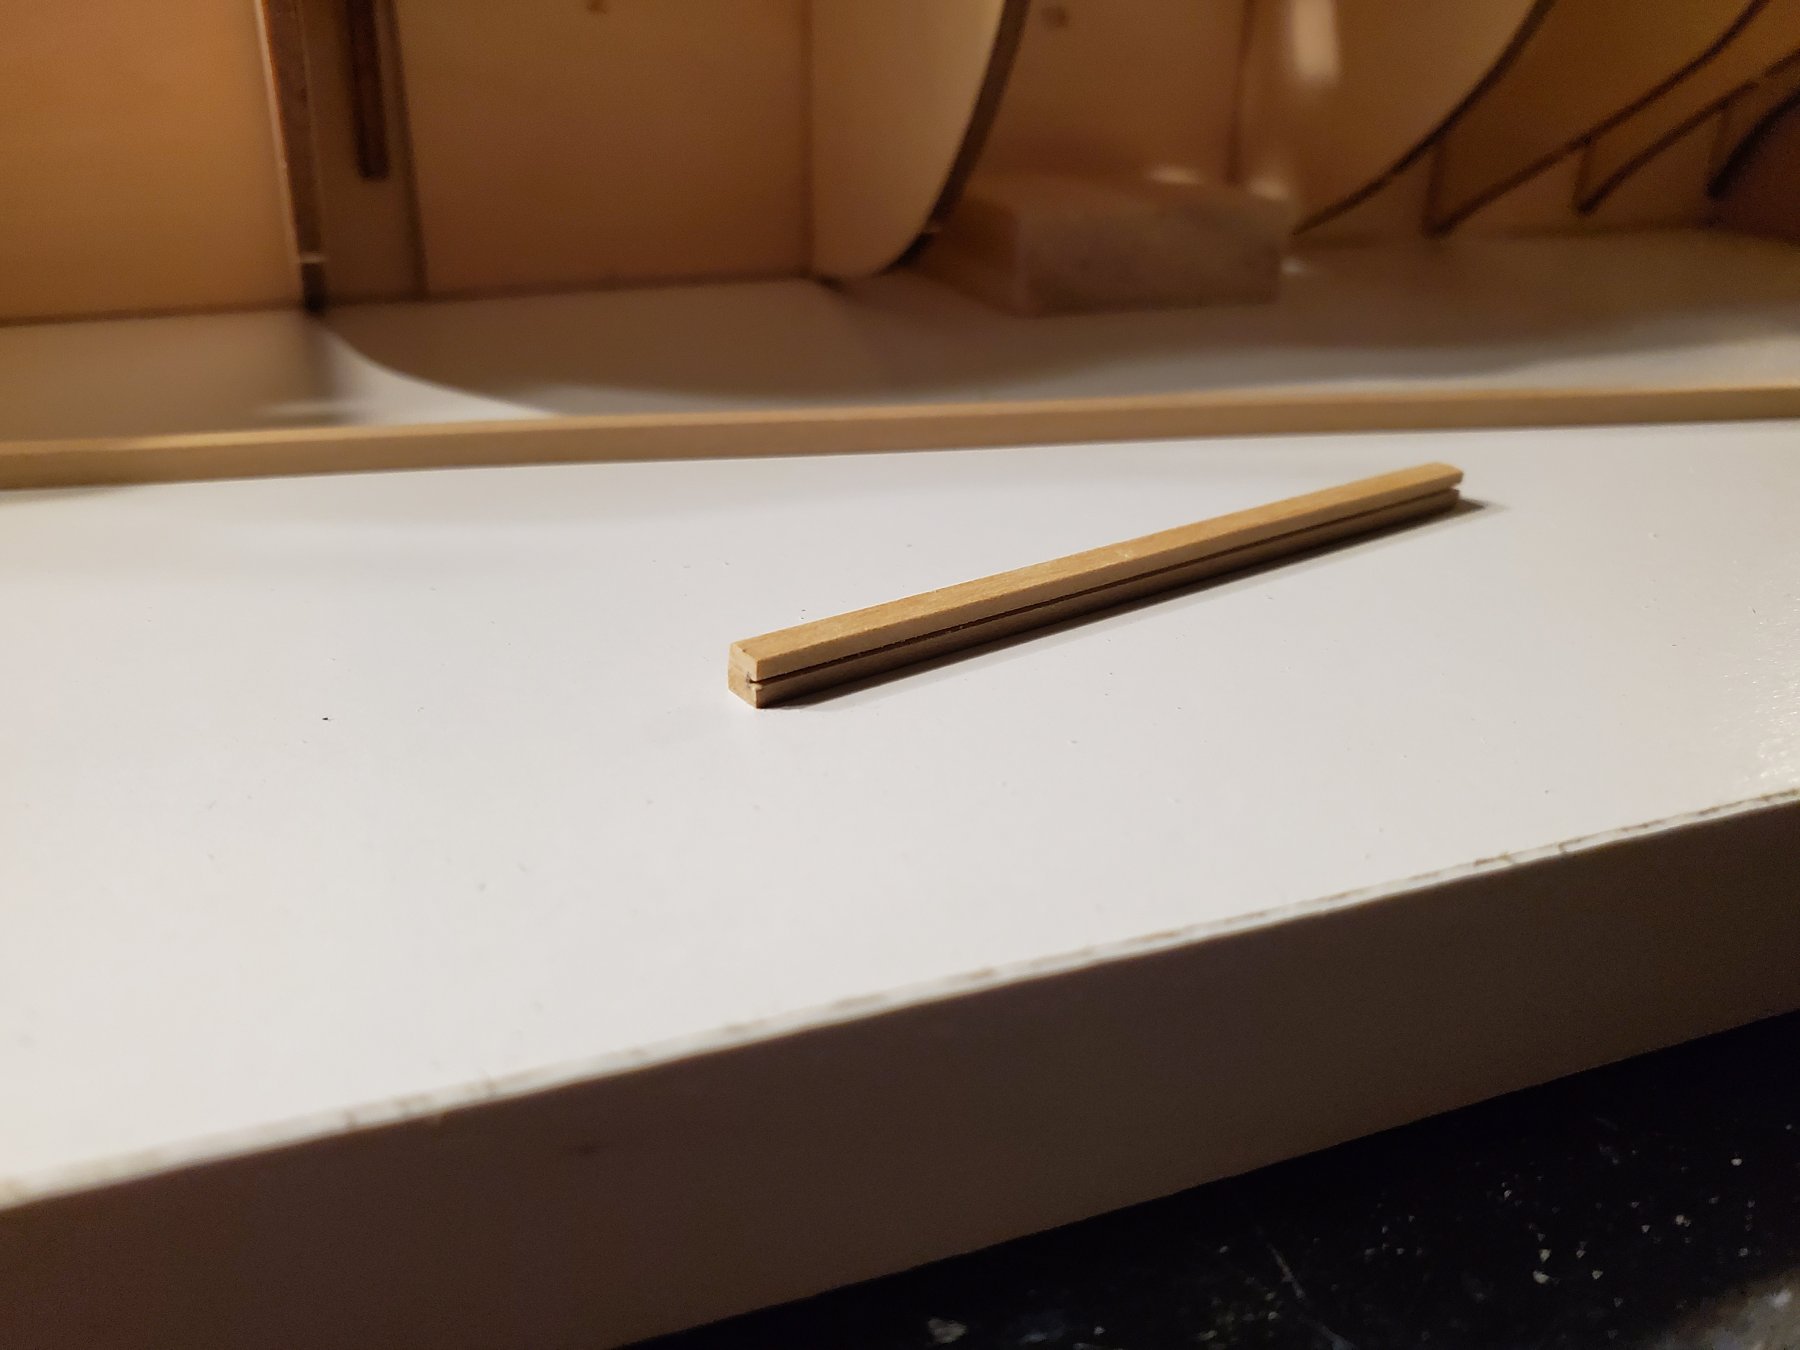
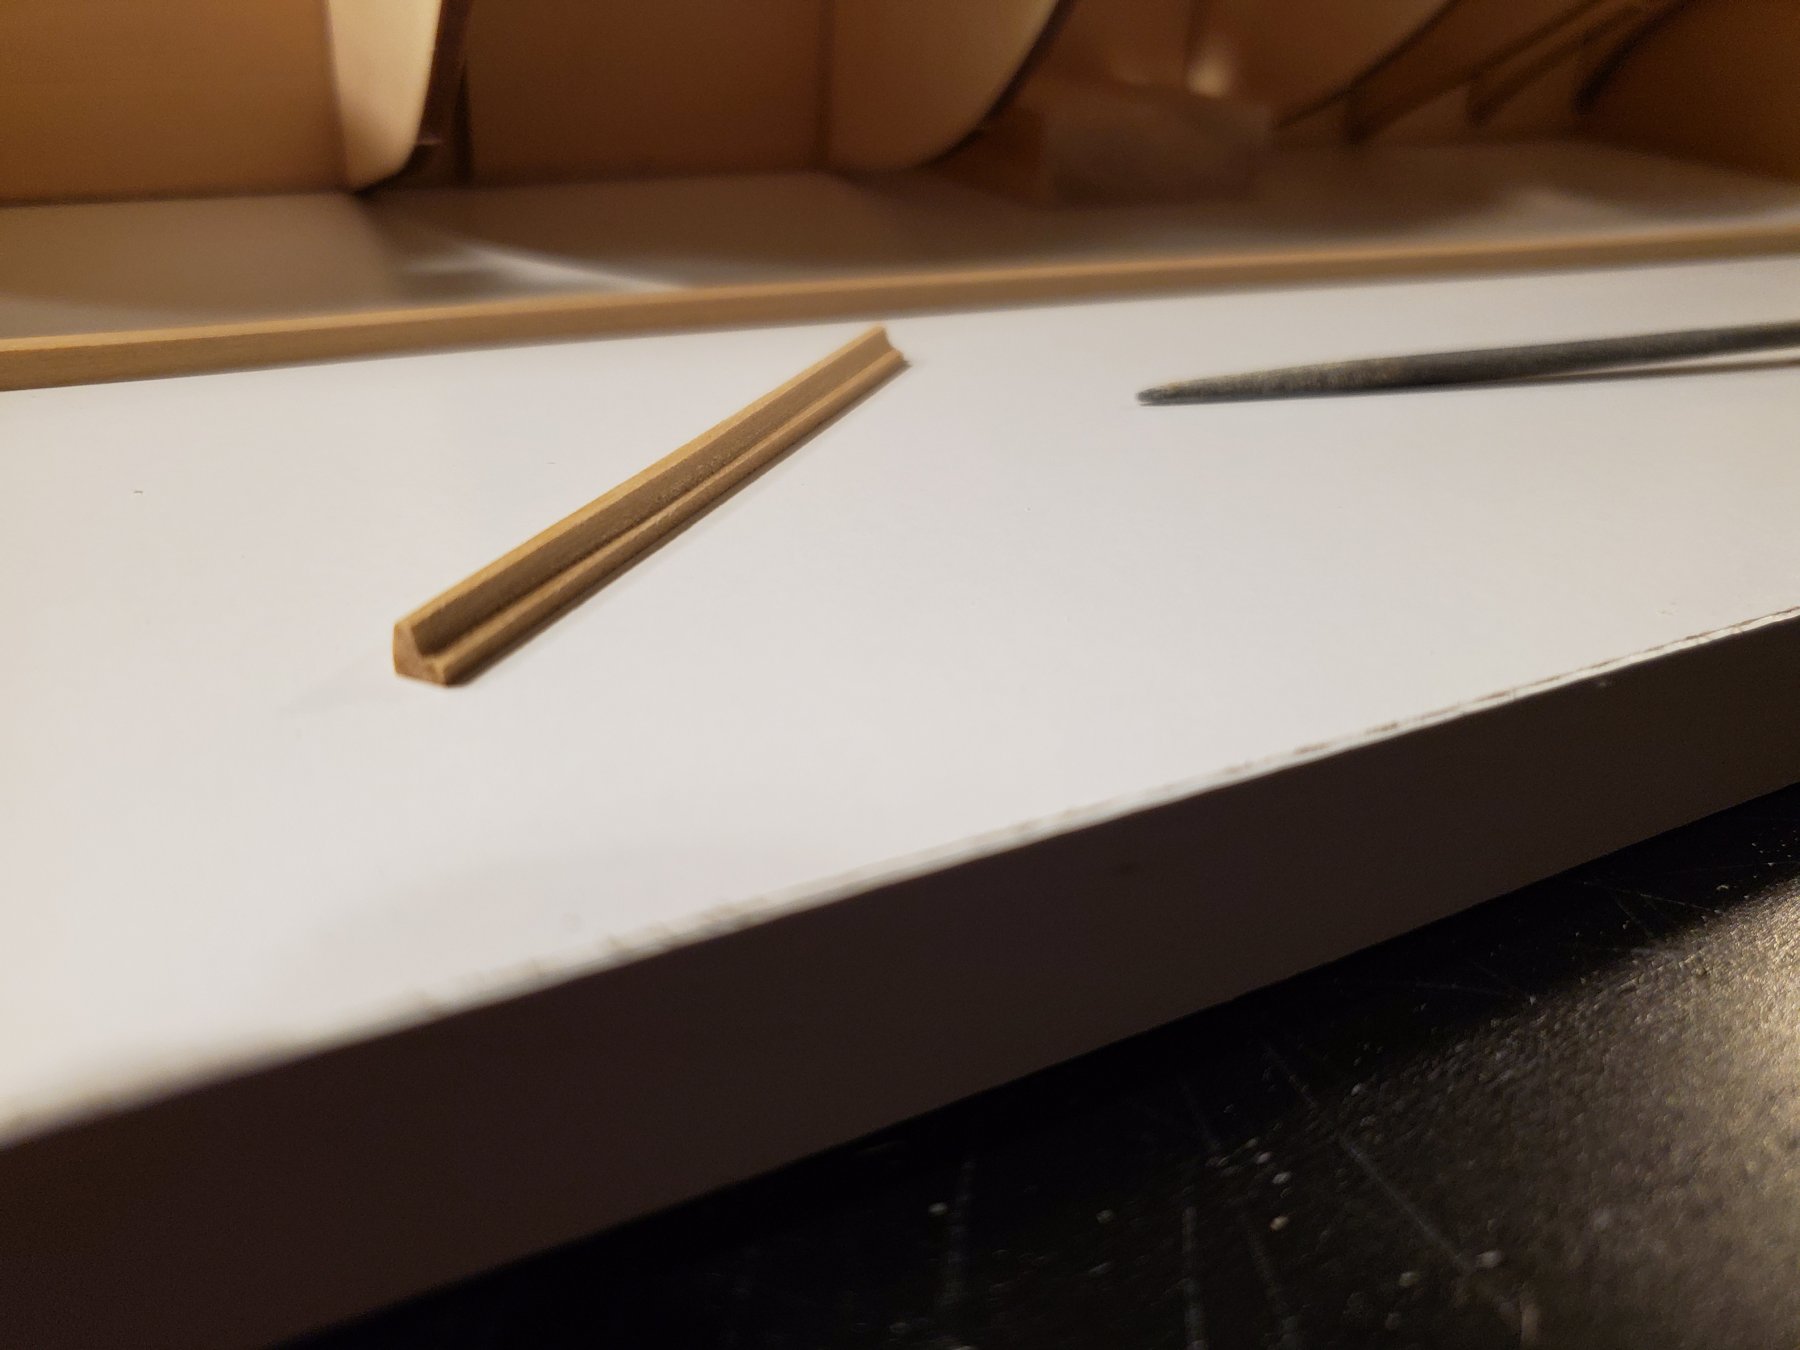
The issue I had was, I don't have anyway to mill my own planks, and Syren Ship Model Company currently is out of boxwood strips. So it took me yesterday to come up with a solution that should have taken me 1 minute to realize. Just glue 2 strips together and sand off the access. Haha!! So here was my attempt to create my first plank ends that end at the waterways:

I was surprised I was able to get the edge that touched the waterway correct. So I drilled the nail holes, and glued it in place. I then made the next row. I knew this row would be harder than the first:

I hope you can see it, but those 2 rows ended up much better than I thought! I feel that I accomplished something that really in
Isnt very easy (well, for me anyway!). So I am pretty happy with it! It got me wondering what it will look like when the guns are in place!
I'm tired so I will finish up this side tomorrow and start on the other.
Thanks!
Jeff

- goetzi73, Dutchman and GrandpaPhil
-
3
-
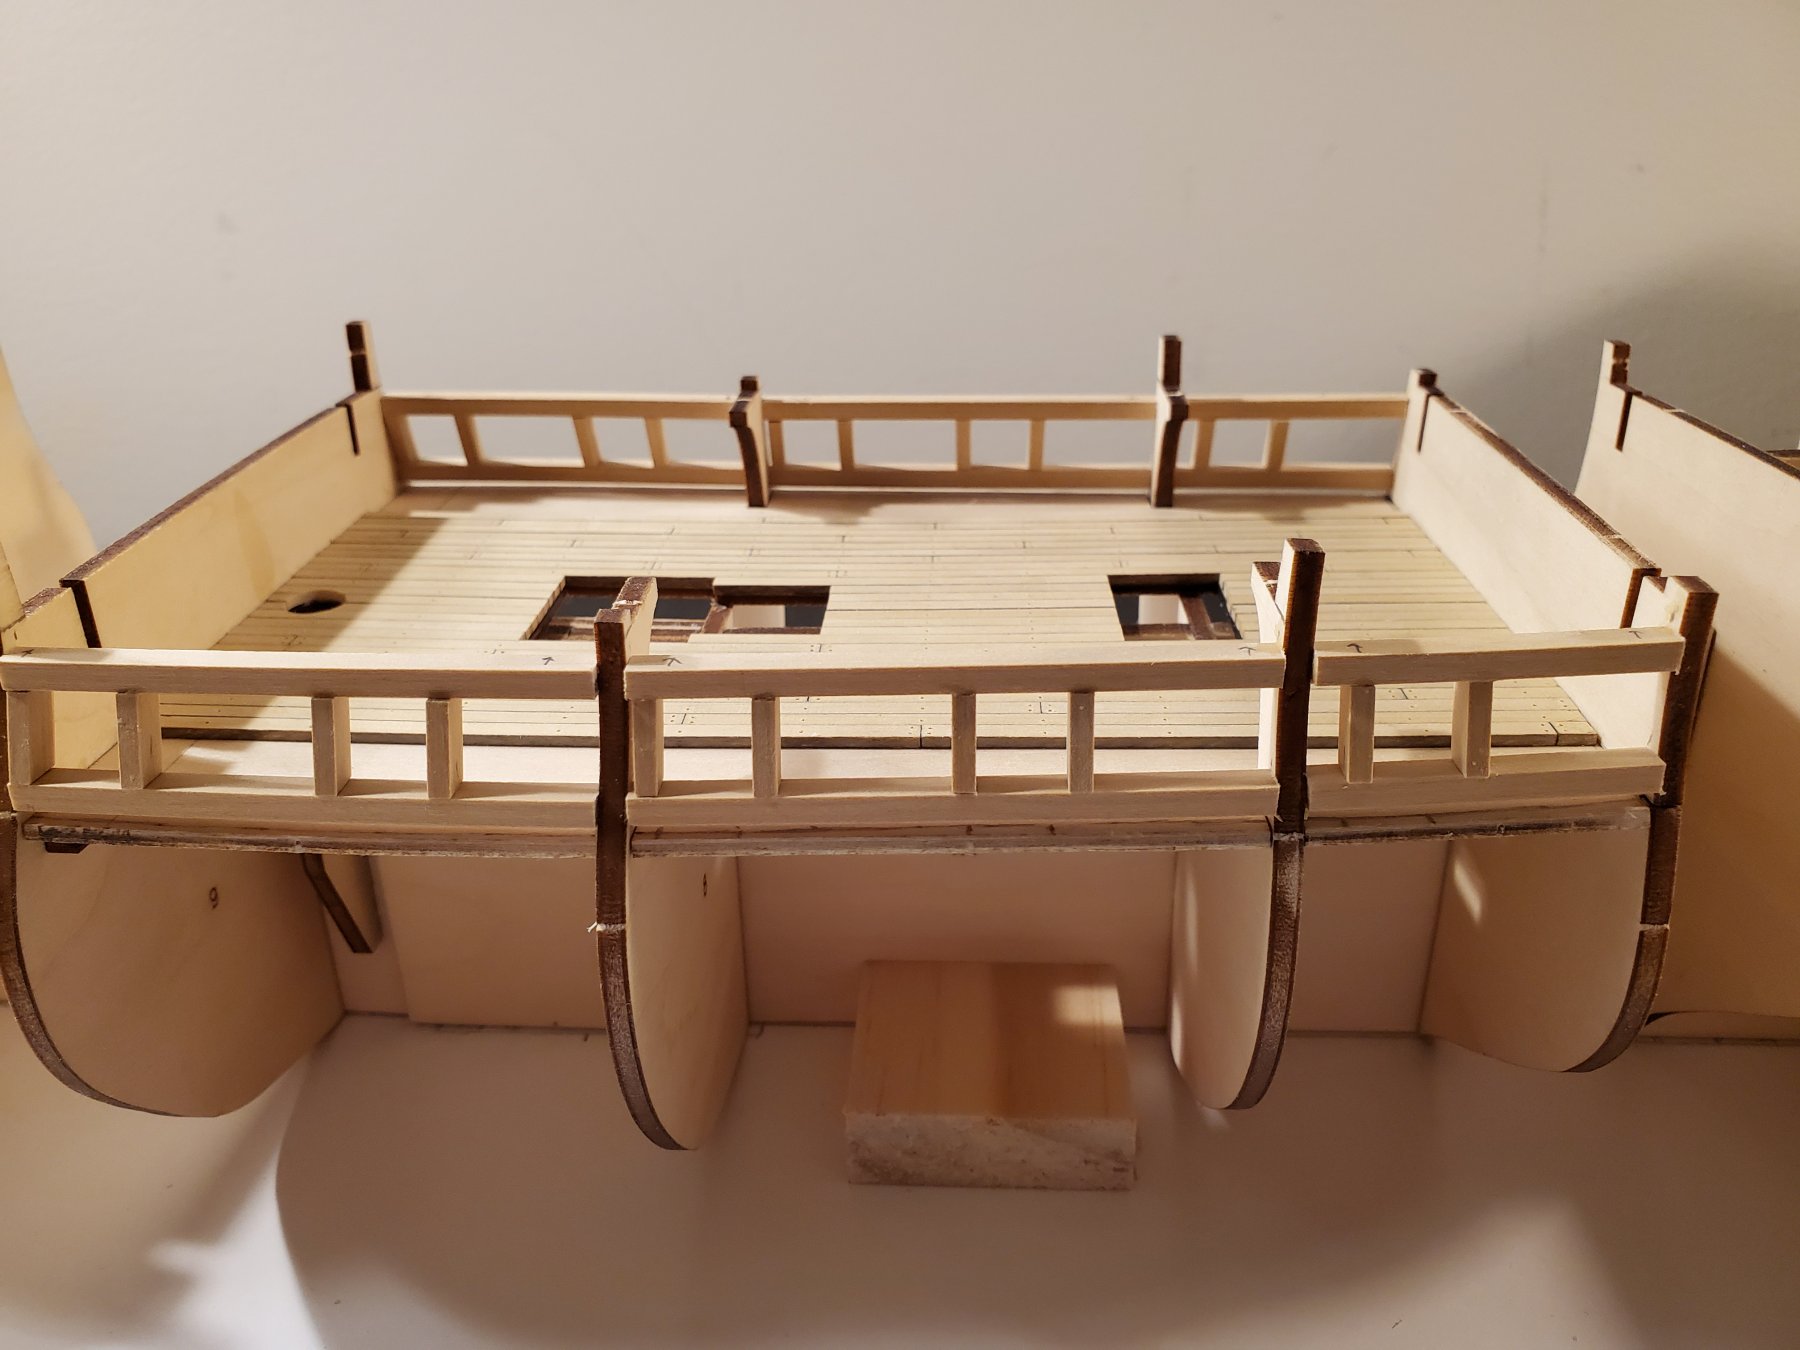
Thanks for the likes!
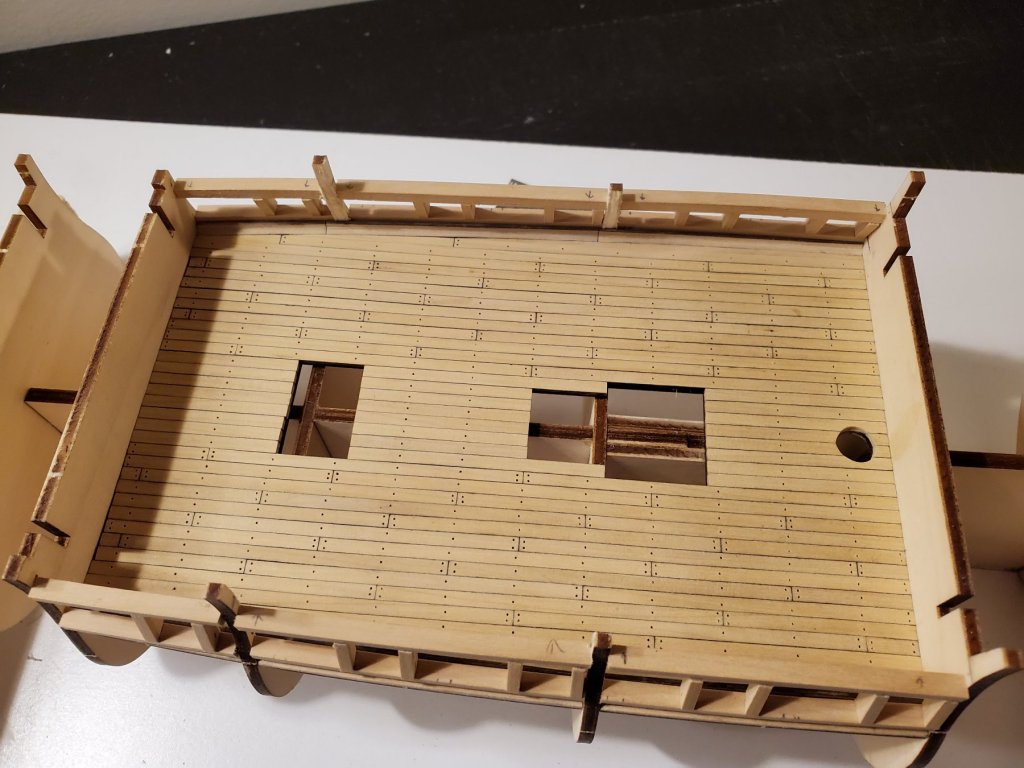
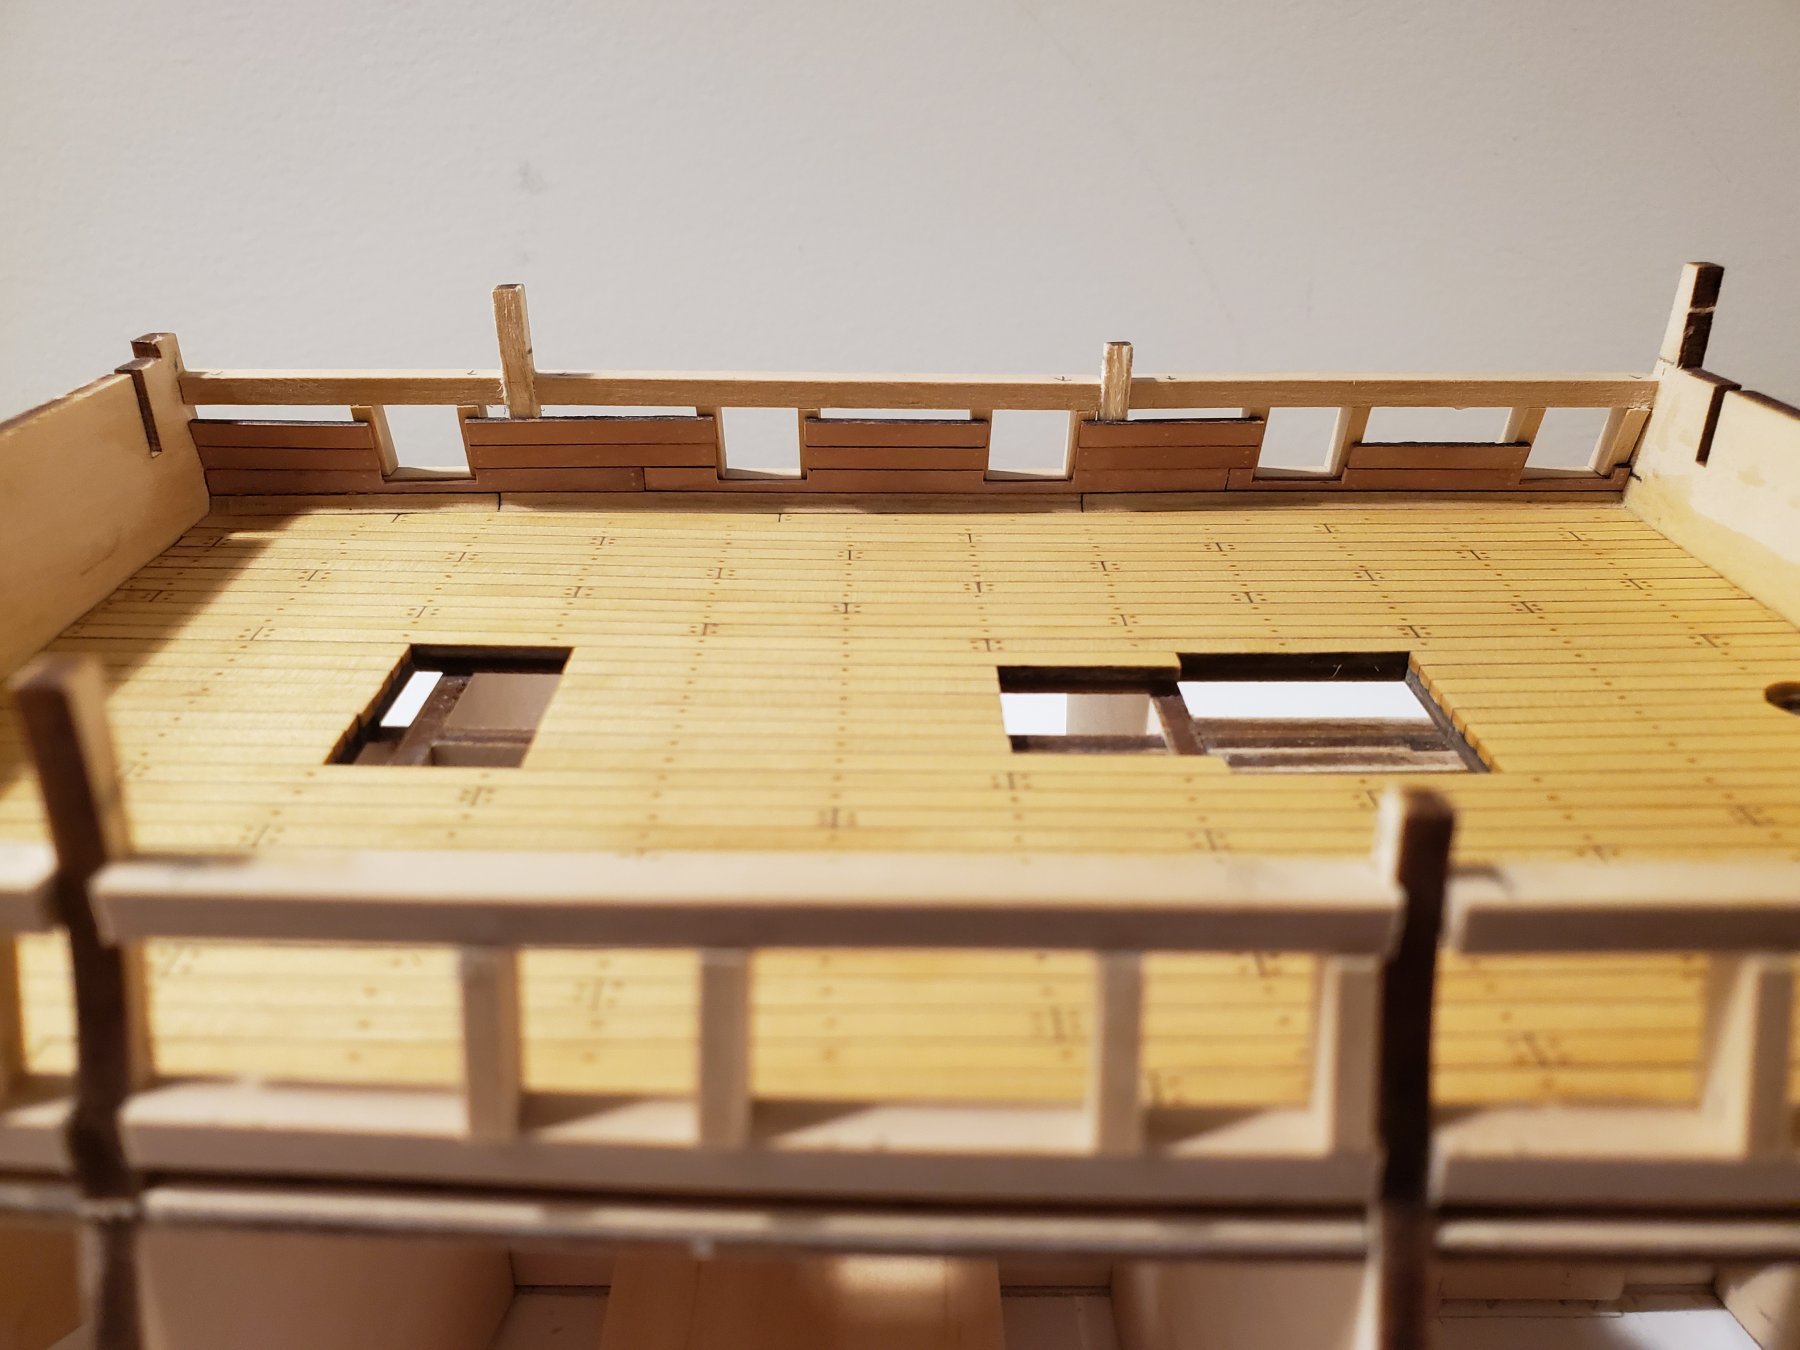
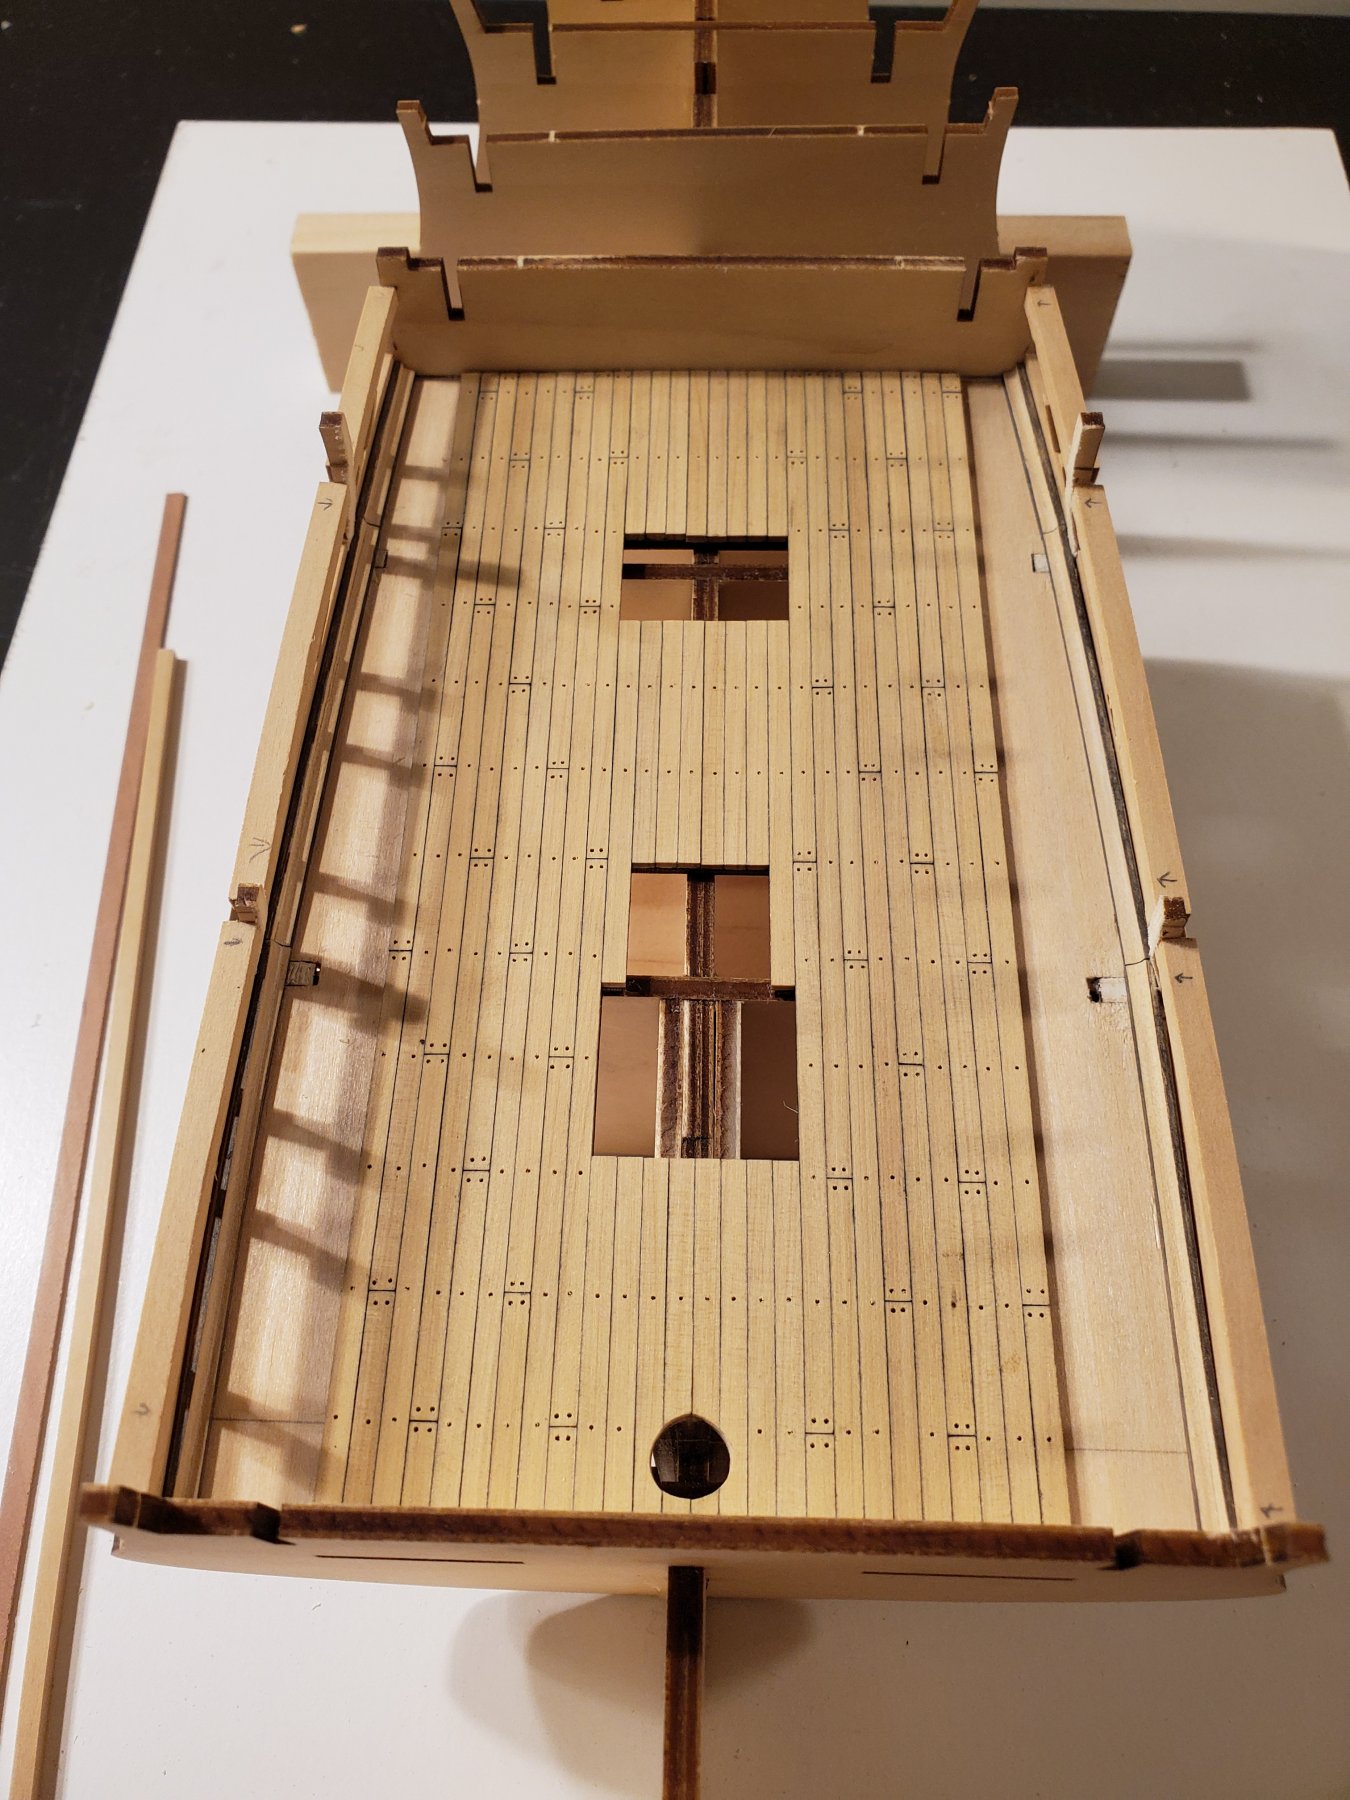
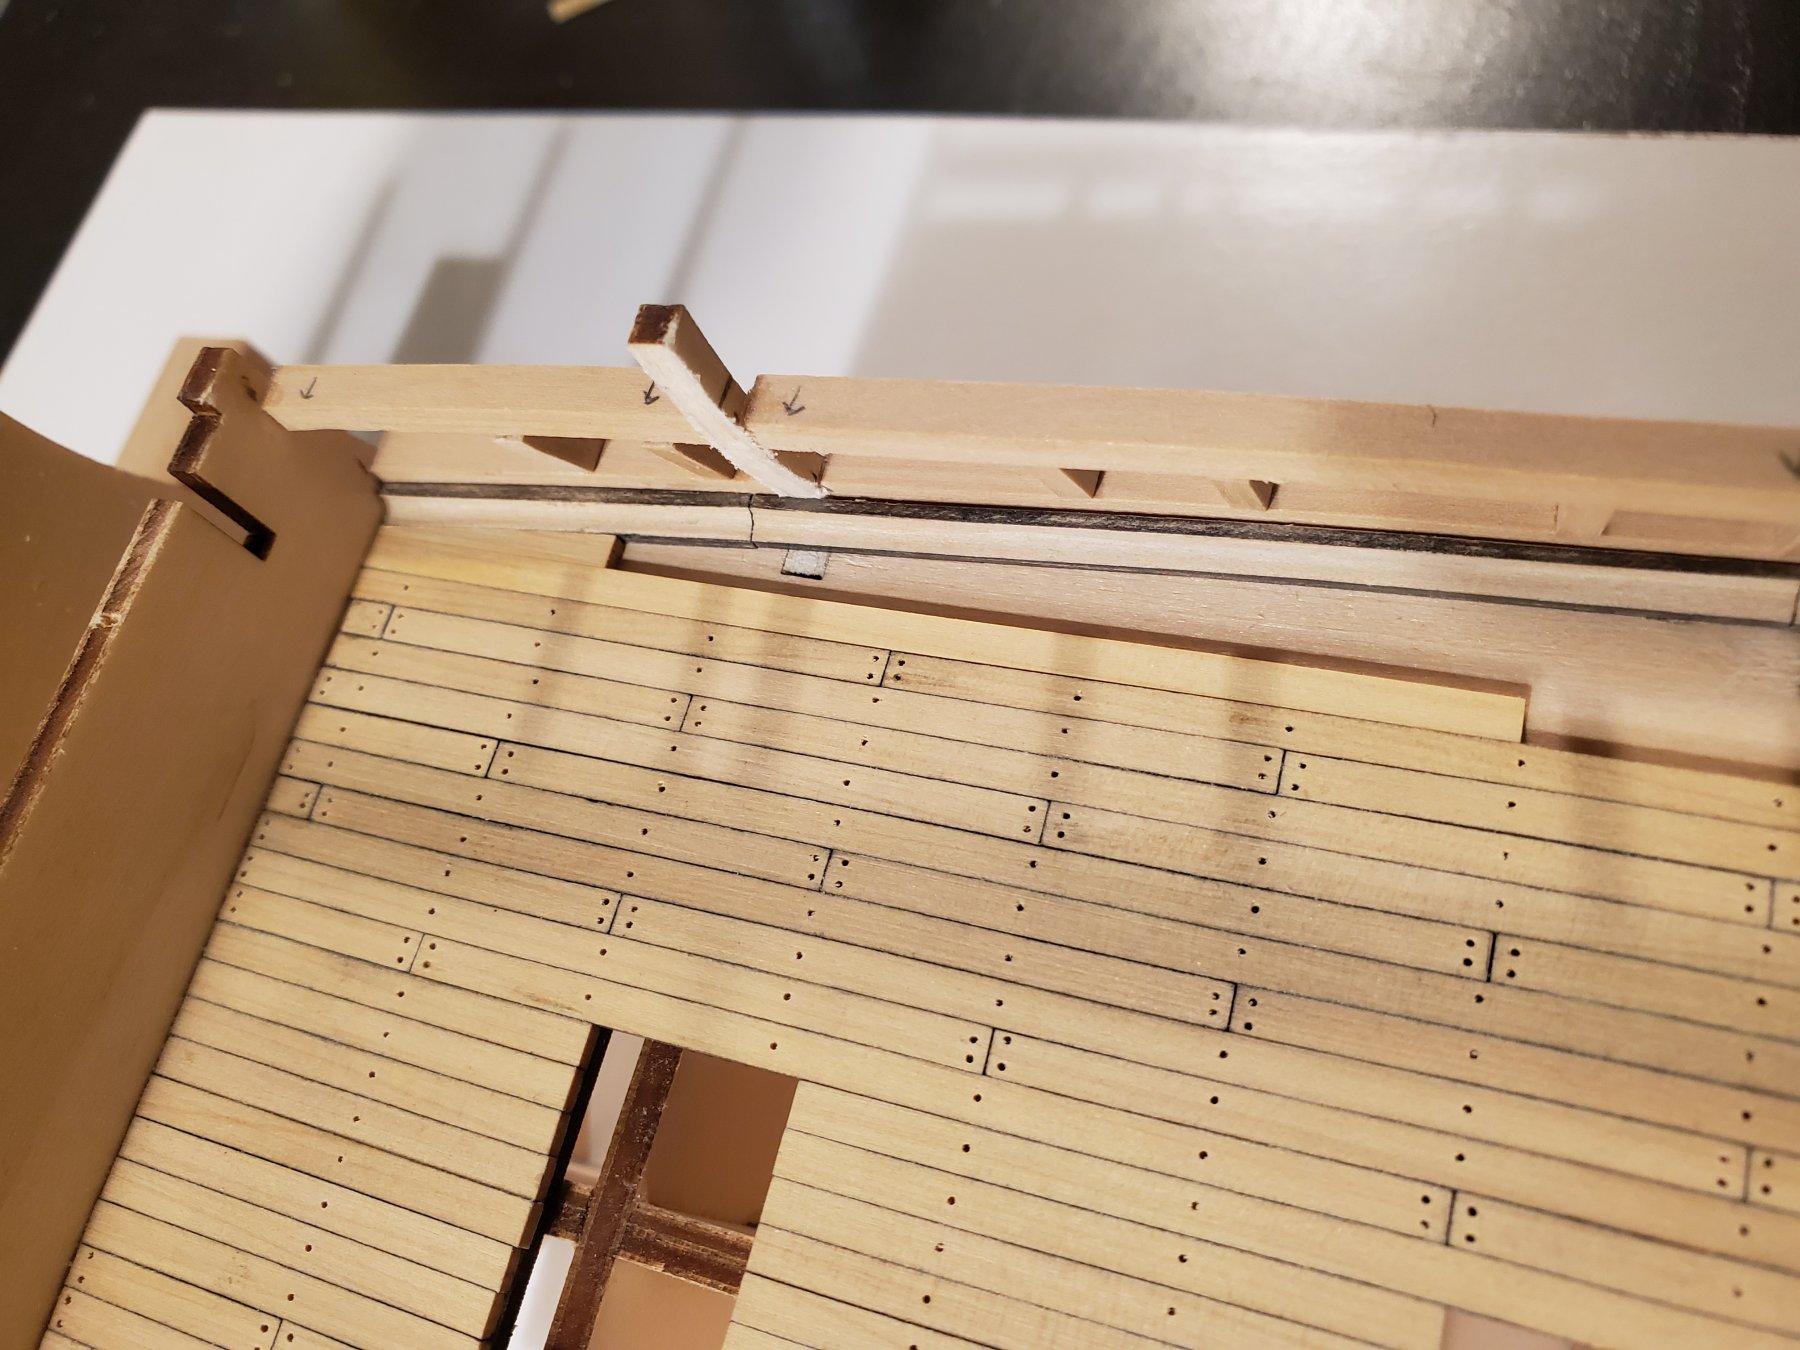
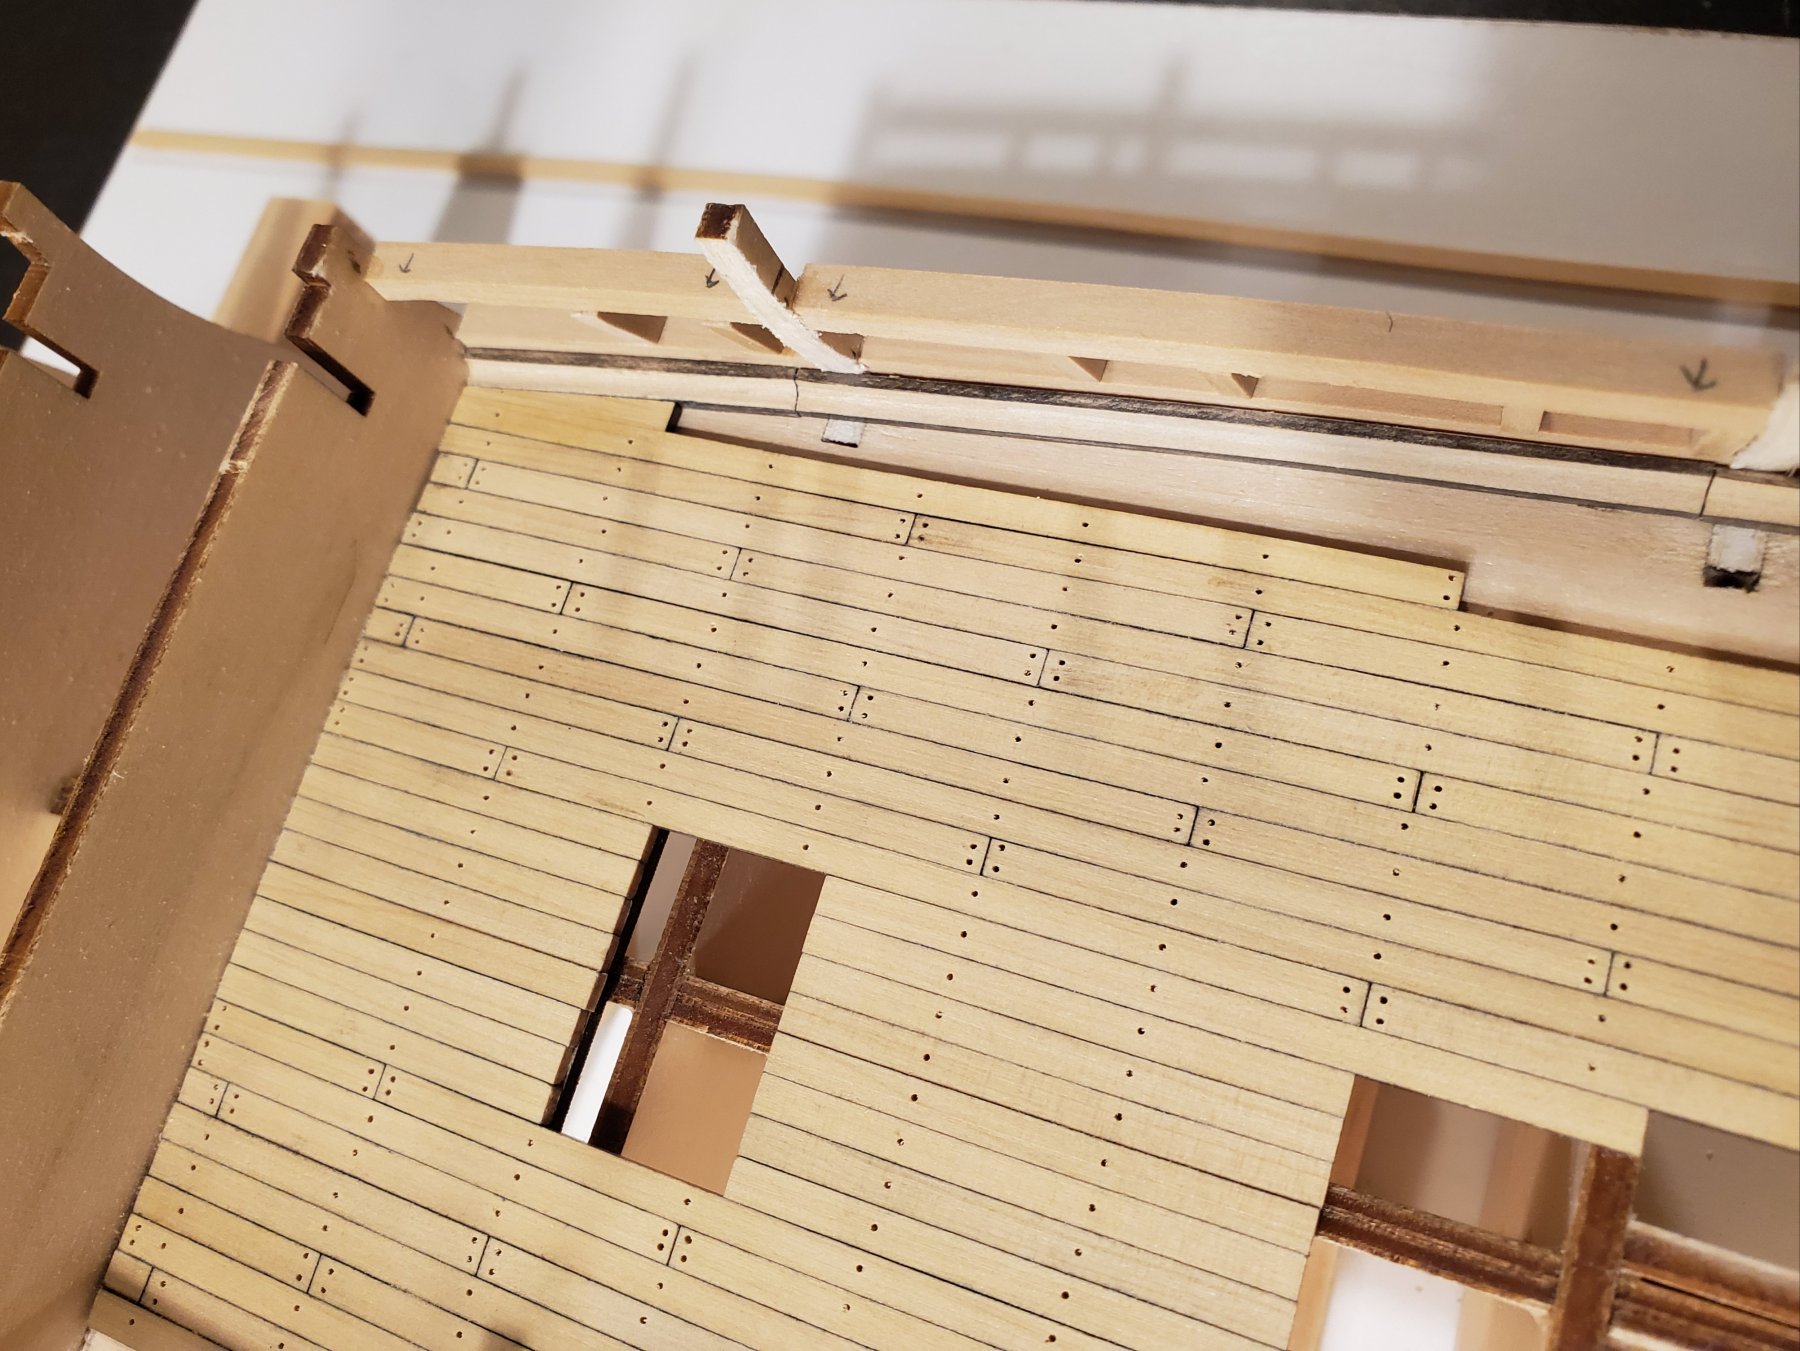
I finished cutting the frame tops
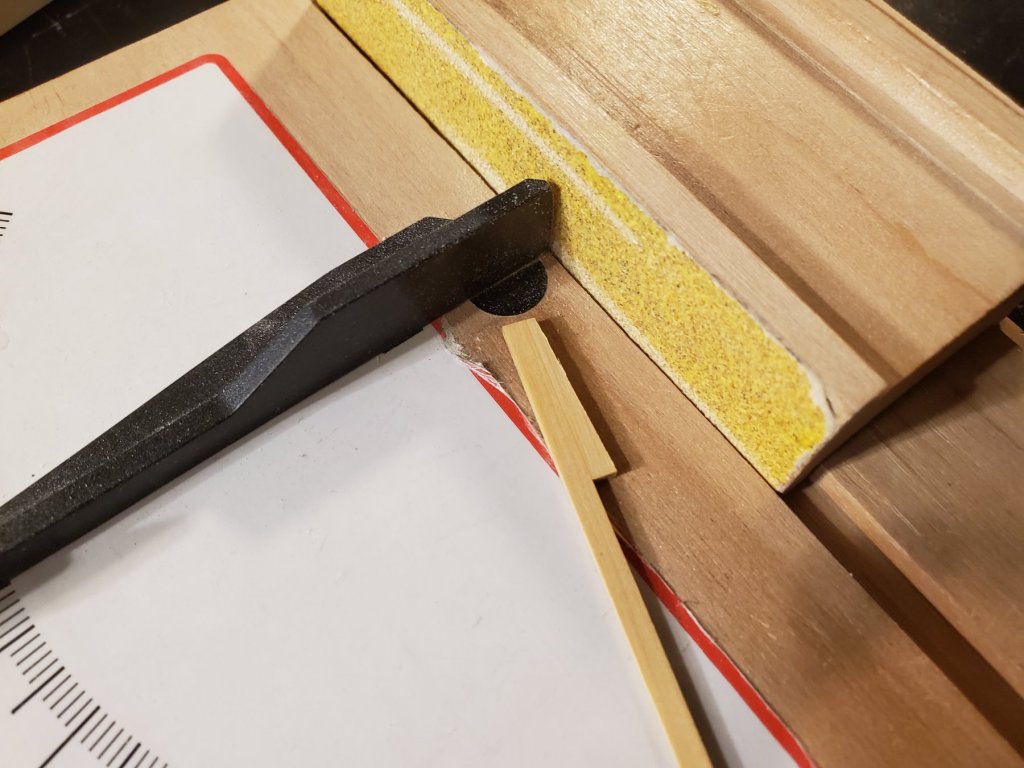
The gunport supports kept the frame tops from breaking. That was my worst fear. I then started on the waterways on this deck. Luckily, I had 3mm x 3mm boxwood to which to form the waterways. It took me a while to figure out how to cut and sand them to the correct shape. Below is how I performed it with pictures.

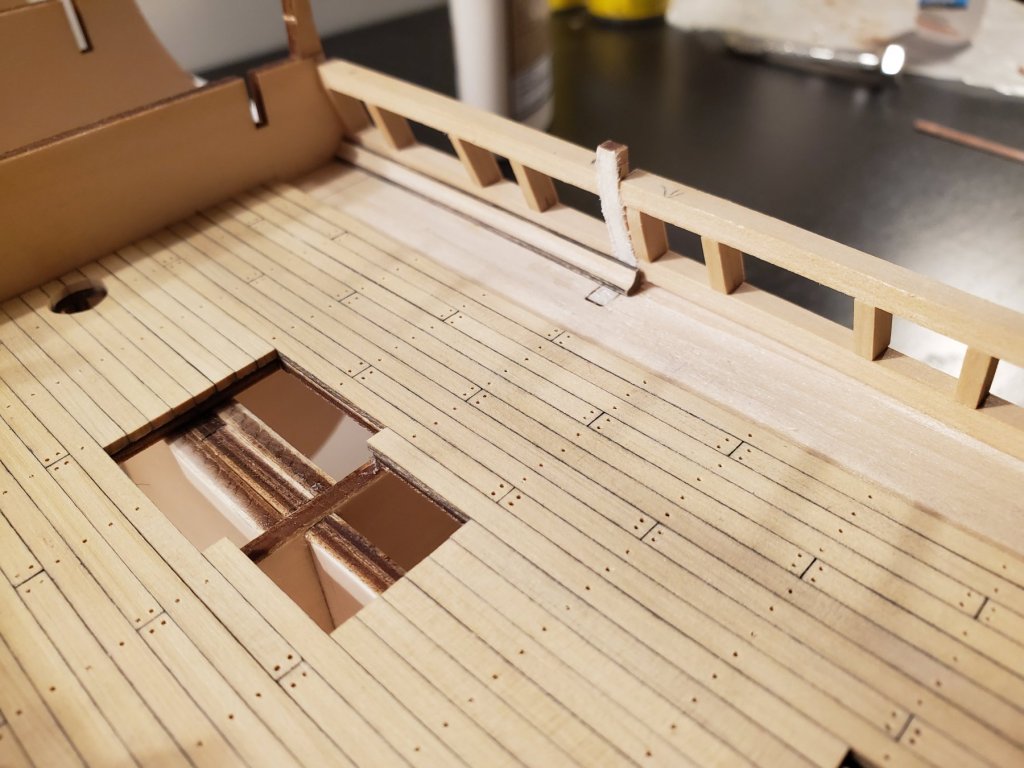
I made sure that the bottoms of the waterways was the same height as the deck planks. Now I have 1 more side to do. But that will have to wait till tomorrow!
Thanks!
Jeff
-
What a wonderful build!! She looks excellent! I can't wait to see your next build!!!
Jeff
- J11 and marktiedens
-
2
-
-
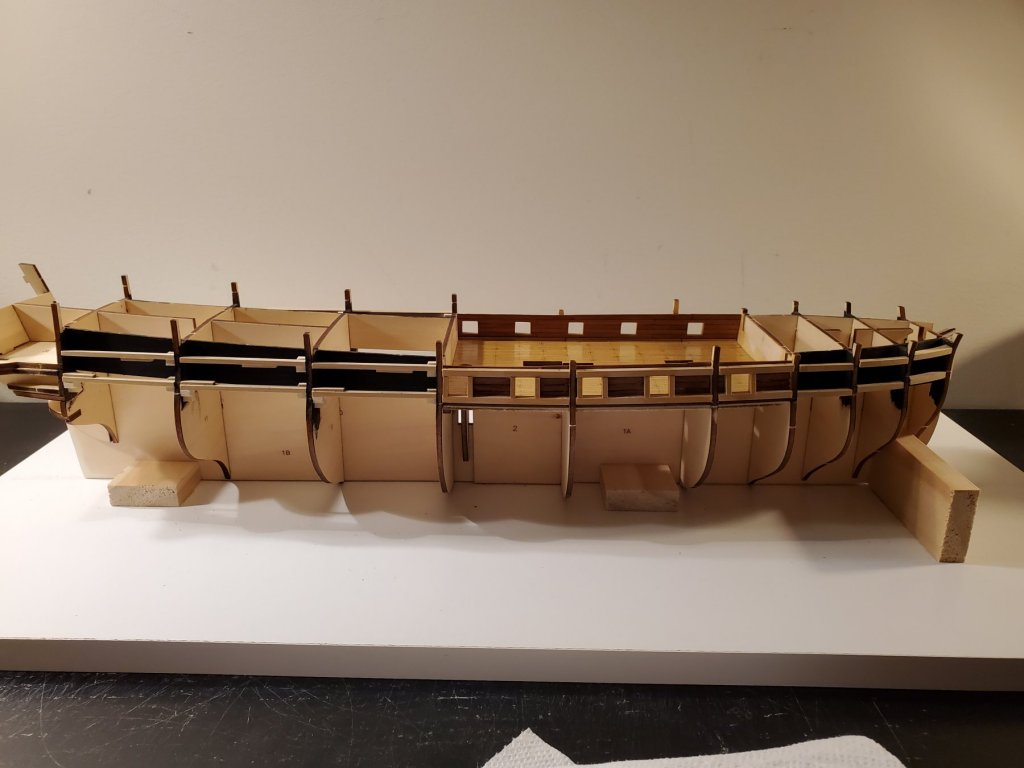
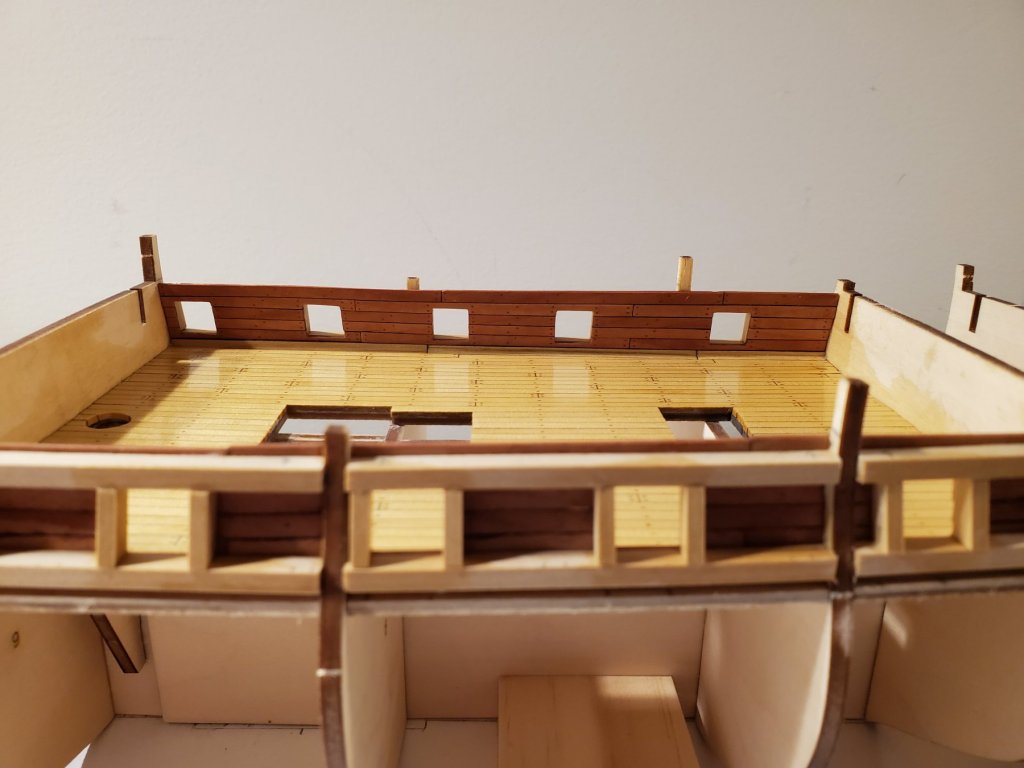
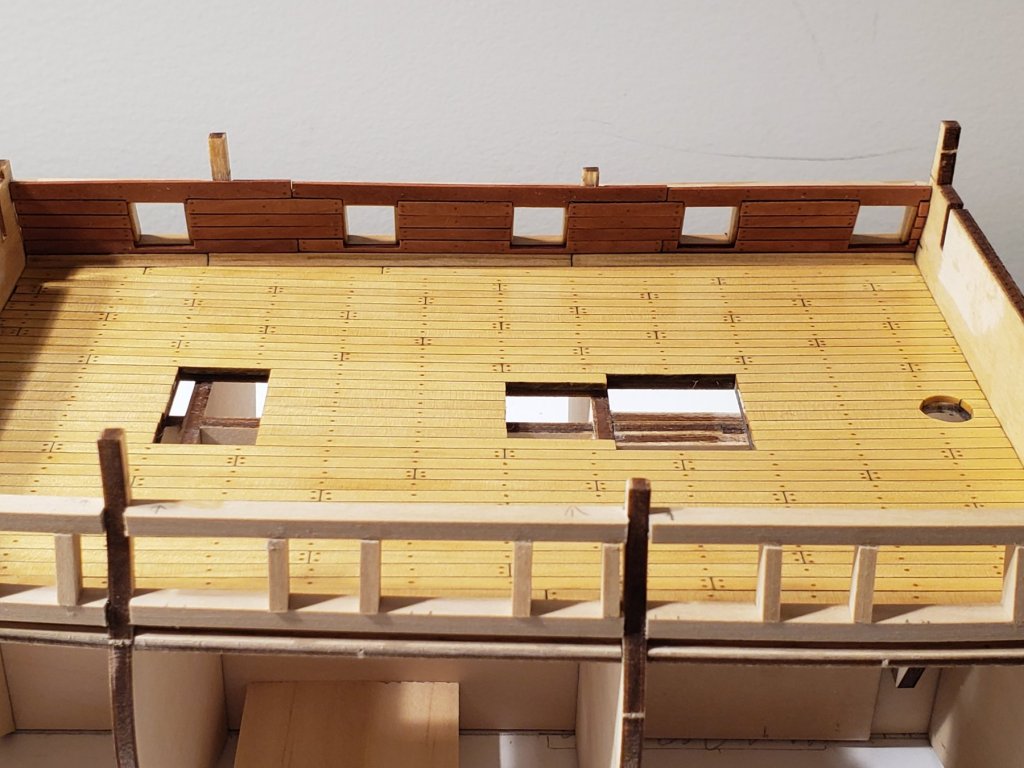
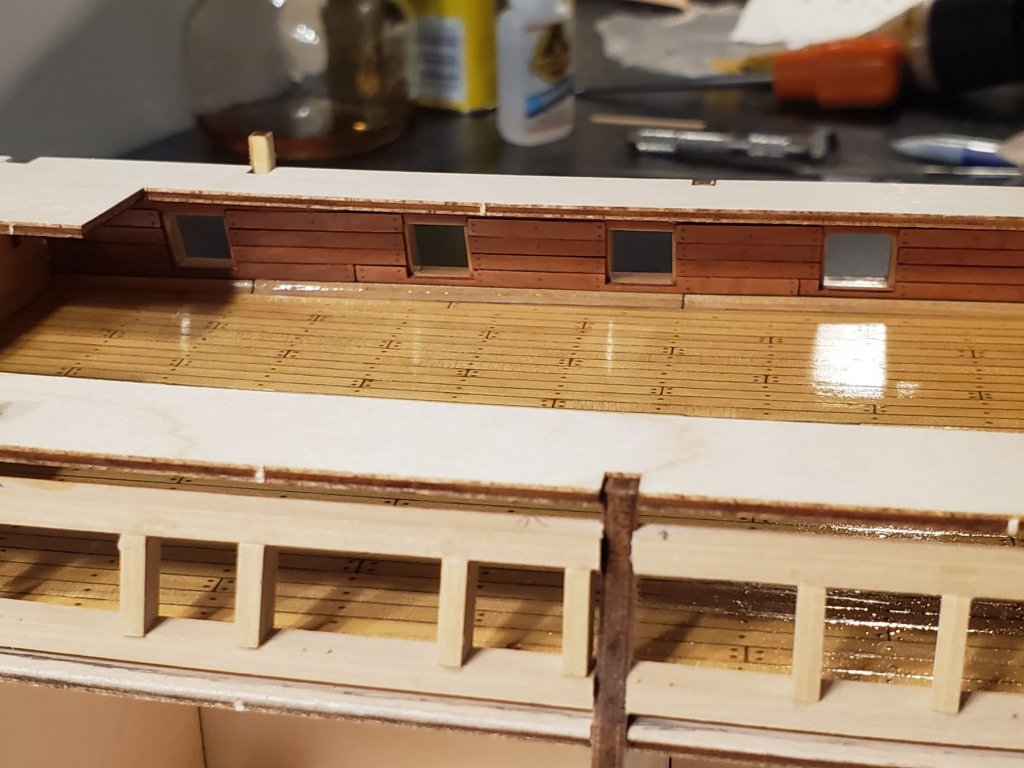
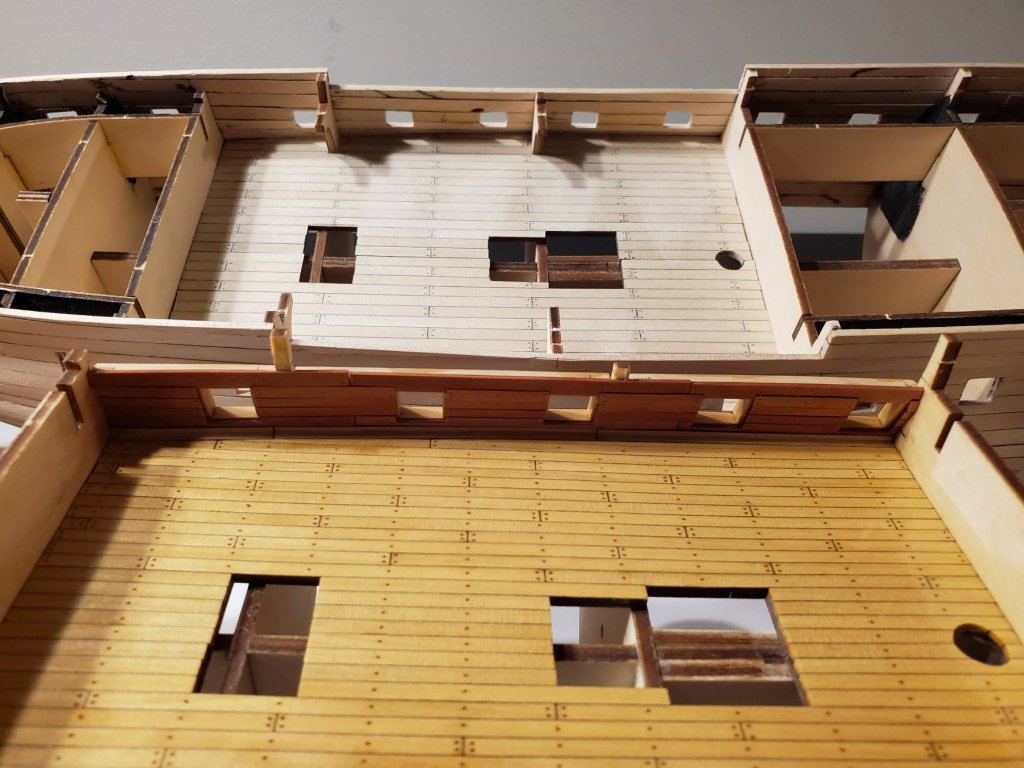
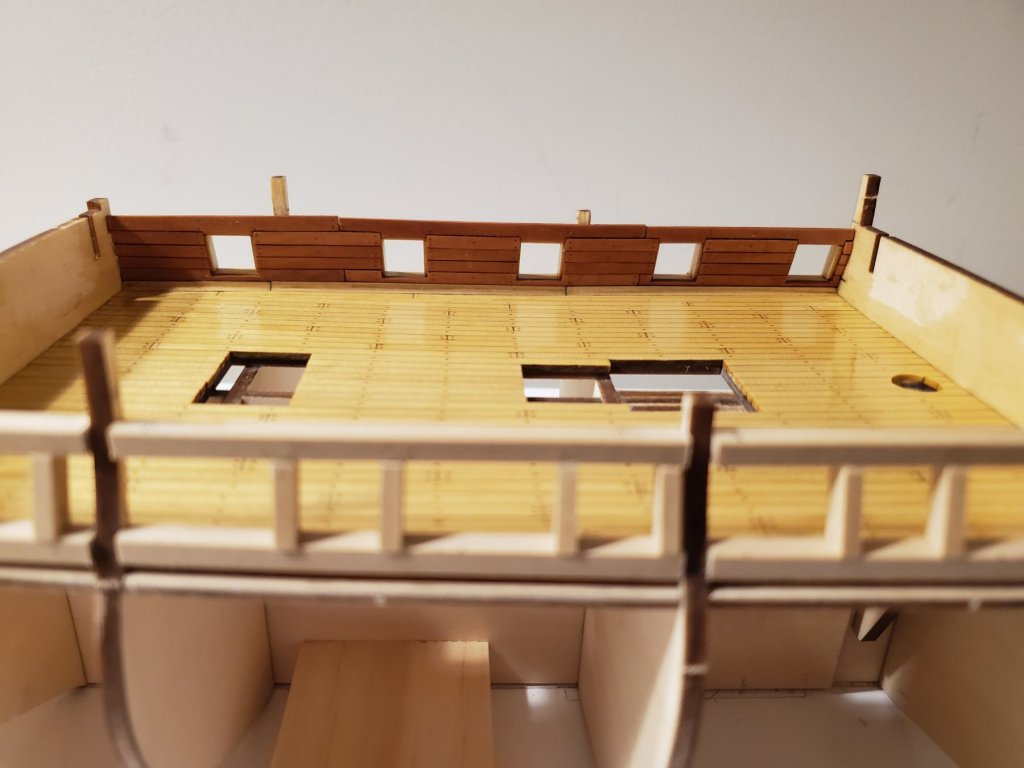
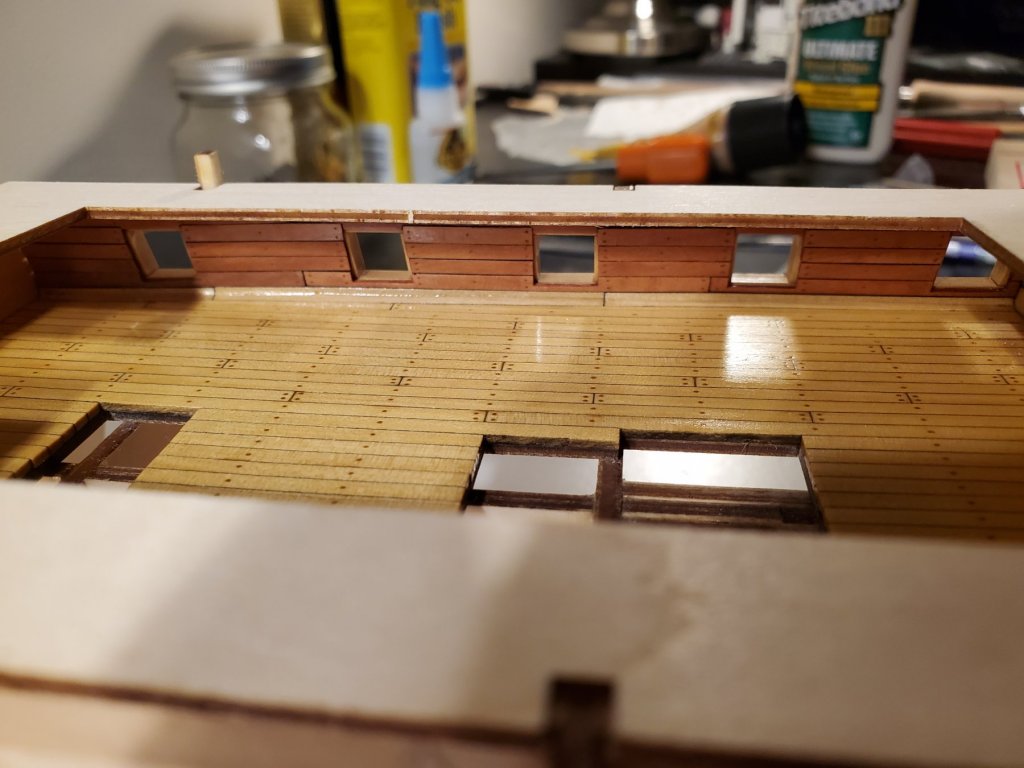
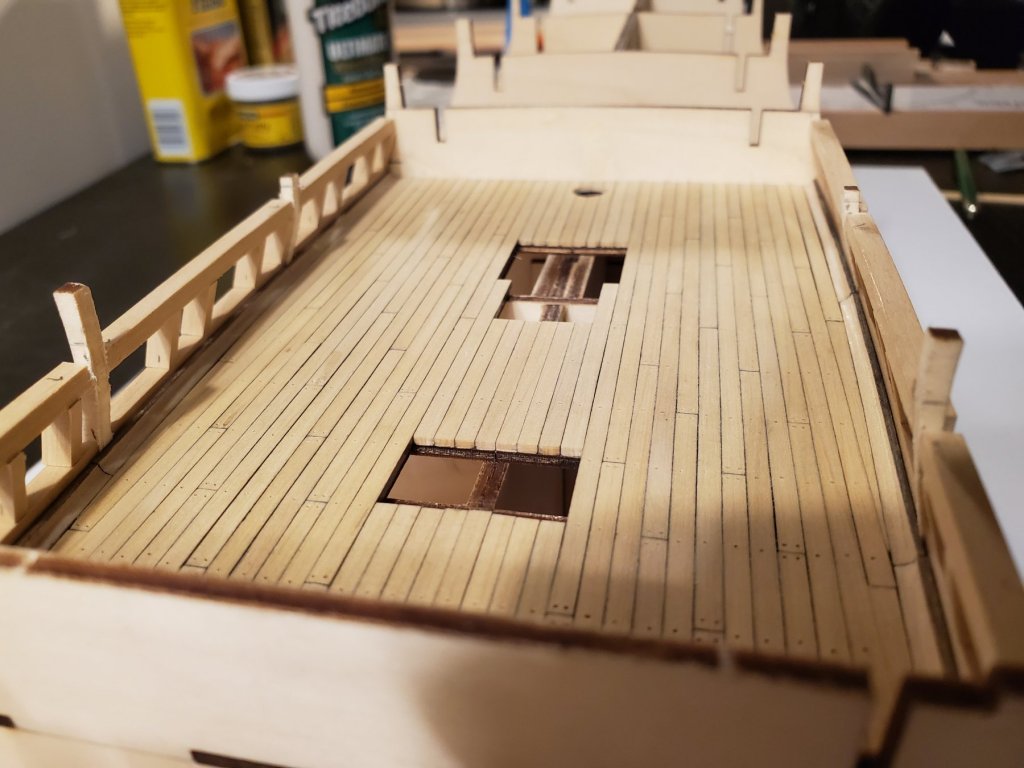
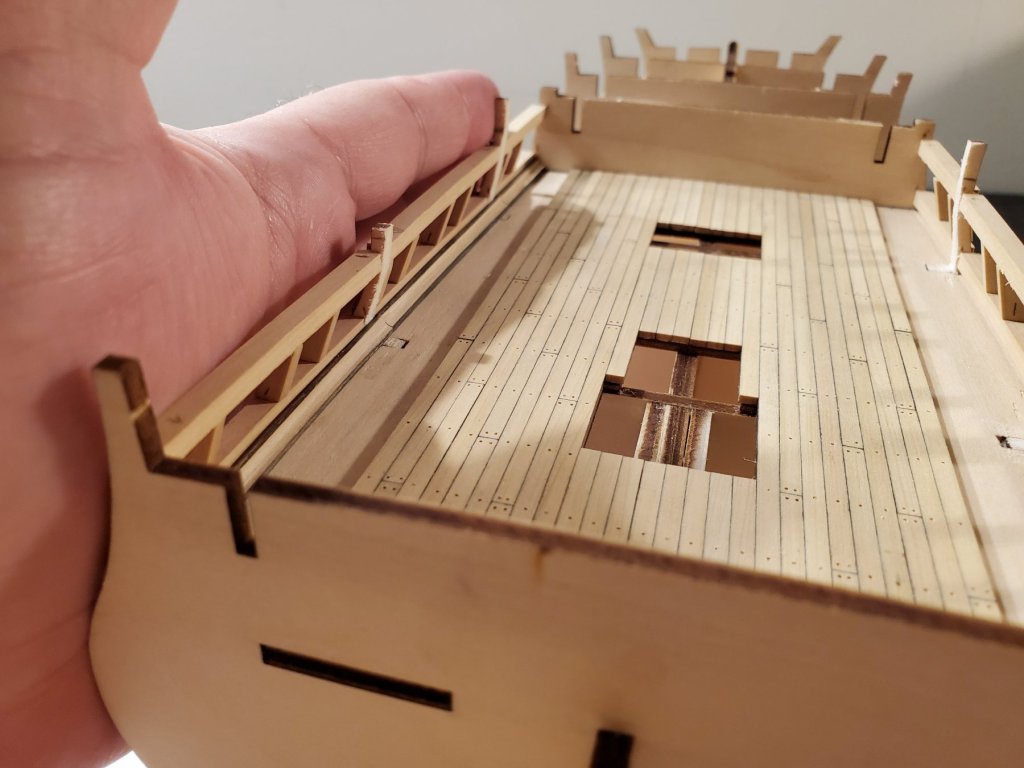
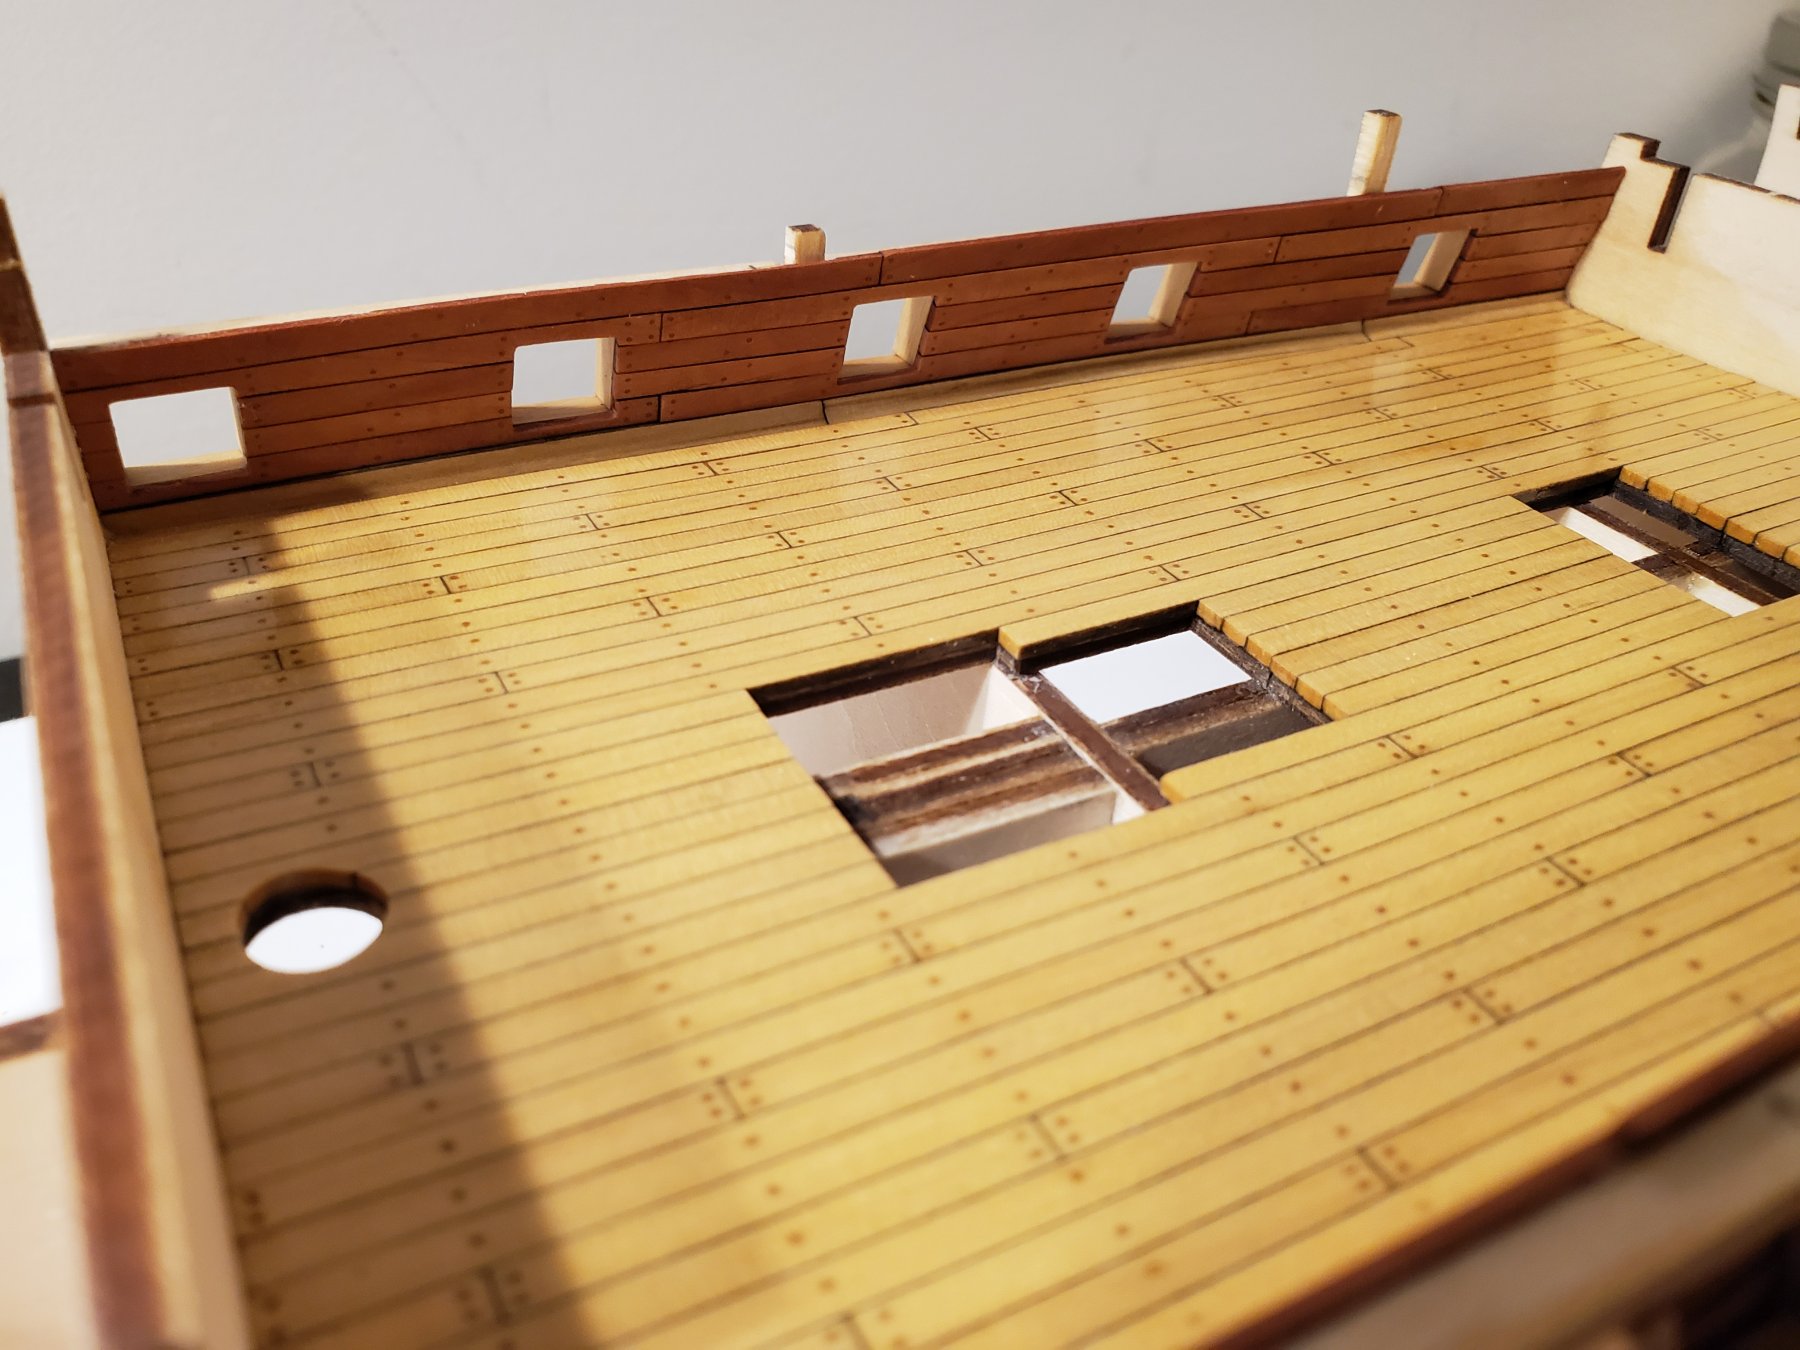
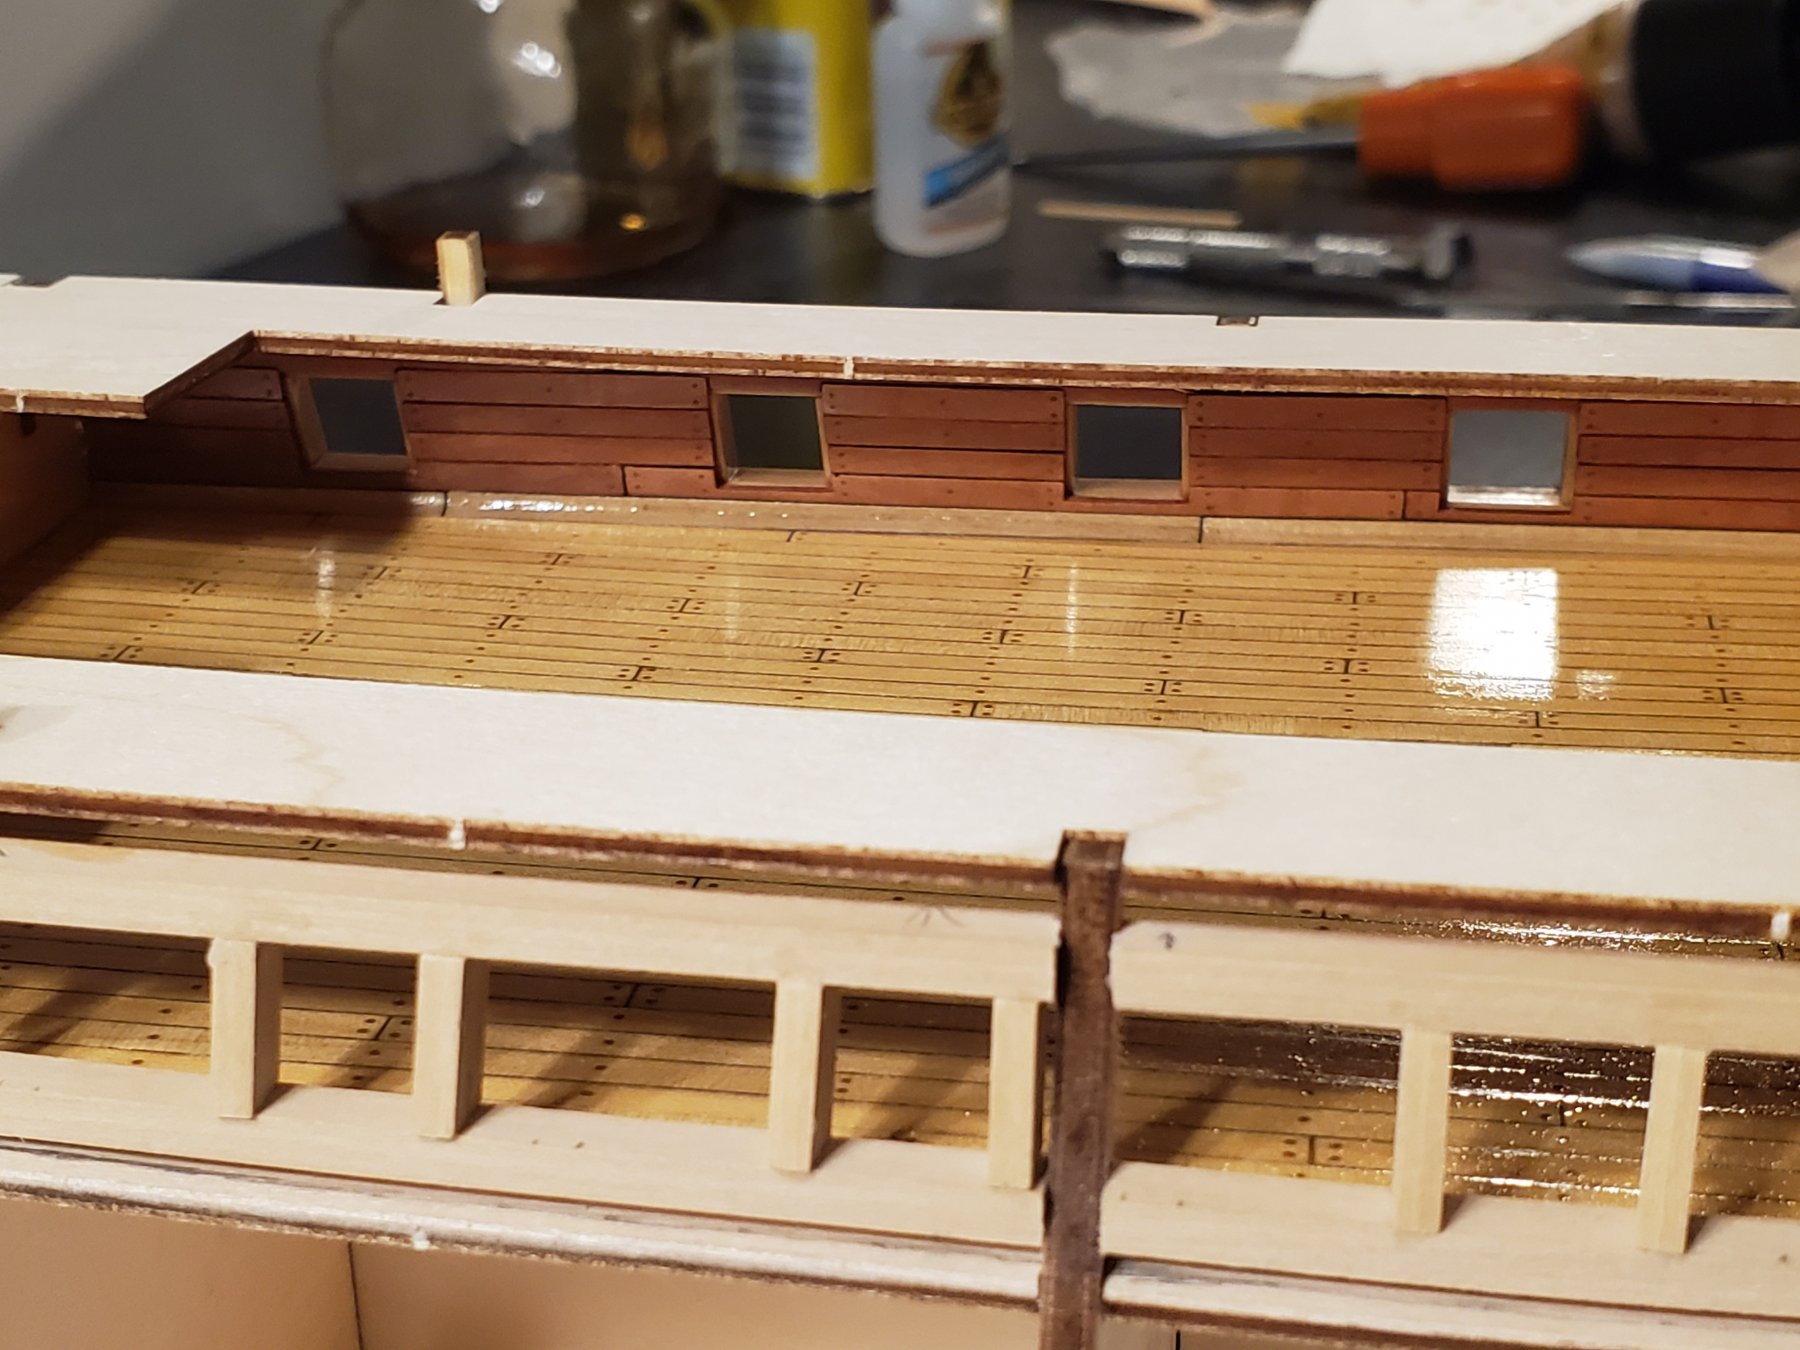
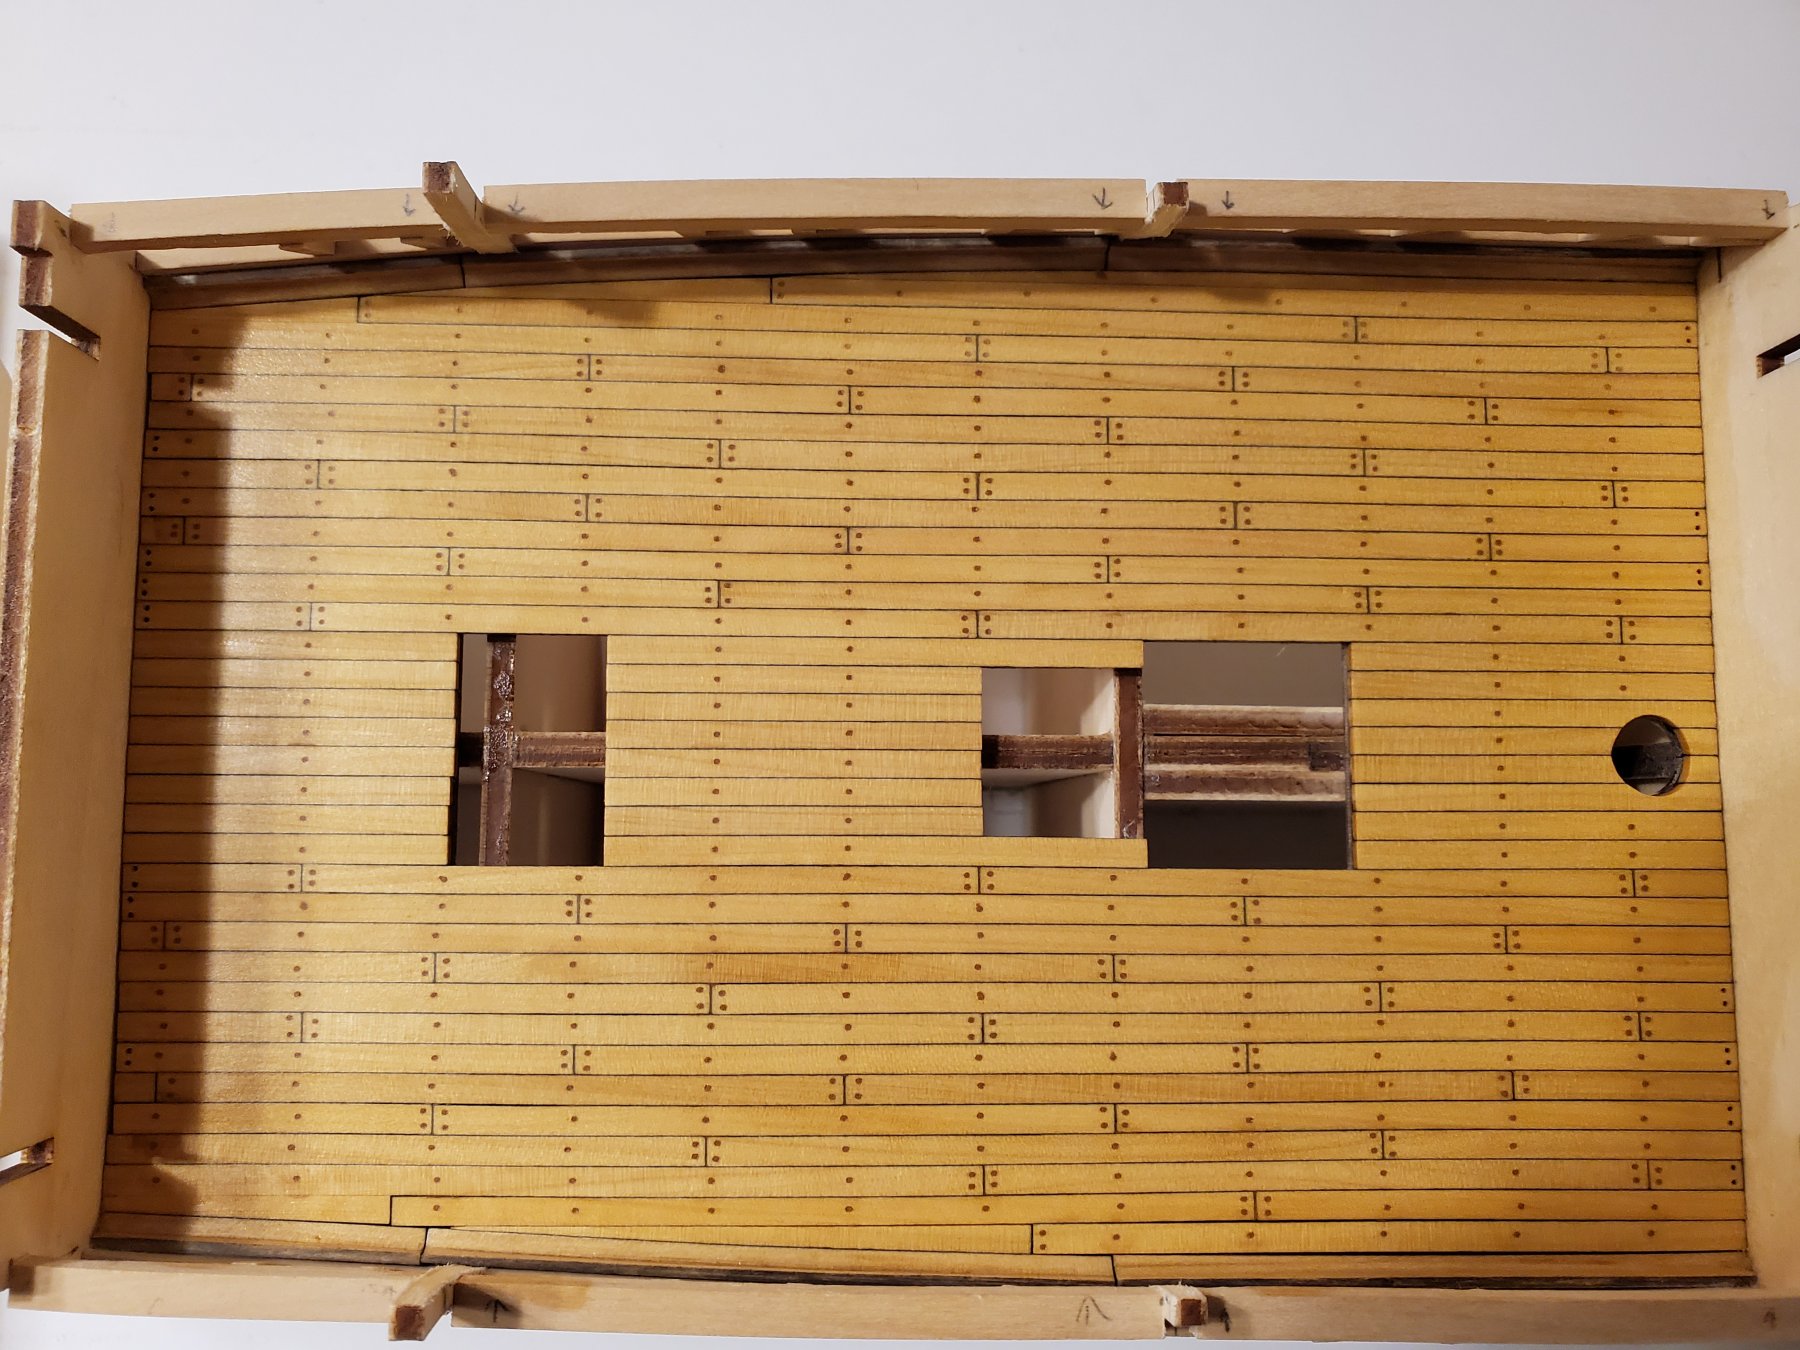
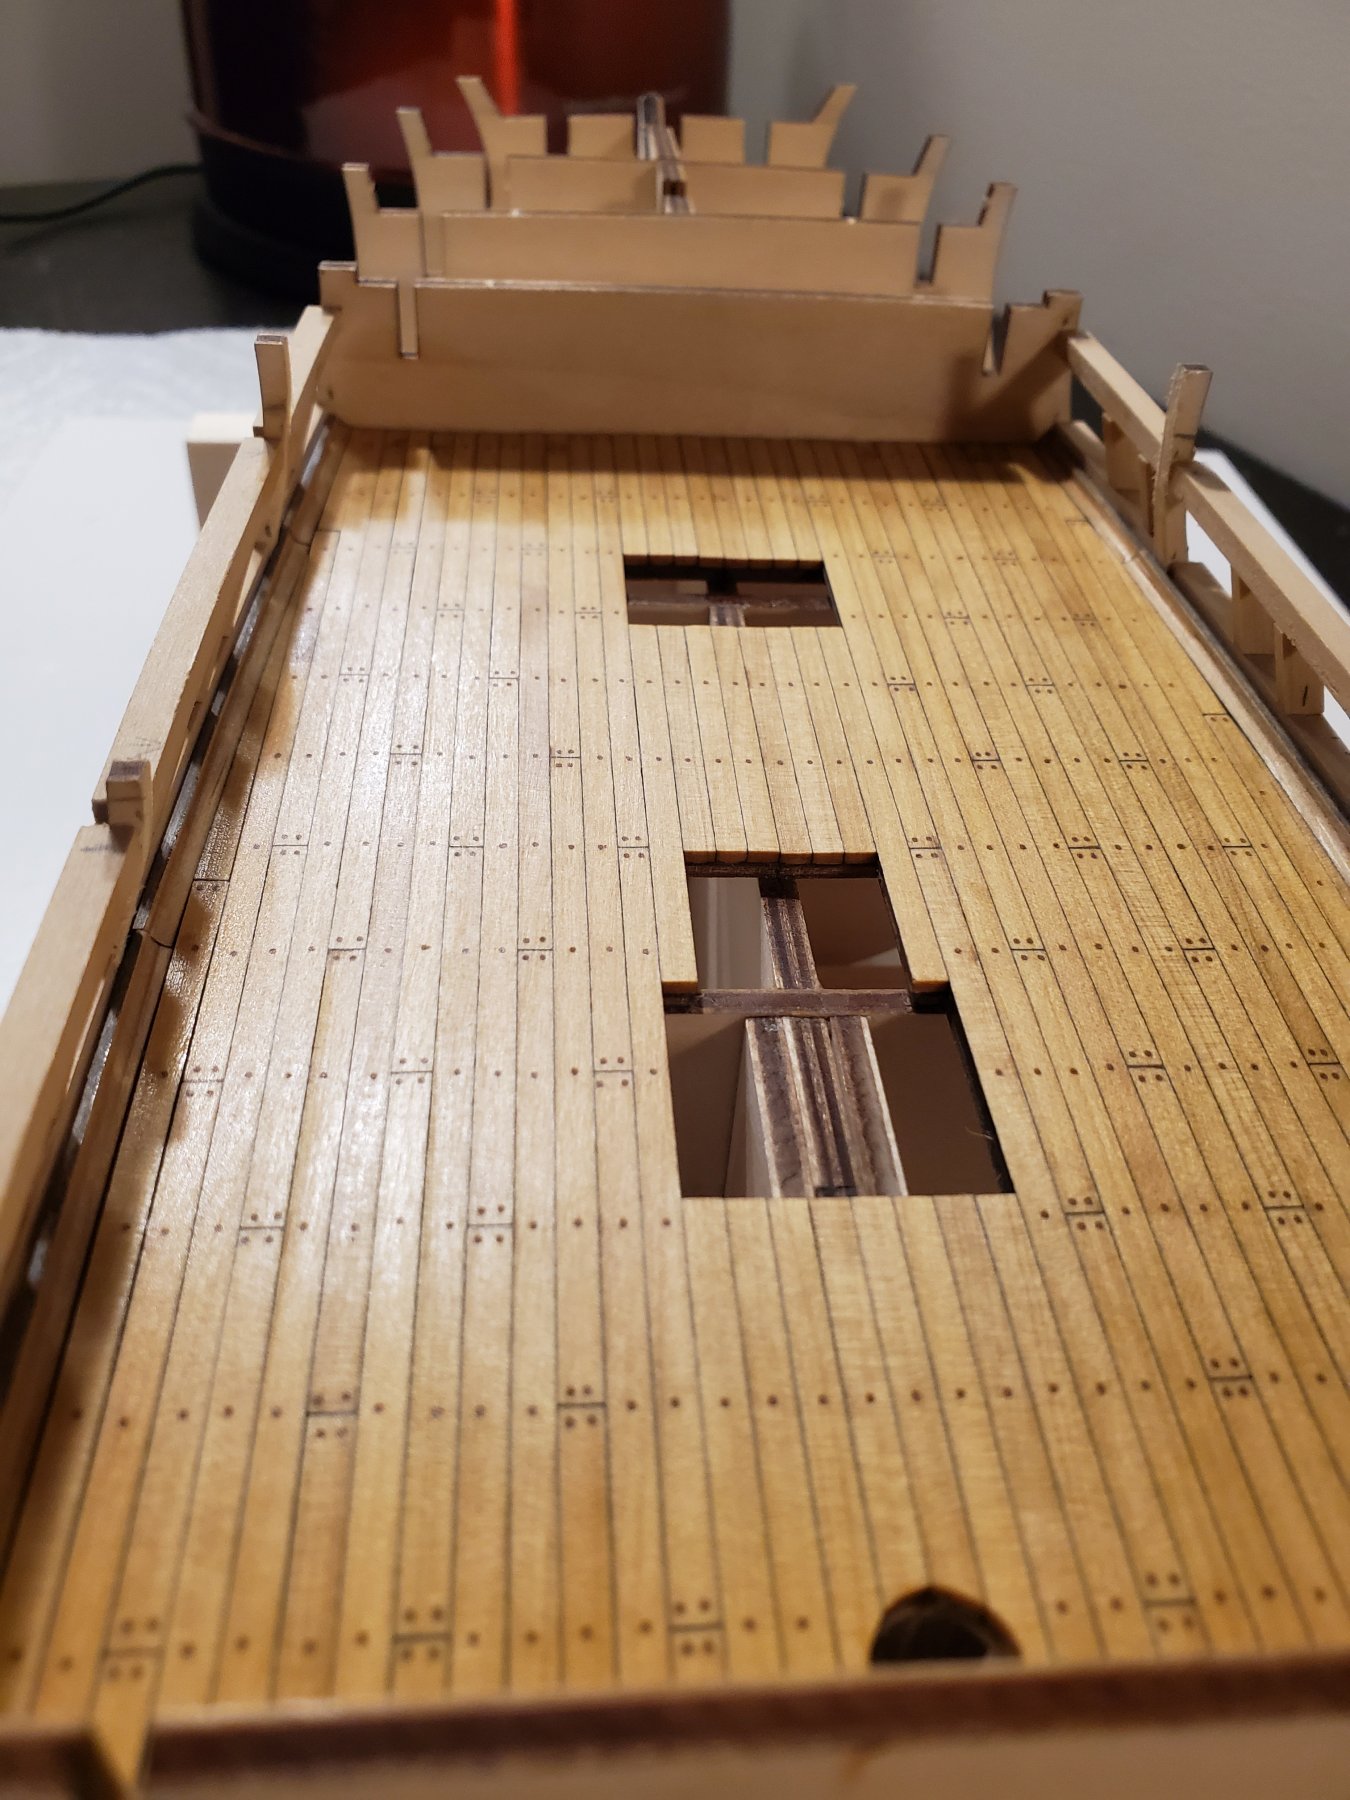
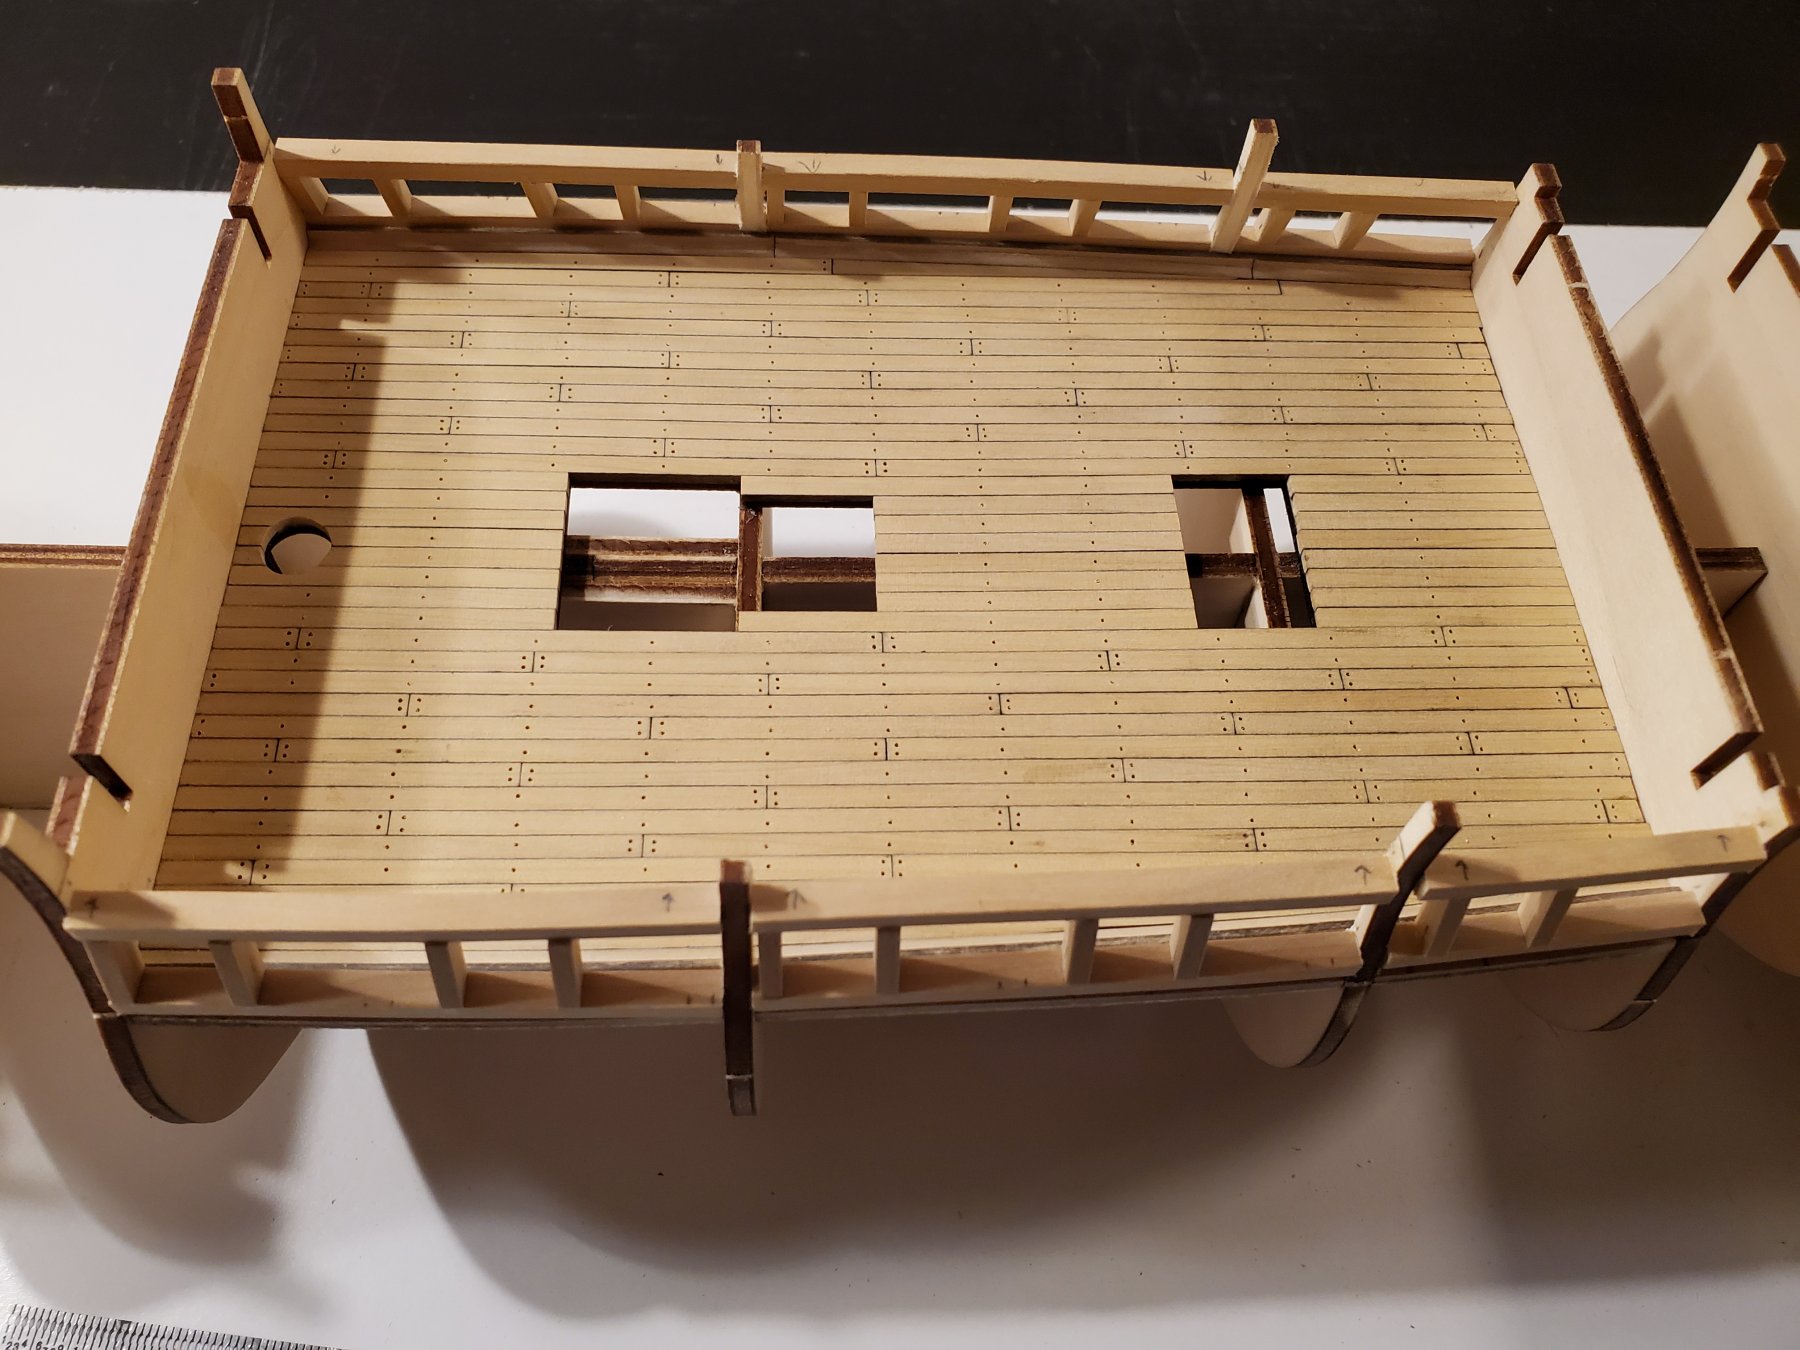
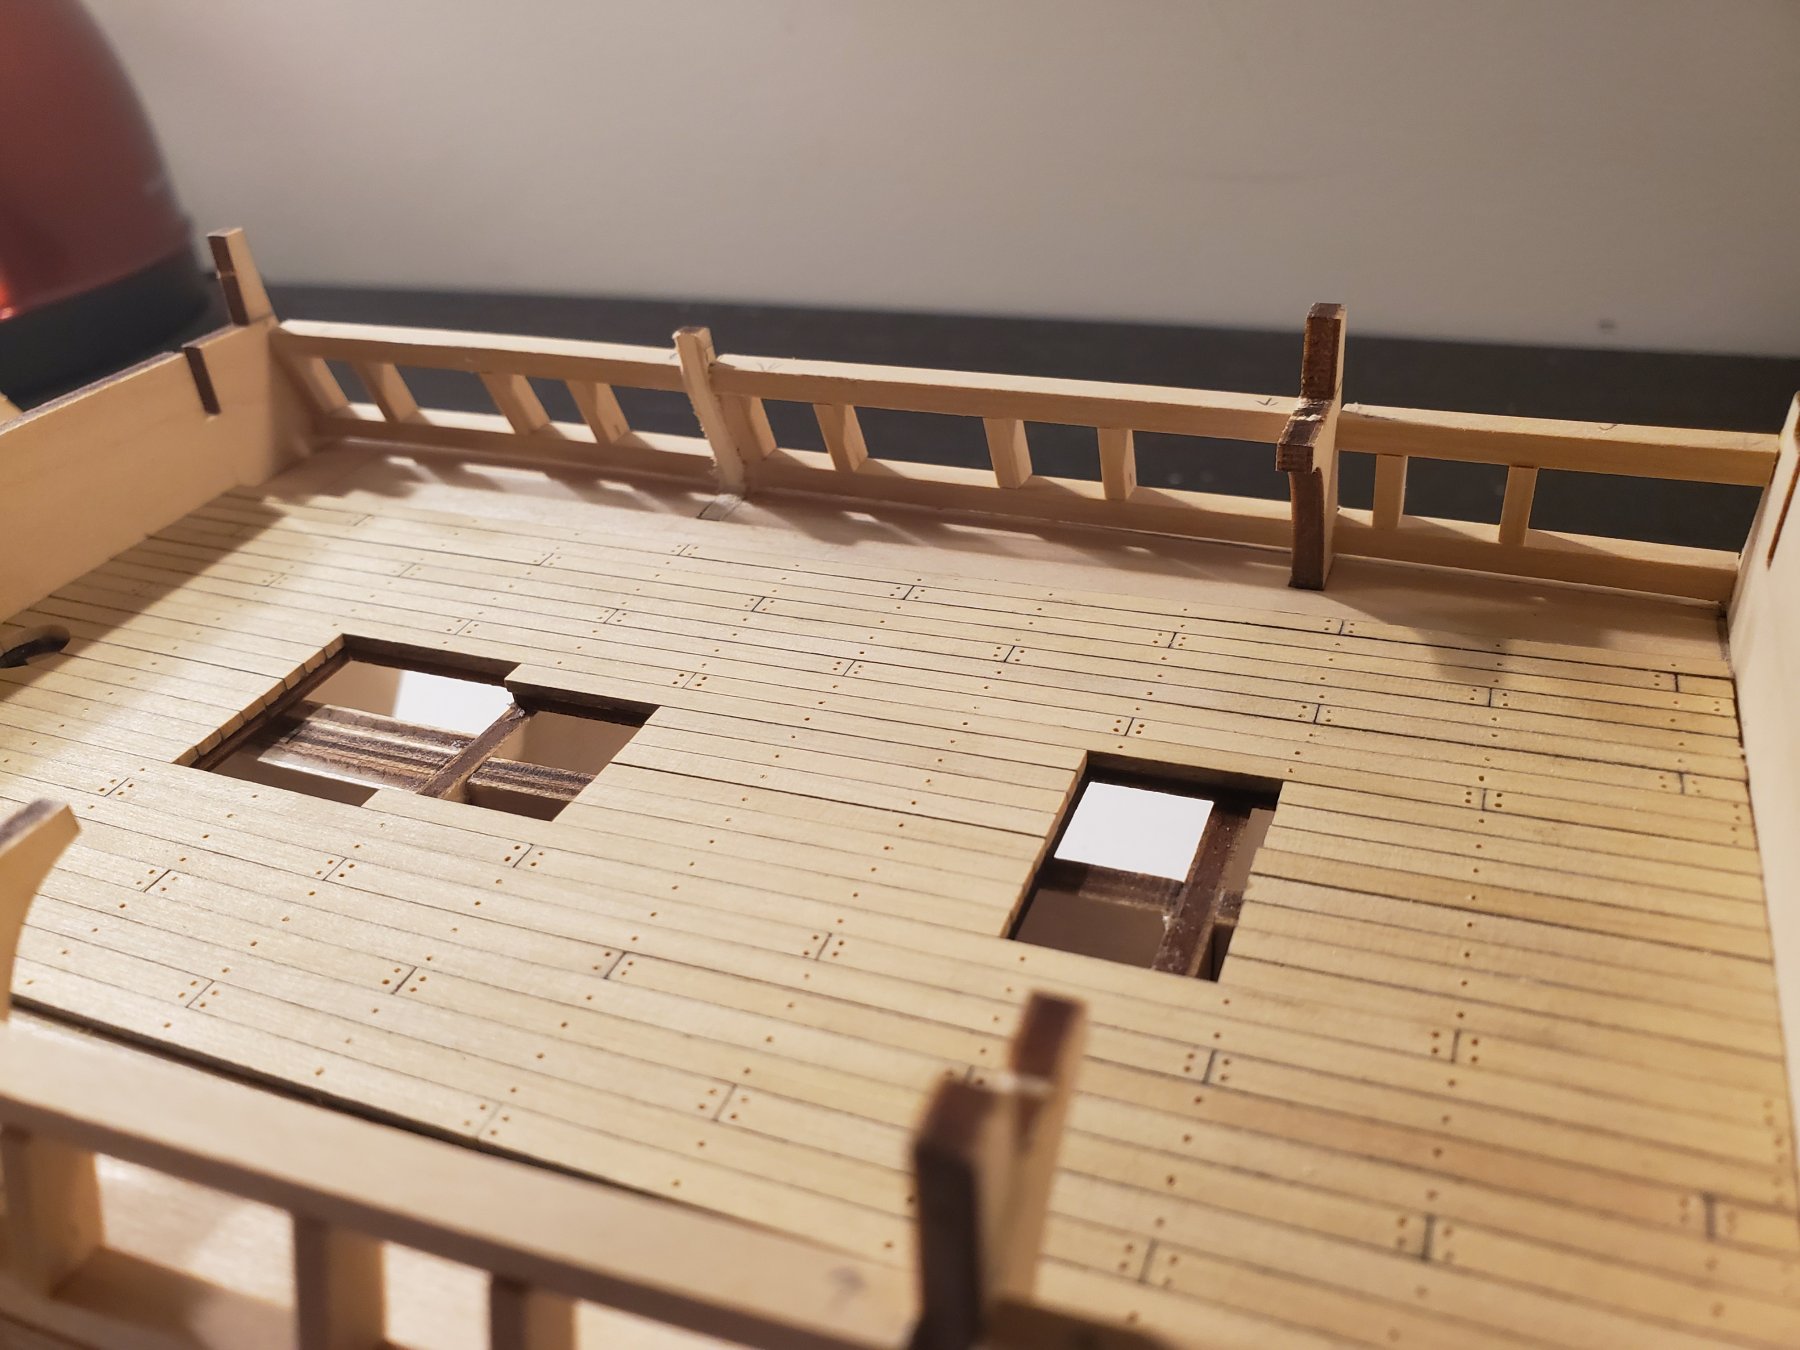
I finished putting in the gunports on the exposed second deck:

Took a while , but I am pleased with it!
There has been something that has urked me since I started to plank this deck. The frames 7 and 8 protrude into the middle deck WAY too much compared to the plans. Farther into the instructions, it shows to paint it, then put molding around all of it:
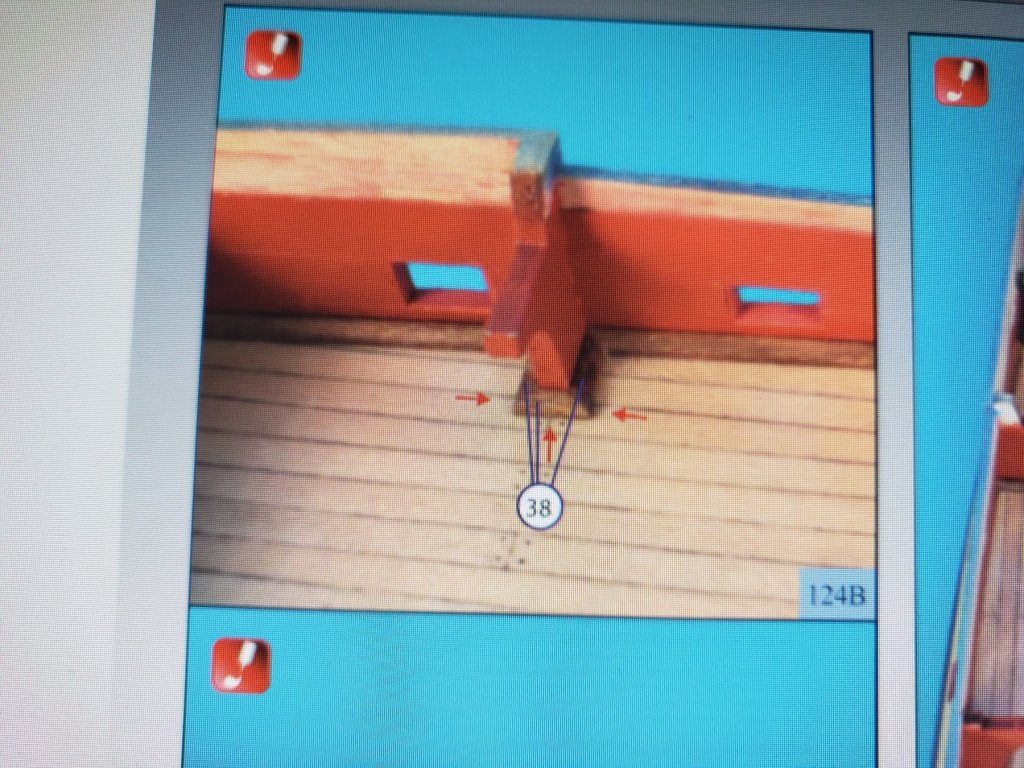
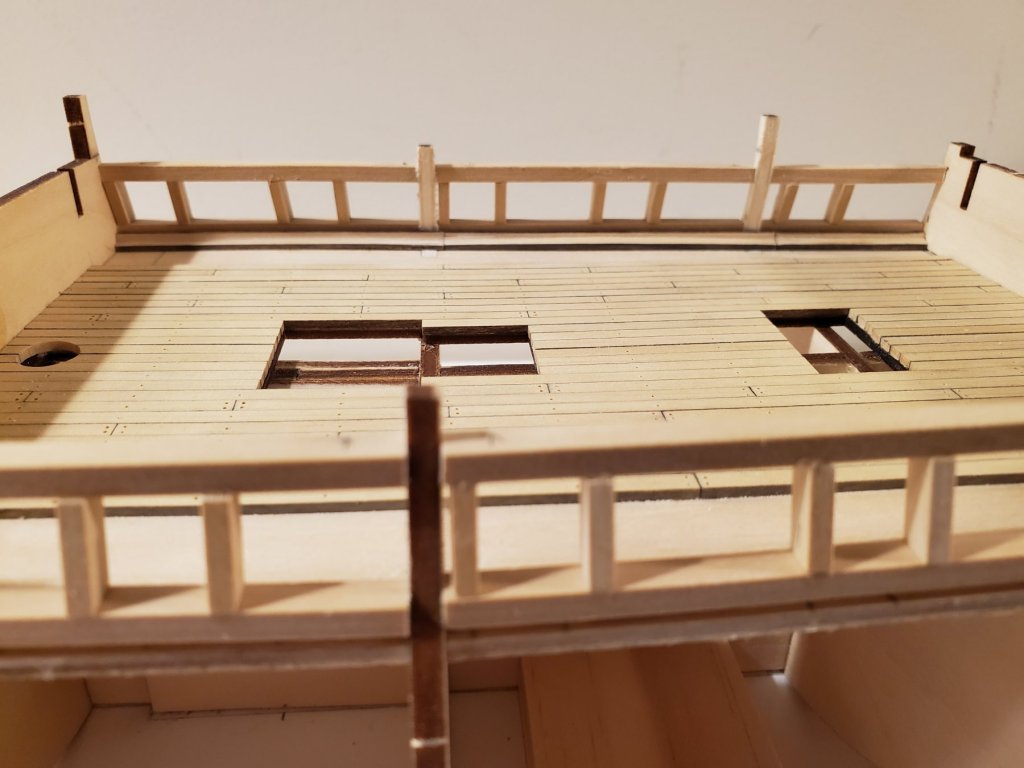
This didn't look very good to me nor was it any sort of accurate to the the ship. So the reason I didn't plank the deck all the way yet, was so I could ( if I decided to) cut them too the shape of the actual frame of the ship. This way, I could plank the inside of the deck much more actually.
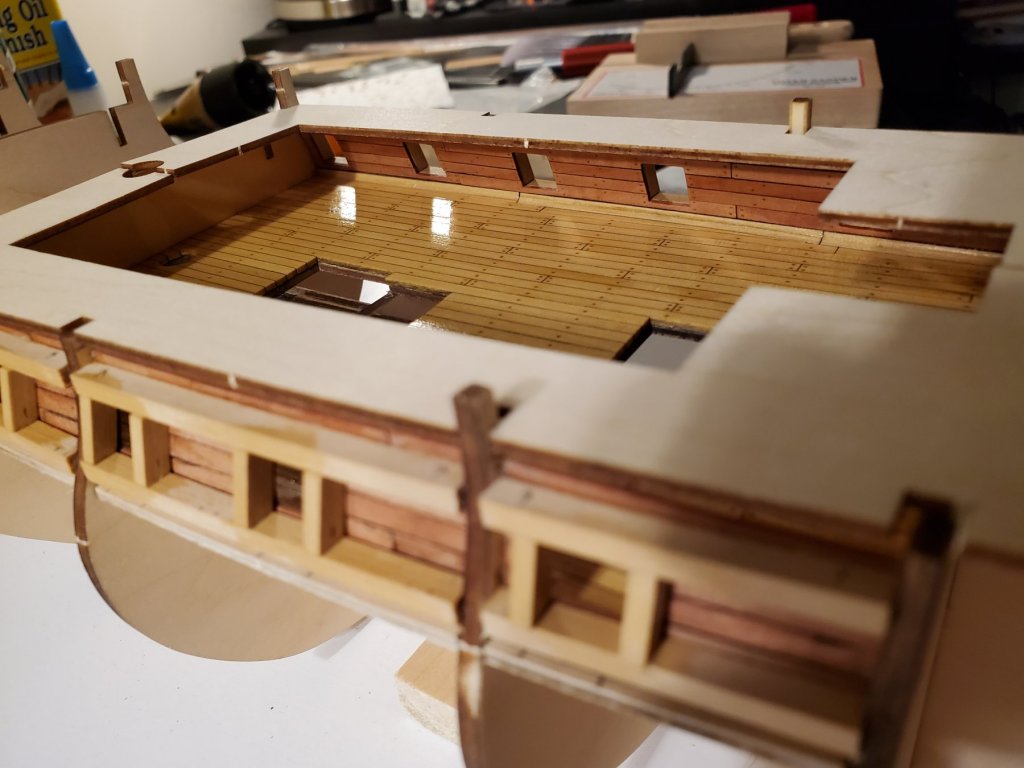
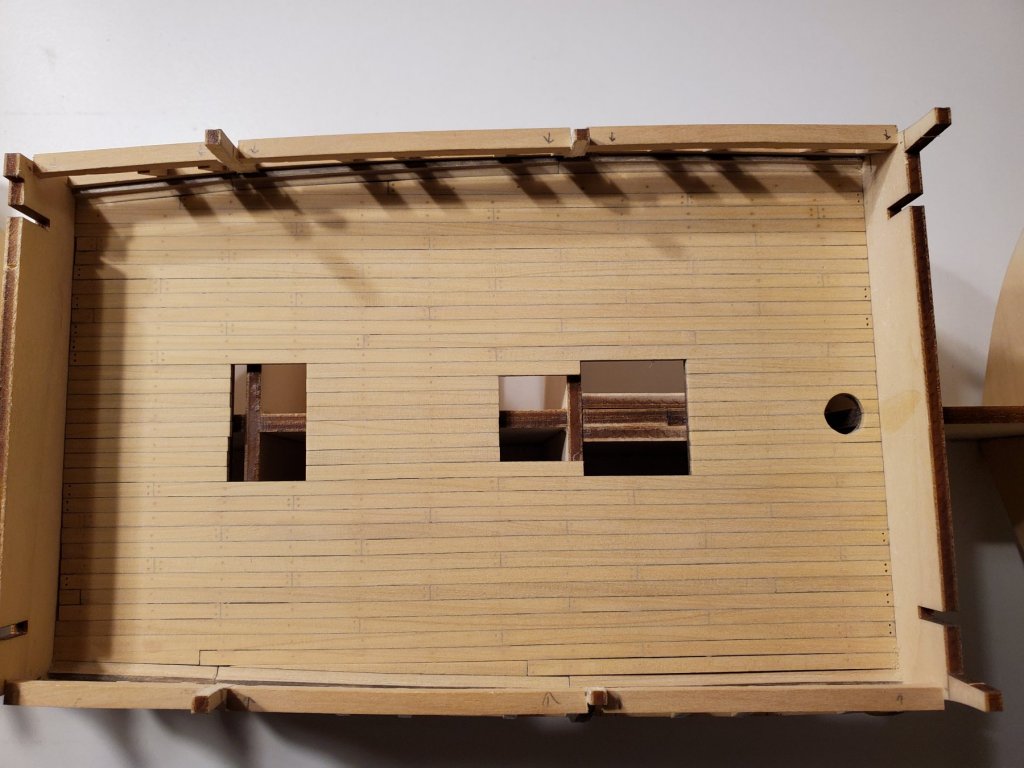
I pondered over if I wanted to do this or not because this would be a big modificationfor me, but finally decided to do it. I know that the upper deck uses these frames to rest on, so I made sure to take the measurements before sawing away.
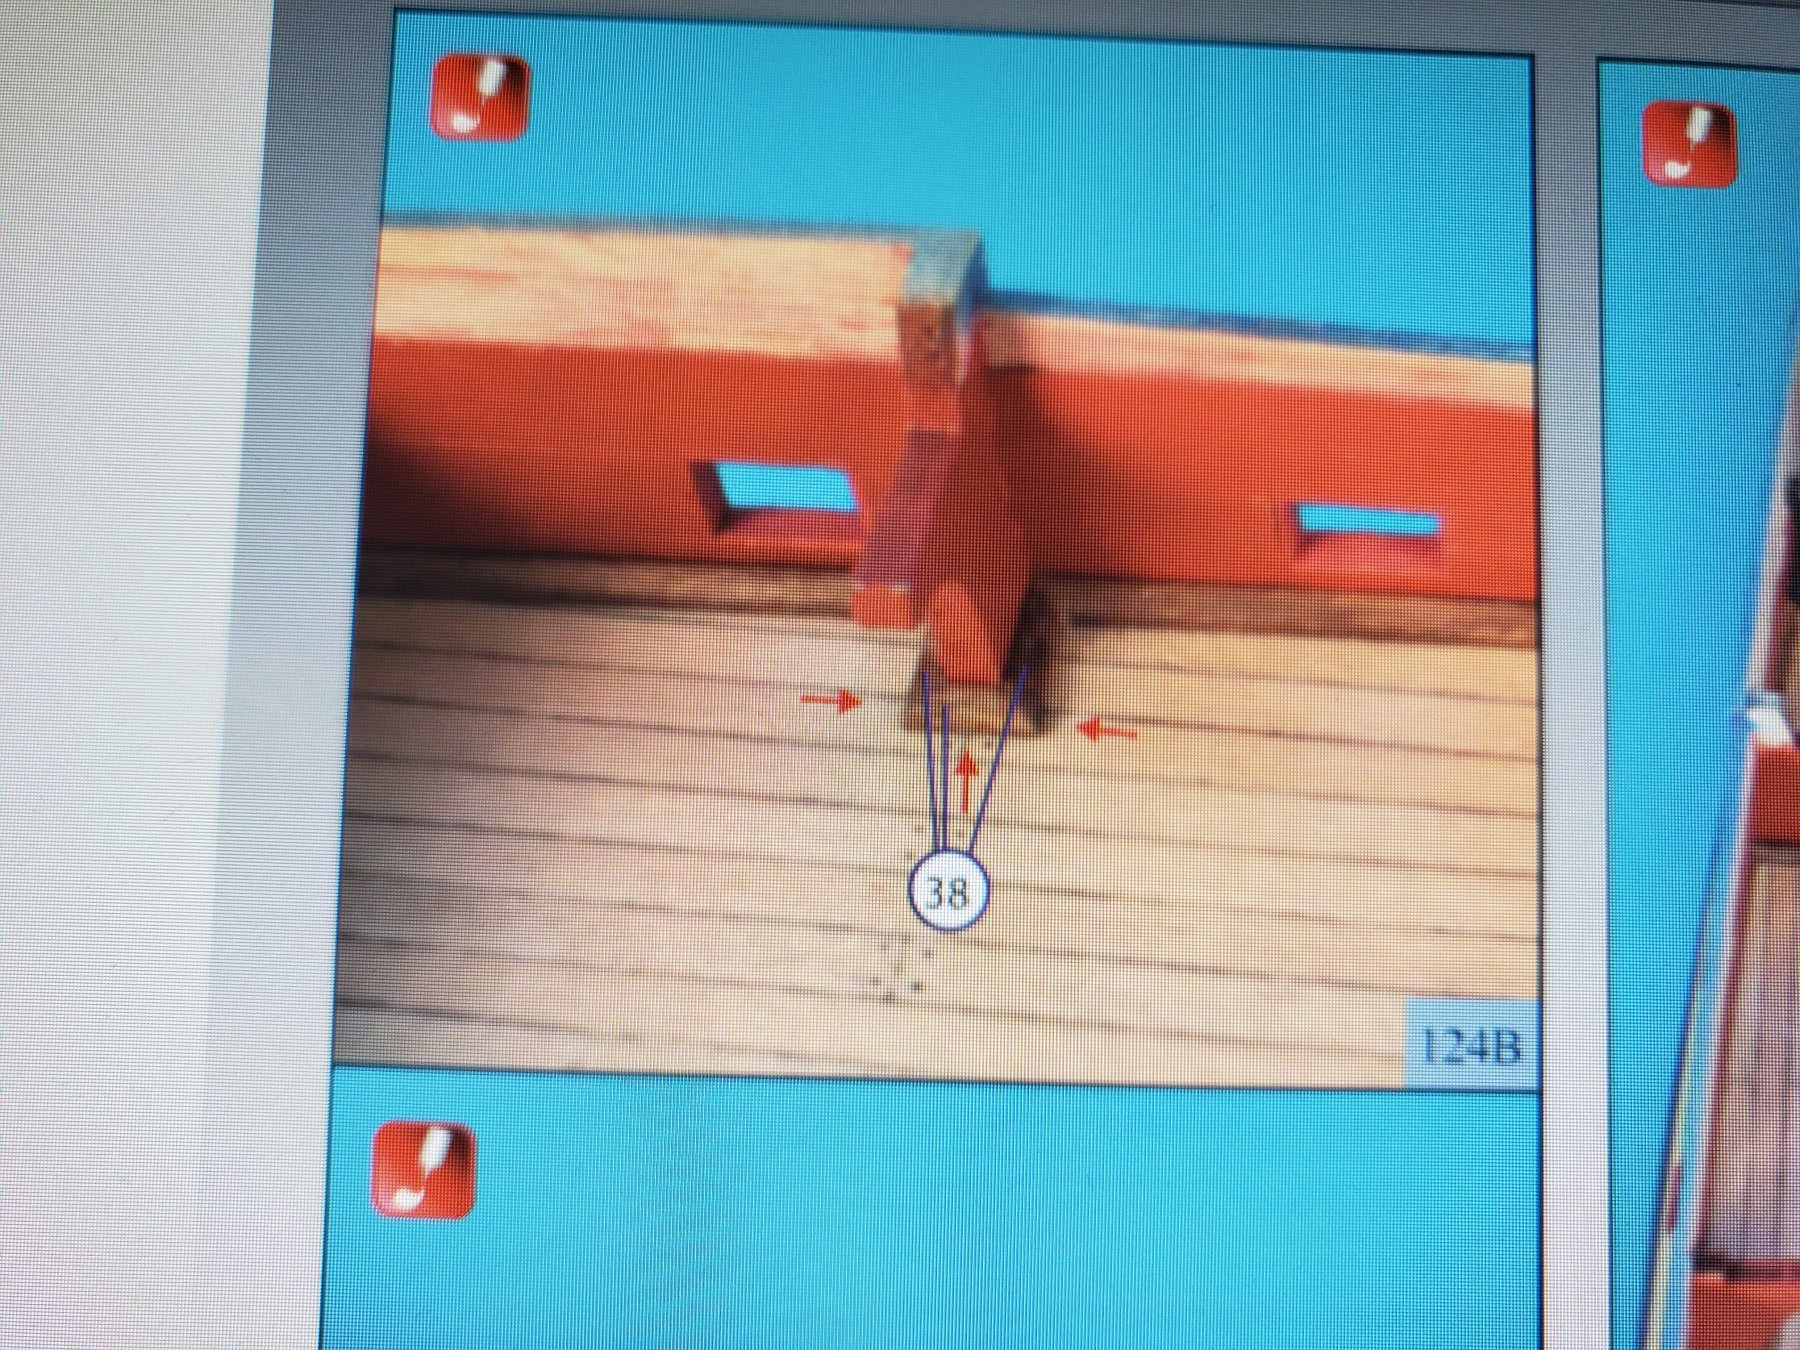
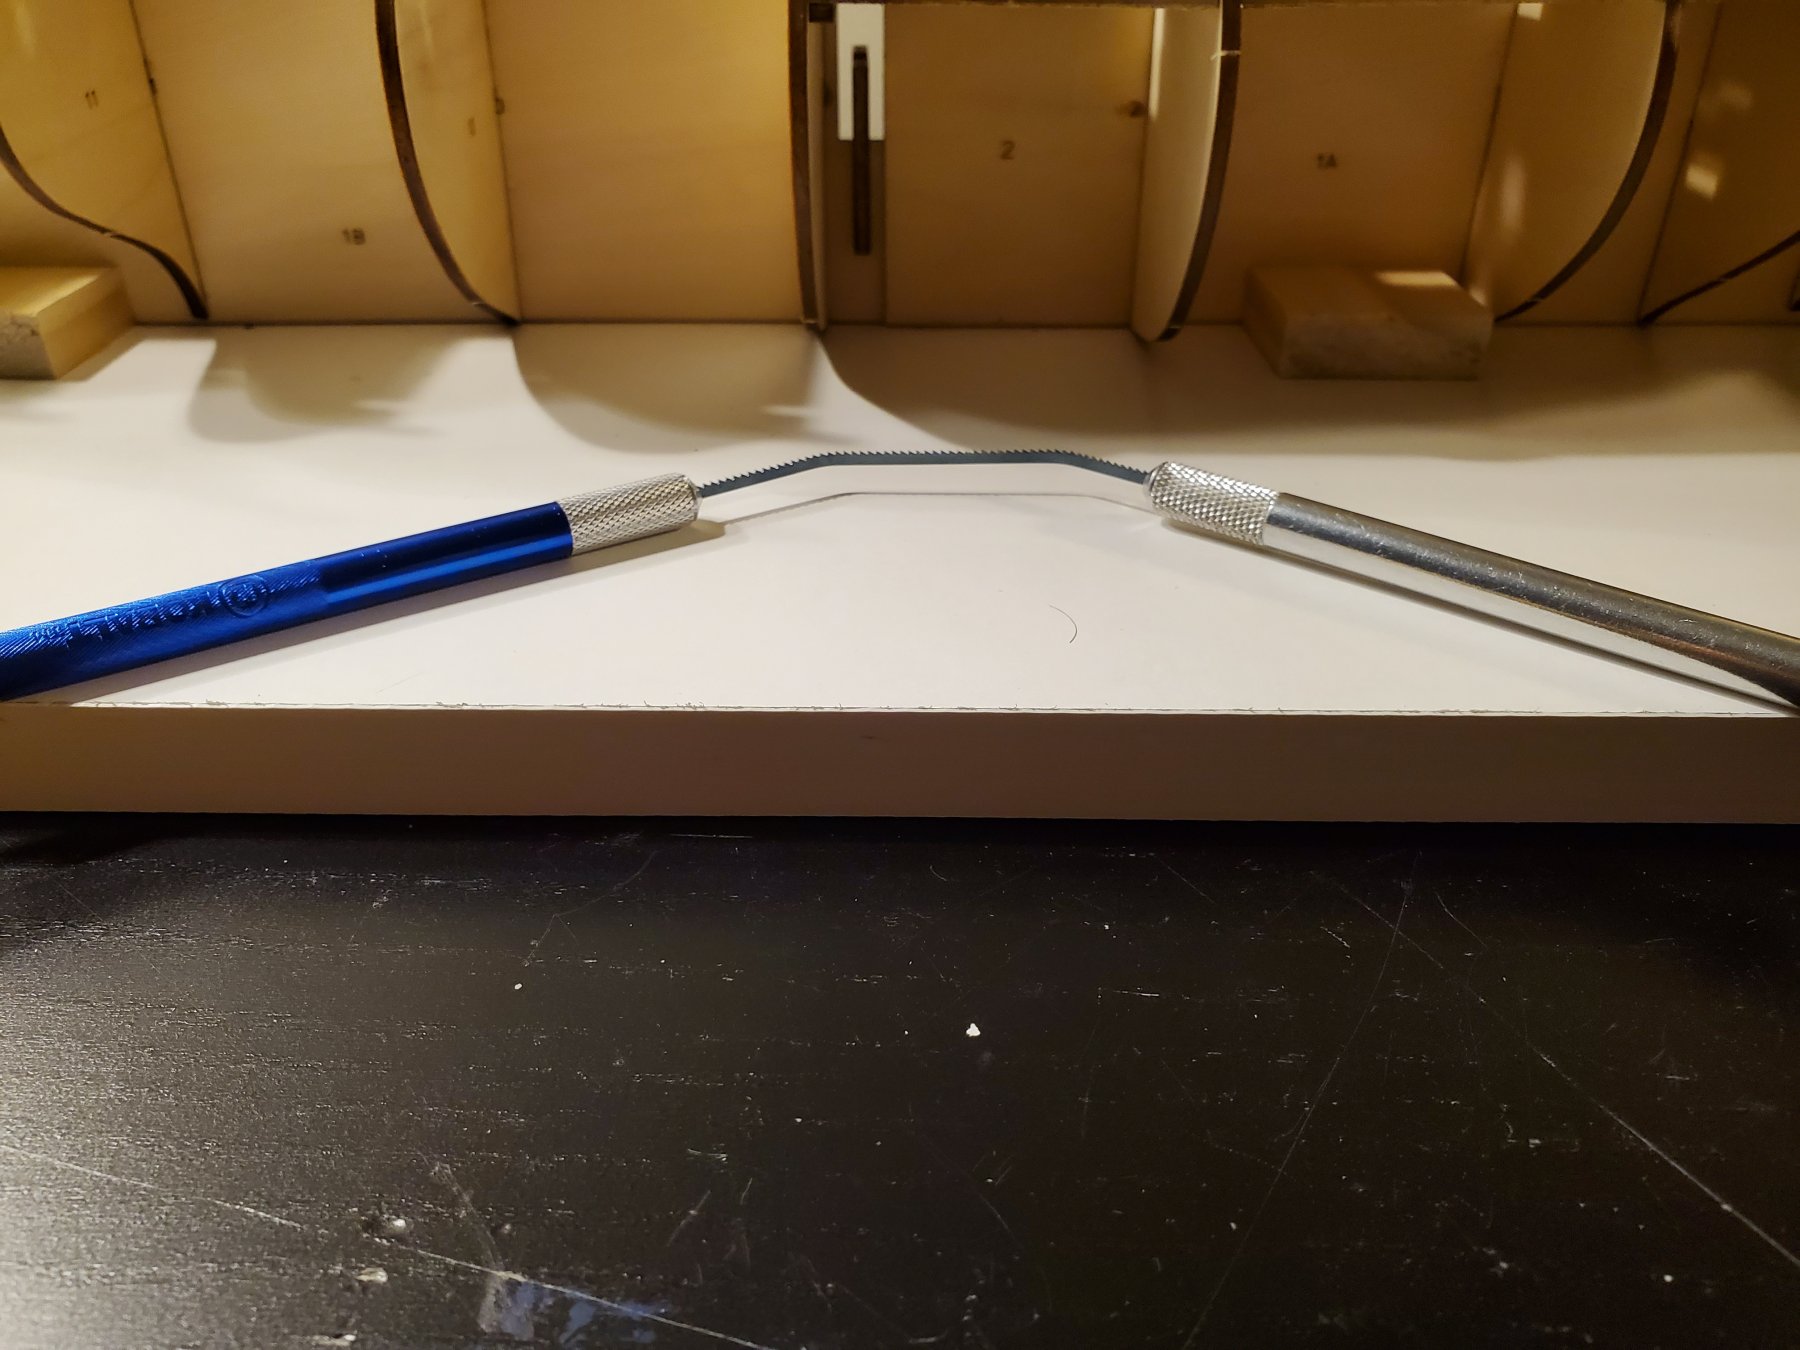
I had to figure out how to cut the bottom evenly and accurately without messing up the already set deck planks, and the deck frame to which the deck planks sit on. I then noticed on this site how Chuck cut a small scroll saw blade to cut out some frames on the Confederacy. It then gave me the idea to go a little farther with it.

I used this to cut the horizontal portion of the frame that is ontop of the deck. It kinda looks like something from a horror movie, but it worked! I wish the teeth were smaller, but it worked! I then filled/ sand it down. I had to place the gun ports first to strengthen the frames before I could do any cutting. The frame that is left after cutting is about 2mm wide which is about accurate to the actual frame width shown on the plans.

Somehow, I didn't damage deck planks, nor gun port segments!
1 down. 3 more to go!!
Jeff
-
You are of course, correct!
Altering anything from the kit's design will affect things down the road. I thought of that when I decided to make the alterations to the gun port locations. I look at this as more of a fun challenge than a problem. After placing the gun ports for this middle deck, I will analyze the build to see what other modifications I will need to do. I will then create an custom parts by hand to replace any prefab parts (when the time comes), using the actual plans from the book as a guide.
Jeff


Hermione by Zarkon - Artesania Latina - 1/89
in - Kit build logs for subjects built from 1751 - 1800
Posted
Thanks for the likes!!
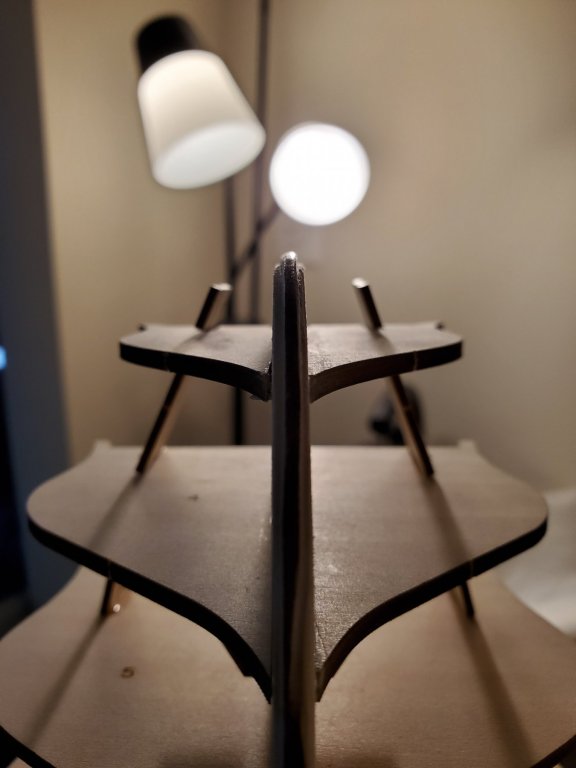
So I was able to glue on the stem!
I think it turned out very well! It's not 100% perfect, but they are all minor things I can improve on in my next build!
The last thing to do before I plank above the wales is to add in the vertical gun port walls!
Thanks!
Jeff