HOLIDAY DONATION DRIVE - SUPPORT MSW - DO YOUR PART TO KEEP THIS GREAT FORUM GOING! (89 donations so far out of 49,000 members - C'mon guys!)
×


Heinrich der Seefahrer
-
Posts
533 -
Joined
-
Last visited
Content Type
Profiles
Forums
Gallery
Events
Everything posted by Heinrich der Seefahrer
-
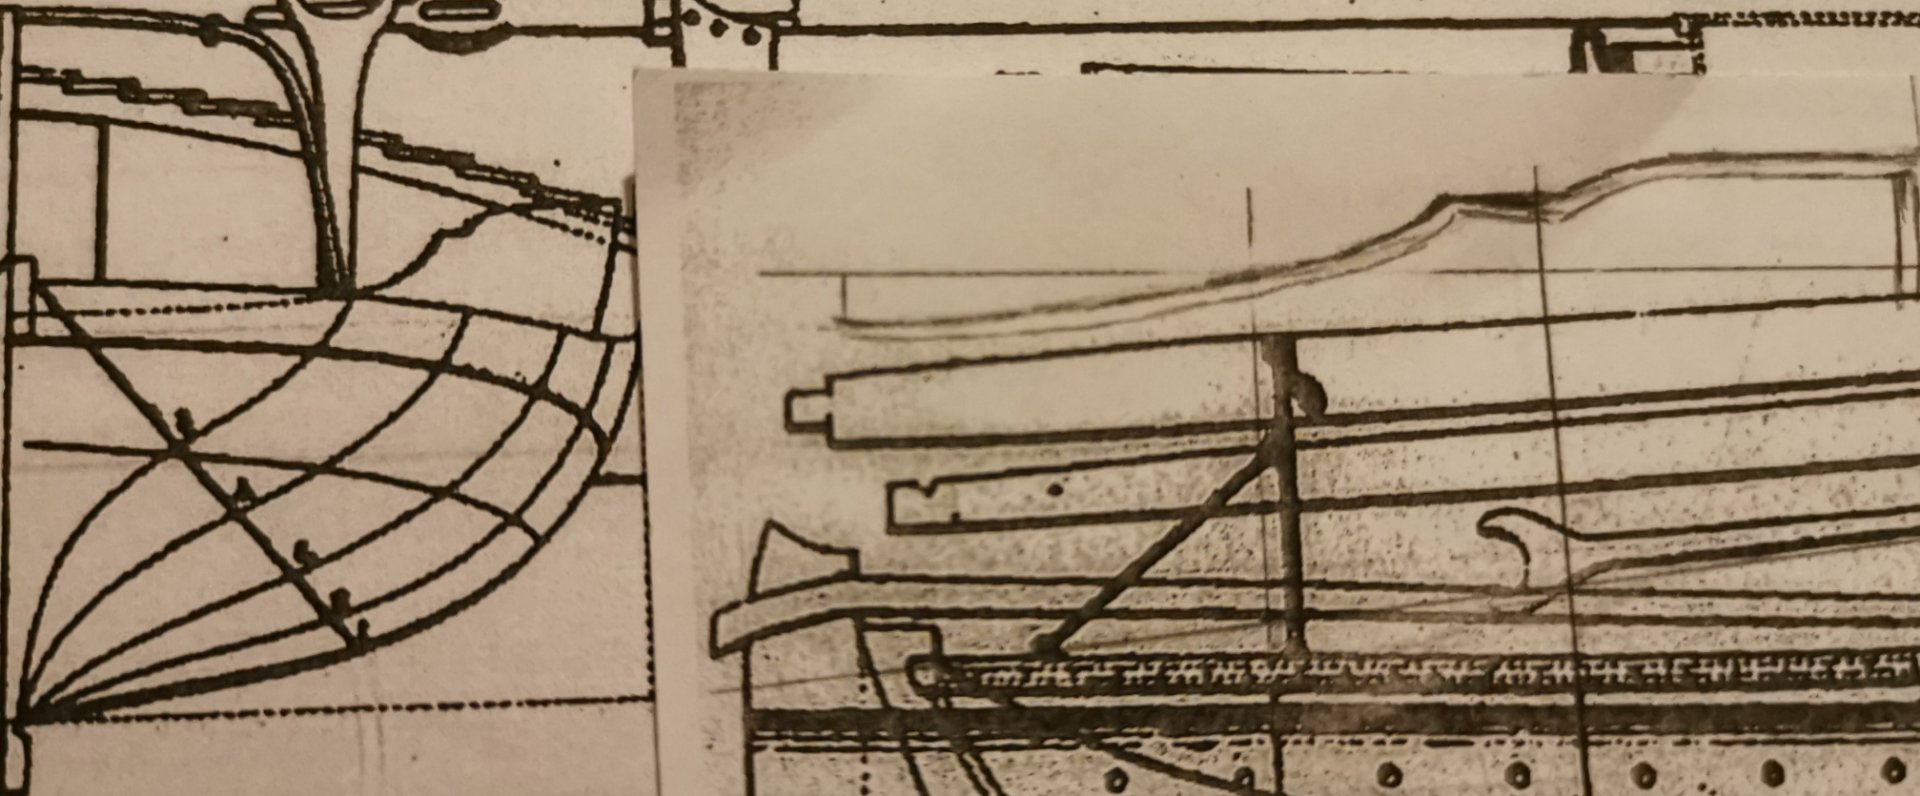
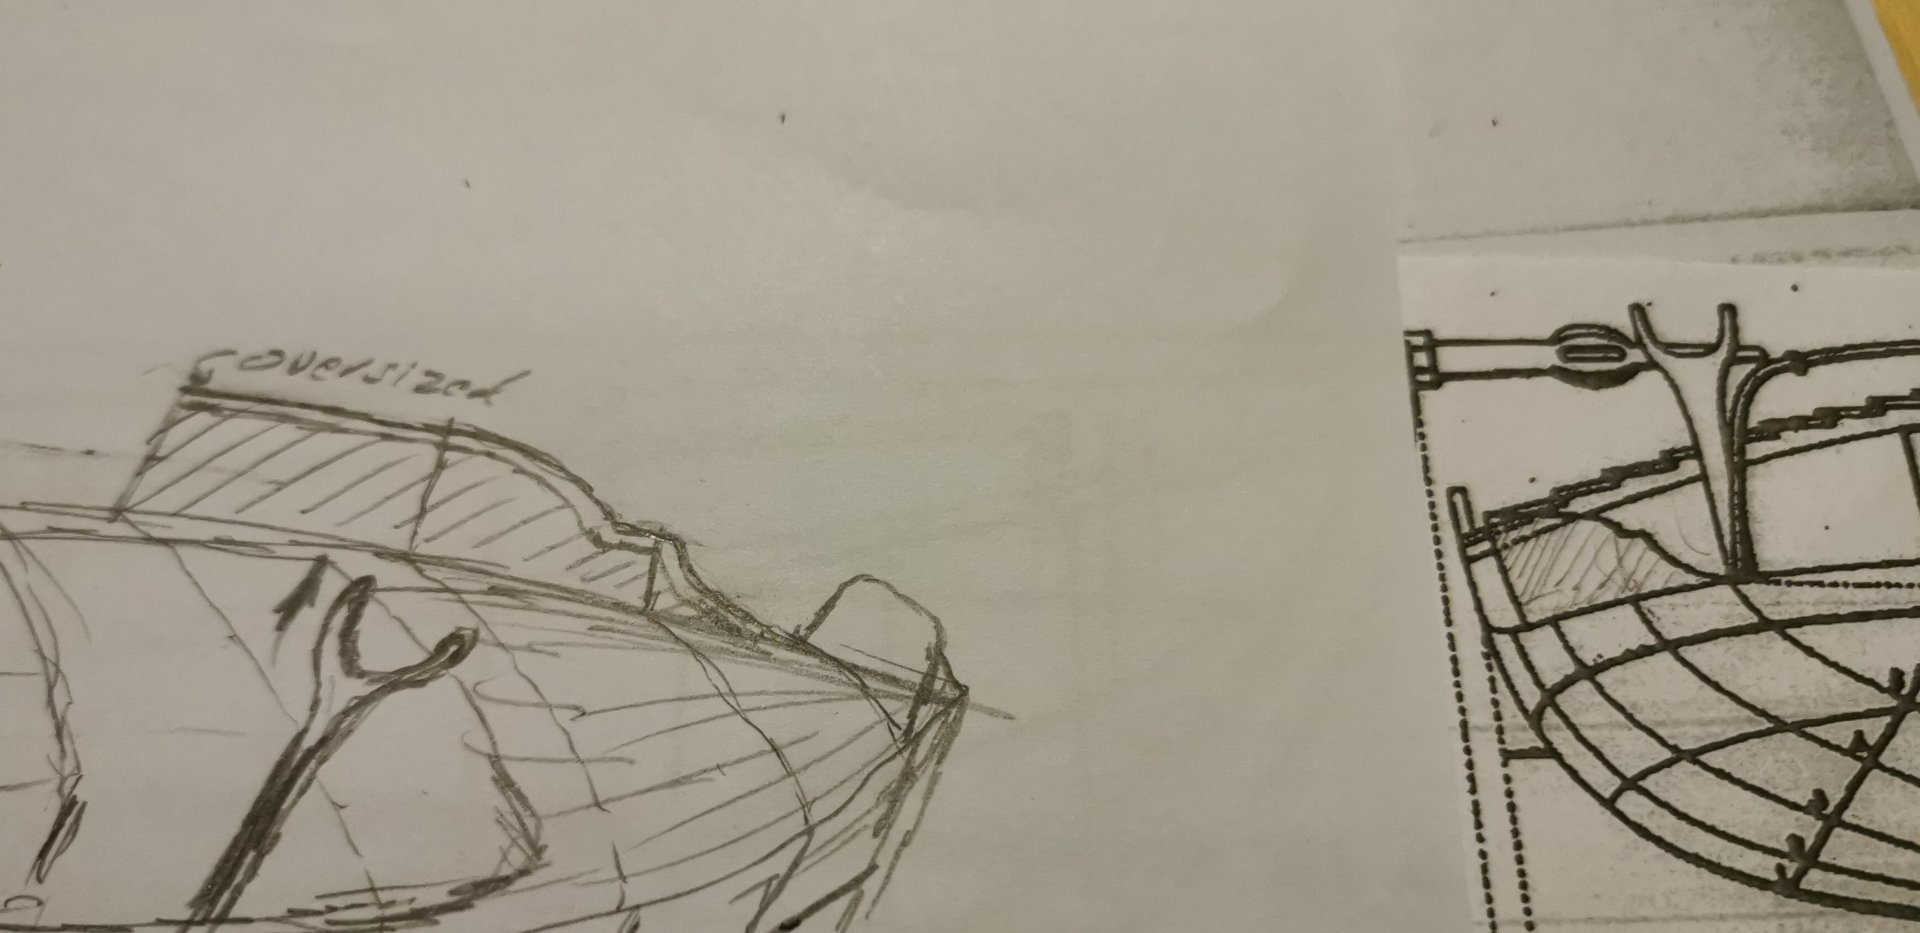
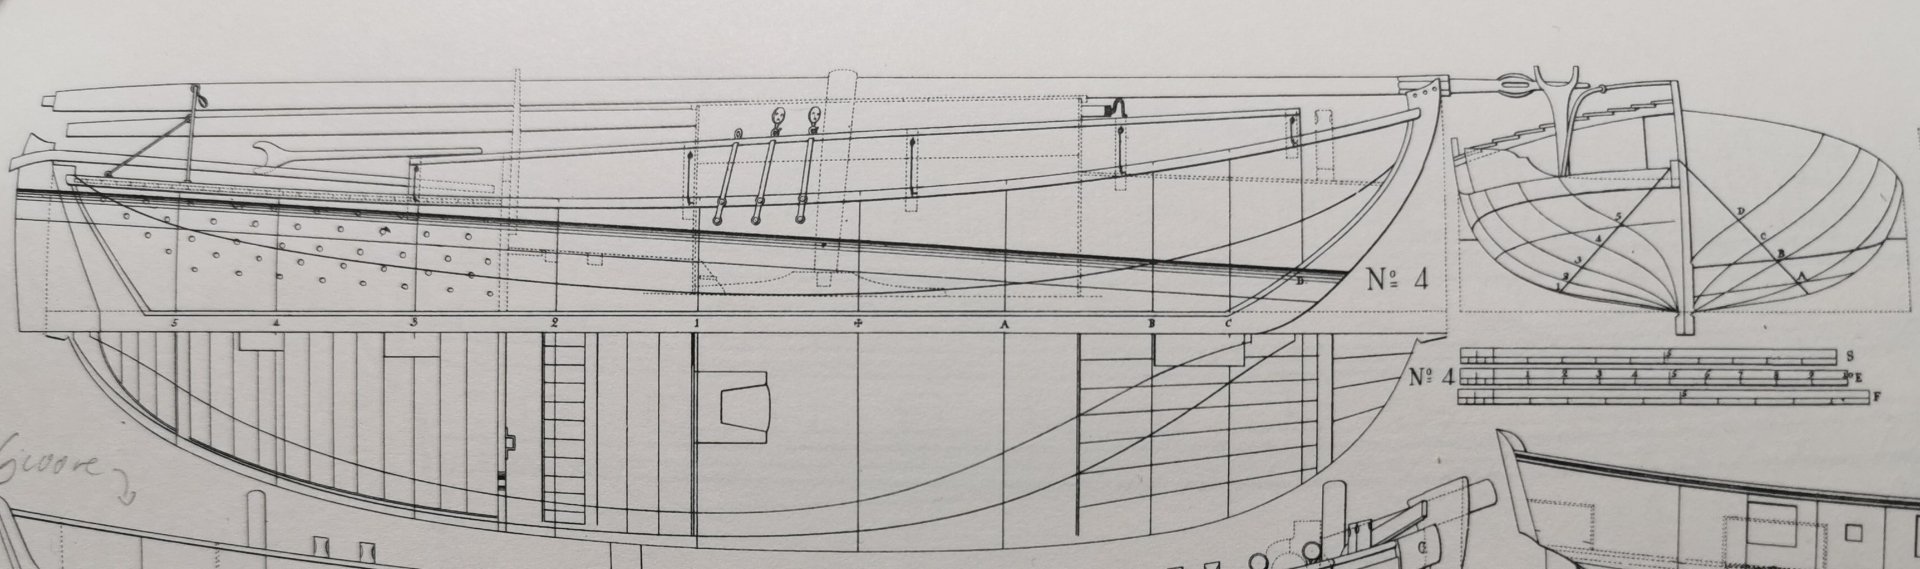
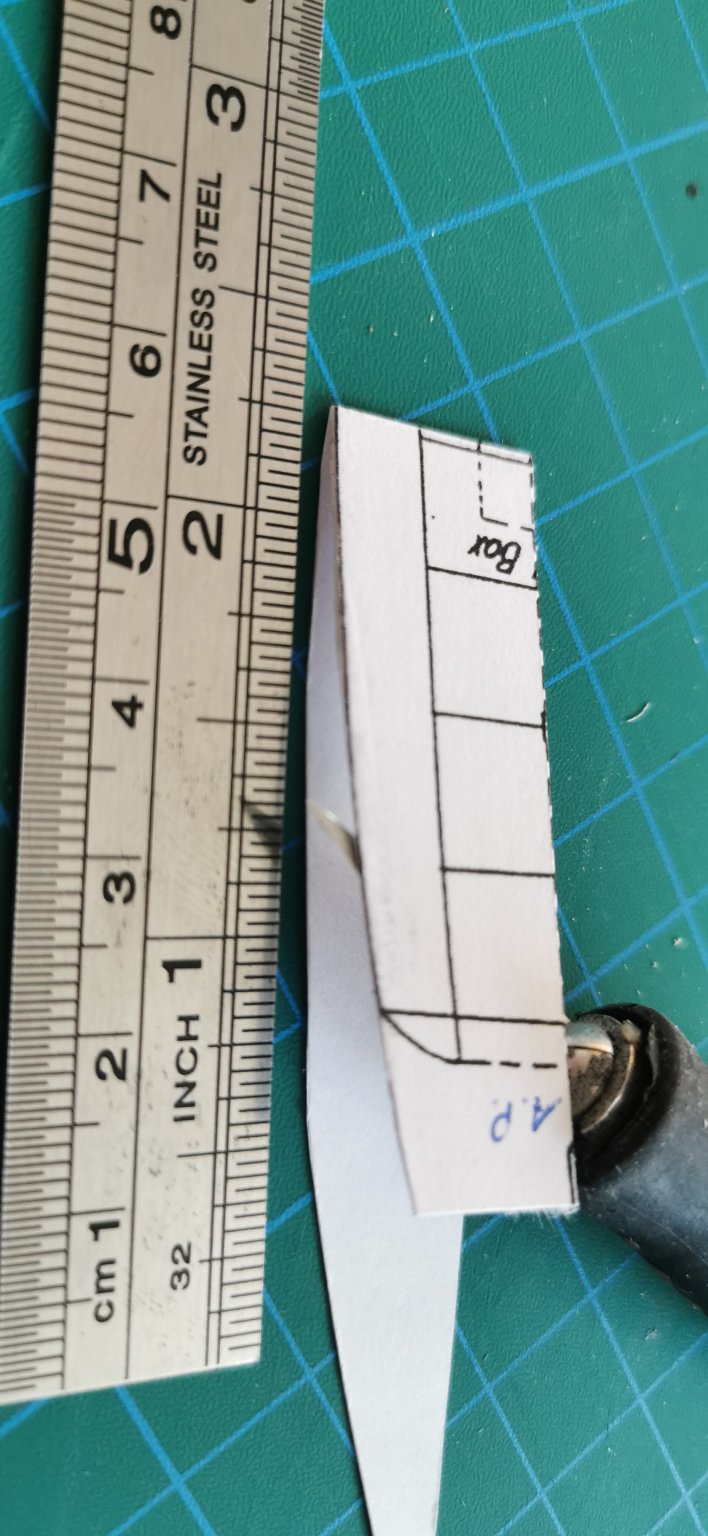
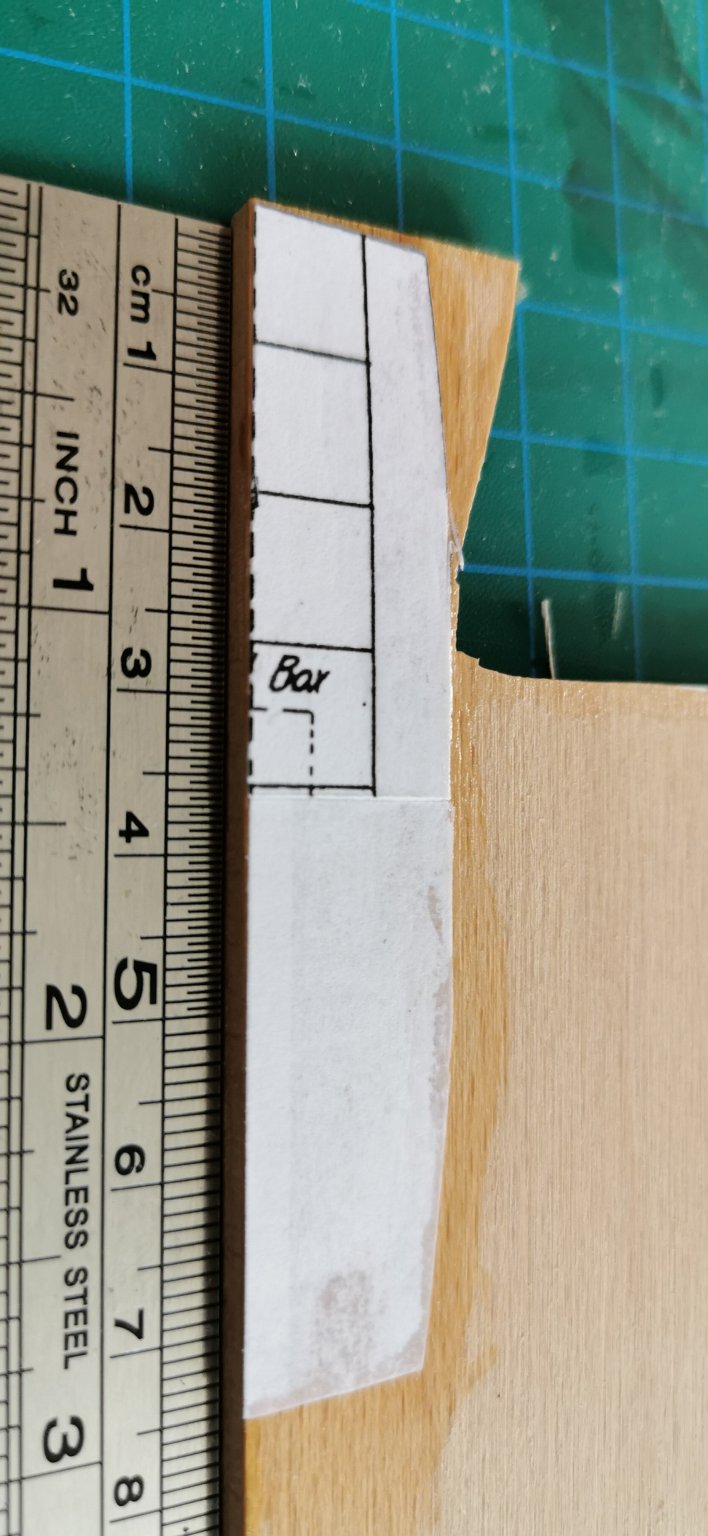
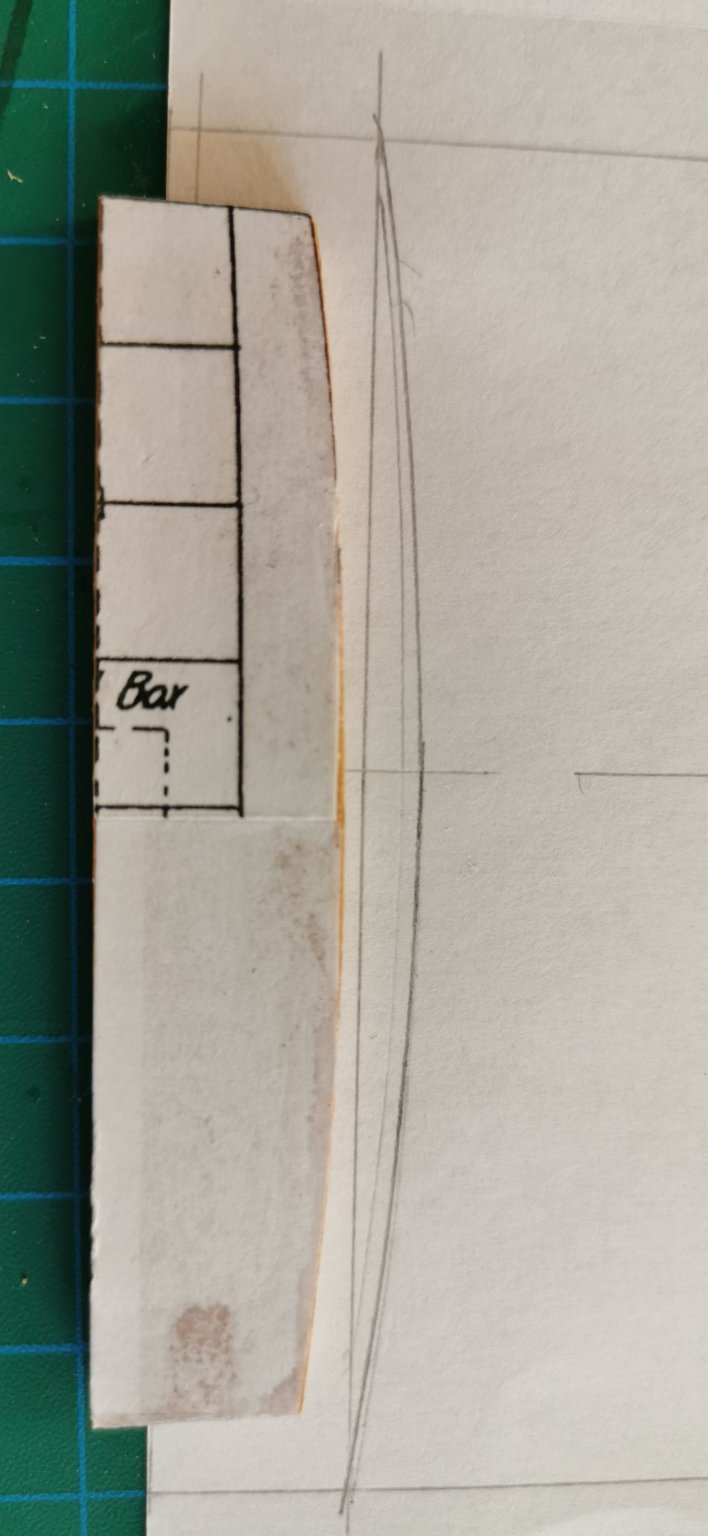
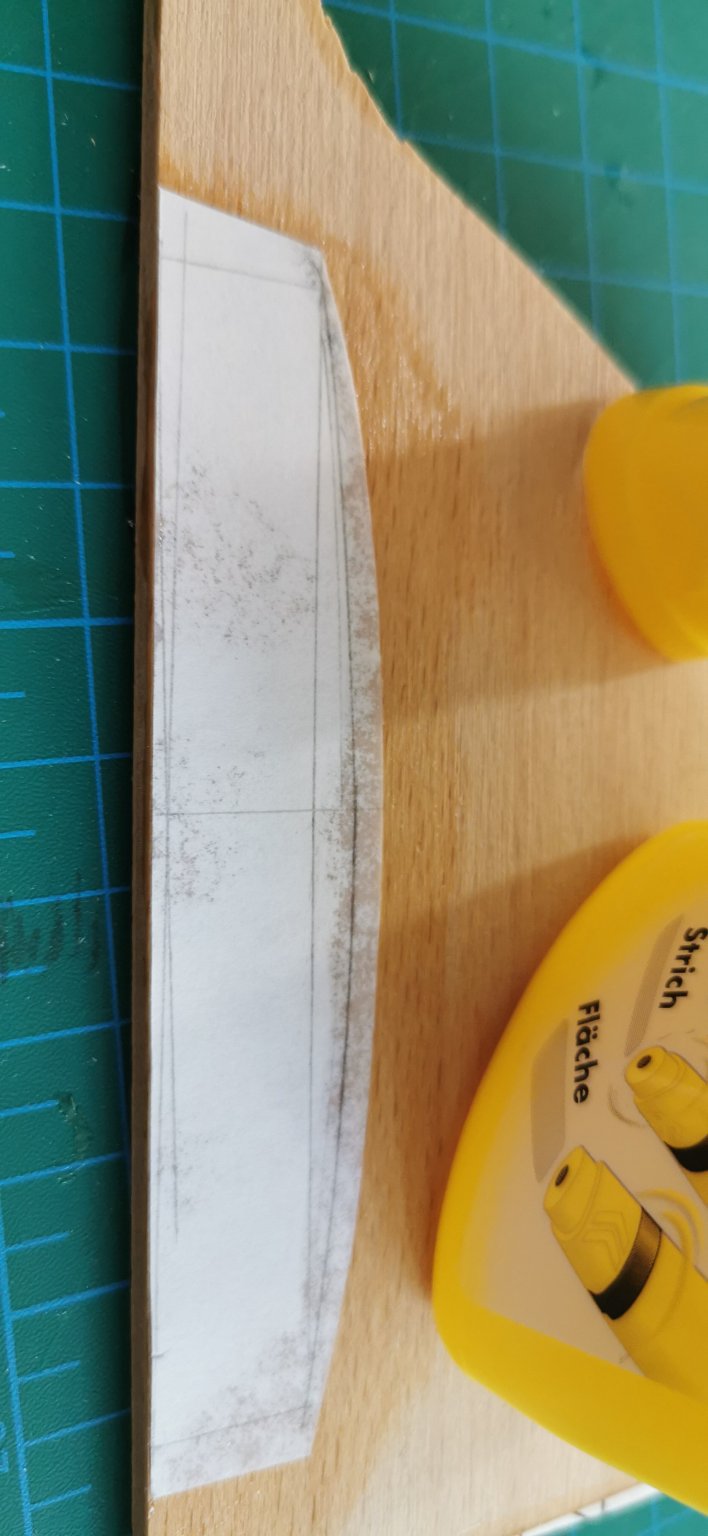
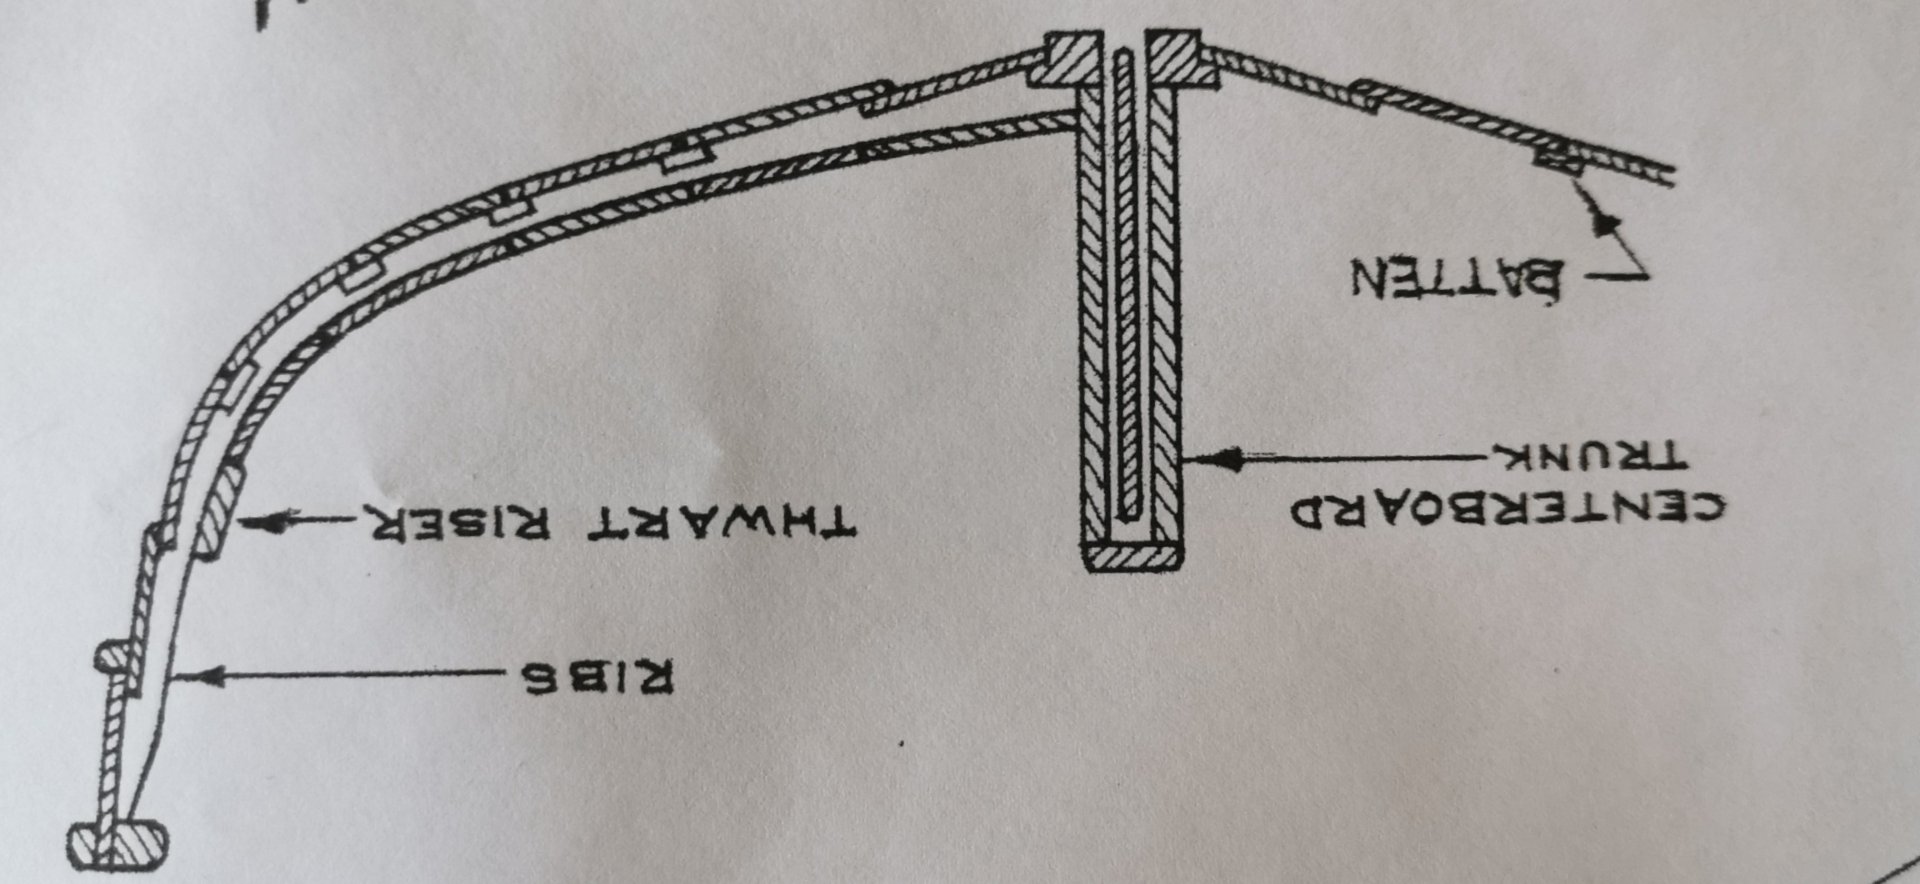
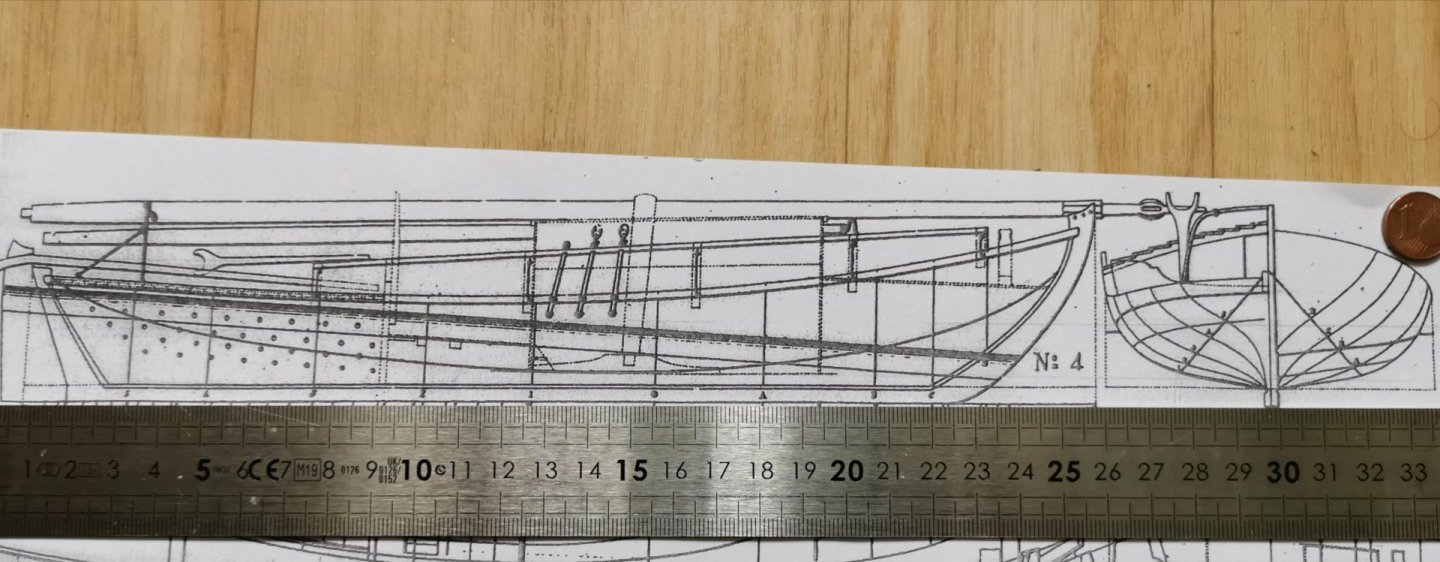
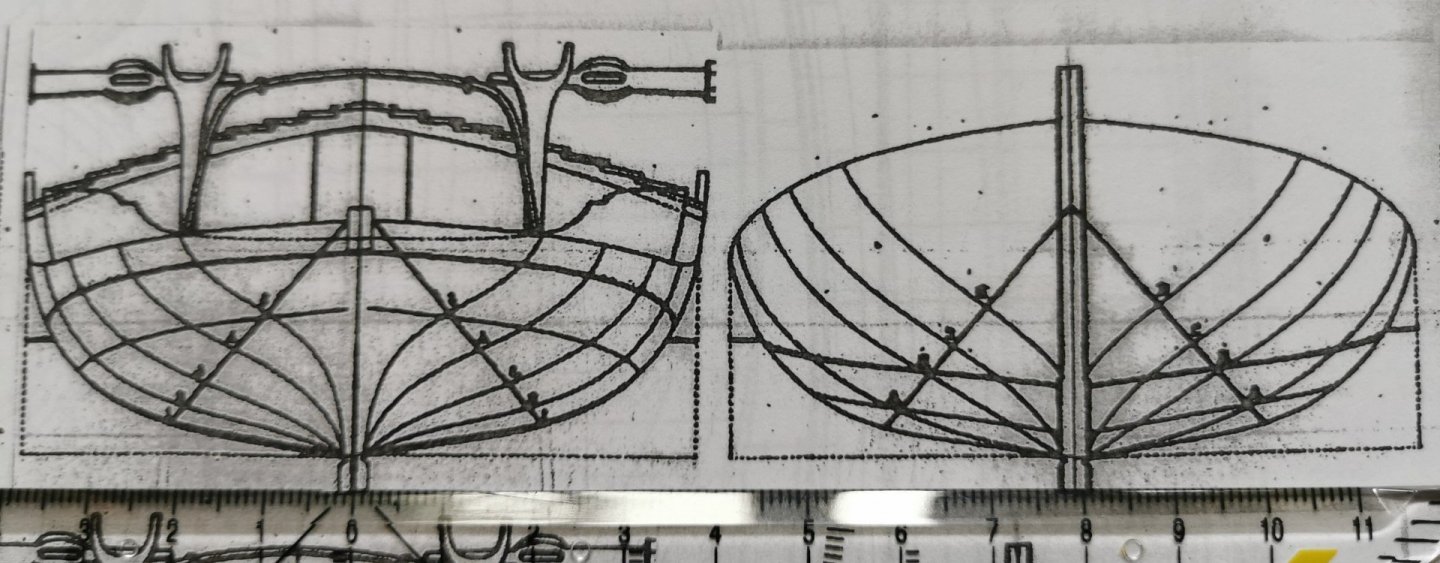
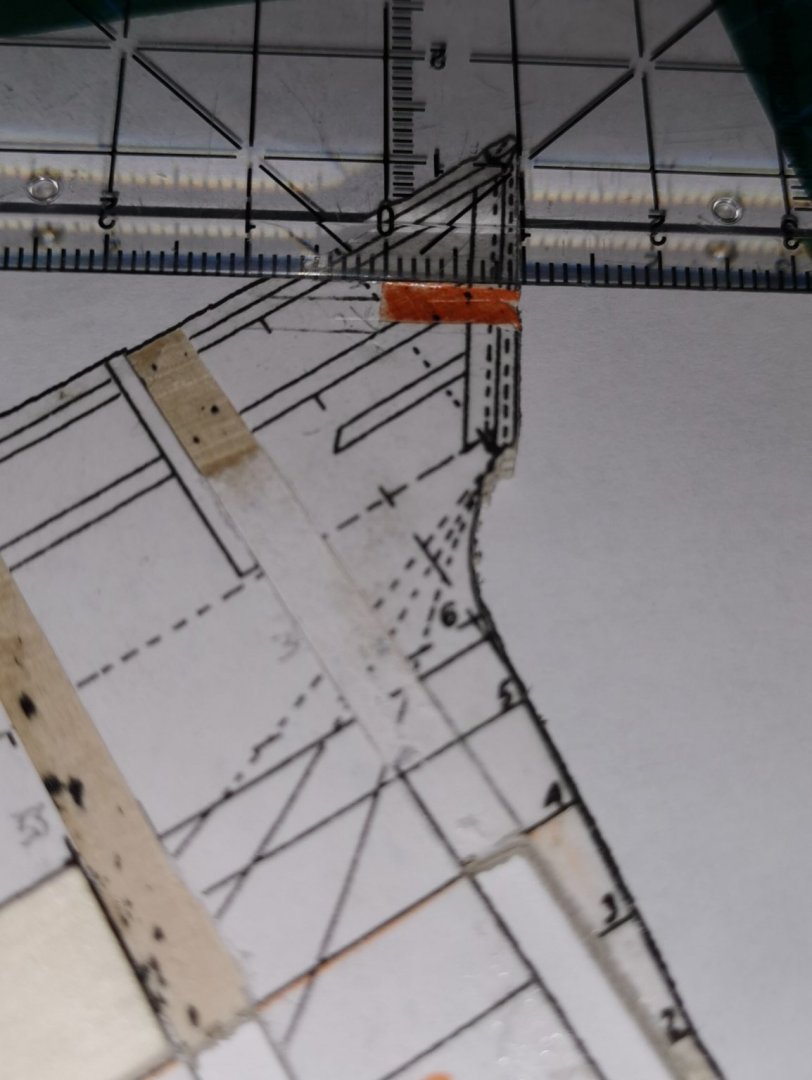
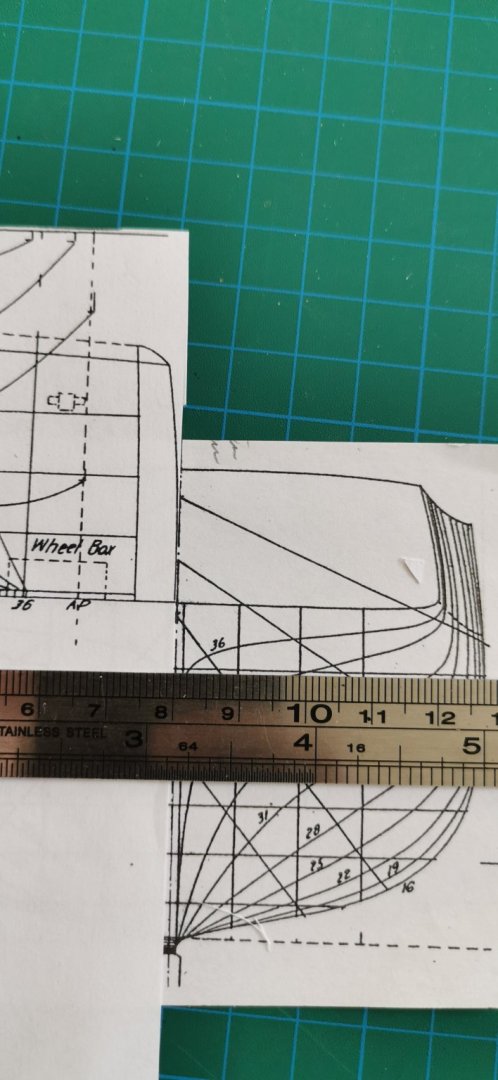
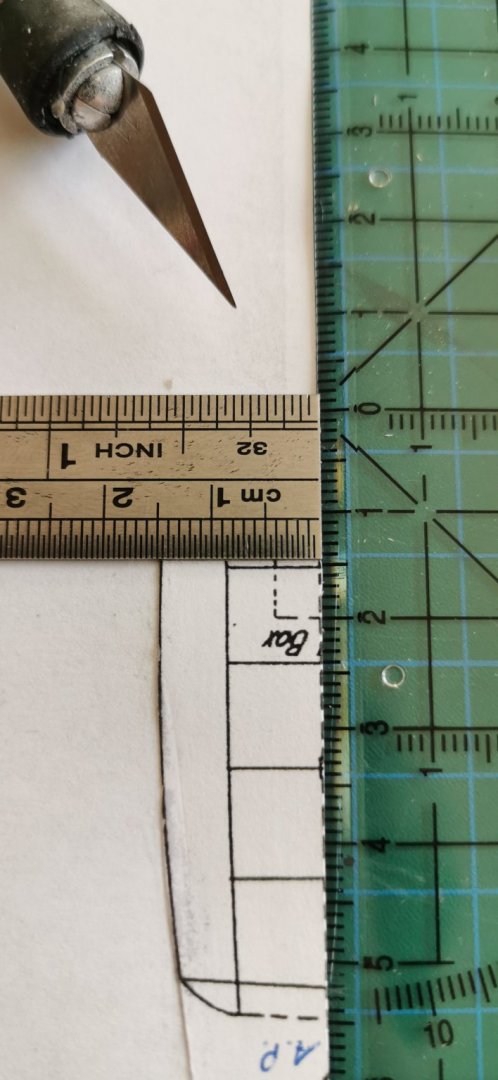
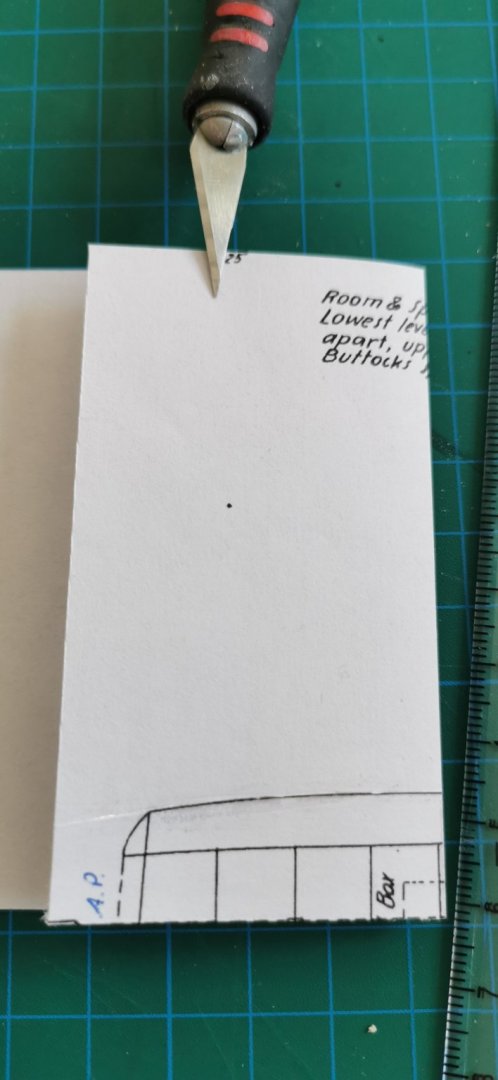
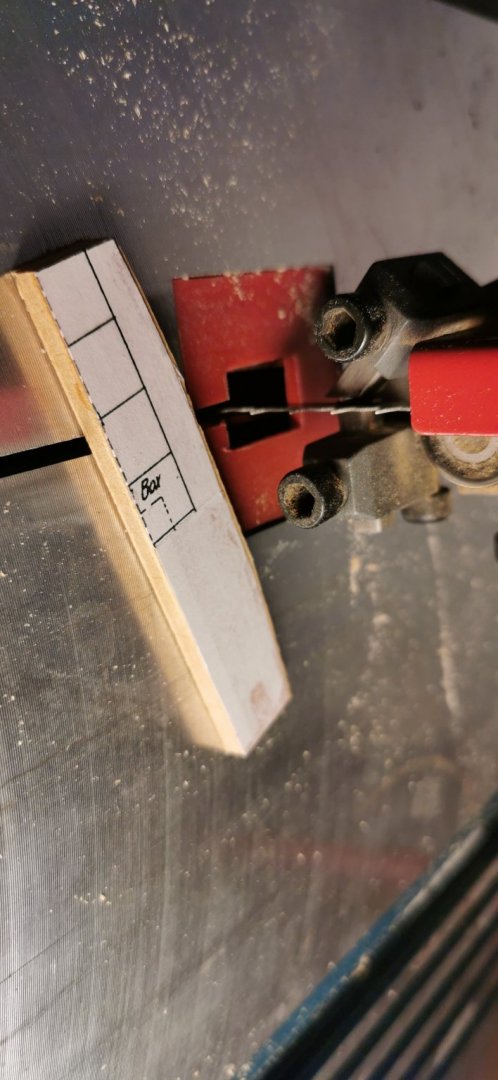
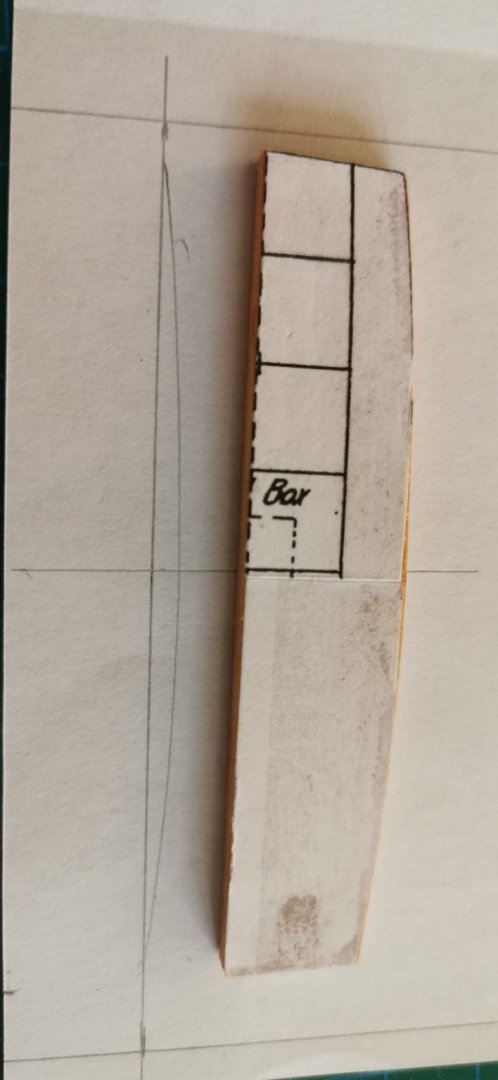
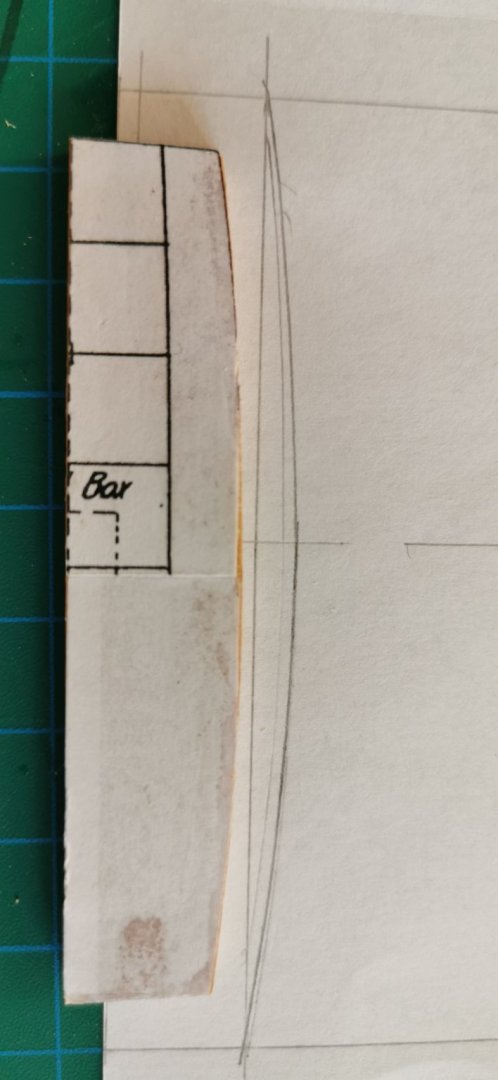
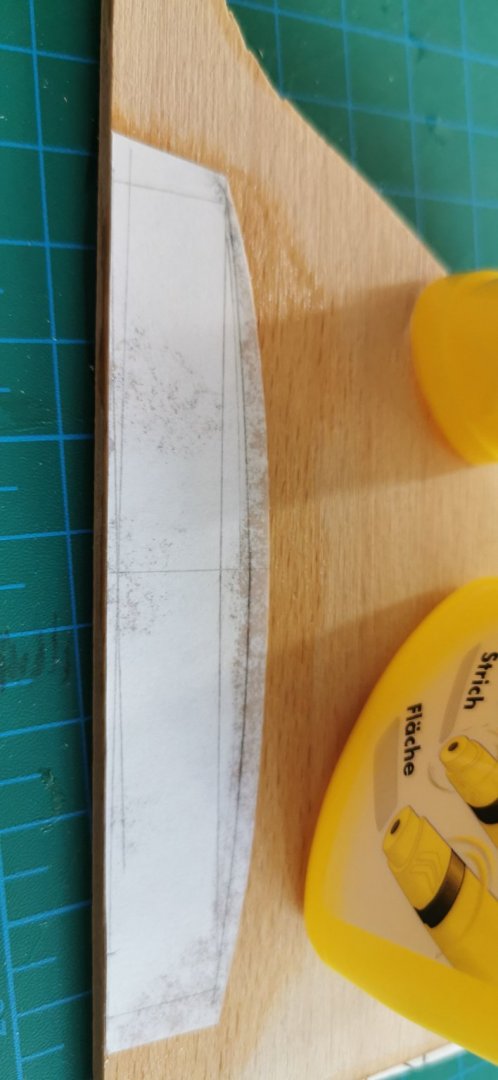
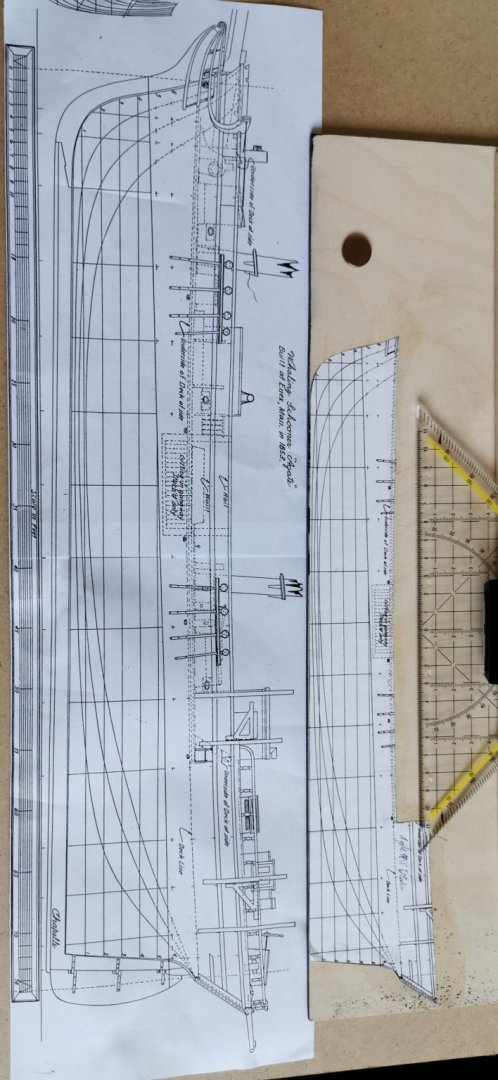
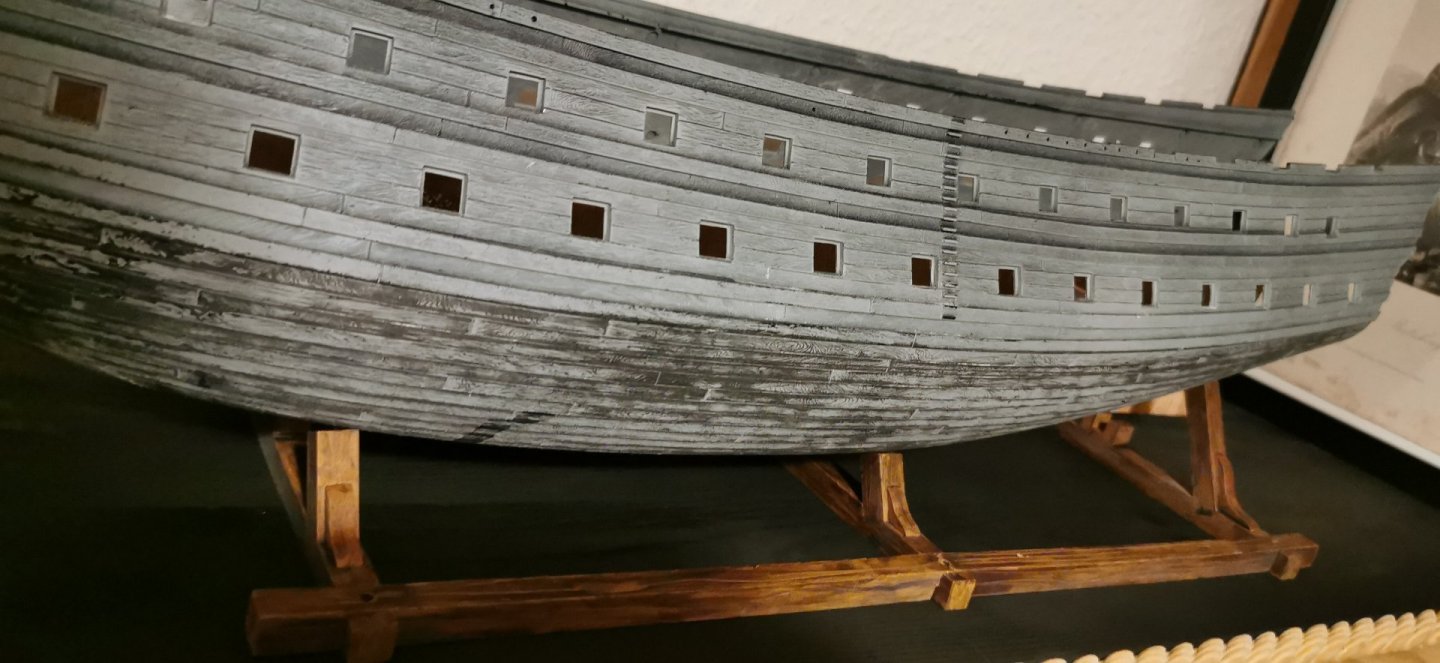
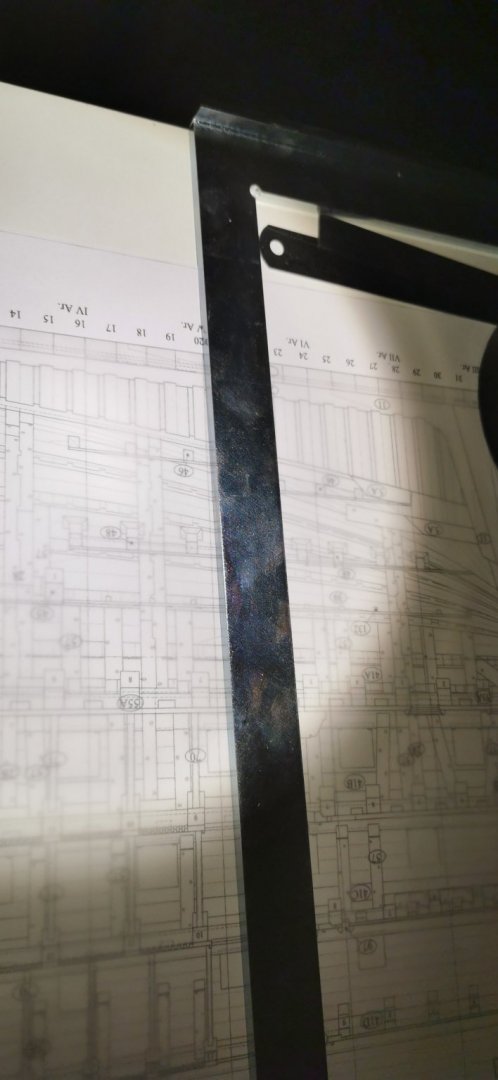
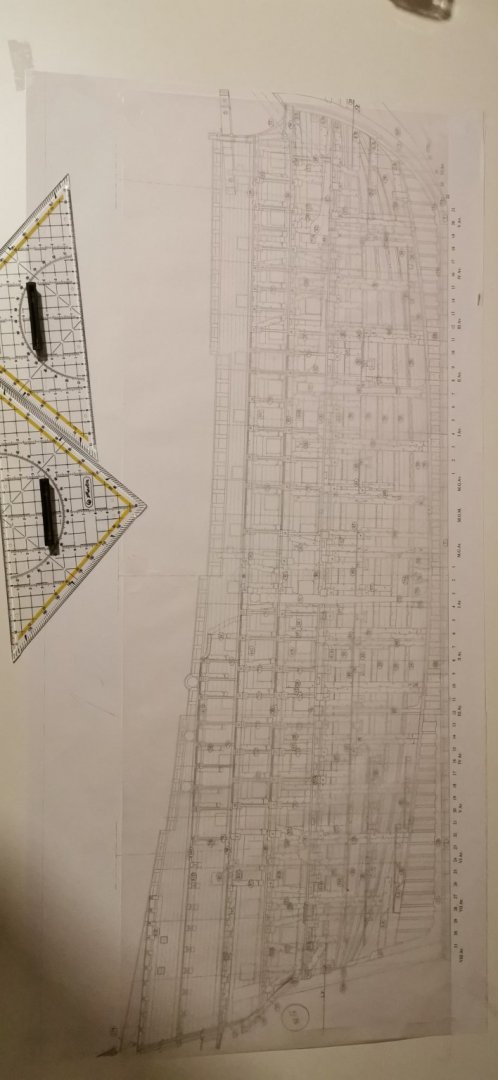
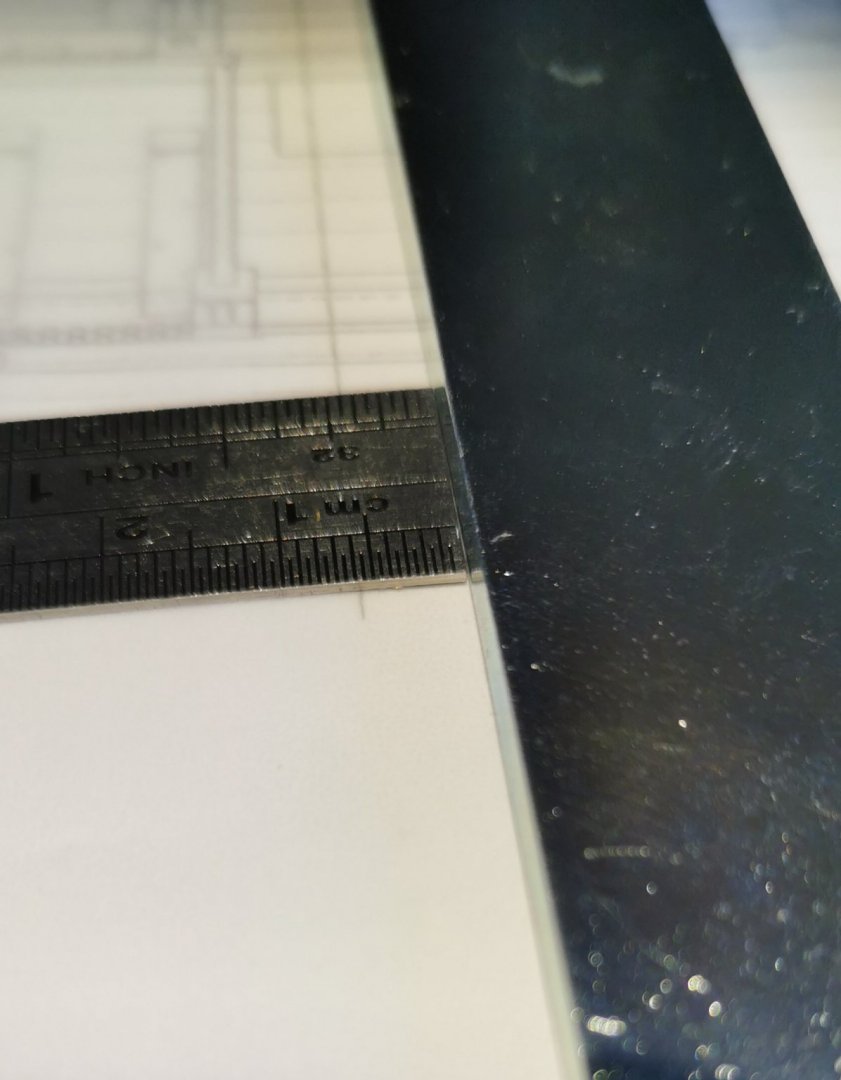
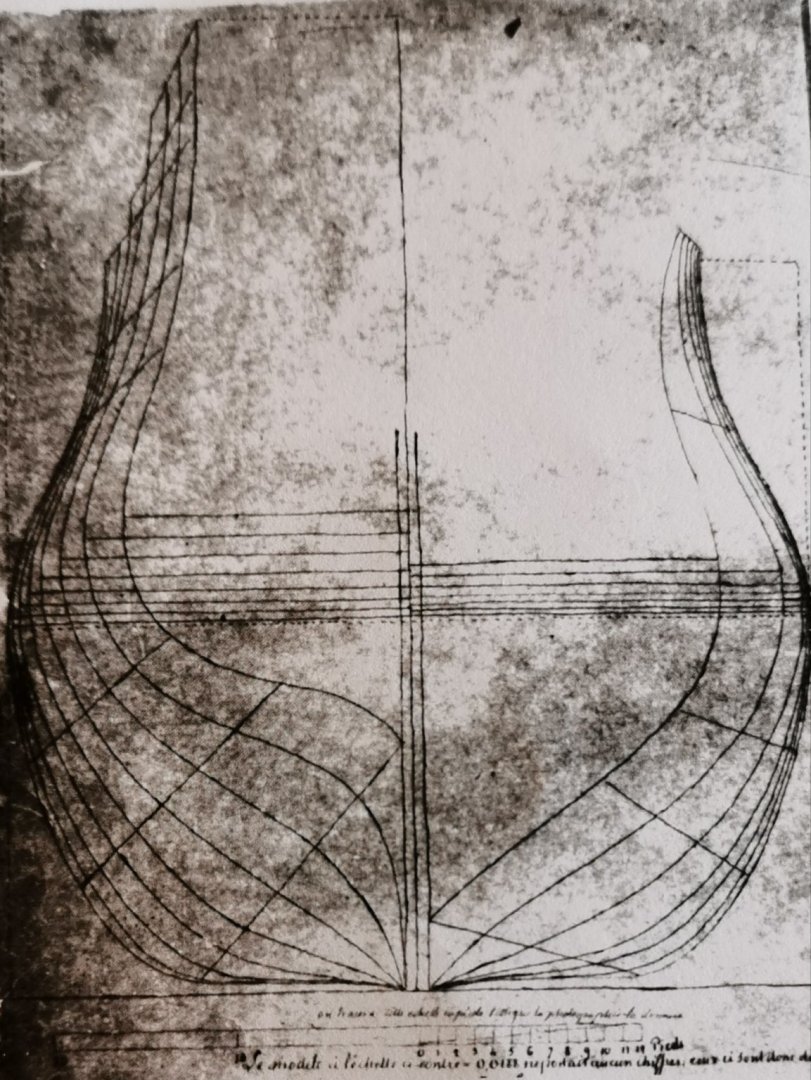
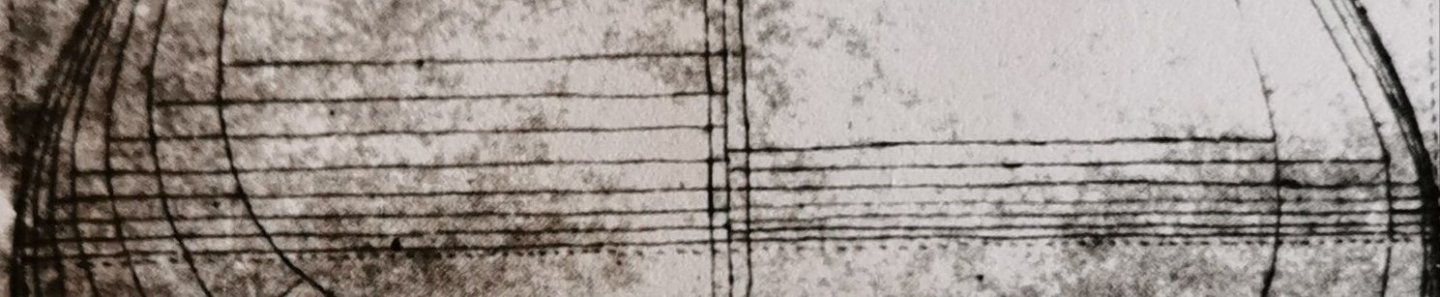
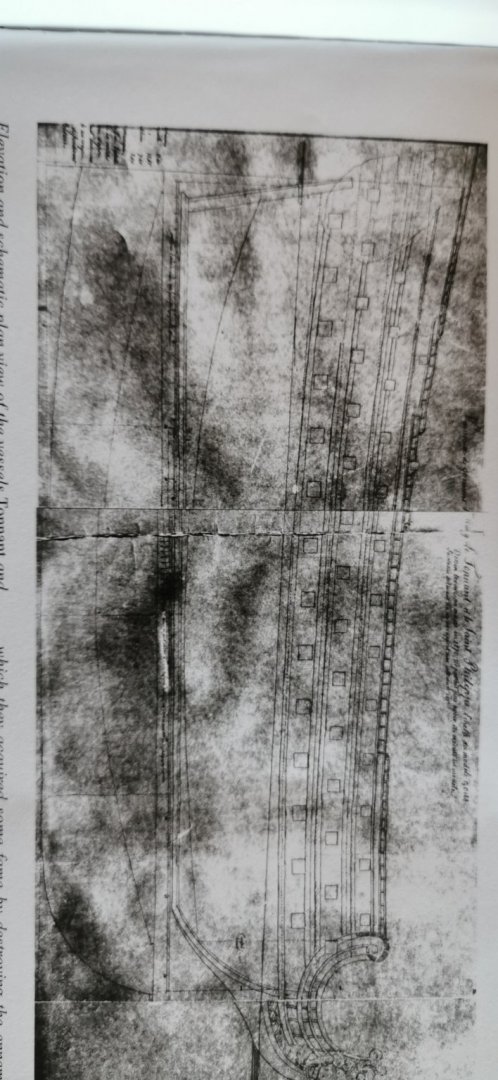
 Hi Guys, since this small boat is covered, I hope to have a better chance of getting the model build than with an open top and an inner structure to be build. The plan comes from the Architectura Navalis Mercantoria and can be found on plate LX under number 4 with it's own scale ruler. My girlfriend builds, when she improves and sews on her beautiful little Tilda figures, I can work in the living room on her table on my cardboard pices with a cutter a steelruler and a glue. So I can work without too much machine tools and dirt vice versa to her. So it always goes ahead when we are sitting opposite each other and are creative in the same moment - a beloved time. So there is progress especially on weekends. The small vessel, which is not even 13 meters long, is referred to in the index as "life fish transporter with a well used around/at Stockholm". This also explains the holes in the aft hull, because in the well the caught fish swam in the fresh water. So they came to the customers and cooks fresh even in summer. It was the case that the fishermen knocked off the contents of their net at the catcher in front of Stockholm directly in his well alive and were paid on the spot. As a result, they did not have to face the risk of selling, but only that of the already uncertain catch. The dealer then sailed to Stockholm and sold the freshly caught fish on the quay or in the market. Like the fishing boats of the southern Baltic Sea (the German specialist for southern Baltic Sea's wooden boats Helmut Olszak wrote about it ), flat and very round shapes are predominant here. And from the same source I have been told there were very little of the boats not clinker in the Baltic Sea. (But I will try her fitst inva creveel planking.) This hull shape developed to be able to drive with the uneven Baltic thinning and the changing flow in this swallow waters. Unfortunately, I find no more specific date than "dated before 1768" before the first edition of Chapmans Arch. Nat. Merc. Dimensions: - Length: 42 - 2/3 Engl. foot - Width: 12 - 5/6 engl. foot The hull has only two frames with a real convex shape, otherwise everything is concave, which should make construction very easy. I find the clinker of the cabin roof and the supported iron bracket that leads the lower gaff tree interesting. The masts are completely specified and I like that very much, I don't have to reconstruct anything. The rigging is certainly rewarded in red and probably in two parts, since the boat may have driven a large gaff sail and a jib. So far I have not found anything that indicates a second foresail. The lower gaff tree is moved with a hook on the mast, the shorter upper one with a rope and a claw. I scaled the plans to 1/48 and then printed out a copy set in 1/24 and finished it ready to build; so I'll start in 1/48 as the scale is quite confortable to work in in cardboard... So now it is time to search for materials for the construction of the inner hull. So this is the start on this weekend. Bought some cardboard in "bookbinder quality" in 2mm, 1mm thickness and cardboard from 300g to get 0,5mm in brown (the DIN A4 sheet came 0,29 each and the DIN A2 sheet came 0,79...) I also got an 8×1000mm round beech stick for the mast. Now I have to deal with the construction of the inner hull. So let's start. Just cut off the frames to bulkheads. But I figured outone very aesthetic baroque feature on the bodyplan: In a hatching the S-curved bulwark. And my furst trial to get a three dimensional drawing of the hull it is not breadth enough - but does give a very first start to me for the superstructure. Here the S-shaped bulwak at the stern - my design trail filling the gap in the Chapman drawing aft. So I hope there are some ideas about the S-shaped feature, as I amnot really shure how to deal with it. And in particular what's to do with the dotted line under the gunwale's level? Hope you like it seeing me working on saturdays and sundays
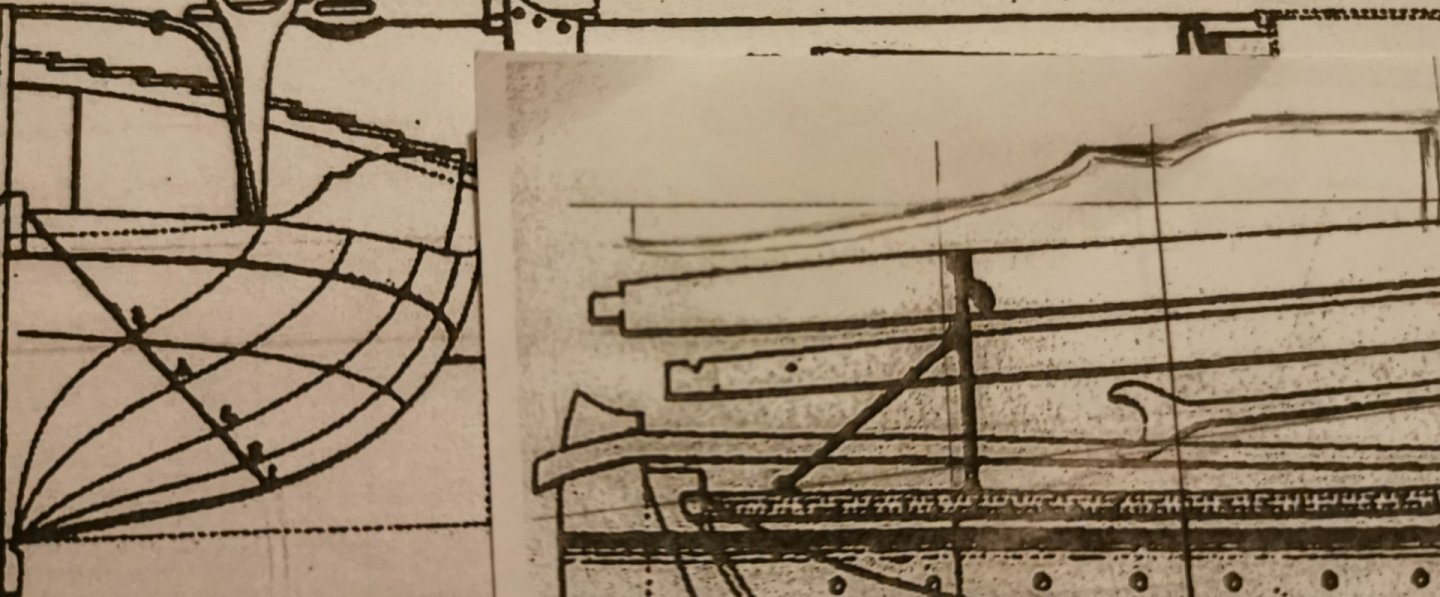


-
A great work on wood stone* and rope. Thanks for this wonderful journey in the a Egyptian shipbuilding. I learned a lit from your threat. Thanks a lot for sharing! *the only item in stone (beside ballast) I thought of were stone cannonballs... ...till today!
- 81 replies
-
- 3
-

-
- egyptian
- byblos ship
- (and 1 more)
-
Great progress, Christian!
-
Great job you do. I really like your style to build the little "Womanizer". Looks like you build her in her appearance under the RN flag after the rebuild, don't you?
-
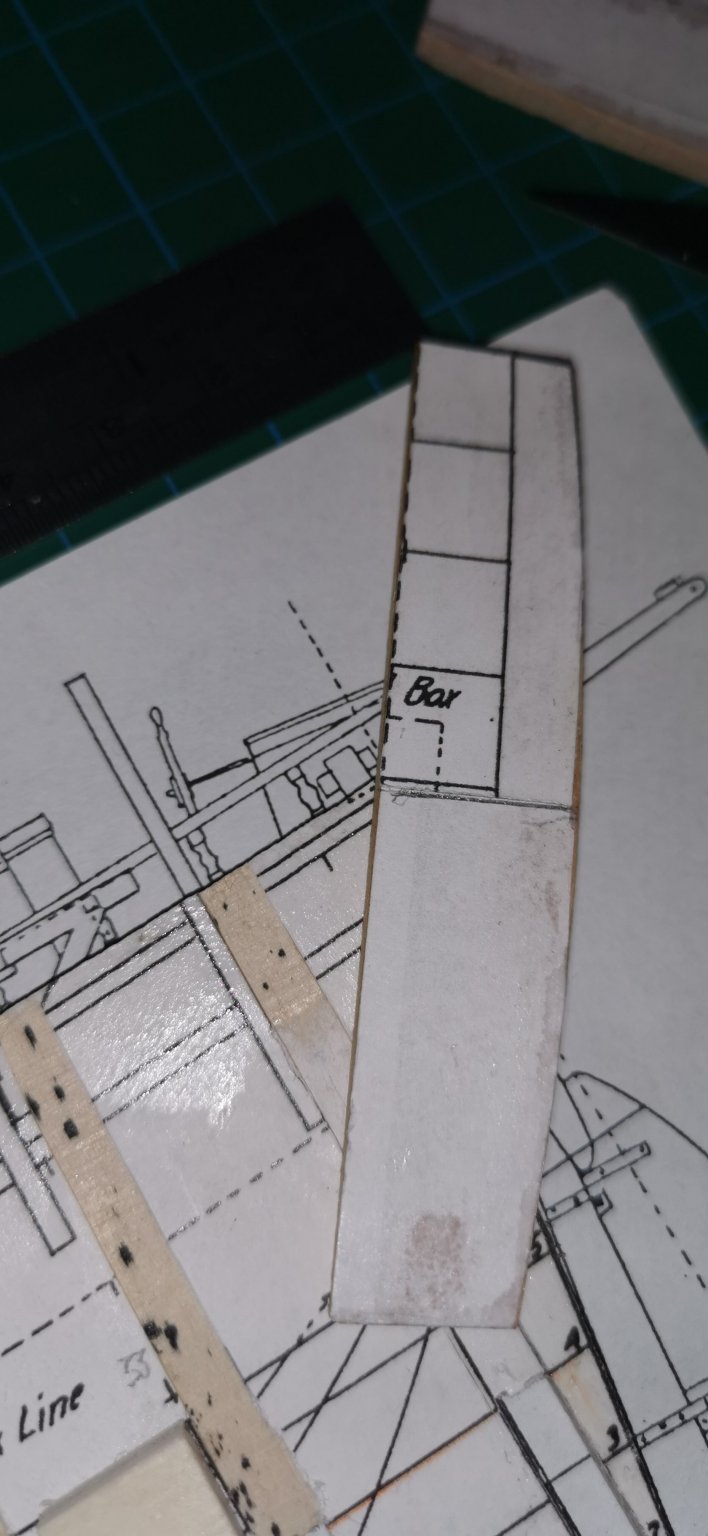
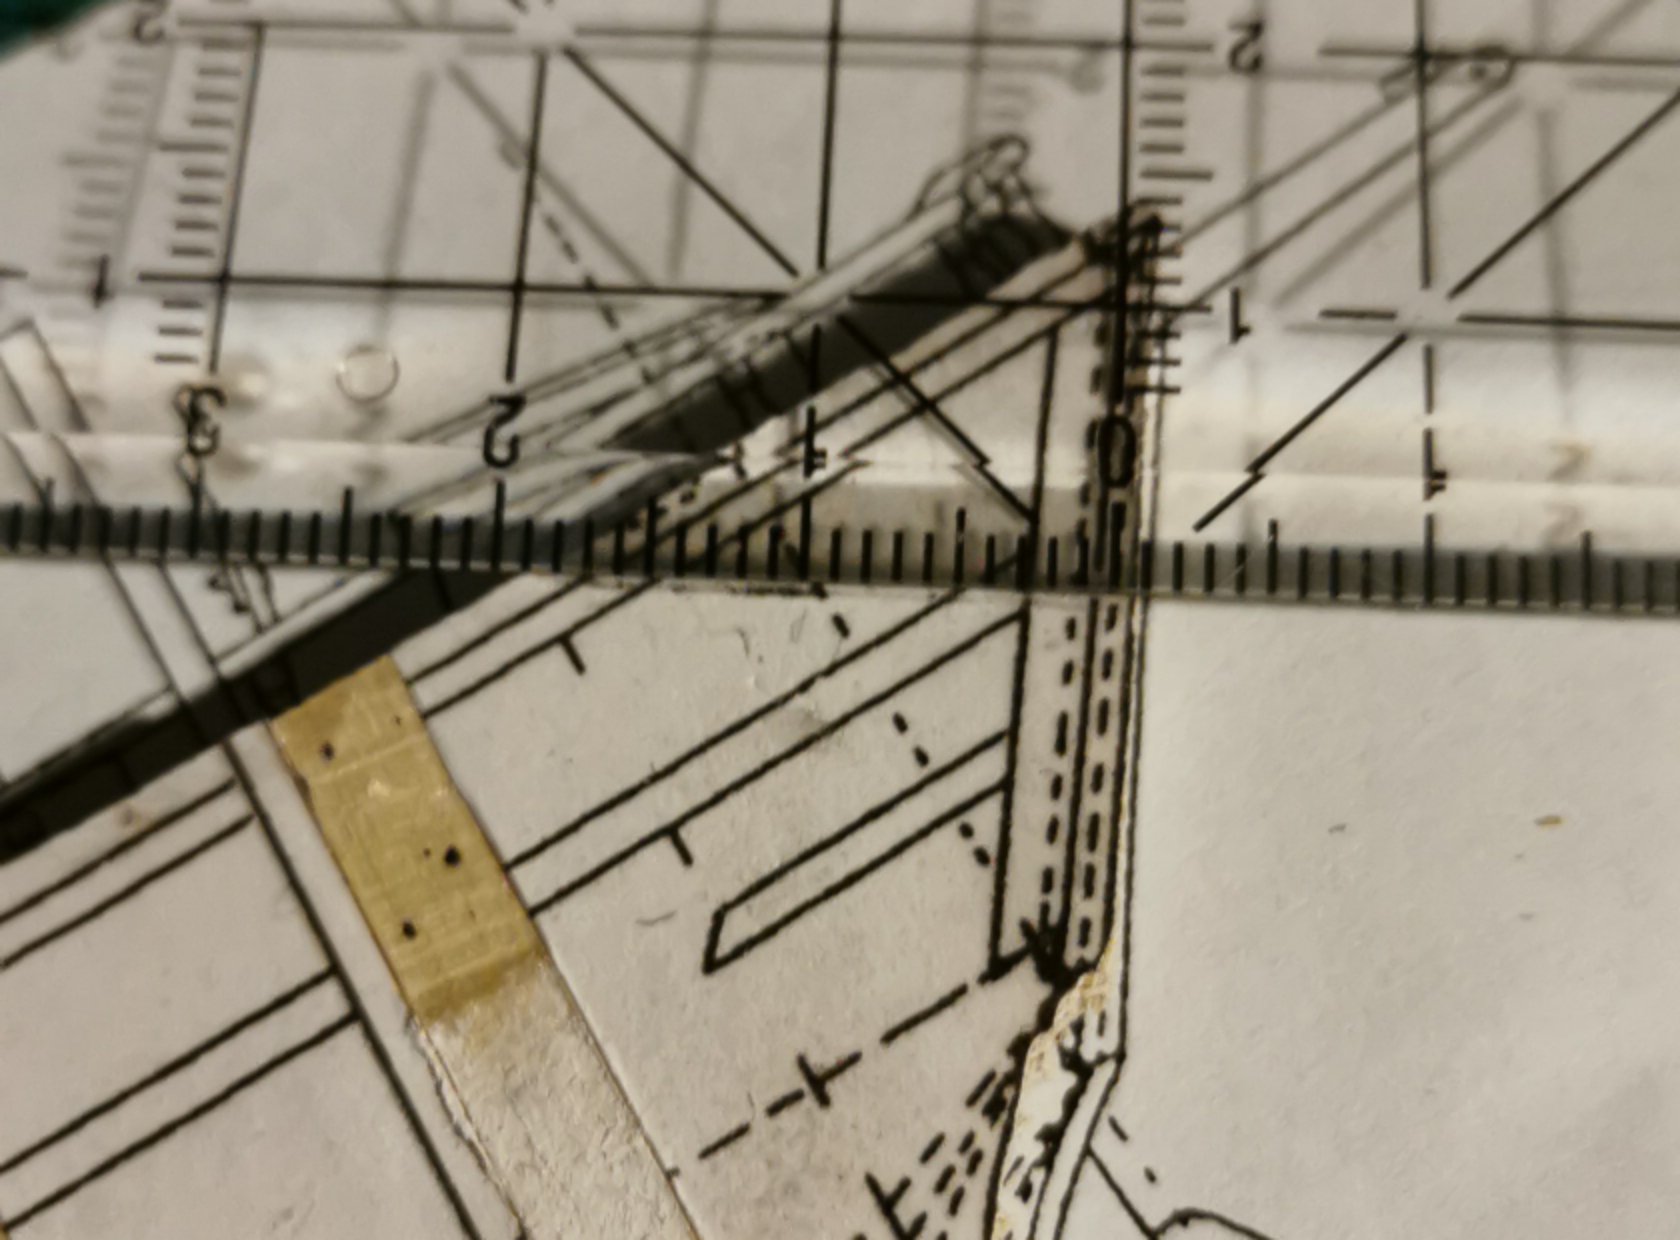
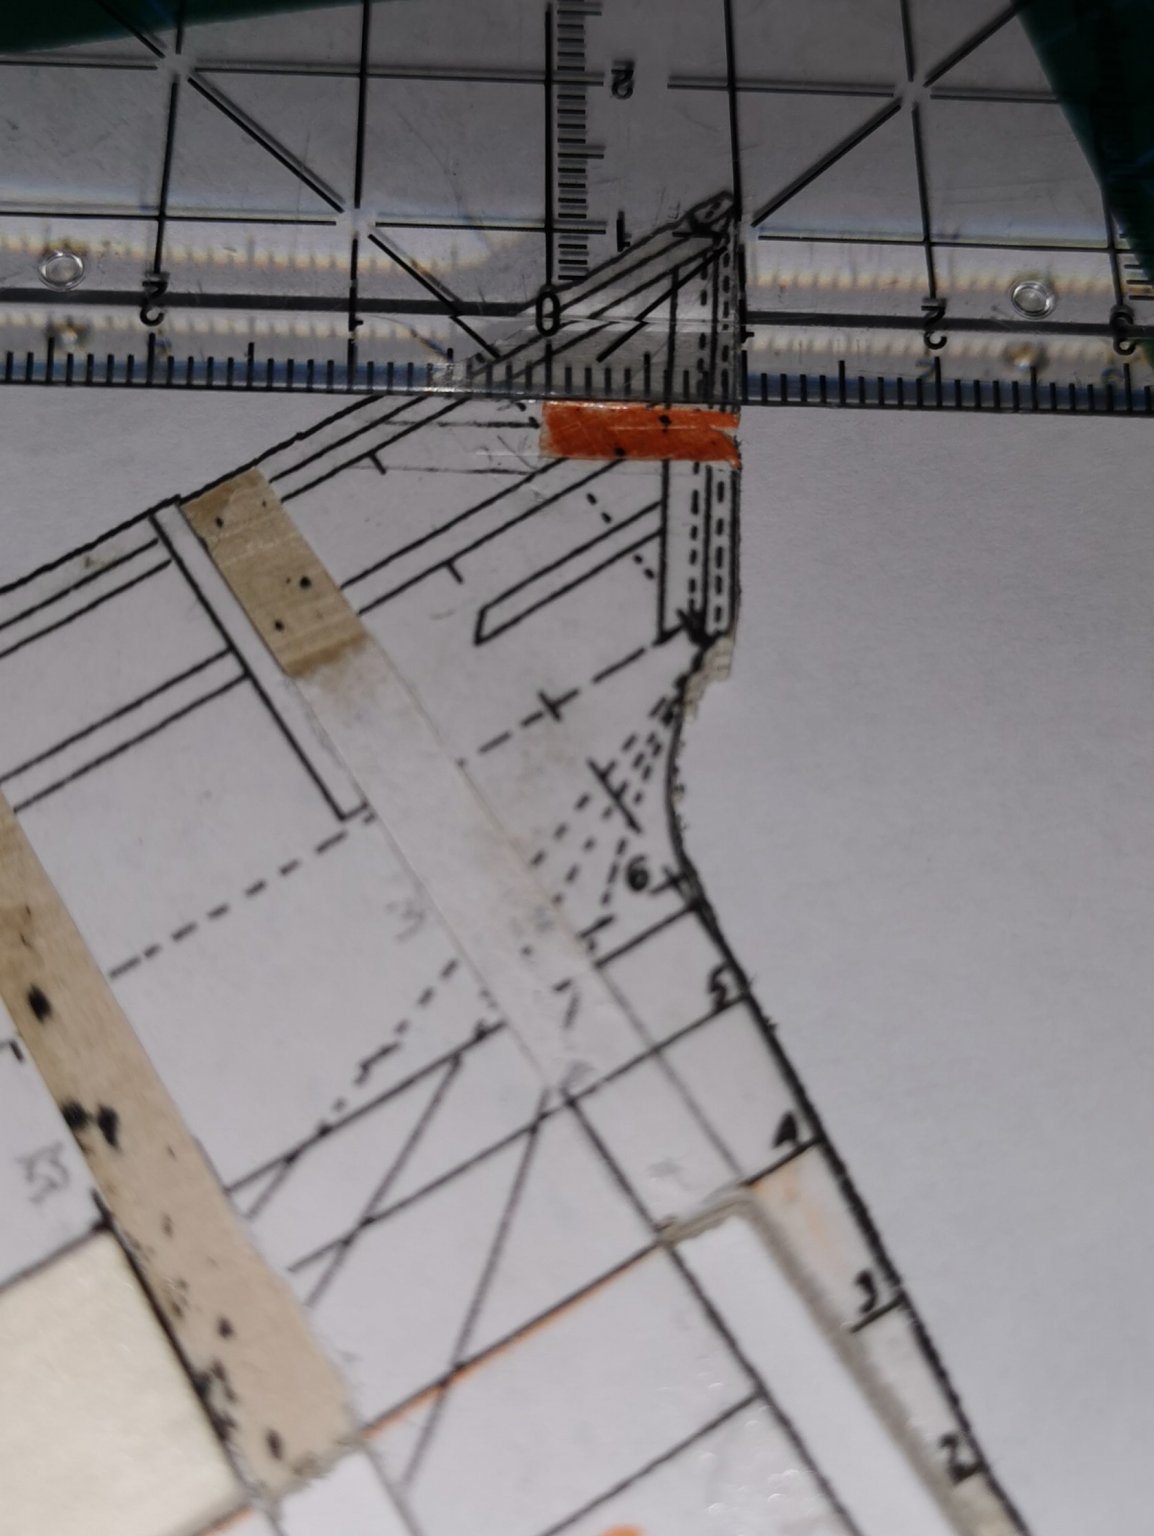
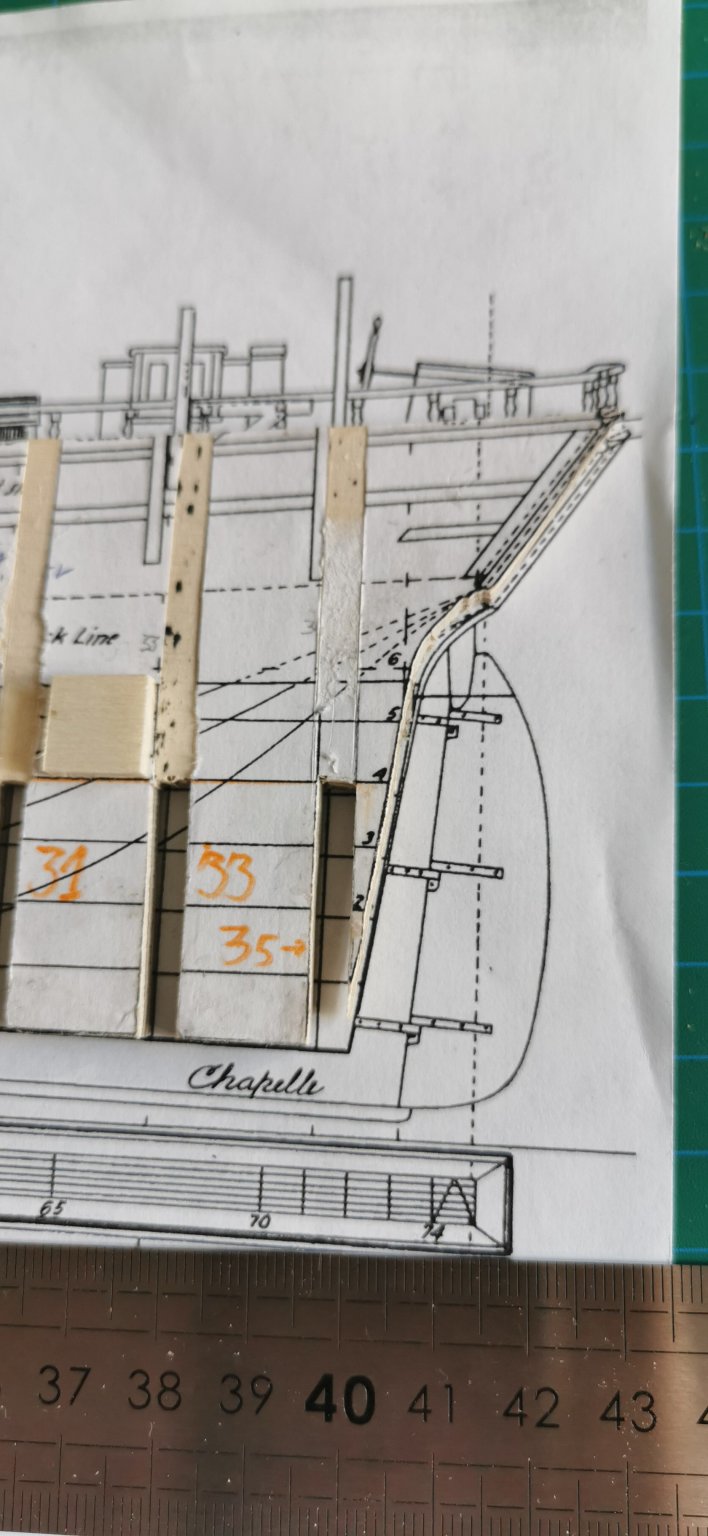
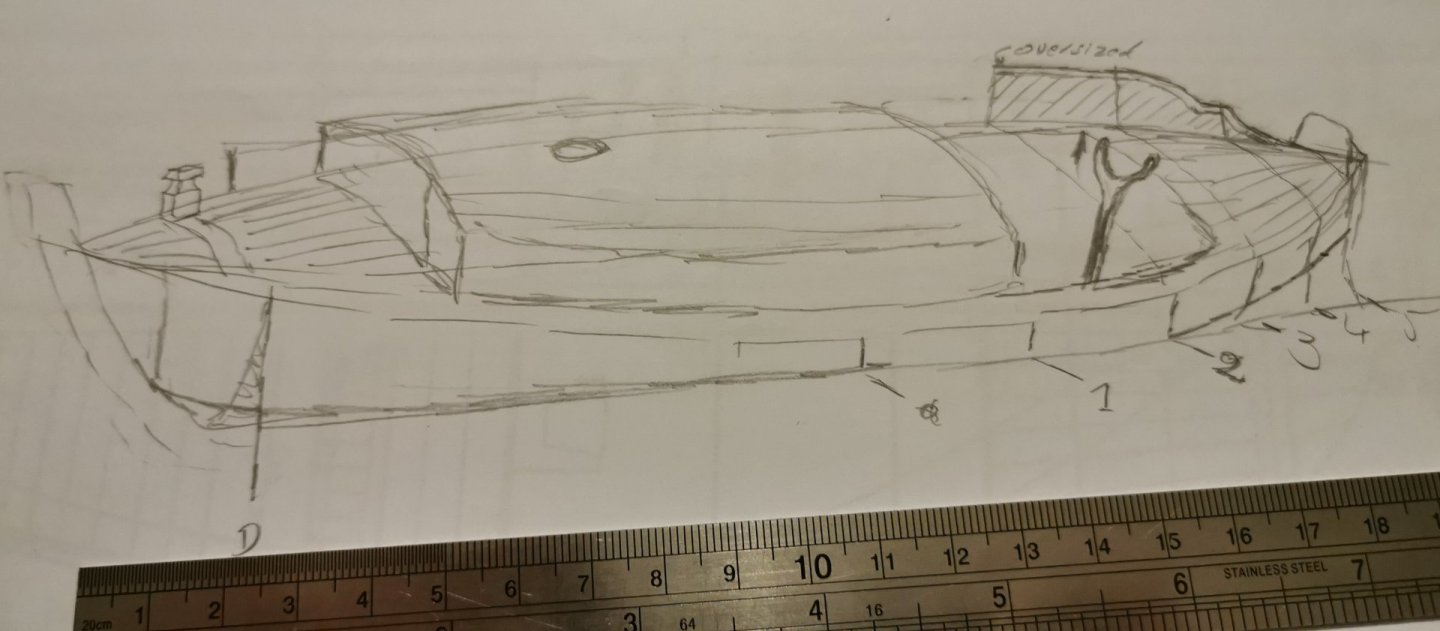
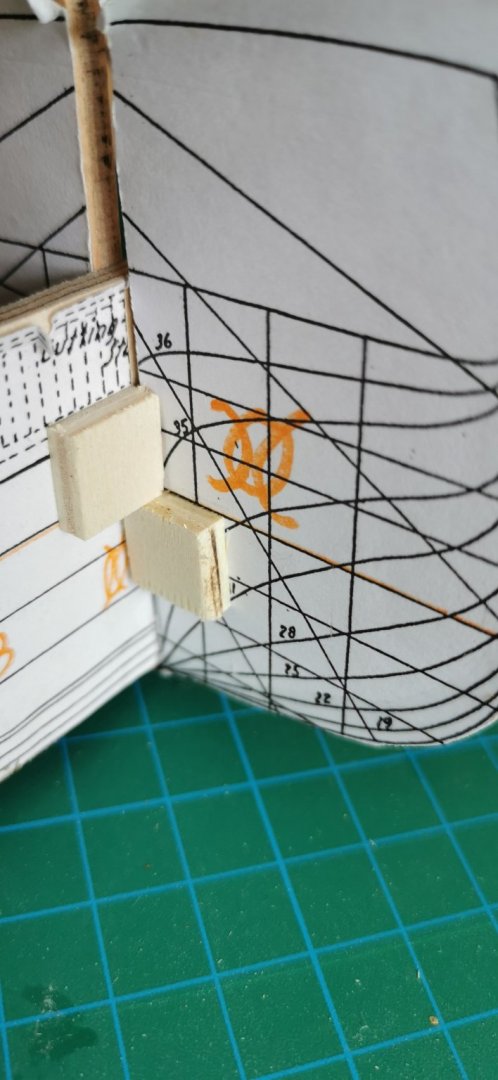
What do you think about this solution? When I do only put only in one transom's frame... It has had 17mm space on the backside towards the deck's highest level. (The deck is bent down towards the sides!!!) If I do cut o groove in the very middle of the frame by 4mms width and 8mm length... ...it will gently pass into the 4mm groove in the centerboard - so I do get a single transom hardwood frame. And best of it 😁 There is no collision with frame/bulkhead N°35!!! What may be added with a second frame (the lower one so these two are the "rulers" in the sanding. Is this possible to be done? Will it work properly?

-
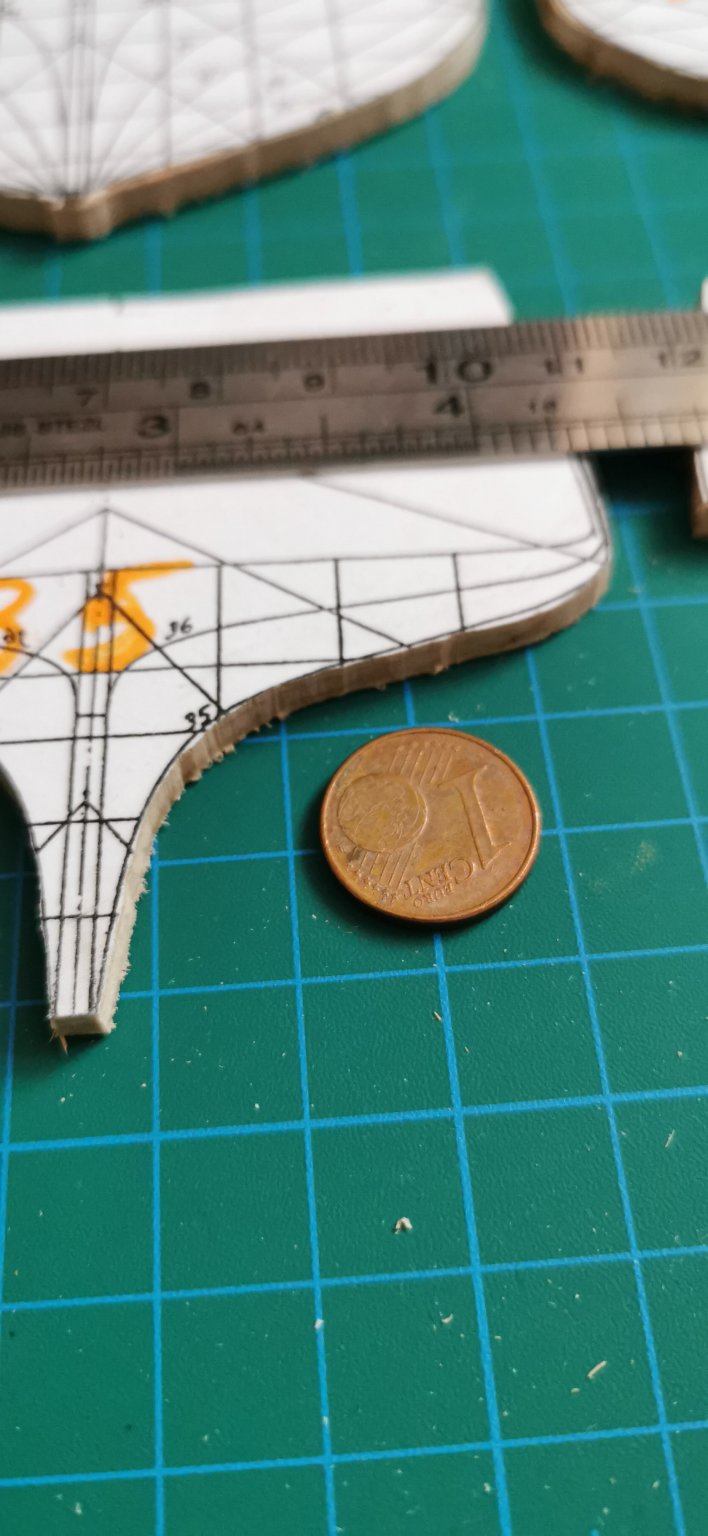
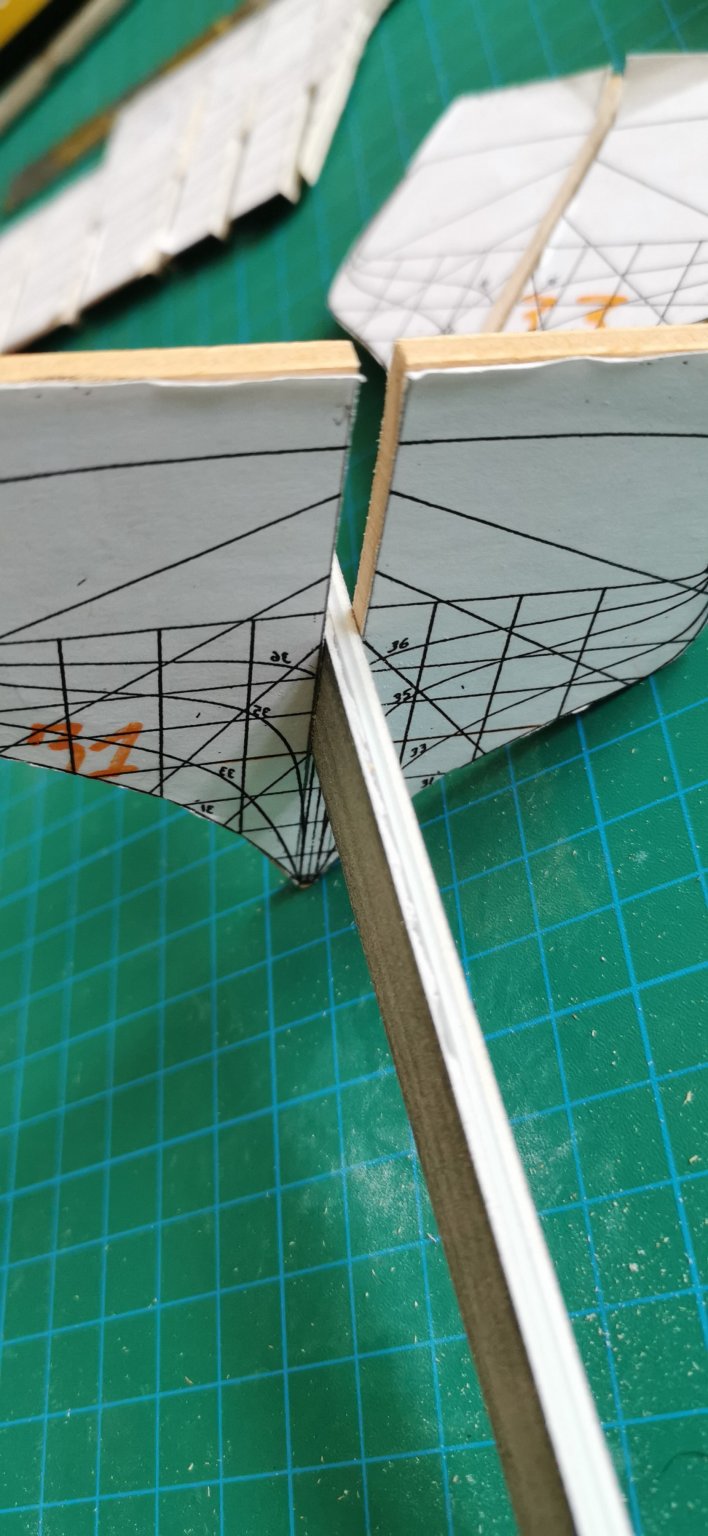
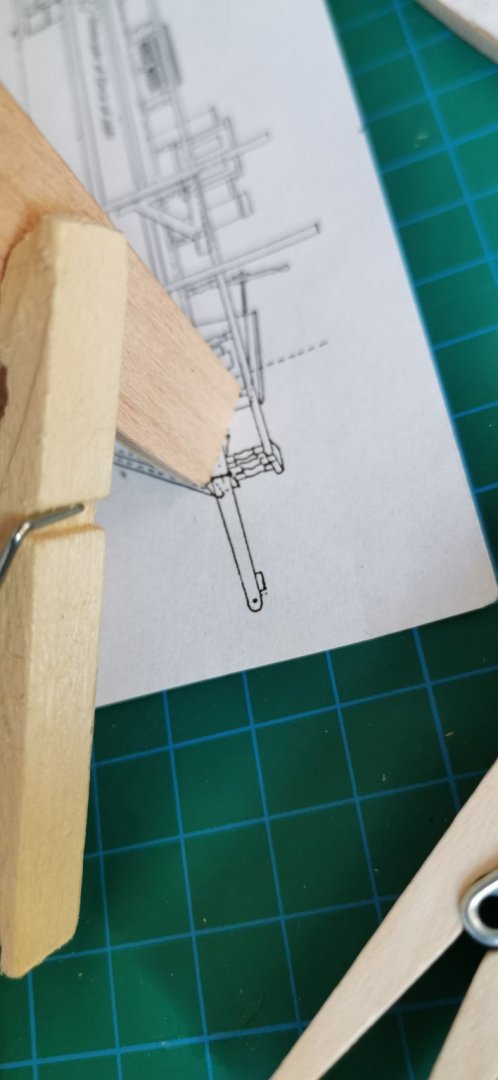
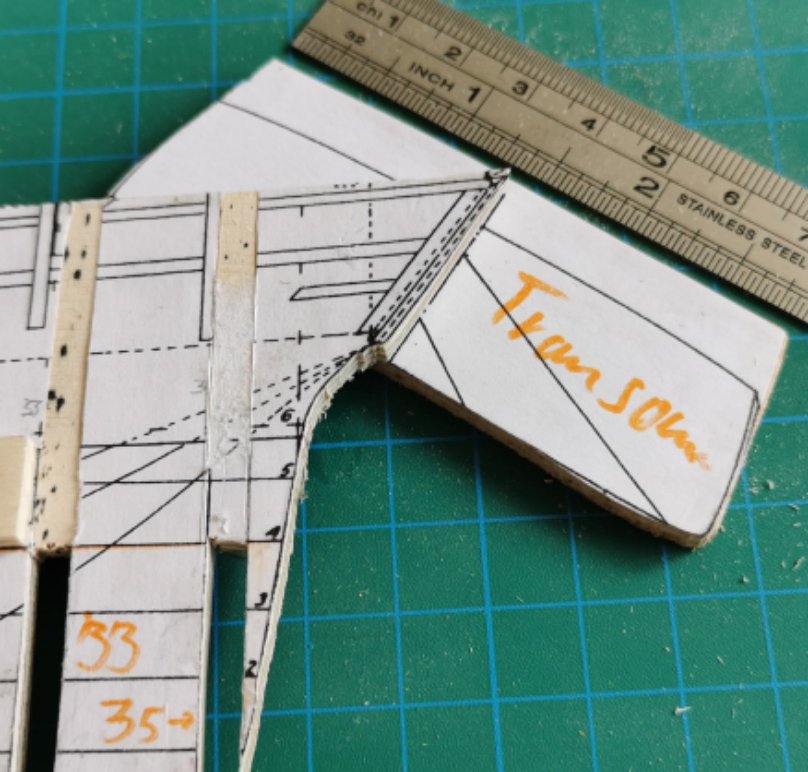
Thanks for the kind comment and your question. I do build in 1/64 (from the scale down line of 1/2 -> 1/4 -> 1/8 --> 1/16 -> 1/32 - >1/64). I voted for this firstly as this scale does made ships that will fit into my flats limited space and secondly as the degree of detailling is limited. A German modelshipbuilder wrote in his "Handbook of Historical Modelshipbuilding" 30 years ago allways 1/48 or 1:50 for specialists 1/72 or 1:75 for the beginners. So I did came to this scale often used on English and American model kits made from wood. THE TRANSOM So here I am with the topic of the transom's complex curveature. There is a convex area bent 1,5mm in hight and with a edge of 64, 5° to the WL. The area is between 23 at the sides and 26mm in the middle high. On the top runs a beam 1,2mm high. So the transom is a tricky bit of a part of the hull's construction. I copied my technique from the whaling boat's frames to... fold the second half of the paper under the frames line... ...along the CL by scratching a groove into the paper and cut the line of the frame out as exactly as I am able to do... ...the I glued it onto the beech plywood's fitting cutoff... ...cut off what wasn't needed at the bandsaw and used the little additive wood for sanding machinery work... ...and got my upper horizontal transom's frame. The much longer lower frame had had to the curved in the very same way. So I used the upper frame as a curved ruler, took the triangle of the lifting onto the other side and wasvby this able to copy my line from the portside in a second run... ... cut it off the paper and glued it on the same pice of cutoff and after doubling my same procedure from above I got the lower horizontal transom's frame. Here we do see both frames together... the length is right at the upper and the lower boardside and... ...also the curves do look quite parallel. So I hopefully can put these parts aside to use them later on. My idea is to fill them like a multi breadslips sandwitch with layers of softwood. So I want to sand this pile of wood with hardwood fames into shape. What I was affraid of disappeare immediadly when I calculated that the angle of inclination of the hull's sides will come into the construction by this sanding, too. So I will get a solid "transom block" that will give the sides planking a good surface where they will be bond onto. Are my ideas right or is there any error in my future's calculation. Or are there in this construction any mistakes I did not be aware of? EDIT: But I did really run in a horrible mess: The transom block will pierce through the quater deck's planking. What can I do due to this horrible error?


-
Today I just "hardened" the whaling boat's bulkheads and the centetboard by adding CAglue to the "machinery allowance": The glossy wet looking is the CAglue... And my MOBBY SLIM in the backgroznd is still smiling...


-
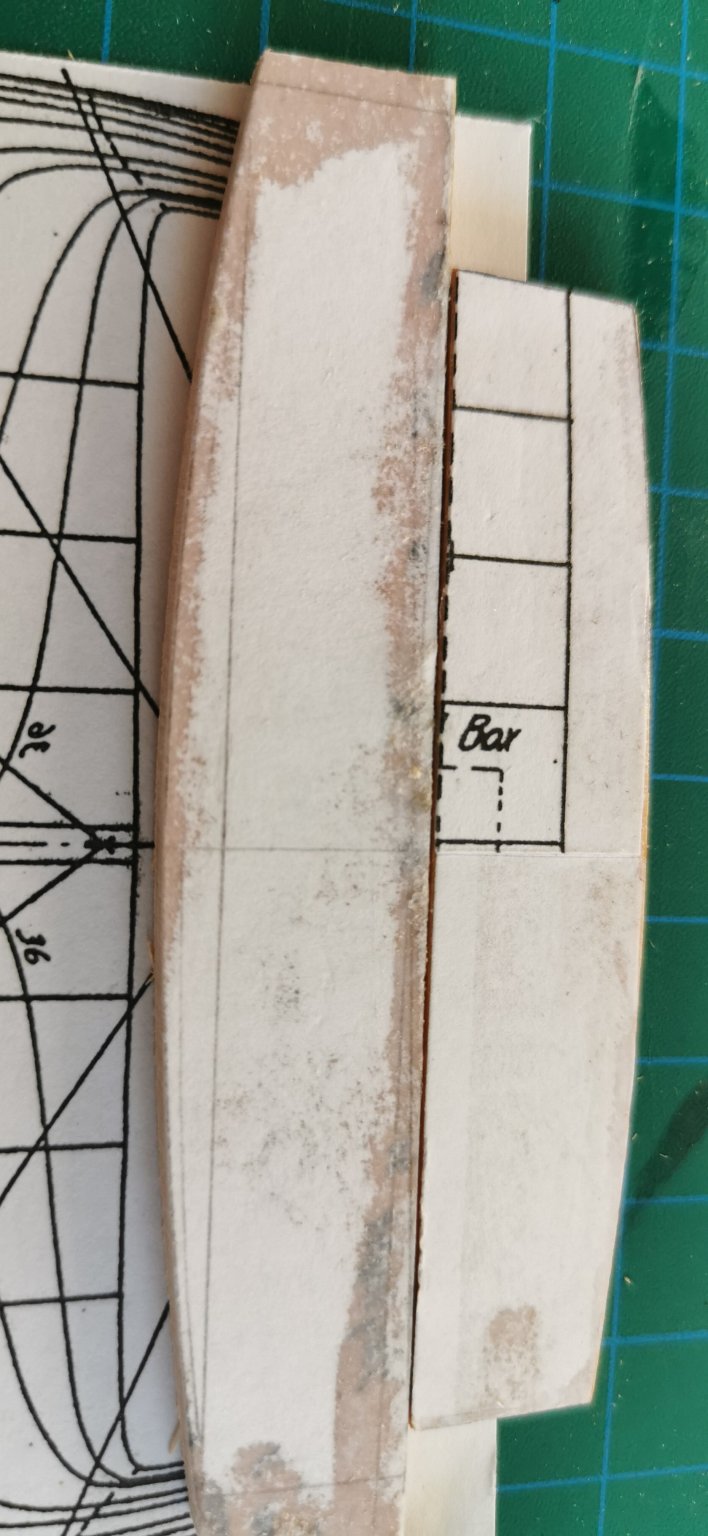
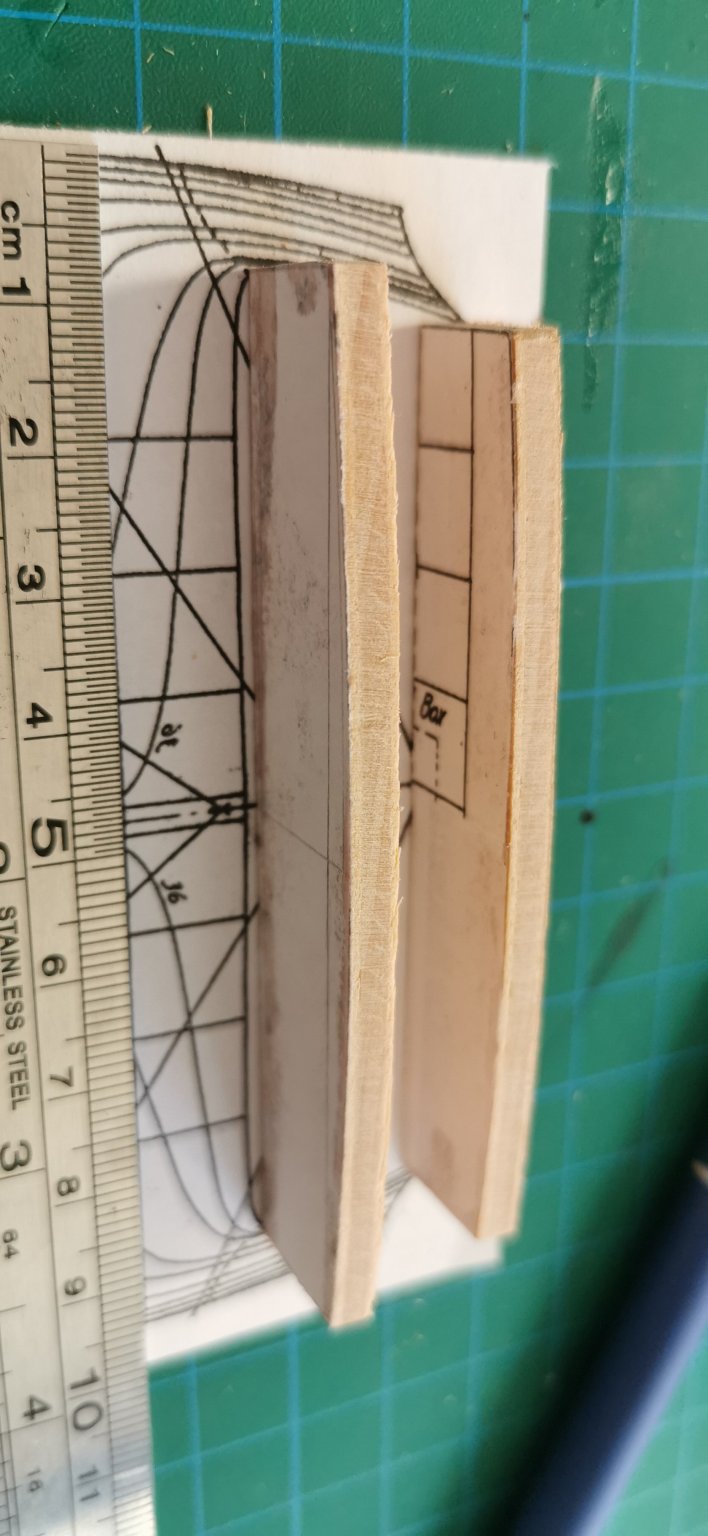
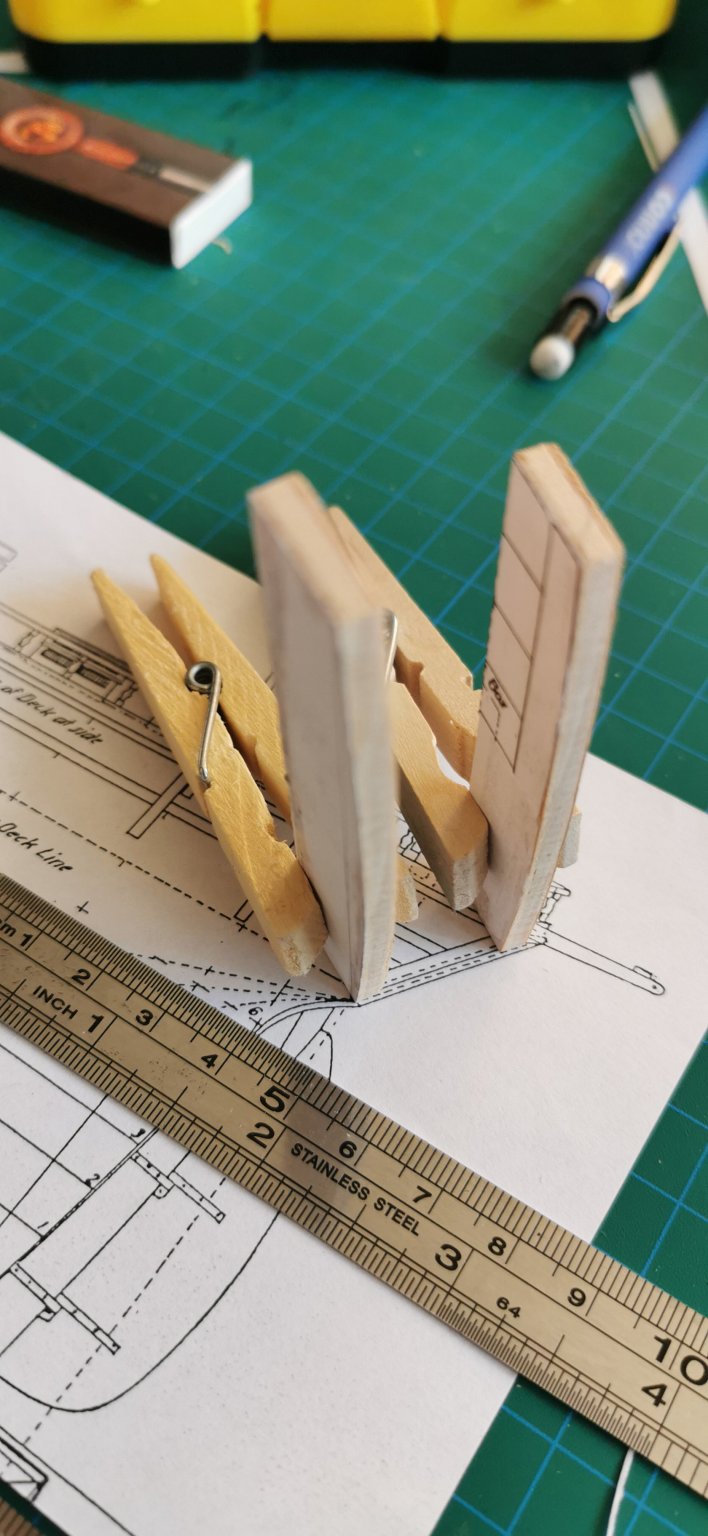
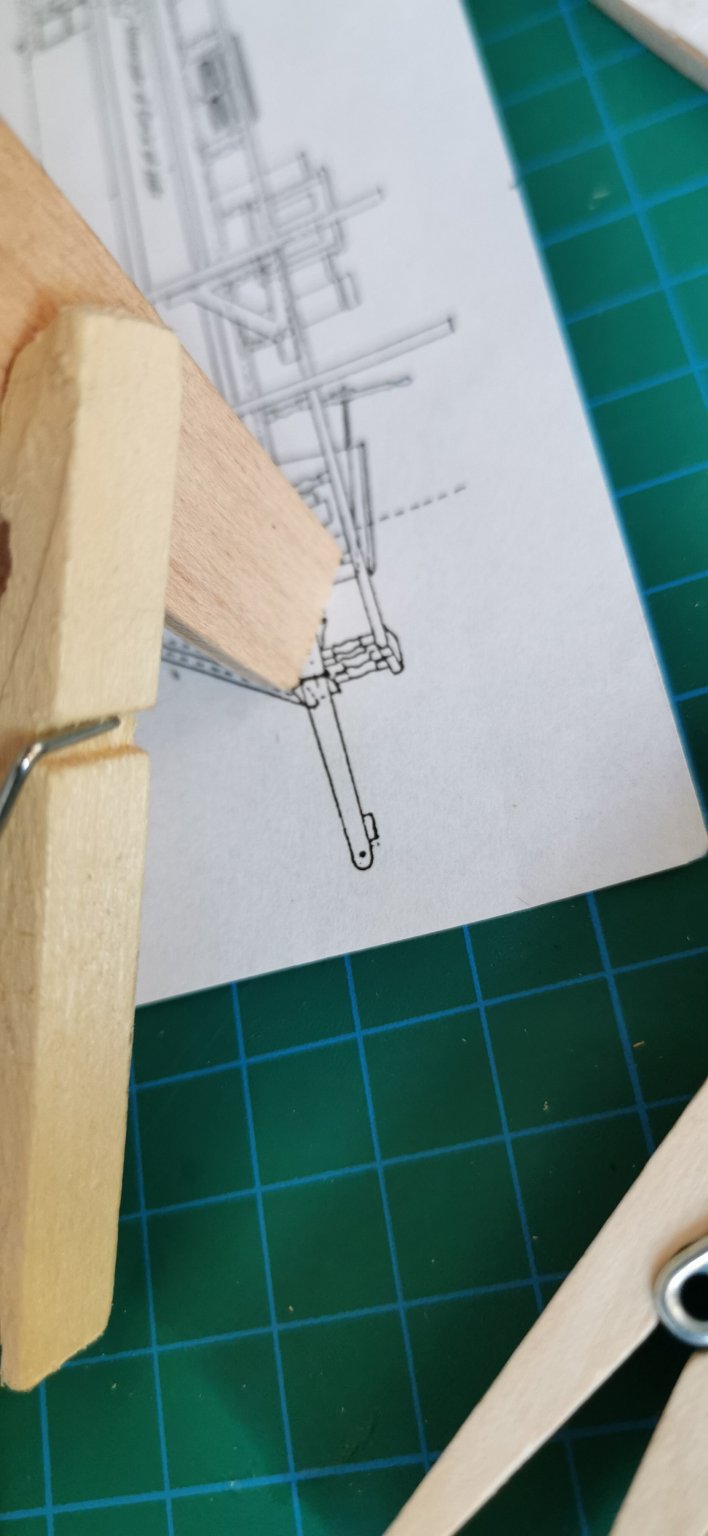
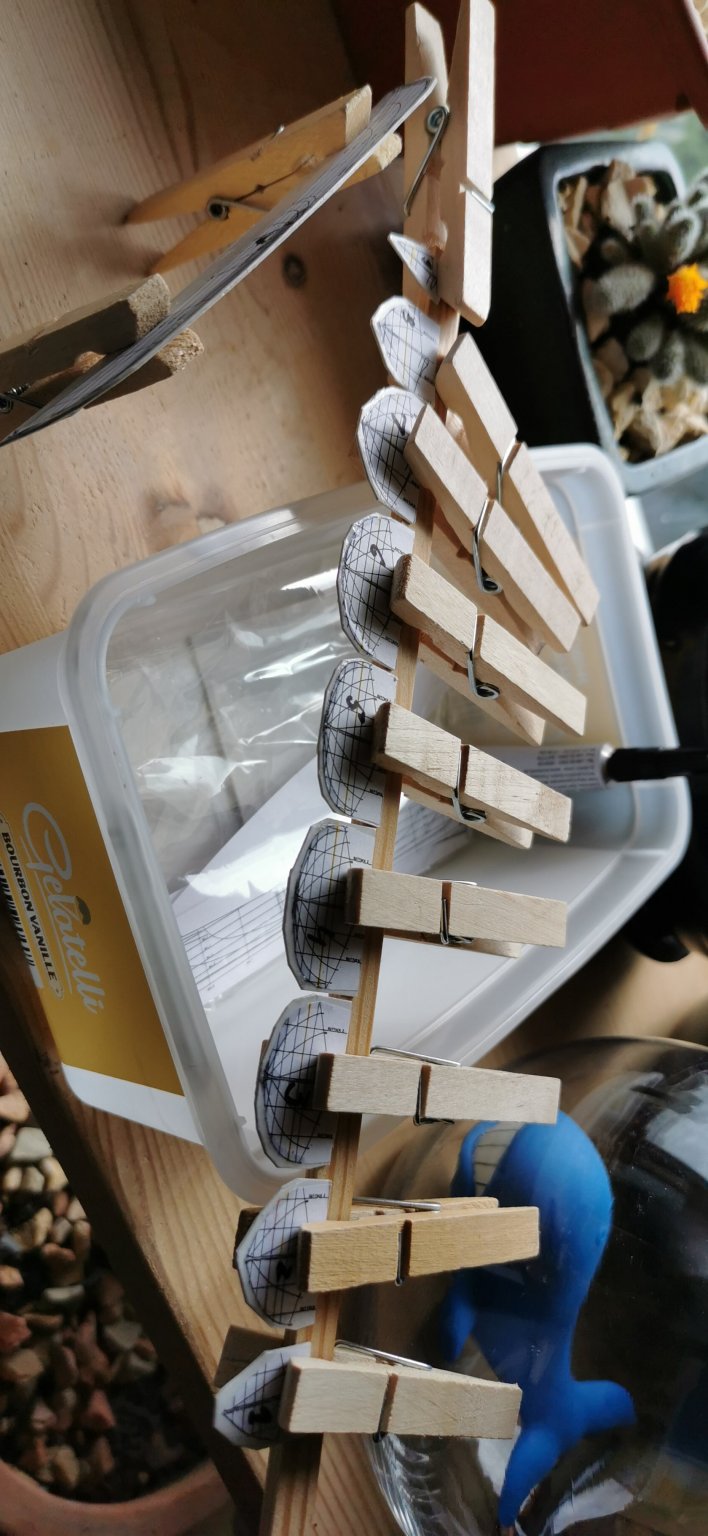
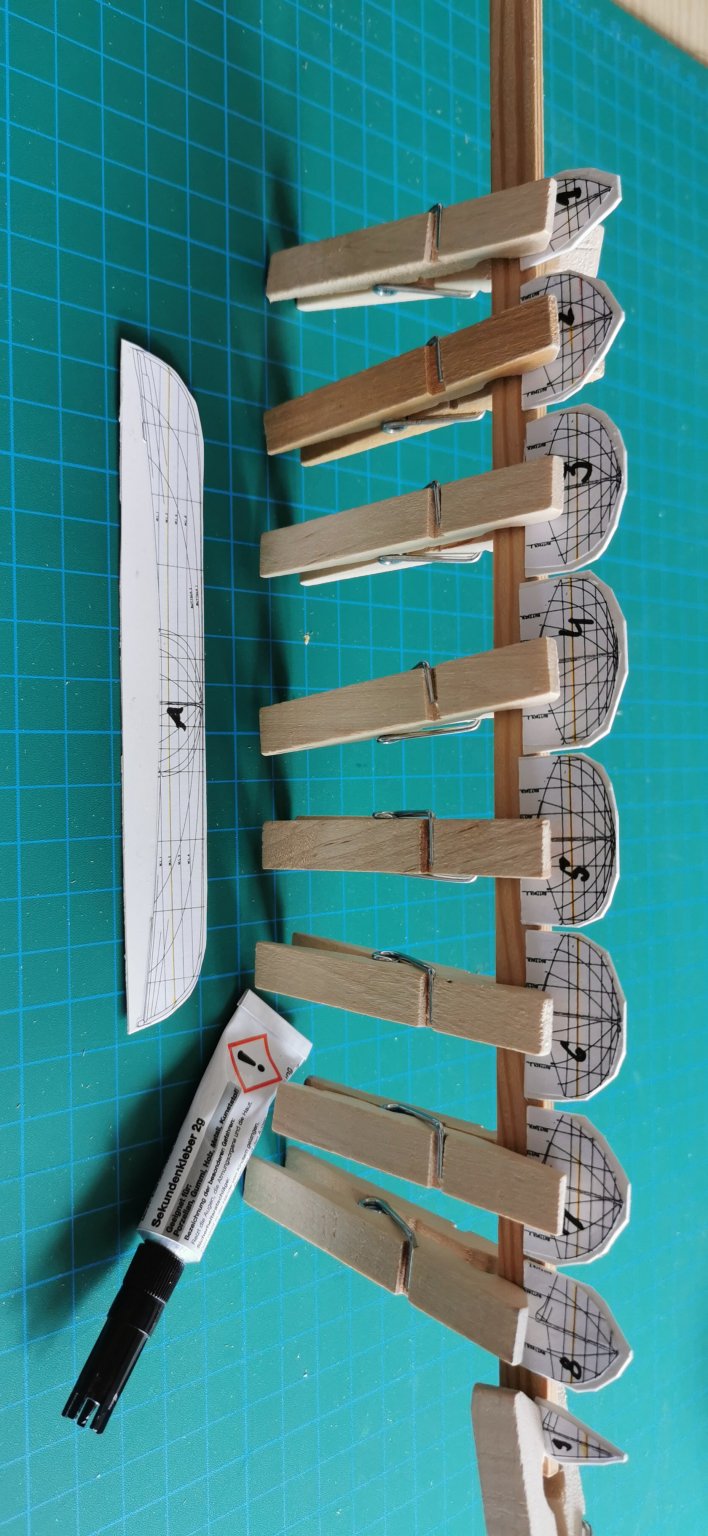
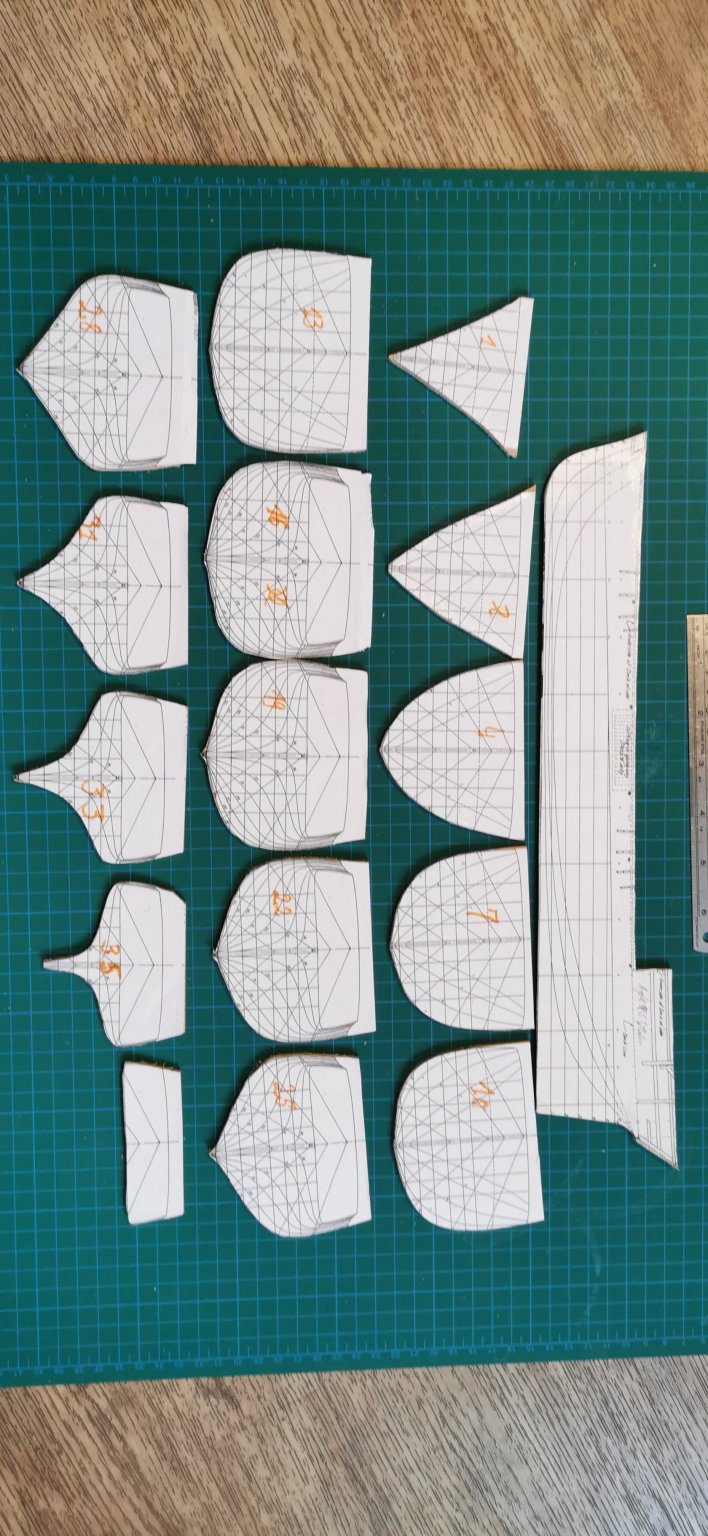
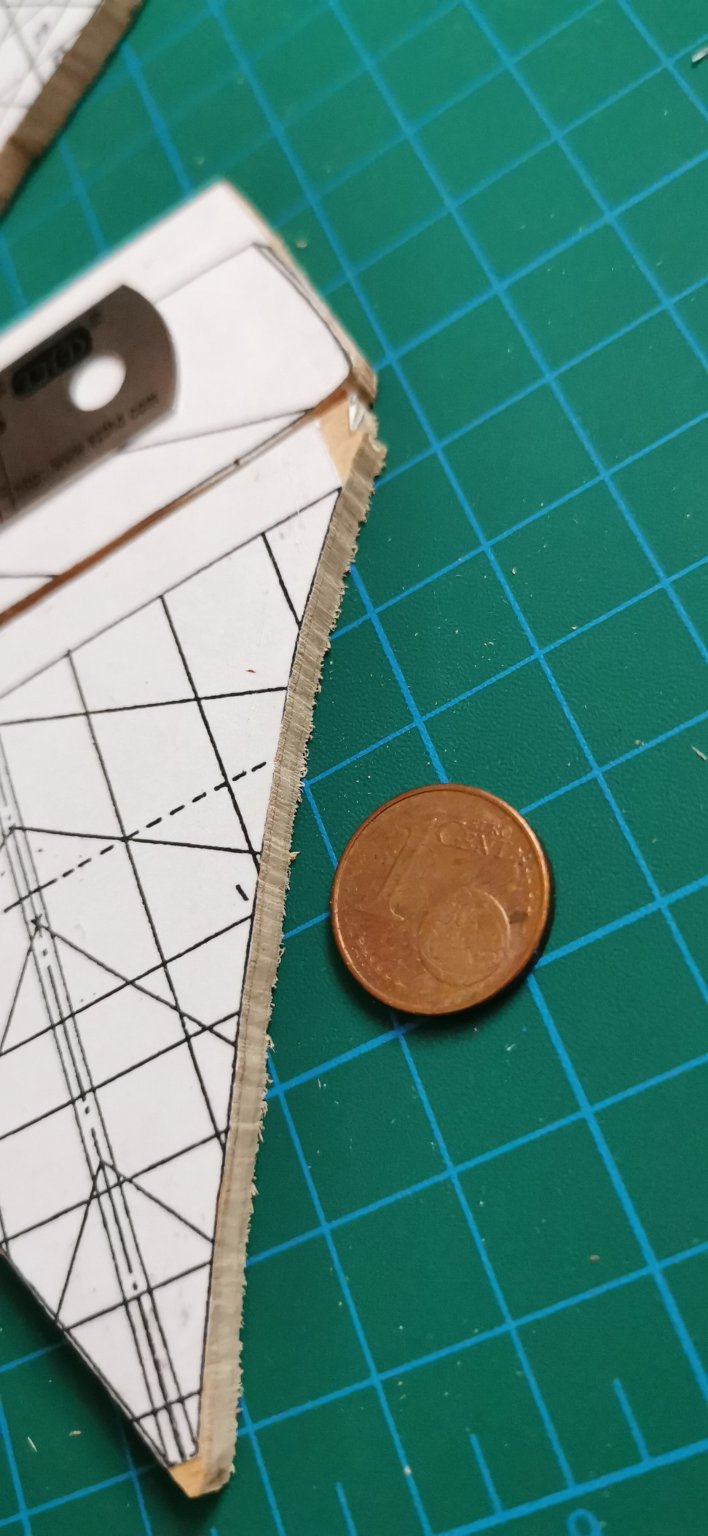
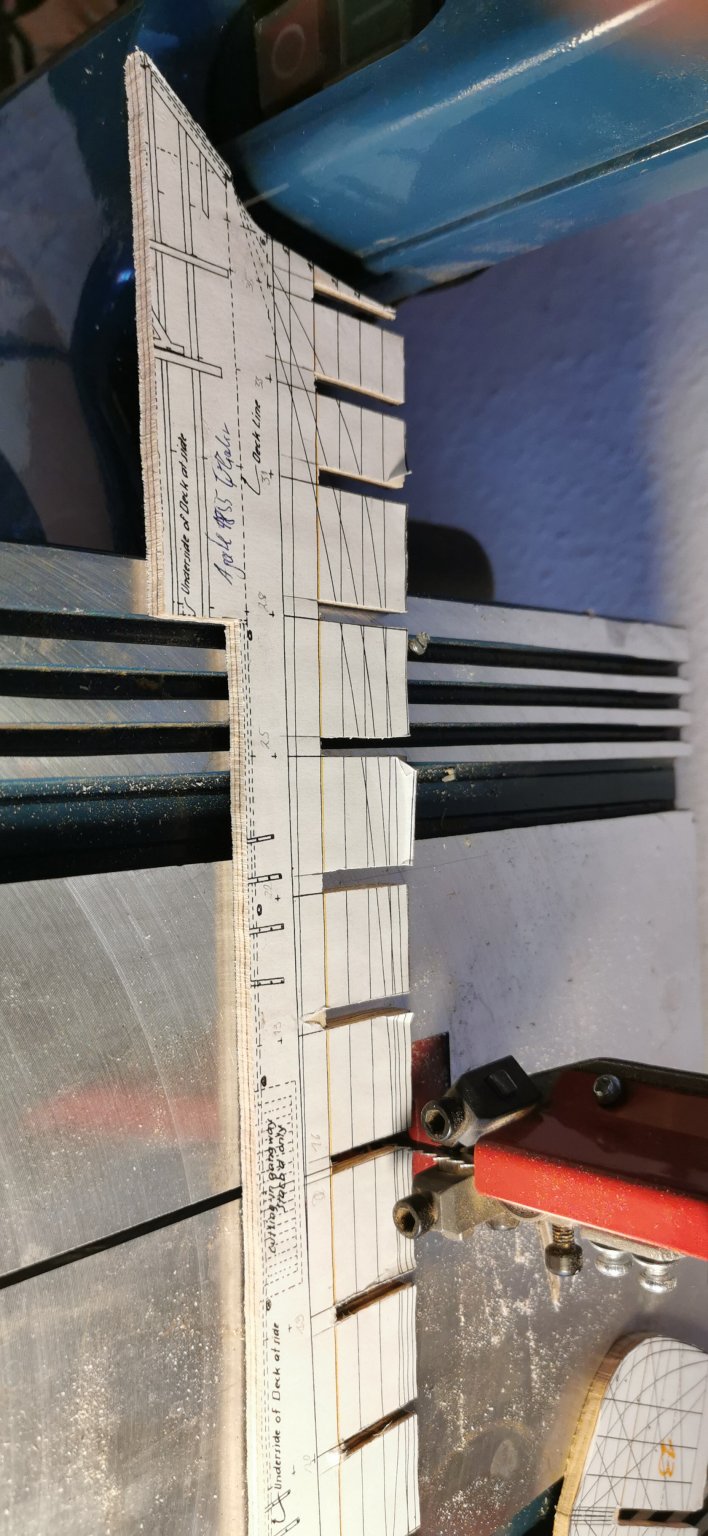
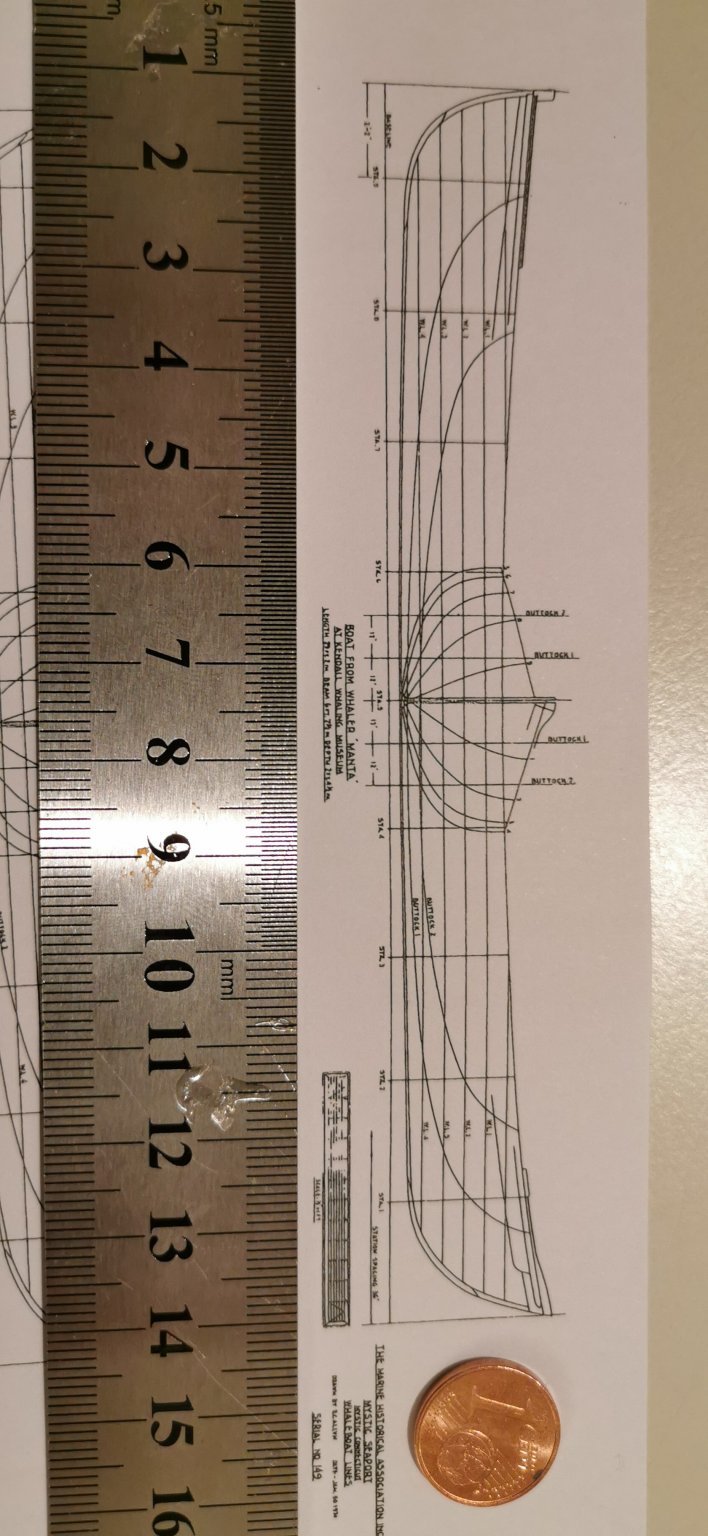
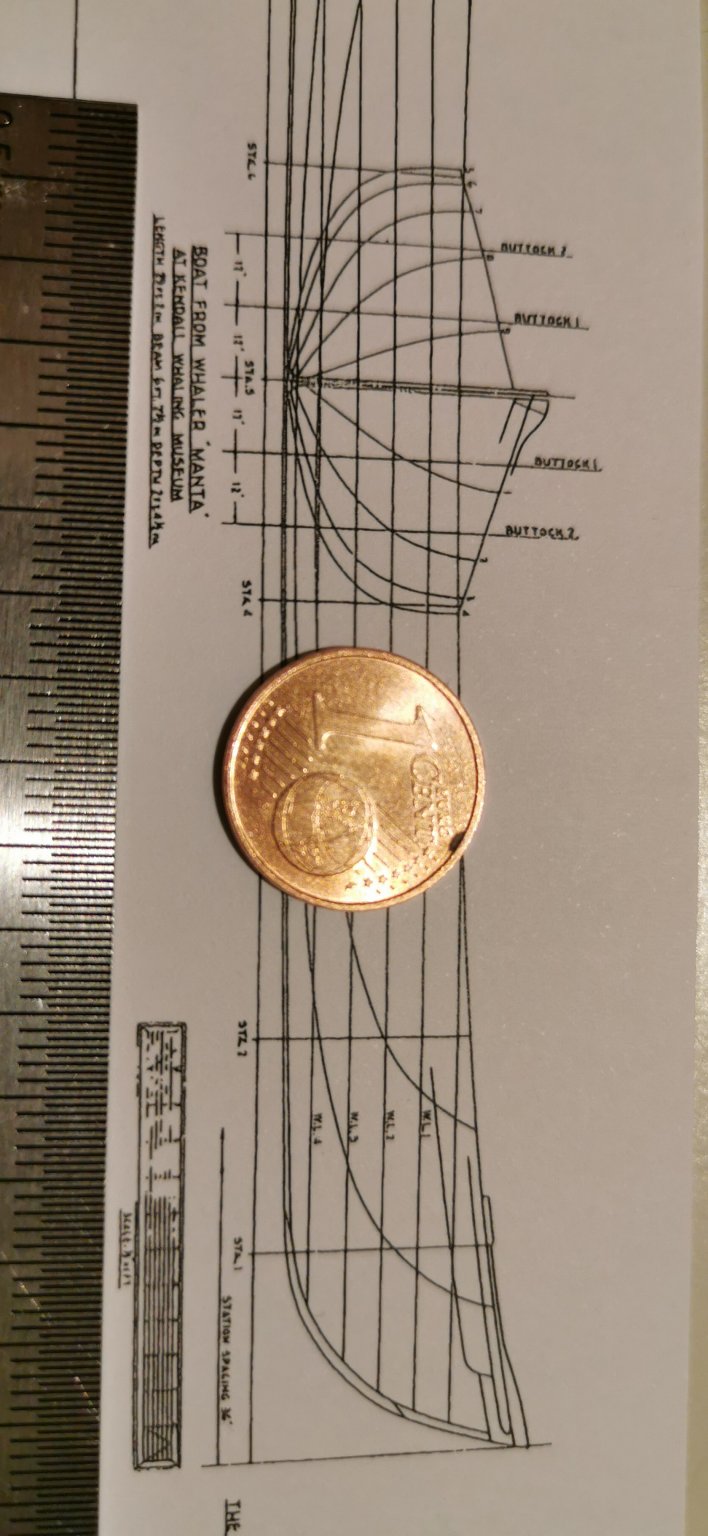
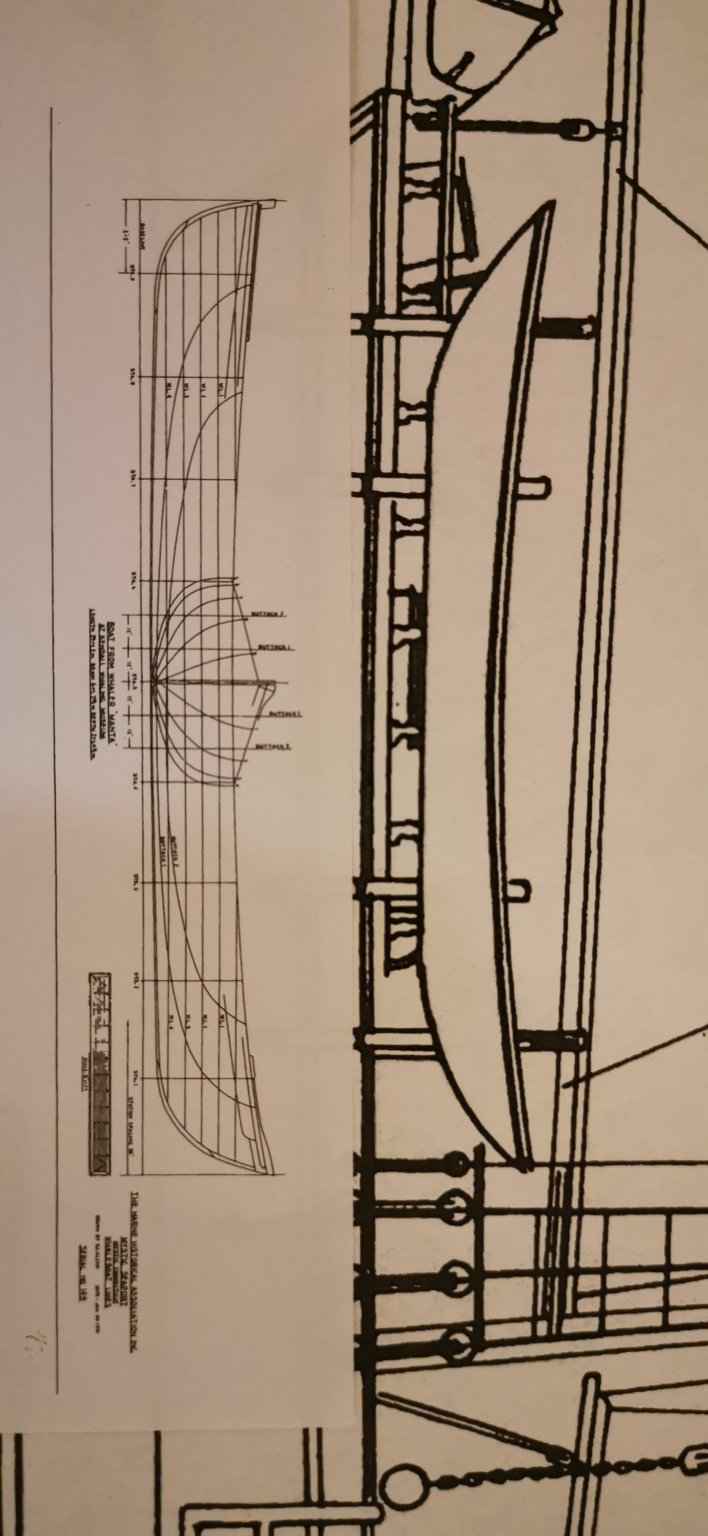
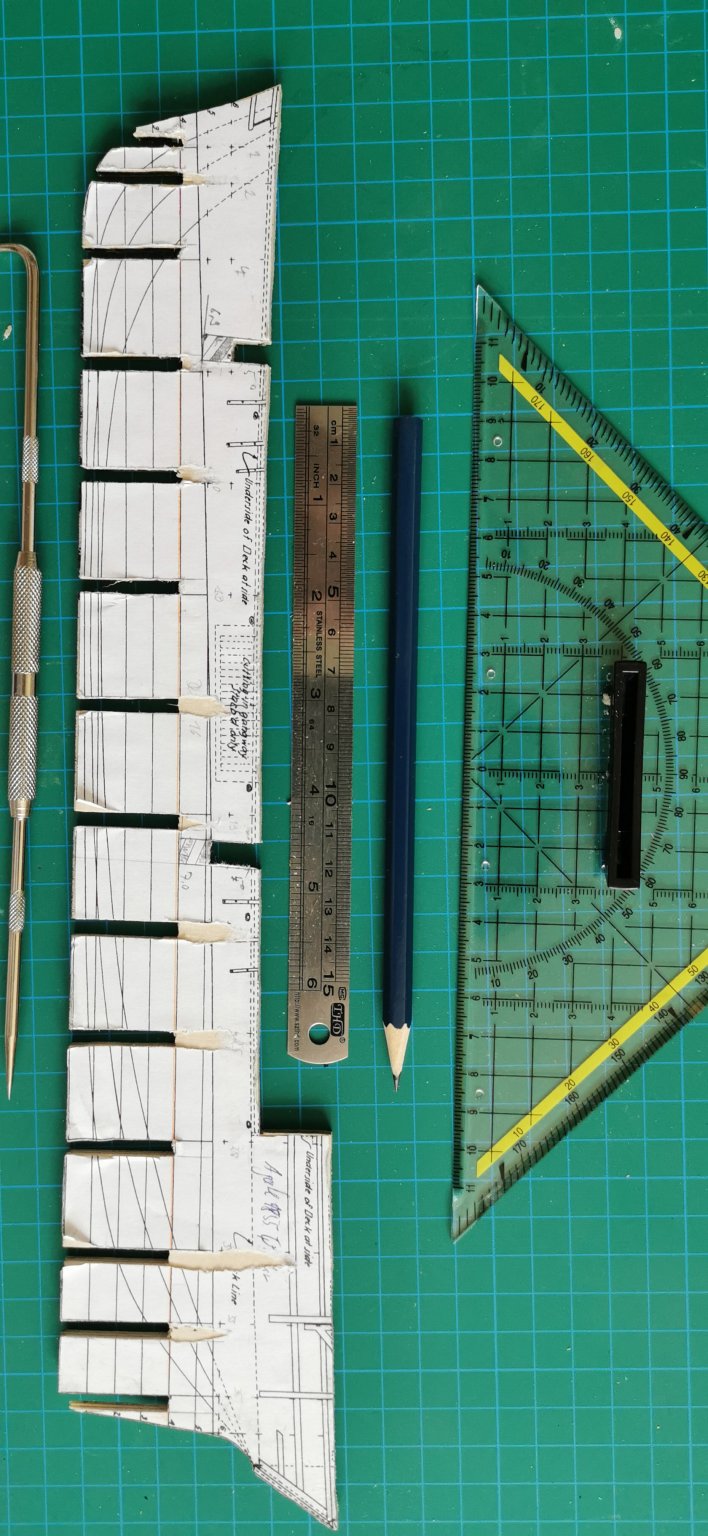
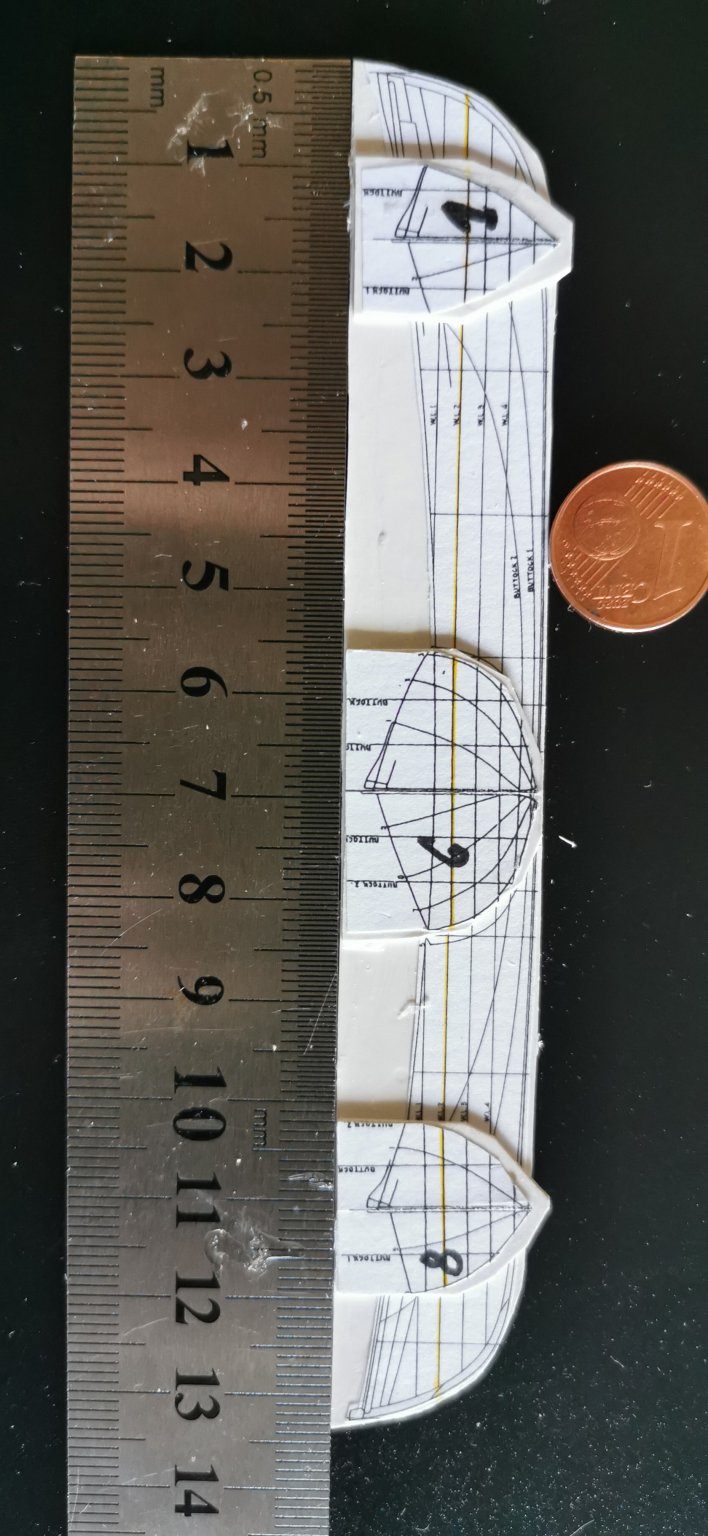
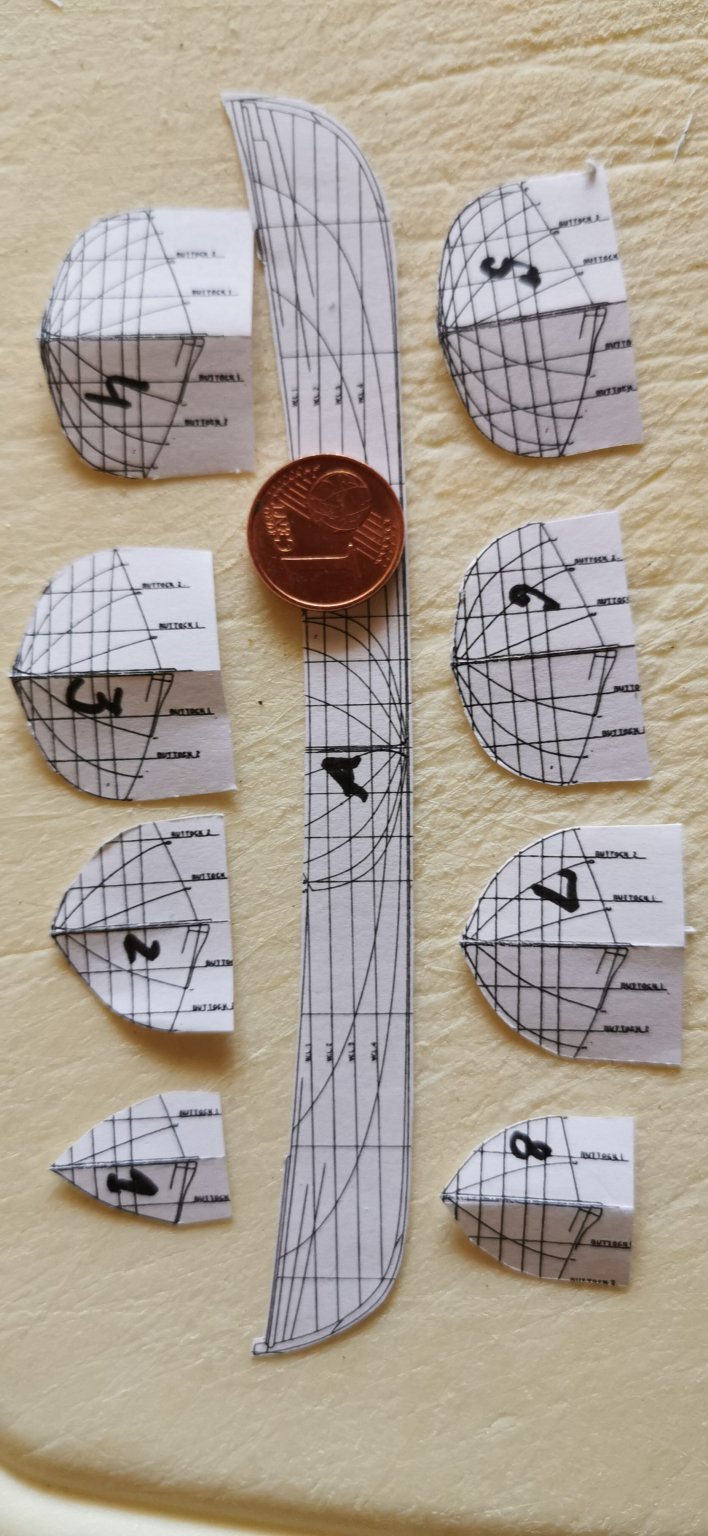
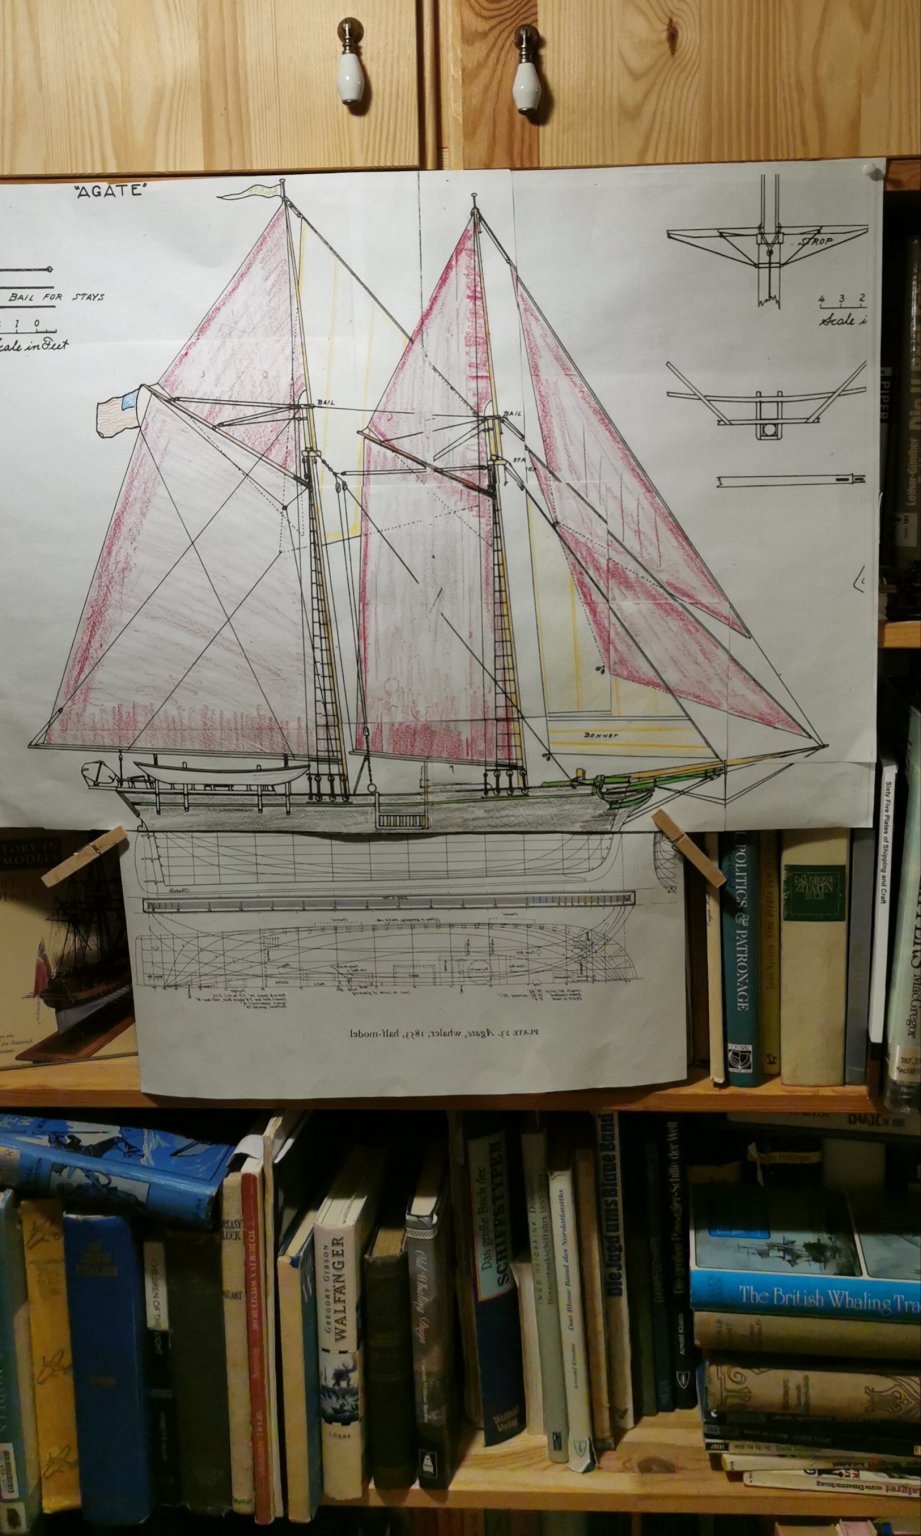
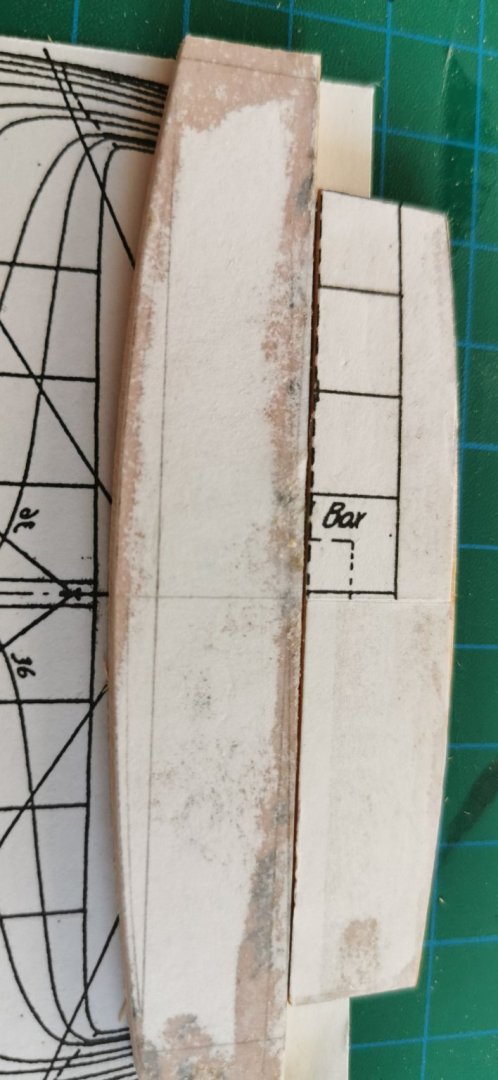
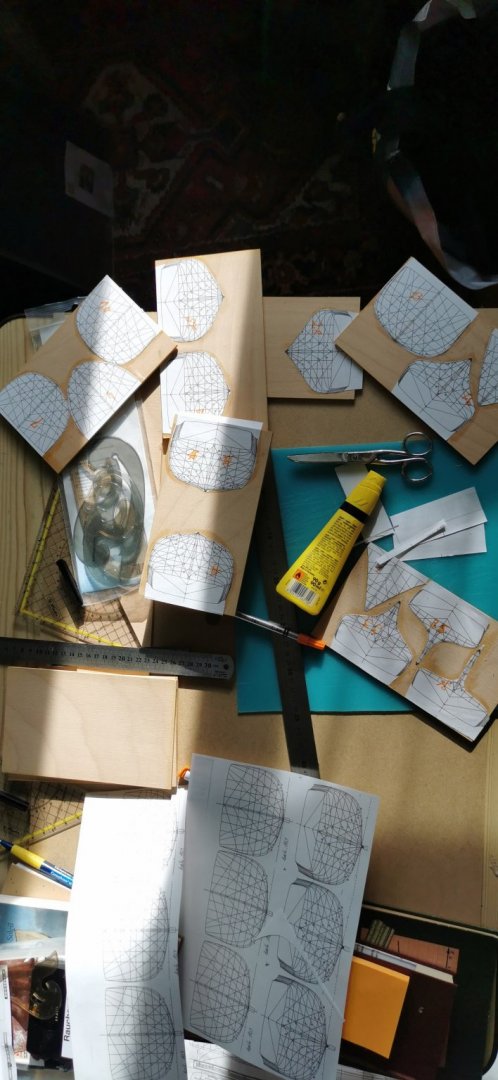
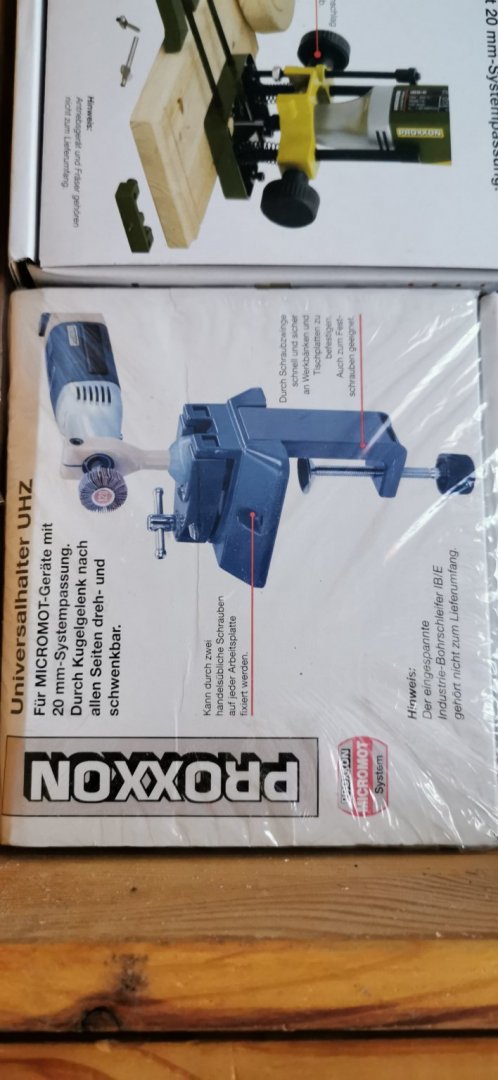
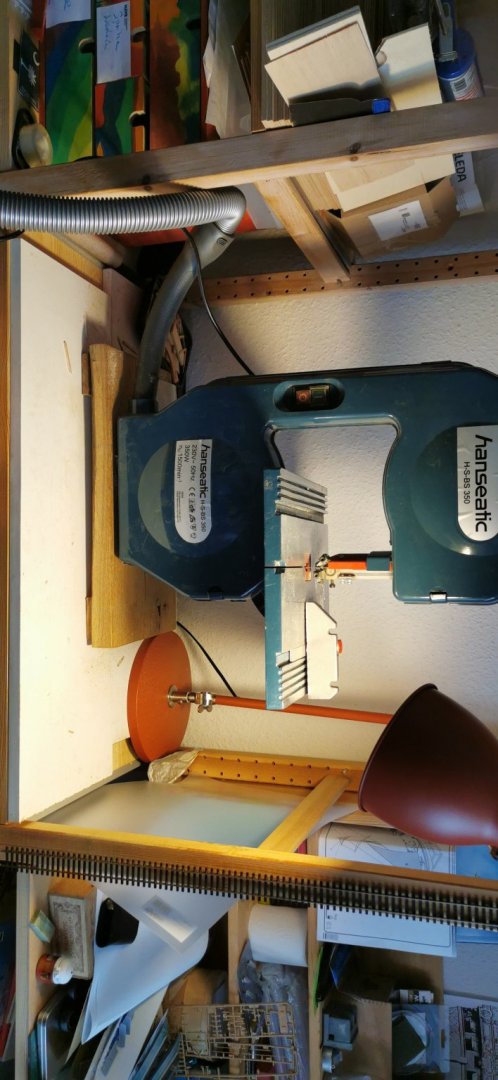
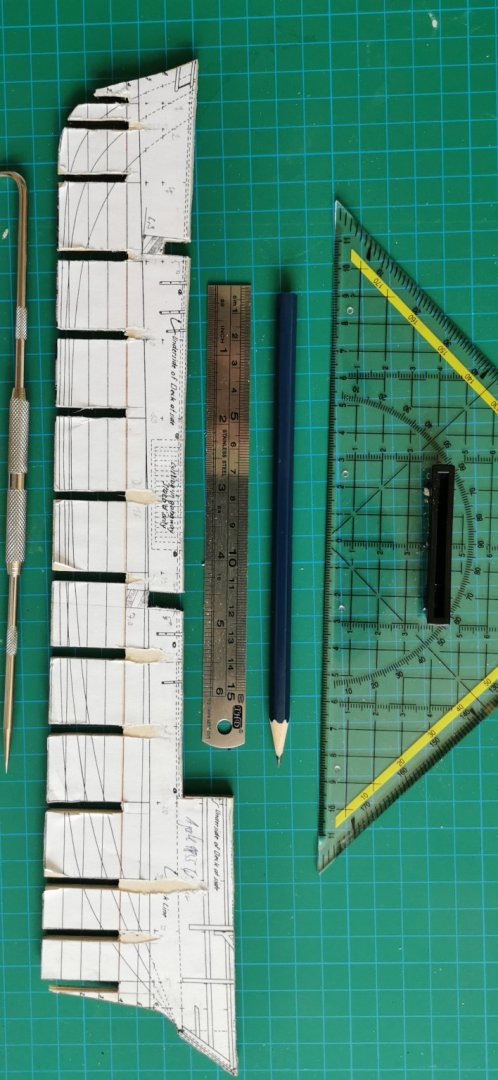
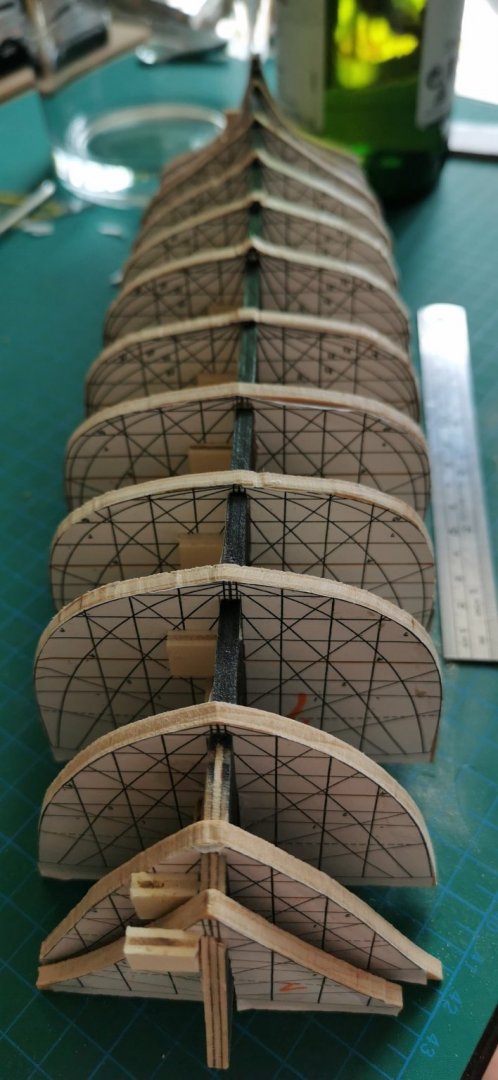
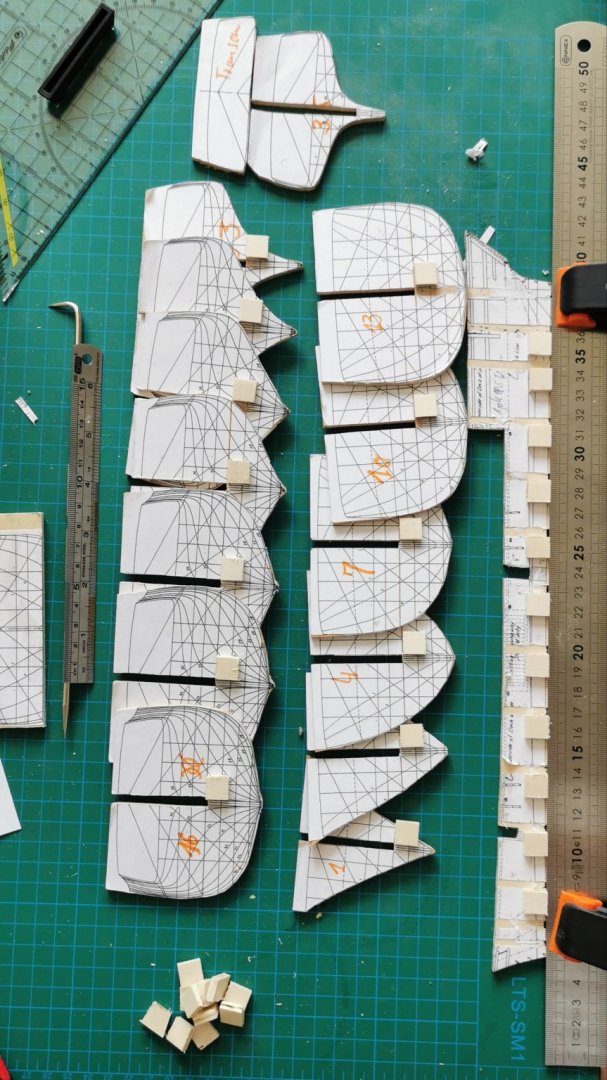
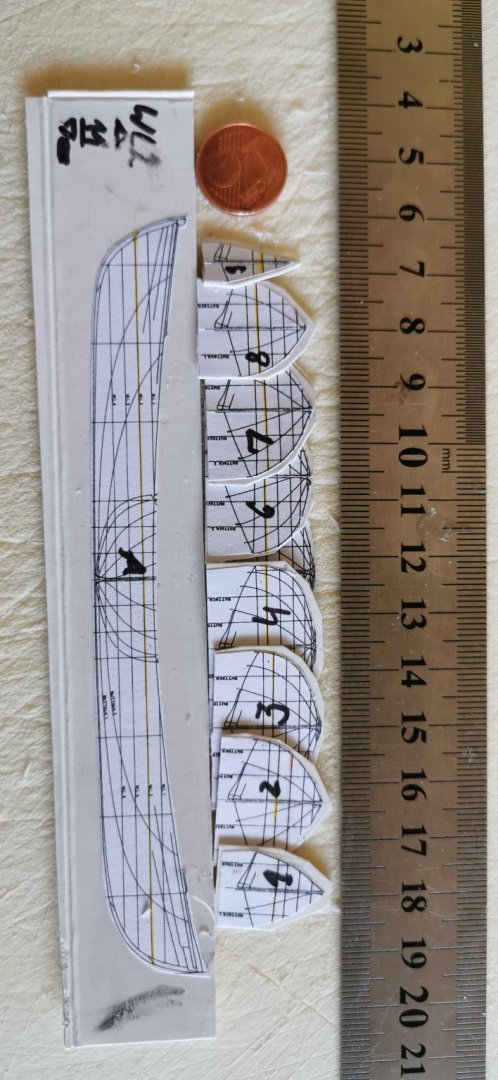
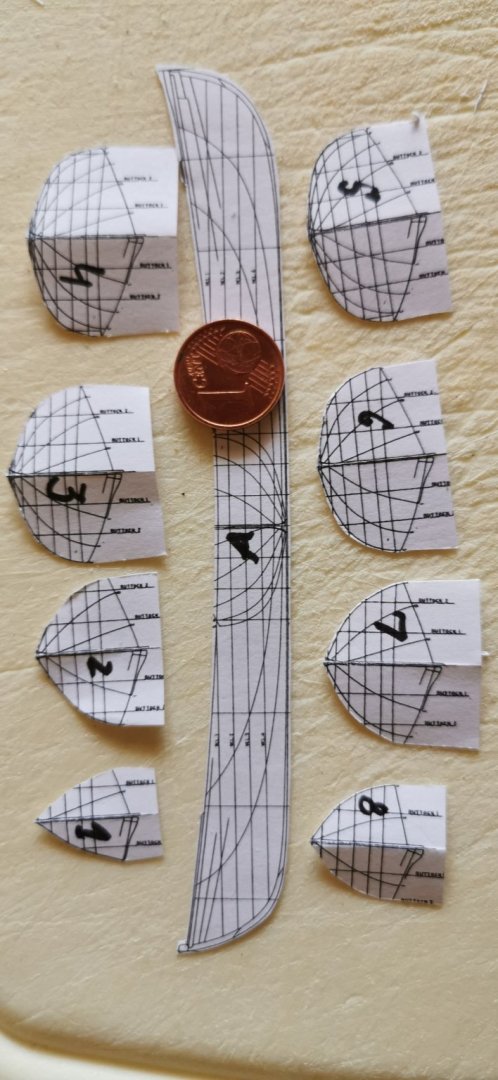
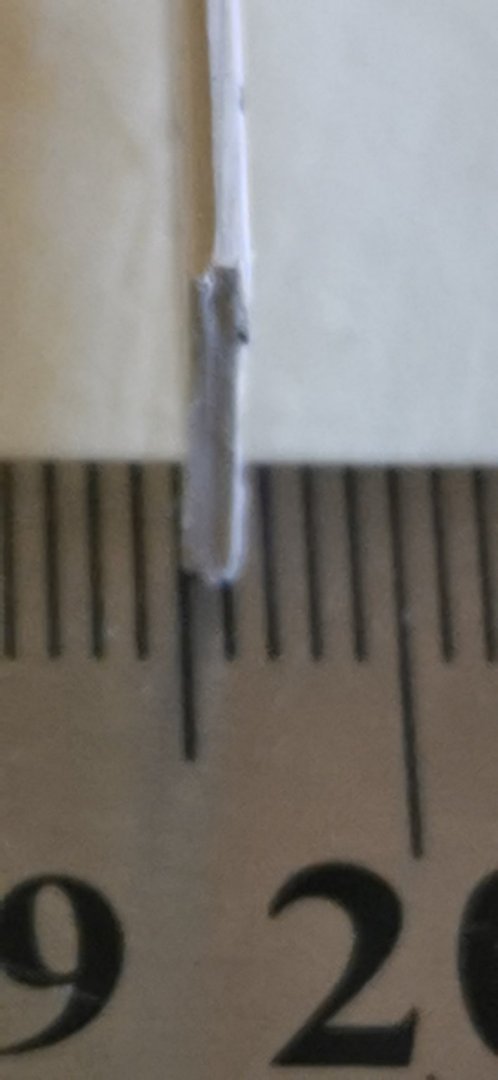
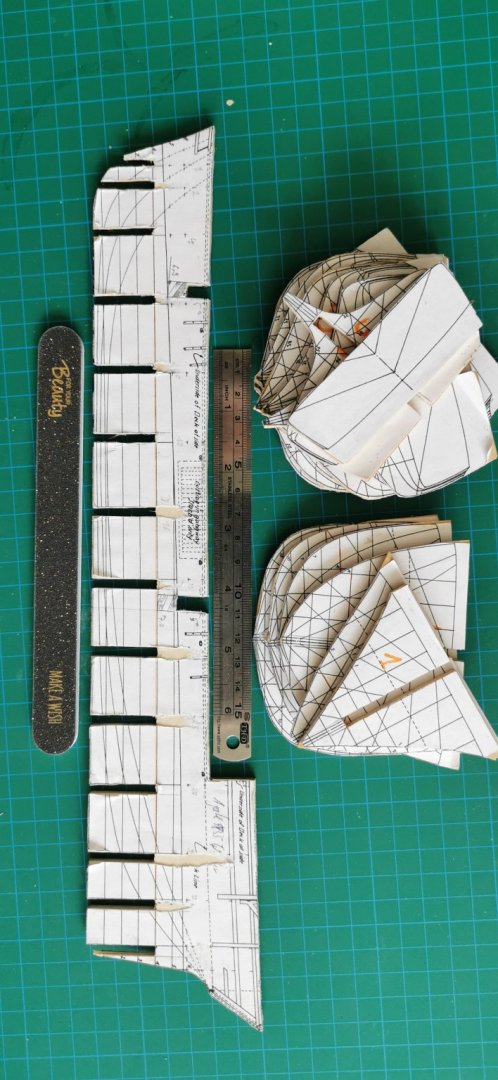
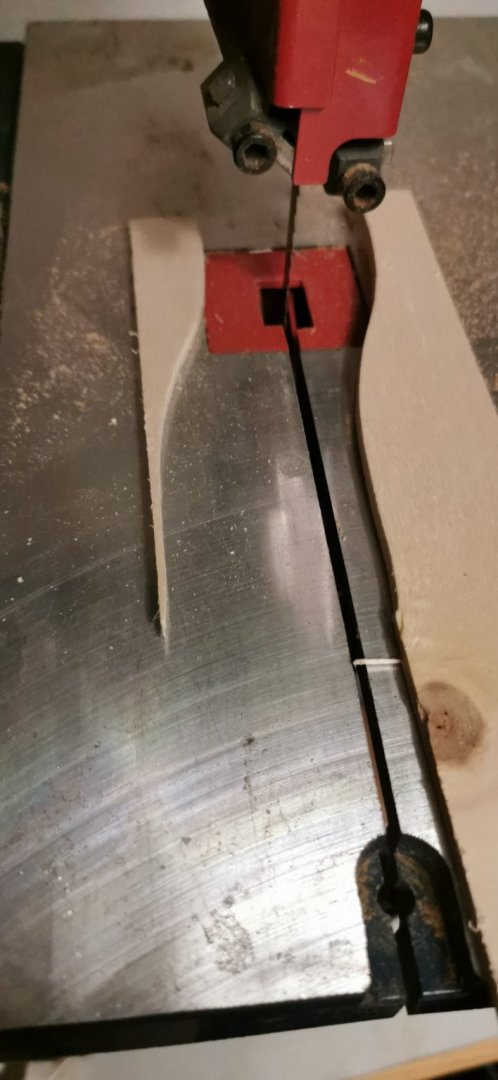
Hello friends of AGATE, as I can tell you proudly during the last days there was a bit of a progress with the hull itself and a start with the whalingboat after sever l month of quite on this shipyard. RESTARTING THE BUILT I figured out my planset and the centerboard again - archivation isn't my thing to do. (By this I recognized that I still didn't recived the rest of the KATE CORY ans LAGODA plansets from NewBedford - so I wrote to there.) I also found the 1/48 copies for a hull model I still think about to come into deeper darker detailling. So I started by glueing the frames cutouts on the wood and I voted for 4mm beech plywood for its stiffness. (Here the typical HdS mess on my working brench.) As allways I secured the side of the paped edge by wiping some extra Uhu on it to avoid any wobbling during the sawing. After some hours on my brandnew but preowned bandsaw I have got these results - and killed a sawingband by my stupidity of too much torsional force. combining the saw with a vacuum cleaner I got nearly no dust what is a grwat deal - but the vac is noisier than the saw. But as it runs without those mechanical jiggsaw vibrations the cuts are more precise and I am really happy about the result. And I do have got less to sand on. My only problem was the arm so I sprayed the backside black cut the grooves on the table saw and added the groove ending line with a scriber... so I could turn it arround and cut the rest easily - but how to deal with the 900mn centerboard of SAINT PHILIPPE 1693??? (But I do this small ship to research for the pittfalls of her!) To sand the concave parts I will build a little drumsander from my Proxxon hand drill and this UHZ. The headache comes from how to build the little workingtable to bring the parts horizontally to the drum sander. So here the centerboard with its grooves for bulkheads and masts. I do still think about opening one staircase hatch to show down into the hull (or shall I transferring it into the 1/48 hull model?). I also think about a sperm whale in the cutting station to show the spectacular dimensions of a usual 70ft whalecow beside a 74ft schooner! KEEPING THE HIGHT Main central point of sorrow was how to bring the bulkheads into a correct row? so I decided to glue a pair of 2mm poplar plywood cubes onto the centerboards over the WL N°4 and on each bulkhead under WL N°4 - so the bulkheads are all in order. But I canged my mind due to the little gluing area and went cut out to 2×5×5mm stoppers from poplar plywood. Here my construction to bring them exactly aline at a steel ruler clamped onto the centerboard. Aquite primitive way to deal with this problem. Here my way of gluing the stoppers on both and what it looked like on the very end. And that is what it looks like now and how it does work. On the Bulkheasa N°s 1 and 2 It does not fit too goodly and not all the bulkhead's stoppers touch to each other. So I sanded the grooves again with a nailsander with gold glitter in it... But exactly my needed 4mm thick - so this work was a really fast and easy job to do. This is my cliffhanger fot the next step of progress - the transom: From the rectabgular drawing to the real size with the light bent from the drawing. WHALINGBOATS My next troublemaker are tbe three (and surplus) whaling boats I have taken the plans from this well received and highly recommended book with eight plans. I decided to scale them down onto 18,7% and the do fit to the Grimwood drawing. The are only 130,5 mm long and arevquite flimsy. And due to this I will try to build them in cardboard. The hull is a clinker-kraweel mix interestingly. Whalingboats capsized that often, that there was installed a groove by a clinkered plank for the fingers at the sandplank to the common design to give the whaleman a change to left the water. By this it is clear why Sir Arthur C. Doyle called his book about his time aboard of a whaler "Dangerous Work". I will show the ship after a successful hunt with weathered boats and tje a spermwhale beside the hull and the flag still in the body. The tugs for the ropes mainly empty, harpoons damaged and such details from after the fight. So I started with the mould for the whalingboats scribed the centerline into the frames plane CL and folded it cut out both and got the bulkhead. (As the copies are never mirrowed 1:1 exactly this is the most accurate way for me to do so.) Than I chose WL N°2 for the right hight of the bulkheads gluing the drawings onto 0,55mm cardboard. At the moment I do deal with the idea of doubling the cardboard to 1,1 - 1,2mm so I have got the width of my bandsaws cutting goove. Here three of the bulkheads a ligned to the centerboards redy for the "case hardening" by superglue due to a better usage of the "machining allowance" on the mechanical sanding. Dueto this the keel is still on the centerboard. The keel is only 1/2mm thick. And I still think what it could be made from? This is AGATE's progress for today.


.jpg.5180a27a412c37e3051cde682585955a.jpg)

-
Hello everybody... after nearly one year I reboot this project do to the simplicity of the lines and the fact that I am thraitwn to fail in my baroque projects as I am unable to deal with some problems I never met on a lower tier... So I do follow the helpful hint of a friend who warned me not to overdo it my a too big project. And so I stopped all the work on SP and do store it in my archiv untill I have got developed the needed skills. So I do open my whaling drawer and continue this project as it is easier in the hull to build. This is the state of the project recently.

-
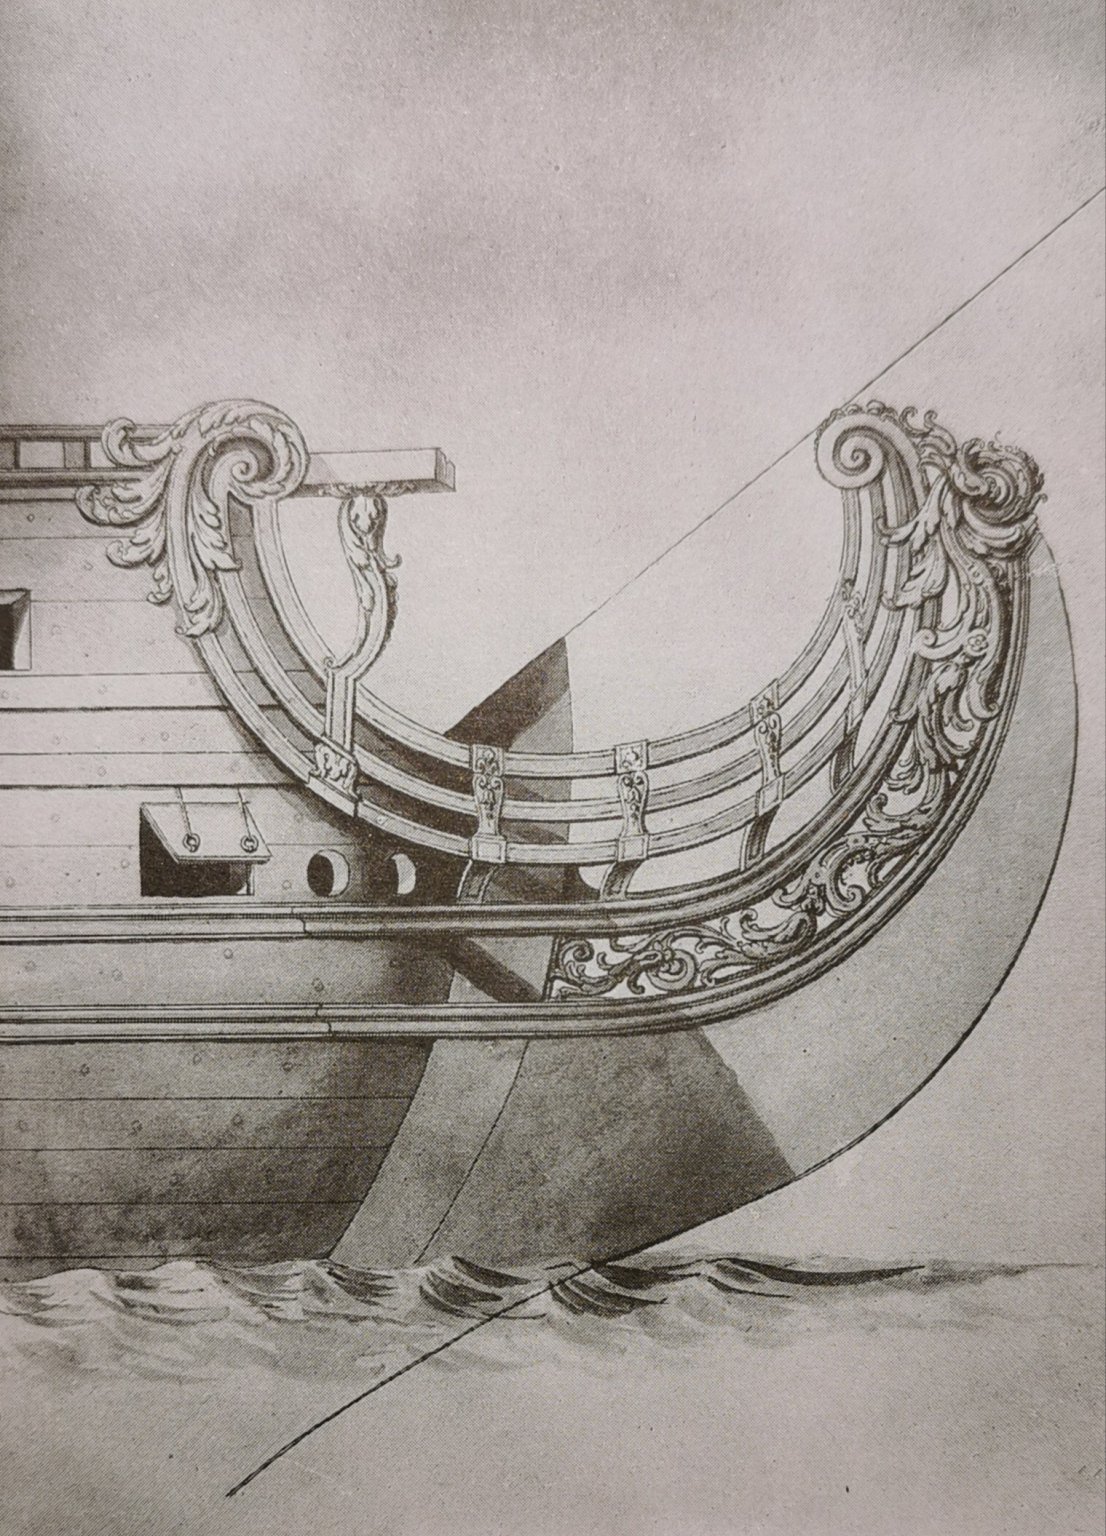
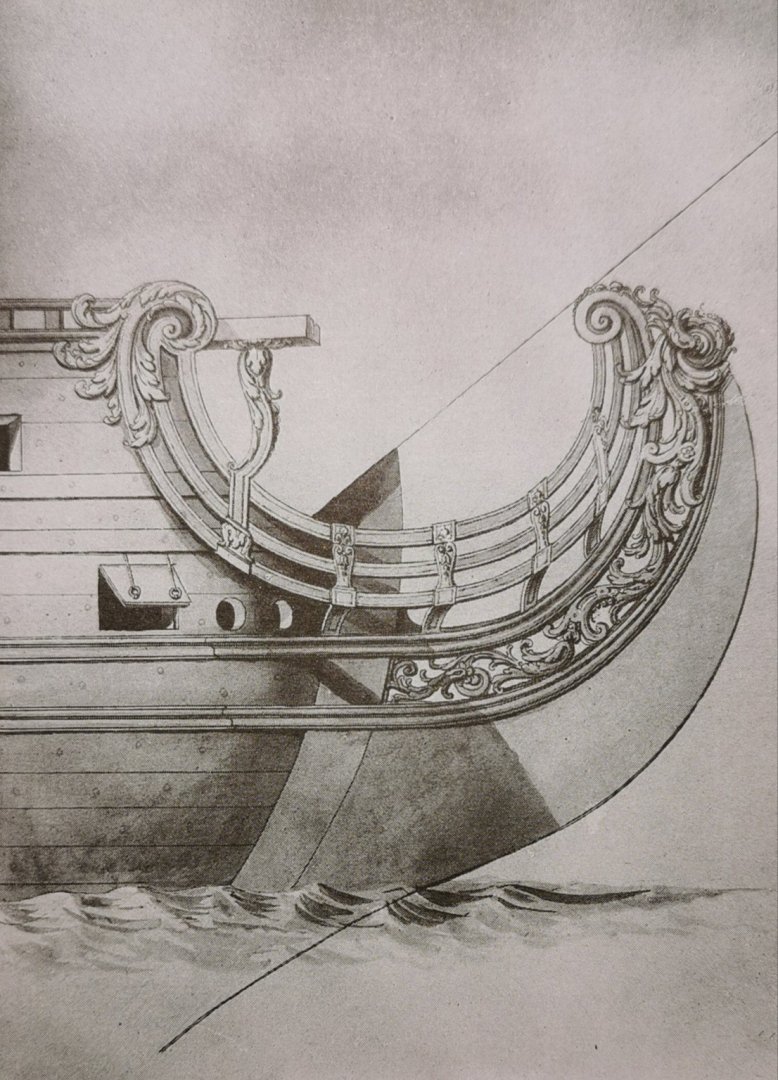
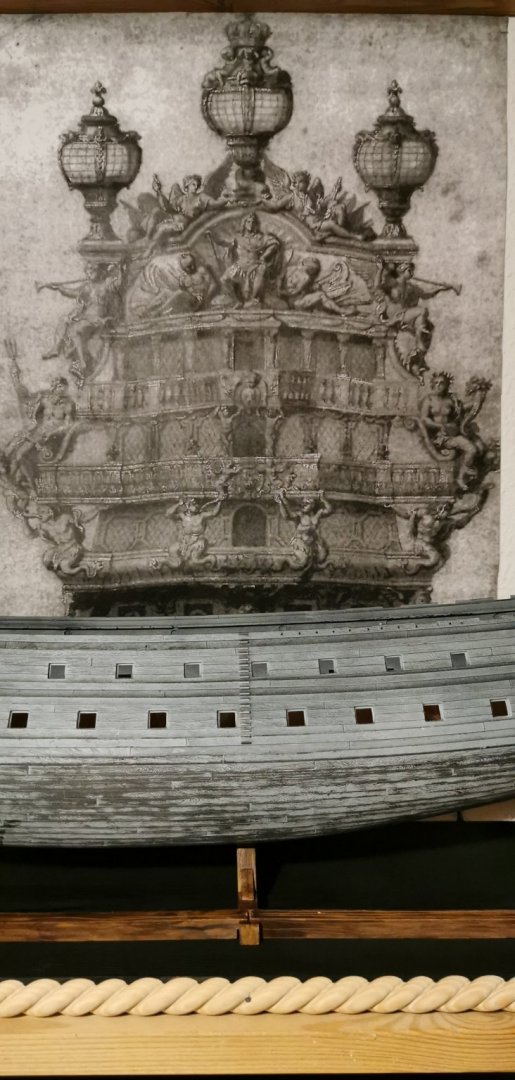
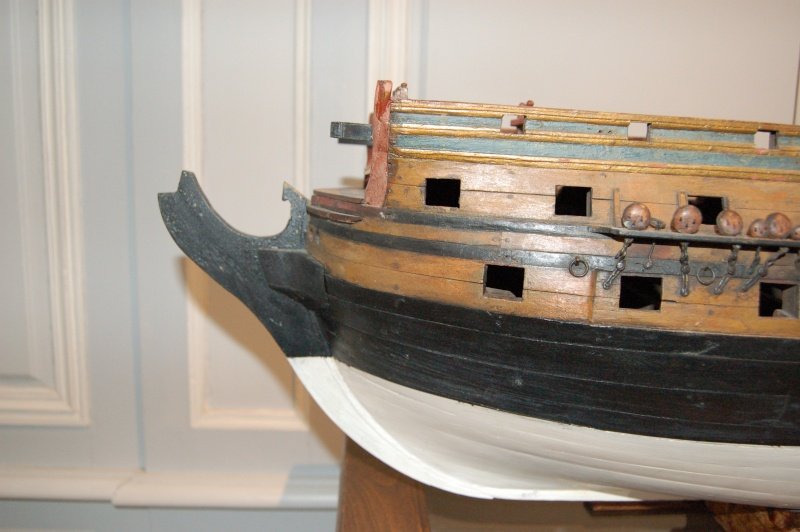
Dear Marc, here one often forgotten feature, one not even implemented in the Heller kit - the pair of galleys and the bread oven: Here the the Bread Oven - lacking a chimney or using the lattice above? But there is not lattice above: And why is the united legs of the cable bitts suddenly disapeared??? So but more of intrest for us are the chimneys looking out of the deck behind the breakhead bulkhead - the ugly chimneys: A second feaure prominent on the UD is the cannonball boxes with ist beautyful curved appearance (shown here in the LD) : Hopefully this might help you towards a drop of more practical realism in the ocean of decorational detailling you have got at all.
.jpg.23e6d7f5fd9198f4824a52cd0a1964f1.jpg)
.jpg.af09bb0417e79814d82c50bd281a0cee.jpg)
.jpg.3f489f27655b3b648886a118c05e003f.jpg)
.jpg.5d19fa09e5f3f118bd865af4b7c02c69.jpg)
.jpg.a412f2d53c1da988034d9c427ab85a92.jpg)
.jpg.4ad8546cac79431b82746d65fd290d4c.jpg)
- 2,697 replies
-
- 7
-
-
- heller
- soleil royal
- (and 9 more)
-
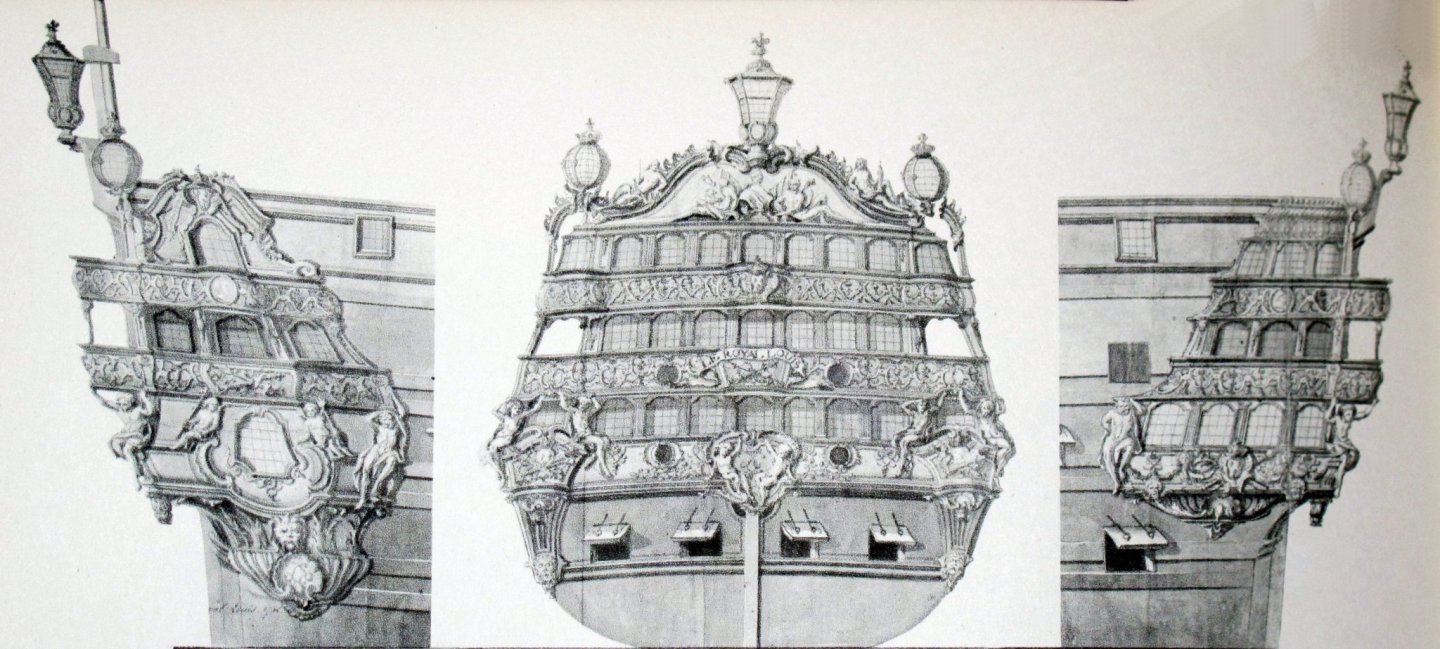
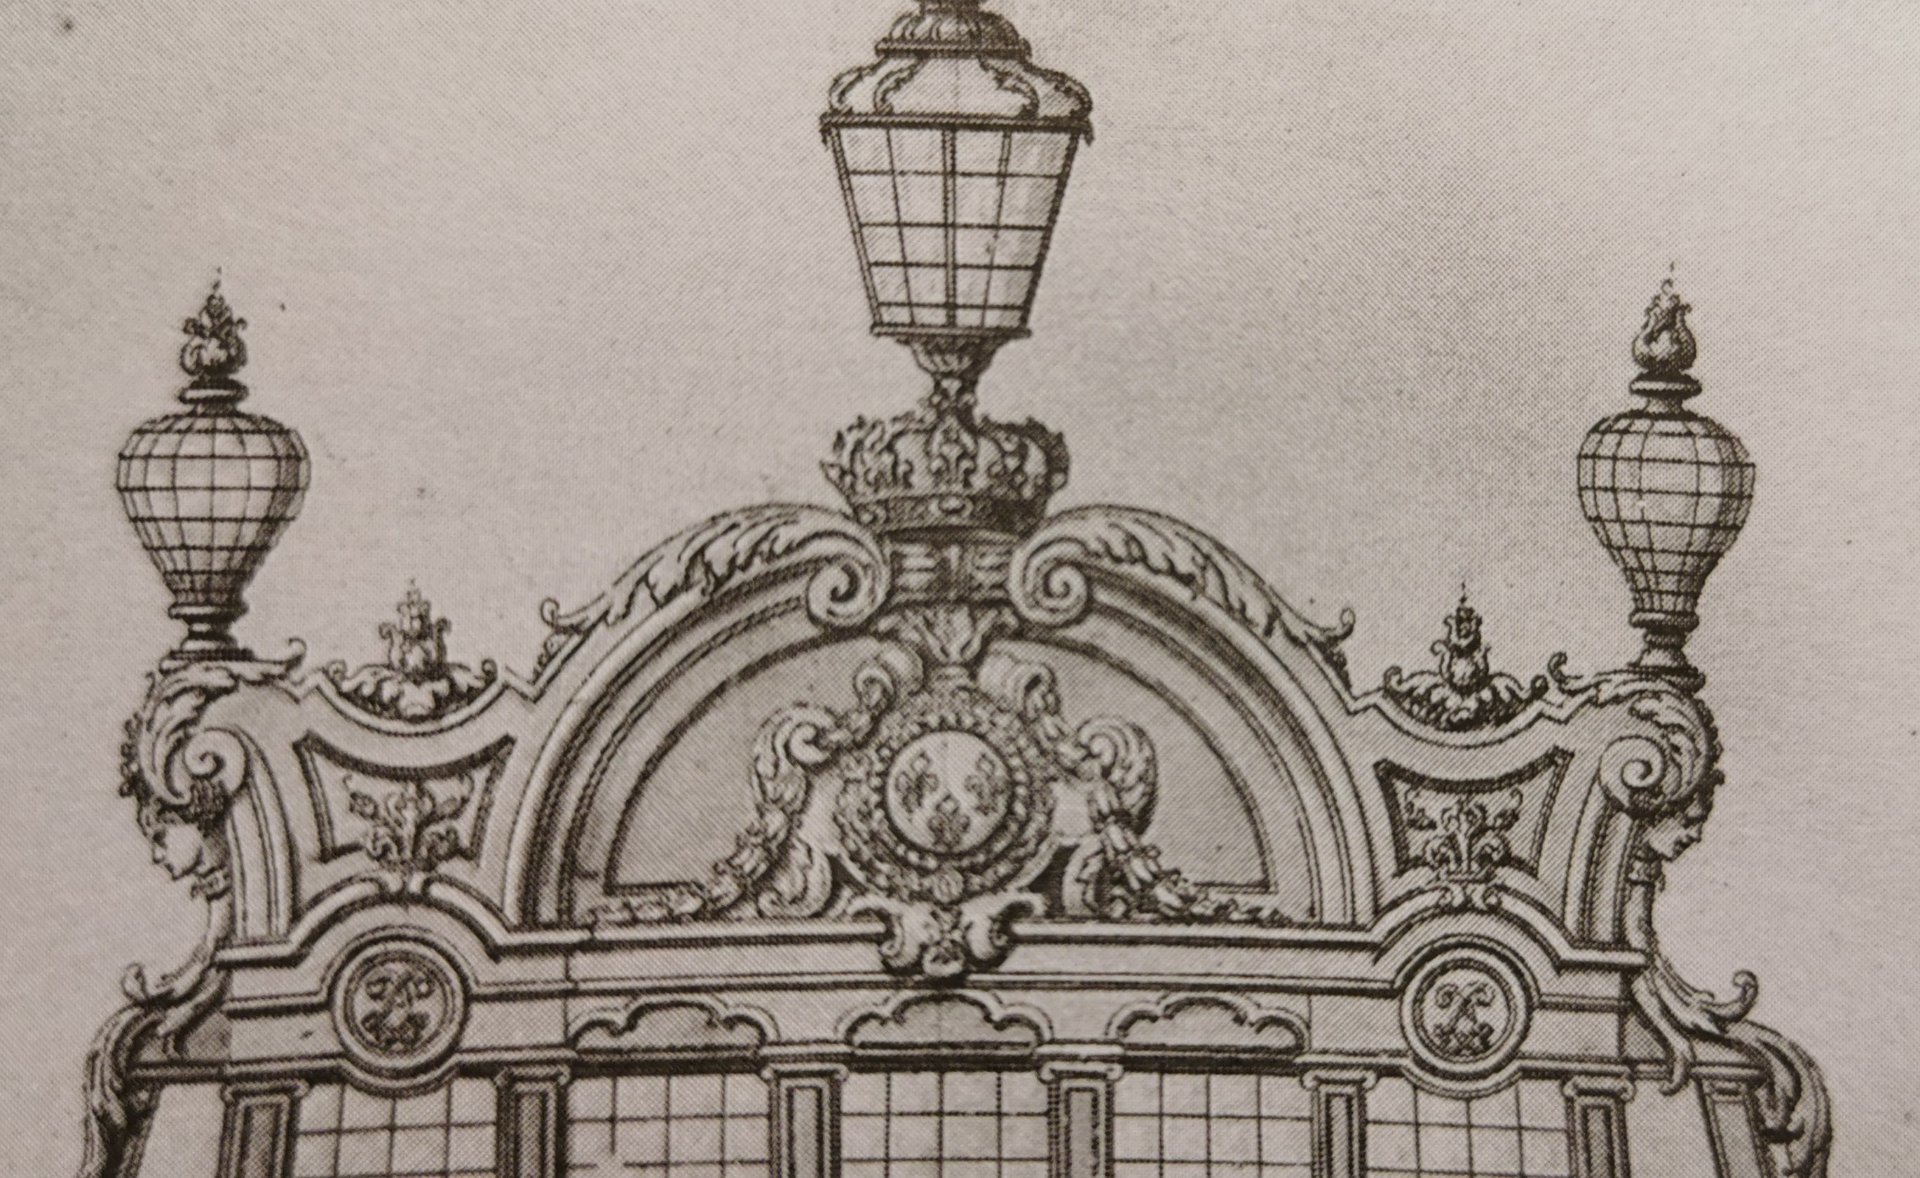
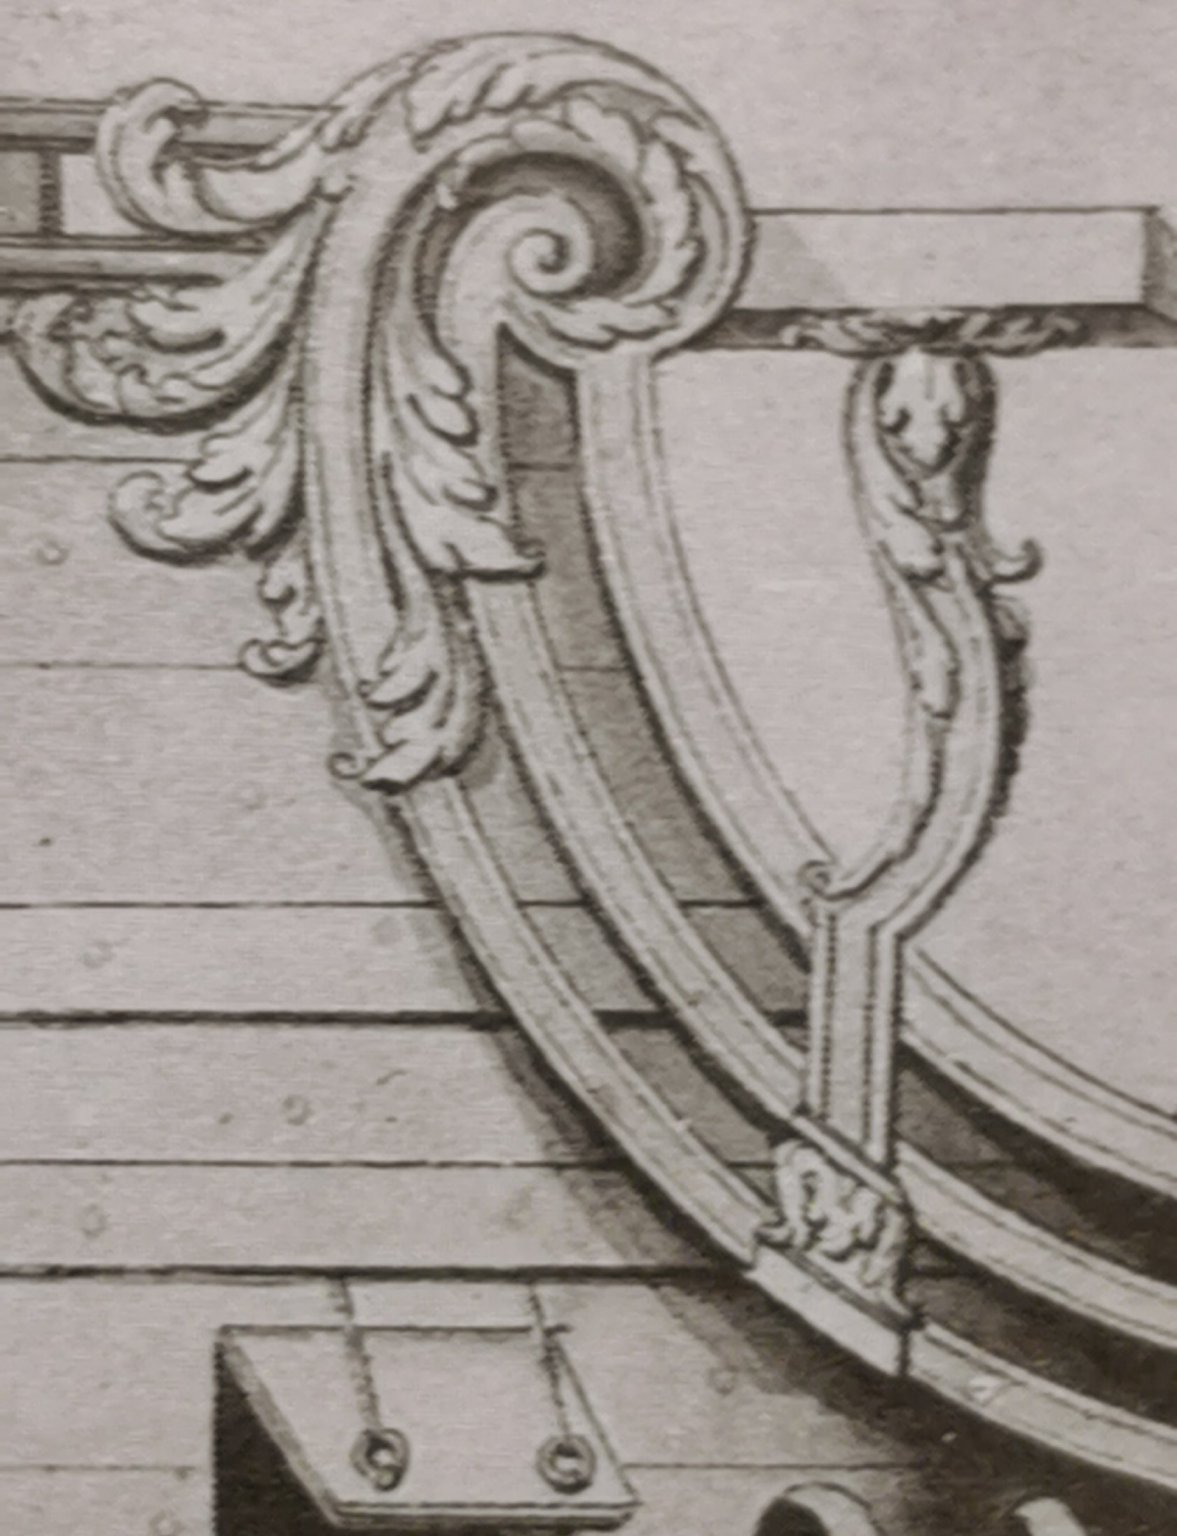
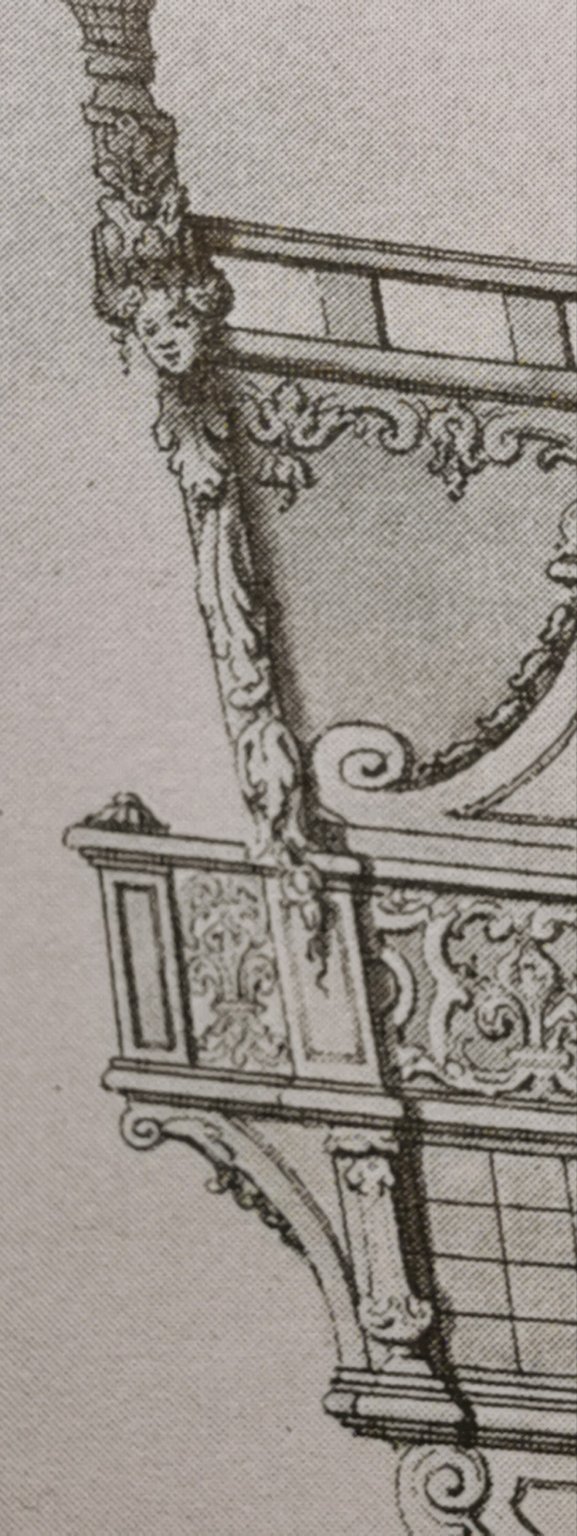
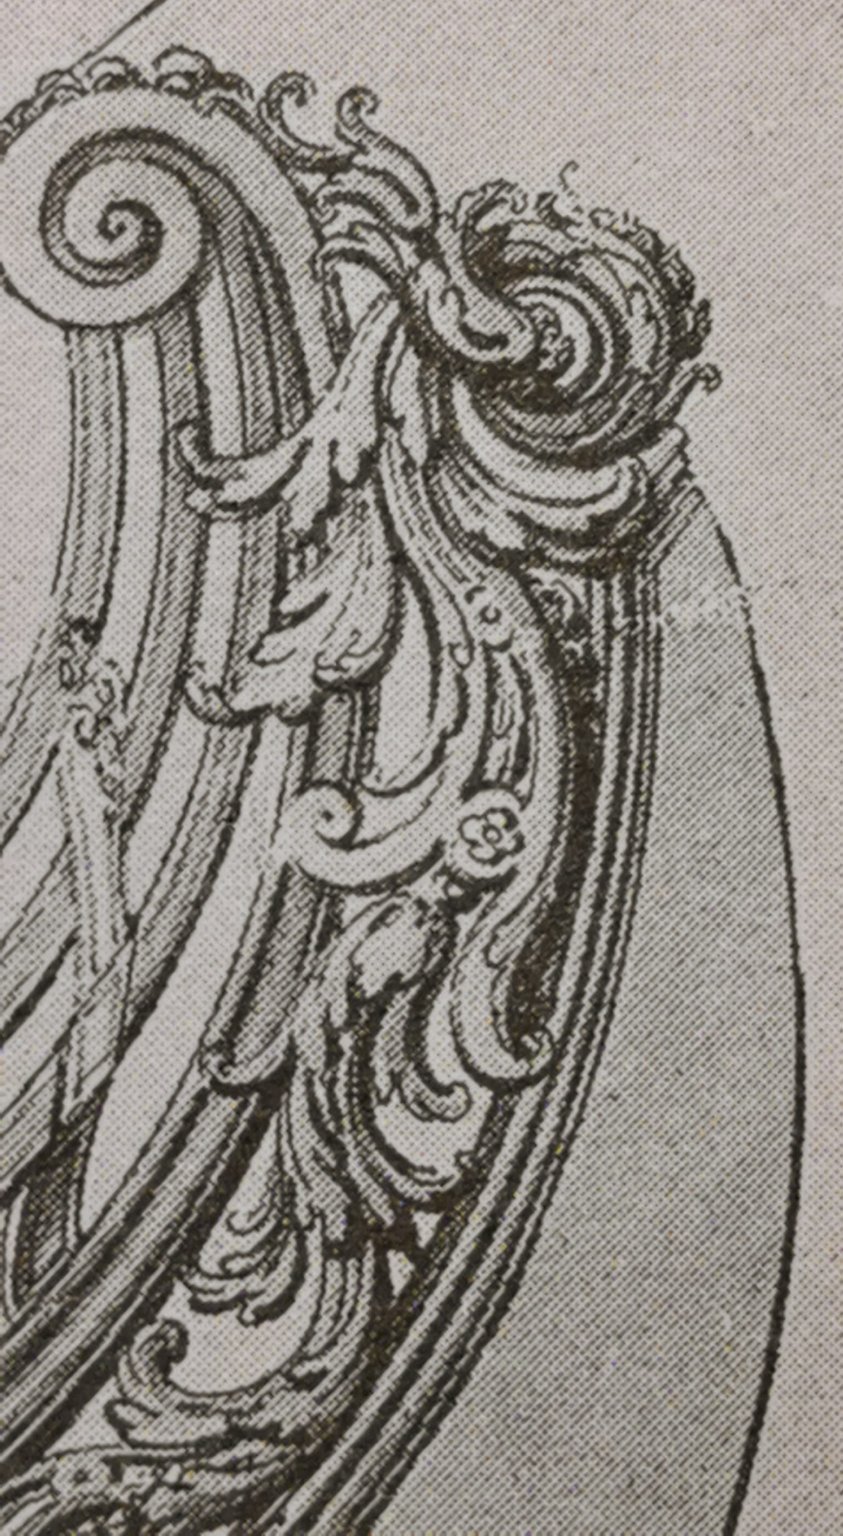
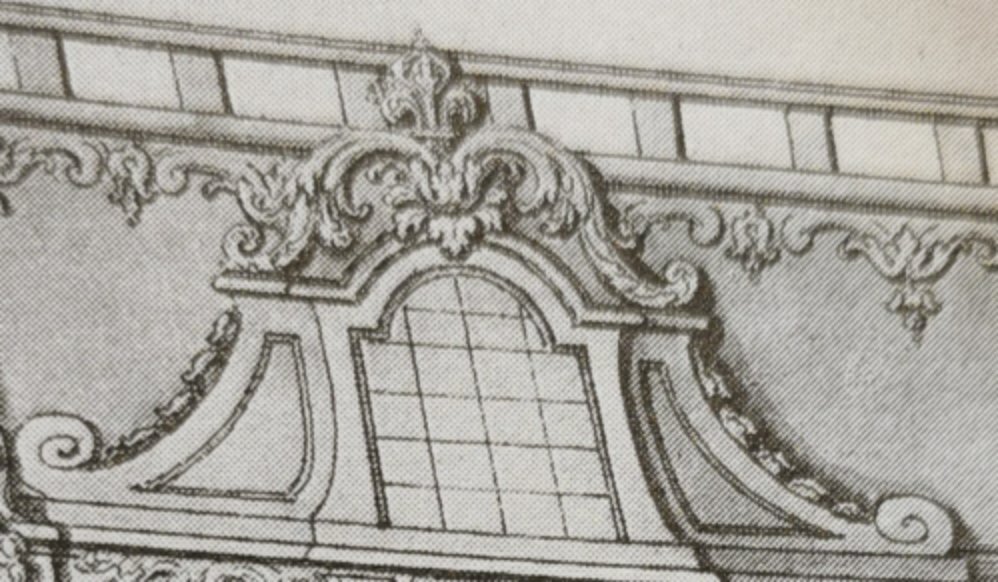
Asyou like her so much heee the full set of three drawings of 1688 with some very distinguished Arcanthus leaves in beautiful shape - but for the start the top of the bottle en details: Her the tripple of the decoration drawings: The transom The side gallery The gallion Now some further details of the decor: The simply half circeled Couronnament with with very useable detailling. And now the floral shape of wood in its finest way to be: Hope this helps for the non state room's inner decoration and some the unknown decoration at breakheaswalls &c. so it is "some contemporary stuff" on and surrounding it. Thanks for the interesting new pictures.


- 2,697 replies
-
- 10
-
-
- heller
- soleil royal
- (and 9 more)
-
Thanks for the text and beautyful pictures - nice little in between project.
- 40 replies
-
- 1
-
-
- la tartane
- heller
- (and 1 more)
-
Hello Marc, thanks for your great work! I am still astonished by your wounderfull and accurate craftman's workship!!! I. My own idea of building the SR, too gets faded more and more by any of the new pictures you do post... 😇 Ia. I think I'll take the 3rd Heller hull for ROYAL LOUIS 1666 and do await the next book of Rickenbacher to get the detailling. Ib. And the 2nd hull will be invested in the DAUPHIN ROYAL. II. There ist without these light top framing nice braid FLEURON 1688 (56guns) no guideline for the frise design in the official-approved-decoration-three-view-drawings (typical German way of linking words together, sorry) so far I looked around: these place was empty - was it the space for the captains privatly payed personal decor of his own taste? (I do remember s. th. like this in the Greorgian RN.) III. And last but not least my intention to write here... ...there is one question I don't think I will do a home-run with this but it is important for ALL of us in here: Till when the inside planking of the battleststion was painted red? We all know it was done due to camouflage the horror of blood in a sea beattle aboard - and sothere is only one question: What was the coulor before? Did we have got any colour pigments surviving inside the hull of VASA? At SAINT PHILIPPE in the Ancre calendar of 2019 it is painted red... But for the French side I found in the Monographie of Commissar Huet of ROYAL LOUIS 1666 only a "light grey" - but it was the colour for the admirals accommodation - but no idea what the battelstations inside was painted in. Did you pass aside this important information duiring your literature journies in the Baroque world? I figured out this picture in DU BOIS DONT ON FAIT LES VAISSEAUX. BOIS ET MARINE. 1650-1850 but the red inside if the gunport lids does (in my point of view) only corresponding to the red an "gold" decoration on the UP's frieze not any evident proof of some completly redly painted inside of the gun decks, isn't it? Thanks for your intrest - and please do not feel pressed to start to demolish the hole hull in a Dafi and beyond VICTORY manner to change the inner wall's colour!!!
.thumb.jpg.d16791a52d6995441213b2c90066a93f.jpg)
.thumb.jpg.04aea963a8dc8b5764c8b0fc3223043f.jpg)
.thumb.jpg.a94f3f4cb714476c0b71f477397a2555.jpg)
.jpg.f0af615661539d661b9fa7d7662741ca.jpg)
- 2,697 replies
-
- 6
-
-
- heller
- soleil royal
- (and 9 more)
-
I nailed the decor ribbon onto the boards side and set SP on her stand for a test fit and figured out how to place the stand right. I really do like this geathering of the colours in particular thinking about the white underwater hull in contrast to the black wooden board... The transom of ROYAL LOUIS 1667 reminds me on its motto: "Over the eaves I am unmatched; and my king is it in the world." And the idea of building RL on this Heller hull also...

- 244 replies
-
- 3
-
-
- heller
- soleil royal
- (and 1 more)
-
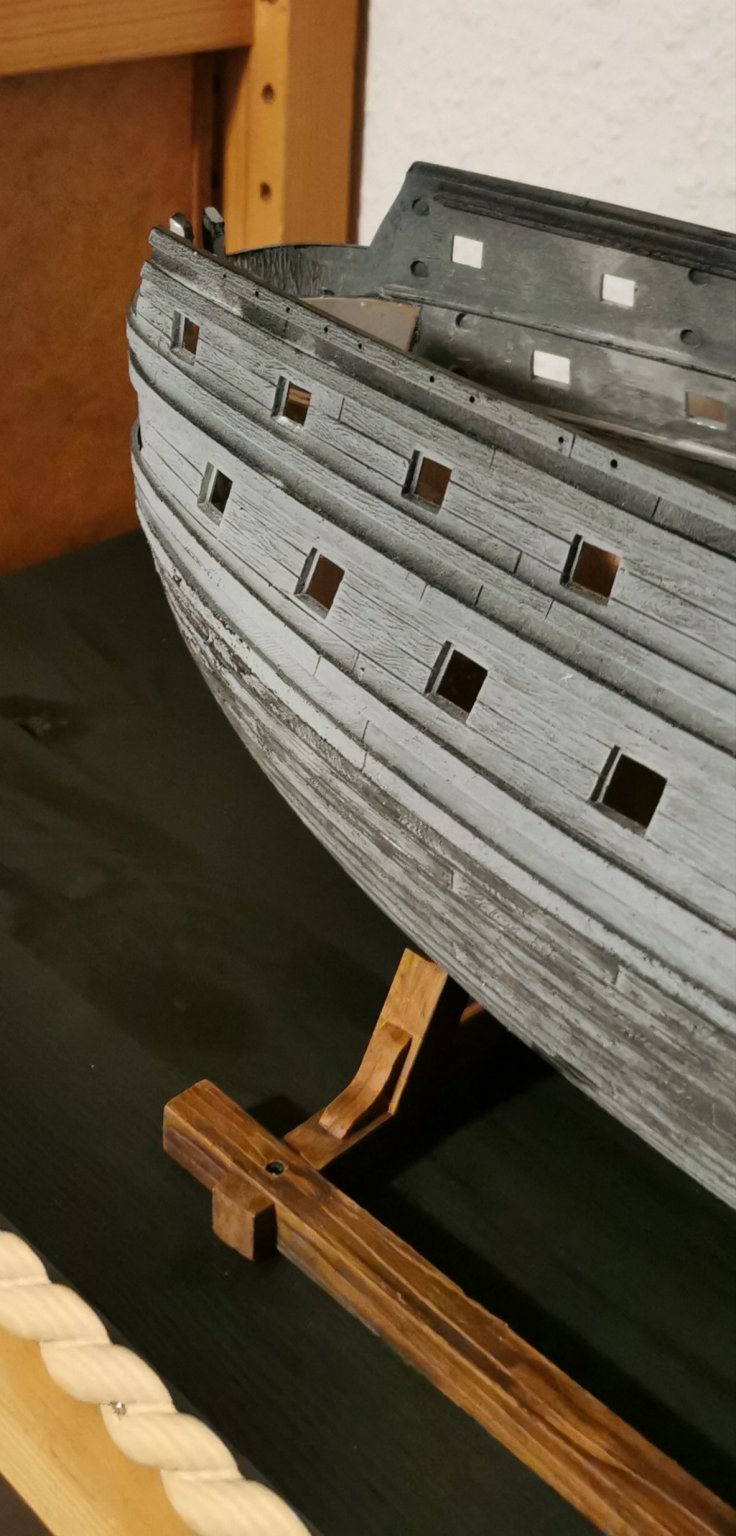
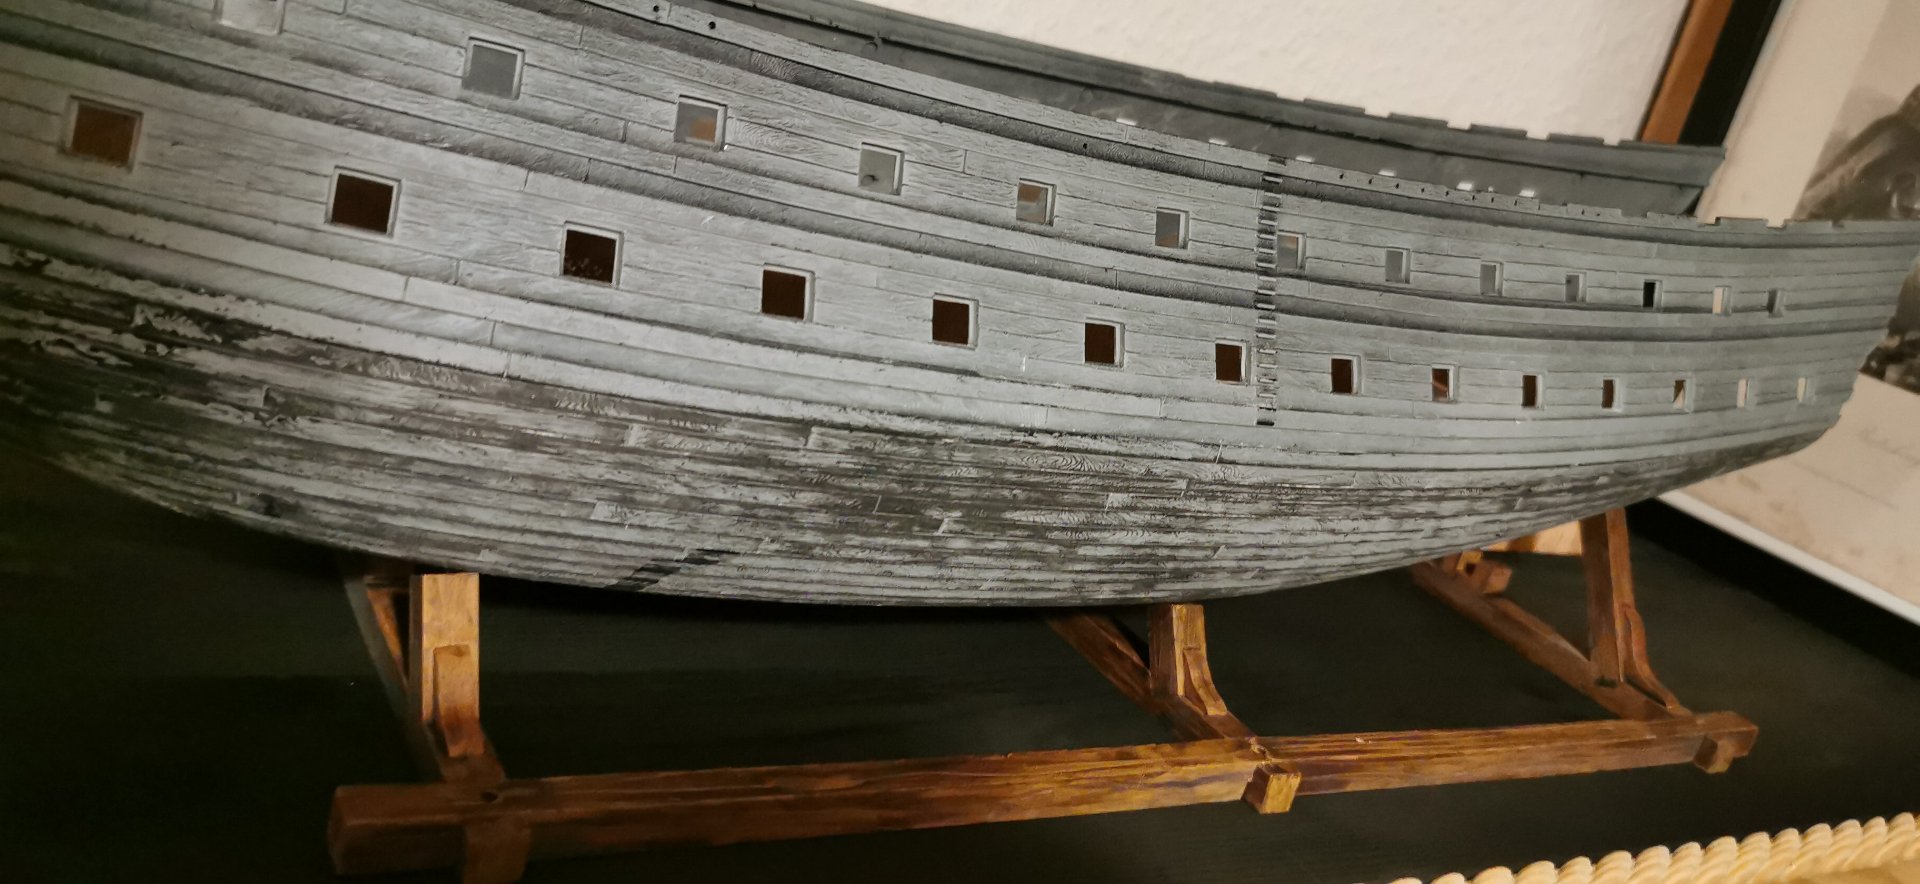
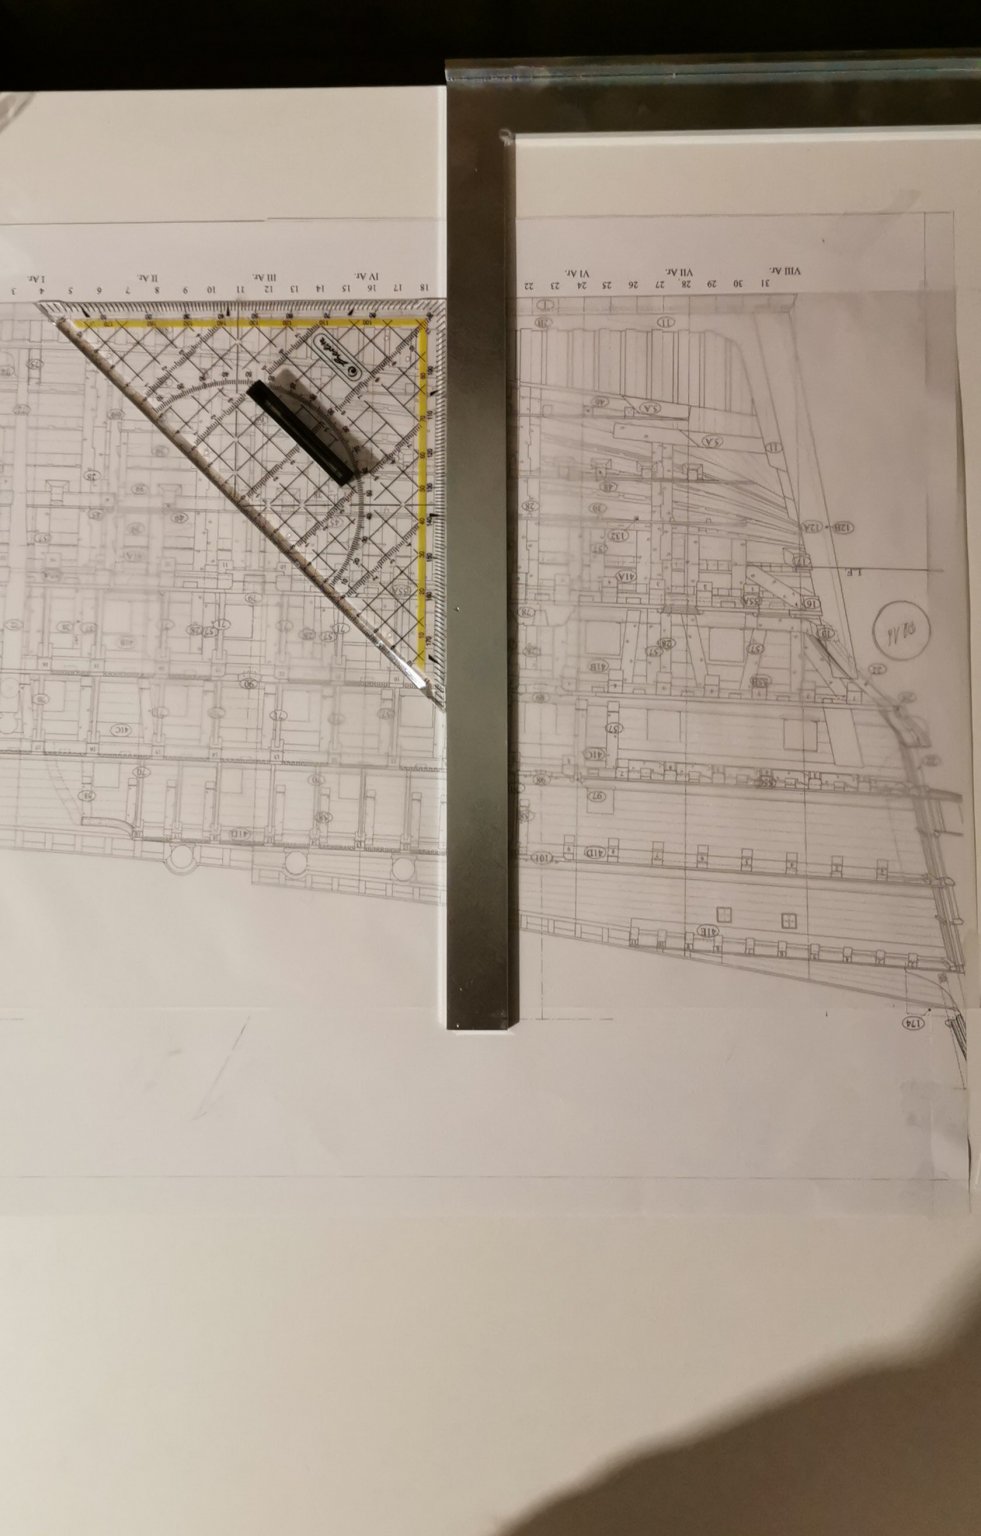
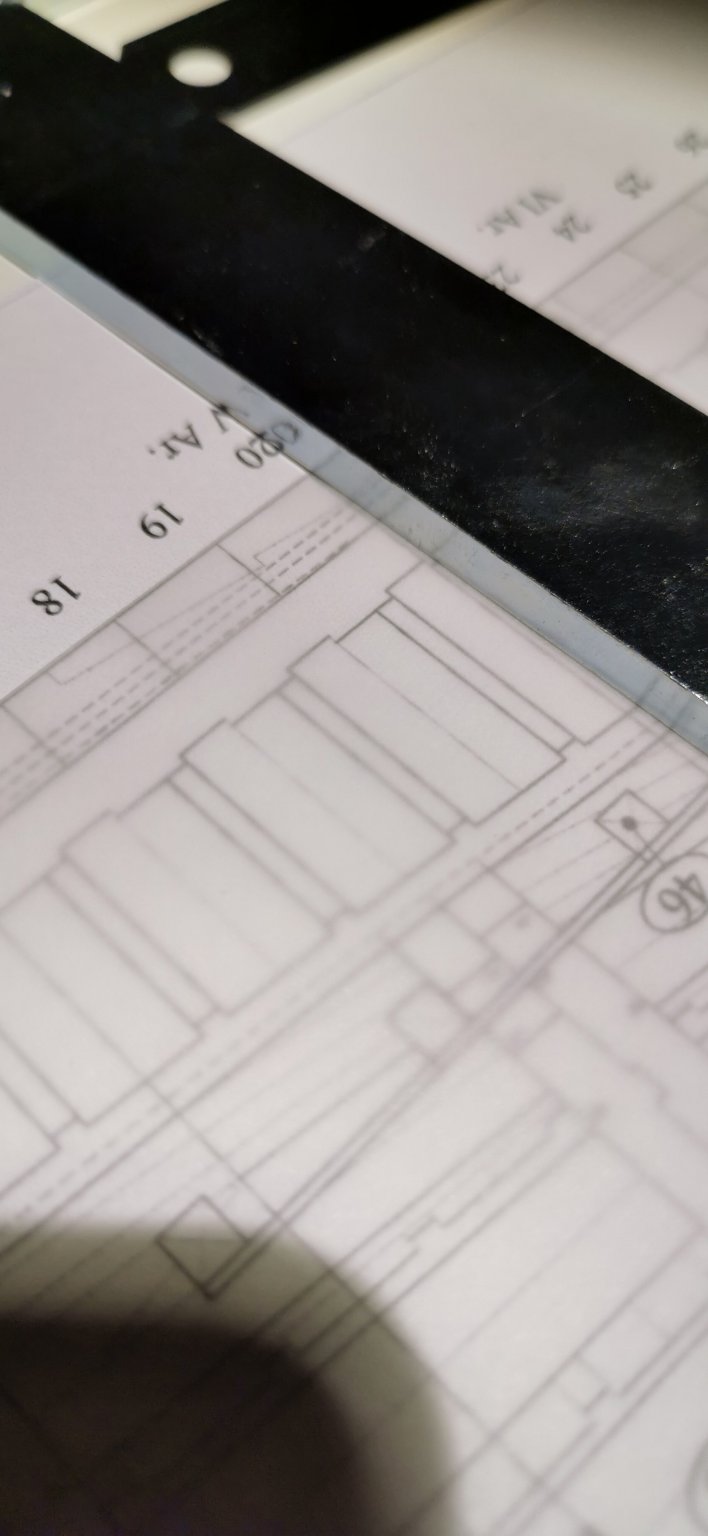
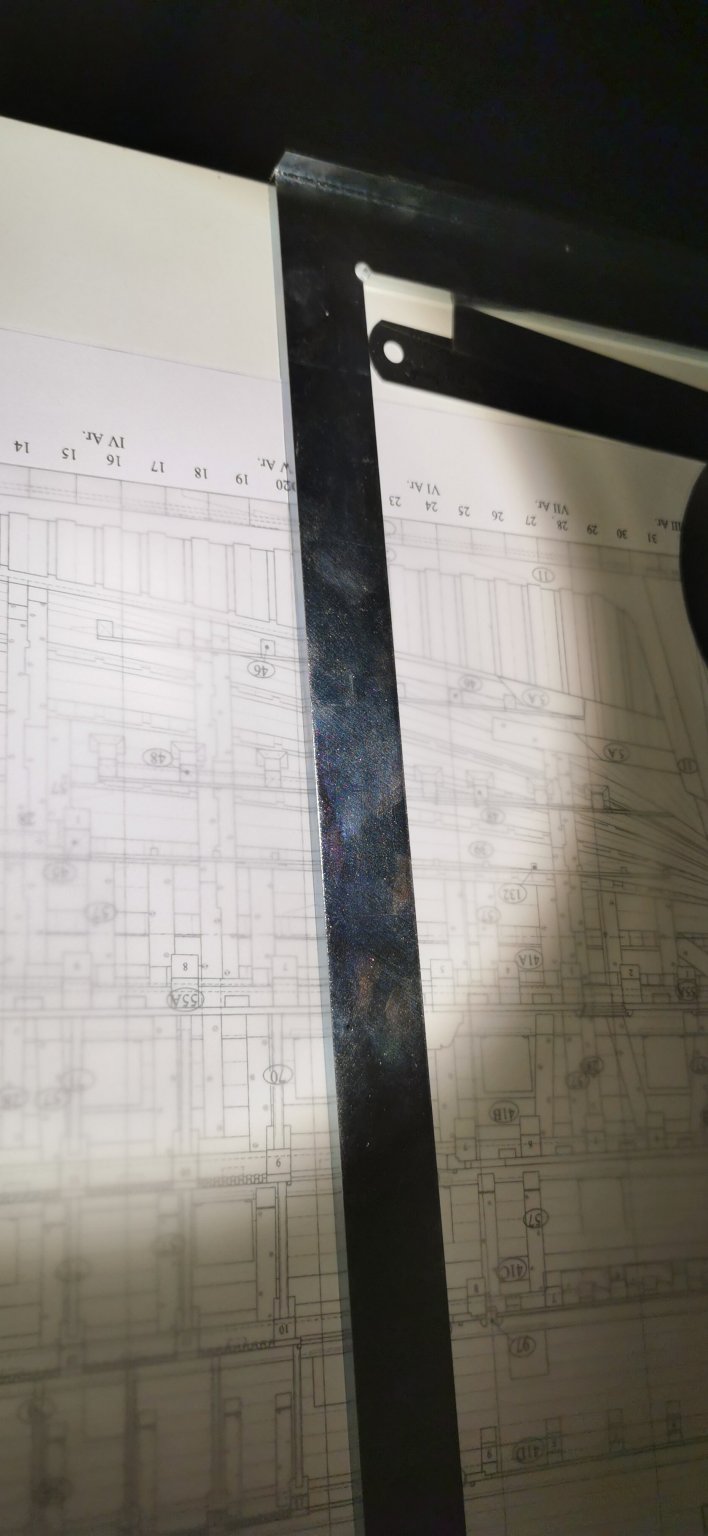
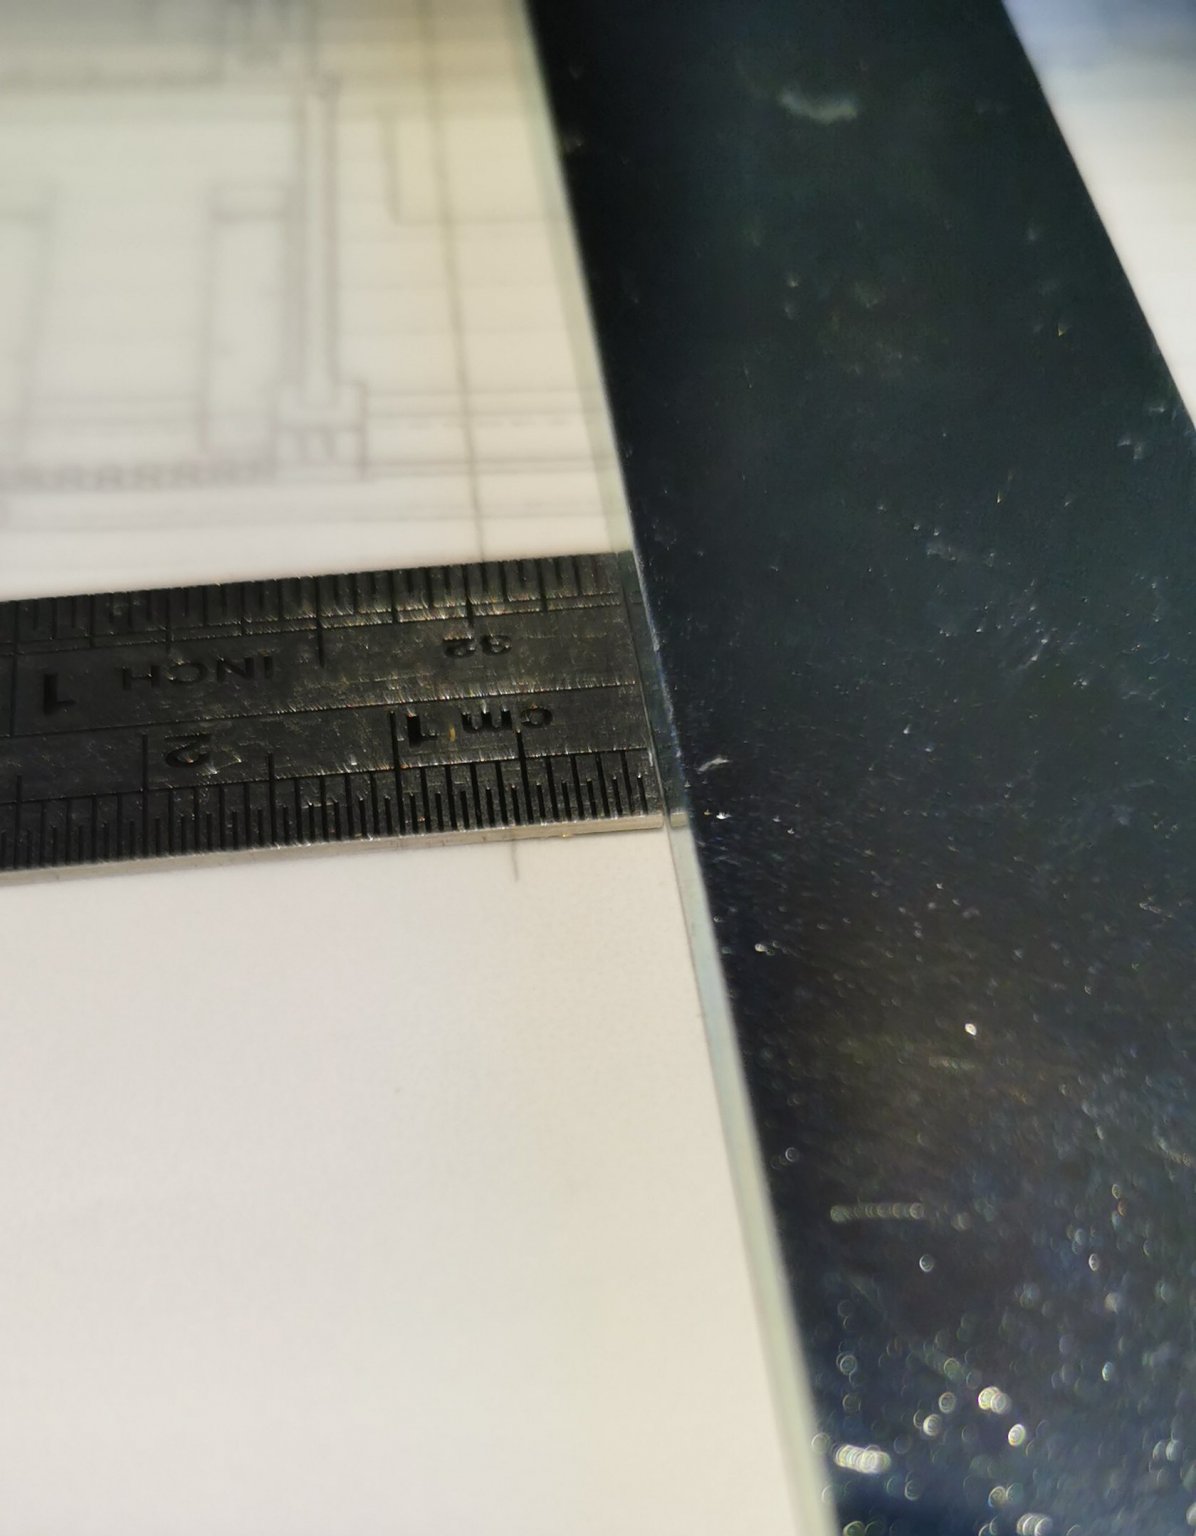
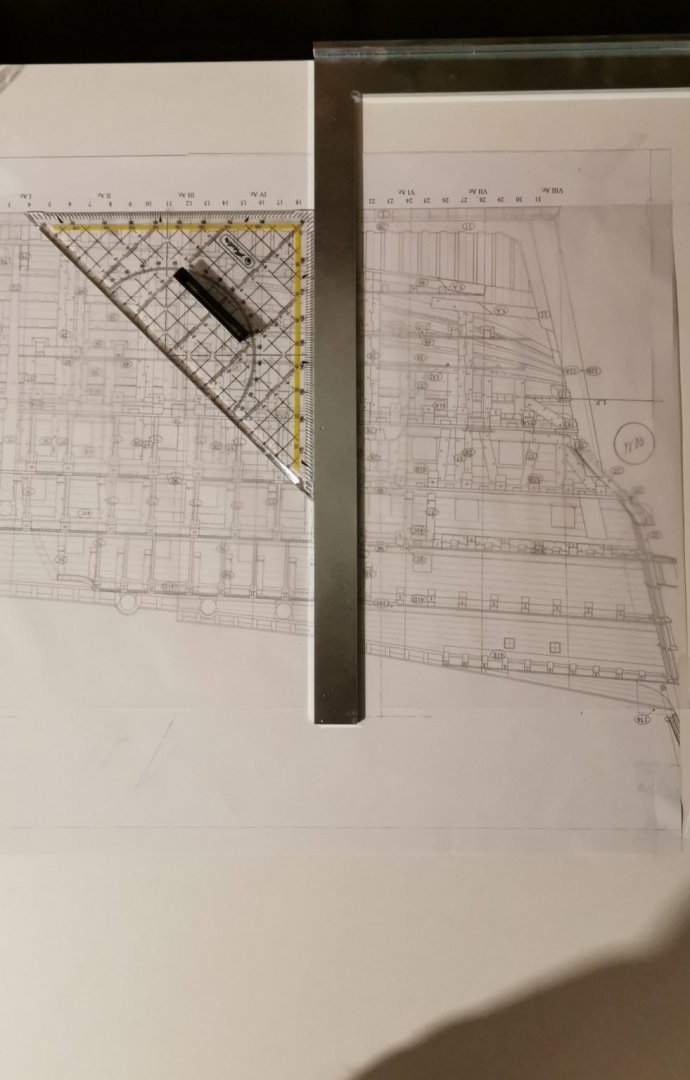
The set of plans of SAINT PHILIPPE 1693 is a permanent source of trubble: As the formers in the plan were drawn 89,1° to the keel I had to re-draw the hole thing - as you can easily figure out in our last picture. But where do they start? the original drawingbmakes absolutly clear the body plan shows the lines of the formers have to be placed on the inner rabbet, so they do fit perfectly right hopefully... so U edited my text due to the anger inside of me to show the discrepances in 1/64 to you: my deviation is at former Ar.V 5,75mm! So if you do not redo the plan due to this the hole hull ist too low and by this in the some moment looking too breadth, too. And your are going to crush your skull by wandering over the decks. 🤕

-
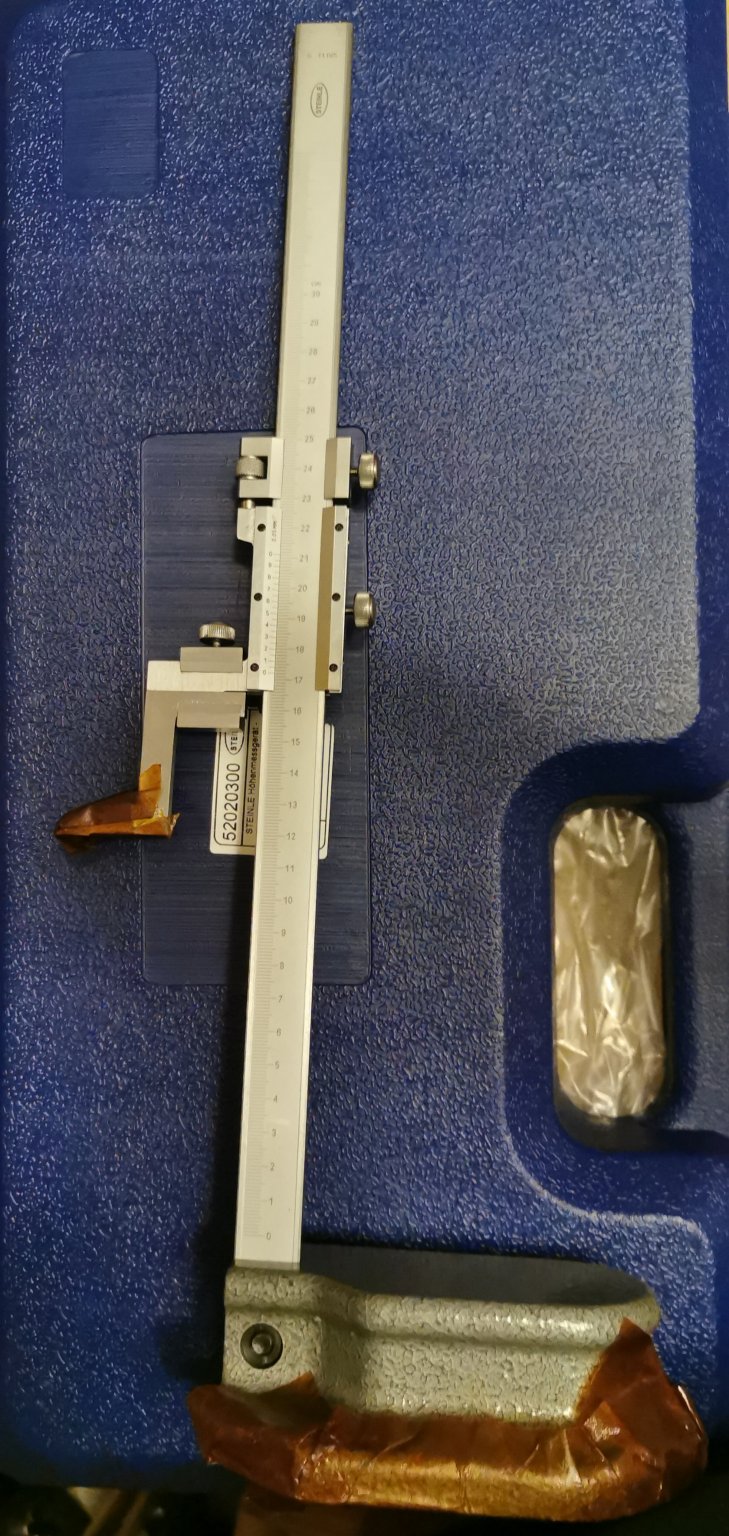
Hello the workshop got supplyments a small bandsaw and a hight measurng tool now I am onmy way to the DIYcenter to get som 640x1200mmx{something stabil} baseboard

-
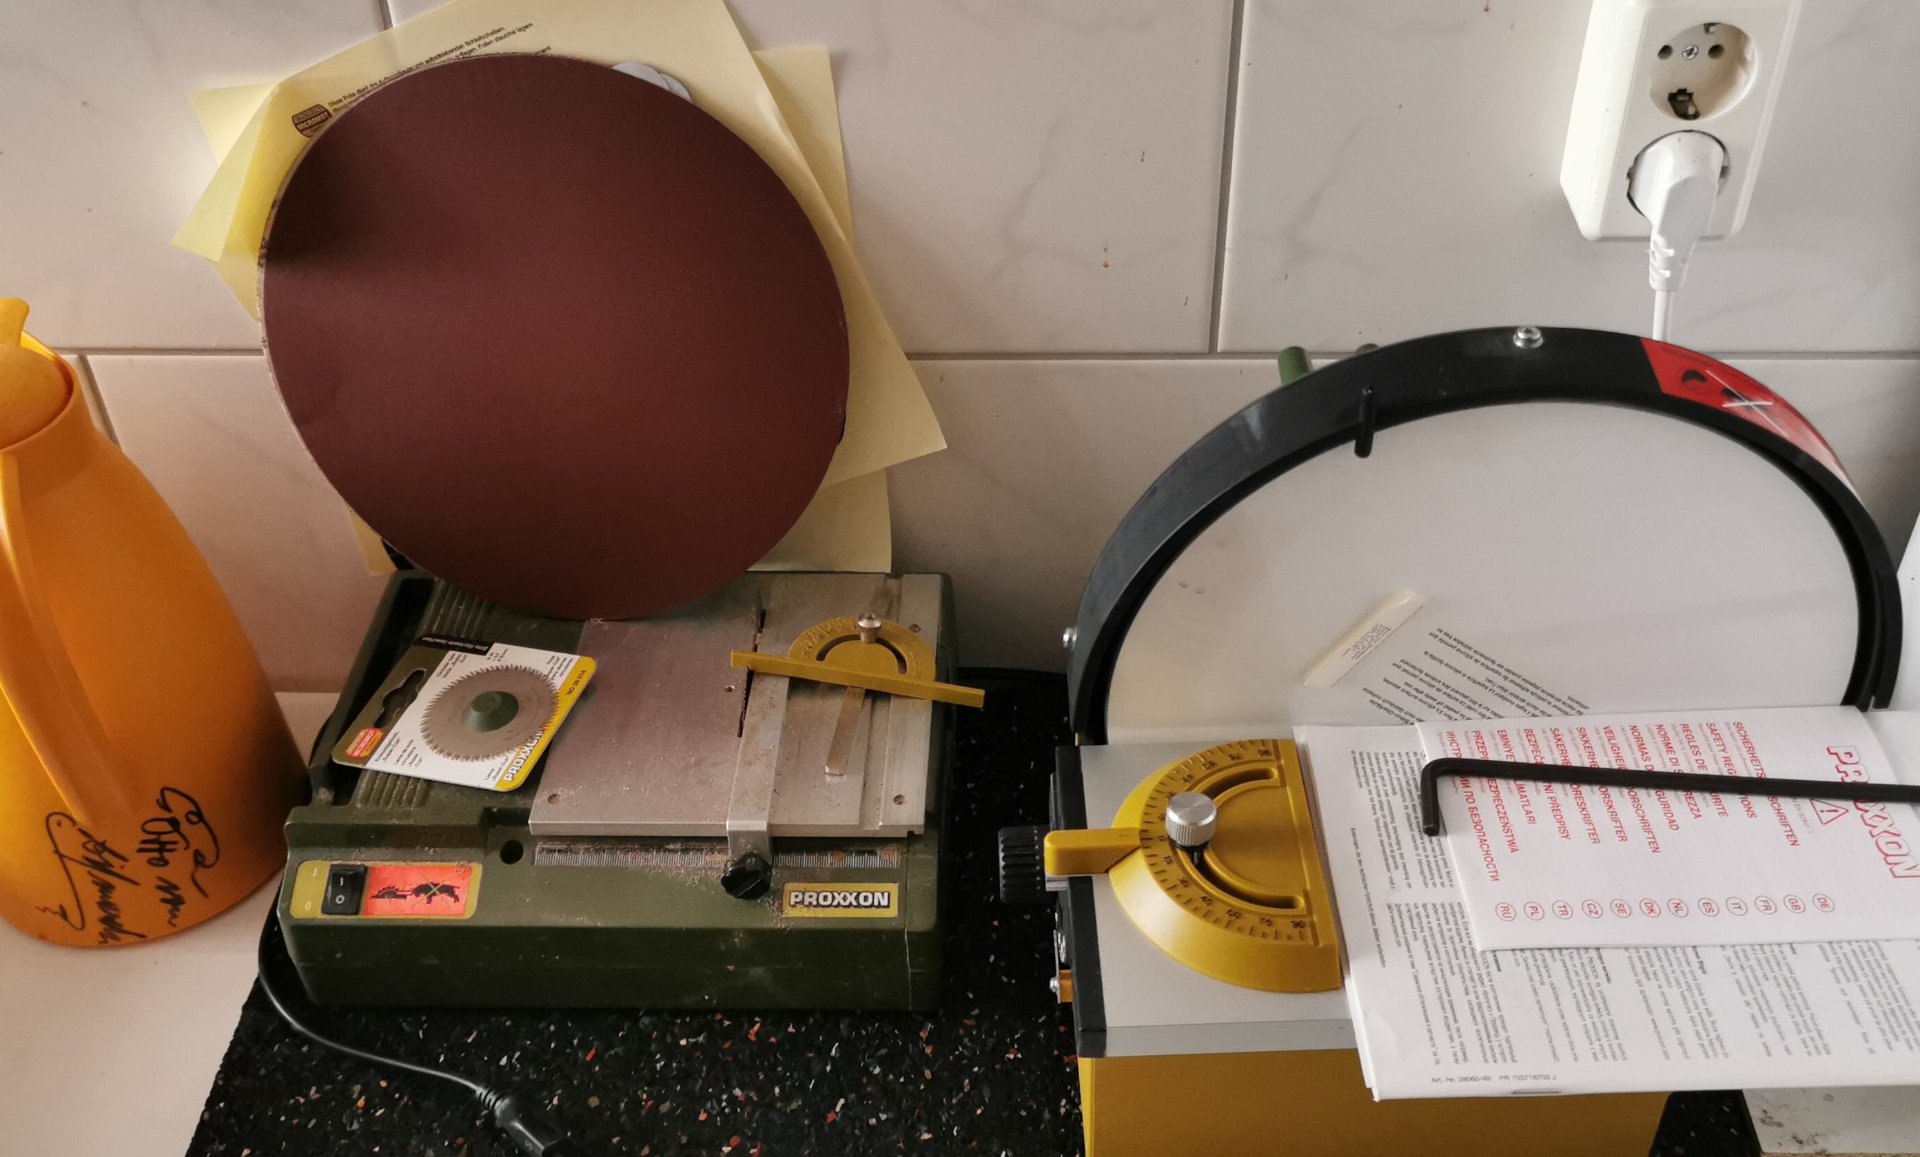
My workshop gets a disc sander 250mm is hopefully enough for three Deckers scaled down to 1/64... ...I foold my colleauges with the thermos in orange saying it is the original one of my "class mate Otto von Bismarck" and noone figured out the lapsus in the "signature"... 😆

-
Hy Jan, yes it will and is on my "list for spontaneous quick builds beside to raise motivation". I'm waiting for a opportunity to catch James Bender's "Dutch Warships in the Age of Sail 1600 - 1714" for my slim pocket as I bought a pre-owned ribbon saw recently. I do own from the Blaue Reihe by Hirnstorff also "Der holländische Zweidecker", "Risse von Schiffen des XVI. und XVII. Jahrhunderts", "Modellbau von Schiffen des XVI. und XVII. Jahrhunderts" und die großen DelisClarsing Druck "Segelschiffe den XVII. Jahrhunderts" But at the moment I have to work on the death of my mother and the working on emptying her flat. And concentrating on SAINT PHILIPPE as I have a run in her.
-
...and as there is no difference between the underwater part and the hull side (in the printing from Rochefort) the colour has to be white and not a light grey. Sometimes life can be so kind!
-
To the very beginning g as used some music that I do listen to while drawing and thinking to kerf p my mood relaxed and my emotions calm: And as the problem of colour schemes with my mock - p is happyly cleared by an contemporary document through Iflixueyun's wonderful pictures I can now went to my status quo: I pushed my 75% copy of Plate 16 under the frost paper to figure out where to place the upper deck and those above - due to the enclosed hull und shut gun port lids you will have only these as a top of the monster of a ship. My Marple plywood is 0,7mm thick and it will be glued on quite soft 4mm poplar plywood so I will end the center board and the bulkhead 4,7mm below the decks line. Am I right or did I forget any important issues?
-
That makes life a lot easier! I think this massive white hull with its red Ries was an astonishing object to the viewers in the Mediterranean sun light at Toulon! The colour scheme I do believing into as the noblest French infantry regiments used white red gold also in the same mixture: State of the art 😁

-
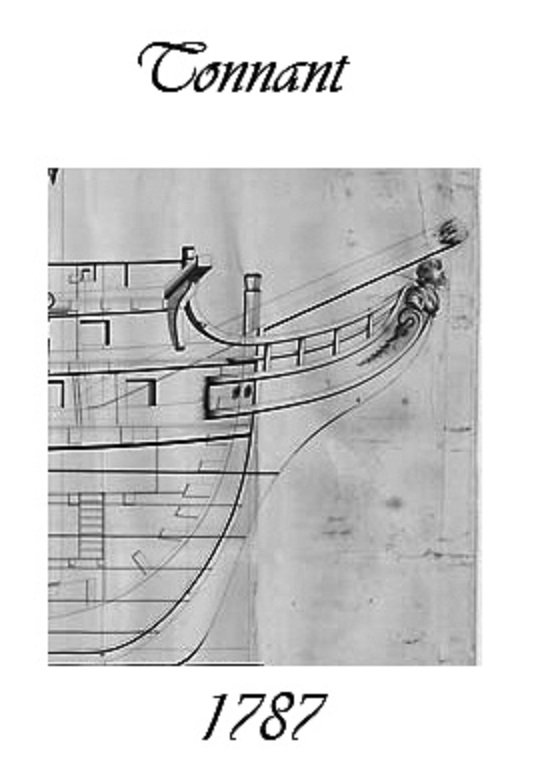
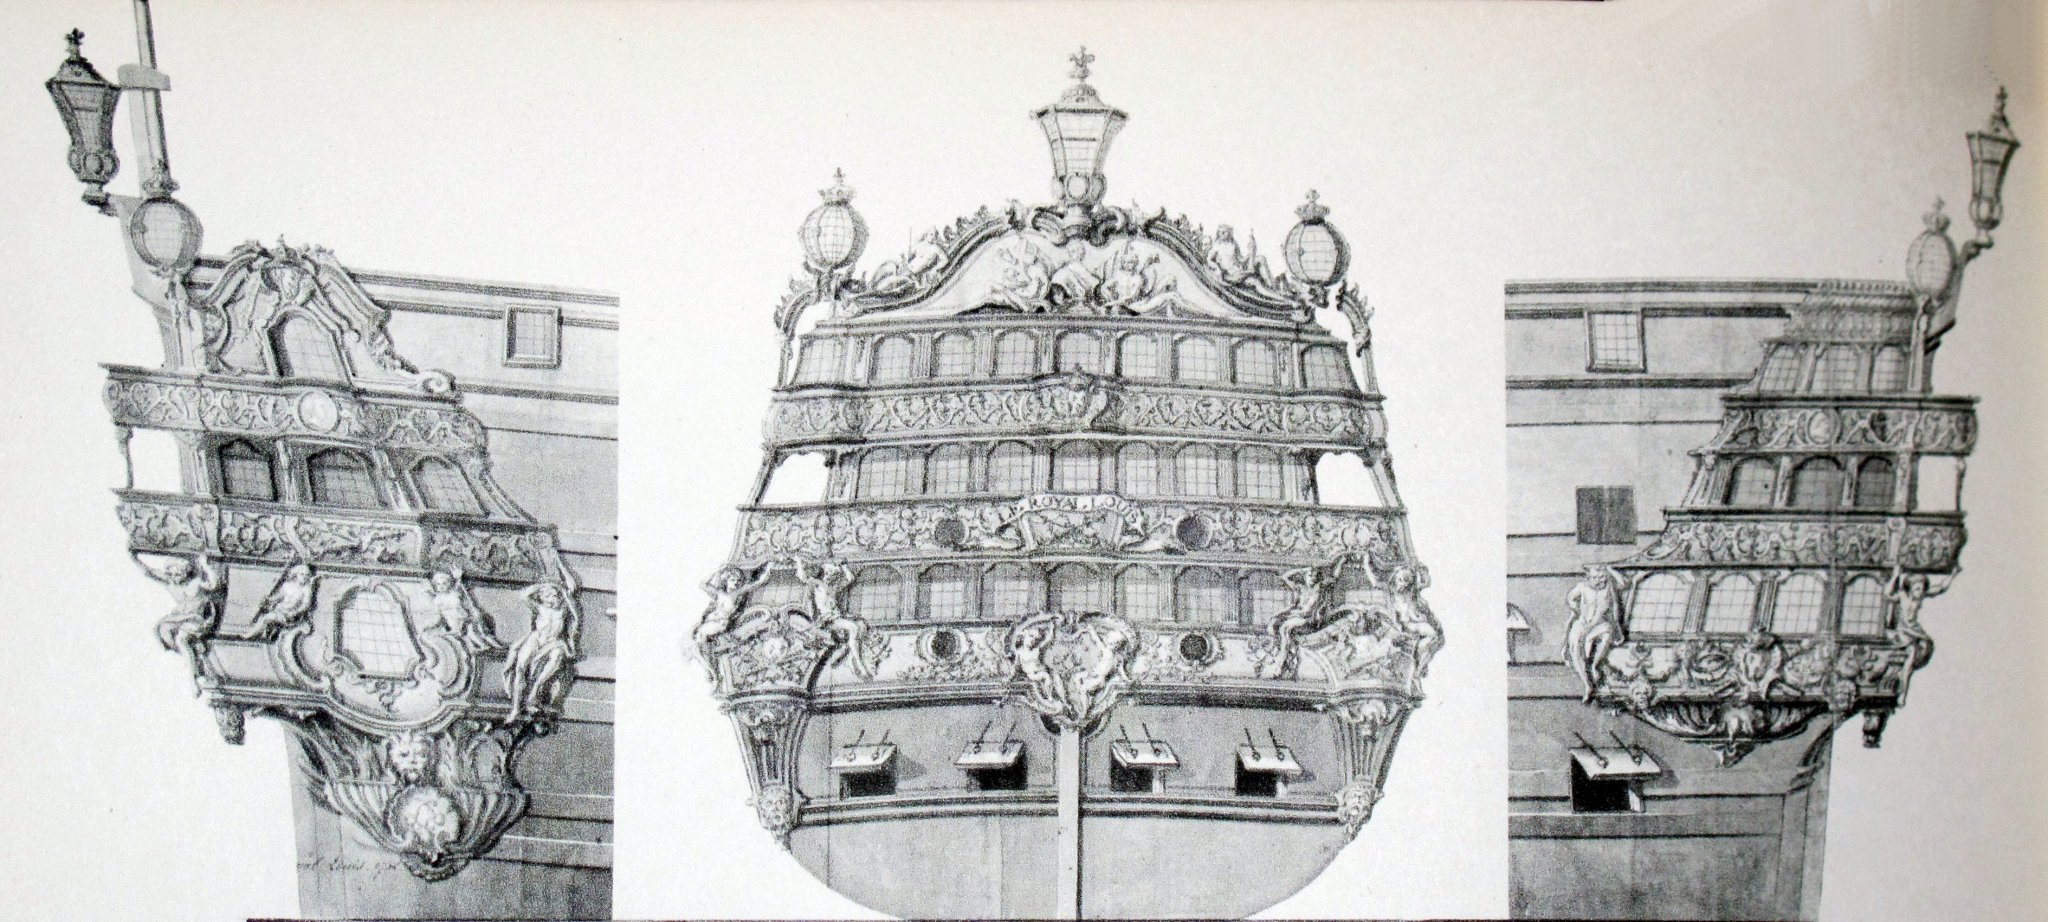
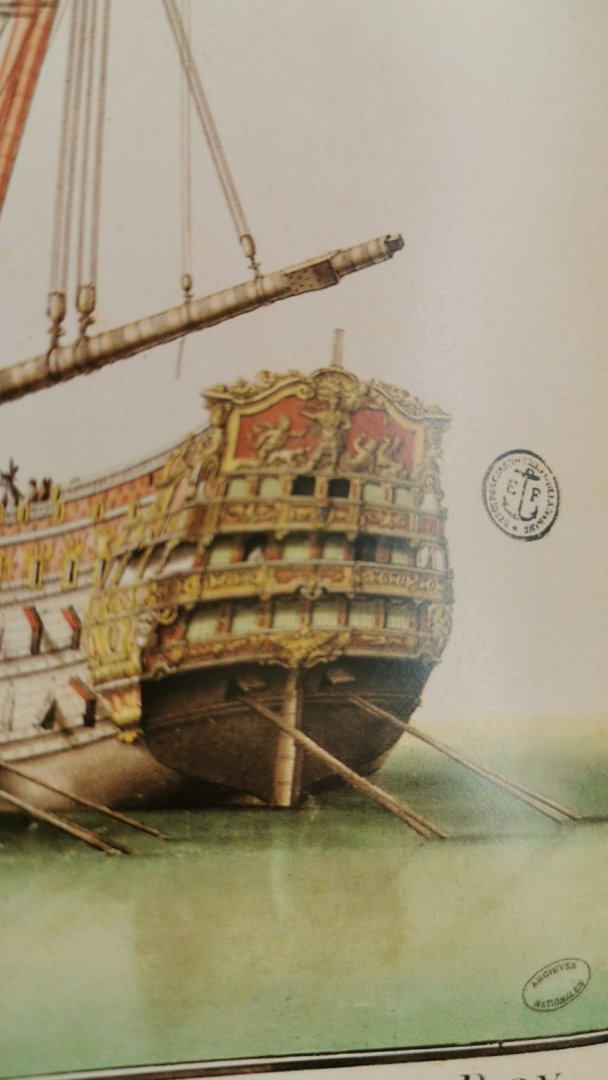
...and I did find a TONNANT - the ship from 1740 and found the right green-grey but as you cannot get it all - no figure head is looking ahead:
-
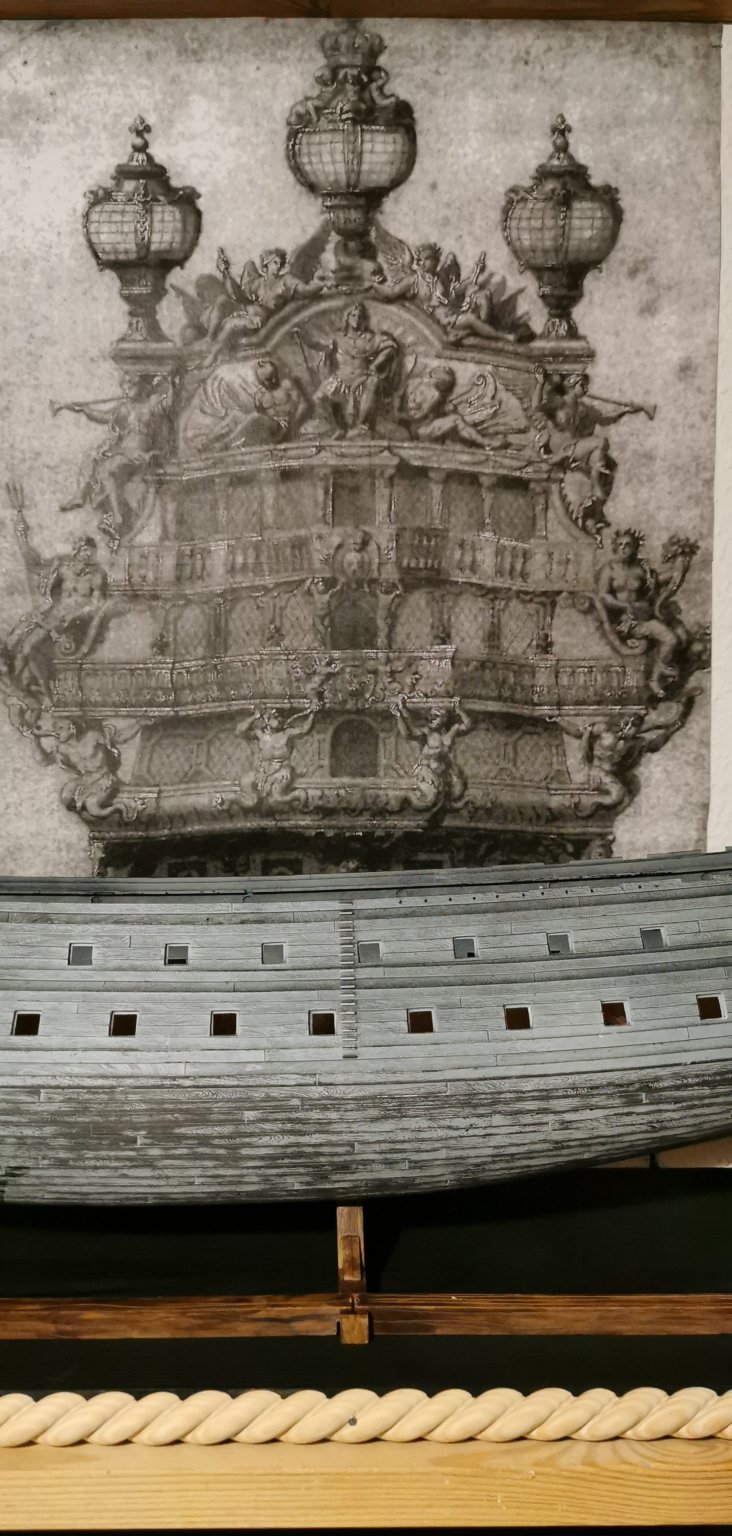
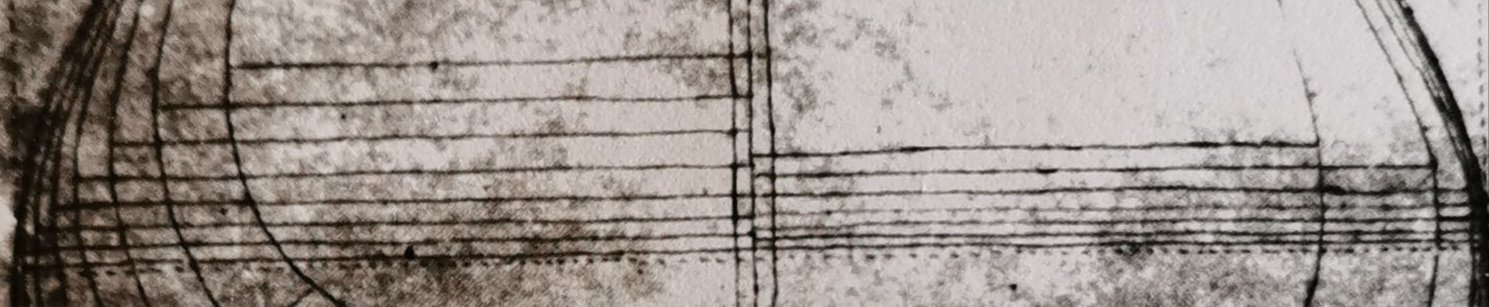
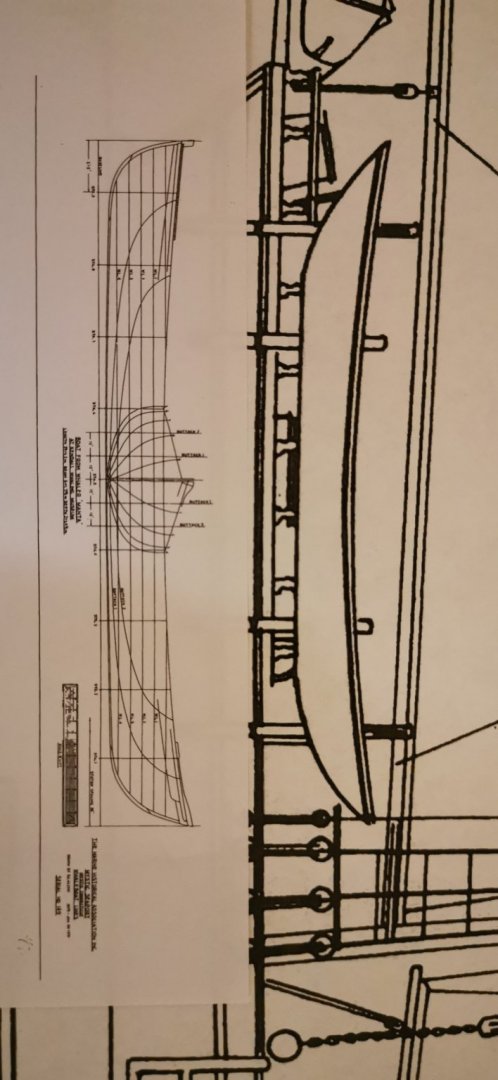
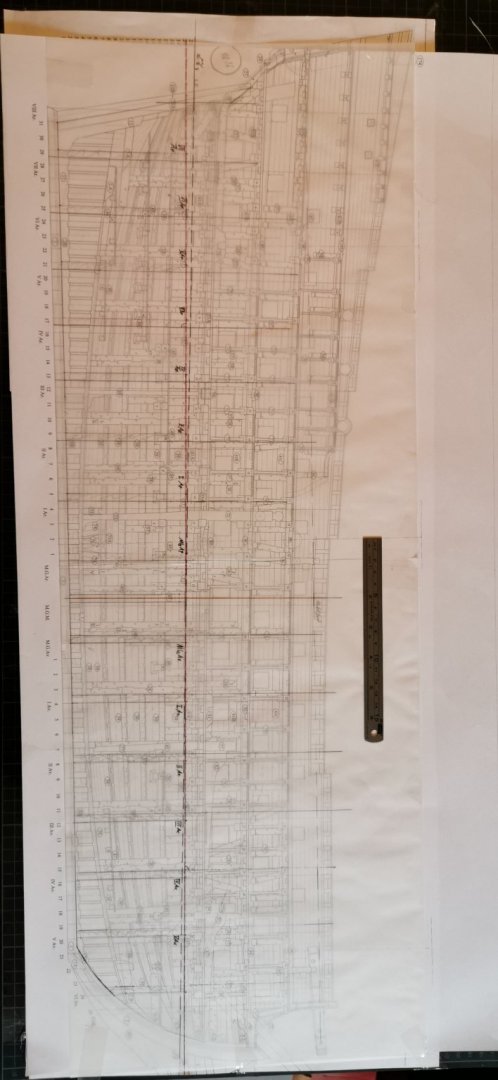
Here the body plan of SP used by Mr. Lamineur: It is obvious the keel is horizontal to us and are the main deck's lines. And there is also a Sideview of the ship: ...with a proper L.F./CWL in it (but lacking the lowest wale). All of these is part of Chapter I "presentation of sources" page 7ff.
-
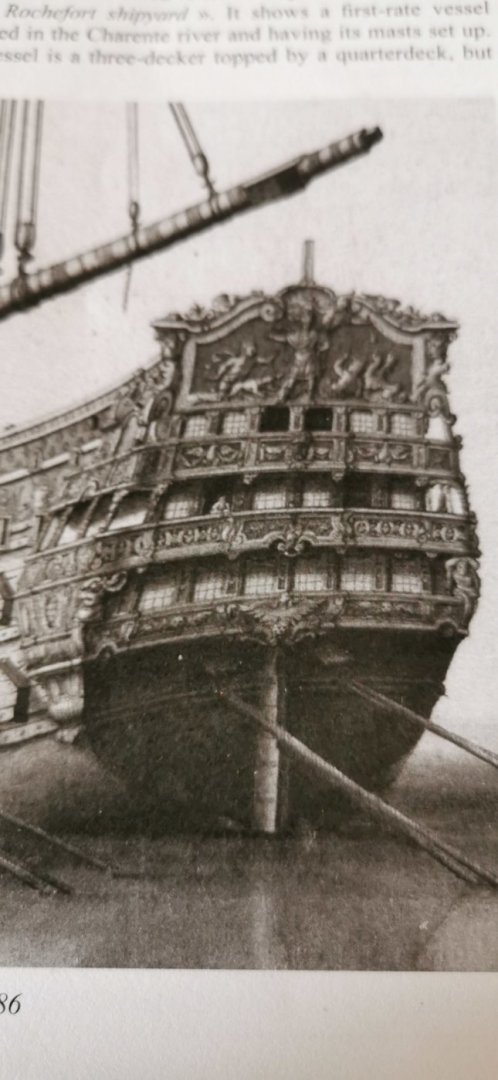
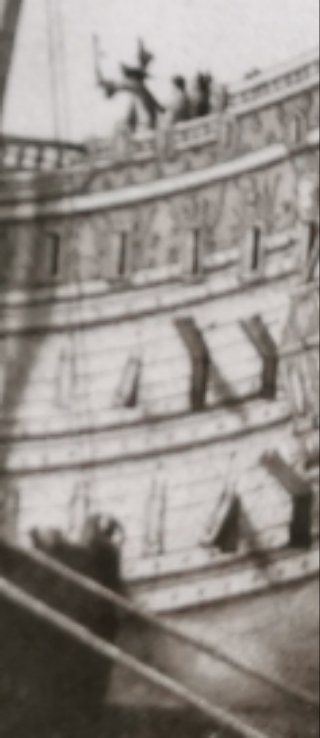
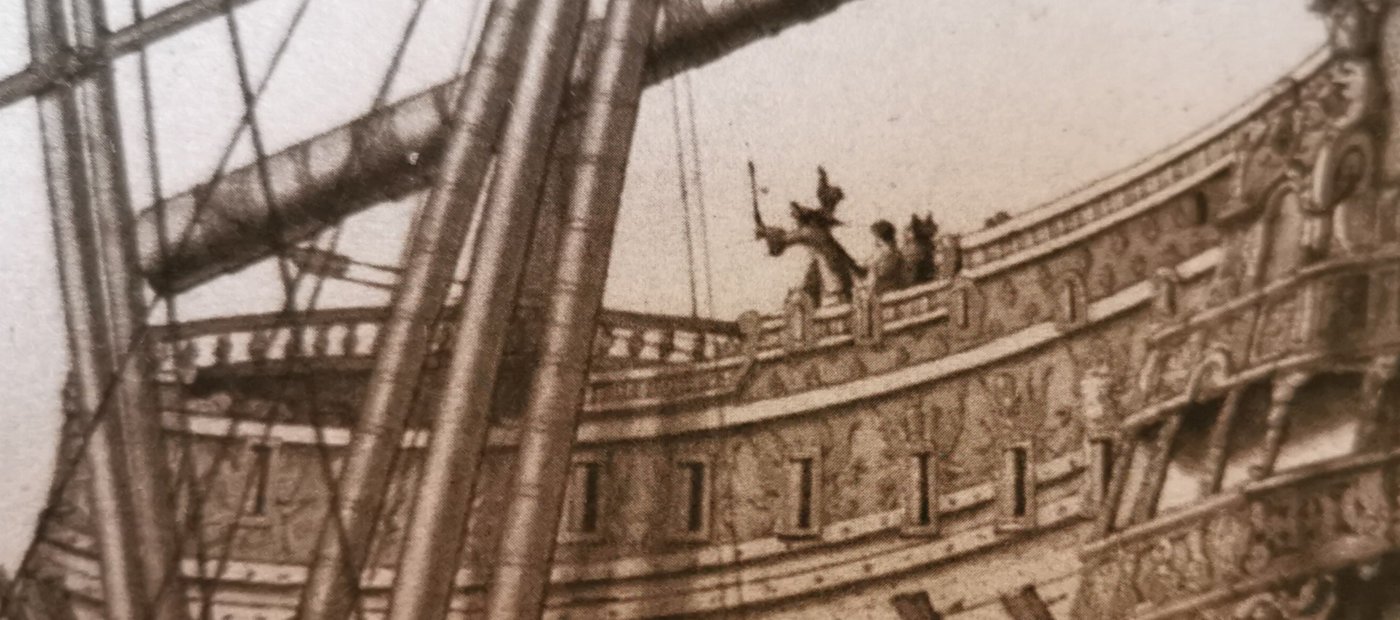
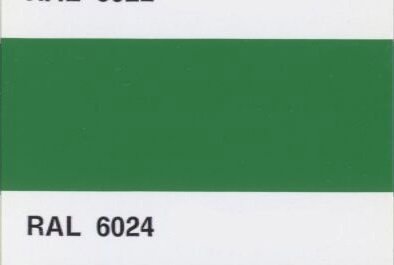
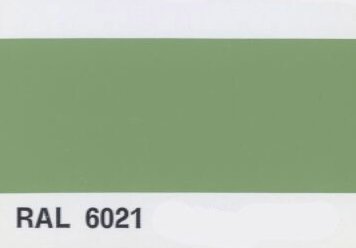
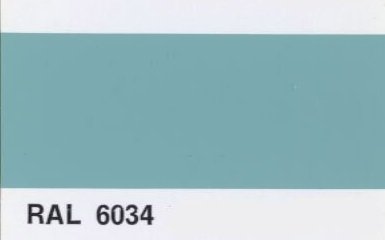
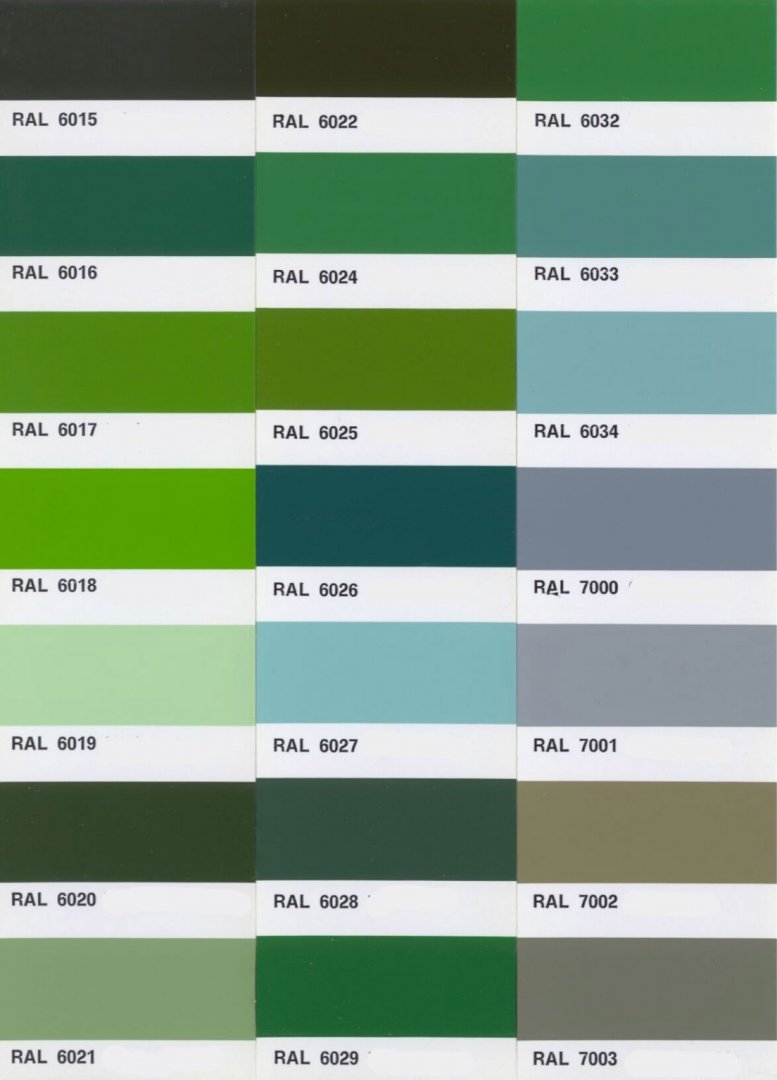
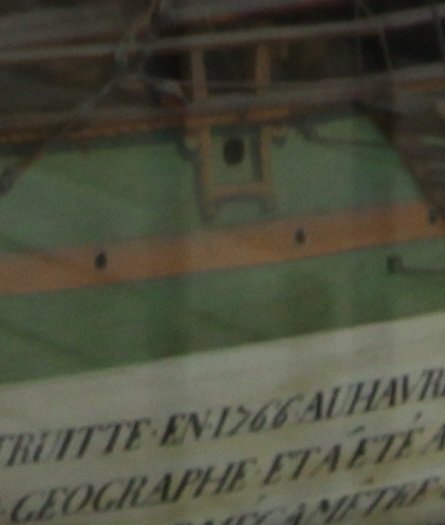
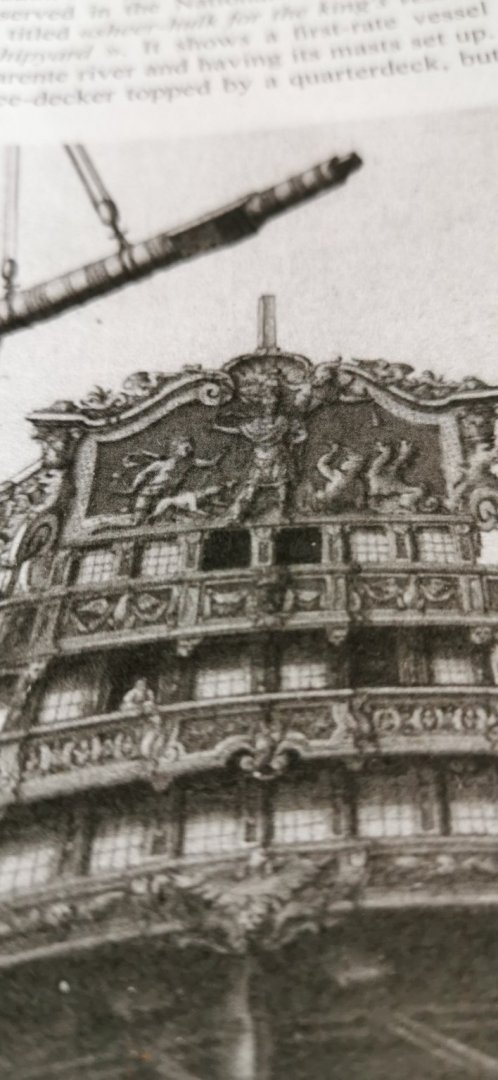
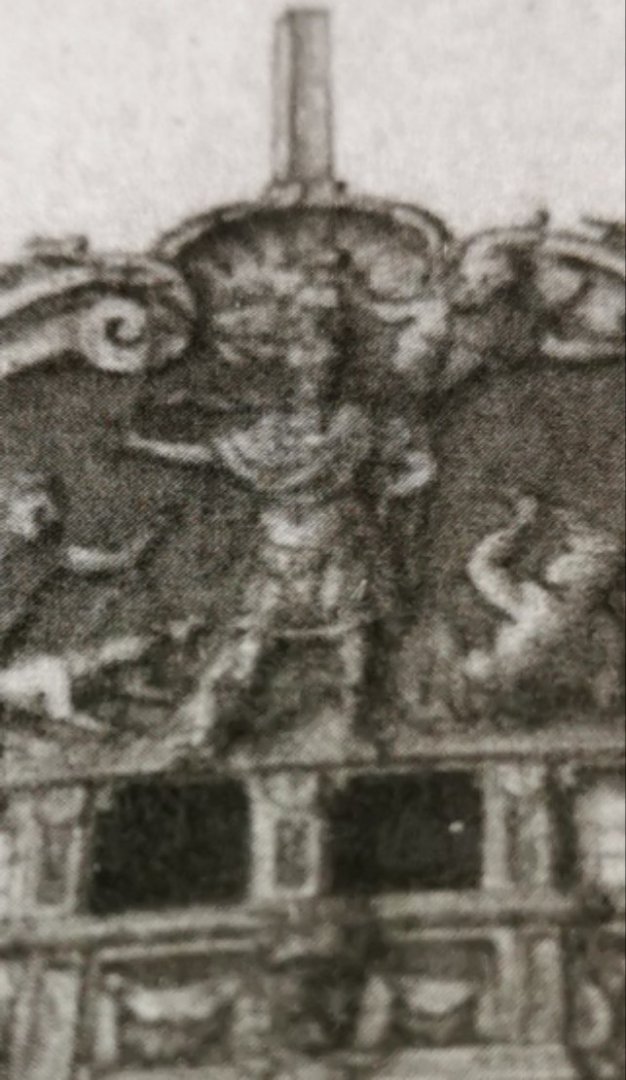
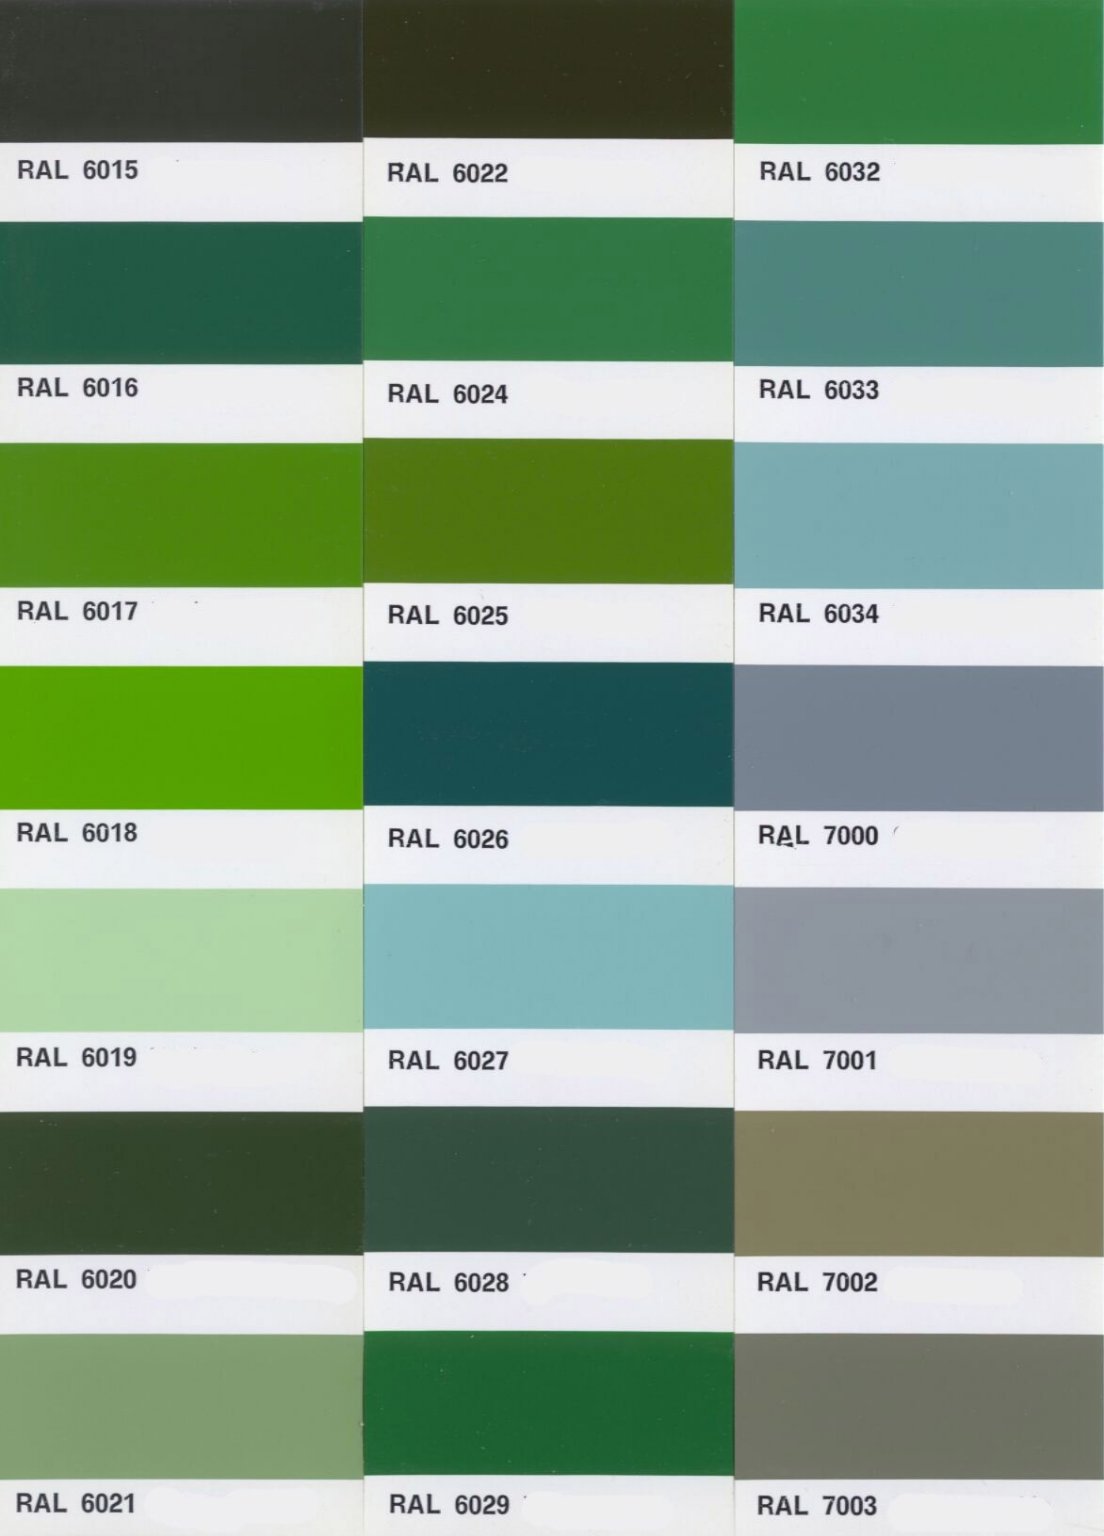
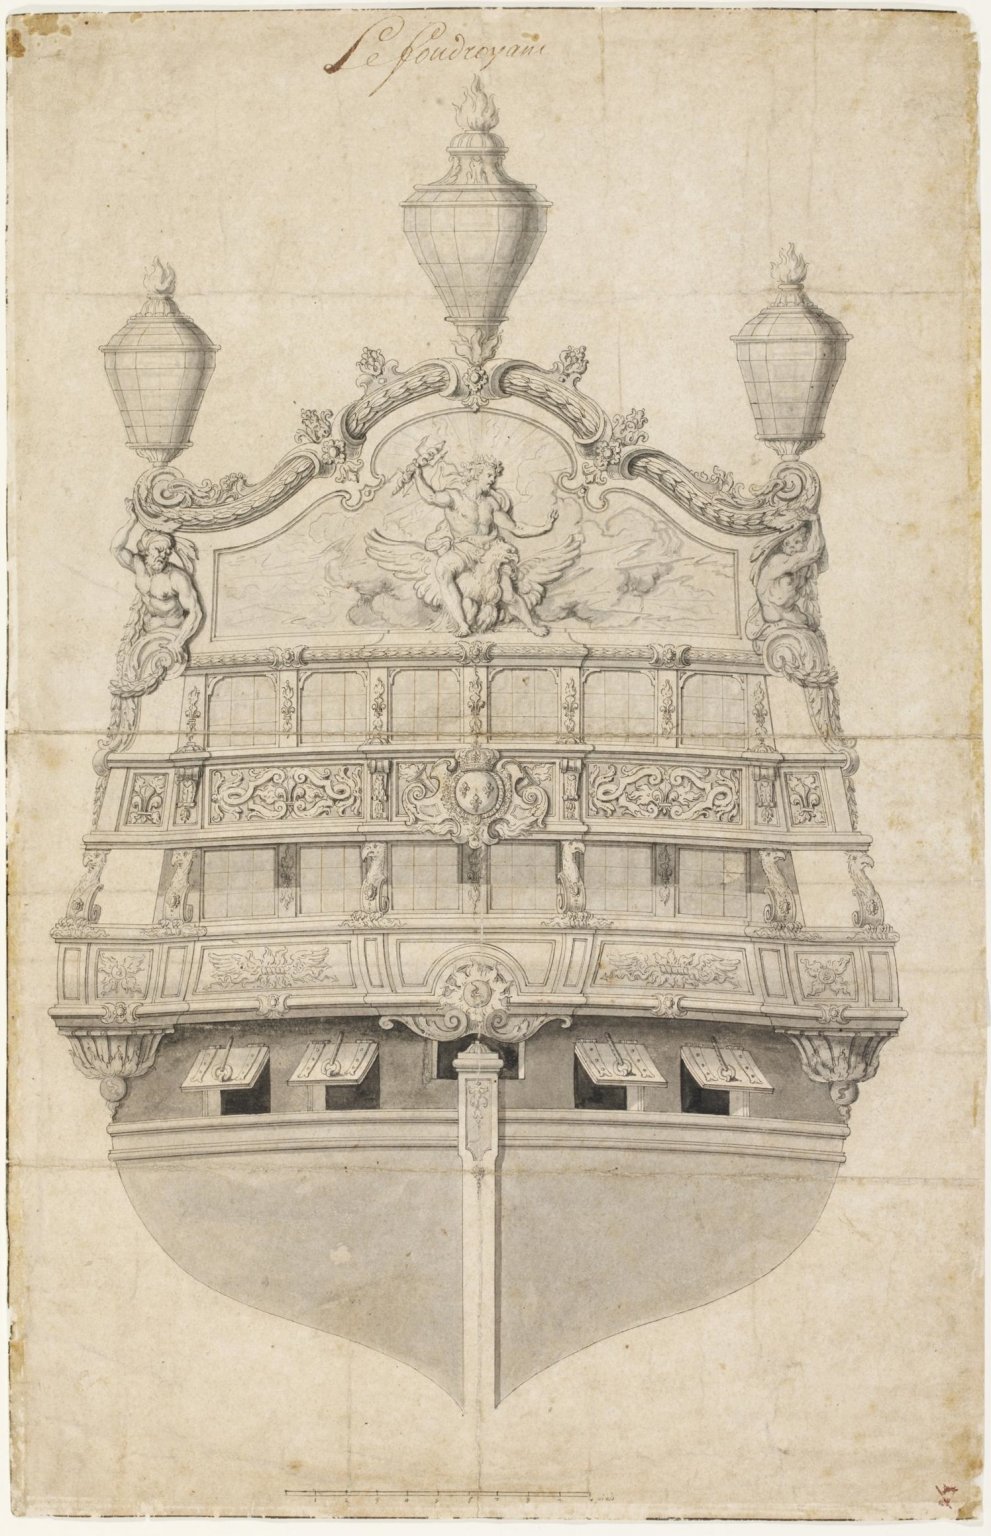
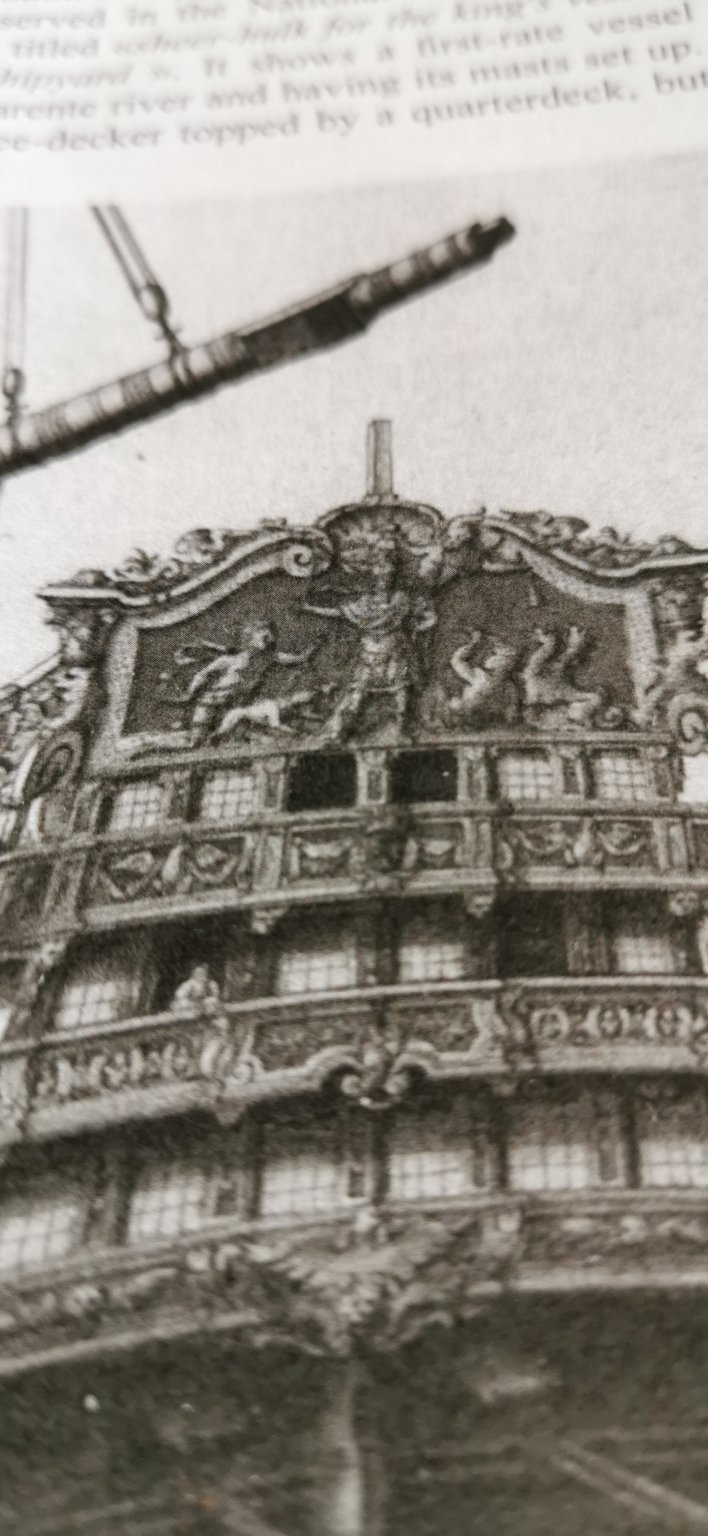
The problems a side I like to bring the mock-up-model as a hullmodel with enclosed gun port lids and without guns. There maybe no interior in the stateroom and the officers apartments (I think about aluminium foil to imitate the windows). So I went into page 9 of the monography where I did finde the picture "sheer hulk for the kings vessels at Rochefort shipyard" where in the background the vaisseau is a threedecker and the decoration is "compareable"(Lemineur) to that of SP - so this might be TONNANT. Devided to her sister and flagship by the absence of a lattice gritt over the highest vries between their fleu-de-lys. Intersestingly the decks or even the wales are NOT painted darker - I can't figure ot if the the space between the wales is shadowed or painted. But the decoration background is cleraly darker than the wooden part below. Looking at the most upper wale this is absolutely clear. There are several possibilitys in this time a verdisgrin based turkis-green was quite popular due to the idea of the royal blue. Or a greenisch grey - I would think the coloures were different from the vermillion red of SP. This as the distinguation from the similar looking flagship in the battle was very important. I think about three RAL colours as back laying base: (I do perfectly know that the RAL-coloursystem was invented in Germany in the early 20th of the XX. century but it is a good starting point as the colours are allways the very same we do discuss about.) The 6027 (as 6034) would need for the bluish tone some lapislazuli and would have been very expensive colours in the XVIIth century. Yes I am looking at the very nice verdigis green at L'AURORE 1766 at the Paris Bibliothèque Sainte-Geneviève - but this is 70years younger. Does anybody has some historical more correct ideas? Missing the figurehead (I could certainly fllow the SR-pdel of the Paris Marirtime Museum and avoid an uncleard Figure head but as the Figure of Saint&daemon is so prominent at SP I would like to finde a allegorical figure for the "Thunder" As I looked arround for a figure head I found this very late XVIIIth century figurehead of a twodecker TONNANT (86guns) with the pain of an abbreviation of a baroque figurehead. and the typical oppulent and luxourious Coffiere made decoration of transom and side gallerys from 1743 - missing my needed figurehead example. Perhaps anyone of you has a figurehead drawing of TONNANT I could use as a prototype. Here the figure standing in the couronnament: and as detail: Or looking at the FOUDROYANT (flash fiering) - no thunder without of any fired flash: So there may be similarities - and I do know I'll edit this artiocle when I did figure out where I did hsd had seen the FOUDROYANTs figurehead's drawing belonging to this transoms view. the side gallerys drawing and the king wor war flaing on an eagle and throwing thunders...