HOLIDAY DONATION DRIVE - SUPPORT MSW - DO YOUR PART TO KEEP THIS GREAT FORUM GOING!
×


JpR62
-
Posts
699 -
Joined
-
Last visited
Content Type
Profiles
Forums
Gallery
Events
Everything posted by JpR62
-

HMS Enterprise by AlexBaranov - 1:36
JpR62 replied to AlexBaranov's topic in - Build logs for subjects built 1751 - 1800
Superb ! What a wonderful frigate ! -
I like the principle of cutting the sternrail in glued pieces of wood rather than wanting to bend a single wooden piece. Efficient and smart 🙂!
- 589 replies
-
- 3
-

-
- le gros ventre
- cargo
- (and 1 more)
-
The levels of detail and realism are fantastic. Thank you for this wonderful model!
-
Thank you BE for your kind words. Your work is a great inspiration to me and I will follow with great interest the progress on the Muirneag.
-
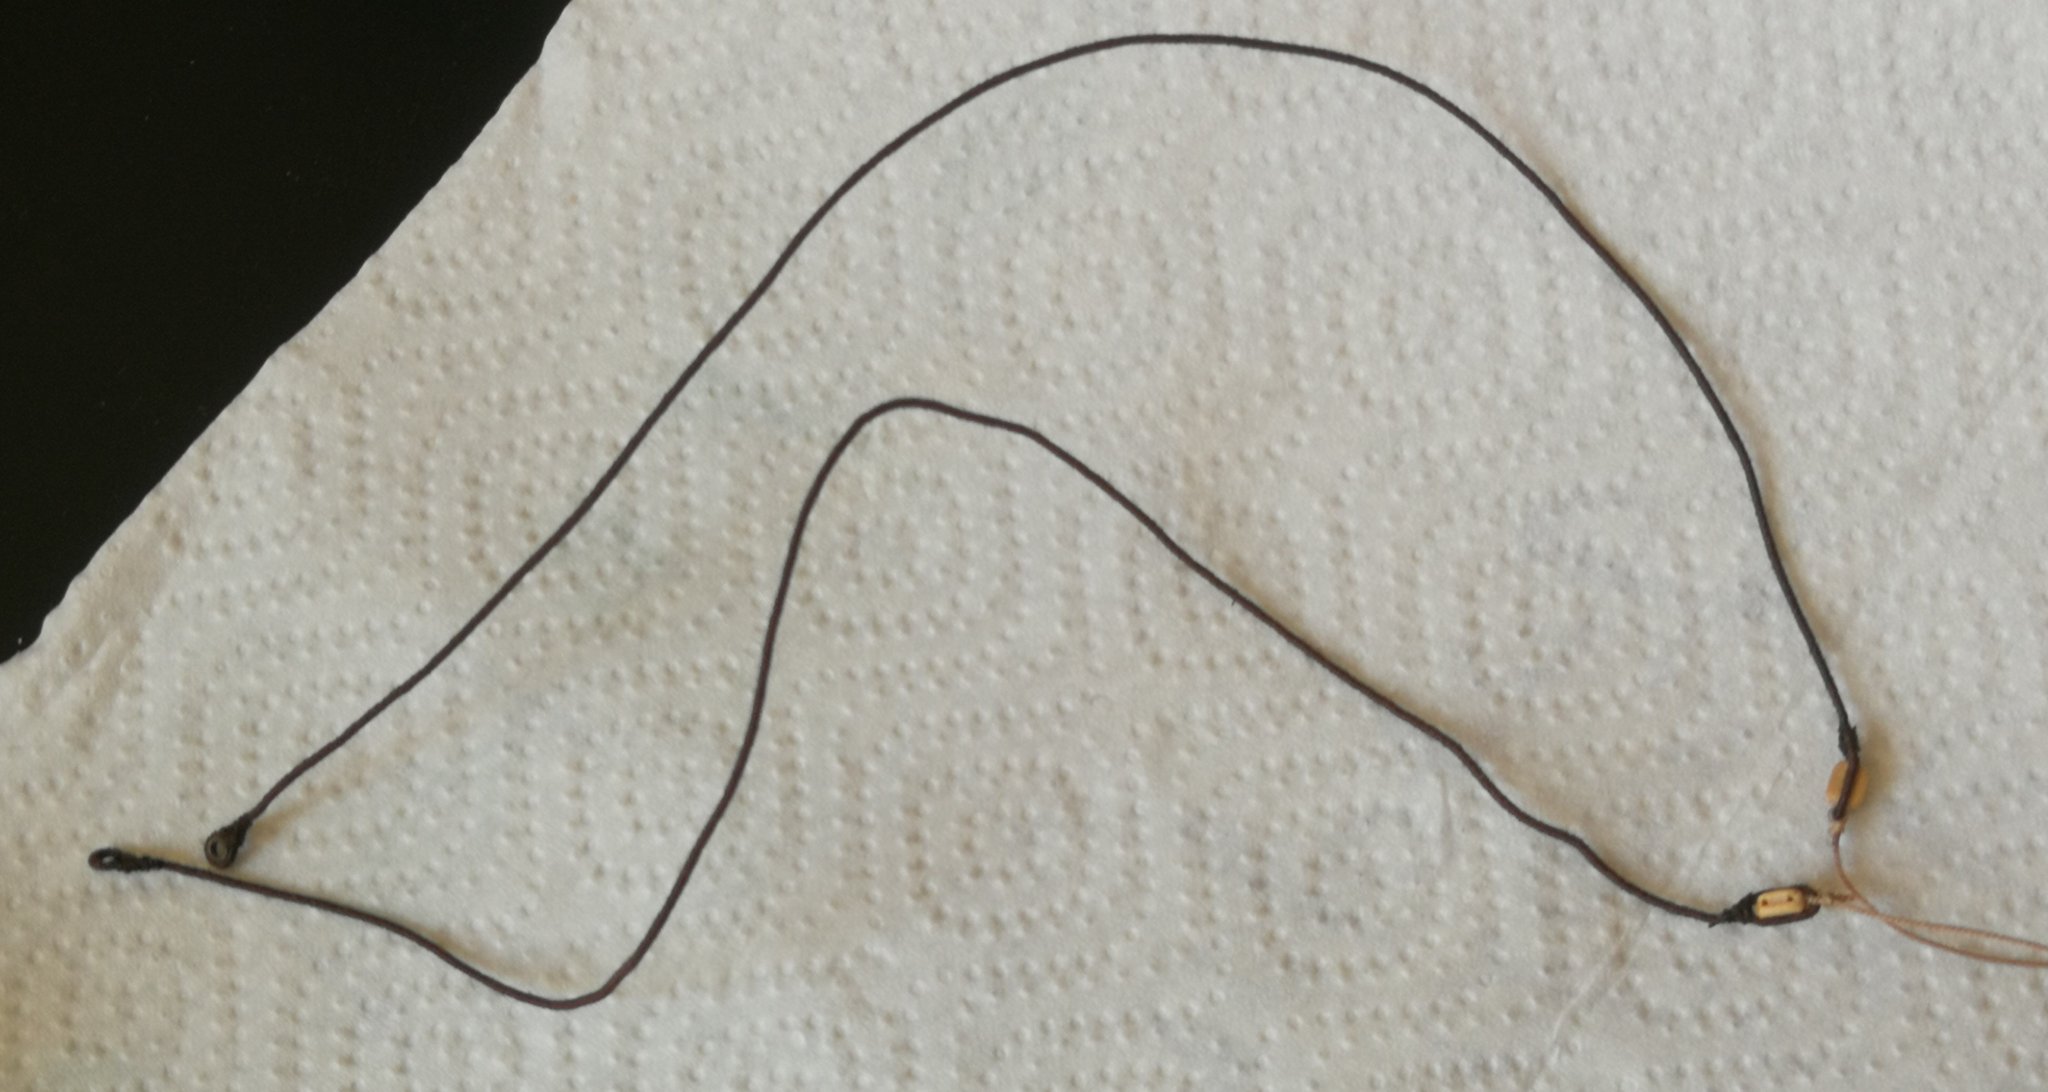
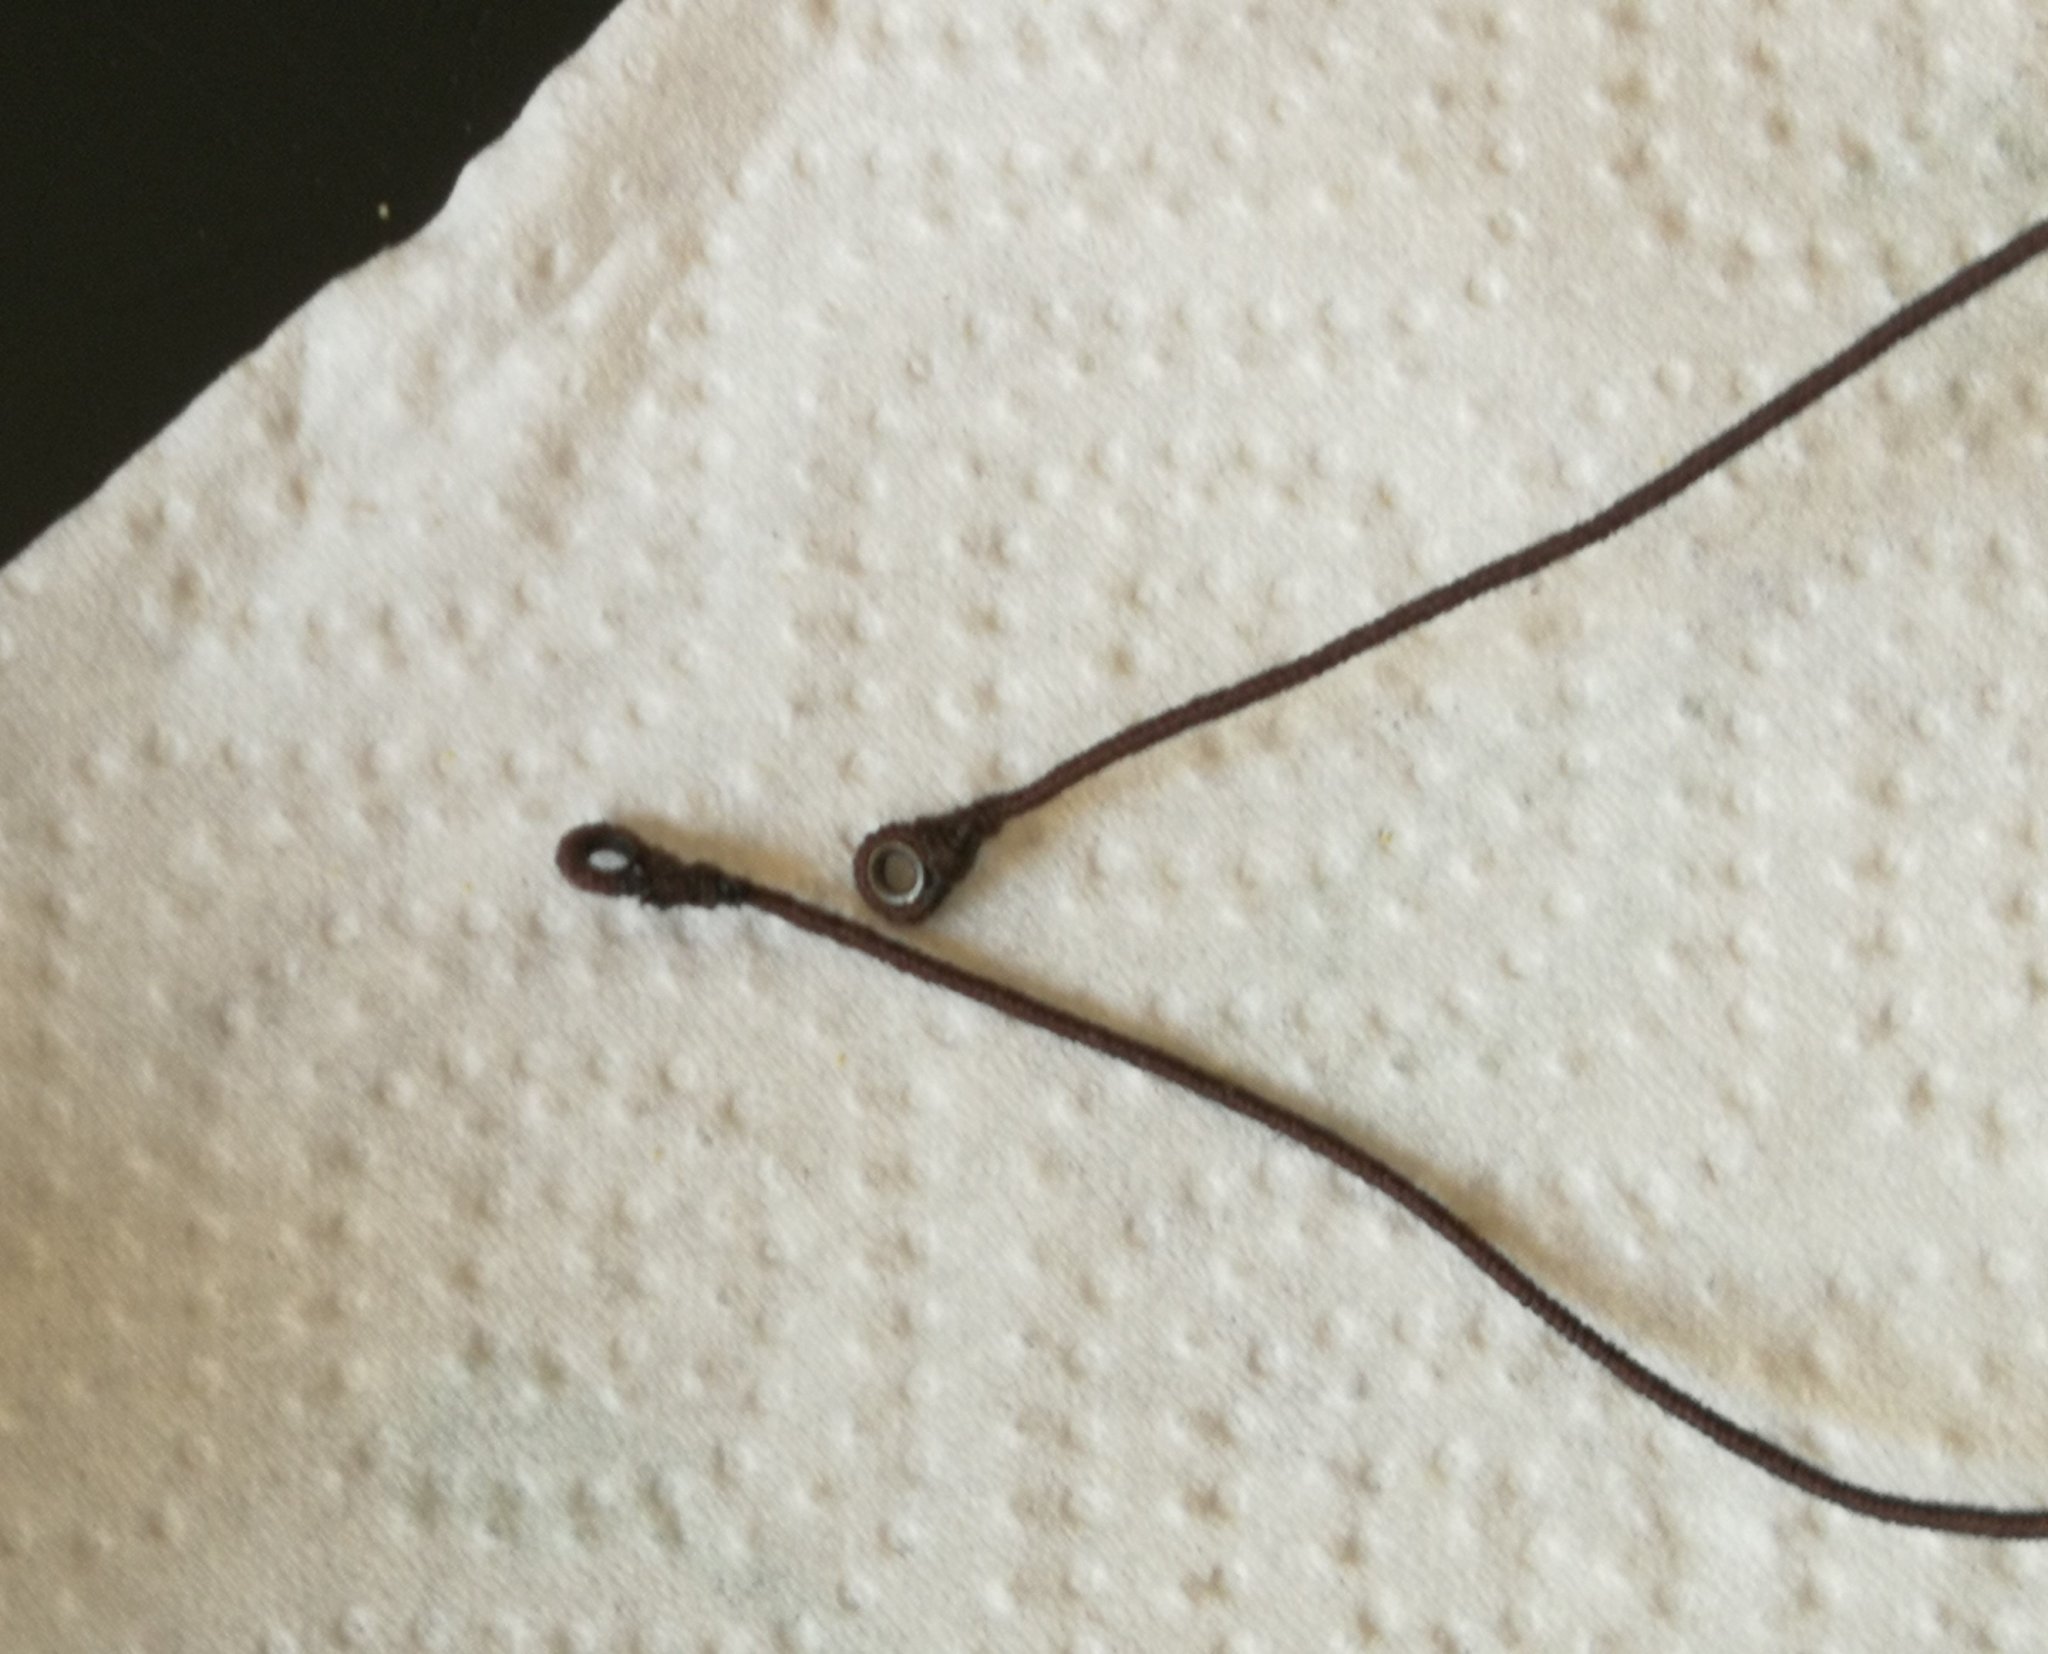
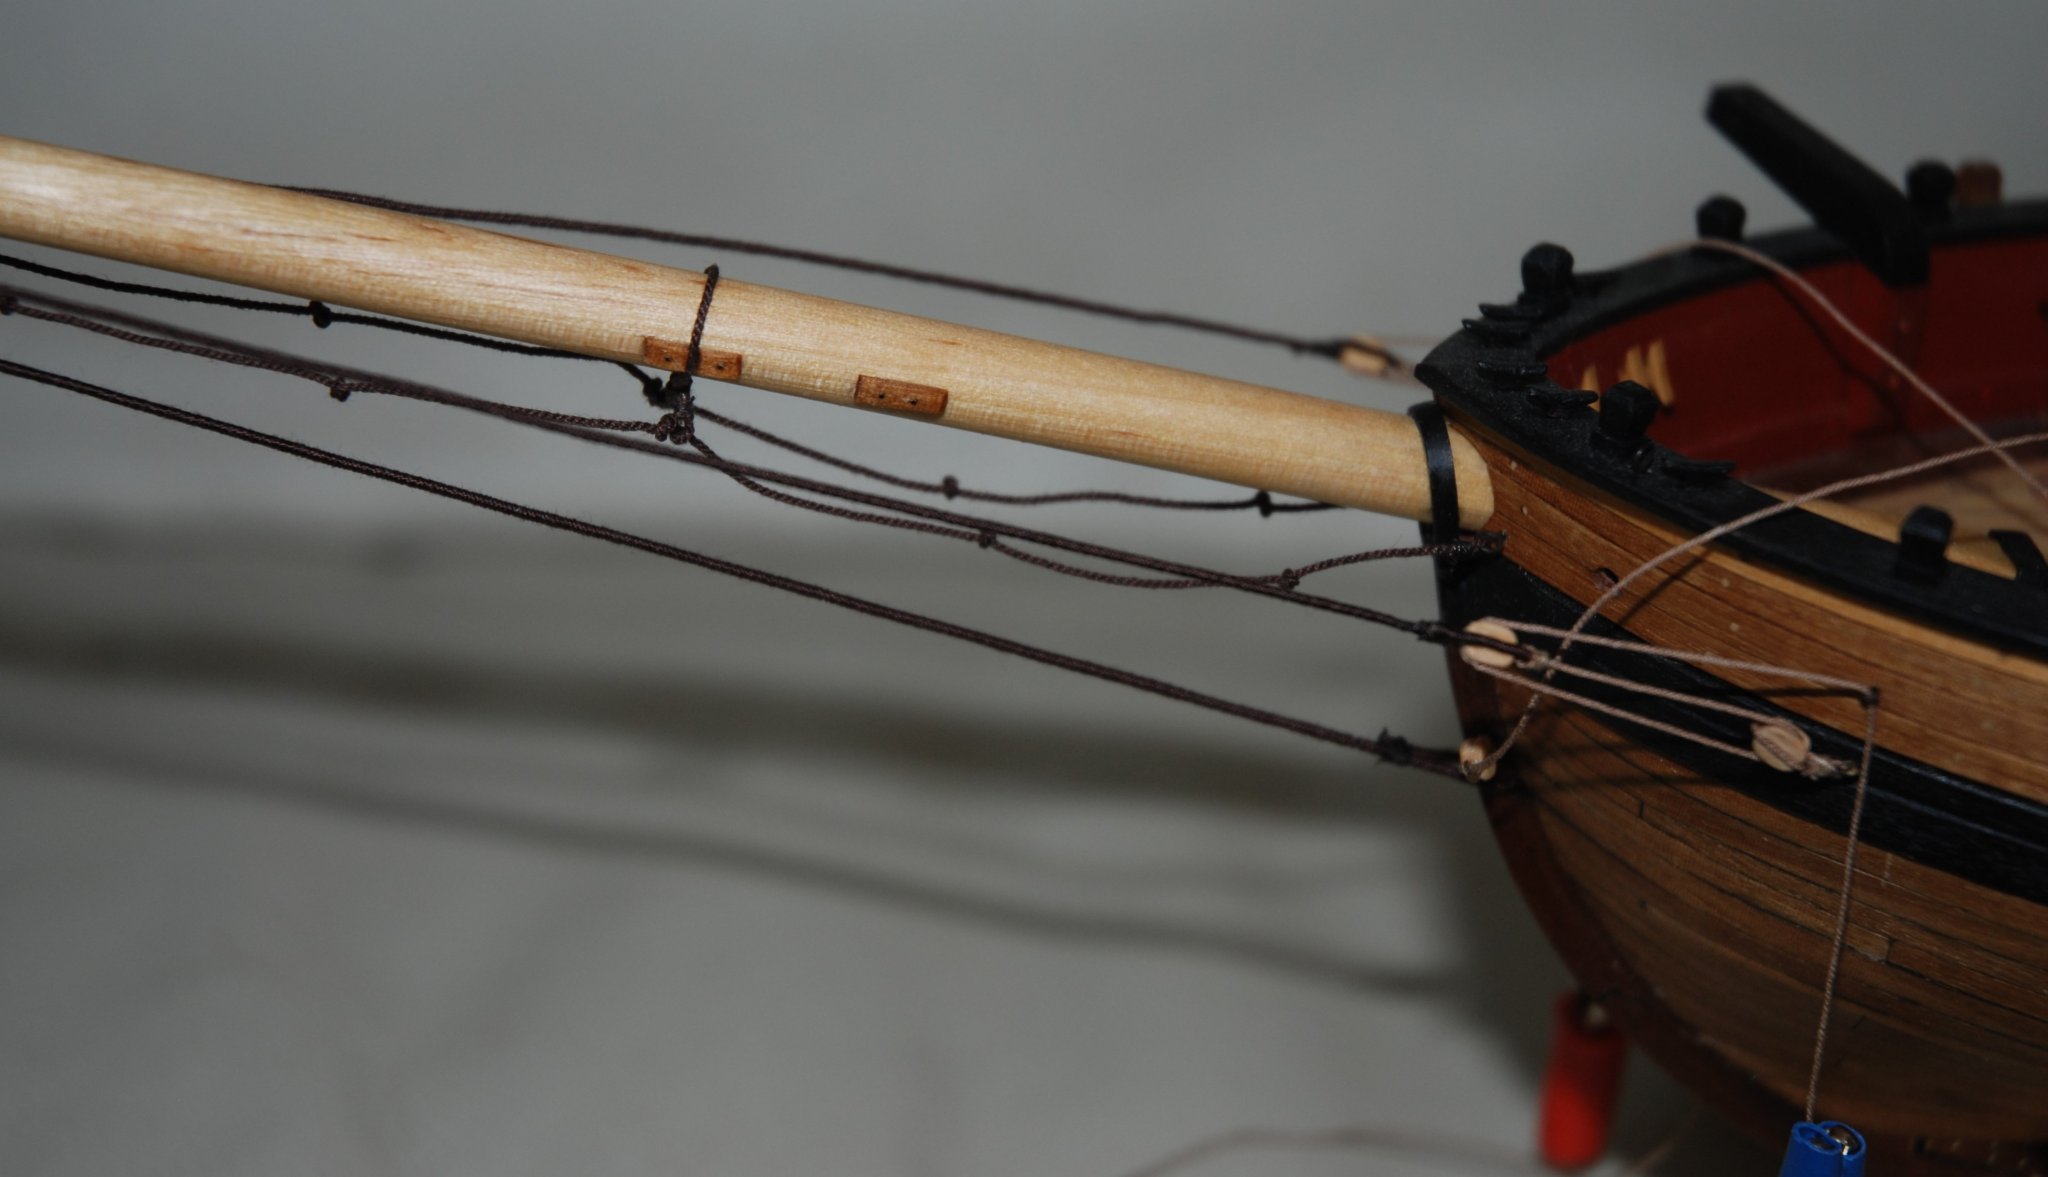
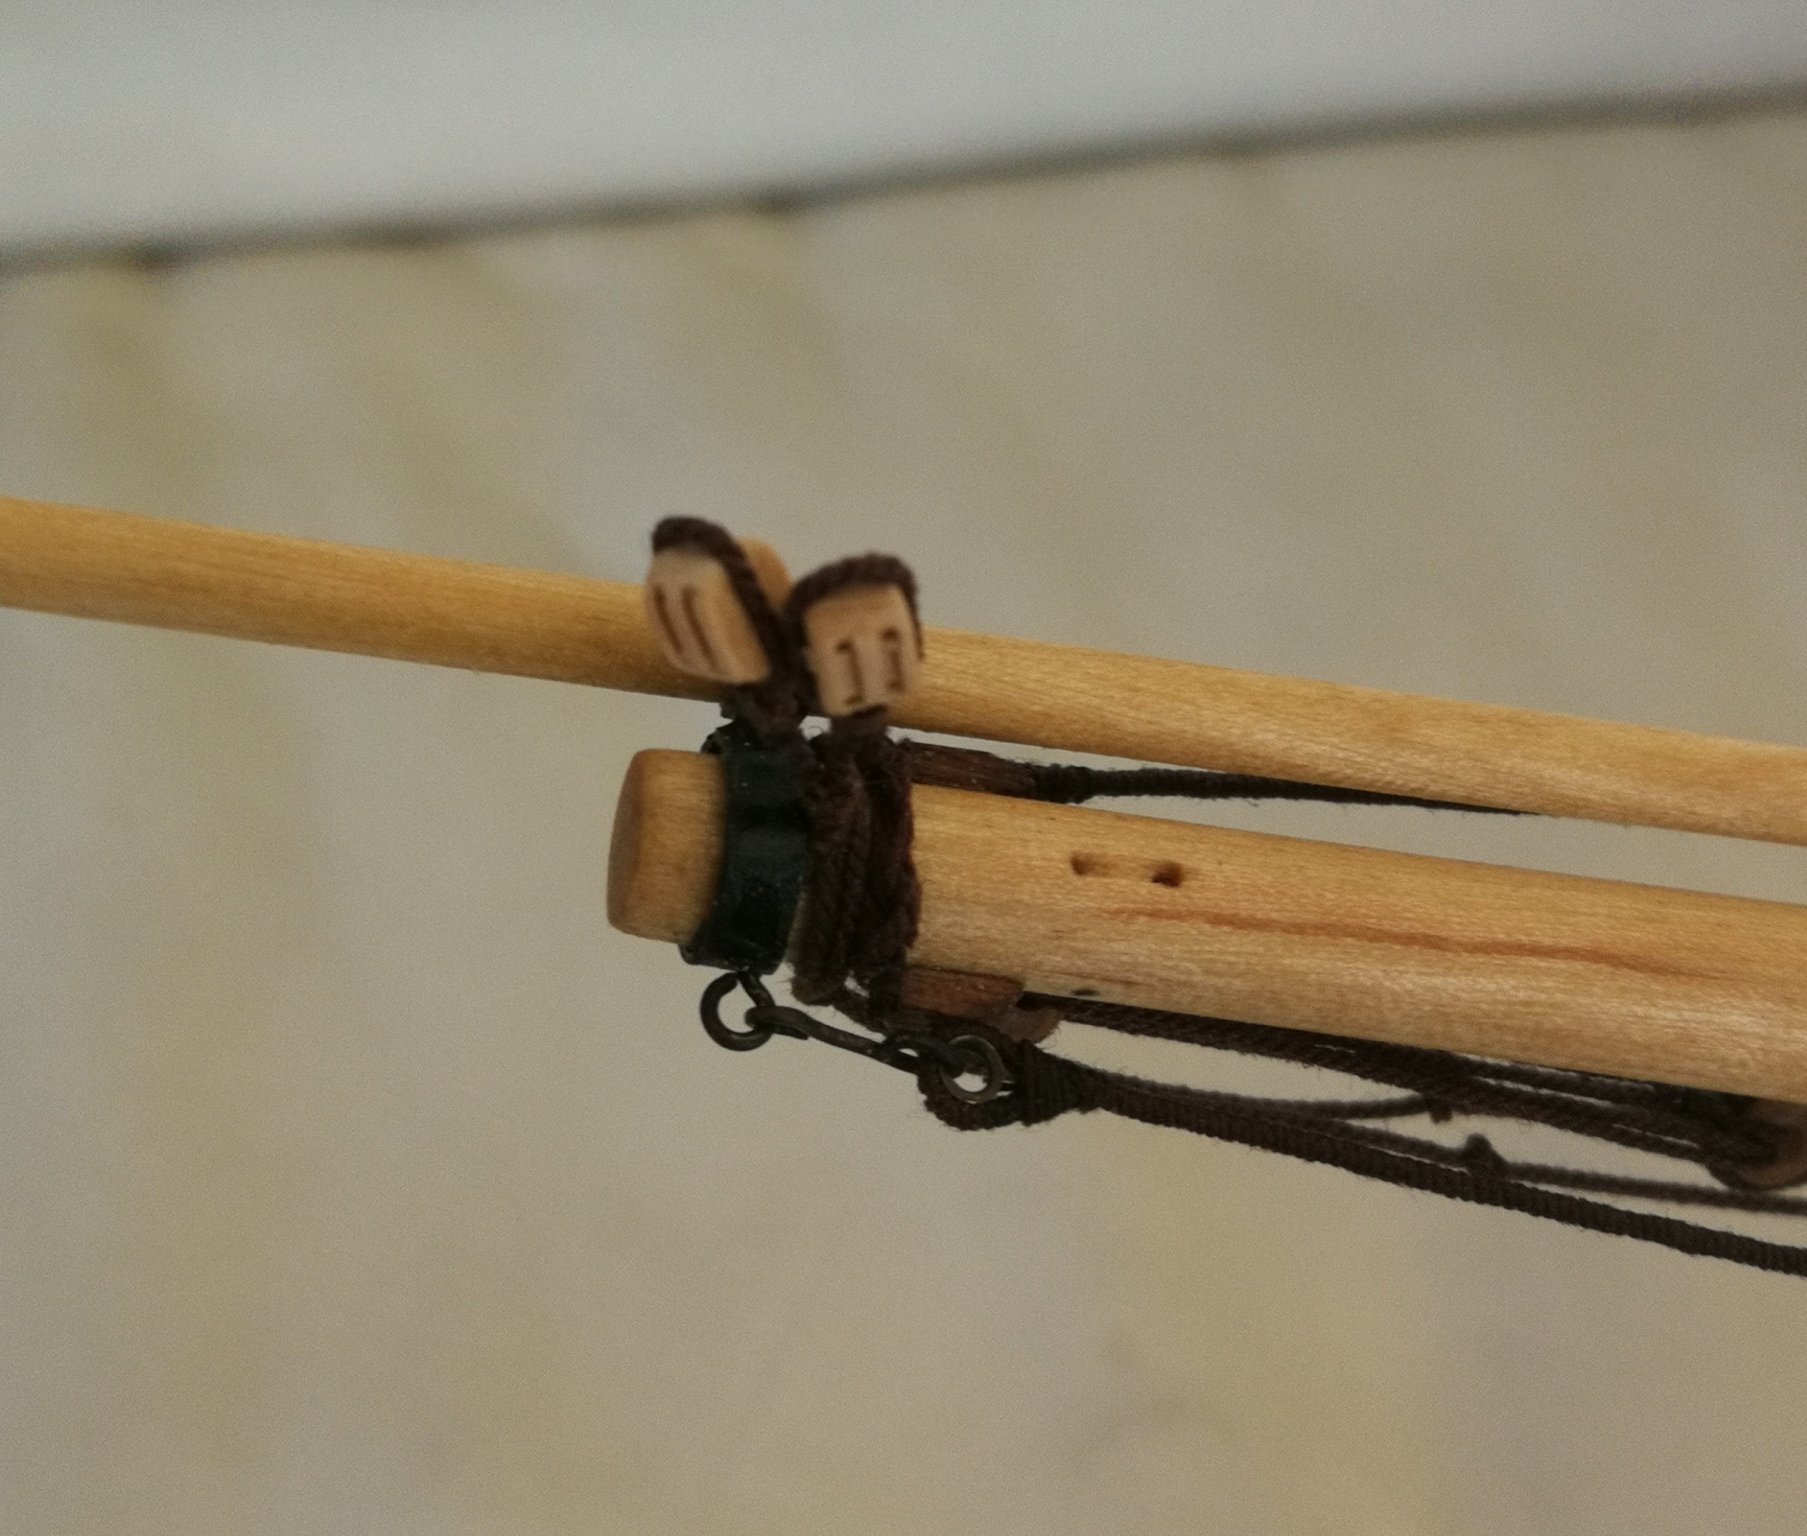
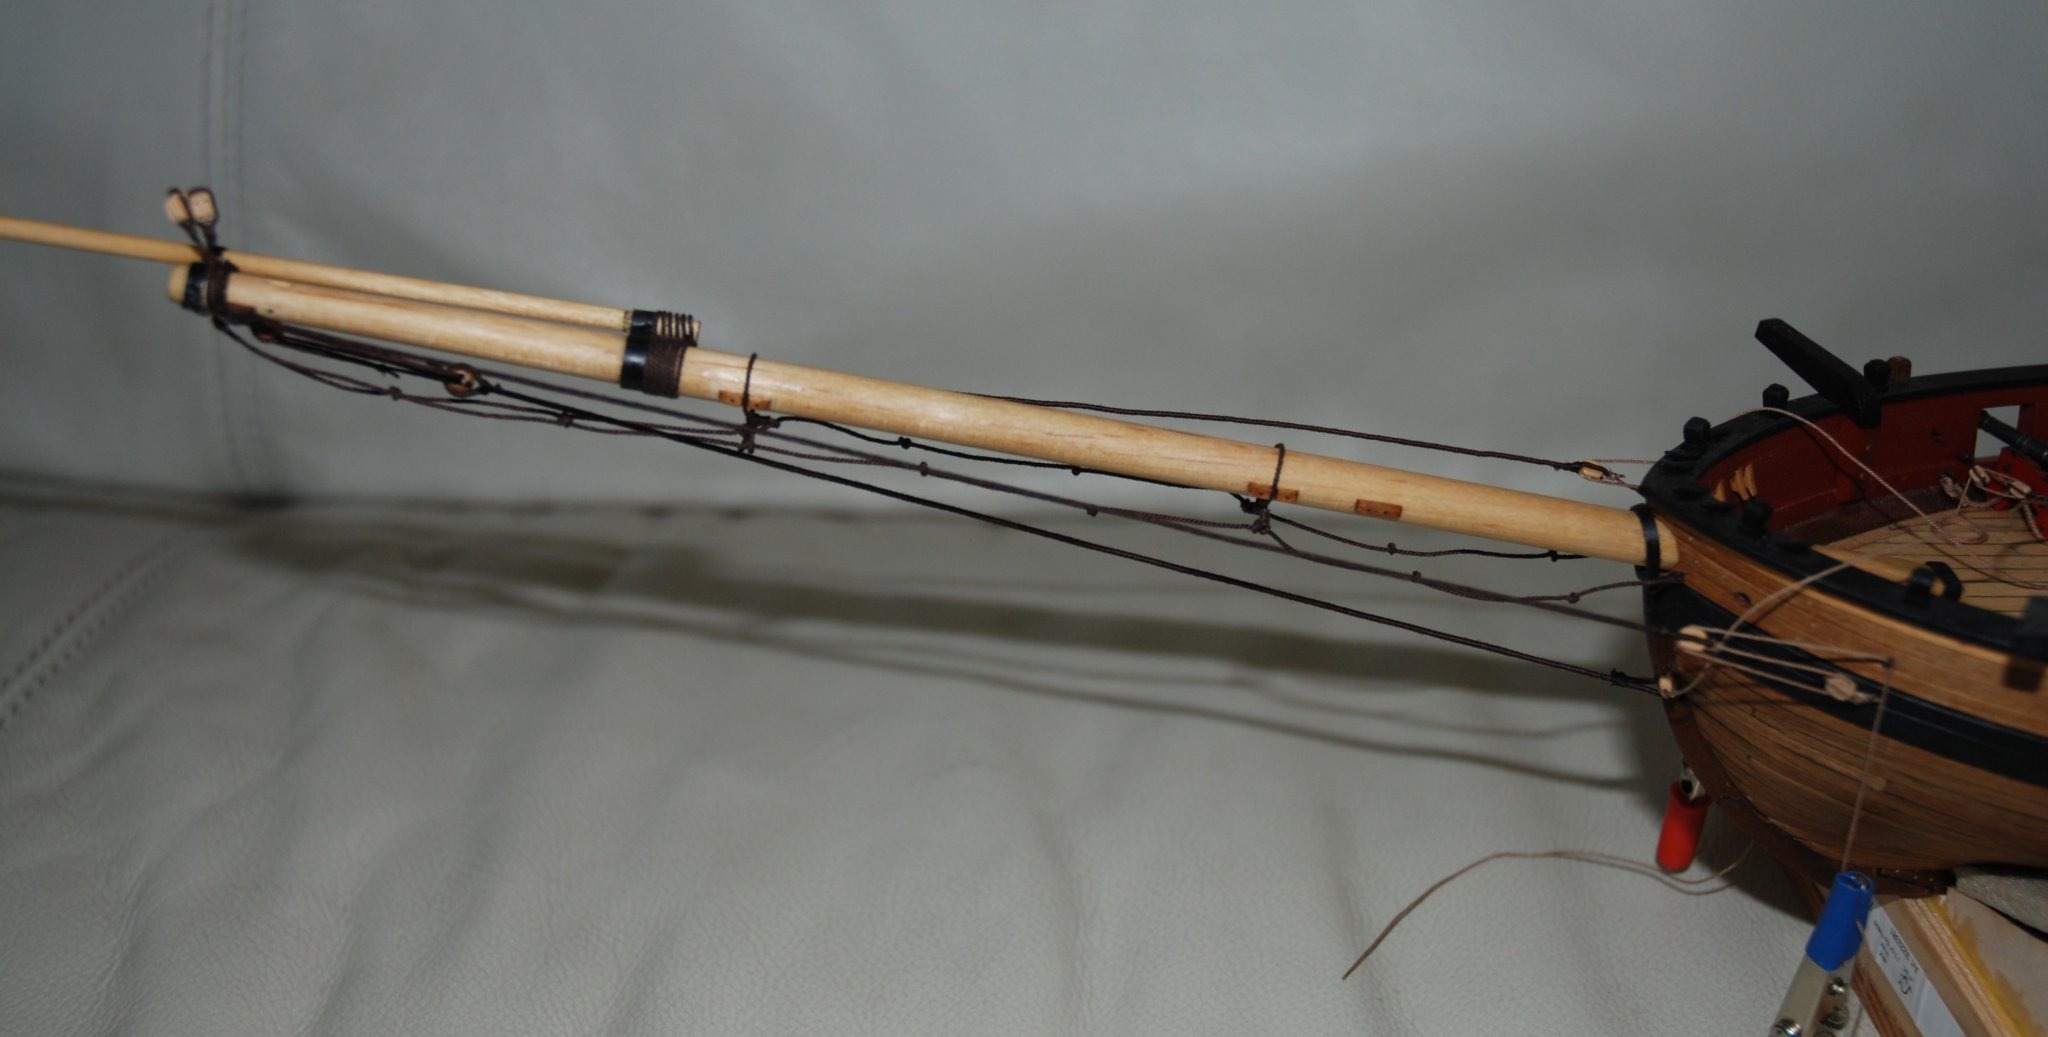
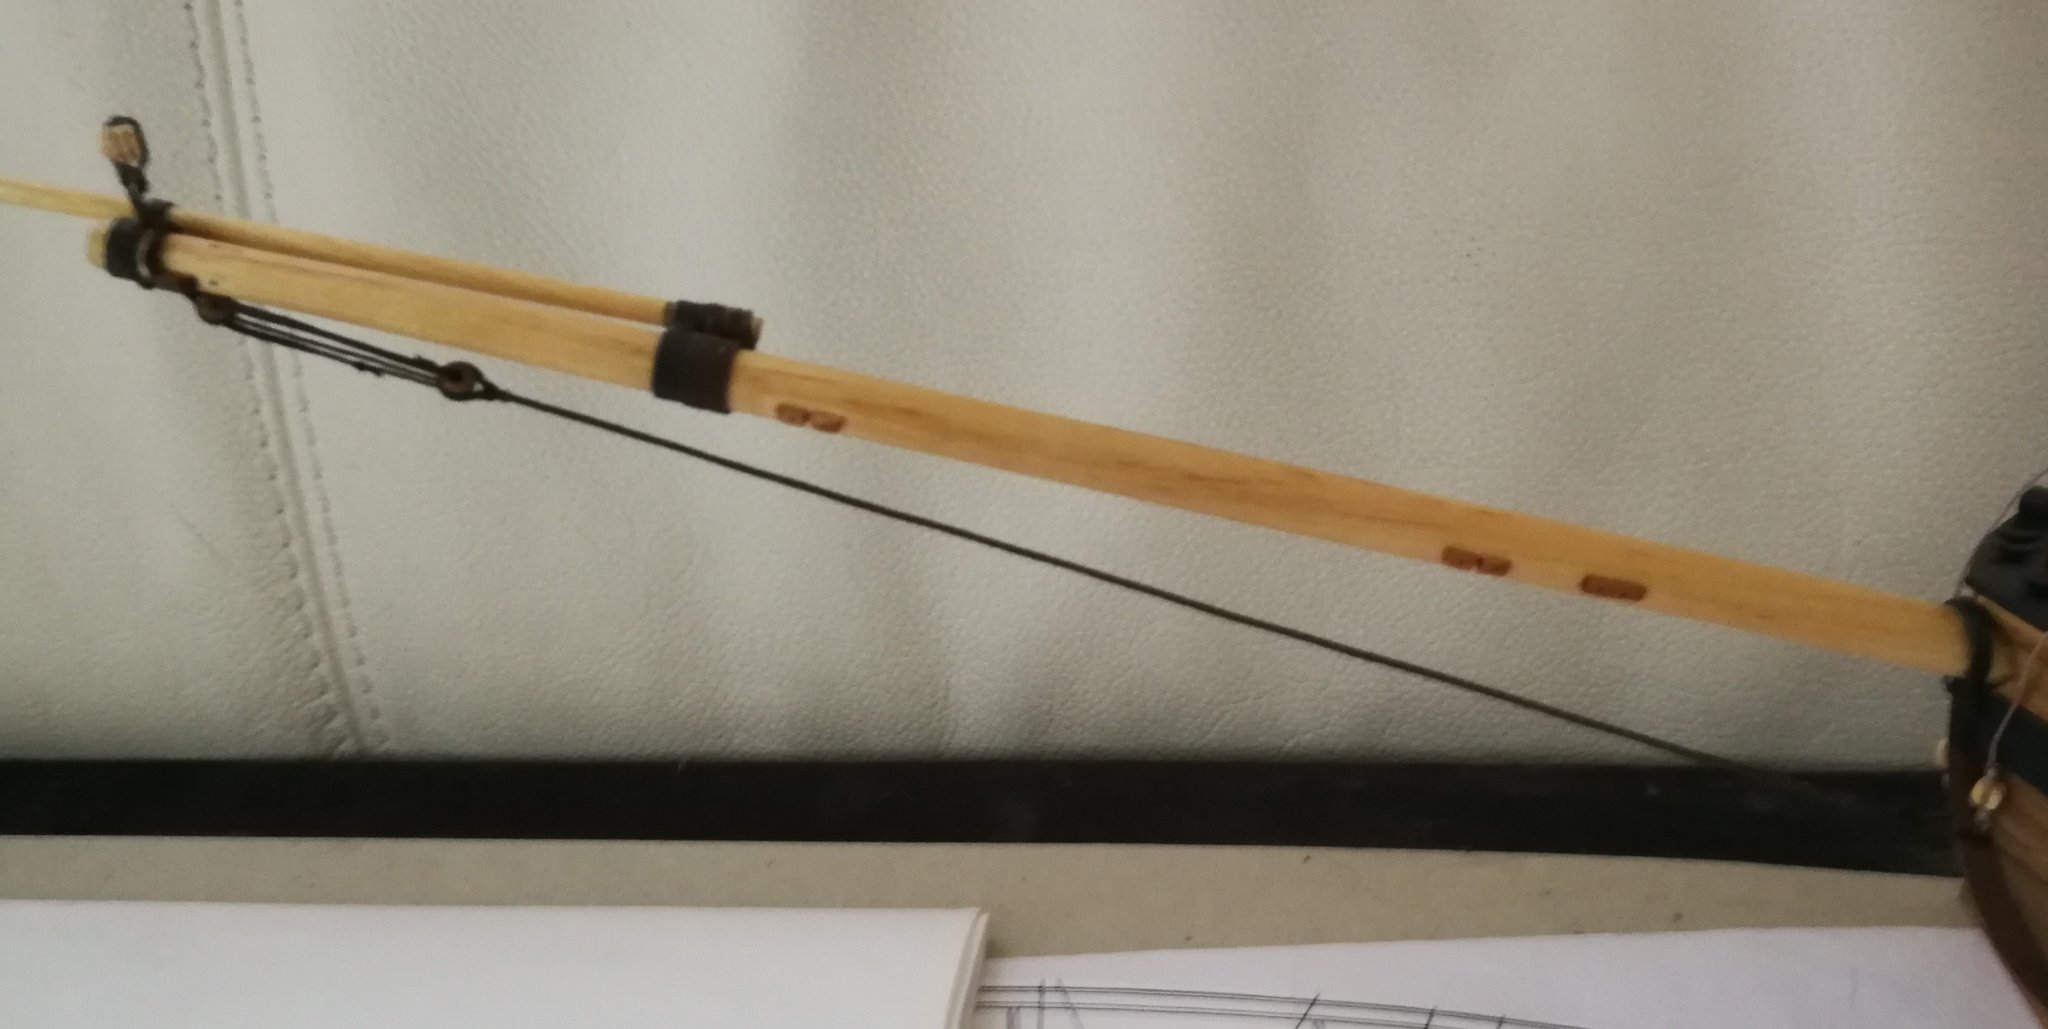
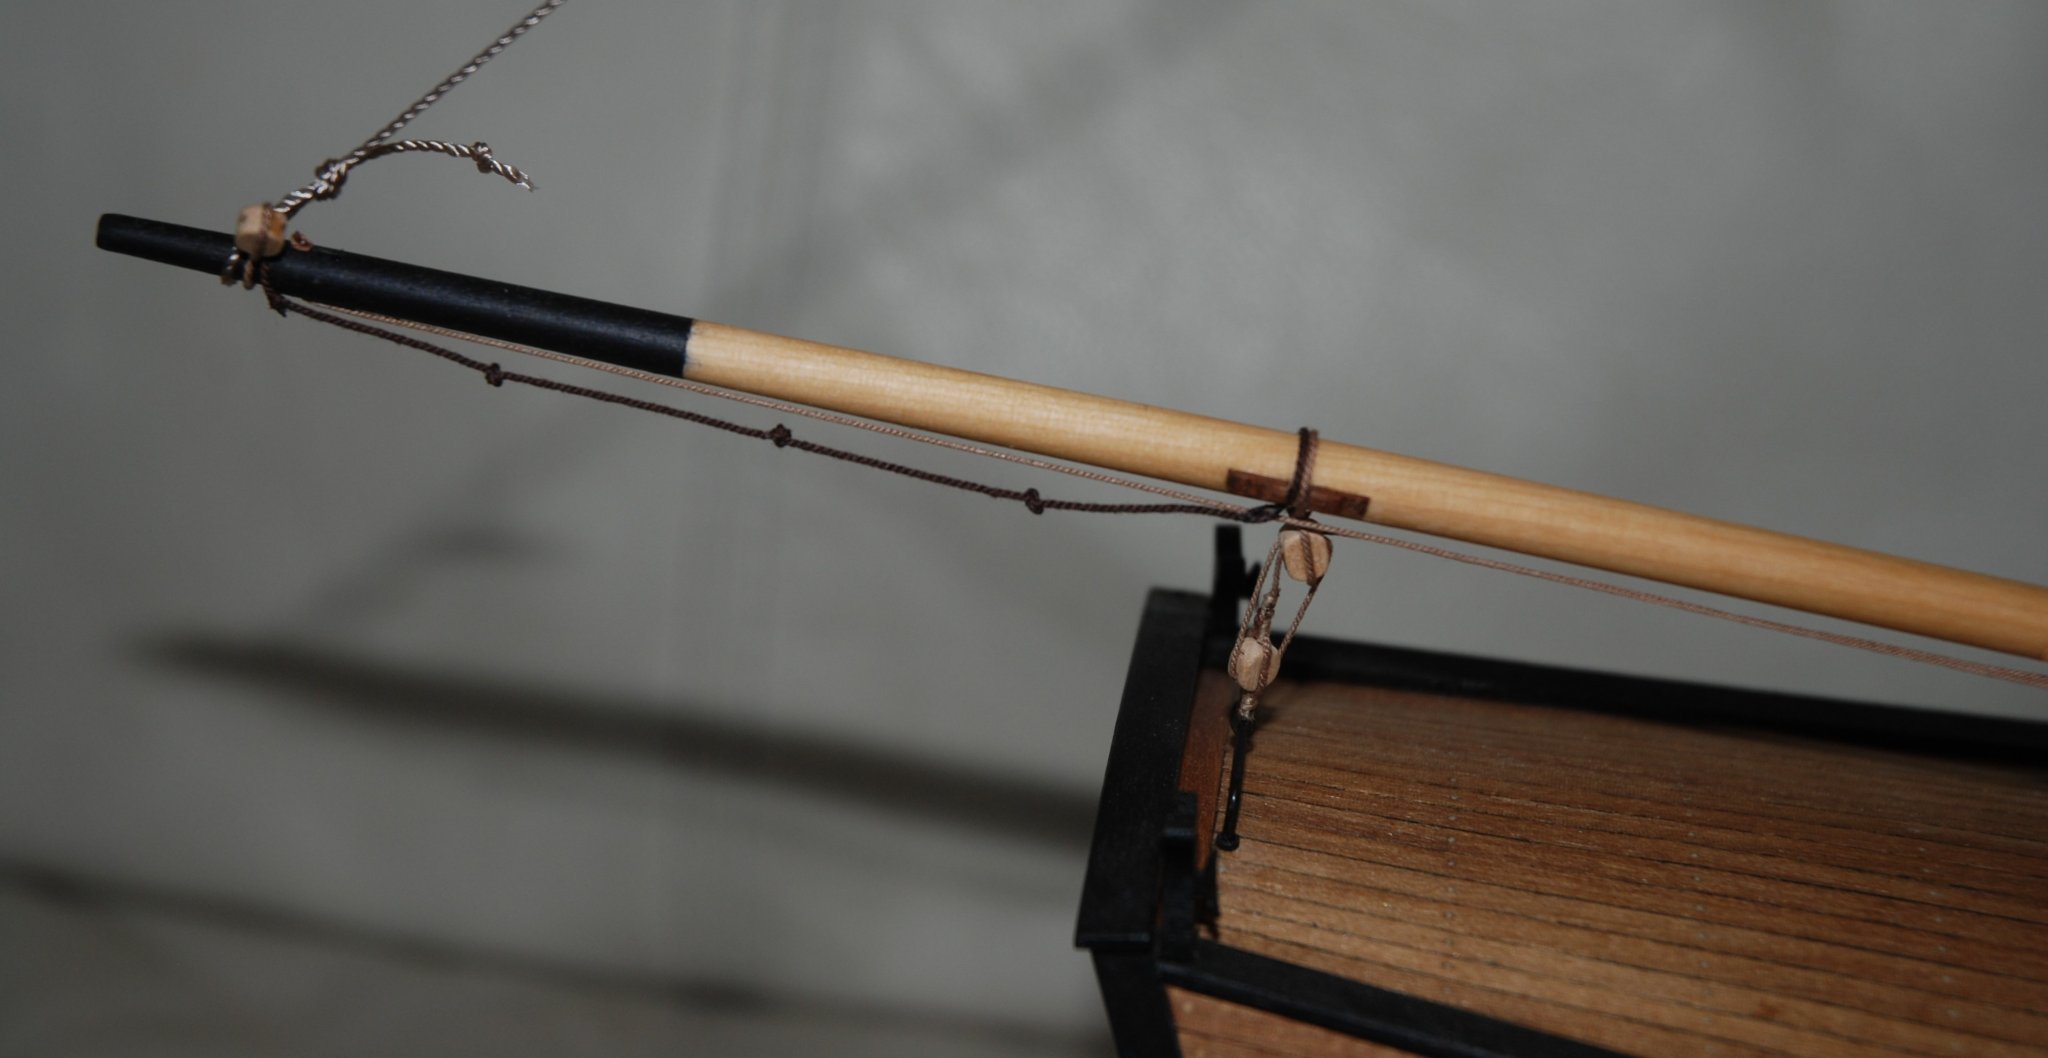
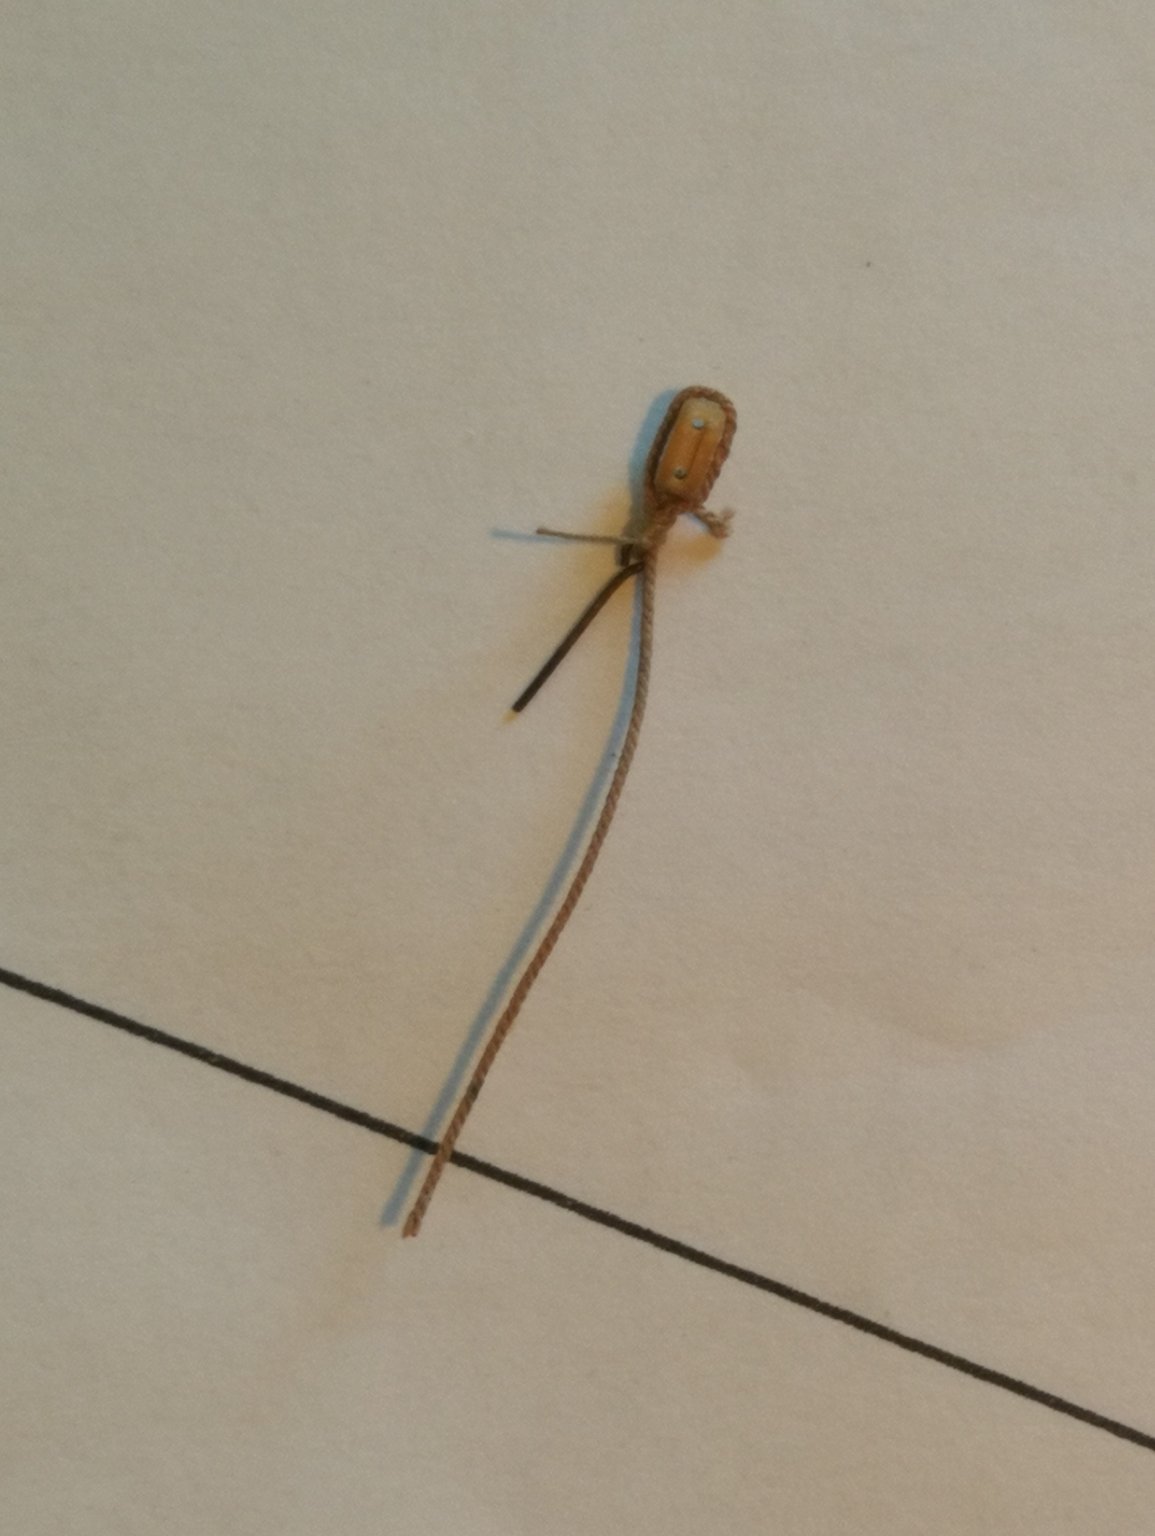
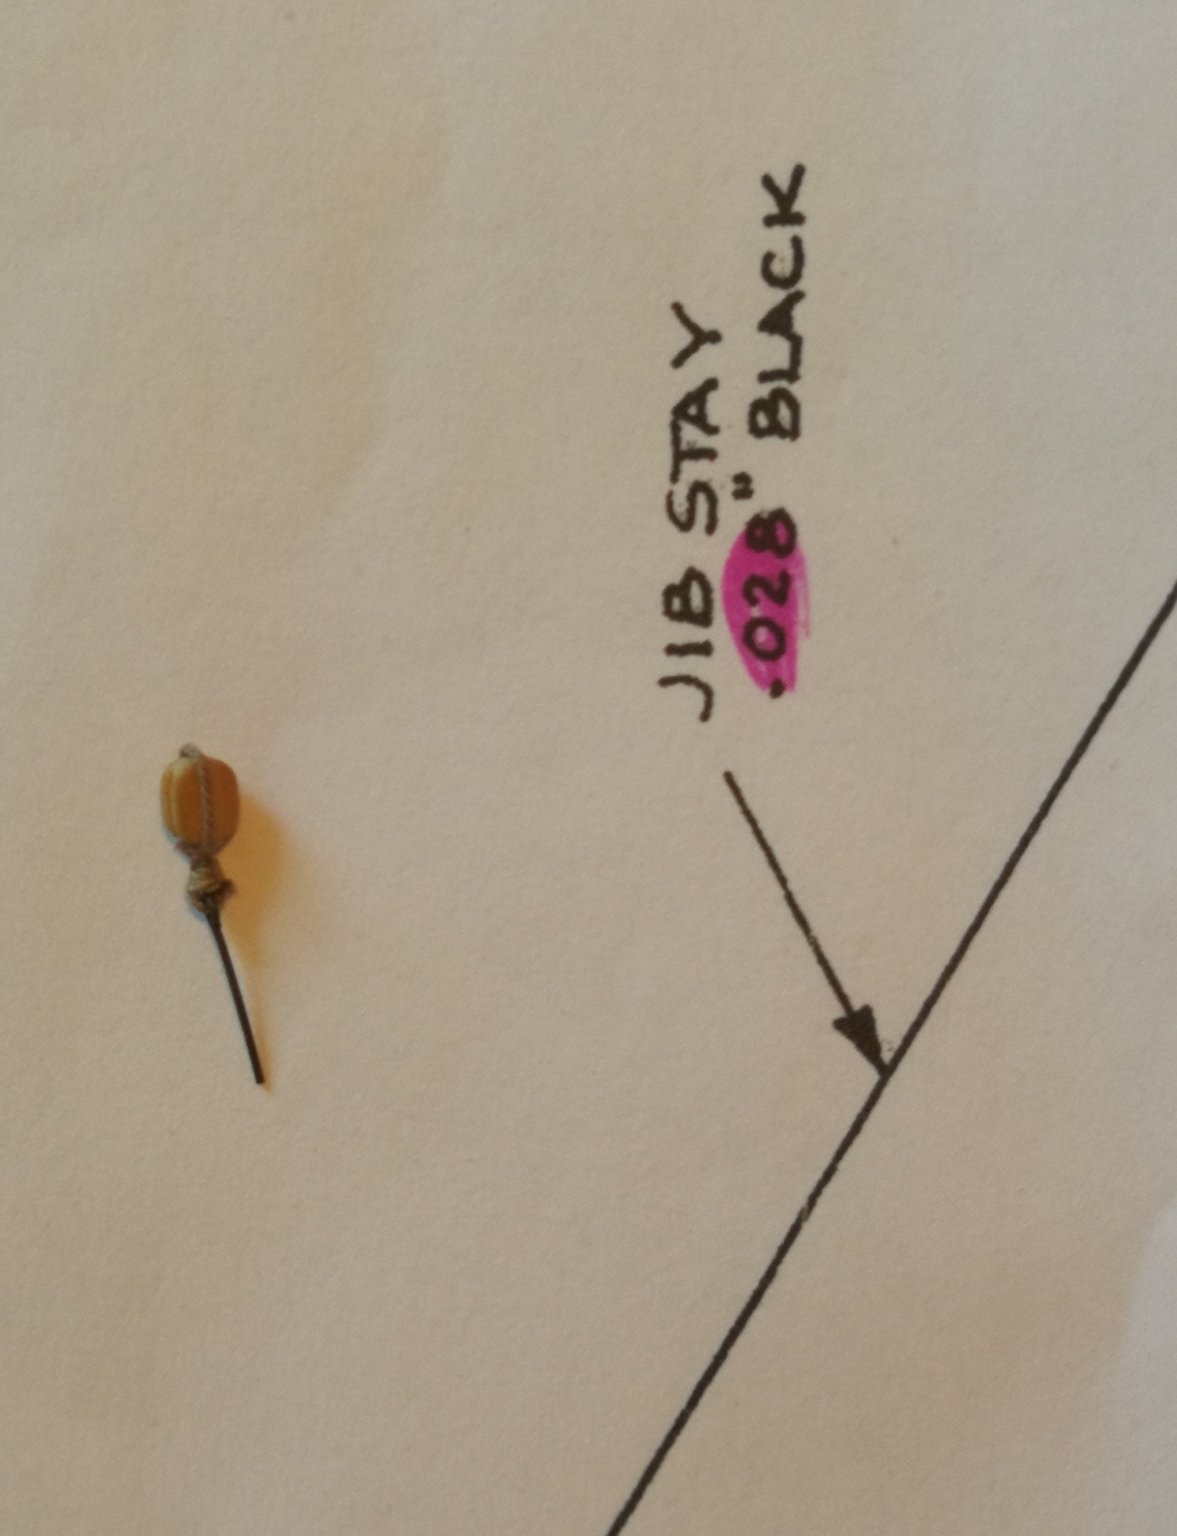
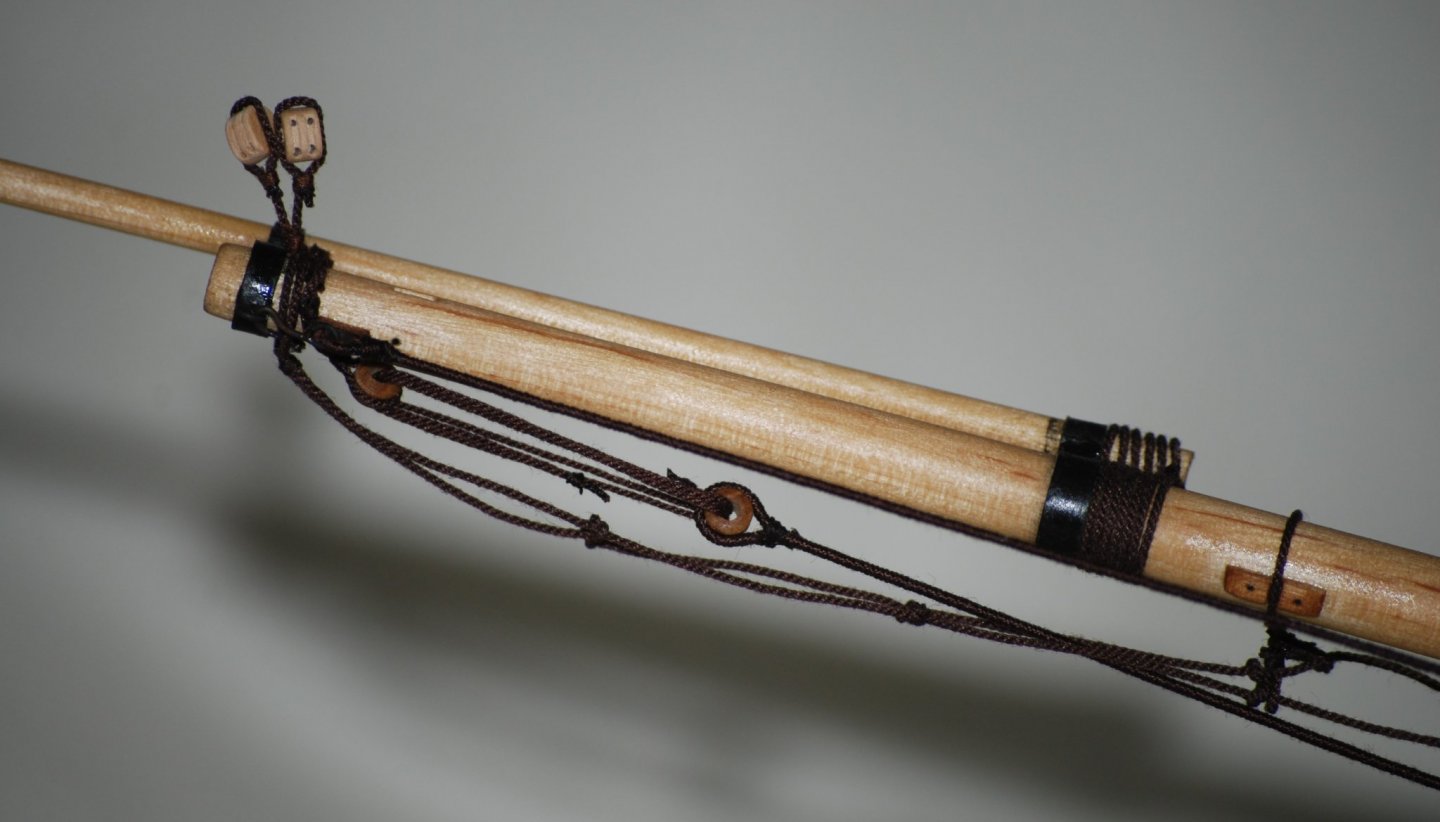
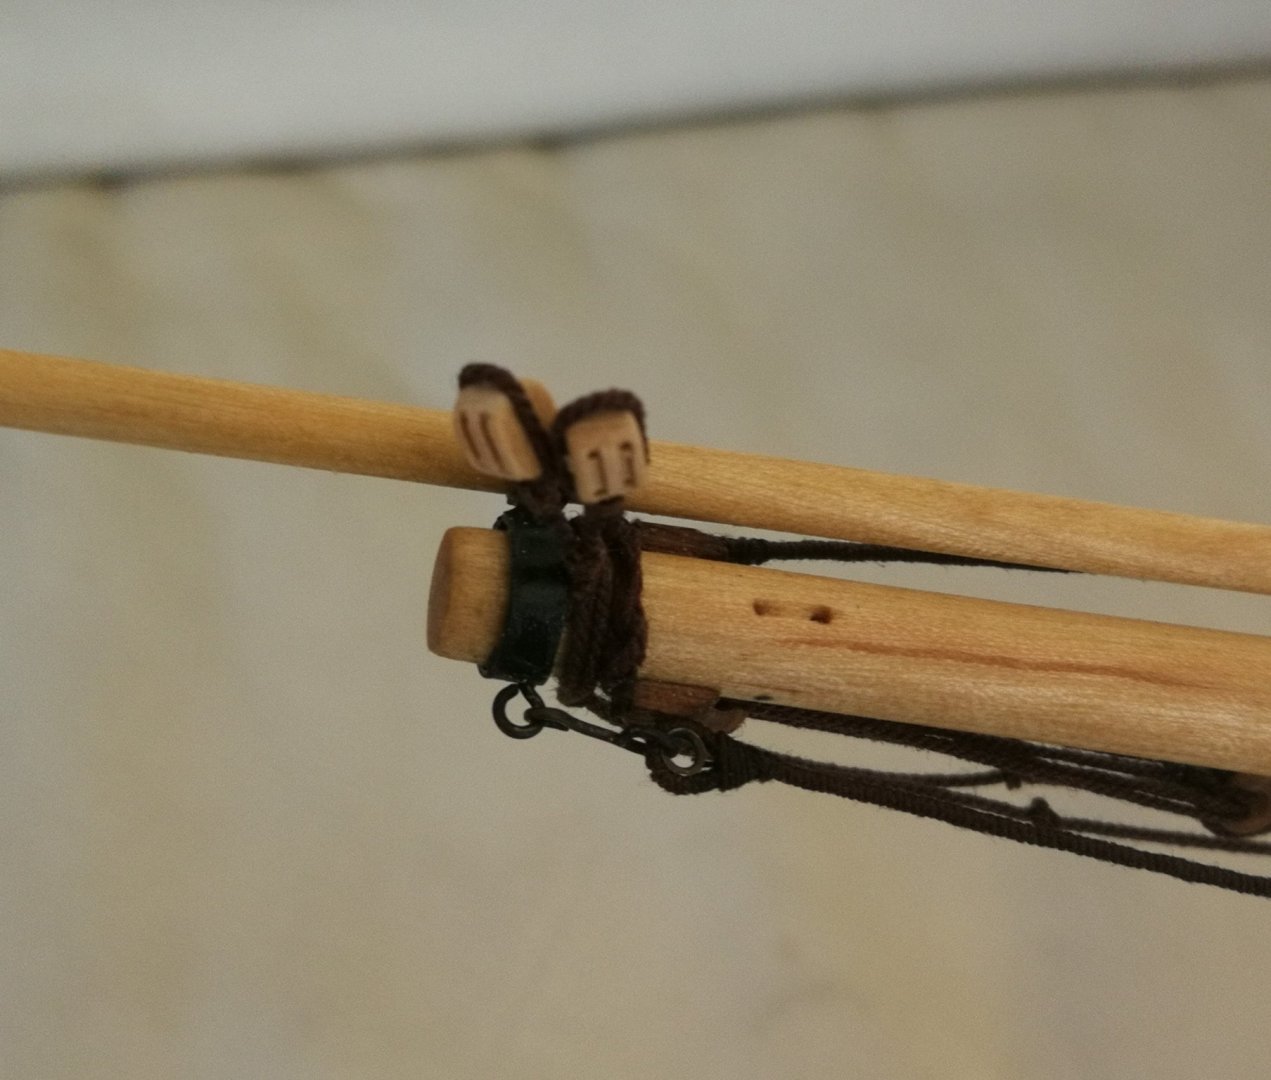
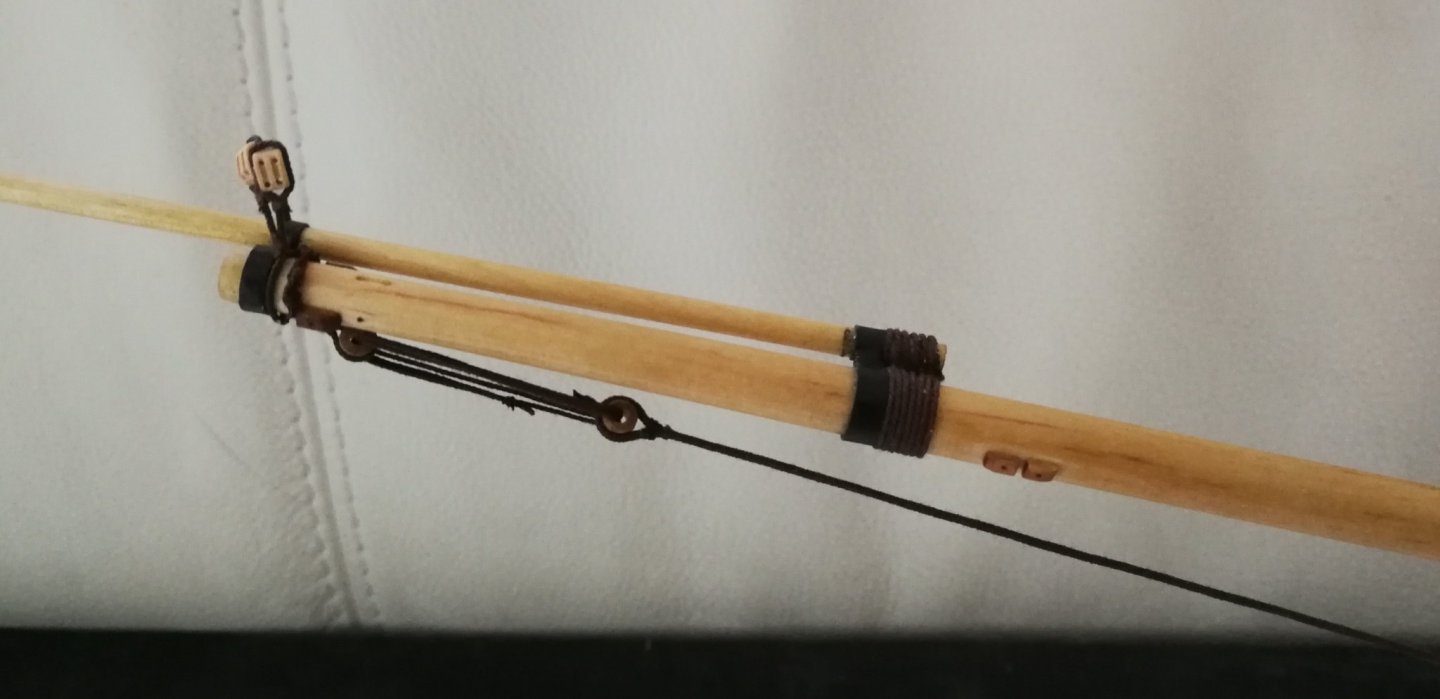
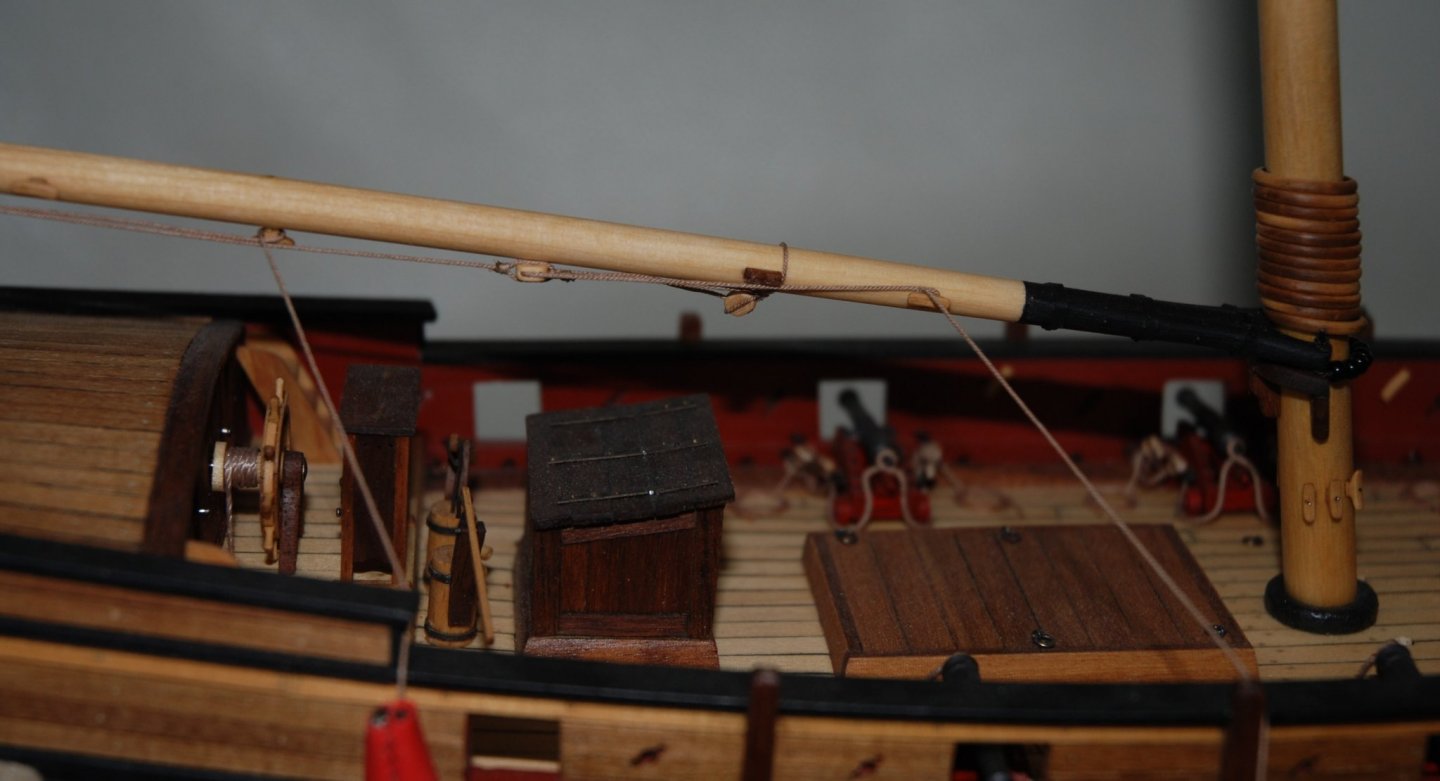
Thank you to all the 'Likes' and thank you Captain_hook for your advice. I would pay attention to the tension of the stays. So far I have set up the footropes and the bowsprit shrouds. The footropes still need to be coated with a mixture of white glue and water to make them look more real. The shrouds must be still tight and definitively secured. On the sheet 5 of the plan they indicate that the belay line must be secured around the block. Not very convinced and I wonder if I will not attach it to a timberhead on the main rail...


- 164 replies
-
- 4
-
-
- first build
- model shipways
- (and 2 more)
-
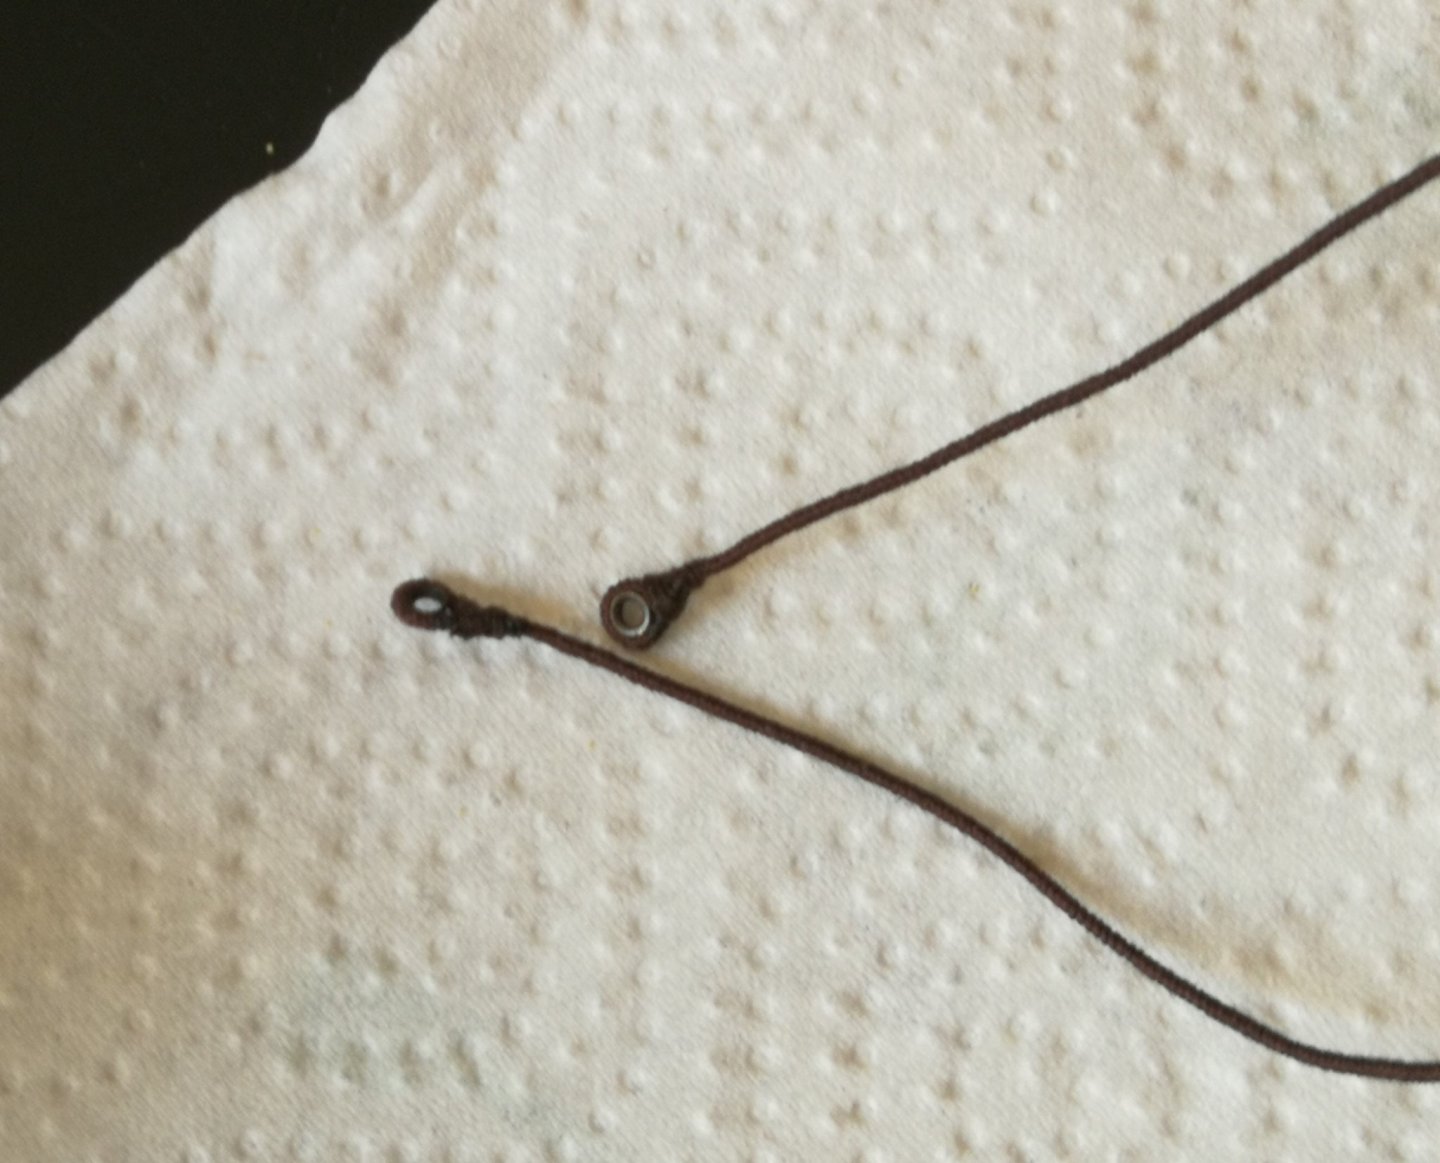
The bobstay is now in place on the bowsprit. I will add now the footropes and the bowsprit shrouds.

- 164 replies
-
- 5
-
-
- first build
- model shipways
- (and 2 more)
-
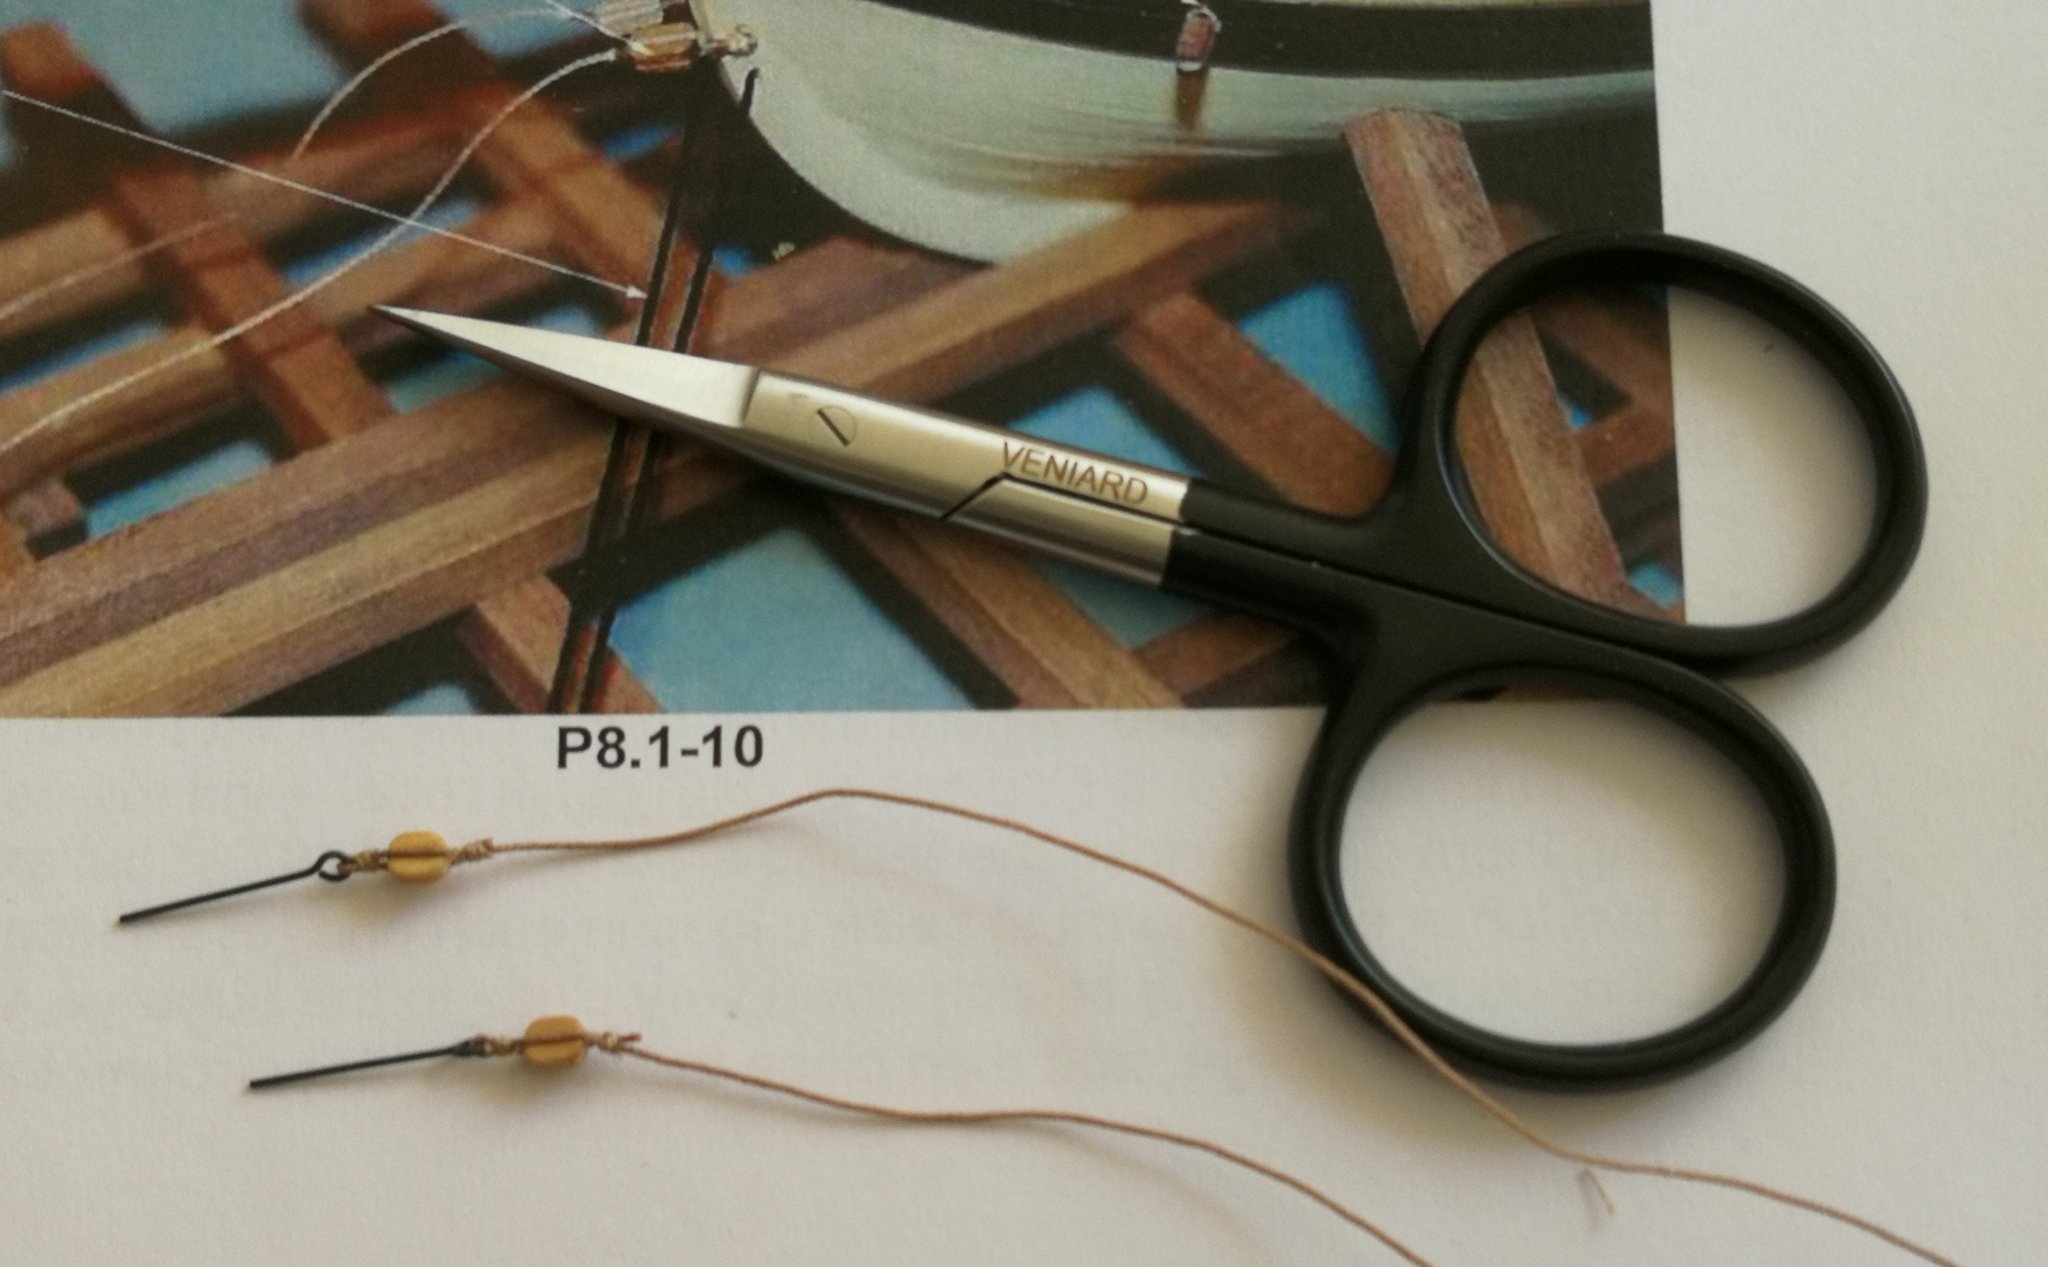
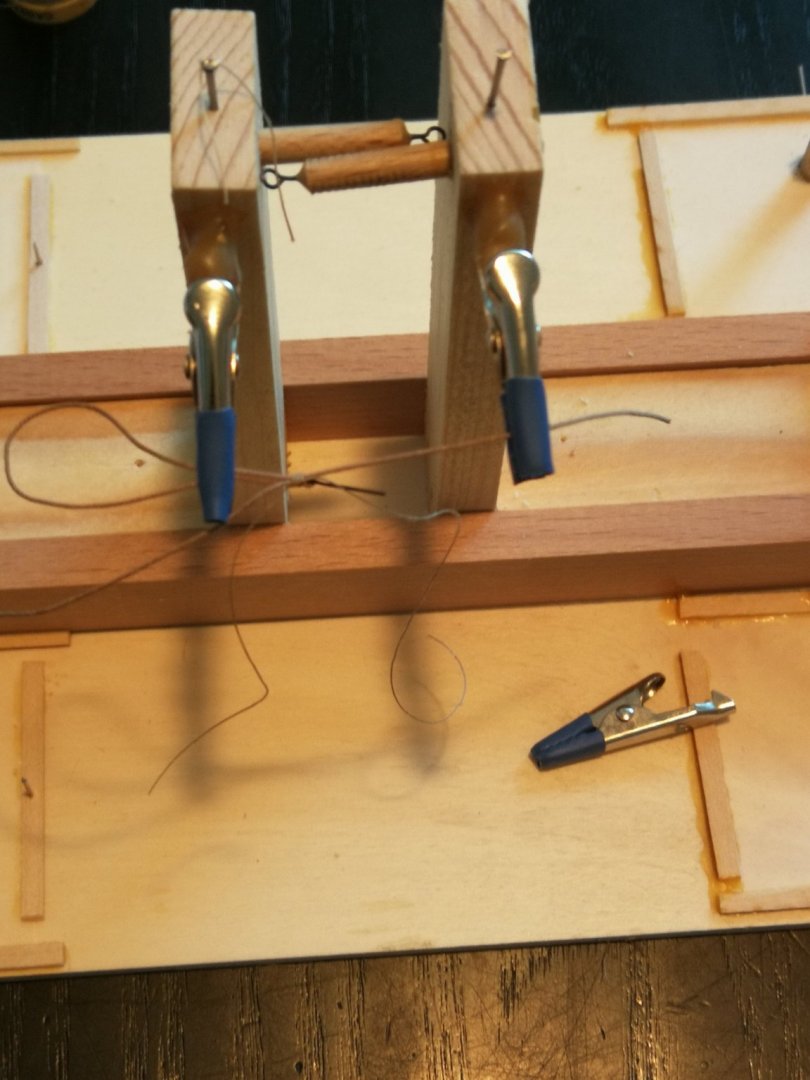
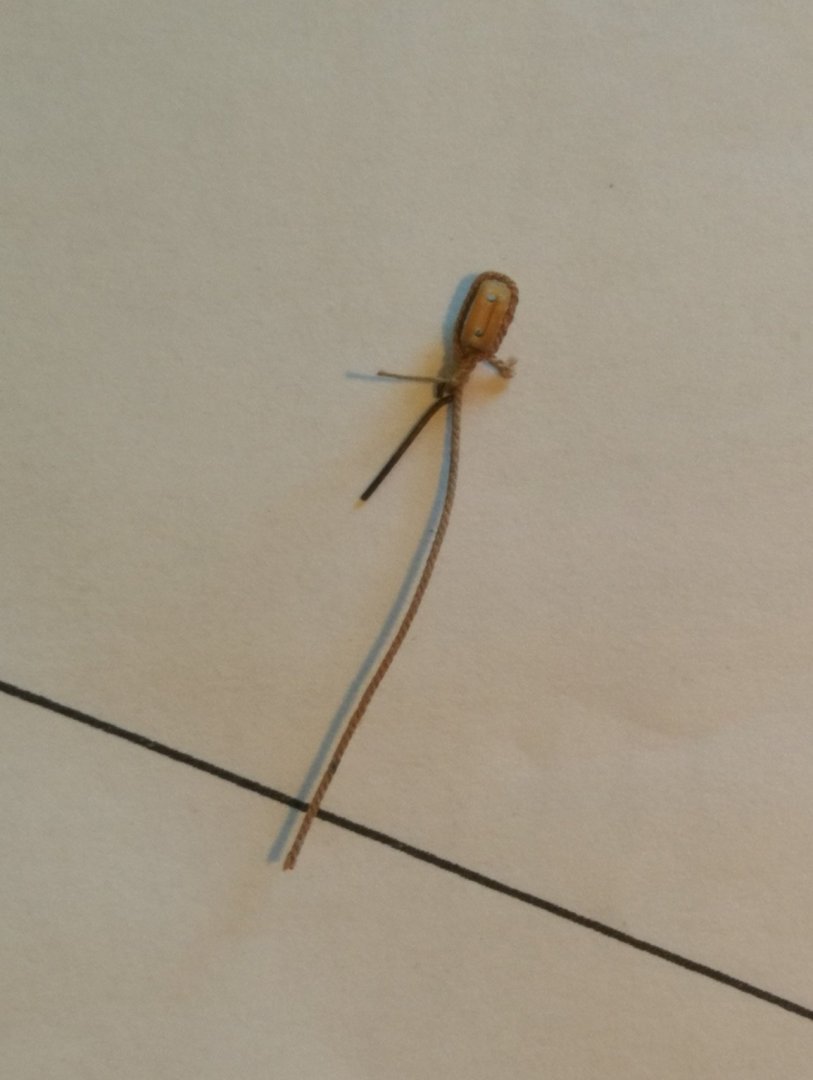
Thank you Brian. I will do this using the method you used. I also changed the nylon rope to that of Syren which seems really very realistic to me.
- 164 replies
-
- 3
-
-
- first build
- model shipways
- (and 2 more)
-
Thank you David for your advice. I will try to follow it and make more diagonal cuts to better simulate the splice.
-
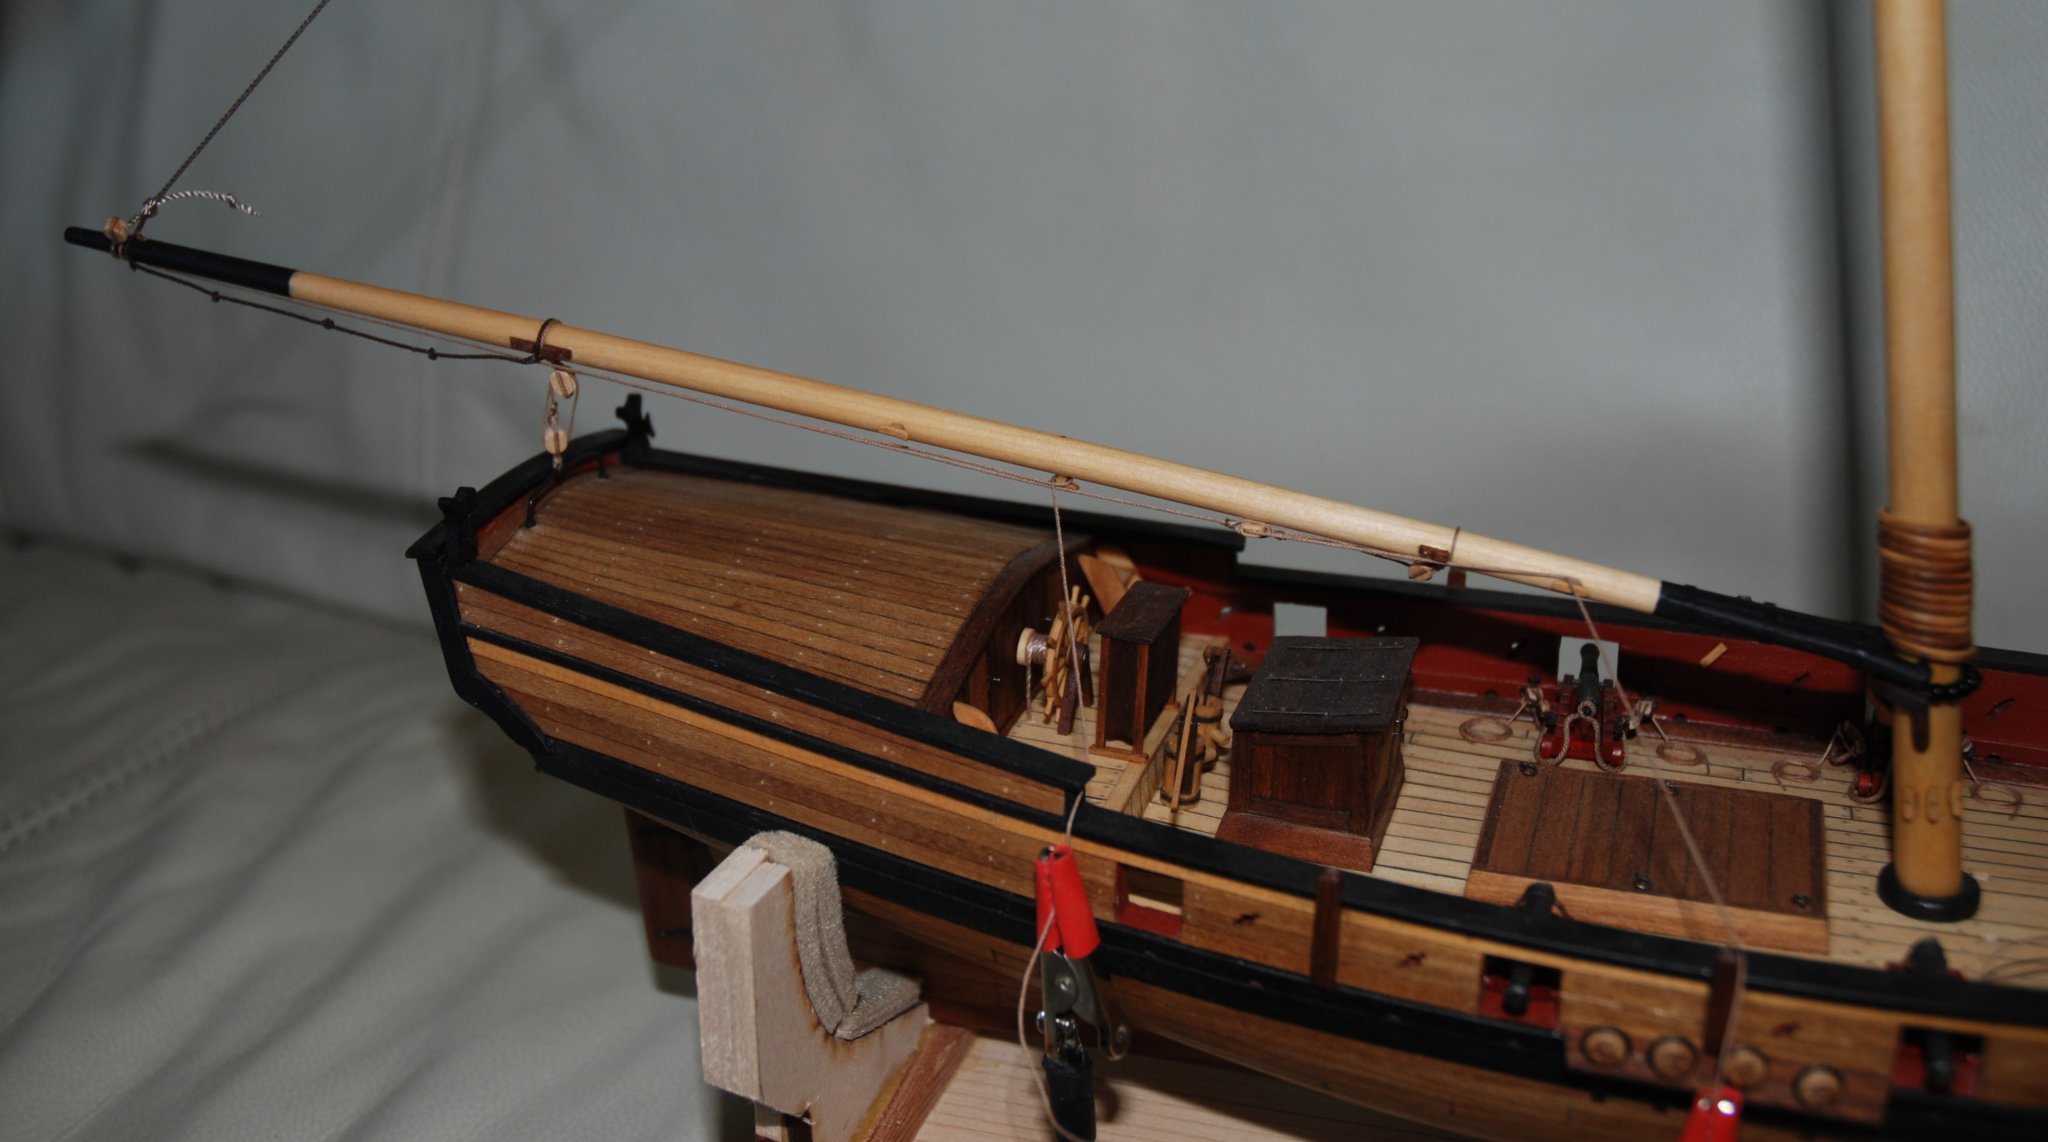
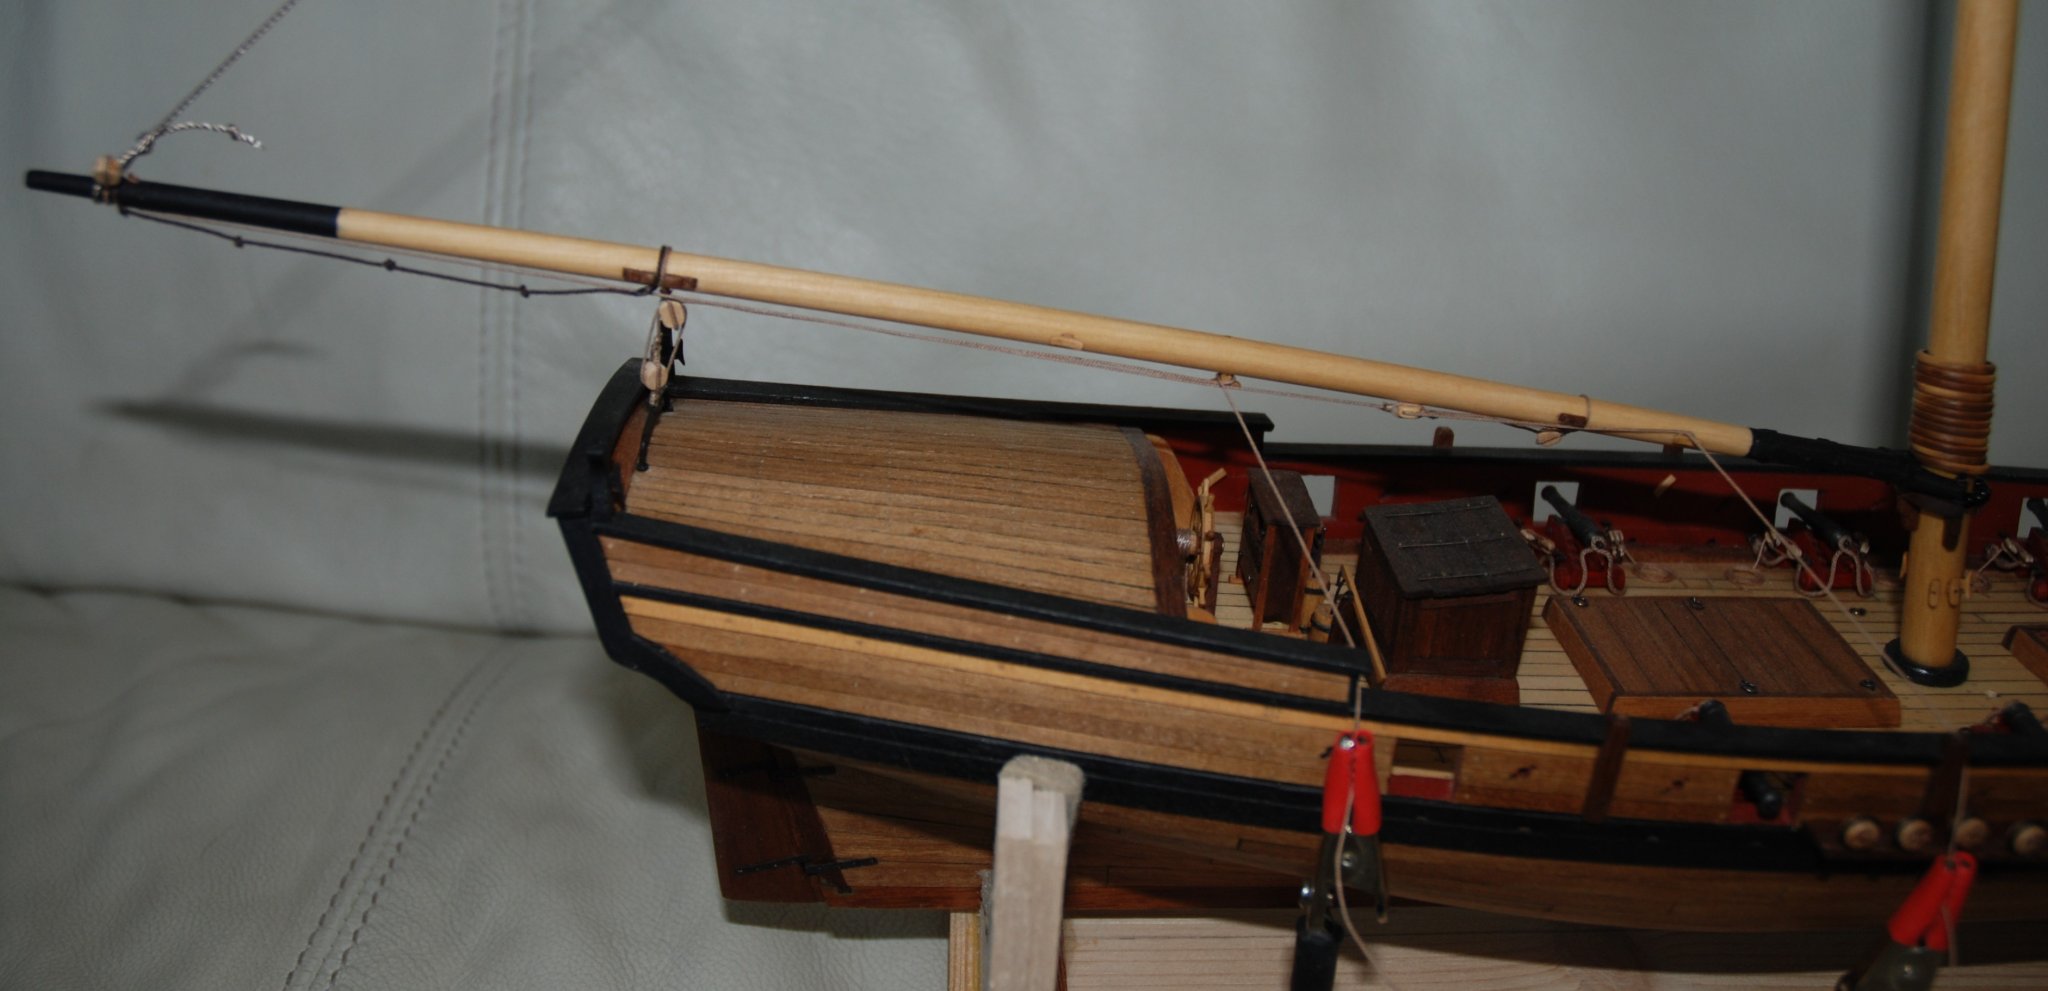
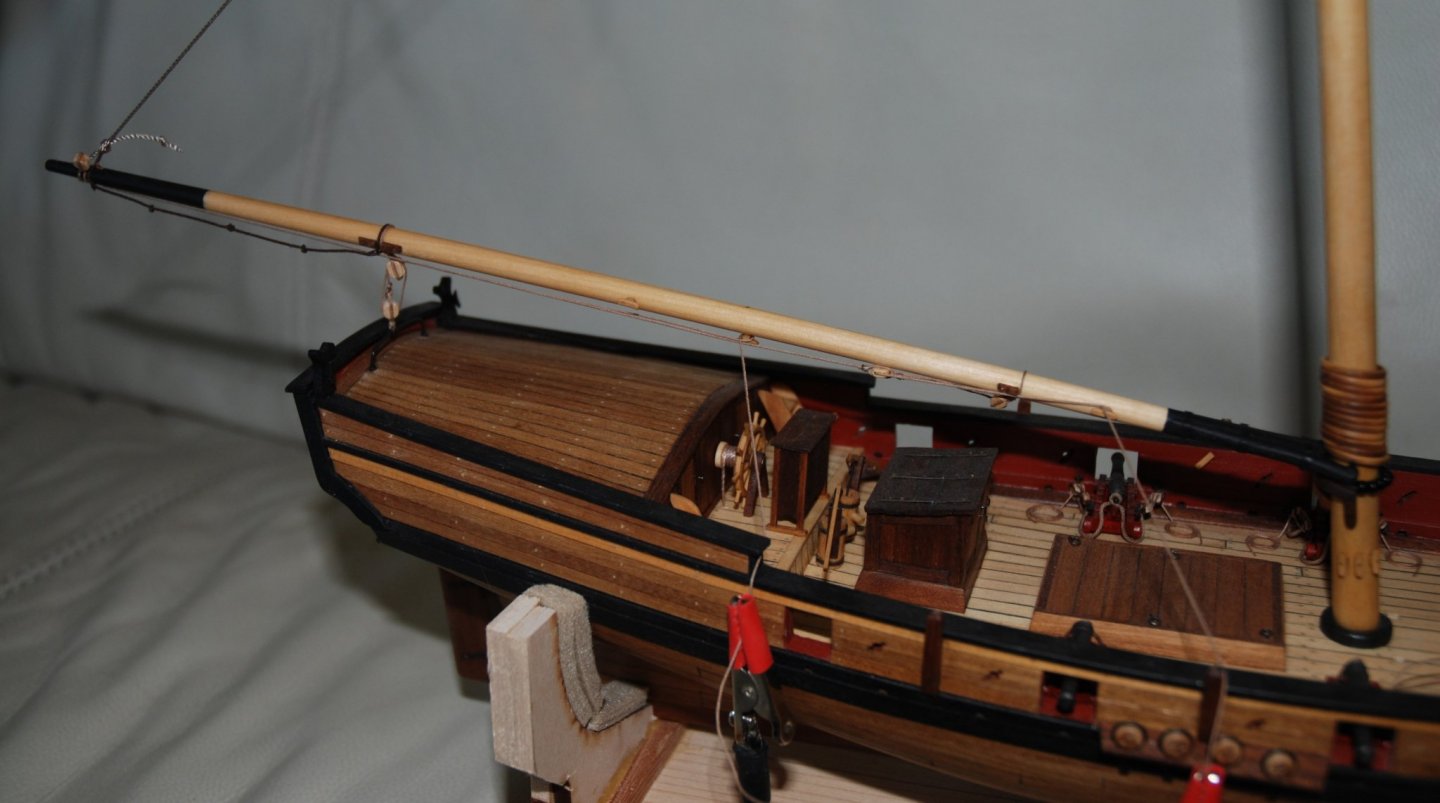
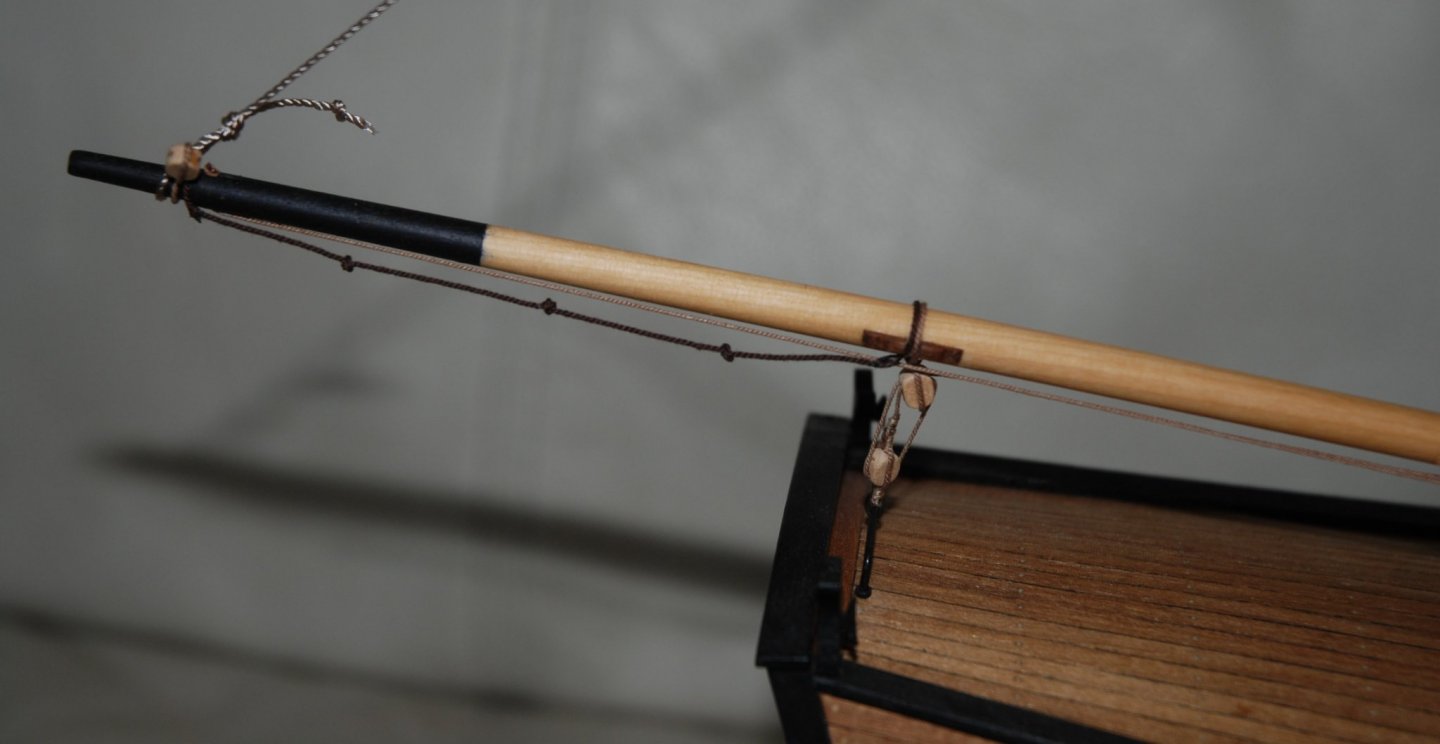
The rigging of the boom has been carried out. A temporary rope is placed at the end of the boom while waiting for the boom topping lift to be fixed. I don't know if I can already fix the ends of the boom sheet and of the outhaul on their cleats definitively or if it is better to wait before giving the final tension to these two ropes... Next step : the bobstay

- 164 replies
-
- 8
-
-
- first build
- model shipways
- (and 2 more)
-
Thank you Brian for your help. It's always reassuring to know that you can have the help of people who have already done this same job. I will mostly use the practicum to acquire the basic techniques. For the rigging sequence, I will follow the method read in the Cheerful instruction manual and especially reread the various logs on the AVS ☺️.
- 164 replies
-
- 3
-
-
- first build
- model shipways
- (and 2 more)
-
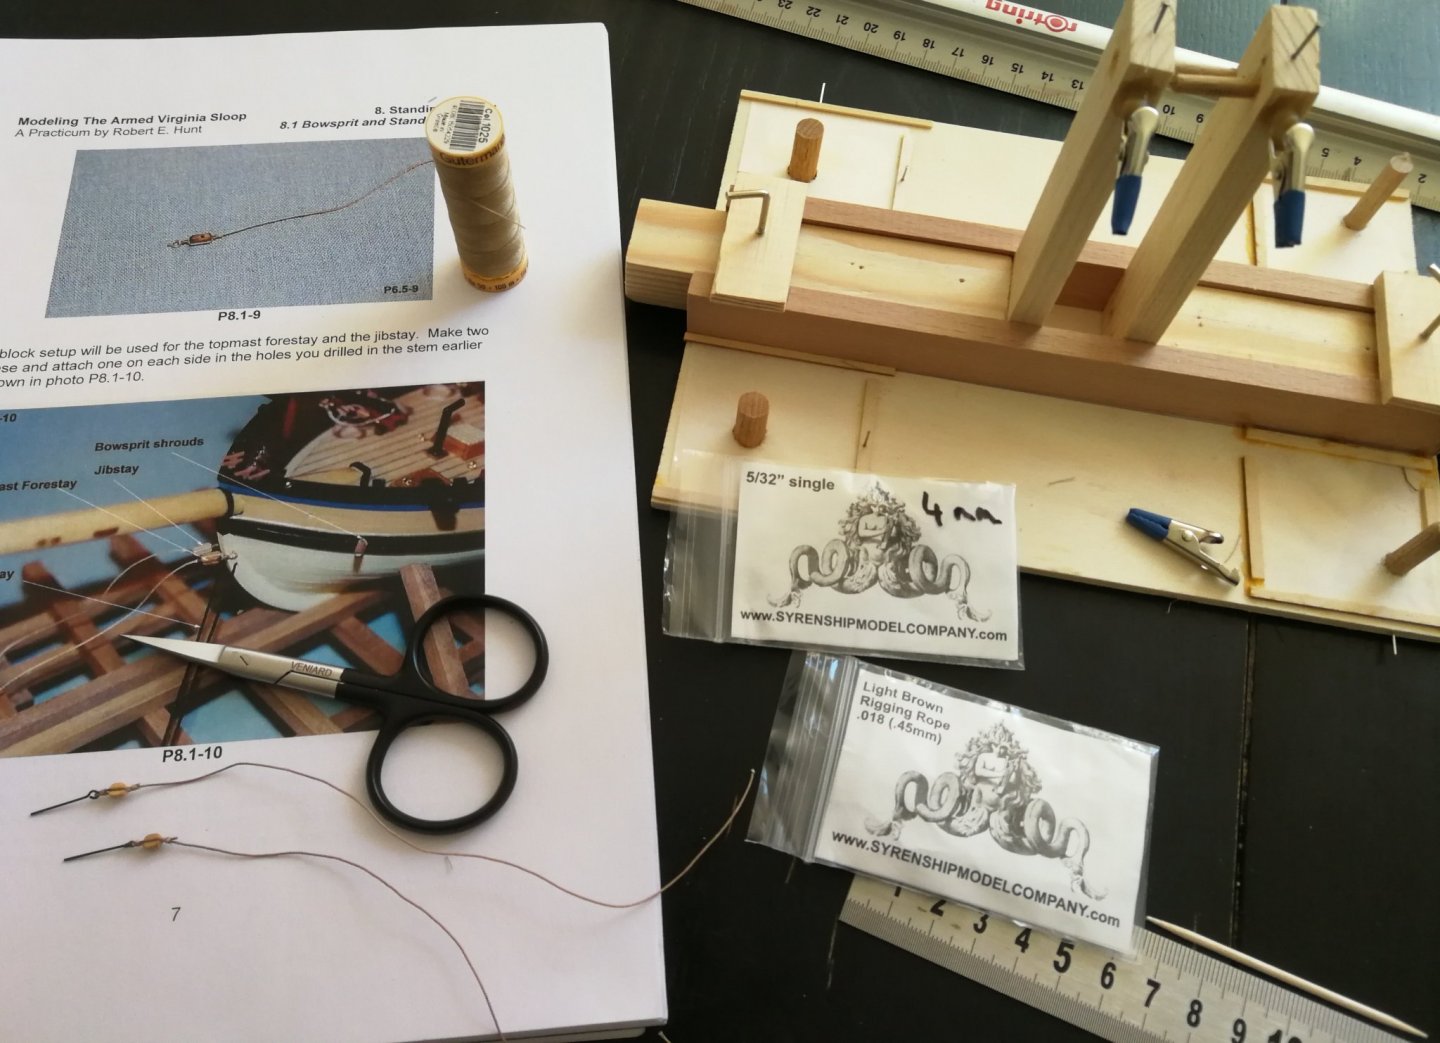
I'm officially starting the rigging steps 😁 I need to learn some skills first. Robert Hunt's practicum is very helpful in my learning. I'll start with the boom first and move on to the bowsprit.

- 164 replies
-
- 7
-
-
- first build
- model shipways
- (and 2 more)
-
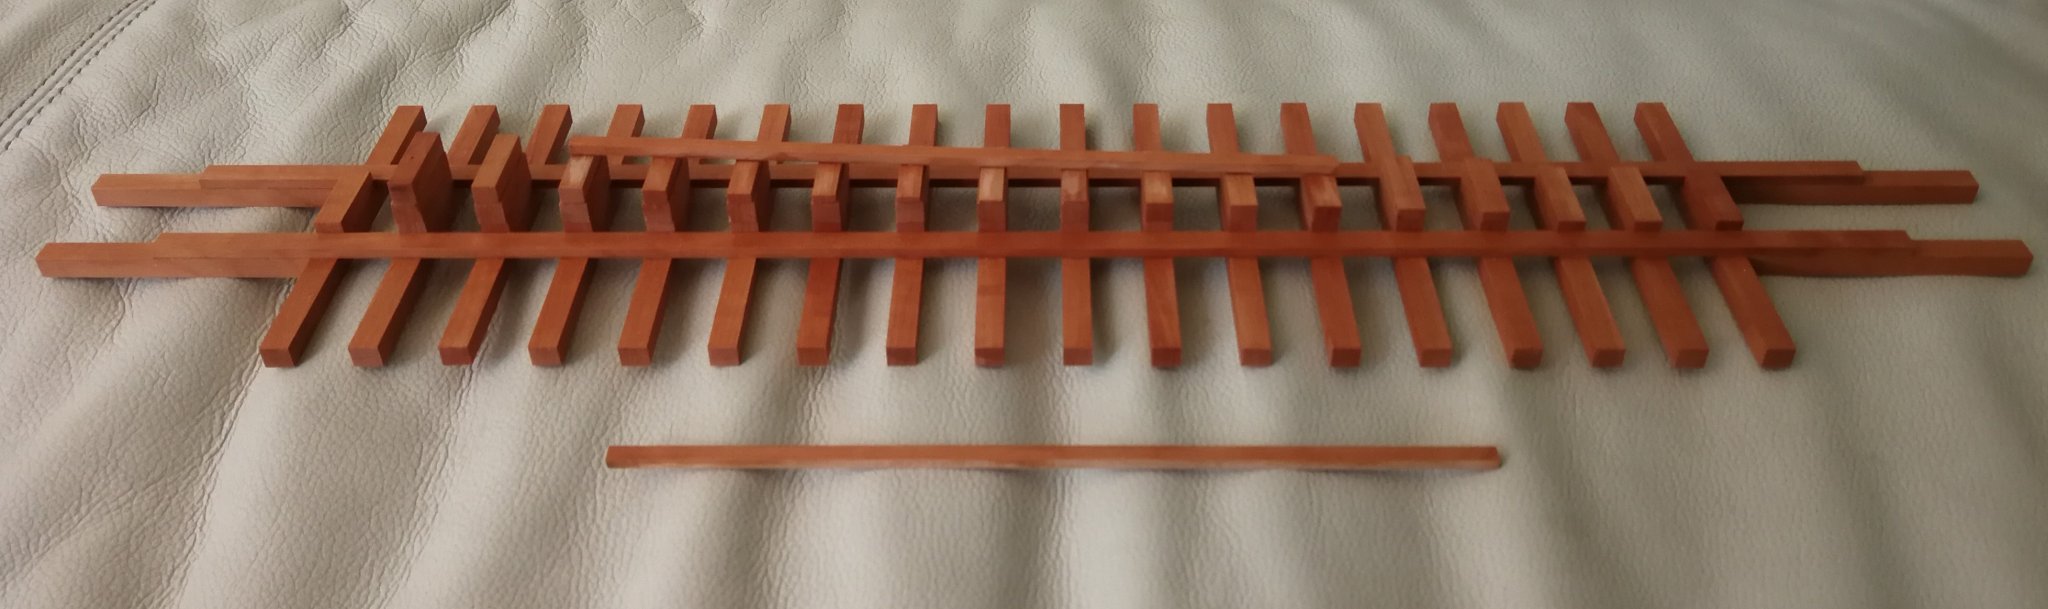
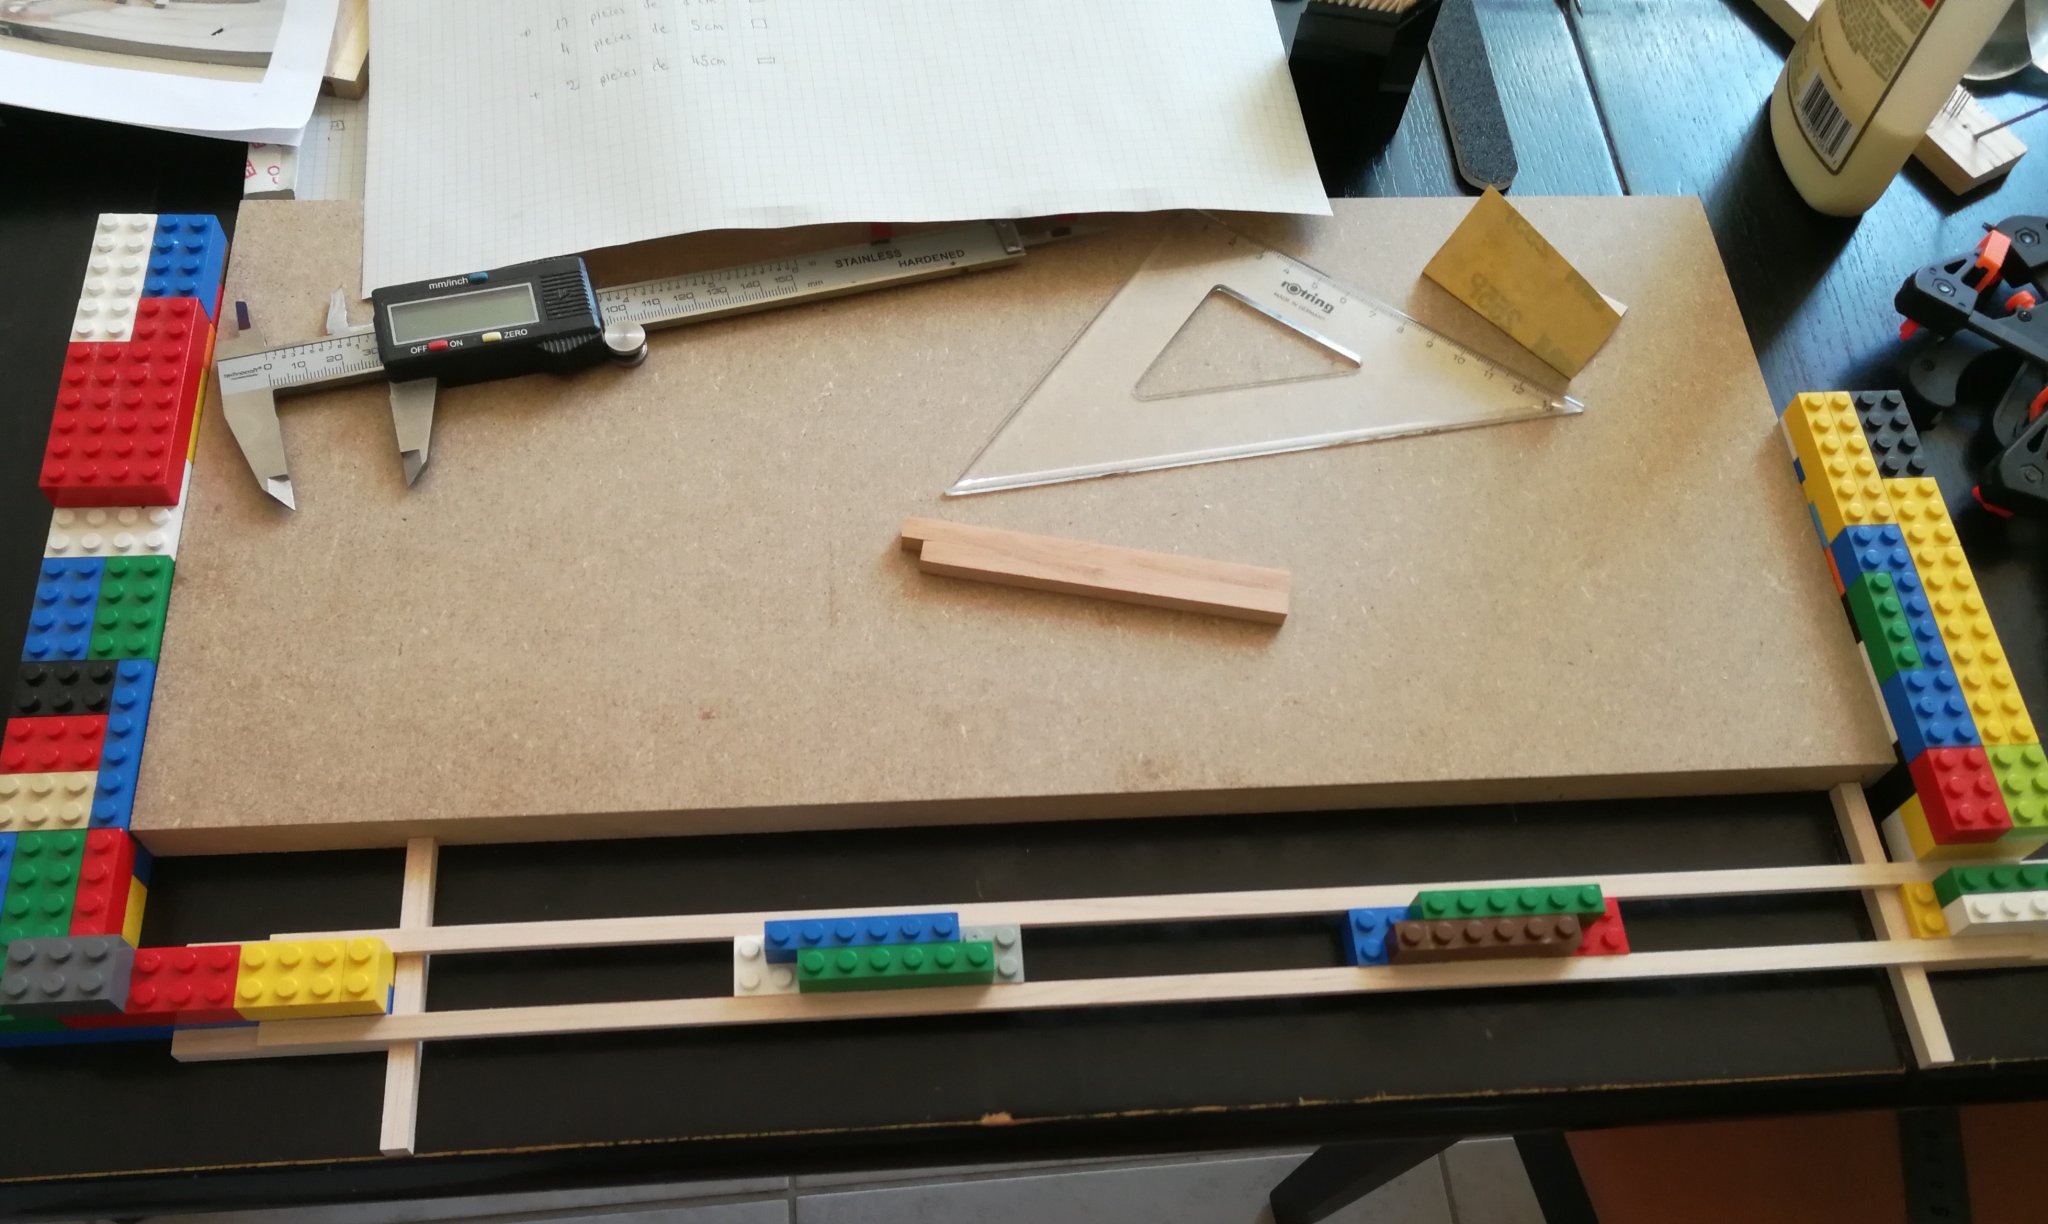
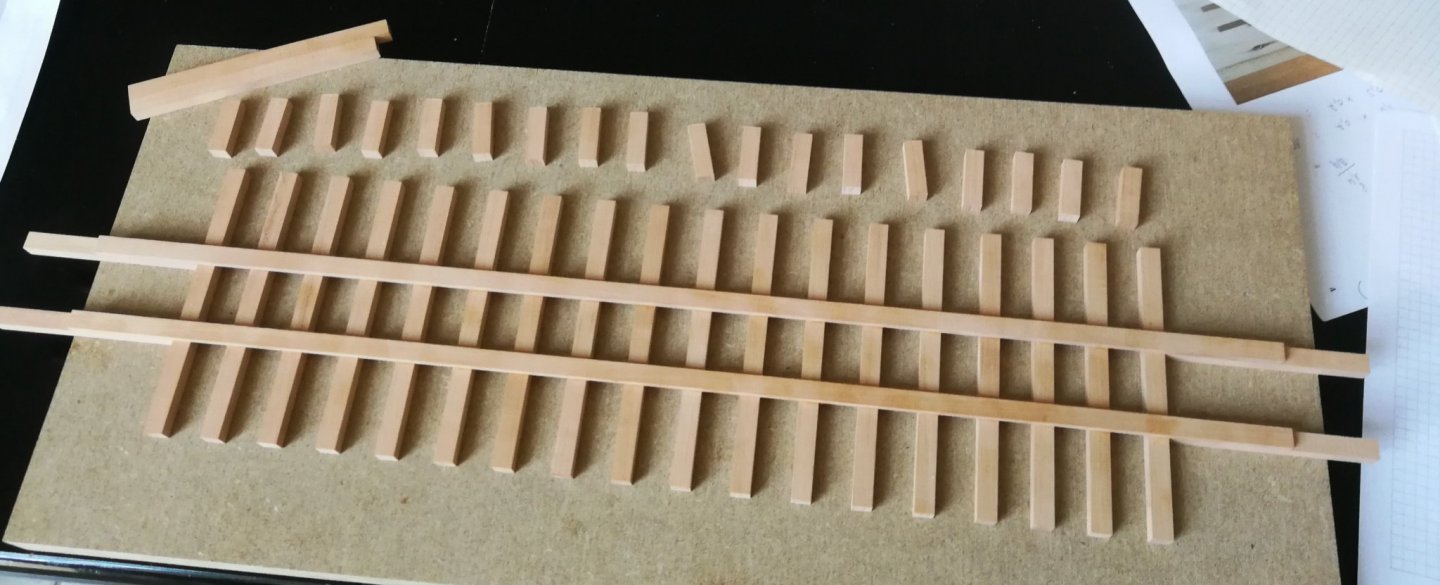
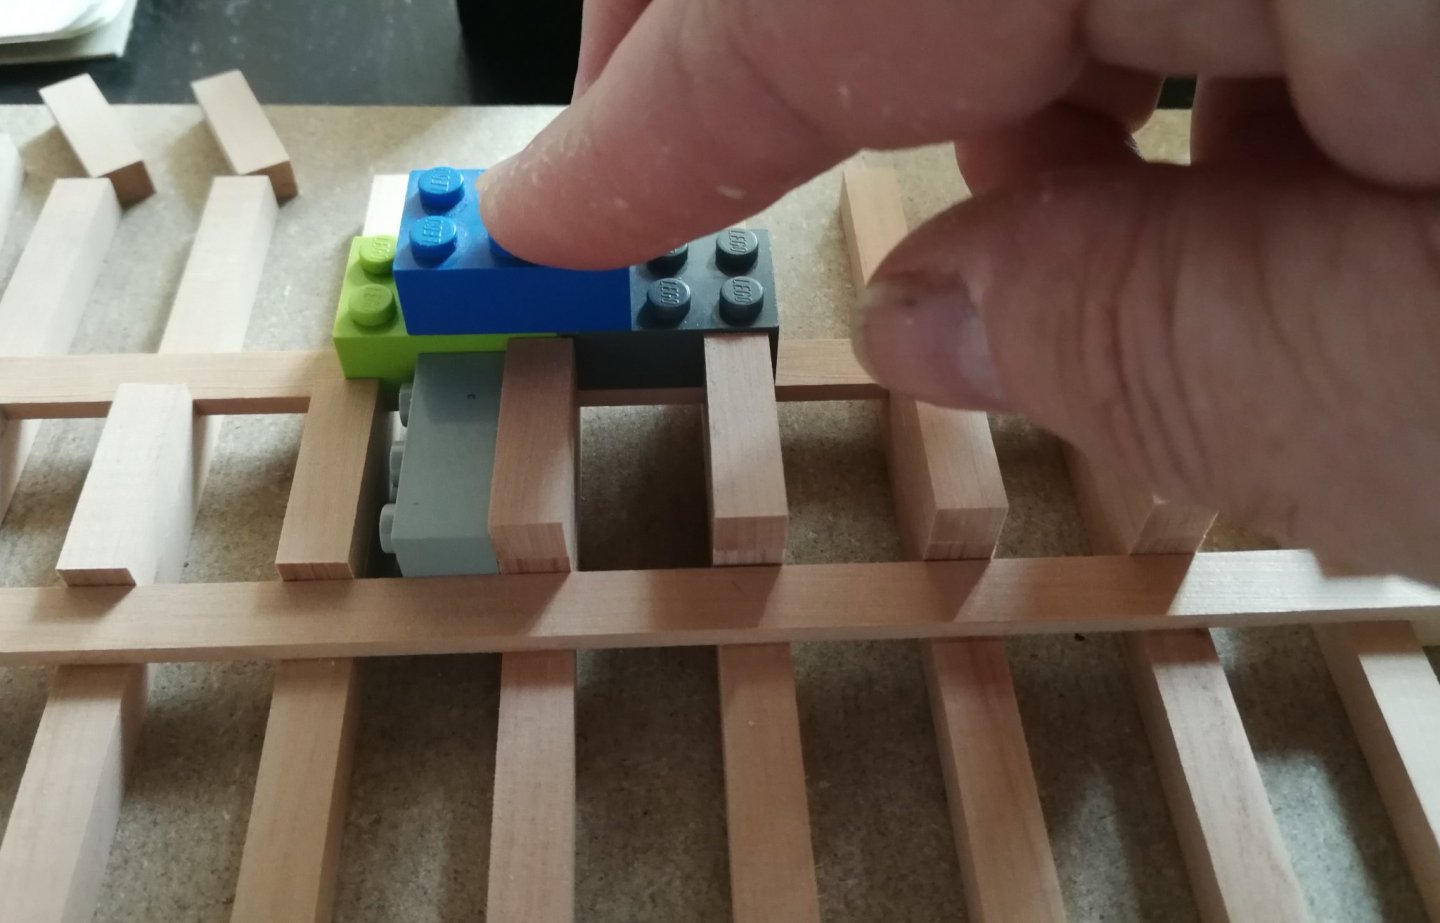
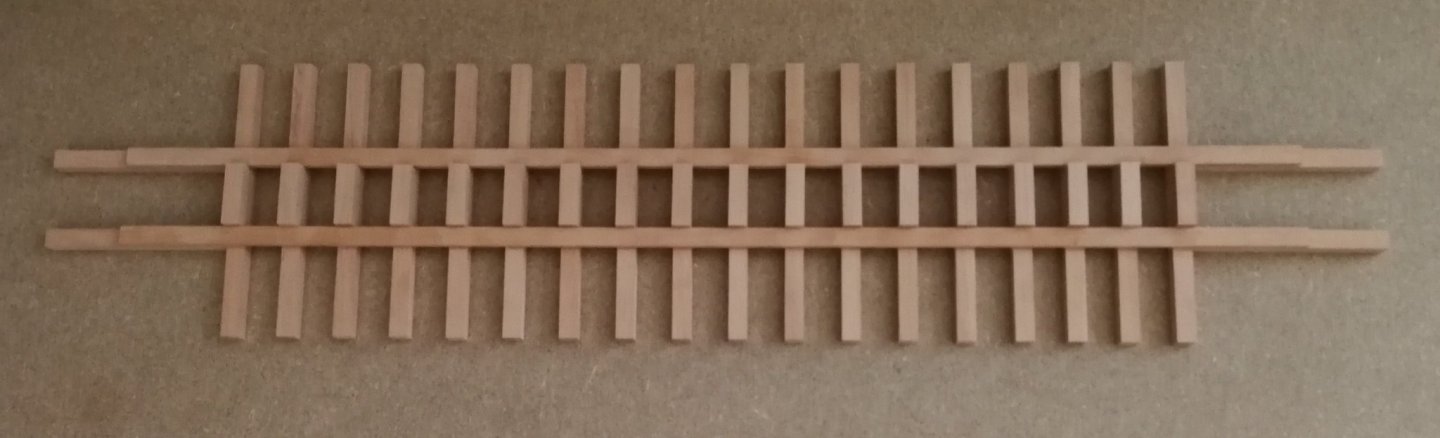
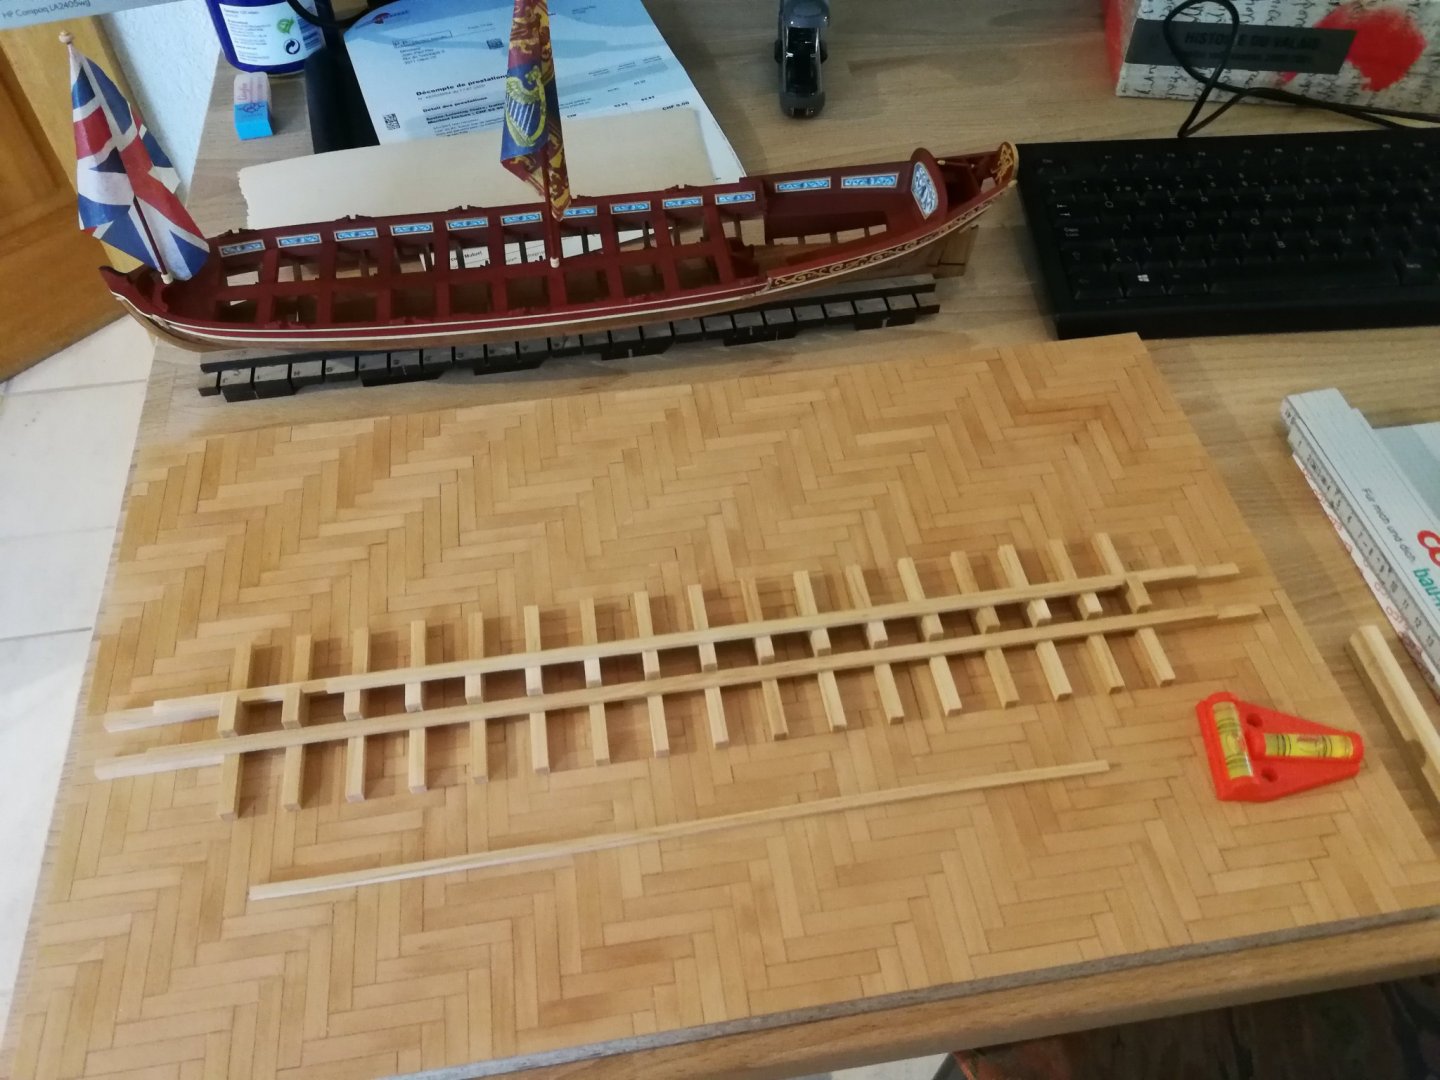
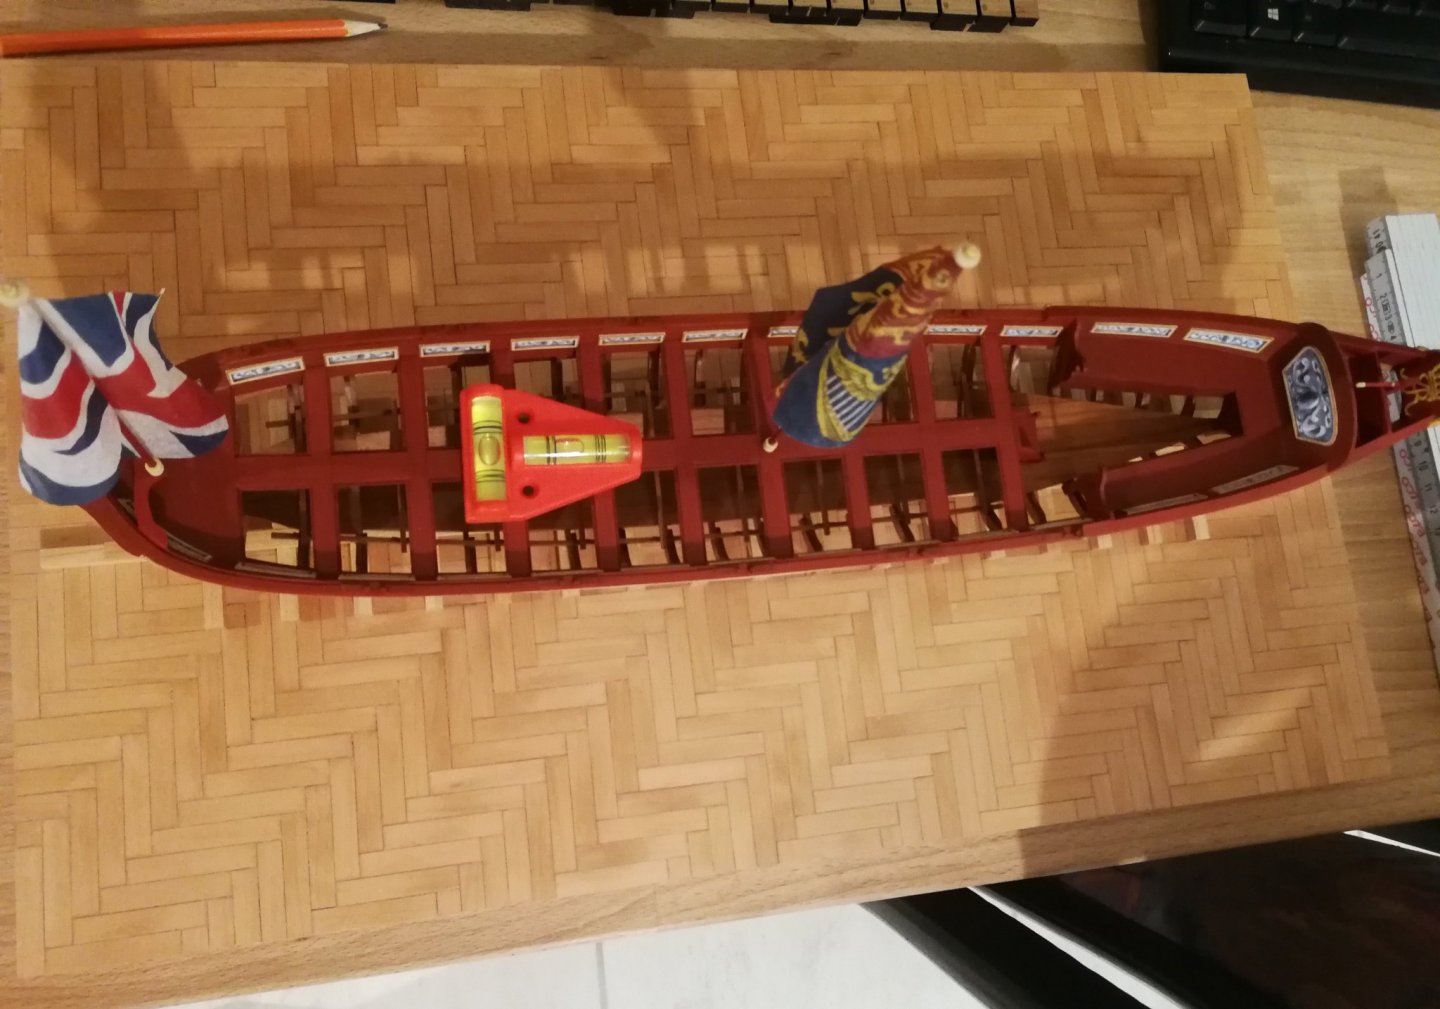
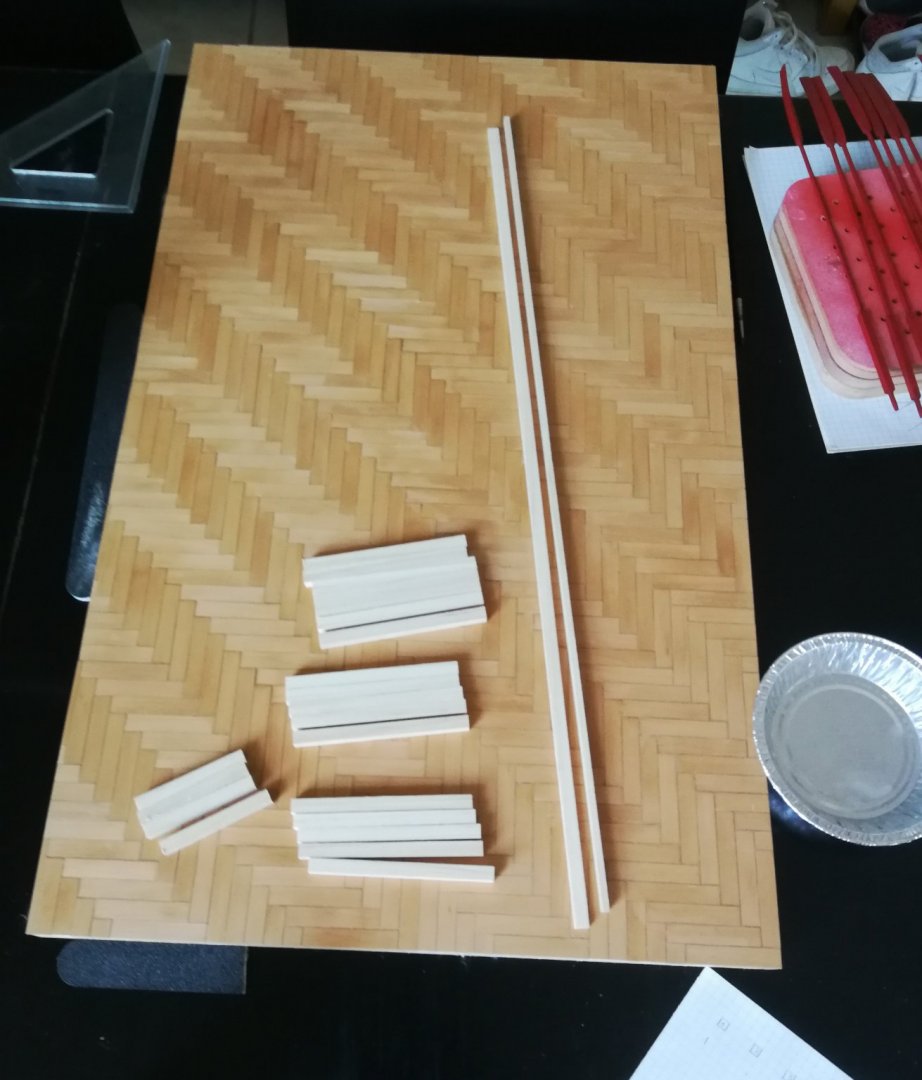
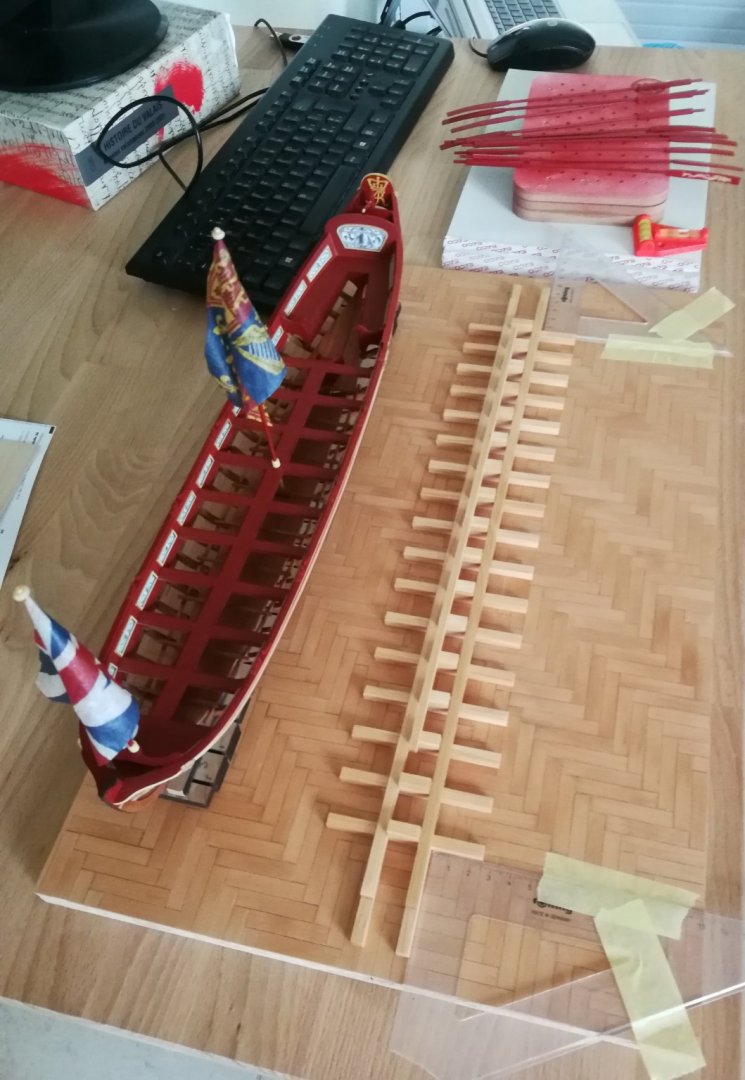
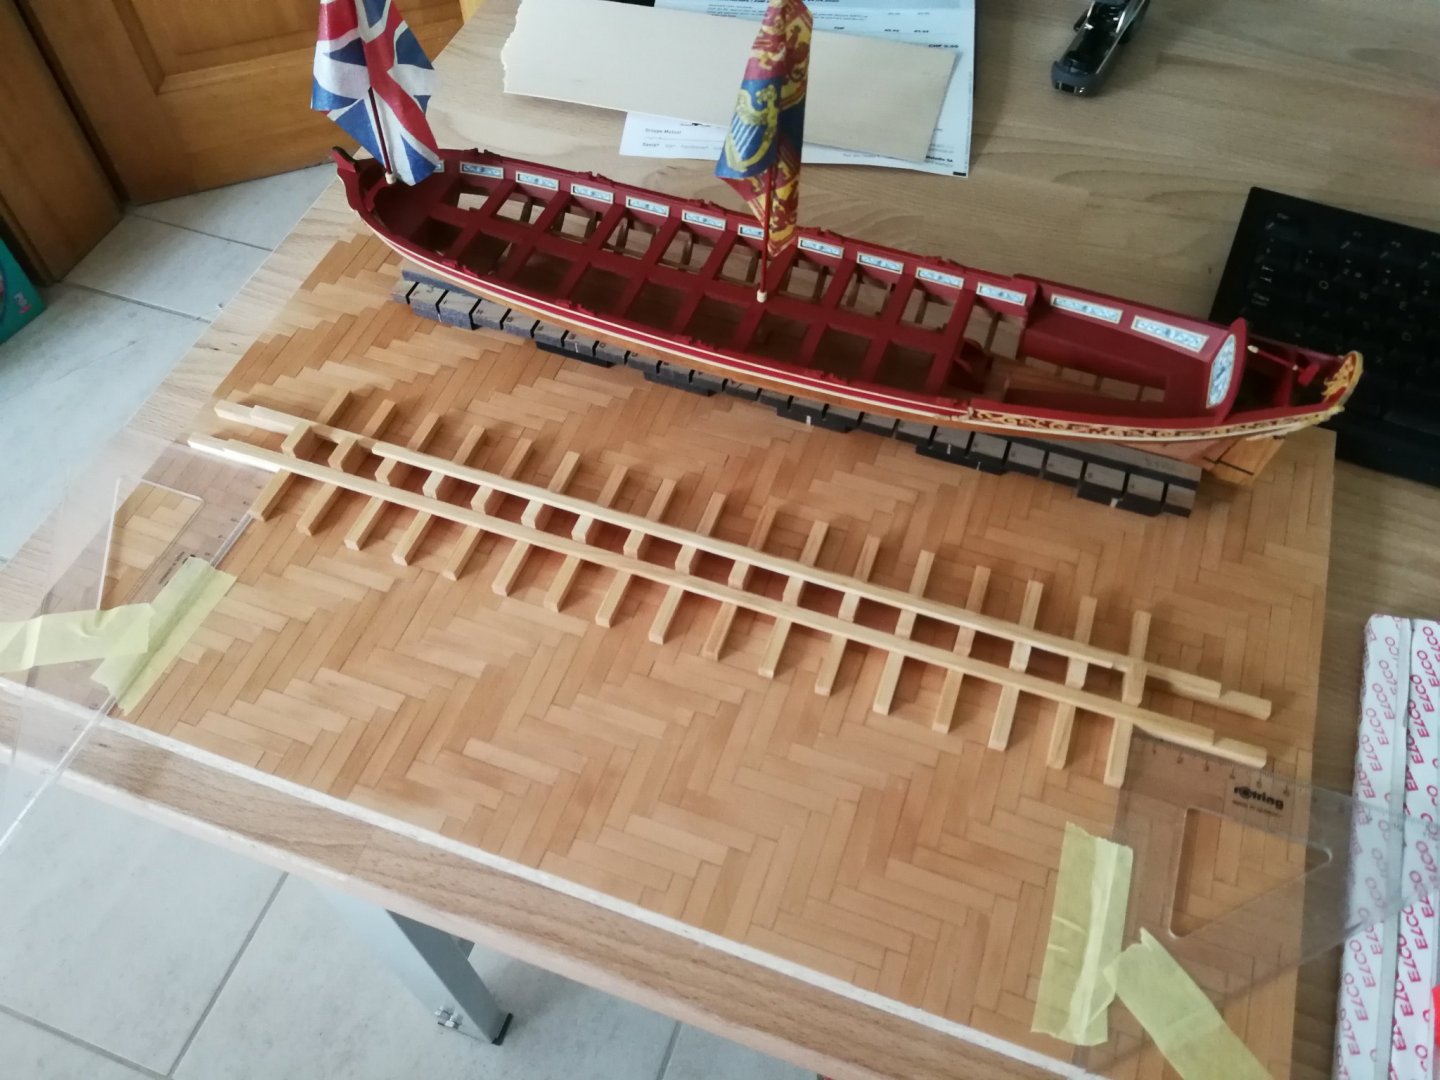
It's been a really long time. Having worked on the Queen barge and on the Medway longboat, I had put aside my work on the AVS. In fact I was waiting to be able to build the support. Having been able to acquire a Byrnes table saw, I therefore tackled the construction of the support. As during the construction of the support for the barge, I was greatly helped by these dear legos ... For the precision of the cuts, the Byrnes table saw is a formidable efficiency ! The support is ready to receive his ship.


- 164 replies
-
- 9
-
-
- first build
- model shipways
- (and 2 more)
-
Superb work on these flags Michael. She is going to be beautiful ! I can only confirm: this kit is a little gem. Chuck really did it all perfectly.
- 221 replies
-
- 4
-
-
- queen anne barge
- Syren Ship Model Company
- (and 1 more)
-
Happy owner of volume 1, I ordered without hesitation of this second opus. Knowing the quality of the work of the two authors, I could not ignore this final volume. 😁
-
Byrne's saw accessories question..
JpR62 replied to CPDDET's topic in Modeling tools and Workshop Equipment
Very interesting topic on how to secure a cut. As the new owner of a Byrnes table saw, I too have been subjected to these kick back effects. Novice in the matter, I learn by trial and error to avoid them. If an experienced user, could illustrate the correct way to do this using step by step photos or a video, I think more than one of us would benefit from it ... Apart from that, the work of Olha Batchvarov is absolutely remarkable and her youtube channel very informative. It is a pleasure to read his posts in this forum. -
Chuck, always easier when the kit is of high quality. Thank you for your beautiful models ! Thank you Ryland, my first ship model is in fact the AVS, but rigging will probably take me time... The Medway longboat will probably be finished before 😉 Thank you Michael, I will follow the progress of your work on the barge with great interest. She will surely be magnificent. Thank you Glenn, as the Cheerful will be my next model, thank you too for your excellent build log. And thank you to all the 'Likes'. I will put some more photos when the base is finalized.
- 103 replies
-
- 1
-
-
- queen anne barge
- Syren Ship Model Company
- (and 1 more)
-
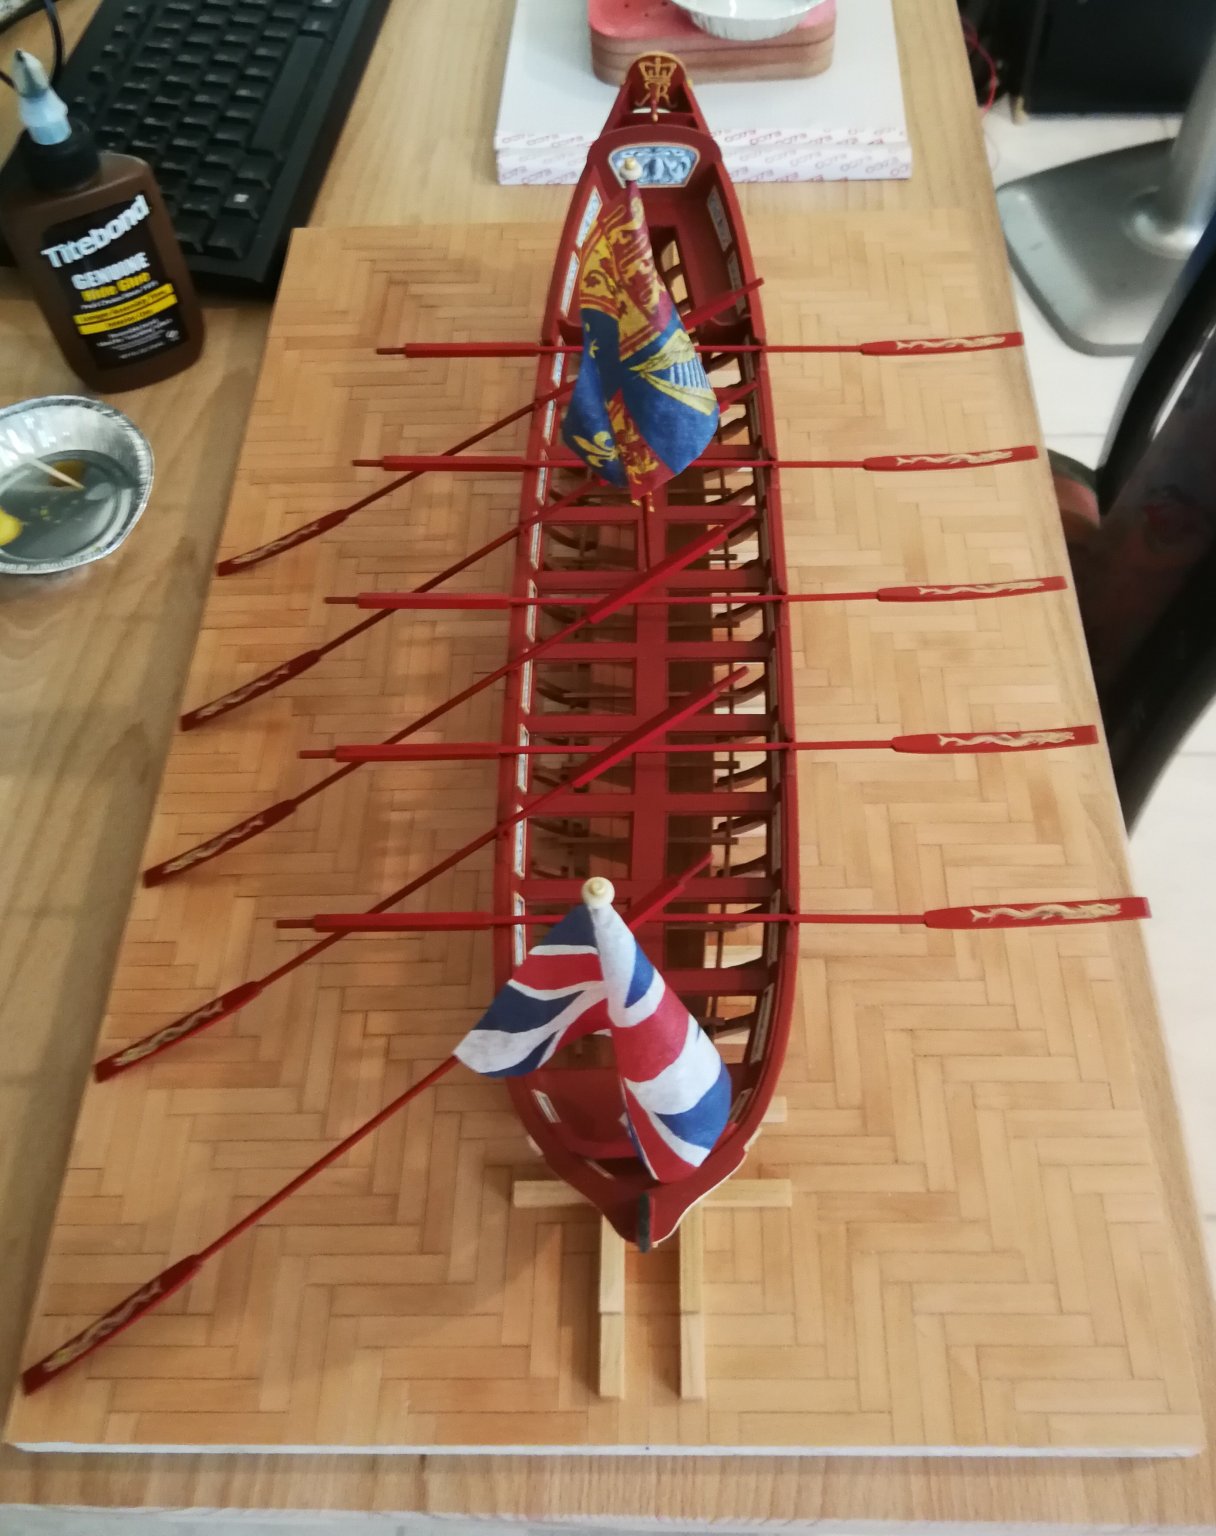
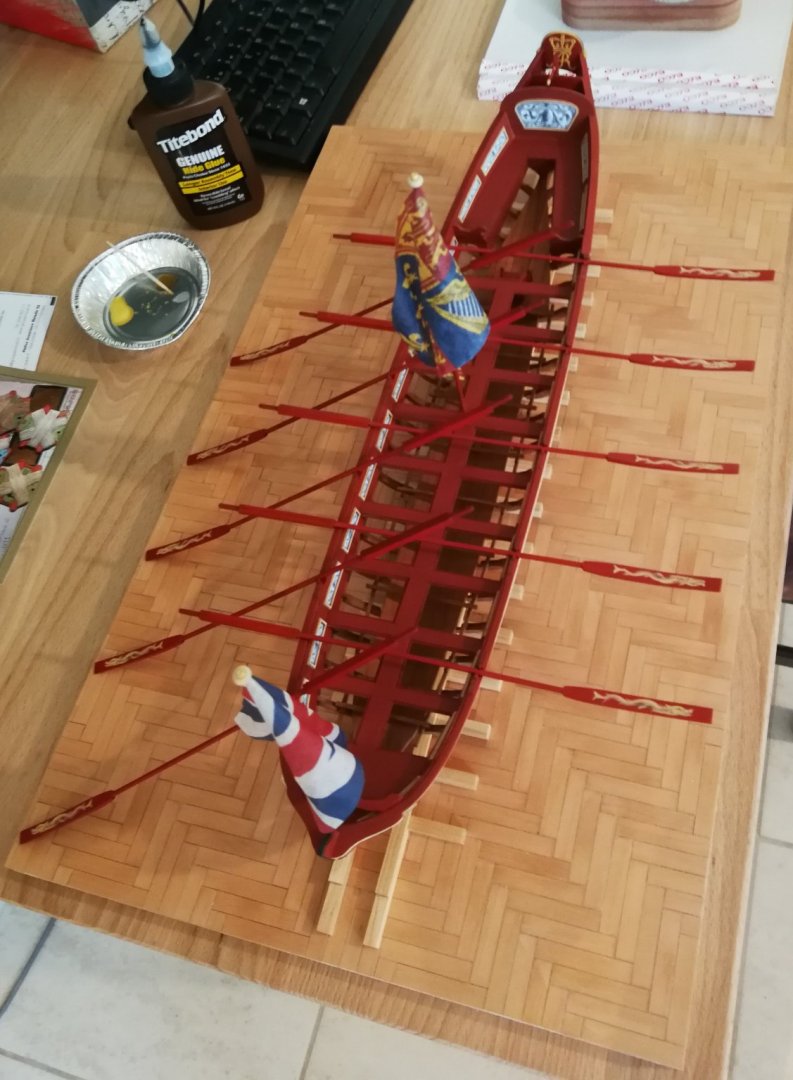
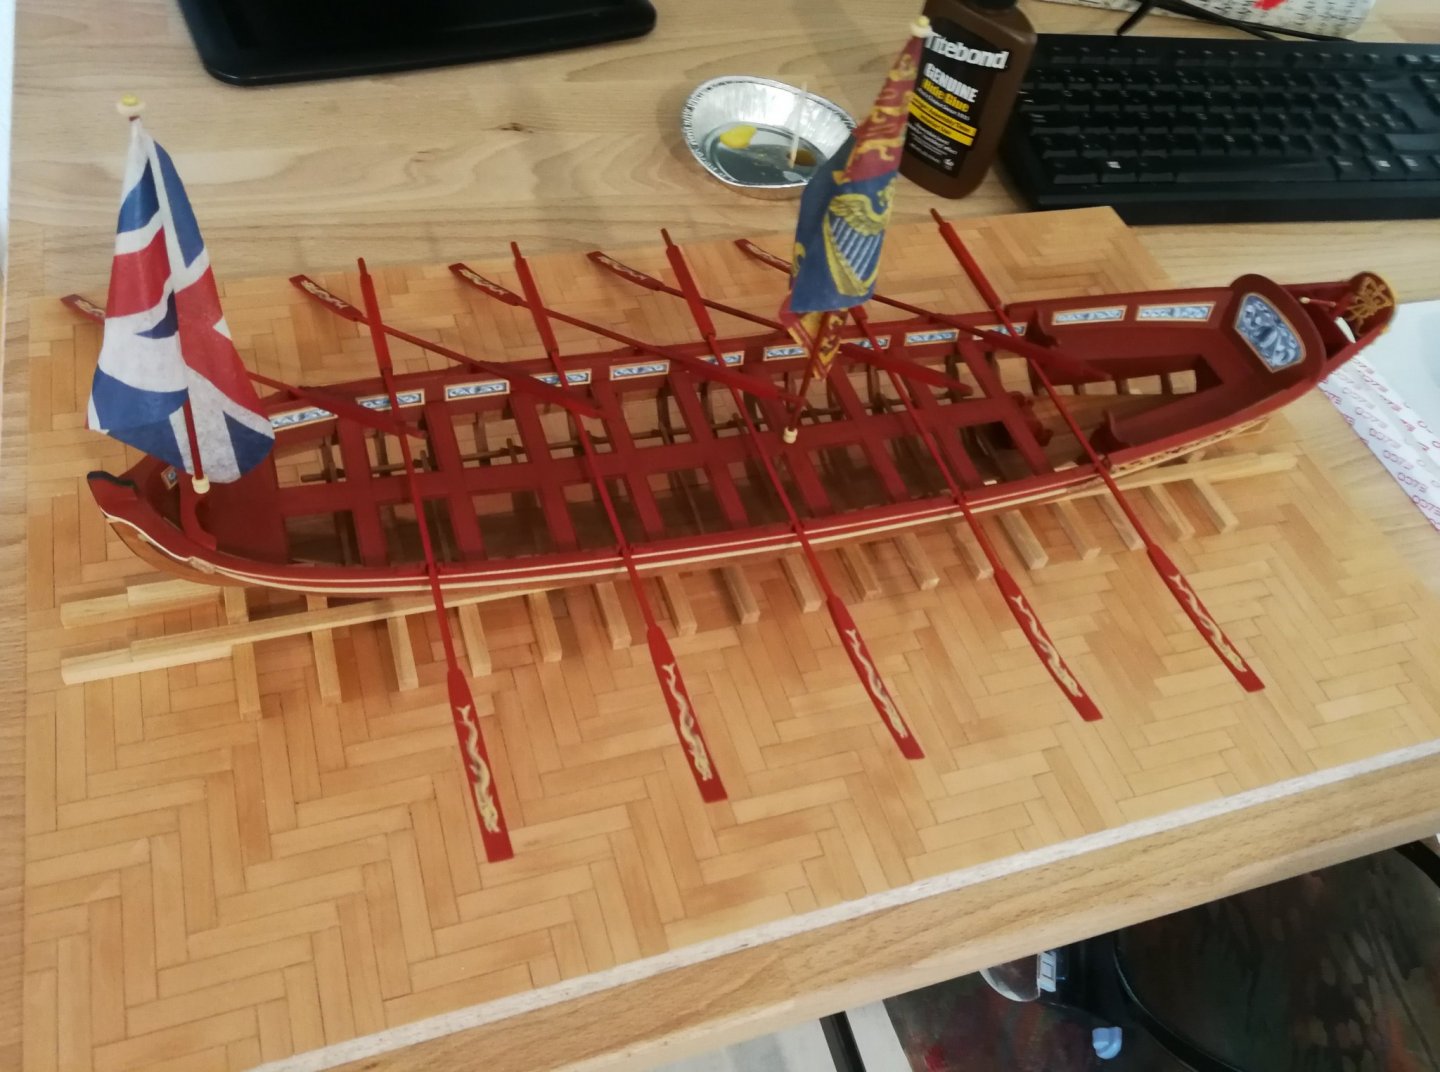
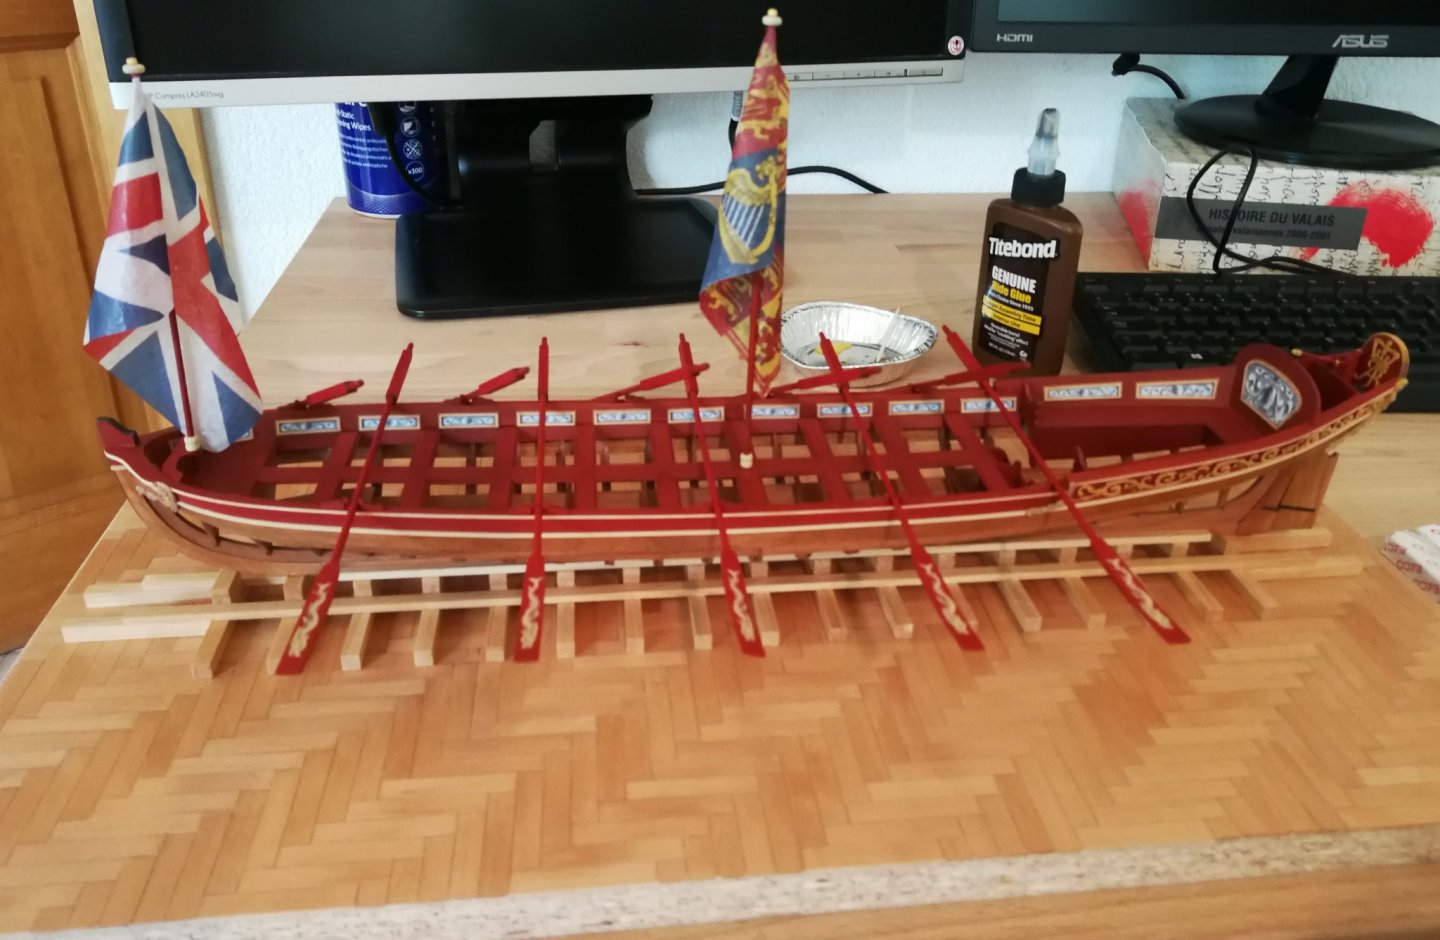
Thank you to all the 'Likes'. The oars are in place. I still have to order an acrylic display covers and finalize the border of my base. Glad to finish my first model.

- 103 replies
-
- 12
-
-
- queen anne barge
- Syren Ship Model Company
- (and 1 more)
-
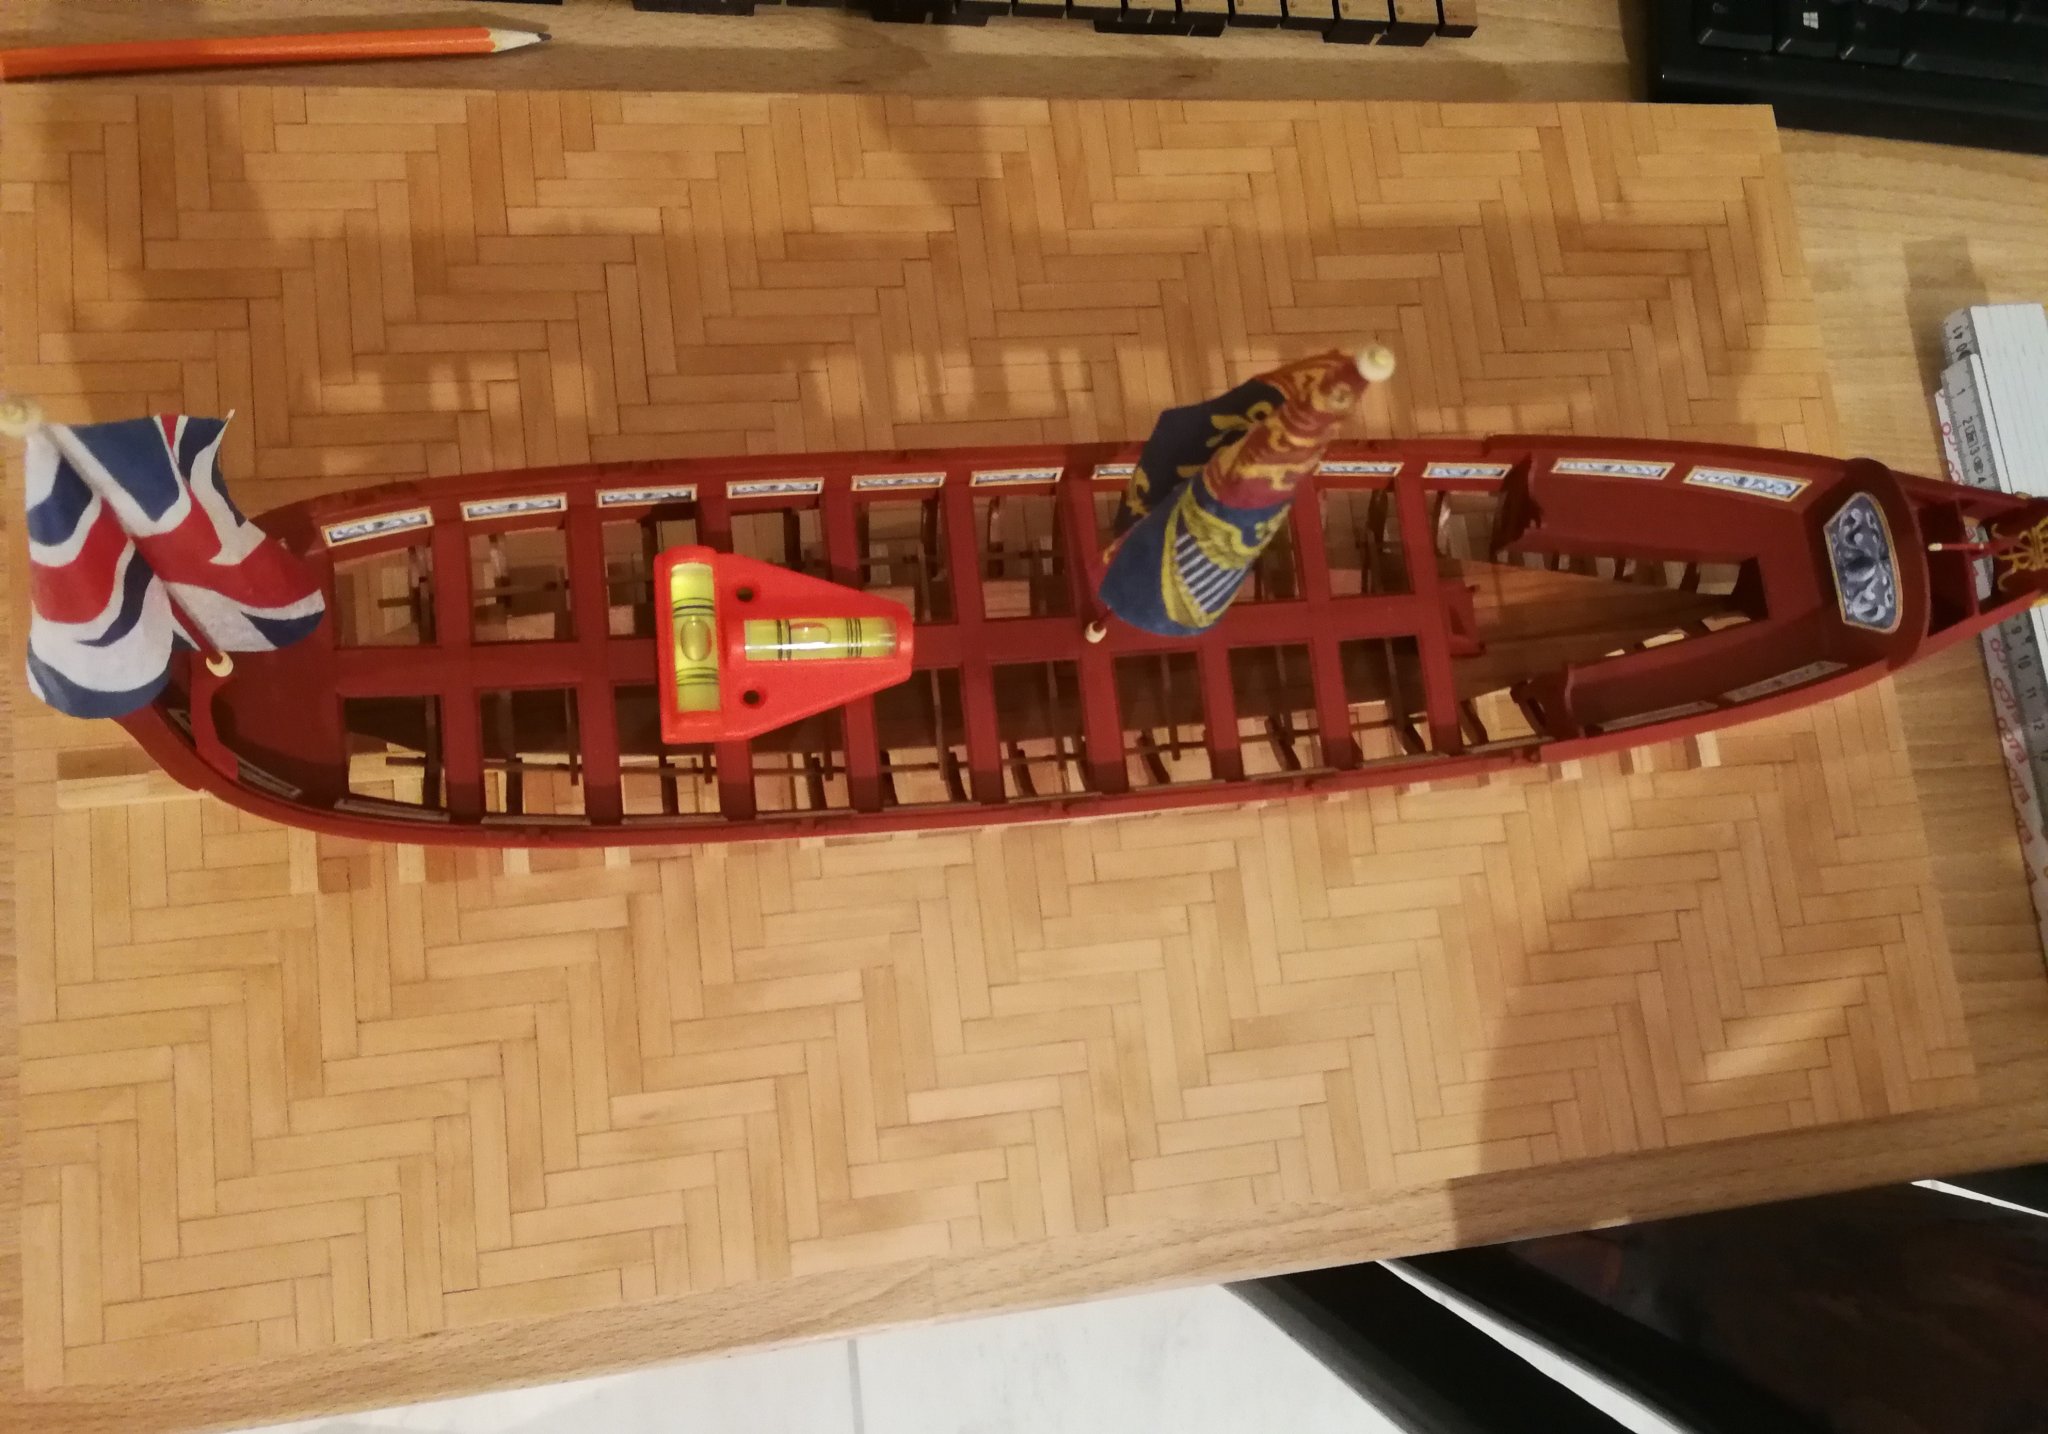
Thank you Derek. Yes this barge is a nice model. Syren provides us with magnificent models. The end is coming. The barge is positioned on its support. I still have to add the oars.
- 103 replies
-
- 6
-
-
- queen anne barge
- Syren Ship Model Company
- (and 1 more)
-
Superb work as usual and a very instructive step by step again. Thank you !
- 778 replies
-
- 4
-
-
- cheerful
- Syren Ship Model Company
- (and 1 more)
-
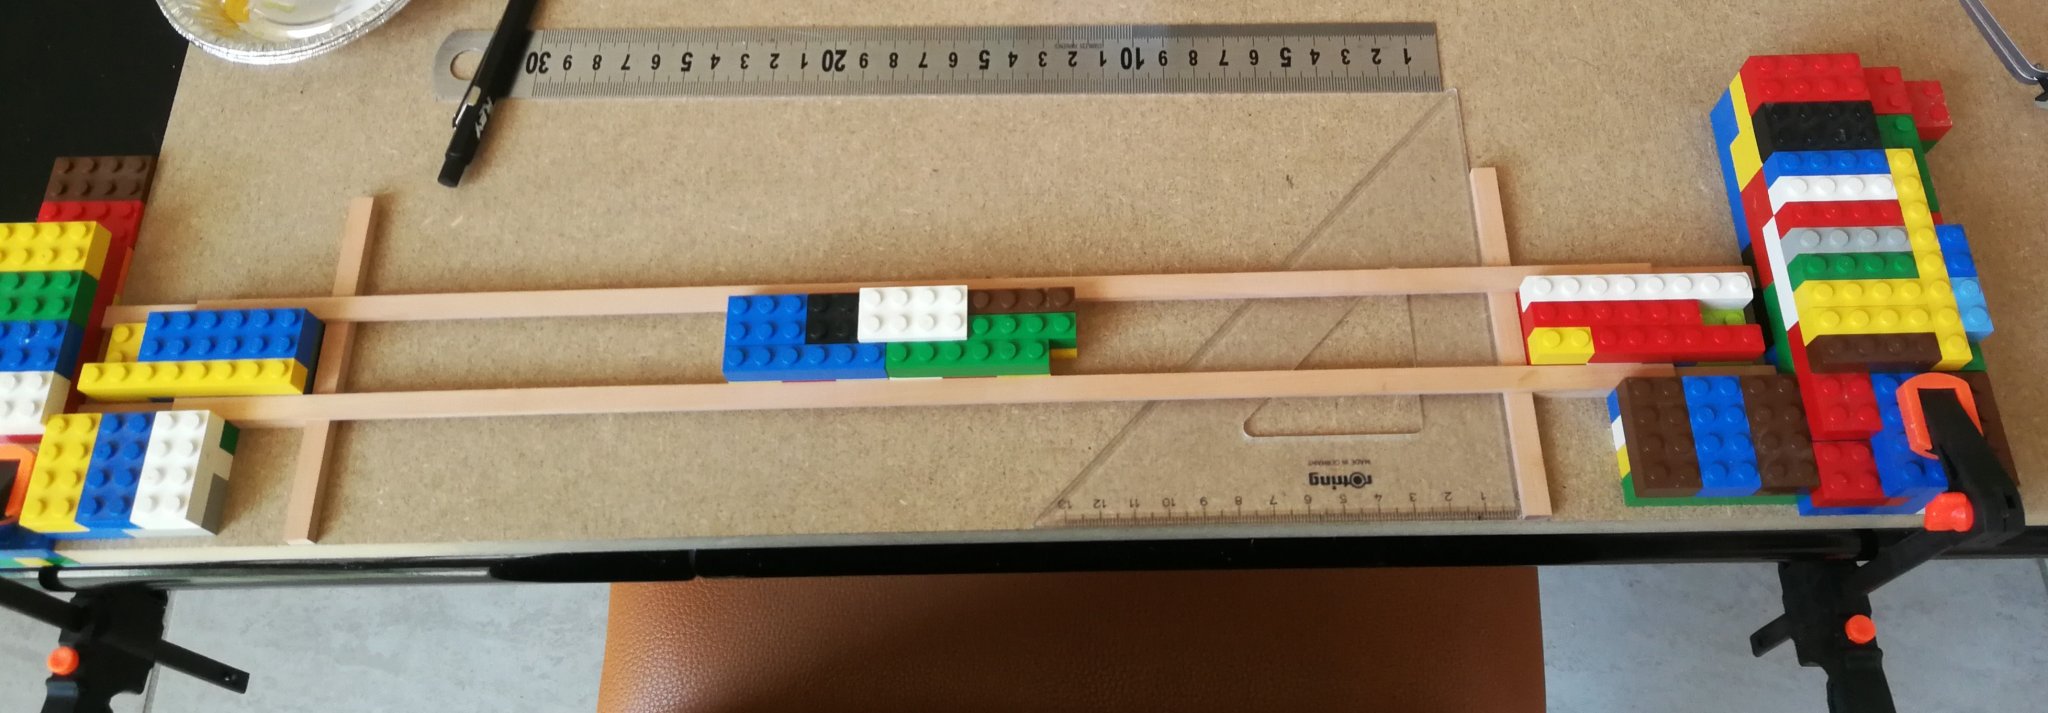
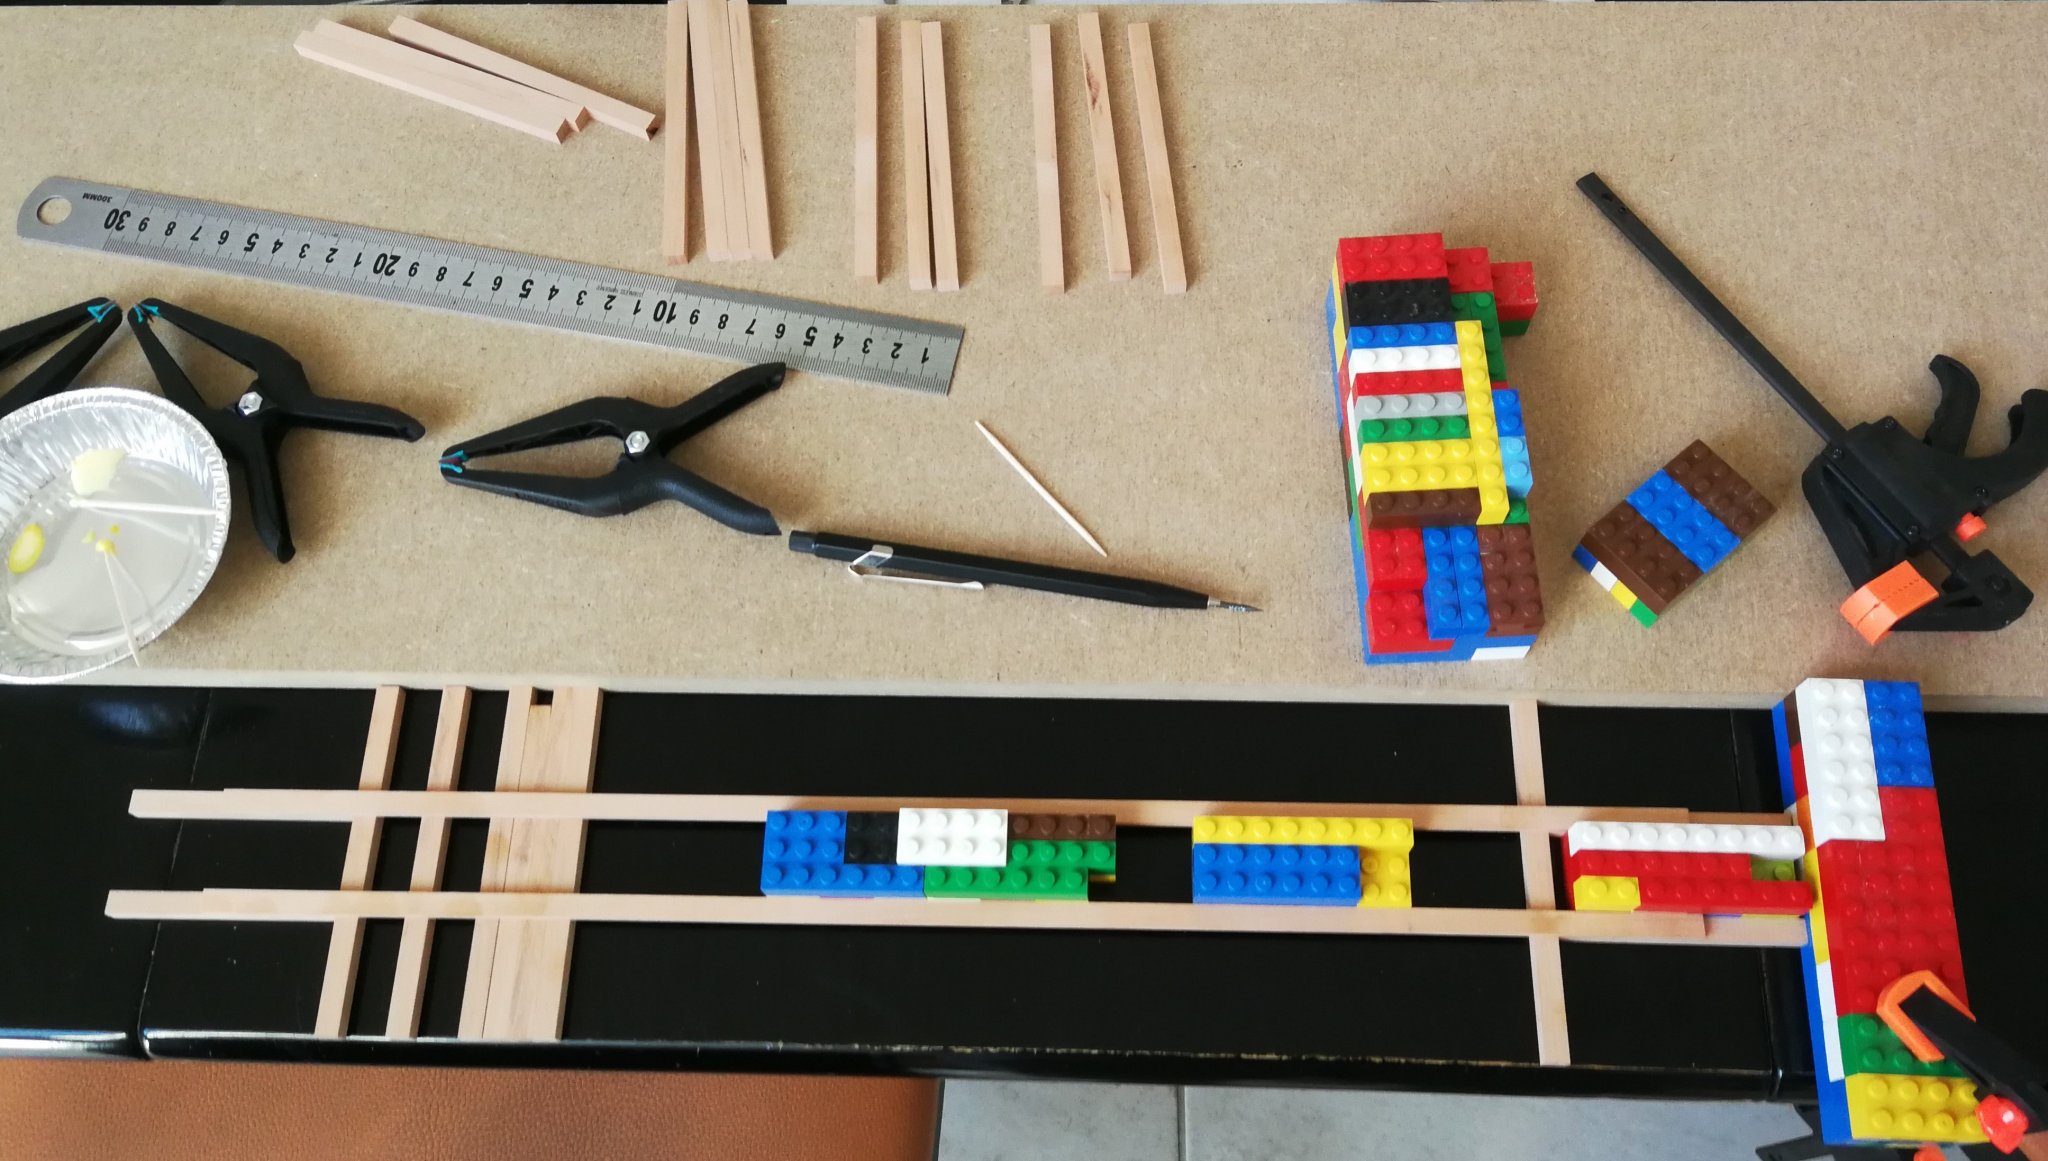
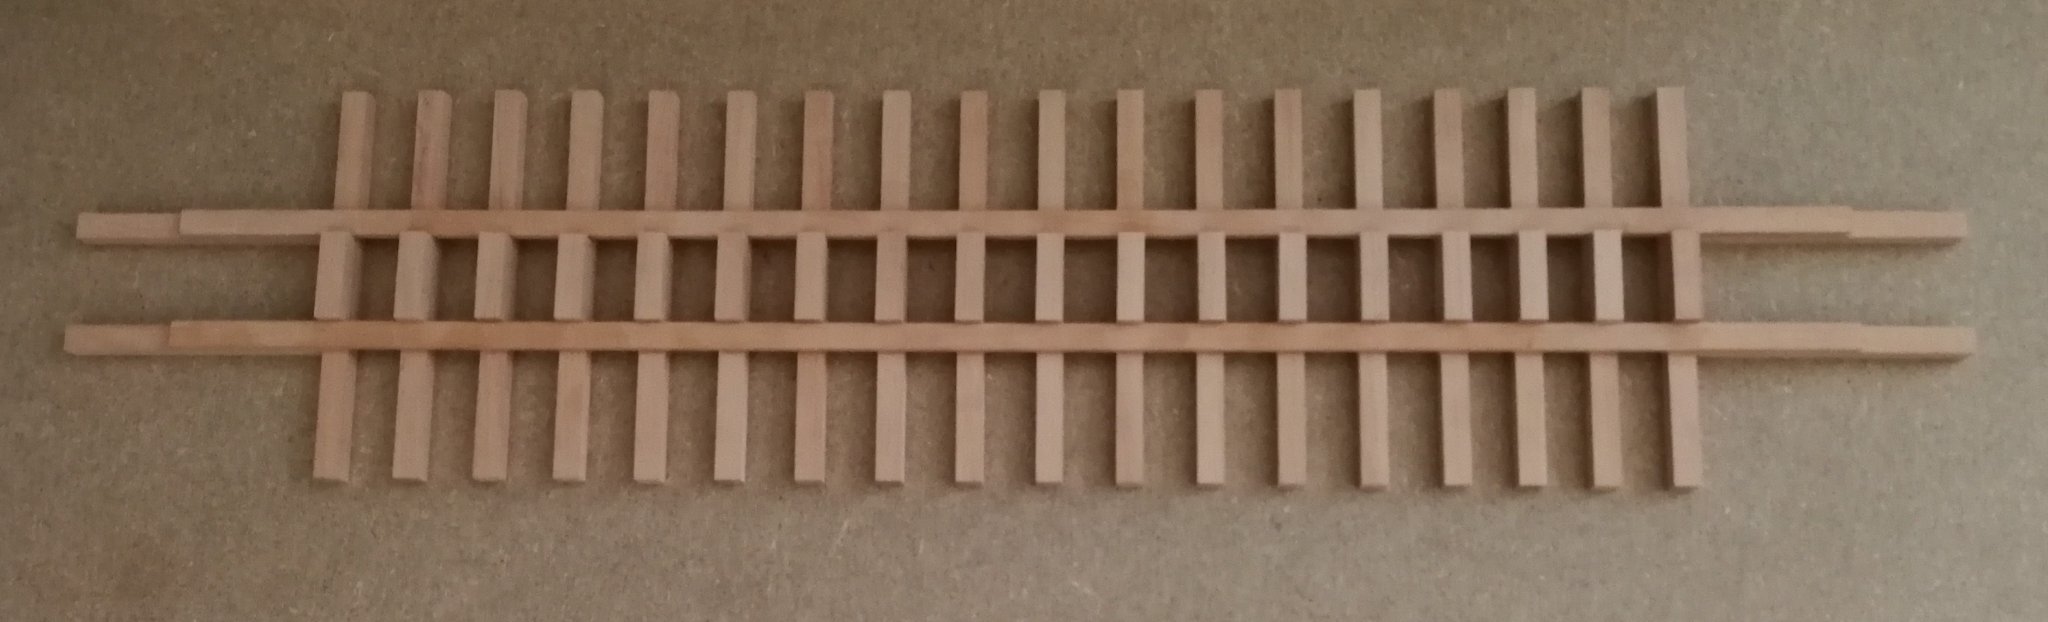
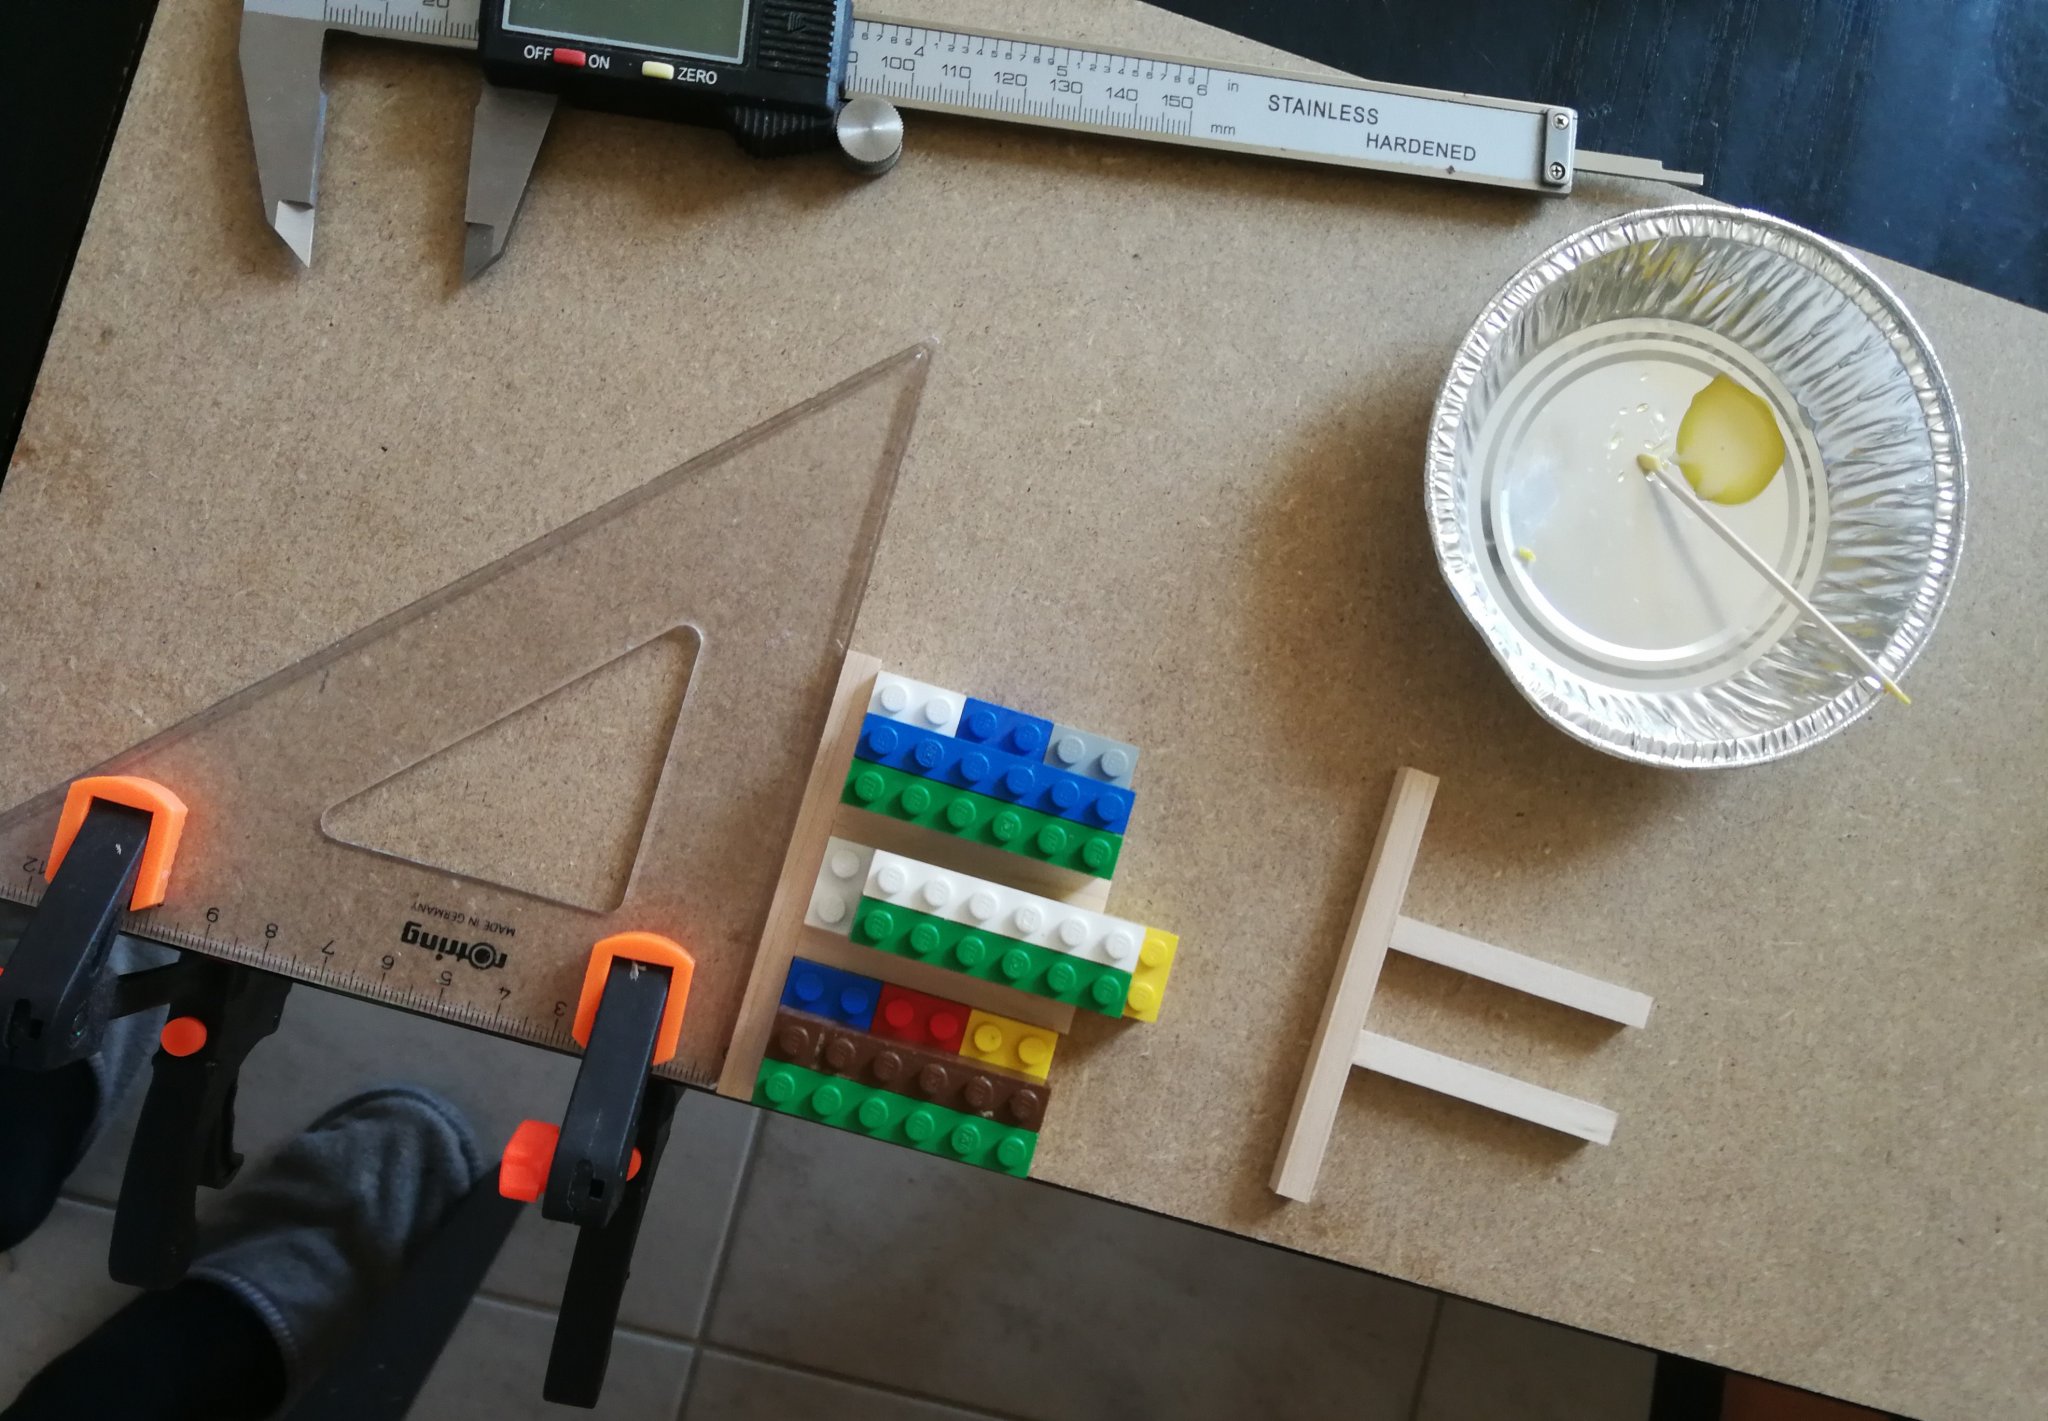
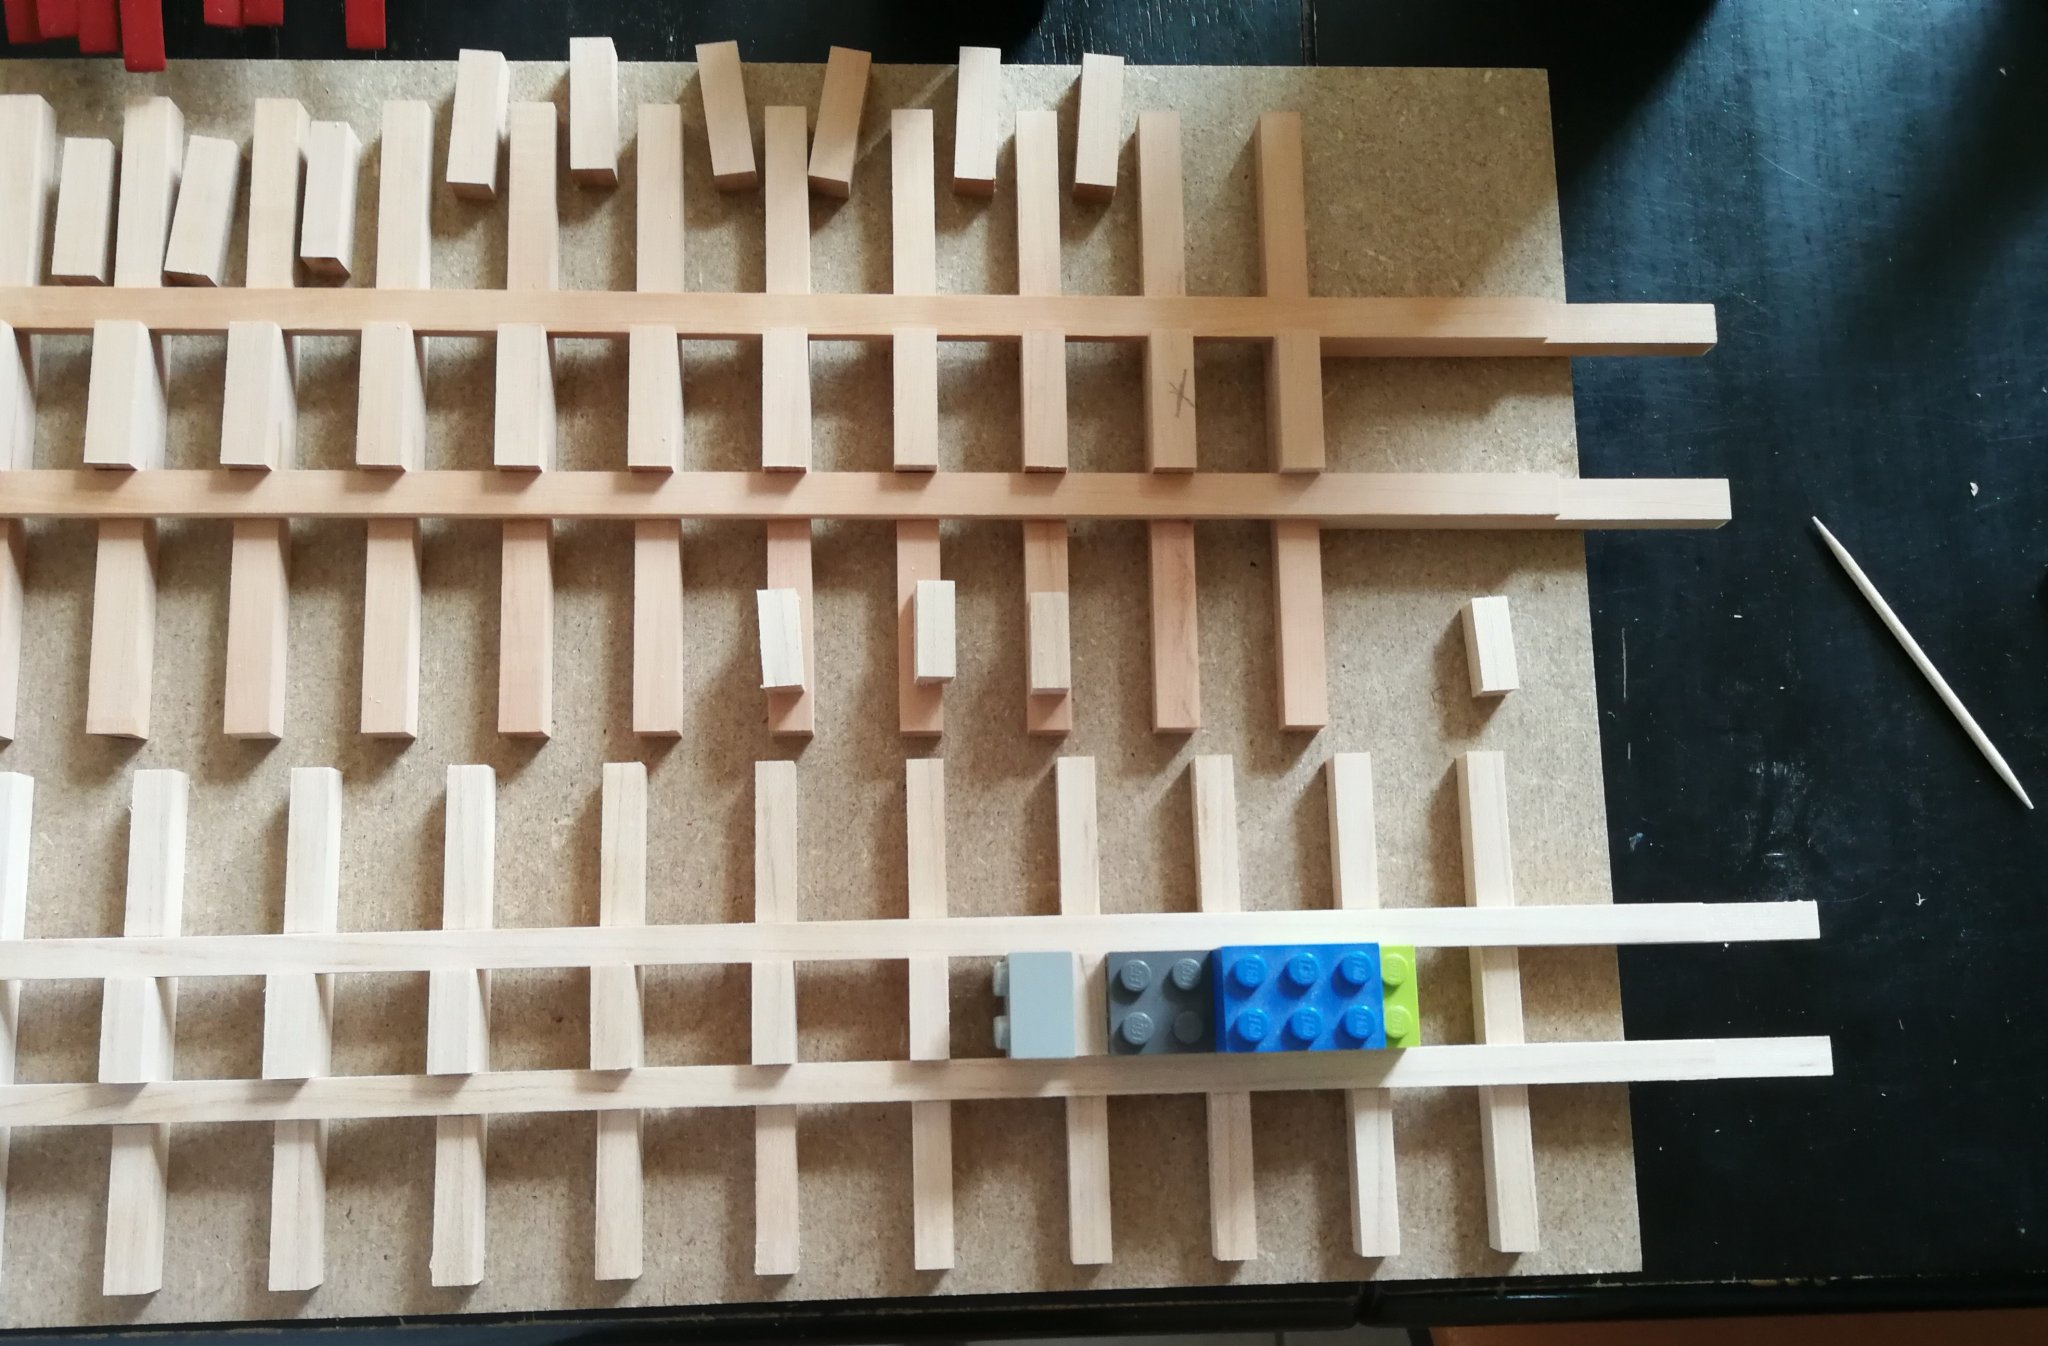
Thank you for all your comments and thank you to all the 'Likes'. I have fun like a child with my new Byrnes table saw. What a pleasure to obtain parts of the same length and with a perfect cutting angle. I wonder how I have been able to do without it until now... I am inspired by the supports that we see in some museums. Being able to adapt the dimensions to my convenience, I take this opportunity to make them coincide with the size of the legos. It facilitates the assembly and amuses my daughter a lot who sees me bringing out these old boxes of legos. I take this opportunity to build a second support which will be used for my Armed Virginia Sloop. The one for my barge is in american maple while the second is in pink pear. When assembly is complete, the bracket is glued to the base. I will be able to finalize my project.


- 103 replies
-
- 4
-
-
- queen anne barge
- Syren Ship Model Company
- (and 1 more)
-
Superb ! This battery of guns is absolutely magnificent ! The time invested was worth it 😉
- 725 replies
-
- 1
-
-
- vanguard models
- speedy
- (and 1 more)
-
YOUNG AMERICA 1853 by Bitao - FINISHED - 1:72
JpR62 replied to Bitao's topic in - Build logs for subjects built 1851 - 1900
Wonderful ! From an another world !- 257 replies
-
- 4
-
-
- young america
- Finished
- (and 1 more)
-
Thank you Captain Hook. Yes, Byrnes work with UPS. But I must admit that the shipping costs are extremely expensive... Fortunately the VAT taxes in Switzerland (only 6.5%) are very low compared to those in Europe.