JpR62
-
Posts
699 -
Joined
-
Last visited
Content Type
Profiles
Forums
Gallery
Events
Everything posted by JpR62
-
 Thank you all for your encouragement. I really enjoyed working on this little model. And I'll probably start building a small model again in parallel with my work on the Cheerfull. It'll probably be the Santa Maria boat from Korabel, on which I'm thinking of fitting the sail. New techniques to discover 😄!
- 57 replies
-
- 3
-

-
- marisstella
- batelina
- (and 1 more)
-
HM Cutter Cheerful 1806 by JpR62 - 1:48 scale
JpR62 replied to JpR62's topic in - Build logs for subjects built 1801 - 1850
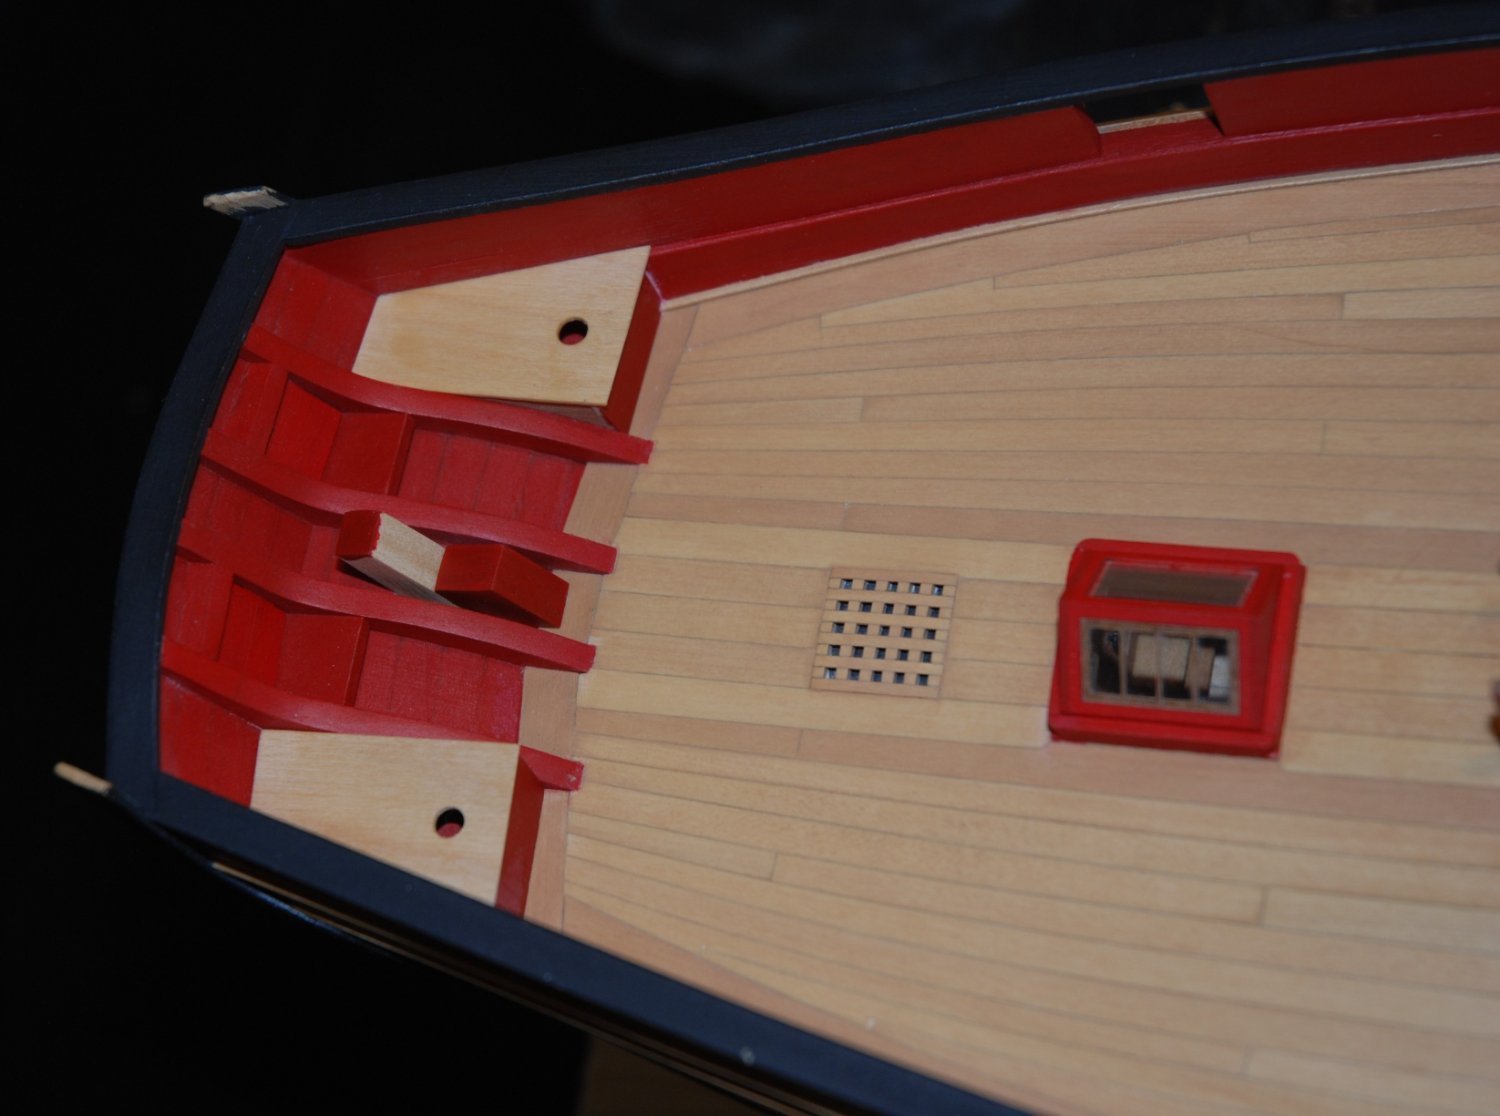
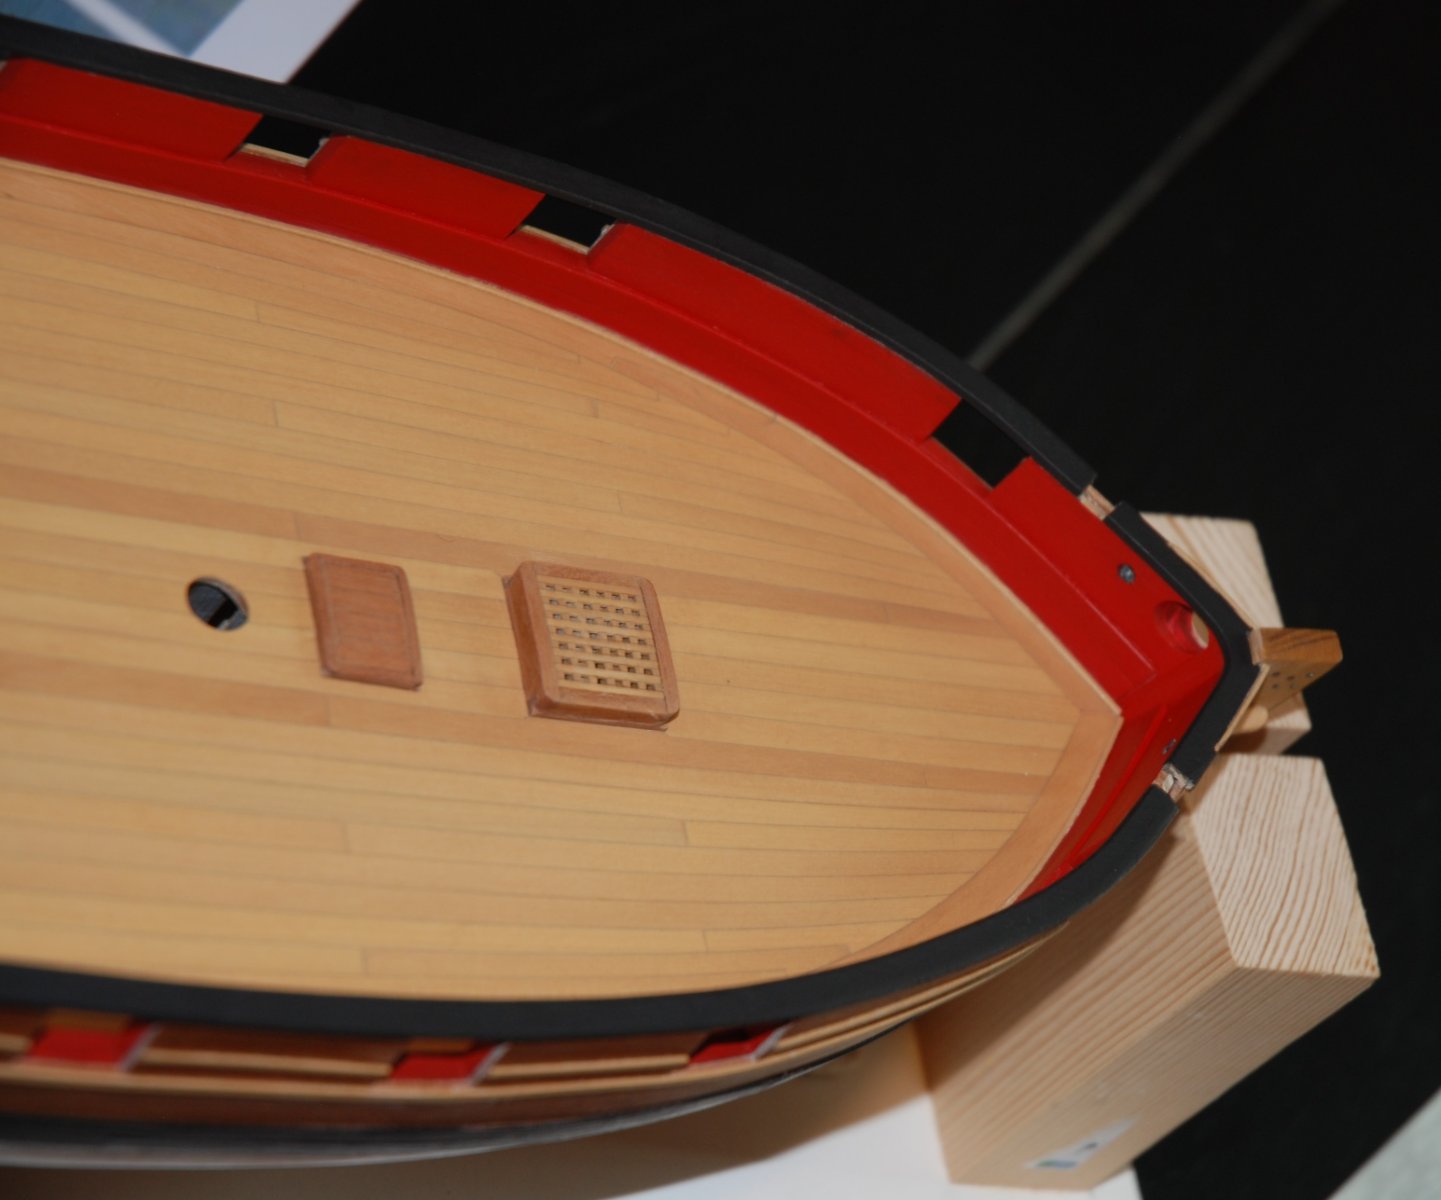
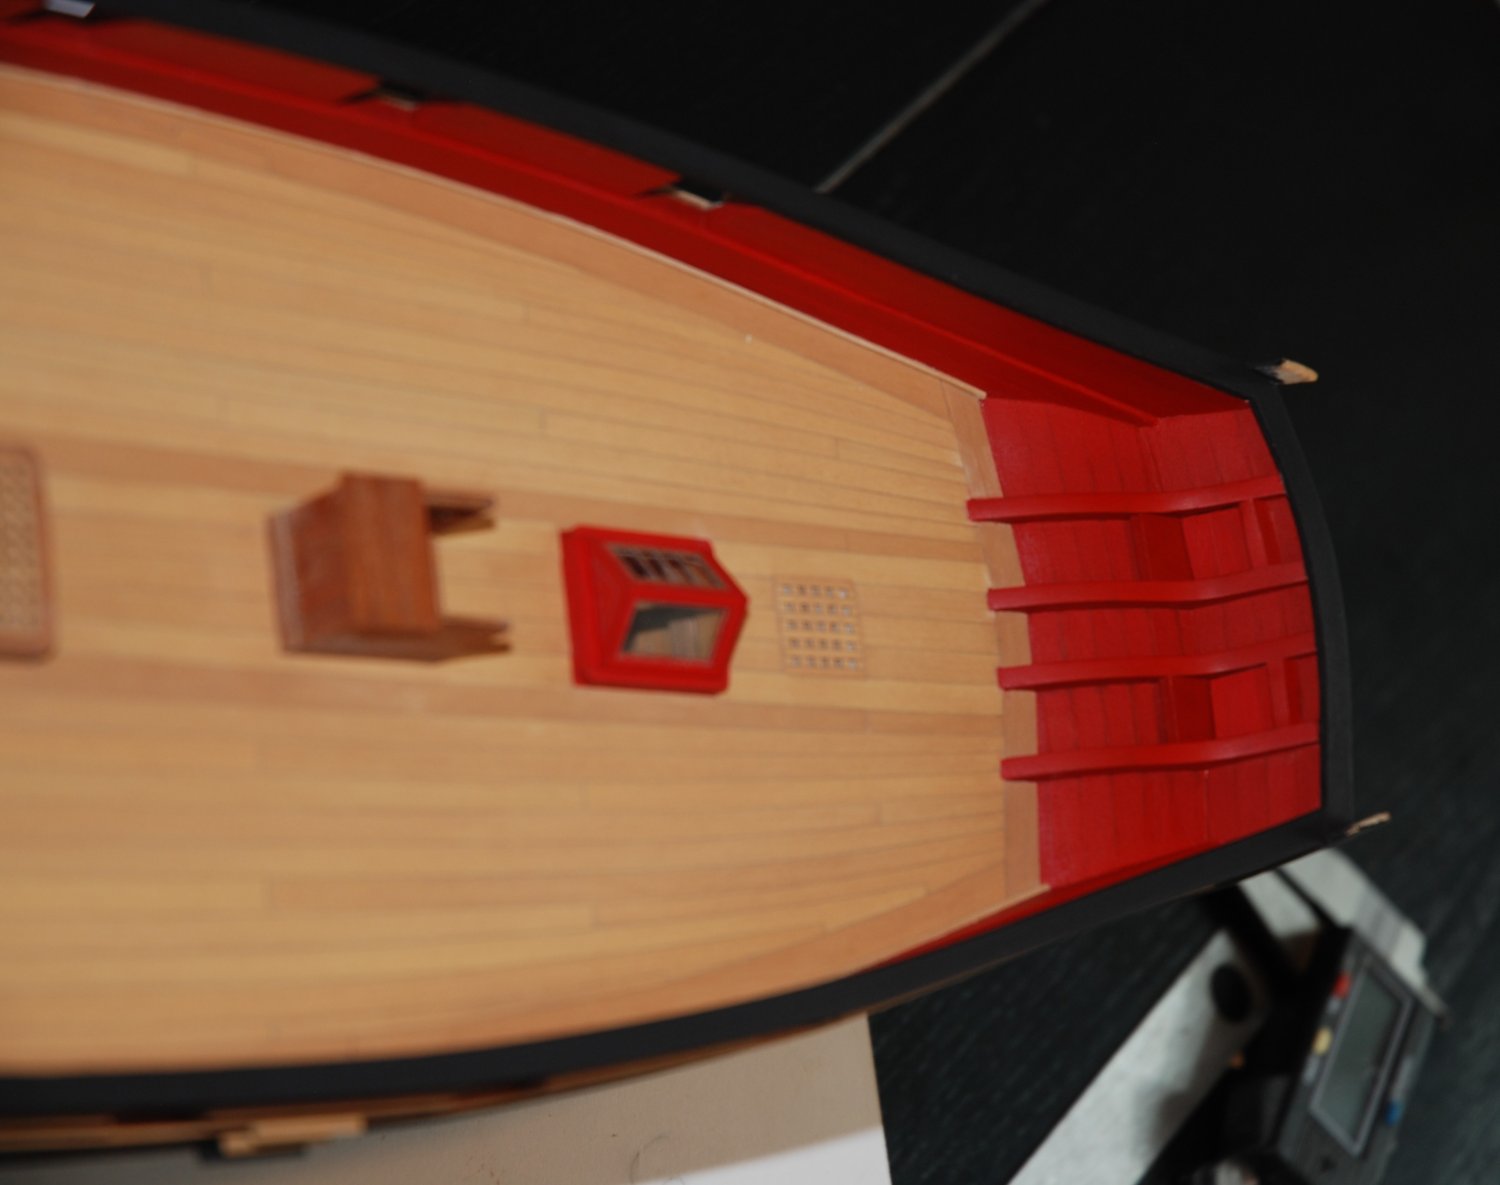
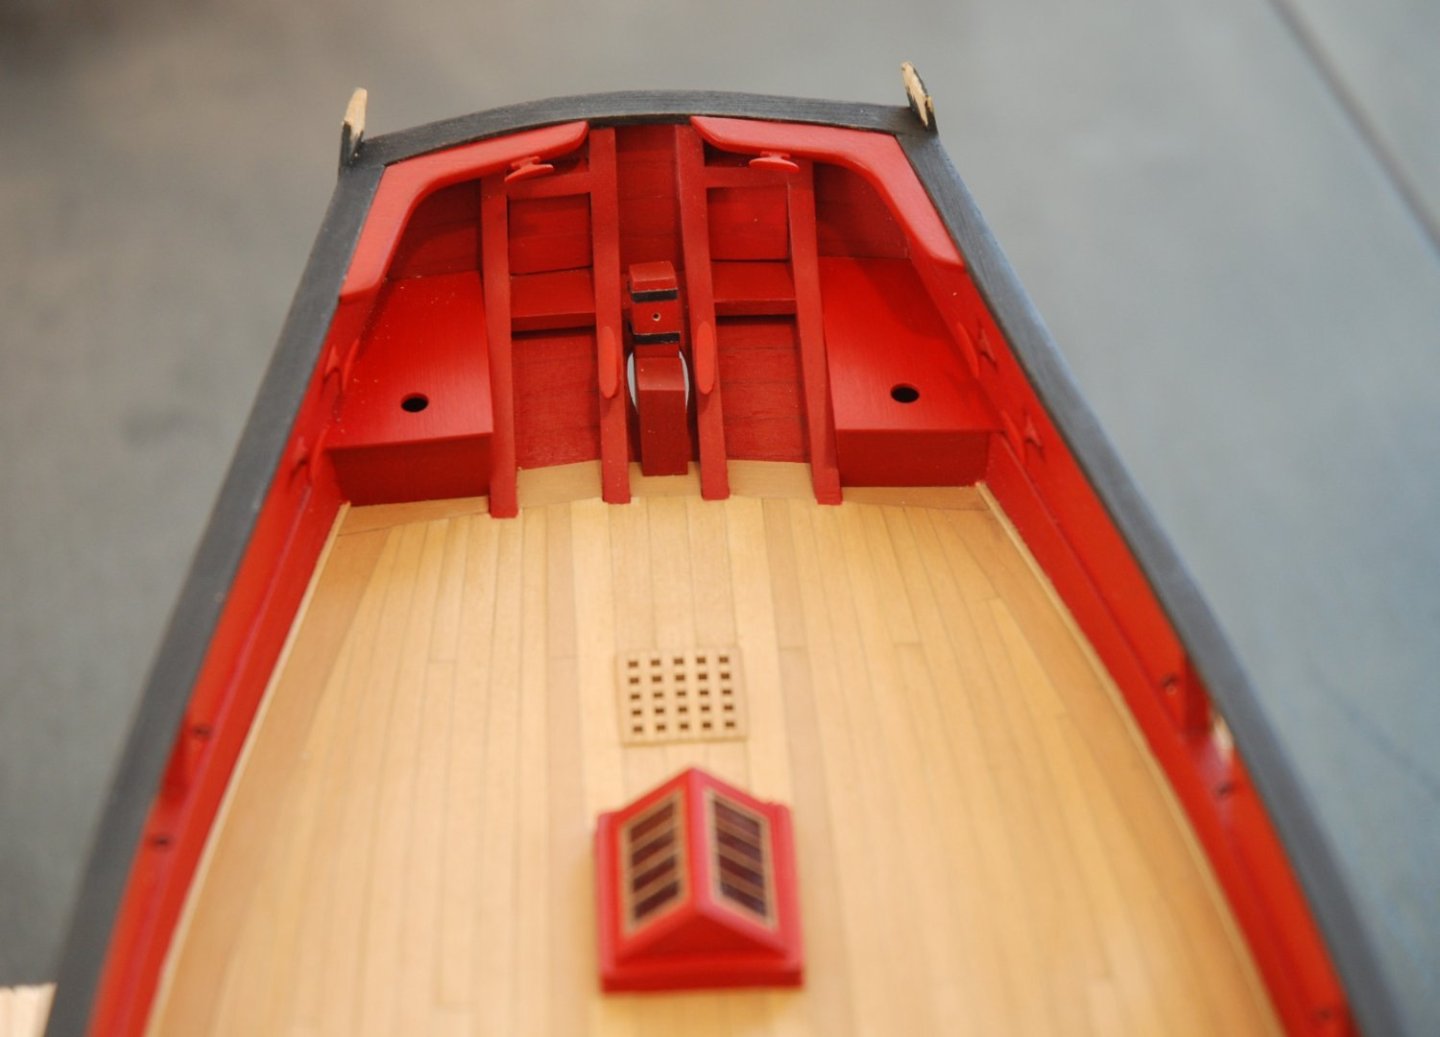
It's been a long time... First of all, a big thank you to all the people who have encouraged me and commented pleasantly on my work. While working on my Batelina, I made a few small advances on the Cheerful. First of all, I finalized the stern details. Just follow the instructions, which are really the best you can do. Don't be in a hurry, and take things one step at a time... I also fixed the windless definitively to the bow, using a small piece of wood to make sure it was placed at the right distance and in the right position. To be continued
-
Thanks to all the 'Likes'. Thank you Chris and Ron for your kind comments. This model was a pleasure to build and a great source of inspiration.
- 57 replies
-
- 1
-
-
- marisstella
- batelina
- (and 1 more)
-
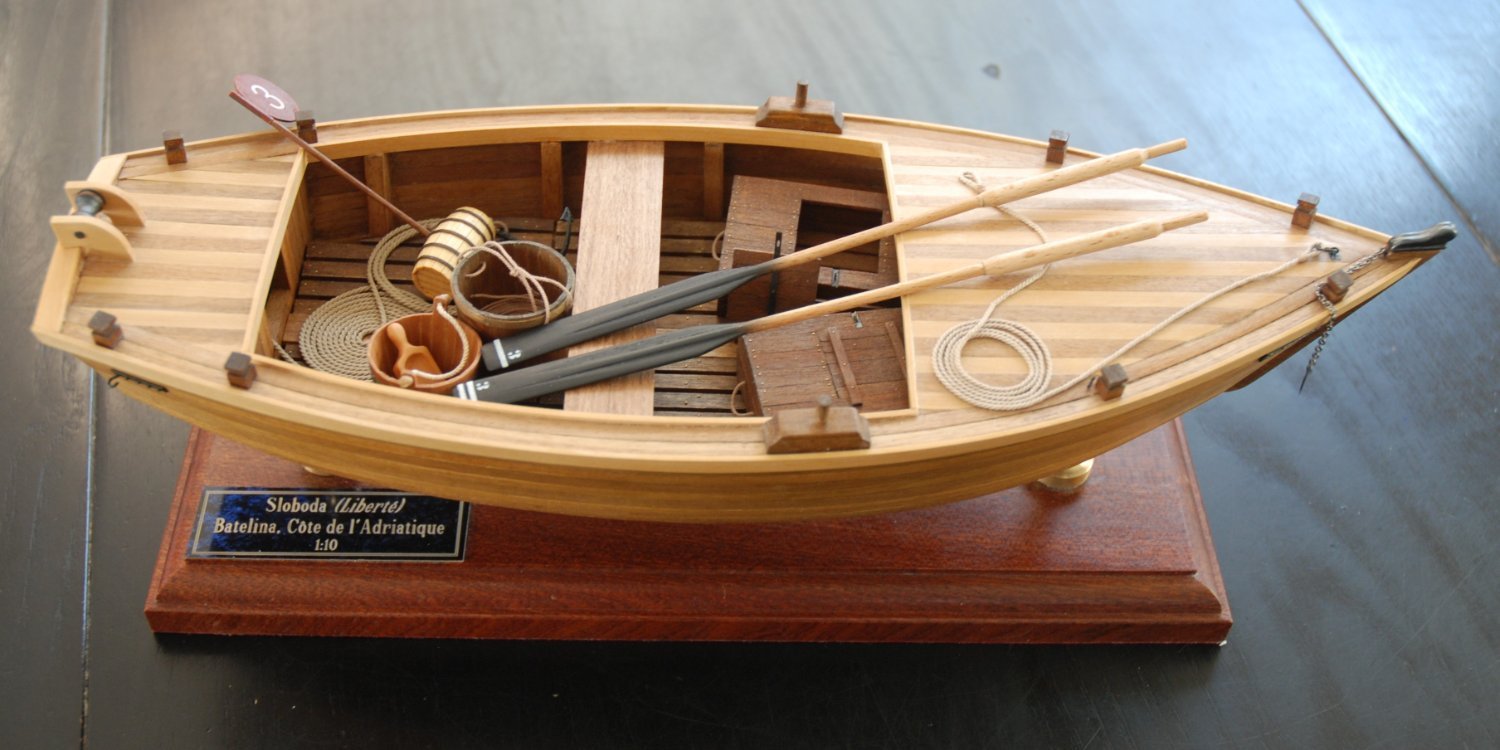
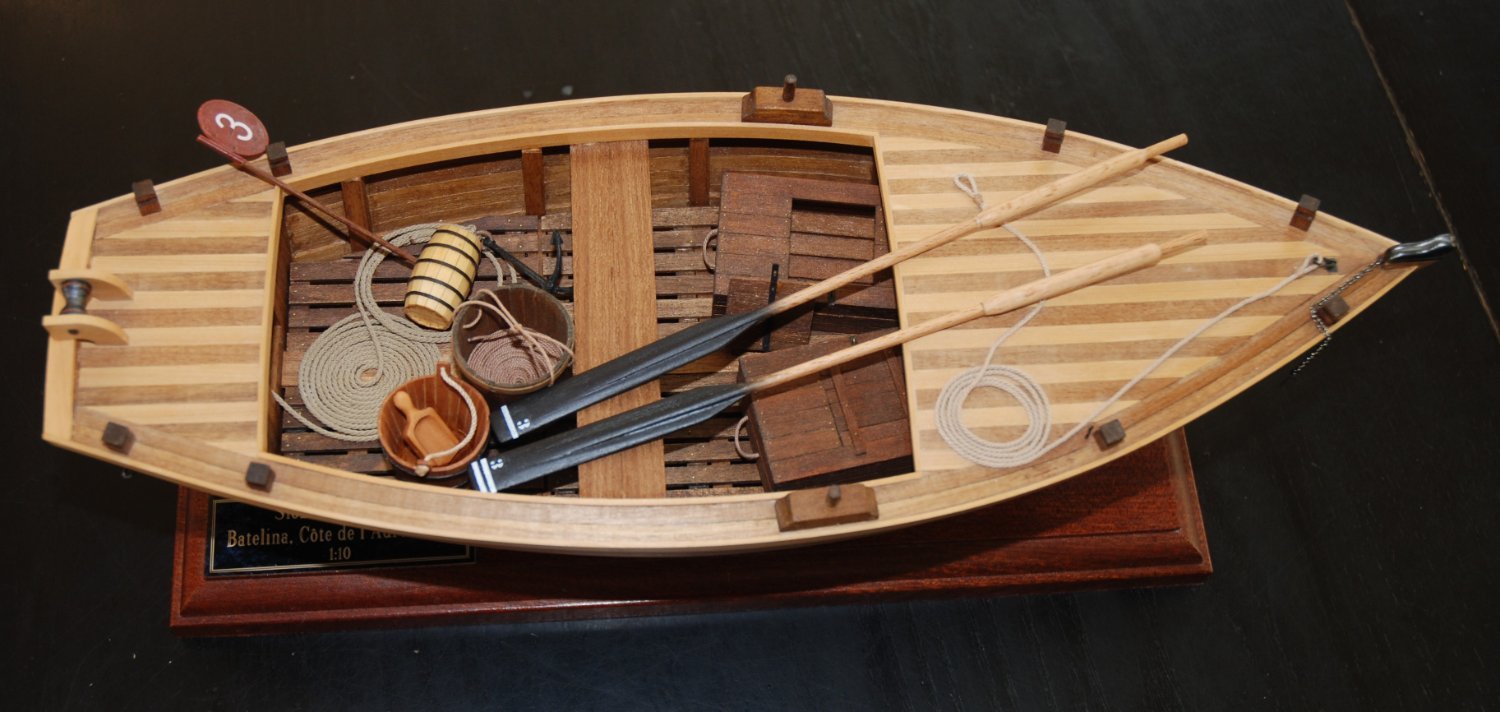
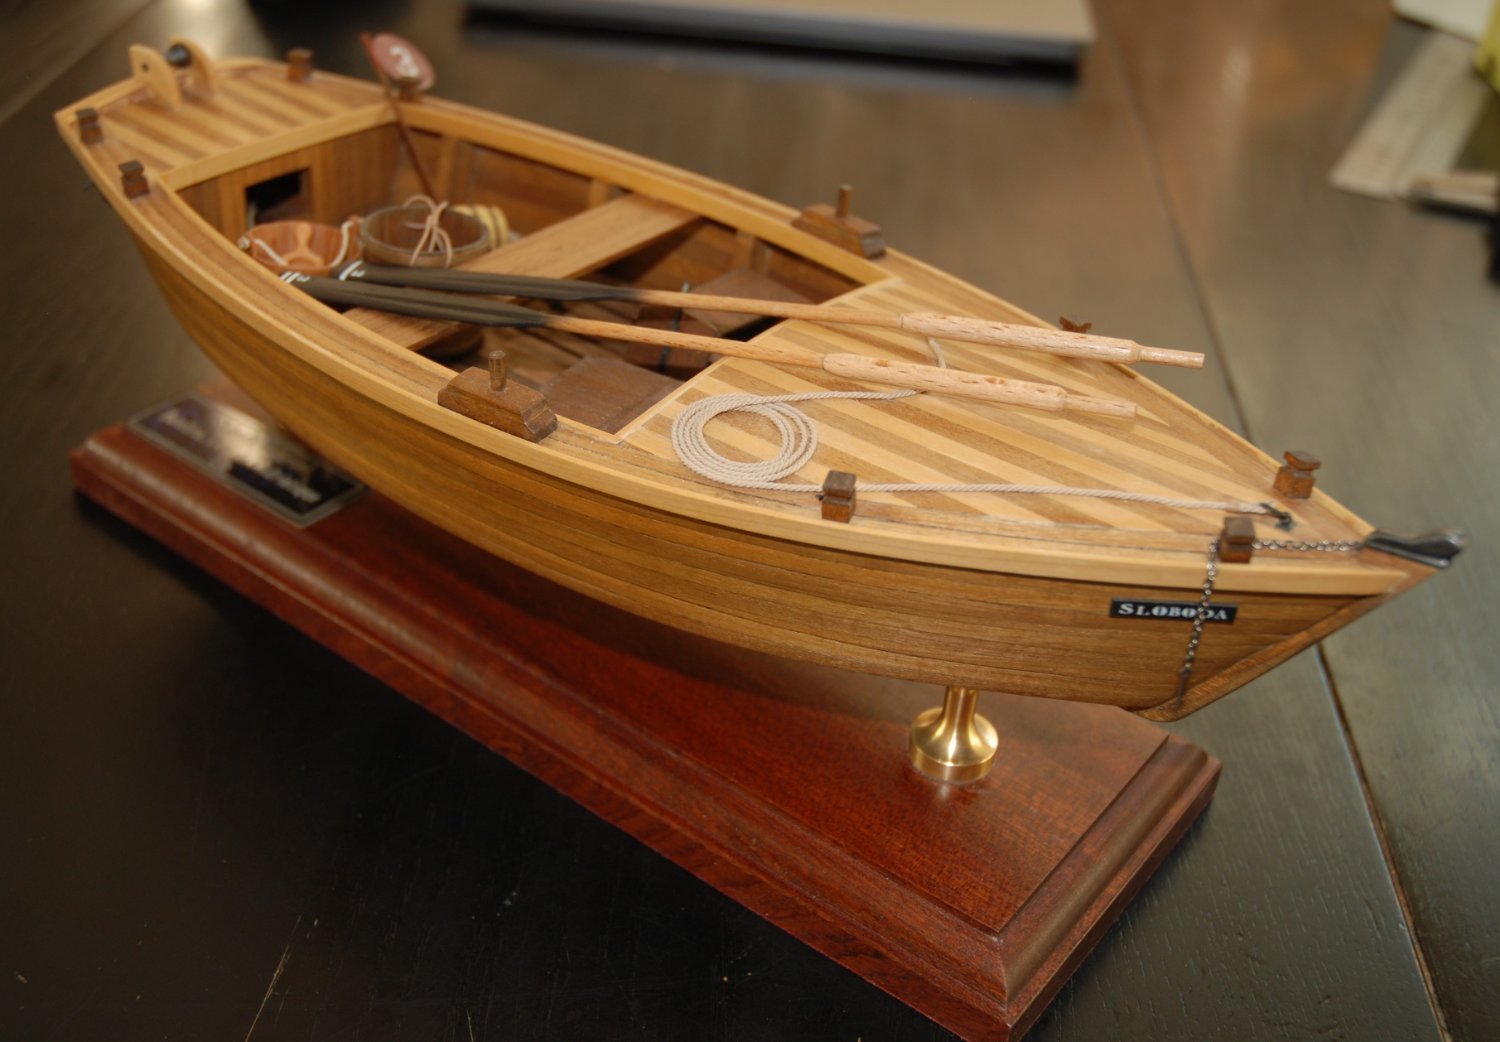
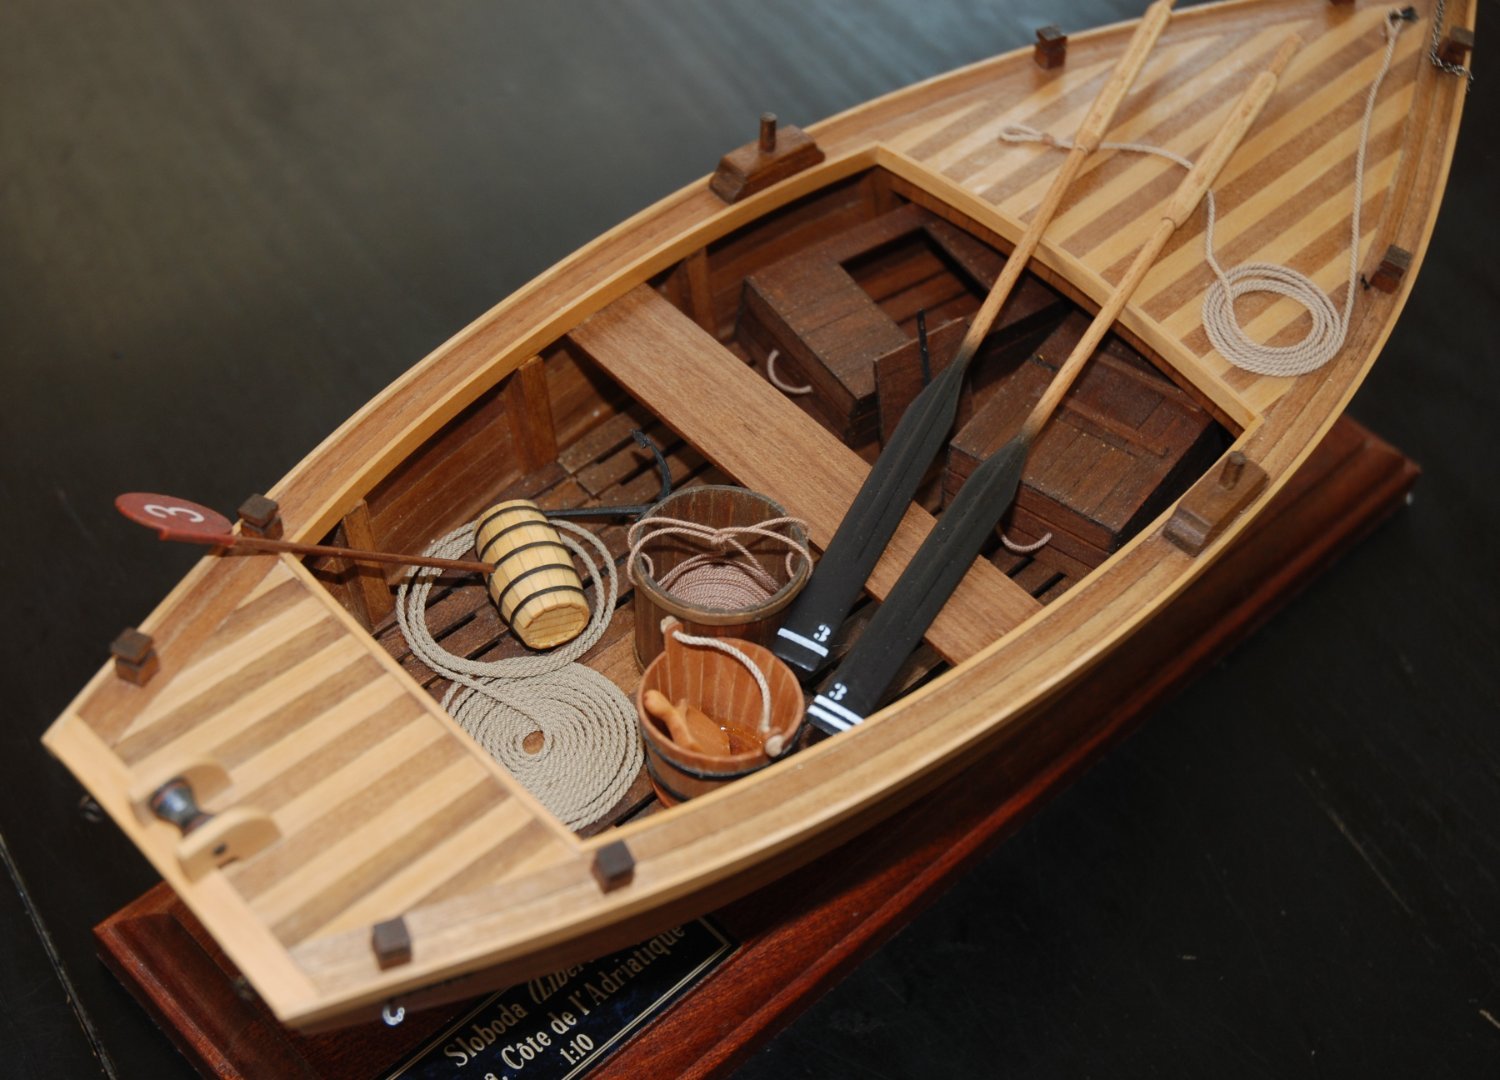
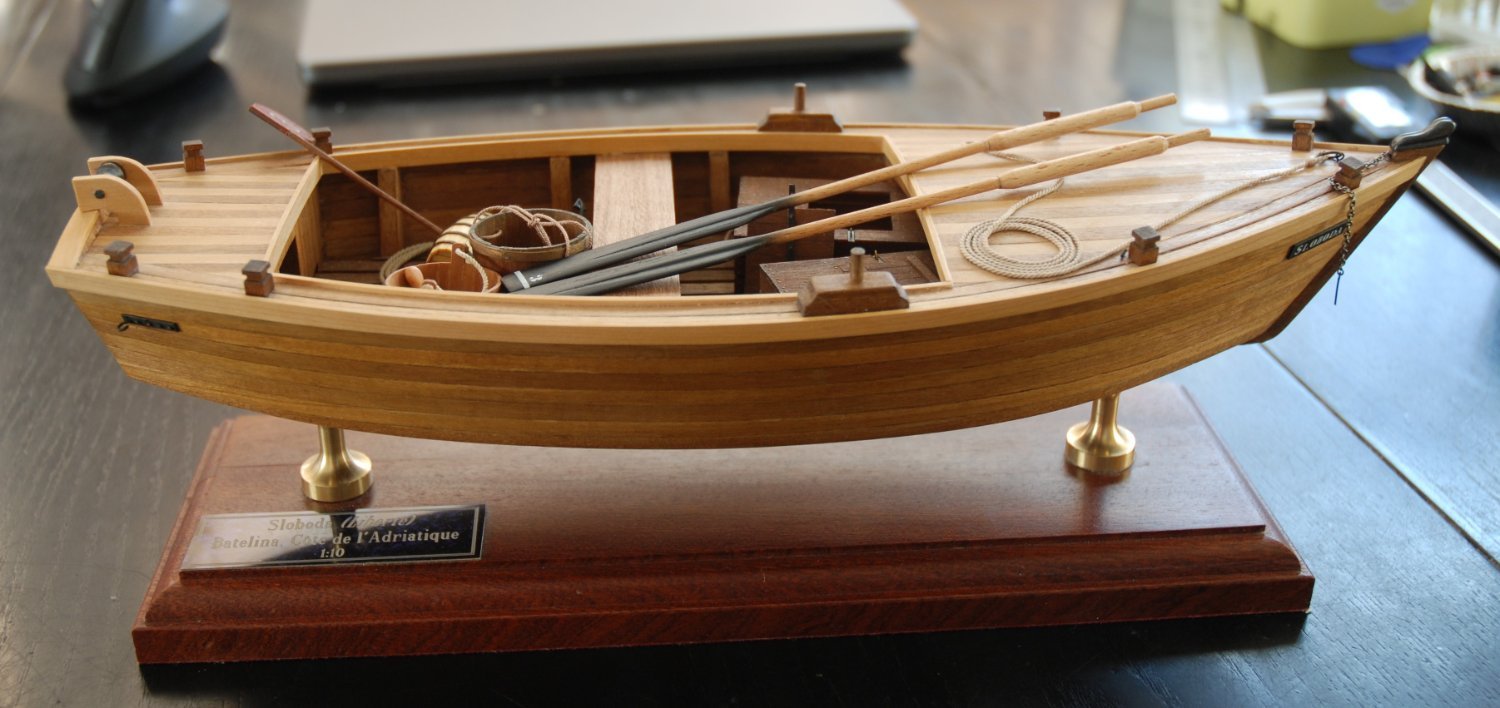
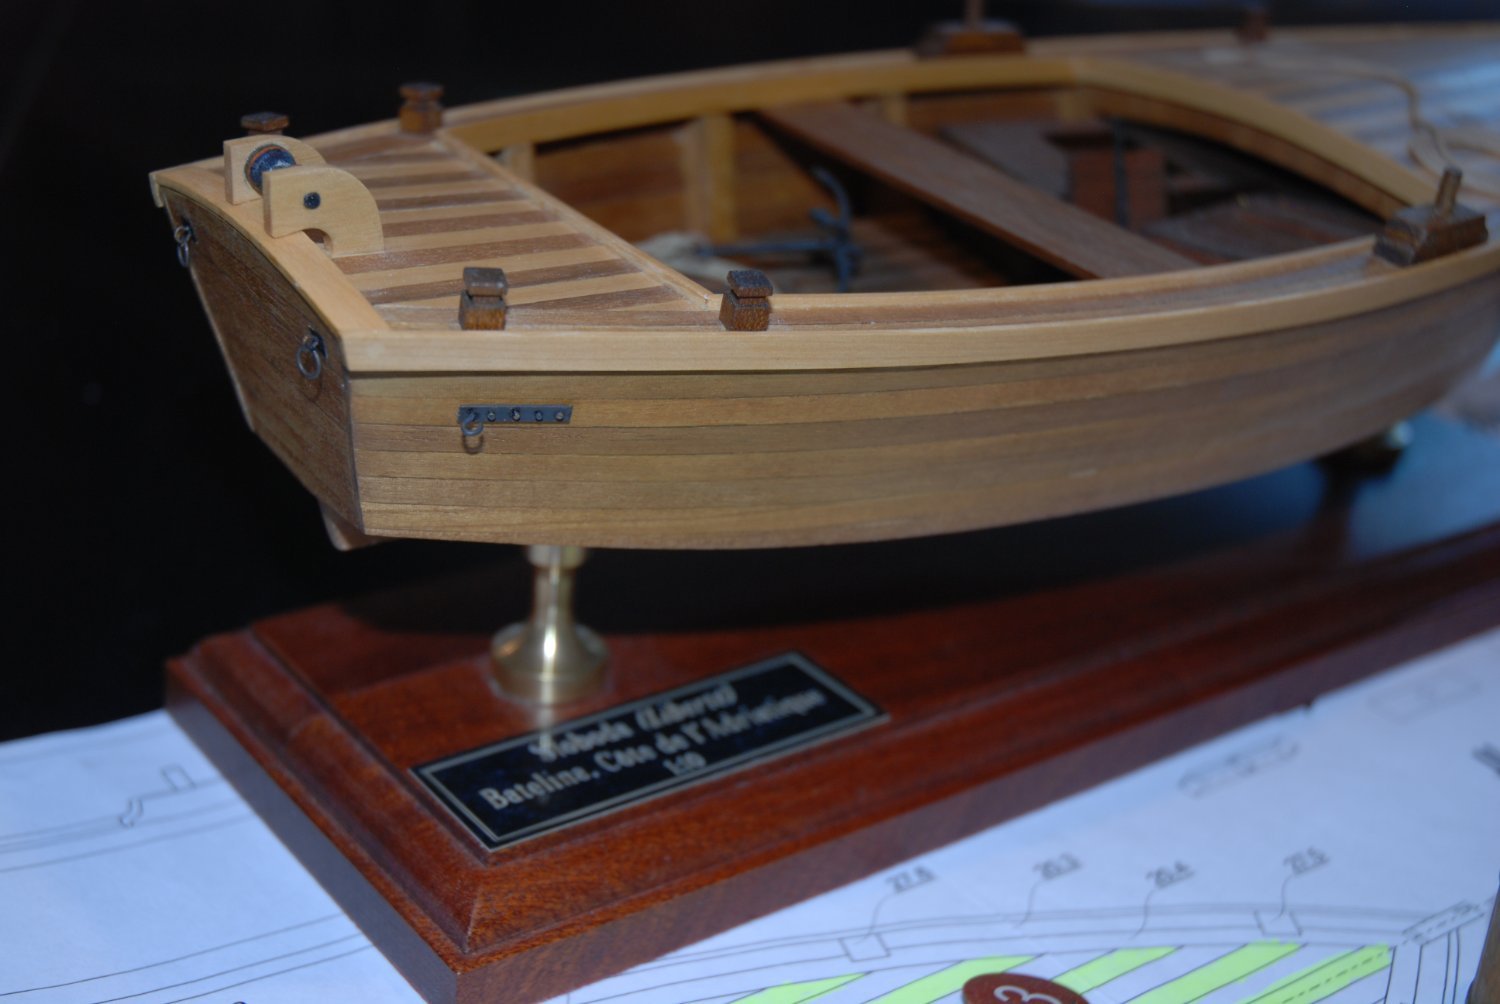
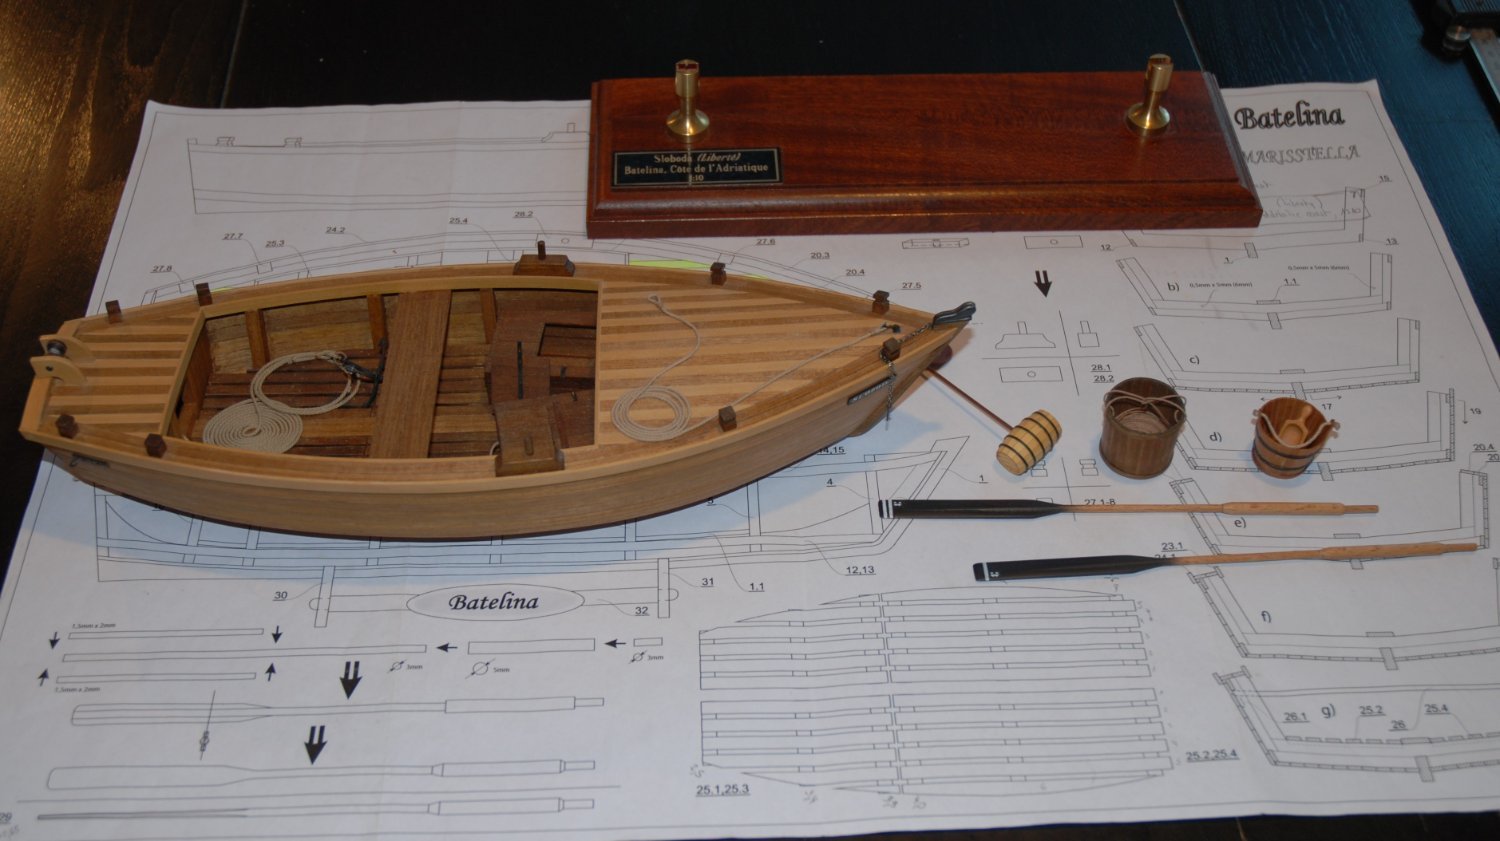
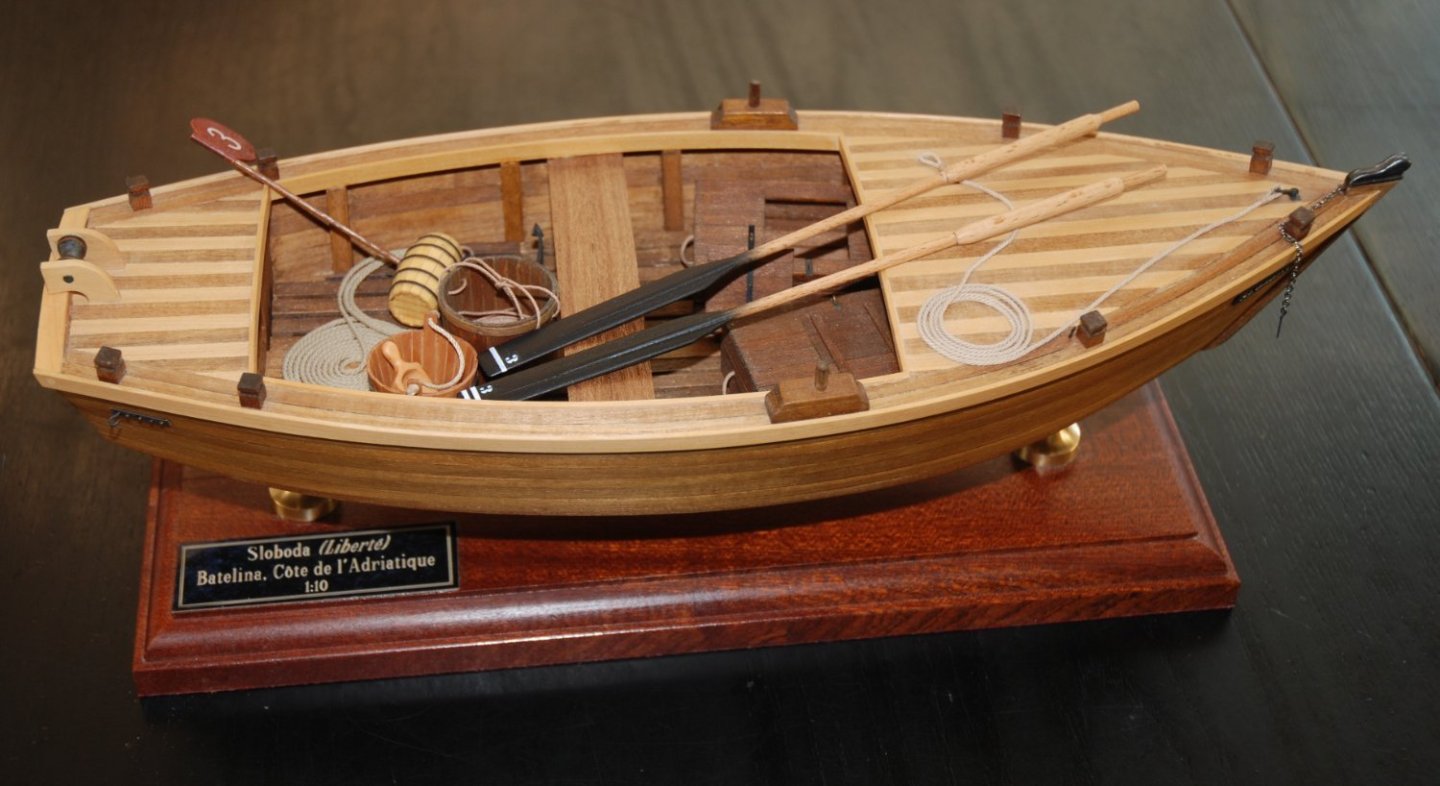
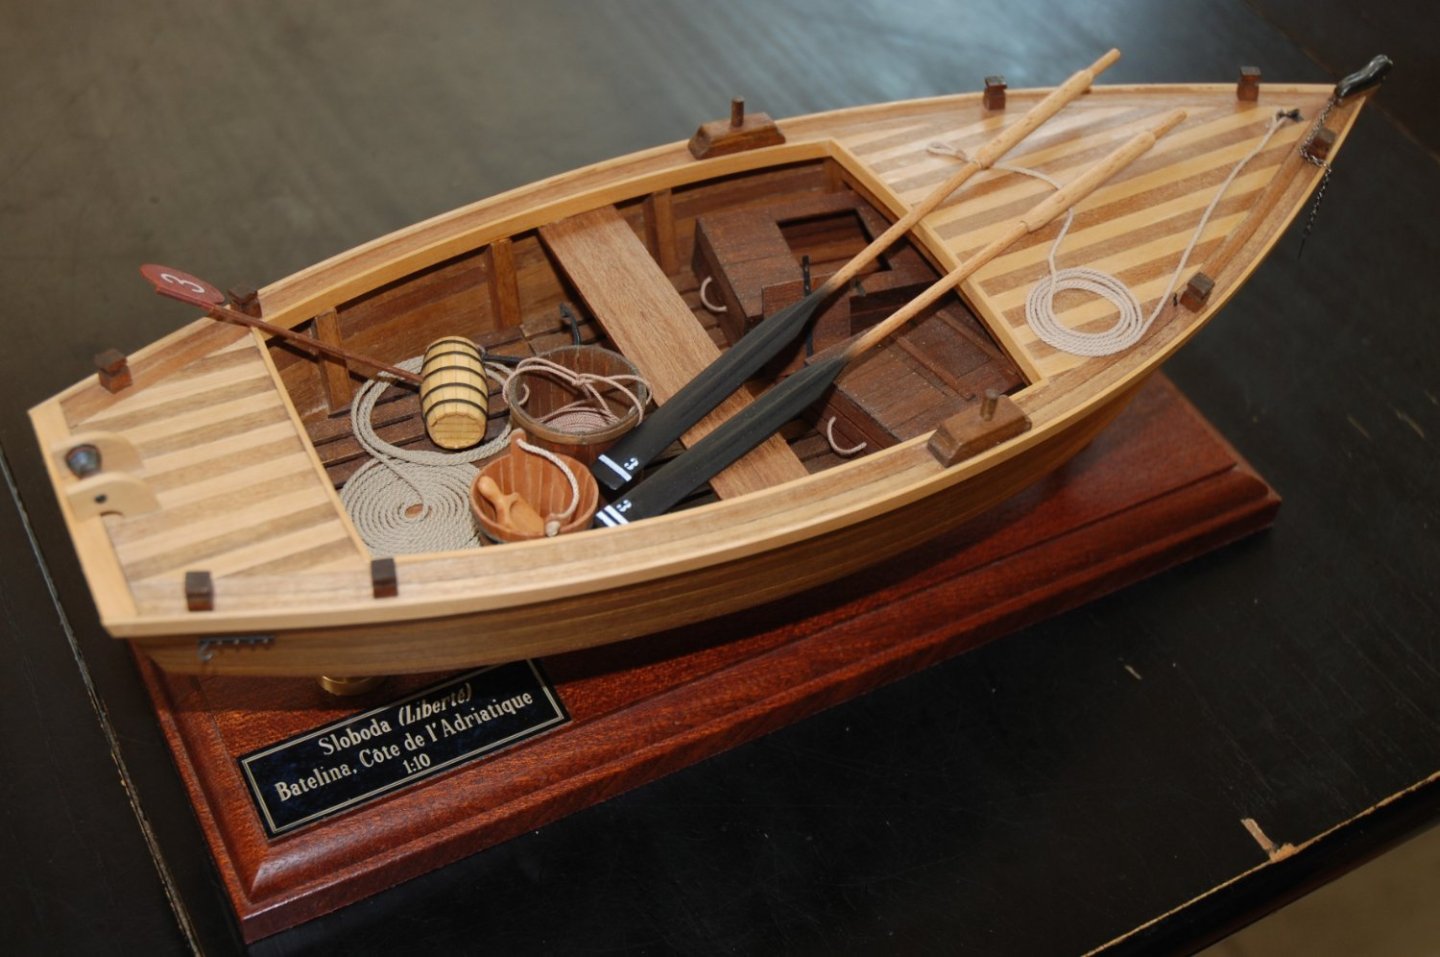
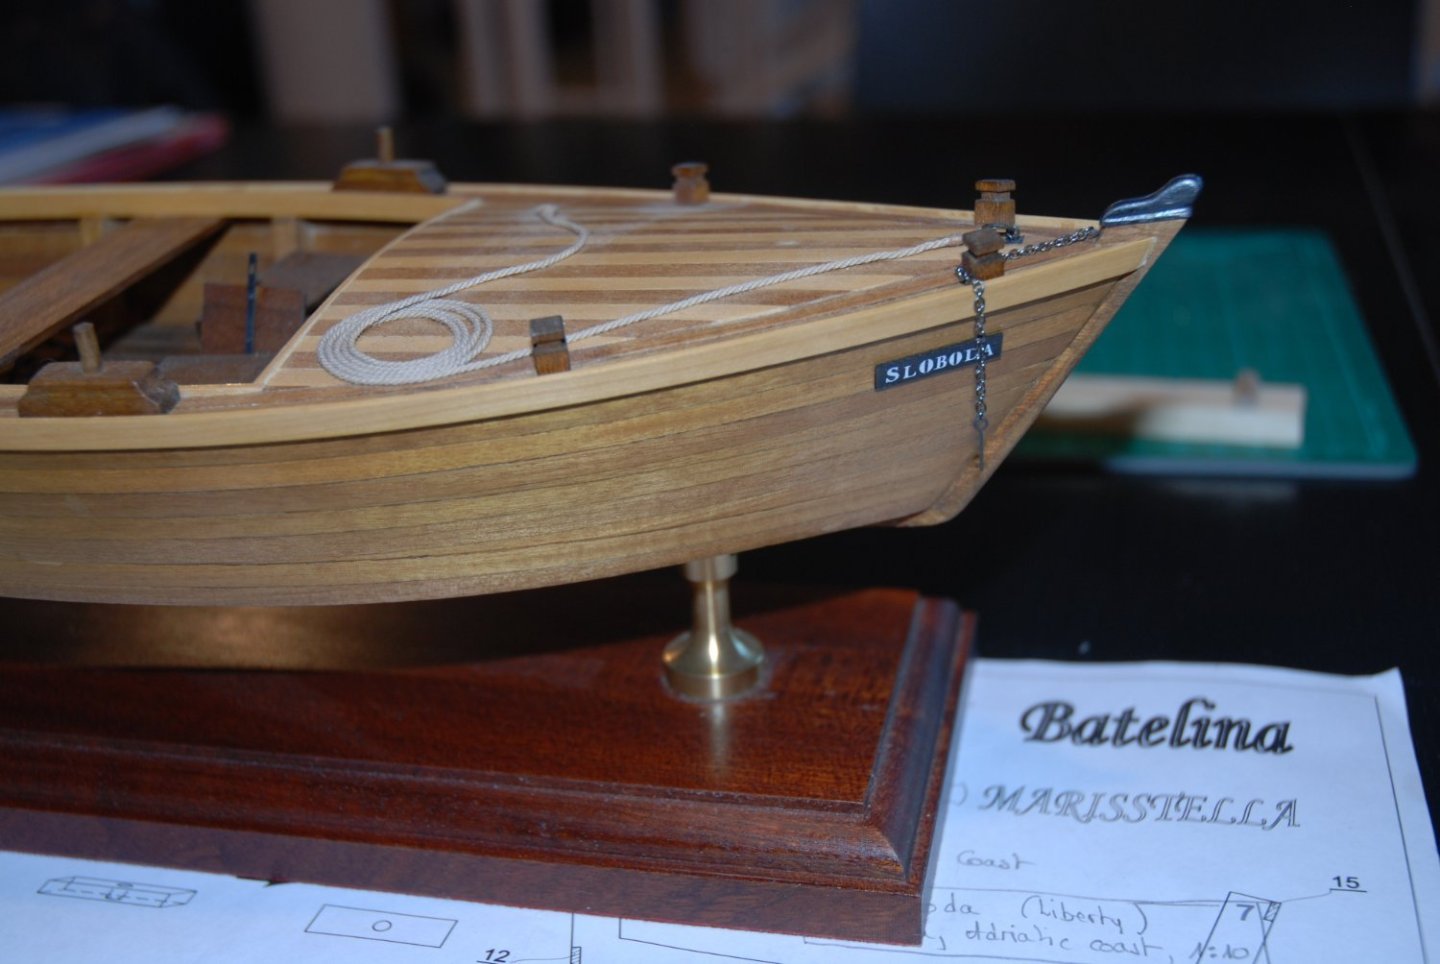
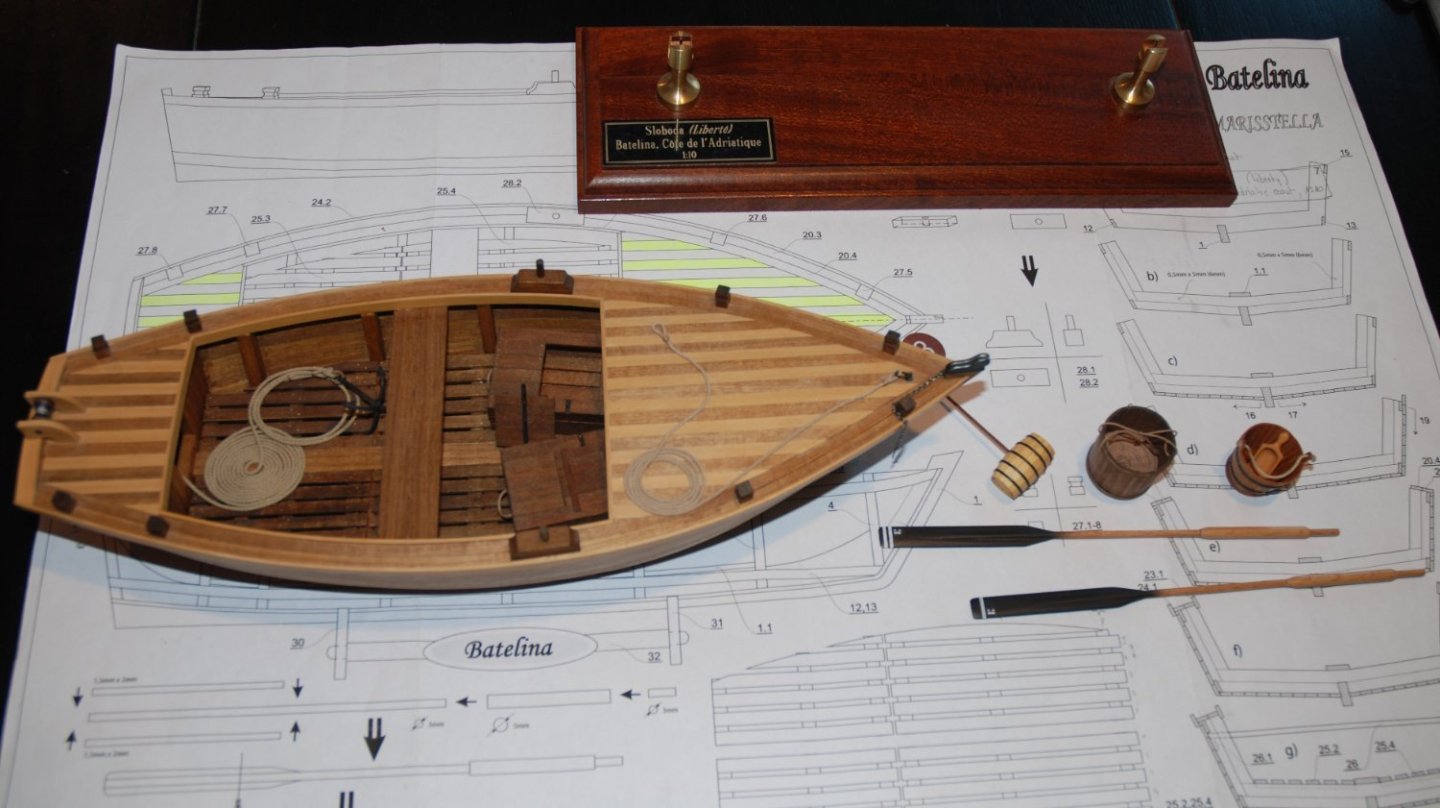
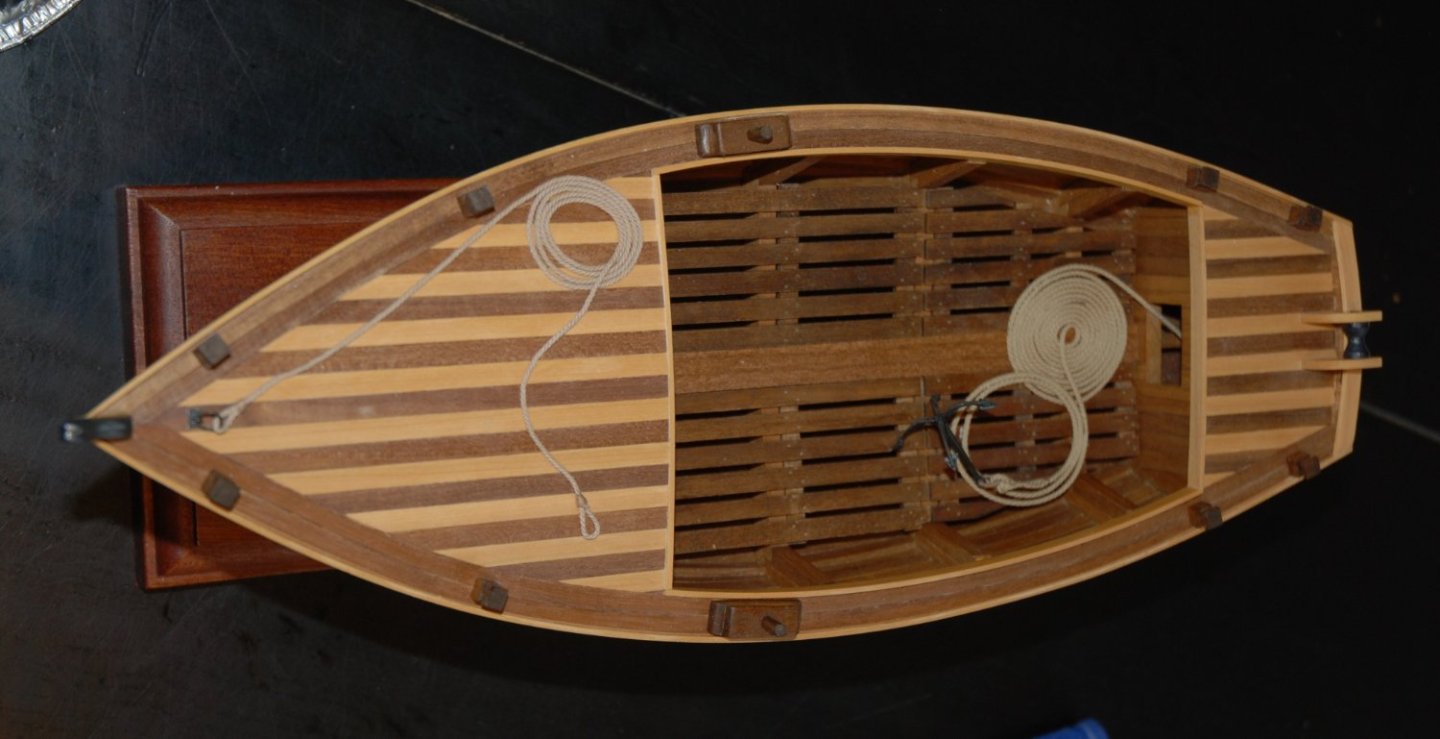
Thank you to all the 'Likes'. And that's all there is to it. Here are a few photos of my finished Batelina. An excellent little model from MarisStella that gave me a lot of pleasure. I tried to personalize it to make it a little more unique. Thanks again to everyone who has followed my work and encouraged me. Back to the Cheerful and its cannon battery.


- 57 replies
-
- 10
-
-

-
- marisstella
- batelina
- (and 1 more)
-
Thanks Bob. It's a really fun model and the wood is of excellent quality.
-
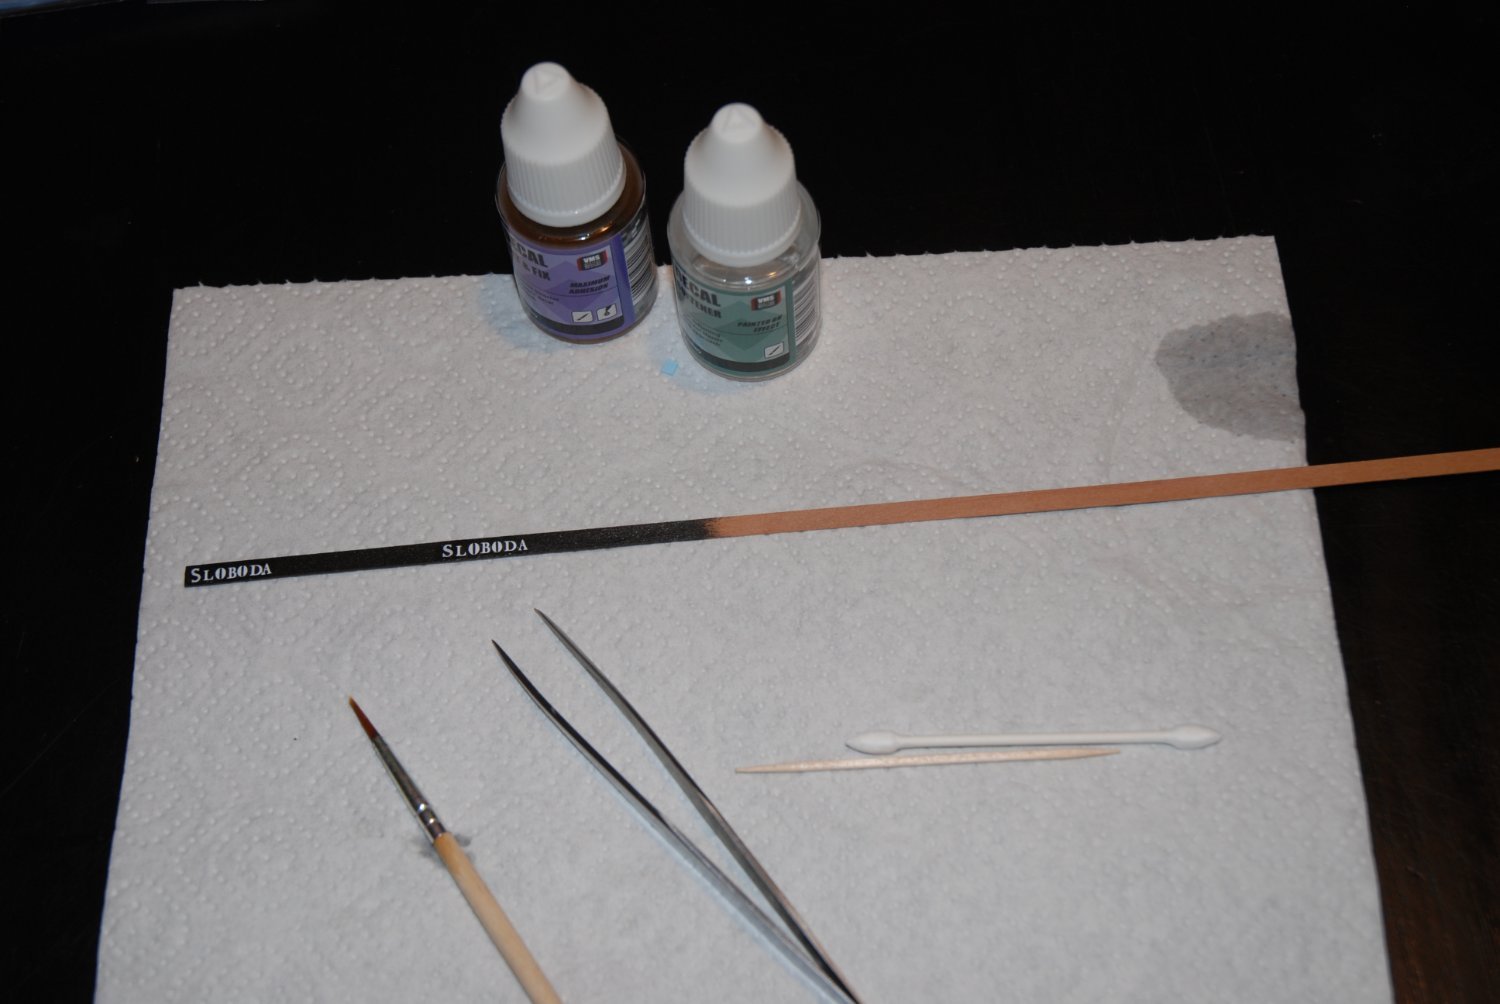
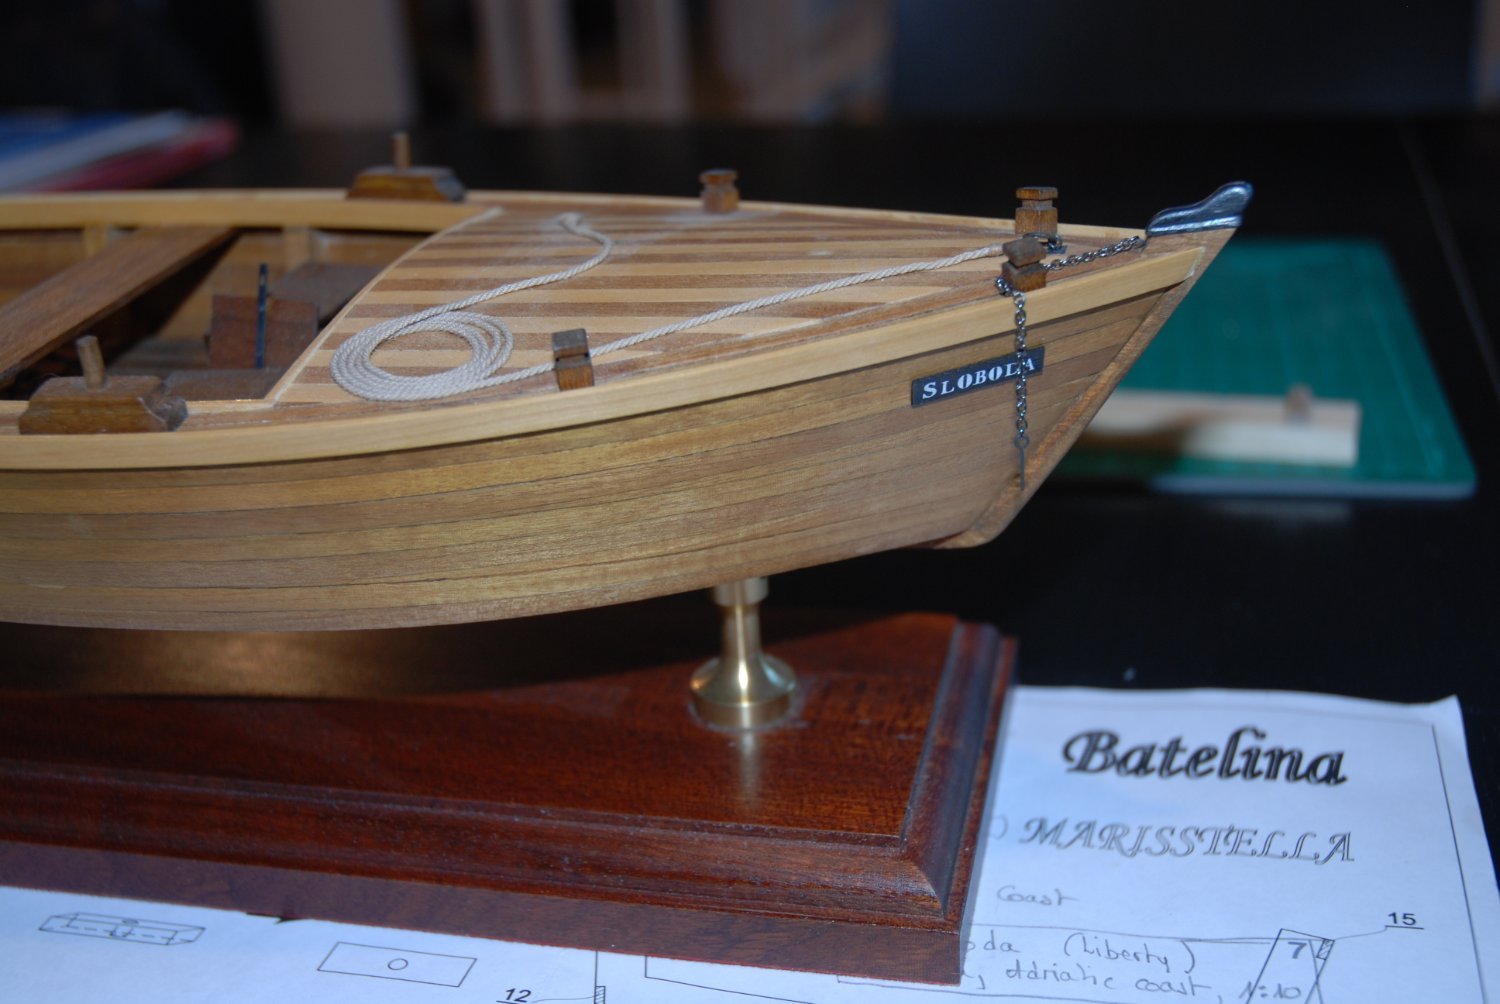
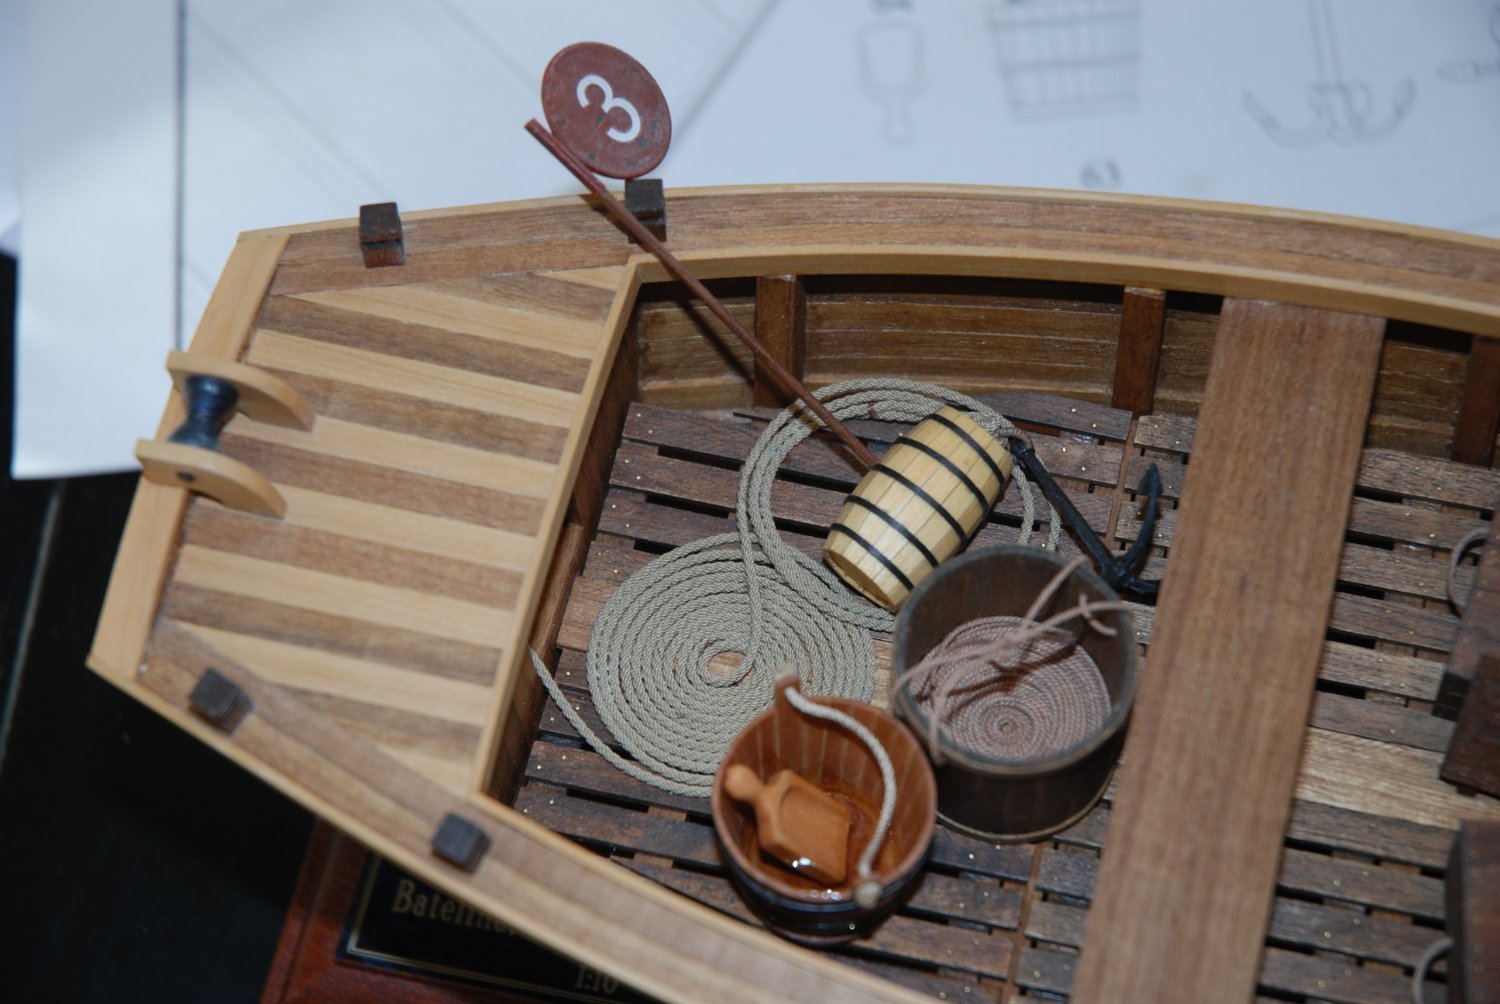
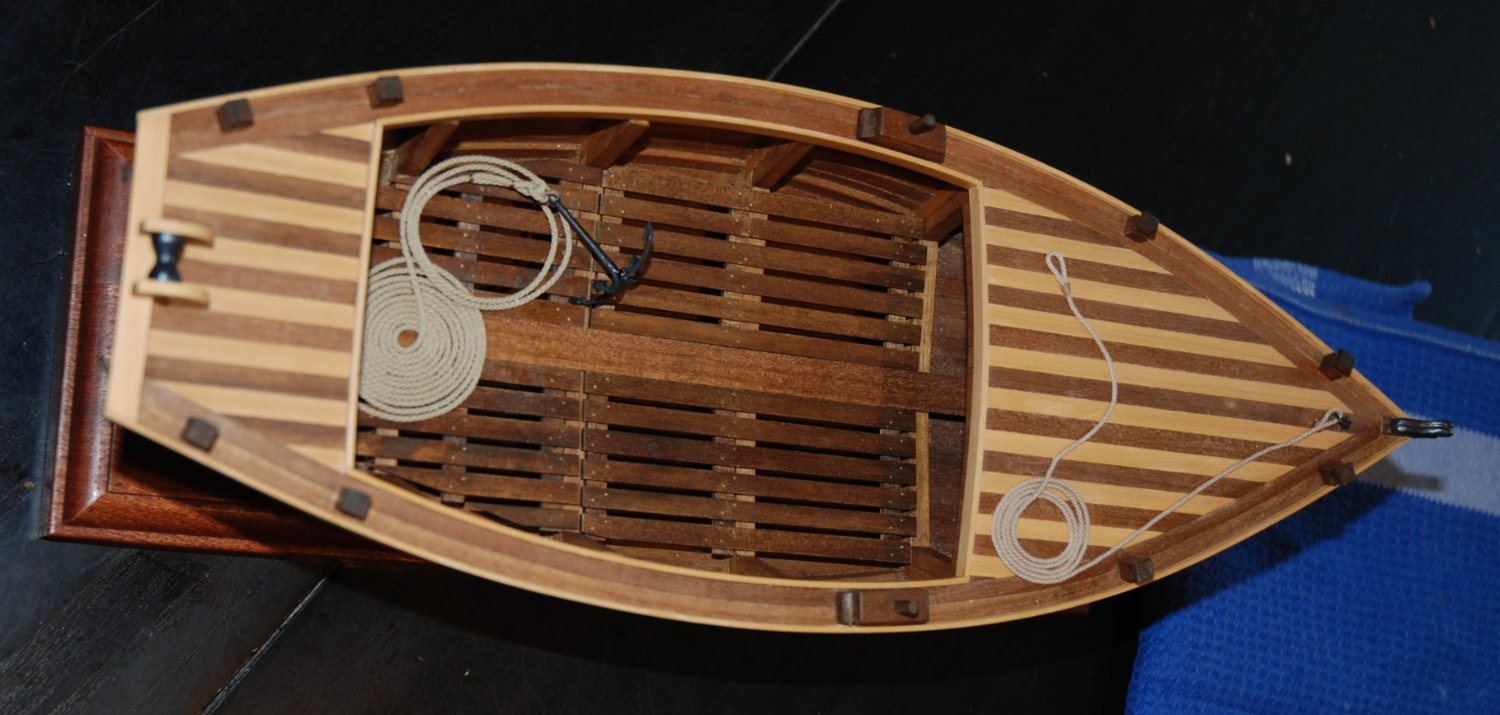
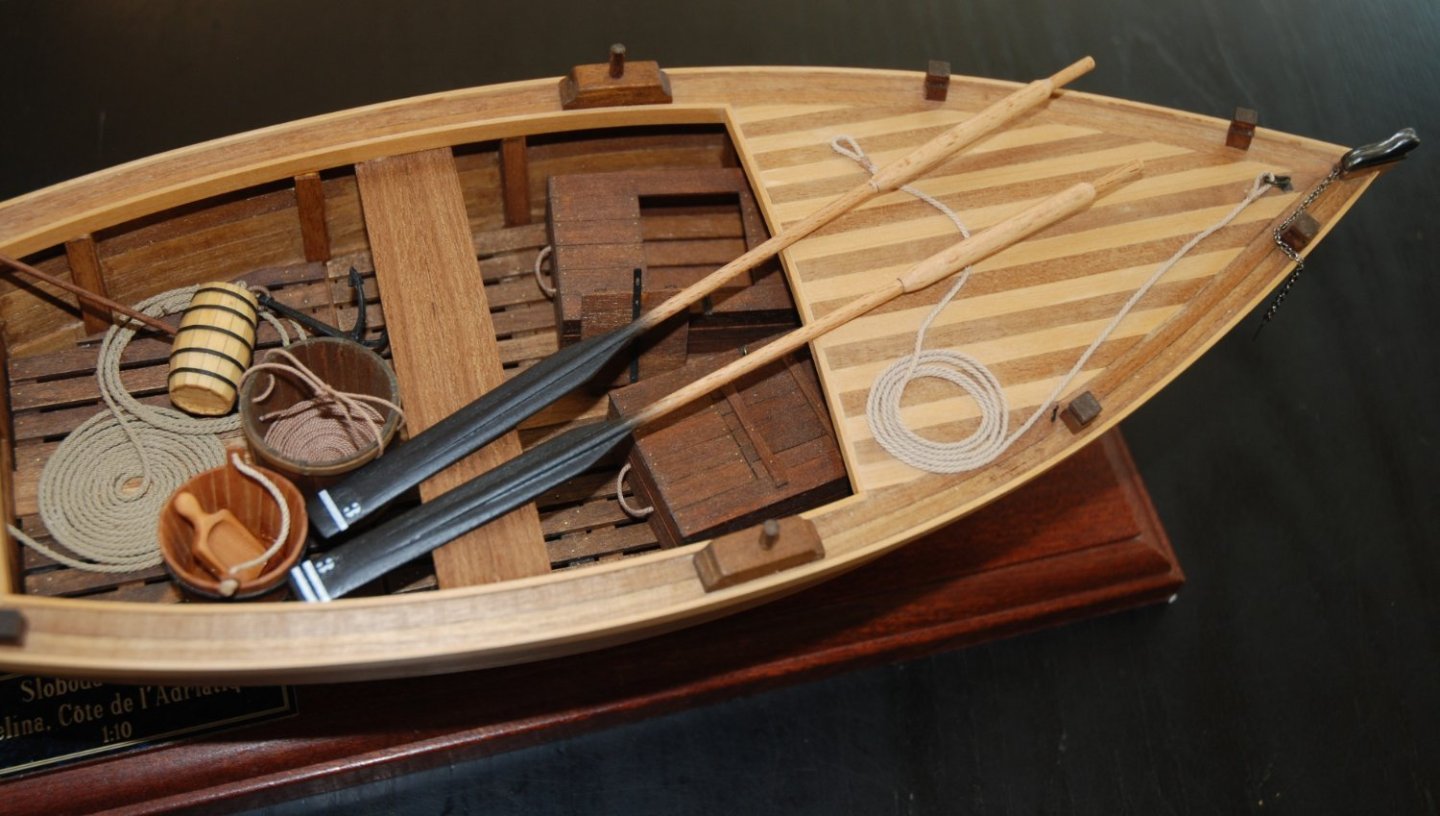
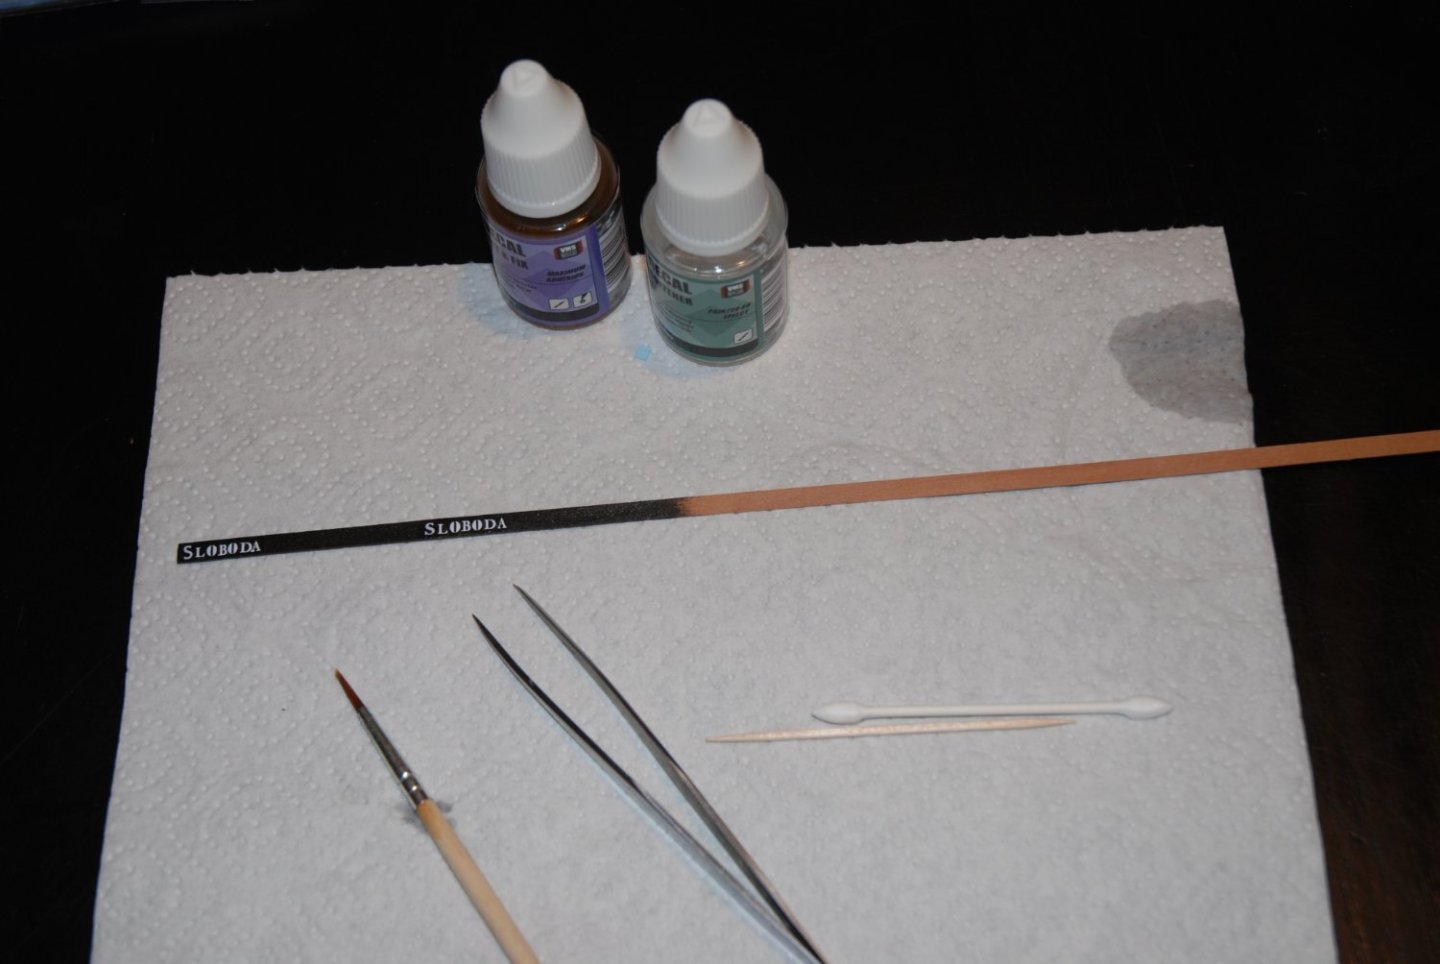
Thank you to all the 'Likes'. I decided to add a small plate bearing the name of the boat to the bow. I chose to name my batelina 'Sloboda', which means 'Freedom' in Croatian. The name is made up of letters cut from a sheet of decals. I prepare both plates on the same very thin wooden board, painted black. The two plates are cut and glued on either side of the bow. I take this opportunity to add a trolling hook (crochet de traîne) on either side of the boat's stern. This element allowed the boat to be towed dry on the beach using a beach capstan. This time, all the fittings are ready. I can now finalize my project.


- 57 replies
-
- 5
-
-
-
- marisstella
- batelina
- (and 1 more)
-
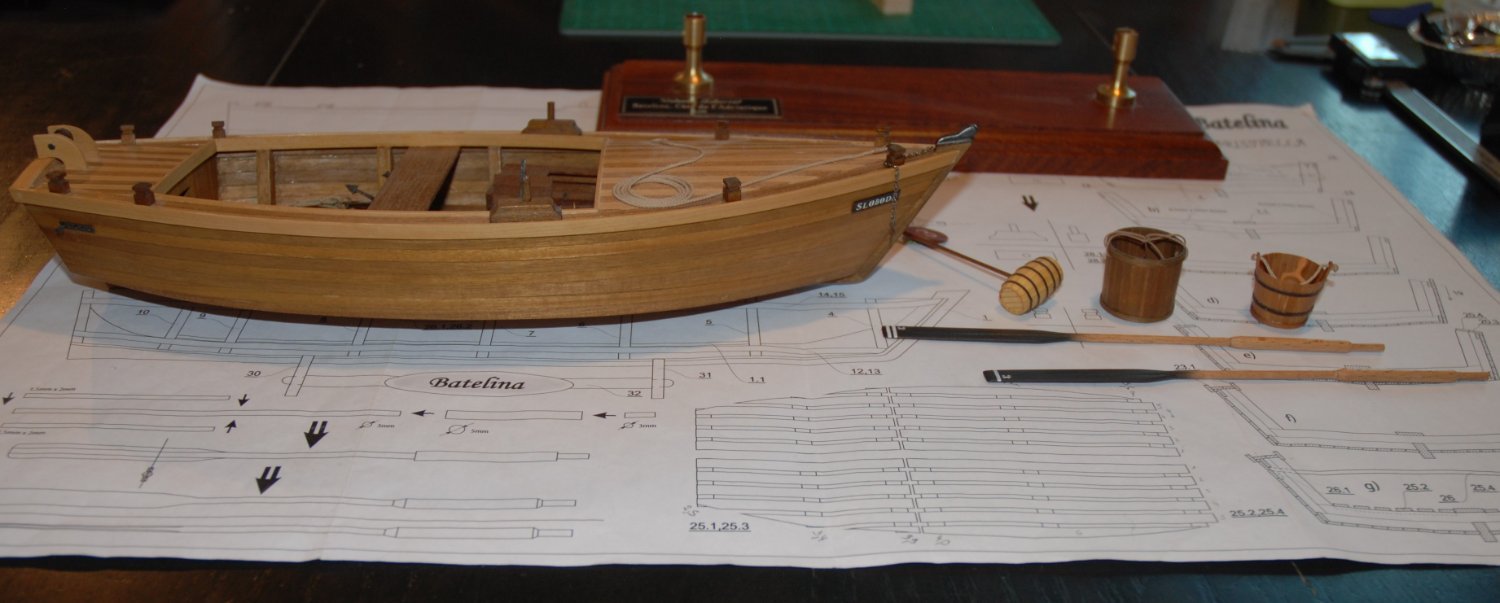
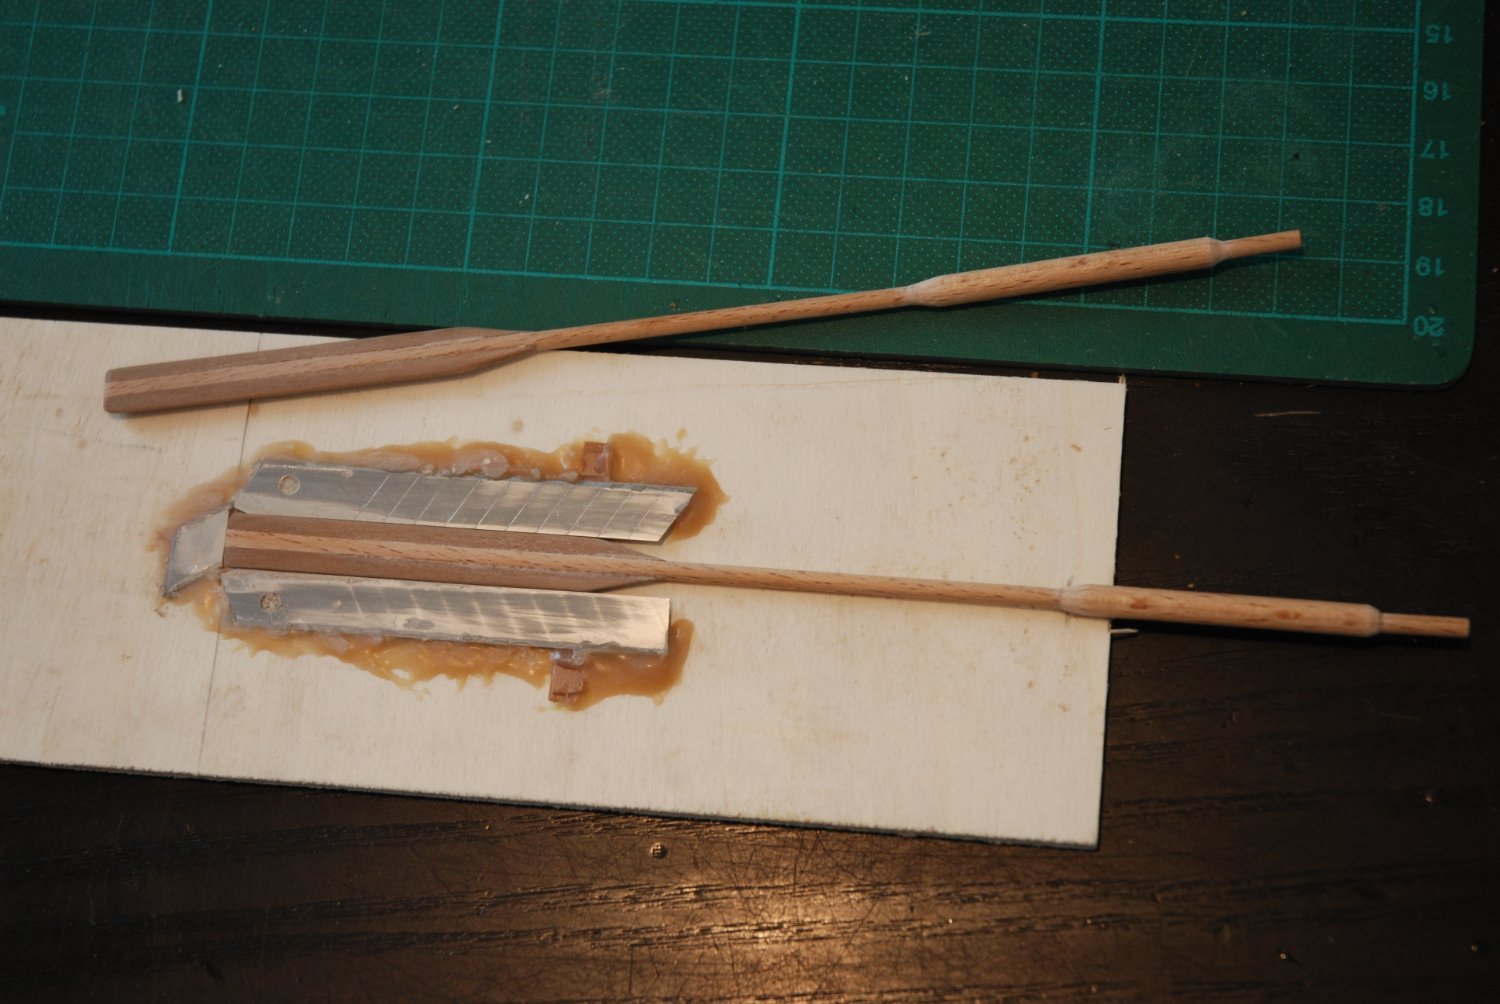
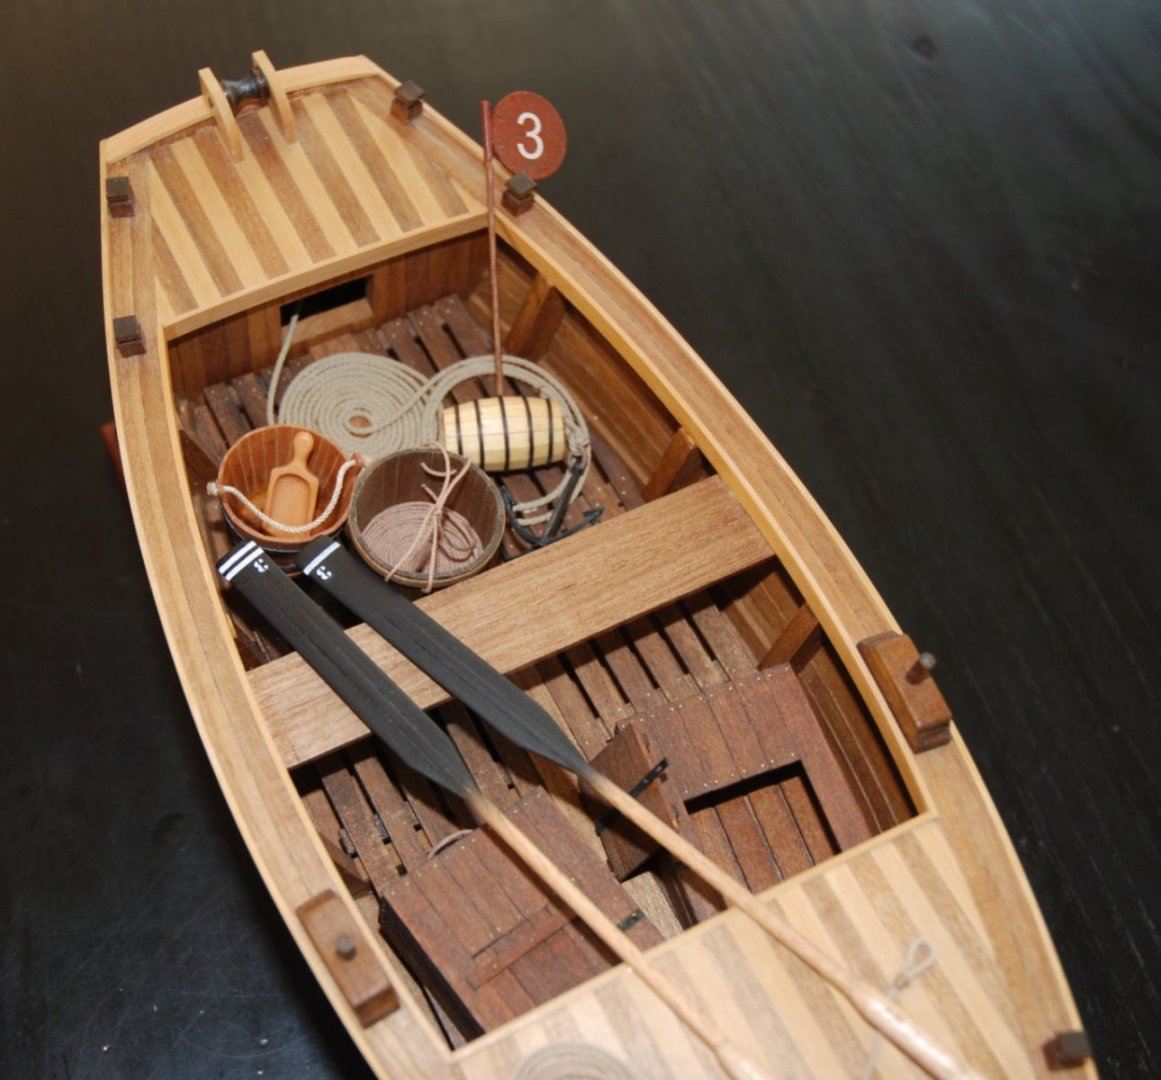
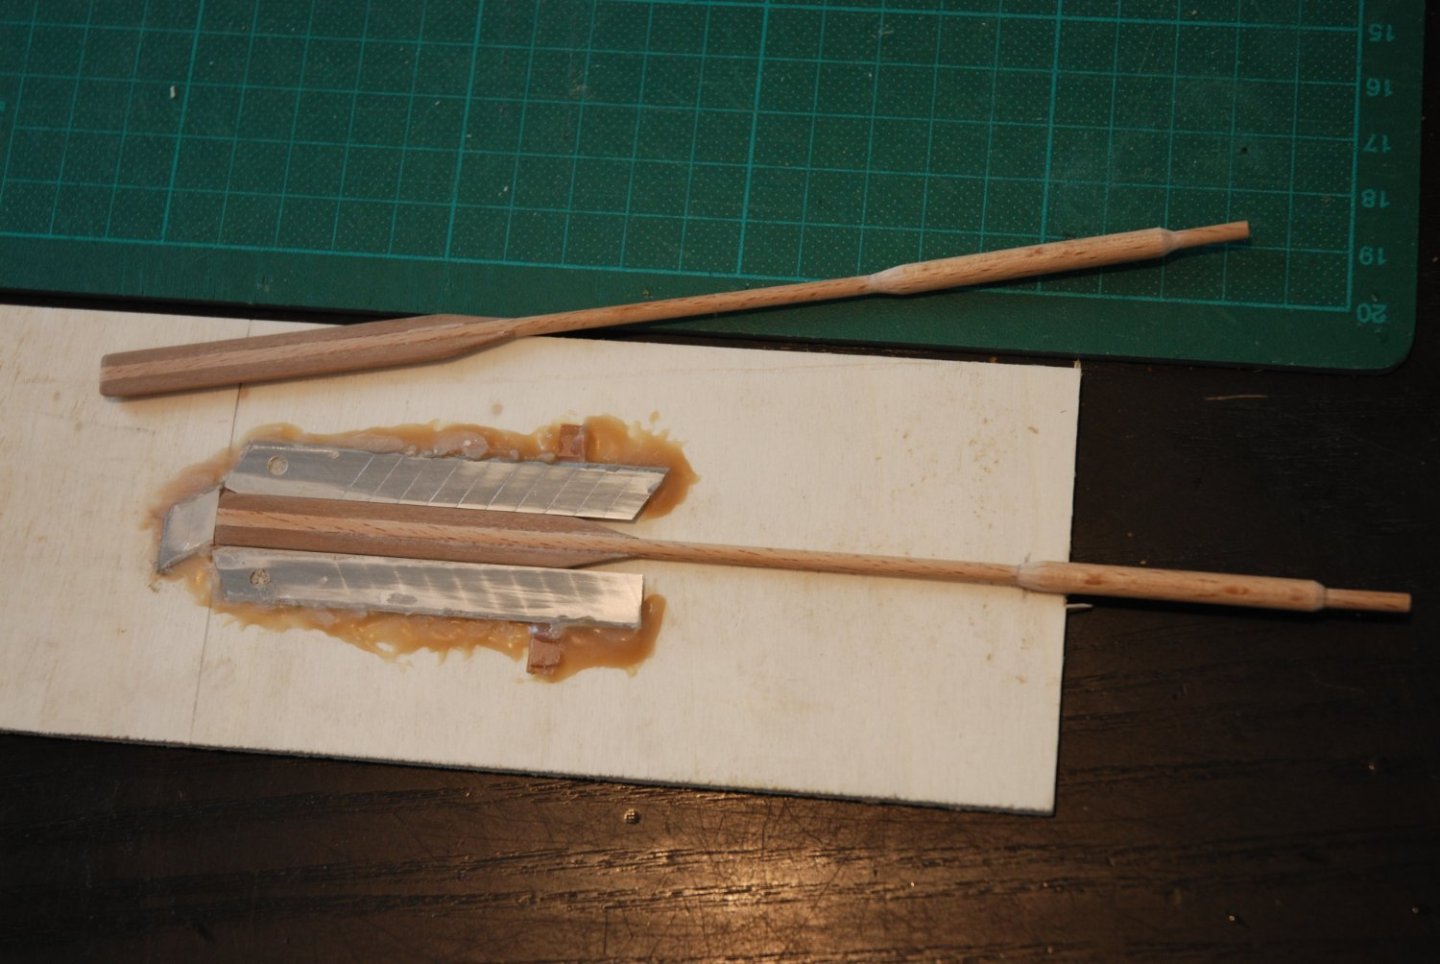
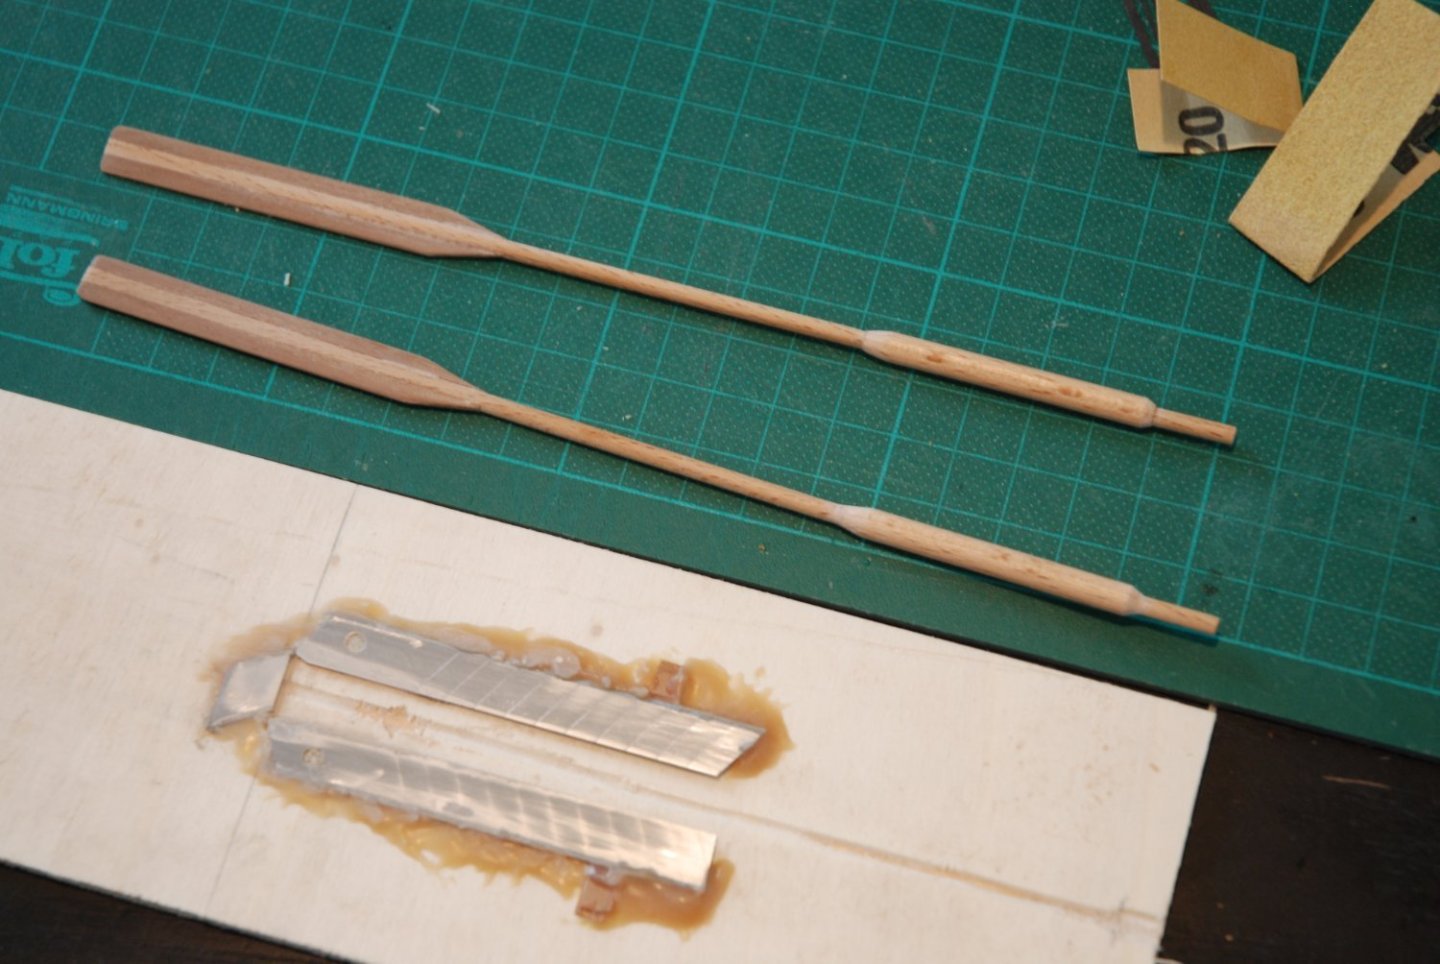
Thank you to all the 'Likes'. I quickly made a small jig for the boat's oars. Two cutter blades glued parallel, raising one end to give a slight inclination. Then simply insert the oar and sand, leaning on the two blades. The result is good evenness and, above all, two identically shaped oars. A coat of black paint on the paddle and two small numbers from a sheet of decals, and the oars are ready. All the elements are now ready and I can proceed with the final set-up. To be continued shortly..
- 57 replies
-
- 4
-
-
-
- marisstella
- batelina
- (and 1 more)
-
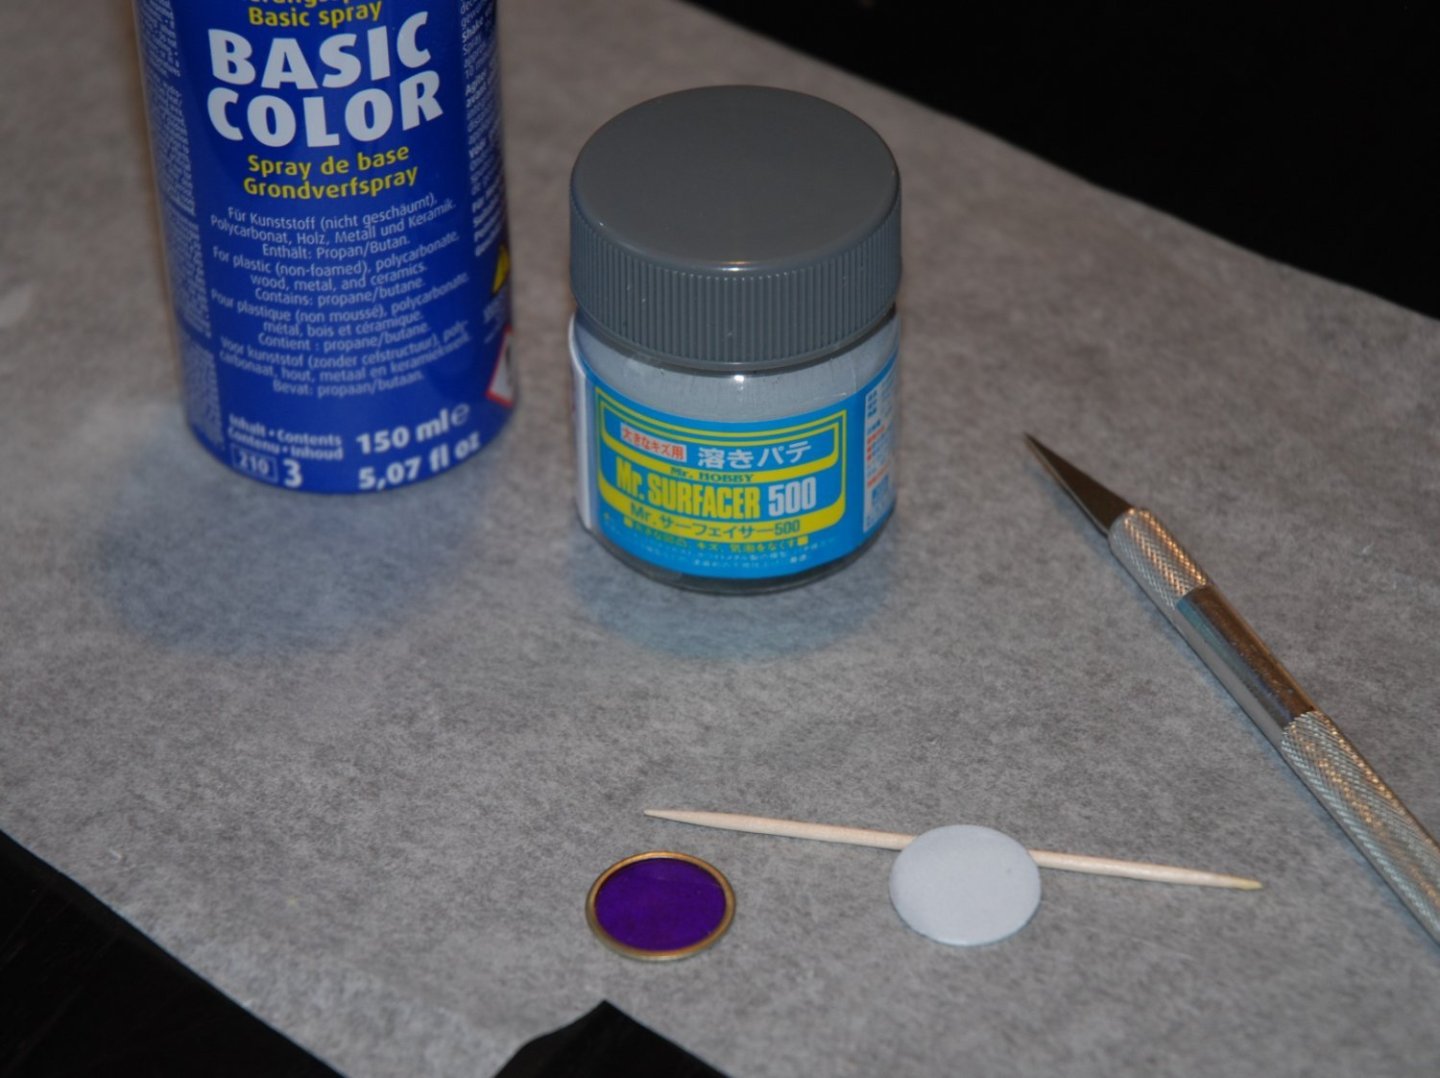
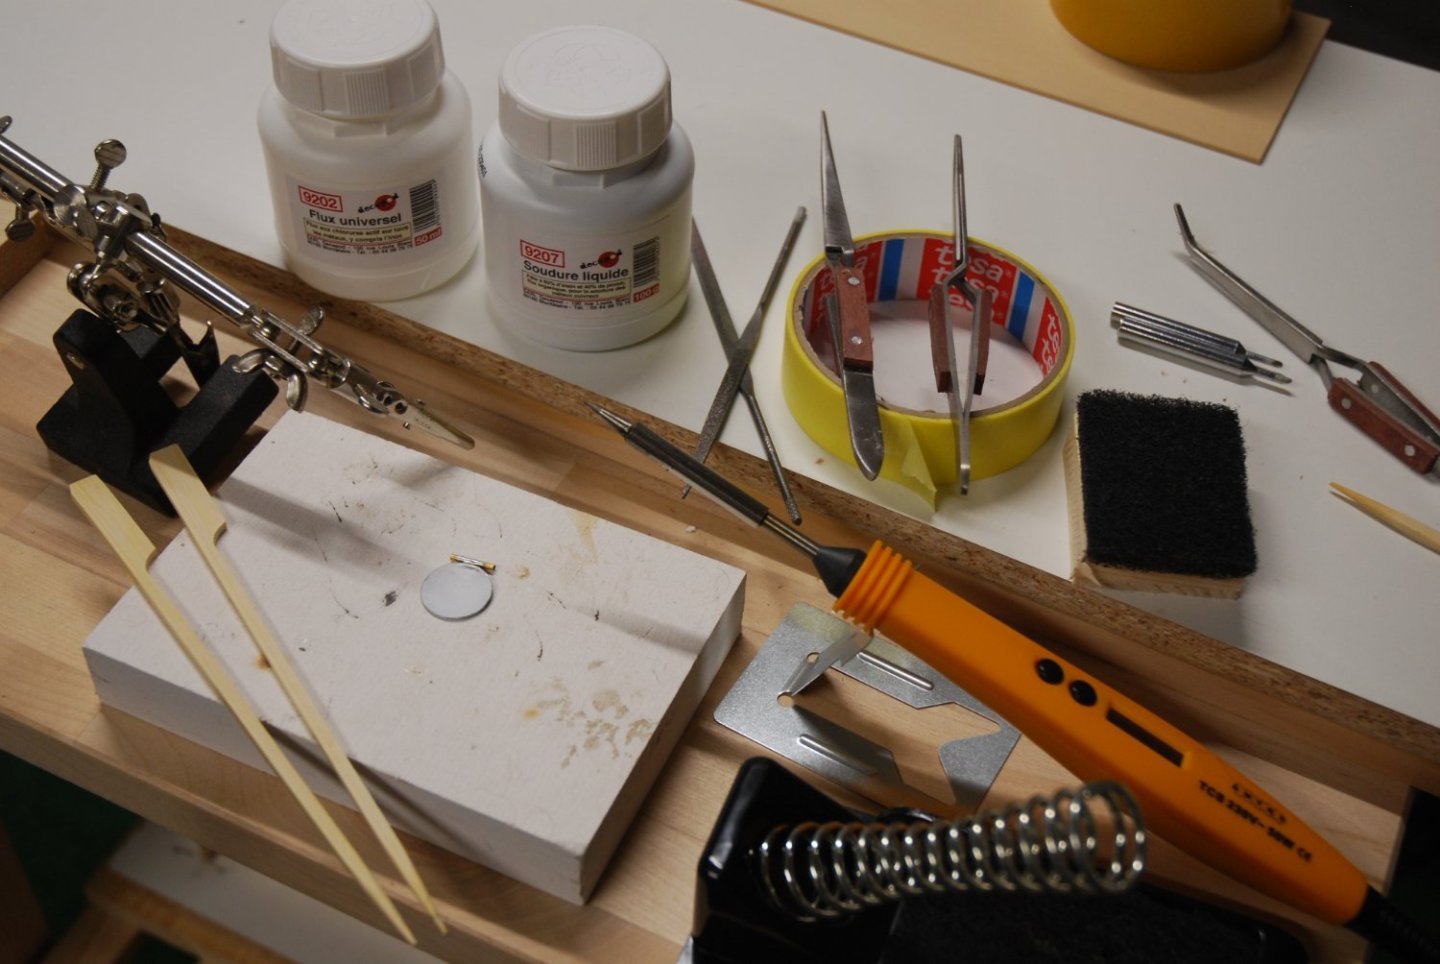
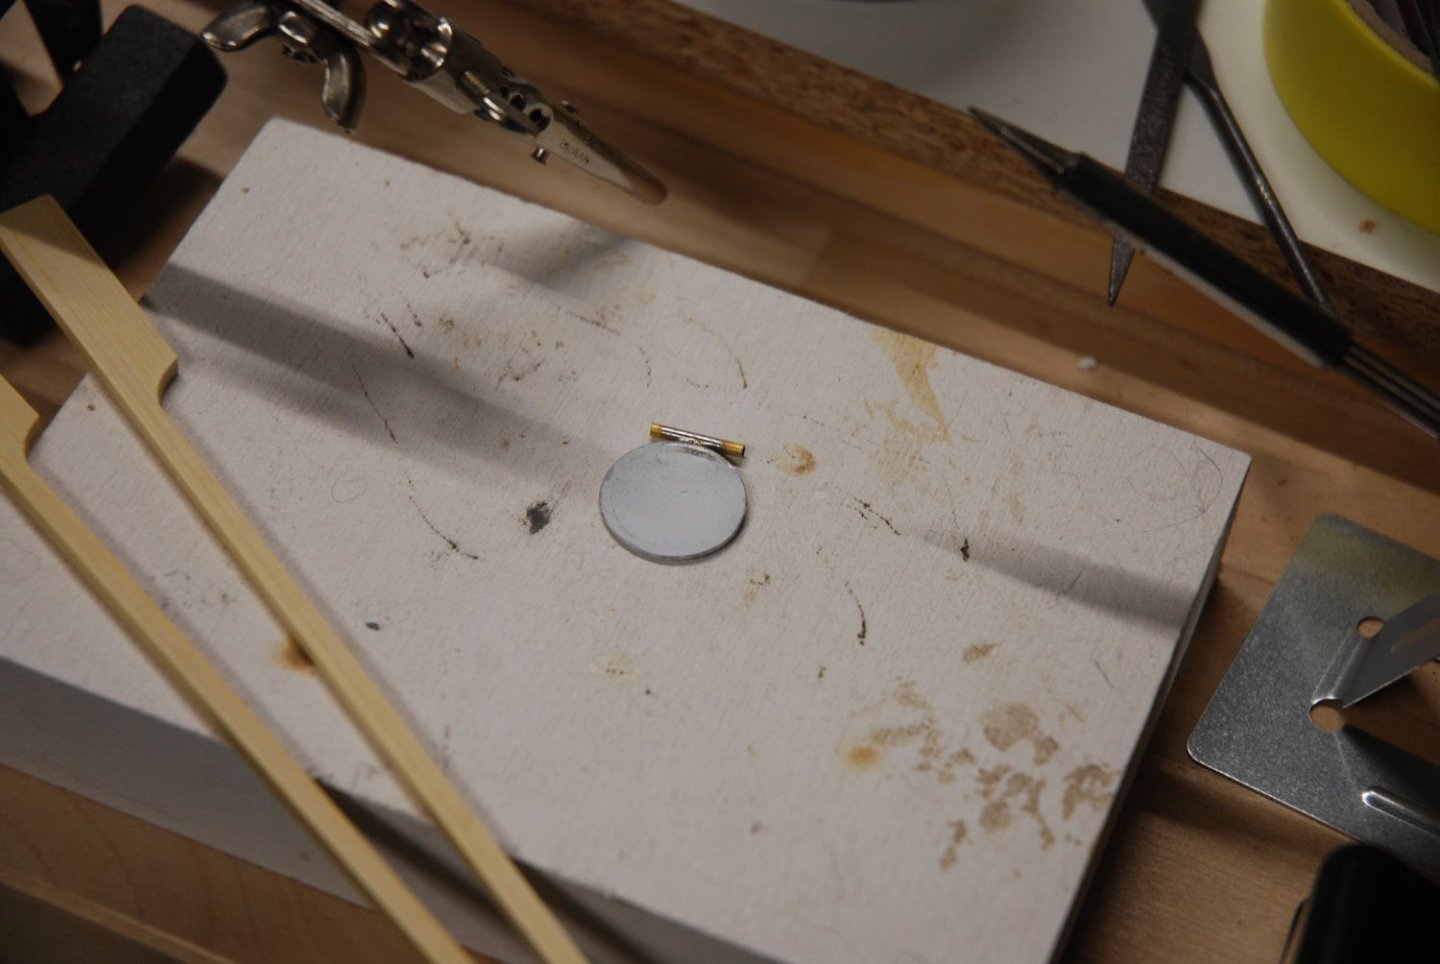
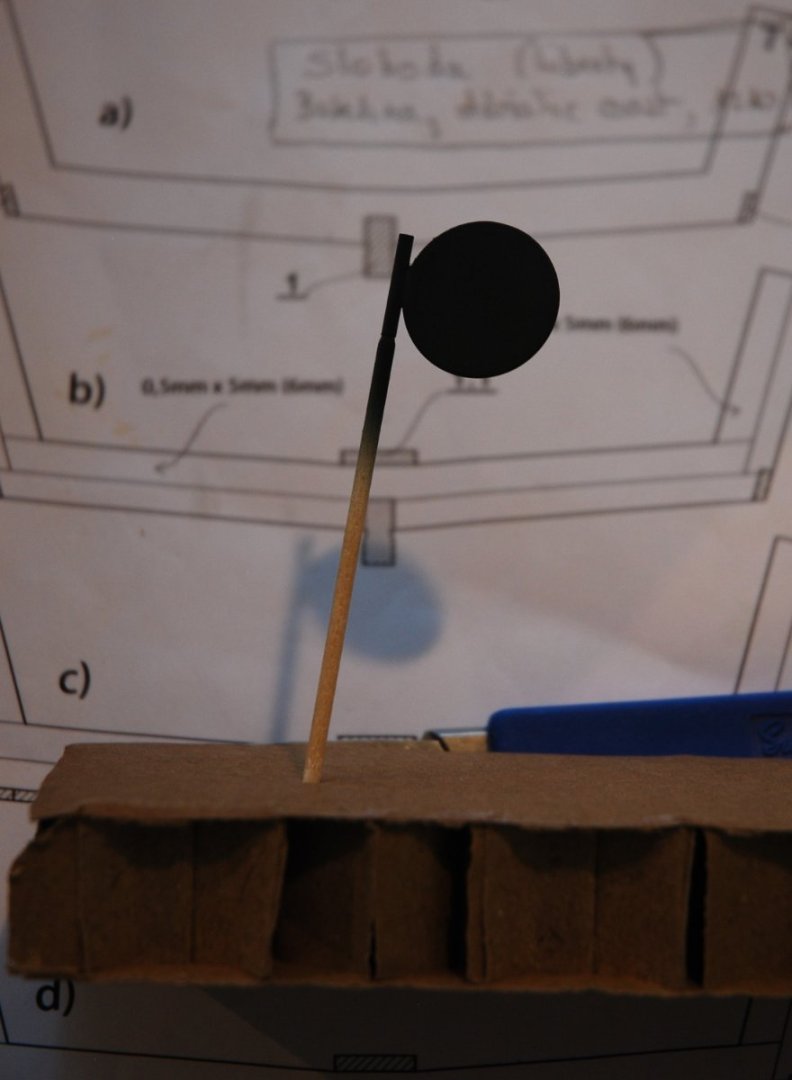
I then decided to add a buoy. I started with a token used in Switzerland to play at lotto parties. This token is perfectly round and, above all, very thin. First, I coated both sides with a thin layer of Mr Surfacer 500, a product used to fill imperfections on plastic models. A little sanding and a thin coat of primer. I then soldered a small section of brass tubing to receive the future shaft. Thanks to the excellent youtube site "Chroniques du blindage", I was able to discover an excellent product for model soldering. It's liquid solder from Decapod. On the youtube site, there are two excellent videos explaining the method used to weld photo-etched on plastic models. One shows how Emilien Pépin, editor-in-chief of Steelmasters magazine, works, and the other was published by Max Lemaire, a well-known model builder in the tank modelling world. It was they who introduced me to the Decapod brand. Airbrushed black undercoat, then painted. The barrel is a Chuck product and, like all Syren brand fittings, it is absolutely perfect. A small test of the temporary positioning of the various elements. I still have to work on the oars of the boat. To be continued shortly..


- 57 replies
-
- 5
-
-
-
- marisstella
- batelina
- (and 1 more)
-
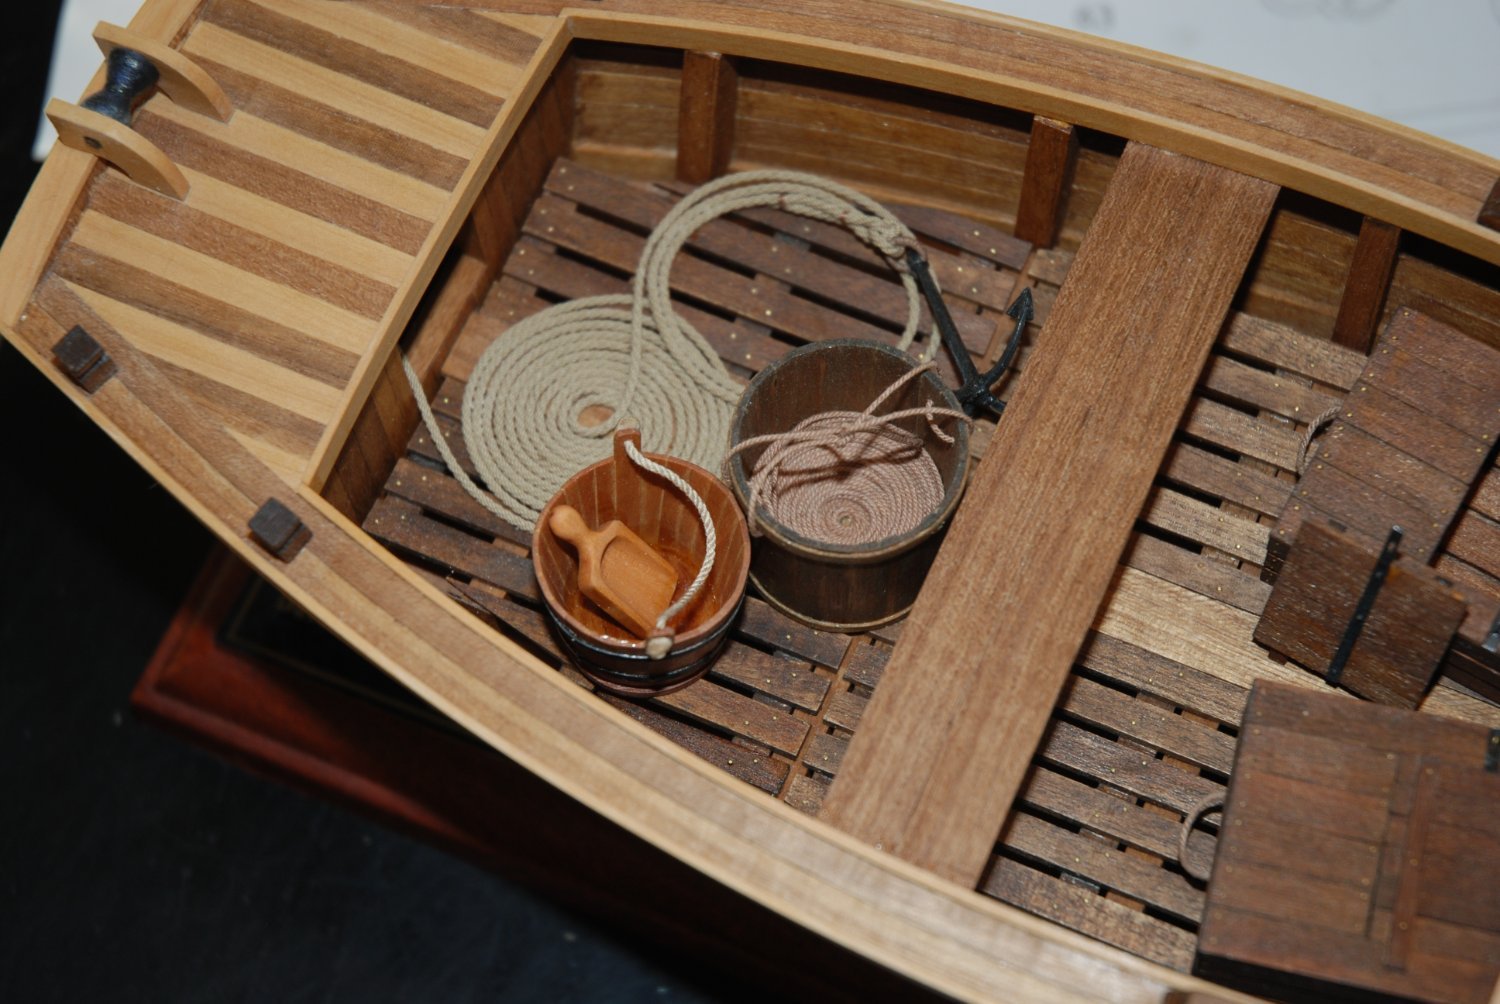
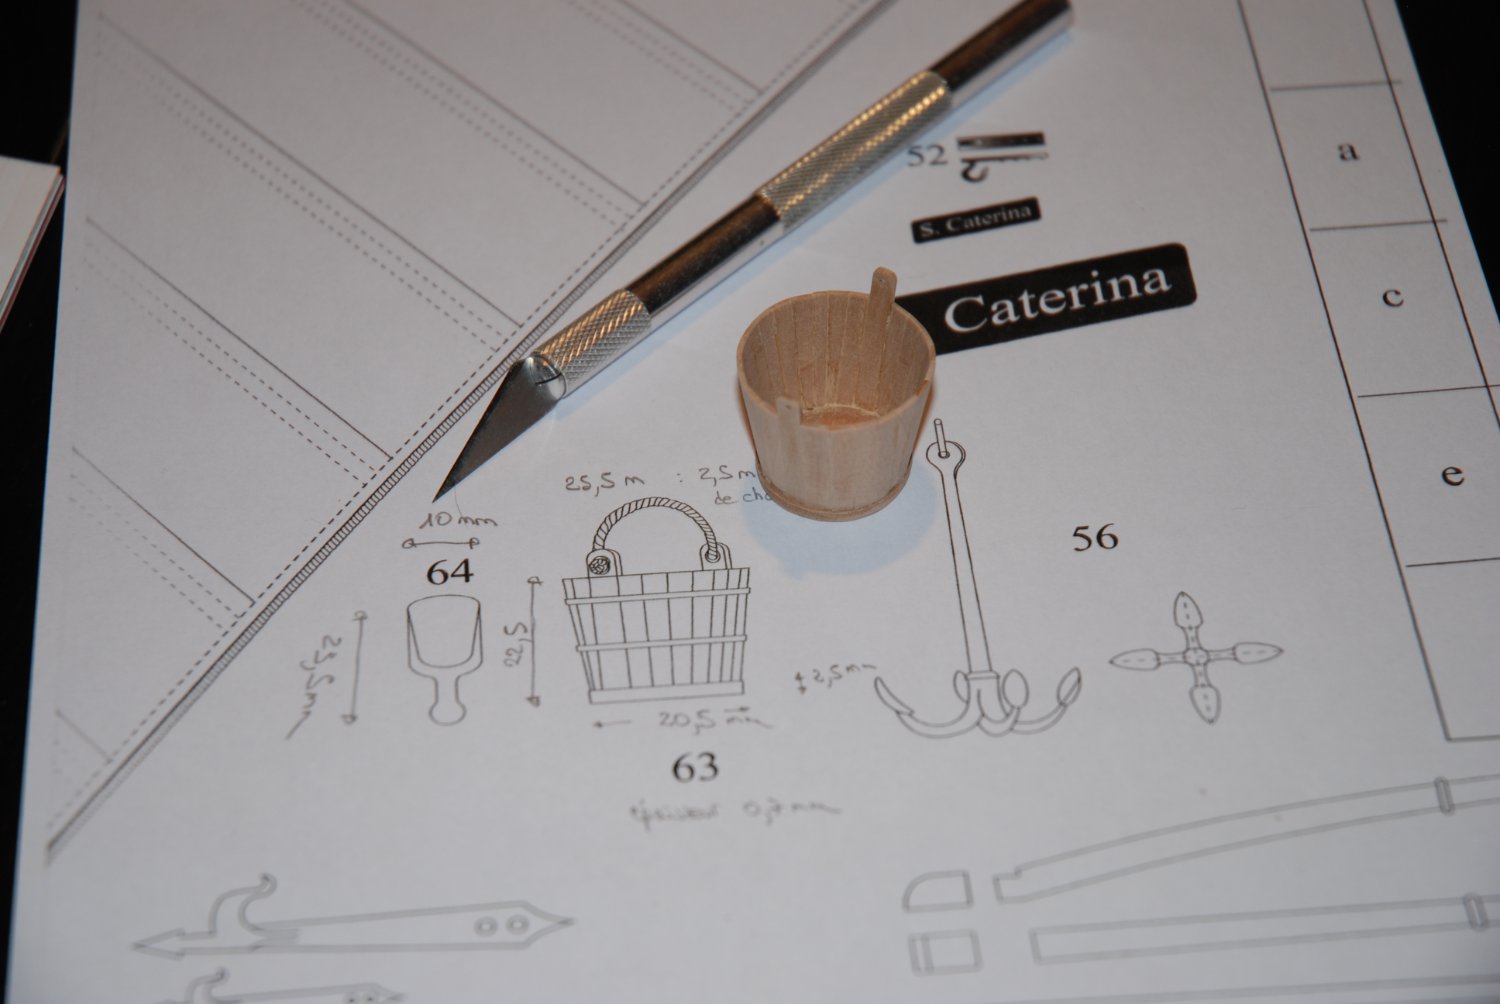
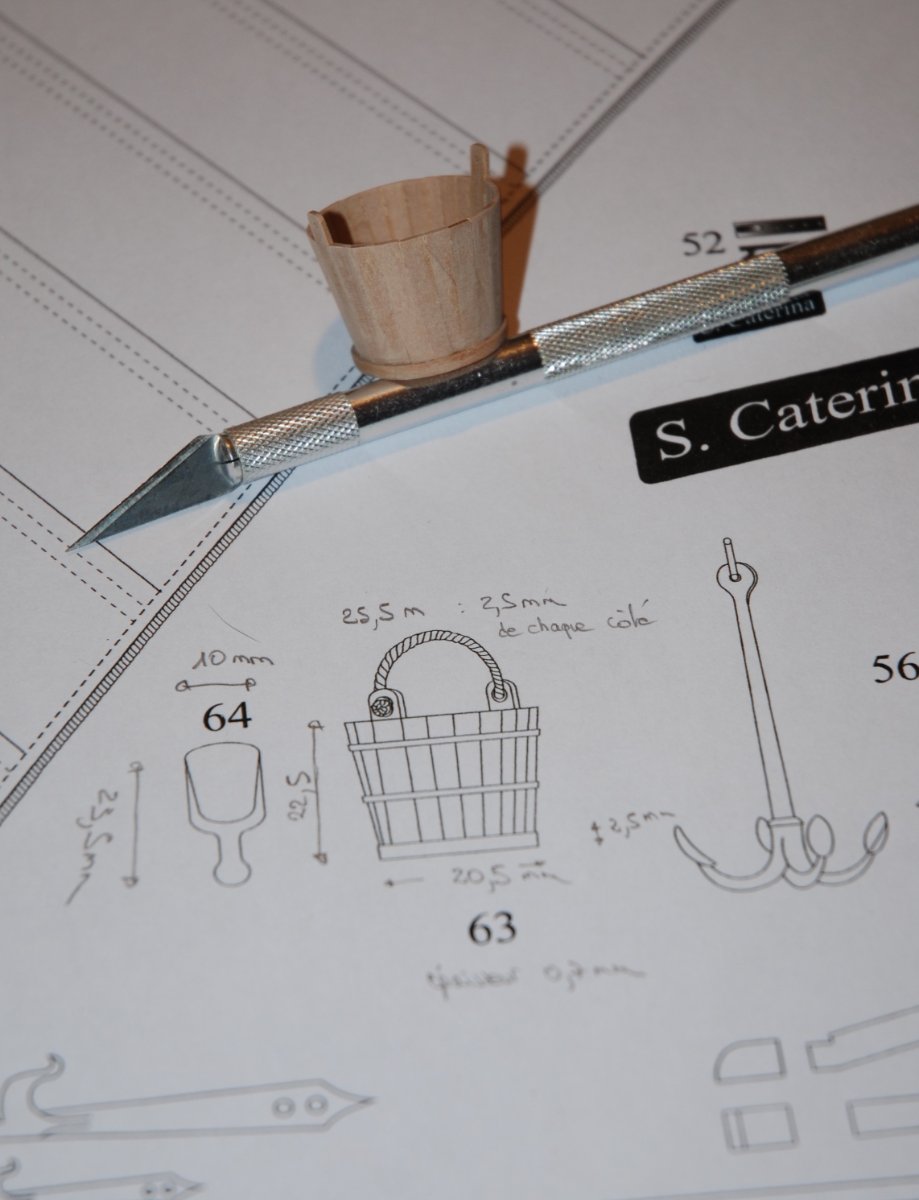
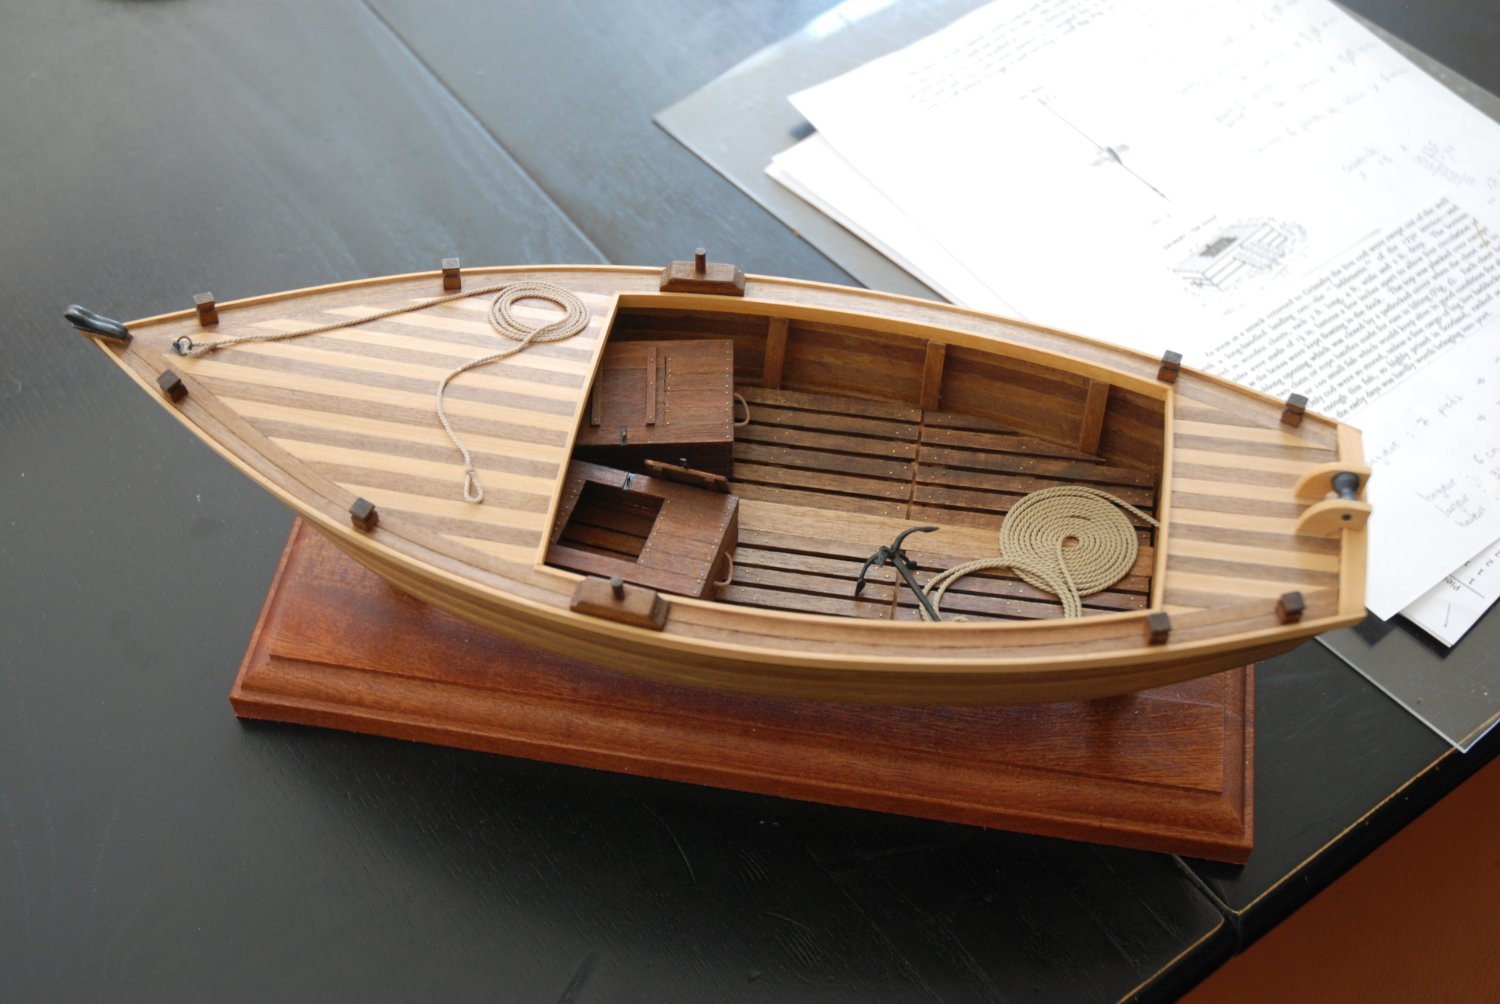
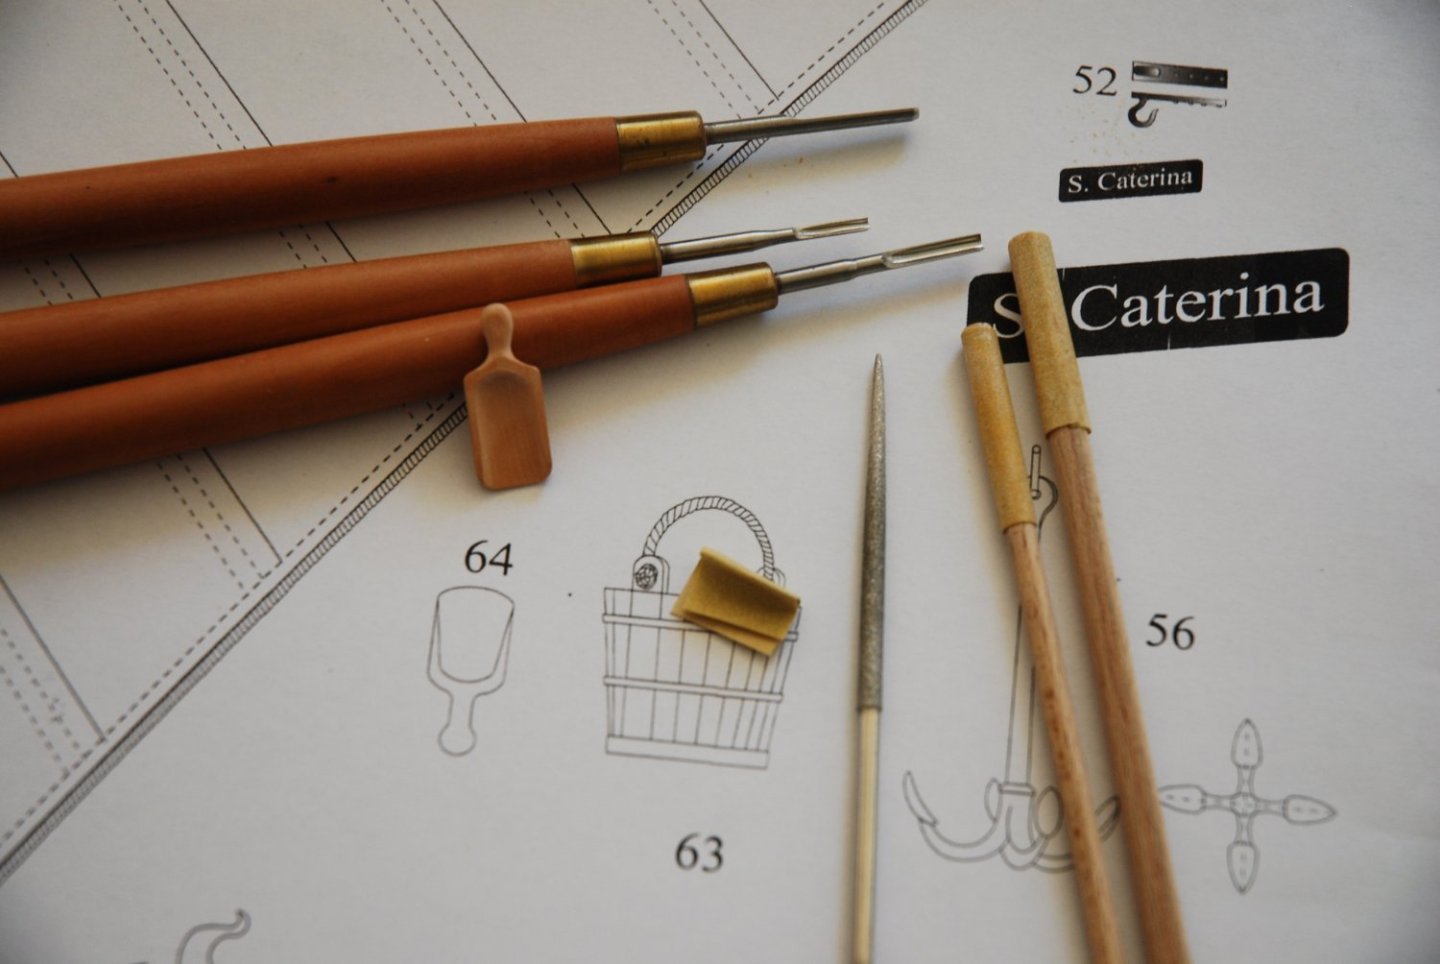
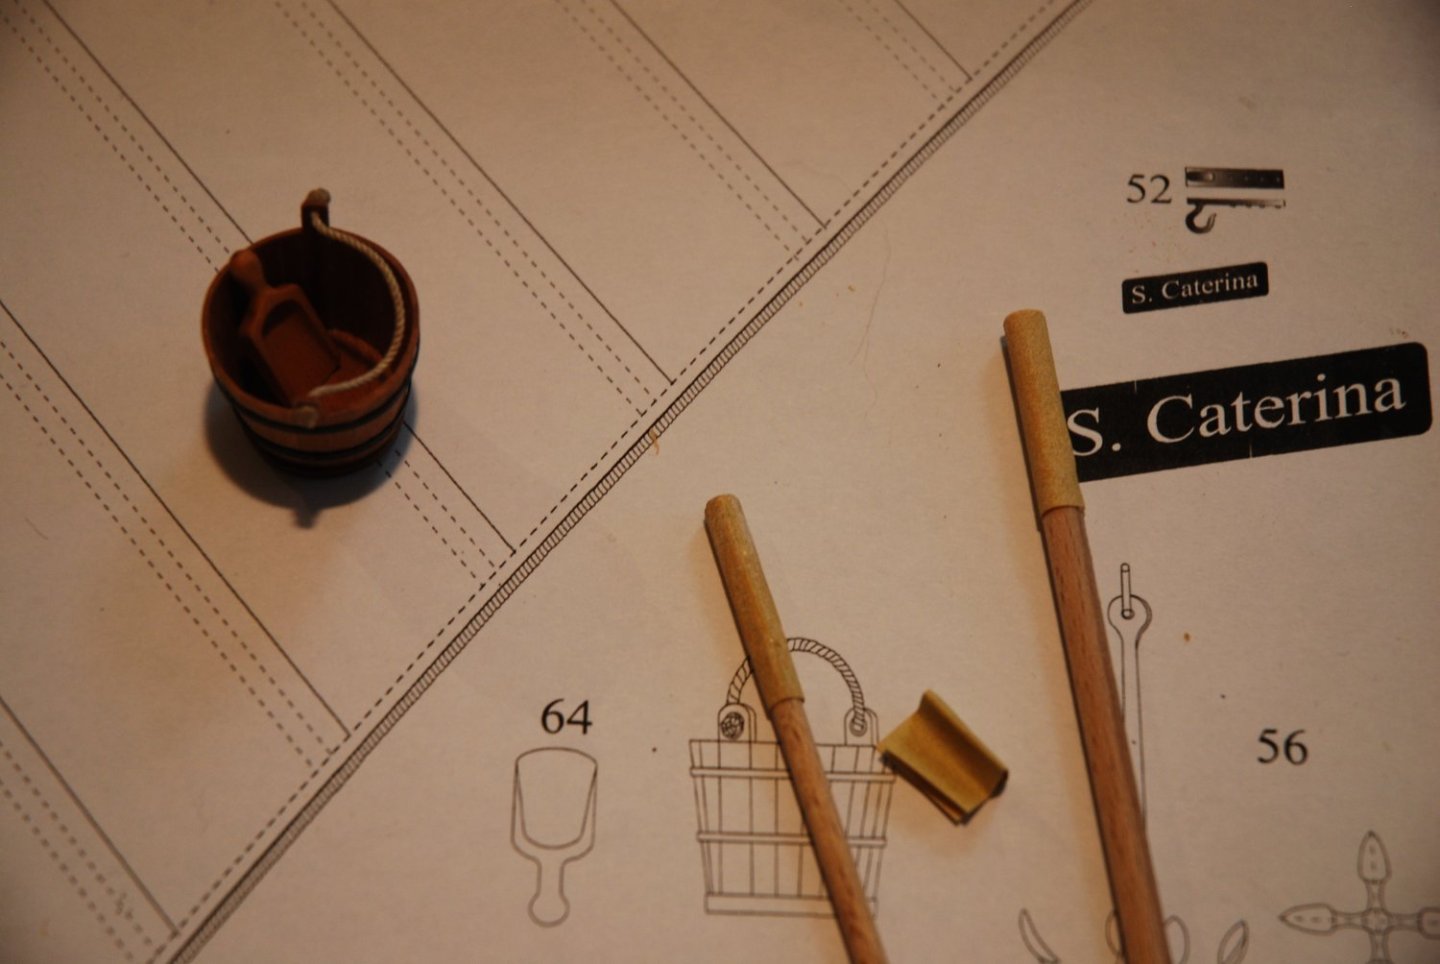
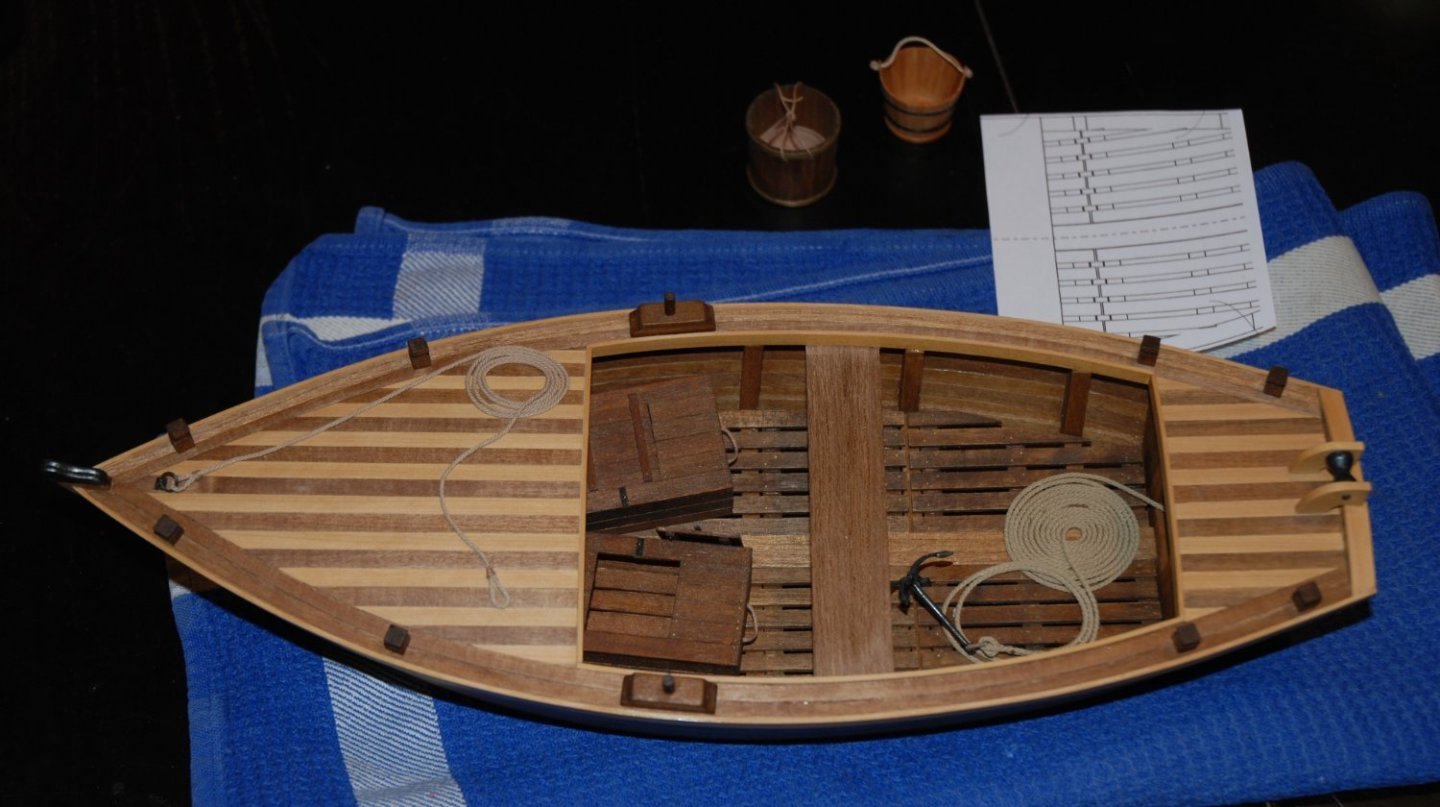
Oh my God, how time flies... Being in my last year of work (I'll be retiring at the end of June 2024), I unfortunately have very little time to devote to my favorite hobby. I'm looking forward, once I retire, to finally having more time to work in my workshop... However, I was able to add a few more details to the final presentation of my Batelina. First, I carved a small scoop to fit inside the bucket. A little resin ('Aqua Magic' from 'Deluxe Materials') was added to the bottom of the bucket to simulate a little standing water. It's very easy to use. Simply pour the liquid product in a thin layer of less than 3mm and leave to harden for 24 hours.

- 57 replies
-
- 5
-
-
- marisstella
- batelina
- (and 1 more)
-
As beautiful and precise as ever. It's a wonderful model that comes out of your hands. Well done!
-
Congratulations, this is a fantastic ship model. I had a lot of fun following its construction. Thank you for sharing your tips and tricks. It's a great help.
- 589 replies
-
- 1
-
-
- le gros ventre
- cargo
- (and 1 more)
-
It's really a magnificent piece of planking work. Taking your time always pays off! Bravo
-
Great model! A very interesting subject for a more than magnificent result with a lot of details and a perfect selection of wood species. Thanks for sharing.
-
Beautiful model, Rusty. I love the warmth of this wood species. This is absolutely a fantastic Winchelsea !
- 642 replies
-
- 3
-
-
- winchelsea
- Syren Ship Model Company
- (and 1 more)
-
Beautiful work Glenn ! Always so precise and perfect! And full of good advice. Thank you !
- 840 replies
-
- 3
-
-
- winchelsea
- Syren Ship Model Company
- (and 1 more)
-
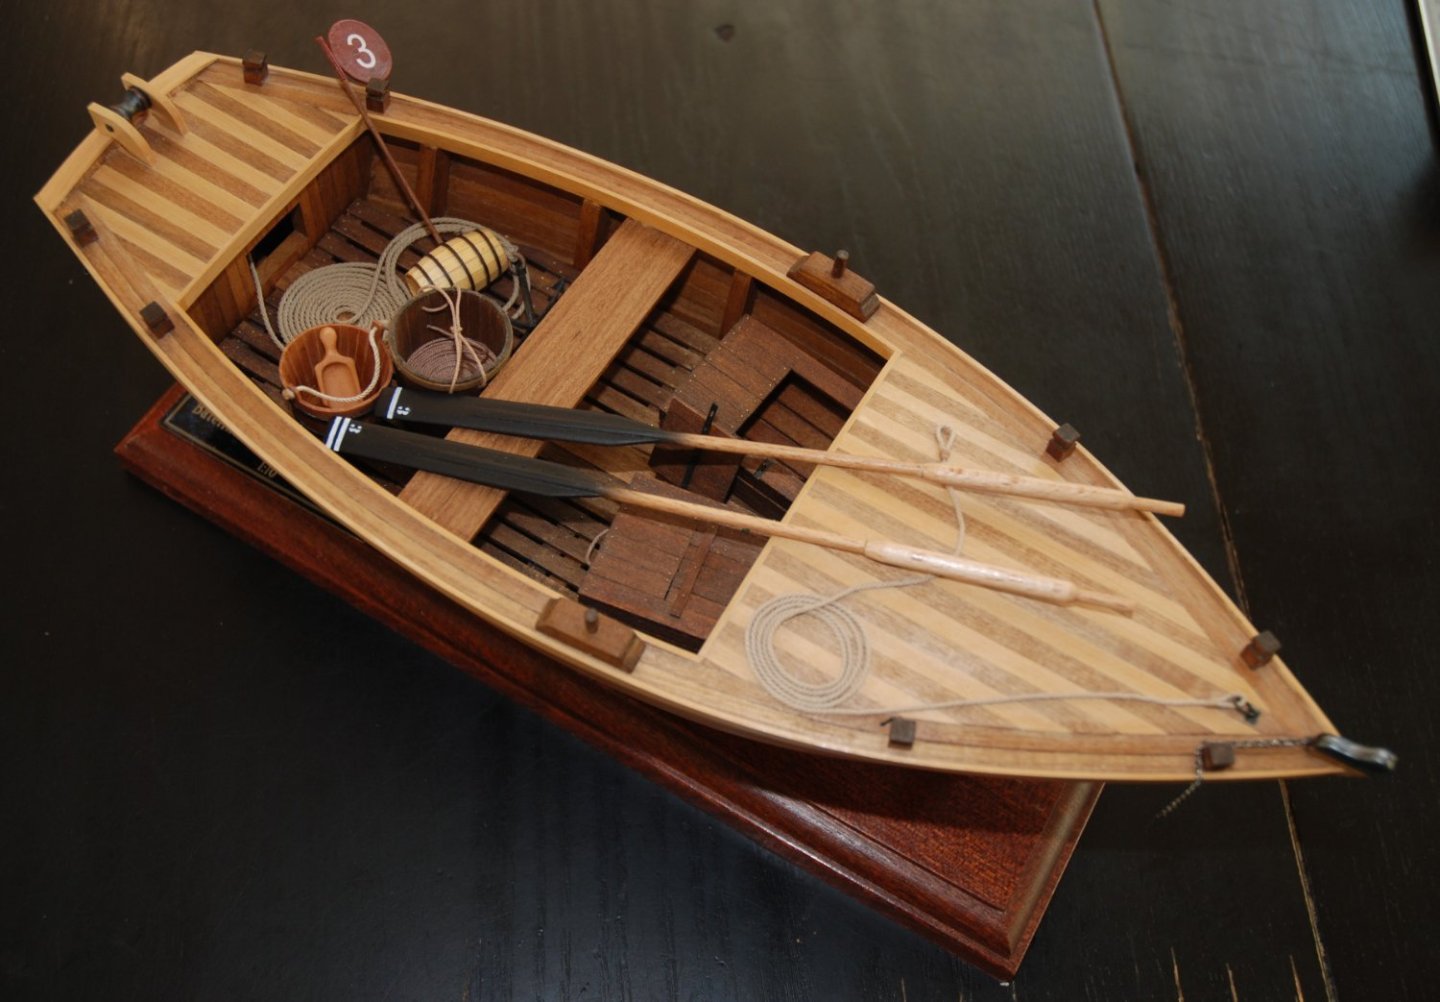
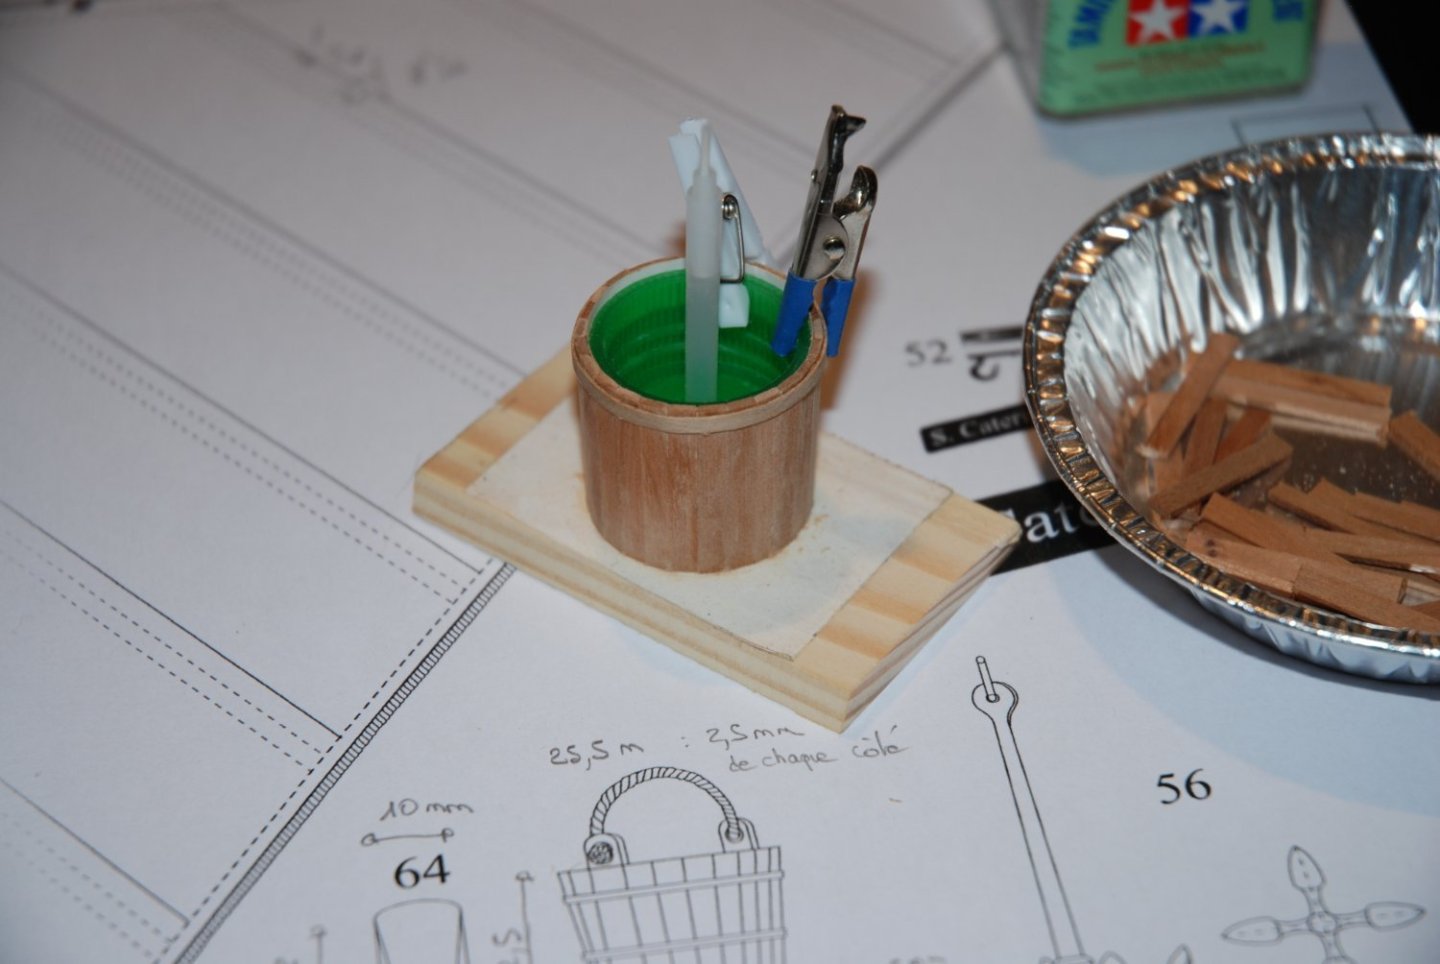
Thank you to all the 'Likes'. I finished the finishing touches on both buckets. I first added the bucket strapping and drilled the holes for the rope. Then I stained the wood. I then added the line using the very nice Syren light brown rigging rope (.025) Finally I added the thwart using a copy of the plan to position it precisely. I'm getting closer to the end. I will be able to position the two buckets and add a marker buoy. I will finally have to make the oars...

- 57 replies
-
- 8
-
-
- marisstella
- batelina
- (and 1 more)
-
These scarf joints are absolutely perfect ! Excellent work 👍
-
Superb model. You can be proud of the result. It is really a very nice longboat !
- 155 replies
-
- 2
-
-
- Medway Longboat
- Syren Ship Model Company
- (and 1 more)
-
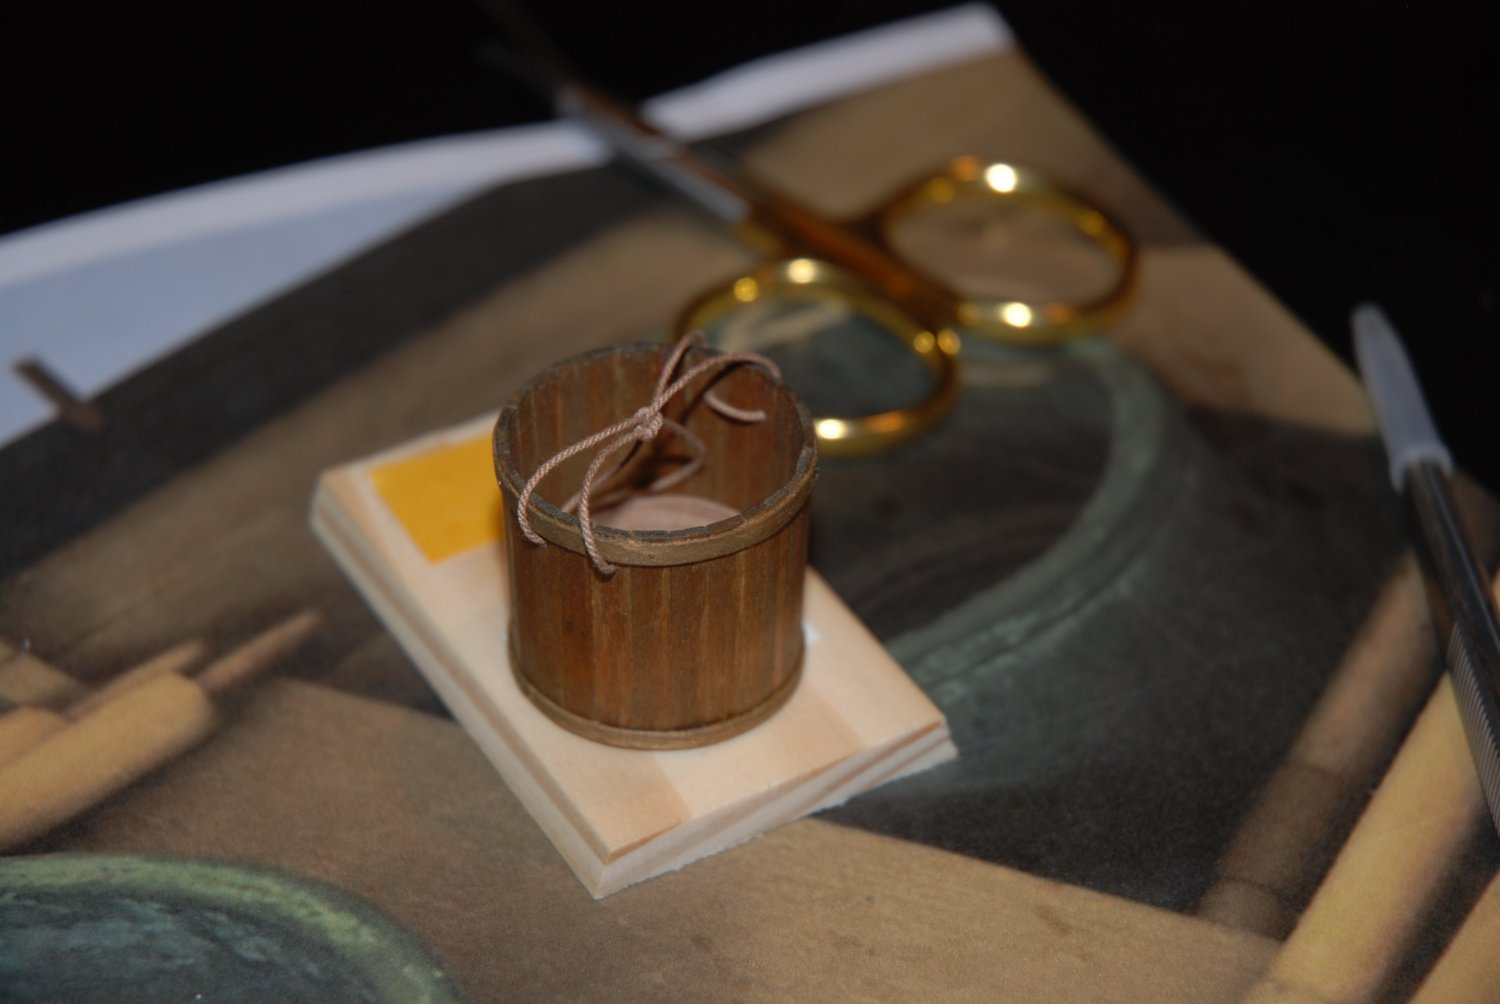
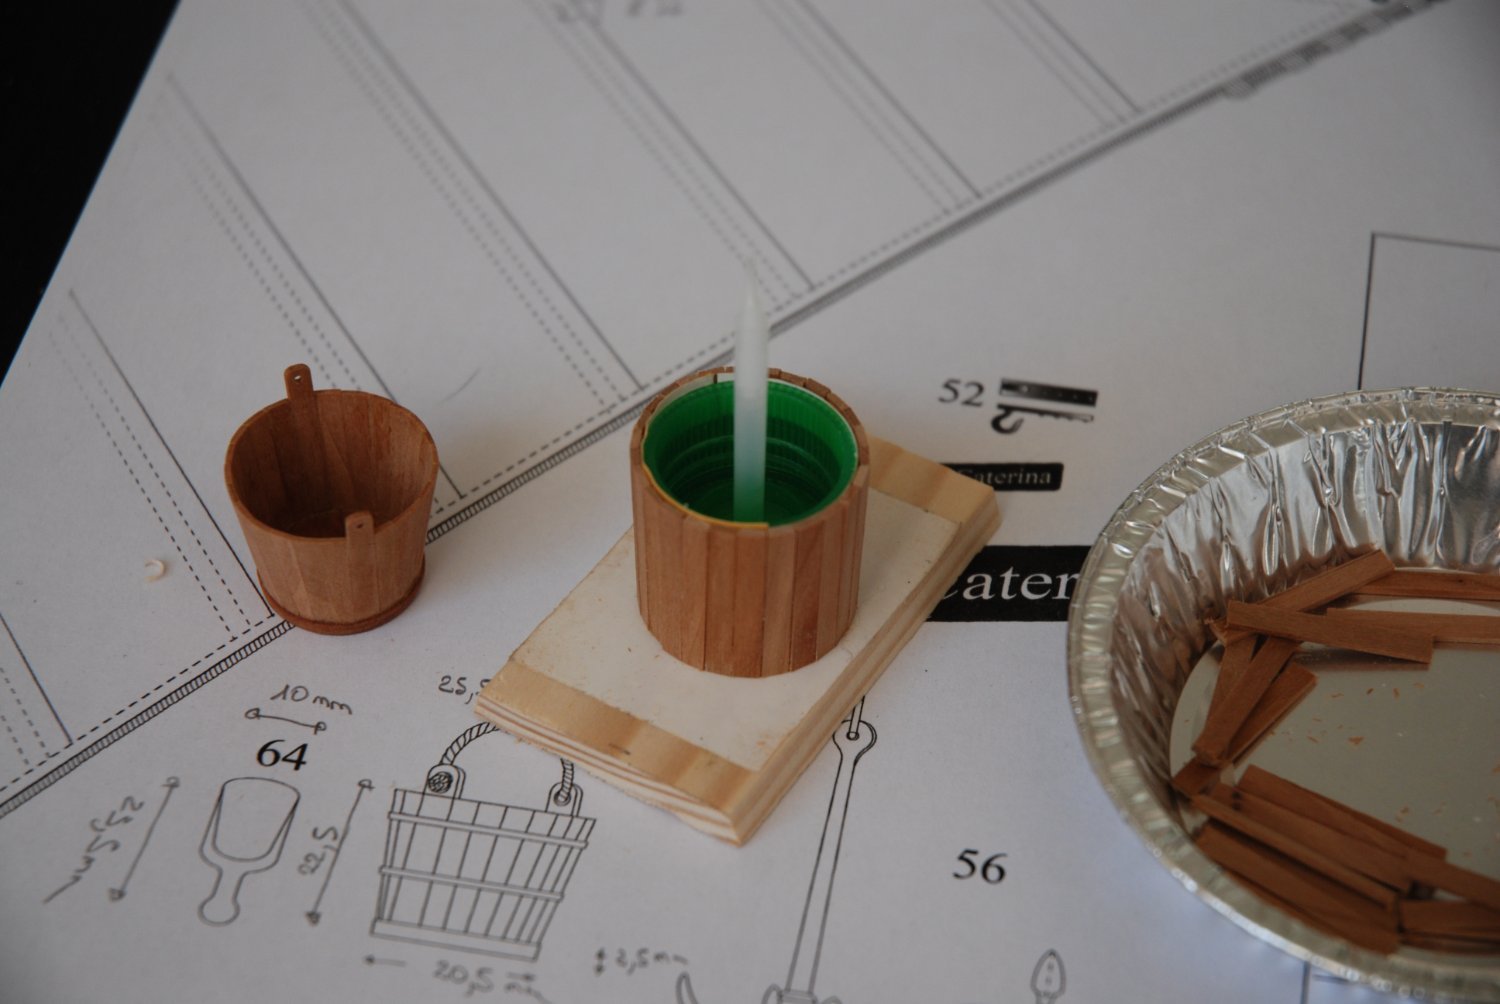
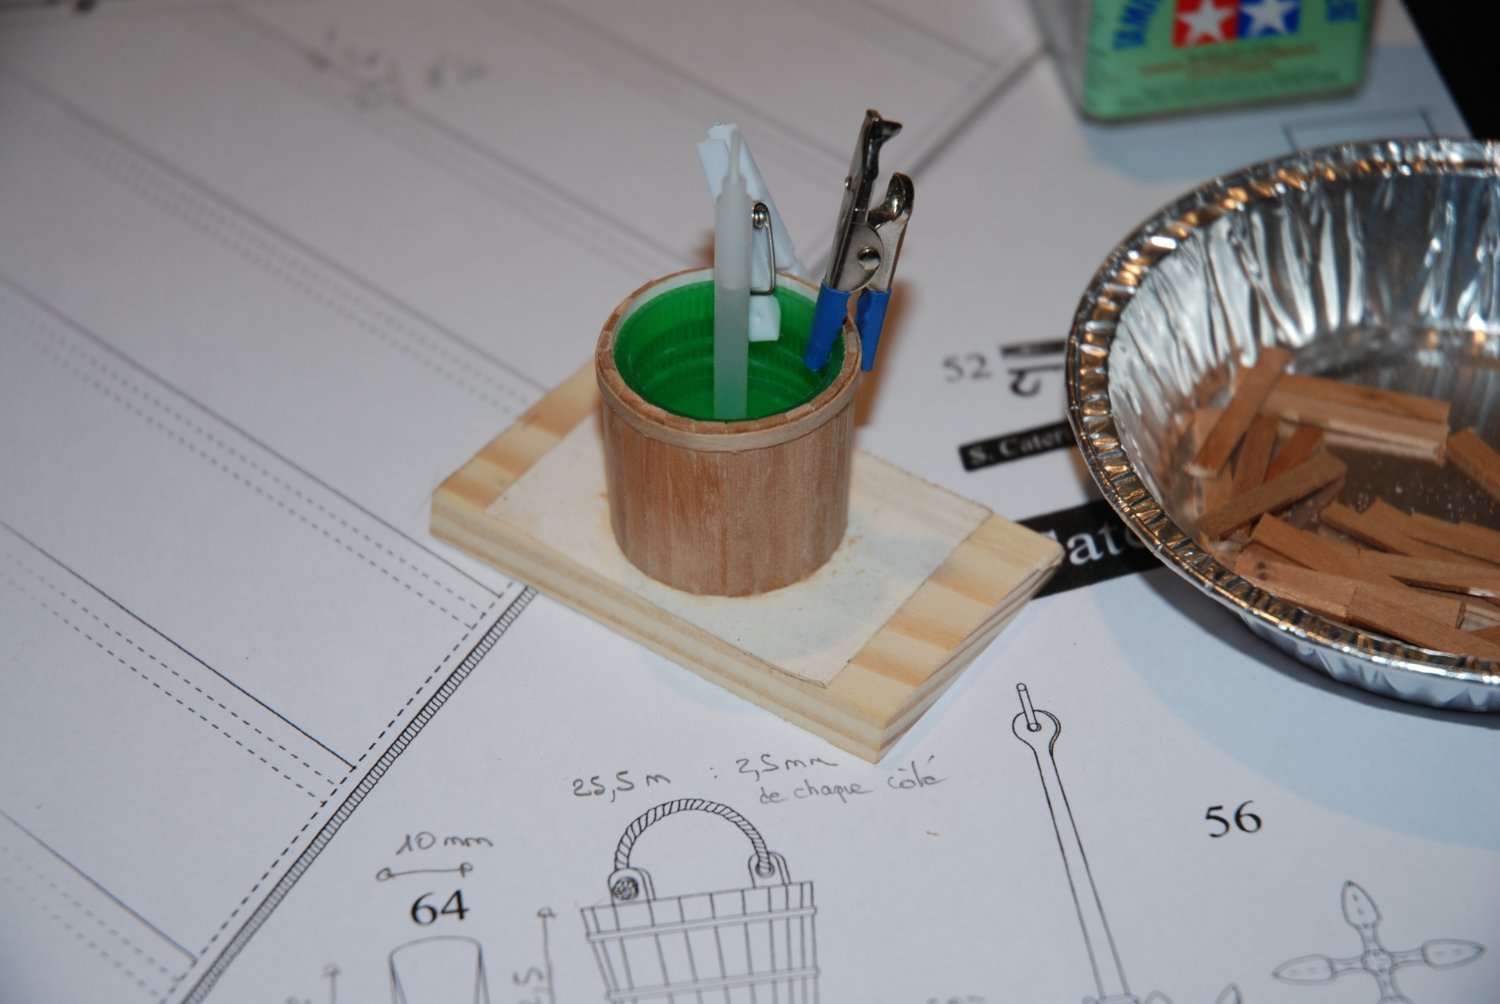
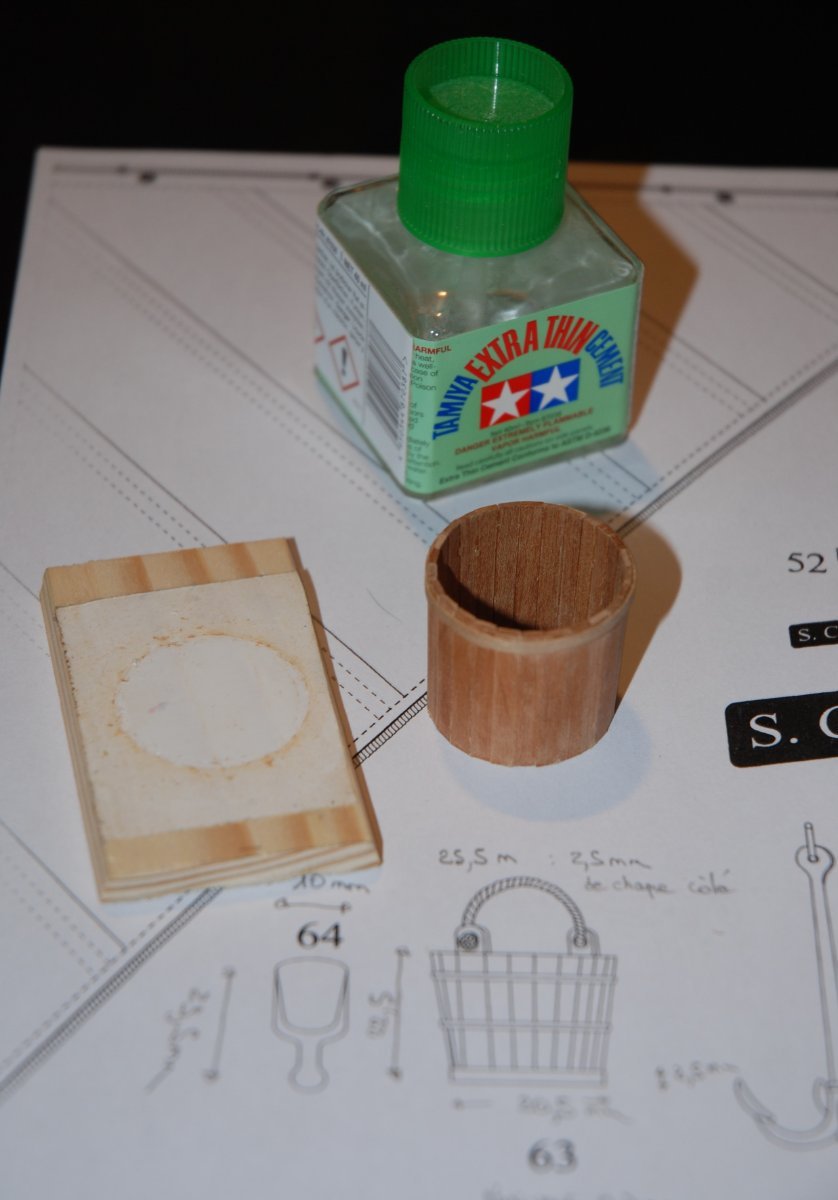
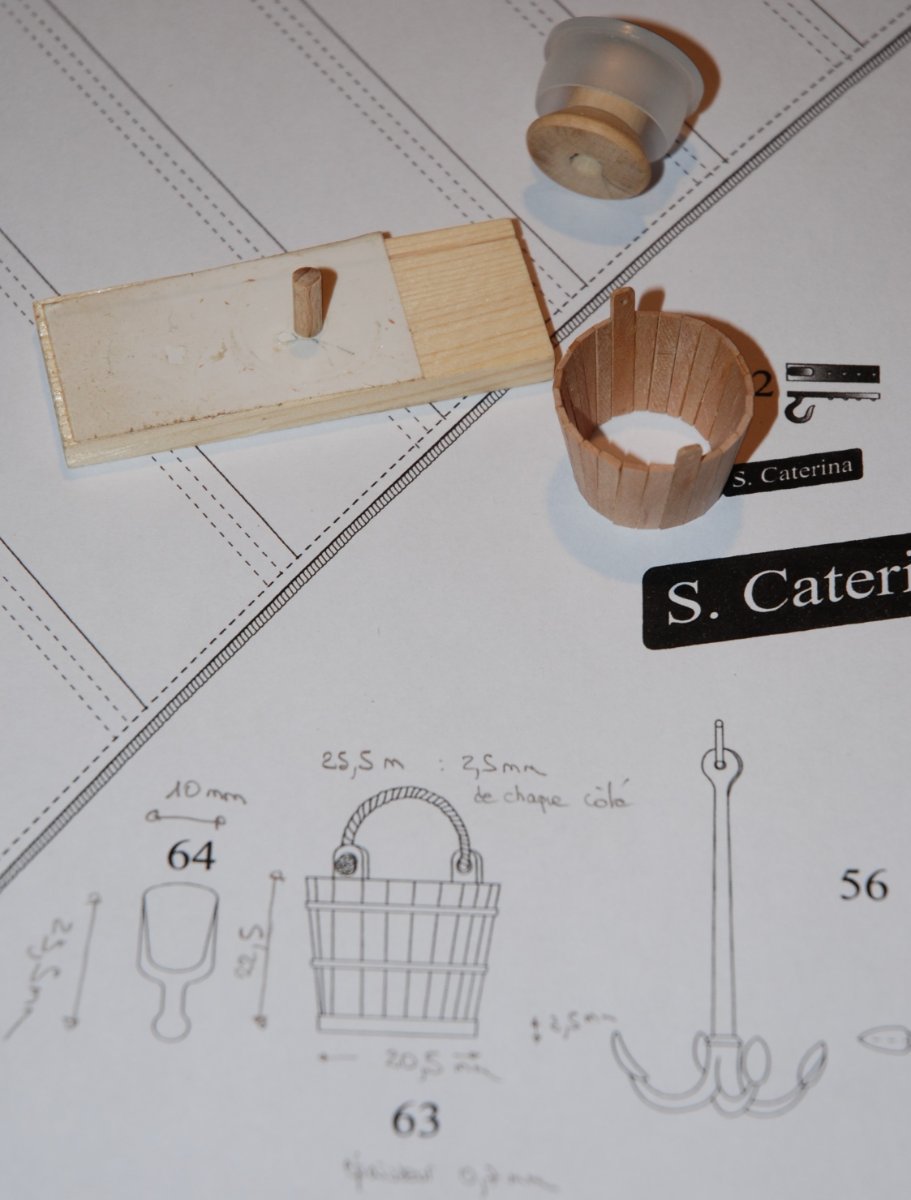
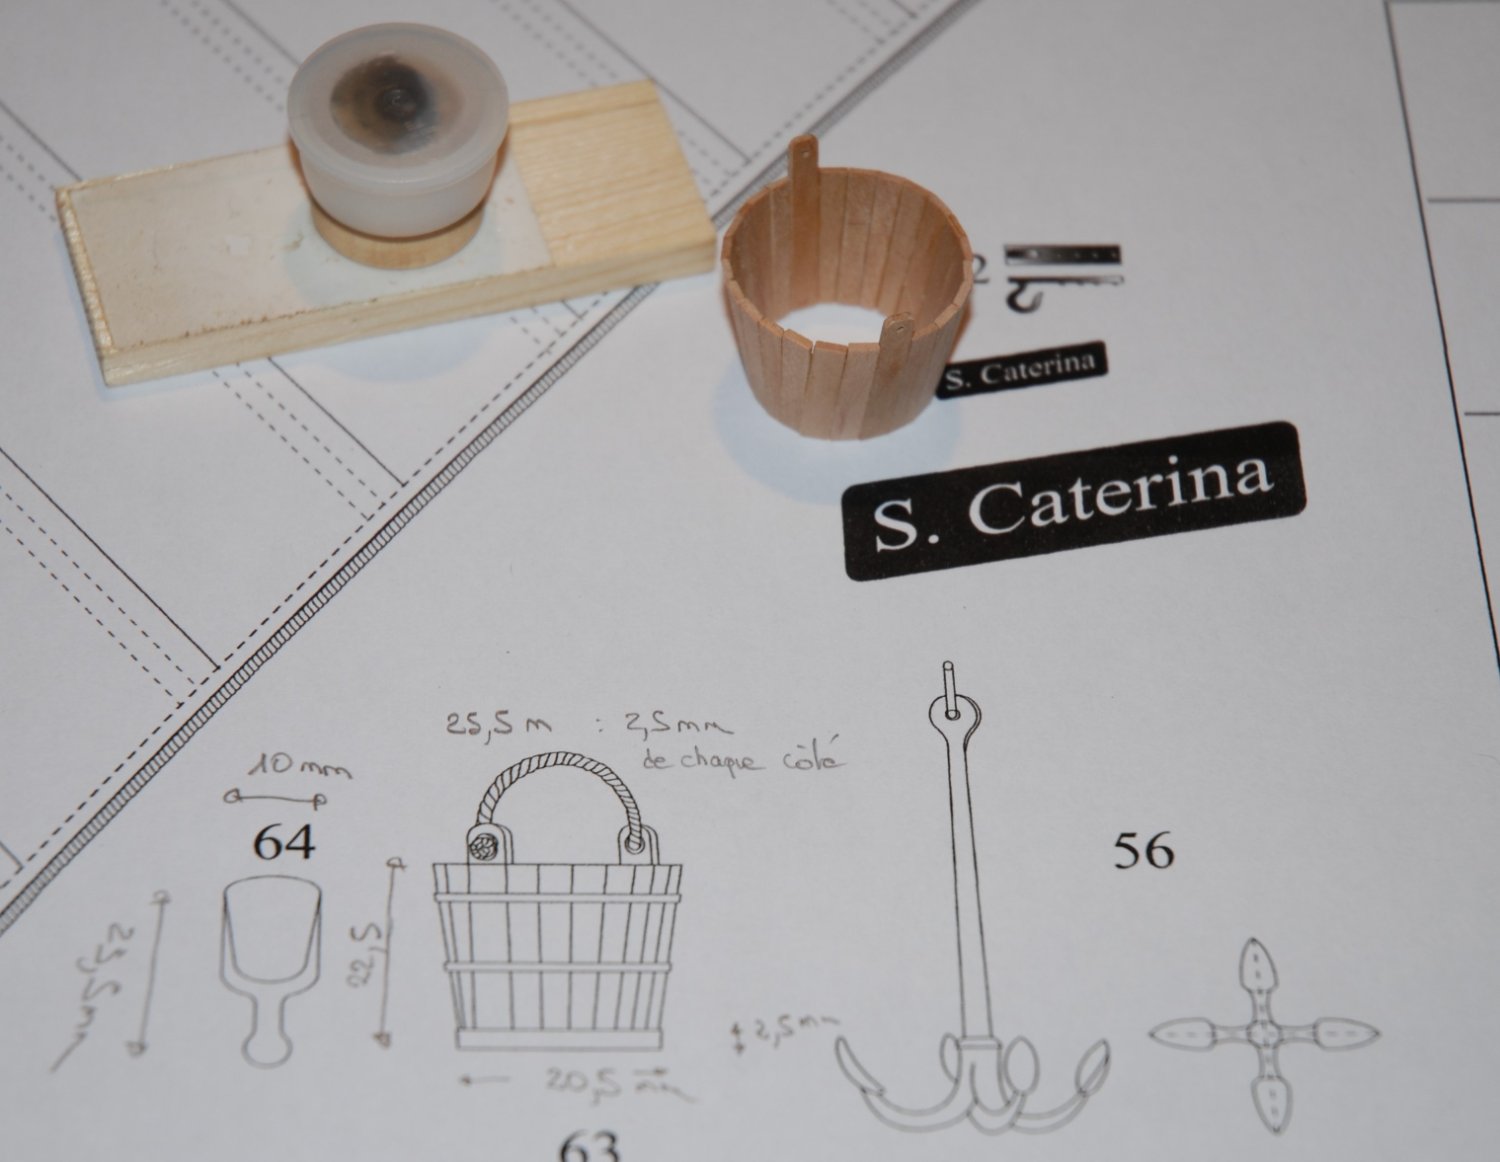
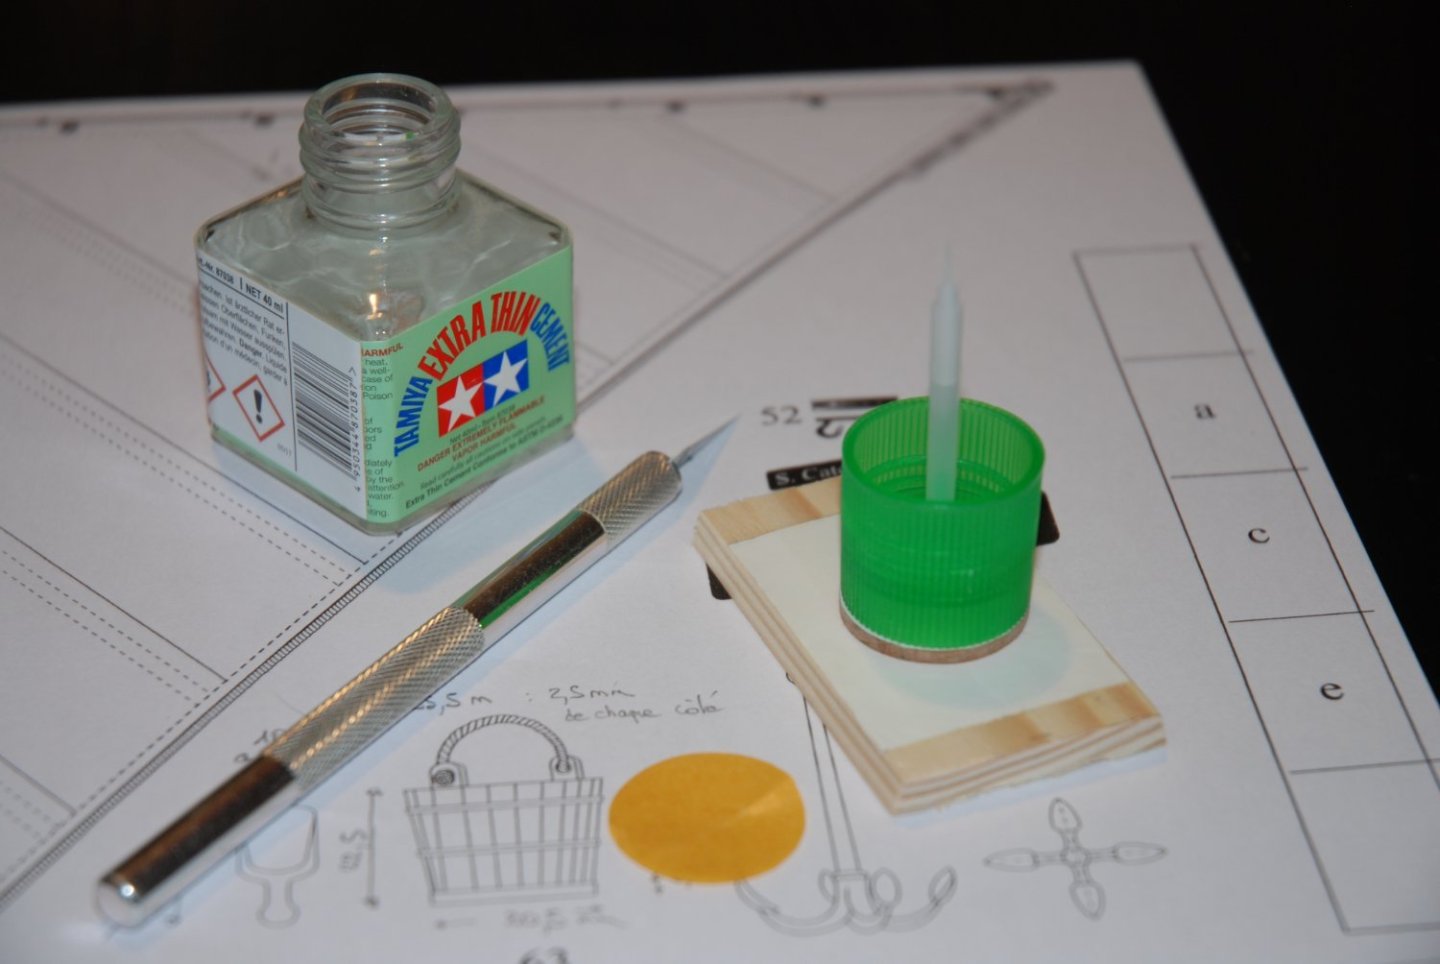
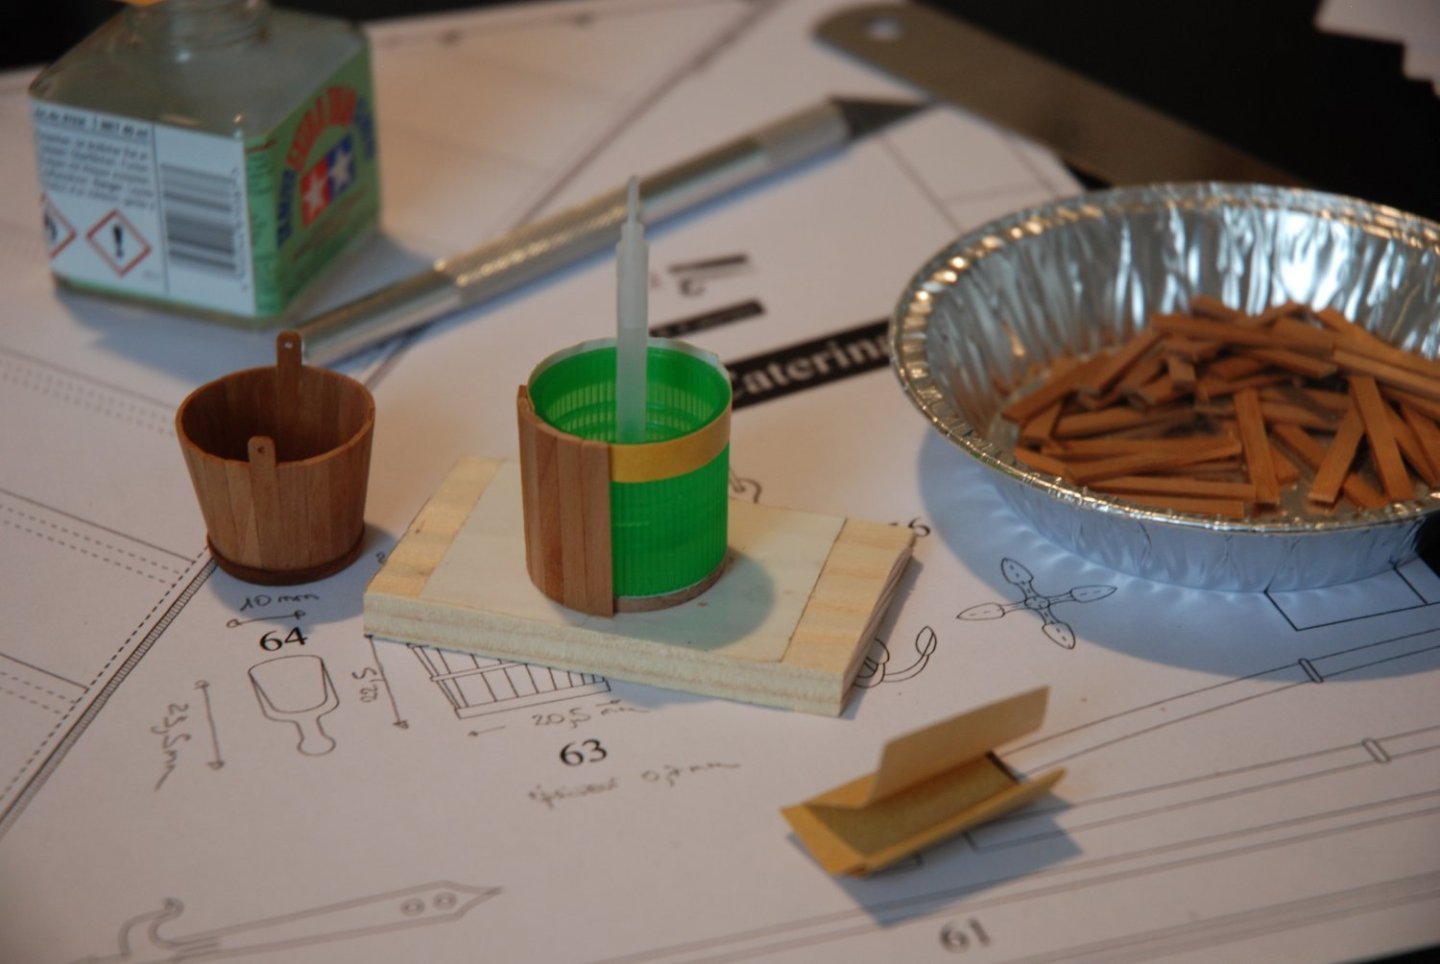
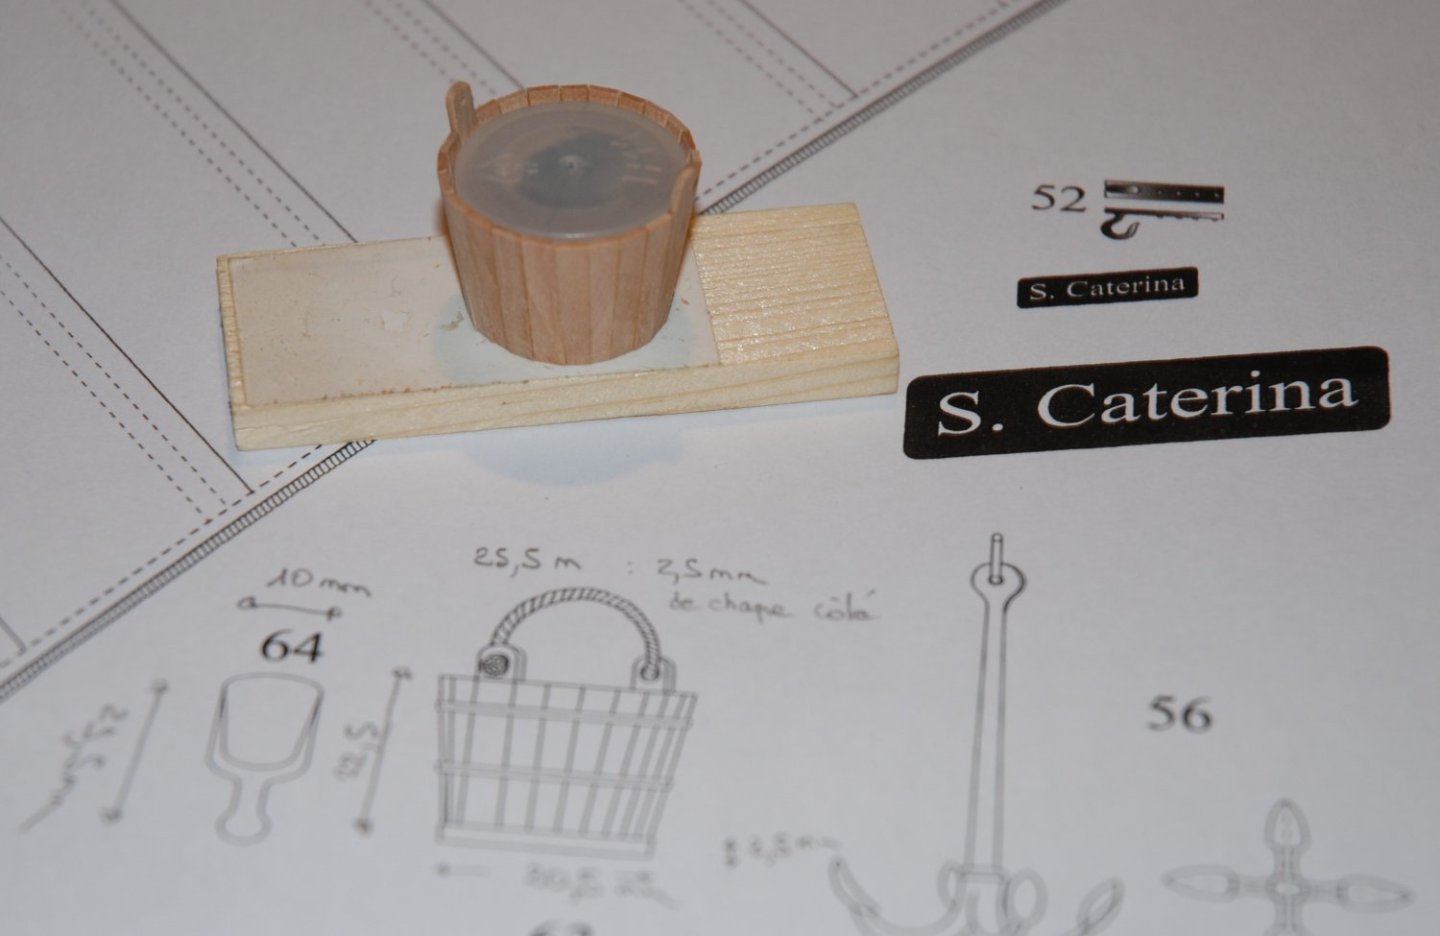
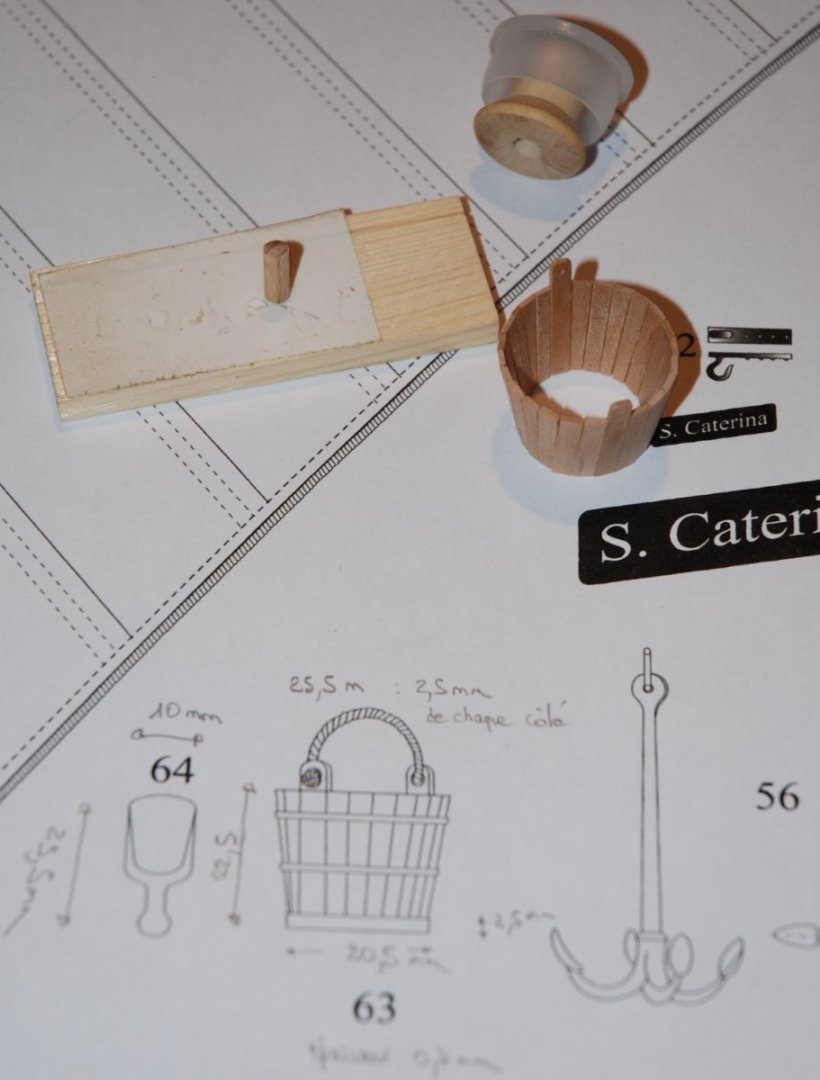
Thank you to all the 'Likes' and for your kind words. As decided, I focused on building a bucket to unroll the fishing lines. As luck would have it, the cap from an empty glue jar was exactly the right size and shape for the bucket. So I started by cutting the bottom of the bucket out of a pear sheet and gluing it to a wooden board with double-sided scotch. The glue cap is also temporarily glued to the bottom of the bucket with double-sided tape. This will prevent it from moving during the installation of the small strips. A small strip of paper is placed at the top of the cap to give the bucket a very slight flared shape. Then I glue one by one the strips after having each time slightly sanded their edge to give a small angle to facilitate the gluing of the strips between them. And finally all the strips are glued. I still have to extract the cap of the glue jar, but before that... A thin strip of wood is glued to the top of the bucket to represent the strapping. The cap of the glue pot has regained its original function. I still have to put the strapping at the bottom of the bucket and drill the holes for the line but the result is already quite satisfactory.


- 57 replies
-
- 5
-
-
- marisstella
- batelina
- (and 1 more)
-
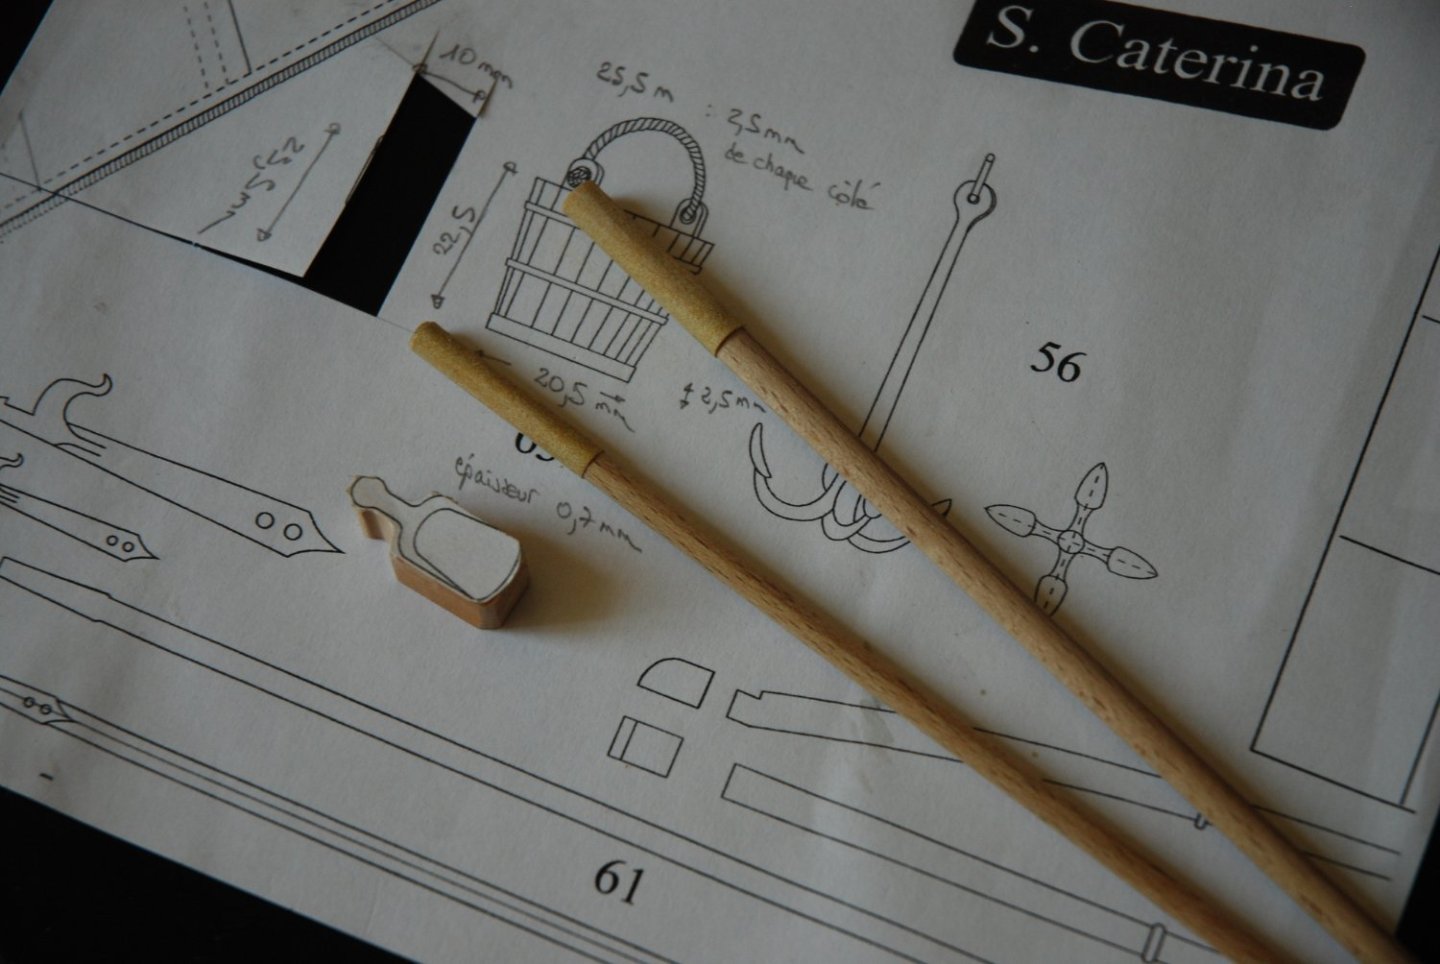
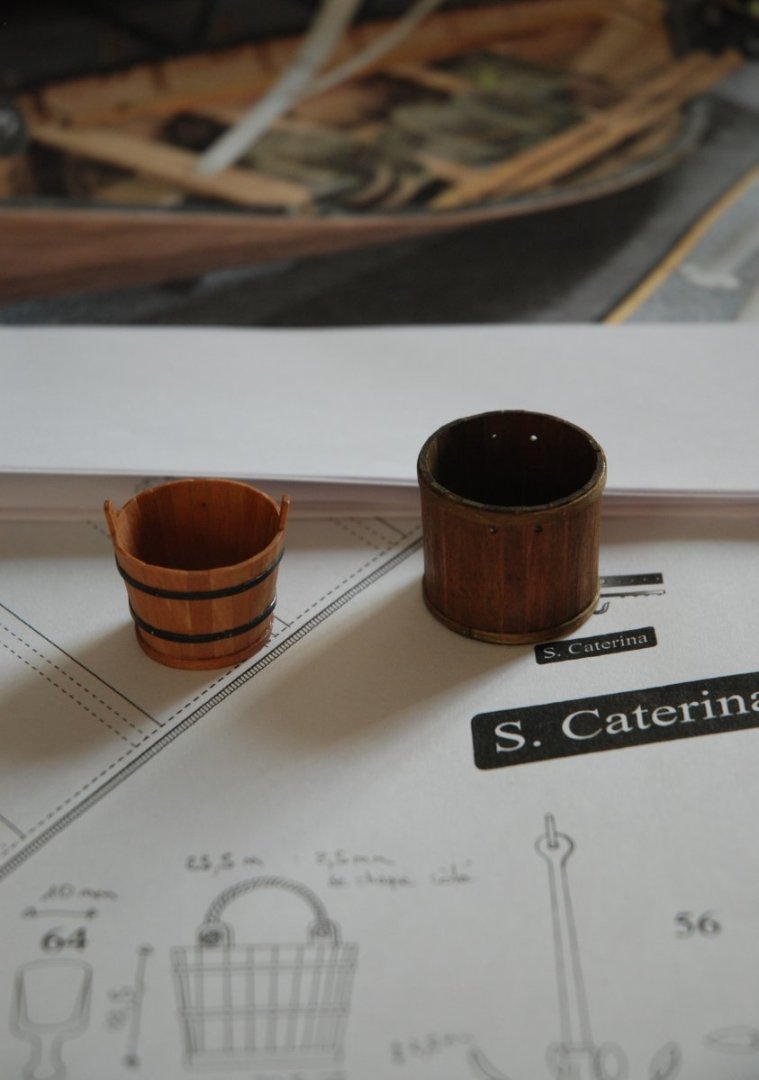
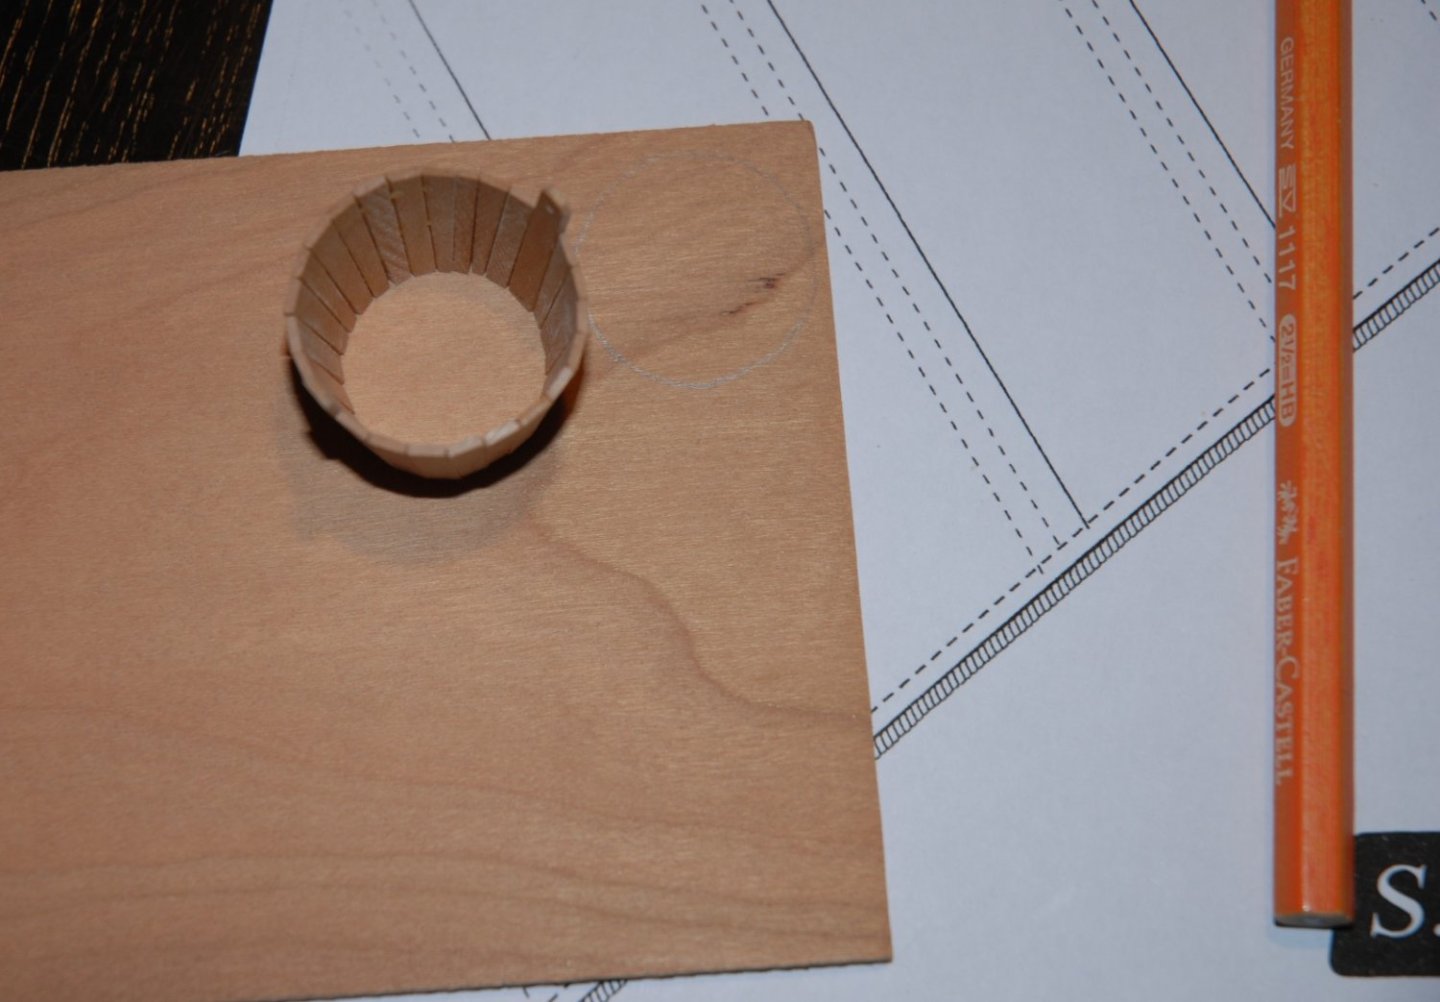
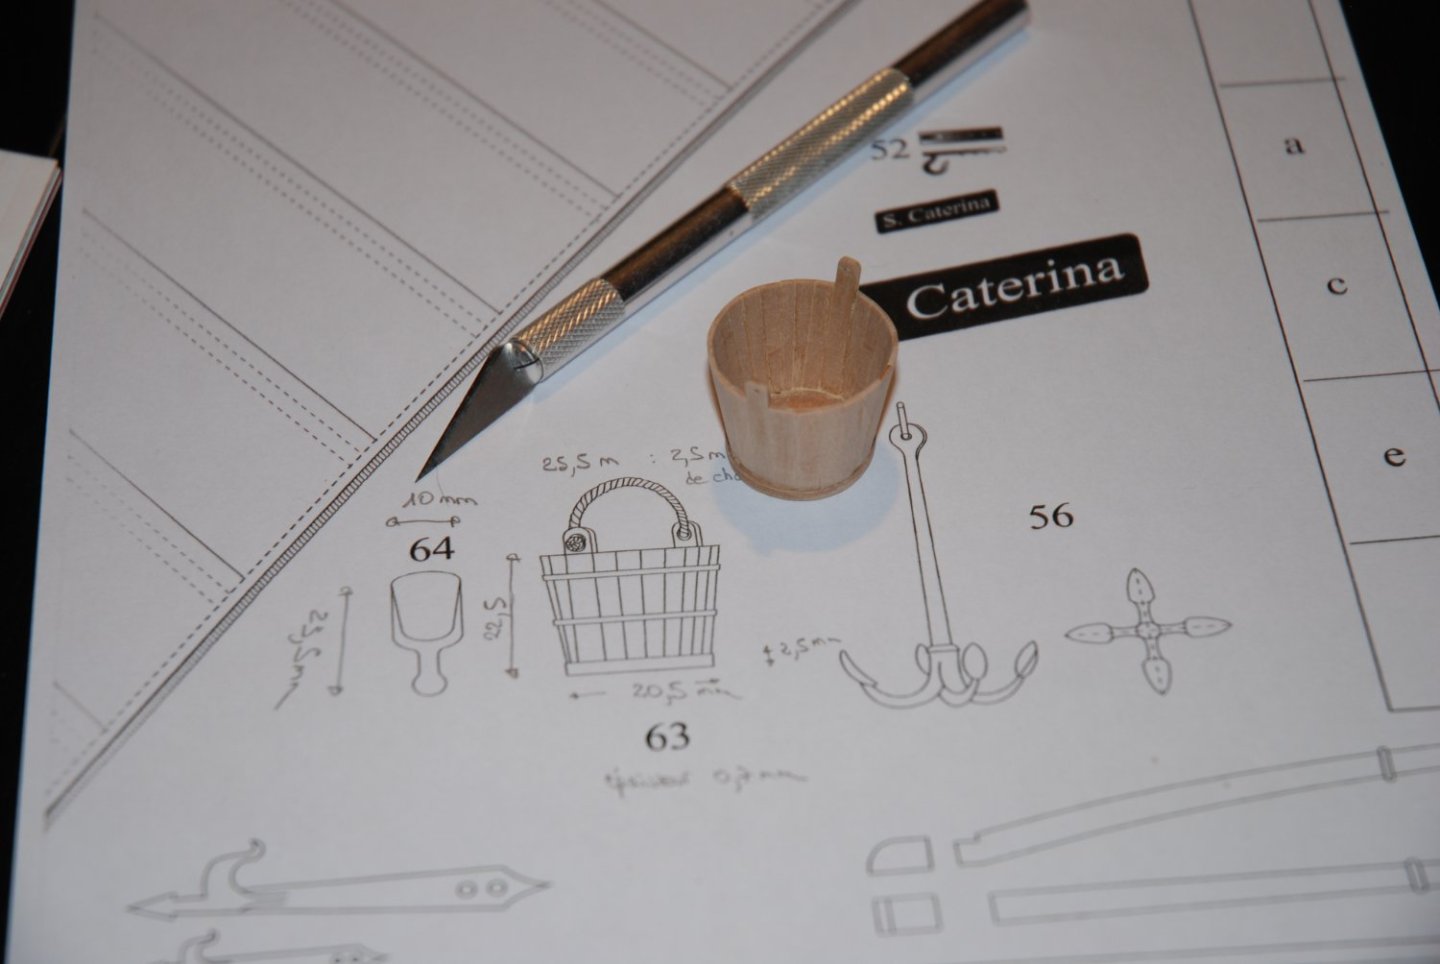
Thank you to all the 'Likes' Andrew, I also think that March's book is absolutely essential if you are interested in fishing boats. There is a lot of informative information in it and since the "Nisha" is in my plans... For the small bucket, I based myself on Francesco Fissore's plans for the Mediterranean Pointu "S. Caterina" (Ancre Editions). The plans are at 1:12, so I just recalculated the dimensions. A small removable mold allowed me to give the bucket a regular shape. Then, it's just a matter of patience. But the pictures seem to me to explain the process. I will now try to reproduce the cylindrical bucket that was used to unwind the fishing line.


- 57 replies
-
- 7
-
-
- marisstella
- batelina
- (and 1 more)
-
HM Cutter Cheerful 1806 by JpR62 - 1:48 scale
JpR62 replied to JpR62's topic in - Build logs for subjects built 1801 - 1850
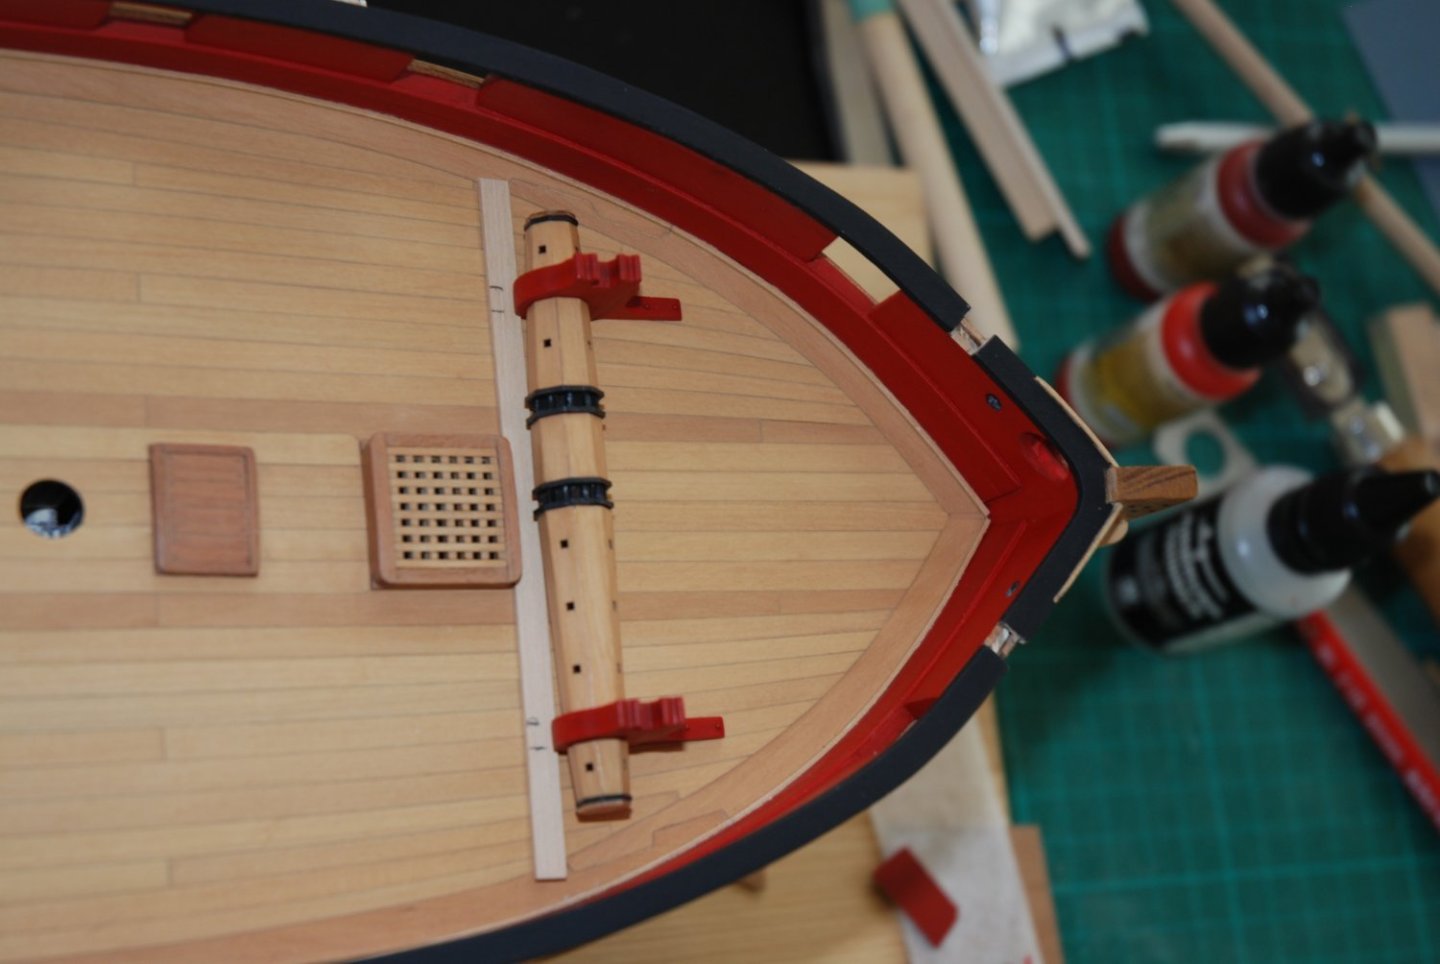
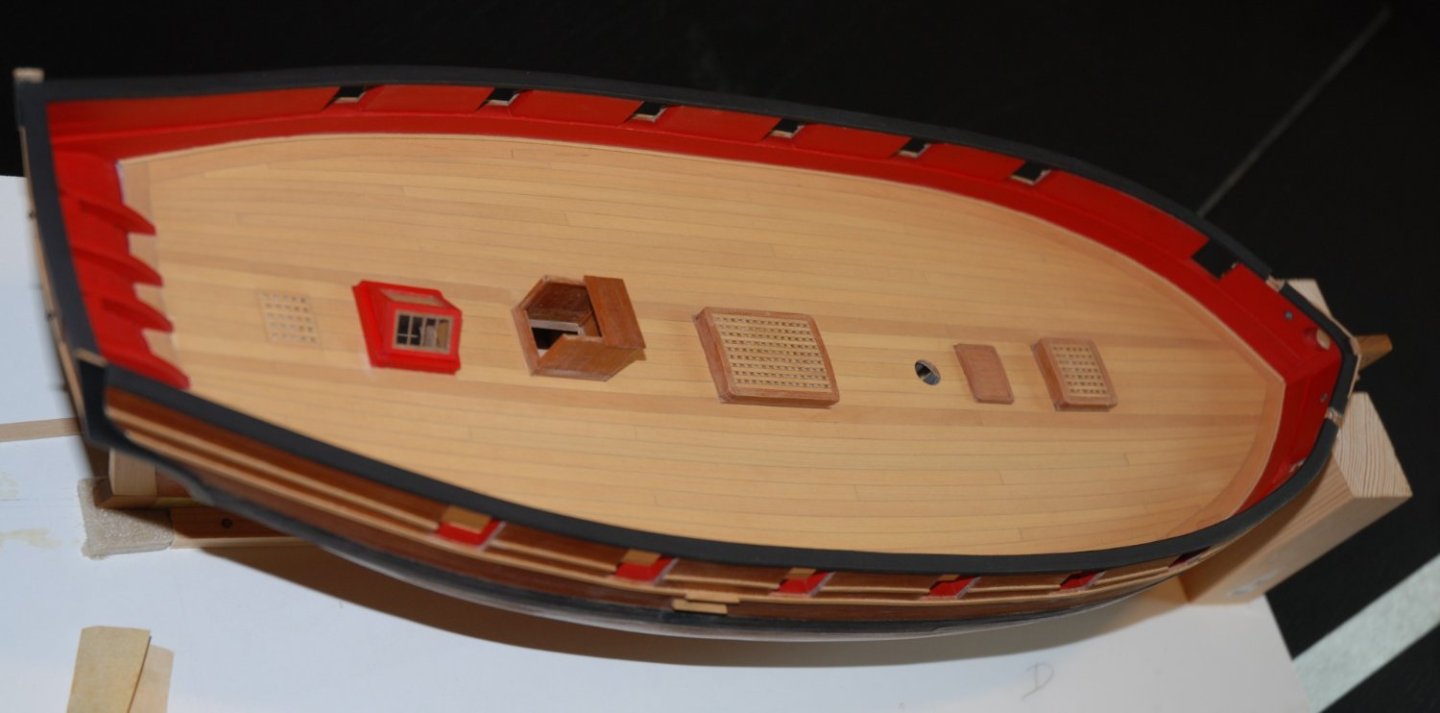
Thank you to all the 'Likes'. In parallel with my work on the fishing boat 'Batelina', I continued to make progress on the planking of the Cheerful deck. An important step has just been taken as I finished this step yesterday which should mark the end of the dusty work. It took a lot longer than I thought it would, but I think a lot of hard work was necessary to try to get a satisfactory result. A new coat of teak oil will have to be applied to the deck elements because the sanding of the deck has left some marks. While blowing away the dust, one of the delicate window panes also flew away and disappeared... And of course, as I had left the house to blow out the dust, it was impossible for me to find him... Fortunately Chuck was generous with the material provided and I still have the two extra window panes that come standard in the kit. I will now drill the rudder port and put the seats in place on each side at the stern.


-
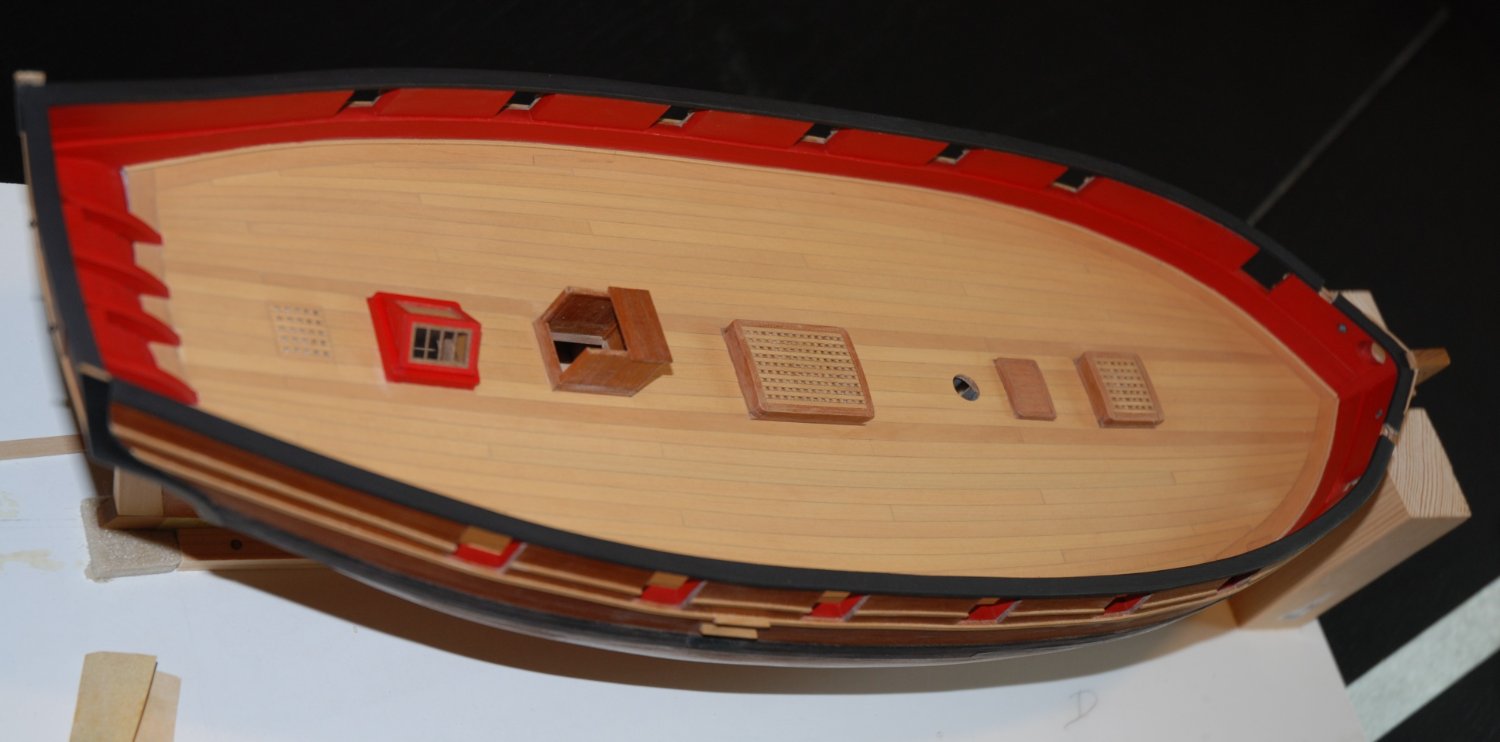
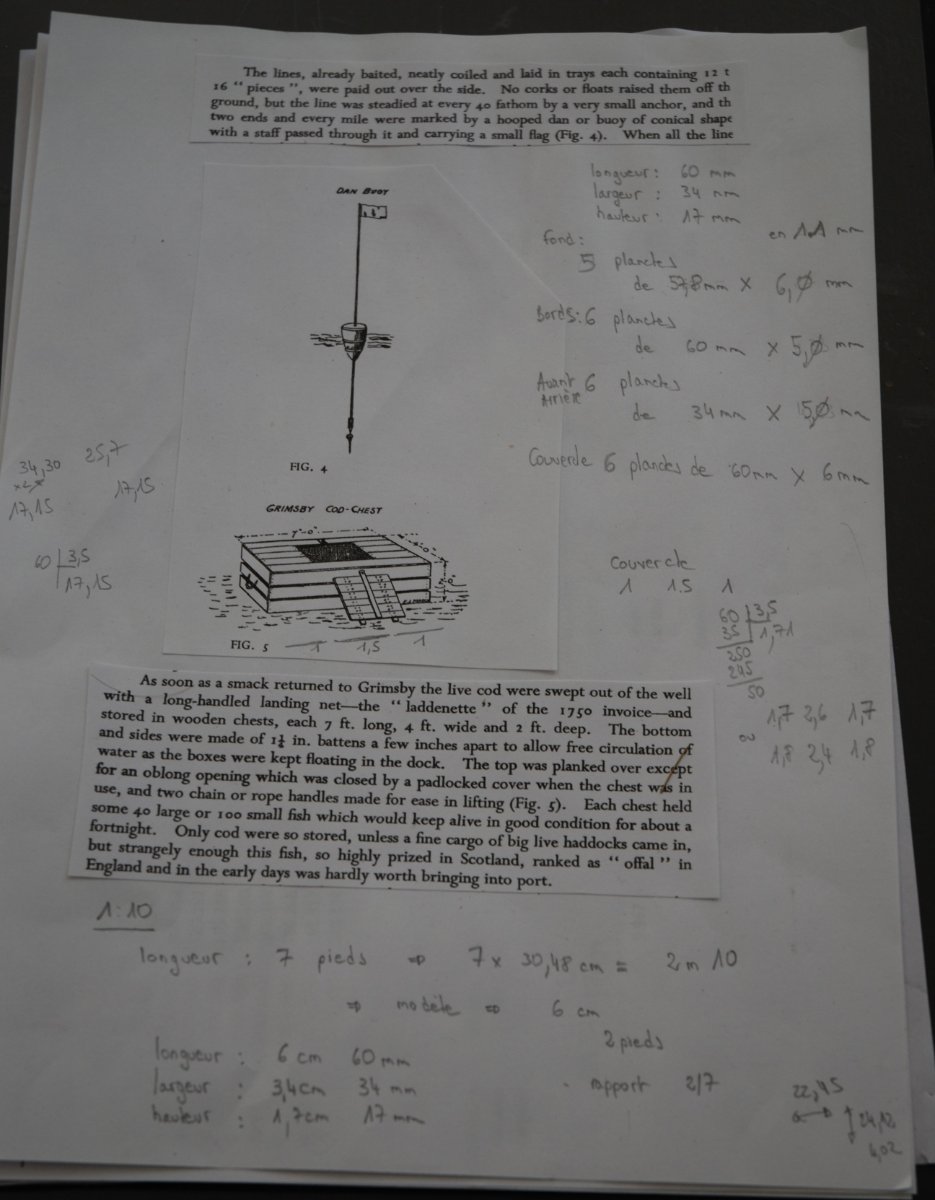
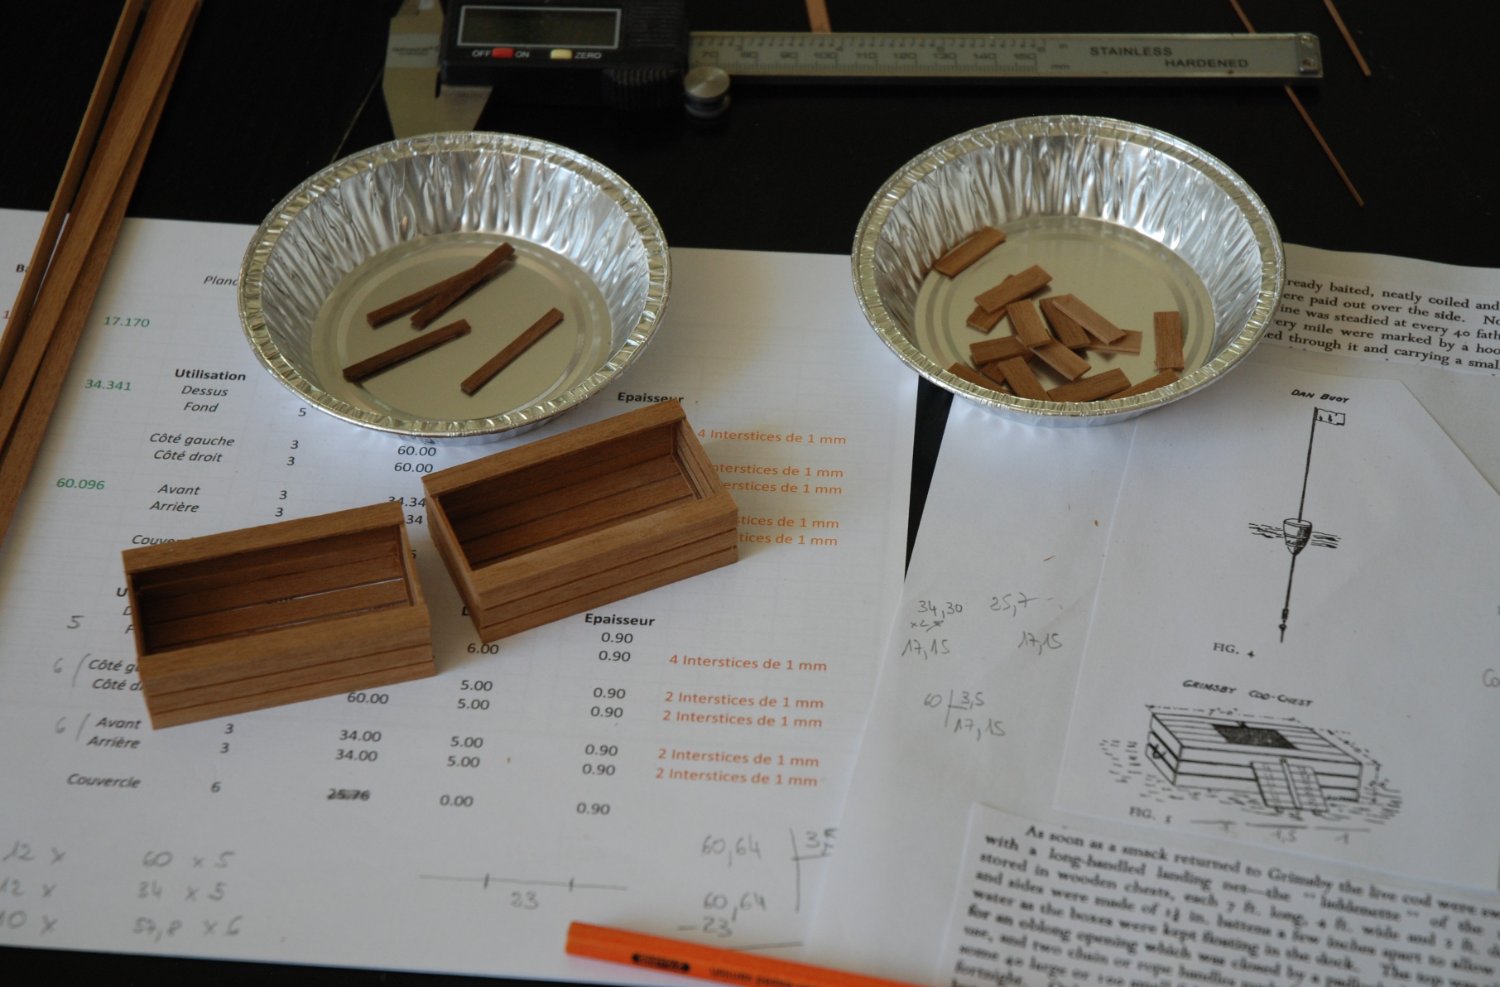
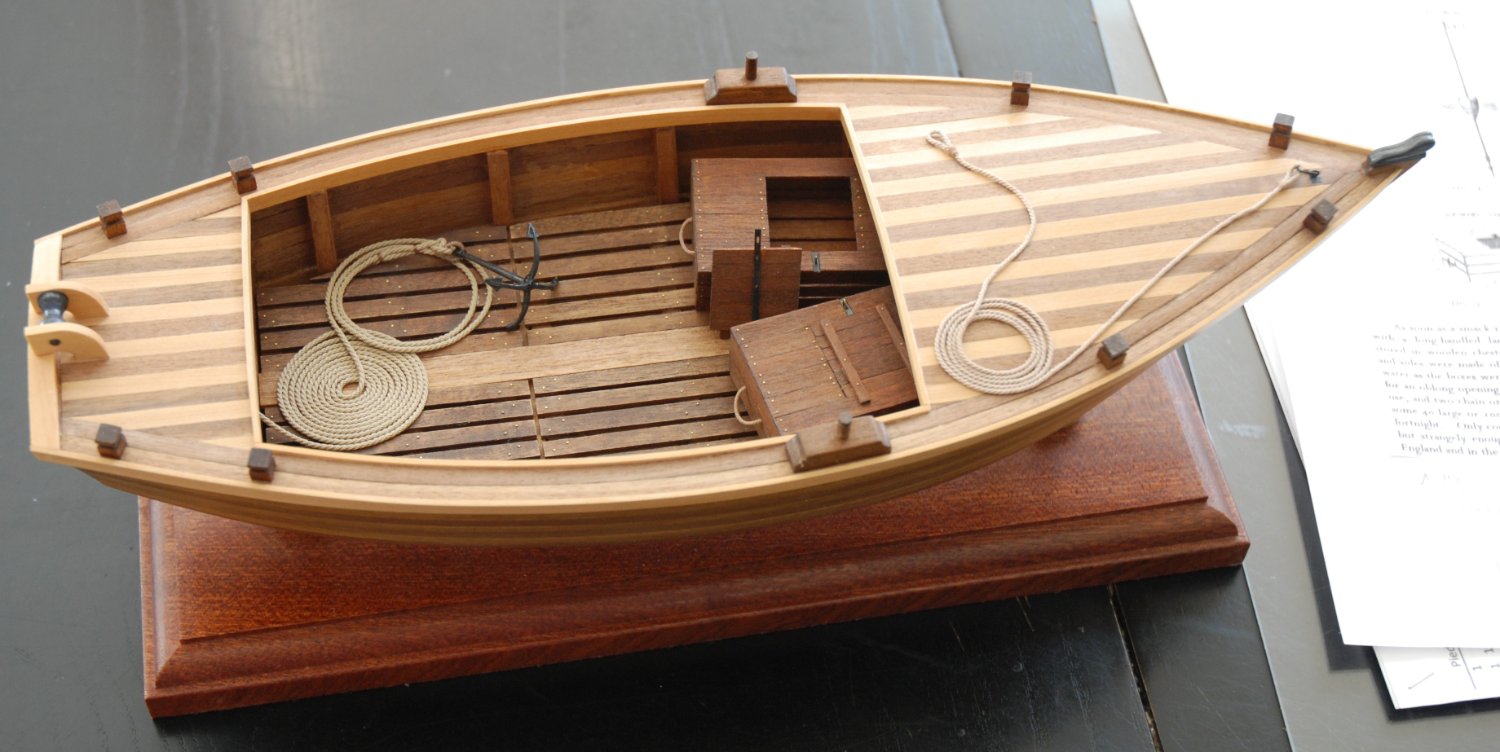
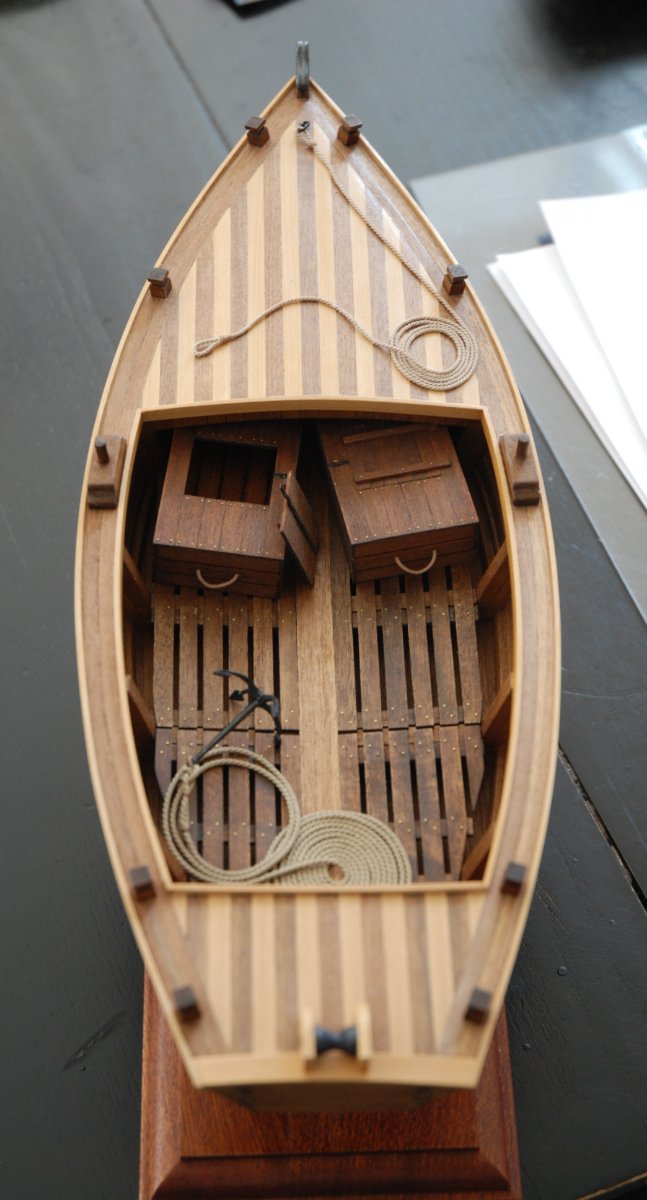
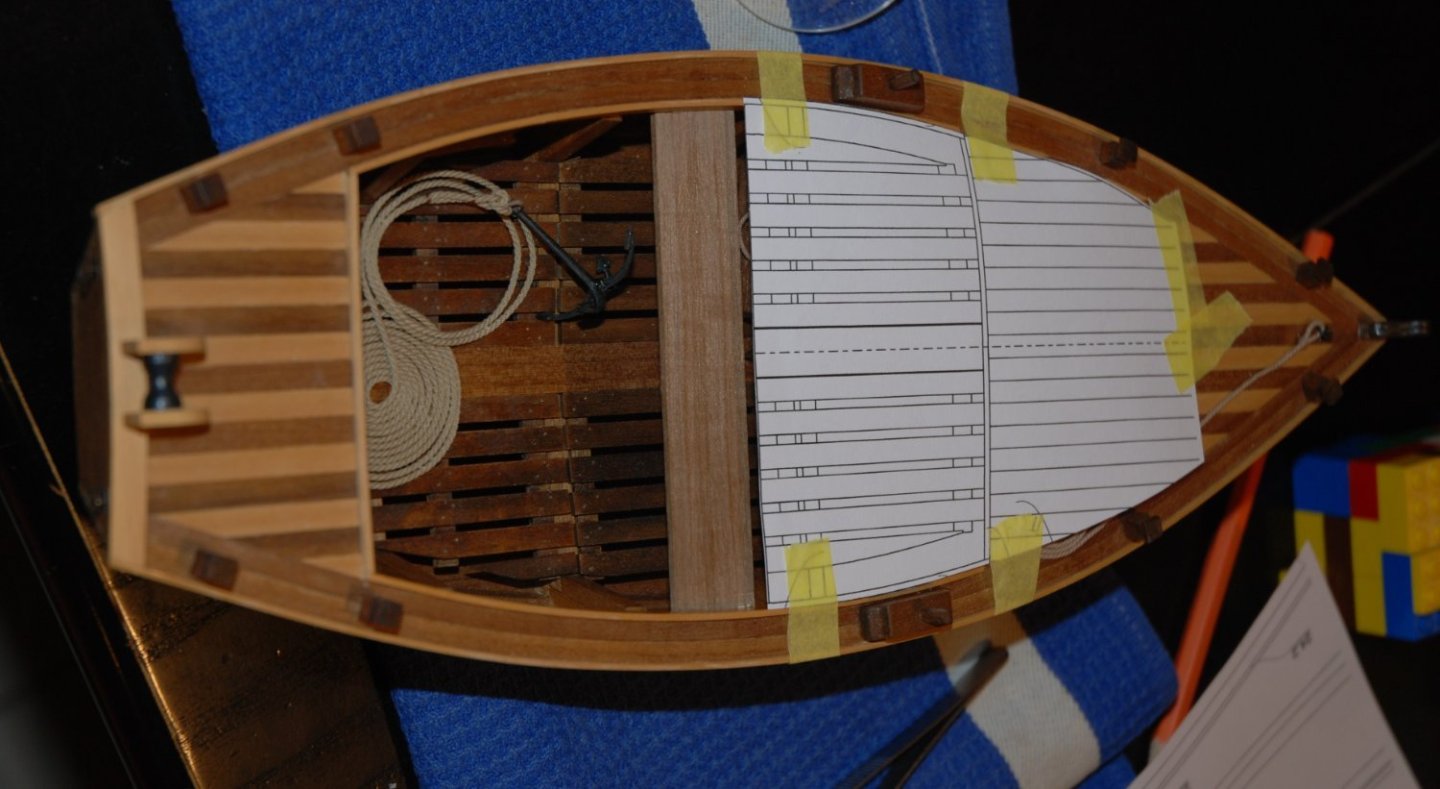
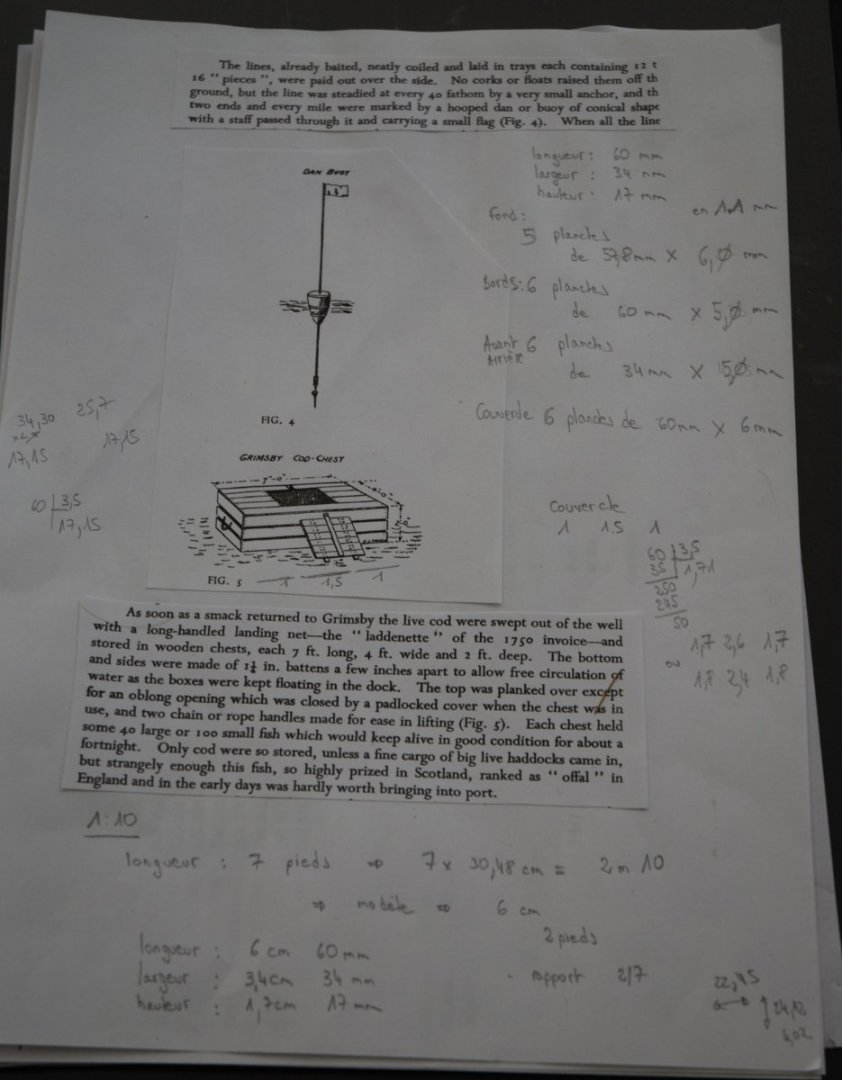
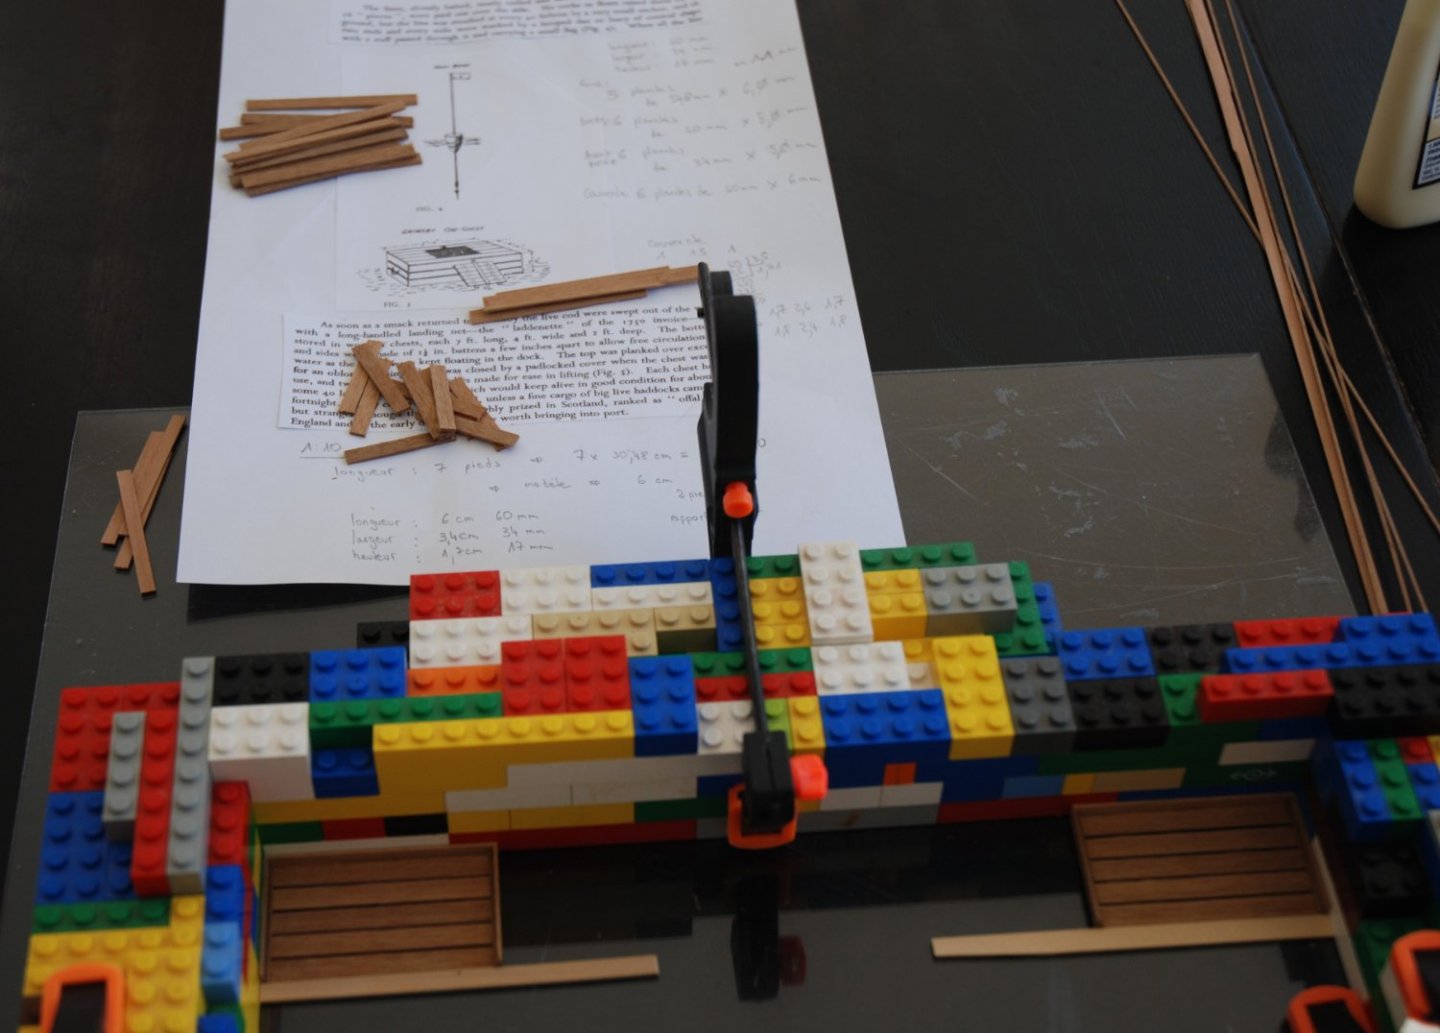
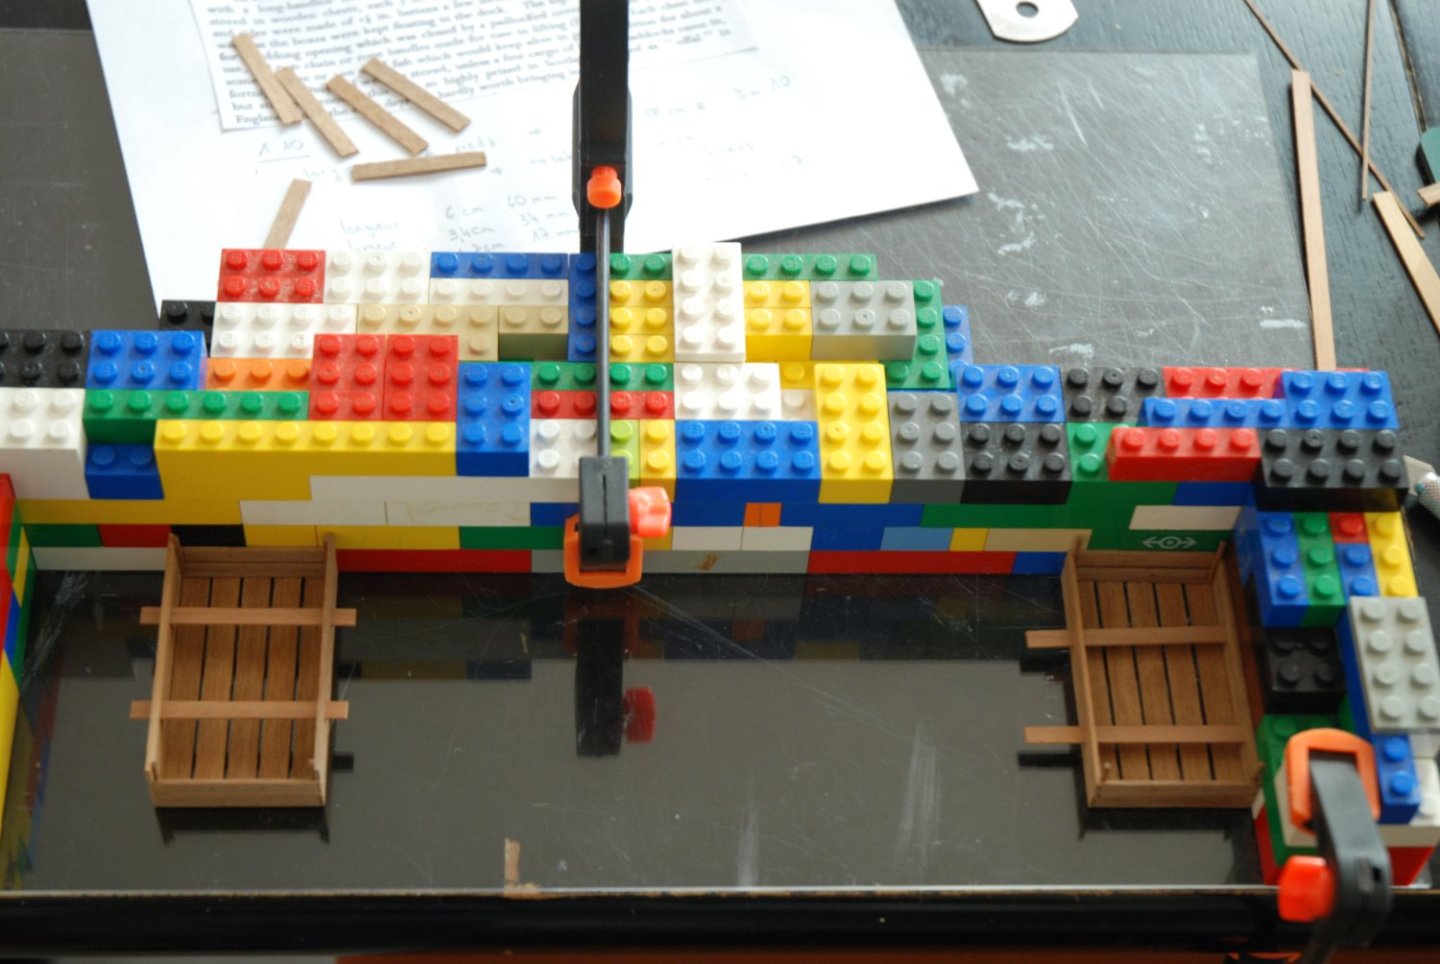
Thank you to all the 'Likes'. I started to add some details about the fishing activity to which the Batelina was dedicated. While reading the excellent "Sailing Trawlers" written by Edgar J. March, I found my inspiration to add two wooden chests that were used to store live fish once the traps were hauled in. On page 23, I even found a drawing and a description of how these boxes were made. So I decided to add two of them to the interior of my boat. Once the dimensions were scaled, the wood strips were cut to the right length using my 'Byrnes' table saw. A little patience and the assembly progresses with the help of my usual Legos to keep everything square. The nails are then simulated with 0.3 mm brass wire. To bring a little singularity, I decided to keep one of the two chests open so that I could visualize the closing system. I will now add a small bucket that was used to scoop water.


- 57 replies
-
- 8
-
-
-
- marisstella
- batelina
- (and 1 more)
-
What a beautiful model ! This is an absolutely perfect build. Thank you for sharing your tips and your fantastic work. We can only dream about this version of the Winchelsea !
- 607 replies
-
- 1
-
-
- winchelsea
- Syren Ship Model Company
- (and 1 more)
-
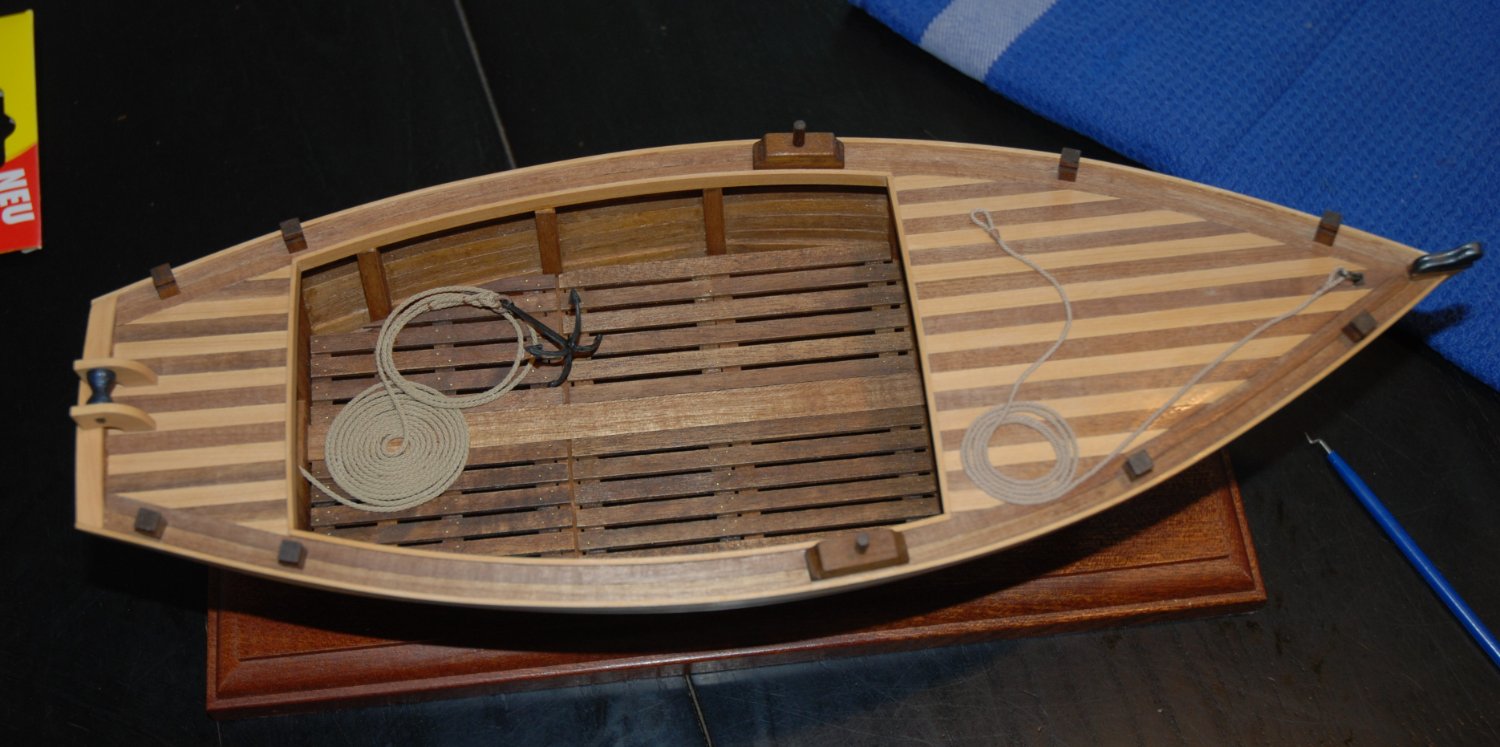
I continue to add some personal details. I'm focusing on the boat's mooring rope as well as the rope that will be used to drop the anchor. A test is made because I decided to replace the traditional white glue/water mixture by a mixture of water and acrylic medium. The result seems to me convincing I proceed to the installation of the ropes. The grapnel anchor is from 'Amati' (30 mm) I will continue to add some details to make this fishing boat a little more alive.


- 57 replies
-
- 6
-
-
- marisstella
- batelina
- (and 1 more)
-
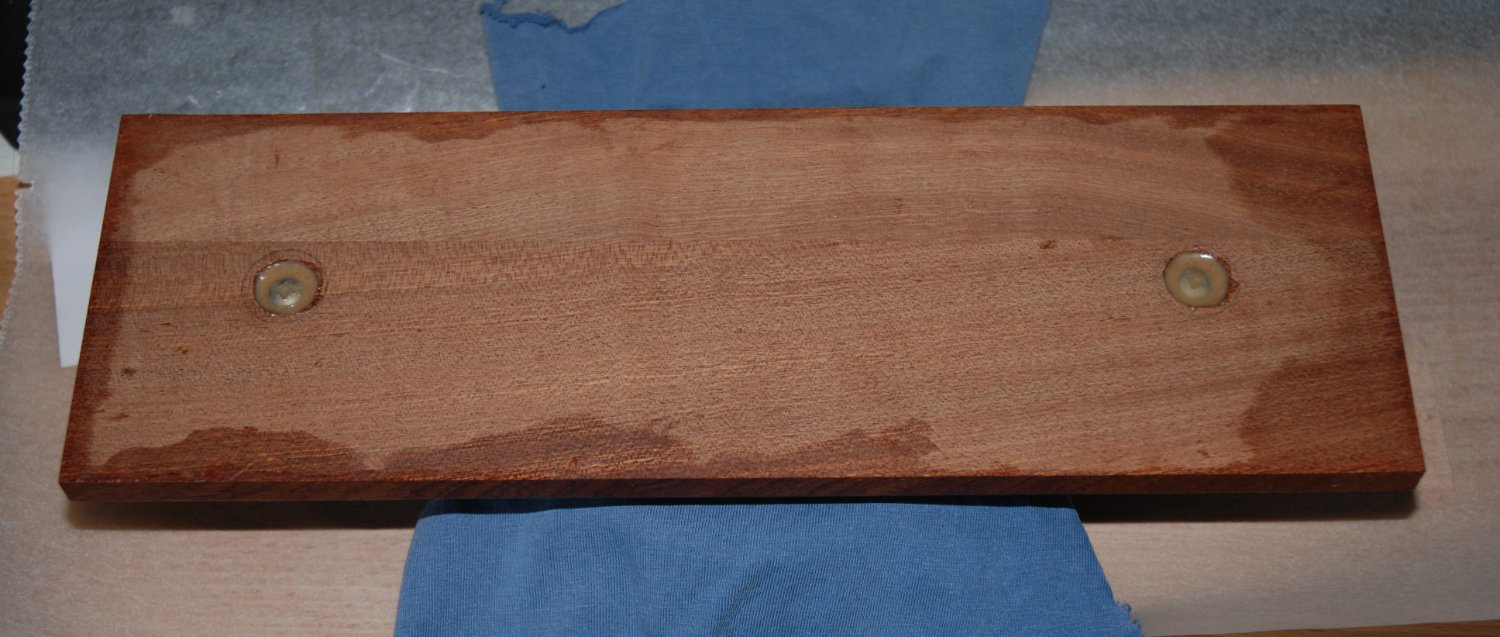
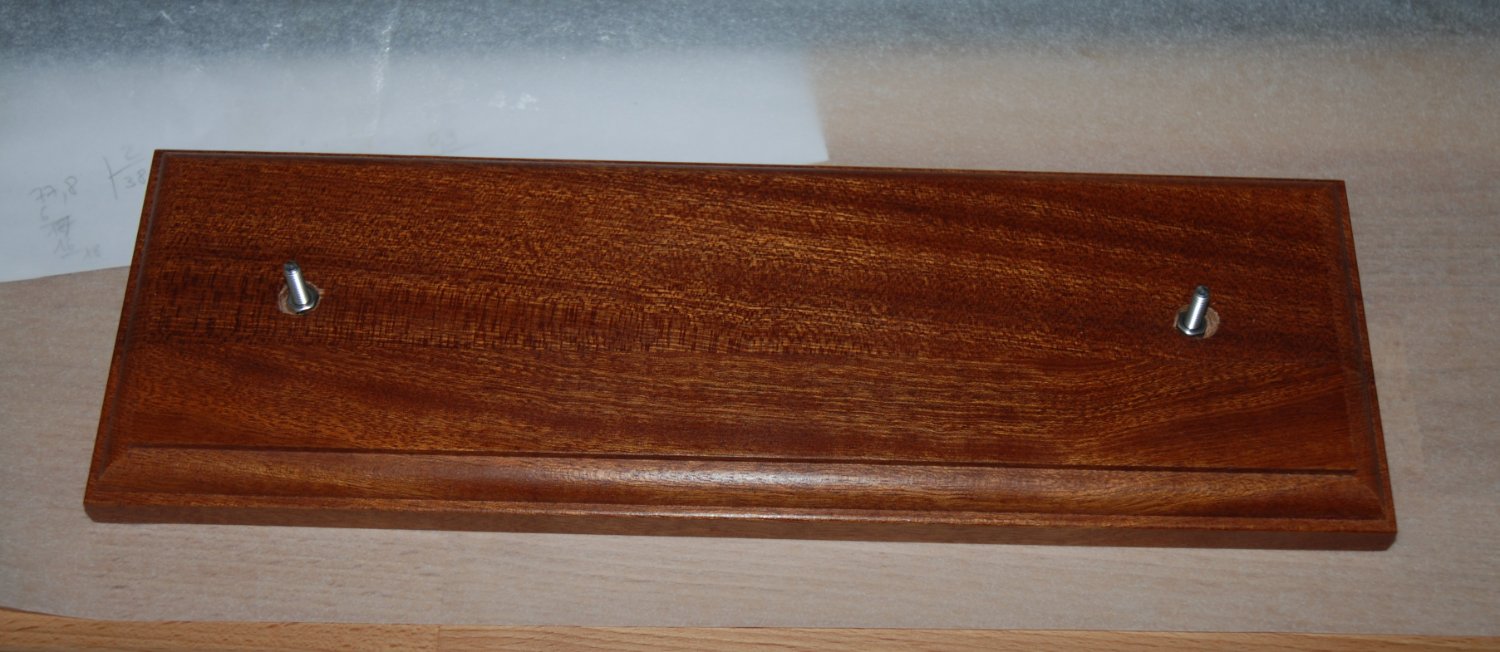
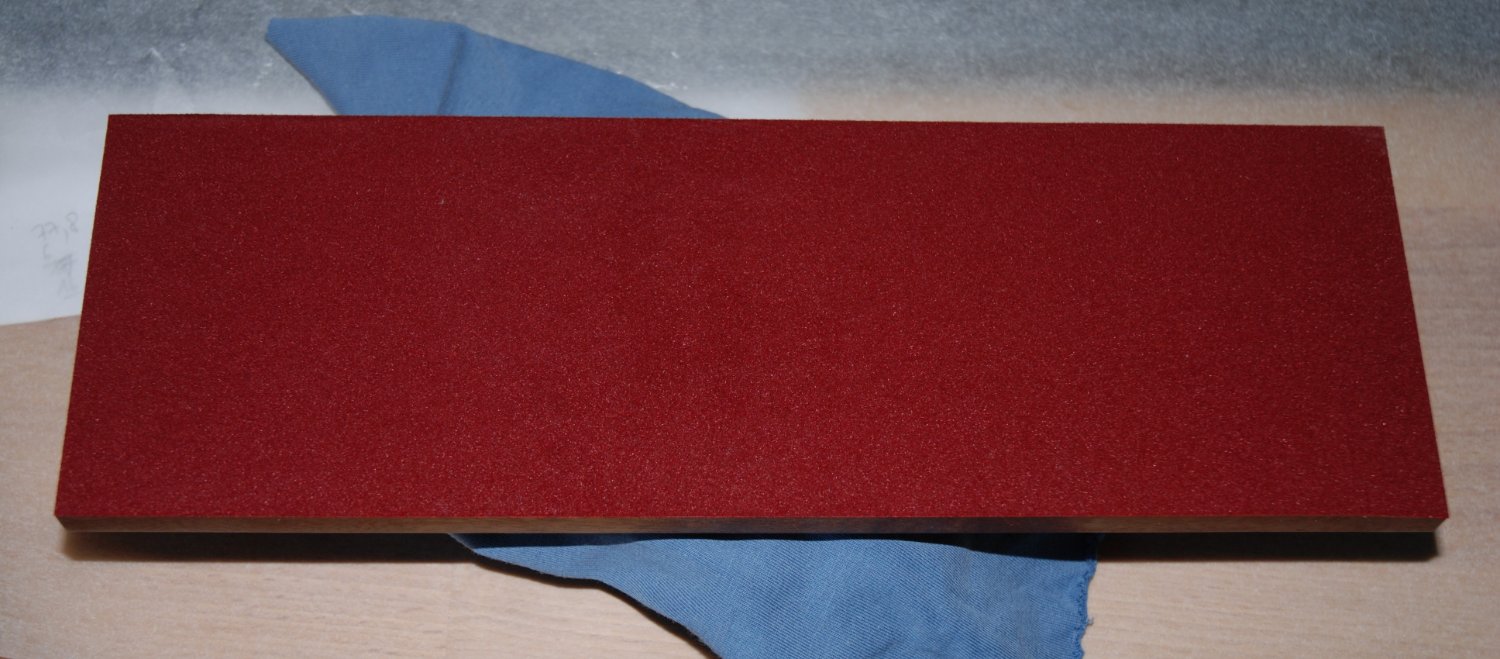
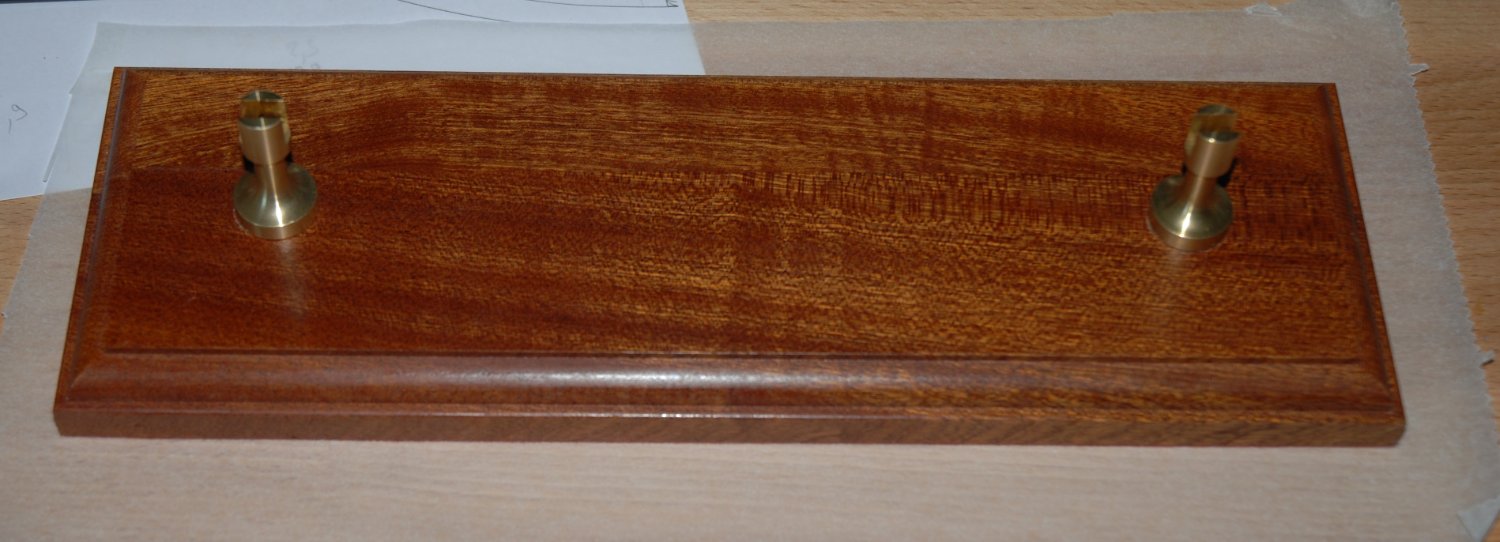
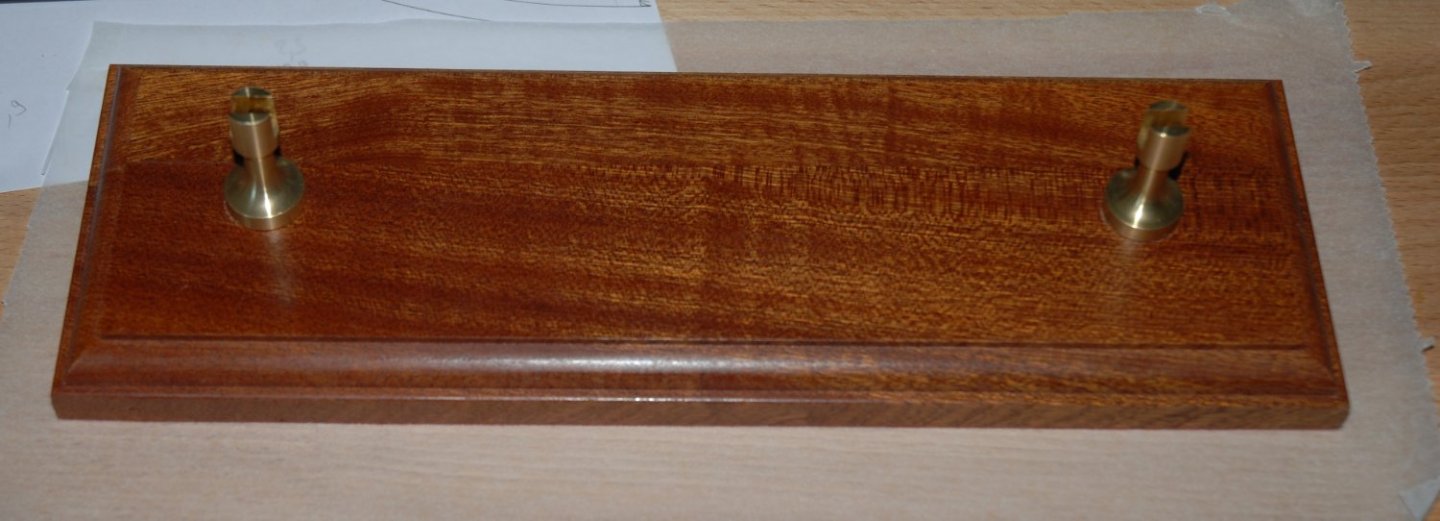
Thank you Bob and Andrew for your kind words and thank you to all the 'Likes'. I have prepared the base on which the Batelina will stand. I used for this a natural wood baseboards cm. 30x10x2 of the brand 'Amati'. It was treated with teak oil and then I applied a coat of protective wax from 'Liberon' (Black Bison antique shop). Holes are drilled to attach the threaded rods that will receive the brass pedestals h. mm 35 always from the 'Amat'i brand. The screws are permanently fixed with epoxy glue. A sheet of red self-adhesive fabric is attached to the underside of the base to hide the mounting holes. And finally the pedestals are glued (epoxy glue). The base is ready to receive the model.


- 57 replies
-
- 4
-
-
- marisstella
- batelina
- (and 1 more)