Jeff T
-
Posts
247 -
Joined
-
Last visited
Content Type
Profiles
Forums
Gallery
Events
Everything posted by Jeff T
-
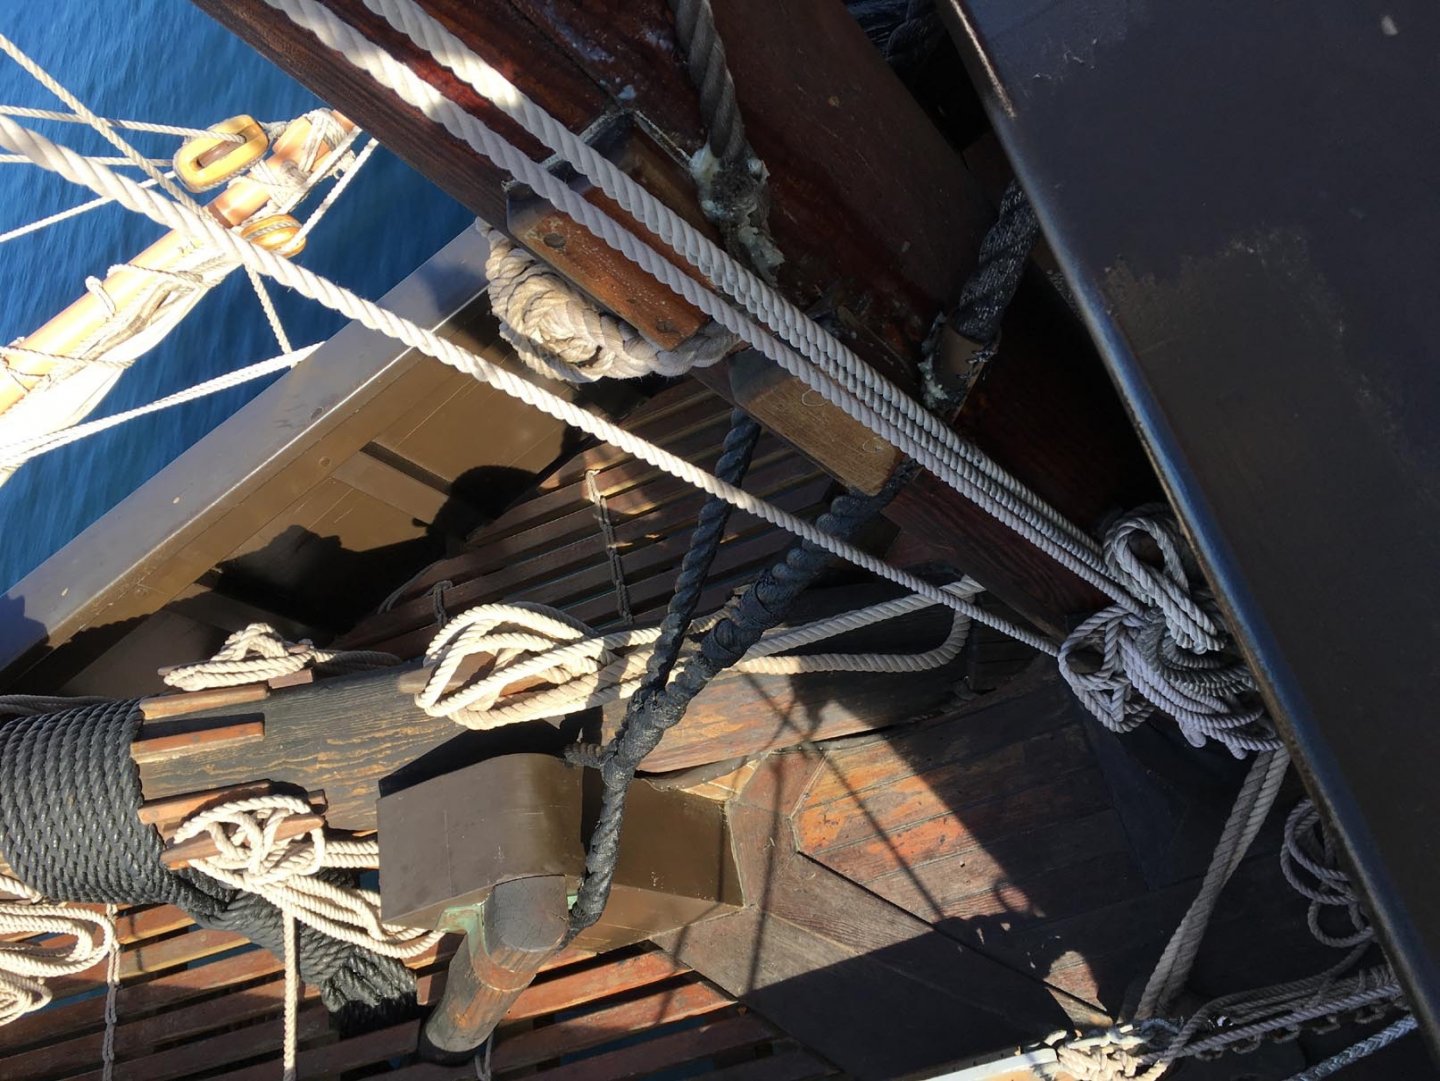
Going under the railing is definitely a way to do it. On a replica here in San Diego of a galleon ship that sailed in 1542, the mainstay also travels under the railing: An interesting thing is how after the fore part of the mainstay is stropped around a deadeye, the two limbs are first “seized” together, then they separate to go around the foremast as a “loop” rather than sit together to one side of it or the other. Here is how it looks from the forecastle: It still attaches to the beakhead rather than the foremast. But what appears to be the protruding stempost in this replica is to the port side of the bowsprit here, with the bowsprit not “dead center” in the beakhead. What could be done if the bowsprit rested on the stempost? (I am struggling with the idea of eventually using this mainstay “loop” technique on my own galleon (a plastic kit), because the bowsprit does indeed rest on the stempost in that kit, but I think maybe the separation of the mainstay that goes around the foremast can stay separated around the bowsprit and then travel through a tunnel drilled transversely through the protruding stempost beneath the bowsprit, thereby completing the “loop”?)

- 756 replies
-
- 9
-

-
- galleon
- golden hind
- (and 2 more)
-
Very nice, Robert! Sometimes, the smaller the scale, the tougher the project. I use a head-mounted magnifying pair of lenses, but that still doesn’t solve the “shaking hand” problem that looks like an earthquake through them 🙂.
-
Masking tape residue may be removed with mineral spirits. Using odorless mineral spirits, gently applied with a soft brush and then blotted off with a very soft cloth, may work. Brush bristles and cloths can potentially scratch the clear plastic, so you have to be very careful, however it may take a little light brushing with the odorless mineral spirits to loosen the sticky residue, and you may need to do it more than once to get it all off. It’s important not to use the mineral spirits in standard paint thinner because it may be mixed with another chemical that may harm plastic. Since the gold is acrylic paint and not enamel, the odorless mineral spirits would likely not affect it. If the globes came with clear plastic sprue, and if you have any left, you could do a test on the sprue by first sticking some of the same type of masking tape on it, applying Future to the edge just as on the model, and then applying the gold acrylic. Let it sit, unmask it, and if there is residue, try out the odorless mineral spirits. I hope this helps, and good luck with your project. (BTW — I am also a fan of 20,000 Leagues Under the Sea — nice choice of kit!)
-
Steven, I like this idea that you used for keeping your sail from deforming when you cut it. I will keep the technique in mind when it comes time for me to cut my own lateen sail.
-
Thank you for your kind comments. Making these modifications takes extra time and fuss, but I think it is worth it.
-
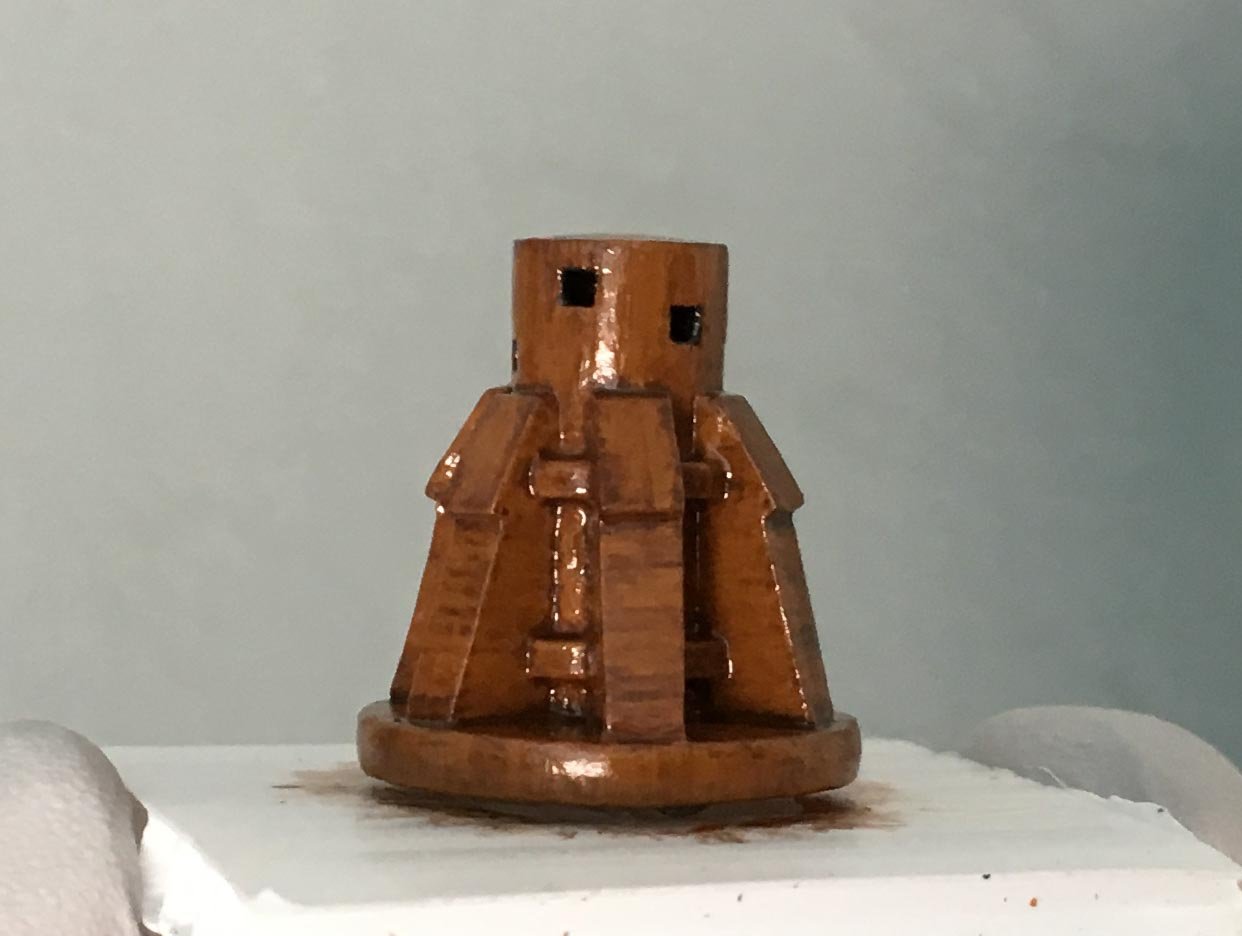
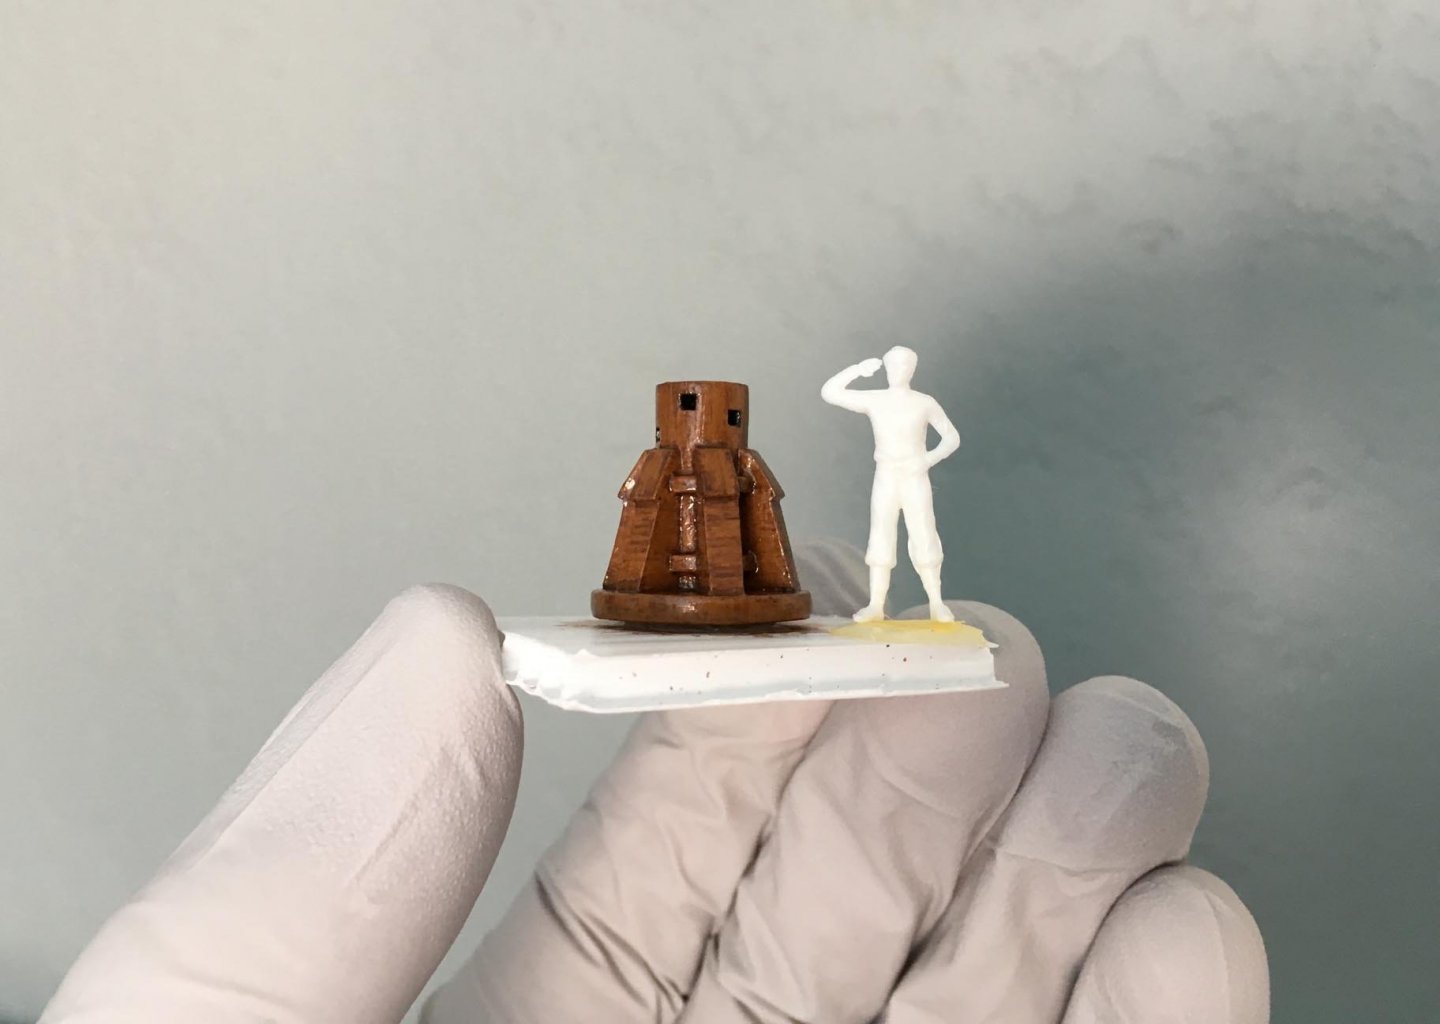
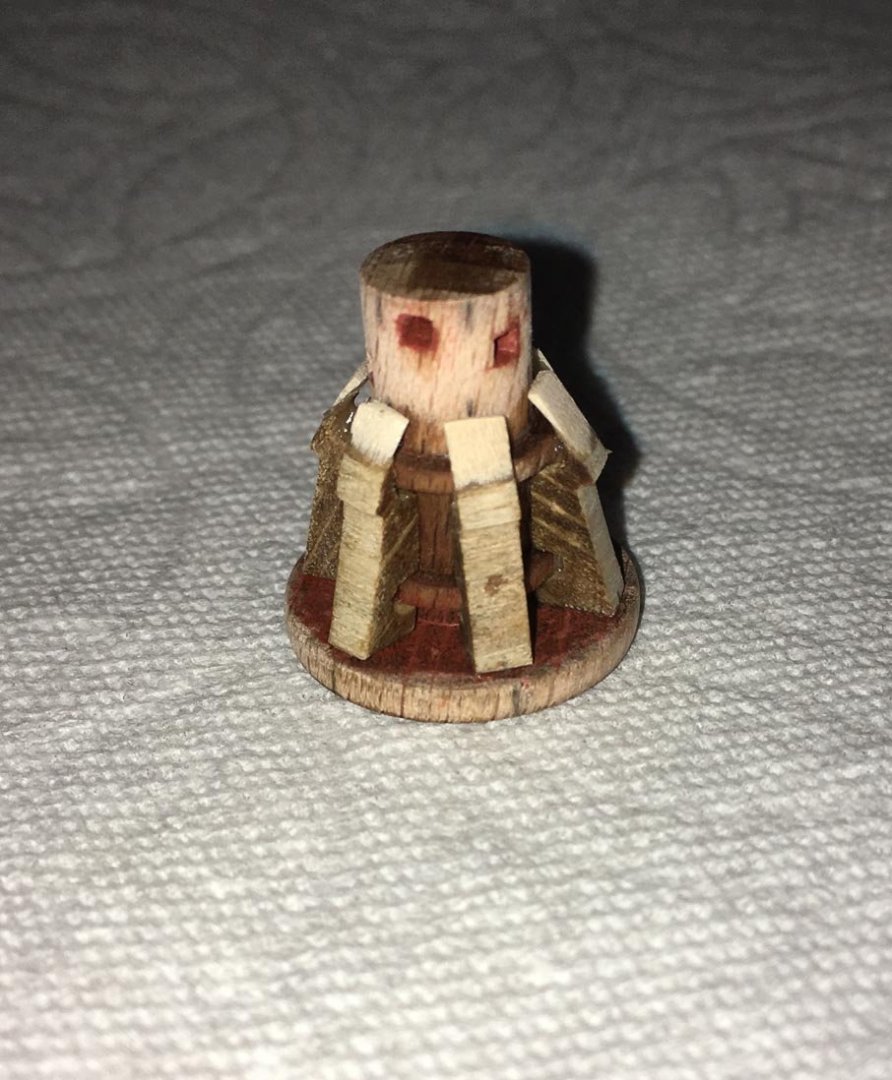
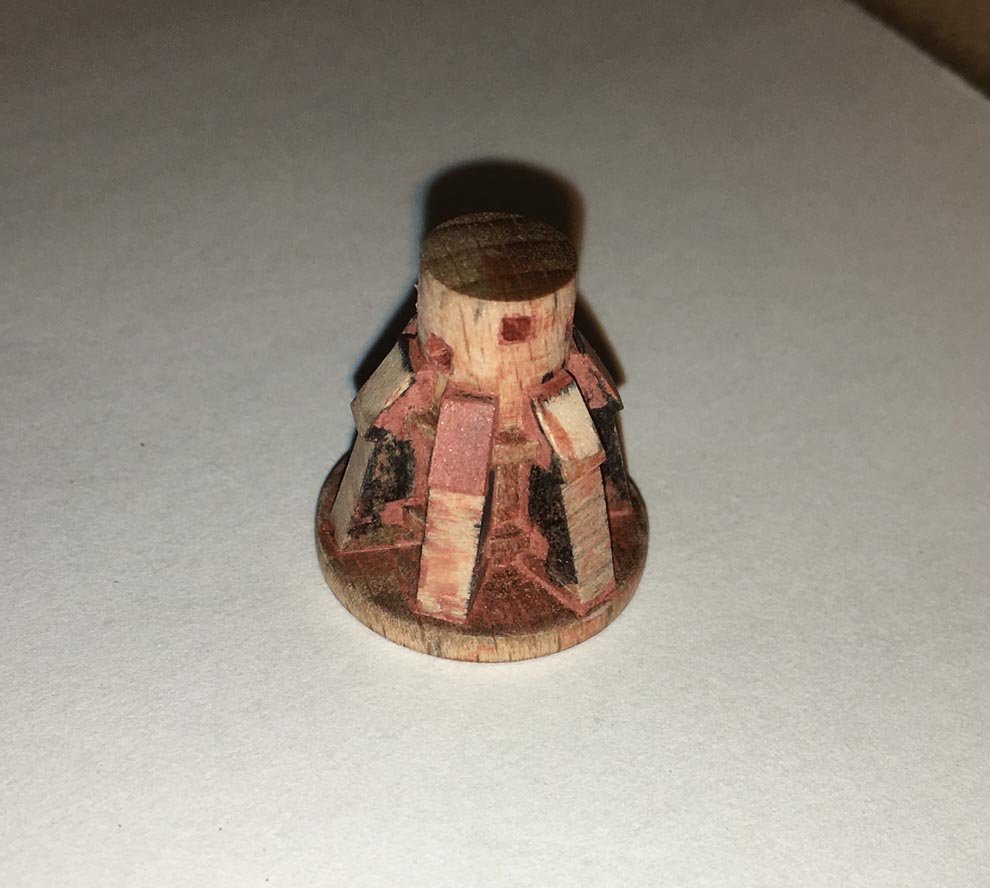
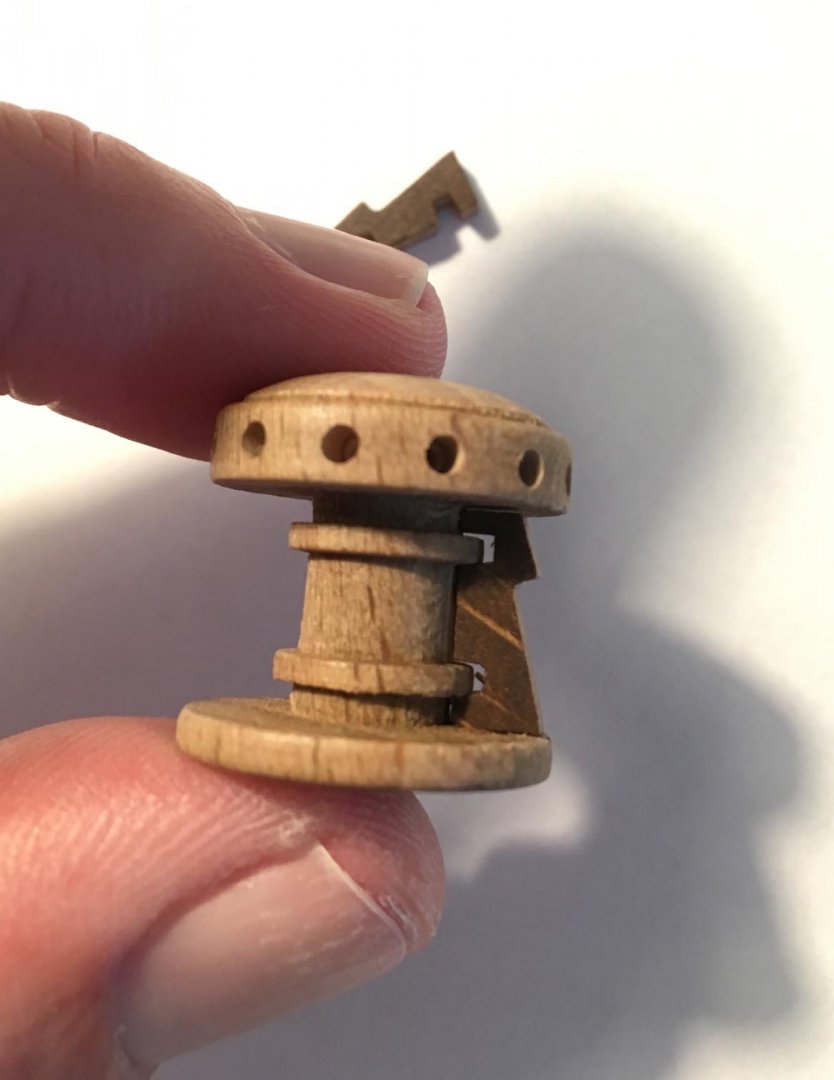
Here it is after the base color and the holes for the capstan bars were painted: I used the same type of paint (Testors enamel) that I often use for plastic parts in the kit, so in order to apply one of the same enamel "washes" that I have used previously for weathering, I first needed to apply an acrylic isolation coat (a clear gloss): Here it is after the weathering: Pictured next to one of the sailors (yet to be painted): I think the scale is reasonably close. I know that the proportions of the whelps and drum on this modified capstan are not exactly like those of San Salvador's capstan, but I think it covers the basic idea. Also, it won't be so shiny after it is covered with a clear mat varnish.

-
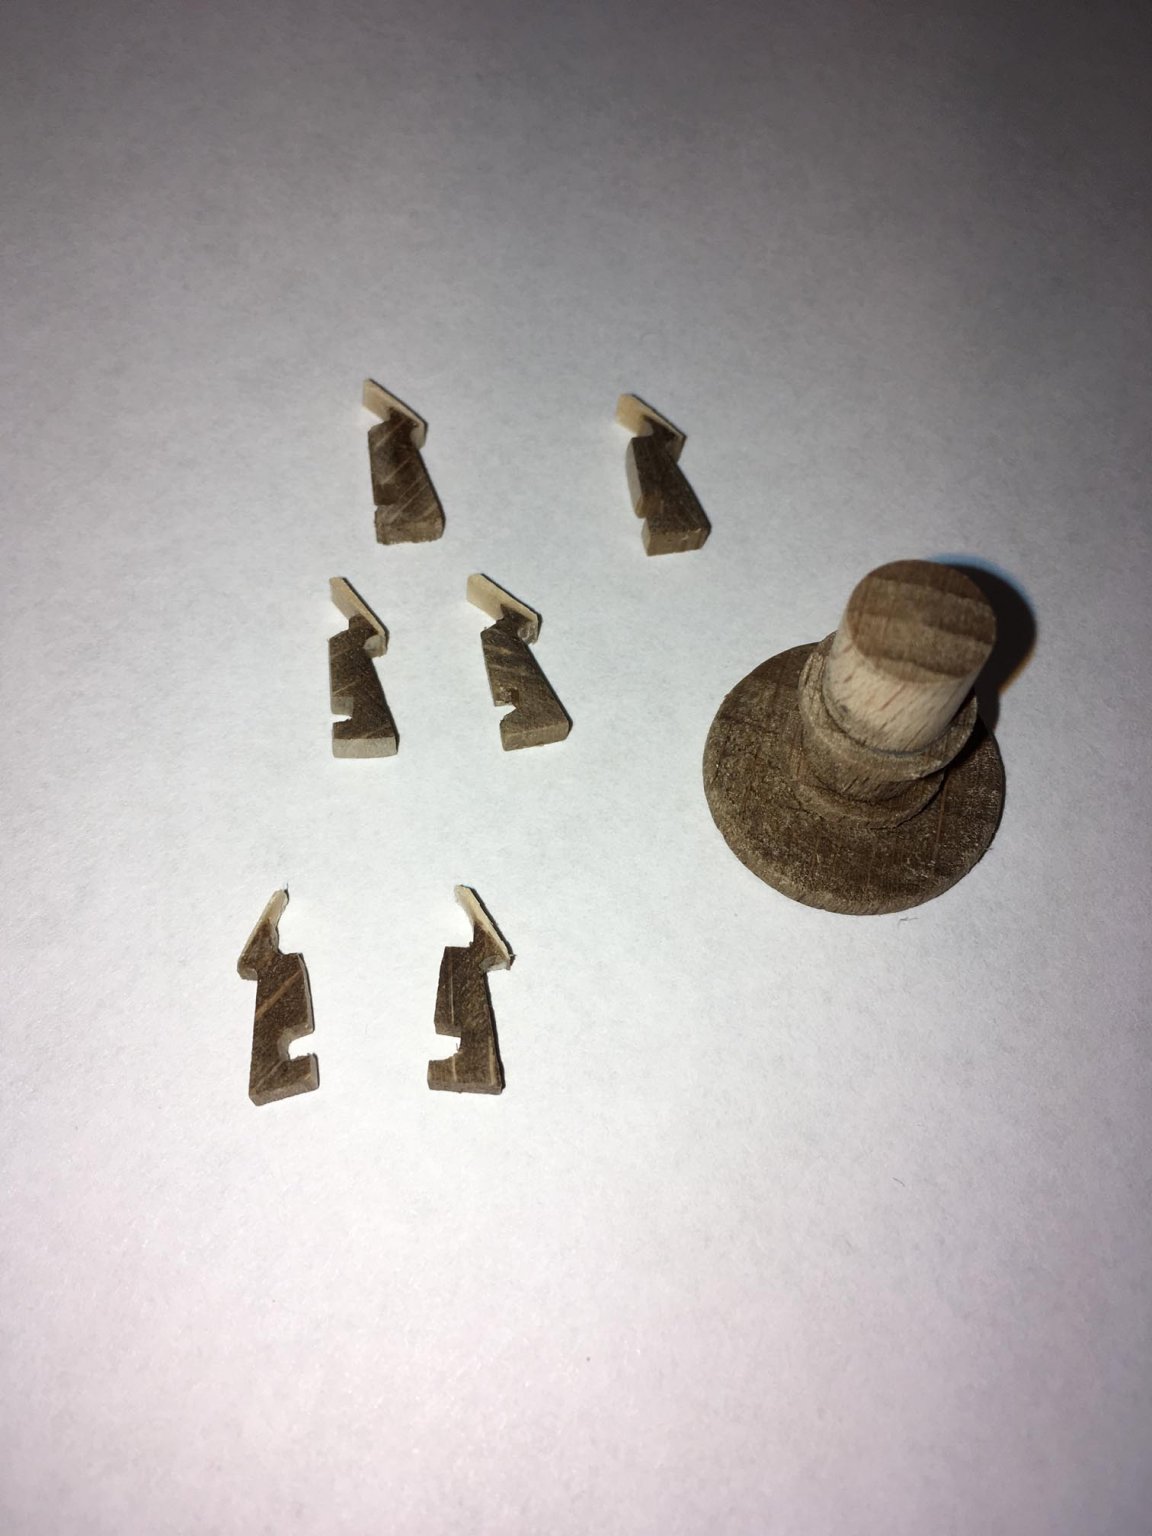
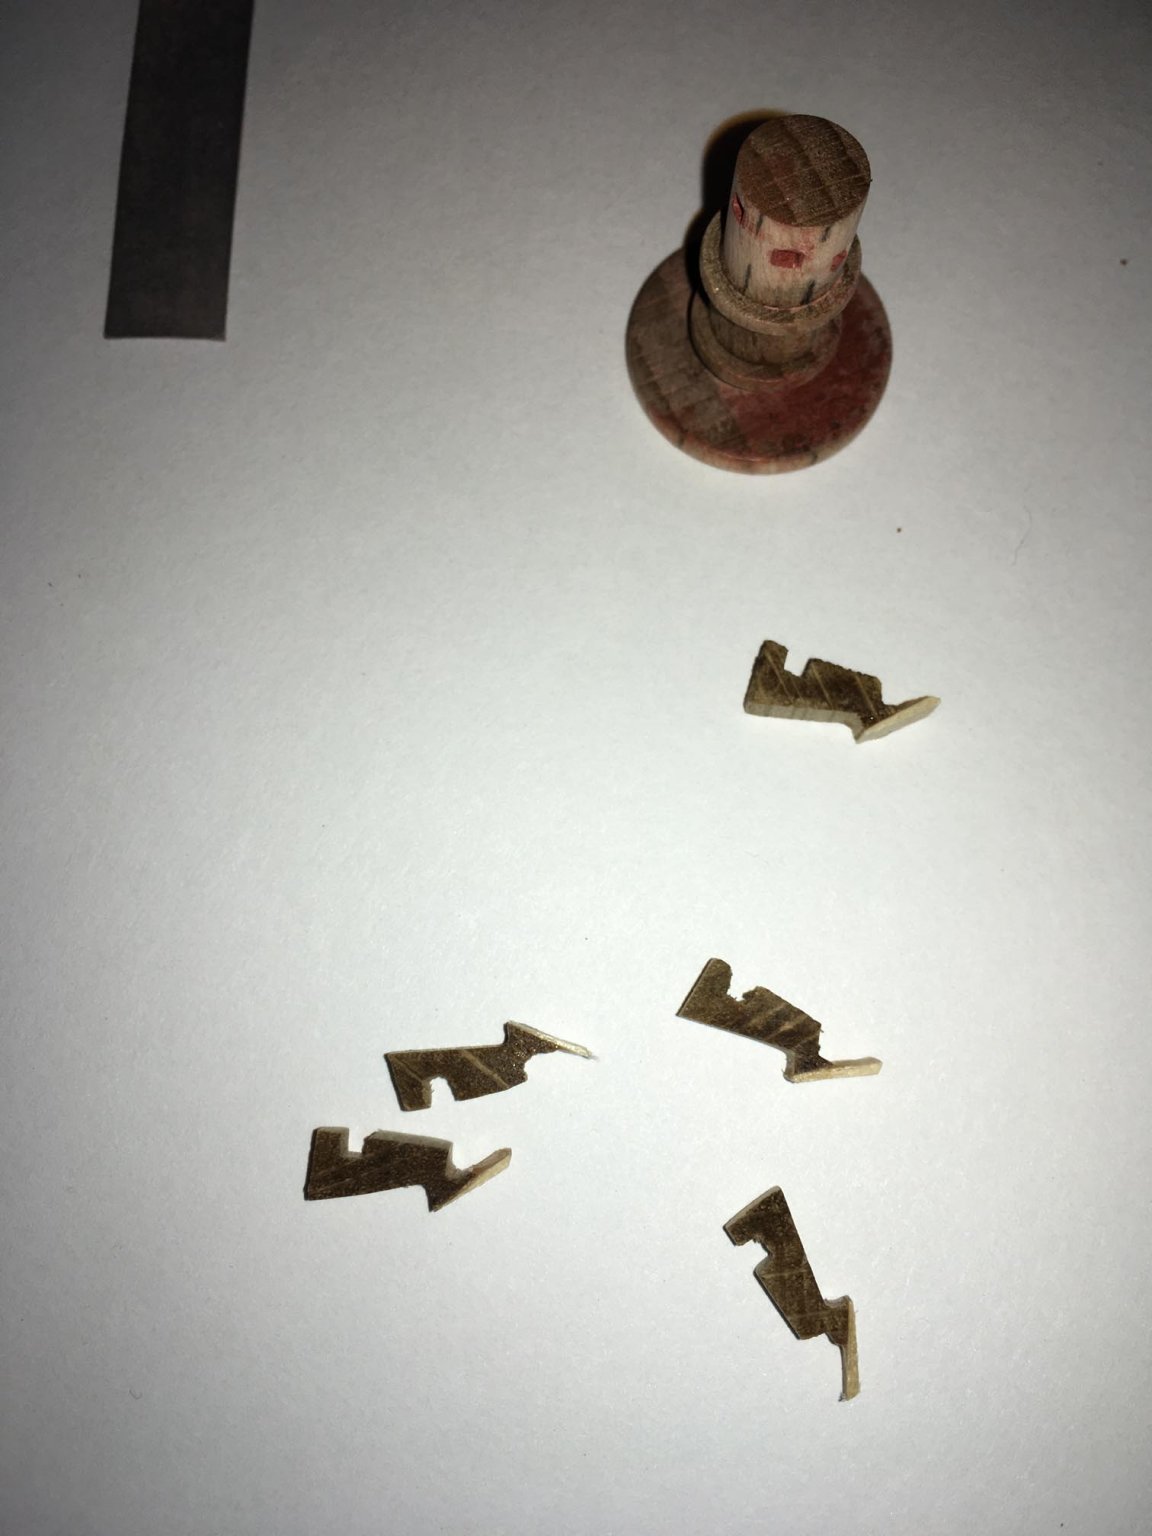
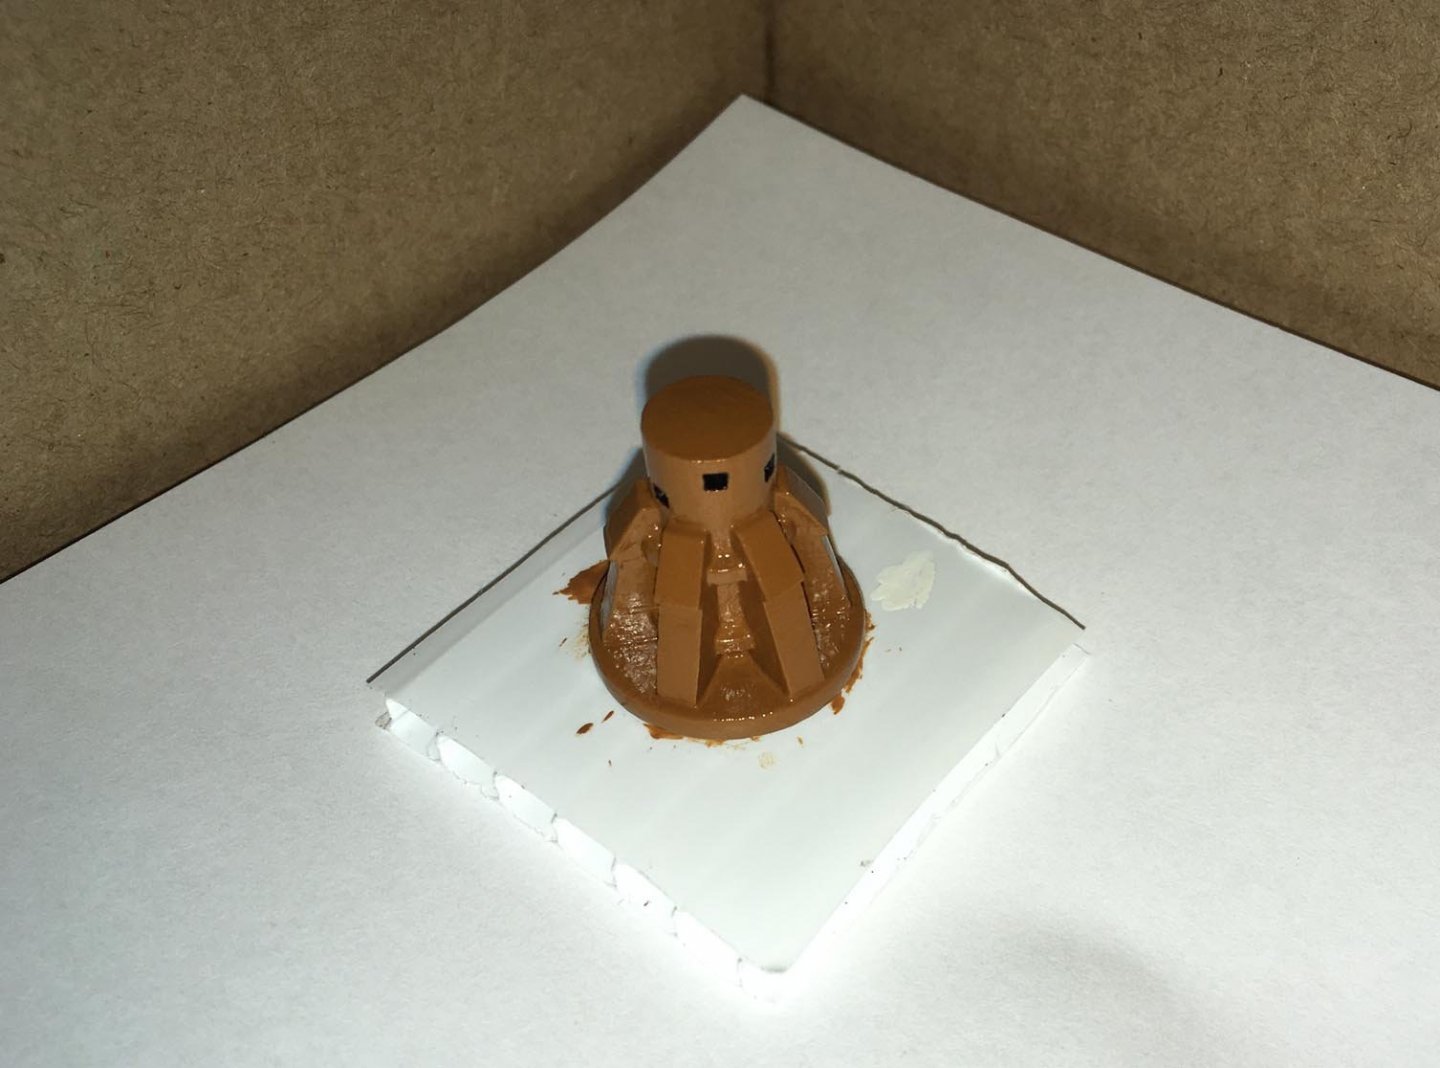
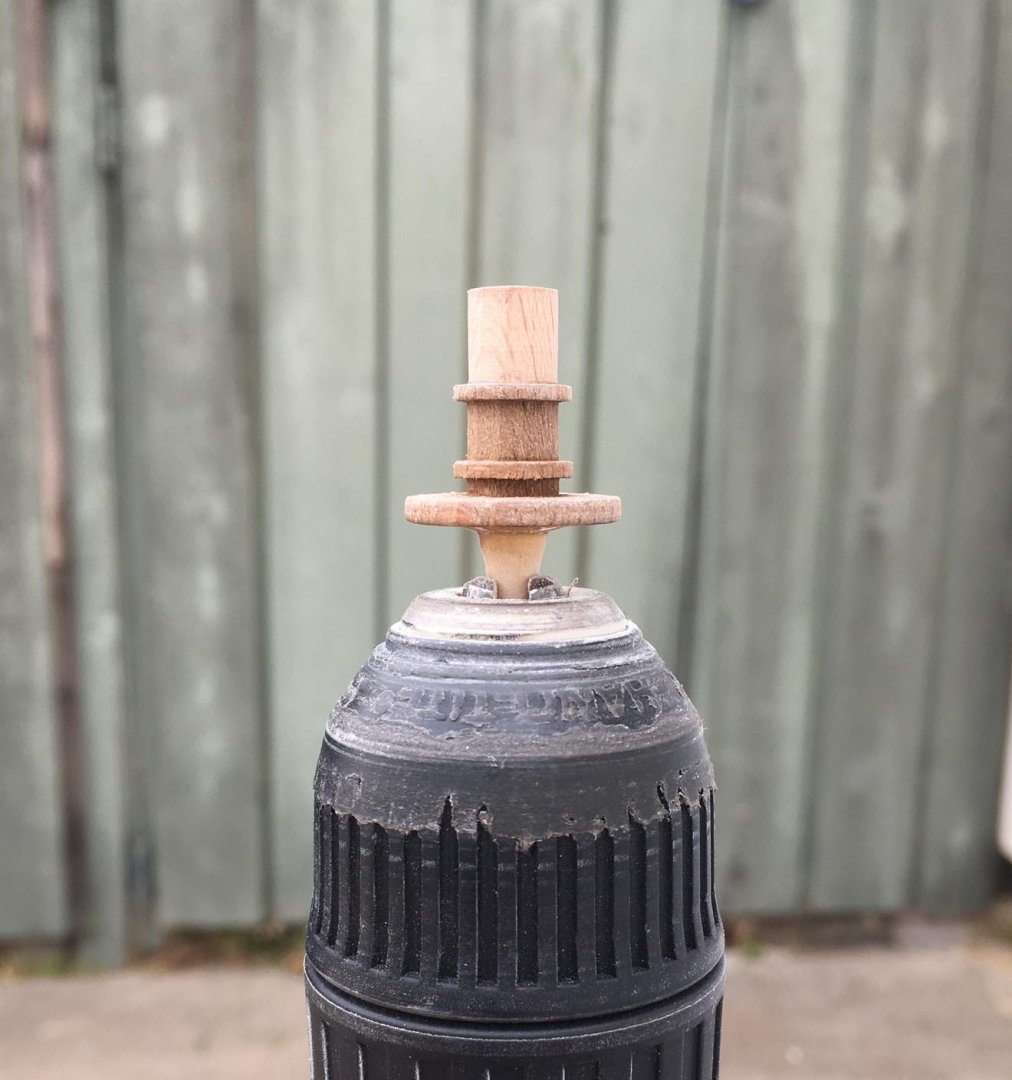
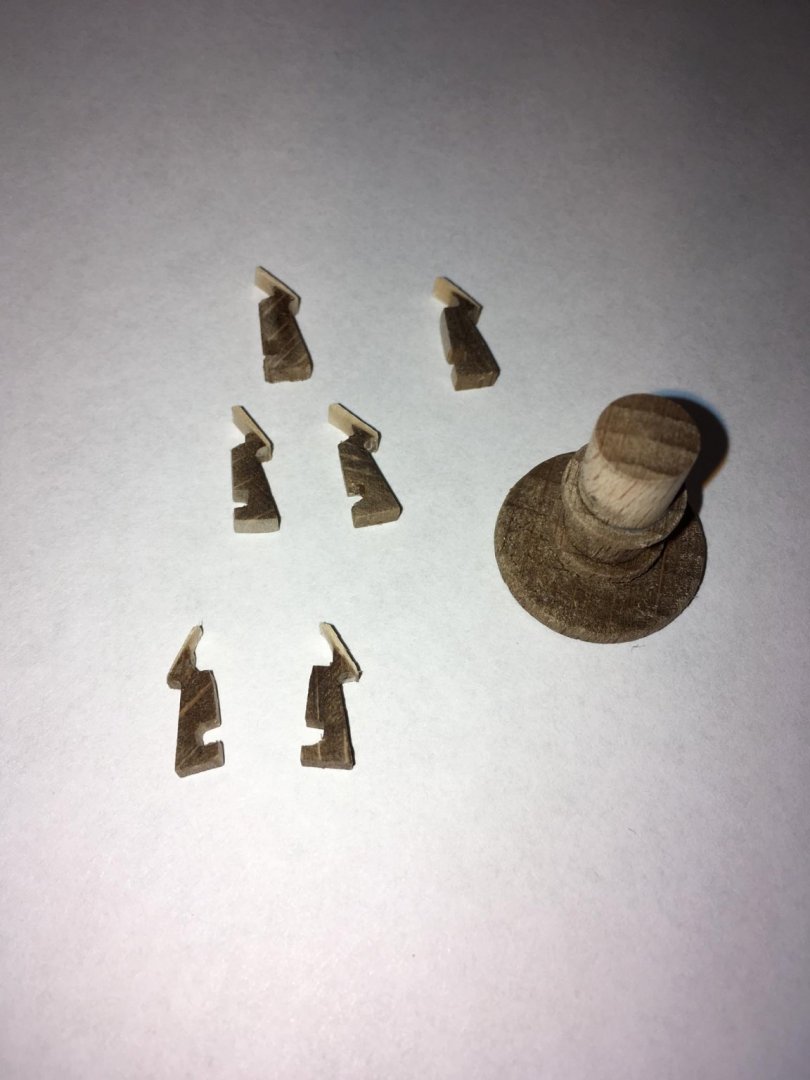
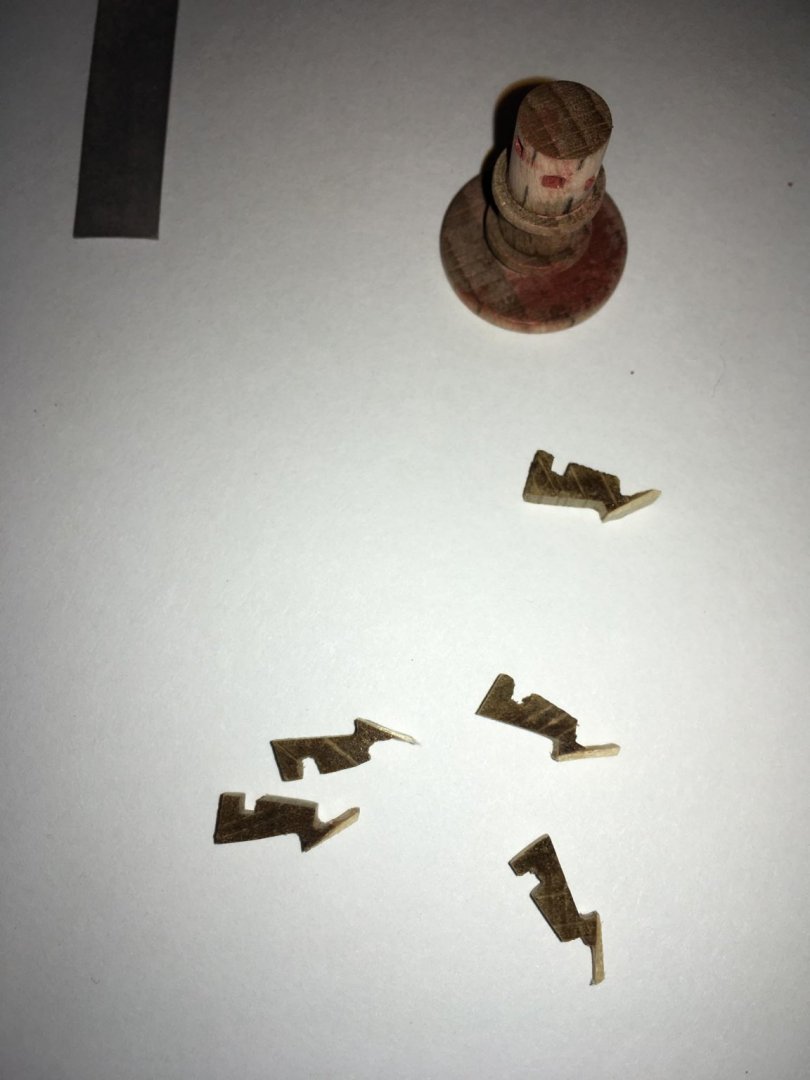
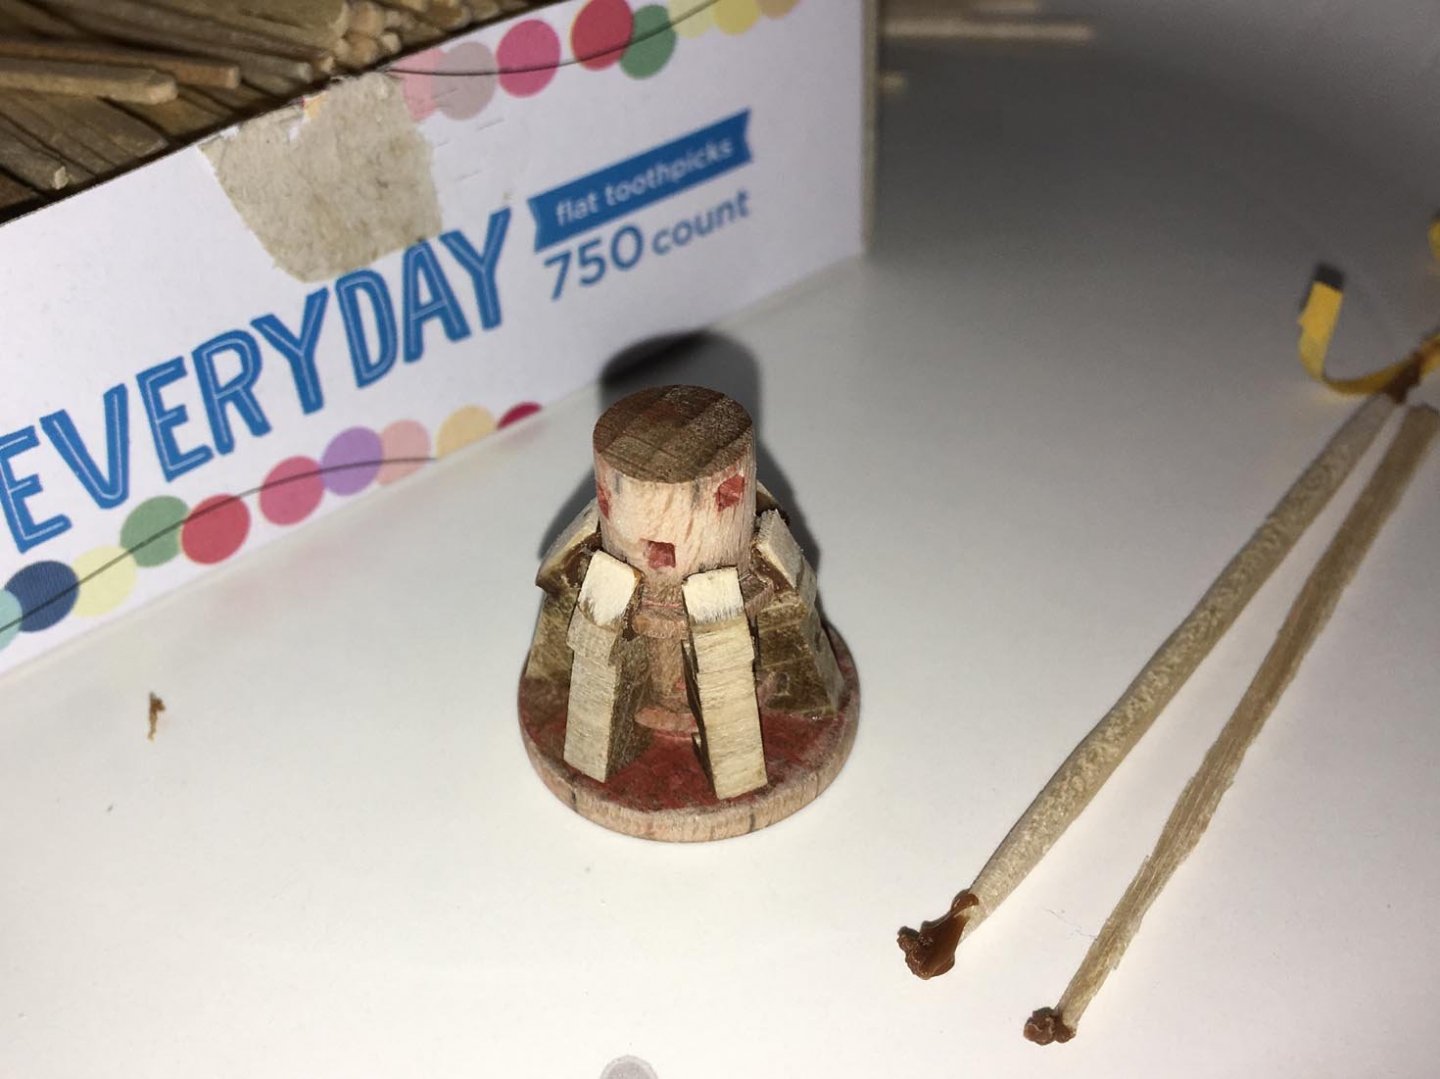
I attached a temporary stand to the base of the capstan and set it up on my hand drill held in place with a vise: When I had spun it with the drill, sanding it down with a makeshift "sanding block", it looked like this: I also modified the whelps a bit: After I marked and drilled the holes for the capstan bars (which I will not mount or include, since the ship will be at sail and the anchors will be up), I squared off the round holes the best that I could: After the whelps were glued to the capstan, I sanded them some more to try to get the tops of the whelps closer to the drum as uniformly as I could: I filled some of the open spaces with "molten" styrene (as described earlier in the log for fixing the hole on the main deck): After puttying and sanding, the capstan was ready to paint:

-
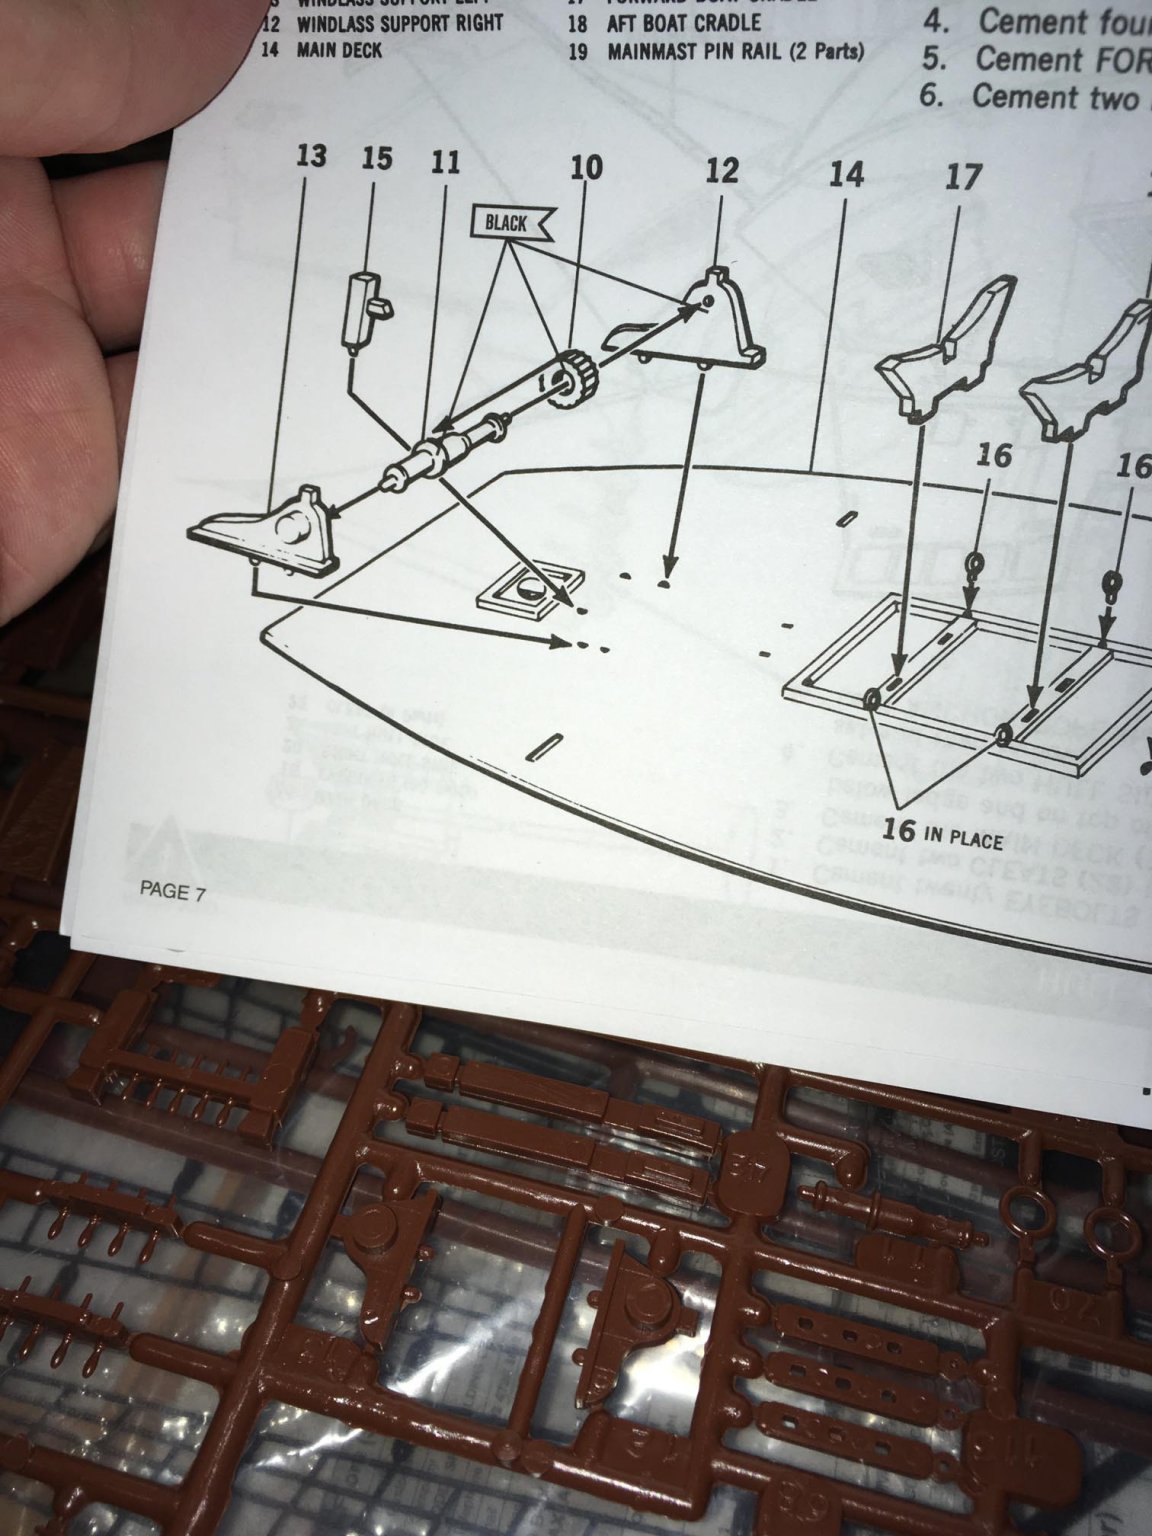
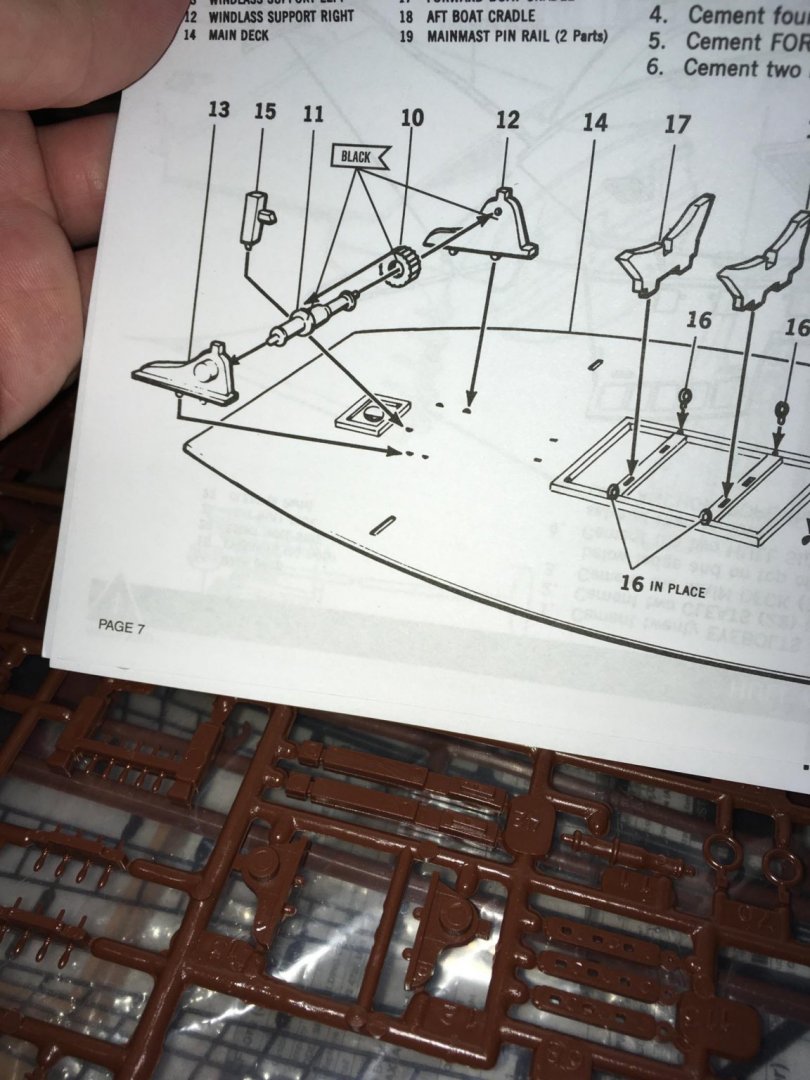
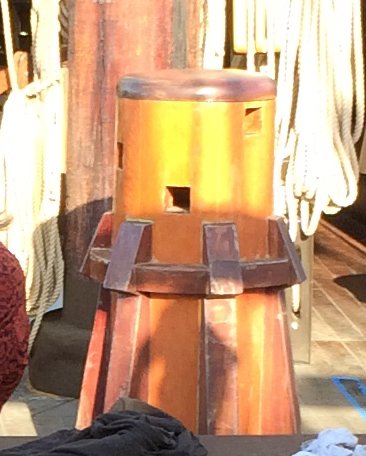
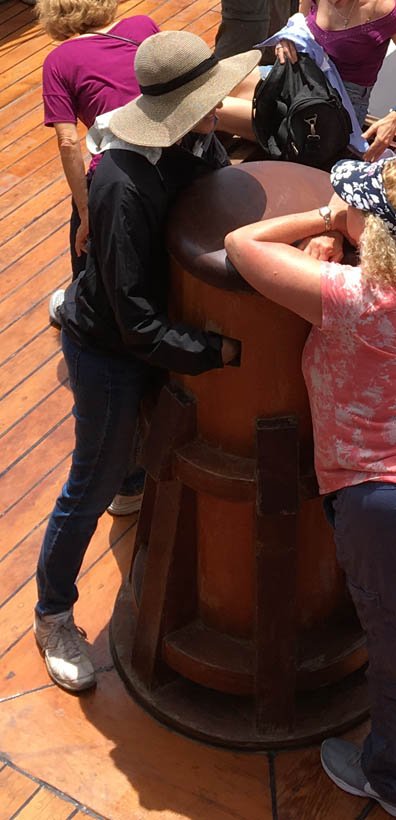
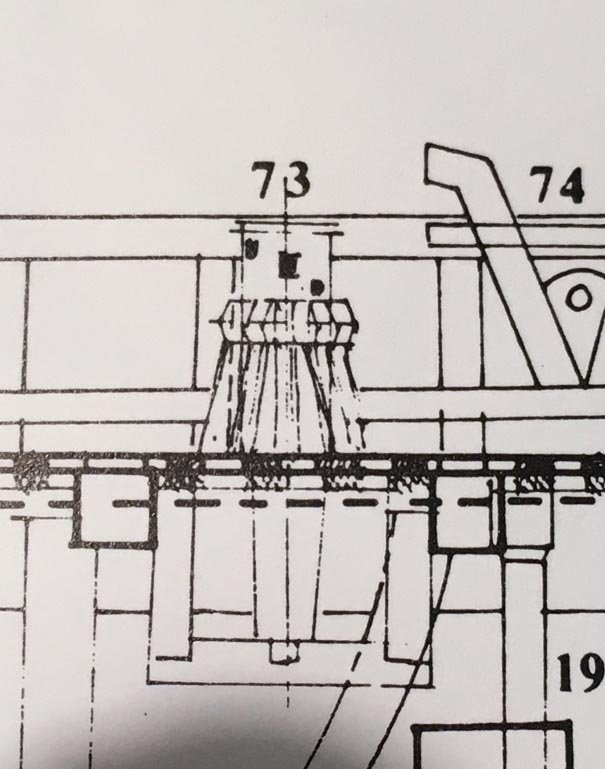
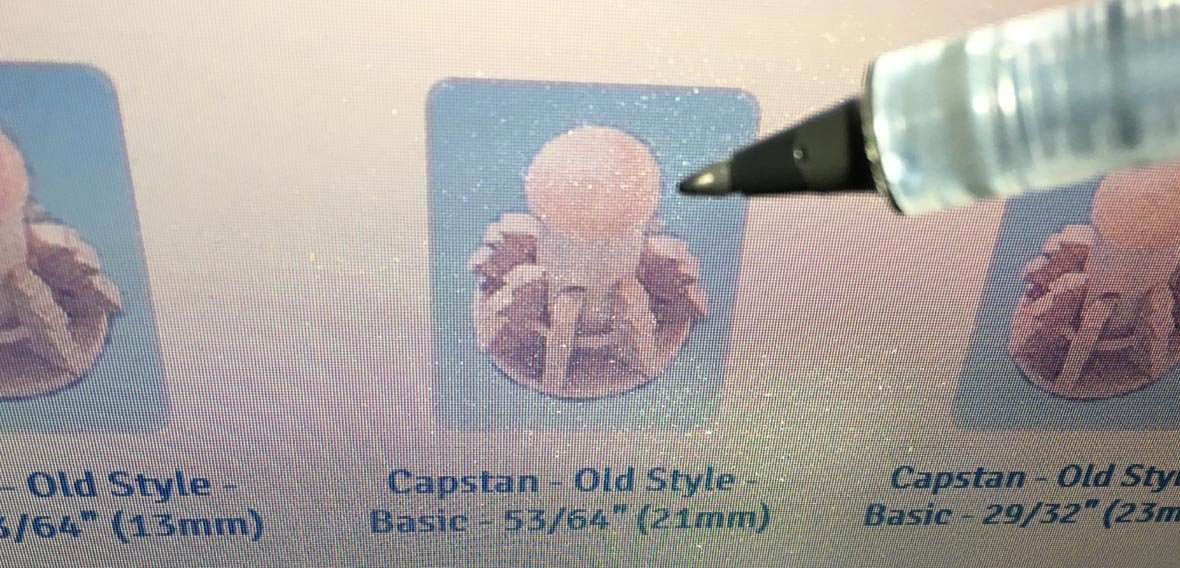
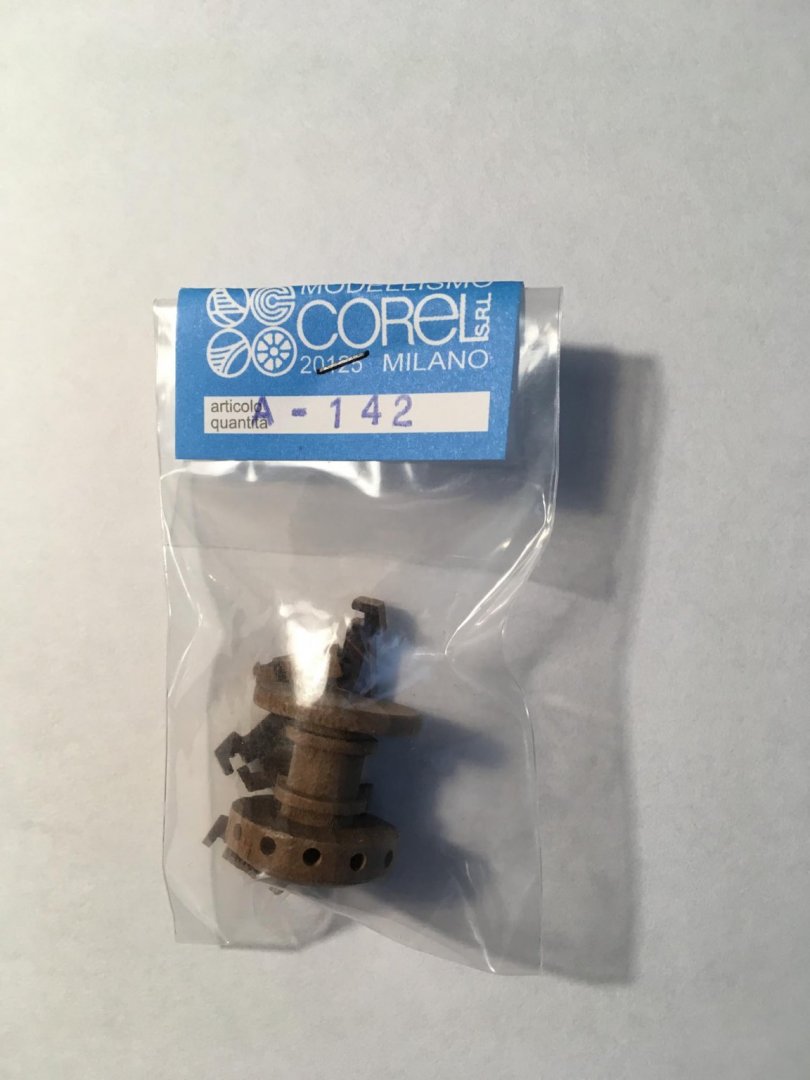
The kit includes parts for a windlass which would be assembled, painted black, and placed on the main deck: I decided not to use it for my galleon. At the Maritime Museum of San Diego, the replica of a mid-sixteenth century Spanish galleon, San Salvador, was well-researched and is supposed to be as authentic as possible for a galleon of its time period, so I oftentimes look to it for ideas. It has a capstan instead of a windlass: Here is the size of the capstan with respect to the size of a person: I see that in Peter Kirsch's book The Galleon: The Great Ships of the Armada Era (Naval Institute Press, 1990), in Figure 84 on page 140, there is a capstan with a similar shape on a cross-sectional drawing of a reconstruction of an early seventeenth century galleon from Stockholm, Sweden (see number 73): So I wanted to have a capstan that looks like San Salvador's capstan. It would need to be the right size when compared with the size of my sailor figures that were included with the kit. Online, I found a capstan whose advertised picture has a similar appearance and whose height is approximately correct. I ordered it: What arrived, however, although it had the correct height, did not look like that picture: Also, at least one of the whelps did not fit snugly: It would have been costly and time-consuming to return the item, and I am not sure if I would have been able to find one with the shape I was looking for in the appropriate size. Therefore, I decided to modify the capstan to get it to look more like San Salvador's.
-
Great Job, Robert! That’s one beautiful model! Congratulations!
- 165 replies
-
- 1
-
-
- english galleon
- revell
- (and 2 more)
-
Very impressive job with all those oarsmen — looks like this model could be a museum piece!
-
Thanks, Steven!
-
My best wishes for strength for you and your family in these difficult times.
- 165 replies
-
- 1
-
-
- english galleon
- revell
- (and 2 more)
-
Robert, I hope your family member recovers soon — my thoughts are with you. Your model is looking very good — it’s great to see all that rigging in place so far! 👍🏻
- 165 replies
-
- 1
-
-
- english galleon
- revell
- (and 2 more)
-
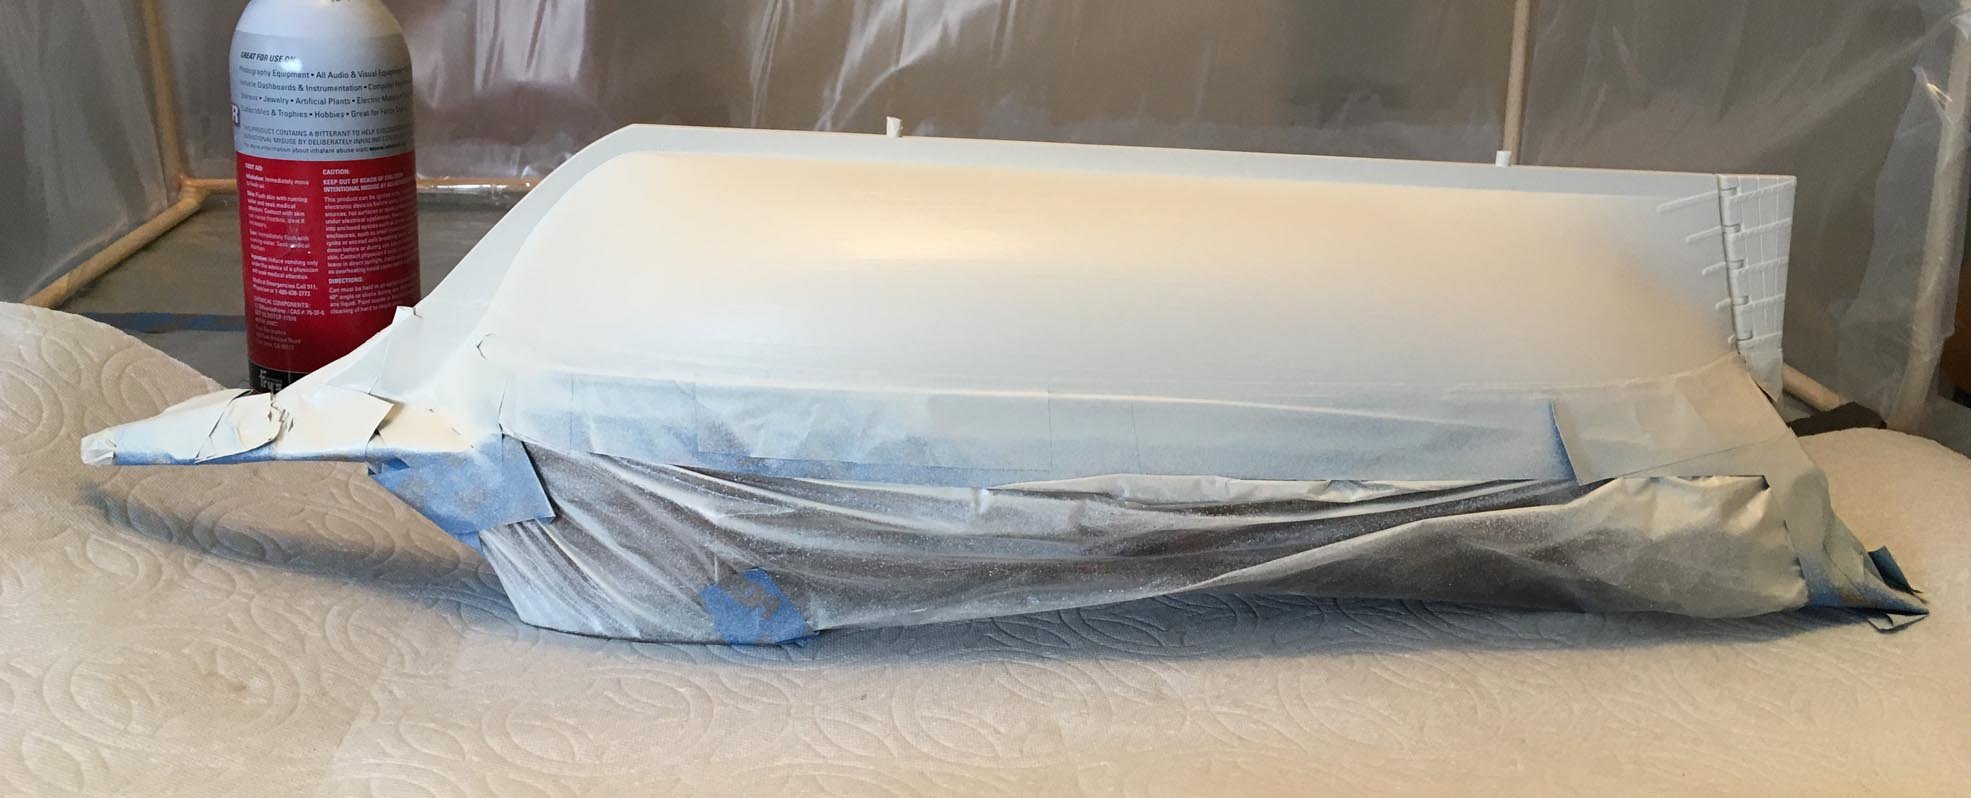
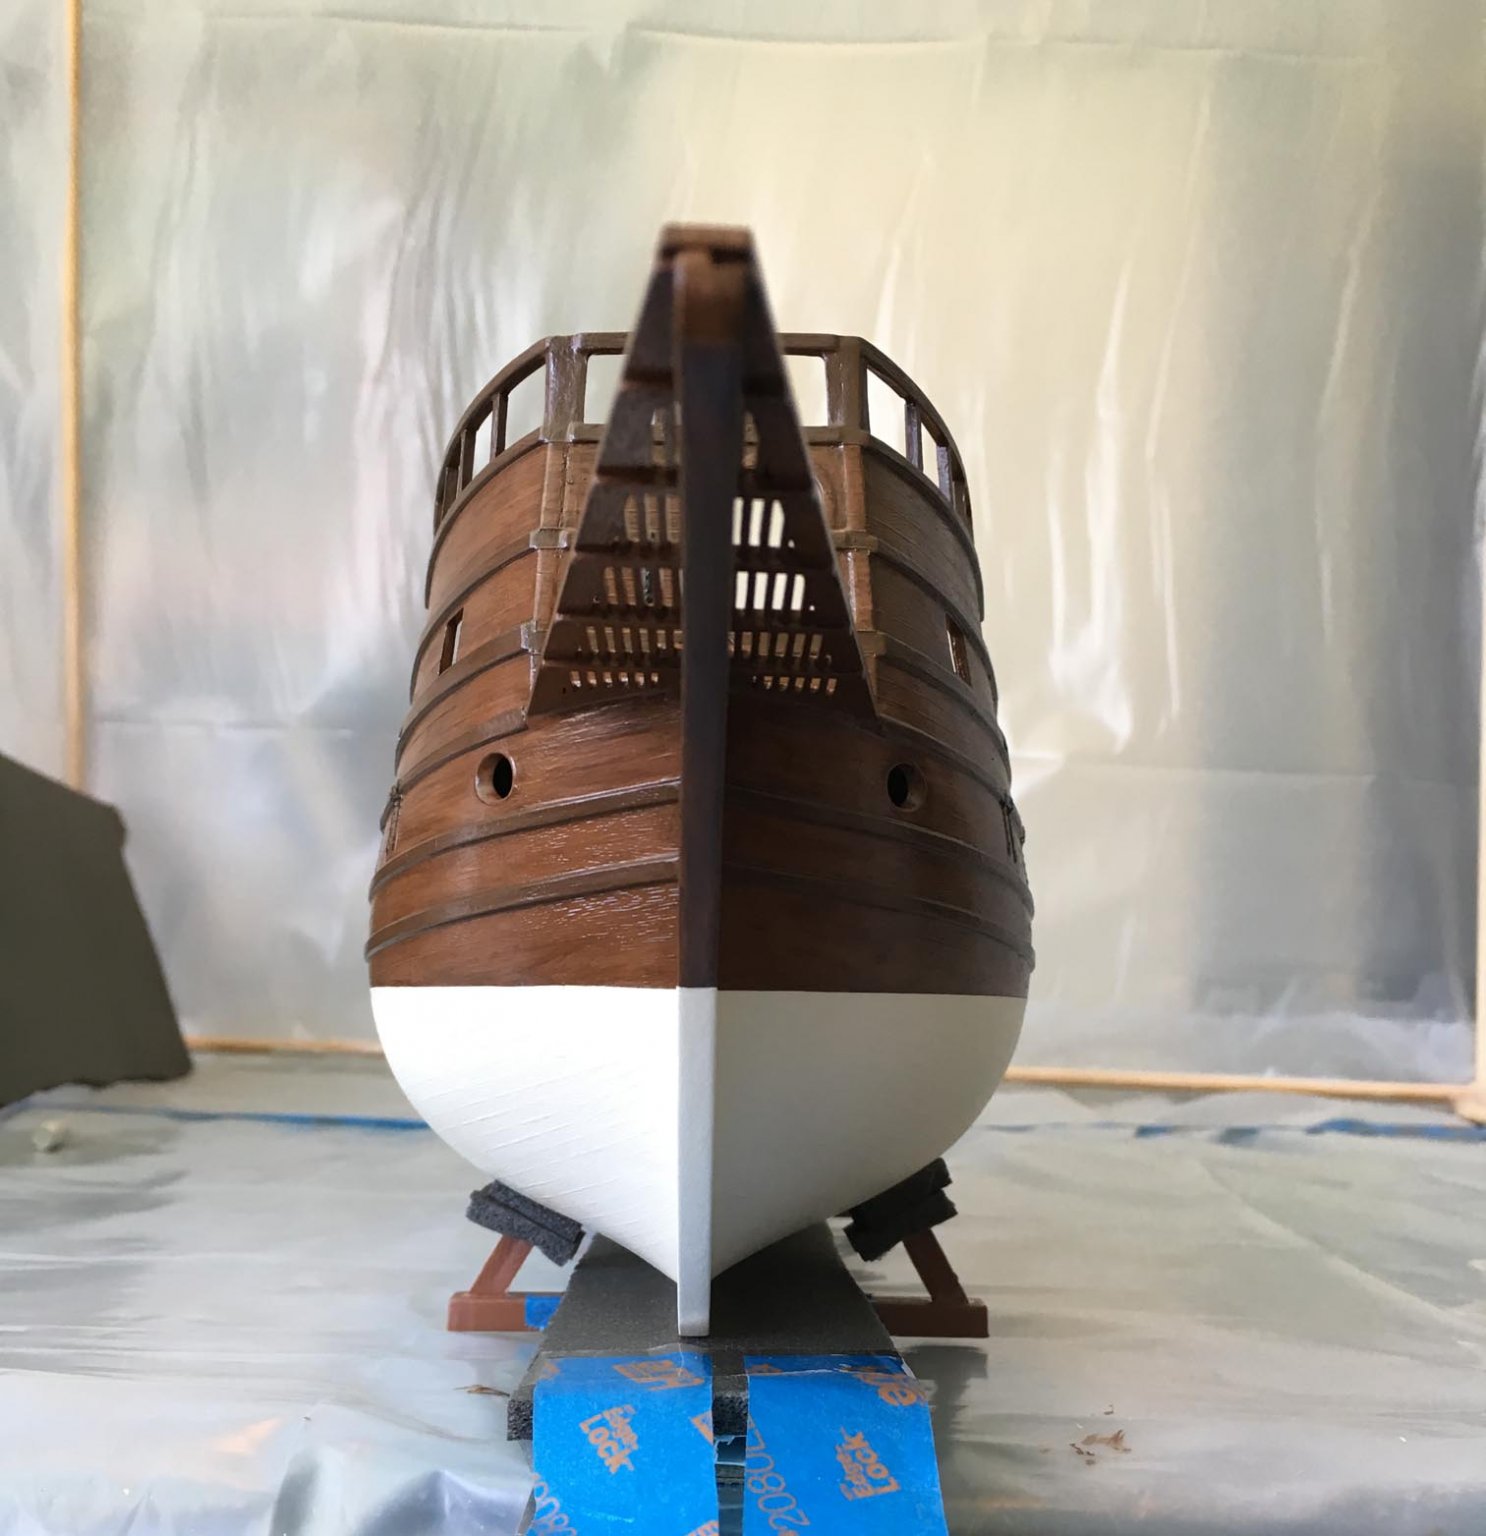
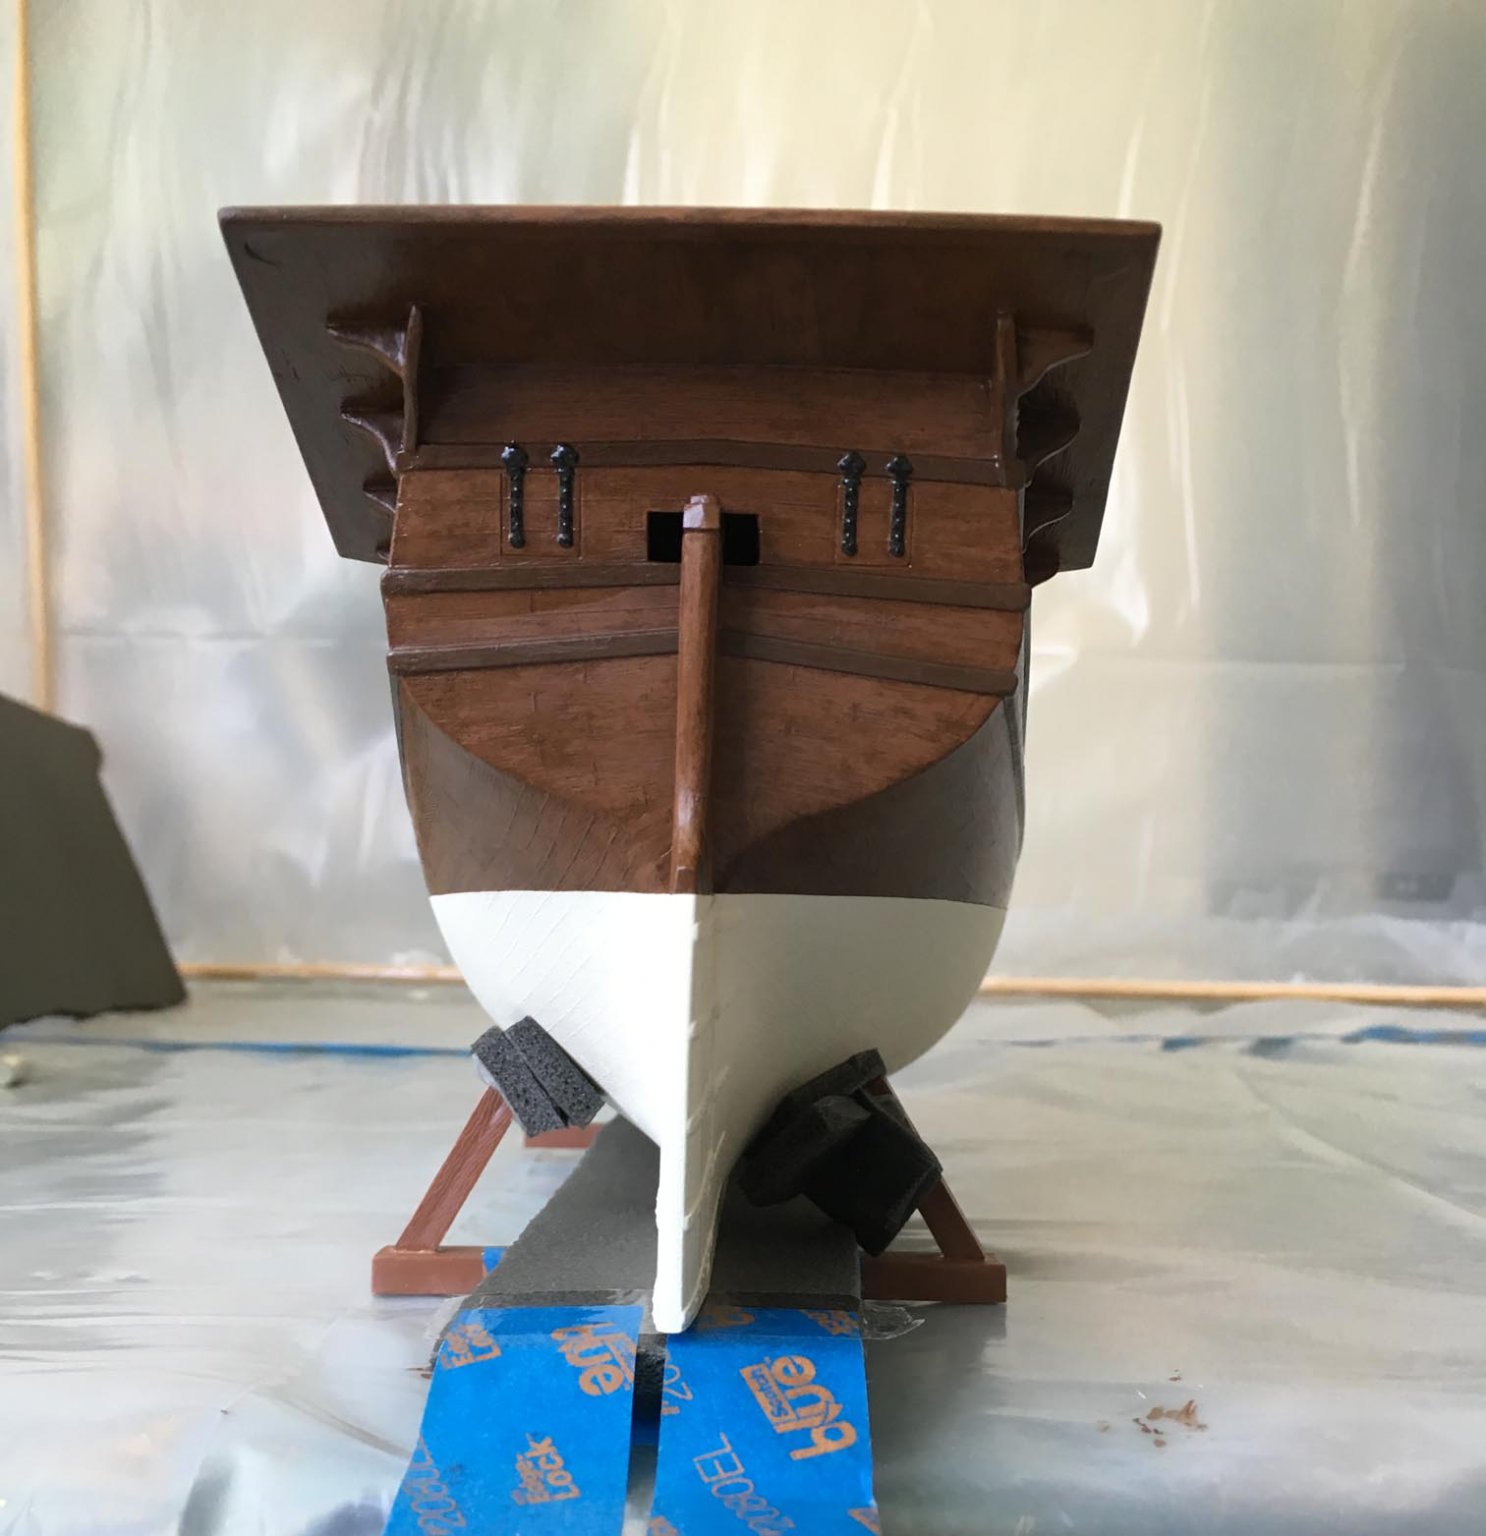
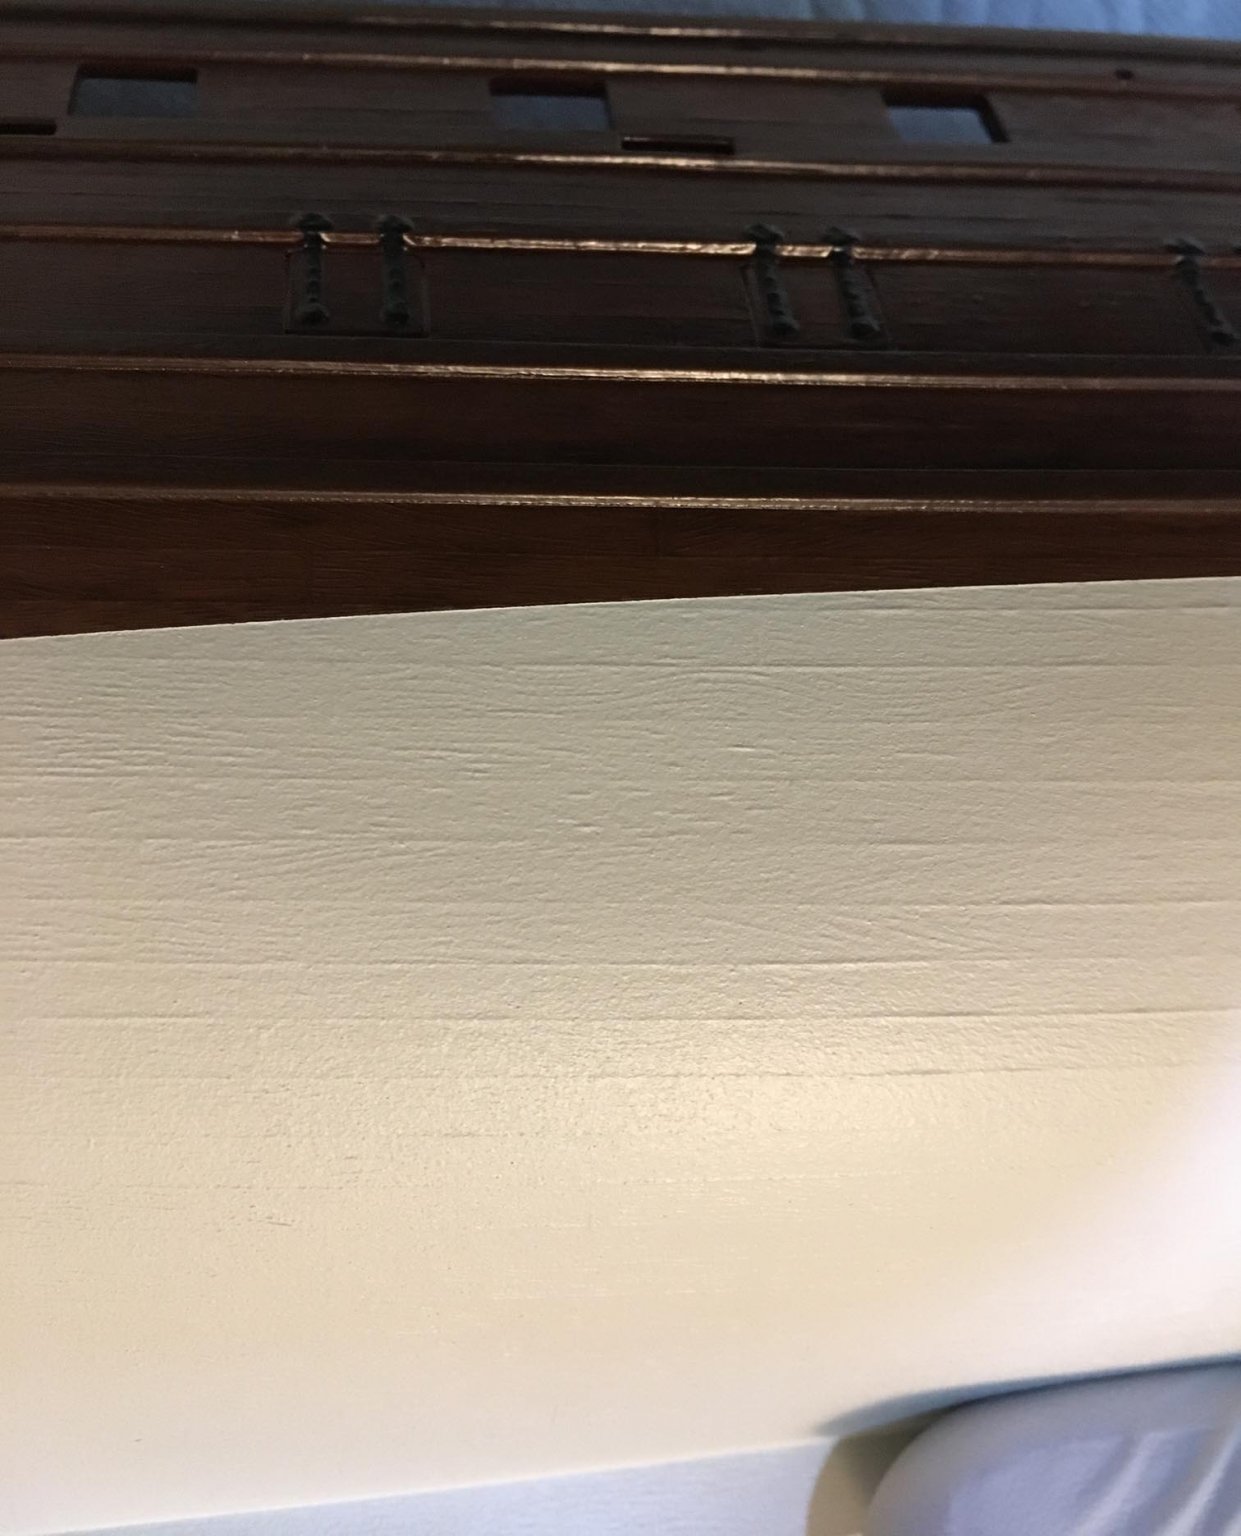
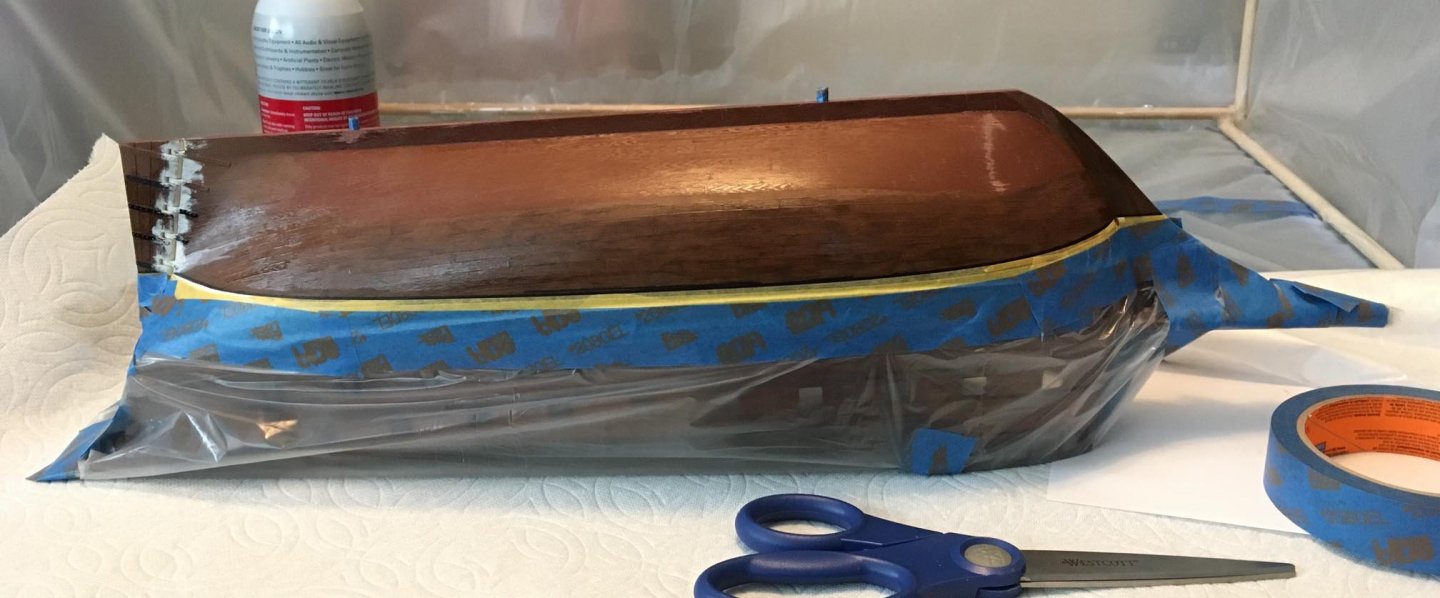
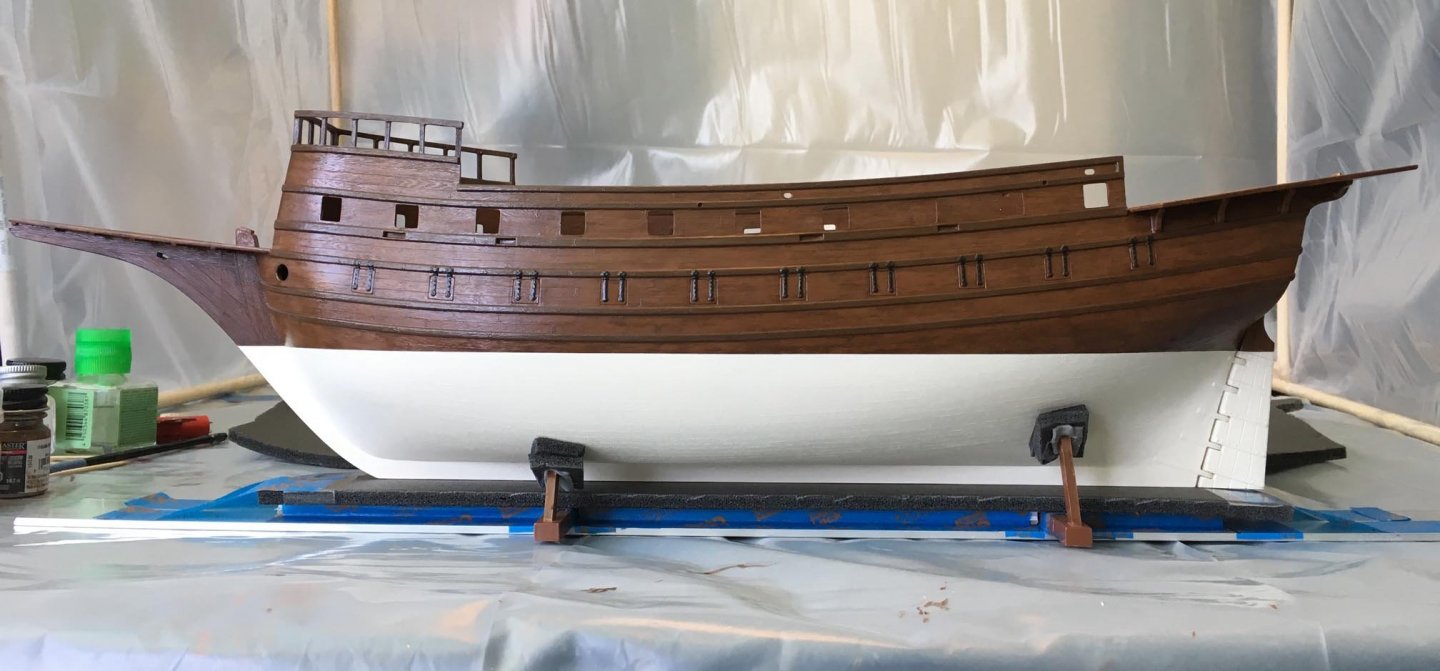
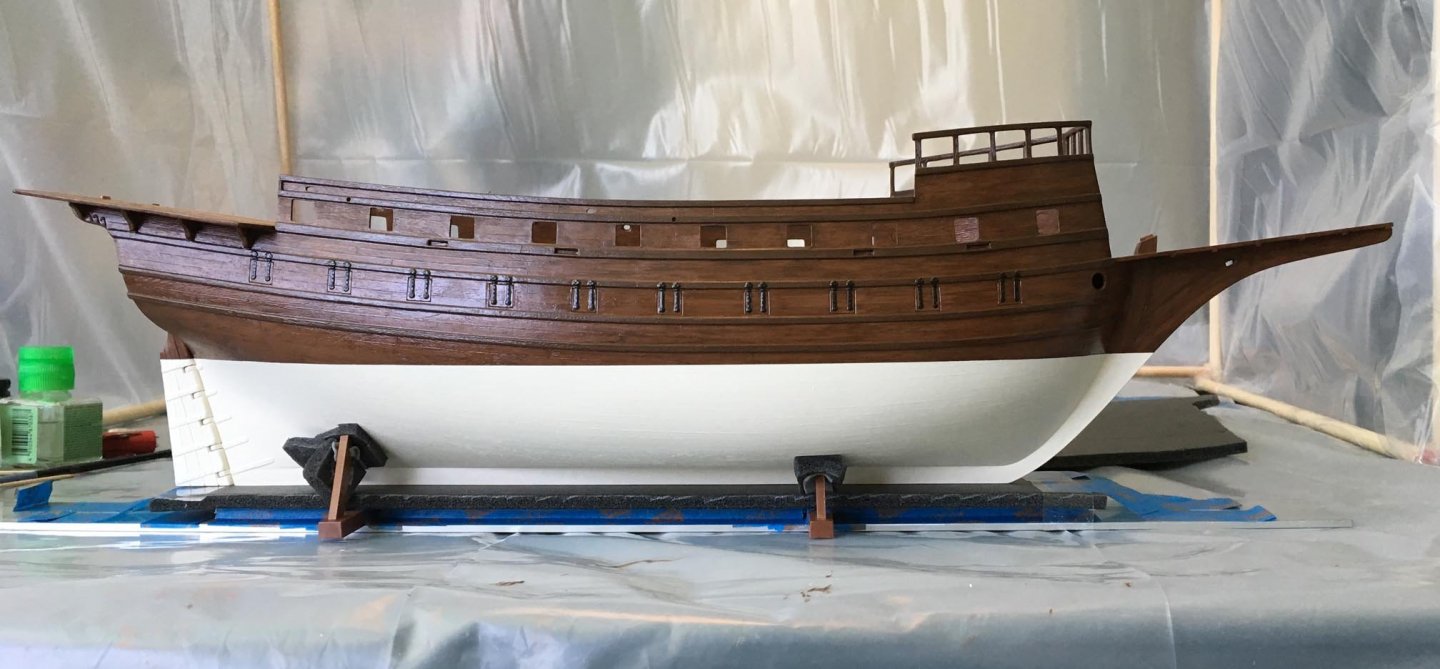
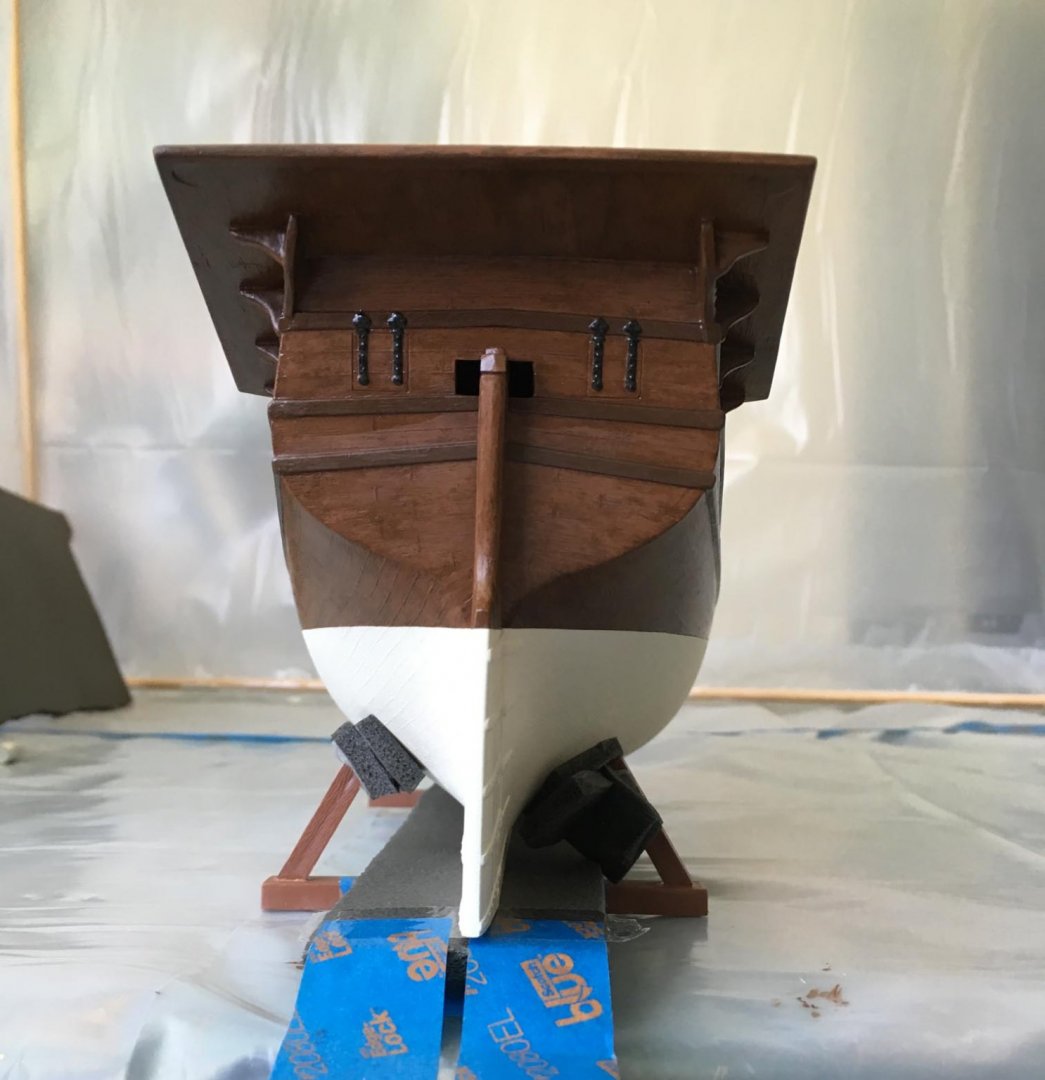
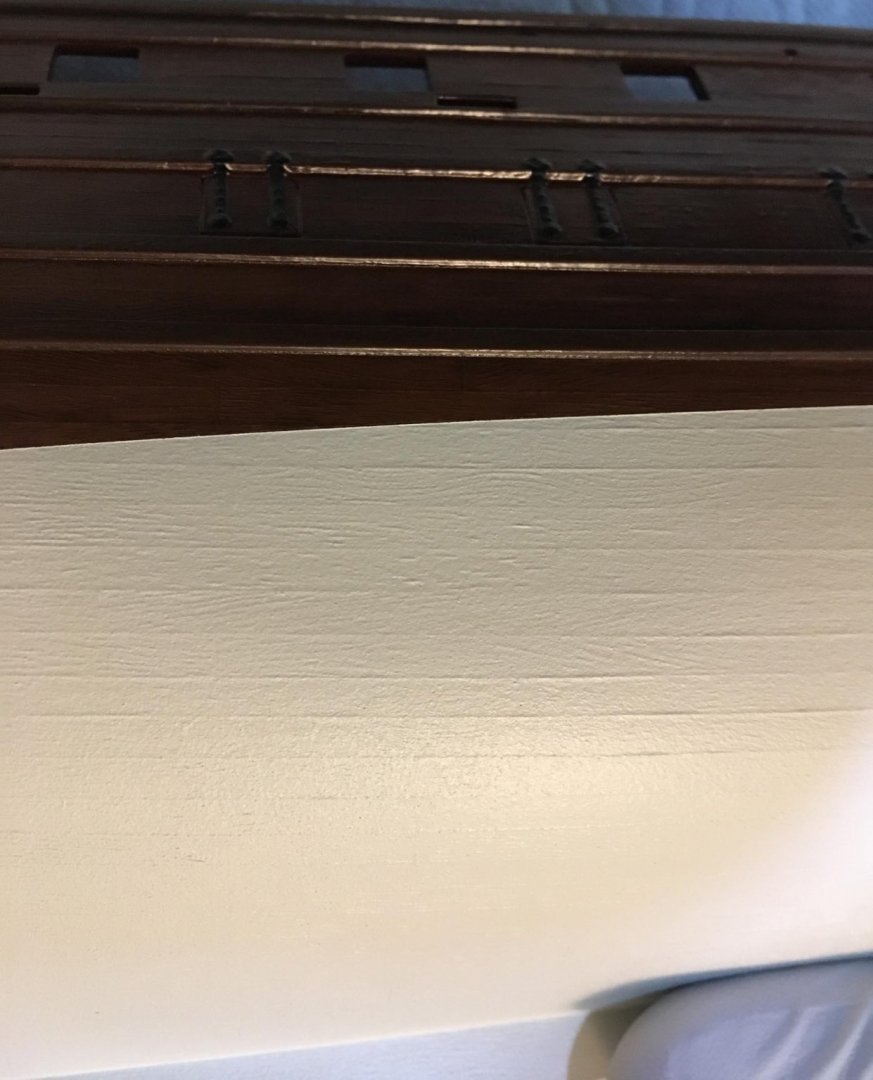
The hull is now painted below the waterline. The first photo shows it covered above the waterline masking and ready to paint: This next one shows how it looked after it was sprayed with multiple coats of a slightly off-white paint from a spray can ("rattle can"). I used an enamel paint because in my experience enamel adheres better to plastic than acrylic. Multiple coats were necessary because I wanted an opaque, uniform color, and the dark hull not to show through. Here are a few views after the masking was removed and a little "touch up": The straight waterline is marked a little below the point of maximum breadth, as seen in Peter Kirsch's book The Galleon: The Great Ships of the Armada Era (Naval Institute Press, 1990) -- although that puts it a little below the lowest wale here, since the point of maximum breadth is actually AT the wale in this model. With the waterline where it is, the stern bulkhead in this particular model rides a bit high above it. I wanted the wood grain and "planking" of the lower part of the hull to be visible beneath the off-white paint, so I avoided brush painting (which may have obscured it and also may have been difficult to make uniform with multiple coats to hide the dark hull beneath it). I do not have an airbrush to do thin sprayed coats. Actually, years ago, I did have an airbrush and a compressor, but I often had difficulty using and maintaining it. So instead, I used a spray can. Testors didn't seem to have an enamel color that I liked ( I didn't really want a stark white), so I used a Rustoleum multi-purpose enamel that would also stick to plastic. It ended up being a rather thick paint that dries hard. Despite its thickness, I still needed multiple coats to make the result a uniform, opaque off-white. Unfortunately, with a spray can, you do not have any mechanical control over the spray pressure or the size of the outlet hole at the nozzle. These droplets ended up being a bit large, and there is a prominent "spray" texture that is visible over the surface: Some of the wood grain and "planking" in most of the sprayed areas is visible despite the "spray" texture, while in other areas, it is obscured almost if not completely (where some of the paint coating was thicker). I sanded a tiny bit of it down, but then there was the problem of exposed dark plastic wood grain, because in this model, the simulated wood grain and "planking" is actually raised above the surface! So I cannot reasonably get rid of the texture without eliminating the grain by sanding and starting over. Since the off-white color below the waterline is meant to simulate tallow or lime or sulfur, or some combination of those (and maybe throw in some pitch), to prevent barnacles and/or shipworms, perhaps I can imagine the texture and unevenness on my model as a thick, "lumpy" coating of those protectants. I really don't know what the coatings actually looked like in the 16th-17th centuries, though, but I doubt they were as smooth as paint.


-
Robert, this is one way in which the English Man O’ War differs from the Spanish Galleon. The two kits apparently share the same mold for the main deck, so that hole exists in both. However, the Spanish Galleon only has three masts (instead of four as in the English Man O’ War). The Spanish Galleon’s mizzen mast is actually placed further aft than what you see with the Man O’ War, since there is no bonaventure mast in the Galleon. In the Spanish Galleon, the mizzen is placed on the quarterdeck, and it does not go down completely to the deck below. I hope this helps explain it. Jeff
-
Thanks, Bill! I am aware that it likely does not represent a specific ship, and there are some problems with proportions. Some old paintings do show very high sterncastles (and forecastles, for that matter) on Spanish galleons. But since there is so much variability in the galleons’ appearances in the paintings, I am not sure if the artists were intent on making their paintings entirely accurate in the lines of the ships. I am a bit bothered by how high the masts are in this model, so I have decided to make upper masts and spars out of wood to lessen their length a bit, going more for proportions that I have seen outlined in books, including Peter Kirsch’s The Galleon: The Great Ships of the Armada Era (Naval Institute Press, 1990) and A Modeller’s Guide to Rigging by A. Richard Mansir (Moonraker Publications, 1981). I will construct cloth sails to fit the different masts and spars. I also found your old thread from FineScale Modeler about the models: http://cs.finescale.com/fsm/modeling_subjects/f/7/t/99275.aspx With that information, I looked at the photograph of the votive model ship, possibly built in the time of the galleons, on page 8 of the New Vanguard book Spanish Galleon: 1530-1690 by Angus Konstam (Oxford/New York, Osprey Publishing, 2004) and it does show a high sterncastle with a far backwards sweep as seen in the model. At any rate, my final vision of my build will be like a “fantasy” version with some associated heavy gilding of the stern which was probably not really seen in the real life Spanish Galleons, yet represents a “regal” designation and alludes to the treasure of the Spanish Empire. I will also ground that vision with as many practical realities as I can (given the limitations of this plastic kit) that likely did exist in one form or another in the late 16th or early 17th centuries.
-
Thanks, Nino. The lacquer is not perfect in preventing an occasional small “chip”, but it does a reasonably good job.
-
You’re welcome, Bill. I think that if it had not been for online forums and other sites, I would not have been able to expand my knowledge, and I continue to learn new ways to improve the results. I am happy to share it with others.
-
Thanks. It takes some time, but it’s worth it in the end considering all of the hours invested in the whole project.
-
Thank you, Old Collingwood. By the way, your build of The Black Pearl is amazing, and I think that the alterations really add uniqueness and life to it (especially with those awesome pirate figures that you added)! The figures that are included with the Spanish Galleon are less varied (repetitions of the same poses), but I definitely intend to use them.
-
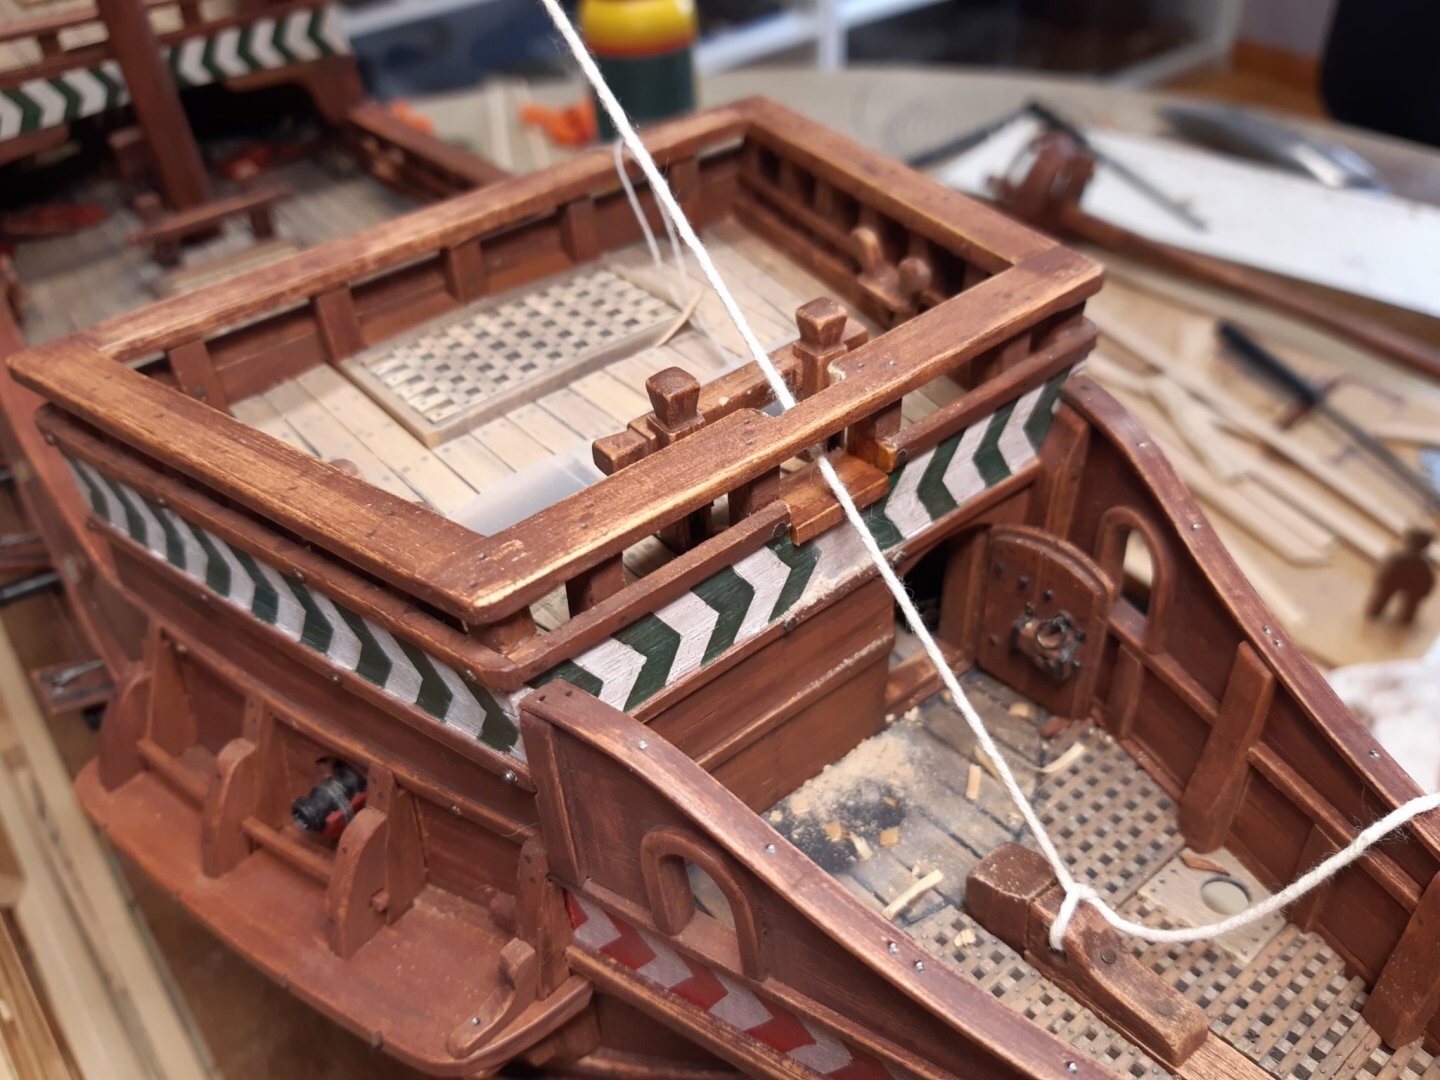
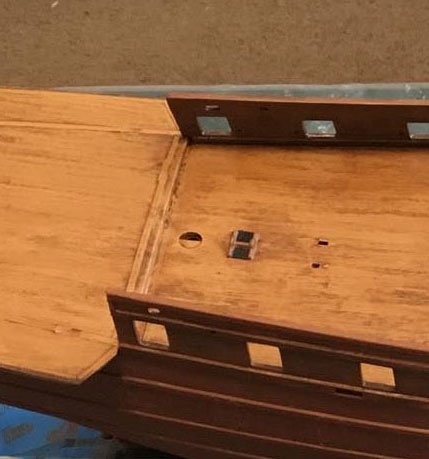
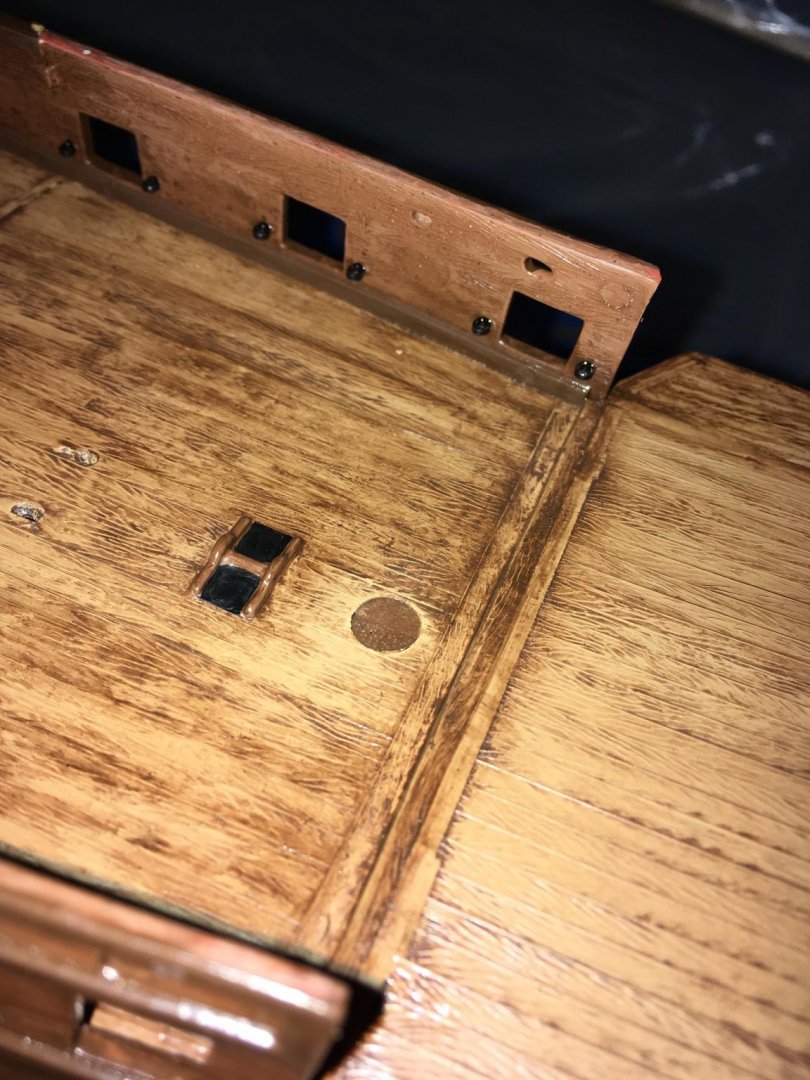
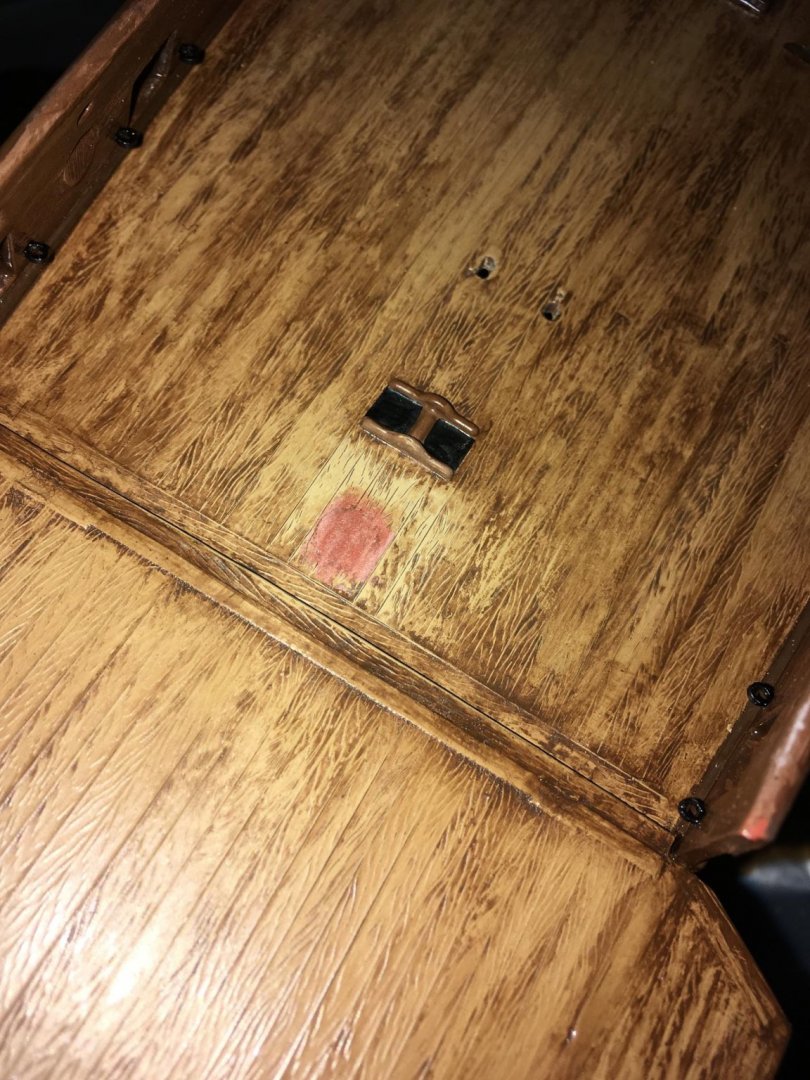
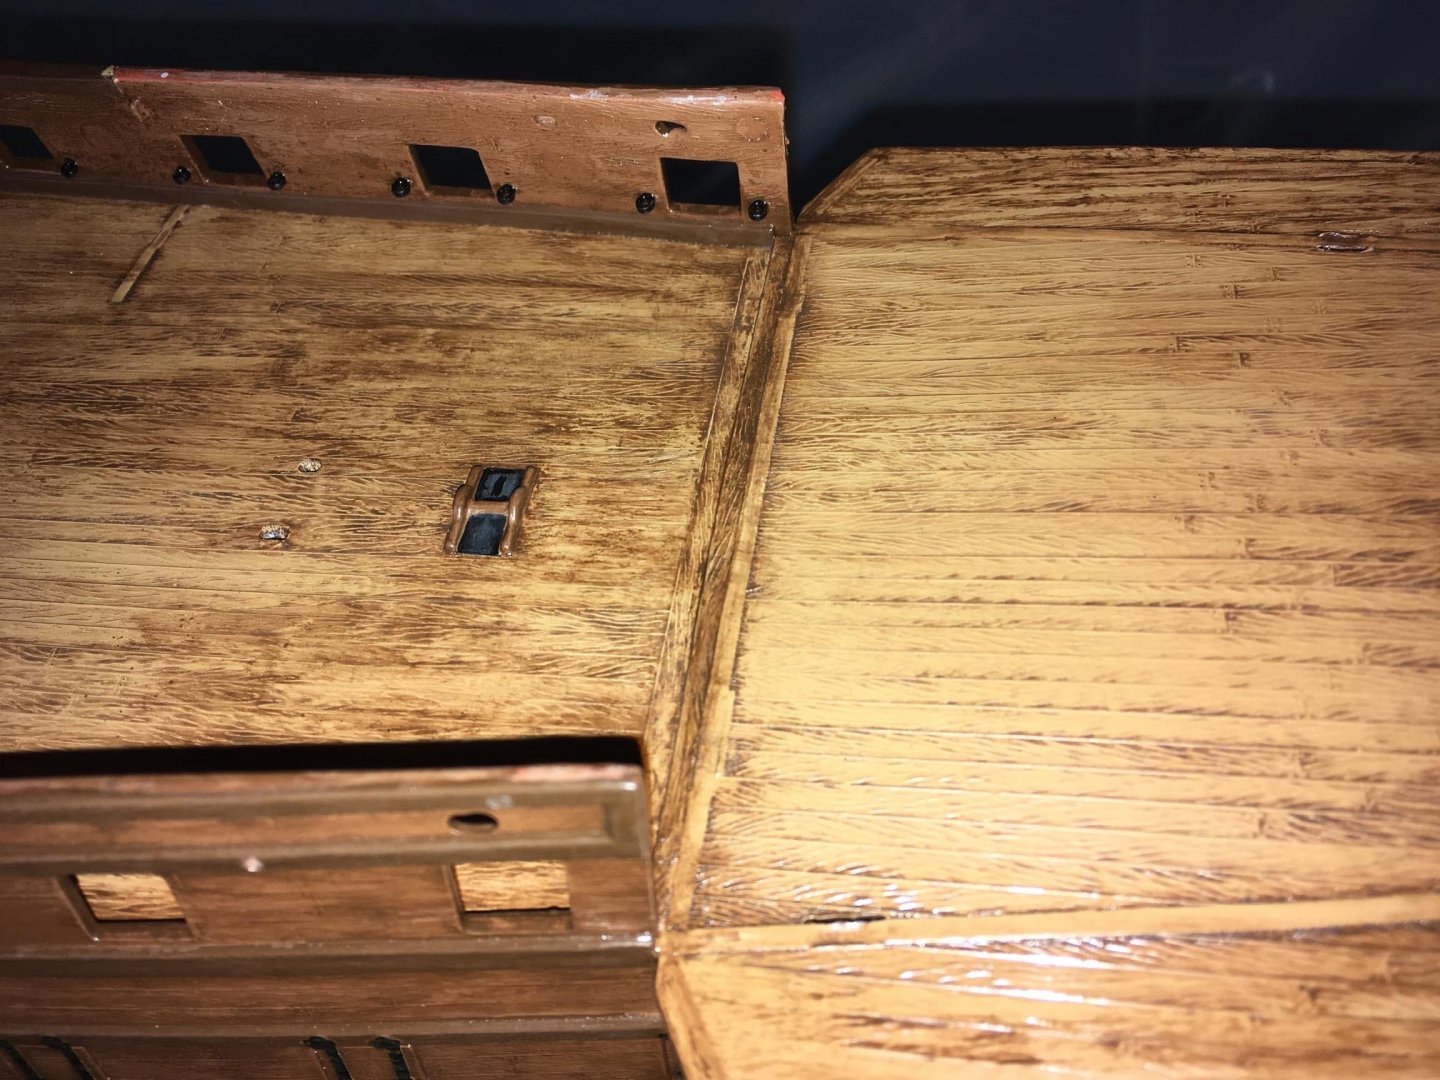
There is an additional hole on the main deck that has no purpose for this model. I did not initially realize this fact when I painted the deck and glued it in place. I figured that each hole had a purpose for cementing bitts, masts, etc. It appears to be a hole to fit a mast, and it is located behind the rowle where the whipstaff will be attached (to the left of it in this view): The Revell 1:96 (really 1:64-65) Spanish Galleon shares many of the same molds as the English Man O' War. They probably share the same main deck mold. Spanish Galleon has three masts, with the mizzen mast attached to the quarter deck. English Man O' War has four masts, with the bonaventure mast apparently attached to the quarter deck. I wonder if this "extra hole" on the main deck is meant for the English Man O' War's mizzen mast? At any rate, I needed to eliminate it in the Spanish Galleon. So here is the technique that I used in "fixing a hole"... I have a glass jar in which I dissolved some styrene sprue from the kit with Testors liquid cement, which resulted in "molten" styrene that can be used to fill gaps, etc. I placed some of this styrene into the hole and kept it supported and pressed down flat with Tamiya masking tap for over a week (it takes a while for the styrene to harden). When I removed the tape, the styrene was slightly depressed in the hole: To even it out, I used Bondo Glazing & Spot Putty (907) and sanded it down: When dry, the putty is hard and crumbles easily, so I coated it with Testors flat clear lacquer, and then, after it dried, I used a knife to "scribe" some "wood grain" into the surface to take the weathering when I painted it. Here is the result after painting and weathering: Mat varnish will eventually "flatten" the sheen and even out the black around the rowle (which I had sanded and touched up).
-
That is an amazing stern!