HOLIDAY DONATION DRIVE - SUPPORT MSW - DO YOUR PART TO KEEP THIS GREAT FORUM GOING! (Only 72 donations so far out of 49,000 members - Can we at least get 100? C'mon guys!)
×


Jeff T
-
Posts
247 -
Joined
-
Last visited
Content Type
Profiles
Forums
Gallery
Events
Everything posted by Jeff T
-
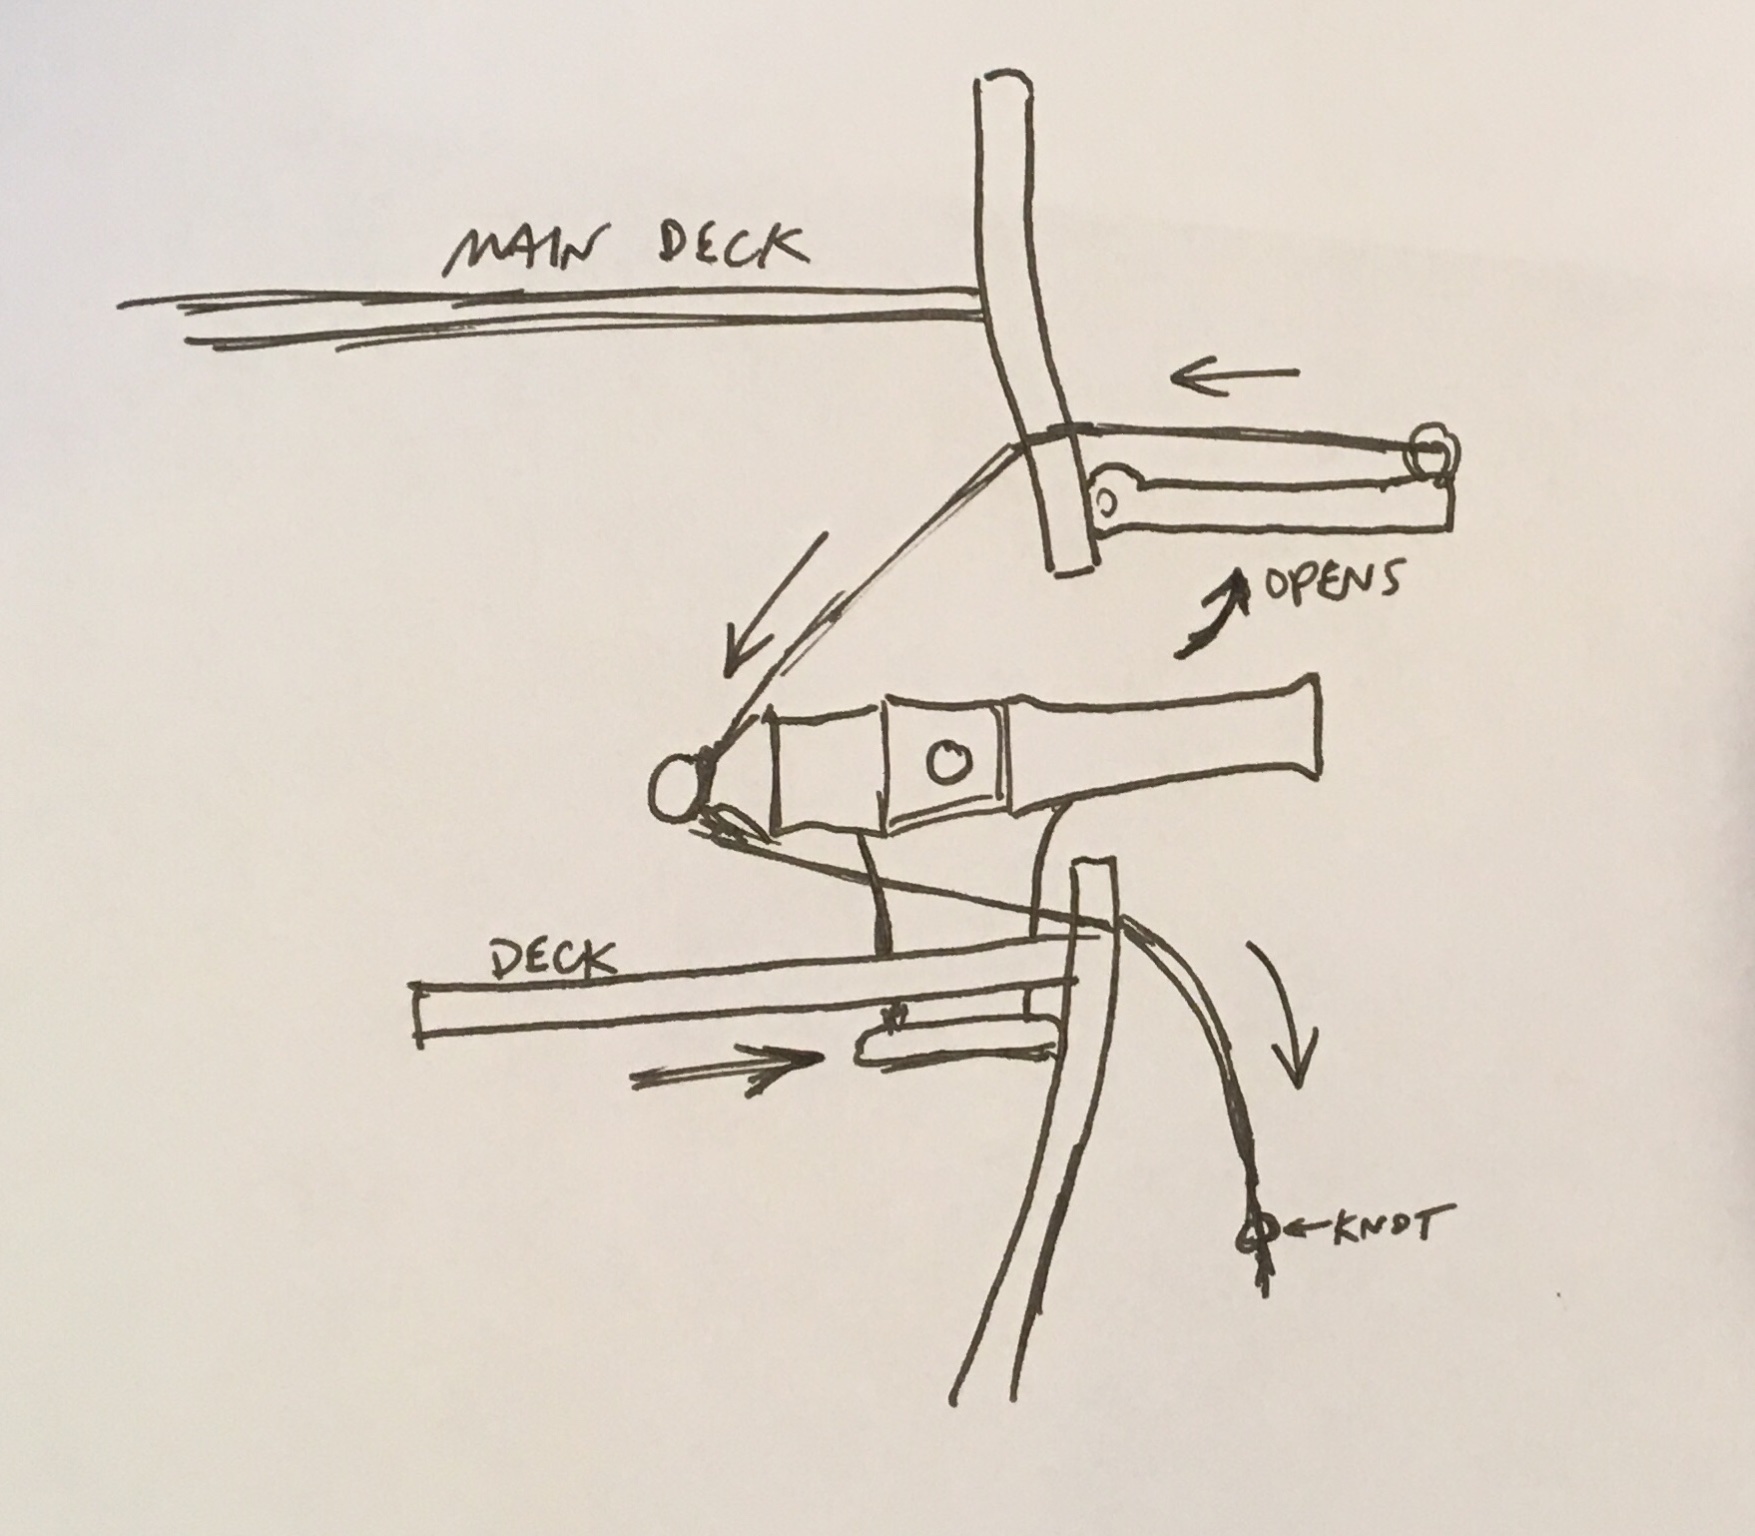
I was thinking more about the above scheme and realized that the rigging line cannot be tied to the breech, because the length of line between the gunport door and the cannon actually has to shorten as you pull the line in order for the door (lid) to open as the cannon moves forward. In order to do this, it may be better to drill a hole in the metal cannon somewhere in the rear of the cannon, vertically (top to bottom) so that you can feed the line through it. When you pull on the line below the gunport, the line will then slide through the cannon, moving it forward as the door opens.
- 41 replies
-
- 2
-

-
- Spanish Galleon
- Flying Dutchman
- (and 3 more)
-
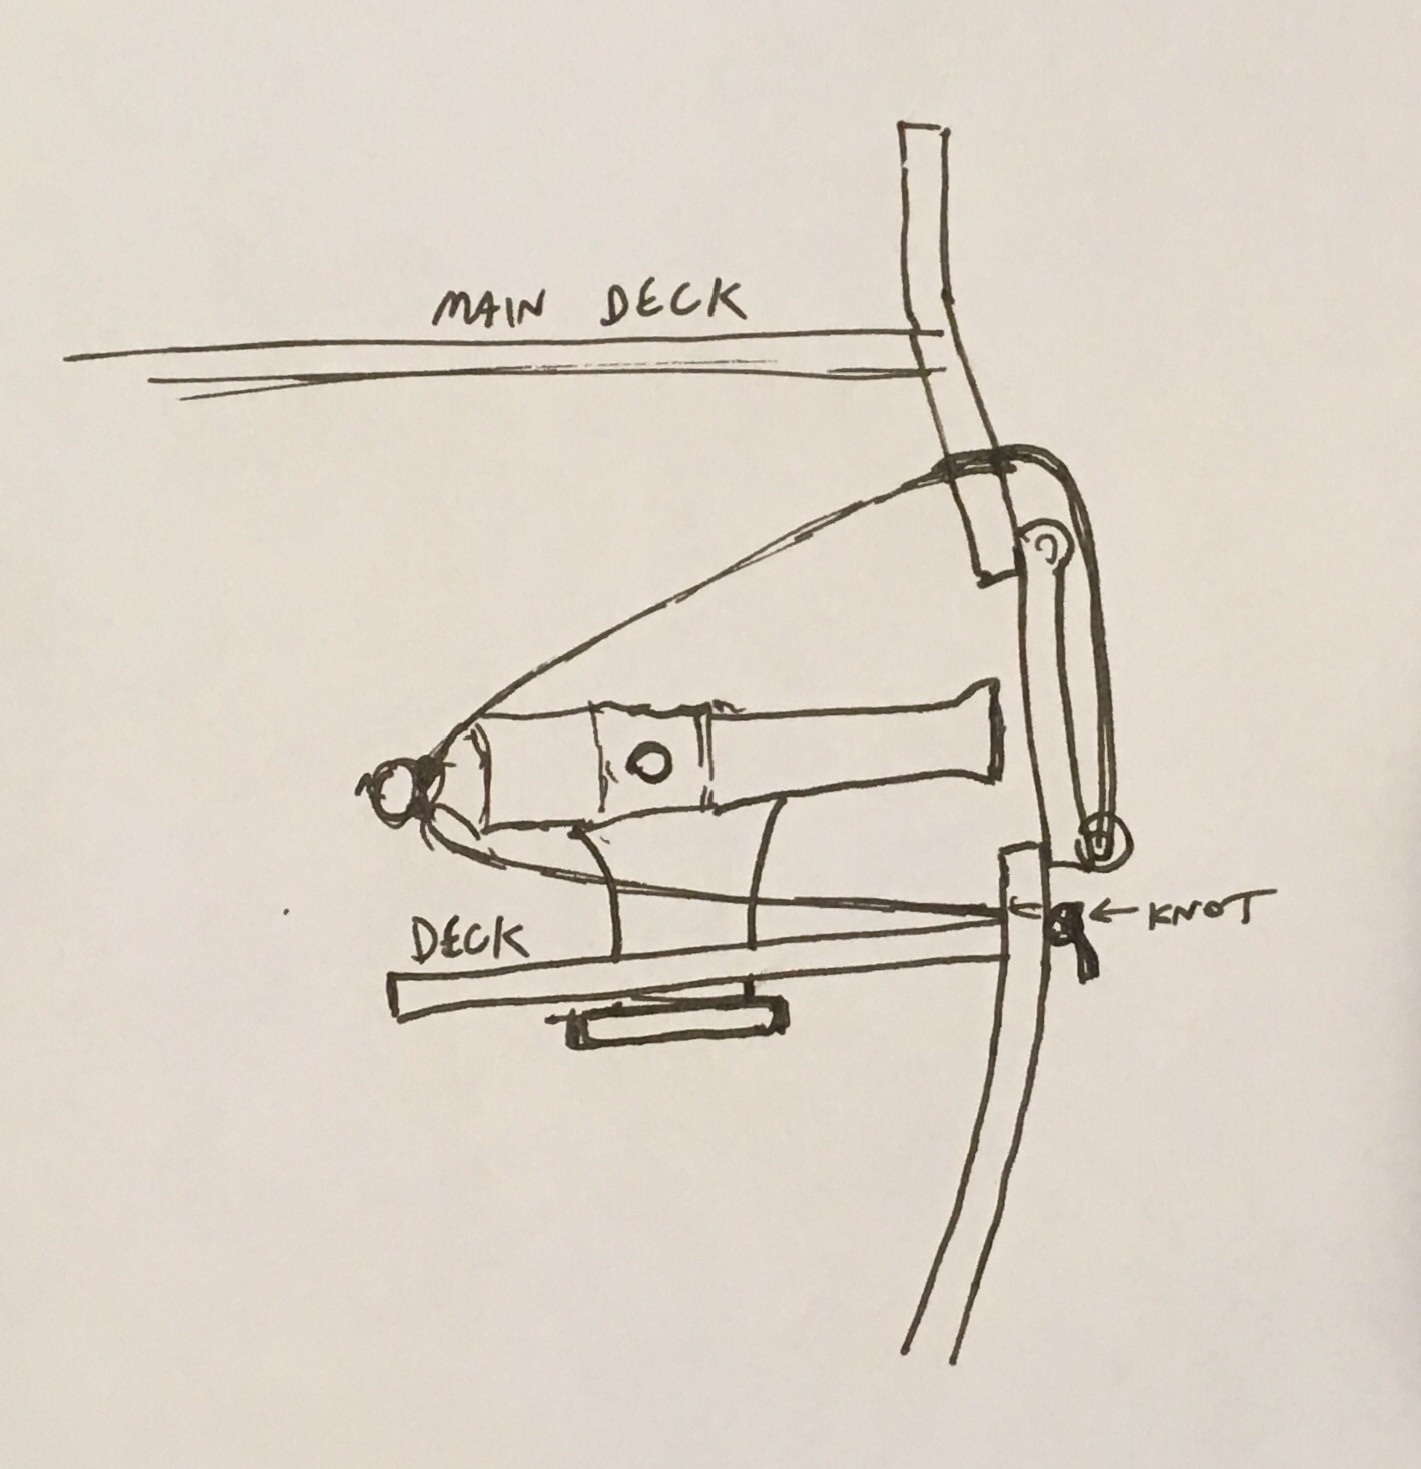
I have an idea on how you can add some “action” to the cannons. In the sketch below, it is a side view. The cannon is mounted on a vertical “slider” made of styrene or wood, which goes down through a long slit in the lower deck, and ends at a crosspiece BELOW the deck which will keep the slider from coming out of the deck when the cannon is moved. You may also need some kind of crosspiece on the slider ABOVE the deck as well (I didn’t draw that one) to keep the slider from sinking down into the deck. Basically, there is rigging line attached to the gunport lid, which goes through a hole above it, is then tied to the breech of the cannon, and then comes out again through a hole below the gunport: When you pull on the line below the gunport, the tension will open the gunport lid (door) and move the cannon forward at the same time, as it slides forward in the slit in the lower deck (see the directions of the arrows): When the ports are open, you can mostly “hide” the line that you pulled on by tucking it in through the gunport. When you want to close the gunports, “untuck” the line so that it is outside again, start to slide the cannons back with your fingers, and as the gunports start to close, you can push them closed the rest of the way. This system might theoretically work, but I haven’t tried it. Maybe it is worth experimenting?


- 41 replies
-
- 3
-
-
- Spanish Galleon
- Flying Dutchman
- (and 3 more)
-
I especially like the more ornate frames around the windows. It give a more “romantic” feel to the ship that is typical of pirate movies and such. It reminds me of the Neptune galleon in Genoa, which was built for Roman Polanski’s pirate movie (not a great movie, but the ship is amazing): https://en.m.wikipedia.org/wiki/Neptune_(galleon)
- 41 replies
-
- 2
-
-
- Spanish Galleon
- Flying Dutchman
- (and 3 more)
-
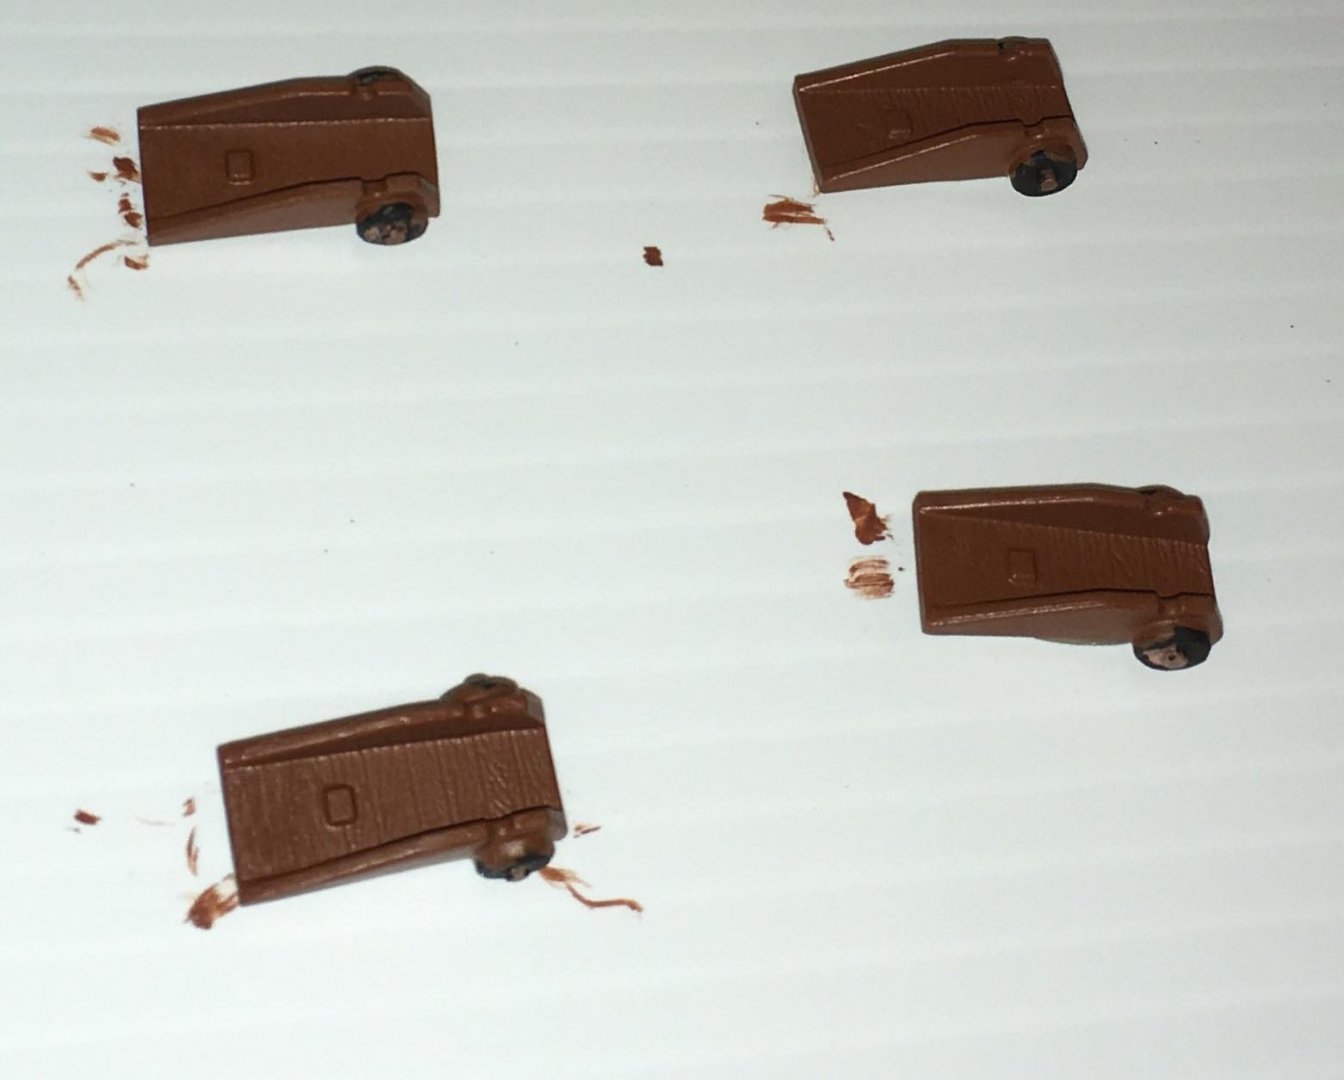
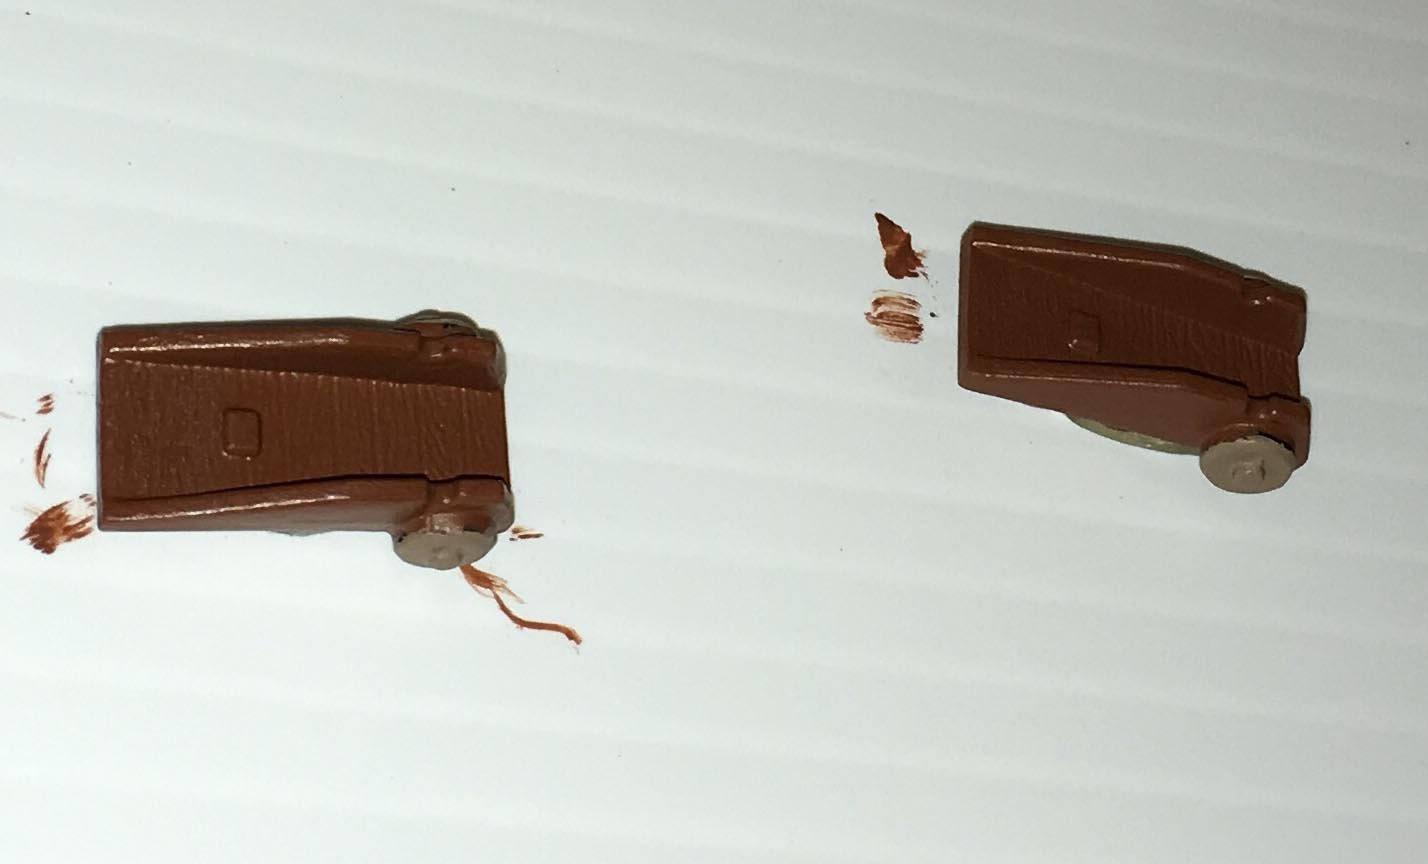
In the description of the steps involved in painting the gun carriages, above, I forgot to mention that before I weathered them with the brown enamel stain and then the dry brushed leather enamel, I applied an isolation coat of gloss acrylic medium. This was done so that when I used the brown stain and then brushed over it with enamel paint thinner to subtract the stain in streaks over the surface to make it appear more like weathered wood grain, the enamel coats beneath it hopefully wouldn’t have gotten dissolved. Unfortunately, some of the acrylic isolation coat also dissolved with the thinner, so I found it better to stop using the thinner and just dry brush the leather enamel over the stain. I could still preserve the stain, which was darker, in the recesses of the textured wood grain that way, because the dry brushing would not reach it.
-
I think it looks great — it really adds to the decor of the aftcastle. 👍
- 41 replies
-
- 1
-
-
- Spanish Galleon
- Flying Dutchman
- (and 3 more)
-
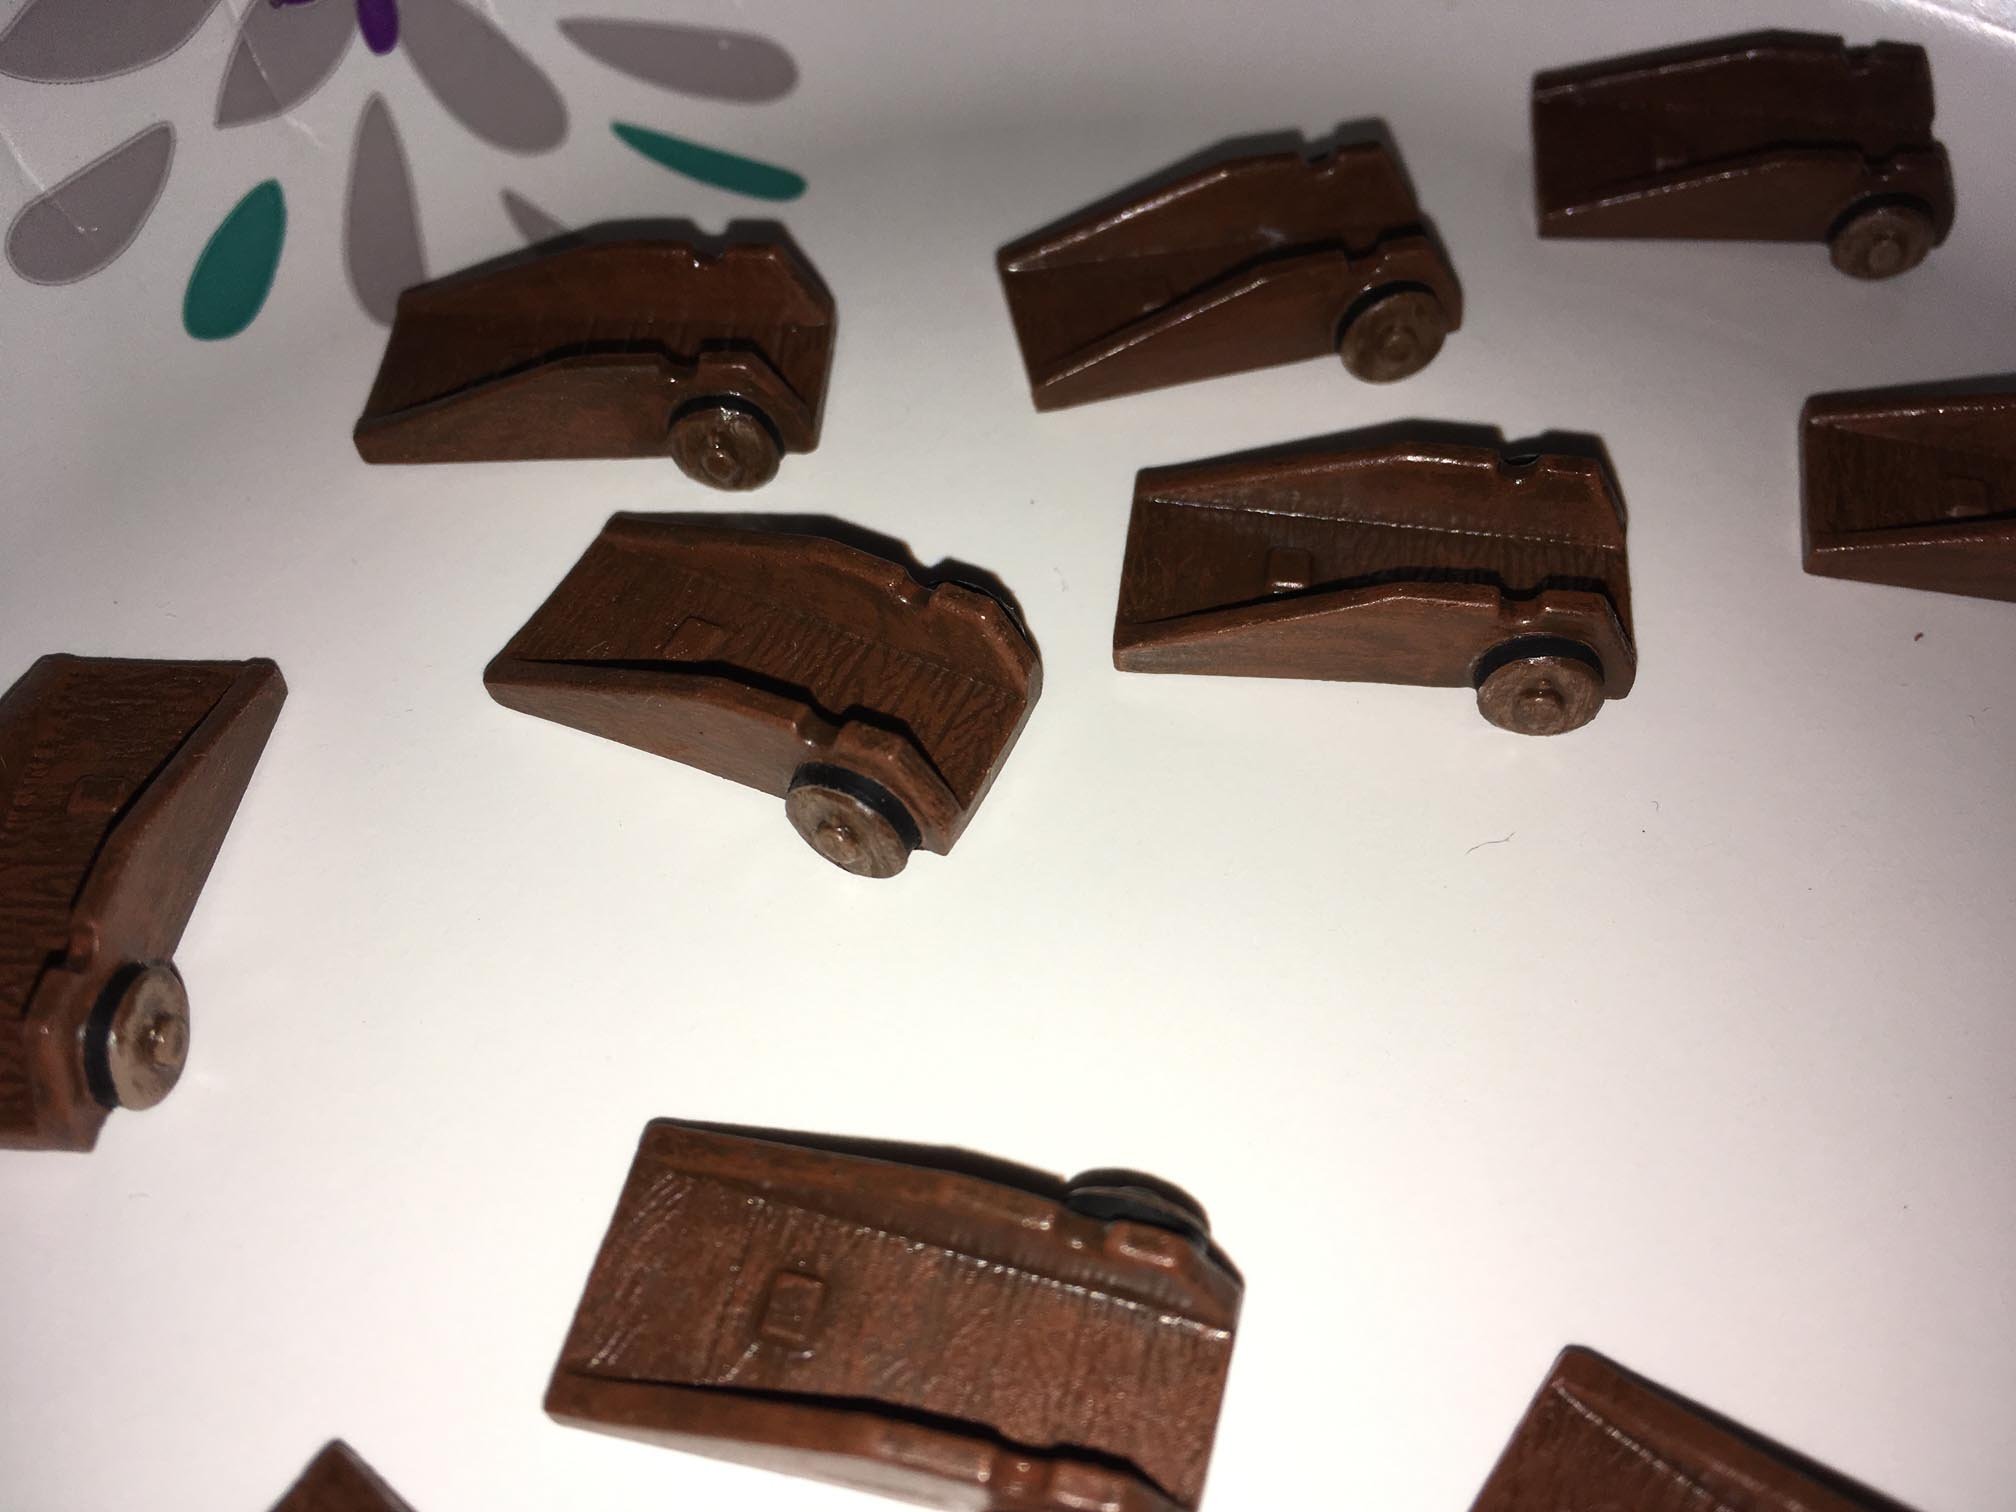
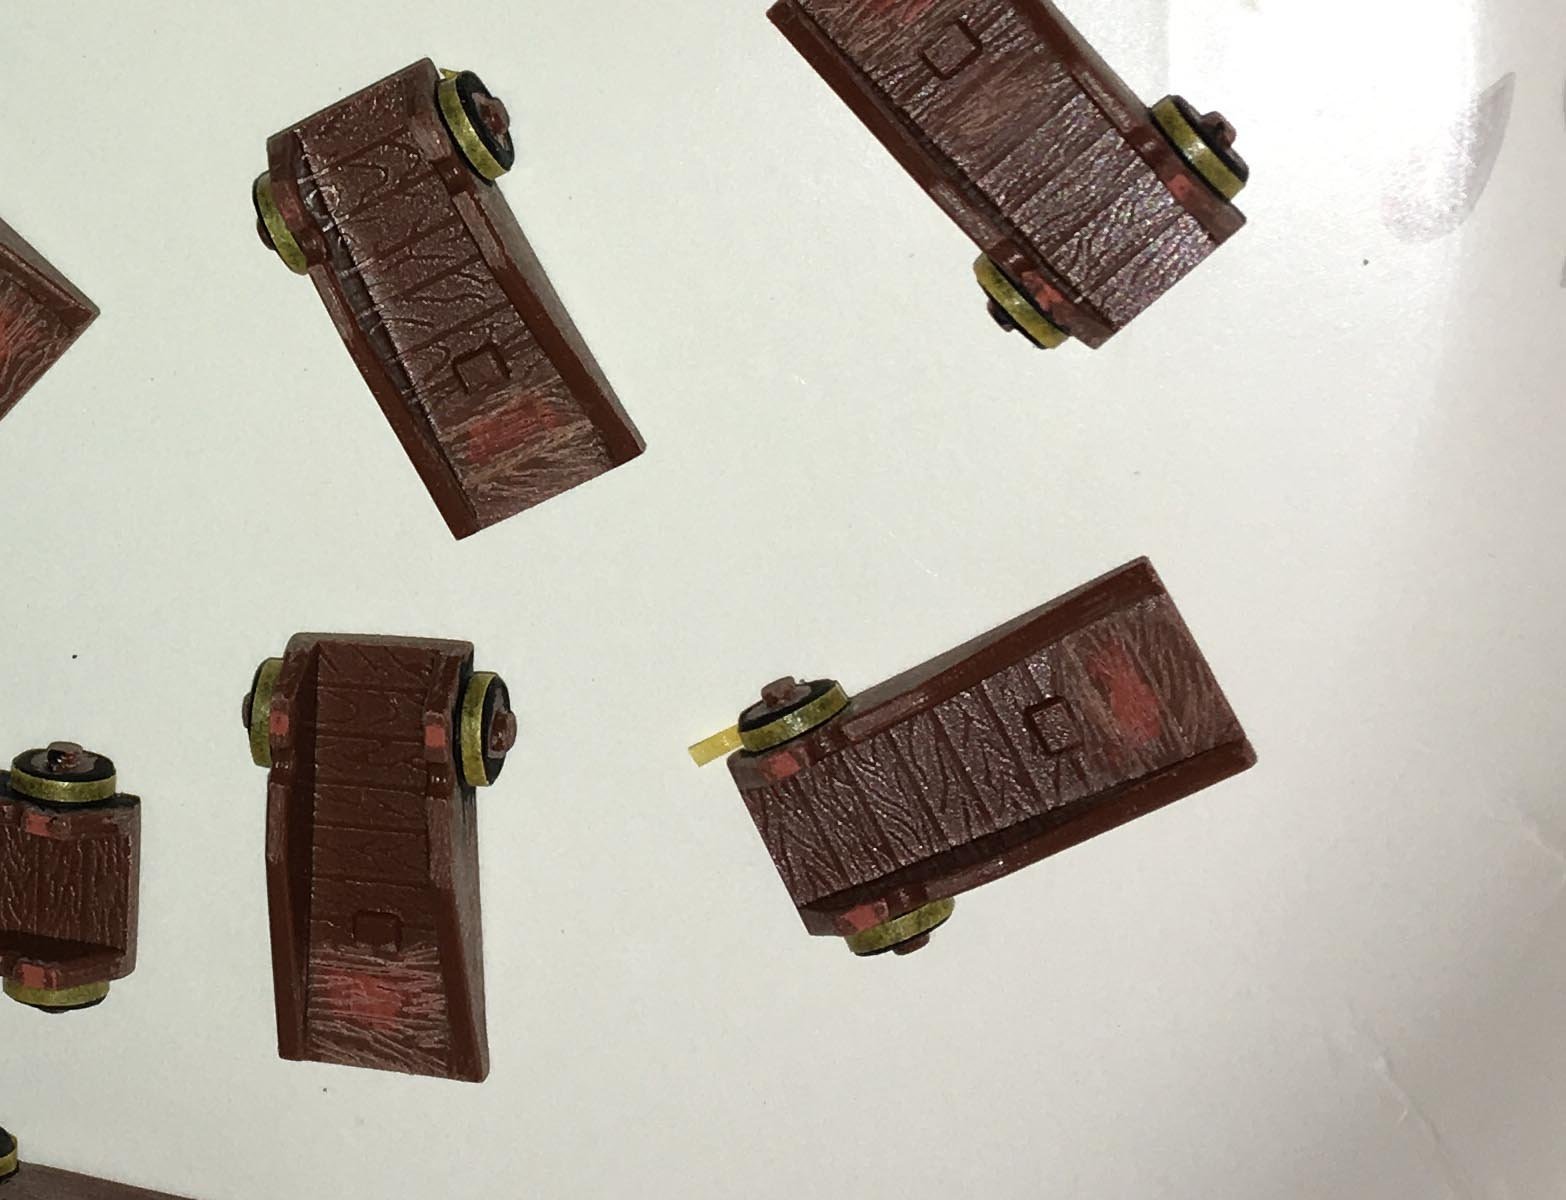
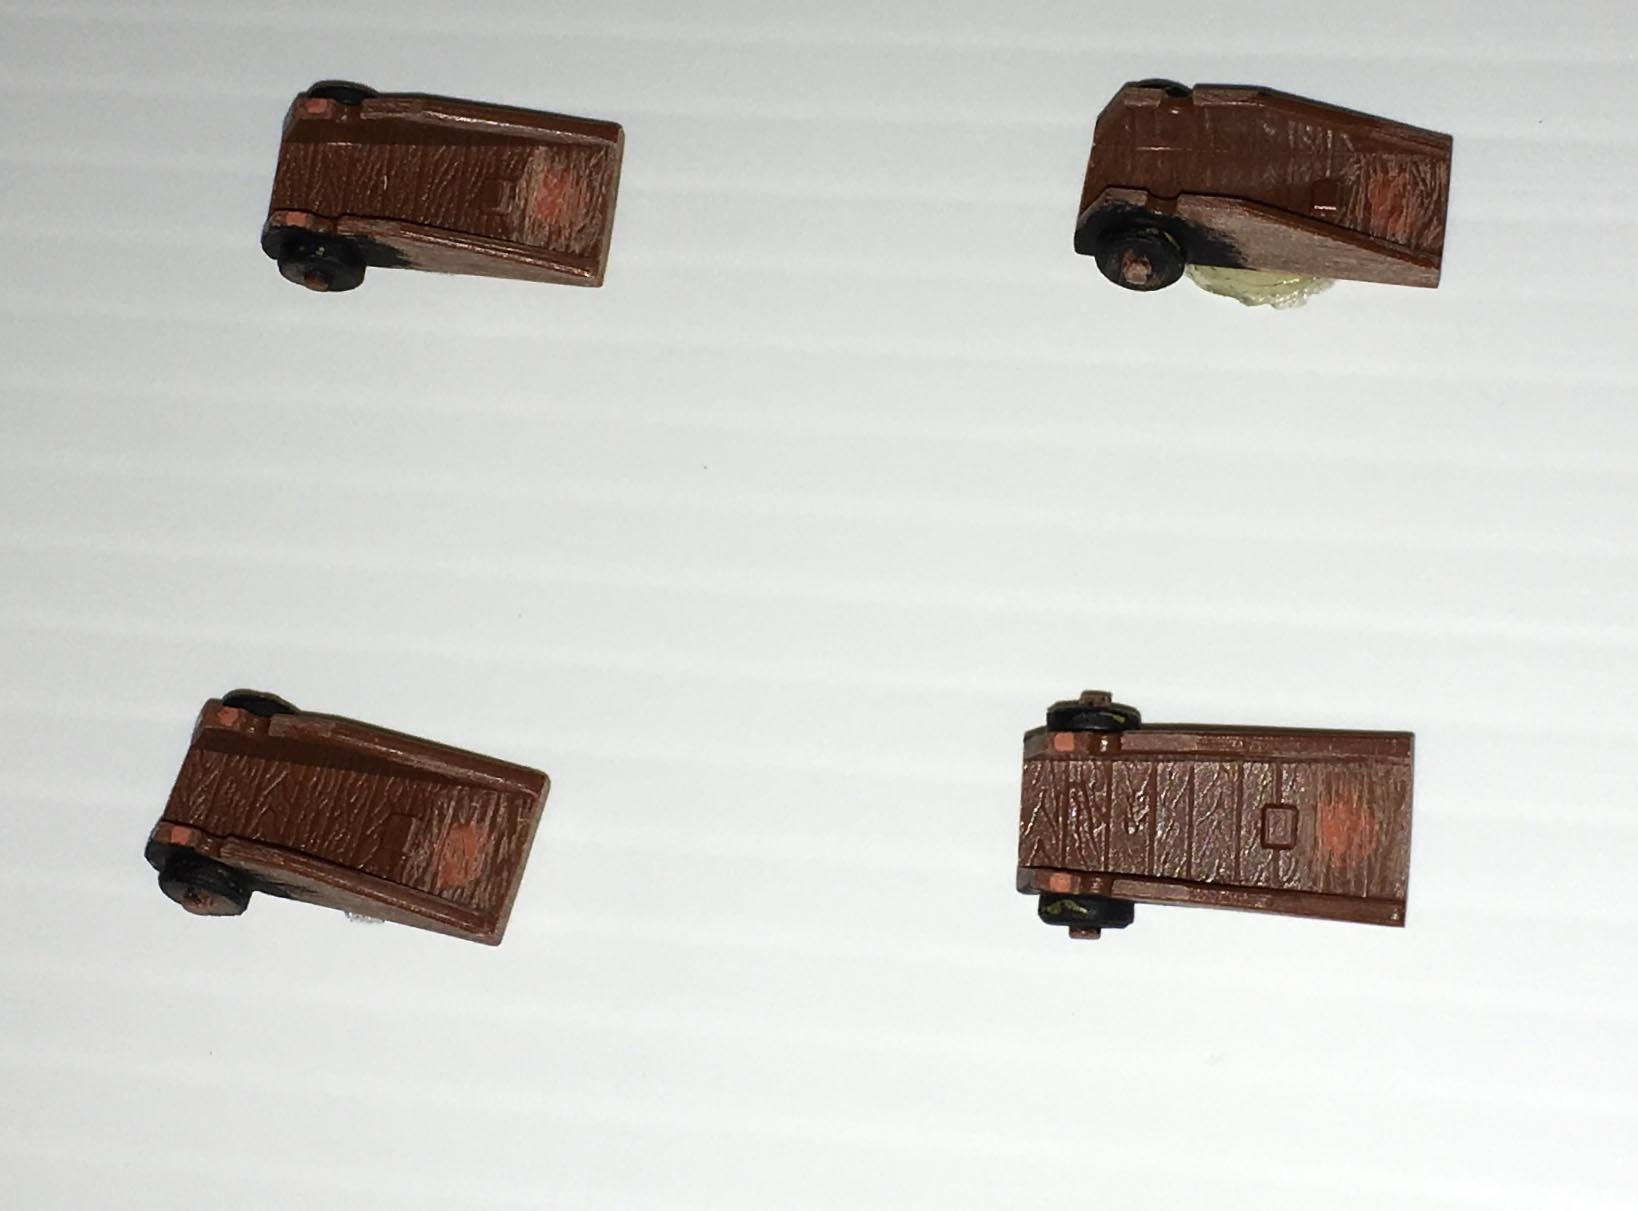
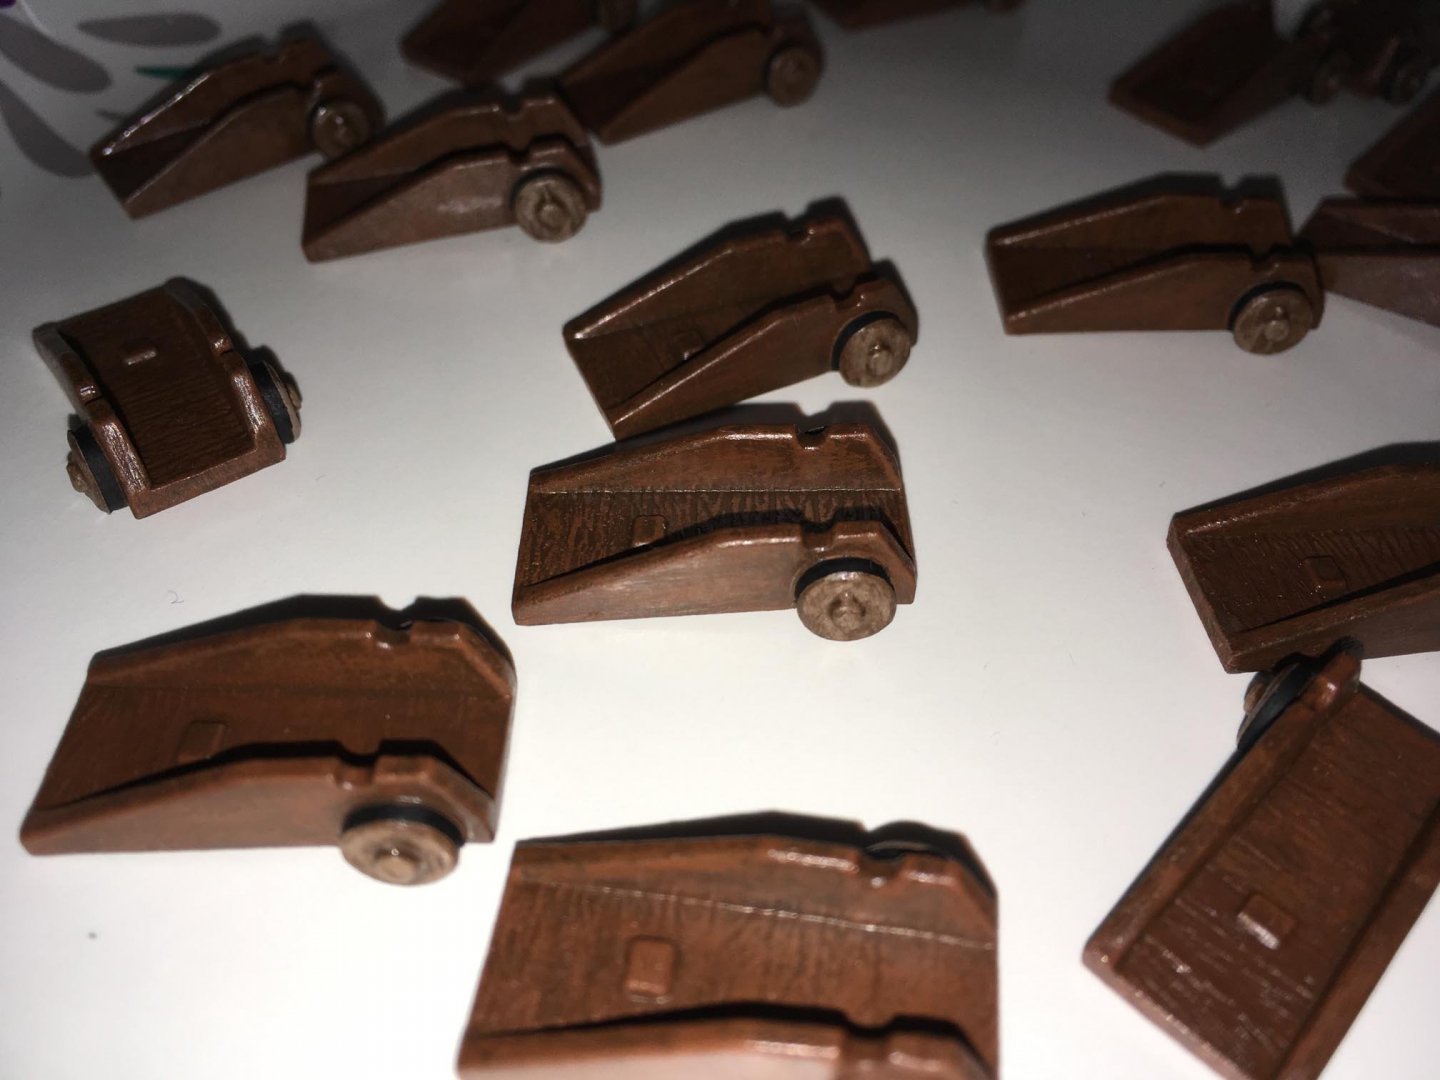
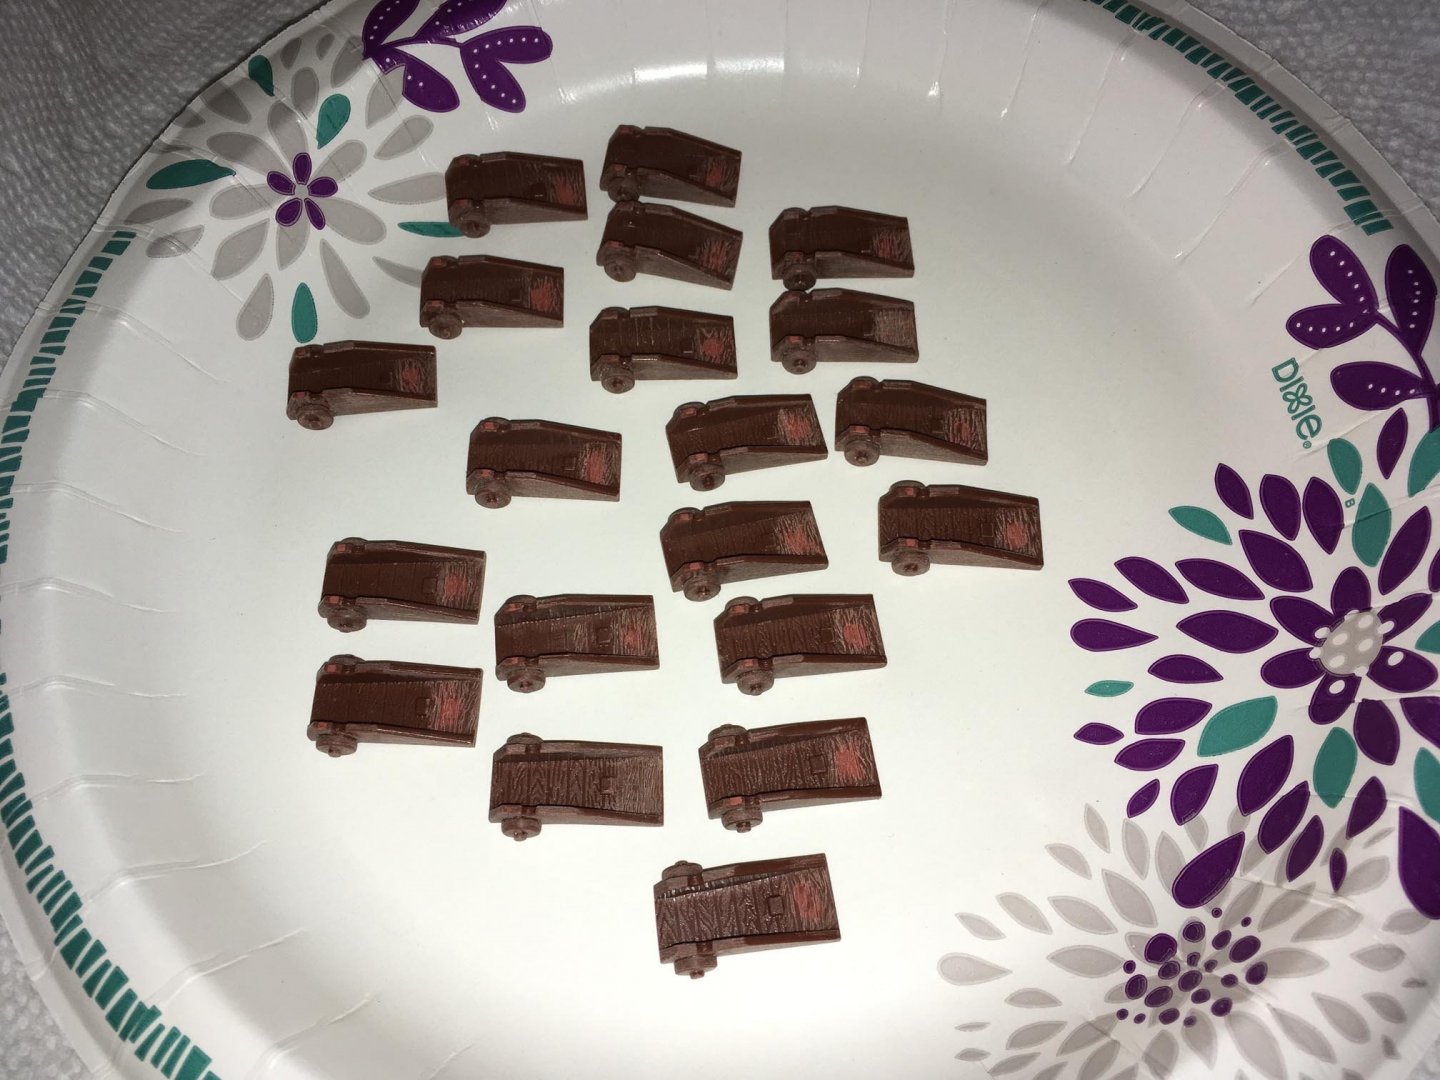
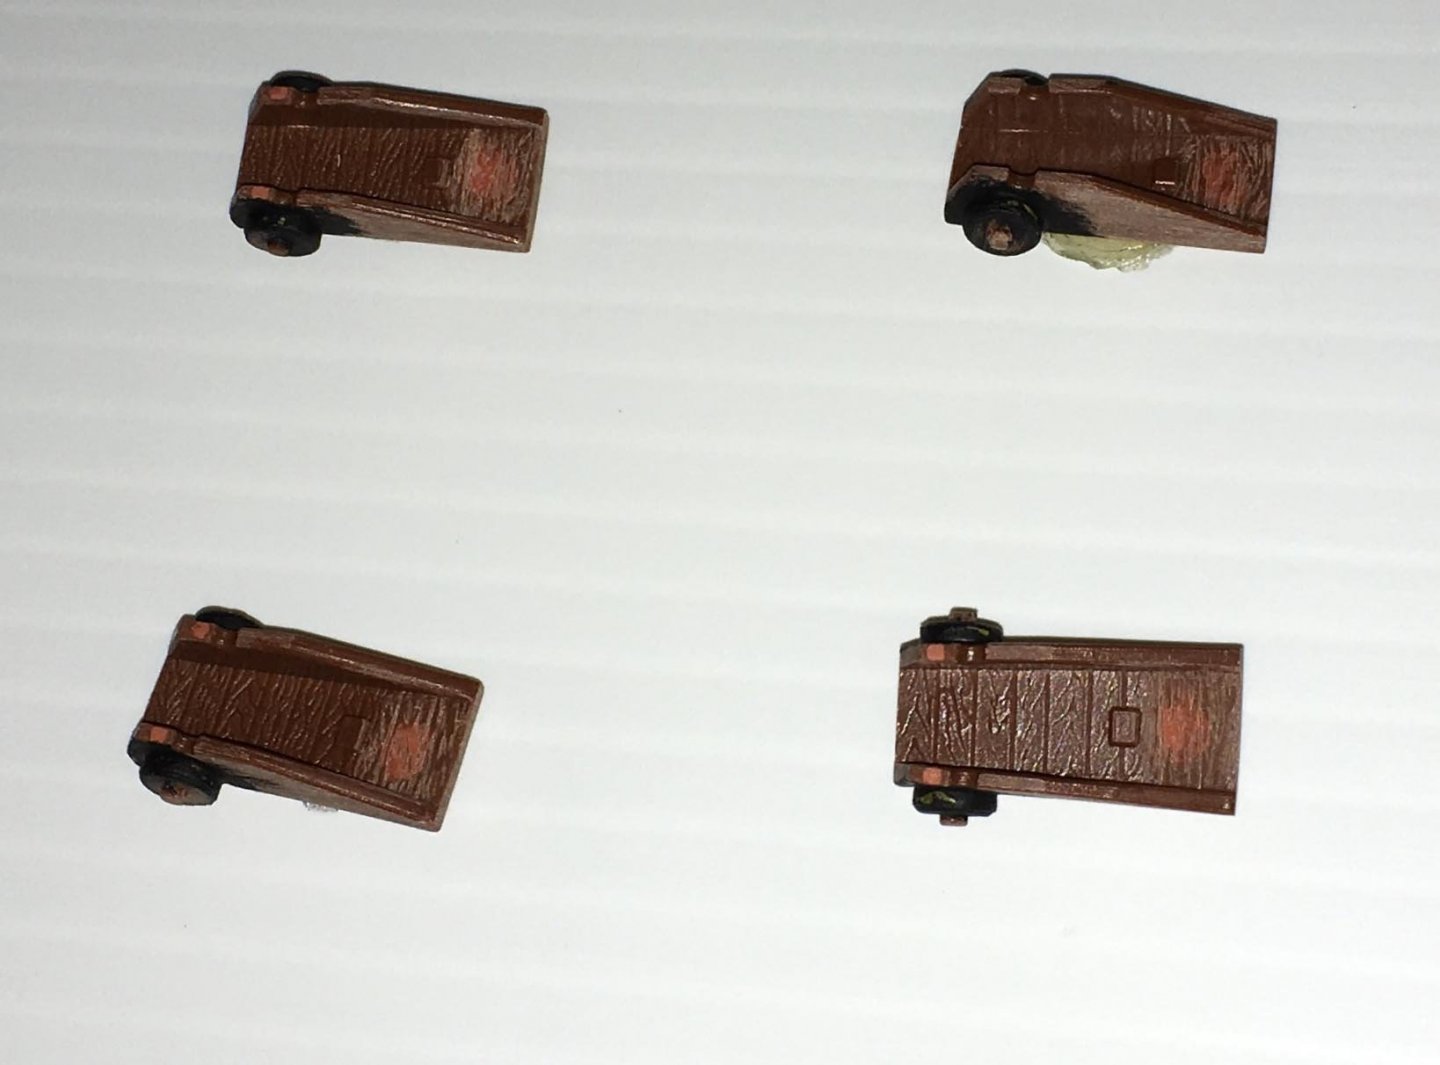
I weathered the frames and wheels of the carriages by using Testors Brown Enamel Stain (2179) and some dry-brushing of the Leather enamel over that (on the frames). Here is a representative piece: After the masking tape was removed from the wheels and "touch up" was done, here is how they looked: I have since applied a rust-colored enamel pain to the black "rims" to create a rust effect, but I do not have a photo of that yet. The next step will be the clear matt spray.


-
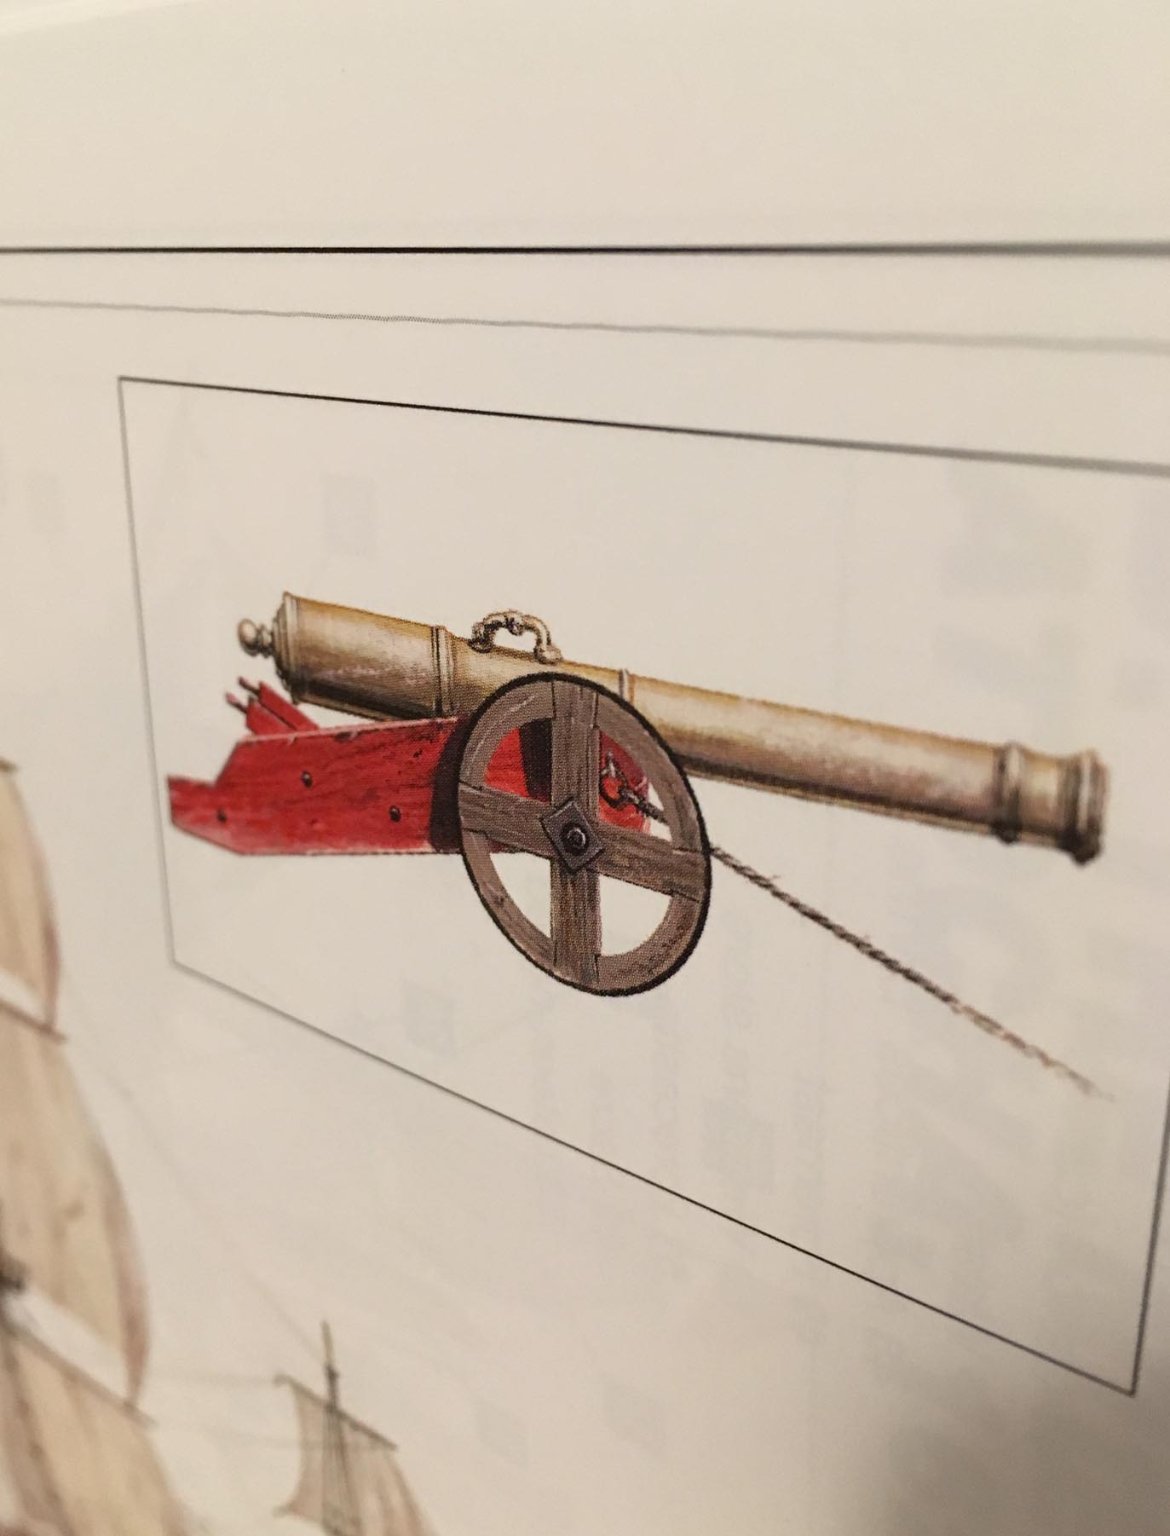
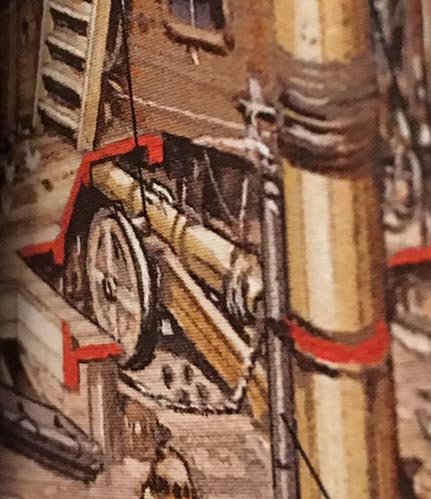
The gun carriages still need to be sprayed with a matt varnish, but I can show you some photos of the preparation and painting process. I have seen that some old gun carriages have an iron "rim" or "tread" (not sure if there is a correct name for it) covering the circumference of each of the wooden wheels. I decided that I would like to simulate that with my own carriages. Illustrations by Tony Bryan in Angus Konstam's book on the Spanish galleon seem to show "rims" that were probably iron: They also show that the carriages had two wheels rather than four, which in my research was typical in sixteenth and early seventeenth century Spanish galleons. Following a lot of scraping and sanding the wheels and carriages, and filling ejector pin marks in the carriages with putty, sanding them flat, covering them with clear flat lacquer, then scribing wood grain, and taking care of other imperfections, the carriages were ready to paint: First, I painted the wheel circumferences, with overlap, using Testor's Flat Black enamel. This photograph shows the undersurfaces of some of the carriages: Note that I have sanded the undersurfaces with a fairly coarse sandpaper so that they will stick to the deck better when I eventually use a methylmethacrylate adhesive or epoxy to secure them. Next, I used 1mm wide masking tape around the circumference of each wheel: I overpainted the edges of the tape with the black enamel so that bleeding under the tape would be black, and there would be less "touch up" needed after the tape was removed: The frames of the carriages were painted with Testors Model Master Leather enamel: I then painted the wheels with Testors Model Master Dark Tan:


-
Congratulations, Bill! The Mayflower looks wonderful!
-
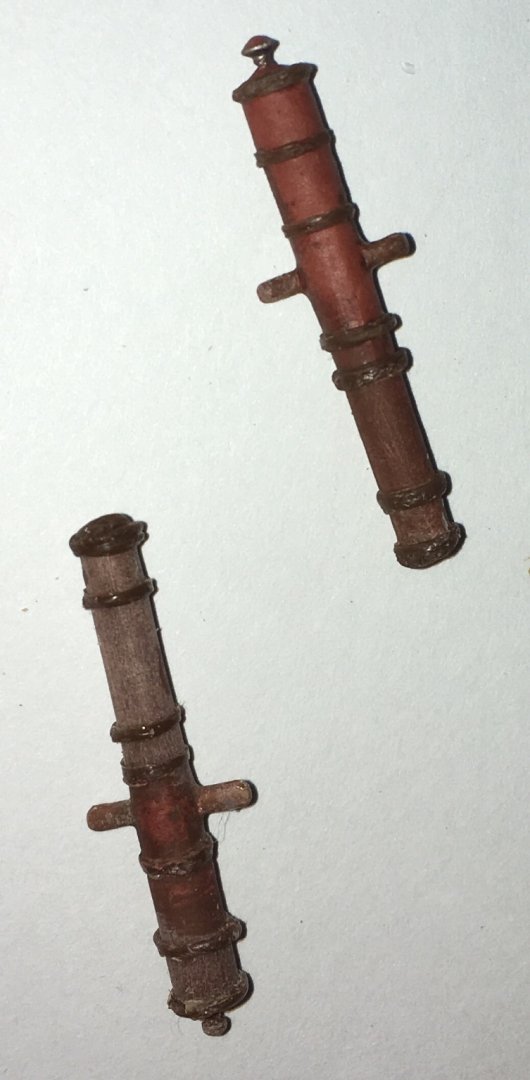
Just an update... I am still working on the gun carriages and the cannons, spending a couple of hours at a time here and there. The gun carriages are almost done. I will post pictures once I have varnished them with the matt varnish. The cannon barrels, however, have been frustrating. As I indicated, two of the cannon halves were lost. It is not possible to get replacements from Revell of Germany right now due to the pandemic. I tried to make the missing halves with plastic sprue, but I also need to make reinforcement rings, and although they looked somewhat like cannons in the end, they did not match up in appearance to the 18 other cannons. Also, it would have been nice if the cannons weren’t molded in two halves that had to be assembled. It has taken a lot of work to try to scrape away and sand down the seam lines along the length of the barrels. Unfortunately, there were small gaps in the halves of the cannons where they were glued together at the muzzles. I tried to fill the gaps with melted styrene, but it would take a lot more work trying to round out the openings again and shape the muzzles — it may be difficult to achieve a nice roundness of the muzzle by hand. Since the cannons are high profile — readily visible externally — I decided to stop work in trying to clean up the kit cannons. Instead, I have ordered twenty brass cannons from Radimir at HISmodel. They won’t have any seam lines to clean up and they will be ready to paint (a bronze color, then patina over that).
-
Your “weathering” of the sails is great — it makes the plastic sails look more realistic, which I understand can be a difficult thing to achieve.👍
-
Shipyard makes laser cut triangle deadeyes using card, but nothing smaller than 2.5 mm. I guess the advantage if you make your own would be that card won’t likely split.
- 740 replies
-
- 3
-
-
- Tudor
- restoration
- (and 4 more)
-
When I look at the photos, the plastic triangular deadeyes in the kit seem to be of an appropriate size for the scale, so perhaps you could measure them in mm and then order order the needed quantity of that size. Note that the deadeyes for the upper masts may be of smaller sizes, so be sure to measure them, too.
- 265 replies
-
- 2
-
-
- Golden Hind
- Airfix
- (and 1 more)
-
I completely understand you. I feel that way, too, when I think of all the things that I still have to do for my own build. I’m sometimes thinking about the rigging for my Revell Spanish Galleon, even though I know that for me, that step may be a long time in the future. Ship model building is very intricate and involved, even if you are building a plastic kit. If you don’t rush and spend the extra time to make it, you will be very proud of the results.
- 265 replies
-
- 3
-
-
- Golden Hind
- Airfix
- (and 1 more)
-
It is the mast rake. The following article may help explain it: https://www.woodenboat.com/whiskey_plank/why-mast-rake I hope this helps Jeff
- 265 replies
-
- 1
-
-
- Golden Hind
- Airfix
- (and 1 more)
-
I like the method you use (jig) to make sure that the masts are vertical.
- 756 replies
-
- 3
-
-
- galleon
- golden hind
- (and 2 more)
-
Here are two links on the internet that have some information on the Mayflower’s cannons: https://www.plimoth.org/explore/mayflower http://mayflowerhistory.com/cross-section I do not know about the accuracy of the information — no bibliography was given.
-
Looks like a good kit, Bill. You’re off to a great start — best wishes, and have fun with it!
-
Thanks, Ron! I am hoping not to put too much tension on the cleats when the ship is rigged. If they break off, I may need to go with reinforcements, but it may be very challenging to do them because the cleats are small. The other problem is that the holes can only be drilled a short way into the styrene before resistance will be met due to the aluminum, which does not drill easily. The solvent cements that I used are Tamiya Extra Thin Cement and Testors Liquid Cement for Plastic. Both of these tend to do a reasonably good job of “melting” one plastic surface into another.
-
Golden Hind(e) by rkwz - AIRFIX - 1:72
Jeff T replied to rkwz's topic in - Kit build logs for subjects built from 1501 - 1750
Very nice paintwork, Ron! I know how difficult it can be to get red and yellow to look opaque, as they often need multiple coats (depending upon the type of paint used), and yours turned out well. 👍