Jeff T
-
Posts
247 -
Joined
-
Last visited
Content Type
Profiles
Forums
Gallery
Events
Everything posted by Jeff T
-
I agree — the Evergreen strips, sheets, rods and tubes are also invaluable when you do modifications in plastic modeling. Bill, two of the Hobby Lobby stores near me carry Evergreen materials. Maybe you can also find them near you?
-
I use synthetic or natural hair brushes interchangeably with either acrylic or enamel. For acrylics, the brushes may be easier to clean if synthetic rather than natural hair, especially if the paint starts to thicken while you are working. For enamels, the enamel thinner that I use is mild — mineral spirits based — so it doesn’t seem to affect the synthetic bristles. I buy packs of assorted fine brushes at Hobby Lobby periodically (although the shapes and sizes I like for detail there tend to be natural hair) and switch to the new ones as the old ones lose their shape over time, but I keep the old ones for things like weathering and dry-brushing.
-
Thanks for the recommendation, Kirill. Yes, I did think about using CA glue, and I do have some and will use it for some applications, but I think epoxy has better shear strength than CA, so if I accidentally bump into one of the cannon barrels while working on rigging, there would probably be a smaller chance that it would pop off if I use epoxy.
-
Looks beautiful, Bill — congratulations!
-
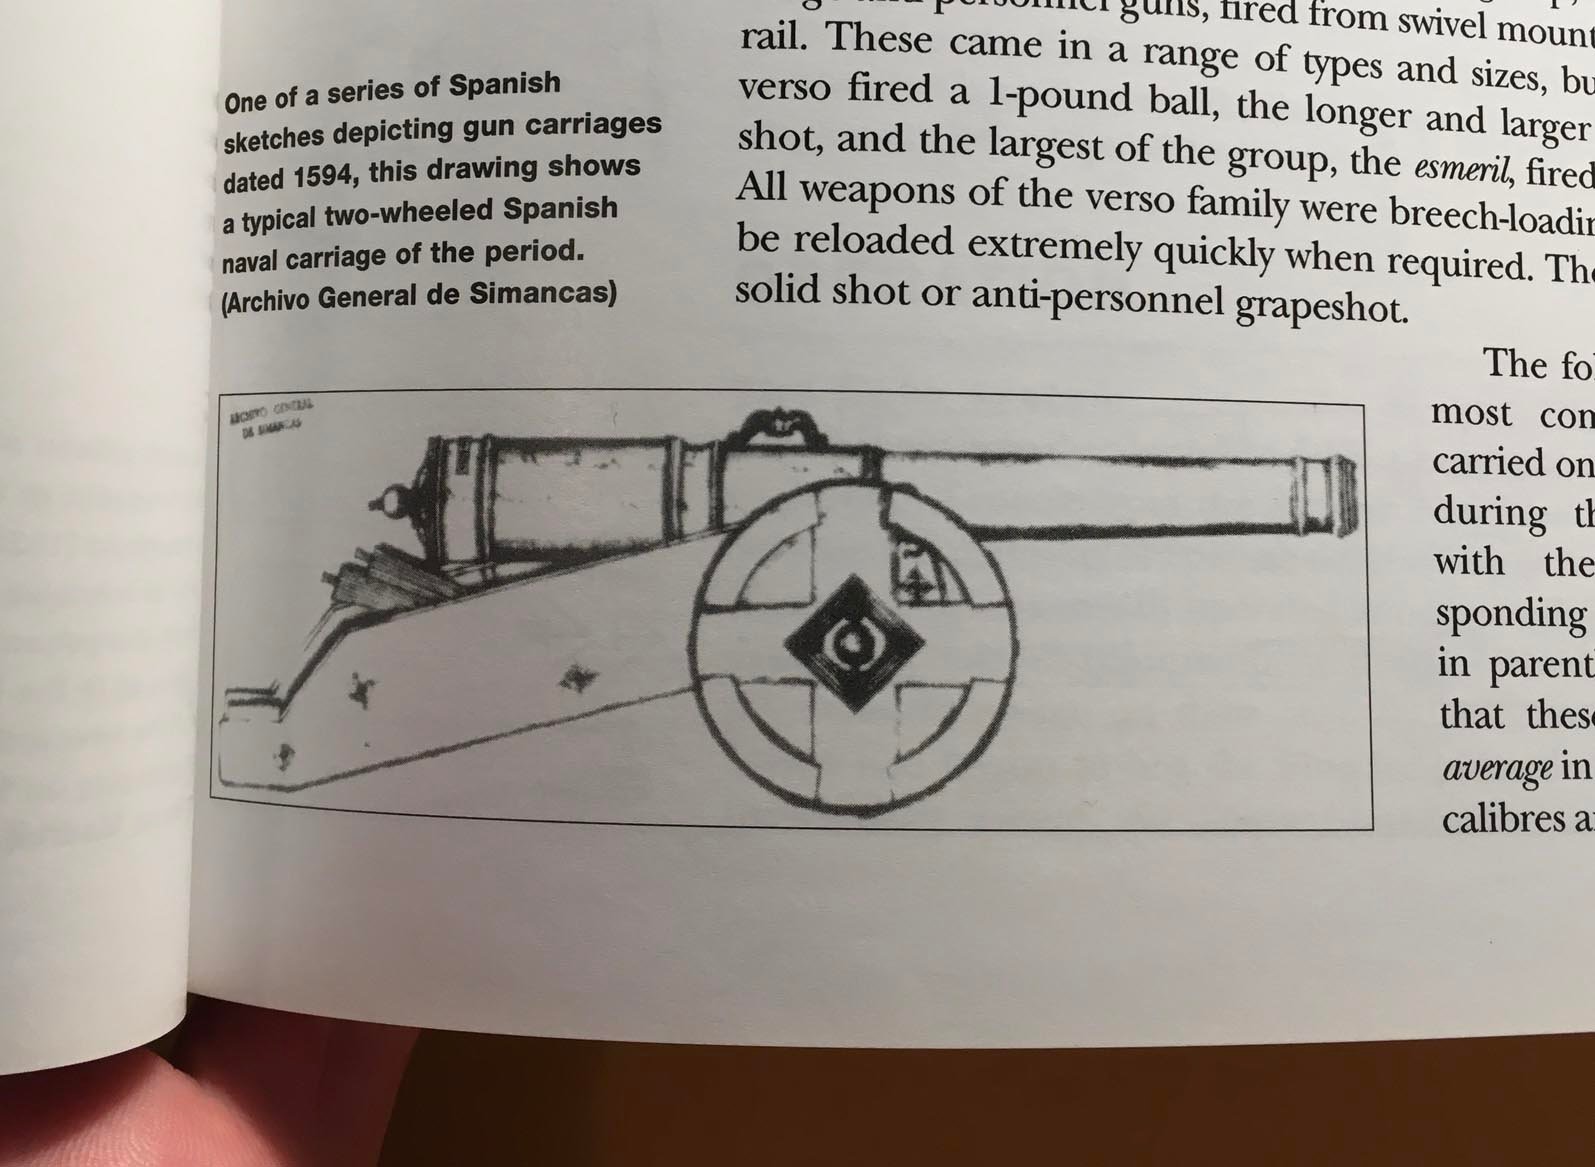
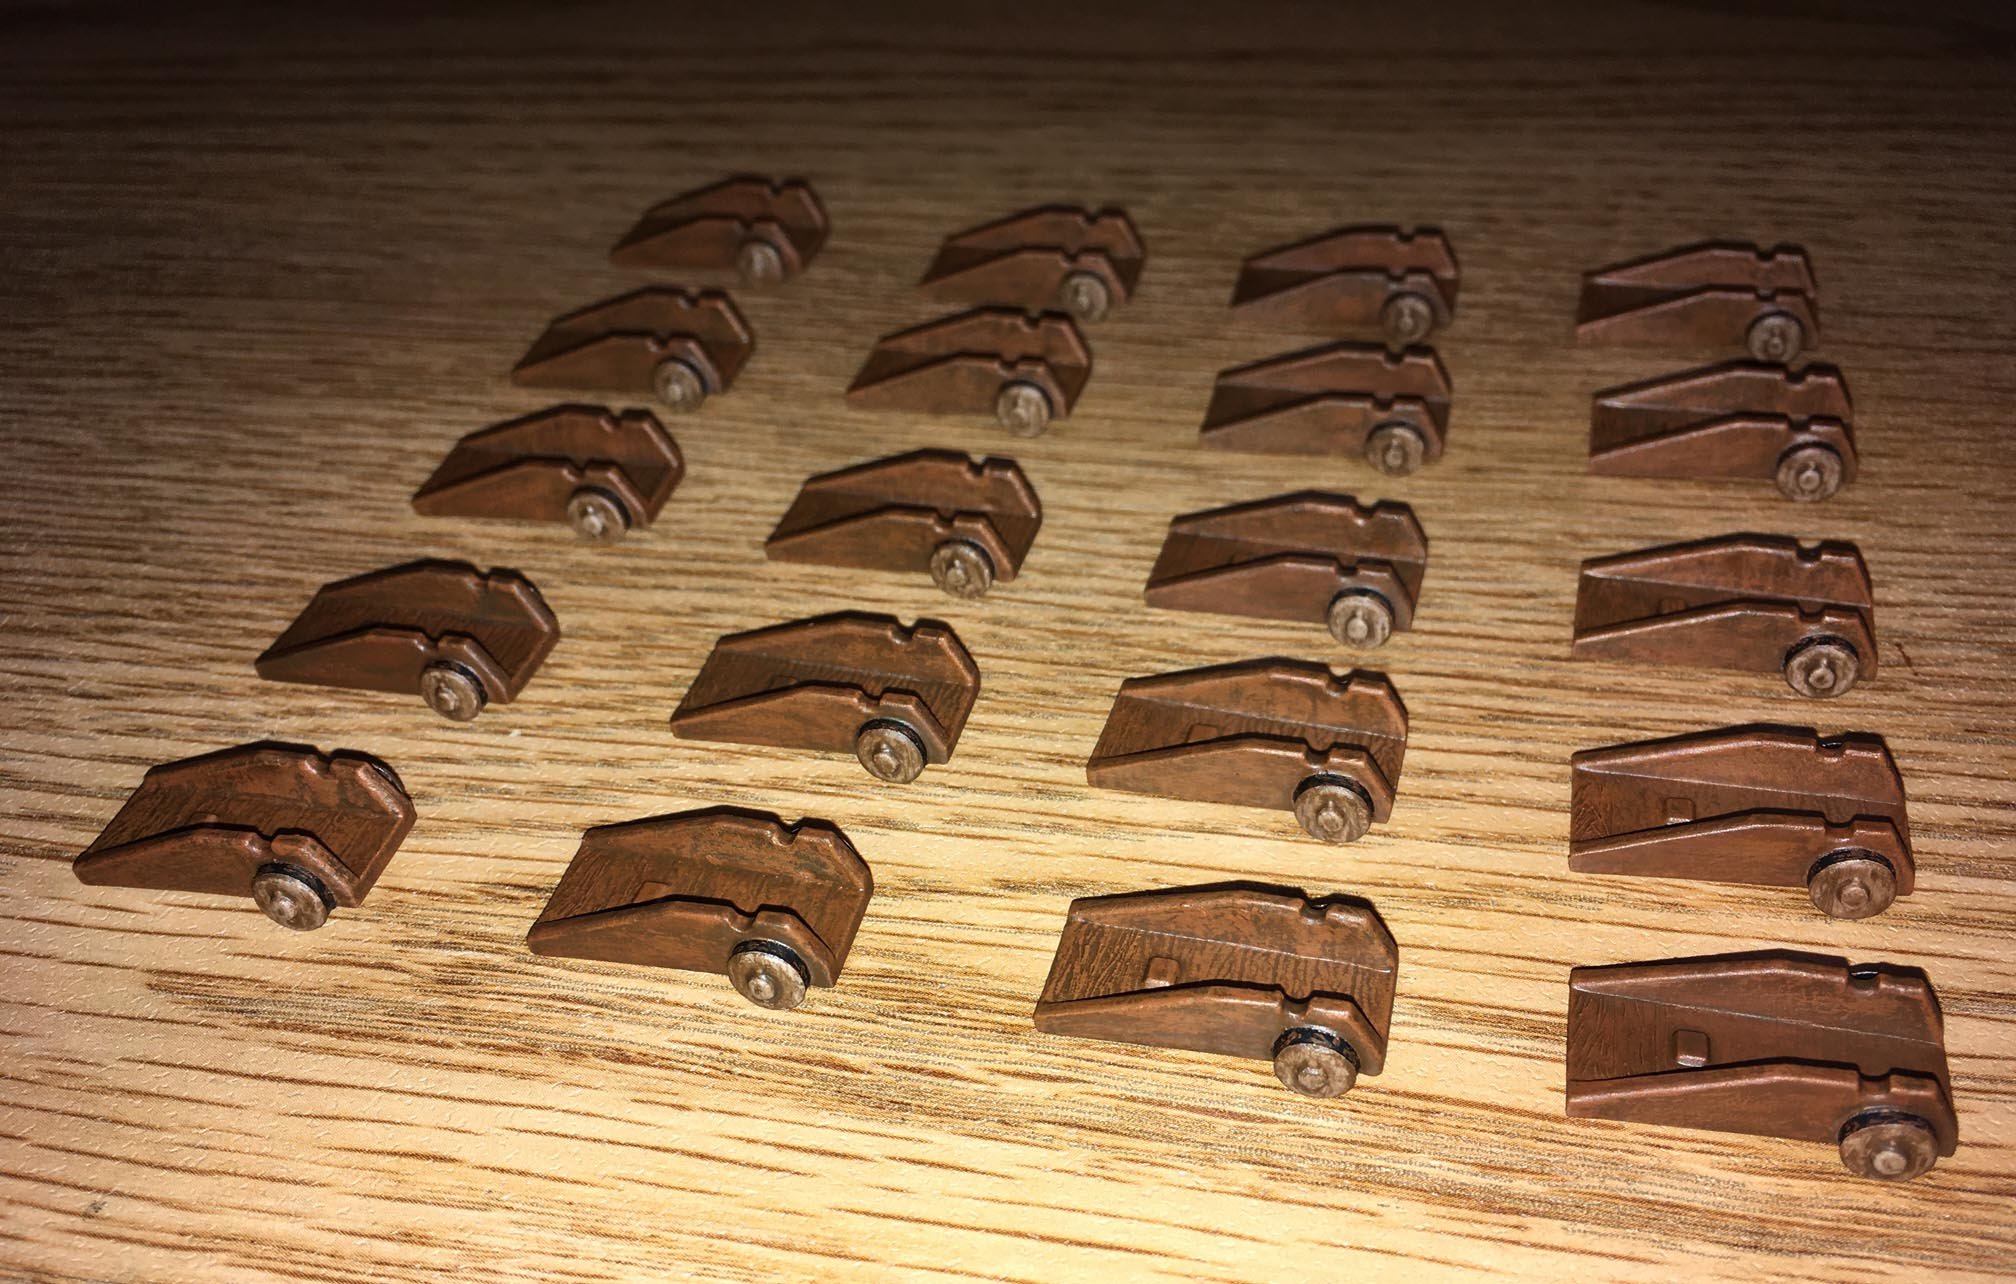
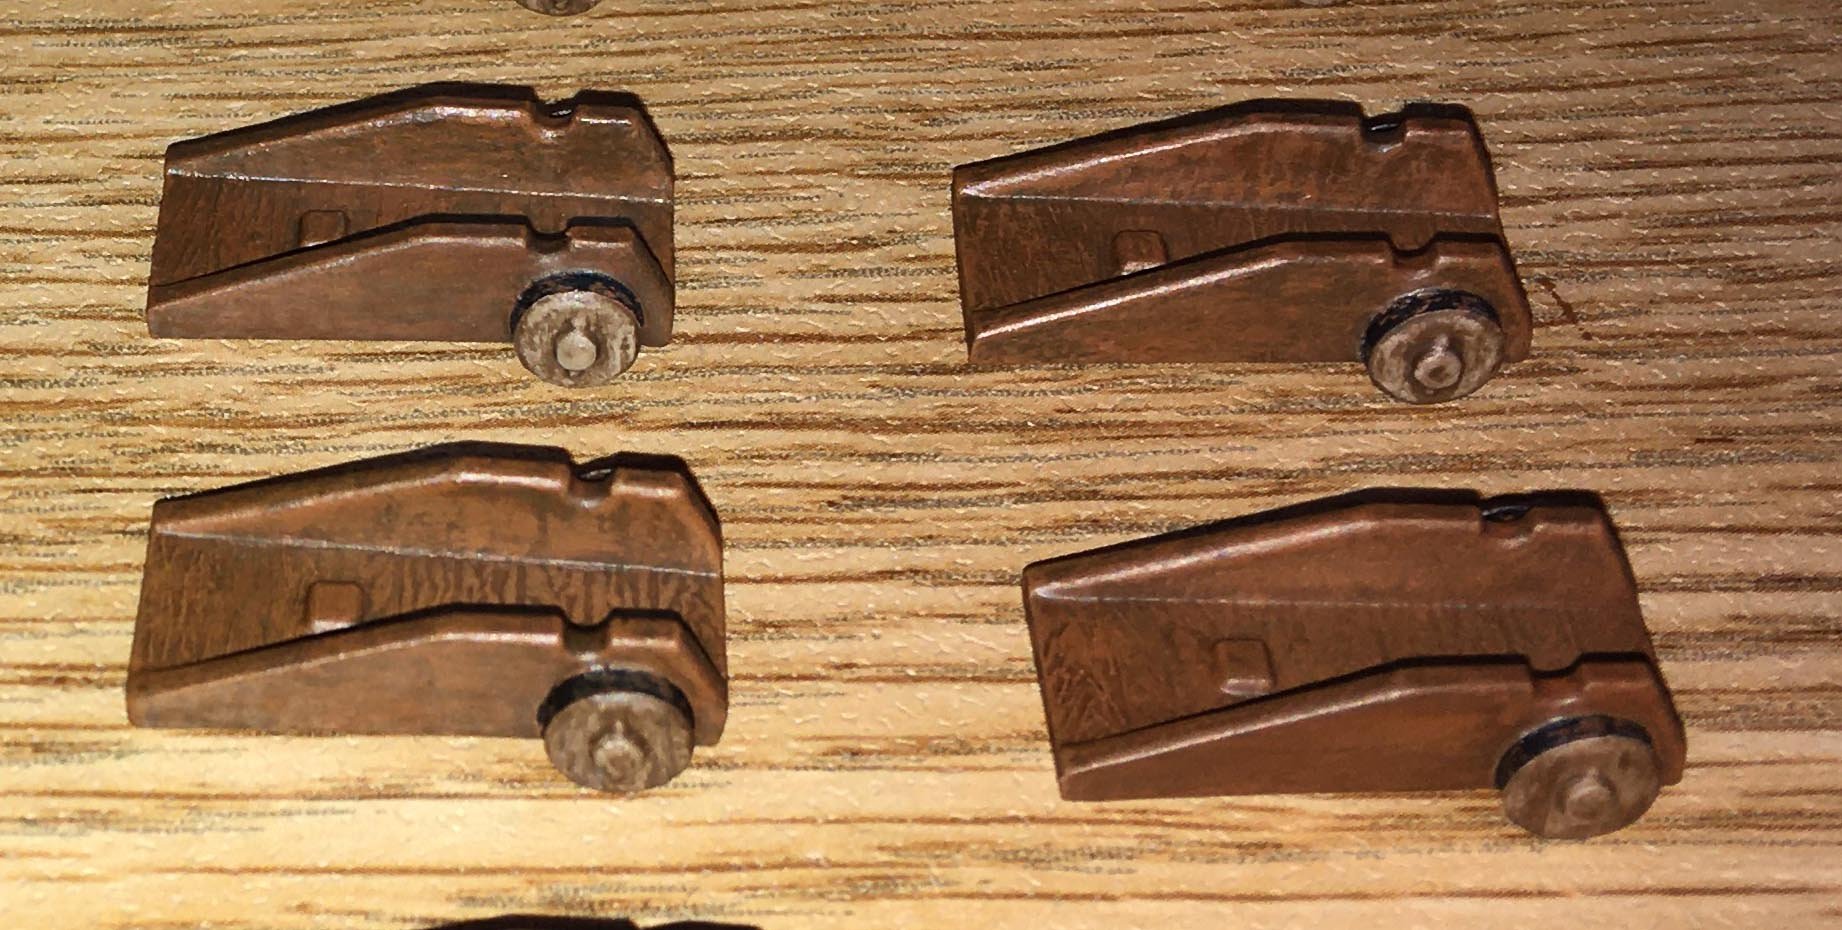
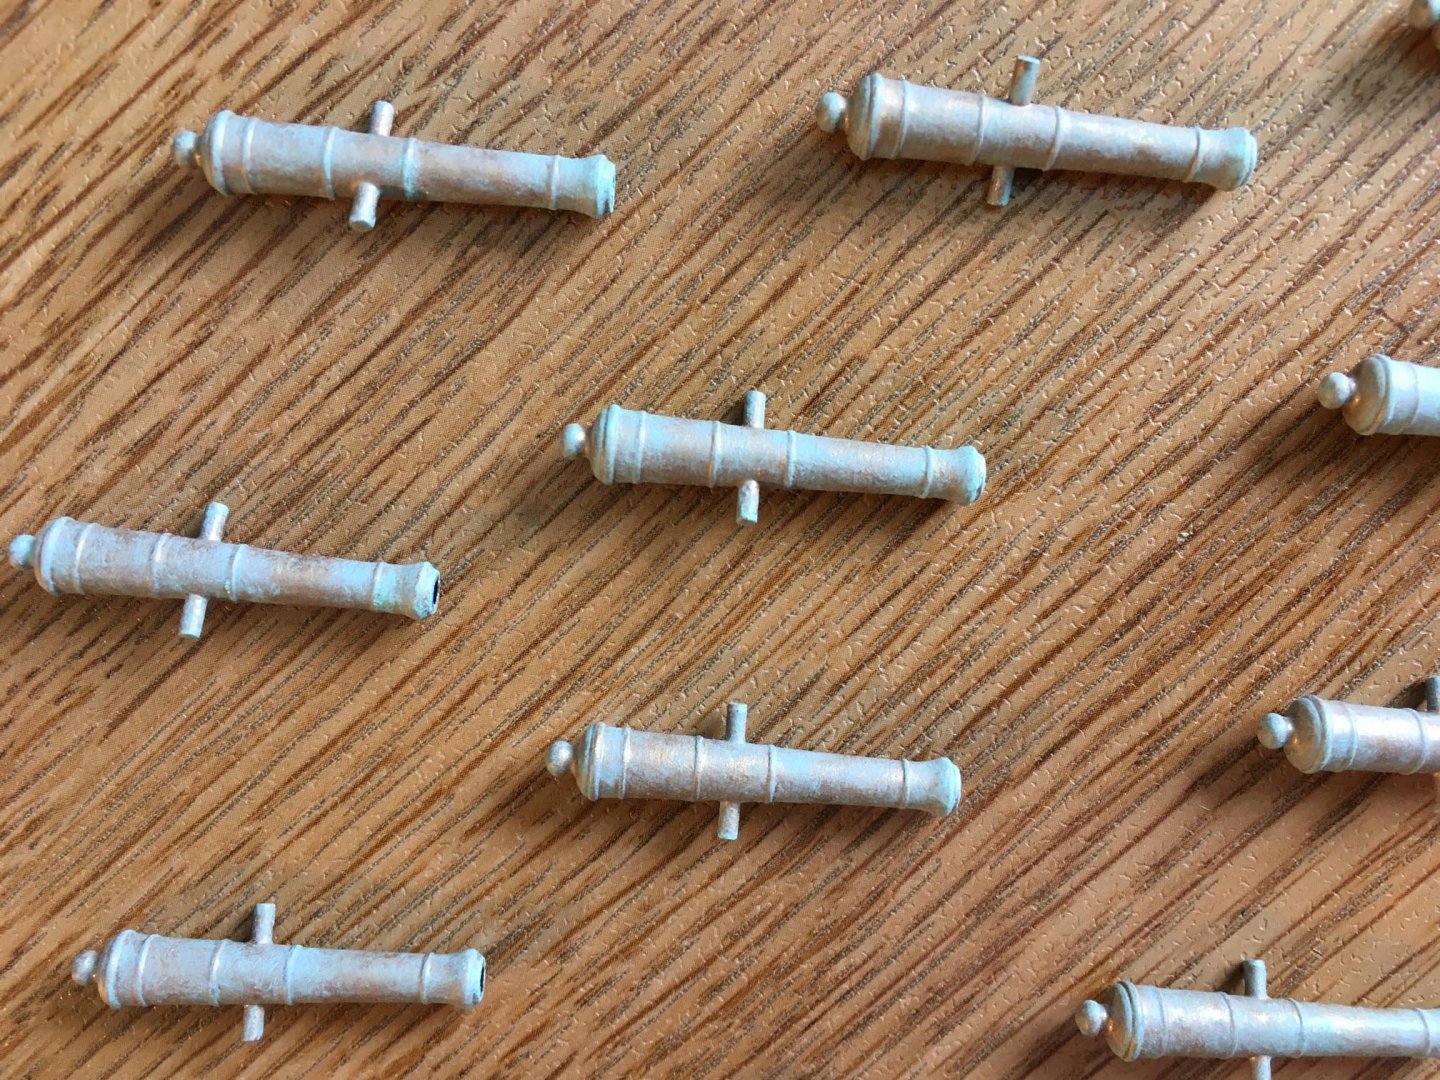
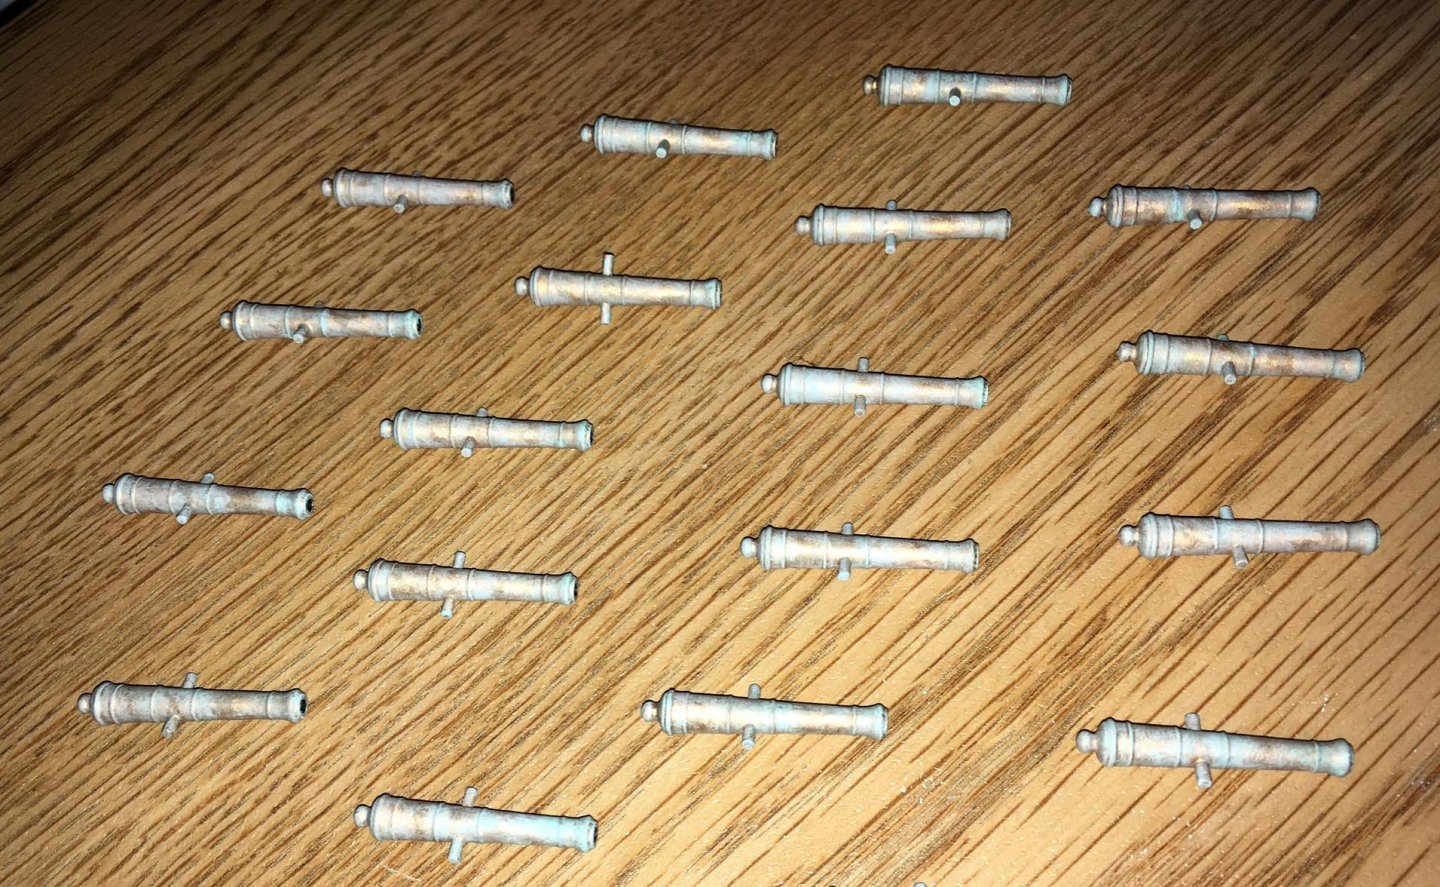
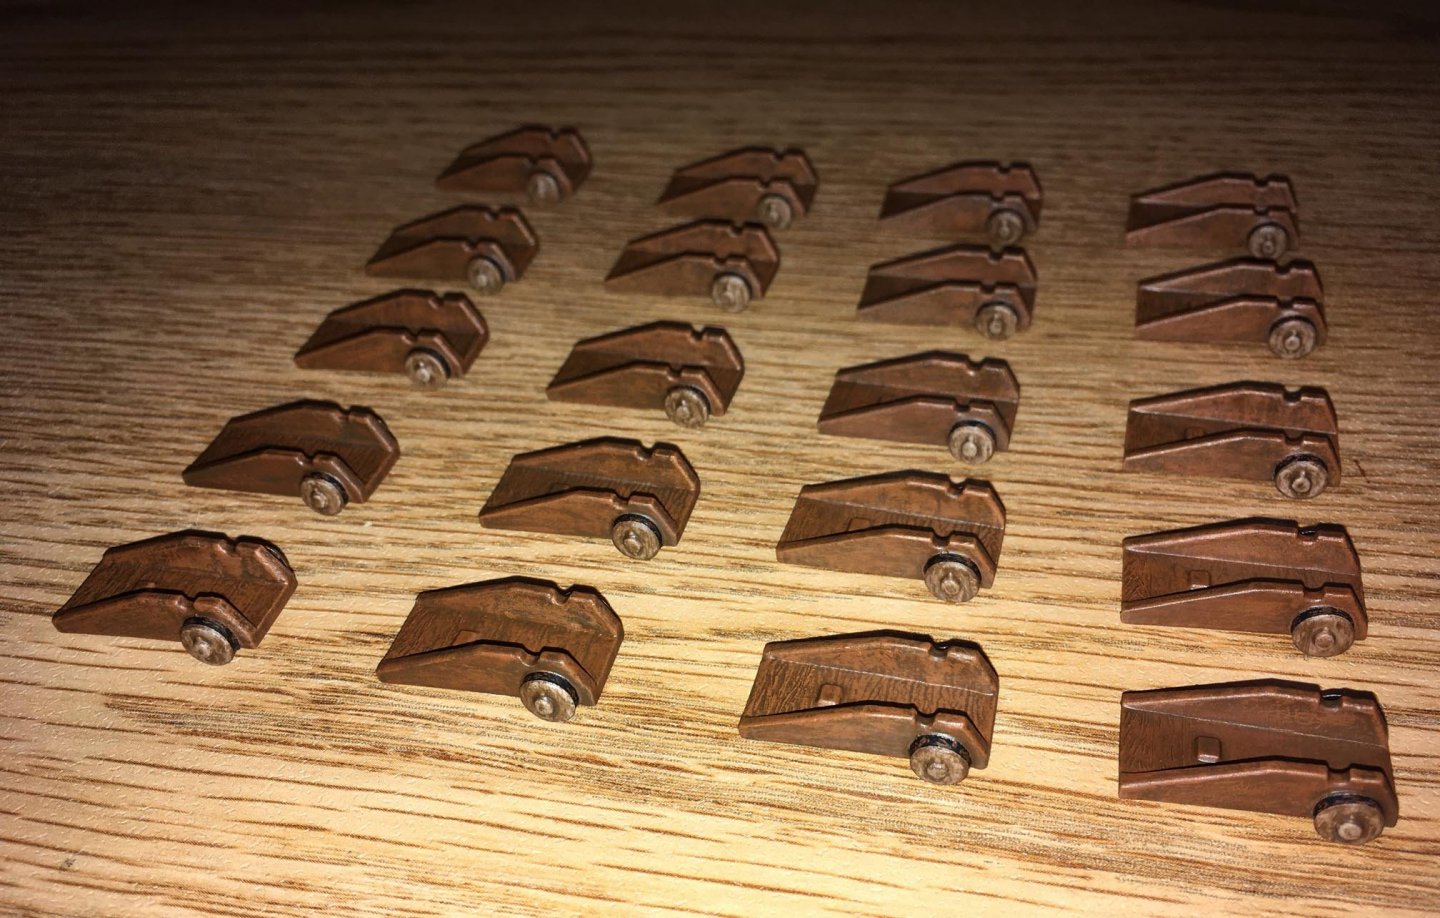
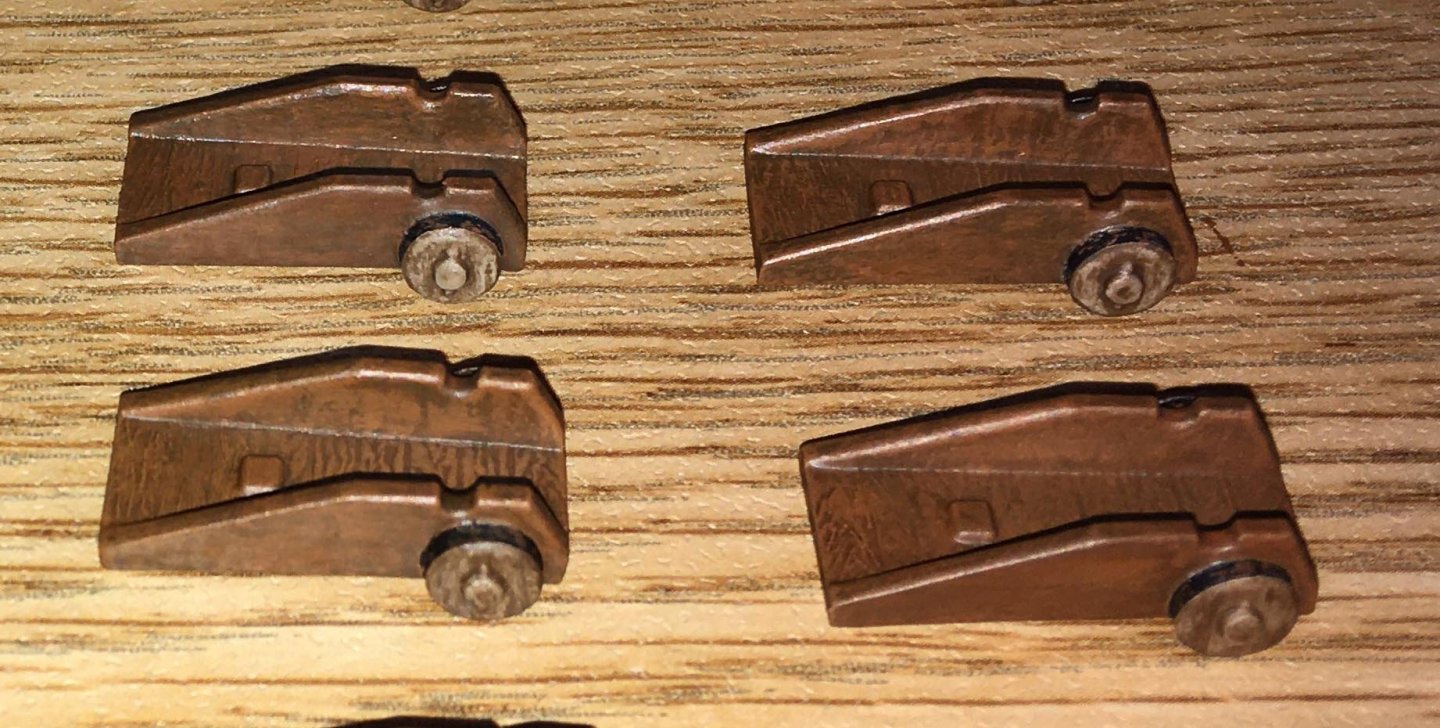
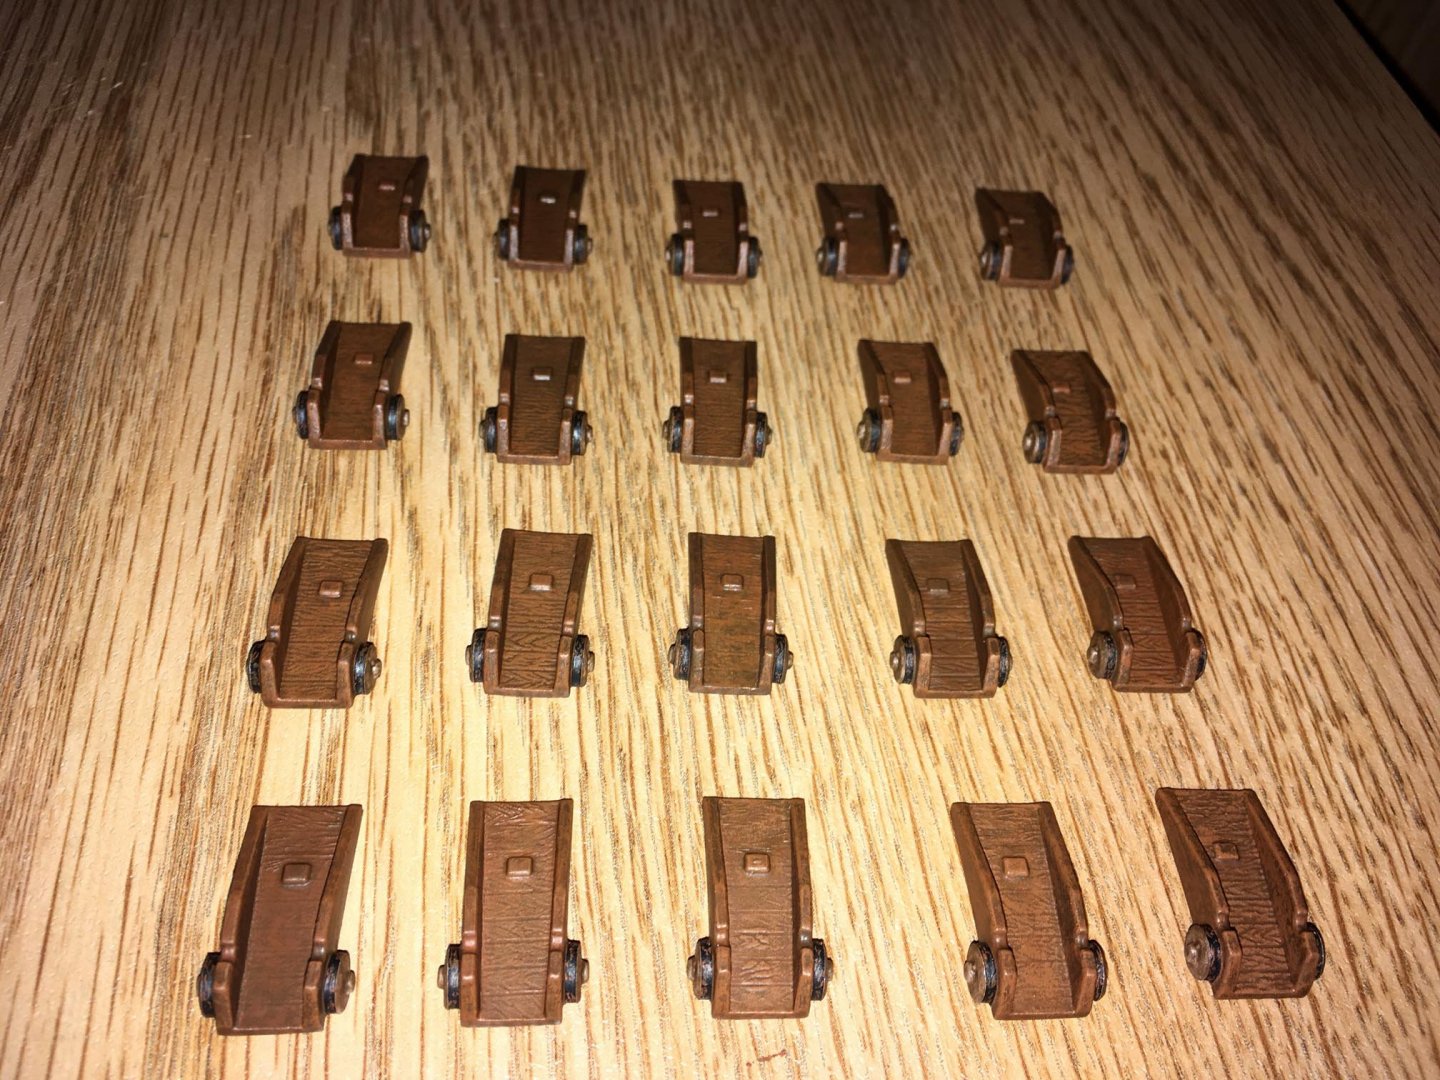
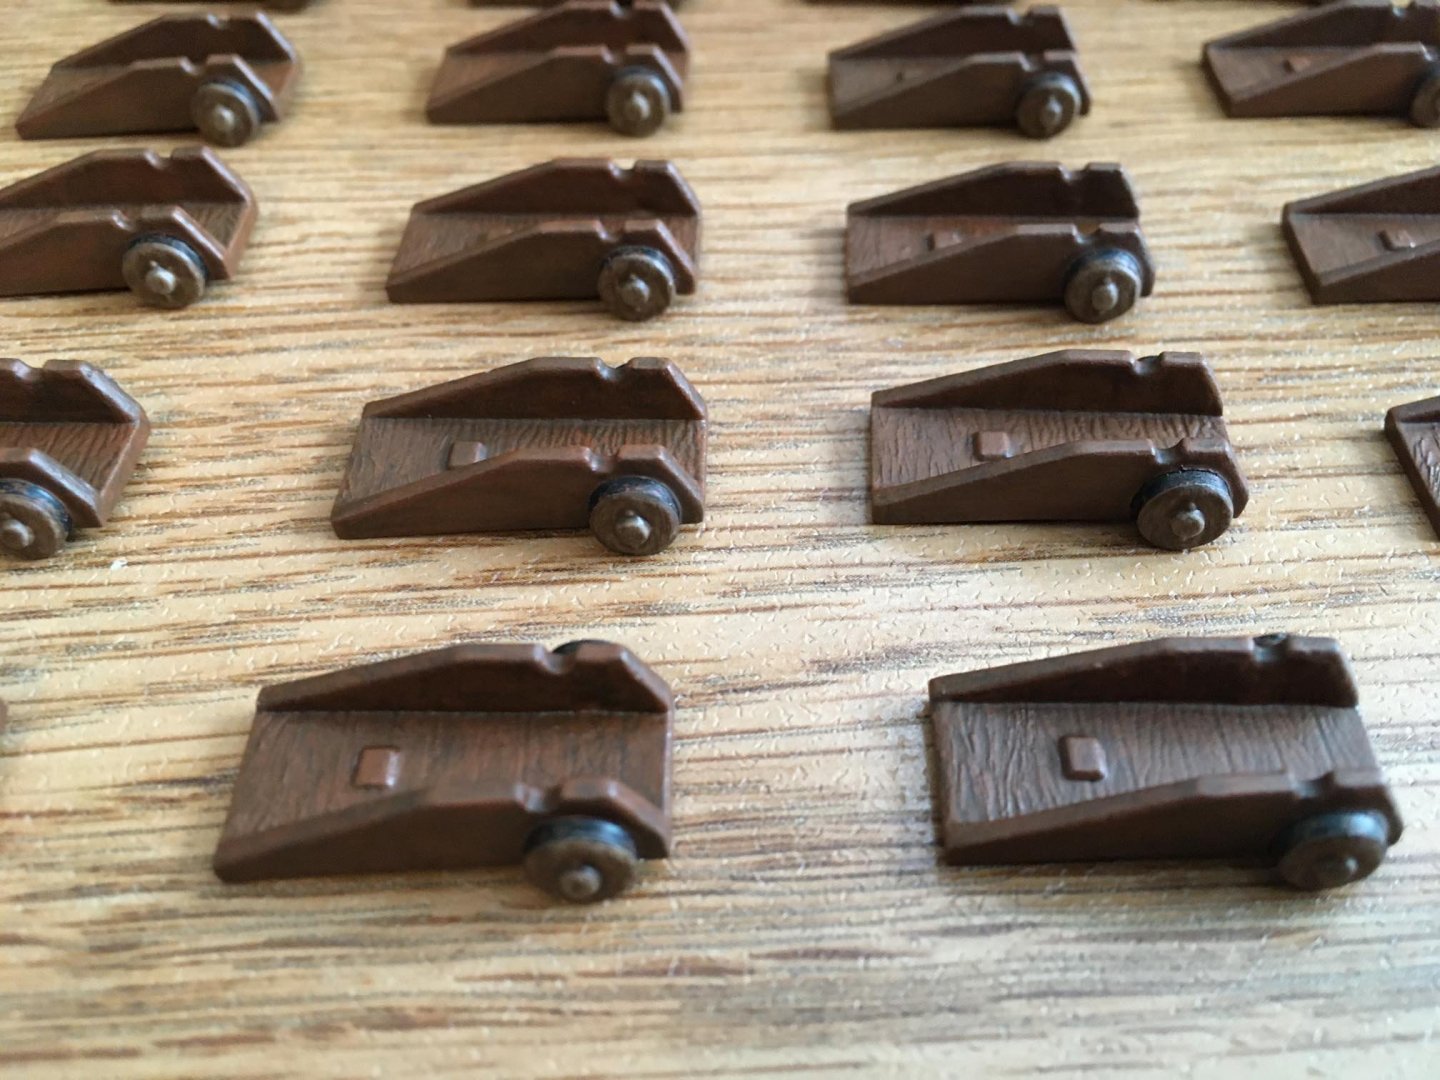
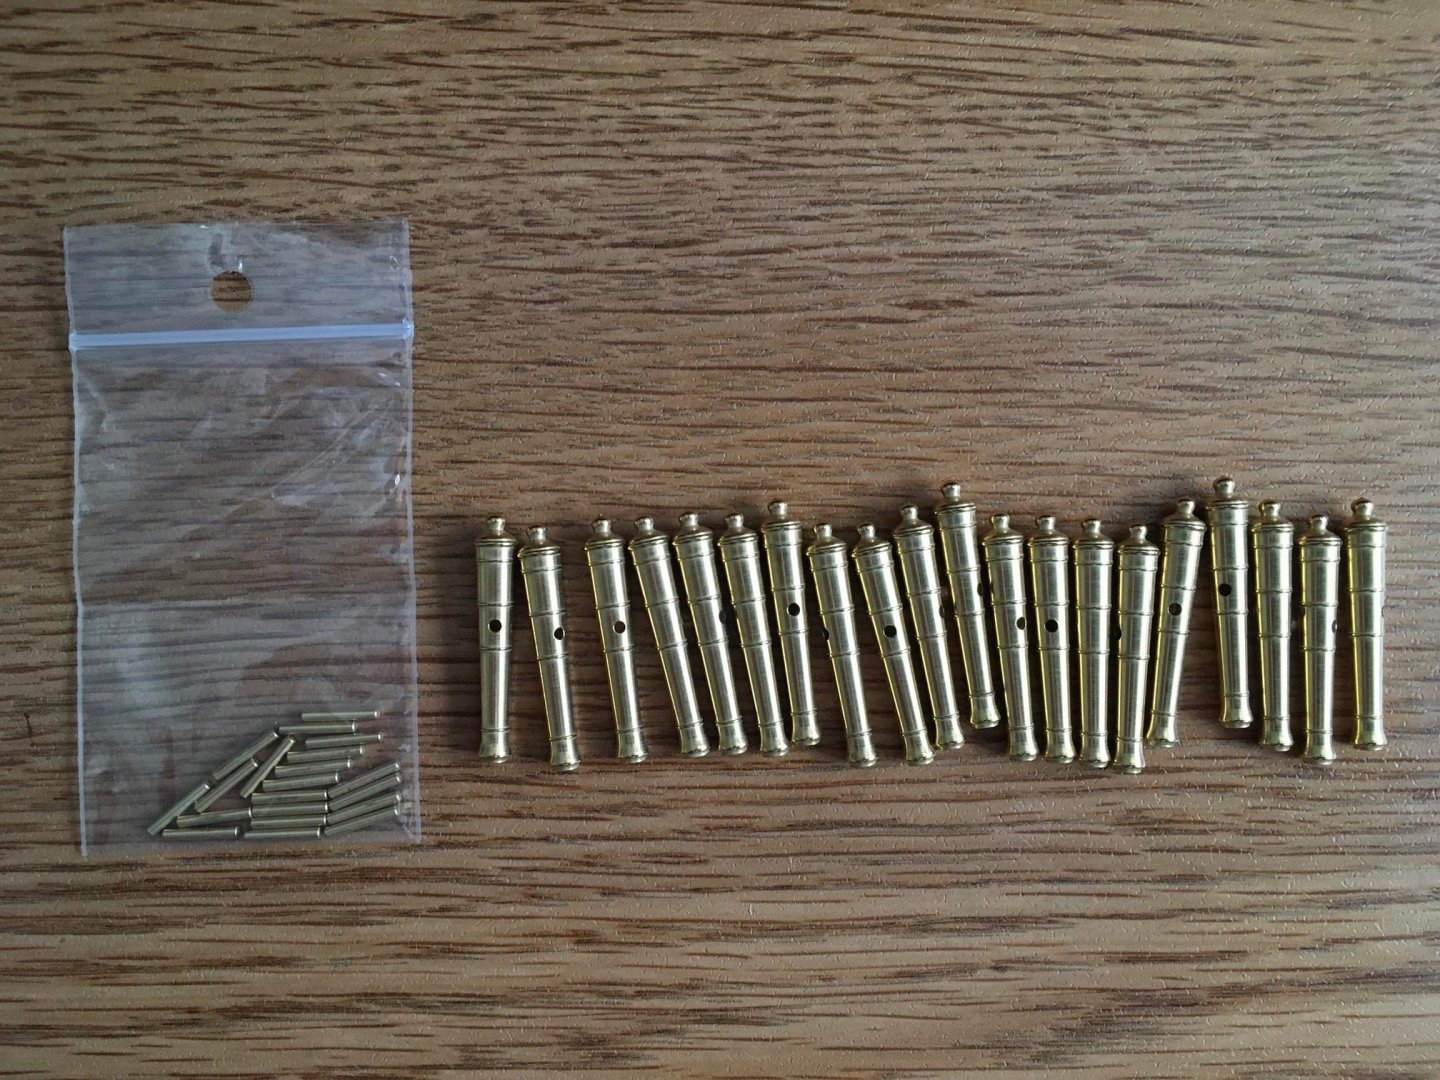
I have just been hit with a major setback in my build, which erases months of work (because I cannot work on the build continuously). I found that after gluing the rear of each cannon to its gun carriage with 30 minute epoxy to stabilize it before I would glue down the styrene trunnions with liquid plastic cement, some of the epoxy did not cure completely. It was tacky, and it was softer than the other epoxy that I had mixed, long after it was expected to be fully cured. I researched online the temperature at which styrene would warp, and keeping that in mind, I tried to gently heat the cannons/carriages, staying below the warping temperature, to try to force the epoxy to fully cure. Unfortunately, the styrene of the gun carriages and trunnions warped anyway, ruining all 20 carriages. The photo below shows what some of the carriages looked like (with the cannons removed). I will not be able to salvage any of them. So it is basically "back to the drawing board" for the cannons. But now I do not have any gun carriages to work with. I looked online for Spanish-style gun carriages, but there are few. I could make my own, but I know that I would have difficulty making them consistent in size and shape, especially since I need 20 of them. In the late 16th and early 17th centuries, which would be the time period for this galleon (which seems to be like an early 17th century style), the Spanish used two-wheeled gun carriages, with large wheels like one might see on a land cannon at the time. See the drawing below, which is reproduced in Angus Konstam's book on the Spanish Galleon which I have referenced earlier in this log. A Russian model company called Falkonet makes carriages that are very nice and look much like the carriage pictured above, but only one size is available to me, and it is just too large (wrong scale). So I will have to alter some four-wheeled carriages. I have ordered 20 carriages from Radimir at HiSModel that will fit with my 29 mm cannons. I will shape them to look a little like the carriages that came with the kit, which will hopefully be easier to do than trying to rework them to match the picture above. The wheels for the four-wheeled laser-cut wooden carriage kits that I ordered are too small to look good in a two-wheeler, so I ordered some 8 mm wooden disks to make new, larger wheels. We will see how it all works out. Since I will be gluing the cannons and trunnions to wood, I do not have to re-make styrene trunnions (which I did previously for a styrene-to-styrene bond). Instead, I will use the brass trunnions that originally came with the brass cannons (and I had lost one of them, so I made one from a brass rod). To melt away the warped styrene trunnions from my cannons, I had to strip off all of the exterior paint from them. I did this using both acetone and enamel thinner (which has mineral spirits). So now, the only paint that remains is the flat black paint in the bores. Here we go again...


-
Looks good!
-
I agree that the 2 larger cannons should be single in their gunports. I think the 3 piece multi sets look less crowded in their gunports than the 4 piece multi sets, but you could still a combination of 3 and 4 if you like.
-
Looks good! The multi set ups remind me of the Flying Dutchman in the Disney Pirates of the Caribbean movies.
- 41 replies
-
- 1
-

-
- Spanish Galleon
- Flying Dutchman
- (and 3 more)
-
I realized that the link to a website showing a bronze cannon in my post above isn’t working, so I will try it again: https://www.ima-usa.com/products/original-18th-century-bronze-2-pounder-falcon-cannon-with-oak-naval-carriage?variant=19428799938629
-
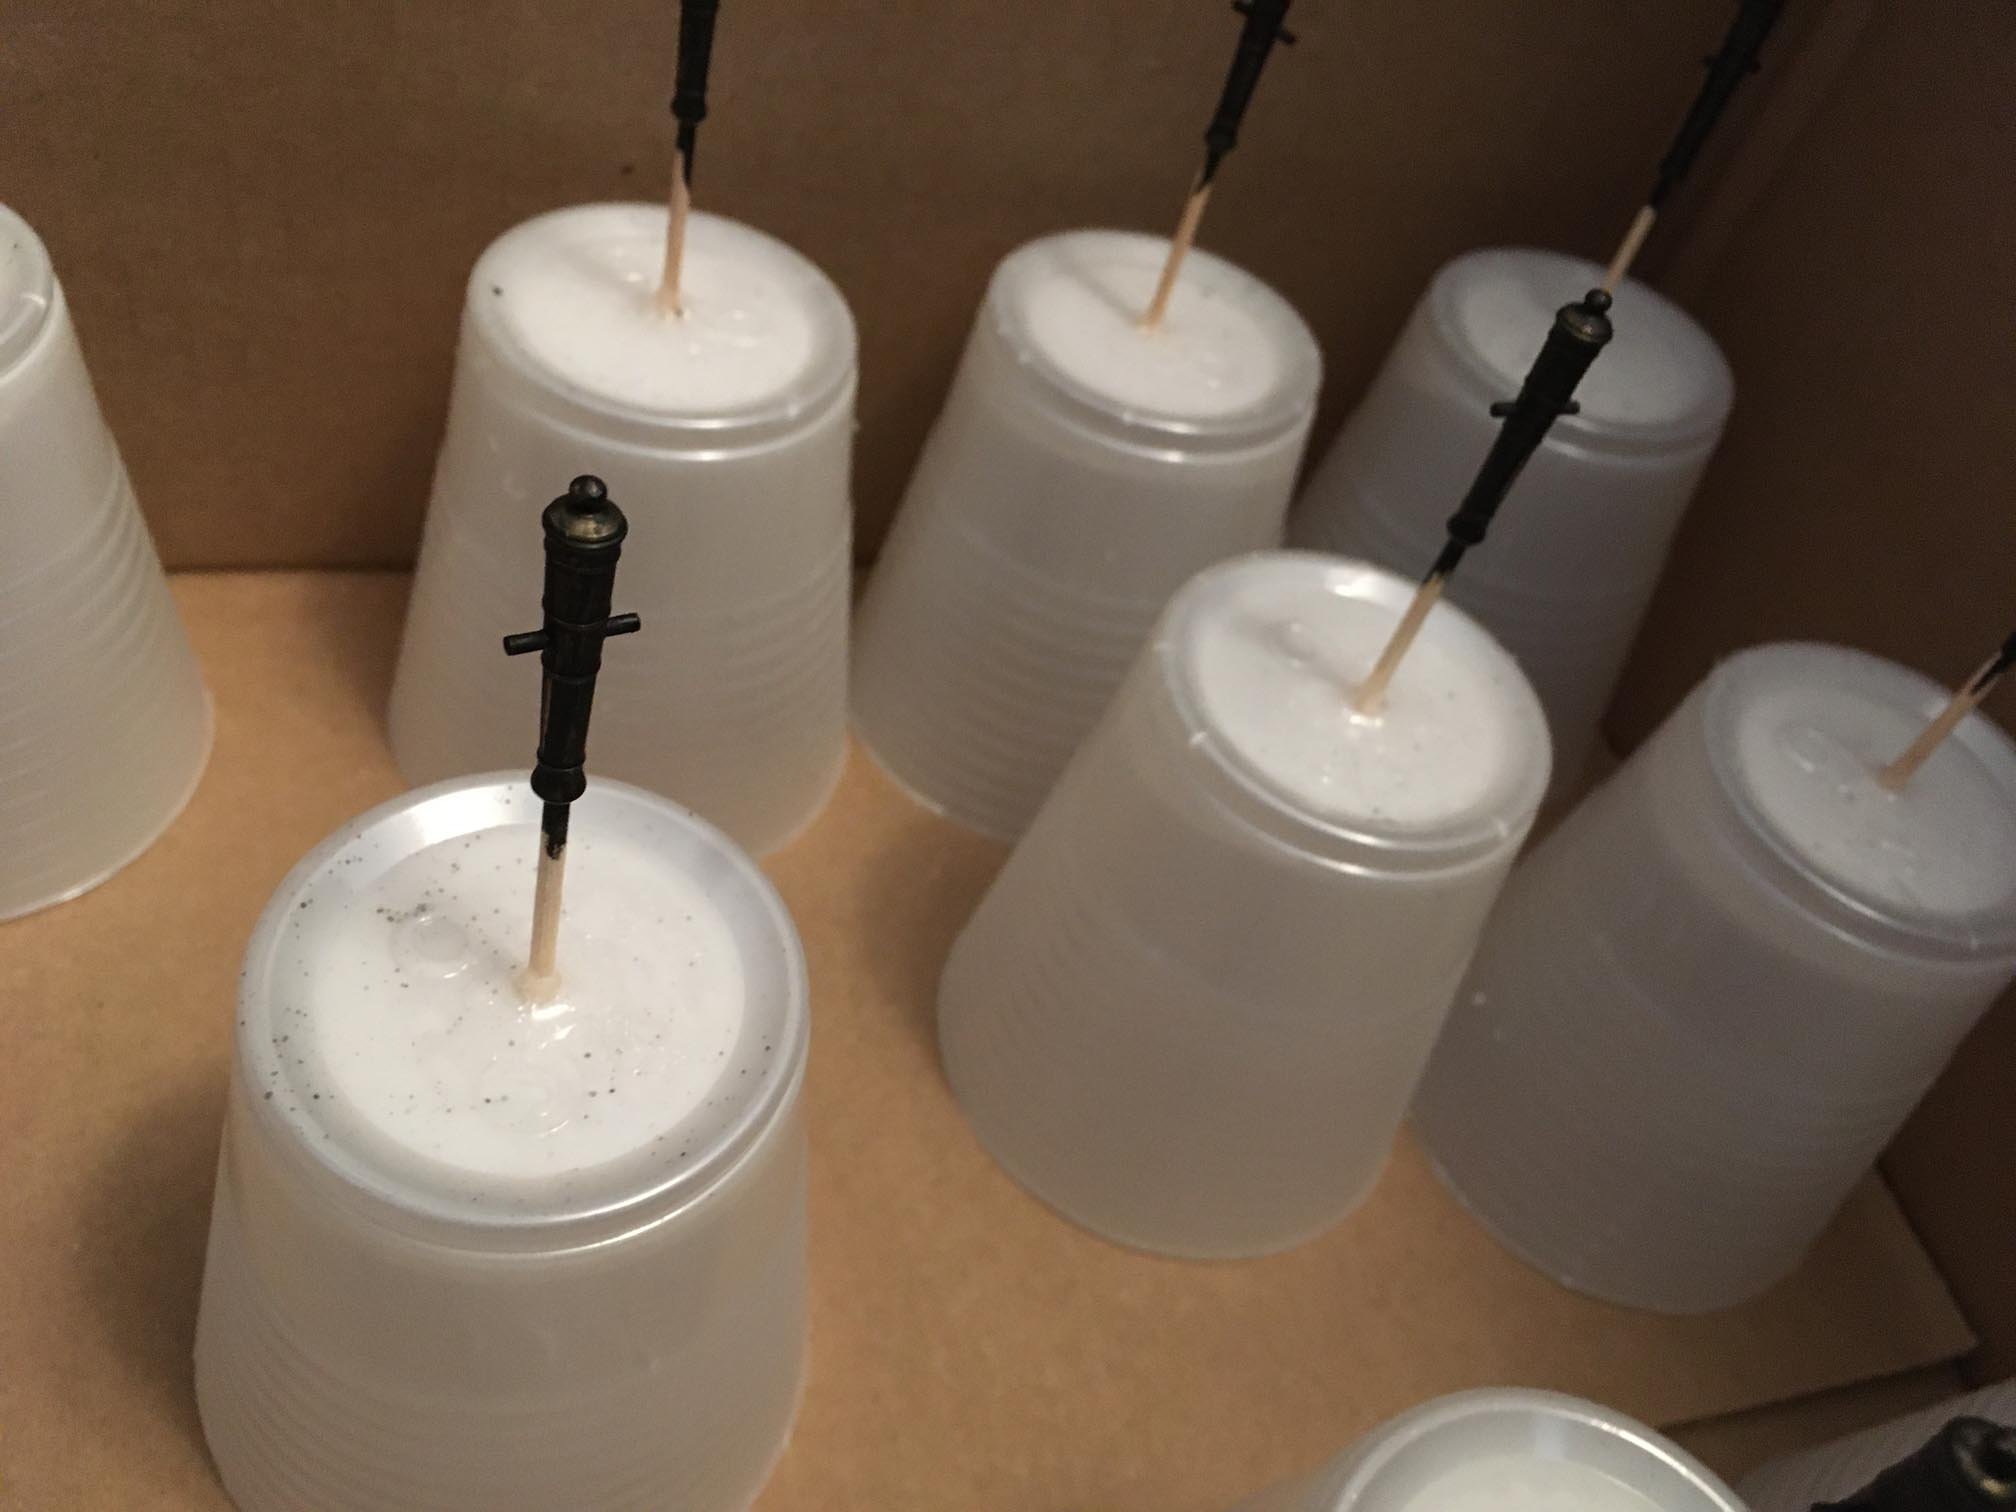
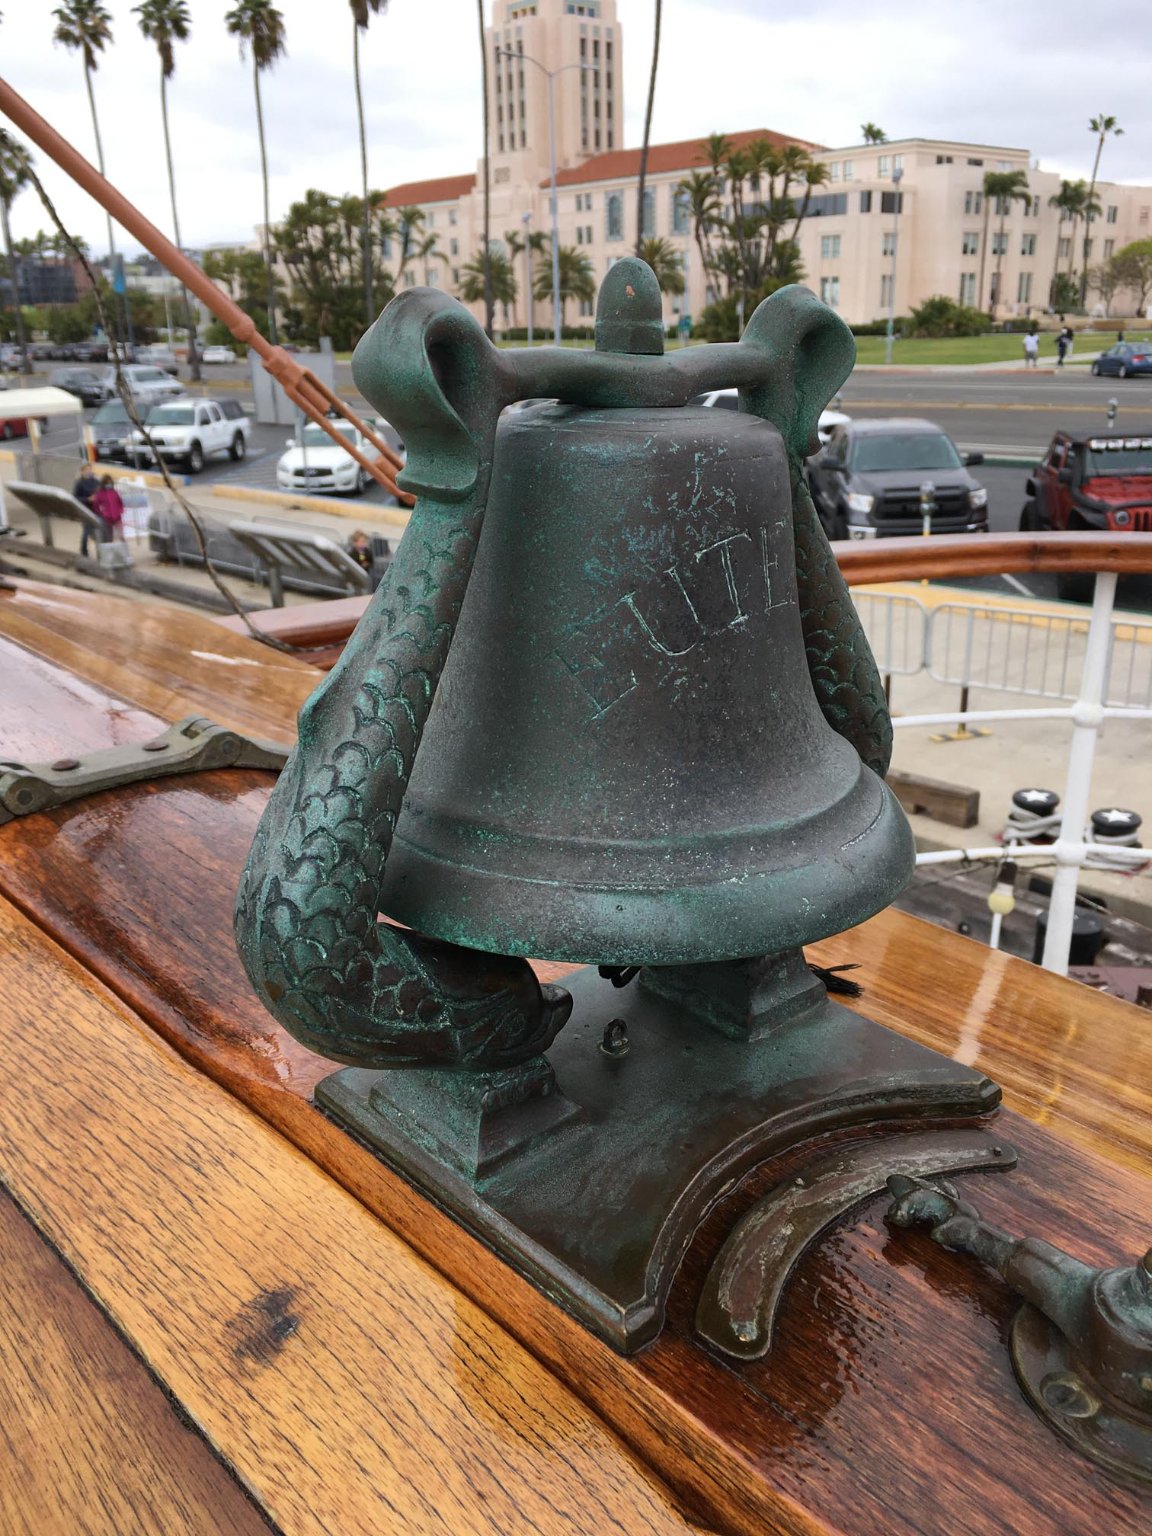
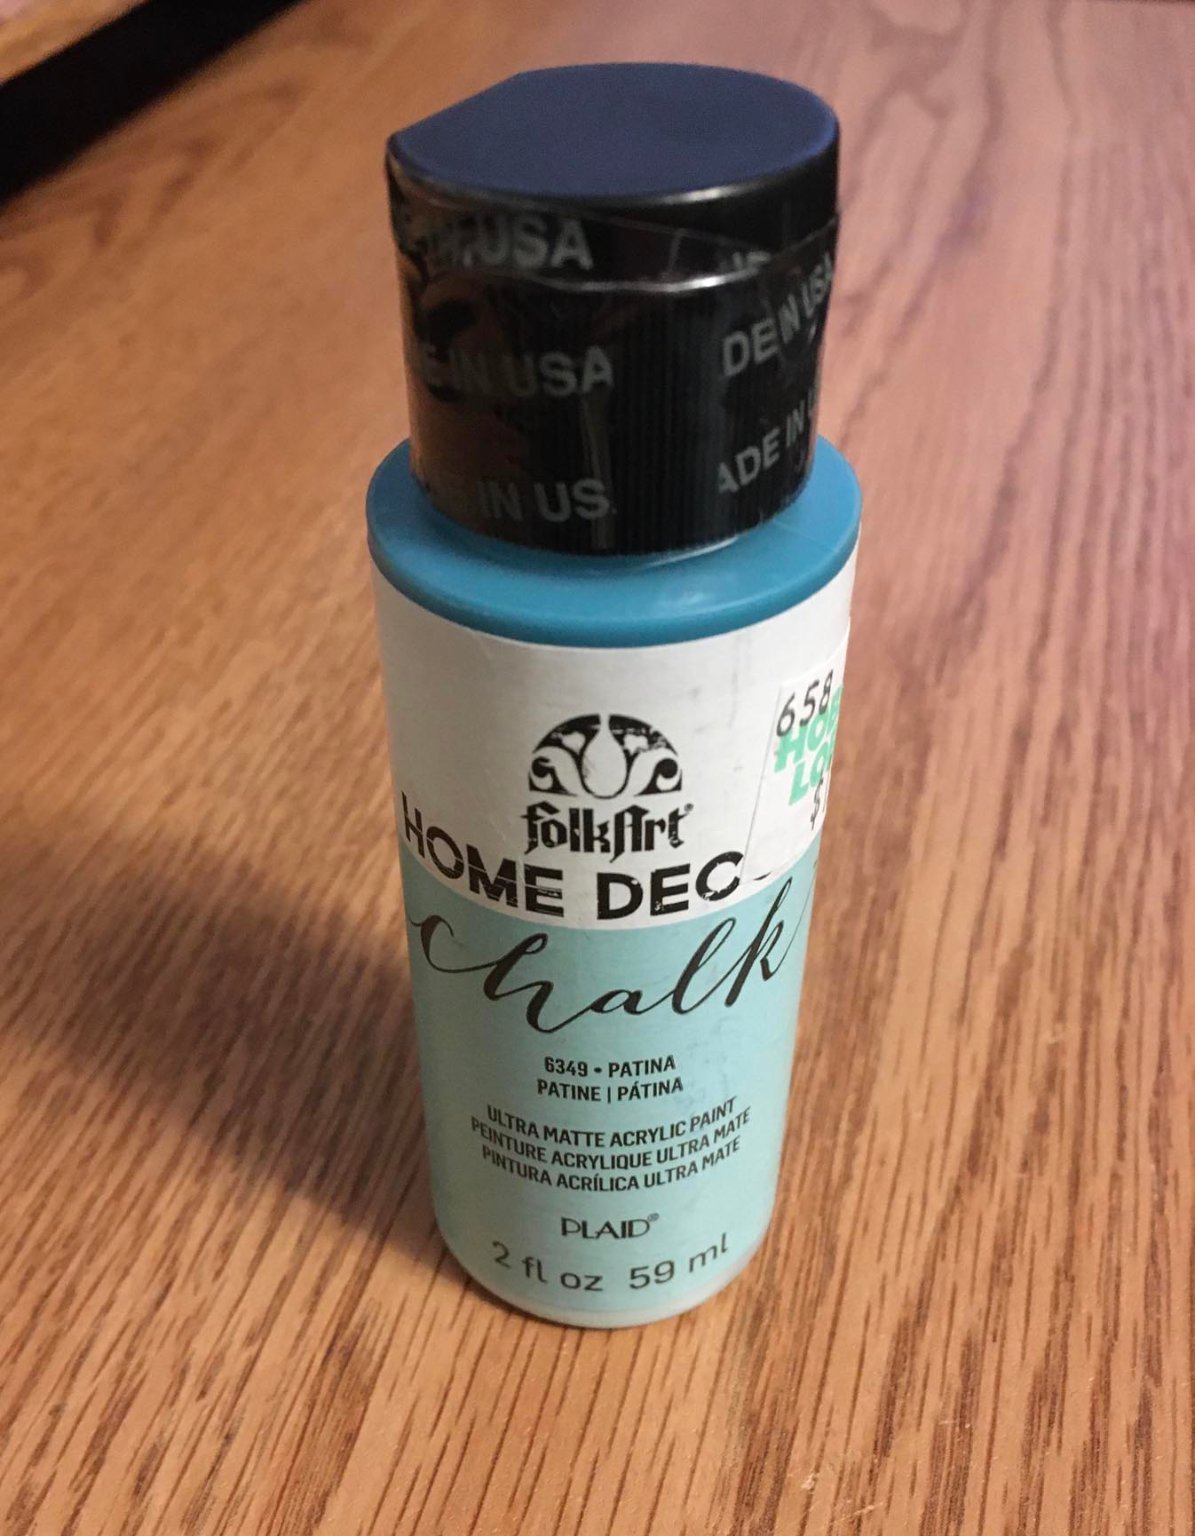
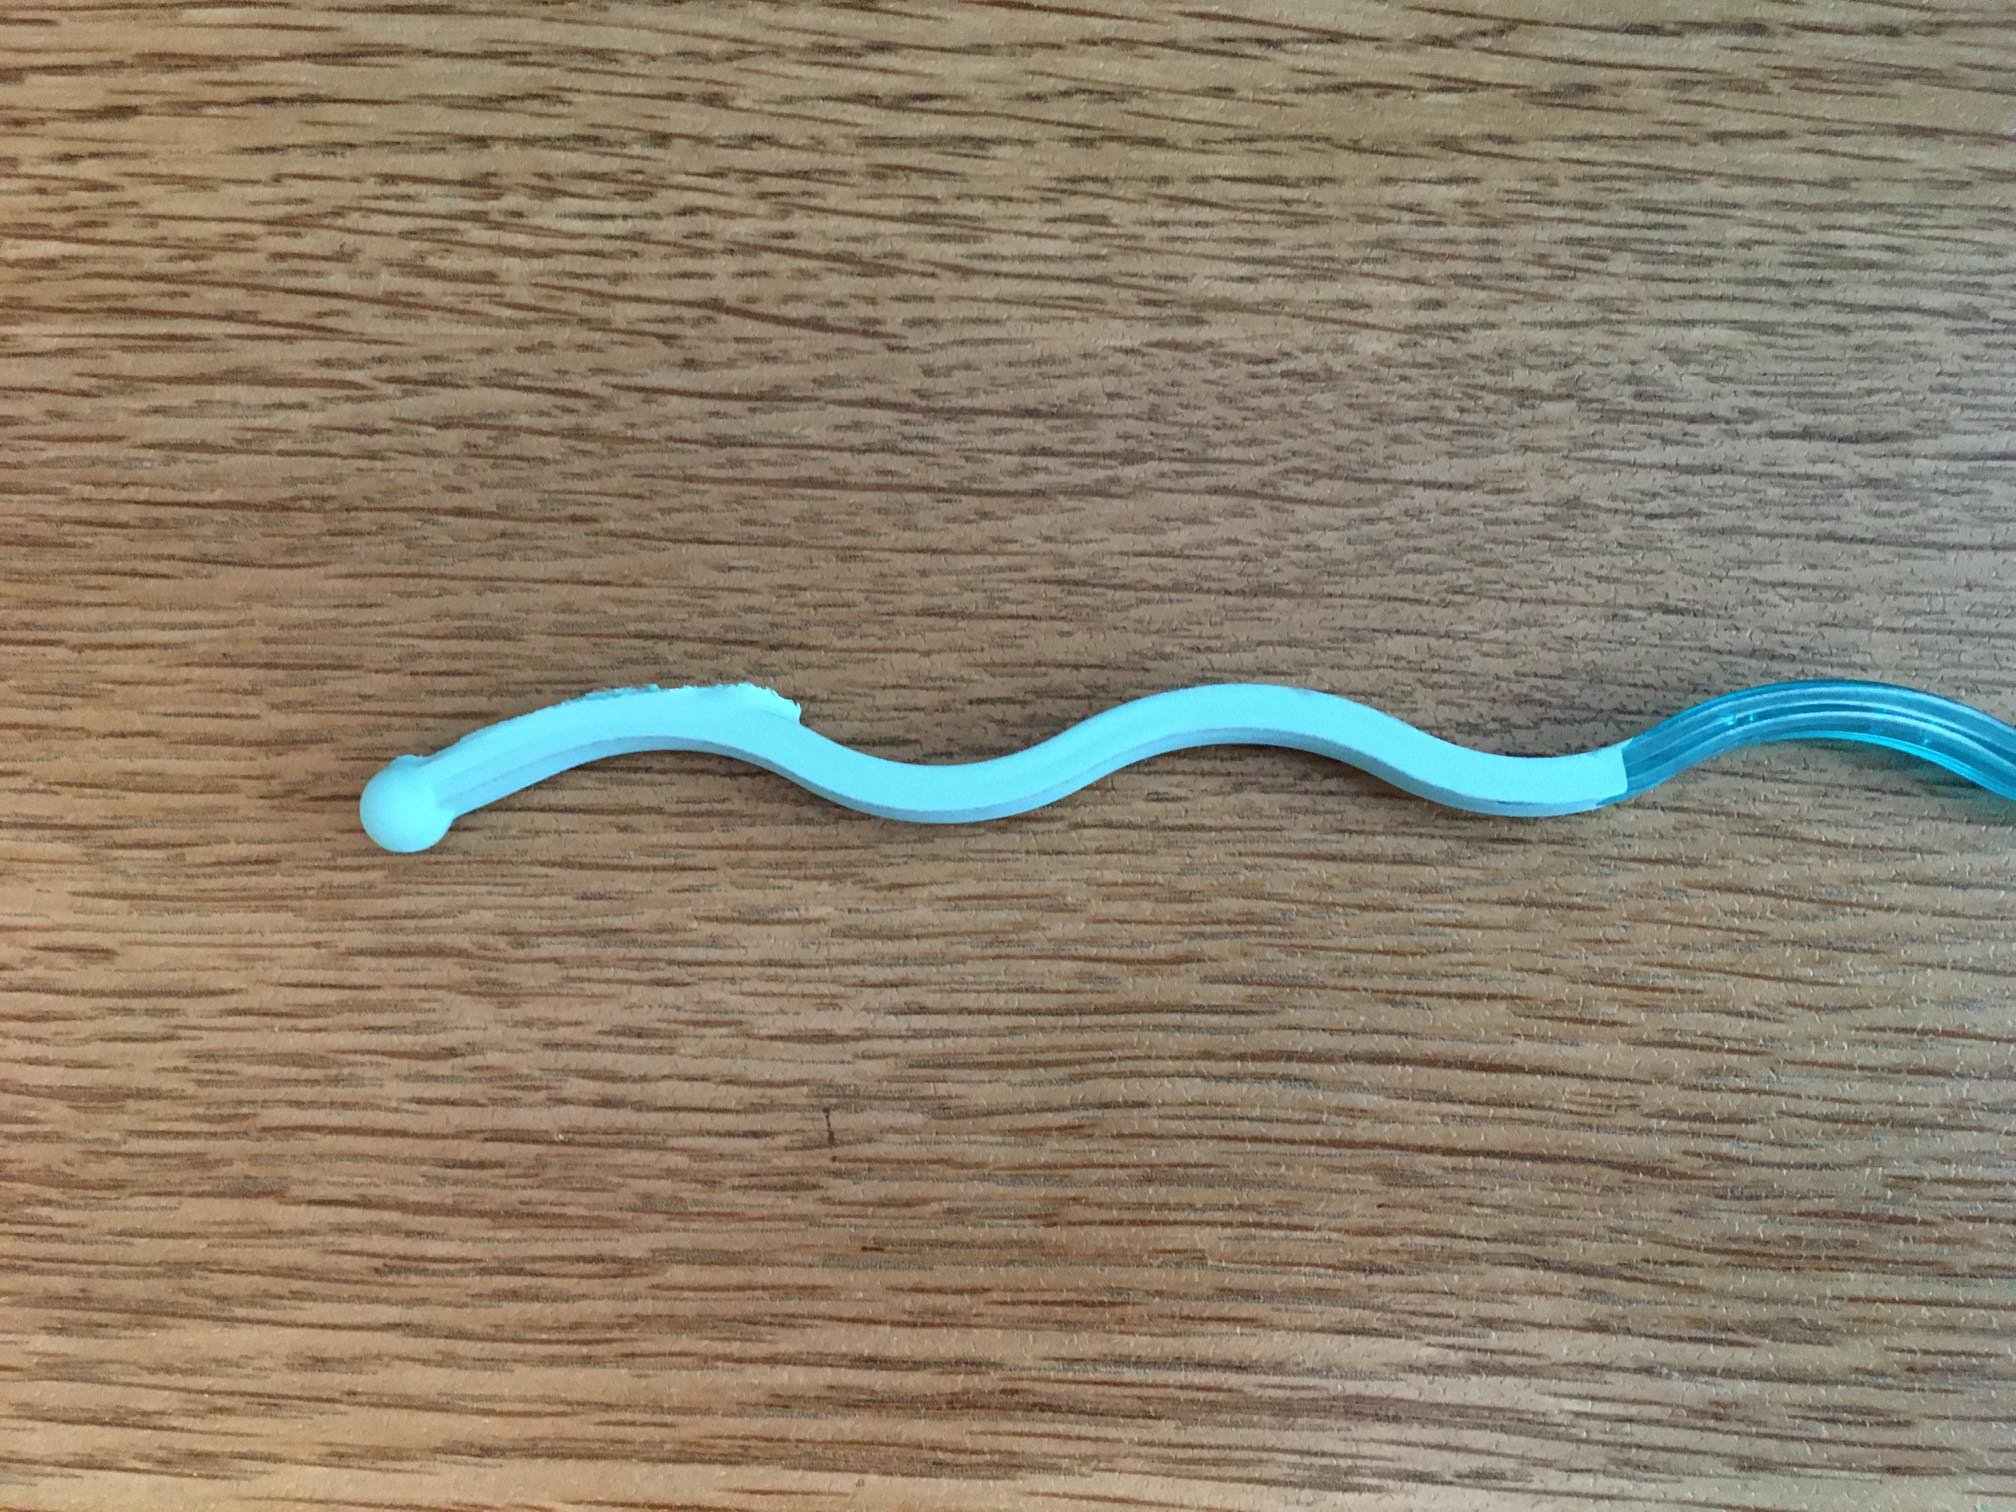
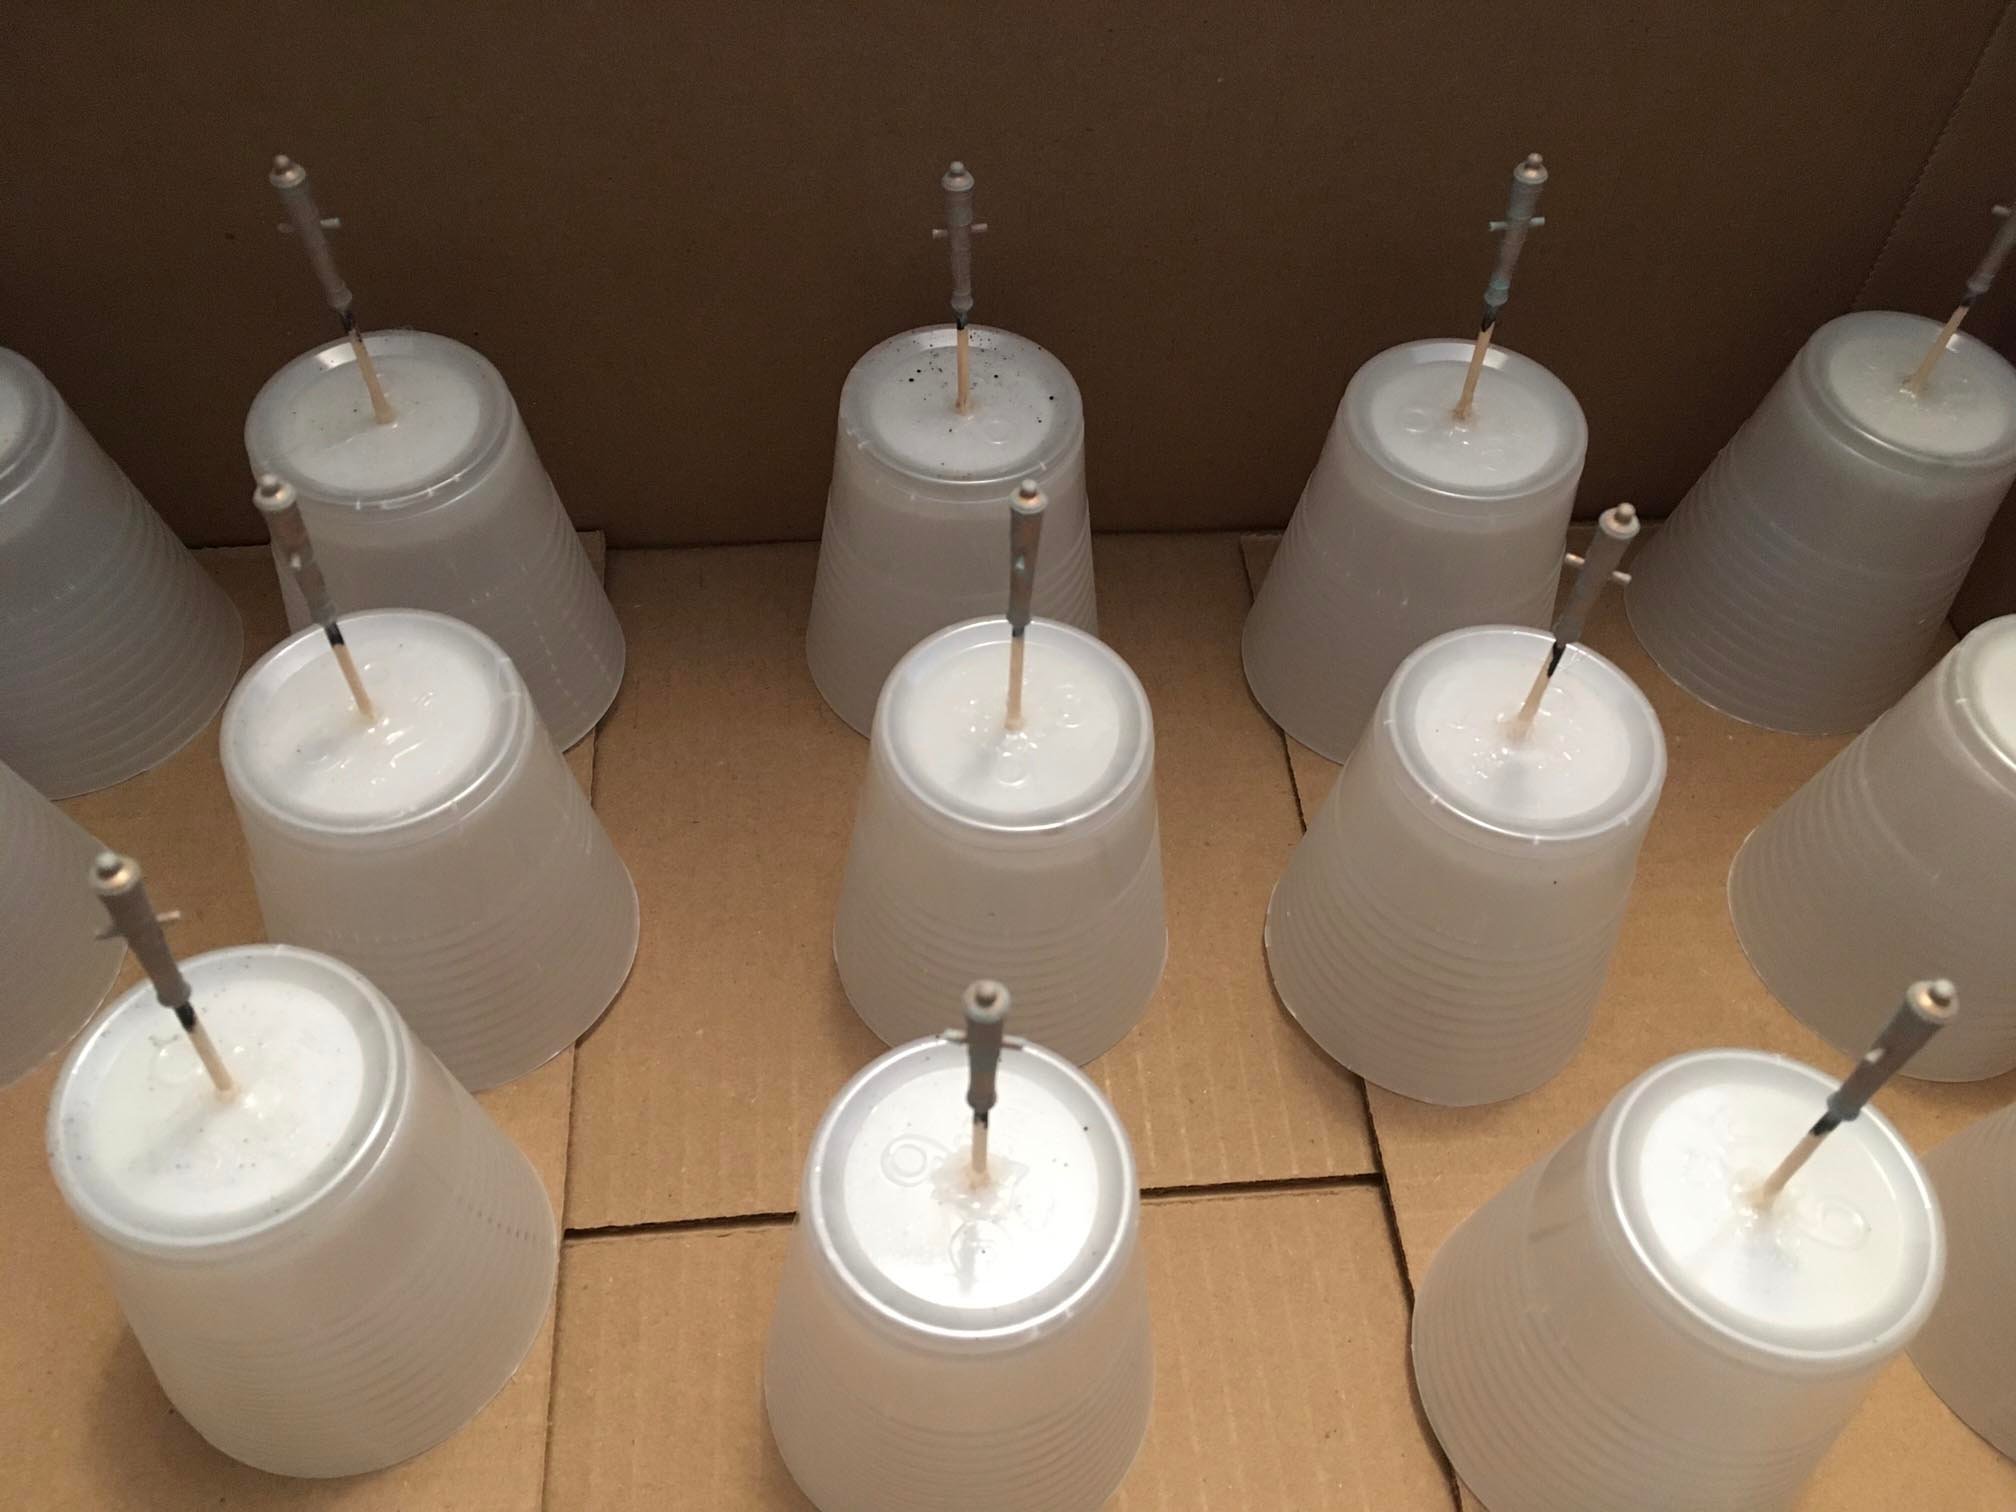
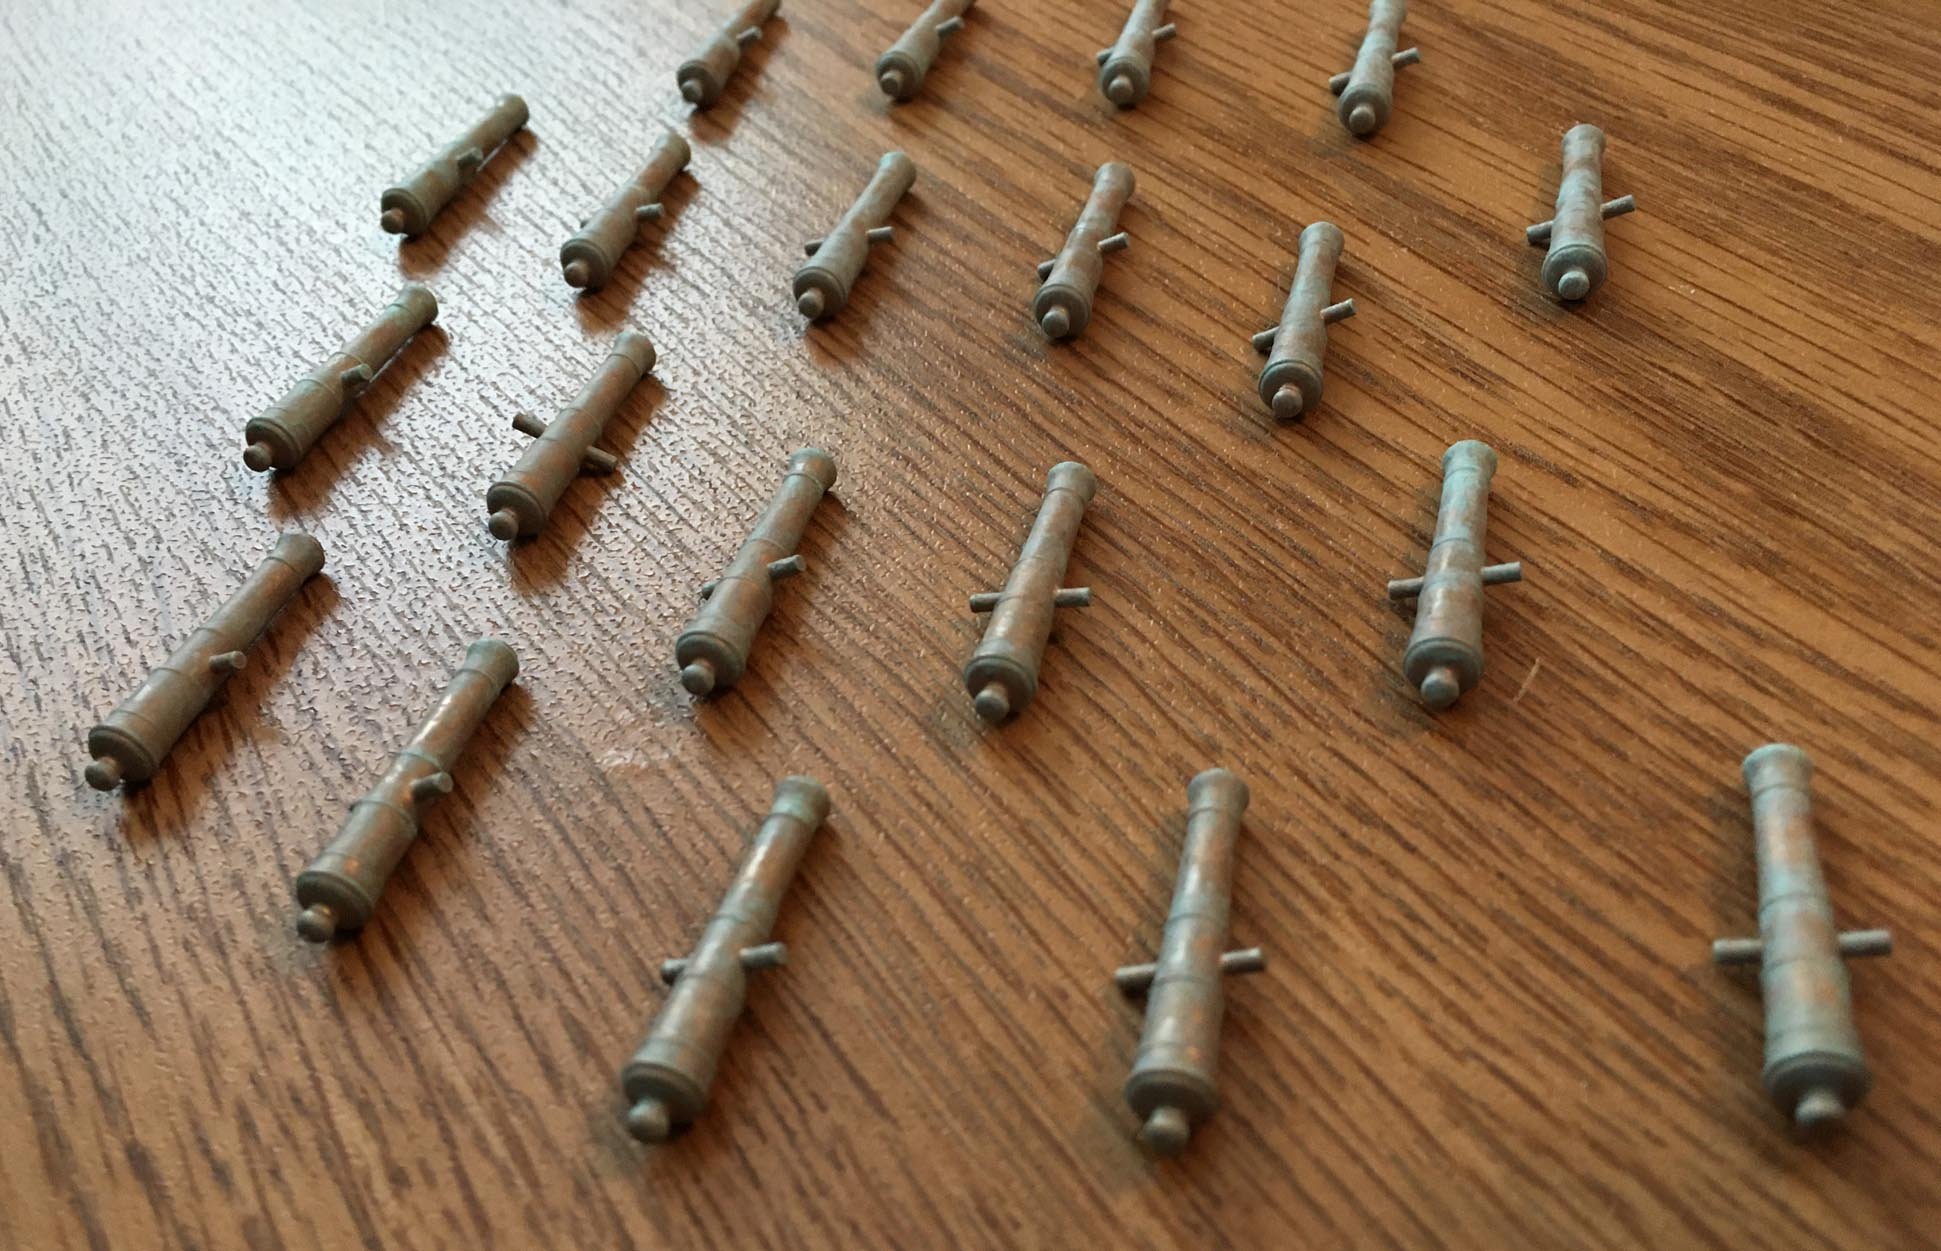
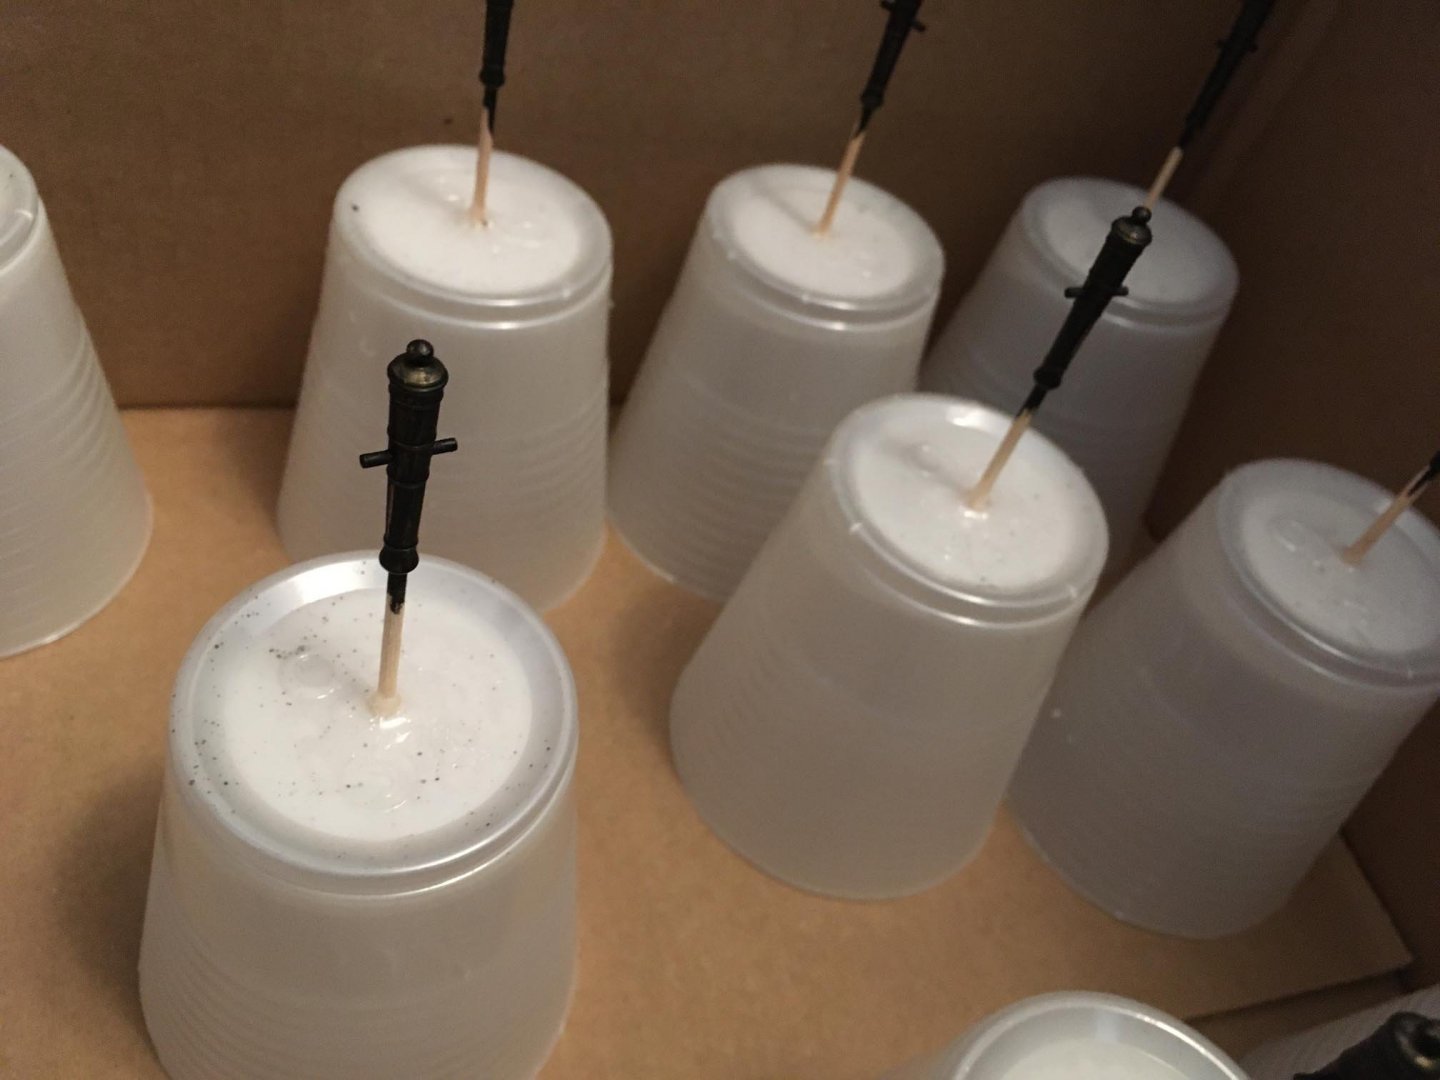
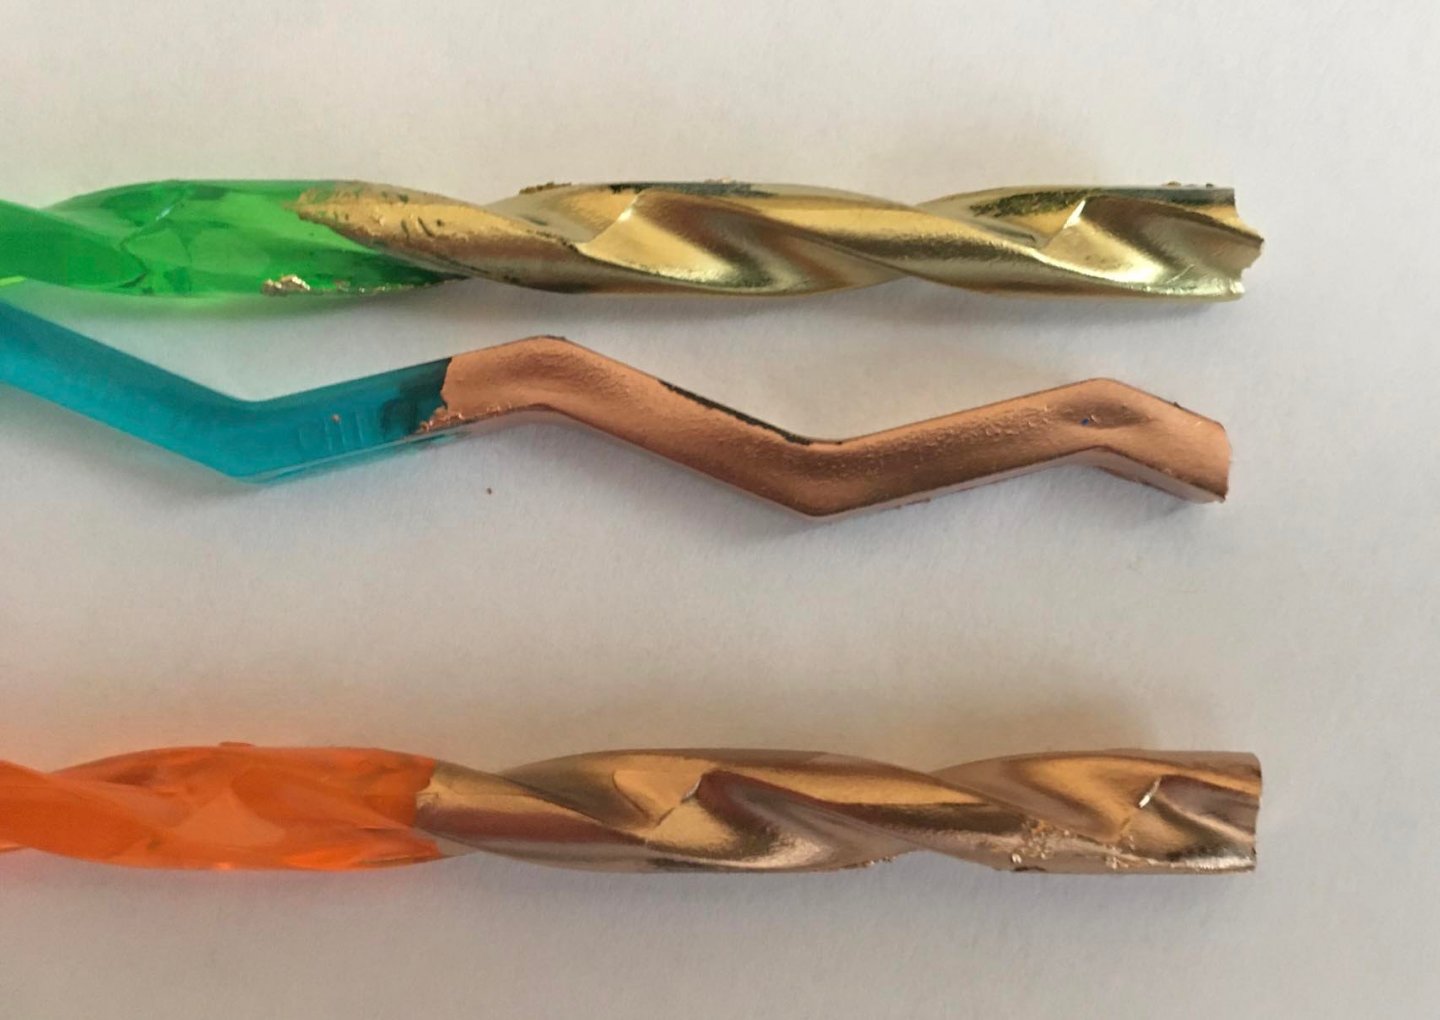
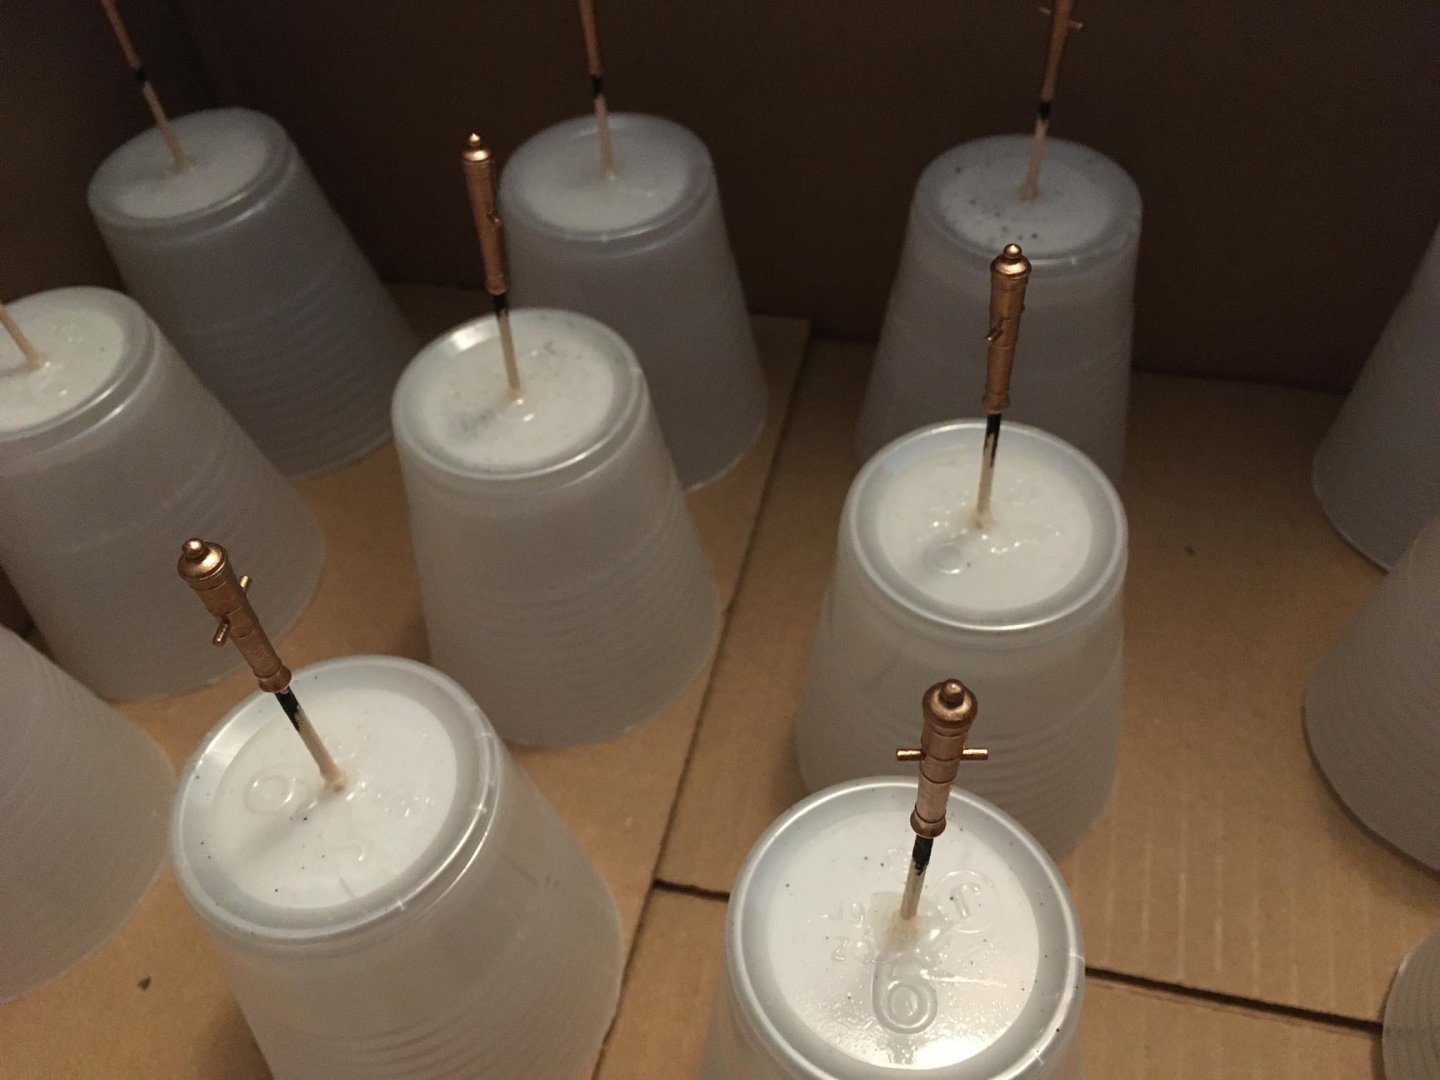
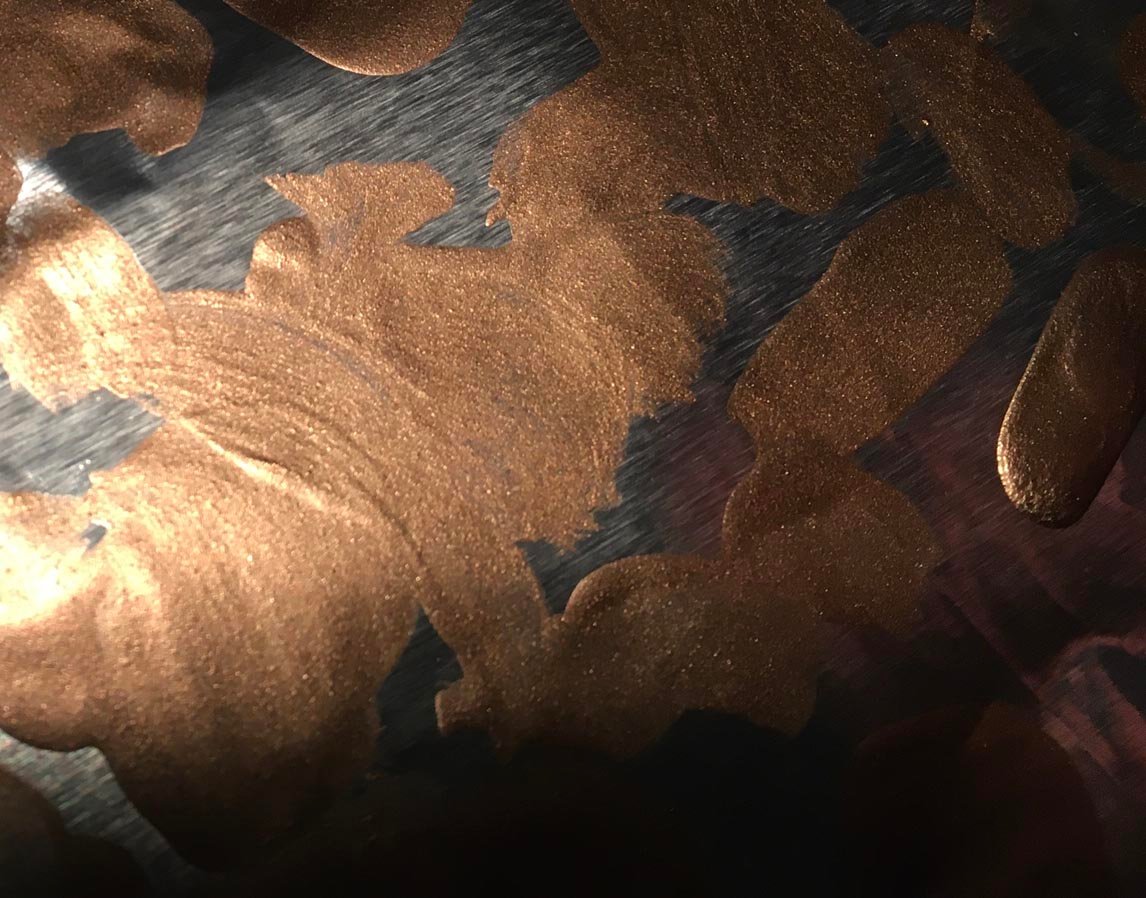
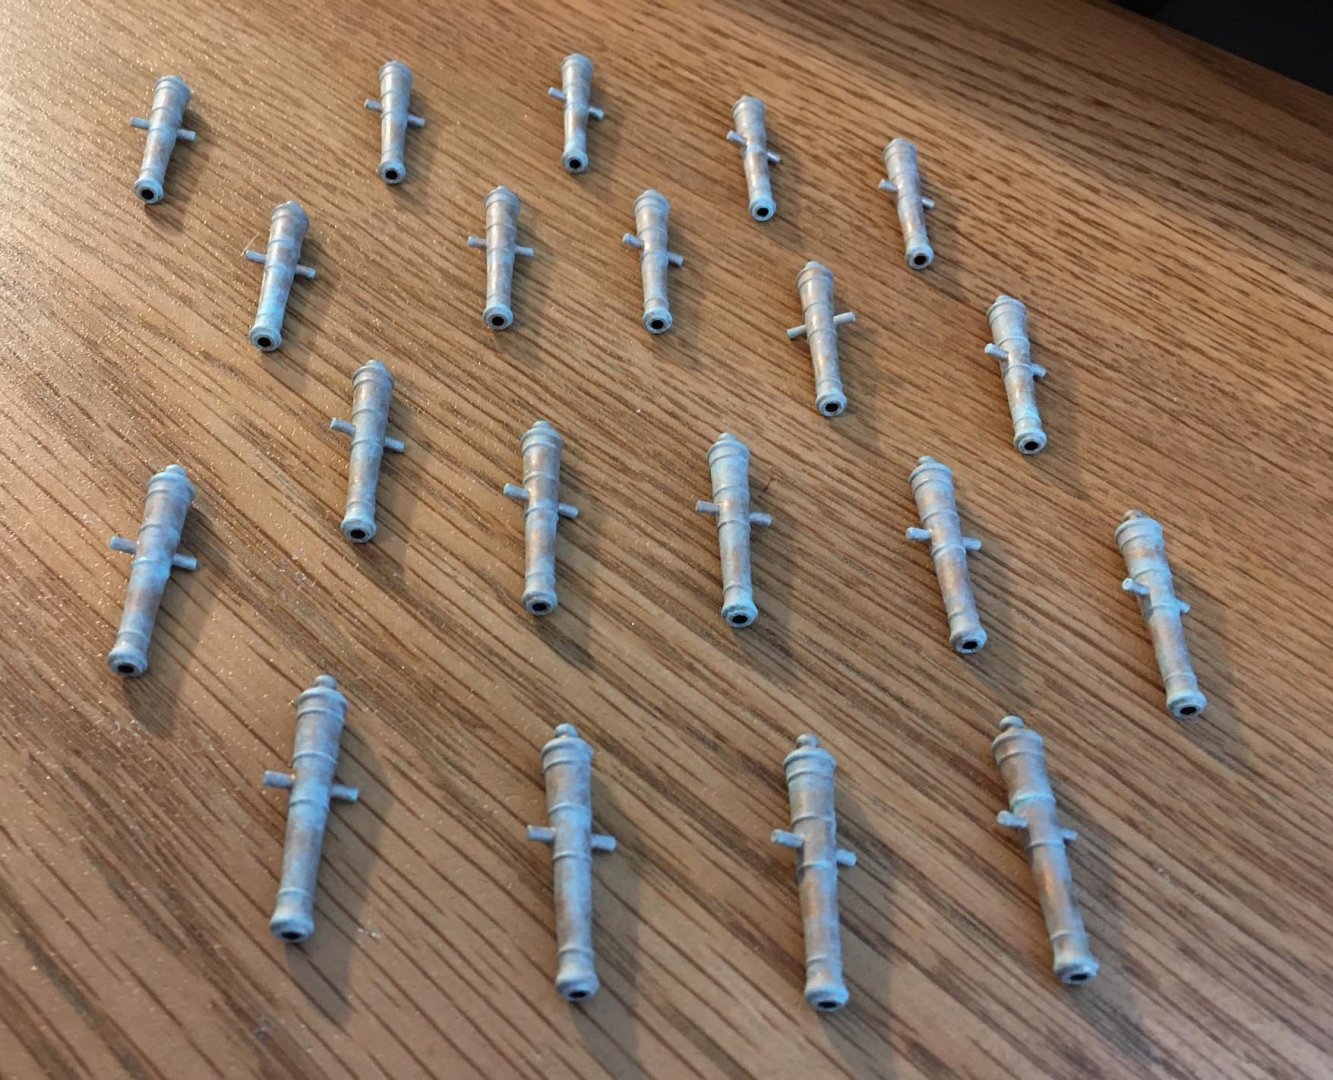
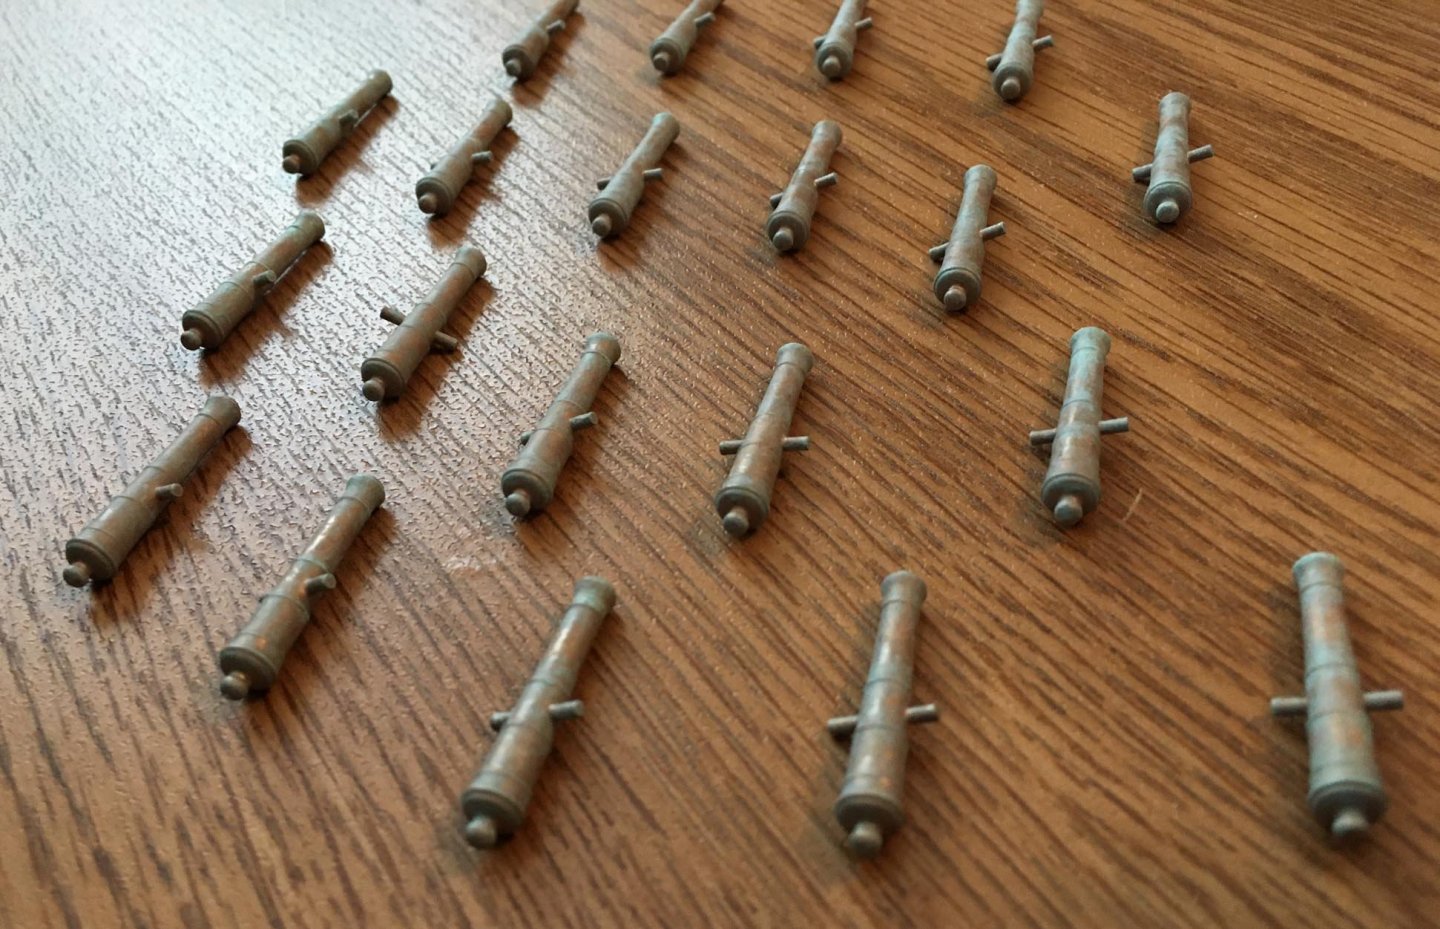
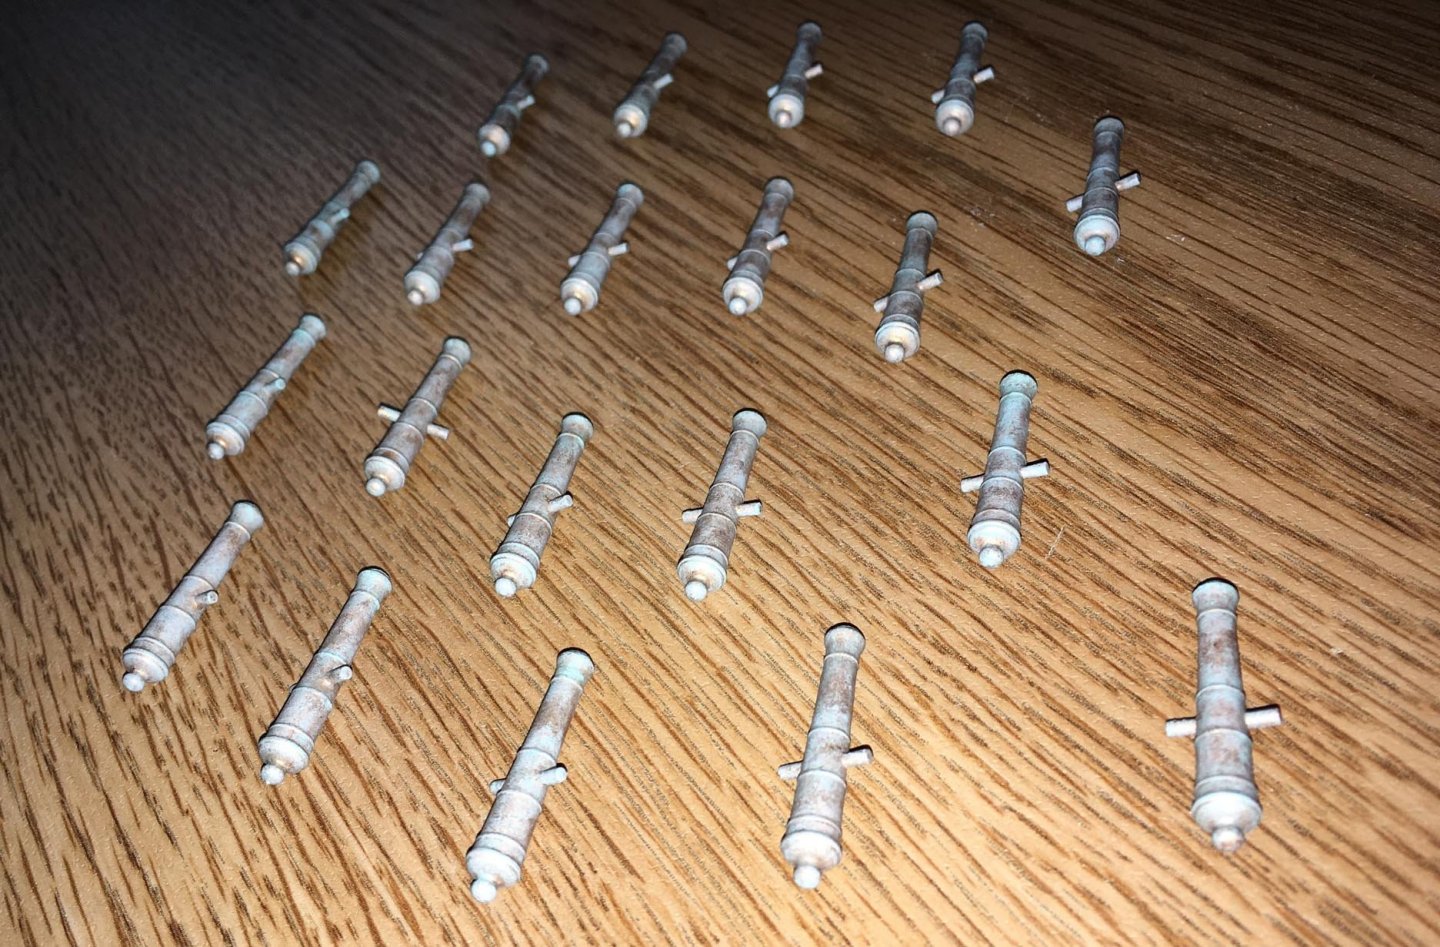
The cannons are now painted. It was a multi-step process, starting with mounting them temporarily on toothpicks: The first coat of paint, an "undercoat", was thinned-down Testors flat black enamel: If I had left the cannons unpainted, they would have been too yellowish to pass for bronze. Testors metallic enamel paints are generally good for making a surface look like it is made of metal. I could not find a metallic bronze paint, so I mixed Testors Model Master brass enamel with Testors metallic copper enamel. In the photo below, the brass paint is on the top mixing stick, copper is on the one in the middle, and the bronze mixture is on the bottom one: I painted bronze over the flat black: The metallic paint seemed a bit "grainy" with its metal flakes, and it did not level well (see test brushings below): I think that if I thinned it, it may have ended up not dense enough for the pieces to appear like solid metal, so it was applied with full viscosity. The grain and the brush marks, however, could be used to my advantage when it came to applying the patina. Since I am weathering other parts of the model, I wanted to present the cannons as if they had been exposed to salty sea air over several years. Patina for bronze can have a blue-green appearance, as in this cannon: and this bell: I wanted to make the cannons still appear metallic, so I did not coat them entirely with the patina paint. Rather, the application was done sporadically, such as can be seen on the cannon in this webpage: https://www.ima-usa.com/products/original-18th-century-bronze-2-pounder-falcon-cannon-with-oak-naval-carriage?variant=19428799938629 I found this acrylic patina paint: Rather bluish on the stirring stick: I applied it with (mostly) a dry-brushing technique: To protect the paint, I applied a gloss acrylic polymer varnish. Gloss was used so that the metallic look of the bronze would not be too flat and dull for my taste (although I know that in real life, the bronze can become really dull with time). I used matt acrylic varnish to cover most of the patina and some of the raised texture. Once the cannons were removed from the toothpicks, I cleaned up the muzzles with sandpaper and coated the bores inside them with flat black enamel (to simulate dark inner shadow, eliminating the brightness of the brass). Then, the muzzles were painted bronze. Patina, followed by the varnishes, was applied to the fronts of the cannons. Here are the final results. I am showing pictures both with and without the camera flash because each method shows differences in the detail. Next up will be to mount them into the carriages and make the capsquares.


-
I am currently building the Revell 1/96 (really 1/64) Spanish Galleon, with a lot of modifications. I built a few model sailing ships and aircraft carriers and battleships when I was a child and teenager — I kept two of them: Revell Cutty Sark and USS Constitution (neither one of them was the larger 1/96 scale).
-
Thanks, Michael! I will post when I have the cannons painted. My pace is slow, but my interest is kept up when I complete steps along the way as well as when I think about how I can tackle future steps.
-
I figured that 30 minute epoxy would make a reasonable bond to keep each trunnion in place within the cannon barrel. I applied epoxy within the divot, with a little of it welling up above the surface, and then slid the trunnion through the hole in the barrel, cleaned up a little epoxy that may have extruded, and then flipped the cannon over to let the epoxy cure. The purpose of the divot was to allow enough epoxy to be placed to hopefully make a stronger bond. And this is the result:
-
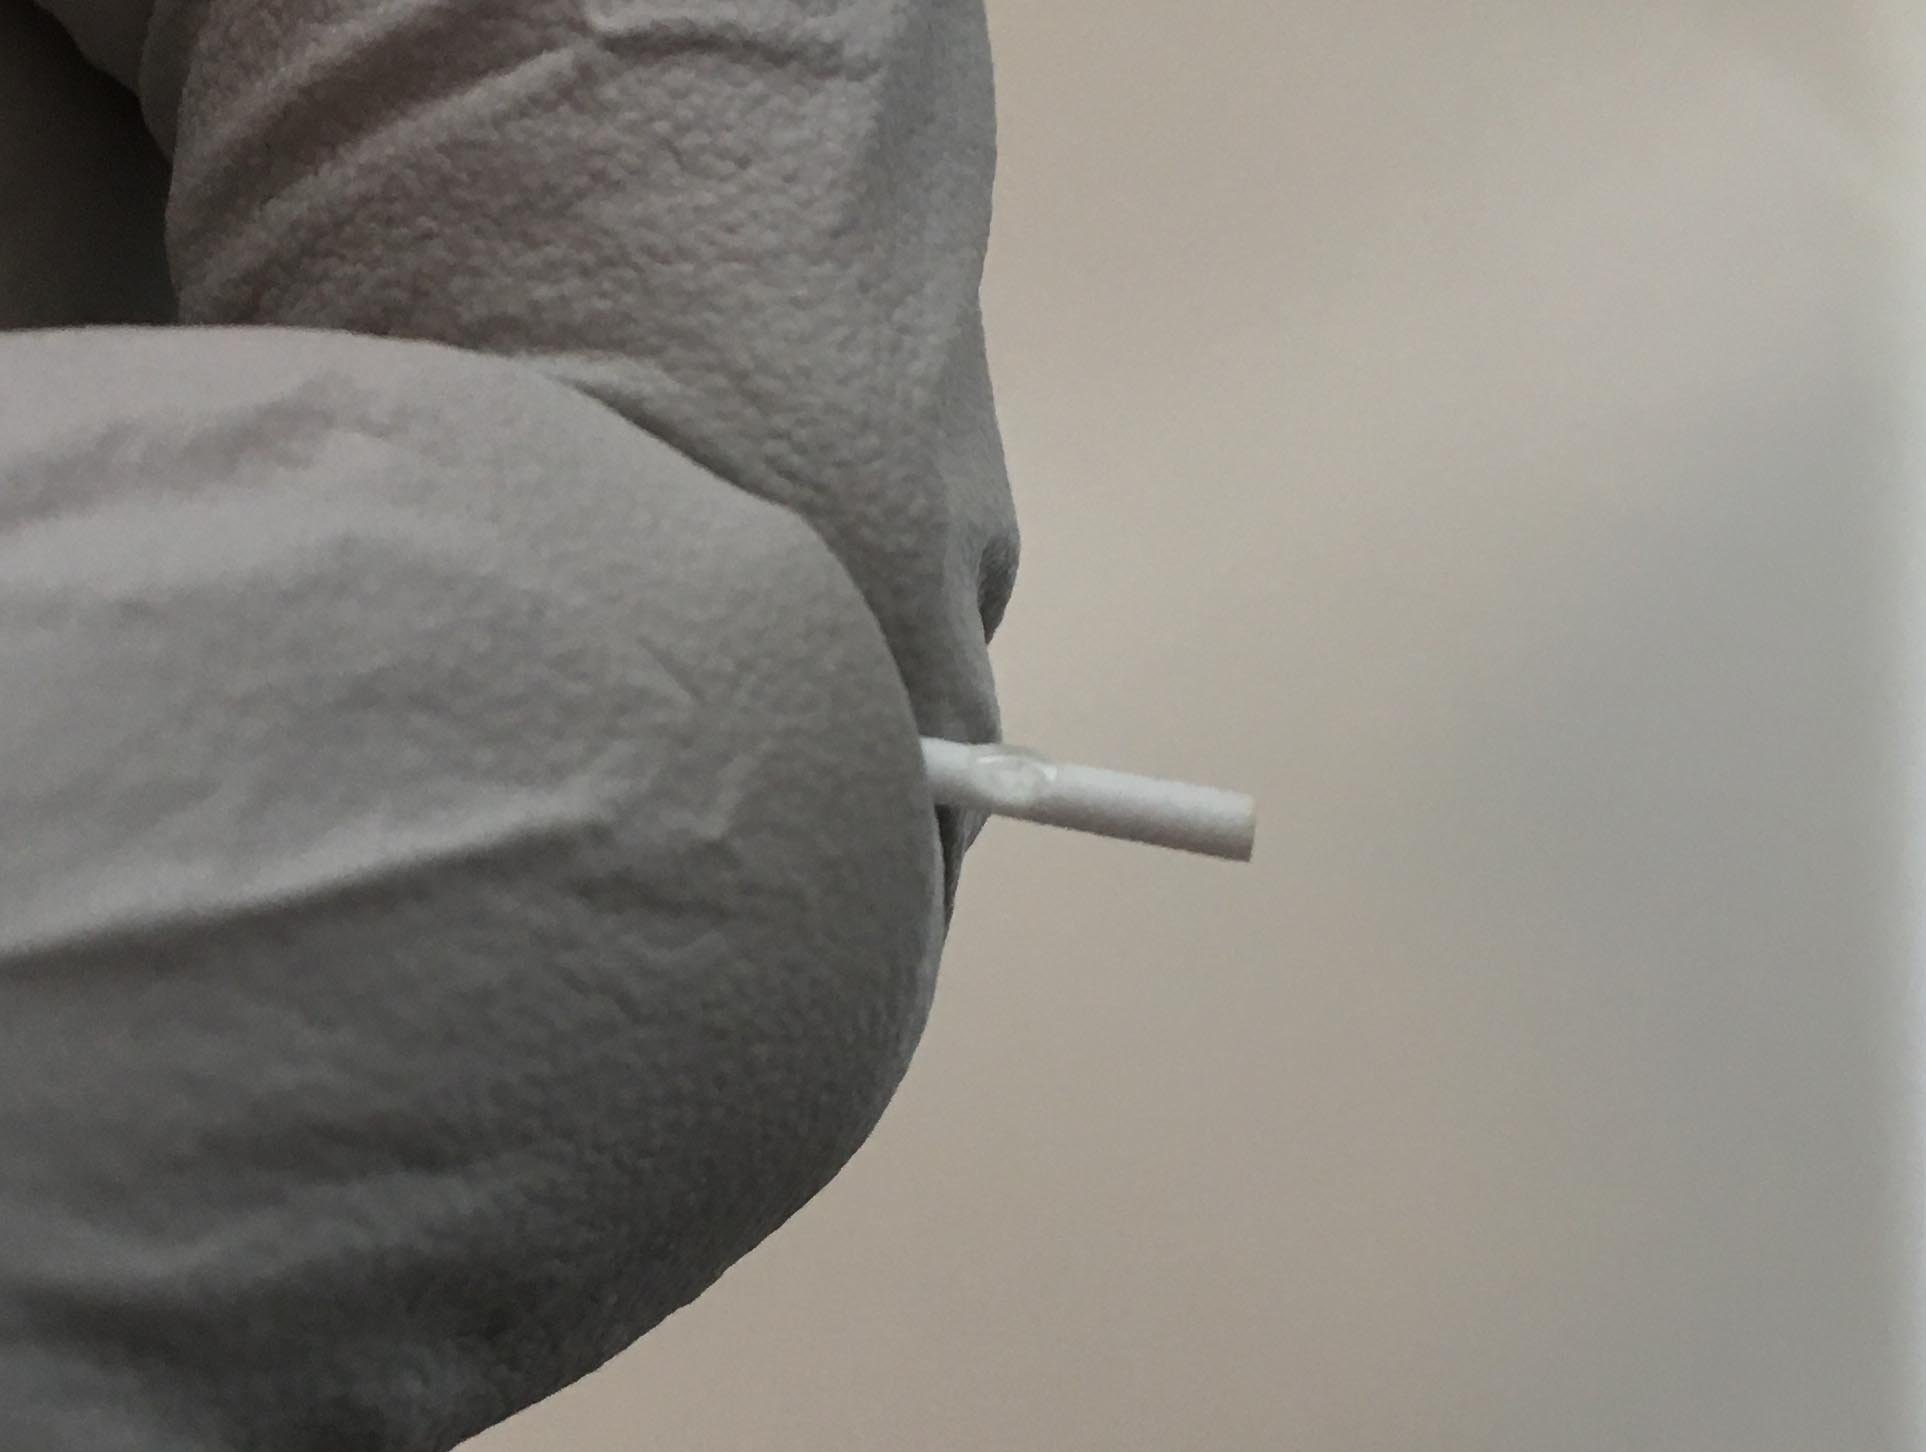
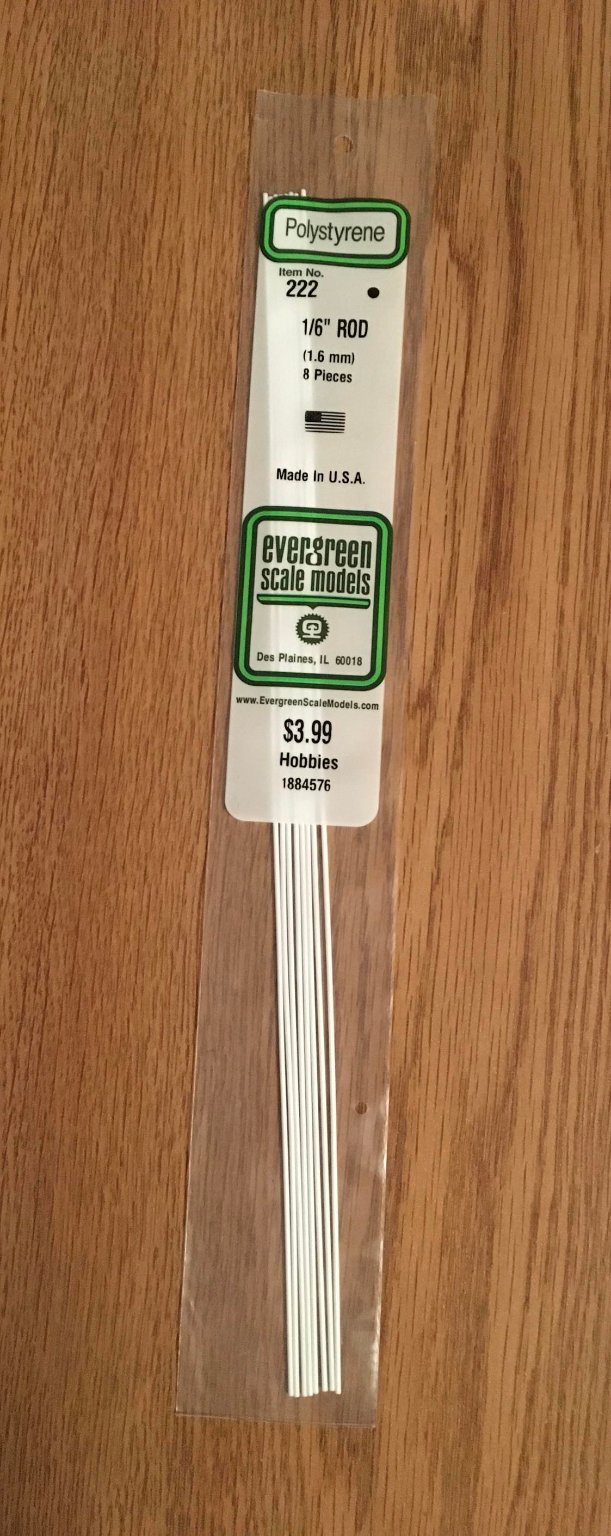
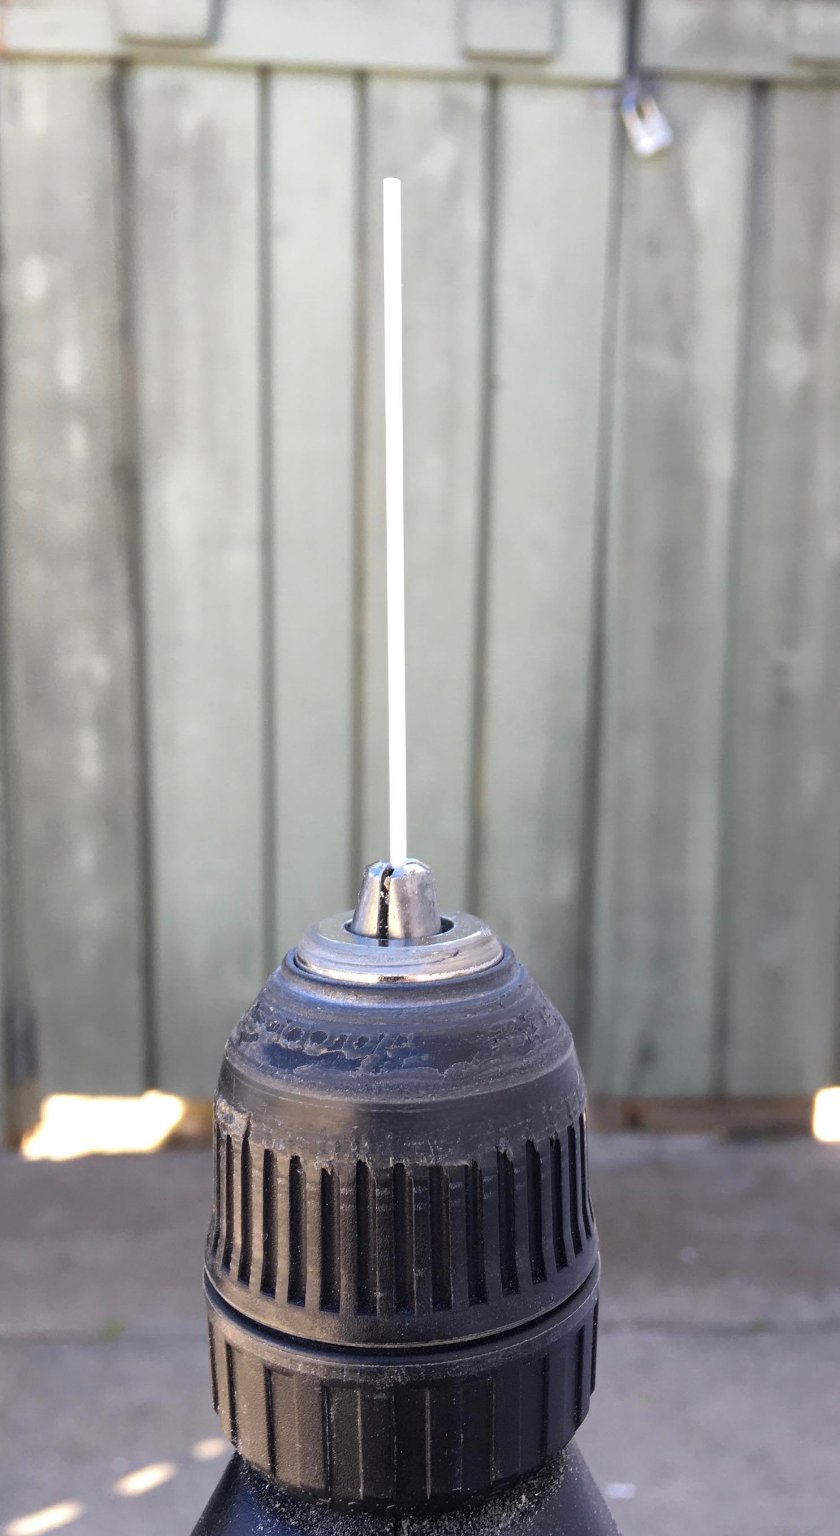
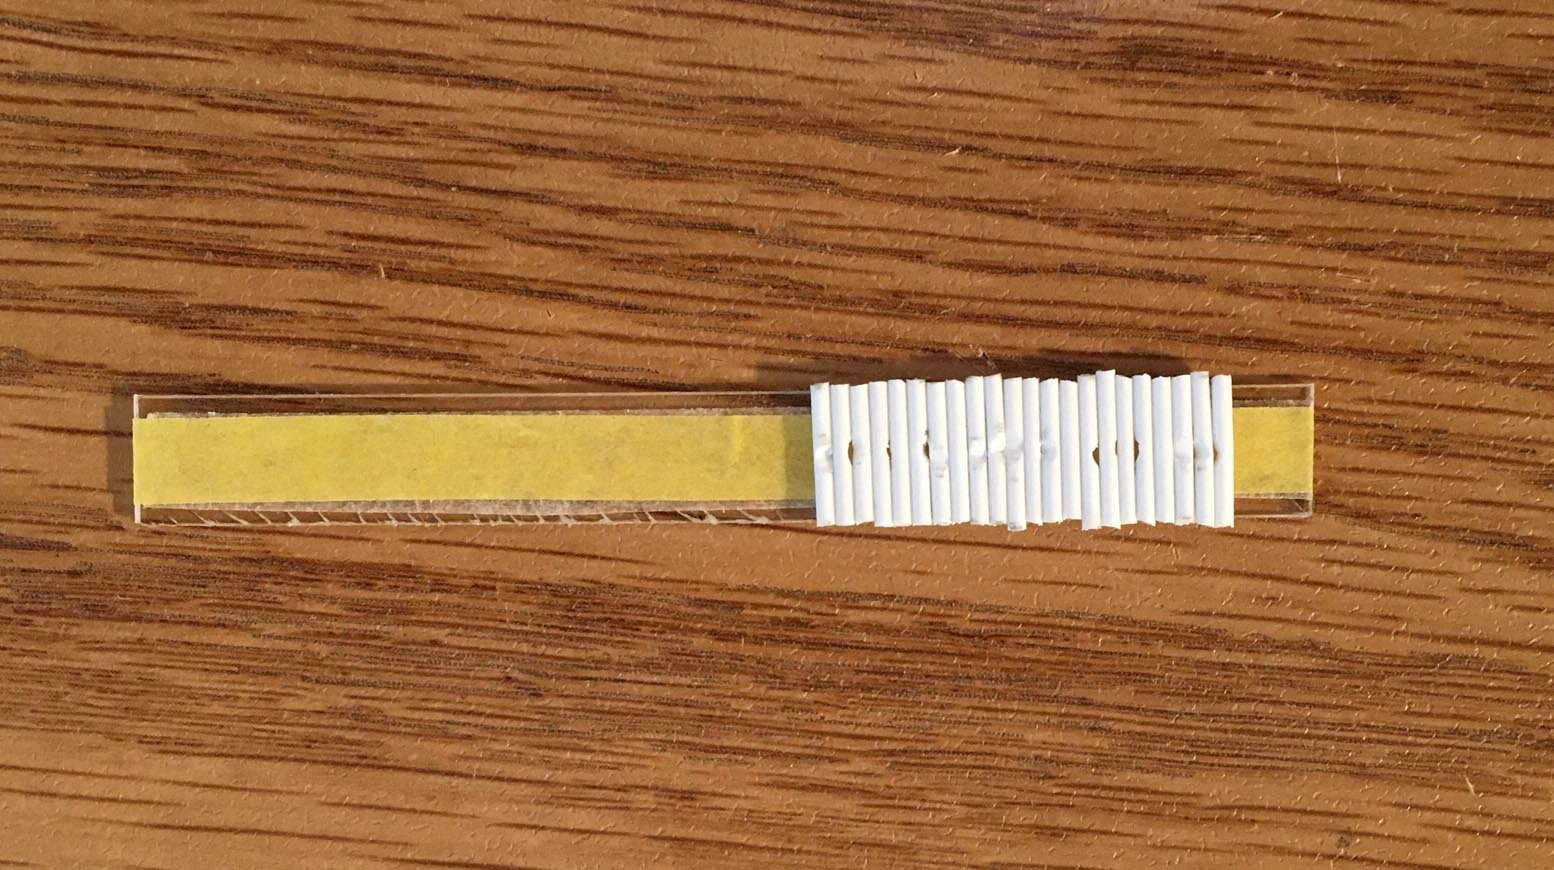
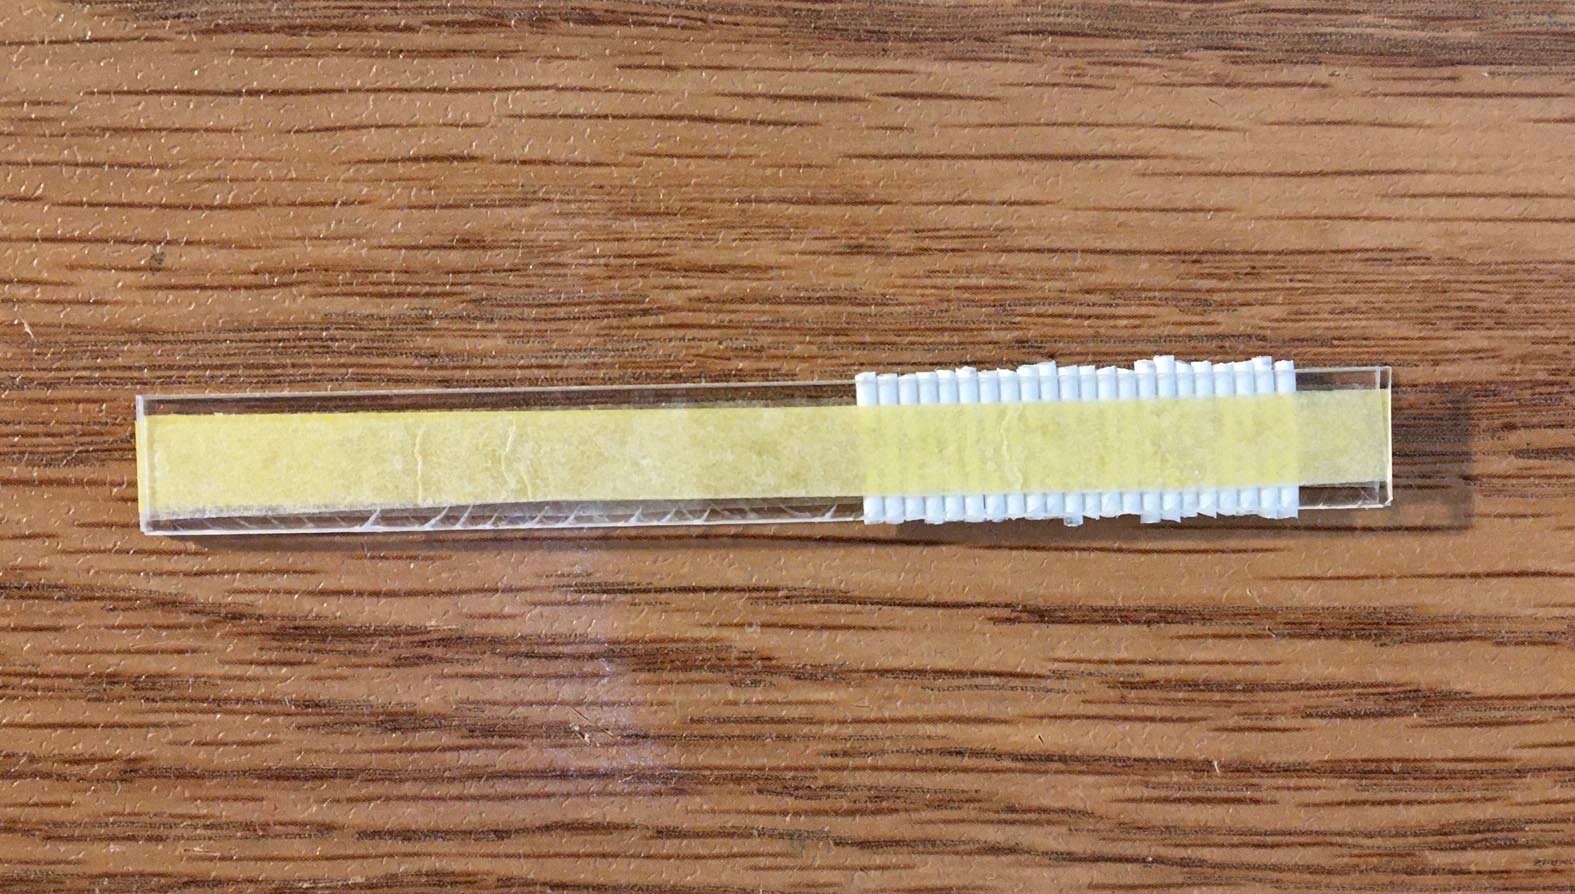
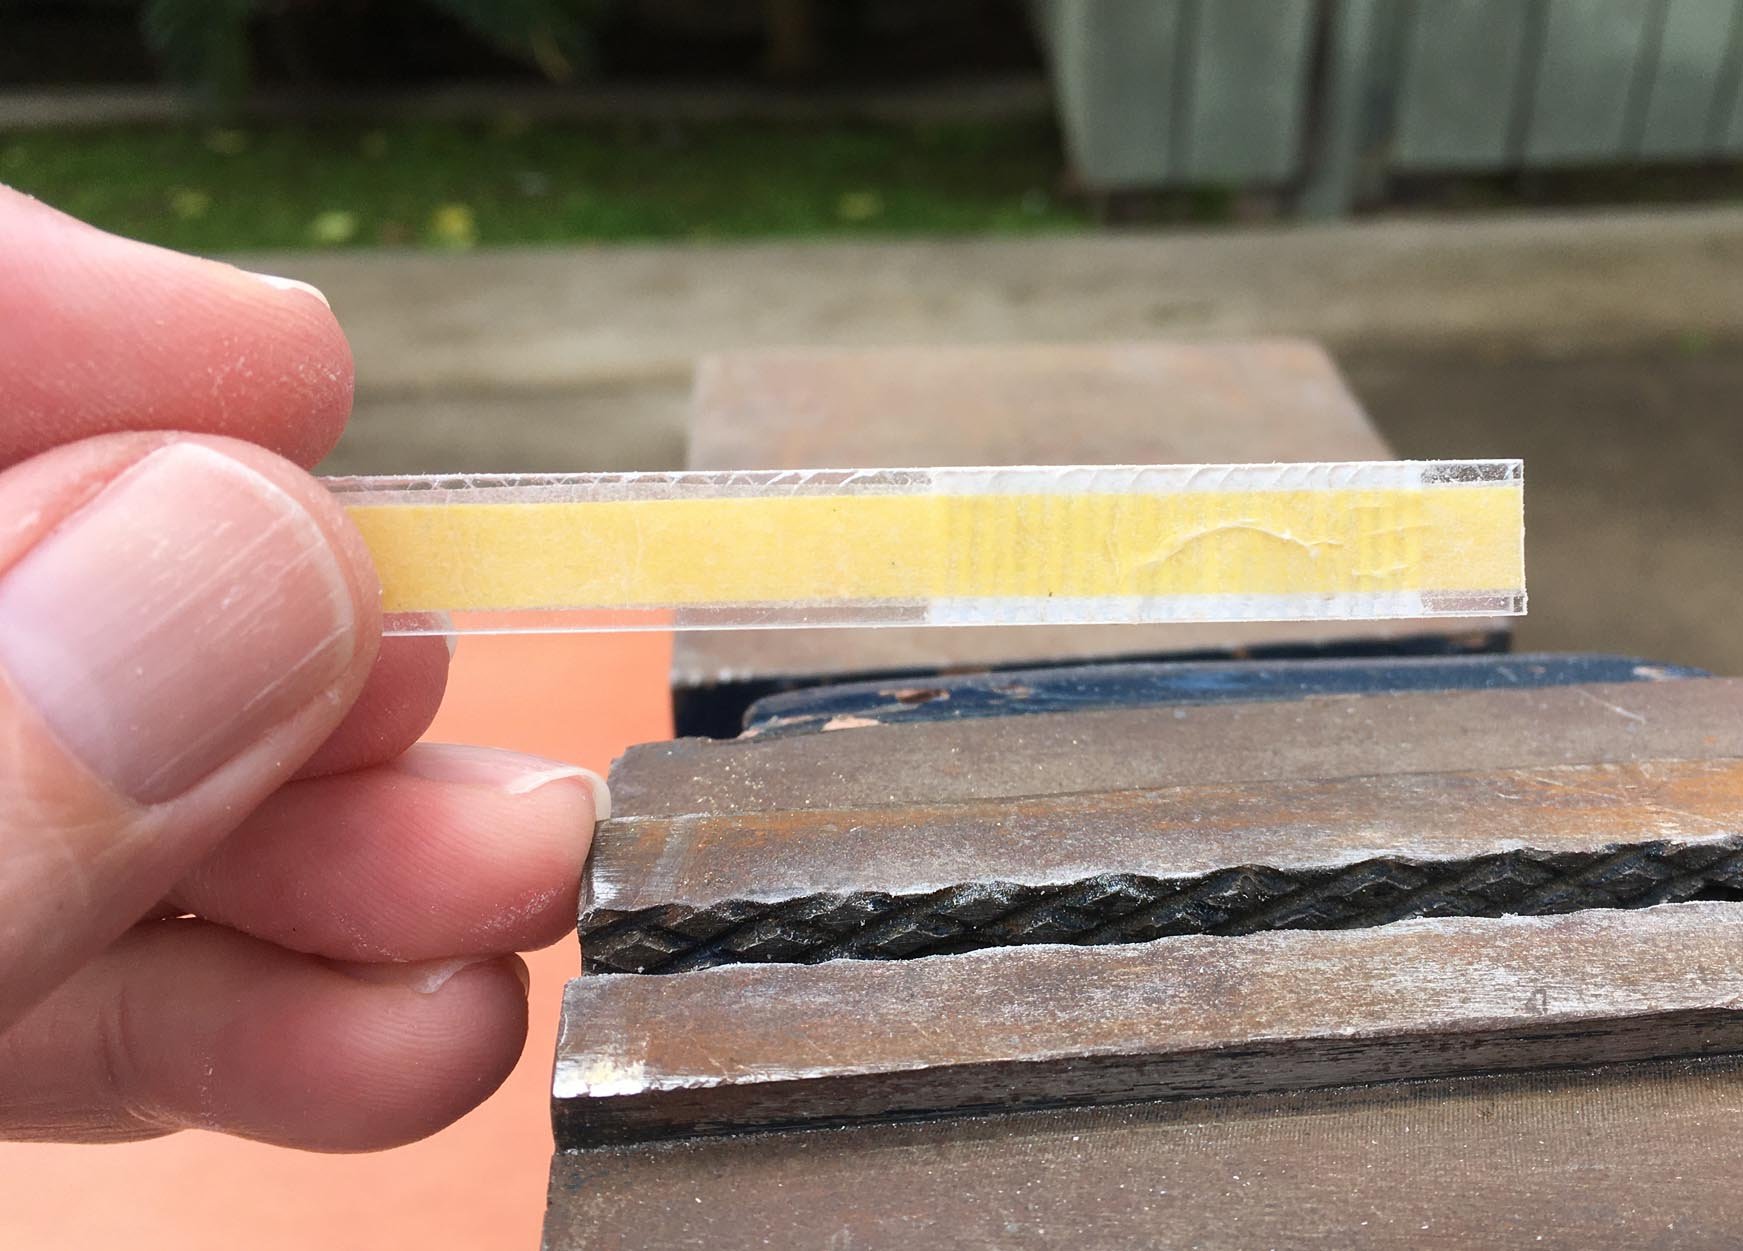
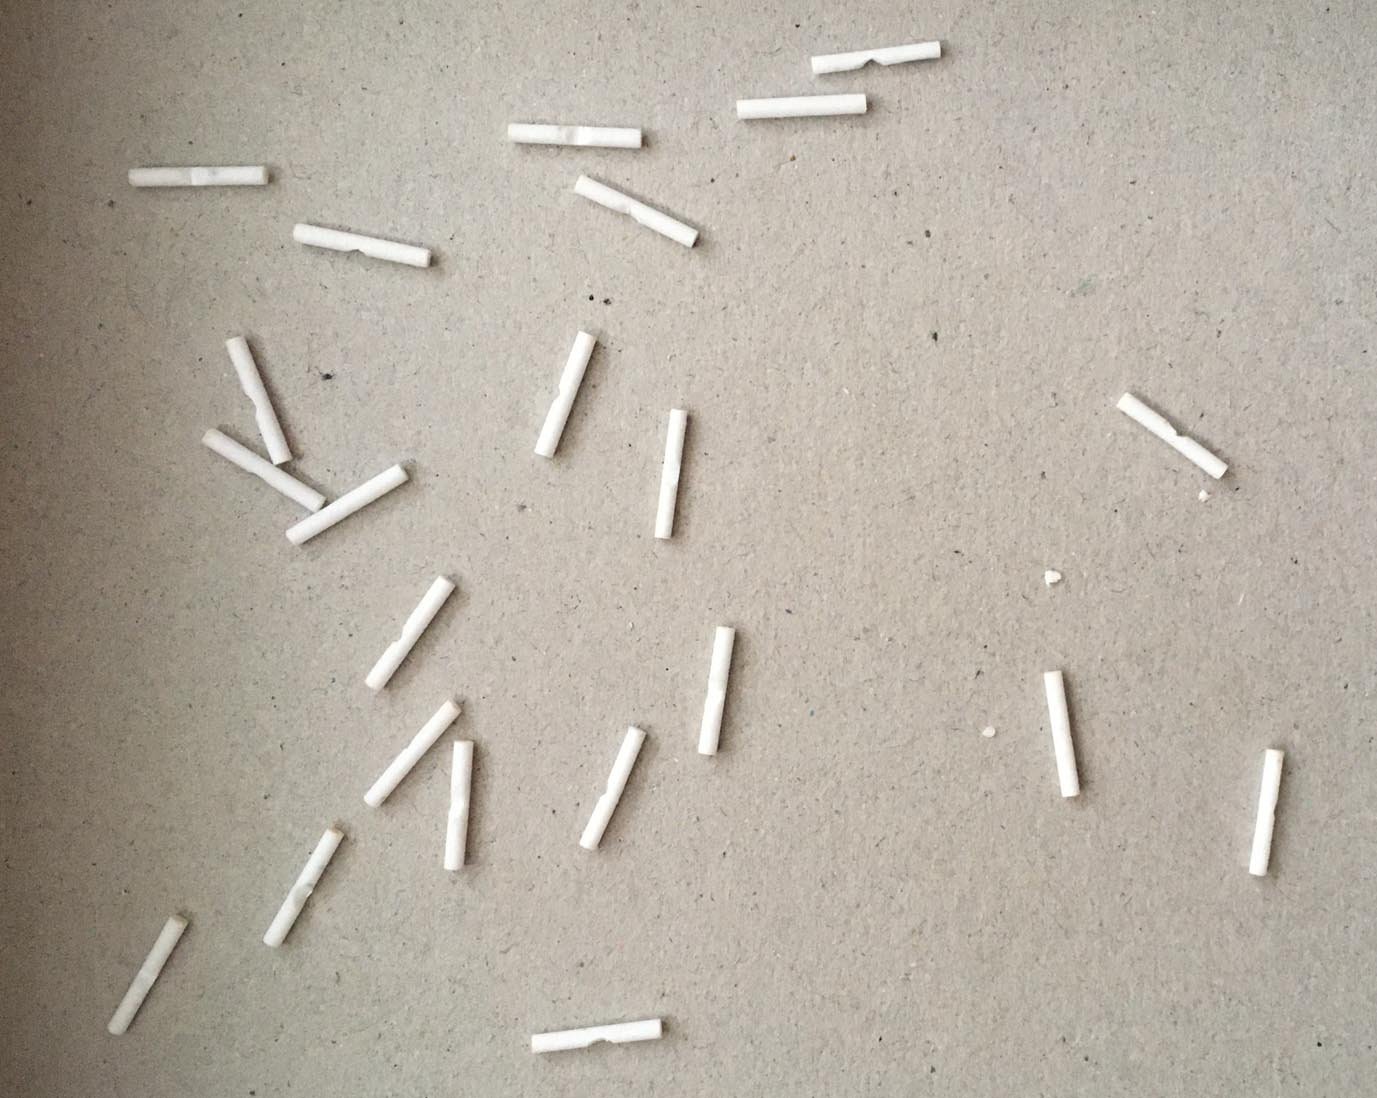
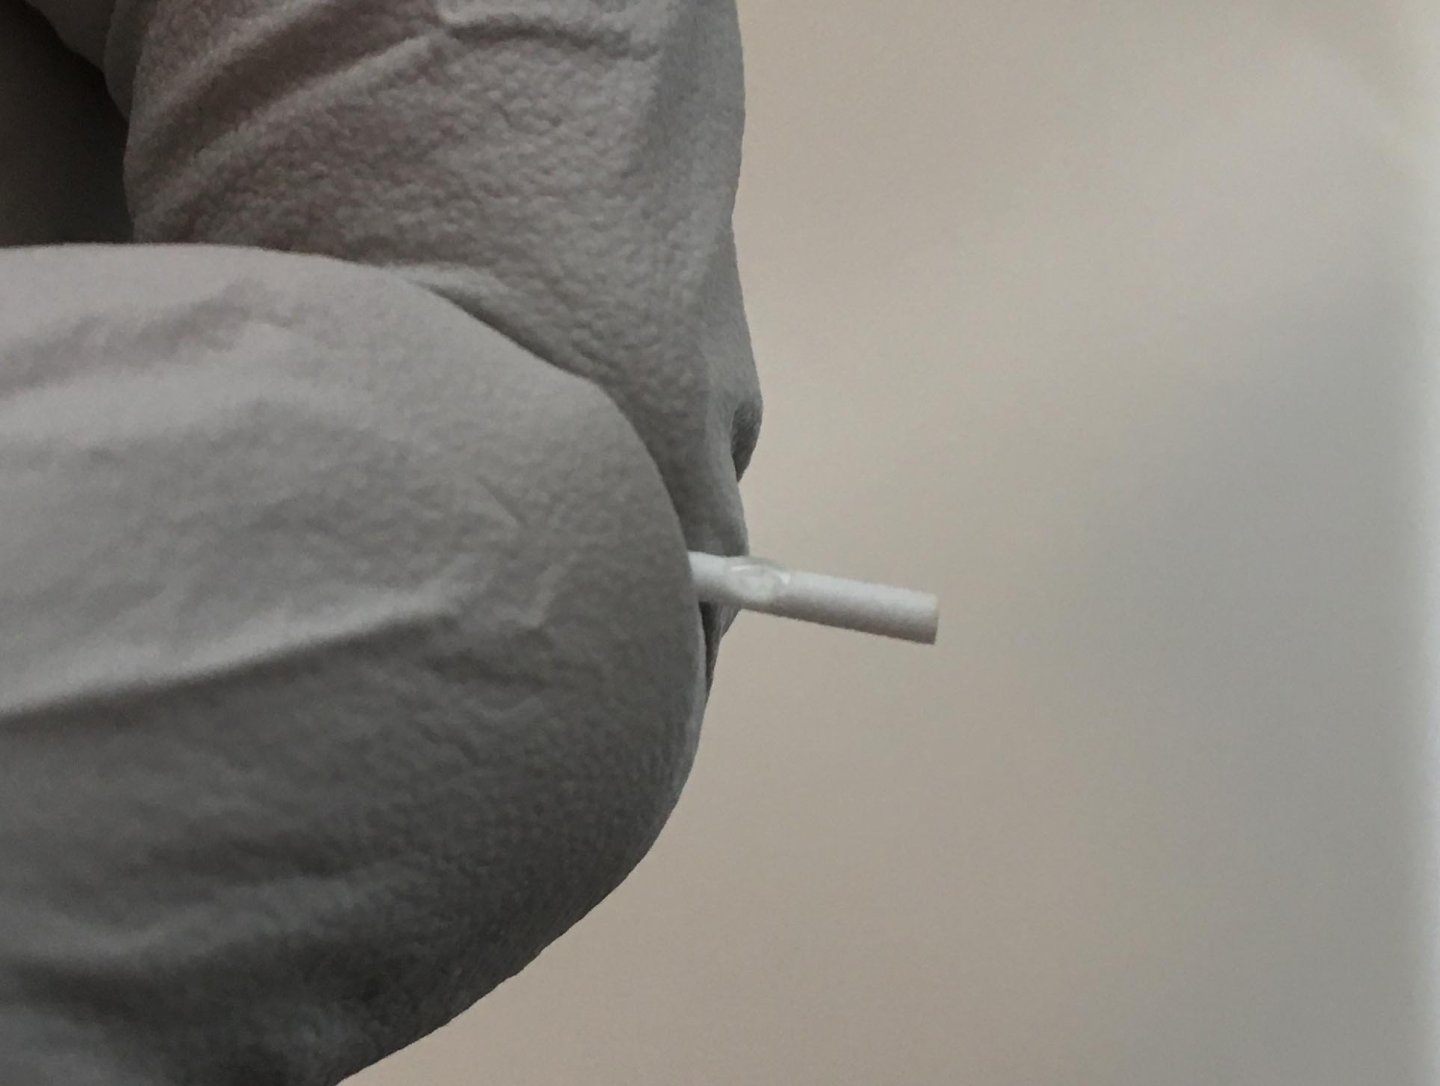
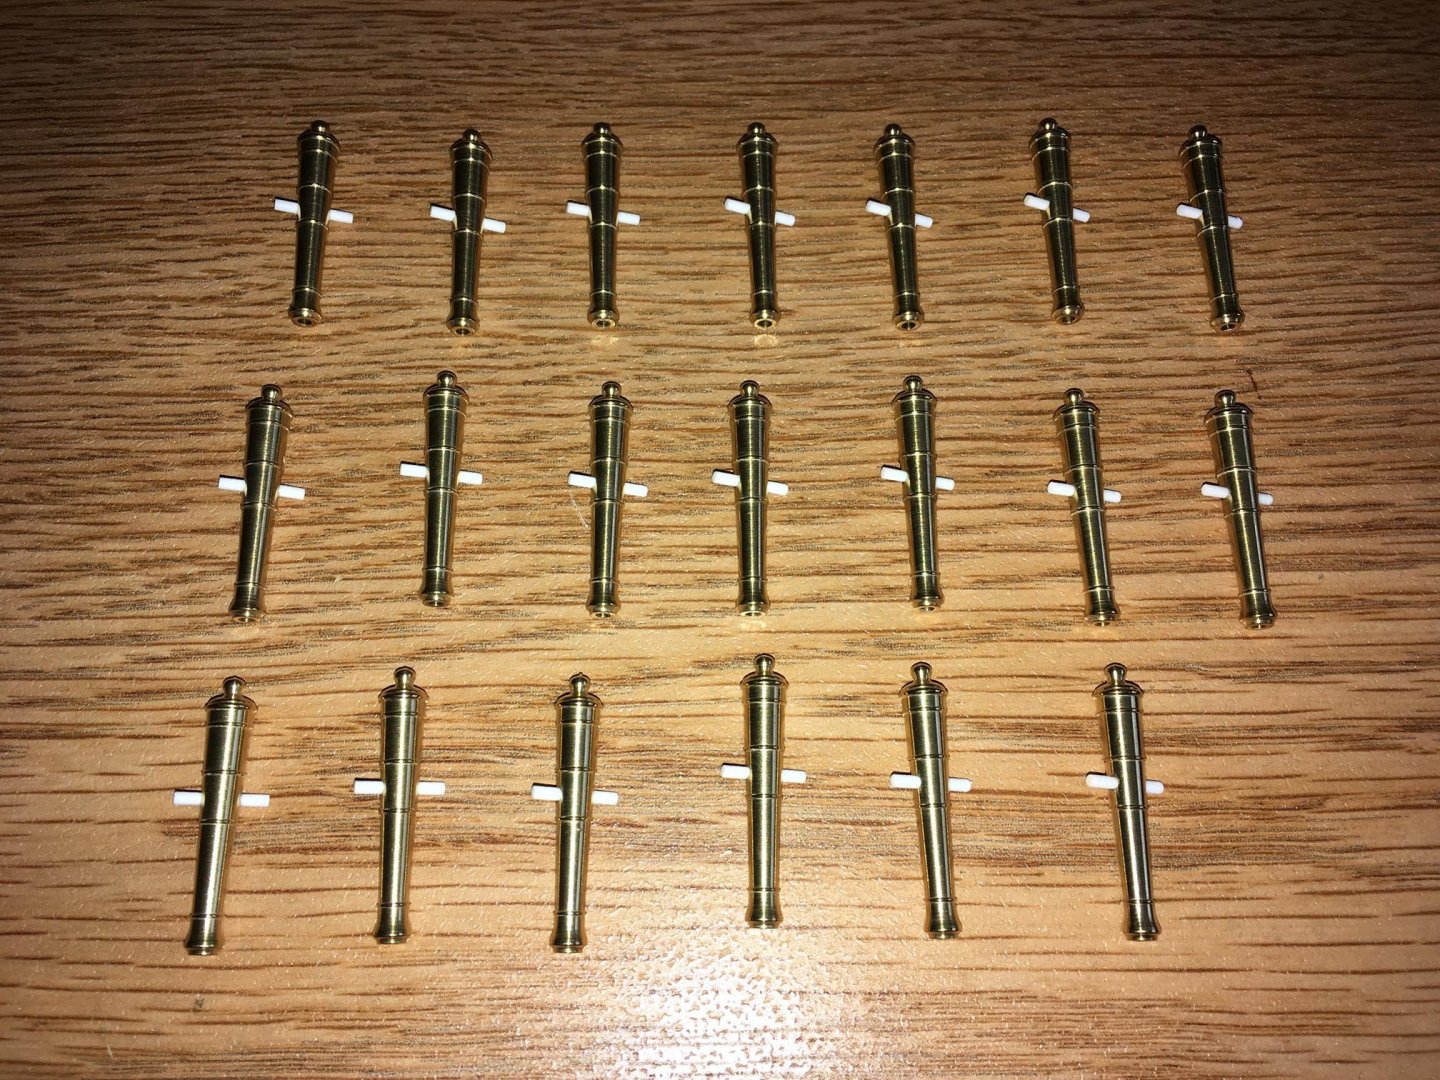
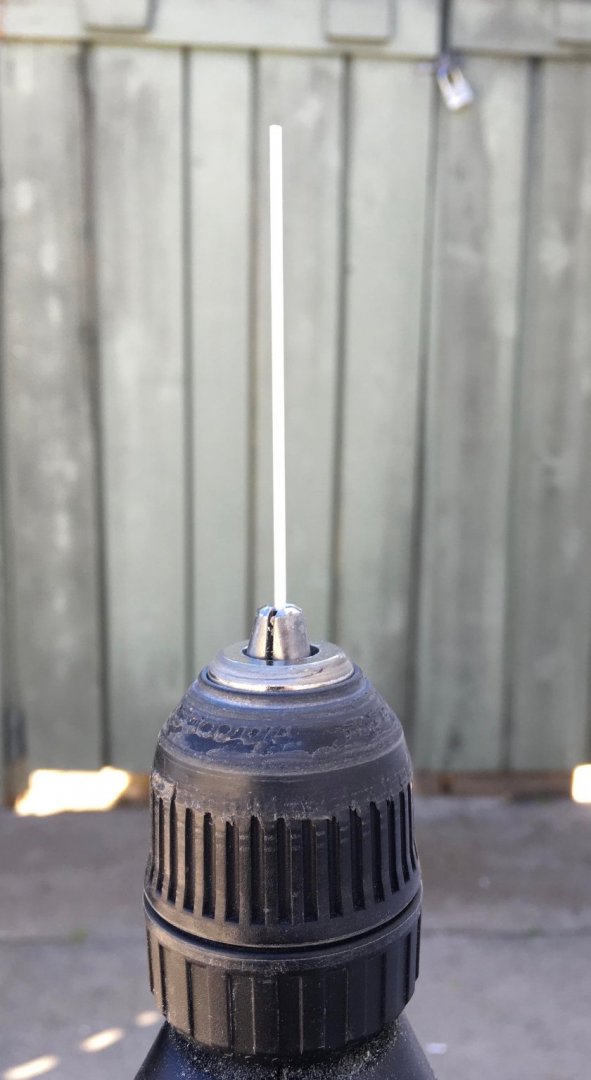
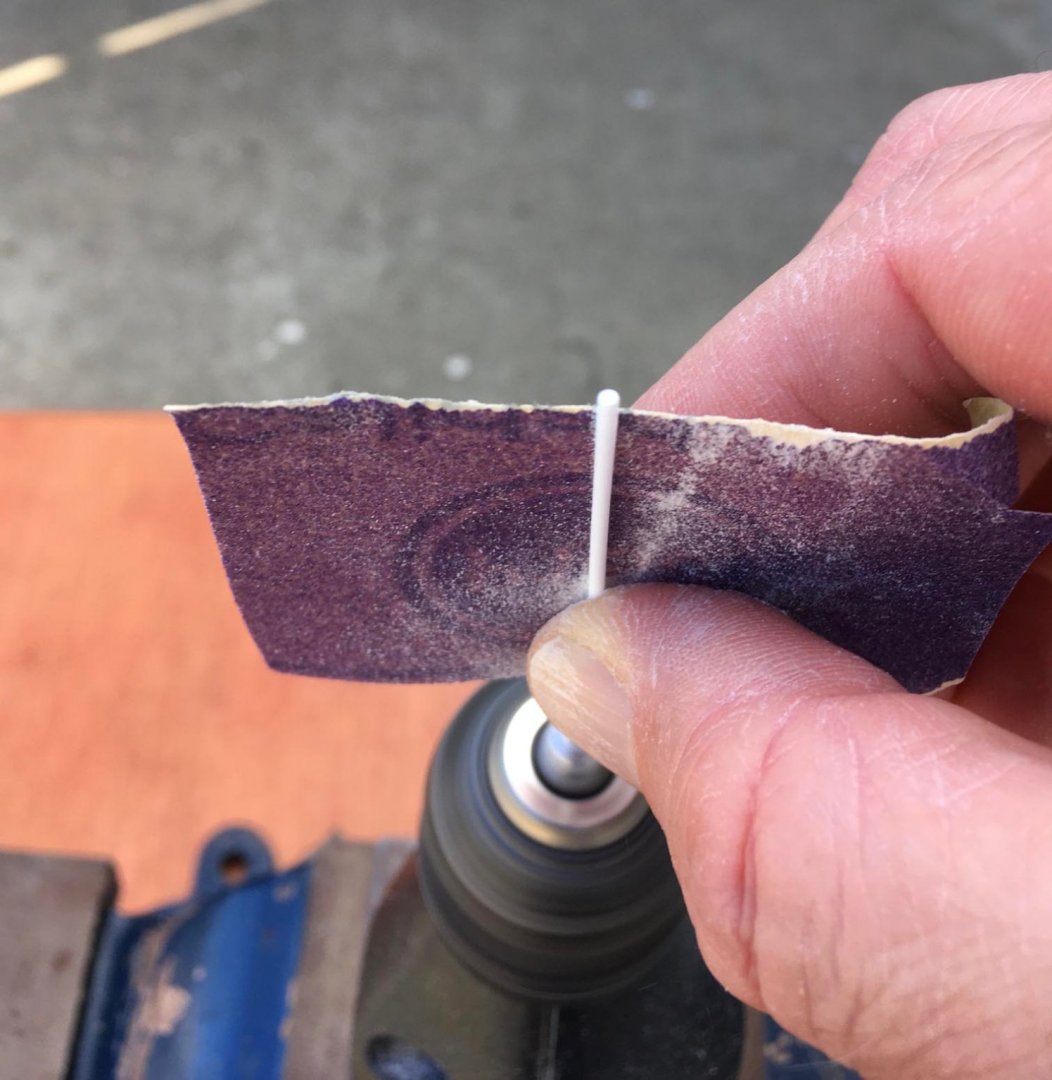
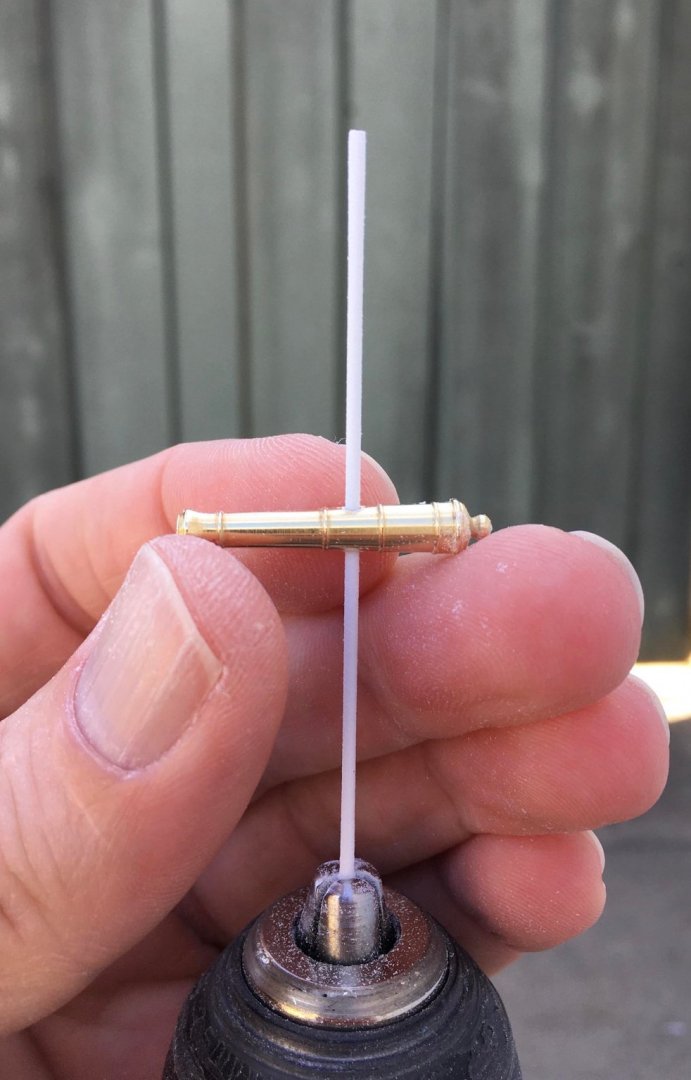
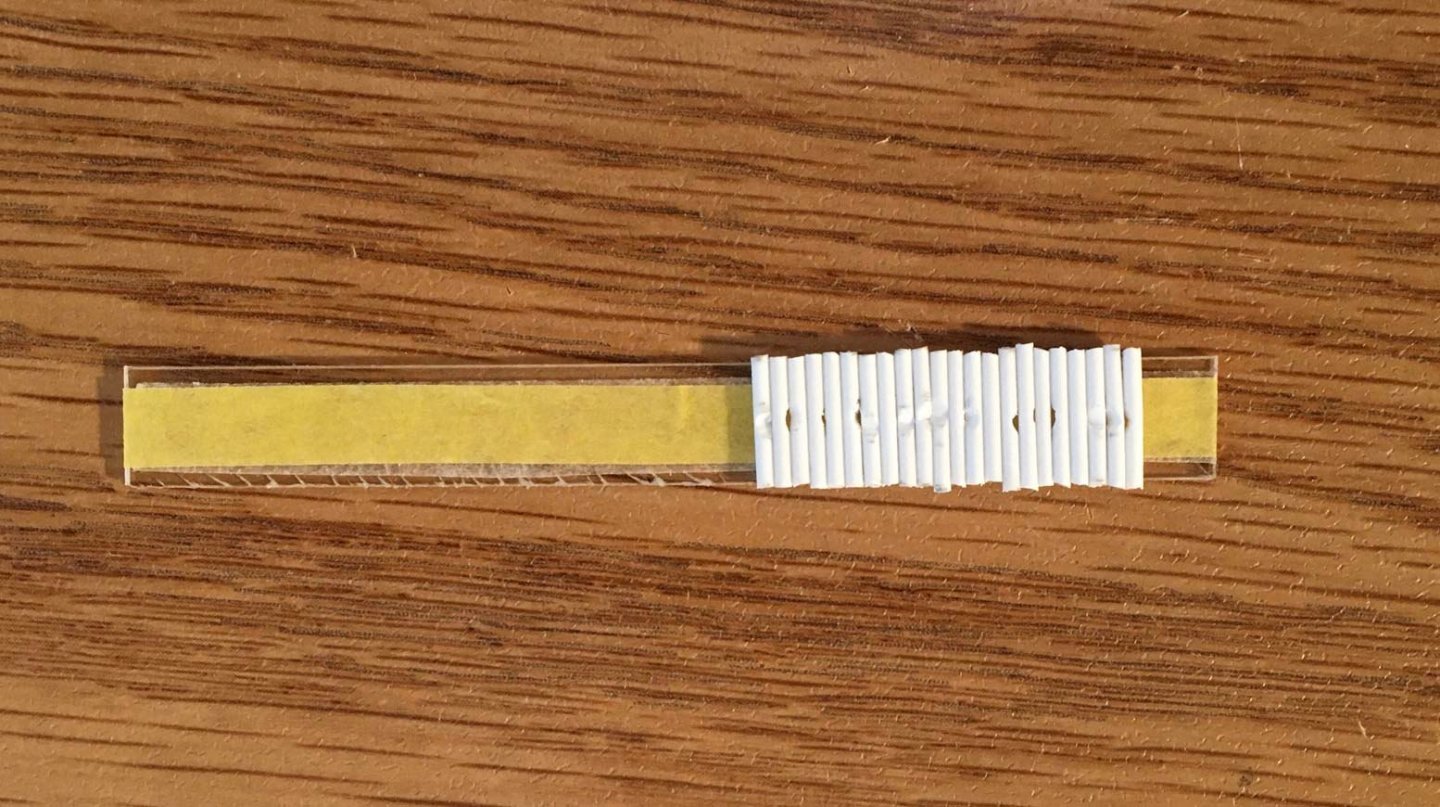
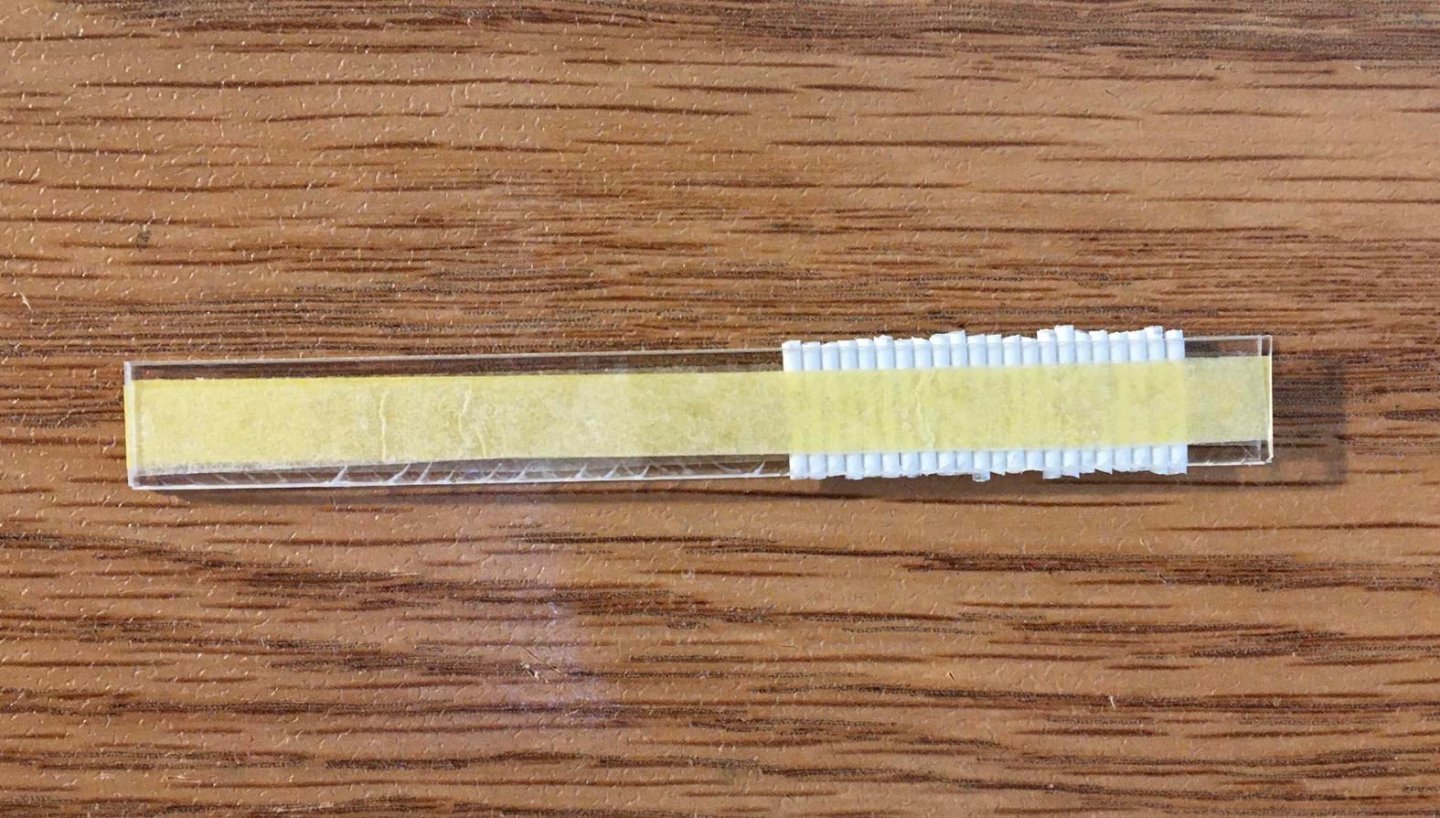
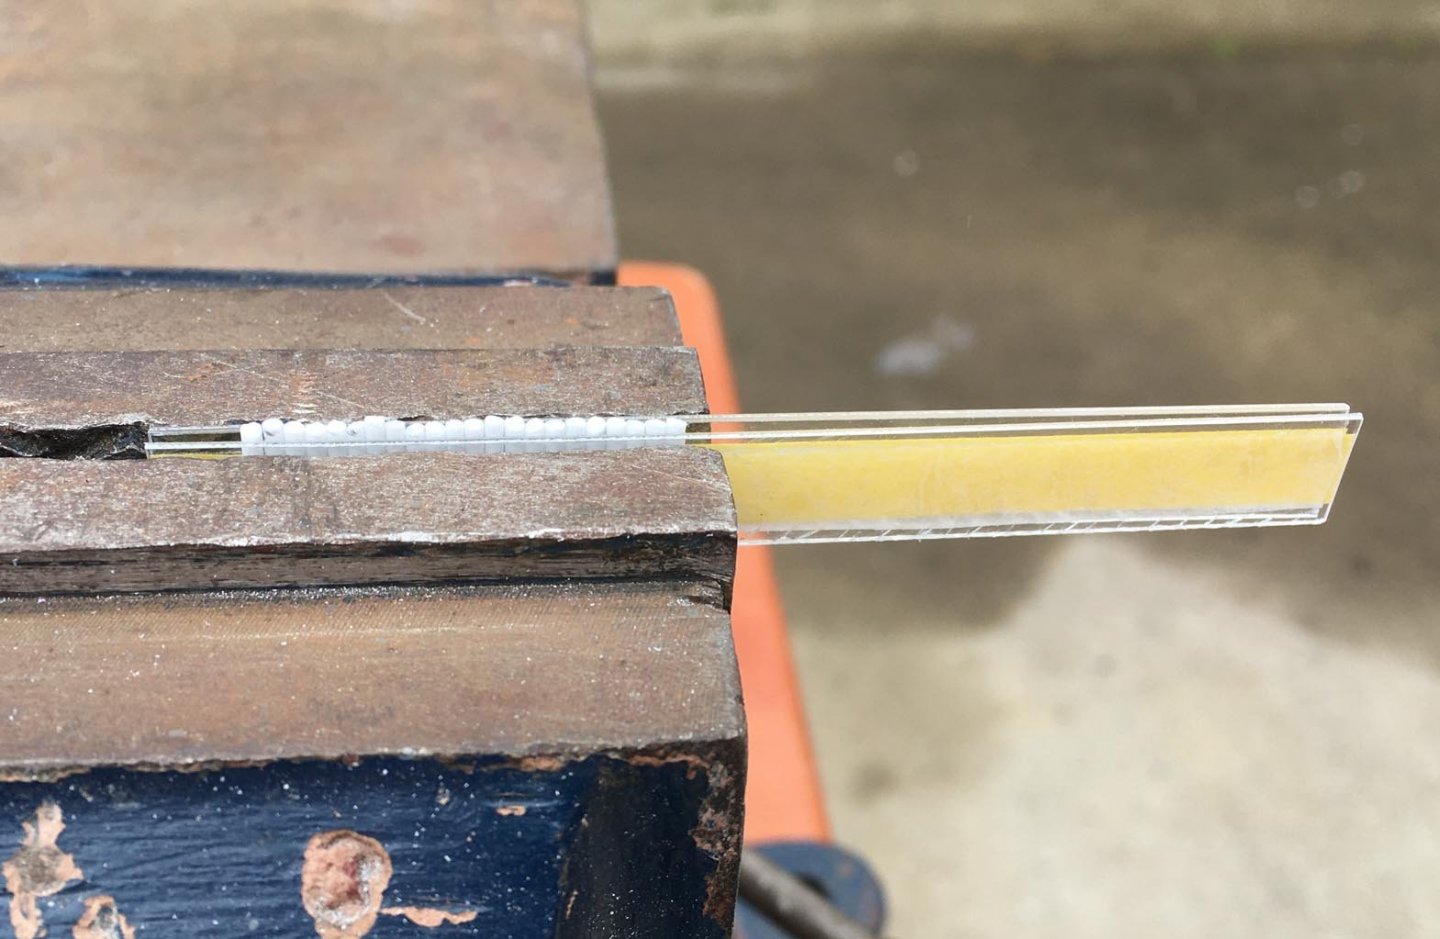
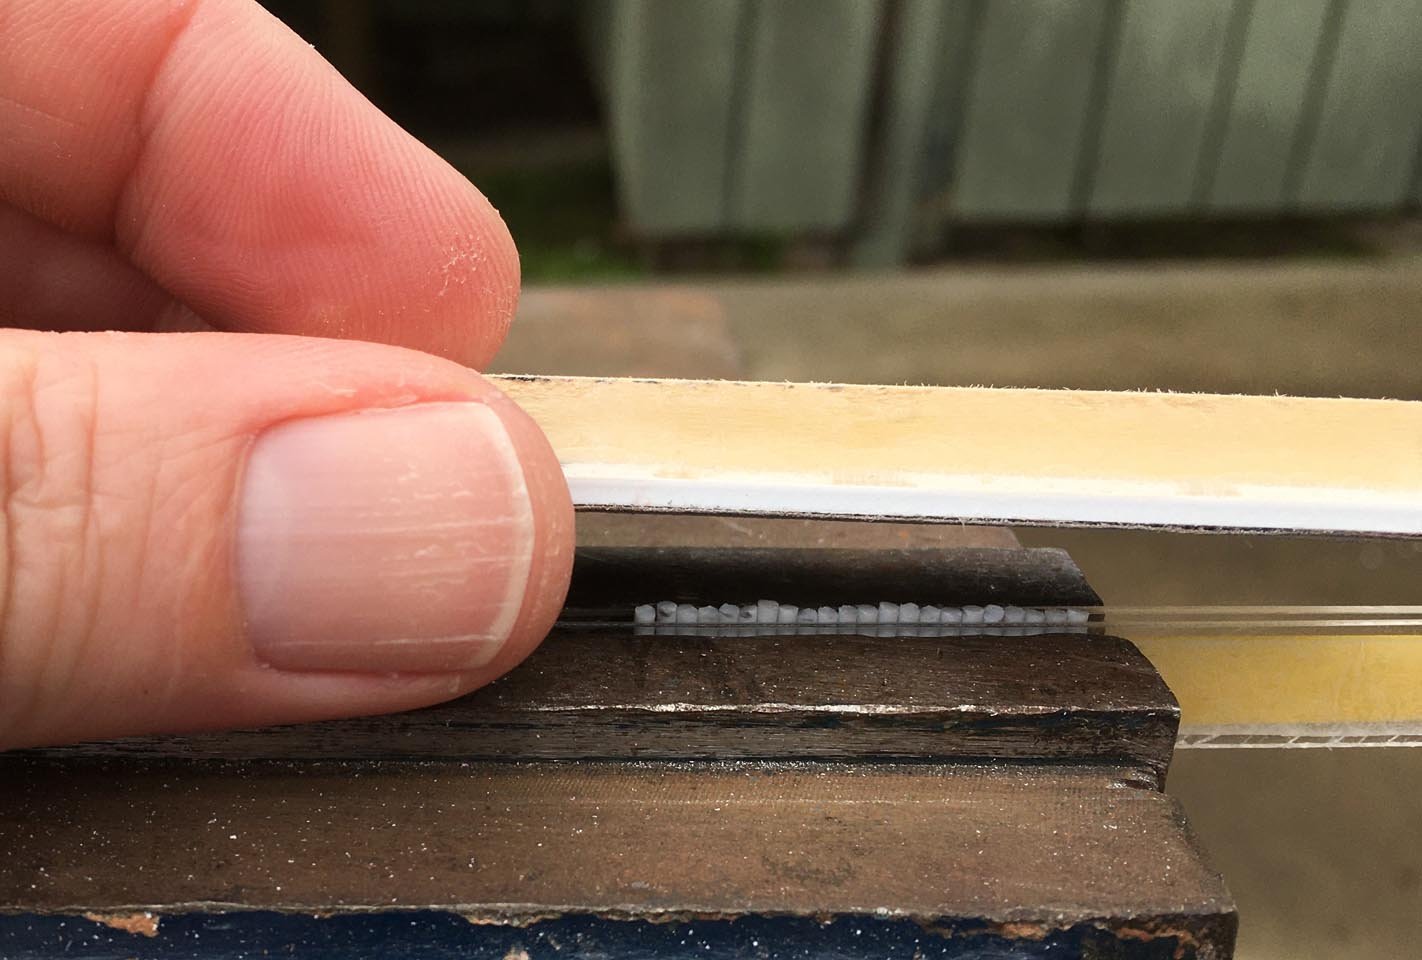
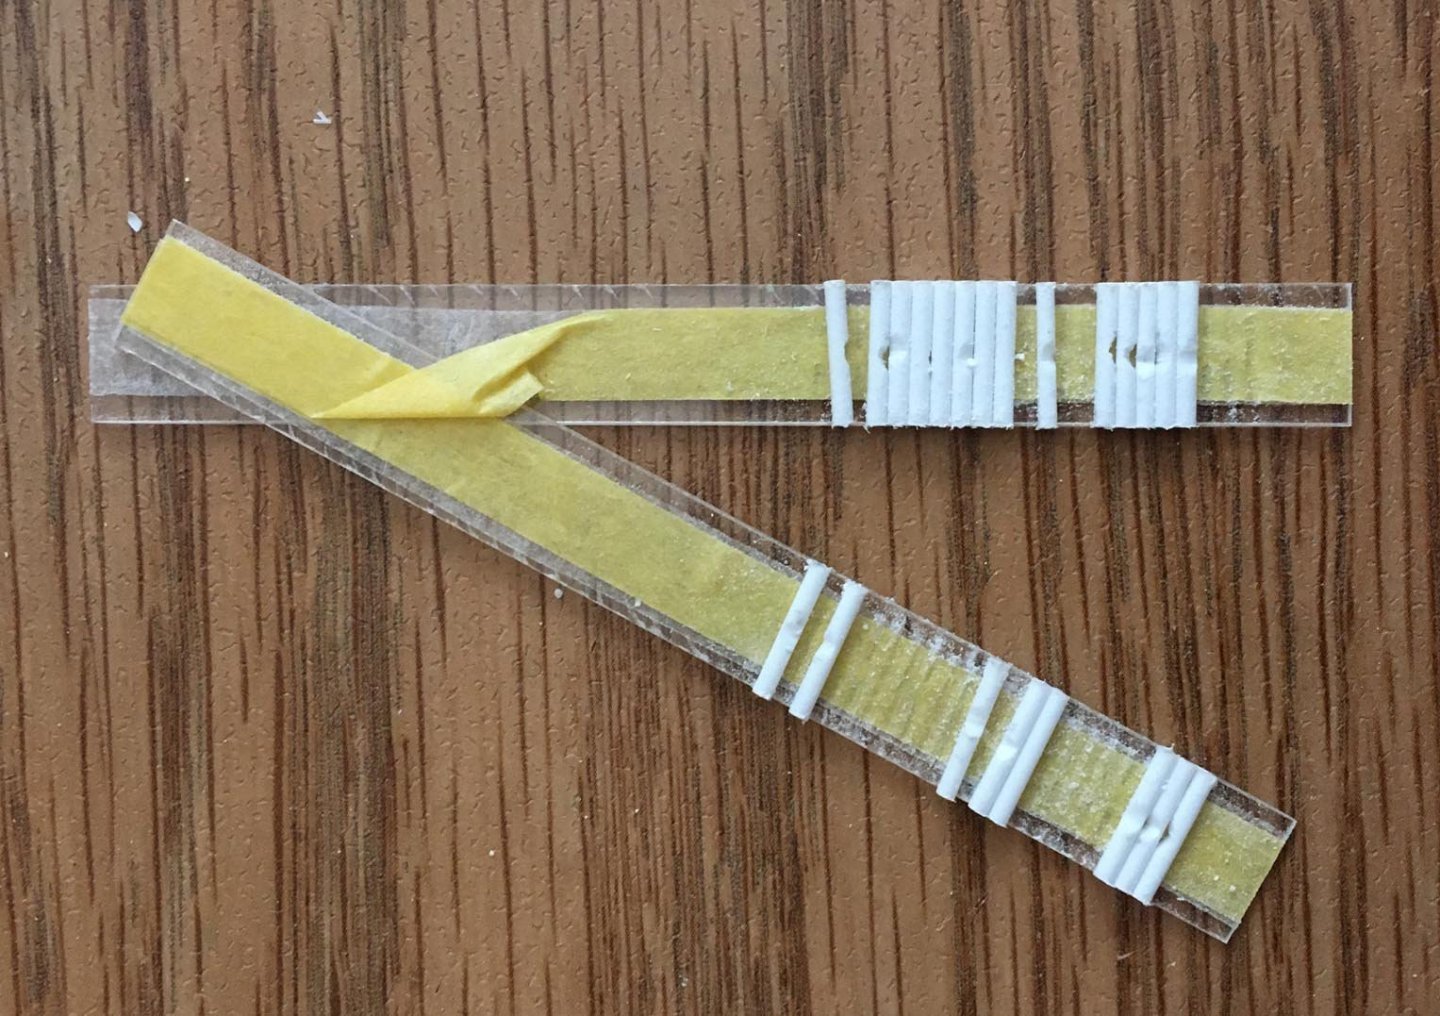
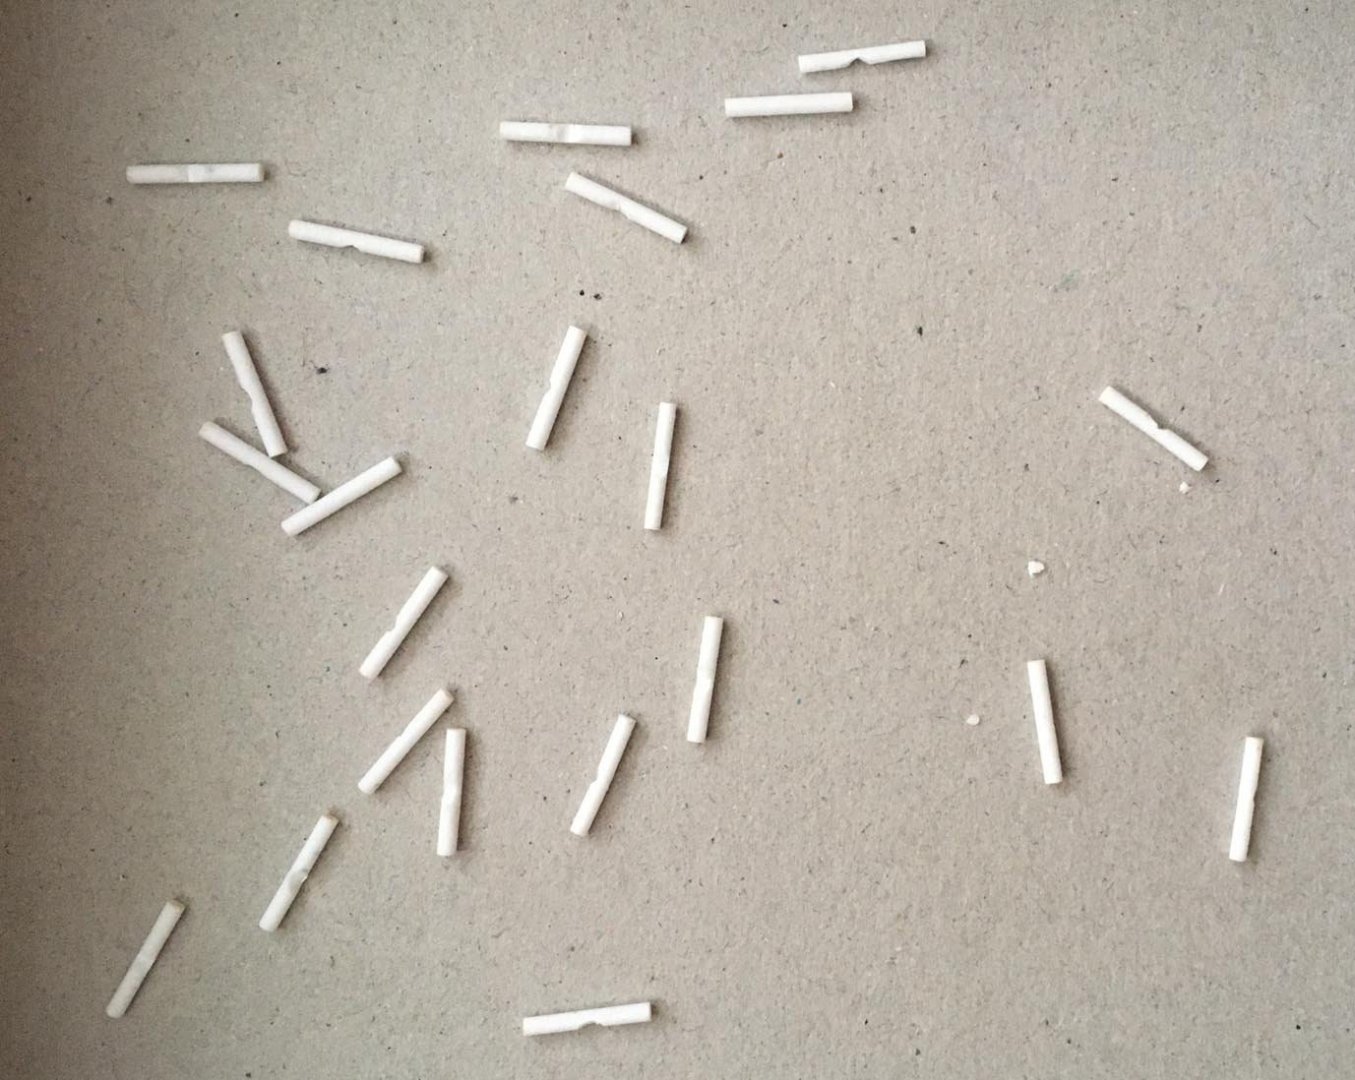
I made the styrene trunnions for the brass cannons. I could find round styrene rods in diameters of 1.2 mm and 1.6 mm, but the 1.2 mm diameter was too small, and the 1.6 mm diameter was too big. I purchased the 1.6 mm diameter rods, with the intent of reducing the diameter to the correct size. I do not have a lathe, so I shortened the rod and secured it into my hand drill, which was held in place in my vise. I spun the rod in the drill while holding it against sandpaper, applying pressure with my thumb, moving the thumb and paper up and down along the rod: I periodically checked to see if the diameter was reduced enough to fit through the trunnion hole in one of the cannon barrels, and when the barrel could slide all the way down the rod, I stopped: "Divots" were made using a hobby knife, spaced along the lengths of the reduced rods, and then I cut the rods into pieces which were each slightly longer than length needed for the trunnion, with the divot close to the center. A paper cutter was used to cut strips of some spare clear styrene that I had, making the width of the strips equal to the length for the trunnions. Masking tape was affixed to the strips with double-sided tape so that the "sticky side" of the masking tape faced outward. I lined the trunnions up along one of the strips, sticking them in place together at a right angle to the long edge of the strip: I placed another strip over the rods, "sandwiching" them in between the strips: To make the trunnions have equal lengths, I sanded them down to the edges of the clear styrene strips using a flat sanding block that I had made: Opening up the sandwich: After some cleaning up, here are the trunnions ready for the cannons: They are not perfect -- some of the trunnions are thinner than others, and some are uneven -- but they are acceptable for the purpose, and small variations may not be that noticeable. In fact, I noticed that the brass trunnions that had been included with the cannons are not all exactly the same diameter, either:


-
The gun carriages have been varnished and they are basically finished (except that after the cannons are mounted in them, I will add capsquares over the trunnions).
-
I agree — and what a wonderful art object it is! Such amazing detail — it looks real, even though it could not be real.
- 228 replies
-
- 2
-
-
- spanish galleon
- lee
- (and 1 more)
-
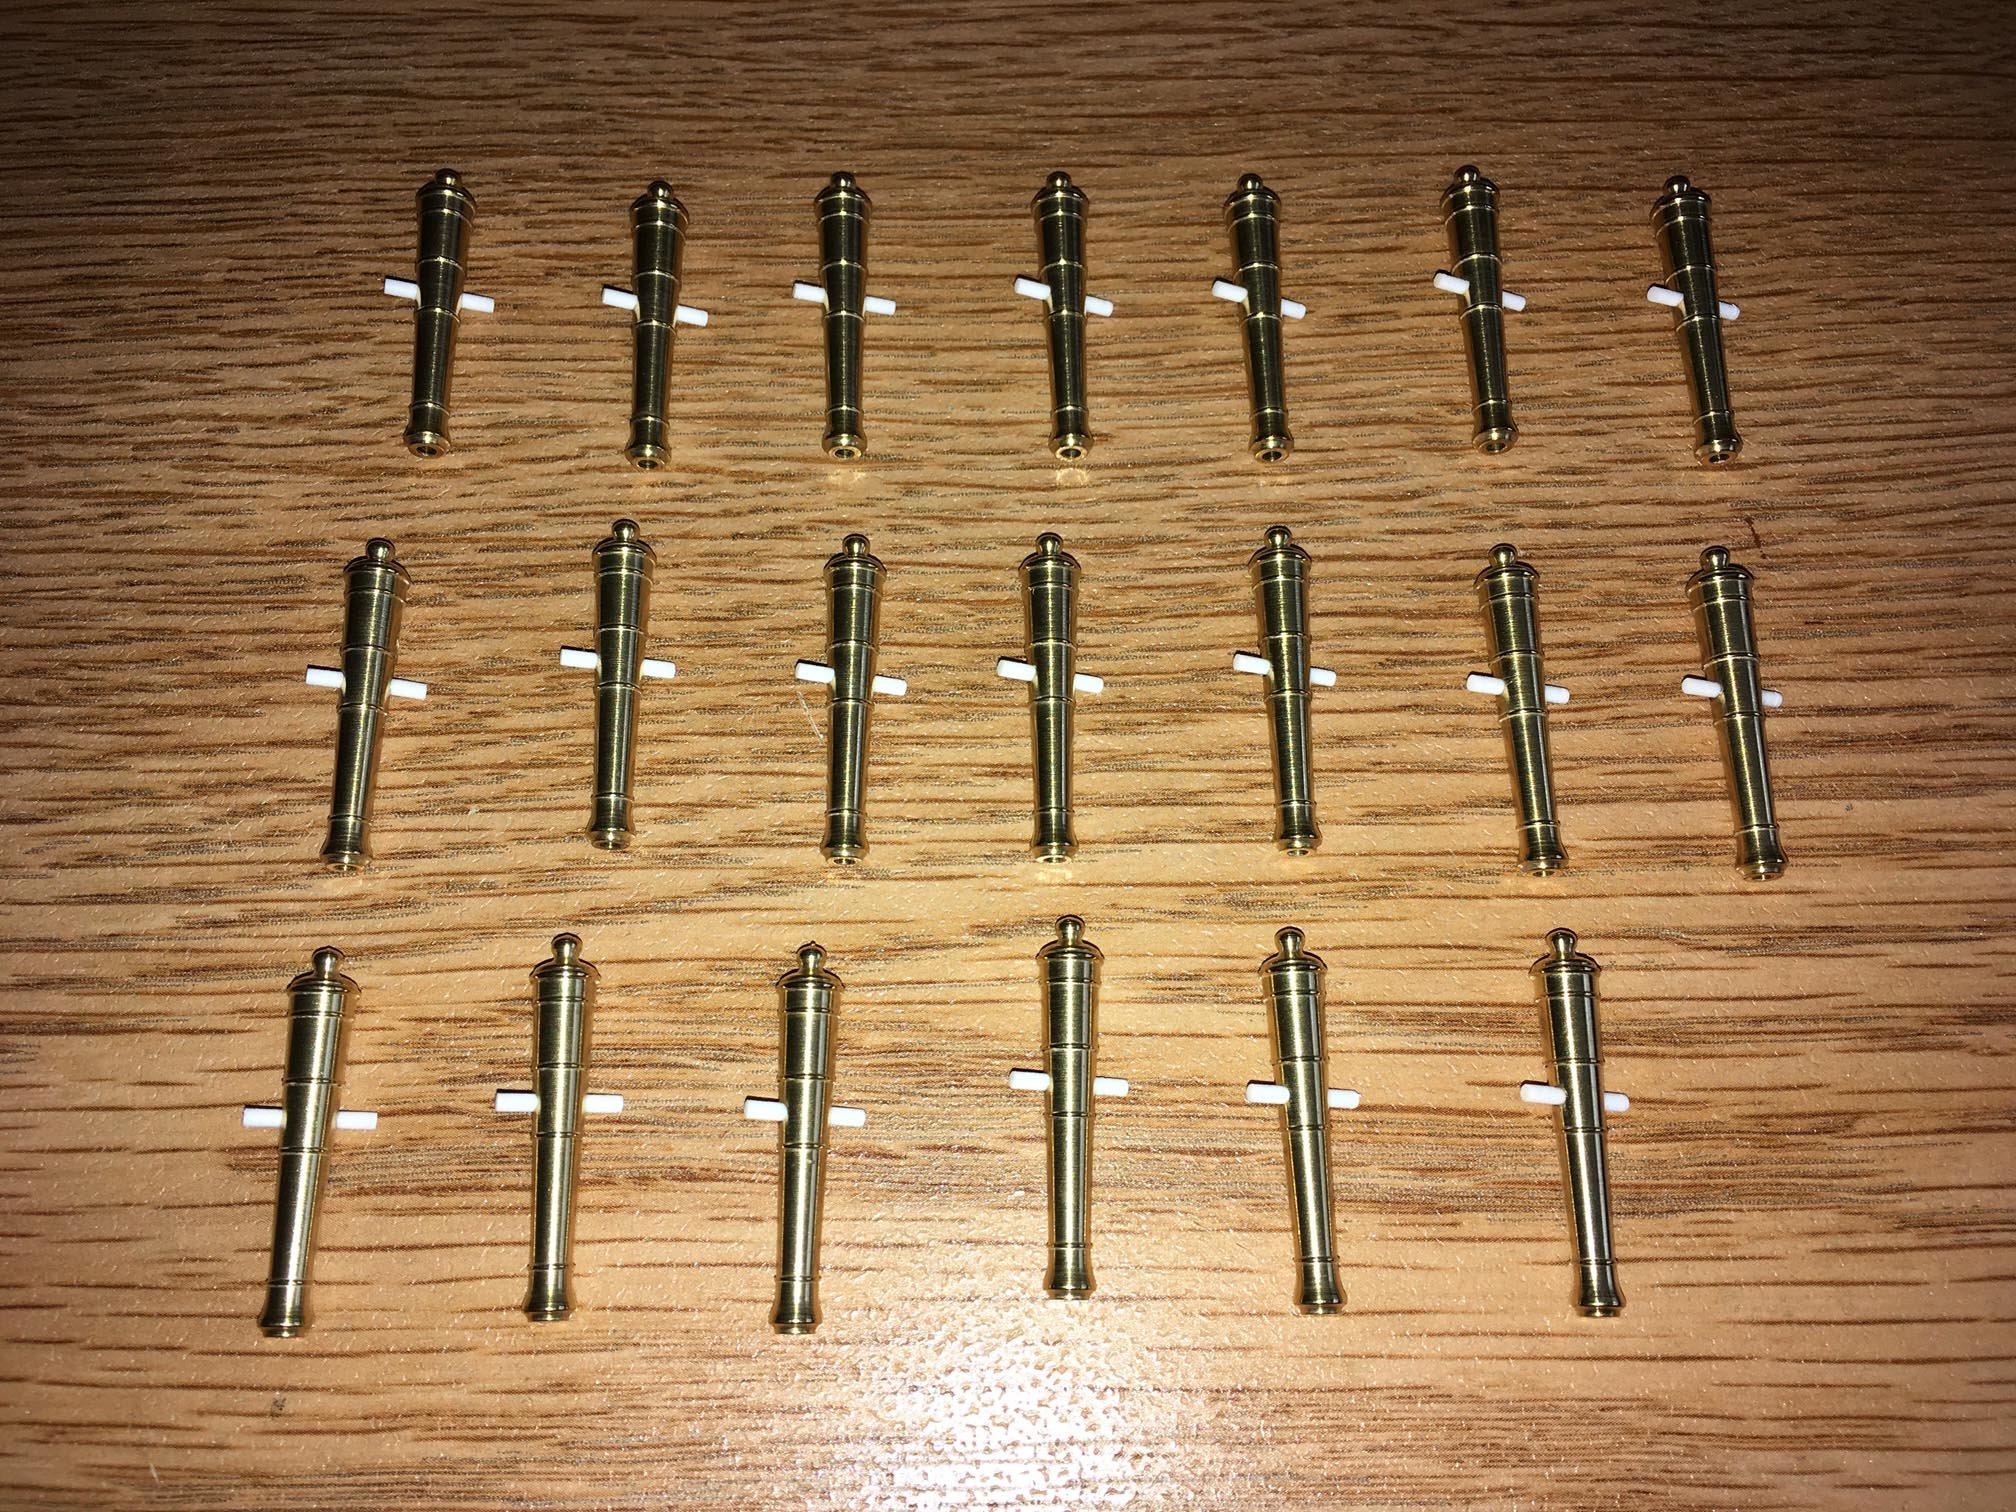
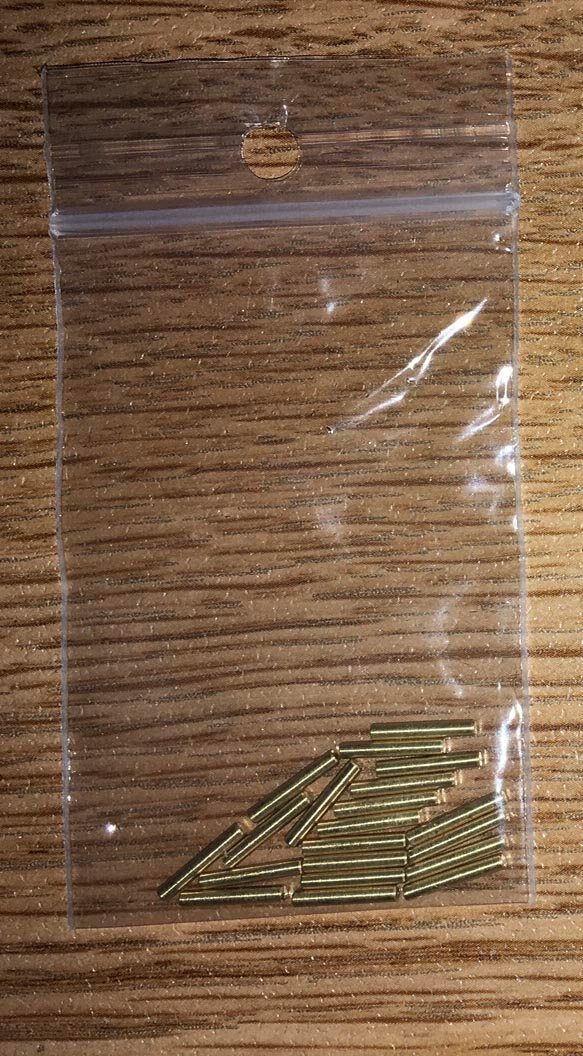
The brass cannons arrived! They came with trunnions (in the plastic bag), which appear to be of high quality, but it may be a bit difficult to get a strong bond between the brass trunnions and the styrene gun carriages. Since I will be painting the cannons anyway, I decided that I will make trunnions out of styrene. The styrene trunnion will fit through the barrel and be cemented on either site to the styrene carriage using liquid cement, making a molten bond rather than a surface bond. I am also still working on the gun carriages -- some difficulty with getting an "even" appearance in the matte varnish.
-
Bill, I love the way you weather your decks. True, you could go back and make it look newer here, but an argument may be had for “what if” the proud Wasa had survived and functioned over the years as the flagship of the Swedish navy. (Also, I’ve learned that it can be difficult to make a plastic deck look realistic without weathering it to a degree.)
-
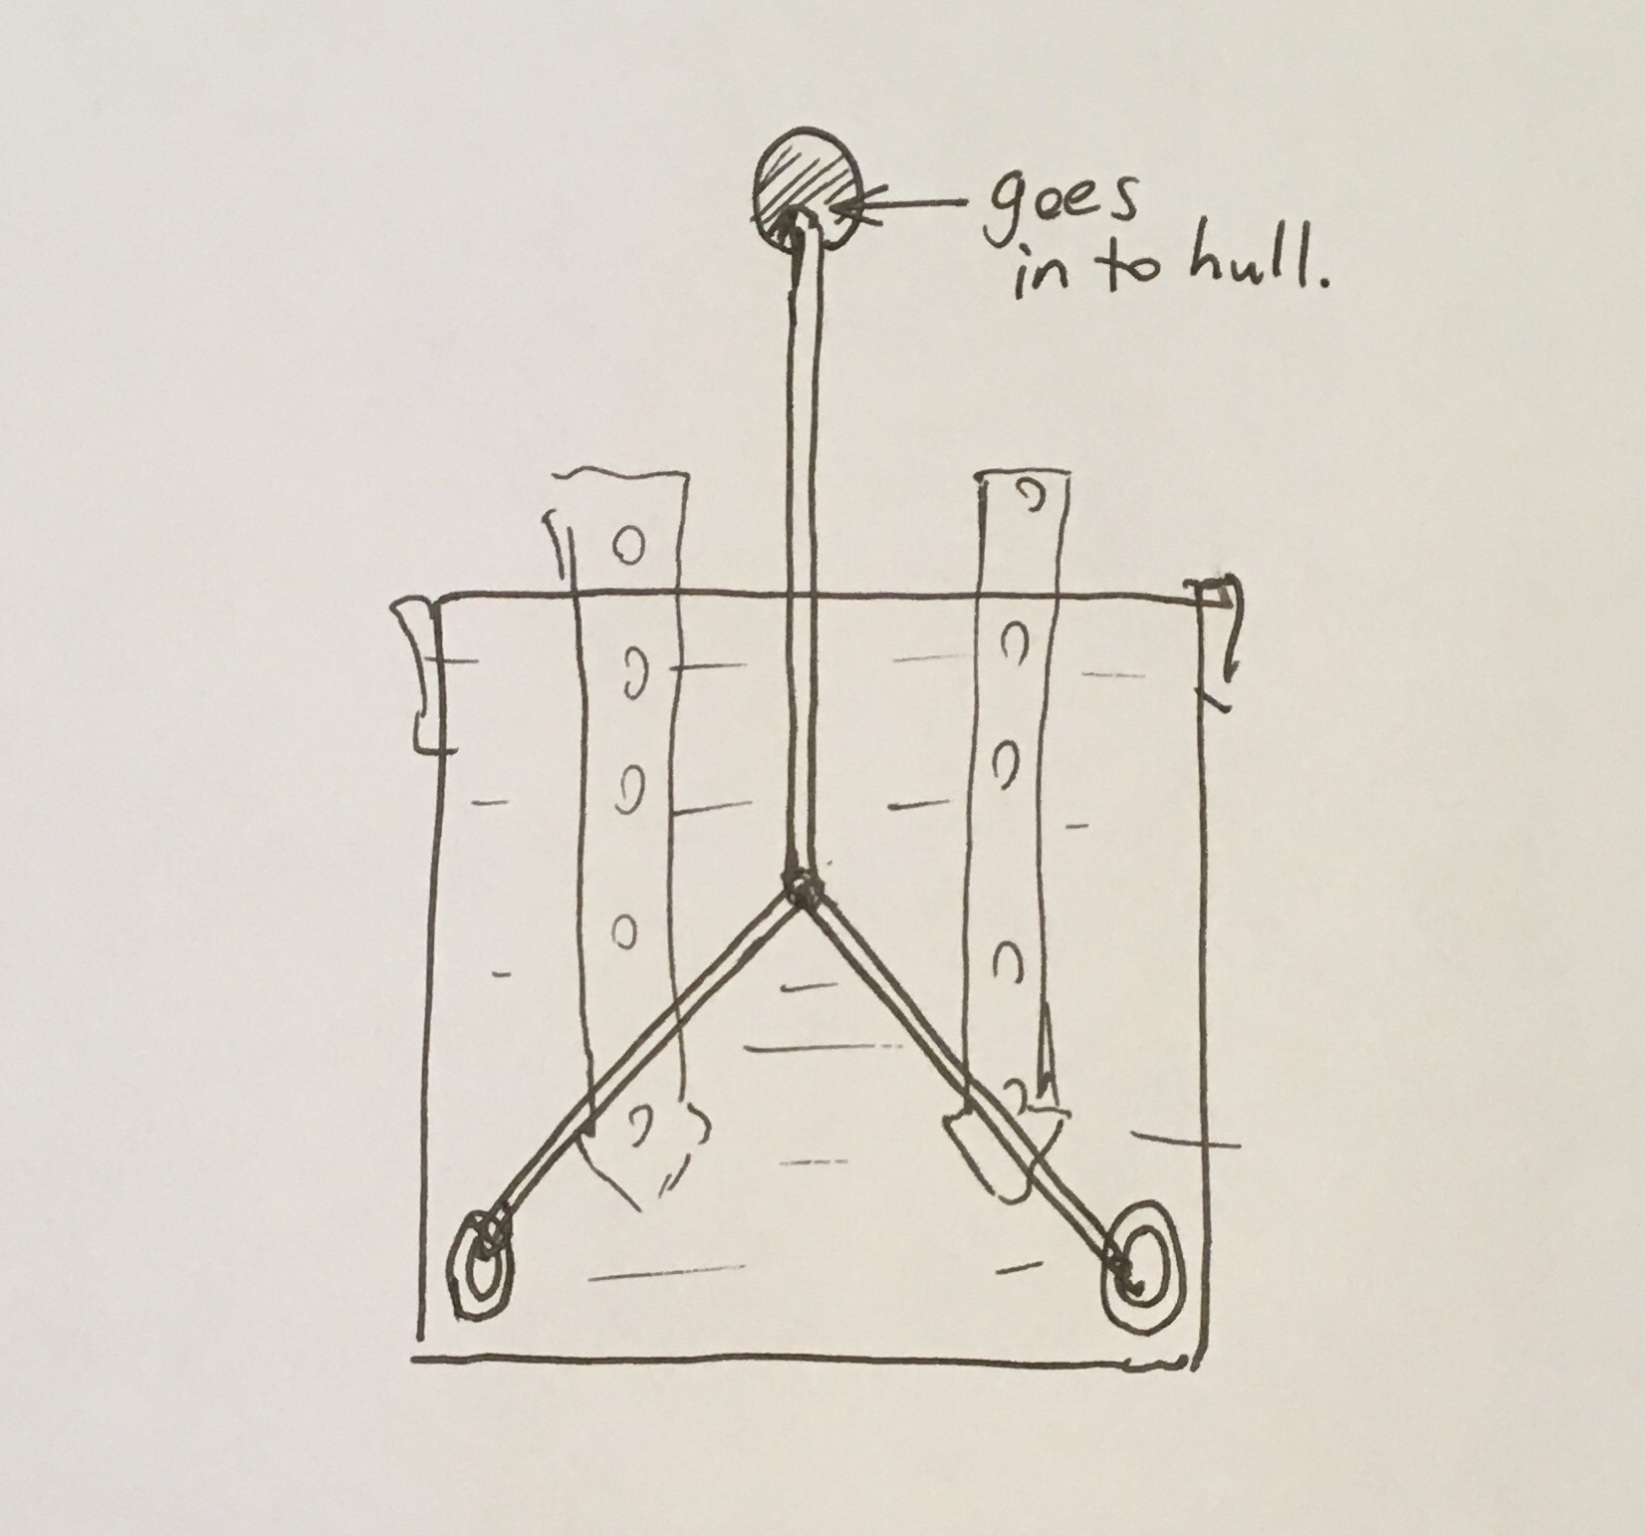
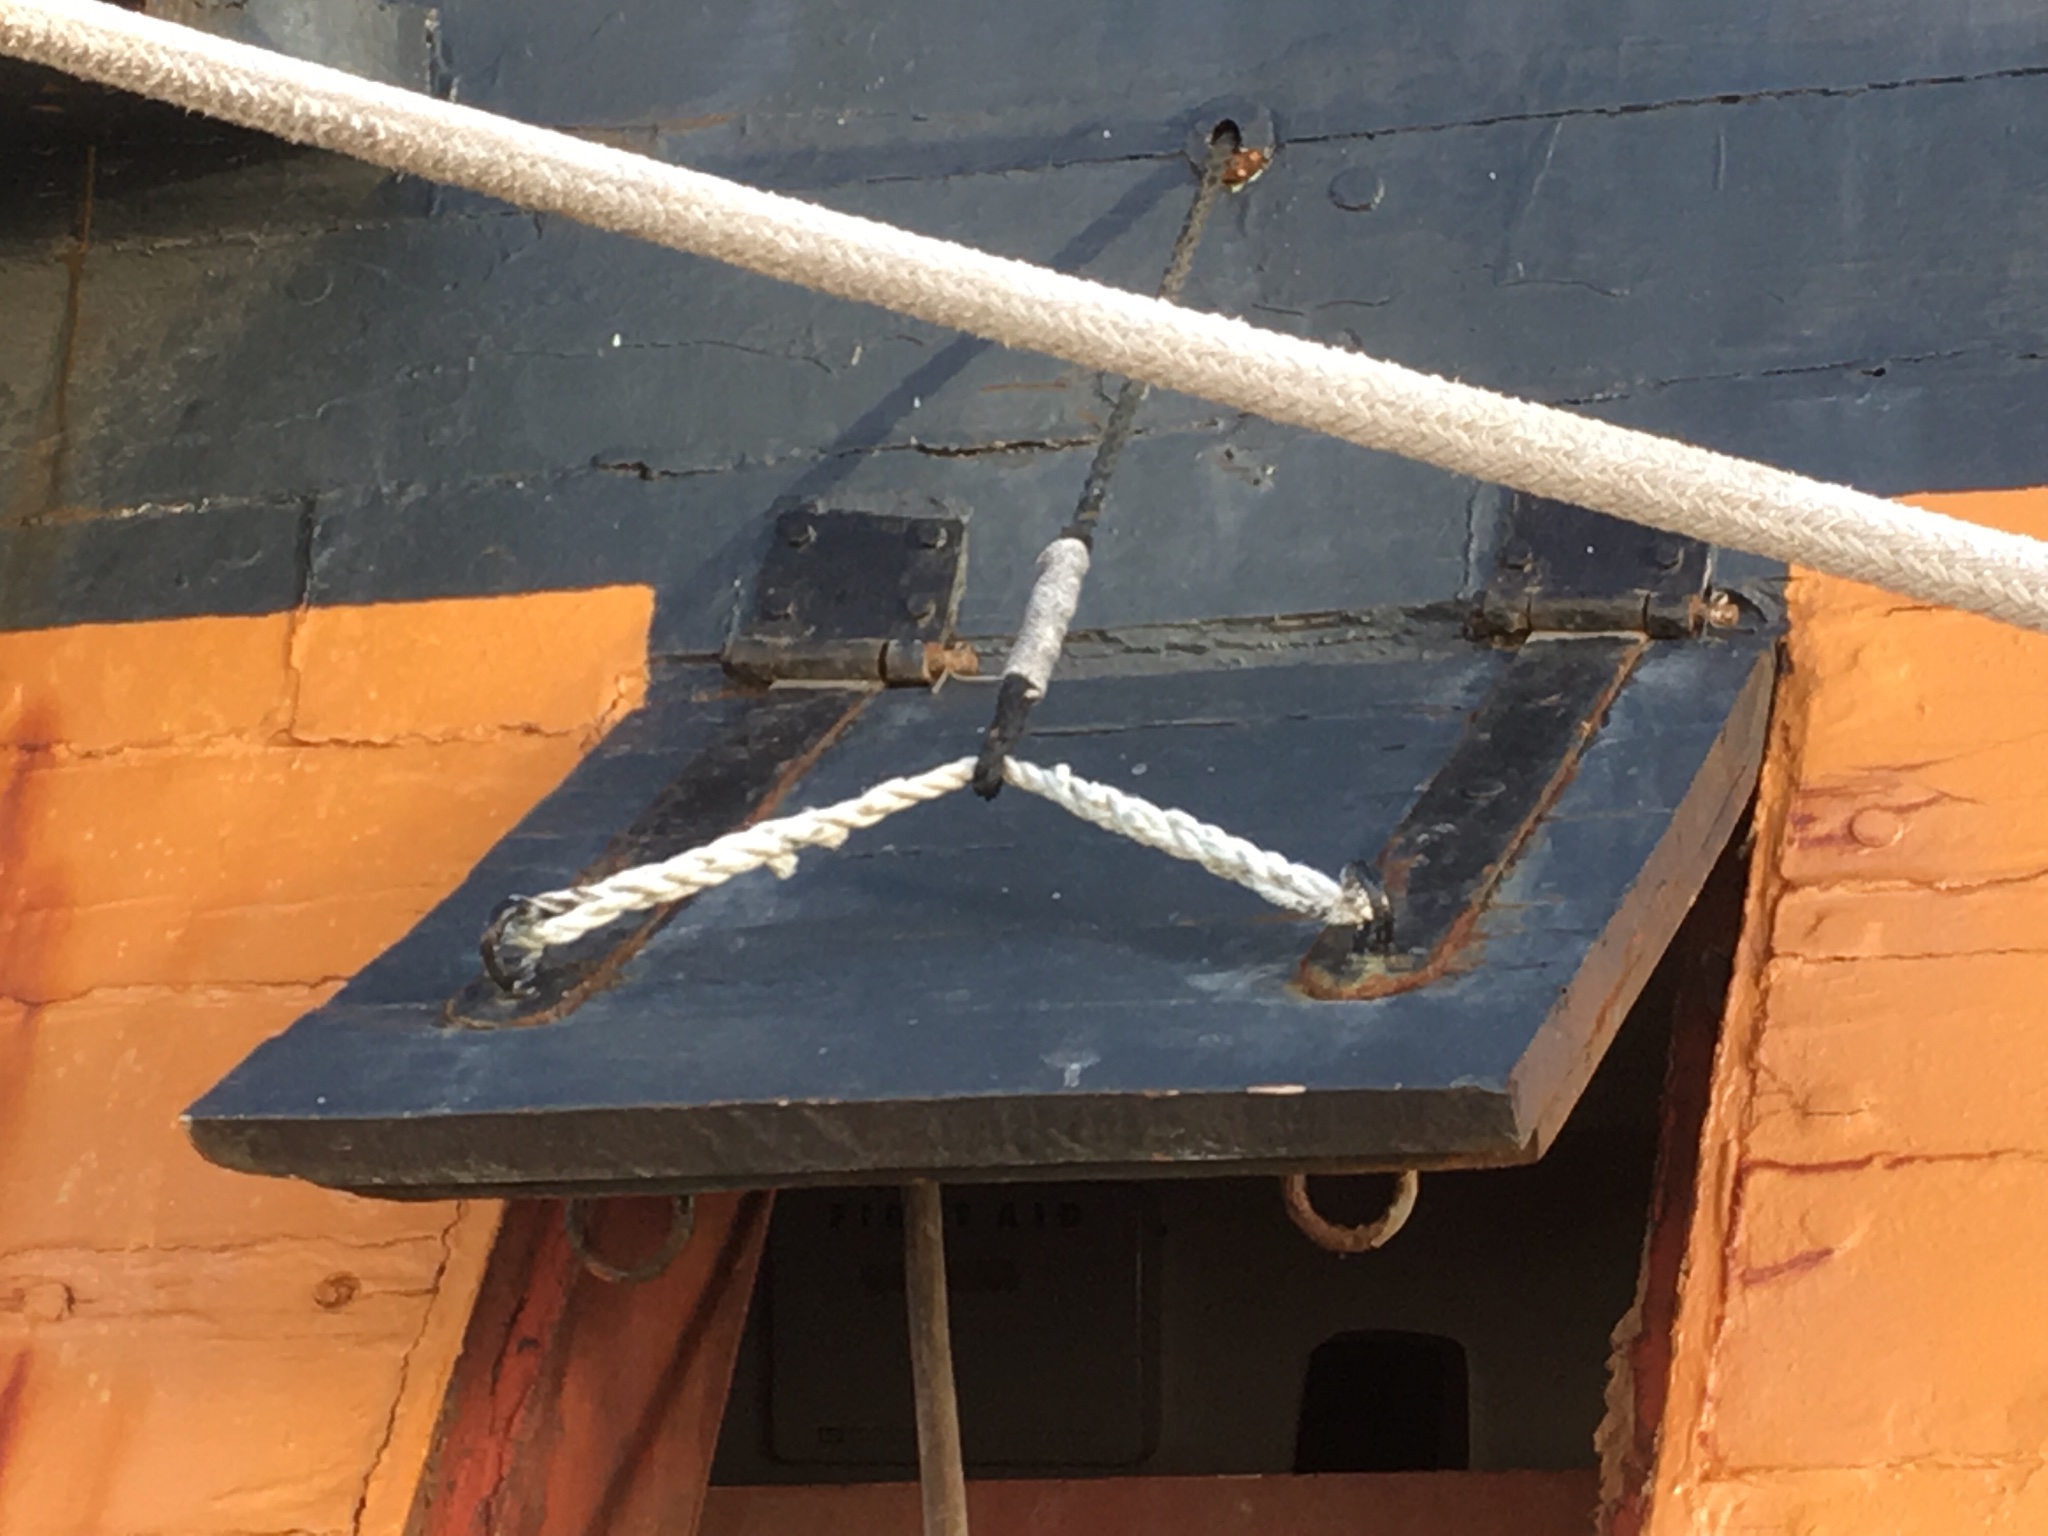
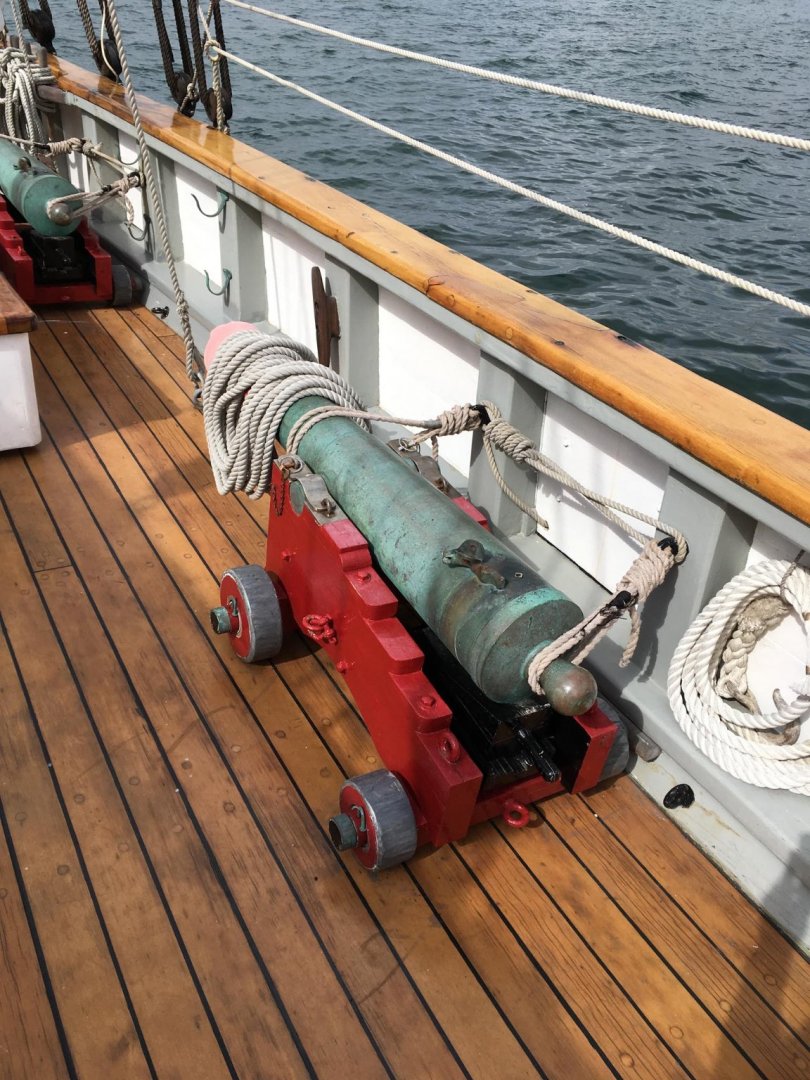
Can you do something like this? I’ve seen this kind of arrangement before. Here’s a photo of a gunport on the HMS Surprise replica in San Diego: I think that this way, you would only need half as many entry points into the hull.


- 41 replies
-
- 4
-
-
- Spanish Galleon
- Flying Dutchman
- (and 3 more)