HOLIDAY DONATION DRIVE - SUPPORT MSW - DO YOUR PART TO KEEP THIS GREAT FORUM GOING! (Only 36 donations so far out of 49,000 members - C'mon guys!)
×


DenPink
-
Posts
818 -
Joined
-
Last visited
Content Type
Profiles
Forums
Gallery
Events
Everything posted by DenPink
-
Hi Brian Have you got a extra bed . Denis.
-
Hi Brian Yes welcome to NZ it is very expensive here we have only 4.5 million people, so some one has to pay for the MP's don't they. For example I can get an milling machine from Australia for $750au + $97au for shipping + import cost ( we have to pay that for any goods that we import over $60nz ) and when you add that up it is still cheaper by $1,000nz if I got it from New Zealand ( work that one out ). Another one for you, a car licence cost about $65nz on top of that we have to pay $459nz ( about ) ACC. Don't get me started Brian ha ha. Denis.
-
Hi Alistair Nice to see you back on the log again my friend. Also thank you for the words. Re Titebond, I got it from Carbatec wood working shop just up the road from me, it cost about $26nz for 473 ml . Go on line to www.carbatec.co.nz Hope this helps you. Denis.
-
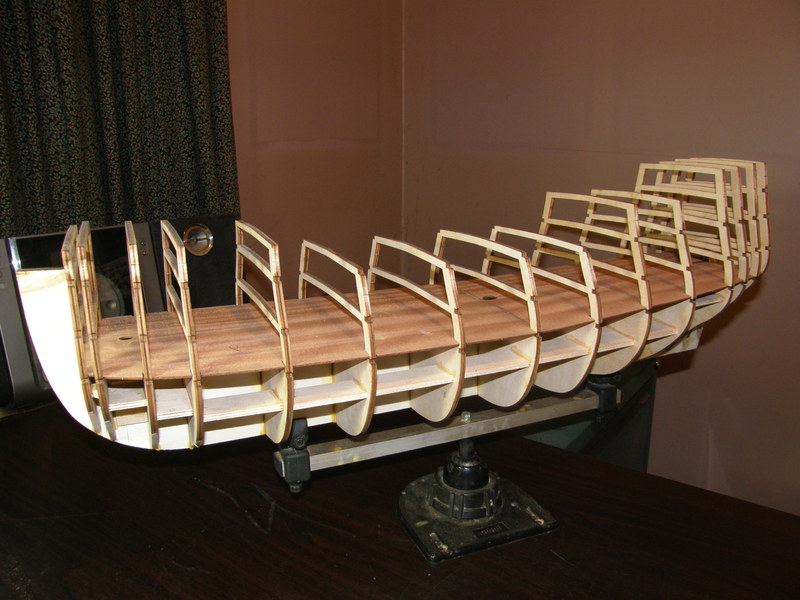
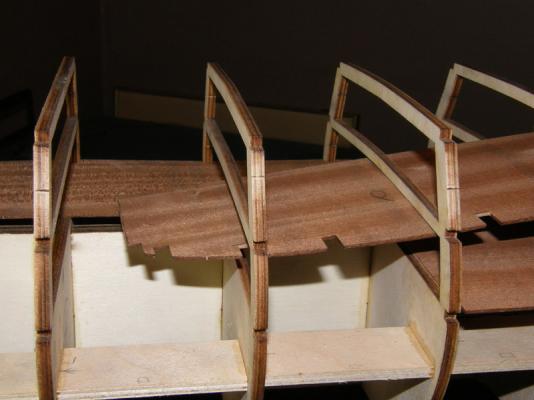
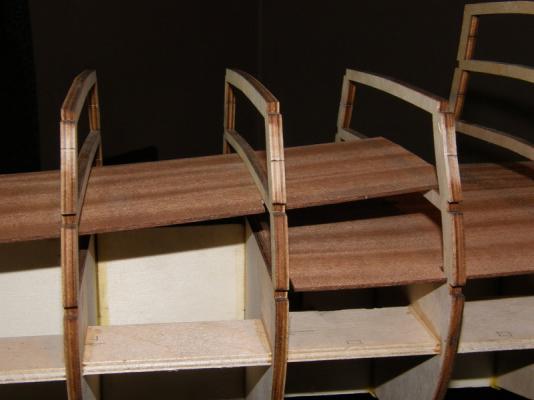
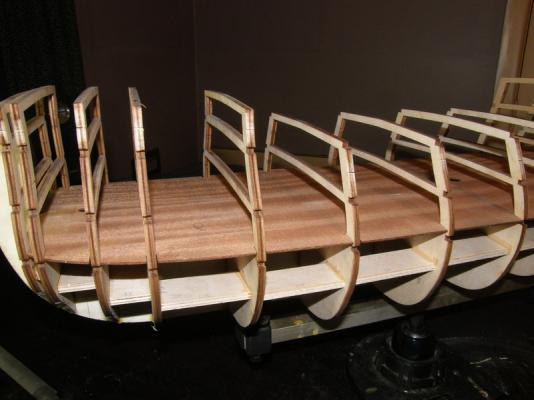
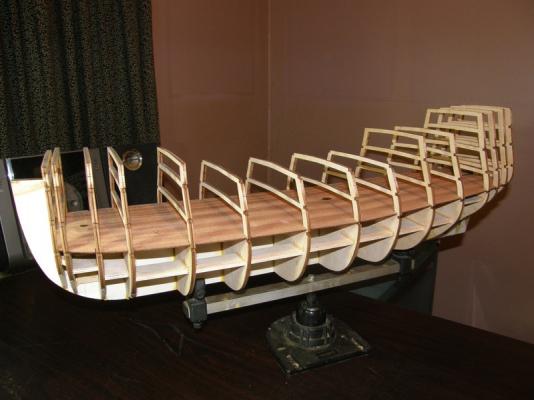
Hi all. This is how the deck was fitted after cutting. Push deck through stern bulkhead frame. Move it along till you get to bulkhead frame 6 from the stern ( or bulkhead frame 2 in the kit ) , now drop it down , you will have to bend it a little to get the deck onto the frames. Now fit the deck. Denis.

-
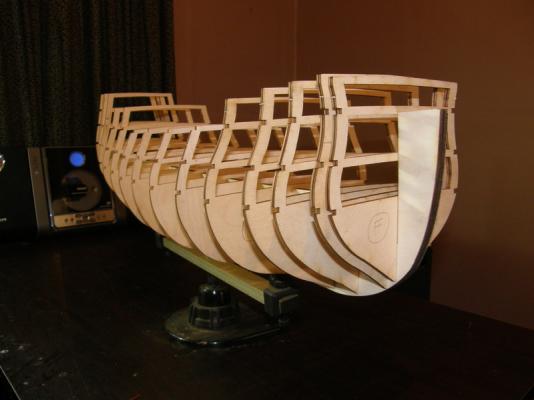
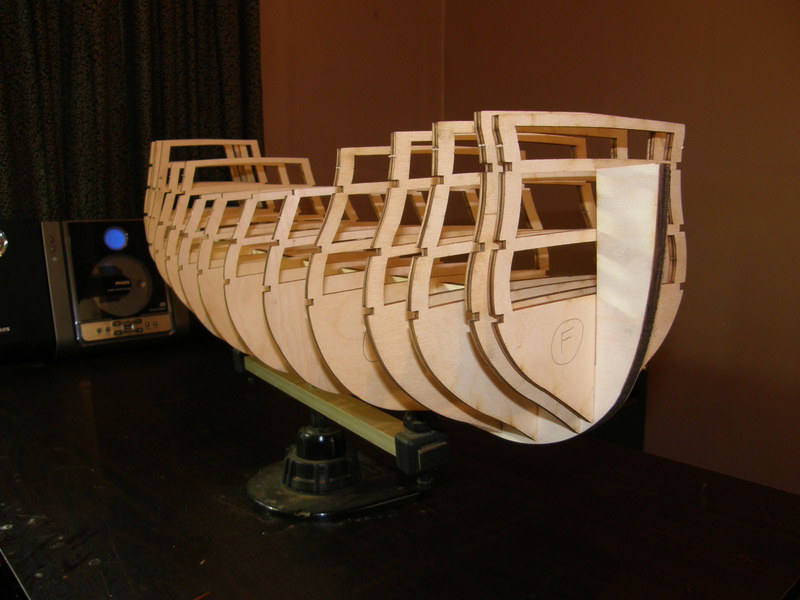
Hi Frank The bulkhead frames were a bit hard to do. I think two of them are a wee bit out of line, I had to cut about 1mm out of the slots on the deck to make it fit. I have put that down to over cutting two of the spacers. Denis.
-
Hi Brian I think I took about 1mm off at the bow end to make it fit. Denis.
-
Hi Popeye The lower deck is split in half as per kit, but to get it into position you have to cut it half again so you have got 4 parts. The first part to go in is the stern end, you do this by pushing it through the last bulkhead frame at the stern and just past the main mast location then bend it to the lower deck area, then keep pushing it to the bow area. Now it has dropped down to the lower deck area, you then push it back to the stern to make it fit, you do this about a zillion times to get it correct. Then you have got to do it 3 more times ( good fun I like doing this ) but I did dry fit them first before gluing, that I am doing now. I think she is the same as the SoS if that is Big ???. Denis.
-
Hi Brian You got it, I also have the waterproof one, I think they are the best you can get. Denis.
-
Hi both Brian the glue is Titebond. Edwin with out looking I think it is the same as the SoS. Denis.
-
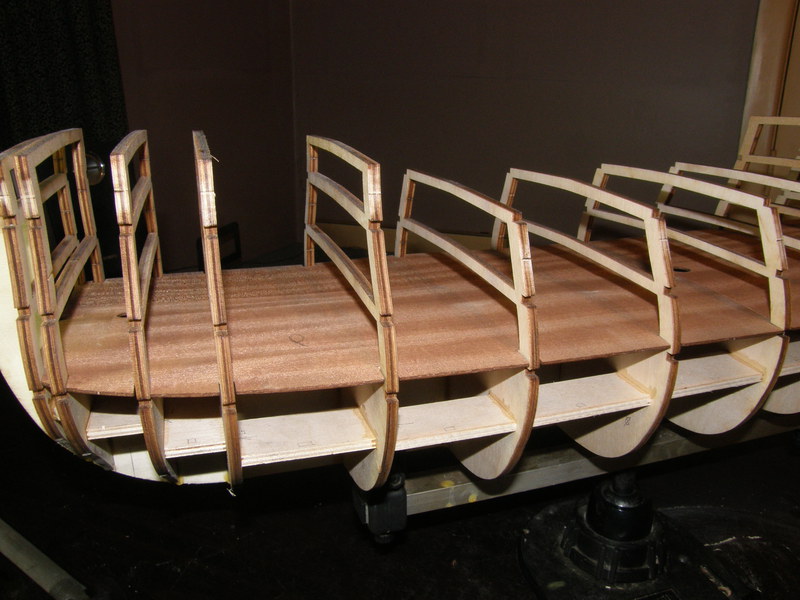
Hi All Just dry fitted the lower deck. Next take it all out and start to glue in place. Denis


-
Hi Edwin I have started painting well not painting but moving things ha ha I have taken the pictures off the wall and some books have gone, you can only do so much in an hour. Then I start the "RW" build. You have to get thing in the correct order Edwin ha ha. Denis.
-
Hi Vince Thank you my friend. Denis.
-
Hi Visi See above. Denis.
-
Hi Max If you go to the main page of MSW and scroll down on the right hand side you will see "Byrnes Machine Tools" just click on the link. As I know it they are hand made to order. If you want to see what they look like I have photos on my SoS log. Page 21 is the Table saw. Page 23 is the Disc sander. Page 25 is the Thickness sander. Hope this helps you. Denis.
-
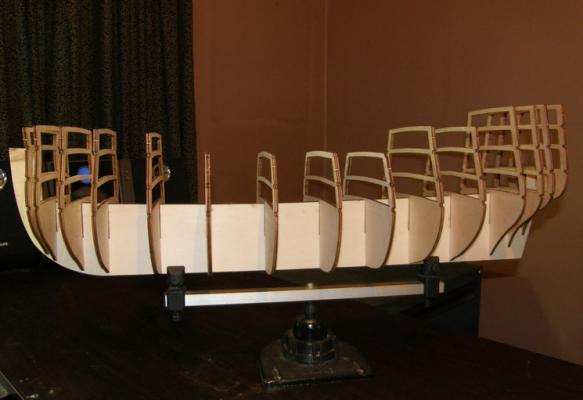
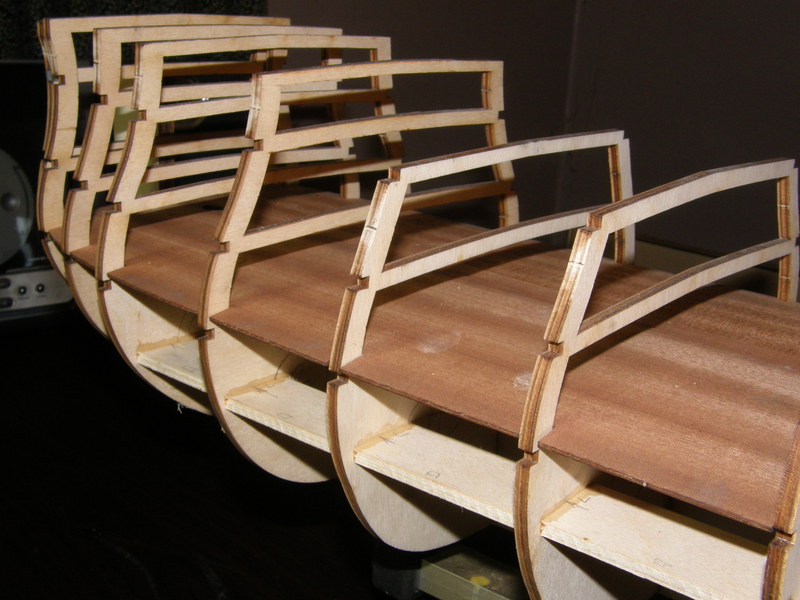
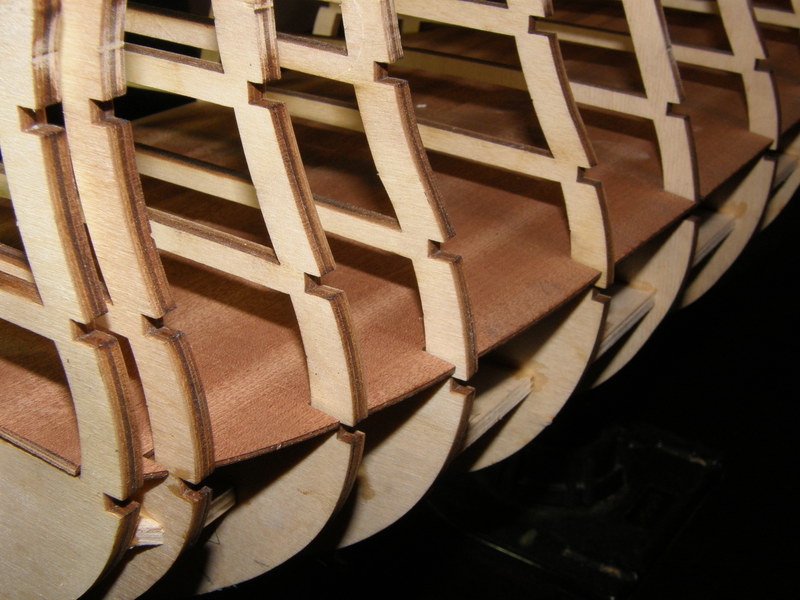
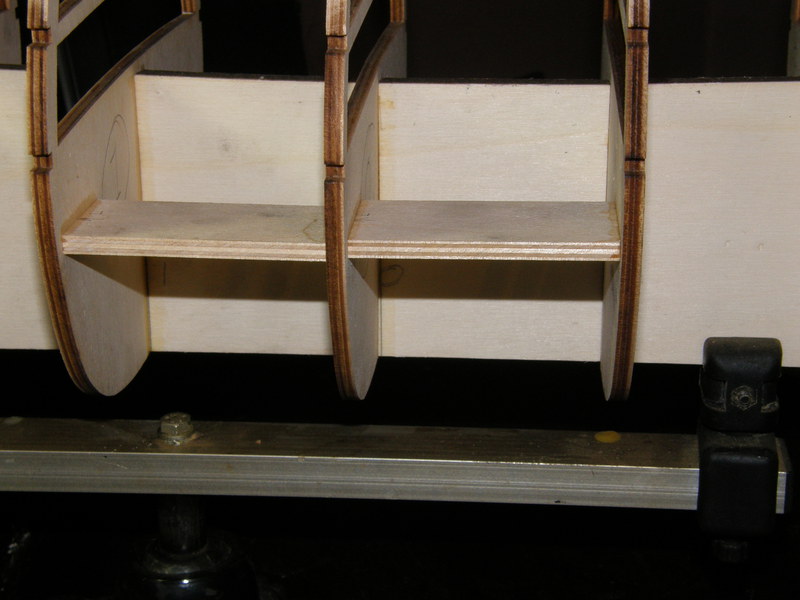
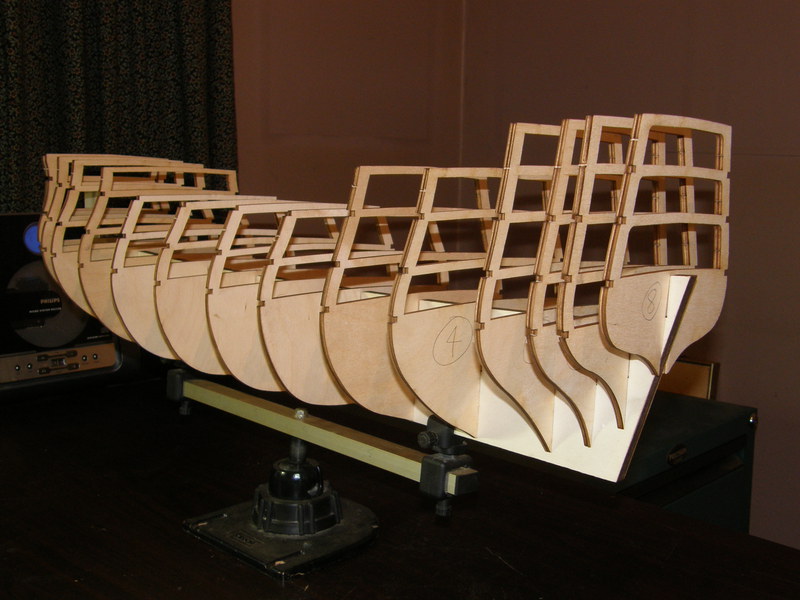
Hi all Before I post any more photos etc. I would like to thank Jim of Byrnes Model Machine tools. Without his tools I don't think I could have cut the spacers so accurately. I overcut the spacers on the table saw and finished with the disc sander, all cuts and sanding are dead square. Denis.
-
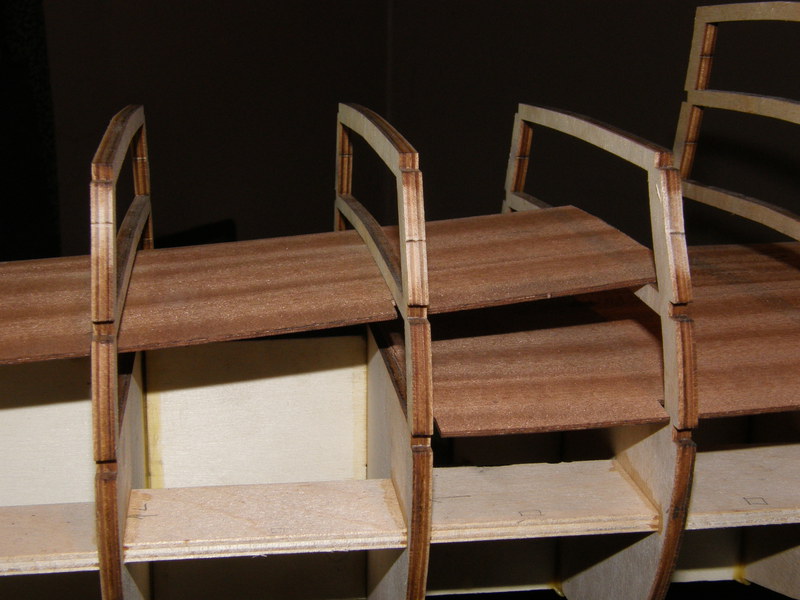
Hi All Just a quick update . Started to fit the spacers in between the frames. Denis.

-
Hi Ron Wow she is looking the best ever, what a wonderful job you are doing on this build. Very nice and clean, I just love your work. Denis.
-
Hi Brian Thank you for the info, yes I do understand that . Denis.
-
Hi Brian I hope you are correct , but I will do my best. Denis.
-
Hi Bindy Thank you so much my dear for them words you are so kind. I do hope you will follow the "RW" as well as you are more than welcome to pull up a chair. Denis.
- 555 replies
-
- 1
-

-
- sovereign of the seas
- mantua
- (and 1 more)
-
Hi Brian Yes you do , it is about the same size as the SoS. The only thing is it's harder ha ha. Denis.
-
Hi Visi You are more than welcome to subscribe to the build of the RW my friend. Denis
-
Hi Keith Yes I did notice them. I was only dry fitting them as I could not help my self to start her ha ha. I am now in the dog house , the wife said I could not start till the room is painted . Never mind the kennel is nice and warm. Denis.
-
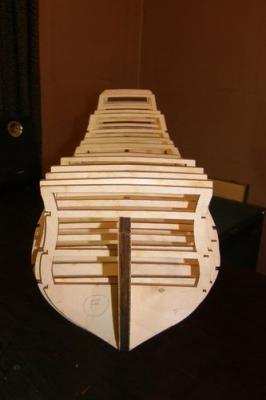
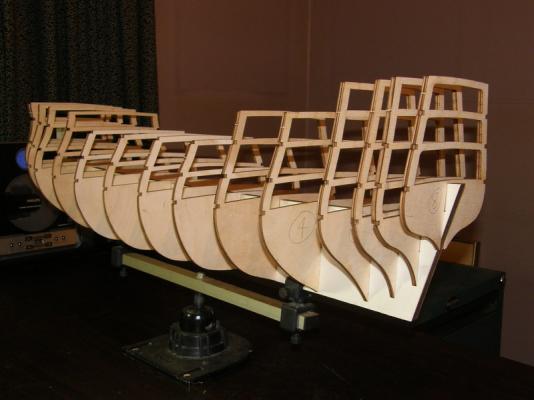
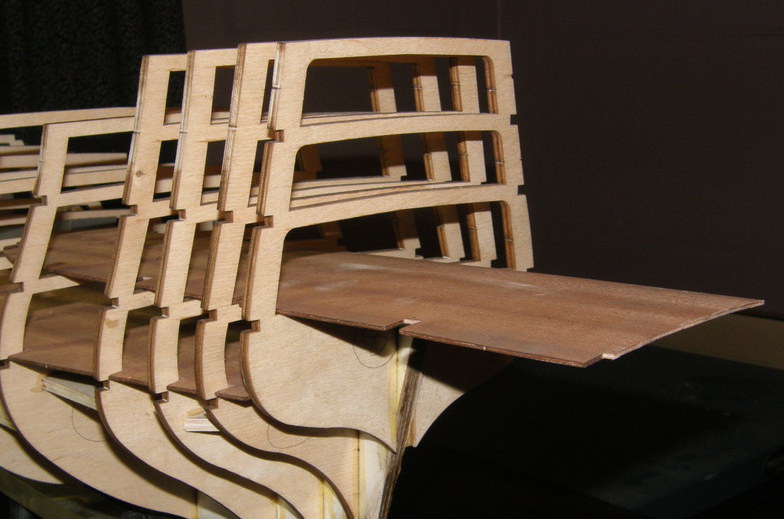
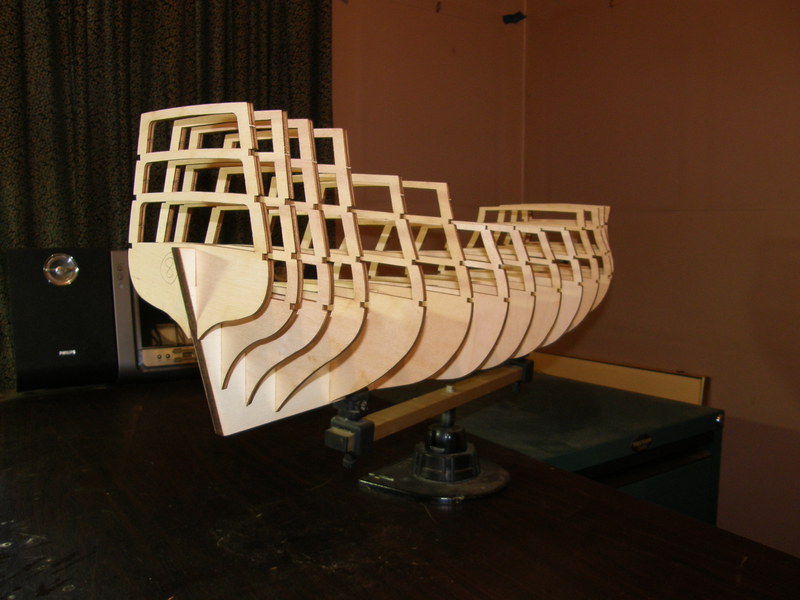
Hi Well I have dived into the RW box. I have dry fitted the frames, some are a bit loose and will need packing out ( about 0.50 x 5mm ). Denis.