HOLIDAY DONATION DRIVE - SUPPORT MSW - DO YOUR PART TO KEEP THIS GREAT FORUM GOING! (Only 20 donations so far - C'mon guys!)
×


hamilton
-
Posts
1,931 -
Joined
-
Last visited
Content Type
Profiles
Forums
Gallery
Events
Everything posted by hamilton
-
 This is really stunning work! hamilton
 -
Thanks Tim - just left a comment re rigging on your America log. And thanks for the reminder about the chainplates! Much appreciated. When I come to that stage I usually cut the dowels for the main and fore lower masts to length and use some knitting yarn to get the run of the shrouds (and therefore the lie of the chainplates) correct. I can't remember where I learned this technique but it was probably from one of the Chuck Passaro practicums (Sultana or Phantom) that I used on my first two builds..... I've been working away at the America lately but haven't had time to update here - been pre-occupied with some minor home renovations and getting ready for a family vacation - we're leaving Saturday and gone for 10 days. I may try to find time to post my progress here before leaving, but not sure that will happen.....bye for now hamilton
-
Hi Tim: Yes Mamoli's blocks are way too big - I used Syren's 1/8" for the sheet blocks on the caprails (haven't updated my log recently) and have adjusted the size of all the blocks on my rigging plan. Strangely, Mamoli's plans seem to indicate much smaller blocks than the ones they provide....I have a stock of Syren's 1/8" and 3/32" blocks from another build, but I don't think I'll go smaller than 1/8 for this build....I've widened the sheave holes slightly on the blocks to facilitate the passage of the lines - I would recommend doing this for each block prior to adding strops and seizing lines. As for the fuzziness there are a couple of solutions. A tried and true one is to run the line through wax pastels of an appropriate colour (these should be available at Michaels or at an art supply store). Another option is to use Syren's rigging thread, which does not fray and handles very nicely. I'm saving the Syren thread I have for a future build (though I'll have to buy more), and will probably go with option 1 for the America...... Anyway, I think the bowsprit rigging looks great - the issues you point out notwithstanding. Looking forward to seeing more progress hamilton
-
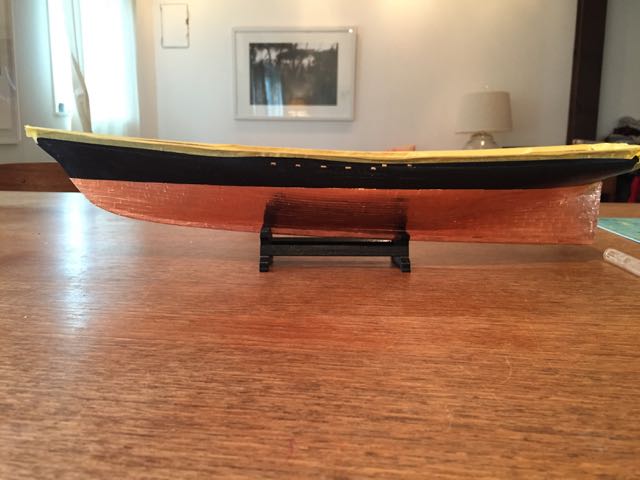
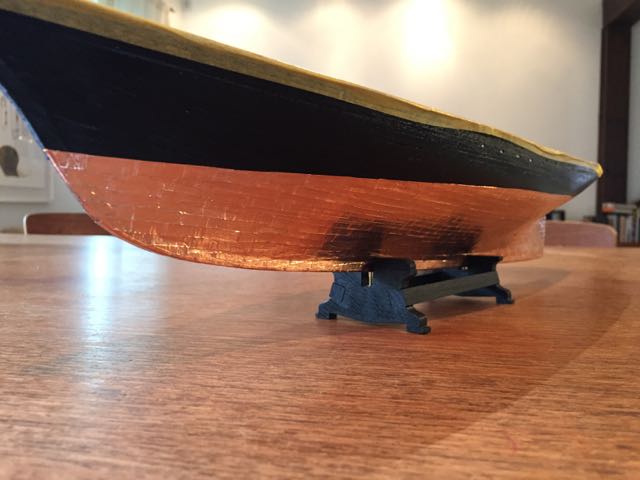
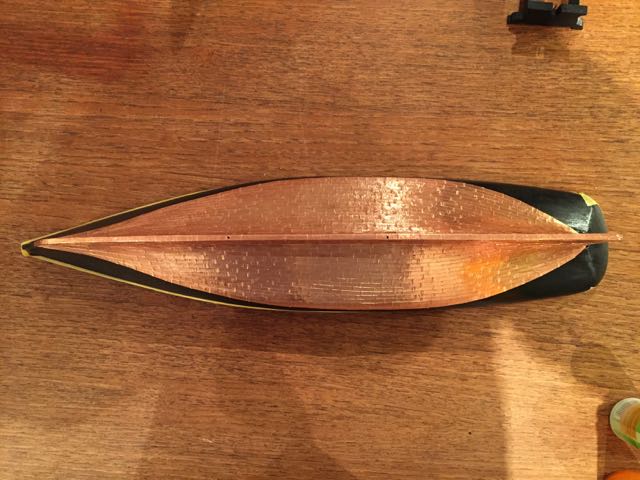
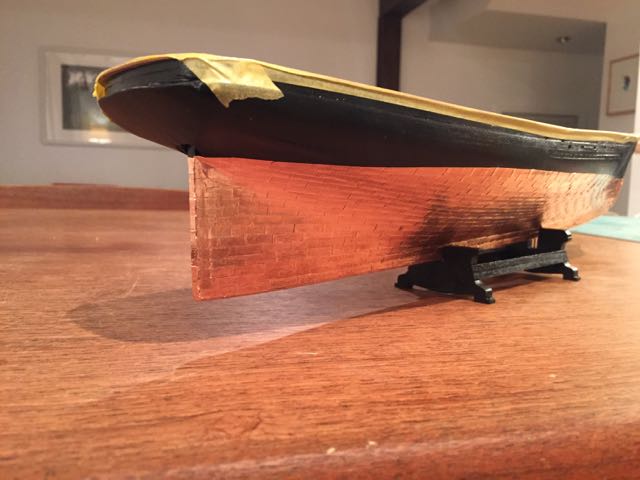
Over 1000 plates and 5 days later, the coppering is now finished! I have to say I'm very thankful to have completed the basic hull and to be moving on to more varied and interesting parts of the build - no ratlines on this one, so the copper plating is the last of the really tedious and repetitive jobs to do.....tomorrow I'll make the rudder, but for now I'll sit back and enjoy this - garish though it might be! In a year or two it will have dulled nicely.... hamilton
-
Thanks Tim! Those pictures are very helpful. I'm interested to see that you put the top band of plates on early in the process - I normally work up to that point from aft forward and then run the top band along to cover the ends of the lower plates. I personally don't mind the look of the bare copper, shiny as it may be. And your addition of the rivets brings a lot to it. I think your more economical approach must also pay off, since you can essentially lay 3 bands at once, whereas I'm making individual plates, which means I can manipulate the bands more easily but it takes FOREVER! To give you a sense of this, I started off by making about 500 copper plates. I've now used all of them and am not even half way through the plating!! I'll make several hundred more this afternoon while my son is napping and then back to it tonight..... hamilton
-
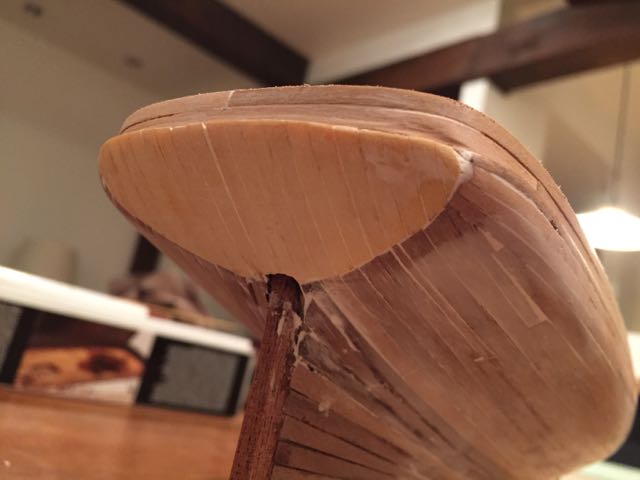
Hi Don and Tim: Thanks for the comments! I'm not going to be simulating rivets - at this scale I think it might be a bit visually overbearing.... Tim - I used a fine line of CA to fix the cap rail. The glue has now had 24 hours to cure and I had thought about putting some 1/32" dowels in it for further support, but I'm also kind of itching to move on to the deck fixtures and furniture, so I may just leave it as is.....during the coppering I will probably wrap the cap rail in masking tape to protect the finish. I did carve out the bow opening for the bowsprit before I painted the hull and dry fit the 5 x 5 square stock that is supplied for the bowsprit. I have not yet had a chance to test it now that the Cap is on, but I'm reasonably confident all will be well. As for the rake of the bowsprit, I haven't considered it. I have a feeling that the practice of keeping the angle low (parallel to the waterline as you observe) is a more modern practice, but I don't really know for sure. The top edge of the stem is called the "gammoning knee", I think - at least this is it's name on period ships of war....maybe in the world of working and racing vessels there's a different terminology....Anyway, it's still a while before I have to consider this - maybe I'll just copy you!! Best to all hamilton
-
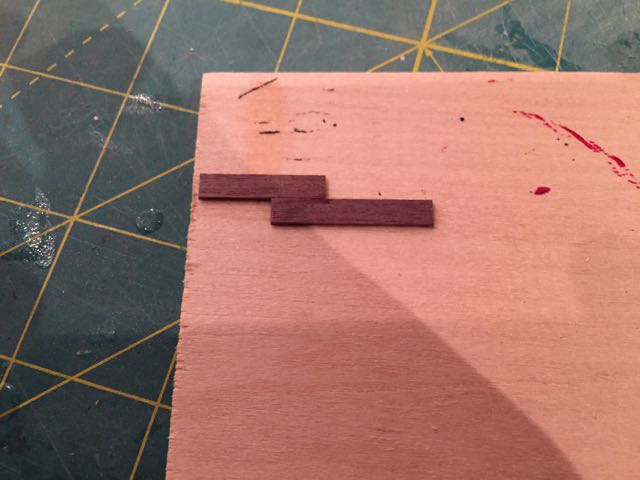
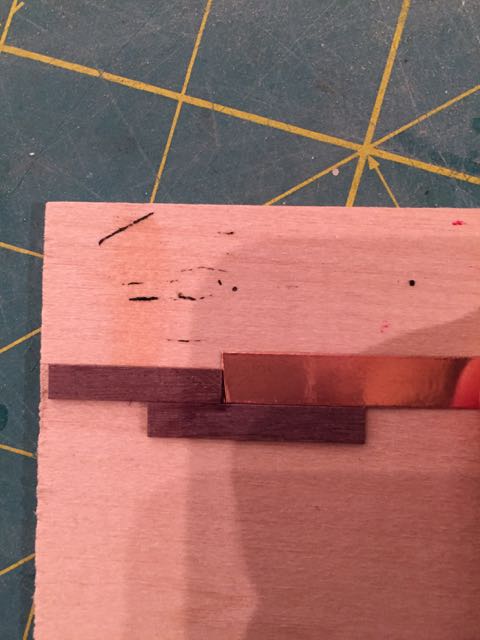
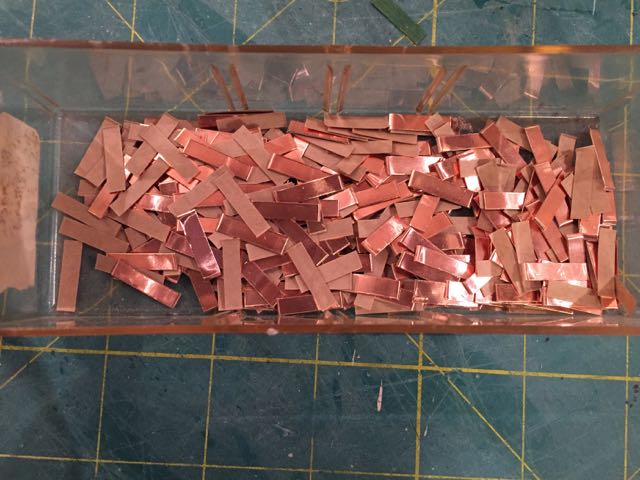
The last step in finishing the hull is the coppering. As I've mentioned before, the kit came with thin wooden tiles to simulate the copper plating. I decided not to use these and to go with adhesive copped tape instead. Unfortunately, the roll of tape I have is 1/4" thick, while the copper plates on this model are 4mm x 16mm. I made a simple jig to mark short (160mm) lengths of the copper tape so as to reduce them to the appropriate width. I trimmed off the excess using a straight edge. This same jig was used to cut the reduced strips into 16mm lengths. I spent the better part of this evening making about 400 of these plates.....here are some photos. Enjoy! hamilton Here is a comparison between my plates and those supplied by Mamoli. And here is a container full of the plates I made this evening.....

-
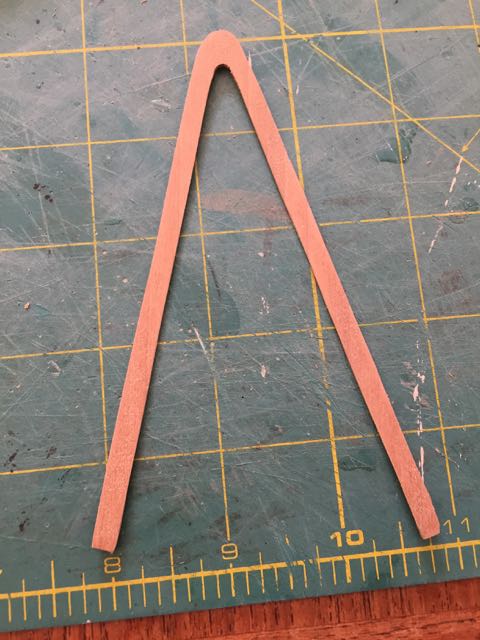
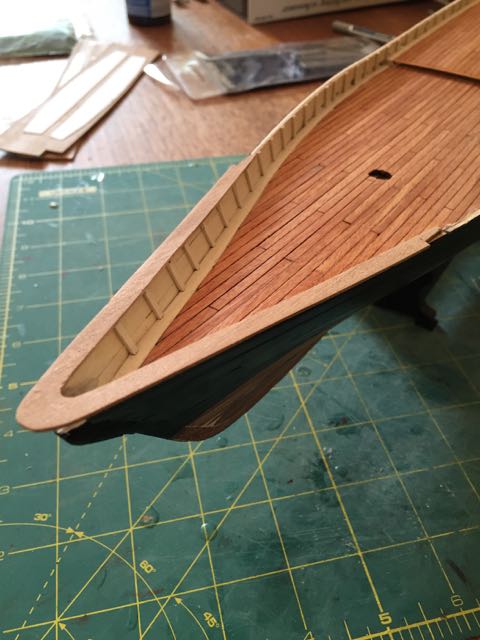
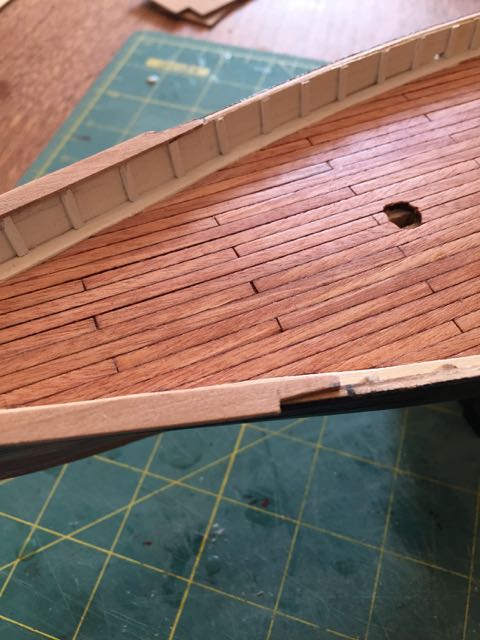
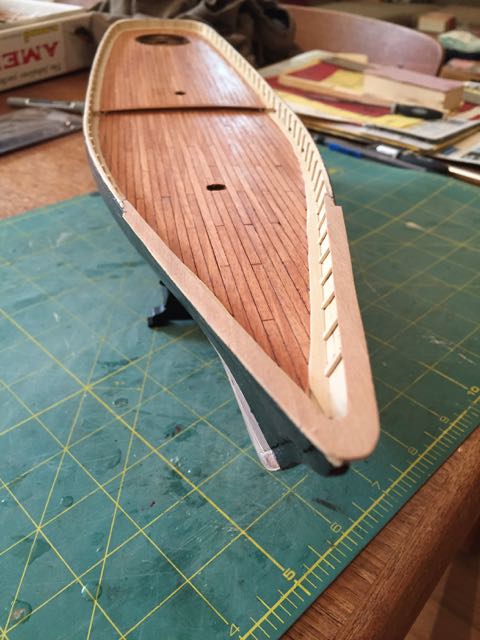
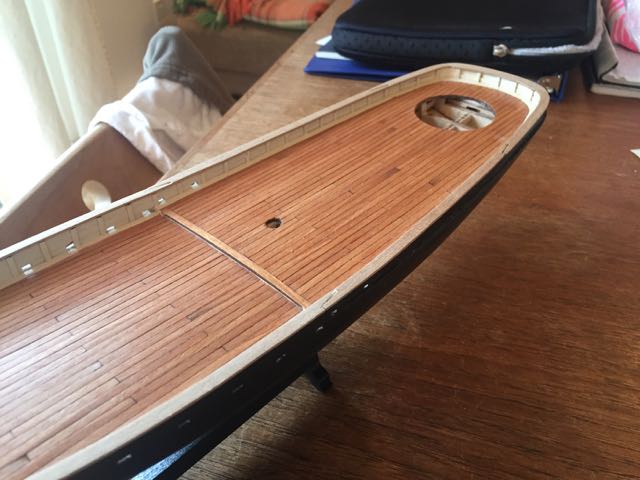
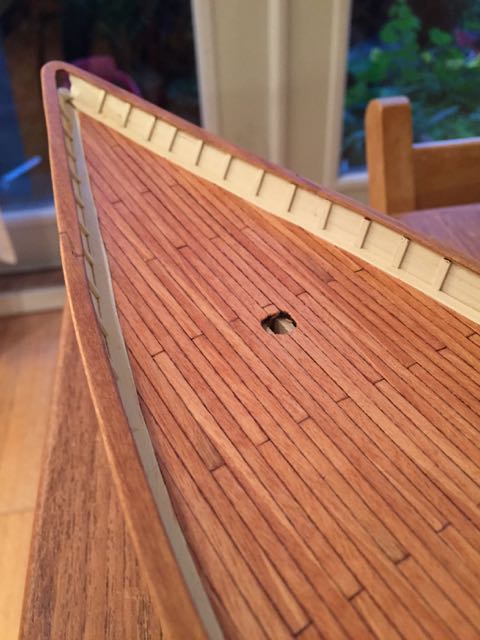
The next step was to make and install the caprail. This gave me an opportunity to pull out my bandsaw, which I have to say made this part of the build a great deal easier. I first laid a large piece of bristol paper over the model on the bulwarks, pressing it down to follow the sheer and tracing the outline of the tops of the bulwarks on its downward face. I used this tracing the make these templates. I then rubber cemented these templates to some 1mm thick walnut sheet I purchased a while back. You'll notice in the following photo that I've marked the proper outline of the bow section of the caprail - using a compass set to 4mm. These pieces were all overlong to account for the scarf joints connecting the various sections. I then cut the caprail pieces using the bandsaw. My neighbour recommended a trick for reducing tear out when using the bandsaw - that is, putting masking tape along the bottom face of the part along the line of the cut. I did this for these pieces and it worked like a charm. Here is the bow section cut and roughly shaped. And here it is with the scarfs cut in and installed on the model - please keep in mind that some final shaping and finishing is still to be done. Here is a shot of the simple scarf joint connecting the bow section and the first straight section of the caprail on the port side. And here are a couple of shots of the caprail aft. I did a bit of final sanding (rounding over the upper edges inboard and outboard and trying the get them as even as possible) and then finished them with tung oil. Here are the results hamilton

-
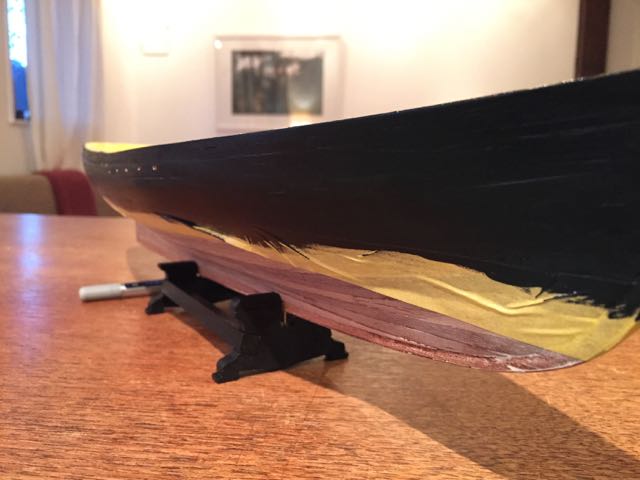
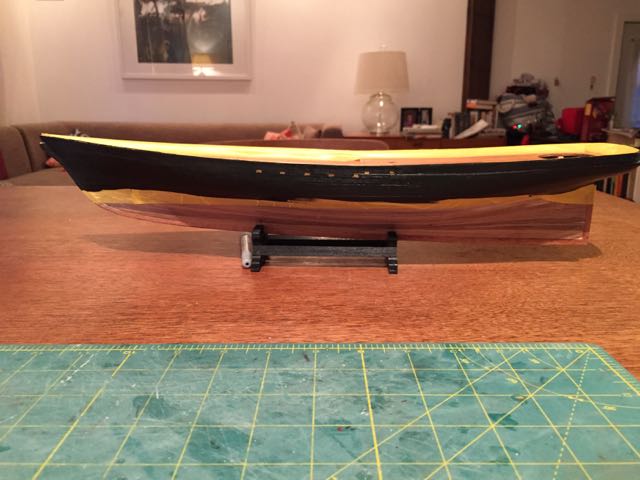
After marking the waterline, I masked the hull both along the waterline and along the tops of the bulwarks. I use Golden artist acrylics for my modelling, only slightly diluted with water. A few coats give a very nice finish - at least I think so. The colour used here is carbon black. Again, here are some photos
-
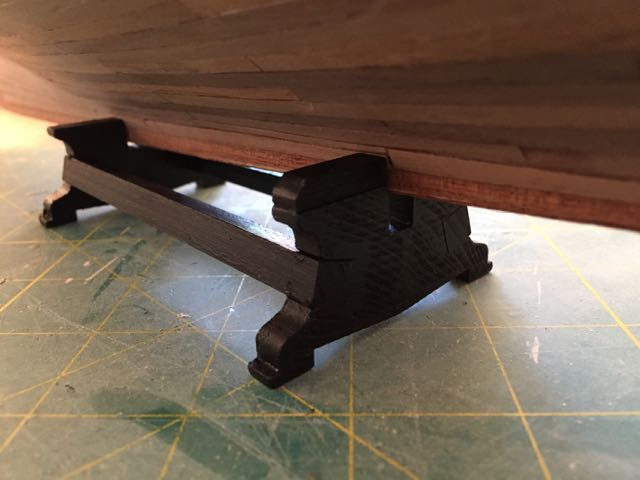
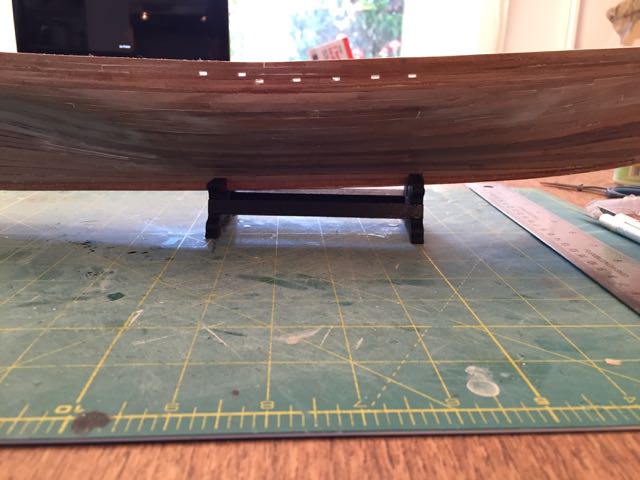
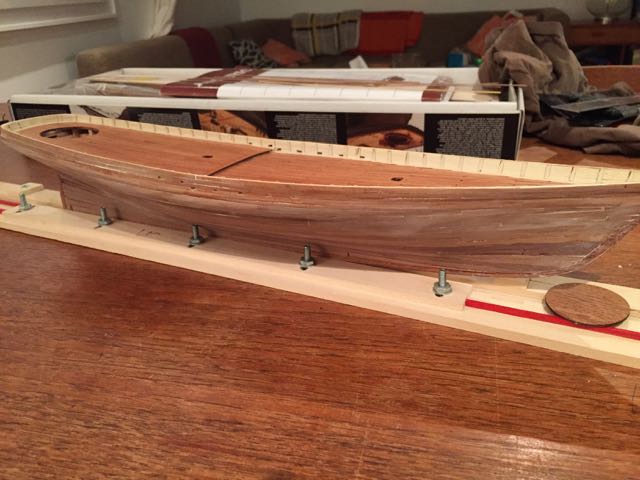
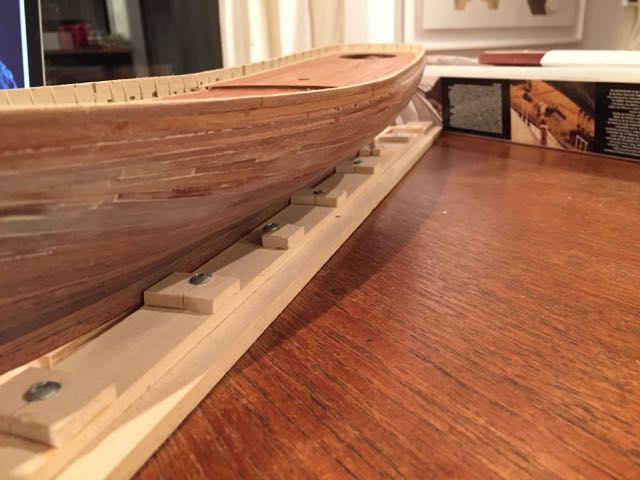
I've made quite a bit of progress on America. Once I finished planking the hull, the next step was to mask and paint above the waterline. To do this, I constructed the small stand that came with the kit, and made some adjustments so that the waterline would run parallel to the flat surface of my modelling/dining table. The supports that came with the kit were identical to one another, so the forward one needed to be built up. I did this by gluing 5mm x 5mm strips on top of the forward support. To stabilise the model I drilled 1mm holes vertically into the bottom of the slots in the stand supports as well as into corresponding places in the bottom of the keel. I then cut a couple of pieces of 1mm brass rod to insert in the holes. Here are a couple of photos. hamilton
-
Hi Tim: Thanks for the comments! And the suggestion - I hadn't thought of that....I will be using copper tape, so I'll have to make sure that hull is clean, as you suggest. I spent a bit of time today building the stand and drilling holes in the stand slots and keel for mounting. I also marked the waterline and masked the hull off for painting above the waterline. We're going away tomorrow morning for the Canada Day long weekend, so I won't be able to get back to the build till next Monday, when I'll start in on the painting. Bye for now all - happy Canada Day to all you Canucks and happy 4th of July to you south of the 49th. hamilton
-
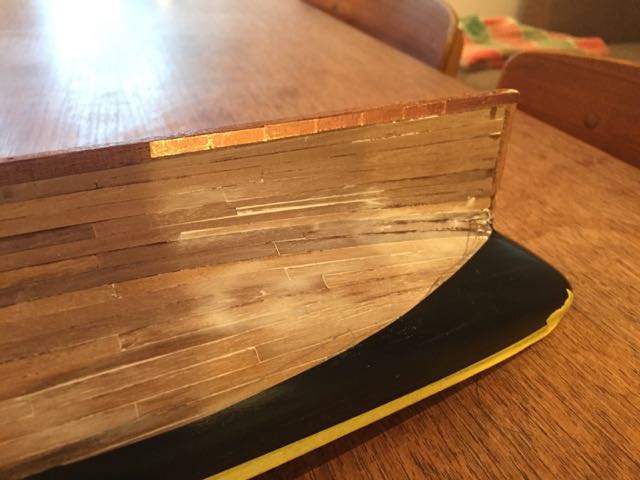
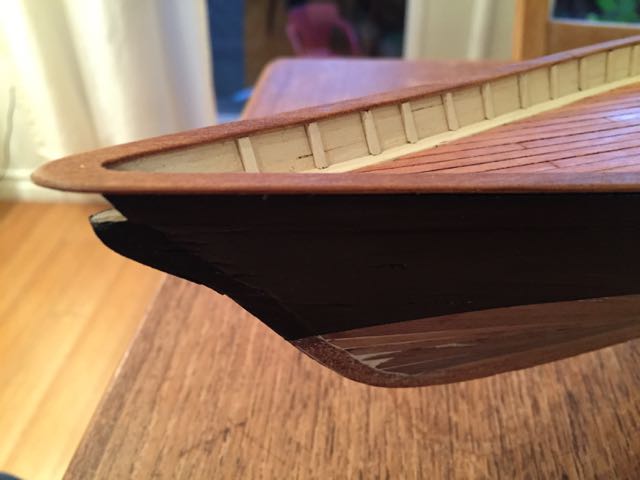
Well I think that at the beginning of this log I mentioned that I was going to show the build warts and all...I guess it's time for a couple of warts.... I've finished the second planking and made something of a meal of it. On the one hand (making excuses) since the hull will be finished and coppered I was not too concerned about the look of the planking, its accuracy, etc. On the other, I'm not terribly good at planking....there are aspects of it that are still, after many builds, a mystery to me....I understand it in principle, but I think I need to actually see someone doing it to understand what I should be doing.... Anyway, I used 1mm x 4mm walnut strips for the second planking, except for the transom, which the keen-eyed among you will recognise as the 1mm x 3mm yellow planks from Corel's HMS Greyhound. At present there are probably parts from at least 4 other kits besides the America in this build.... I use aquitex acryllic paste as a filler. It sands to an eggshell finish and takes the paint very well. A lot of seam-filling here, as you'll notice. Though it looks pretty atrocious now, I'm confident that it will look quite good when painted and coppered. This is the next stage..... hamilton
-
Ferit!! Always great to hear from you! You know, I bought the Berlin kit last year and it is now sitting on the shelf waiting....I know it will be impossible to match your level of craftsmanship on that build, but I will certainly try when the time comes. Bye for now - hope all is well hamilton
-
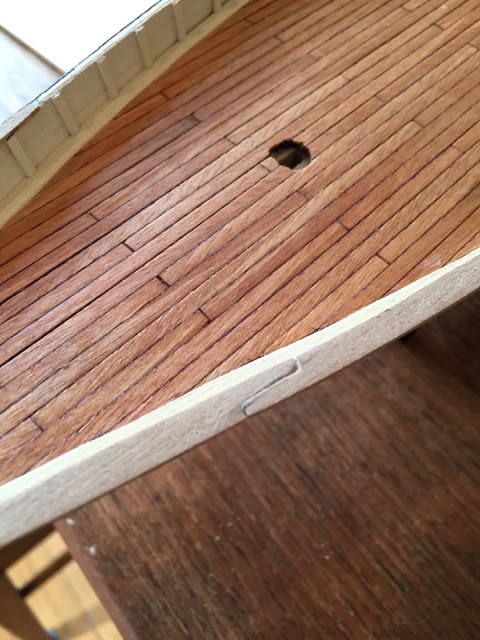
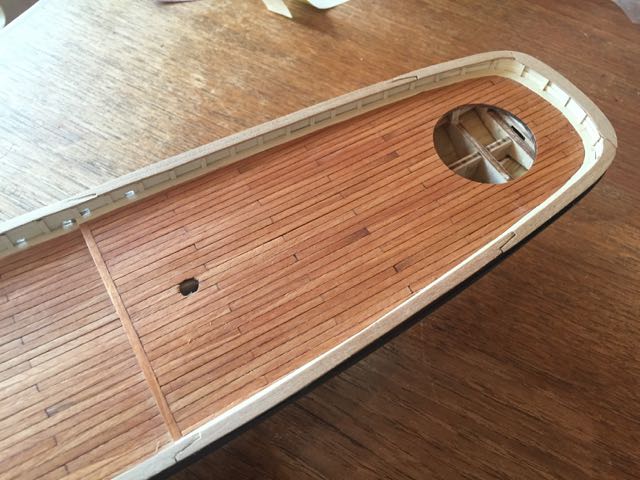
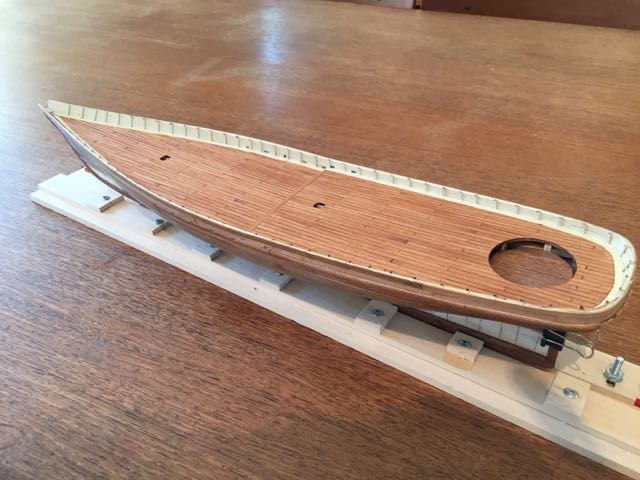
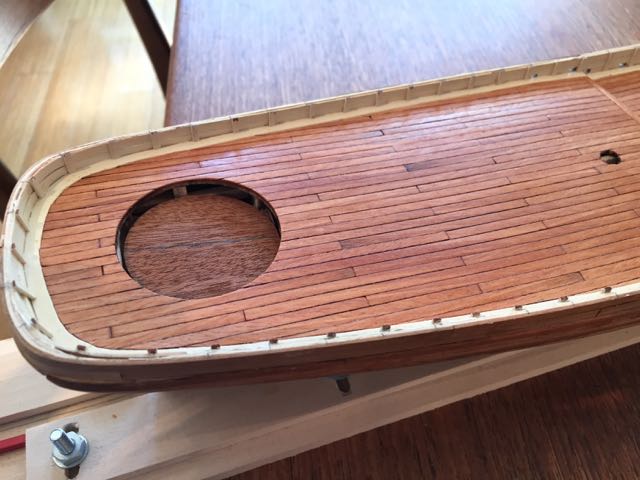
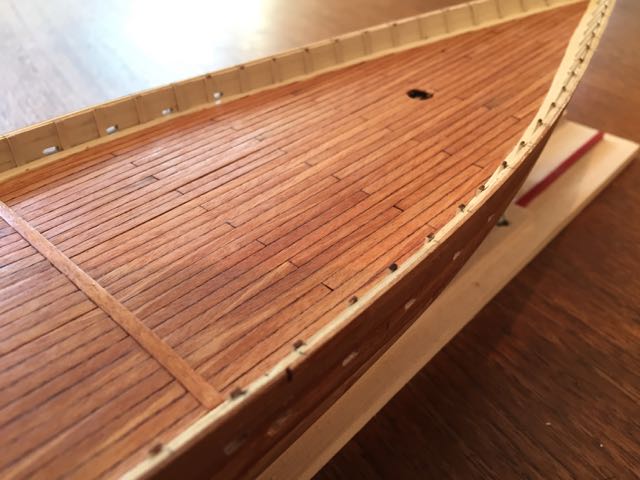
Hello there: Well my summer vacation has started, which means that, in addition to building some new steps for the patio, occasionally mowing the lawn and going on a couple of little adventures, there's a bit more time for modelling - something which has sadly been on the back burner for some time now. This morning I spent a couple of hours on America - the first work I've put into her for a couple of weeks. Since my last post I've completed a few things - the deck planking, the bulwark stanchions and the starboard side hull planking. The port hull is almost fully planked but for a small 4-plank strip at the turn of the bilge. This I'll fill in tomorrow. I am not proud of the planking, but since the hull will be painted and coppered I'm not too worried about it. I will slather it with some of the acrylic modelling paste I use for filler and then sand it to a high sheen before finishing it and hopefully when all is done it will look alright. In the meantime, here are some photos of the deck area - as you can see the bulwarks will need a bit of touching up, which will happen once the hull is fully planked.....The deck could probably take another coat of Tung oil as well.....bye for now hamilton
-
Thanks Tim! Very helpful. I know there are some tutorials on this forum for rope coils - but haven't looked in a while - always good to hear what different people do. I think you've done a great job with them hamilton
-
OK - so after humming and hawing over how to source my 3/16" ply in a way that wouldn't break the bank, I finally found some. And though it cost more than I would really have liked to pay, at least I have it on hand and can begin, once the disc sander arrives, to start this project in earnest. Hopefully my next update will feature some photos... hamilton
-
Thanks Mark and Grant - I'll check out both of these sources for a start - the metalwork is a very long way off, so I guess I've got lots of time to experiment and practice hamilton
-
Thanks again for all these tips! And sorry for the late response - it's been a busy time at work and the I was out of town for a while. But now I'm back and at the front end of my summer "vacation" (meaning I'm just working from home on a more flexible schedule. In addition to some projects around the house and some work-related projects, I'm hoping to make some further progress on both my current builds - the Mamoli America and the scratch Bluenose. It's clear to me now that I should just give up on trying to get super-accurate cuts on the bandsaw. So I've ordered a belt/disc sander from MicroMark (taking advantage of their summer sale) which hopefully will get to me here in the next 10 days or so. In writing this, I realised that I forgot to add to my order some of their birch ply sheets! That was dumb.....Finding 3/16" ply at the few hobby stores we have here is impossible - lots of 1/4" and 1/8"......but nothing in between. Anyways....I can see that scratching something even so "simple" as the BN is going to be a costly endeavour. Tools and wood are going to cost....and of course I'm not going to make my own rigging thread or blocks or cleats....the metalwork overall is an intimidating prospect - I wish some kind soul would post a detailed tutorial on soldering for those of us who only know how solder smells and nothing else..... Anyway, the sun's going to be shining this coming week, the kids will be in school and I'll hopefully drag the saw out to continue with the messing around before the sander arrives and I get around to ordering wood. Bye for now hamilton
-
Great video - thanks for posting! hamilton
-
Just catching up here Bob after being out of town for a while. She's looking splendid! hamilton
-
Hi Tim: The rigging looks great! And your rope coil is very well done - any chance you'll give up your secrets? I've not heard of that book, either - thanks for posting the details - I'm going to look it up right now. hamilton
-
I absolutely agree! I wish I'd built this as a first POB model since it illustrates very well in its design the principles of spiling... hamilton