-
Posts
1,780 -
Joined
-
Last visited
Content Type
Profiles
Forums
Gallery
Events
Everything posted by hamilton
-
Great suggestion, re adhesive backed foils - I actually have a long strip of 1/4" copper adhesive that would suit - a bit of paint and it could work well. I may not be able to get to any attempts for a couple of days - we're prepping my workshop our living room/dining room for painting.... hamilton
-
Well I just took a look at Andy's Pegasus log and his method of building up the quarterbadges....I do not feel confident that I could replicate this with the same stunning results, though the quarterbadge illustrated in Goodwin is much simpler....I may have a stab at both the simplified quarterbadge and the quarter gallery depicted above and see which I like best....to be honest this is a new approach to modelling for me, where usually I just throw on whatever's there! It's quite nice and somewhat more relaxing hamilton
-
Thanks all for the comments! And to Mark and BE for the guidance - much appreciated! Mark - the plans supplied by Corel are horrendous, and there is no perspective drawing at all of the quartergallery - though it seems that they have modelled their metal part on the drawing from Goodwin reproduced above....I took a look at the instruction booklet for the MS Constitution, and the assembly drawing included there for the Conny quarter galleries could serve as a starting point for reproducing the design shown in Goodwin's book - all I would need to do is re-calibrate the dimensions...but this kind of design would work well. BE - I will look at Andy's technique for the Pegasus...From my research it seems that the quarterbadge is more typical of the c.1719 era, while over the period toward the middle of the 18th c. these began to mutate towards the full quarter galleries - at this stage, the 6th rates also went through other modifications that are NOT represented in my build (such as an extended quarterdeck, the ship's wheel moved up onto the quarterdeck, a squared-off beakhead bulkhead, roundhouses at the bow, etc.). I'm tempted to go with the quarterbadge for historical reasons, my only hesitation being the high degree of decorative detail - I don't have Goodwin with me here, but if I'm right, the drawing you're referring to is of a quarter badge that looks very much identical to the one on Pegasus/Fly. My skills are so primitive that I can't imagine the results would be good....there is a drawing in Goodwin of a simpler quarterbadge that might work... I have some sculpy kicking around in my "modelling drawer" so I may have a go at the decorative element at the bottom if I go for the quarter gallery....I might be able to get the look of the semi-circular tiles with some simple carving - how would they have been finished, do you think? Would they just have retained the colour of the lead with no finishing? Anyway, thanks all once again for the input - it is great to find such encouragement coming from so many distant quarters of the world! hamilton
-
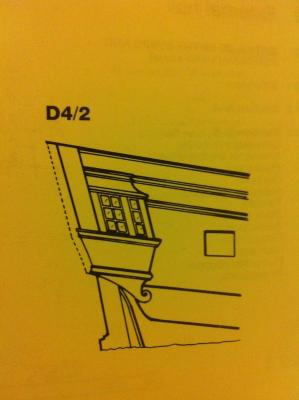
Now for the question(s).... I'm faced with the prospect of having to scratch build both the transom (which I had expected) and the quarter galleries (which I should have expected)...The metal transom is very badly done altogether and while the quartergalleries are not bad, they do not fit very well and would also clash (I think) with a scratch built transom.... So I've looked at the drawings in Goodwin's book, and here is the one that I think I will try to replicate: This is the simplest of the several quarter galleries that Goodwin pictures, which is kind of why I chose it....Anyway, I've never done this kind of thing before, and I have several problems with moving from the drawing to a 3-dimensional installation. 1. This is the only drawing in the book and it does not show any other perspective....so I can't get a sense of the real shape - I can make a guess based on the drawing, but it may take several attempts to work out the details.... 2. I'm thinking of carving it out of three solid blocks - one for the "roof" section, one for the window section and one for the lower section, fitting the moldings separately. Does this sound realistic? The decorative element at the bottom....I'm not so sure....I was actually thinking of sawing the bottom off the metal piece supplied with the kit and using that since it is roughly the same shape (though with more decorative elements)....feel free to let me know that this is a bad idea.... 3. The drawing gives no indication of how it should be finished.....the upper part is in line with the section of the bulwark planking that is painted blue...but I feel like it would be weird to paint it blue....I thought of painting this black, but this might not work either, since the moldings (which are roughly continuous from the moldings on the hull that extend from the cap rail and plank shear) are also black....so maybe I should keep the moldings black and stain the upper and lower part of the quartergalleries? Thoughts? The taff rail will be black, like the other rails.... -- As for the window area, I was going to blacken behind where the windows are, use 1mm x 1mm walnut, finished white, for the frames, and use dark walnut for the posts, with possibly some treated brass strips laid over the posts for an extra decorative element.... Anyway, any guidance or enlightenment you can provide based on these slender details would be greatly appreciated..... I was going to ask about the transom, too, but maybe I'll leave it with this first before moving on to that next challenge....thanks again to all in advance! hamilton
-
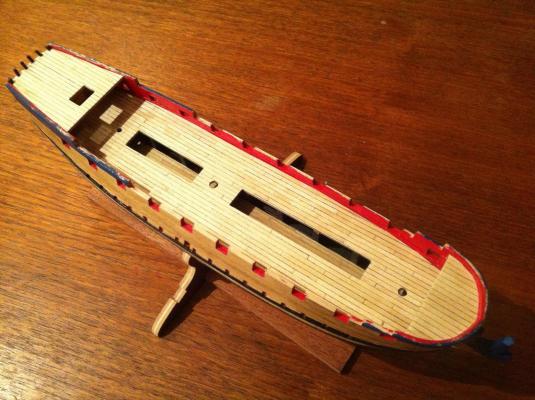
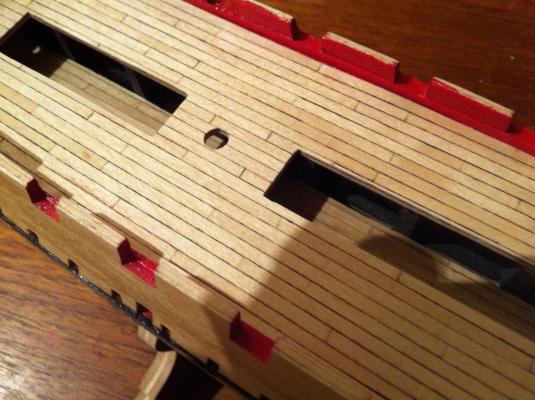
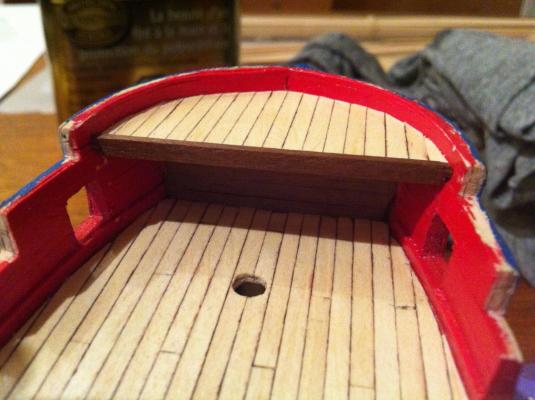
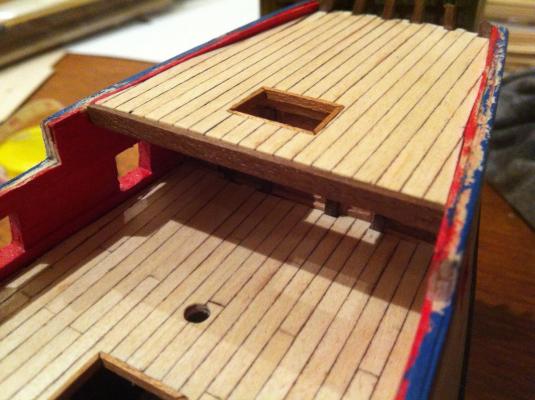
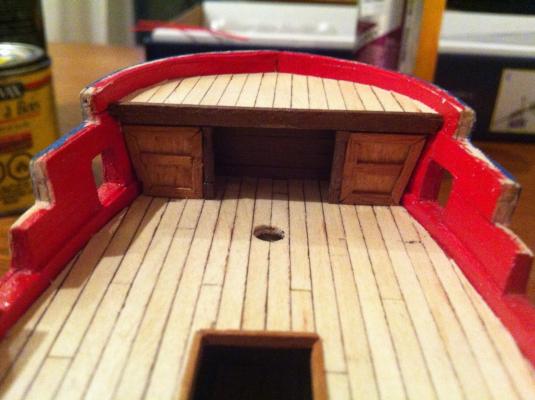
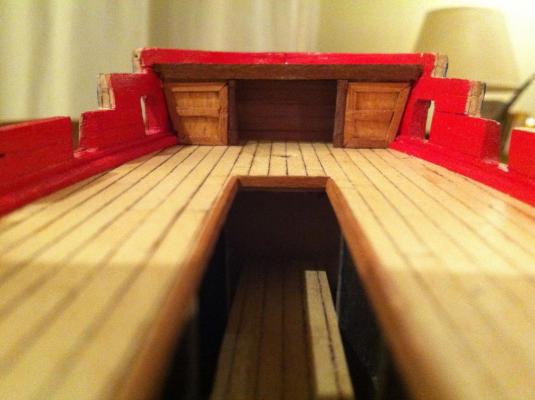
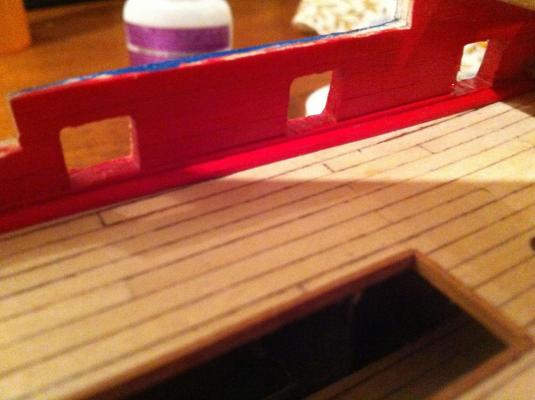
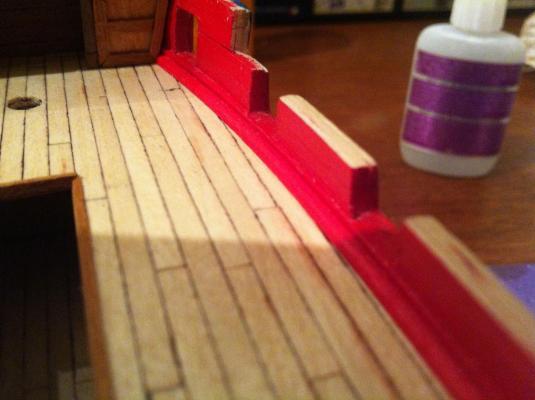
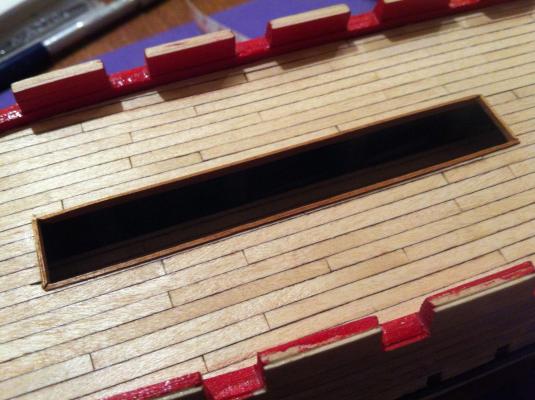
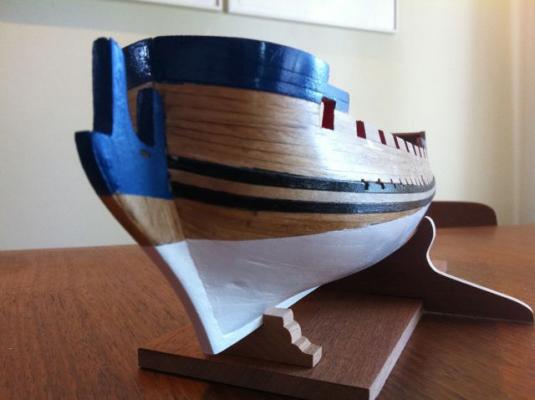
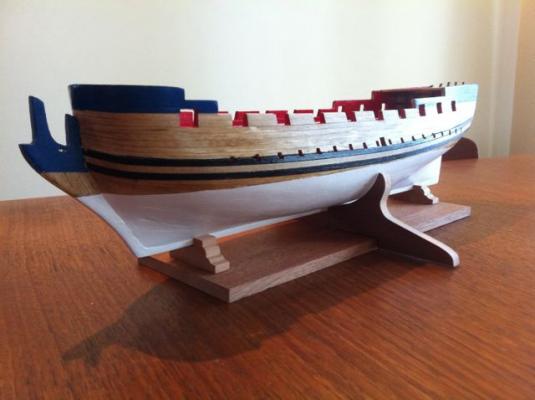
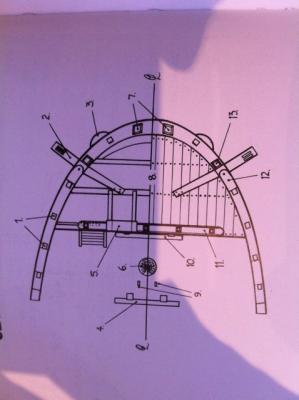
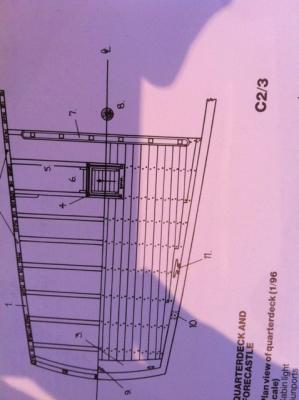
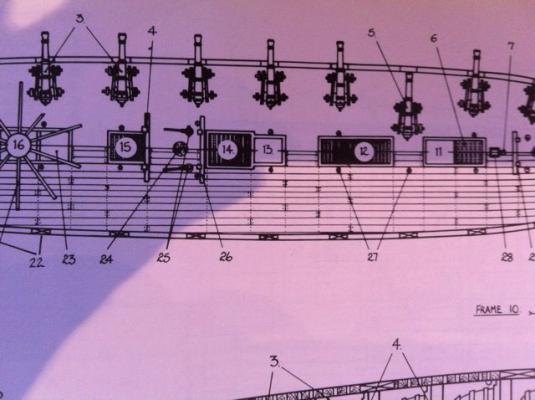
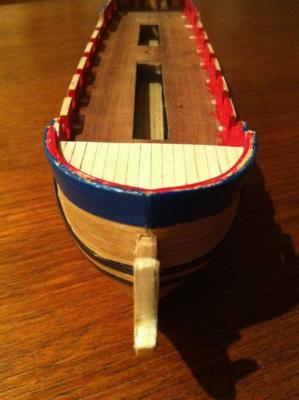
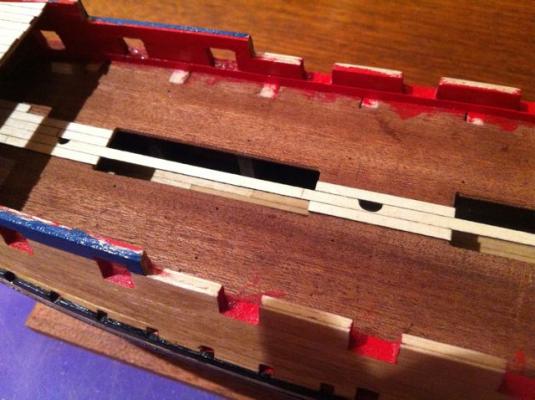
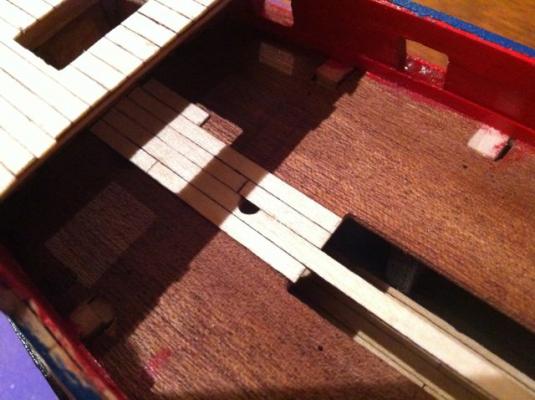
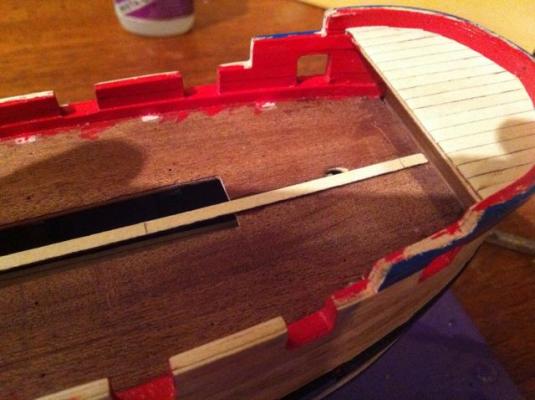
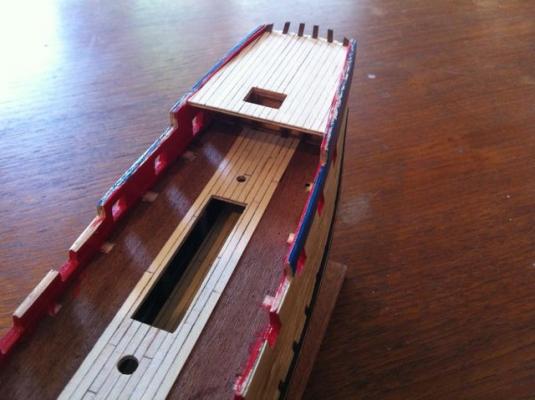
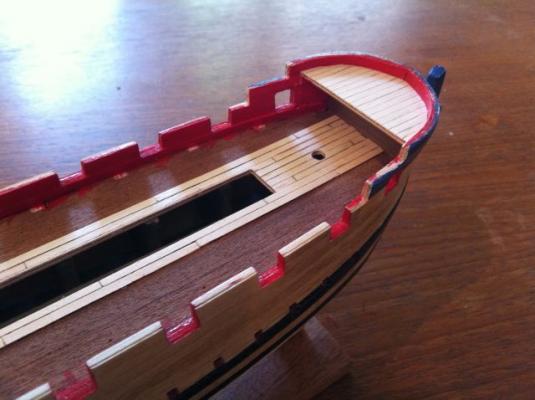
Ok - a small post after a bit of progress followed by another post with a question or two for you all.... I've now finished planking the deck, which brings my planking pretty much to a close (except for building up the transom)...Yay!! The next phase - hull, deck and bulwark detailing has begun.... My first step was to add the margin planks at the forecastle and quarterdeck, using 1mm x 3mm walnut - pretty basic stuff here....measure, cut, glue. I then added two half-bulkheads beneath the forecastle as outlined in Goodwin's Anatomy of the Ship. I tried these a couple of nights ago using quite thin (1/32") basswood sheet, but the basswood kept splitting and the one unit that I finished looked awful. So then I decided not to make this particular feature..... But (in a rare moment) I decided that it would really detract from the build if I did not include this small element, so I had another go and am quite pleased with the results - i used 1/16" basswood sheeting for the backing, 1mm x 2mm walnut for the frames and 2mm x 2mm walnut for the posts. Next I added the moldings around the hatch openings using 1mm x 2mm walnut. I also added the waterways on the main deck using 1/16 x 1/16" basswood filed and sanded into a roughly triangular section and painted red as with the bulwarks. It is very hard to notice on a cursory glance, but I think it turned out quite well.... Here are the photos.... hamilton
-
Hi Mobbsie: I've coppered only 2 hulls in my time - the Phantom and the Kate Cory. I didn't really worry about gore lines (though if I had read this log I might have taken a different approach). So far, your coppering looks great. Make a pot of tea and a sandwich or two and keep on going! hamilton
- 1,279 replies
-
- agamemnon
- caldercraft
-
(and 1 more)
Tagged with:
-
I'm a little late in adding my praise to your log but here it is - amazing work, sir! hamilton
- 1,668 replies
-
- syren
- model shipways
-
(and 1 more)
Tagged with:
-
Yet more impressive work Ferit! Can't wait to see the rigging once it gets going! hamilton
-
Thanks Mark - this is very reassuring to someone (myself) who tends towards laziness...in some things anyway. If you look closely at the photos on the box, it's clear that the prototype model was trunnelled - but the trunnels themselves look very oversized - not to knock whoever built the prototype, which is a very fine looking model. I can only imagine how difficult it is to obtain realistic and good looking results at so small a scale! And even when they are (as on the prototype) out of scale, I am always impressed at the effort that goes into adding these fine details. hamilton
-
Thanks all for your comments and support! Andy - I hope I can get to the level of precision you've attained in the masting and rigging of your Pegasus (which I believe I mistook for the Fly in an earlier post! - apologies!!) BE - yes, indeed. It's a relief to get over the hump, so to speak, with the planking! Augie - the scale has already defeated me! At least as far as the trunneling is concerned....I've pretty much decided against it - I think I could probably sort something out, but the idea of so much tedious work is overwhelming to me....I will definitely trunnel the deck on the Syren when I come to it - and the Bellona after that. Ferit - I'm honoured, as usual, by your compliments! Starting on the deck & hull details, I hope to get somewhere close to the cleanliness of your efforts on the Berlin! Mobbsie - thank you for coming by! Your Agamemnon is beautiful - and not to worry, more will come! I'm not sure if I'm sad or grateful that Sjors has not yet discovered my build log! (though I've been spying on his!) Harlequin - thanks! As mentioned, I'm also not going to bother with trunneling the deck....too frustrating, even for someone like me who normally relishes repetitive and tedious work! However, I do see a few complexities coming up in the near-ish future...I'm going to try scratch building a new transom, which I started working on a design for yesterday. This may lead me into a scratch building of the quarter galleries (it's likely that the contrast between the scratch-built transom and the kit supplied quarter galleries will be too garish)....I'm also concerned about the head rails and cheeks, which I'm also planning on scratch building...I've only ever scratch built one ship's head before - the Sultana, my second build...but I really want to take a stab at building it myself - as much for practice when the Bellona hits my table as anything.... I was looking at the model this morning and realising that the positioning of the double wale may alter how the cheeks and hawse pieces run....but this is still a bit in the future...in the near term it's the transom and quarter galleries that are occupying my thoughts.... In any case - thanks again all for coming by! Much appreciated - hope you're all enjoying the weekend! (though for some it may already be over!) hamilton
-

colour of waterway
hamilton replied to hamilton's topic in Building, Framing, Planking and plating a ships hull and deck
Thanks Russ and Druxey! hamilton -
Hi there: I'm wondering what I should do about the waterways on my HMS Blandford (kit bashed from the Corel Greyhound kit). I've painted the inboard bulwarks red, and the deck is varnished maple. The material supplied by Corel is dark walnut. So should the waterway be painted like the bulwarks or natural like the deck? Thanks in advance for any and all advice and assistance. hamilton
-
Beautiful work - what an impressive hull!! hamilton
- 1,279 replies
-
- agamemnon
- caldercraft
-
(and 1 more)
Tagged with:
-
Excellent work Jason - very precise and clean hamilton
- 800 replies
-
- snake
- caldercraft
-
(and 1 more)
Tagged with:
-
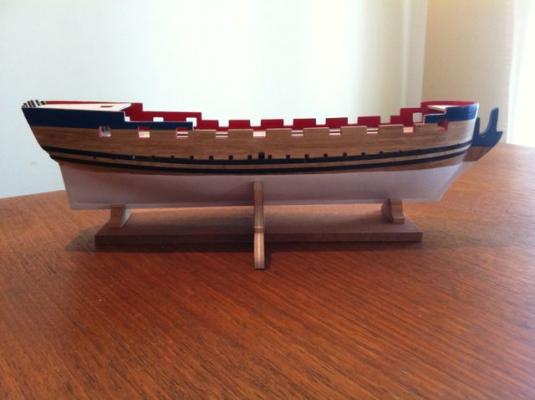
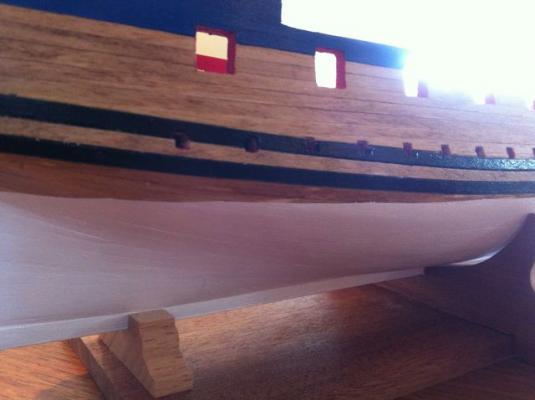
Alright - the hull is planked and finished and the deck planking has begun....photos follow, but here is a brief digest of the progress 1. Second hull planking - in the last episode, I had lined off the hull and laid the second planking in band "A". I needed 2 dropped planks on both sides in the first and third strakes below the waterline. In band "E" (close to the keel) I ended up needing a great number (4 on each side!) of steelers....Clearly my planking skills need work.....I was less concerned about this on this particular build, however, since the hull is finished below the waterline and the actual structural dimensions of the planking would be hidden - I suppose I could have simply said that the planking went perfectly and without a hitch! 2. Keel/stem/sternpost planking - the kit calls for 1mm planking to be used here - no way!! It's much too thick. I used .5mm beech supplied for the deck planking instead. A very straightforward process - I planked the stem semi-vertically from the waterline up, and horizontally the rest of the way. Very straightforward. 3. Hull finishing - The top of the stem from the lower wale upwards is painted blue. There is a patch of exposed wood between the lower wale and the waterline at both stem and stern. The lower hull is "tallow", though I painted it Titanium White. Marking the waterline was a pain, since the jig I built (a pencil taped at an appropriate location to a block of basswood) was a little unstable. But eventually I got it. I followed advice given by Randy (lamarvalley) and Nigel (NMBROOK) and applied several coats of poly to the unfinished hull. I then stained the upper portion with Golden Oak, waiting for it to thoroughly dry. I then masked the waterline, sanded below and gave it five good coats, sanding between. A final coat of poly to finish. -- One issue I encountered was with masking. In my impatience to finish the hull, I used scotch tape to mask the waterline. My experience using Scotch has been good - a nice clean line. The issue is that because it is transparent it is really hard to see....As a result when I peeled the tape back there were some jags at the waterline. I quickly went out, bought some Tamiya tape, re-masked at those points that needed correction and using a scalpul blade (and paint where necessary) made the corrections. 4. Deck planking - the f'csl planking was very straightforward. As for the quartedeck - Goodwin clearly shows a nibbed margin plank. At first I attempted to replicate this, but my efforts were both unsuccessful and exceedingly frustrating. In the end, I went with this simpler planking scheme. Goodwin shows no butts on either q-deck or f'csl. The main deck is planked in 60mm lengths in a 4-butt shift. This is shown clearly in his book - I determined the plank length using the deck planking calculator in the MSW database - very handy! I've not yet completed the deck planking, but you can see it in process below. 5. The stand - I constructed the stand - the parts took a lot of modification, but eventually I got a good fit. The hull is not permanently mounted yet - I won't do this until a bit later in the build. Anyway, that's it - more regular updates will follow now as I move into the next stage of the build. In the immediate future I will be: -- finishing the deck planking - considering trunneling the deck, but with 3mm plank widths I'm not sure I could take it!! What do you guys think? -- adding the rails - the plank sheer between the gunports on the main deck (which extends fwd and aft); the main cap rail (with similar extensions), the f'csl rail & the quarterdeck rail -- adding the quartergalleries (I'm using the kit-supplied ones, but I may have a stab at making new ones from scratch following the simplest of the suggestions in Goodwin -- building the transom - this is going to be a real challenge for me....but hopefully it will turn out ok. Alright - enough talk! Here are the photos hamilton
-
The crow's nest looks great! I had to look very hard to try to find the seam...I can only imagine it was very slow and painstaking bending these to shape without them splintering! Excellent work! hamilton
-
It's very late at night over here Harlequin, so I won't write long (need to get some sleep for an early am swim) - but she is shaping up very nicely - it doesn't look like you've had to do any bulkhead correction to get a nice fair run of the planks - phew! Looking forward to more hamilton
-
Yikes!! I didn't realise there was demand....don't you have enough to occupy you with your Berlin, Ferit? But I promise I won't leave you waiting for long....I'm waiting to resolve a question around the finishing of the hull and then I will reveal the results....In the meantime, keel planking plus deck planking will keep me occupied....photos soon I promise hamilton
-
Oh happy day! The hull planking is complete! Feeling good about it - no pictures to show yet - still have the keel, stem & sternpost to plank up and the finishing to do before I update....but the hard part is over....and it's looking.....well, not bad...phew! hamilton
-
Hello there: I should probably know the answer to this question - so sorry in advance for block-headedness....but.... I posted a question here earlier about how to prevent bleeding between the above-waterline section of the hull on my HMS Blandford (stained) and the below waterlne section (painted tallow). I got a great description of a process from Randy (RNBrook). There he suggested that I first apply stain, then coat with a few coats of polyurethane, allowing this to dry thoroughly. Then sand with 320 grit paper. Then apply paint. Sounds good to me and this is the way I would like to go. Here's my question - the paints I use are Golden artist paints (acrylic), while the stain is (obviously) oil based....so - do I use an acrylic or an oil-based poly? I'm assuming acrylic (for the sake of the paint) but will this have any adverse effects on the finish of the stained sections? Again, I feel myself getting dumber even thinking about this question, but if anyone could set me straight I promise to be more thoughtful in the future! Thanks, hamilton
-
Looking great, Augie - I like the natural wood finish on the spars - a nice choice, which I might imitate myself when I get to the Syren (in about a year's time!)... hamilton
- 1,668 replies
-
- syren
- model shipways
-
(and 1 more)
Tagged with:
-
Hello Ferit: The stern looks excellent! Someone (I'm sorry but I forget who it was) complimented you on the addition of the port lid rigging - looking at your stern, I almost feel that if I gave a little tug to the line, the gun port would open, and I would find a fully rigged canon behind it! Even if it's not really there, the detail you provide certainly provokes the imagination! hamilton
About us
Modelshipworld - Advancing Ship Modeling through Research
SSL Secured
Your security is important for us so this Website is SSL-Secured
NRG Mailing Address
Nautical Research Guild
237 South Lincoln Street
Westmont IL, 60559-1917
Model Ship World ® and the MSW logo are Registered Trademarks, and belong to the Nautical Research Guild (United States Patent and Trademark Office: No. 6,929,264 & No. 6,929,274, registered Dec. 20, 2022)
Helpful Links
About the NRG
If you enjoy building ship models that are historically accurate as well as beautiful, then The Nautical Research Guild (NRG) is just right for you.
The Guild is a non-profit educational organization whose mission is to “Advance Ship Modeling Through Research”. We provide support to our members in their efforts to raise the quality of their model ships.
The Nautical Research Guild has published our world-renowned quarterly magazine, The Nautical Research Journal, since 1955. The pages of the Journal are full of articles by accomplished ship modelers who show you how they create those exquisite details on their models, and by maritime historians who show you the correct details to build. The Journal is available in both print and digital editions. Go to the NRG web site (www.thenrg.org) to download a complimentary digital copy of the Journal. The NRG also publishes plan sets, books and compilations of back issues of the Journal and the former Ships in Scale and Model Ship Builder magazines.


