HOLIDAY DONATION DRIVE - SUPPORT MSW - DO YOUR PART TO KEEP THIS GREAT FORUM GOING! (Only 72 donations so far out of 49,000 members - Can we at least get 100? C'mon guys!)
×


GrandpaPhil
-
Posts
6,112 -
Joined
-
Last visited
Content Type
Profiles
Forums
Gallery
Events
Everything posted by GrandpaPhil
-
Welcome and nicely done!
-
Welcome!
-
Dumas also makes very basic model ship kits geared towards introducing kids to the hobby.
-
Welcome back!
-
Excellent work! That looks amazing!
-
Make sure you seal the paper on both sides with a clear sealant to protect it.
-
You’ll have to make a new account. The old ones didn’t transfer from their old website.
-
Very nicely done!
-
Welcome!
-
Greg, Absolutely incredible work!
-
It’s a Type 1934a Destroyer. I ran a quick search for a model kit of a Type 1934a Destroyer on Google and several kits turned up. You should be able to alter the markings to match the Z13.
-
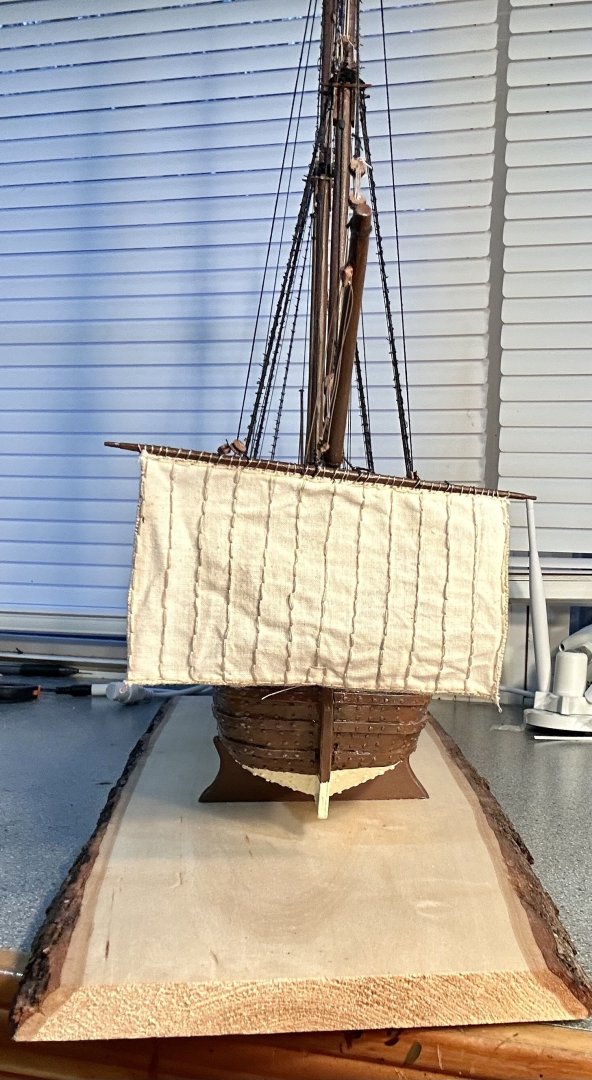
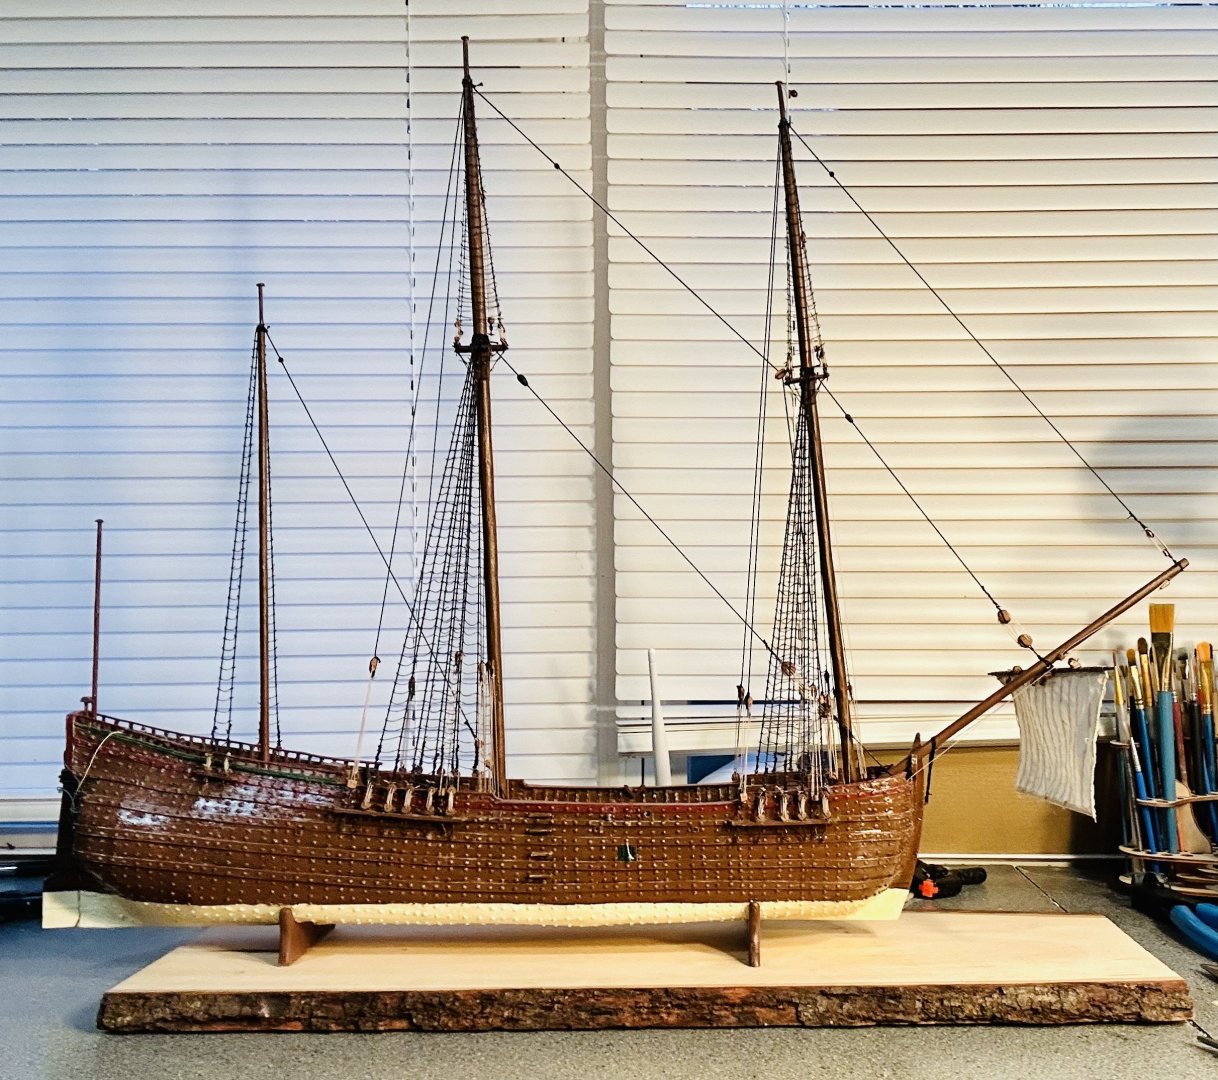
The sprit sail is on and with it, the running rigging commences! Needless to say, the sprit sail has several more rigging lines to be installed. This is only my second ever square/ship rigged ship. The first was Mamoli’s 1/100 Endeavour which had greatly simplified rigging and no sails. That one, built a decade ago, took me something like 3 months to rig. It was an 18 month build overall. Hopefully, I do better this time. I spent about four hours today studying the rigging plan to make sure I understood it.

-
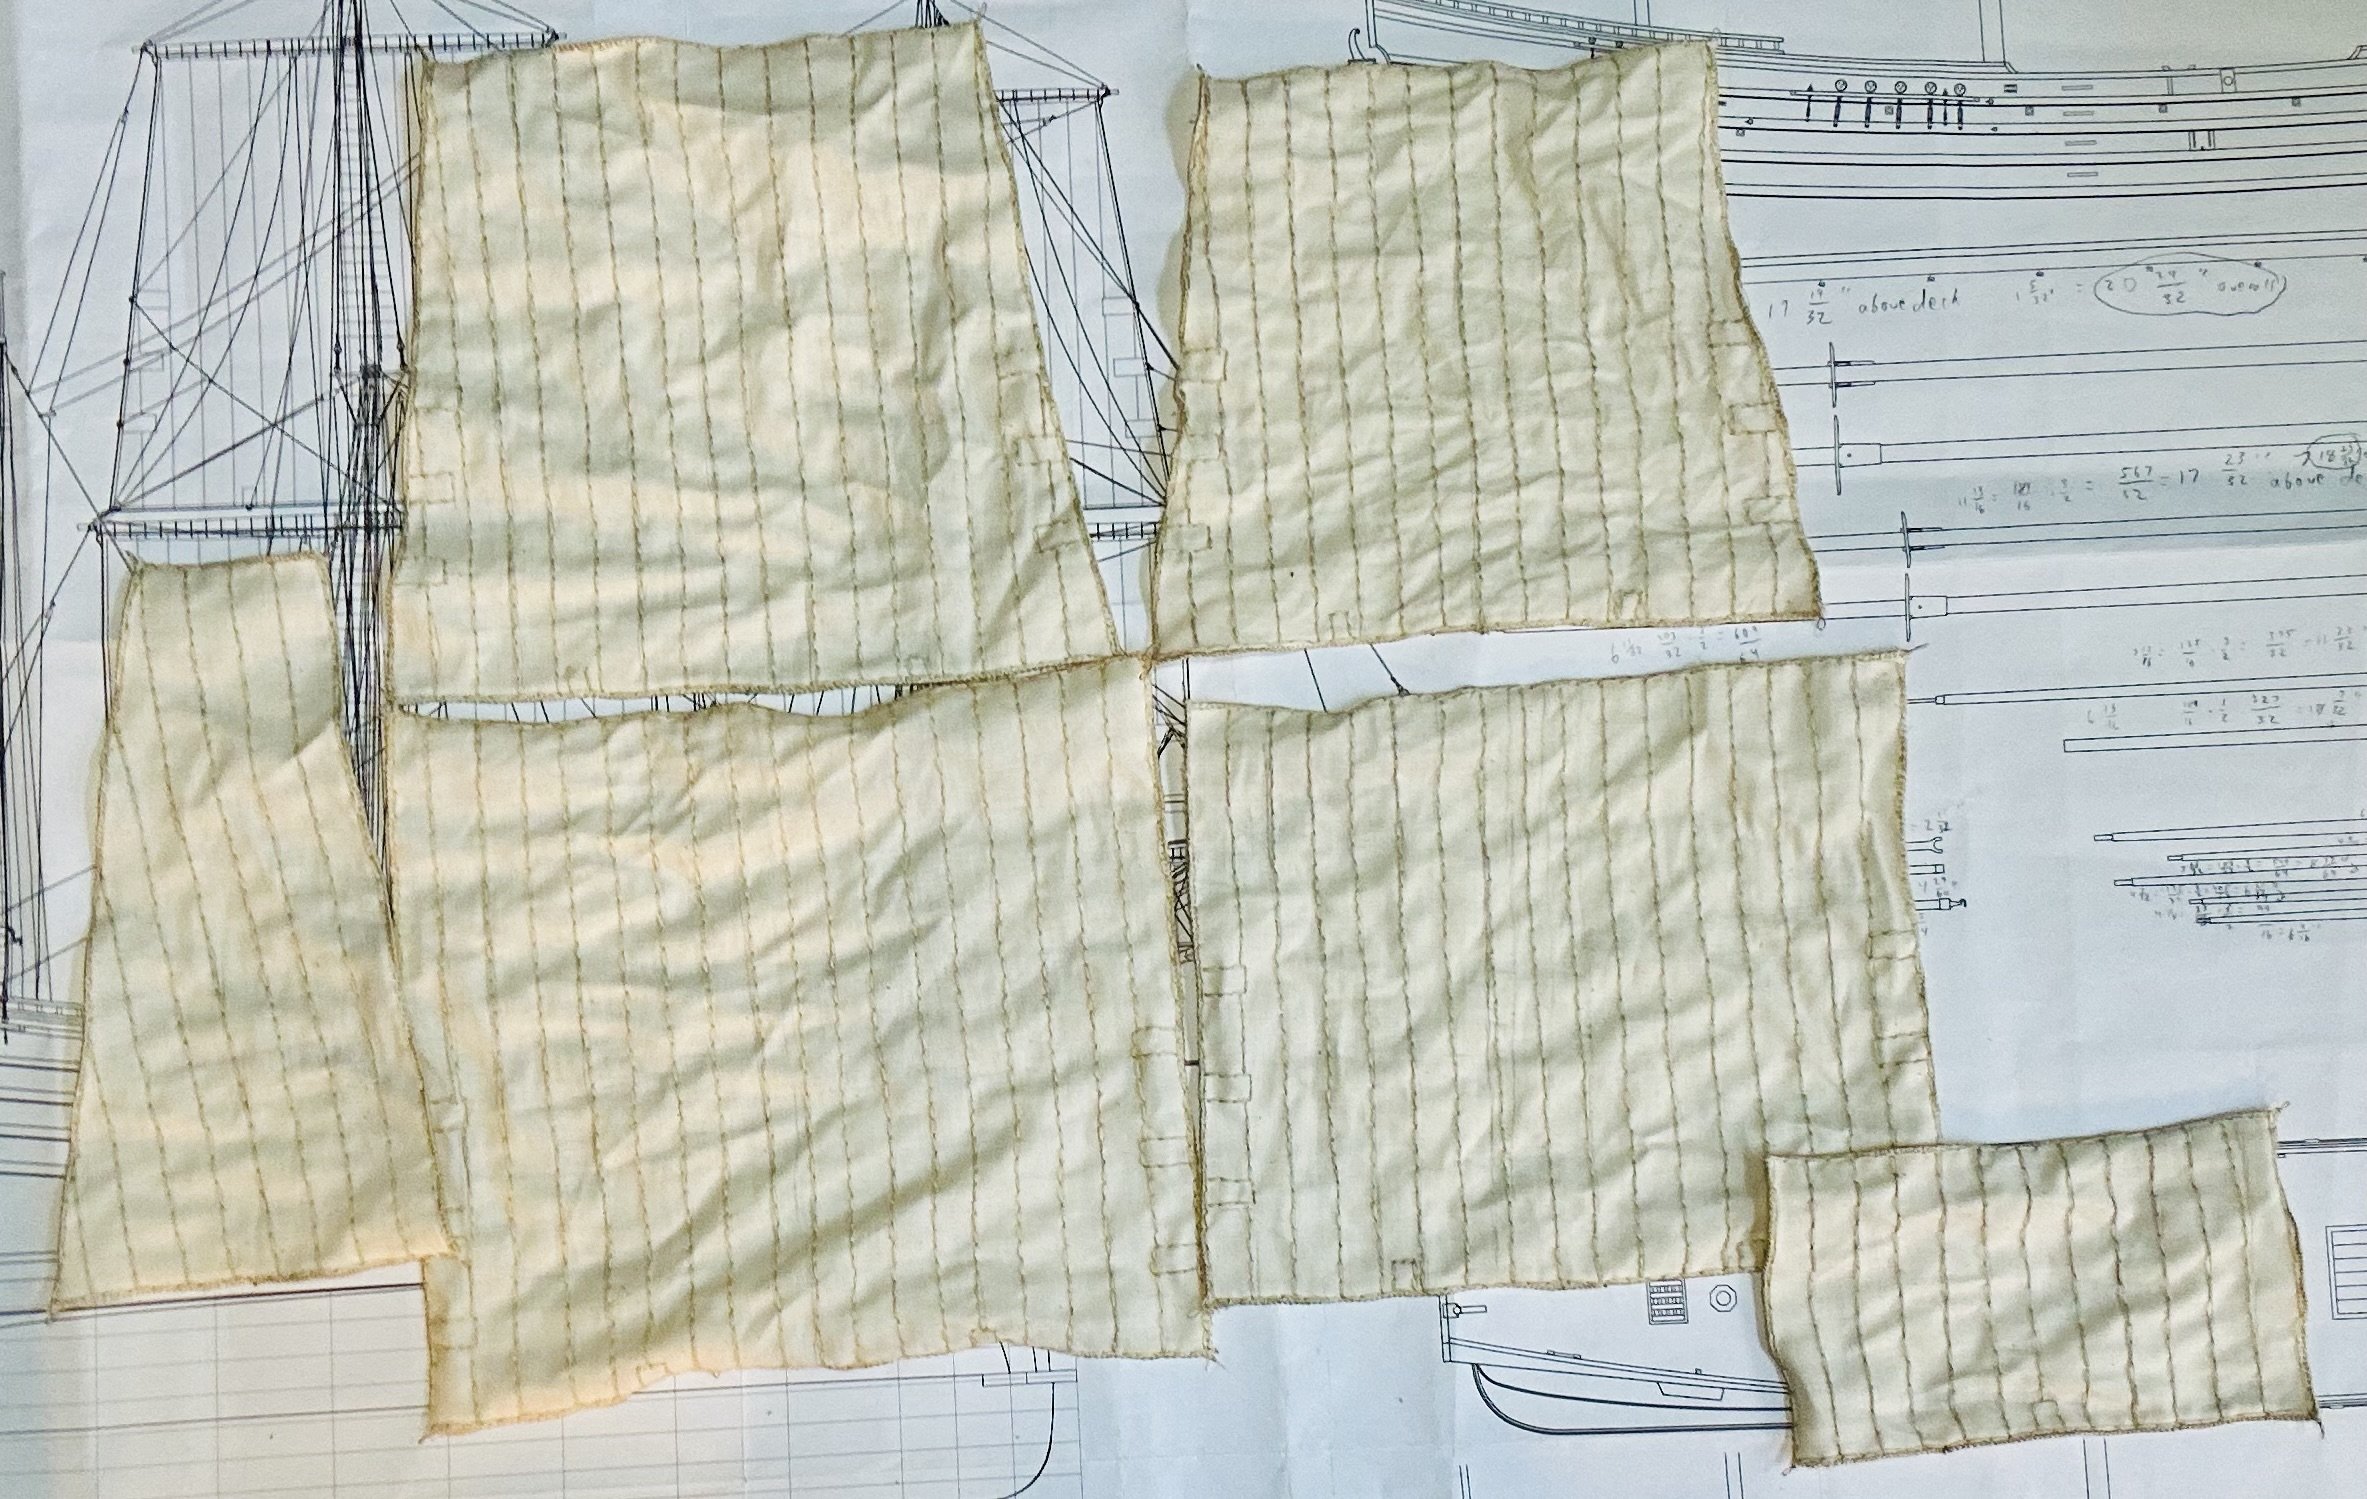
I have a full set of sails now: They are sewn from unbleached muslin linen with all purpose thread. The bolt ropes are upholstery thread. I just sewed them by hand. Next up, I need to wash them to try and remove the stray pencil markings as best I can. Then, I’ll iron them, prior to beginning the installation of them. The last time I did this, I learned how to install bolt ropes. This time, I am learning how to utilize parrels. I am learning. Hopefully, my Revenge and my de Zeven Provincien will gain a lot in quality from this build.

-
Welcome! Nicely done on Endurance!
-
James, The Albatross is looking good! I get the same way about missing working on a model after it is done. That just means that you will have to start another one!
-
Yves, That is awesome! I’m greatly looking forward to seeing this build!
-
Your spitfire is looking amazing! I think the nose art fulfilled the same function as the figurehead of a ship.
-
Very much looking forward to this one!