

AlanDavison
-
Posts
71 -
Joined
-
Last visited
Content Type
Profiles
Forums
Gallery
Events
Posts posted by AlanDavison
-
-
-
The long bolt at the front (muzzle) is the pivot, the gun can be moved left or right aided by the wheels at the back. the short bolt, ties the spacer,(middle timber) to the base. The gun is elevated/ depressed using the rear screw device. I this instance the bed would have extended out over the gun port cill and fixed to it. This is not shown in the diagram.
- mtaylor and chris watton
-
 2
2
-
Chris,
From something I recently read, these gun brigs were rowed when inshore in shallow water. Perhaps the tiller was used to steer when rowing? The wheel being used when under sail in deeper water and using the drop boards.You might consider providing a set of oars in the kit, as this would make an interesting display, what do you think?
- Canute, thibaultron, AJohnson and 3 others
-
6
-
A intriguing layout.
The 24 pounders look as though they would be difficult to control, especially as the breaching ropes either side of the gun would have to be of such different lengths. I can see the gun slewing all over the place when recoiling.
Might not the guns be mounted on rails or sledges to stop this?
- mgatrost, AJohnson, chris watton and 2 others
-
5
-
I read somewhere that the breaching rope should be three times the length of the gun. Seems right to me!
- Peanut6, mtbediz, Thukydides and 1 other
-
4
-
You may be interested in a Seaforth publication called ‘German Naval Camouflage’ published in two volumes, volume one looks at the period 1939-1941 and includes detailed colour schemes for Bismarck. Volume two covers the period 1942-1945.
The books are an excellent reference and study of German warship colours and camouflage and are well worth reading.
Incidentally, in response to Joe100’s comment about grey boot strips, according to the Seacraft authors, Bismarcks boot topping was actually black at the time of its sinking (see p9 of vol 1)
-
-
But most importantly we’re here for the enjoyment and fulfillment of our hobby, be it plastic, wood, metal, ship, aircraft, tank or vehicle
- mtaylor, Snug Harbor Johnny, Canute and 1 other
-
4
-
8 hours ago, Snug Harbor Johnny said:
I'll never knock using plastic (at least as a 'starting point' with care and research added) after seeing some of the great plastic-based builds on MSW. Check out Cutty Sark by Bruma ... THERE is a masterpiece based on the classic Revell CS kit, but with a number of 'busts'. Krill did a masterful rendition of a Spanish Galleon - having a SUPERB paint job and outstanding rigging. Rob Riederrich has used the Revell CS not just for the Cutty, but also modified into the Glory of the Seas. The present U.S.S. Arizona build shows what the incorporation of PE details can do. I could go on, but I think you get the picture.
We're into this not just for the result, but the journey of building and the learning and experience gained.
PS: To see either my Wasa (Vasa) in progress, or the completed Khufu barge, you can click on either link at the bottom of my posts. I've done other stuff, but a lot of it doesn't exist any more.
-
You might find what you are looking for from David J Parkin who is in the Uk. He does a range of 1/72 scale fillings for the Revell Flower class corvette in a range called Great Little Ships. Among the range are sets of 3 & 4 rail stanchions in white metal, they can be a little fragile but are nevertheless quite usable. Hattons on line mail order model shop also stock the range.
hope this helps- mtaylor and Keith Black
-
2
-
Ps I mean shapeway not Safeway. Sorry about that
- thibaultron, mtaylor and Canute
-
3
-
You can order with confidence from them. Also look at the Safeway site, they have a range of sailing ship fixtures & fittings from various 3D printers which you may find useful
- thibaultron, mtaylor and Canute
-
3
-
In response to James H’s earlier post, I thought one of the points of this site was for Chis to discuss the future and existing development of his range with member and to gauge their responses, that will inevitably end up something of a ‘wish list’, but it does help Chris to take into account modelers likes and dislikes and that in turn helps him to plan future projects which he can be confident in selling.
- thibaultron and Canute
-
2
-
Obviously you are a highly skilled model maker as you finishing is of the highest standard. It’s just a pity that you have chosen such a poor example of a an eighteen century warship. Would love to see what you could do with one of the kits in the new Vanguard models range👏👏
-
Looking very good. Regarding decals, it is usual practice to apply a coat of gloss varnish over the whole model as this means you can slide the decals around for fine adjustment before final fixing . Johnson’s clear (yes the floor polish) or it’s equivalent is often used. Also consider using a Decal softener and fixative so that the decals follow the surface contours. After all that you then apply your final coat of Matt or semi-Matt varnish to tone down the gloss. Weathering using powders, oils and so can also be added if you want a ‘used’ look
- mtaylor, Canute, popeye the sailor and 4 others
-
7
-
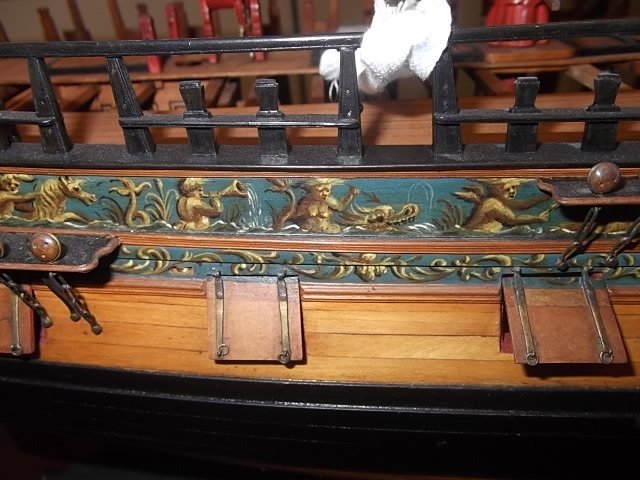
Lightest colour first, darkest colour last is my mantra. So brown, green, black
-
I align the steps both horizontally and vertically using fine pencil guide lines then glue with PVA wood glue or Super-‘Phaltic glue.
For the channels I drill and pin the channel, offer the channel to the hull, mark the pin positions then drill and glue with PVA.
I can’t use superglue as an allergic to it, but apart from that I think superglue dries too hard and is not able to accommodate any slight movement in the wood and ends up cracking.
I also use Super-Phaltic for attaching PE parts to the model
Alan
- HardeeHarHar, Canute and mtaylor
-
2
-
 1
1
-
-
Only problem with tapering planks with an inverted plane is that you are likely to taper the ends of your fingers as well!
Not to be recommended
-
Hi Mark,
its me again!
Sorry,I am still concerned that your quarter galleries are still too high at the stern.
Can I suggest that you check that when you can still fit the stern rails (step 237), the quarter gallery fretwork (step312) and the tile roof (step 319) as designed - I think you might have a problem, and if so, better sorted now that later.
However if you are happy with what you are doing, then please continue, after all it your build.
Just trying to be helpful.
Alan
-
Mark,
Looking at the picture in your post 170 it looks like the quarter gallery is set at the wrong angle, ie to high at the stern where it meets the stern facia - if you look at the plans and building manual photos you will see that the roof of the gallery should be more of less parallel to the top of the rear side pattern. It may be that your only option for correction is to de-construct the gallery, clean up and reattach.
I have also noticed that some of the tags which held the laser parts to the main sheets have not been completely removed, thus producing a gap between parts which should butt up as close as possible to each other. It may be only a millimetre or less but it can throw the whole build out of alignment and create all sort of problem later on in the build, this is particularly true of a "Sphinx" build which has very fine construction tolerances.
Hope you don't ming the criticism, it is meant to be constructive.
AD
-
I never thought that a suggestion for possibly including a flag as part of a kit would raise such a strong reaction.
I wish I had never mention it.
-
2 hours ago, glbarlow said:
As another opinion, I’m not interested in flags or stands and wouldn’t want an increased cost of the kit for something I wouldn’t use. I appreciate the stand you do provide. Actually I appreciate the nice coaster I found in the box even more.
Each to his own. As much as I like the coaster if I had a choice I would go for a Blue ensign, or white or red!
- Old Collingwood, mtaylor and BobG
-
3
-
Wonderfull build, wonderful kit. All we need now are some flags. Any possibilities, Chris, James?
HMS Indefatigable 1794 by Glenn-UK - Vanguard Models - 1:64
in - Kit build logs for subjects built from 1751 - 1800
Posted
Hi Allen,
my best suggestion is for you to google “carronade” on Wikipedia, you will find all that you need to know, including plans & pictures. Also on this site you can find a very long (500+pages) on smooth bore canons. Happy researching