VTHokiEE
-
Posts
1,528 -
Joined
-
Last visited
Content Type
Profiles
Forums
Gallery
Events
Everything posted by VTHokiEE
-
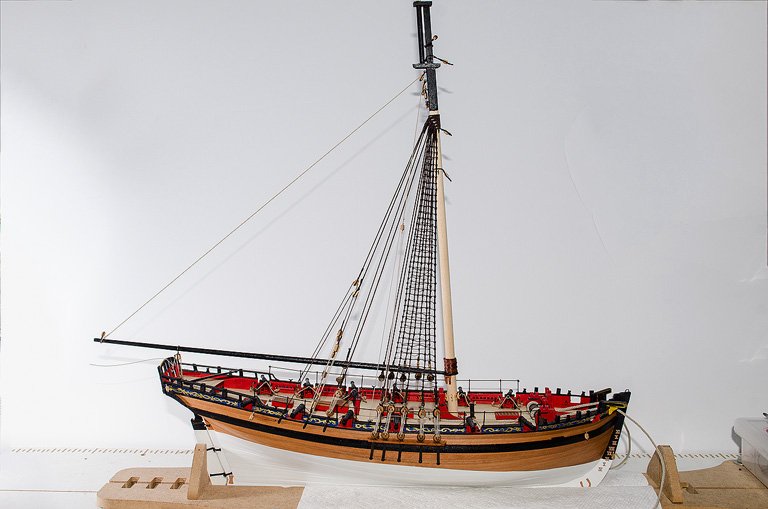
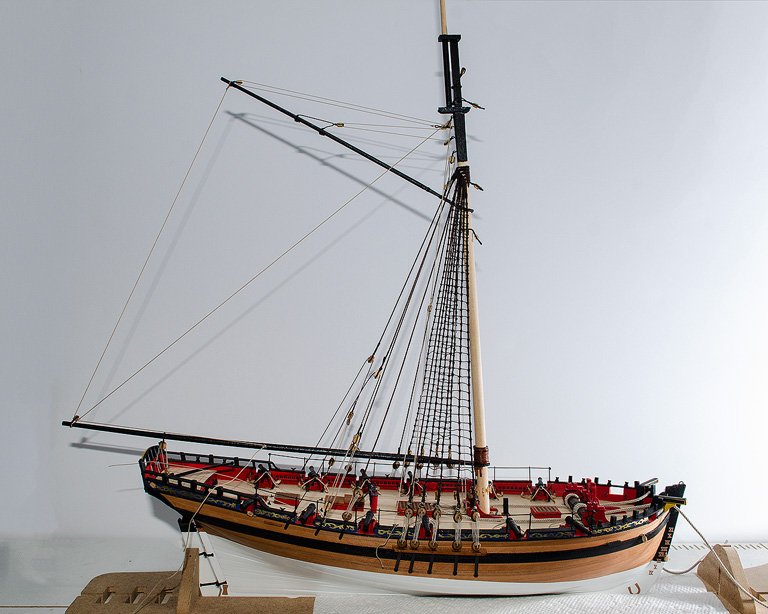
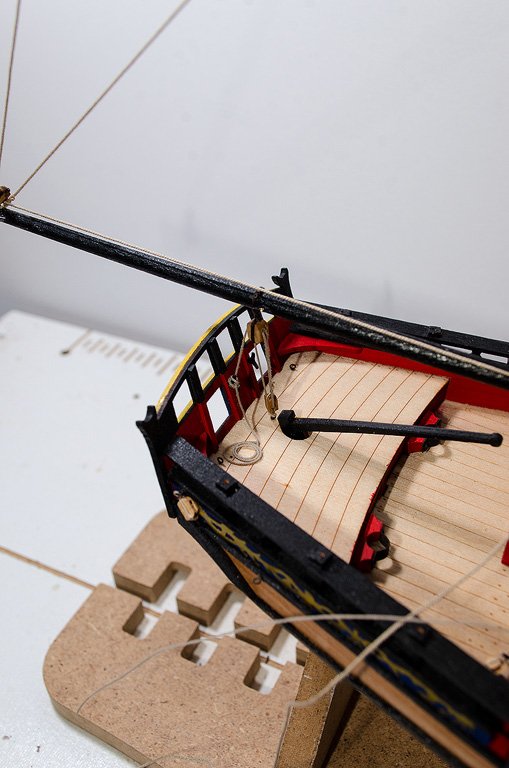
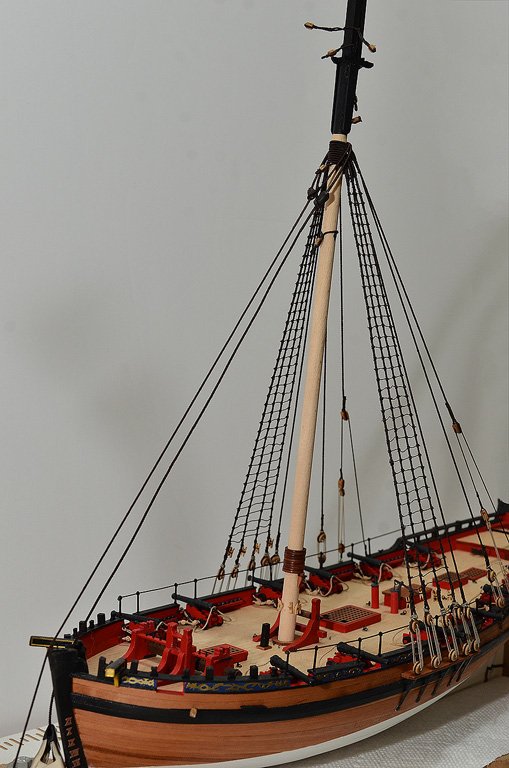
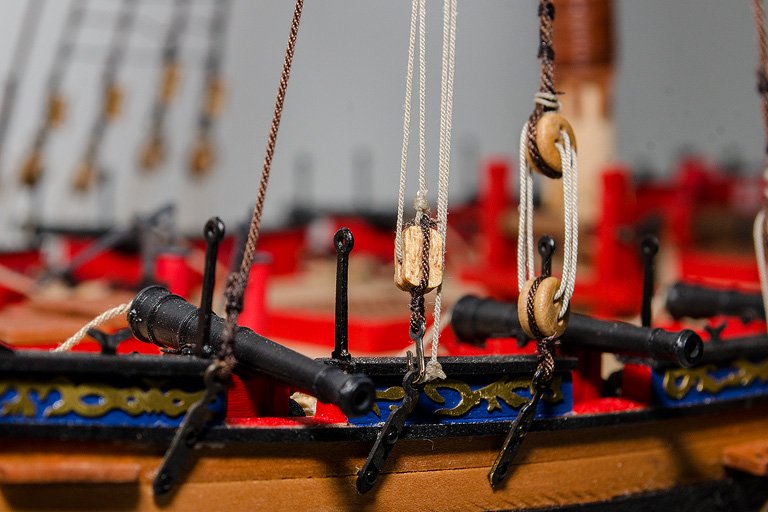
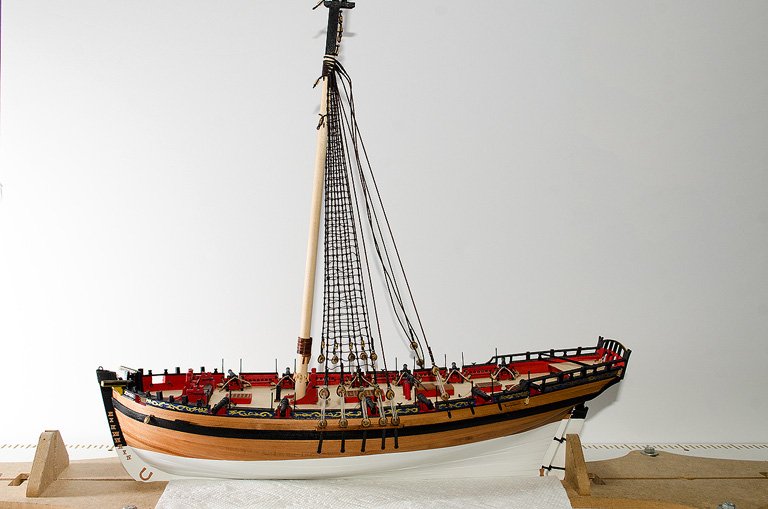
 Raising the booms - pretty much stuck to the plans. I will note that I got ahead of myself and forgot to attach the iron bands on the main boom before installing it . I thought about leaving them off completely (they aren't part of the kit instructions) but it is one detail that I (for whatever odd reason) really wanted to add. After sleeping on it I decided to use the black card in the kit to cut thin strip and glue them onto the boom while it was in place and I think they came out well. I originally was planning on using heat shrink tubing, but the card worked great. Some lines I've trimmed off and others I have kept long. Since redoing a few lines I think I may trim the remaining ones "closer" but leave some length for a little while in case I need to tighten or redo anything (and do that going forward).
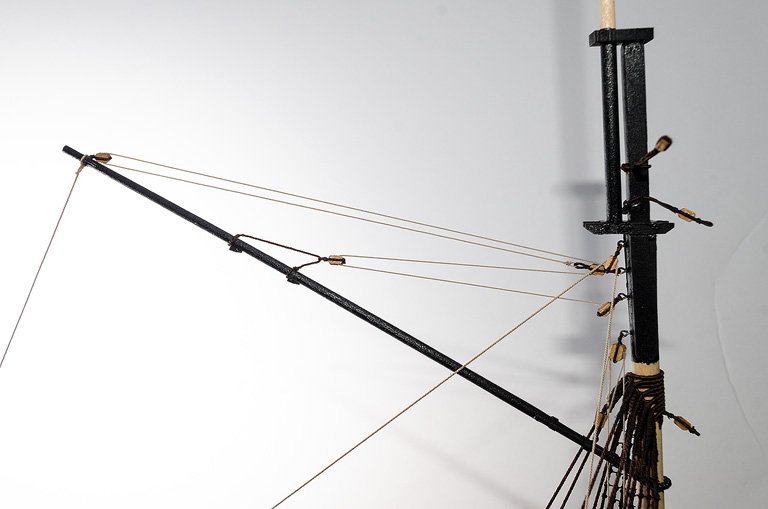

- 436 replies
-
- 22
-

-
- vanguard models
- alert
- (and 1 more)
-
That’s very interesting - cleaning with lemon juice. I wonder if that would be a reasonable way to clean brass bits before blackening (of course for some odd reason I’d feel odd raiding the lemon juice). Looking forward to the build when you start in earnest!
-
I’ve been contemplating something similar (exposed frames) for the future and the CAF Le Coureur is one of the few kits that I’m aware of that is POF and would allow for exposed frames. An alternative could be scratch building a section to expose frames in that area maybe?
-
Really a beautiful job and such great detailed explanations! It is awesome to have such a detailed starting point even if someone decided to do it a little differently. Keep up the great work!
- 778 replies
-
- 3
-
-
- cheerful
- Syren Ship Model Company
- (and 1 more)
-
Thanks Glenn! I am enjoying the rigging - but still finding my footing. It doesn’t feel quite as straight forwards as building out the hull. Every time I think that I know what my next step is I change my mind 😂. That said I think I’m starting to see a plan formulate for myself.
- 436 replies
-
- 4
-
-
- vanguard models
- alert
- (and 1 more)
-
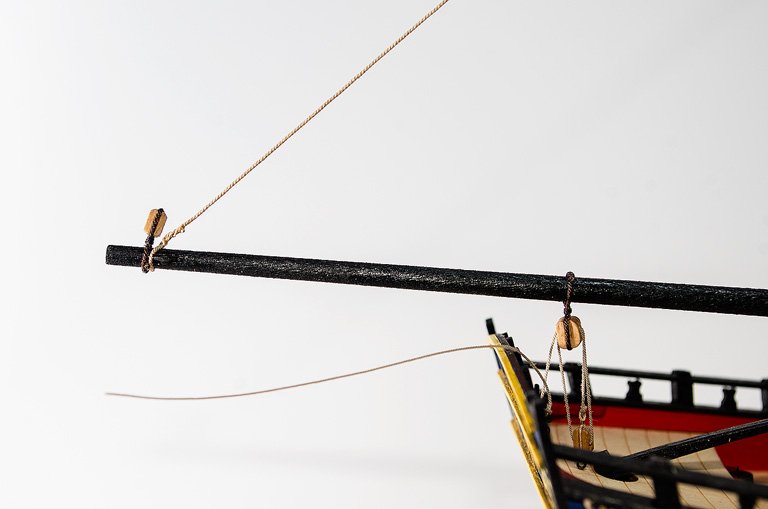
Thanks OC and BE! I placed both in-situ and I think they will do nicely. I repainted the first one (and I would've said I mixed it the same as the second mouse) but the color still seems slightly off but I think I'm going to press on. Of course during this exercise I decided I should install the boom's first so I have nothing in the way of the parrel beads. I'll detail my indecision on the bowsprit incase anyone has any thoughts on it while I continue. I'm trying to reconcile two blocks on the bowspirt, the instructions show 5 blocks, but the AotS book depicts 3. The instructions use two of these blocks to run the topgallant yard bow lines. As far as I can tell the AotS does not include these lines and thus doesn't include the blocks. Does anyone have any idea what could cause the discrepancy? I understand that the AotS book is not perfect, so should I run these lines?
- 436 replies
-
- 10
-
-
- vanguard models
- alert
- (and 1 more)
-
Le Coureur by PC52 - Mamoli - 1:54
VTHokiEE replied to PC52's topic in - Kit build logs for subjects built from 1751 - 1800
I’m glad the LEGO bricks are working for you! I must say I was a little nervous when I saw that you chopped them off so it’s good to know that it didn’t slow you down. I’m not certain what the metal is (aside from a generic white metal). Hopefully someone can help identify it. How much bend does it need? -
Thanks Edward, it means a lot! I’m starting to think that I need to see the mouse in place with the stay collar and see how it looks. Of course I also “need” (maybe want is more appropriate) to try repainting the mouse and see if I can get a better match (and fill in those darned crevices 😂).
- 436 replies
-
- 2
-
-
- vanguard models
- alert
- (and 1 more)
-
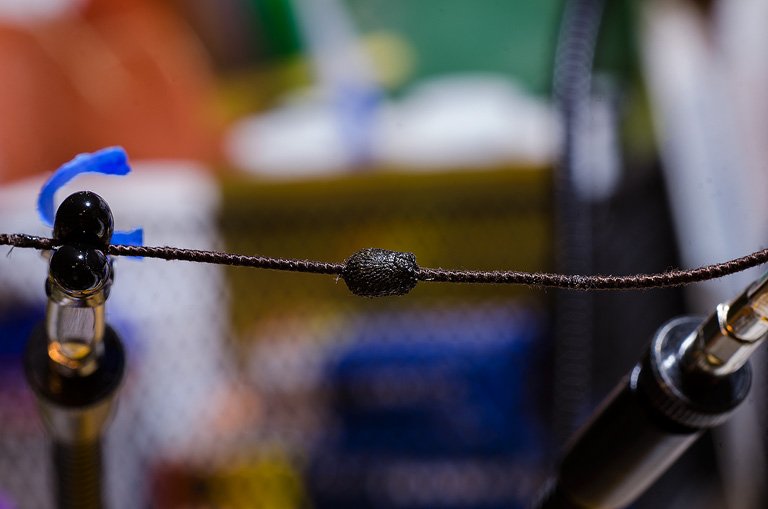
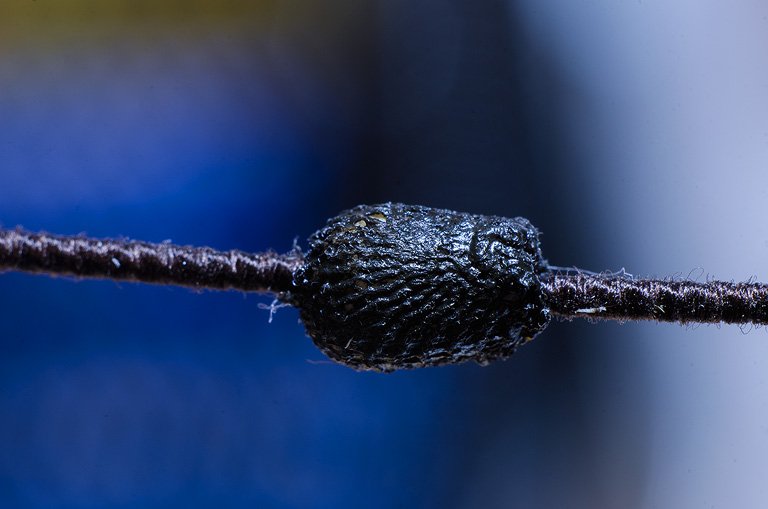
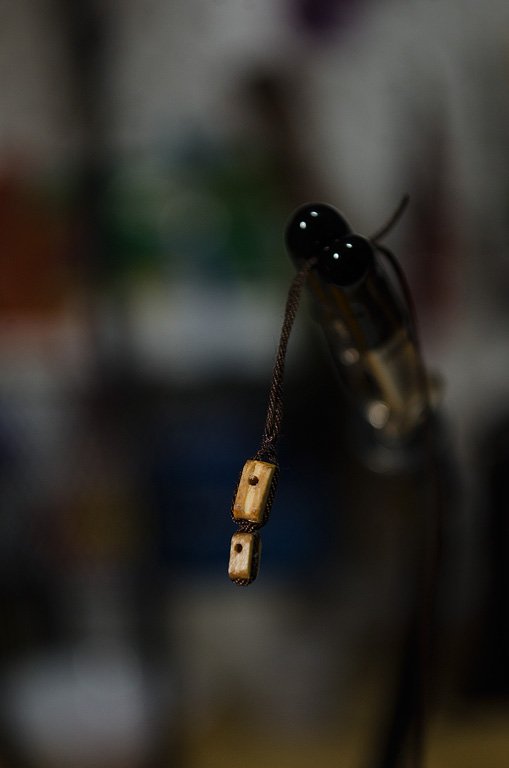
I'm not certain how to approach the bowsprit yet - follow the kit directions or try to get closer to the details in the AotS Alert book. Since I'm undecided there I thought I'd try making a mouse. I turned a small wooden shape in my drill with files and sand paper, but once I put a weave (tights material) on it, the shape seemed to disappear. Then to make matters slightly worse I've never mixed my own paint and found out that I'm not so great at color matching (it is close, but I think it needs a touch of red). I am currently planning to redo it, but I thought I'd show a picture of my first attempt (in the hopes that my next one is much better). I also found out, upon closer inspection, that the paint didn't get into all the crevices.
- 436 replies
-
- 13
-
-
- vanguard models
- alert
- (and 1 more)
-
Le Coureur by PC52 - Mamoli - 1:54
VTHokiEE replied to PC52's topic in - Kit build logs for subjects built from 1751 - 1800
I would have thought that those cat ears would've provided support for the bulwark planking? Are you certain they aren't needed while you plank the hull? Do you have a picture of it? -
Thanks BE and Edward and everyone for the likes; I’m really enjoying myself 🙂!
- 436 replies
-
- 2
-
-
- vanguard models
- alert
- (and 1 more)
-
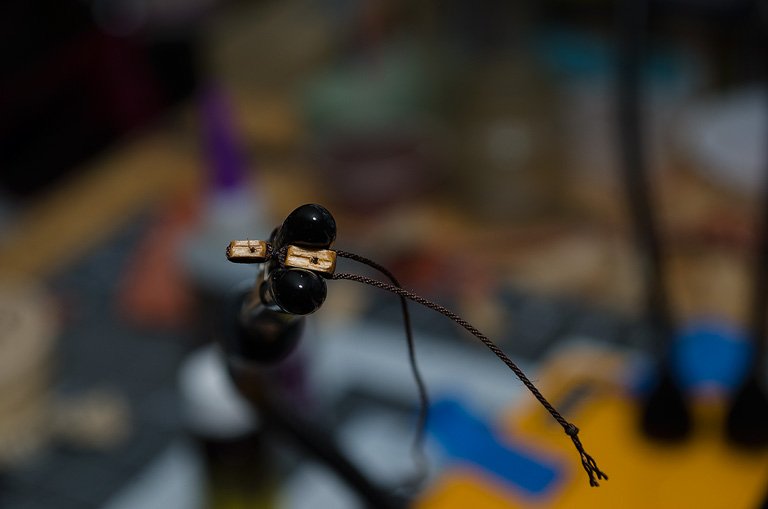
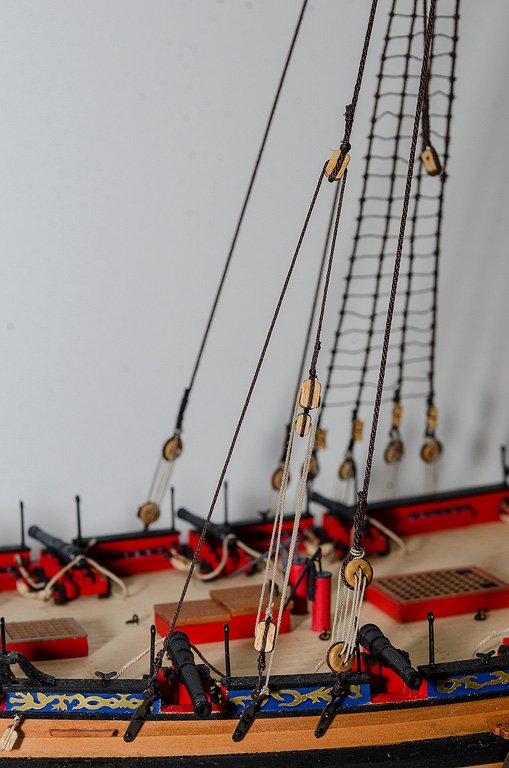
I started work on the back stays and am about halfway through. The kit instructions call for a small block and a large block to be attached together, I think this should probably be a fiddle block, but I don't have any so I decided to see what I could do following the directions. First, as seen below, I tried to seize a small block to the large block but the gap was too large and I needed to redo this. I realized that I should do a false splice between the two blocks to reduce the space and ended up with the follow which looks much better (even if the picture shows a larger gap). Satisfied with this block I completed one side of the back stays. The instructions do not call it out, but I believe the diagrams show a hook, so this is what I used as well. I may have to go in with a small brush to touch up the blackening on the hook with a touch of paint though.
- 436 replies
-
- 14
-
-
- vanguard models
- alert
- (and 1 more)
-
Looks great! For whatever reason a solid hull (never done one) seems scarier to me than bulkheads with the sanding and shaping and you did a great job!
- 100 replies
-
- 3
-
-
- pauline
- BlueJacket Shipcrafters
- (and 1 more)
-
Great picture - this is exactly what I meant, but possibly not exactly how I explained it 😬.
-
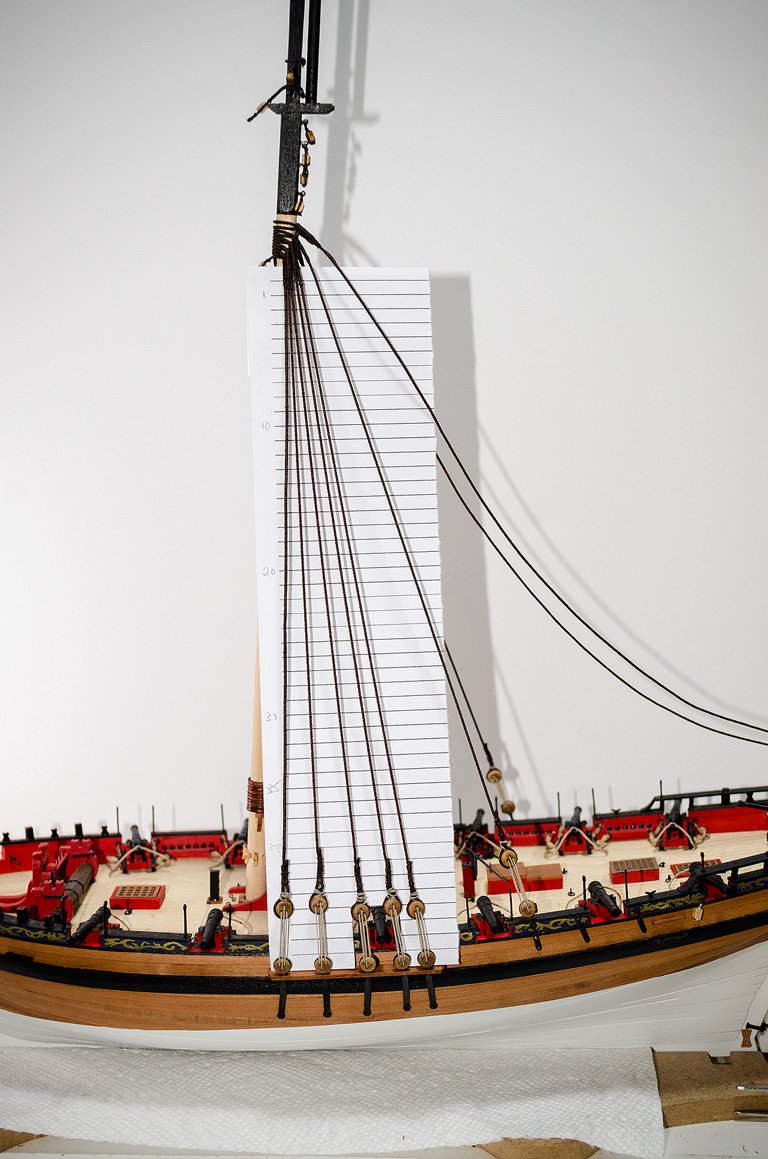
You guessed correctly 😁, a little bit of a rough season so far unfortunately. Here is how I tied them together on model (please note that you can do whatever works for you, this is simply an idea that worked for me) - https://modelshipworld.com/topic/22920-hm-cutter-alert-by-vthokiee-vanguard-models-164/?do=findComment&comment=769279 Spot on there, if you look further in my log you can see that I printed off a sheet of lined paper to get the spacing that I desired and traced the shroud lines so that I had a template to work with for the ratines. You would run a single shroud up, loop it, seize the loop off at the mast and then trim it so there is only one line coming back down. If you want to get into historical accuracy you'll have to find a rigging plan for your model to determine which line was a single and which were doubles (for my model I am using an Anatomy of the Ship book). Hope that helps!
-
Not typically - The easiest way is to make them in pairs but they loop around the mast and then back down to the same side. The next "loop" will go to the opposite side. (I think you mean shrouds, the ratlines are the small ropes that connect horizontally). This is what I did, to me it seems that connecting the deadeyes together off model and then attaching them on model would be trickier, but I've never done that.
-
That’s a solid tip. I have a soldering iron but need to get a needle tip for it. I still have some nubs, so I’ll have to consider this. Thanks!
- 436 replies
-
- 1
-
-
- vanguard models
- alert
- (and 1 more)
-
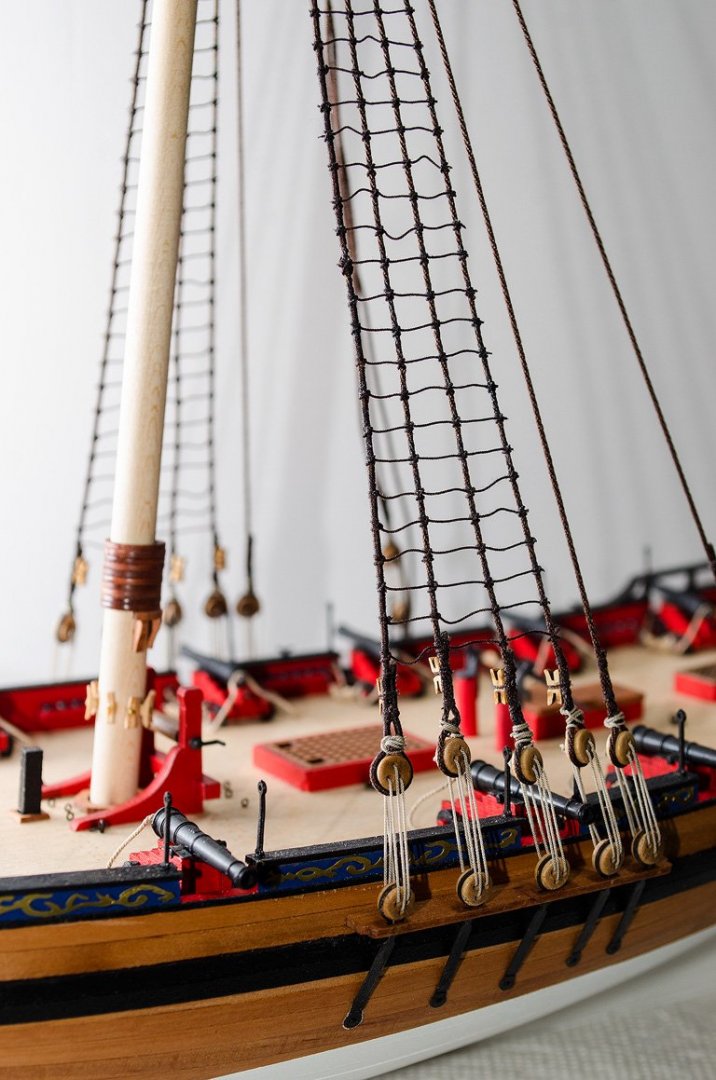
Ratlines are finished (I think, just when I think they are done I find that I clipped a knot too short and a line came lose, but I'm pretty certain that I found all of those). The bottom ratline I think was the final "loose end" as can be seen in this picture.

- 436 replies
-
- 12
-
-
- vanguard models
- alert
- (and 1 more)
-
Unfortunately, it looks like you may have done the lanyards backwards. The knot (EDIT: I mean the knot holding the lanyard at the dead here) should be inboard, and if you tie it off inboard you may not notice the knot (EDIT: I mean the knot on the shroud here) as much. I don't have the book, but I've been heavily referred to purchase The Fully Framed Model Rigging a Sixth Rate Sloop of War 1767-1780 by David Antscherl. I have used “Ship Modeling from Stem to Stern” by Milton Roth for some hints as well. I unfortunately don't have any blog threads to point you too aside from searching build logs on here (sorry).
- 34 replies
-
- 1
-
-
- model shipways
- 18th century longboat
- (and 1 more)
-
For threading blocks and deadeyes I put a little bit of CA glue of the end of the rope to harden it and create a needle to pass through the holes. Generally the holes shouldn't be significantly bigger than your rope which means that a tool won't really work well if everything is close to the proper scale.
-
I apologize for the slight hijack, but do you have a link to these pictures at all? I have been considering rigging my Alert with furled sails and I’m beginning my search for inspiration.
-
Whoa, I’m very impressed. I also can’t wait to see the rest!
-
I really need to pick up these books (and then actually read them), they seem to be a wealth of knowledge. I actually thought about this technique (why didn’t I do it, who knows?). I’ll have to keep it in mind for my next set. I’m starting tho think I’ll consider redoing some (hopefully not all 😬) of the first side or else I’ll stare at it later (even if it’s facing the wall).
- 436 replies
-
- 4
-
-
- vanguard models
- alert
- (and 1 more)
-
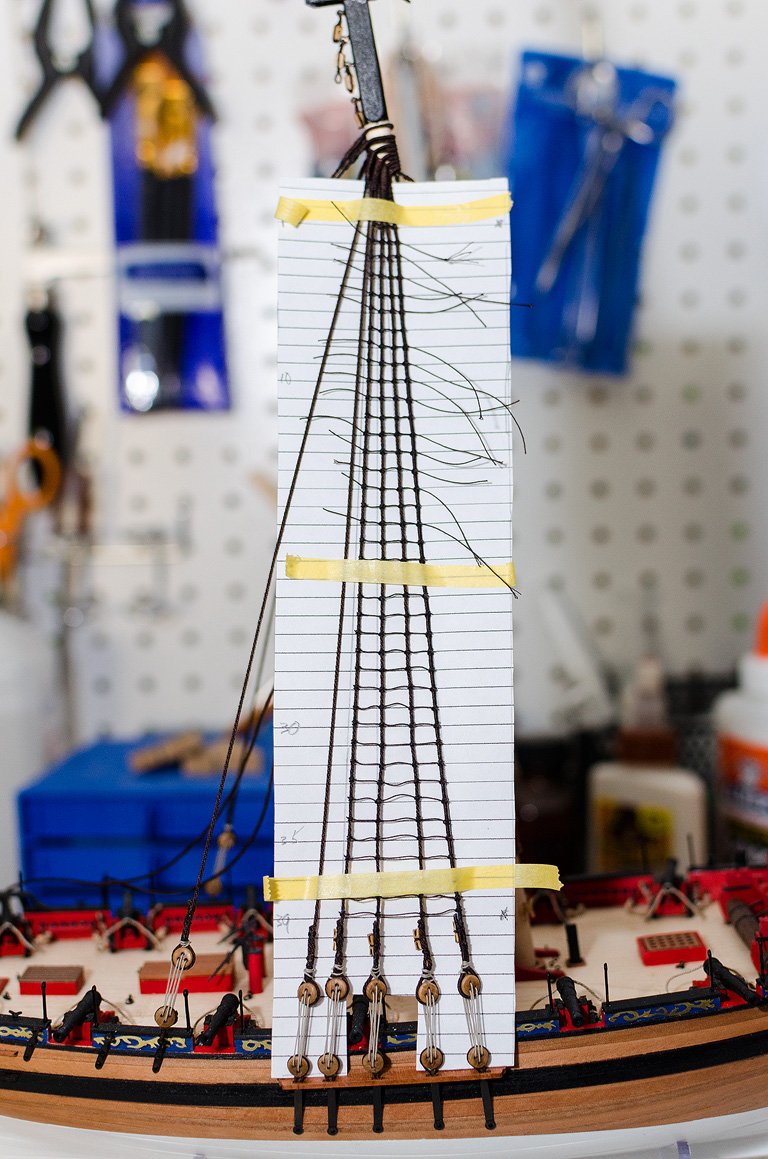
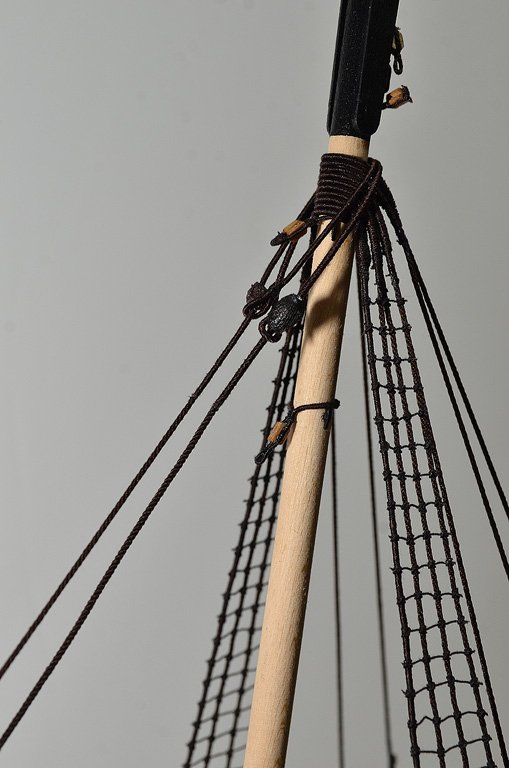
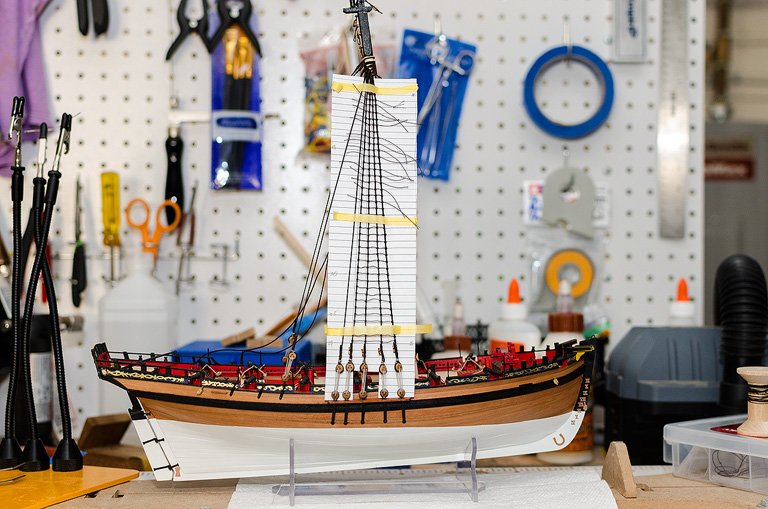
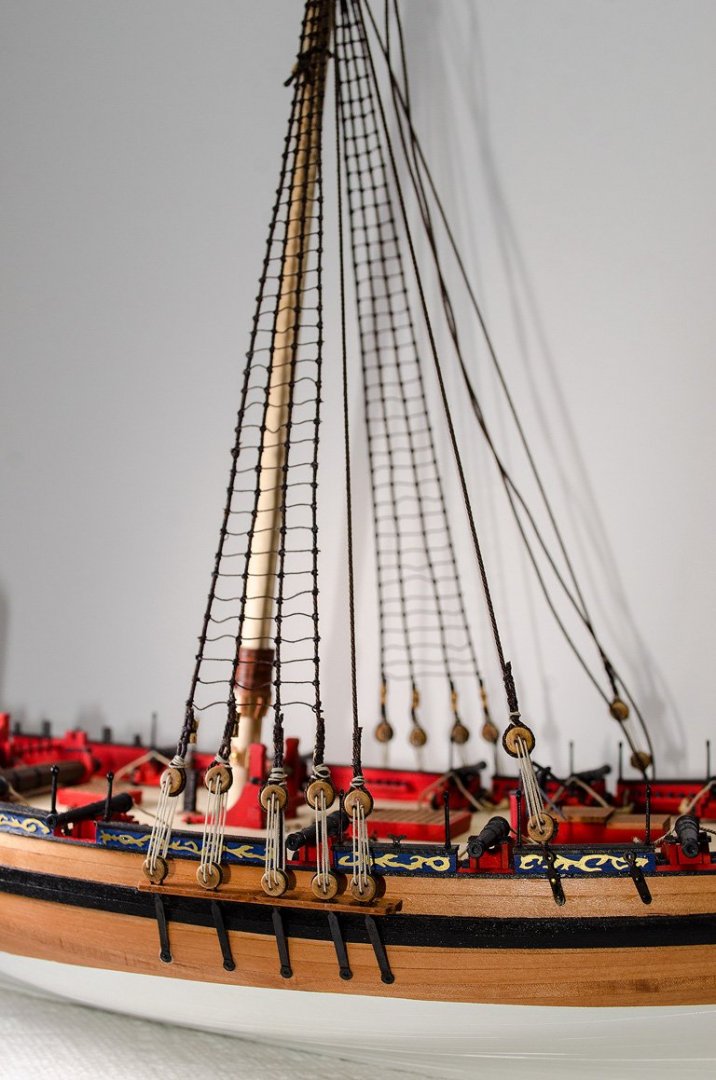
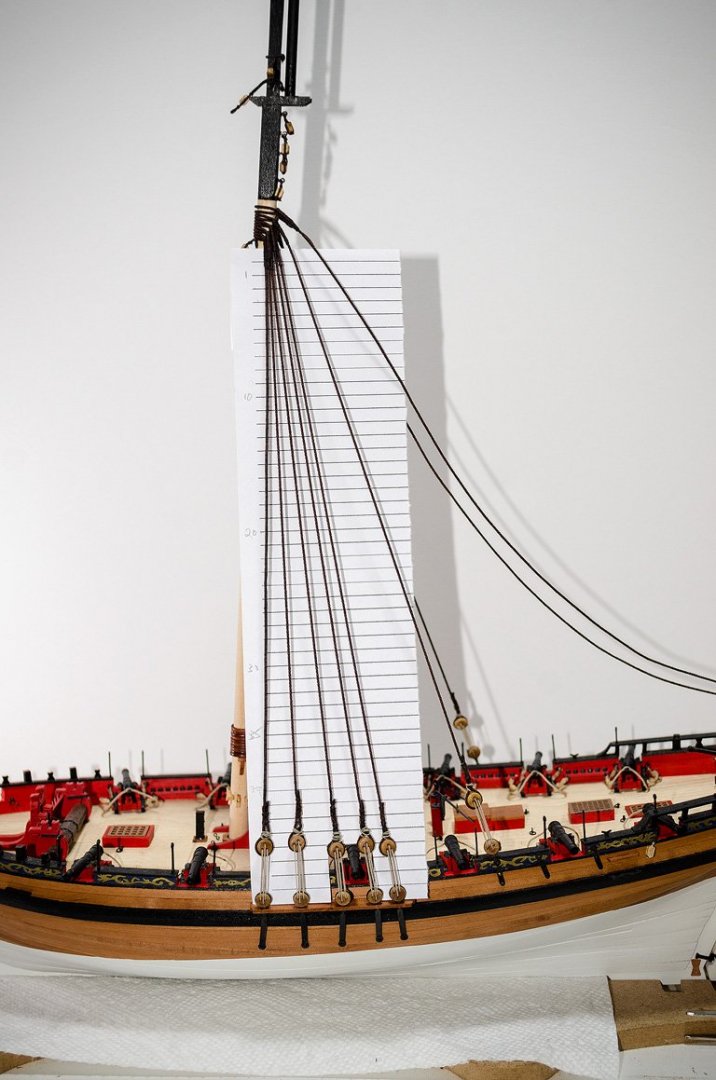
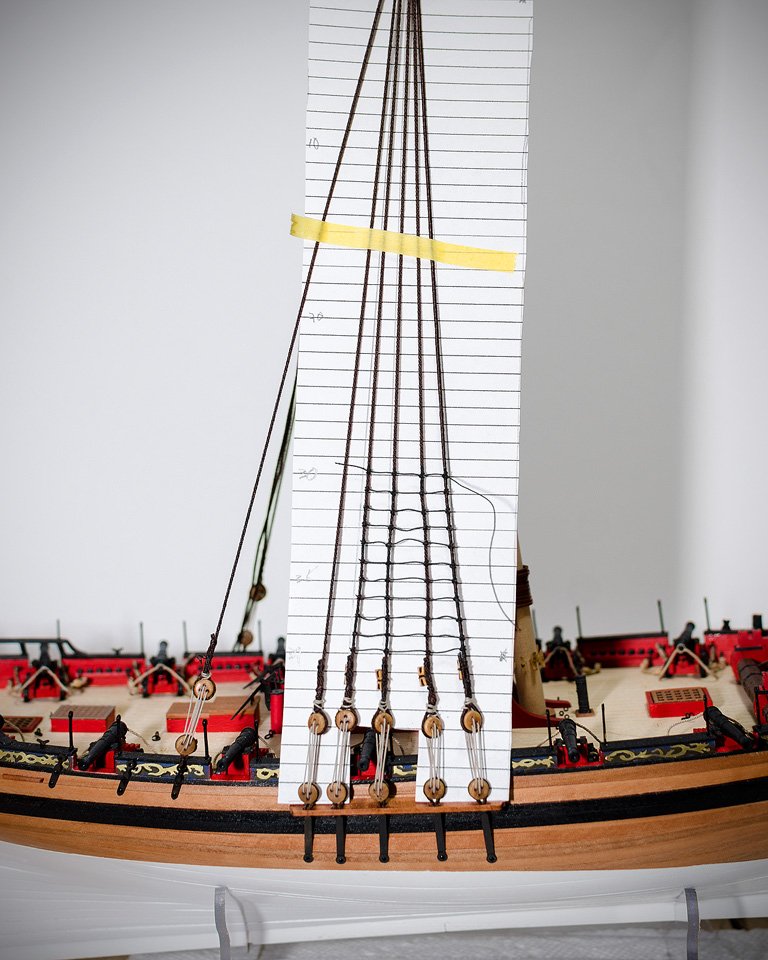
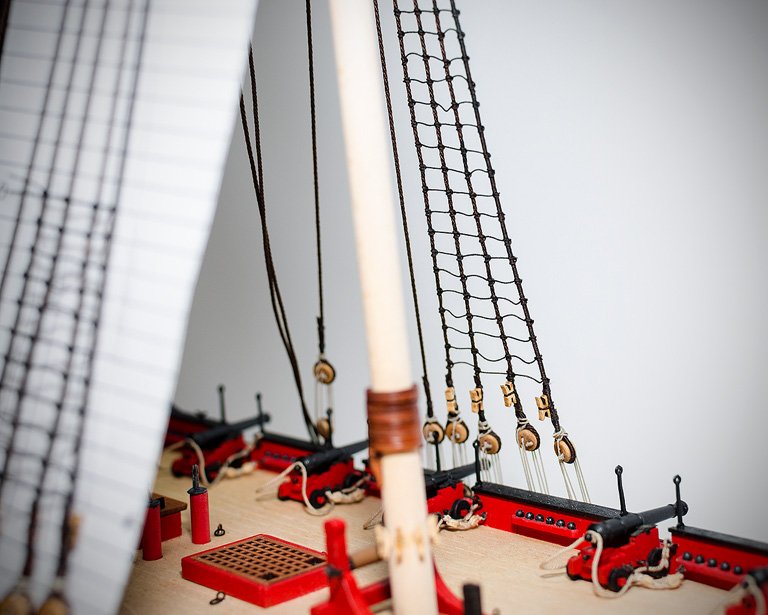
Update on the ratlines and I wanted to highlight this advice. I really should have taken it to heart but I didn't fully comprehend it until I was done with my first side of ratlines and they are a touch squeezed in a lower section. I'm undecided if I'm going to redo them or allow my ship to have a "bad side" (which really isn't that bad so I'm of the inclination to leave them as they are but we'll see). This is what I started with and you can see no "vertical" lines to show where the shrouds should naturally lay. After realizing my error you can see the outline of the shroud lines that I drew in on this sheet. I placed some dots at the top and some down by the deadeyes, then I removed the sheet and connected them with a steel ruler. It's still not perfect (it looks worse in the picture than in real life, especially with the paper removed), but it is closer than the first side and for my first time doing ratlines I'm satisfied so far. Here is a small glimpse of the other "finished" side. Edit: I also placed the ship in the stand to get the ratlines lined up with the waterline.
- 436 replies
-
- 12
-
-
- vanguard models
- alert
- (and 1 more)
-
Glue first layer planks?
VTHokiEE replied to Rivals's topic in Building, Framing, Planking and plating a ships hull and deck
Do you feel like your planks required a lot of force to fit them on the first planking? The second layer shouldn’t really pull on the first layer. If you’re concerned I would brush some on at the bulkheads but I probably wouldn’t do the entire hull. I think the advice above makes sense, it’s not going to hurt anything and if you think it’s needed then go for it.