


VTHokiEE
-
Posts
1,528 -
Joined
-
Last visited
Content Type
Profiles
Forums
Gallery
Events
Everything posted by VTHokiEE
-
 Thank you all for the likes and comments. It would appear that I'm rounding third on the Alert. I have basically all the lines rigged and have been working a little bit on the detail work. On my to do list is to finish the rope coils, rig the anchors, and try my hand at making an ensign for her. I also purchased an 18' cutter mini kit from Vanguard to distract me while I whittle away at the remains. I plan to display the cutter behind my Alert in a similar fashion to the Cole model. Speak of display, do anyone have any recommendations for cases in the US? Also, how much breathing room around the ship feels right to you all? I know some don't like cases, but I don't like dusting even more 😁.
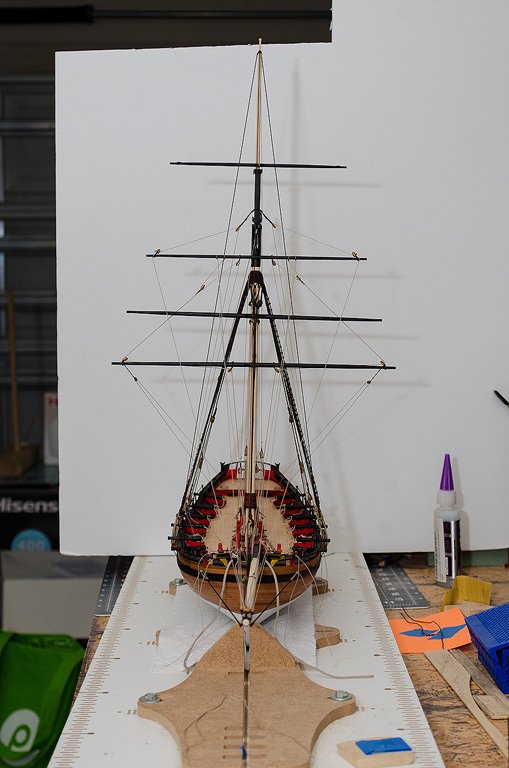
- 436 replies
-
- 16
-

-
- vanguard models
- alert
- (and 1 more)
-
Looking great! I may borrow that idea for covering the mdf on the ship's boat. I have currently decided that, to me, the worst part of the build is making belayed rope coils (other coils are okay). Maybe its my jig, but it is probably me...
- 725 replies
-
- 3
-
-
- vanguard models
- speedy
- (and 1 more)
-
Welcome to the Alert club and have fun with the build!
-
This is really an inspirational build, I’m very impressed!
-
Oh boy, the Vasa gun deck is tempting.
-
She sure is a beauty nice job! Did you make the case yourself? It’s very nice.
- 40 replies
-
- 1
-
-
- sherbourne
- caldercraft
- (and 1 more)
-
Take a look here: https://commons.wikimedia.org/w/index.php?title=Category:Ship_plans_of_the_Royal_Museums_Greenwich&filefrom=CUPID+1777+RMG+J5034.jpg#mw-category-media
-
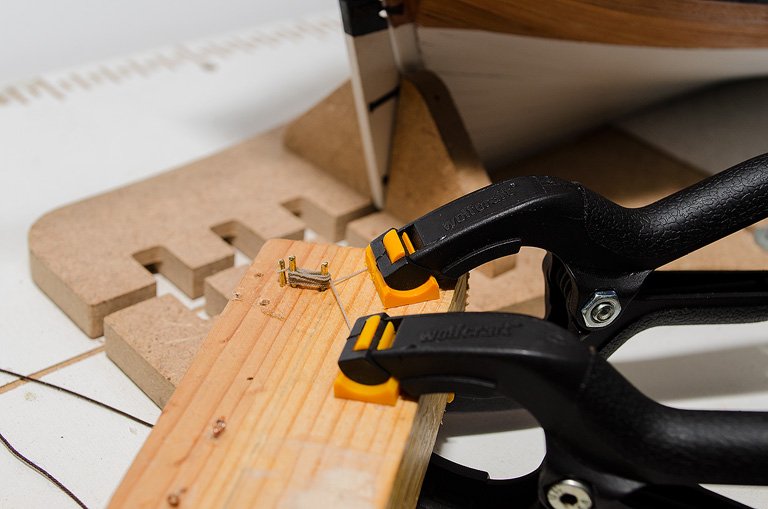
The claws are used in an attempt to get consistent spacing for the deadeyes while the dedeyes are rigged to the shrouds. After the deadeyes are attached to the shrouds the claws are removed and the deadeyes are rigged with rope.
- 277 replies
-
- 3
-
-
- model shipways
- 18th century longboat
- (and 1 more)
-
I suppose this was really my question; I glued the cannons in place after they were rigged (it seemed easier to me) so I'll be very curious to see if this would be an easier path. Can't wait to see the results! PS - I didn't but some add the the rigging behind the cannon (the out haul, I've also possibly seen tackle behind referred to traverse tackle but I don't have my books by me - I assume this would help aim)
-
Looking really nice so far; how much rigging do you plan to add to the cannons?
-
This is really helpful - I see “everyone” talking about 14” saws and then I’m staring at a $11/1200 laguna and questioning my commitment 😂 (of course after the bandsaw I also need the thickness sander and while the Byrnes looked great there’s also a very expensive Laguna with a DRO). That’s about when I stop, take a deep breathe, and just browse the build logs. Did you simply add the widths of the sheets (factoring some kerf for cuts) and then buy a few larger pieces? I feel like hard maple and/or cherry (heck I’ve even thought about using Chuck’s Alaskan cedar to skip the saw route) would work just fine.
-
Awesome! So excited to follow you on this as I want to do either this cross section or Echo in the relatively near future. The whole ordering wood part and not having a bandsaw has made me apprehensive about diving in (and I don’t multi-task, I need to finish what I have in front of me first).
-
I don’t know what the rope is like in the kit, but typically upgrading the rope is a small upgrade that will really go a long way (the blocks may be similar). Syren has some very nice offerings of both if you decide to go down that route. Good luck and enjoy it! My kids are 4 and 8 and I still try to do a small bit every day.
- 139 replies
-
- 1
-
-
- Lady Nelson
- Amati
- (and 2 more)
-
Be really careful about picking up bad habits from his build log 😂. I’m kidding, that’s a great log to follow if you’re looking to scratch build fittings. It might be a different era, but the anatomy of a ship alert would have drawings for deck fittings as well.
-
Bulging 2nd Planks
VTHokiEE replied to drjeckl's topic in Building, Framing, Planking and plating a ships hull and deck
When all else fails I have at times resorted to my 2 five finger clamps and distract myself for a little while until the glue sets. -
Great job BE! I'll be using this log when I get to mine (of course now I wish I waited for the re-release so I didn't have to scratch the oars and potentially the rudder, but they should be fun exercises). Edit: Do you mind sharing your source for the Airwaves etched stainless steel saw blades? Thanks!
-
That is unfortunate as your deck looks really well done. Sounds like you have the right attitude on it though and I imagine you have a separate bin for damp rags now 🙂
-
Very nice work! A lathe seems like a fun toy (especially compared to me making my “mice” with a drill and a file 😉).
- 725 replies
-
- 1
-
-
- vanguard models
- speedy
- (and 1 more)
-
When I painted my hull I taped off the waterline and used cheap white spray paint on it. I imagine some might prefer other methods but it was cheap, quick, and easy.
- 123 replies
-
- 2
-
-
- Model Shipways
- Pinnace
- (and 1 more)
-
That is incredibly helpful. I really appreciate being able to see the loop at the top, that was the part that I hadn’t figured out yet. Thank you! Doh! Oh well, I could possibly trim the pin off but that could very well end up poorly. Yet another tidbit to recall for next time. Very helpful post!
- 436 replies
-
- 2
-
-
- vanguard models
- alert
- (and 1 more)
-
This is really nicely done. I’ve cheated some when doing the loops so far but after seeing this post I’ll have to try this out next time.
- 950 replies
-
- 1
-
-
- syren
- model shipways
- (and 1 more)
-
Great picture, are there any details/links on how to simulate the tie off at the top? Also I’ve seen a few different types of rope coils (I’ll try to get a picture or two linked but I think after a quick google it is typically a could for unattached rope so I may have answered by question...), is there any reason to do one compared to the other?
- 436 replies
-
- 2
-
-
- vanguard models
- alert
- (and 1 more)
-
I’ve definitely been giving a few glances to Cheerful... eventually 😉.
- 436 replies
-
- 2
-
-
- vanguard models
- alert
- (and 1 more)
-
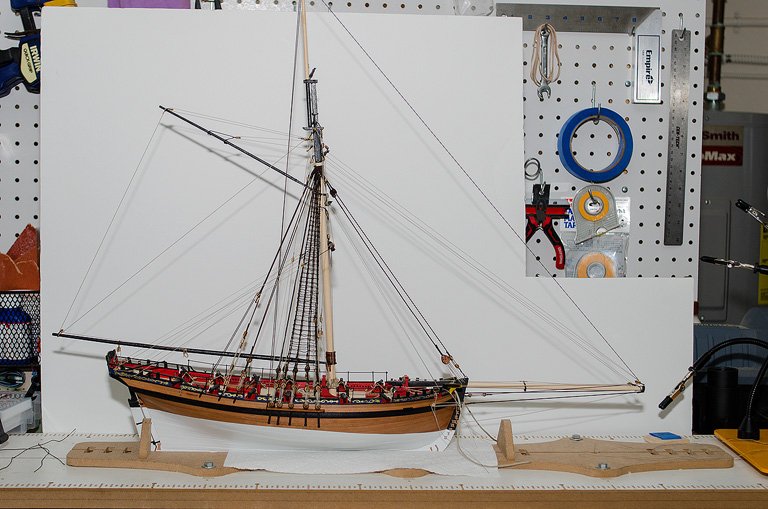
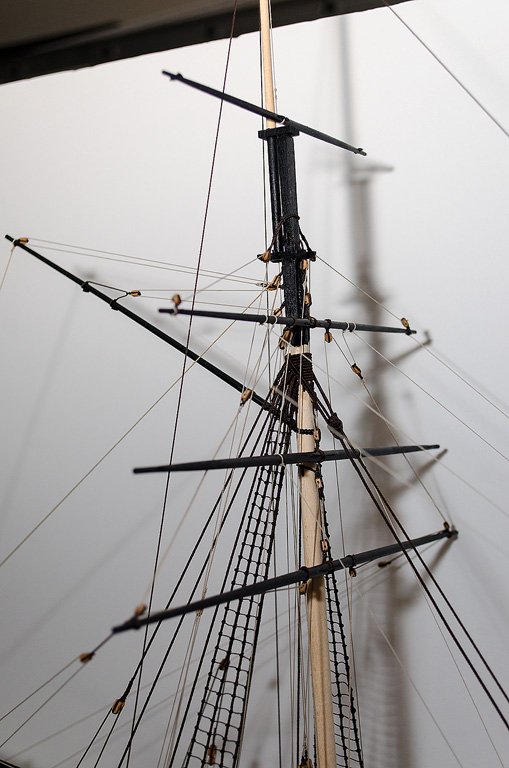
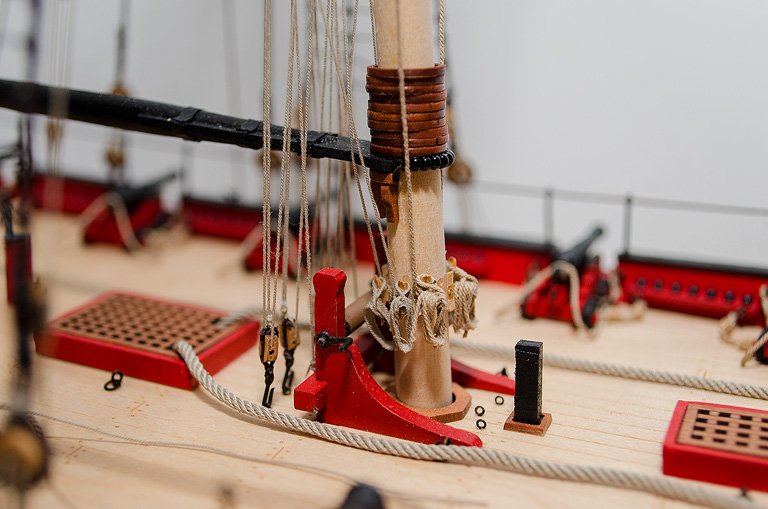
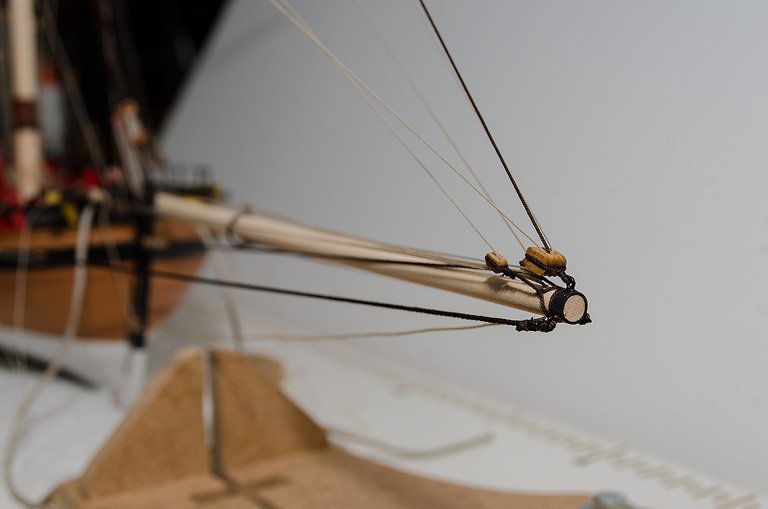
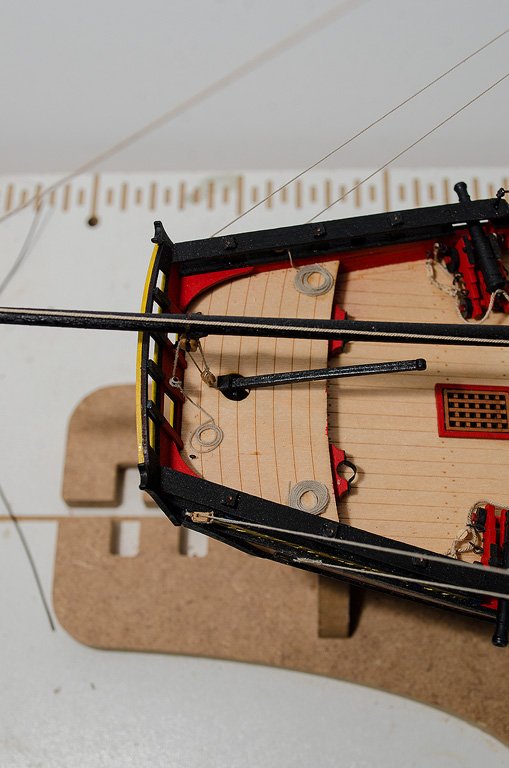
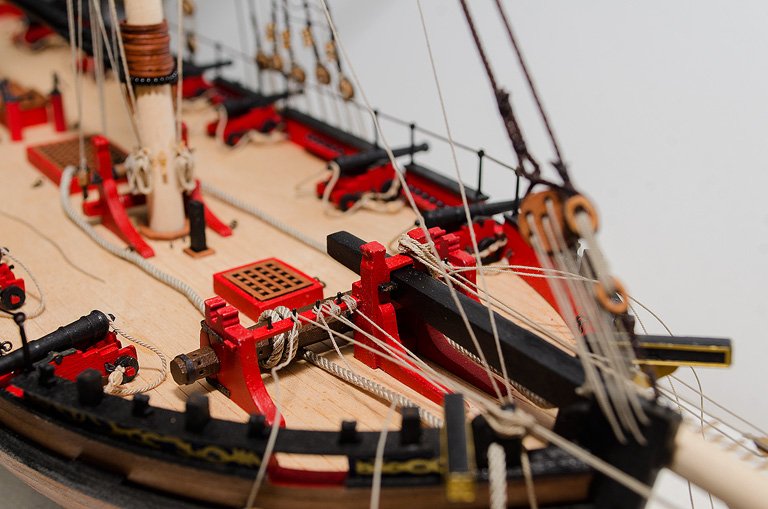
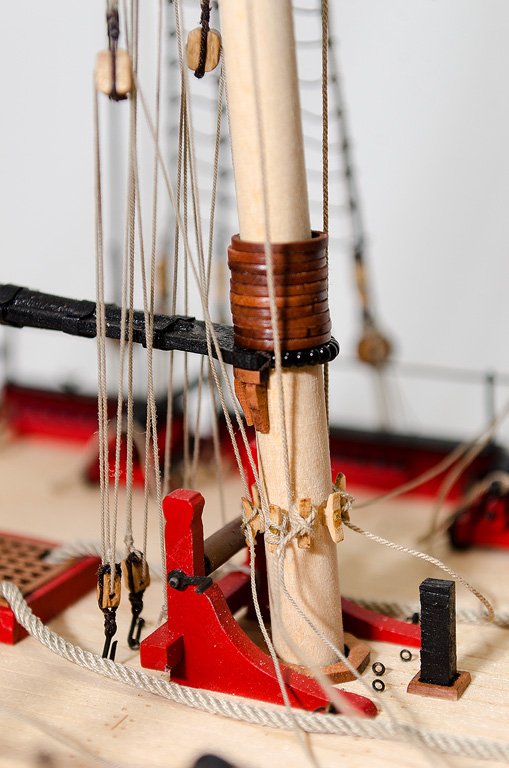
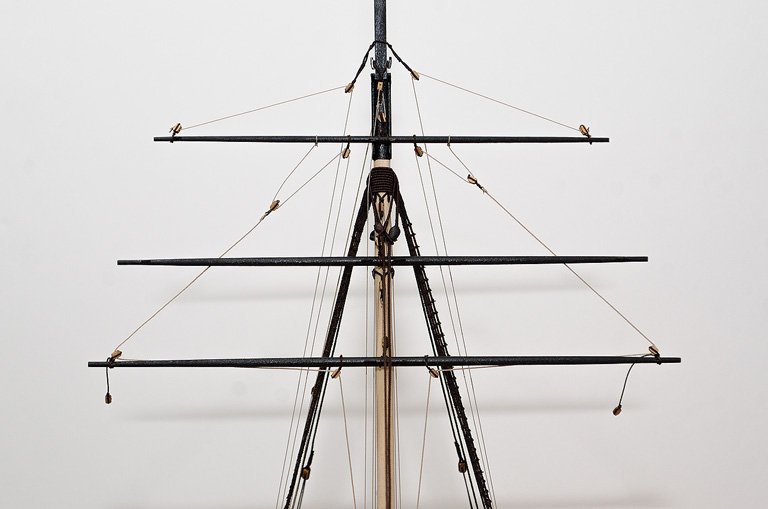
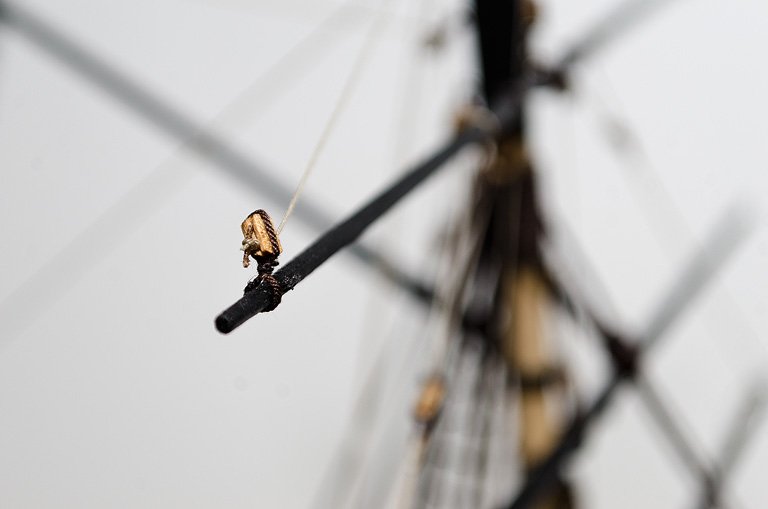
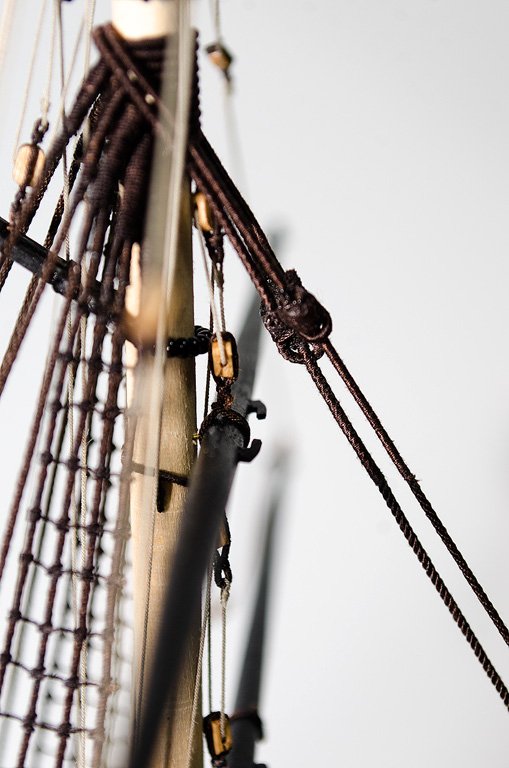
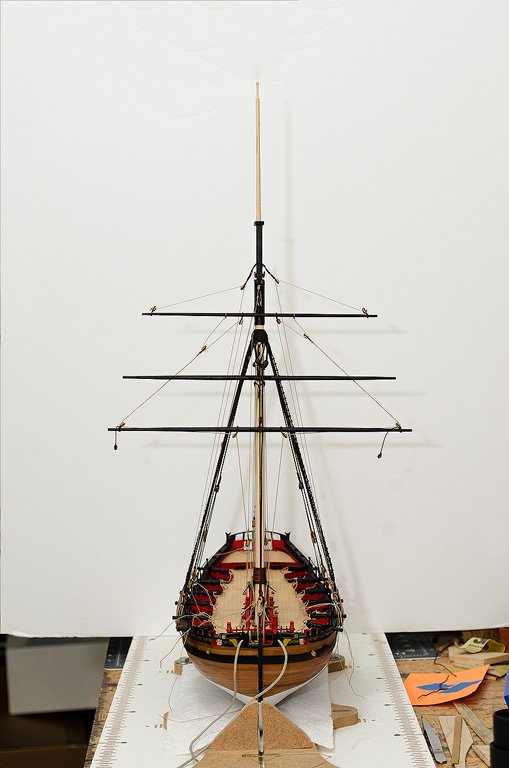
Ha! I sit here with the AotS book in my lap while I write these posts trying to learn the terminology and but in my head I describe it as "the rope that ties off on the thingie" or similiar. It is starting to get busy on the mast (and I forgot how tricky it can be to tie off lines...). I'll eventually add rope coils so much of these tie offs will probably be hidden anyway. I struggled a bit getting the yards parallel to each other but in the end I think its pretty close (and I still have the topgallant yard to fix, but I think - pray - that I'm over the hill with these three up). Whenever I look at the pictures I see some small issues with the ropes, there are two that I may try to tighten after looking at the picture below, but then I recall tying them off so we'll see 😁). I painted the line brown that was to be used for the tack toggles, but I'm not certain if it actually conveys the look due to the knot seemingly being oversized for the scale. Finally my conundrum - securing the yards to the mast. If you look in the picture below you'll see the yard is pulling away from the mast and the pin is visible. I suppose I'll use some temporary holding lines to keep it straight and glue it to the mast with a touch of PVA. I hope that holds up against the squaresail yard bowlines. I'm also pondering how to do the topsail brace. There is a block setup in the AotS book and the instructions, but its a little unclear where the tie off on the bowsprit would be (and a closeup of the bowsprit in the AotS book doesn't show the tie-off point, but that isn't the only inconsistency in the book unfortunately). I'll keep thinking about it, but if anyone has any thoughts I'd love to hear them. And here is how she sits currently.
- 436 replies
-
- 11
-
-
- vanguard models
- alert
- (and 1 more)
-
Looking at that comment it seems to be critical of the instructions. Take a read through the instructions and see if anything pops out as confusing, it might not initially but might as you get further into the build and ask questions about those steps. The comment could also be referencing die cut parts instead of master cut (but I think most Midwest kits are/were die cut as well).