VTHokiEE
-
Posts
1,528 -
Joined
-
Last visited
Content Type
Profiles
Forums
Gallery
Events
Everything posted by VTHokiEE
-
 Congratulations, you did an amazing job!
 -
Congratulations on hitting the two year mark! That is a big decision and I wish you nothing but the best going in whatever path you decide upon.
-
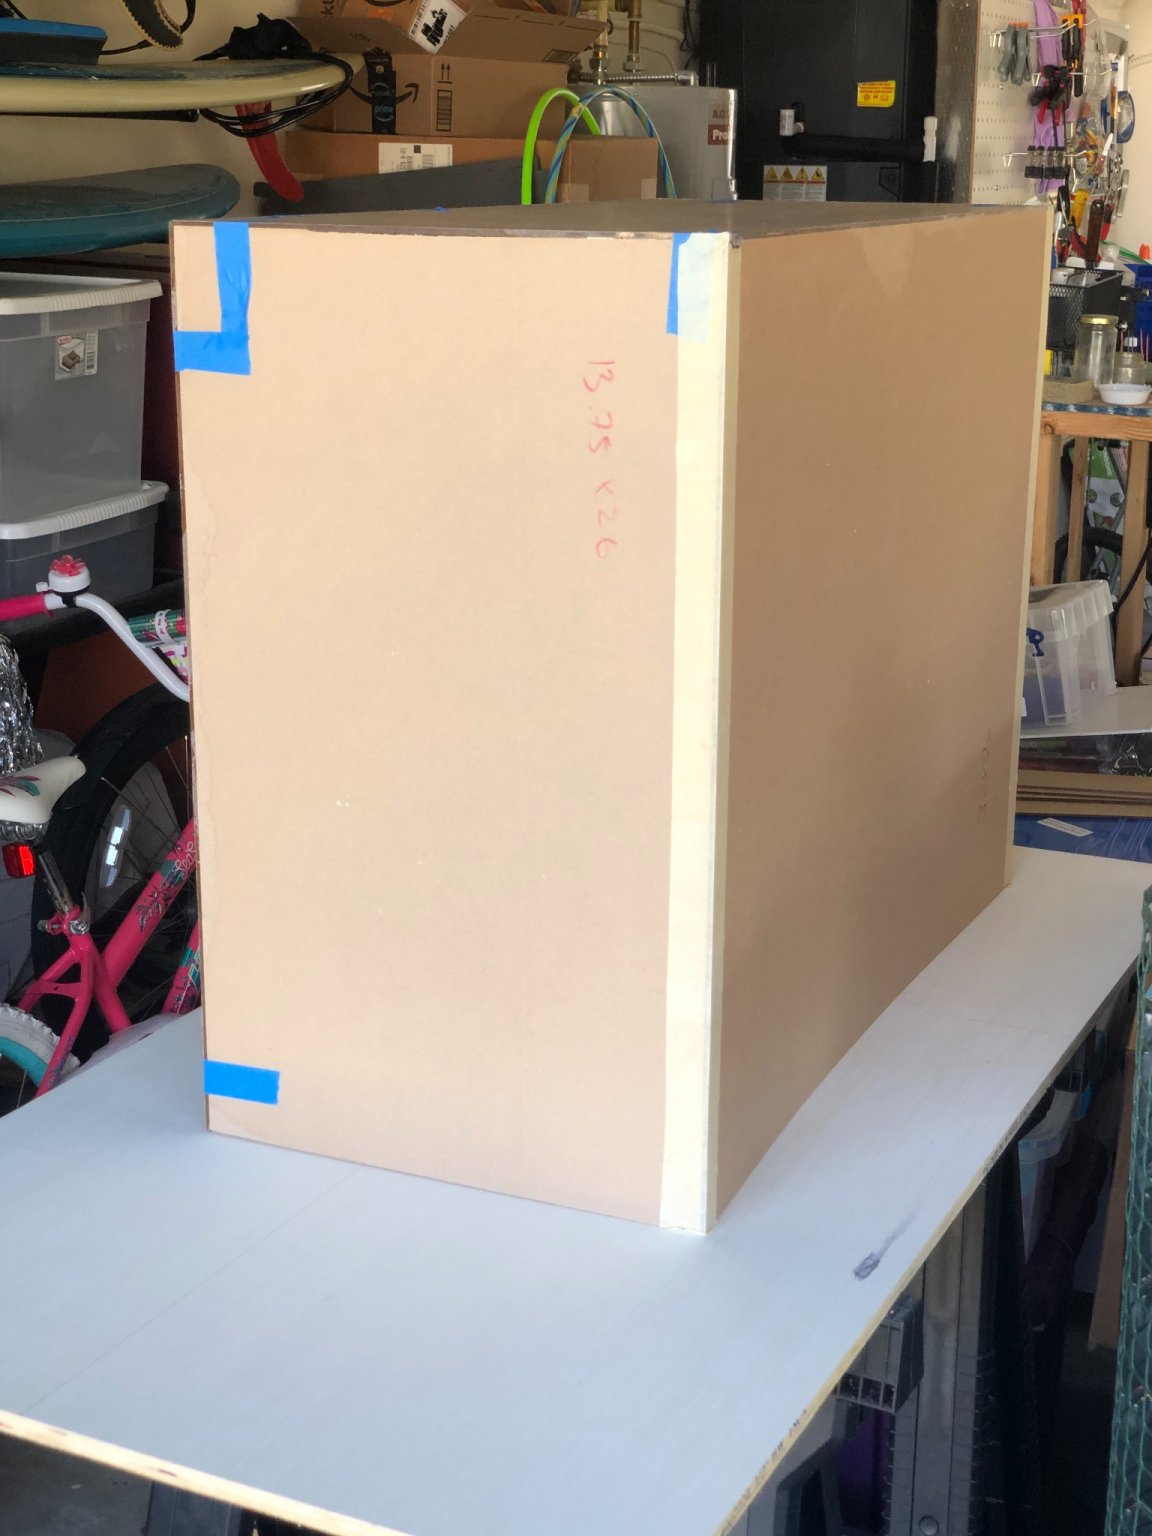
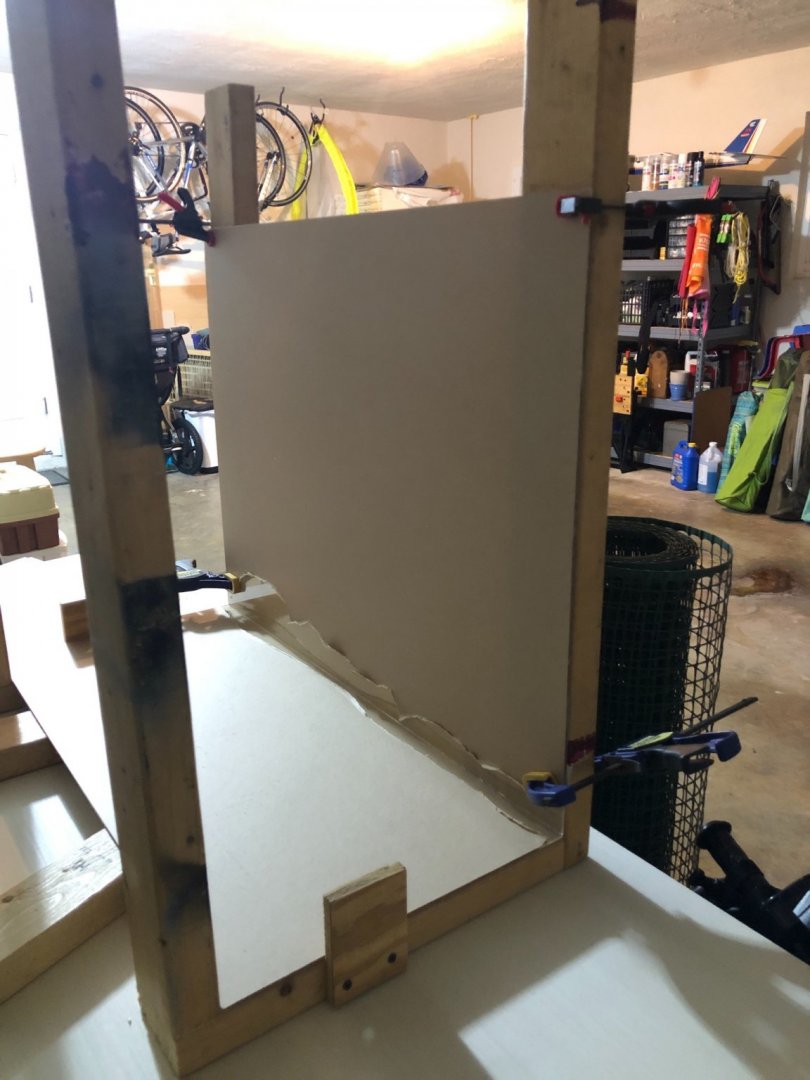
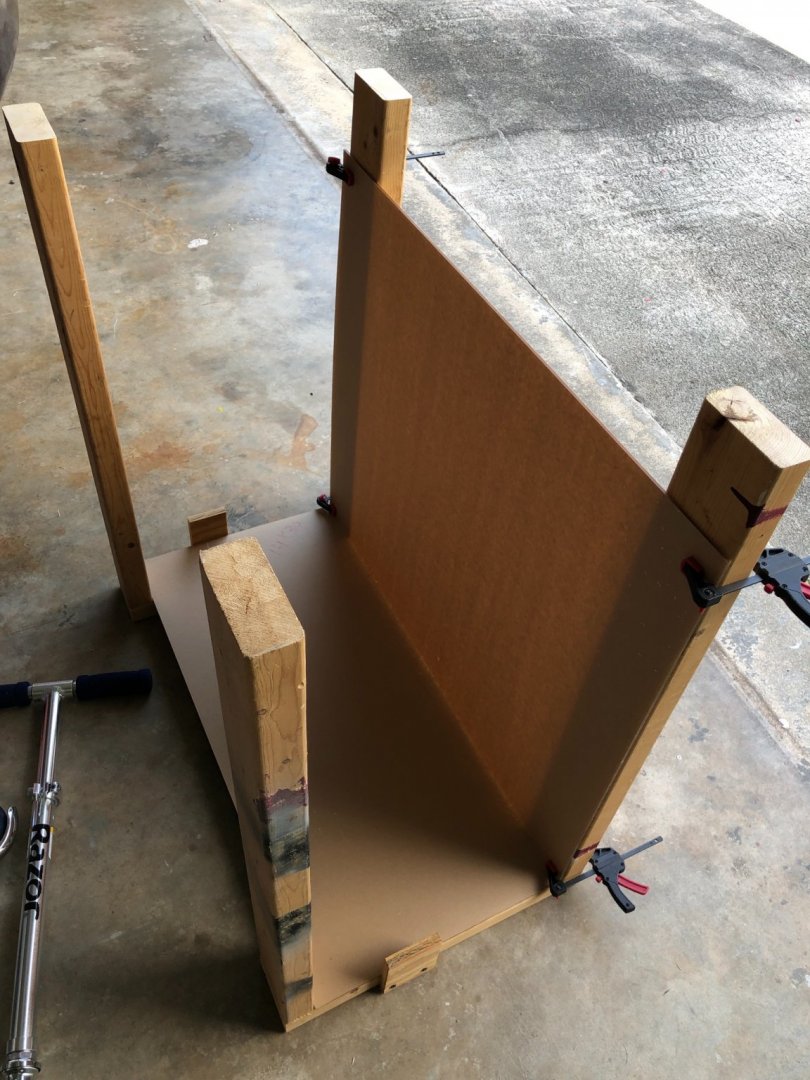
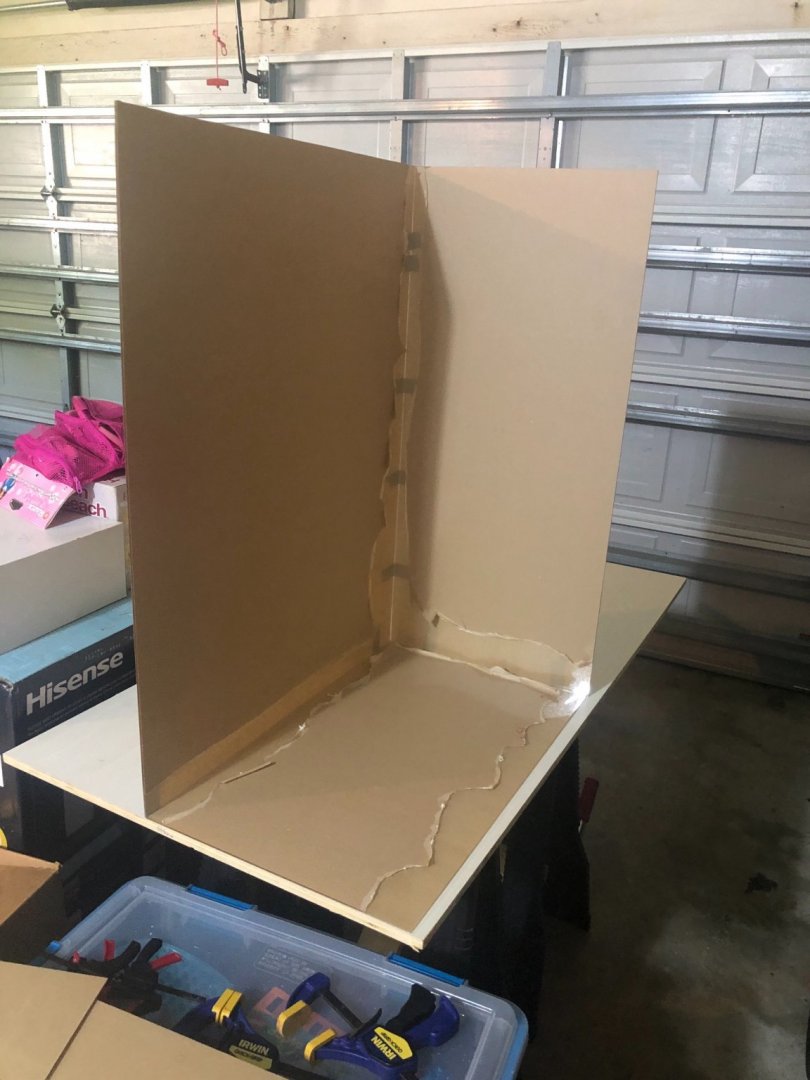
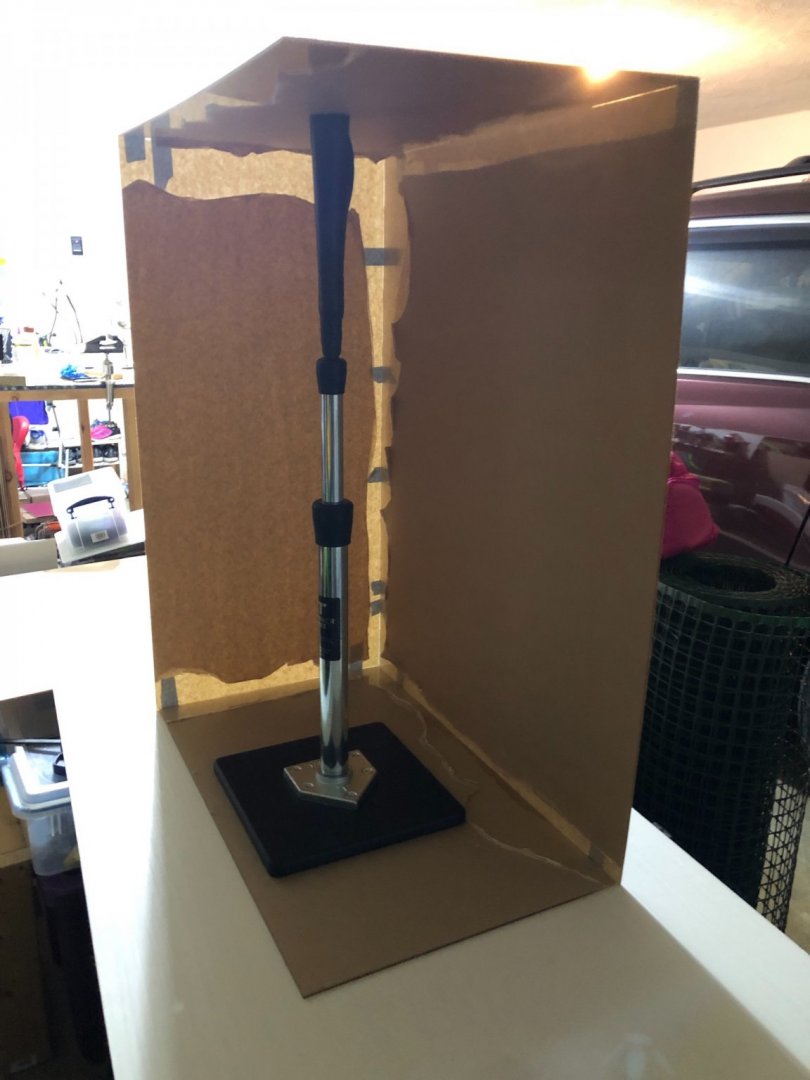
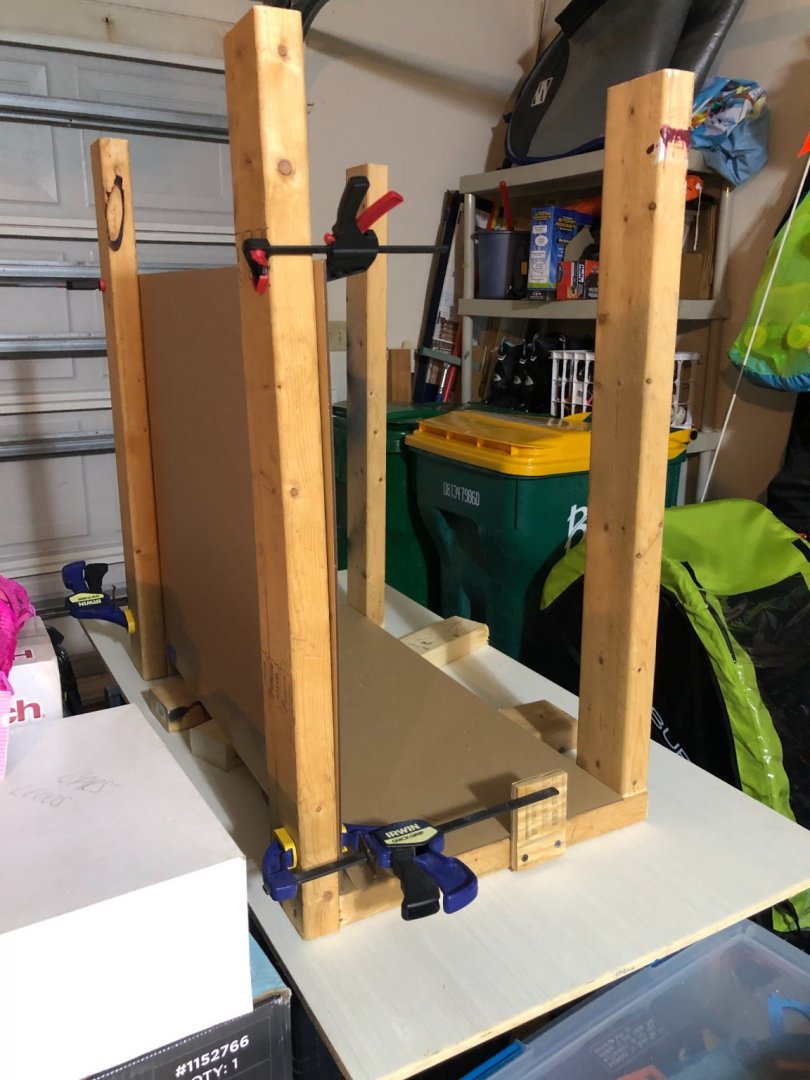
Thanks Allan! I do, I was embarrassed to post them though (it’s quite crude 😬) so I crossed my fingers that no one would ask 😄. I’m certain there are much better ways but it seemed to work okay for me and hopefully someone can use these pictures to inspire them to make a better jig. I cut down 2x4’s to fit the top of the case and provide supports for the larger front/back. I needed to slide some extra 2x4 scrap under the top to ensure a tight fit before welding the pieces together. If I did this over again I would probably make a flat base of some sort to prevent the top from bowing down, but the added support solved this hurdle. Here you can see the backing ripped away near the joint so that I could apply the weld. I didn’t want to peel everything back and accidentally scratch the pieces in the process. Next I rotated the case so that a side was now on the bottom and welded that to the existing side and top (this picture was taken after while weld fully cured). You can barely make it out, there are pictures later, but I also used plenty of tape to ensure the seams stayed tight. The above picture was also removed from the jig to fully cure, but once again the case was rotated to make a new “bottom.” All my welds were done on the bottom. In the absence of a jackstand a tee-ball tee worked wonders to support the already connected side. Below is one last shot showing some of the tape that was also used. Hope that helps some - did I mention that my methods were quite crude?

- 436 replies
-
- 5
-

-
- vanguard models
- alert
- (and 1 more)
-
Looking like a great build! I've had my eye on this kit for awhile (but wow she is huge!) and I'm very much enjoying following your build. You've added some great details in there.
-
I'm glad that they have been some help! I actually live out on the Space Coast (I was vague in the location so I suppose it decided I was from Lakeland 🙂 ). Definitely would be great to meet up with some modeler's in the "general" vicinity. I'll have to hop on over and check out your Fifie build!
-
Really nice job on the oar! I'm not certain I can continue to follow your log though it requires too much restraint to not run out and buy some tools 😄
- 725 replies
-
- 5
-
-

-
- vanguard models
- speedy
- (and 1 more)
-
Thank you @Old Collingwood @Theodosius! @DelF Thanks, you should give it a try, with your craftsmanship I know it'll be a work of art!
-
I decided to add one final update to depict the Alert cased up. I didn't quite realize that it would take me three months to put together a case for the Alert, but time has a way of marching on. I first tracked down some acrylic sheets for the top of the case. Using a jig to keep the pieces in place I applied a liquid called Weld-on 4 to fuse the pieces of acrylic together. After the top had set for several day I removed the protective backing paper from the acrylic. During the backing removal I found out that I overdid the Weld-on in a two areas and the adhesive from the backing etched itself into the acrylic. I may try to polish it out, but I my not for fear of making things worse (and it is on the back and the side of the case so not terribly noticeable to anyone but me). After creating the covering I moved onto the base. I will start this off by saying I used a method that I saw on MSW to build a base with a rebate (rabbit?) without a router. I bought two pieces of plywood and a strip of molding (the molding was the combined height of the two pieces of plywood). I cut down the plywood to the size of the top of the case. I don't have a large table saw, so I attempted to use my circular saw to cut the rectangles out of the plywood sheet. I quickly learned that I need a bit more practice with the saw as I failed to cut rectangular pieces. There were close enough though (and lumber prices have risen so much since I bought those sheets that I wasn't about to toss them) so I pressed on. I then trimmed off the edges of the top sheet to account for the width of the plexiglass and attached the sheets together. I then attached the molding around the edges, applied some protecting poly and was done. All said I'm pretty happy with a first attempt. I have added Vanguard's 18 ft cutter to the display (the first edition) and I have also realized that I never added the Alert name plates anywhere - I suppose there's always one more thing 🙂 but this is the final "build" post of the log. Eventually, I'll start another log - I'm currently still hacking away at the NRG half hull but we are preparing for a local move this summer and I'll need to hold off on anything not currently started until after that.

- 436 replies
-
- 22
-
-

-
- vanguard models
- alert
- (and 1 more)
-
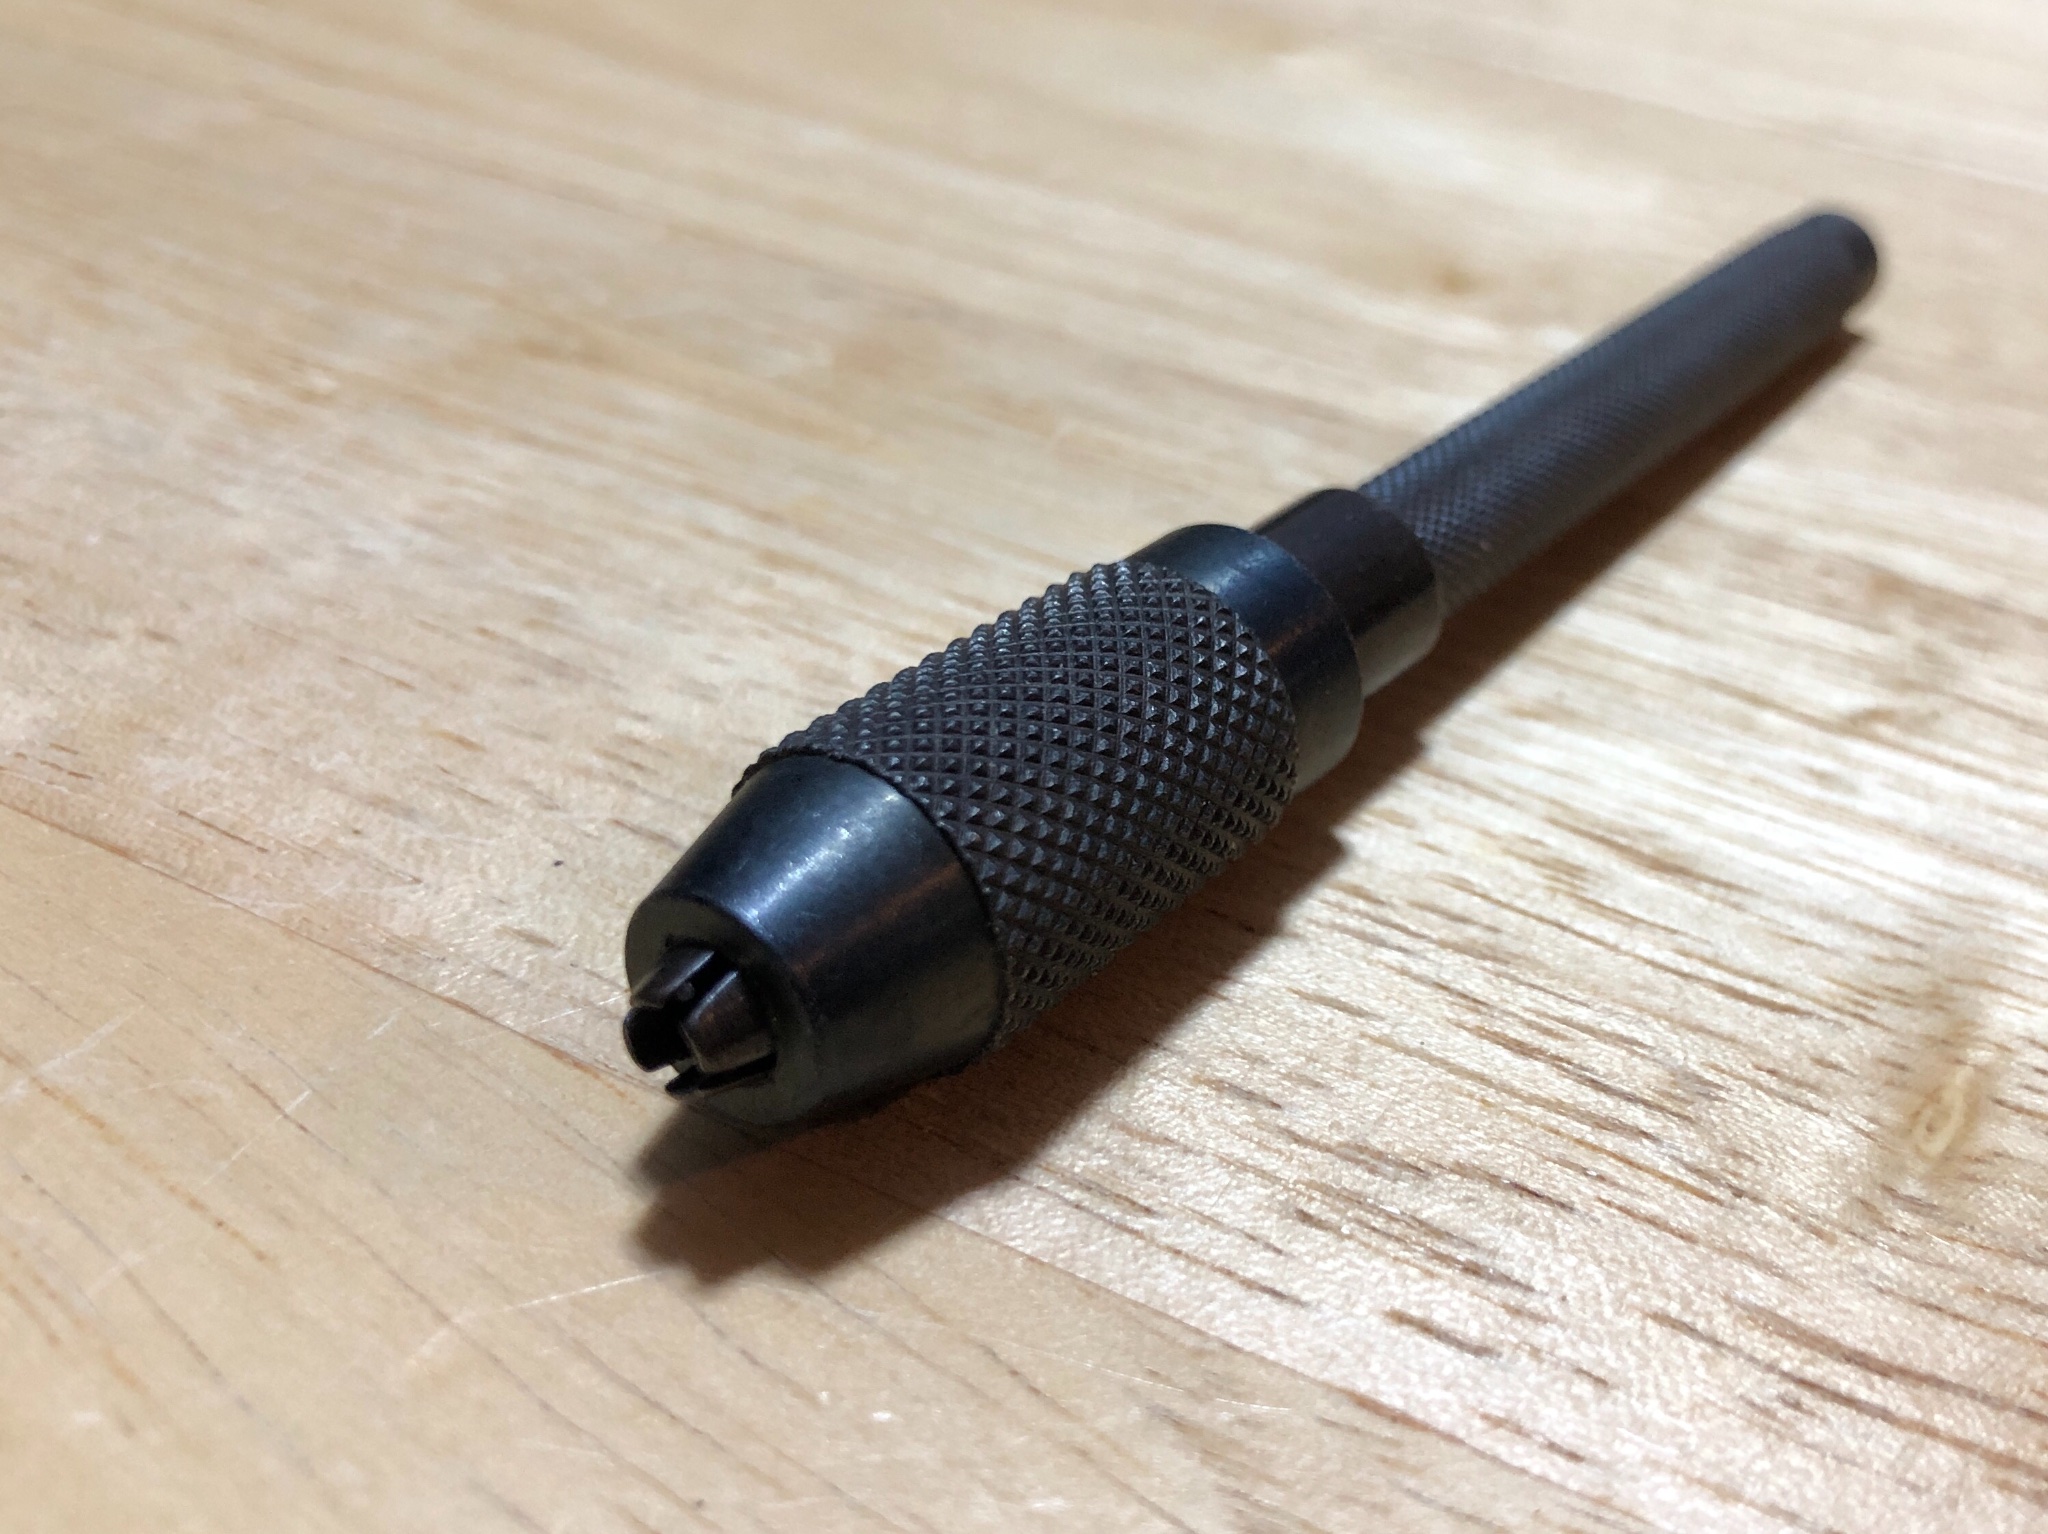
I don’t know if this qualifies as a pin vise, but it took me awhile to track this down so that I could use 1/8” shank bits by hand. I’ll see if I can recall where I picked it up and add it to this post if I do. Edit: I believe this is it - https://www.cornwallmodelboats.co.uk/acatalog/Modelcraft-Pin-Vice-English-pattern-Type-124-T_PPV4001_D.html#SID=1879

-
According to the newsletter that came out recently sending a PM (on MSW) to kurtvd19 or tlevine, informing them of your real name and email address should do the trick.
-
NRG Capstan Project
VTHokiEE replied to tlevine's topic in - Build logs for subjects built 1751 - 1800
This looks really neat! I can’t wait to watch it develop and (fingers crossed) tackle it eventually. -
Such a beautiful build, I'm really impressed with your work. I always look forward to seeing your updates (and really nice photography to showcase it all).
- 950 replies
-
- 2
-

-
-
- syren
- model shipways
- (and 1 more)
-
Nice job, congratulations on completing her! She looks great!
- 382 replies
-
- 2
-
-
-
- Vanguard Models
- Duchess of Kingston
- (and 1 more)
-
Everything is looking great so far! One suggestion (to take or leave) is to start considering rigging prep now for things like stropping blocks. Rigging to me was a slow repetitive process (relaxing at times and maddeningly frustrating at others). My process for prepping blocks is slow and in the future I think I would make a few as I go so I'm a little less idle during the rigging process.
-
Do you think that you might be able to remake these parts from the scrap wood in the sheet? I don't know if they will sell you another sheet and it certainly can't hurt to ask but the turn around time might be such that you'd rather try to remake it yourself.
-
Nice work Glenn; I’m not certain it matters or that you care but the handles (at least according the the instructions) would be placed 180 degrees opposite each other. I’m enjoying watching your builds!
- 160 replies
-
- 2
-
-
- Alert
- vanguard models
- (and 1 more)
-
Great build so far. I’m also curious about cutting the chine notches - how tricky was that? Doing a scratch build has been on my mind but I keep going back and forth about subjects. I think you’re starting to seal the subject for me. Is the booklet a good help? Or are the plans good enough?
-
Glenn - Beautiful work and beautiful photos. If I ever tackle this one my log will be “See log by glbarlow, he did a better job and took better photos” followed by completion photos 2-3 years later. 😂
- 778 replies
-
- 1
-
-
- cheerful
- Syren Ship Model Company
- (and 1 more)
-
Looking great! I’d love to build one of these for my mom (she used to sail them). I’ll have to give your build a few re-reads and see if I can take it on eventually 🙂 When the topic of small screws/nuts come up frequently model railroading sites are given. If I remember I’ll try to search through this site tomorrow and see if I can track down any specifics. Edit: This thread might help -
-
You're doing an excellent job here! I recently took my partially completely half hull out after getting side tracked on a different model. I'm not quite as impressed with my work as when I put it away and now that I see yours I'm even less impressed with mine 😬. It was a learning tool for me so I'll have to see how I can recover and improve the rest of it.
-
kit review 1:48 HMS Granado ‘Cross Section’
VTHokiEE replied to James H's topic in REVIEWS: Model kits
Due to some unforeseen circumstances (potential move), I have to postpone this build but I am still highly interested in it. I'll do my best to get into the logs as much as I can. Sorry about that. -
There is a picture in this comment for the method that I frequently use: https://modelshipworld.com/topic/22920-hm-cutter-alert-by-vthokiee-finished-vanguard-models-164/?do=findComment&comment=745423 It isn't the most accurate but it works well.
-
That looks very nice! I’ve considered testing that thread as well (I have tested Aurifil thread which was nice as well). What I liked about the Mara thread was the elasticity in the polyester rope so that the rigging lines looked tight (I found for cotton thread there wasn’t much wiggle room, but maybe I’m doing something wrong). What I liked about the cotton thread was that diluted white glue is perfect for holding rope coils. Diluted white glue doesn’t work quite as well for polyester and the other “glue” I had on hand slightly discolored the rope. I think I need to try some shellac and see how that works but I simply haven’t gotten there yet. Edit: If you use Mara this thread should help with sizes and recipes: https://modelshipworld.com/topic/19706-gutermann-polyester-thread-for-making-rope/
-
Excited to watch you build this; I’ve become pretty happy with the results on my rope walk but I still have some (well maybe more than I care to admit) failures when I rush through setting the line up. There’s a post by Chuck about using Gutermann Mara thread which I followed and have been mostly happy with (I’m still working to figure out the best way to set poly rope coils but other than that I have found some advantages to cotton that I didn’t realize at first). Good luck and have fun!