VTHokiEE
-
Posts
1,528 -
Joined
-
Last visited
Content Type
Profiles
Forums
Gallery
Events
Everything posted by VTHokiEE
-
 Ha, well I might need one of those as well. I’ve been window shopping my options 😁. Glad to hear that it handles light work well.
- 436 replies
-
- 1
-

-
- Syren
- Model Shipways
- (and 1 more)
-
What is your opinion of that table? I’ve stared at them more than a few times but they seem to good to be true (which is probably more a function of expectations). Nice work on those tree nails! That seems like a very nice method.
-
That’s a really nice shot; certainly something to aim for. It does raise a question though. On a lot of other images I see that the deadeyes have been seized with natural line, but here Chuck used darker line. I wonder why the difference?
- 436 replies
-
- 2
-
-
- vanguard models
- alert
- (and 1 more)
-
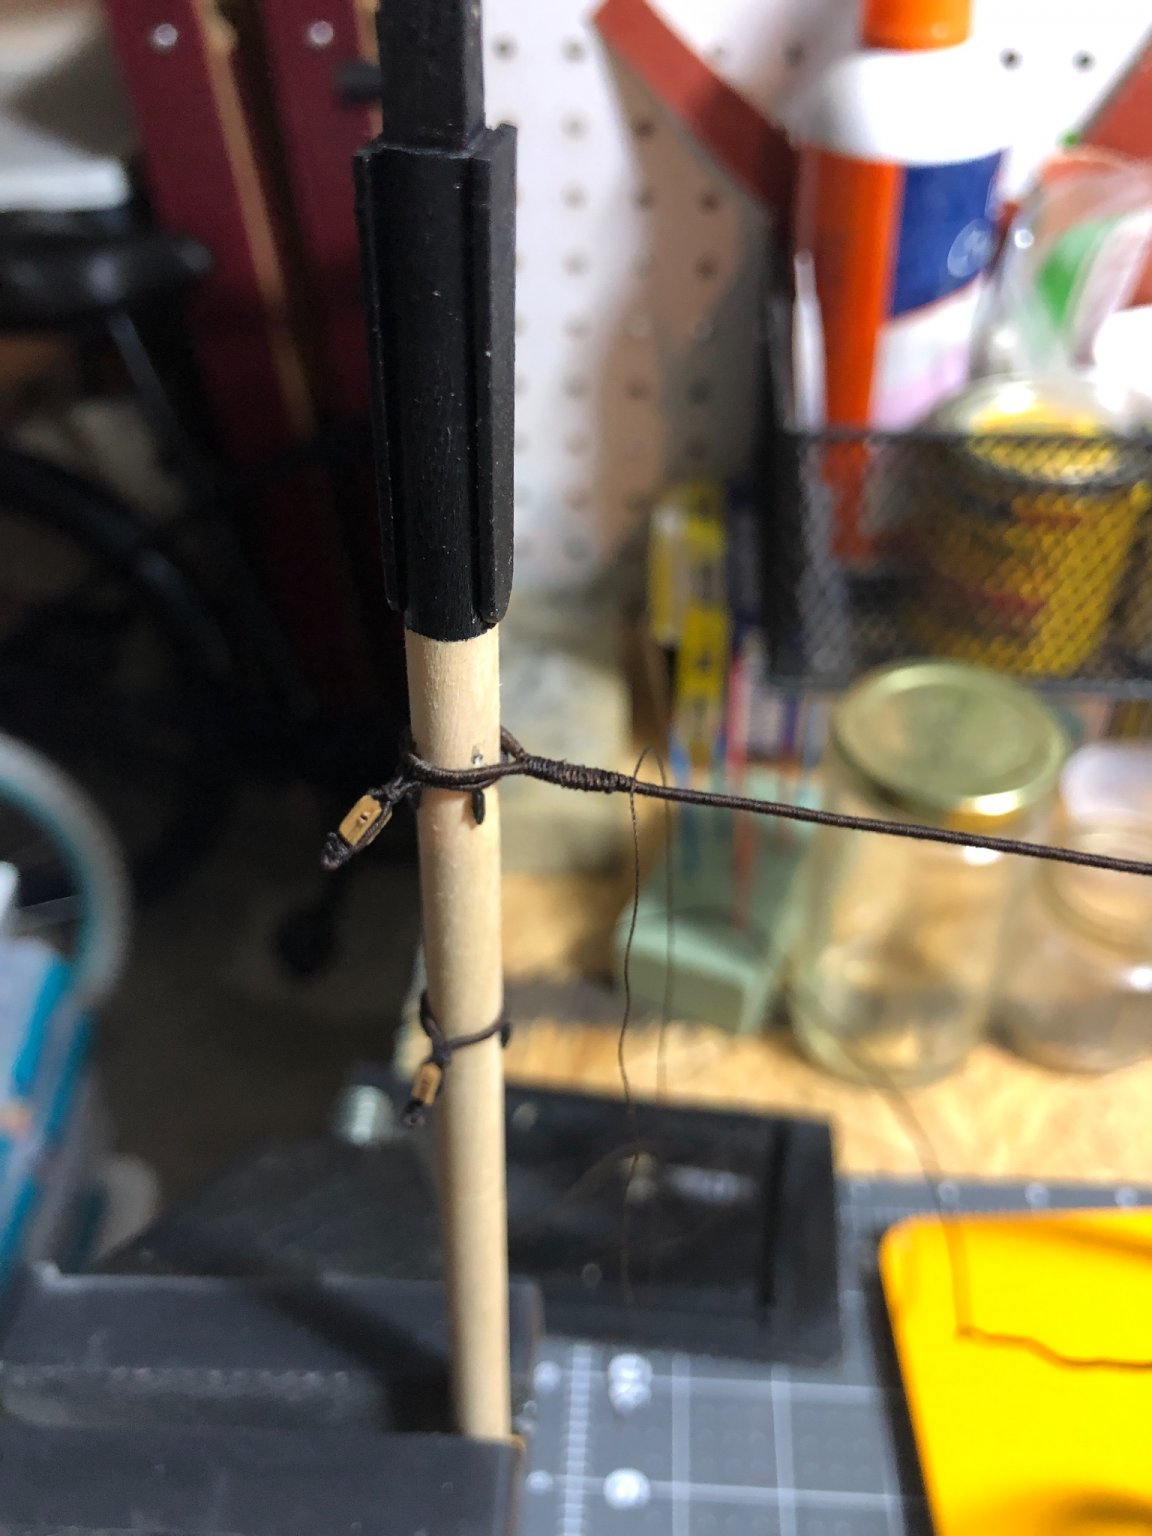
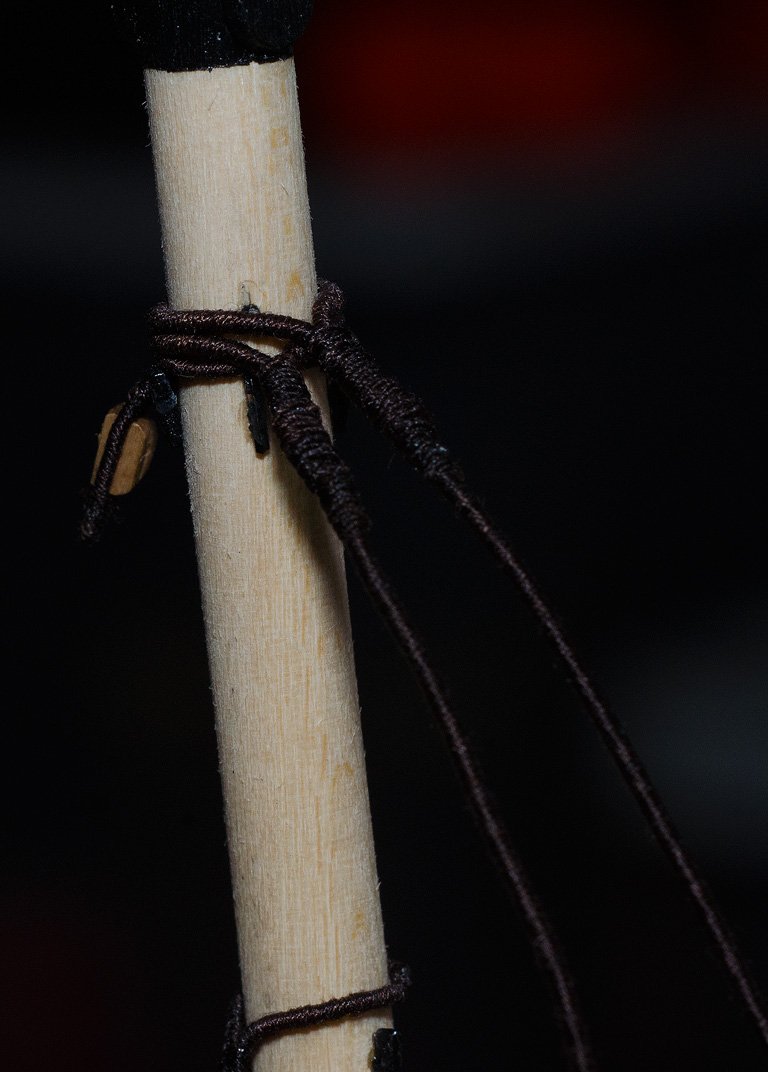
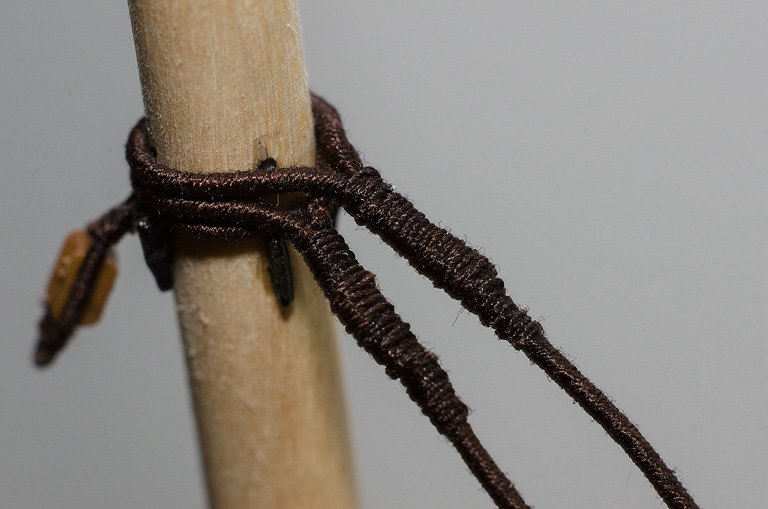
Thanks Bob - I do enjoy Chuck's tools. The rope walk is a lot of fun (if that's the right word?) as well. Every time I use it I think I get better results. Thanks Derek and Glenn as well and for all the likes! As stated above, I used the AotS book for the shroud and backstay arrangement. Even without serving the ropes I feel like the 4mm of space from the instructions would be tight; I highly recommend adding some room here. for the seizing I used a needle to thread the line through the served rope at the start of the seizing and then to half square knots on top and below before finishing with a square knot (below), adding a drop of fly tying glue and trimming the ends. The fly tying glue does darken the line, but it is not that noticeable unless you are looking for it (or get close and use flash on your camera). With the mast up, I'm scratching my chin a little trying to determine how to get the deadeyes on. I'm postponing this by practicing making a loop for them on a spare piece of rope (and eventually a jig for height). I think actually placing the deadeyes on the shrouds might have to wait until I get a solid chunk of time to devote. My spider-sense is warning me of some frustration is ahead 😁, but as with all the steps prior, once I find the right routine for me that'll pass as well.

- 436 replies
-
- 10
-
-
- vanguard models
- alert
- (and 1 more)
-
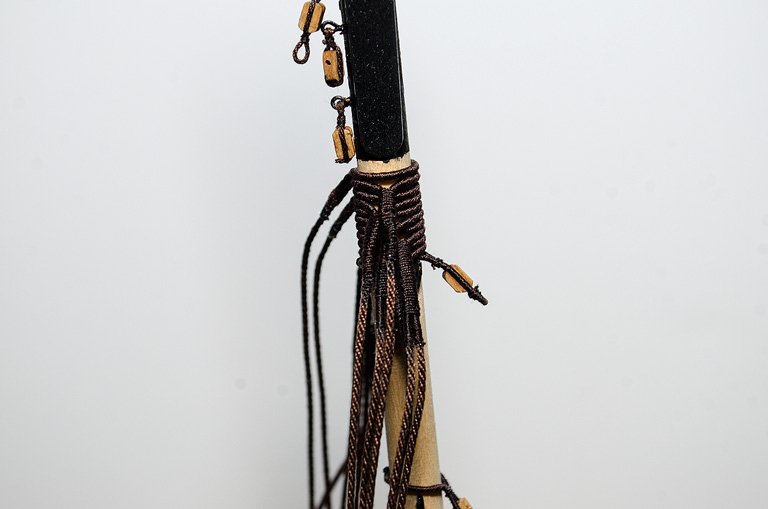
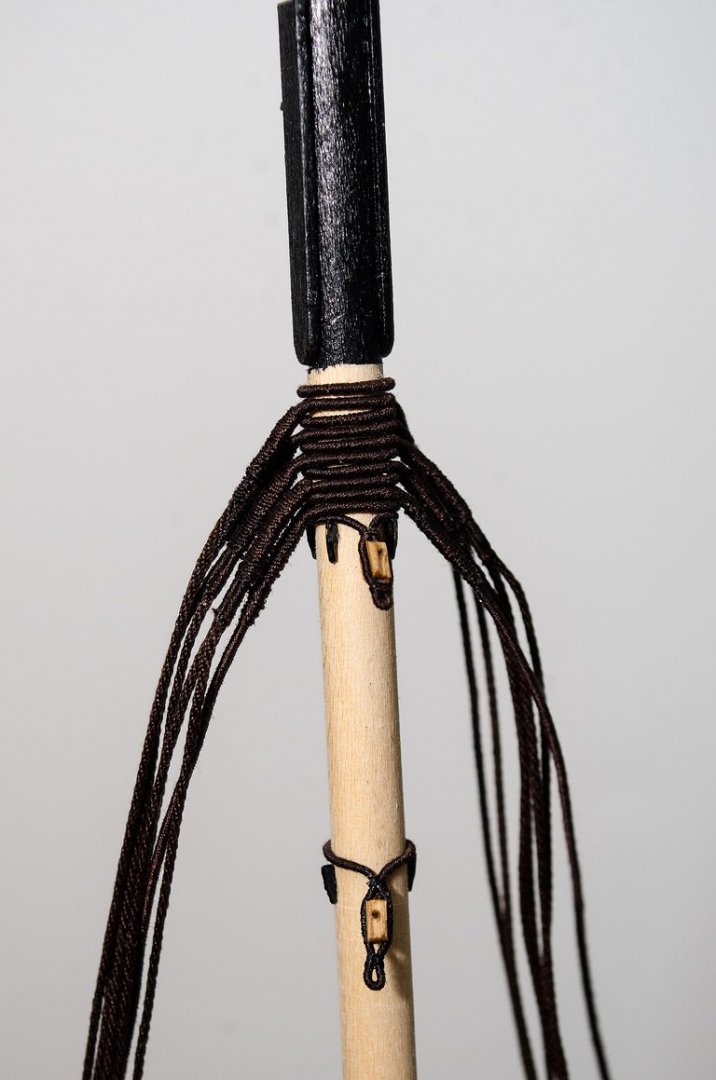
The manual describes that exact method. I, for better or for worse, diverged from that to follow the AotS rigging here. The first shroud is a single (and I served the entire length following BE’s log), then the 2nd and 3rd are doubled together as are the 4th and 5th. Then the backstays are single again. I have all these attached so hopefully I’ll have a picture soon.
- 436 replies
-
- 2
-
-
- vanguard models
- alert
- (and 1 more)
-
How’s everything progressing? Would love to see how the second layer turned out.
-
Nicely done! She certainly is looking nice so far and that is a nice addition.
-
Awesome build and a stunning display - congratulations!
- 158 replies
-
- 2
-

-
-
- byblos ship
- Egyptian
- (and 1 more)
-
Built as designed you’d have to be pretty much directly overhead to see down onto a planked sub deck on all of them. The only real reason to plank the sub deck would be to modify the build and replace one of the gratings with a ladder. I had briefly considered leaving one open and adding a ladder but gave up on that idea because I didn’t think of planking earlier. When I was adding the skylight and grating in the aft I realized that the false keel runs directly through the center of them. This is probably not visible very well either at the end, but at the time I was installing the fittings I wished I had trimmed it down (but again now I don’t really think it matters).
-
Are you considering planking the lower deck? I wish that I had, even if only a small amount can be seen (from the right angle). It is a great build if you end up taking it on!
-
I did not really use my quadhands until now and it is quickly becoming invaluable. I'll have to do the deadeyes on ship as well, but a plan is slowly formulating in my mind which should be complete after I've done 4-6 deadeyes inefficiently and in one of the most difficult ways possible 😂
- 725 replies
-
- 1
-
-
- vanguard models
- speedy
- (and 1 more)
-
I meant to seize the loops off my model but foolishly installed the cheeks on the mast and the loop would be too big if build off model. Since I didn't pay enough attention I have to seize the loops on the mast. Hopefully I'm not overlooking anything (and I'm not certain if this makes it easier), but I haven't put the mast on the model yet so that I can seize the loops to the mast without the model in the way. I am not using a real seizing for the loops though 😄
-
That portion is for creating the gallery/album, after the gallery/album is created then you'll be asked to add photos in the next step. I accidentally made a test gallery/album to find this out and I'm not certain how to delete it though 🤔
-
Very nice job on the skylight! I’m quite interested to see how you retrofit that deck. I regret not planking those areas; but I will on the next build.
-
Hmm, I think that I am misunderstanding the answer (or I phrased the question poorly, both very possible). I didn’t mean a cradle for display on another ship model, but for display on your desk on its own for example. One of the small ships boats that Master Korabel sells (here at agesofsail.com: Yawl) seemingly comes with a nice display stand so that it makes a complete package on its own. I was thinking that would be a neat addition, but as I think about it more it is not that difficult to scratch build one.
-
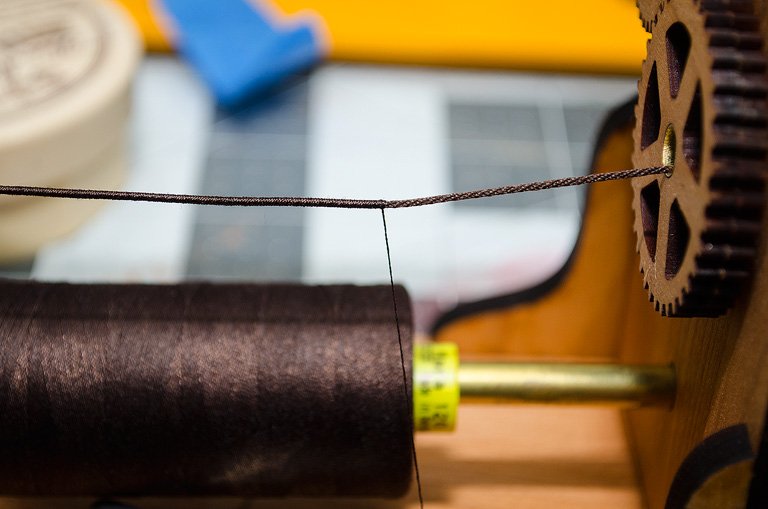
I think it will work out fine without removing the cheeks, simply a little slower. I have the first shrouds attached to the mast and will press forward with the remaining shrouds and stays. I'm following the order and arrangement from the AotS book for this (which diverts slightly from the kit instructions). Everything certainly seems fuzzier under a macro lens (FYI - this is all using Mara thread).
- 436 replies
-
- 8
-
-
- vanguard models
- alert
- (and 1 more)
-
What do I want for Christmas
VTHokiEE replied to Worldway's topic in Modeling tools and Workshop Equipment
This is encouraging as I think I’m going to skip the drill press and pick up a mill for double duty. I am curious how you shape masts and dowels if not on your lathe? (And I used to think a laser cutter would be really handy... but I’m not certain that I still feel the same way, but I do know that I enjoy “toys” so I’d figure out something to do with it. -
Sorry to everyone back east...
VTHokiEE replied to Patrick Matthews's topic in Modeling tools and Workshop Equipment
Ah, I think Winter is a little late on the East Coast this year from what I've heard (of course I may have Palm trees from my view, even over in the East 😉) -
Does the cutter currently available come with a small stand (for display as a stand alone model)? or will any of these assuming they will also be available by themselves?
-
Sorry to everyone back east...
VTHokiEE replied to Patrick Matthews's topic in Modeling tools and Workshop Equipment
You've sufficiently piqued my interest... what has happened "back east?" PS - Looks like a fun shop! -
Thanks Rusty and OC! Of course right after posting I hit a snag. I should not have attached the cheeks, if I make the shroud loop off the mast I can’t fit it over the cheeks 😕. I glued those on pretty well but with PVA so I’m hesitant to remove them. Right now I’m attaching one of the shrouds (or whenever I finish it) and we’ll see how it looks when I’m done before I consider pulling off the cheeks. Also not certain how the seizing looks, but I think it’s okay.

- 436 replies
-
- 6
-
-
- vanguard models
- alert
- (and 1 more)
-
There have been several step along the way that have "kept" me up at night. First would certainly have been planking, but next in the list would be tapering dowels. I was very uncomfortable about how to best go about this step. Ultimately, I used my trusty cordless drill and my digital caliper. I cut off a section of dowel long enough to have some stock in the drill and then used 80 grit, followed by 120 grit and finishing things off with 320 grit sand paper. I did dabble with files, but in the end various widths of sand paper worked best for me (watch out when you taper near the drill as the opposite end can flail wildly and snap off leaving you with a yard that may or may not be about 4 mm shorter than the plan calls for, but I digress). Then I painted the yards, blacked the stops/cleats/eyebolts/etc, glued them on and touched everything up. Now instead of a lathe I think I'm back to looking at the MF70 or similar to use a compound table to accurately align and drill the holes (I don't have a drill press and a small mill seems more functional in the long run but it's all a dream as now). Overall I think they came out pretty well, especially will how fearful I was of the end result. Right now I'm serving the rope for the first shrouds. Once I get these two done I think I'm ready to put the hull back on the table (really looking forward to that).
- 436 replies
-
- 9
-
-
- vanguard models
- alert
- (and 1 more)
-
Thanks for the clear explanation! I may be working on my shrouds soon and was curious about the deadeyes (and how to align them eventually).
-
This detail is awesome! Your log is simultaneously making me want to build the Cheerful and scaring me off from building the Cheerful all at the same time 😂. In all seriousness, you’re doing an amazing job and all your time and effort shines through! PS - You may need a second miniature you with a more proud/excited pose. I can’t help but feel like mini- you isn’t as impressed.
- 778 replies
-
- 4
-
-
- cheerful
- Syren Ship Model Company
- (and 1 more)