-
Posts
65 -
Joined
-
Last visited
Content Type
Profiles
Forums
Gallery
Events
Posts posted by blackjack40
-
-
During the 10 and a half months we lived in Kansas, I did not have a lot of time to work on the ship. School effectively dominated my life. Aside from very minor progress tying rat lines on the lower shrouds I left the ship in more or less the same state as the move to Kansas and moved it to Washington.
Since we got here about a year and a half ago, I've made good progress. First up, rigging the main and fore topmast and topgallants!
The shroud cleats were tricky, I ended up ordering the cleats from from Syren Model Ship Company, supper happy I did, they look much better than the cast ones. They still took a bit of shaping but I think they came out well!
I choose to serve The topmast shrouds, I'm not sure this was the right call as they became much thicker than I think they would be otherwise. If I had to do it again, I would either not serve them or use a smaller serving thread.
After rigging the main topmast, the topgallents went quick.
-Joe
- ccoyle, JesseLee and Prowler901
-
 3
3
-
After tying the lower shrouds I started the rat lines, tied the catharpins, the futtock staves and shrouds. I'm really happy with how these came out. It took a few tries to get it right and the rat lines still look a bit tight, they cause the shrouds to come in a little, but over all I was pleased enough to drive on. With these complete, I packed up the ship and moved to Kansas.
- Prowler901, ccoyle and JesseLee
-
 3
3
-
Team, Happy Holidays! I'm sorry, looks like I've neglected this Log for a while. Since my last post in 2020, the Army saw fit to send me to school in Kansas for a year then moved me again to Washington. between that, and a short deployment I haven't kept this log up to date. That dose not mean that I haven't made progress on the Brig though. Currently I'm working on building the yards arms. I'll make several post to bring this log back to current, lots of lessons learned, so check back in!
-Joe
- Oldsalt1950, ccoyle, Prowler901 and 1 other
-
 4
4
-
Main mast rigged minus the preventer stay.
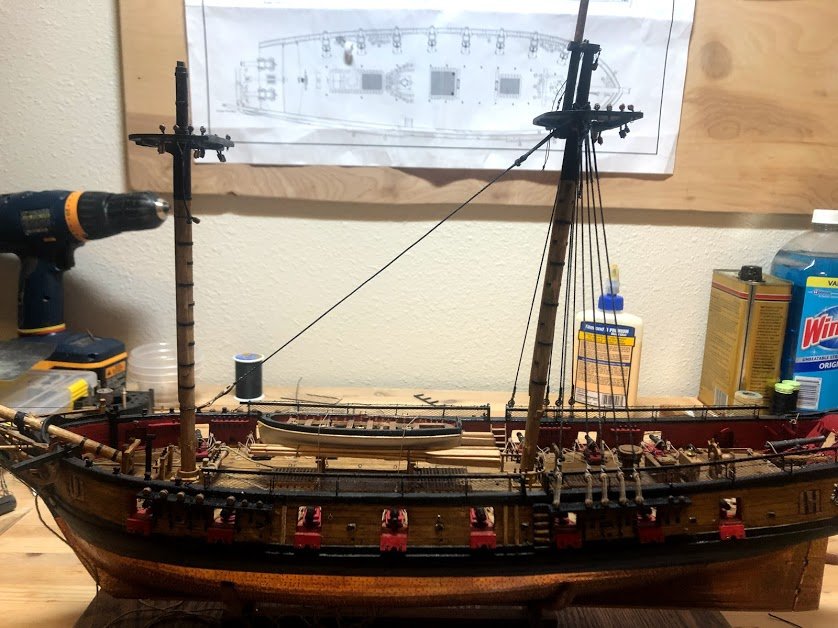
I am very happy with the shrouds. I think they are turning out beautifully.
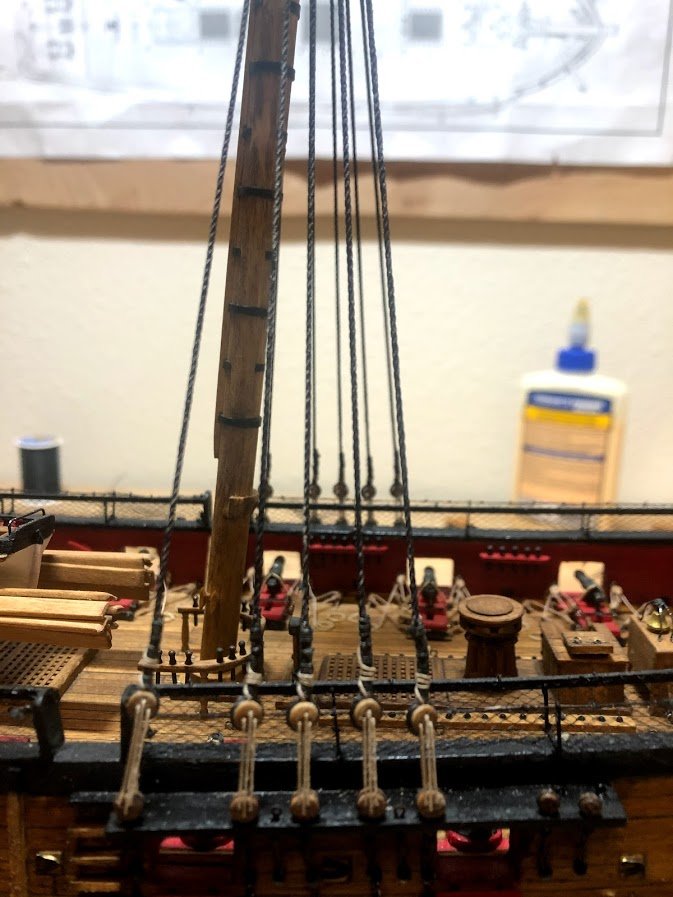
Thanks for taking a look!
-Joe
-
The standing rigging has started! currently complete with the main mast and 4 shroud on the fore. the pictures only show through the main stay, I'll post more once the fore is completed.
first up, the mouse! after I got my serving machine I decided to experiment with serving a mouse in stead of weaving. I really like how it turned out. I made both preventer stays in this method and the fore stay. the main stay was already rigged . I turned a former on my lathe, measured and served from the eye up to the former. Applied a generous amount of white glue then served up from the running end over the former and back to create the mouse. A little patience and I think it looks awesome.
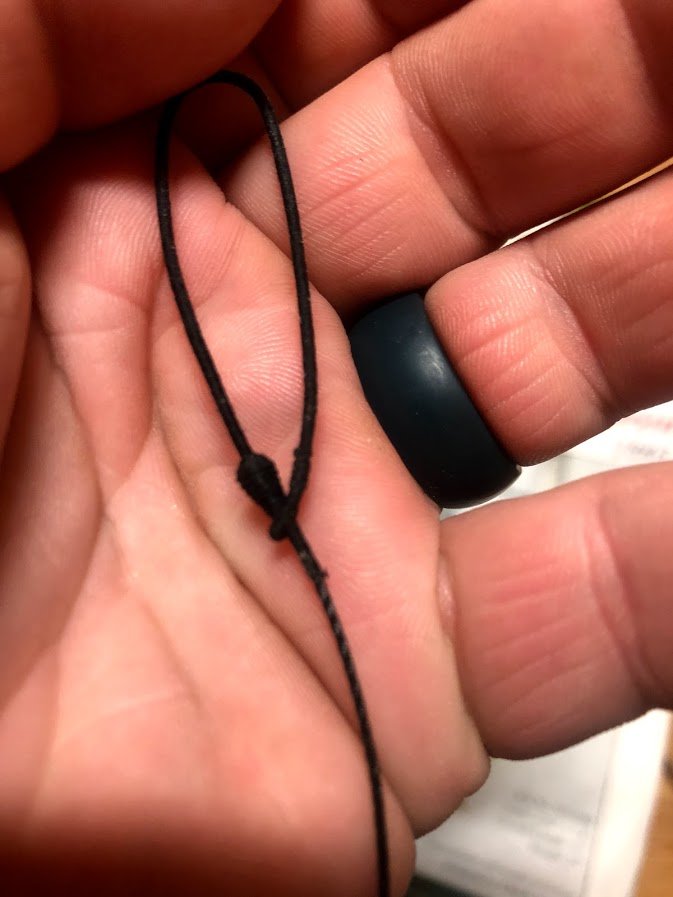
More to follow...
-
Got my Serv-o-Matic from Syren Model Ship company this week! absolutely love this little machine. what used to take hours with meh results now takes mins and looks amazing. Thanks Chuck!
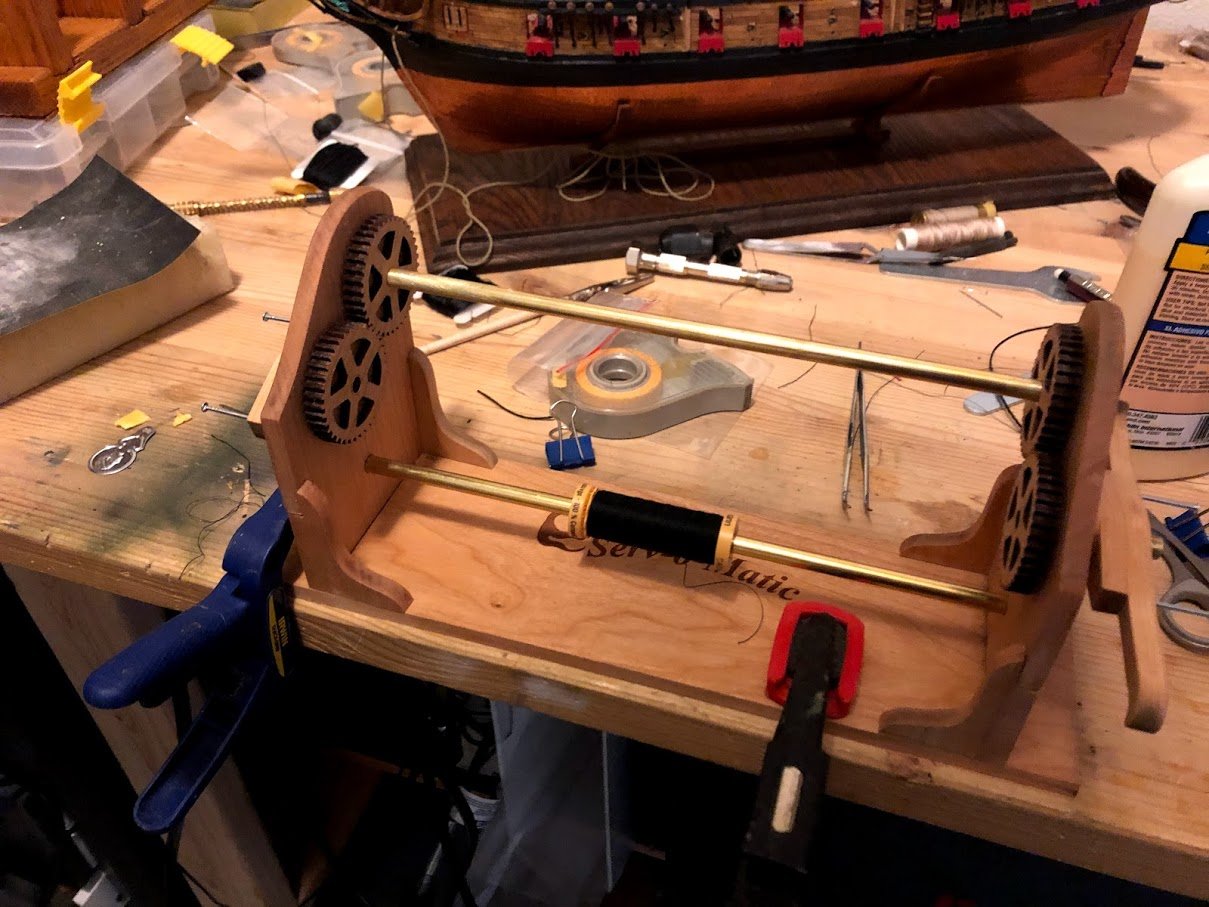
Made all of my pendants, below served vs un-served. The wrap makes a huge difference in my opinion. 20 min job per pendant.
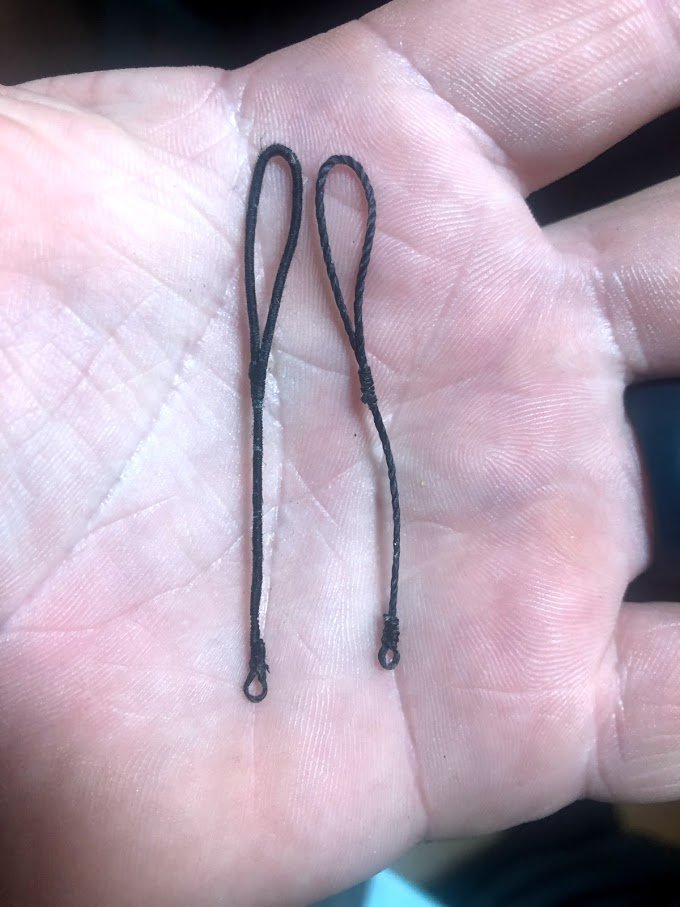
Shroud number 1 Complete!
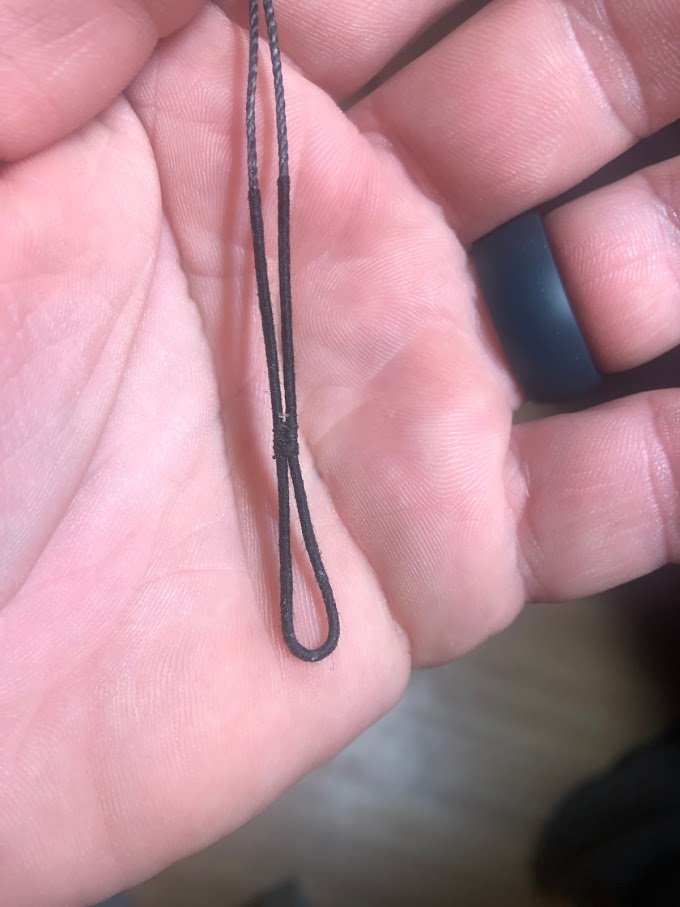
Still working on some of the technique, but I'm very happy with this simple to use little machine.
-Joe
-
Experimented with tying mouse knots tonight using Banyan's jig.
For this I'm using .40mm Line for the main and fore stay's and 50 weight thread for the weave. After building the jig, I turned formers using my mini lathe approximately 1/8 of in long and about 6/32 tapering to 3/32 and bored with 3/32 for the line.
then, I loaded up the jig with 13 lines. I experimented with waxed and unwax lined, didn't seem to make a difference.
After it was loaded up, I used a needle to attached the weaving and serving lines then tied the weave down around the rope behind the former. I tried doing this once on the wide portion and once at the point. It didn't seem to make a difference either way. At this point, it was expedient to serve the portion away from the weave, both times this seemed to work well. I then ran into an issue. a portion of the running threads have bunched on one side of the former and despite my efforts I can't seem to get them to lay properly, the result is a nice weave on one side and a bare portion on the other as the weaving line continues to hook behind the former. once I'm done, I can some what cover this with some massaging and with some paint, the end result don't look terrible, but it's certainly not the beautiful weave Banyan got.
Is this something I need to continue to experiment with or am I missing something?
Thanks for looking.
-Joe
-
Policing up all the items I skipped over before I start going up with the rigging and I can’t reach stuff easily. I knocked out the anchor lines, stern gun port hatches and the rudder pendants. Pretty happy with how everything is coming along. I decided to go with 1 piece gun port covers instead of the split ones called for in the plans. I like the way it looks better. 1 thing is for sure thou, my skills have improved a lot since I made the gun port covers for the sides, these look much better... almost makes me want to redo them... almost.
Rudder Pendants/gun ports.
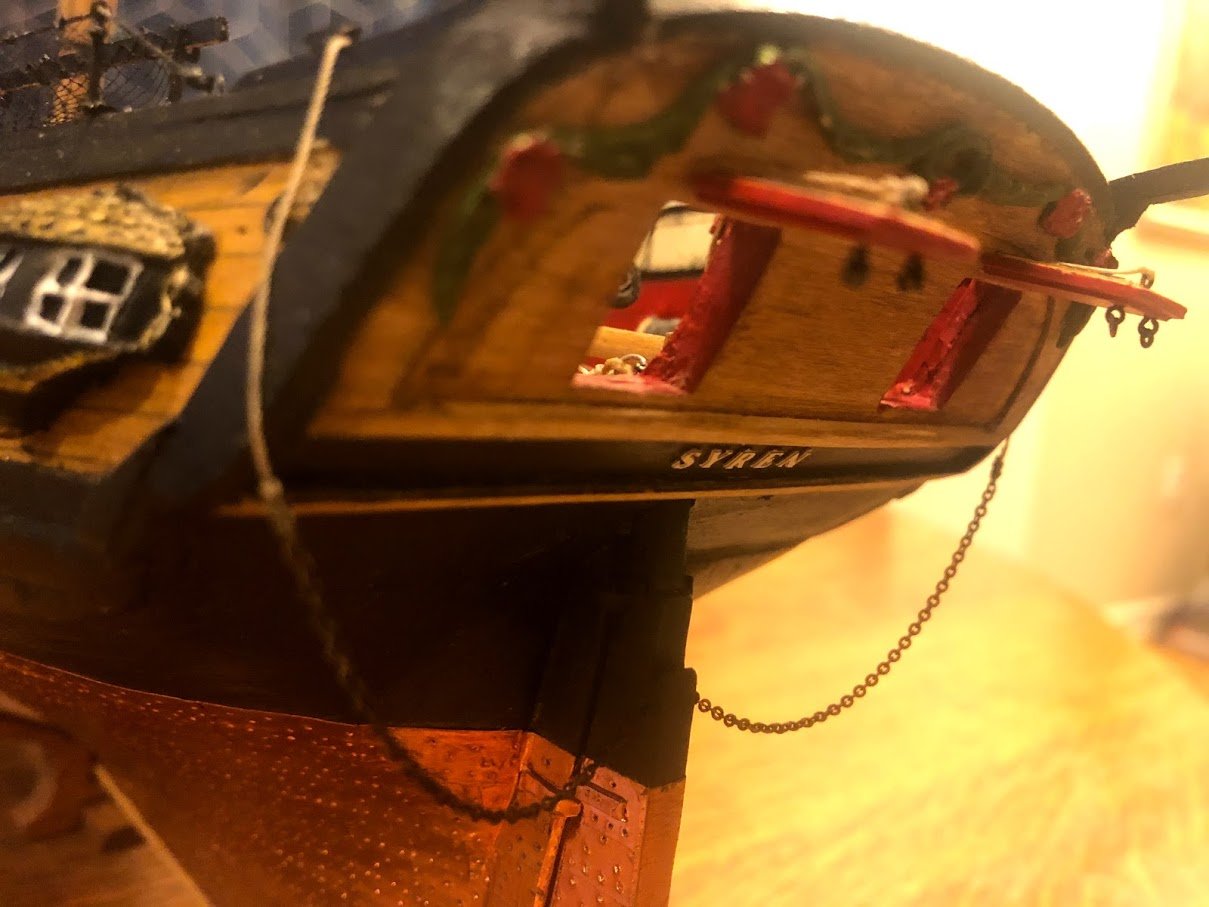
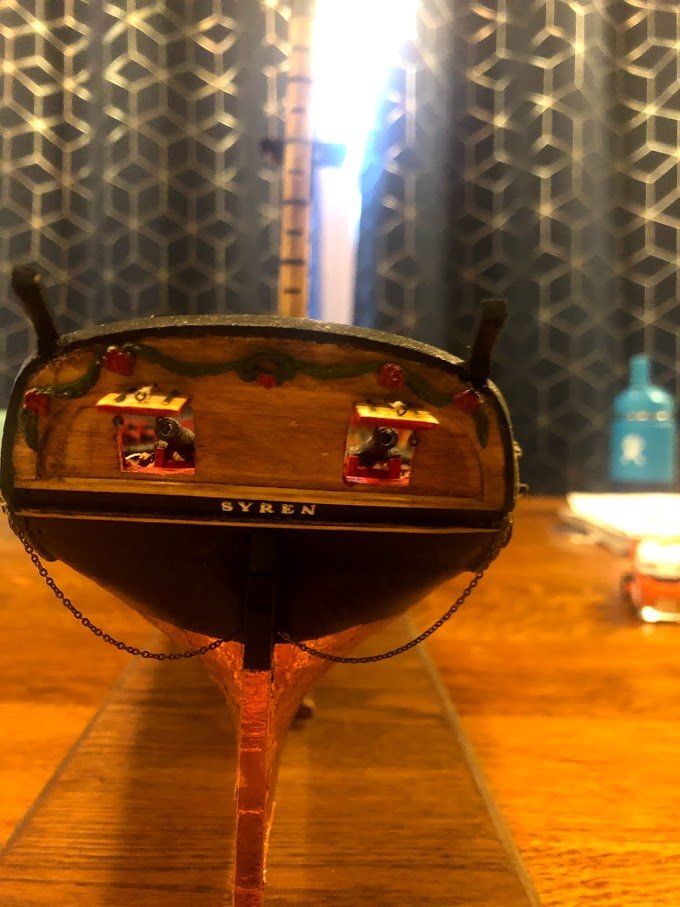
Anchor line
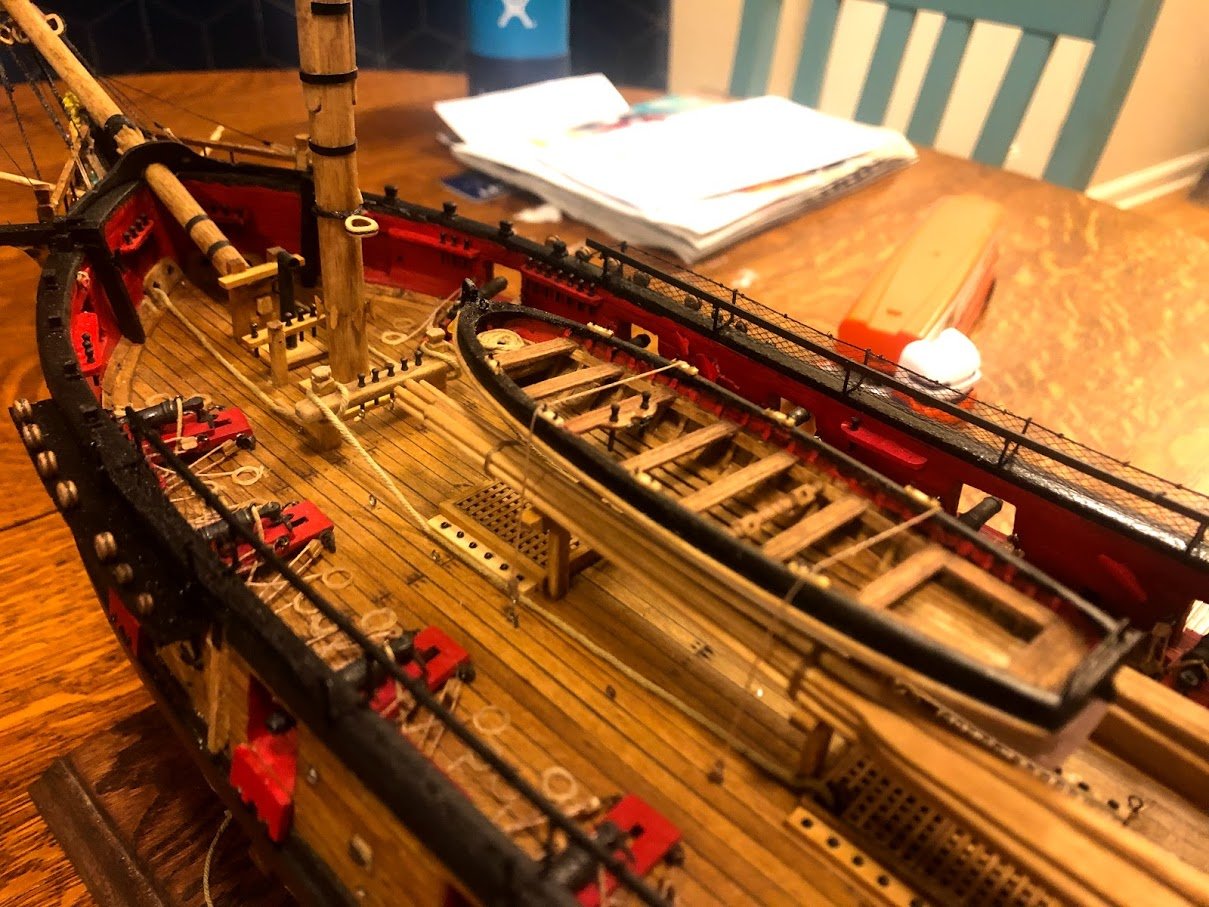
Thanks for taking a look, as always, open to feedback!
-Joe
- GrandpaPhil, JpR62, Edwardkenway and 3 others
-
 6
6
-
The chain plate was an interesting. I followed chucks instructions for the dead eyes and they were pretty simple and straight forward.
After the dead eyes, I ran into issues. I set up my jig as per the instructions but I couldn't get a consistent result. the nails pulled against the wood and bent inward ultimately leading to a lot of frustrations. I ended up using round nose jewelry pliers and a micrometer to get the results I wanted.
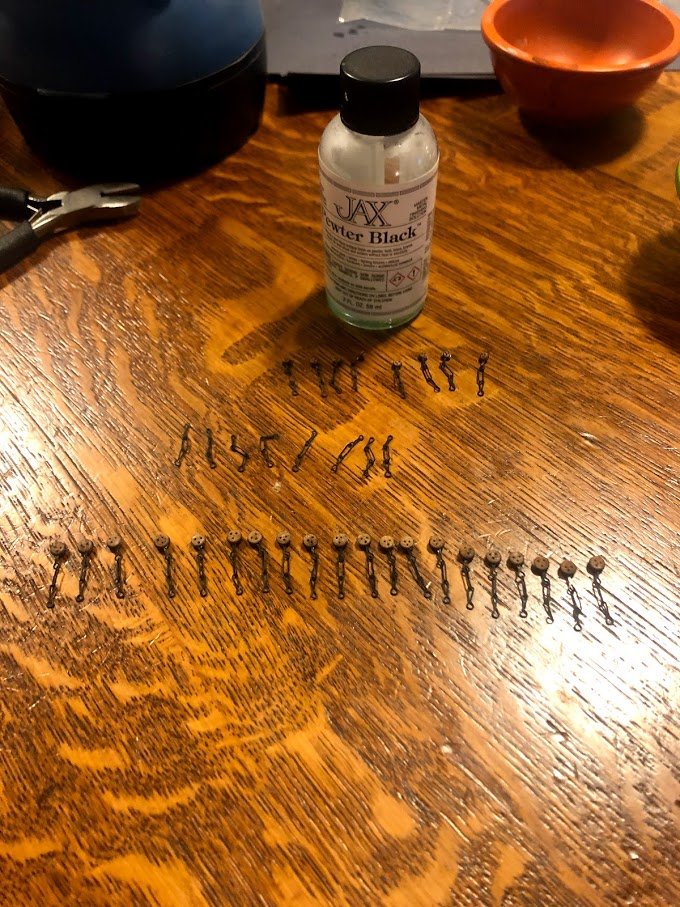
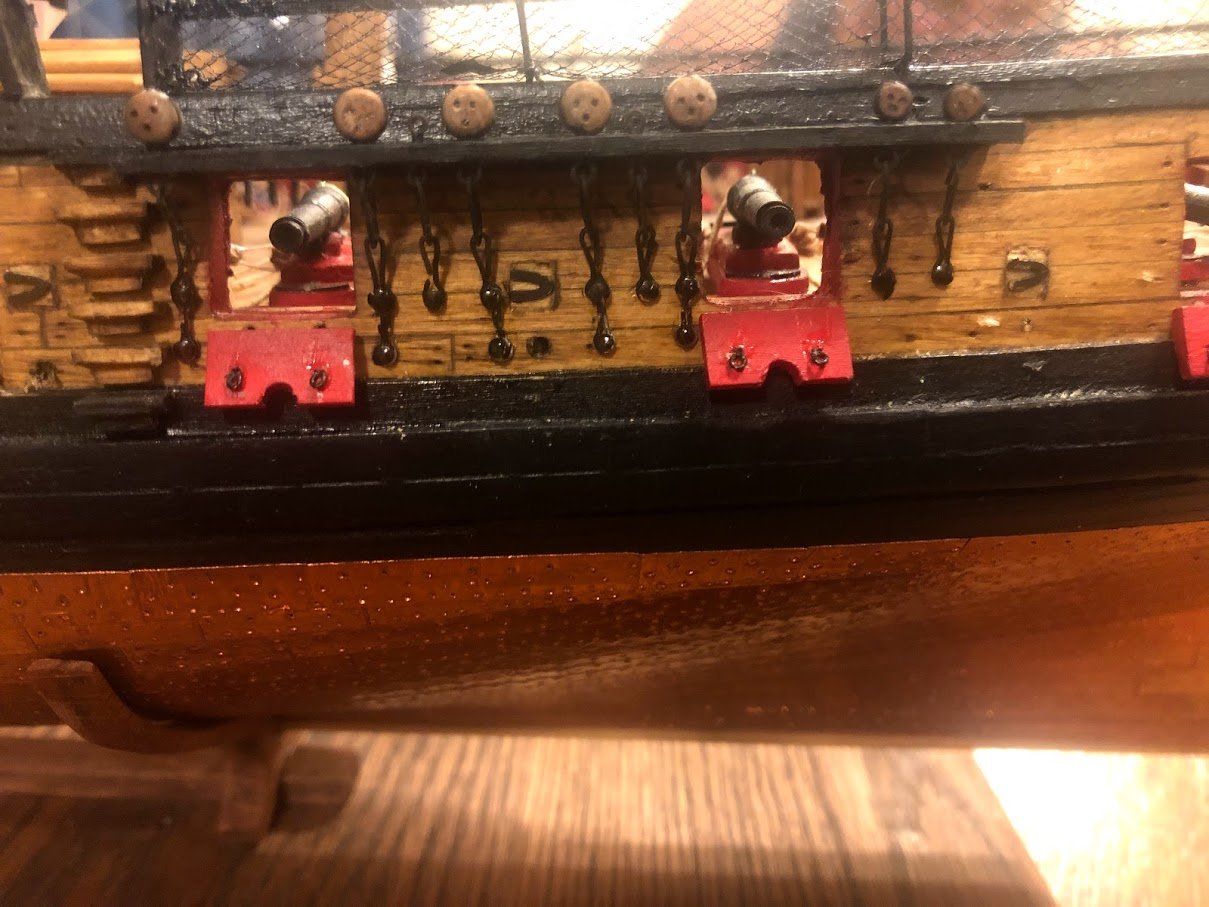
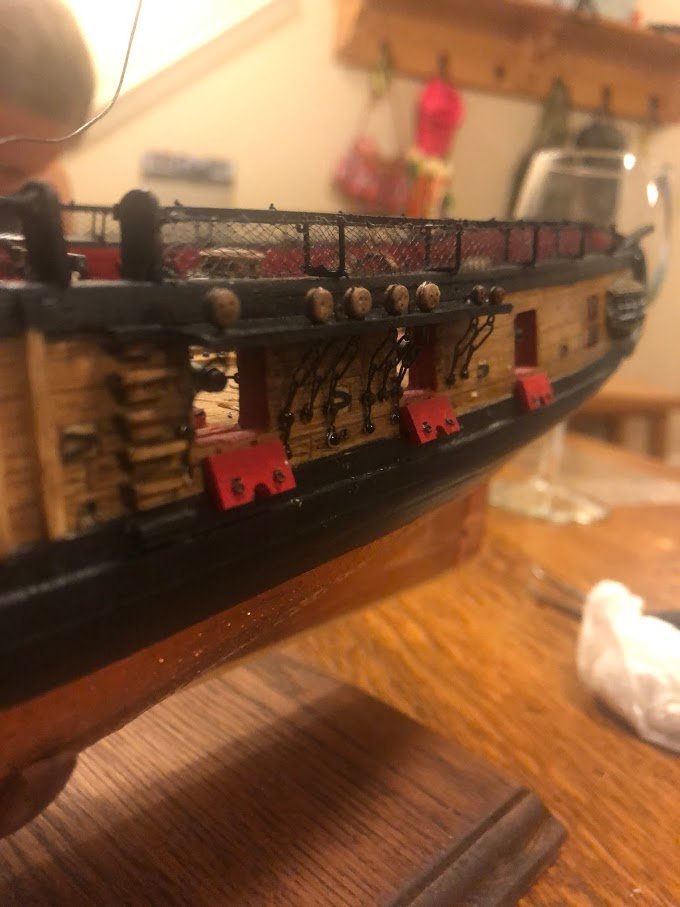
And now I'm caught back up on the build log. I hope you guys like all the pictures, in my mind, the pictures tell the story much better than I can. I ordered Chuck's serv-o-matic this week (thanks Chuck), once it gets here I'll start on the standing rigging!
-Joe
-
THE MAST! So admittedly, I was supper anxious about the mast, so much so that I purchased three spare three foot dowels... I have three remaining now... Taking the lessons from the bowspirt I approached the mast with a much more deliberate and researched approach. Also the steps laid out by chuck were super easy to follow. I neglected to take photos of the lower mast before I had the cheeks on. But, honestly, there was nothing special about the process. The mini lathe was supper handy to shape the cheeks once they were no and the iron bands were no issue. The only part I would say was a struggle was squaring the top with out incorporating a twist. I struggled a lot with that and really didn't get the hang of it till the top mast.
After a lot of work the main mast was good to go.
Next I built the tops, decided to go with the real method of hanging blocks. This was more frustrating than I will give it credit because I simply lack the knowledge of what blocks go where and do what. So despite careful examination of pictures and the plans I kept second guessing my self.
The top mast, things really started to come together. I had my system down, I was extremely deliberate and i think it paid off.
and after a lot more work and some rigging that I didn't take pictures of... I glued them in place... For this step, I wish I had drilled smaller holes instead of the mast sized holes I did, because early on, I failed to place the bracing blocks in the along the keel that would have provided a much firmer base for the mast. Alas, I have learned... so it good right? right.
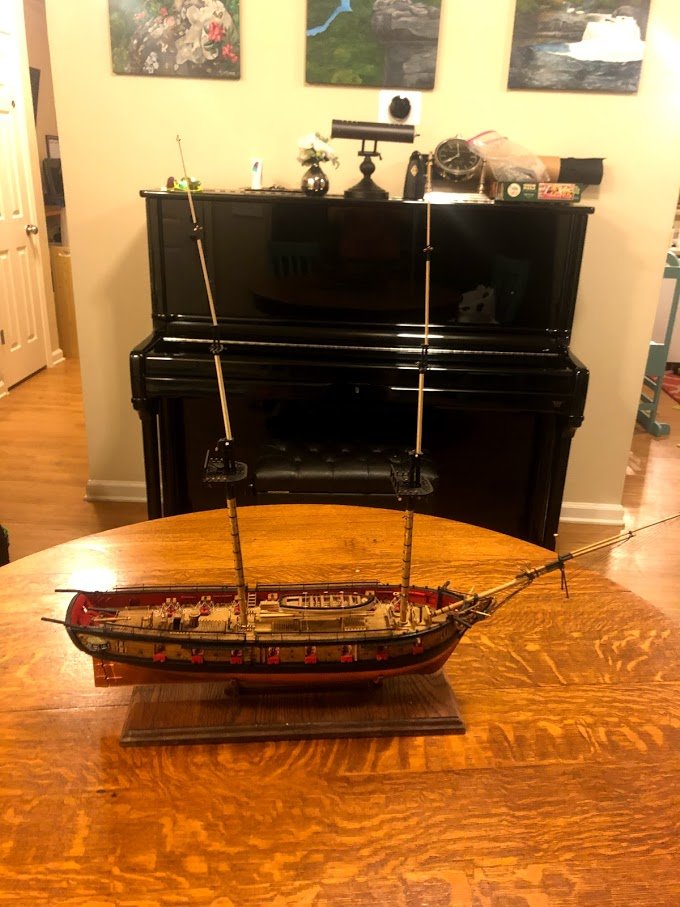
Of note, the curve on the main mast is not as pronounced in real life and yes I did adjust it. Also, important to note, the top mast and up are not glued in place to allow for eaiser rigging later.
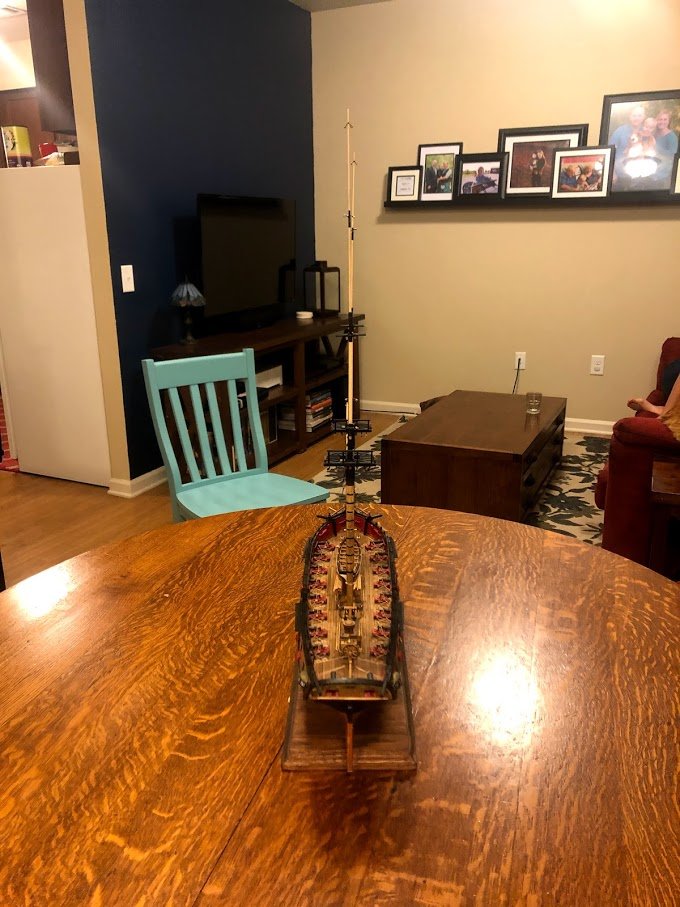
Just about caught back up, next step is dead eyes and chain plate which I finished tonight!
-Joe
- Ryland Craze, JesseLee, Henke and 4 others
-
 7
7
-
My Next step was to tie my launch down and complete the bowsprit. The bowsprit was frustrating for me because I hadn't figured out how to square the beam and taper it appropriately. I ended up replacing the dowel and starting over. Still not perfect but I got it to the point that I was satisfied. I used painted tape for the iron bands... not the best choice, but it does look good. I finally figured out how to used the provided material for the bands when I moved on to the mast but I'm not going back to fix them on the bowsprit. Oh well... this model has been alot of learning.
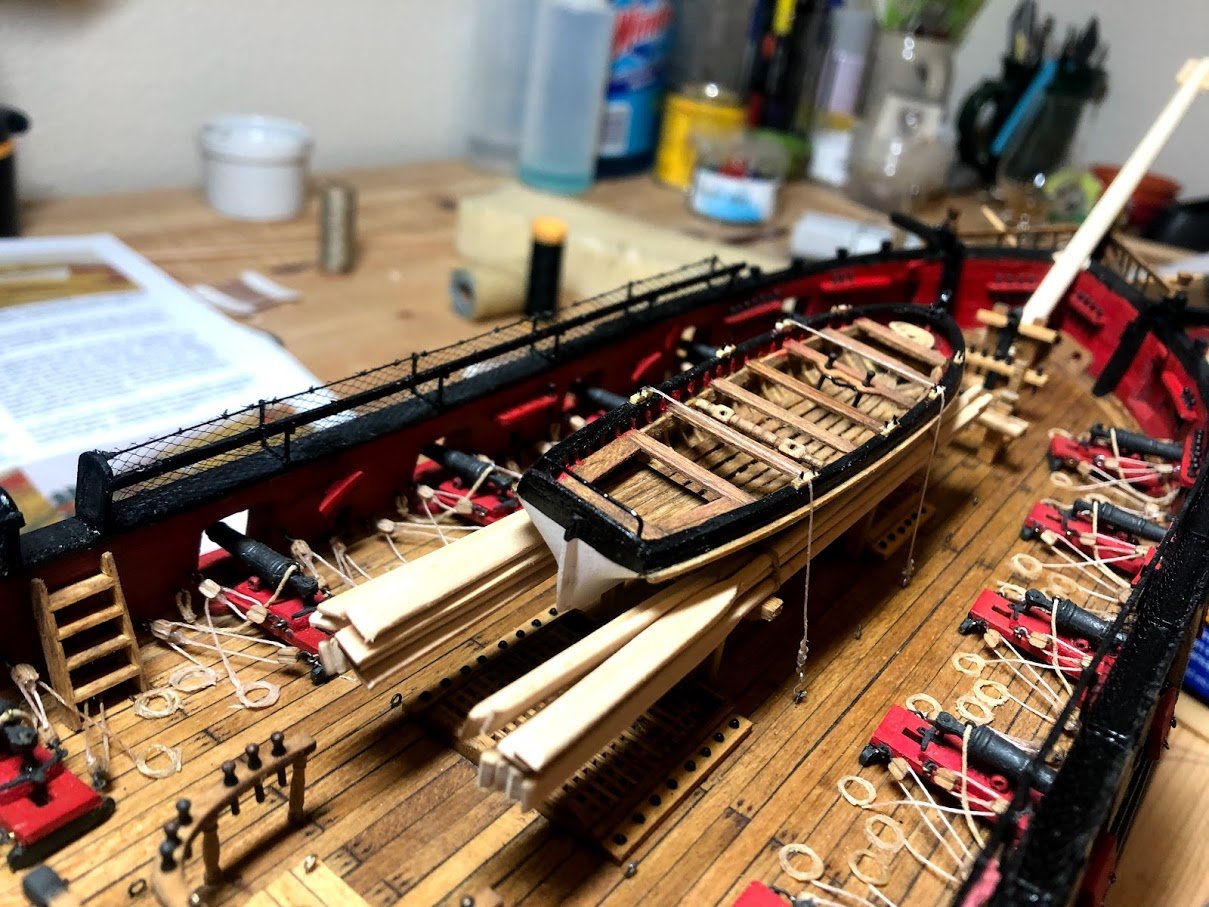
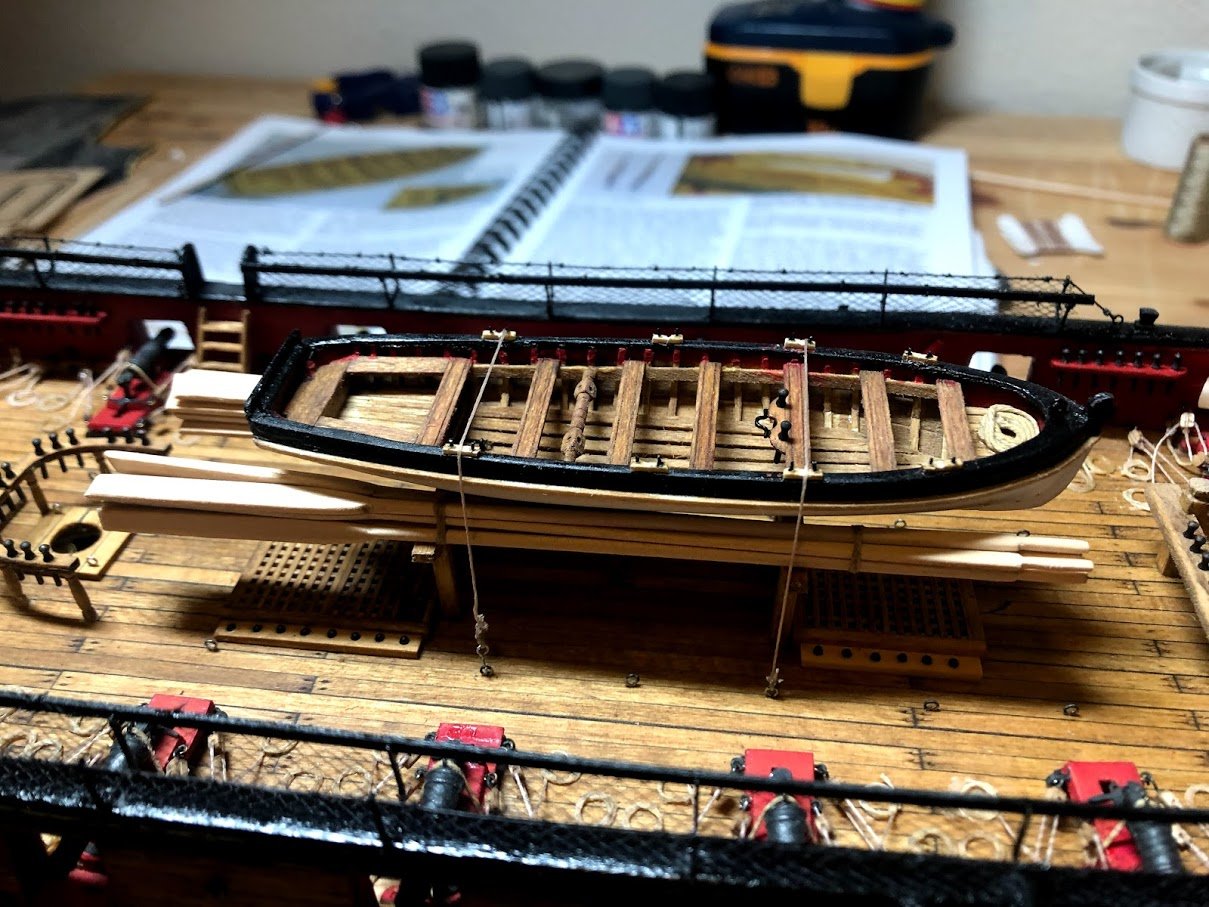
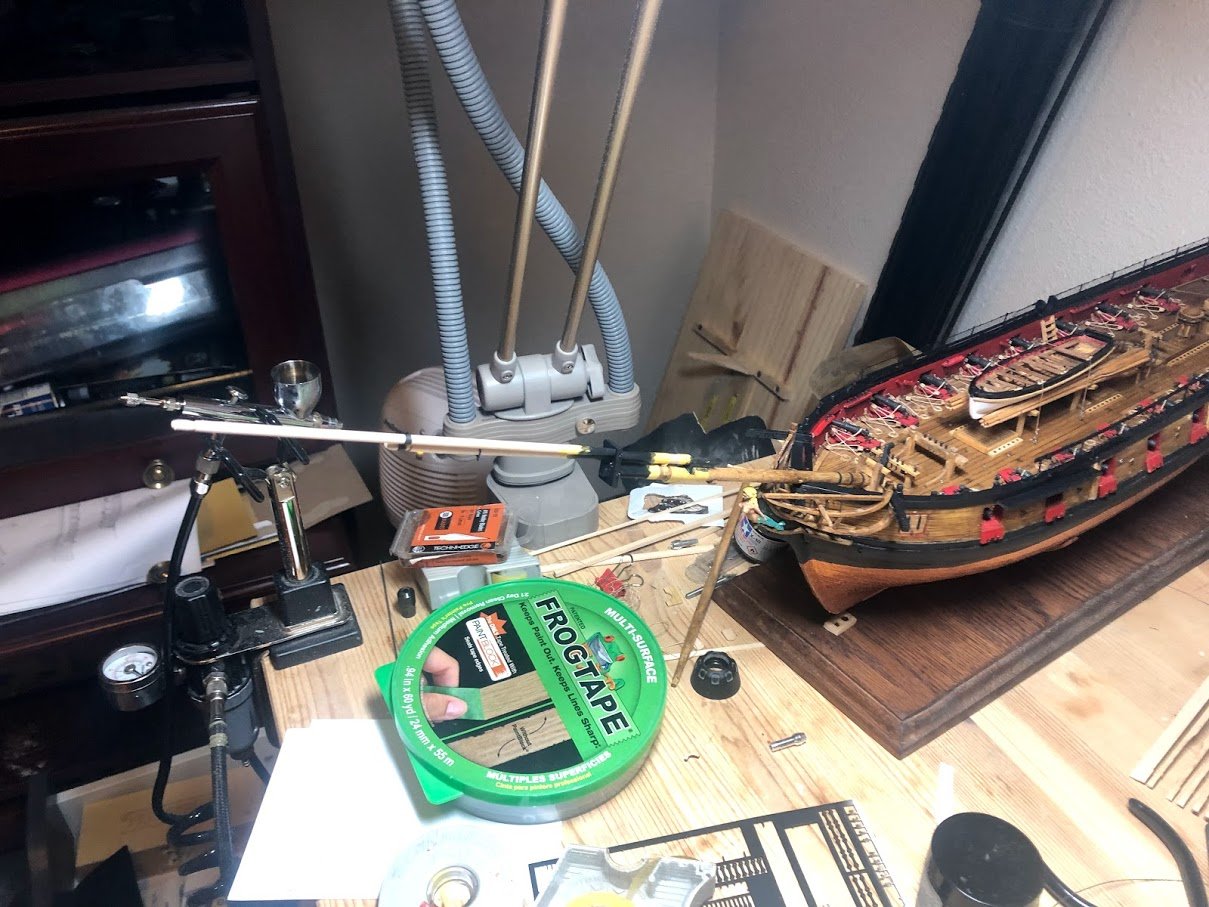
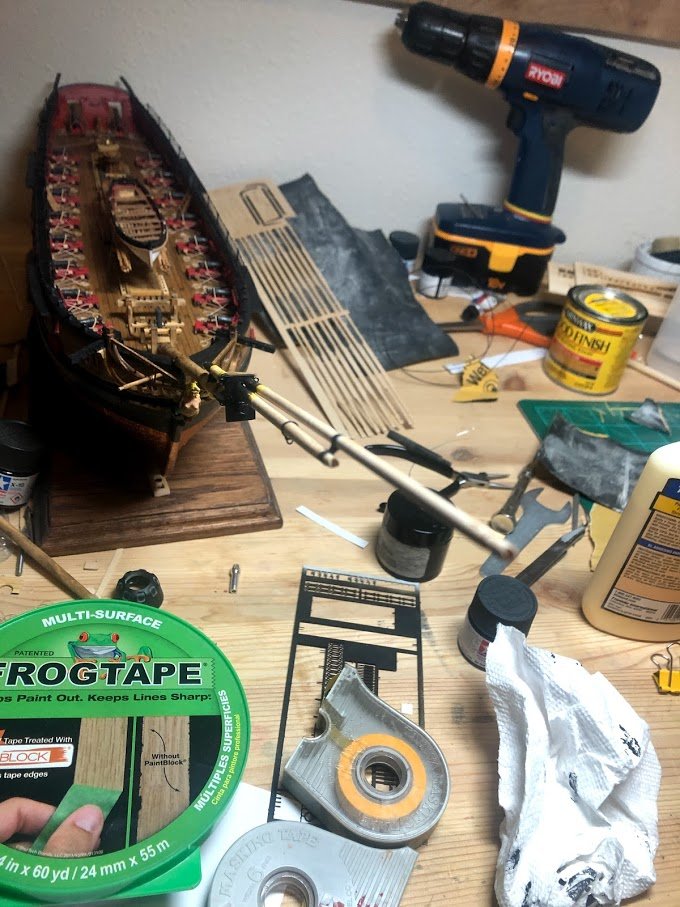
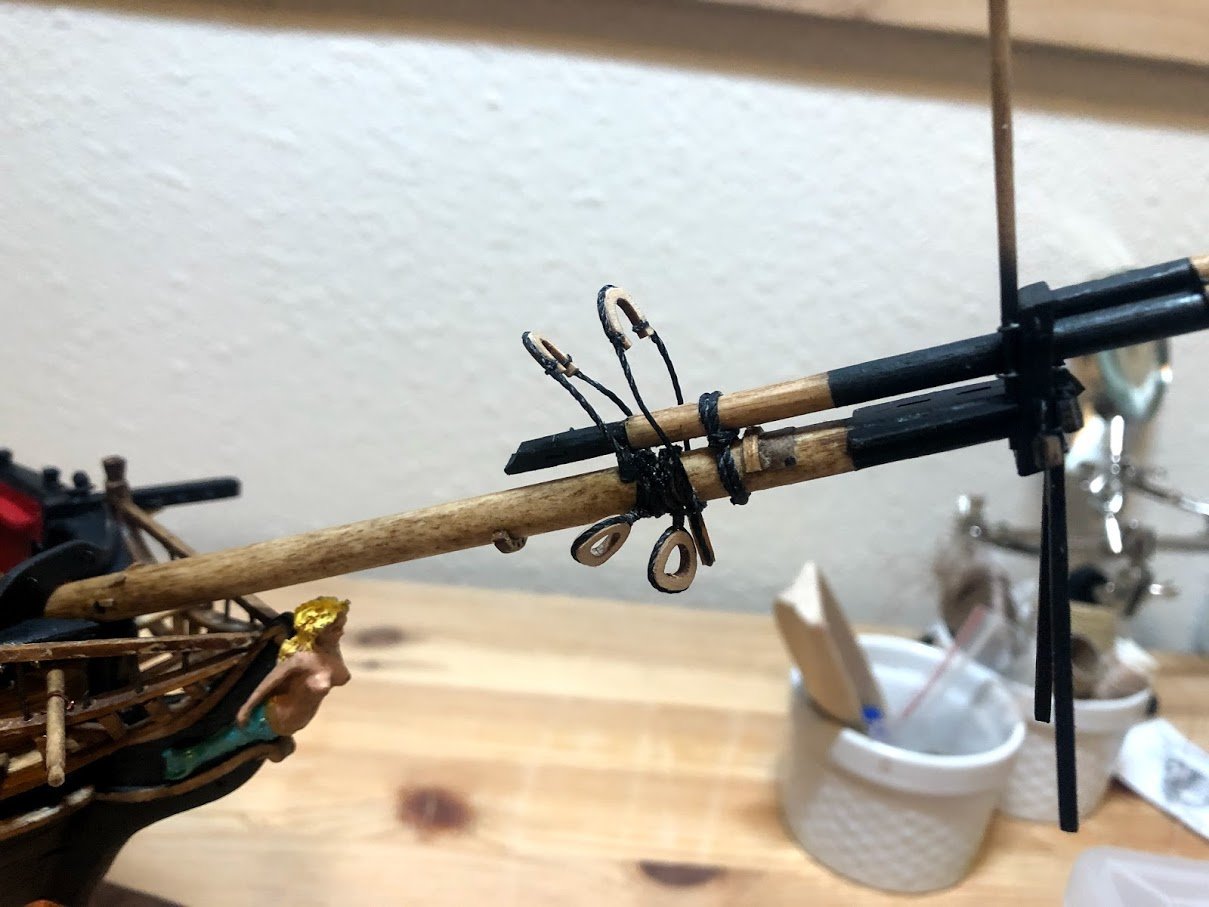
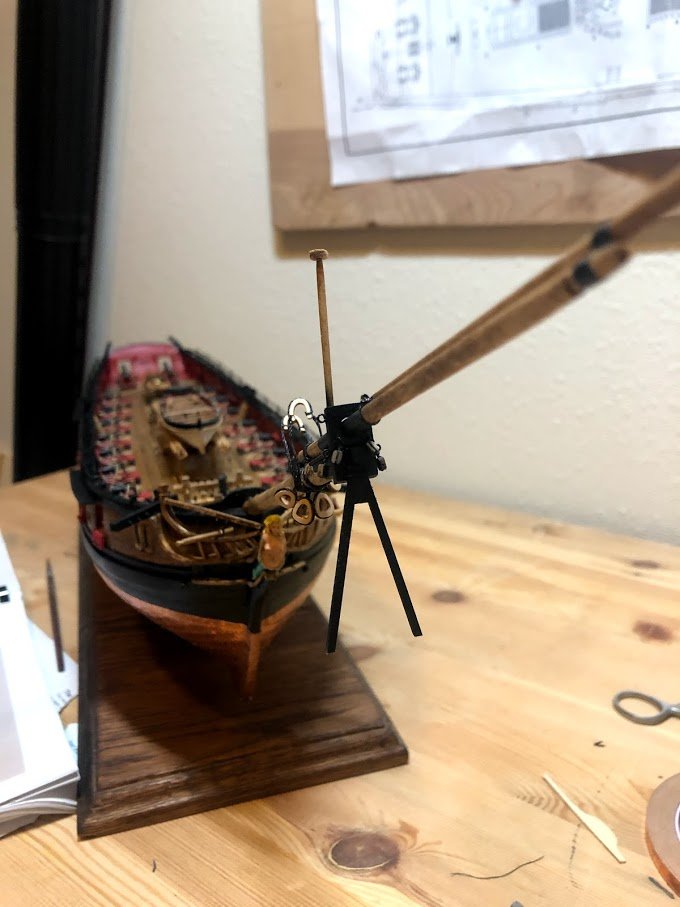
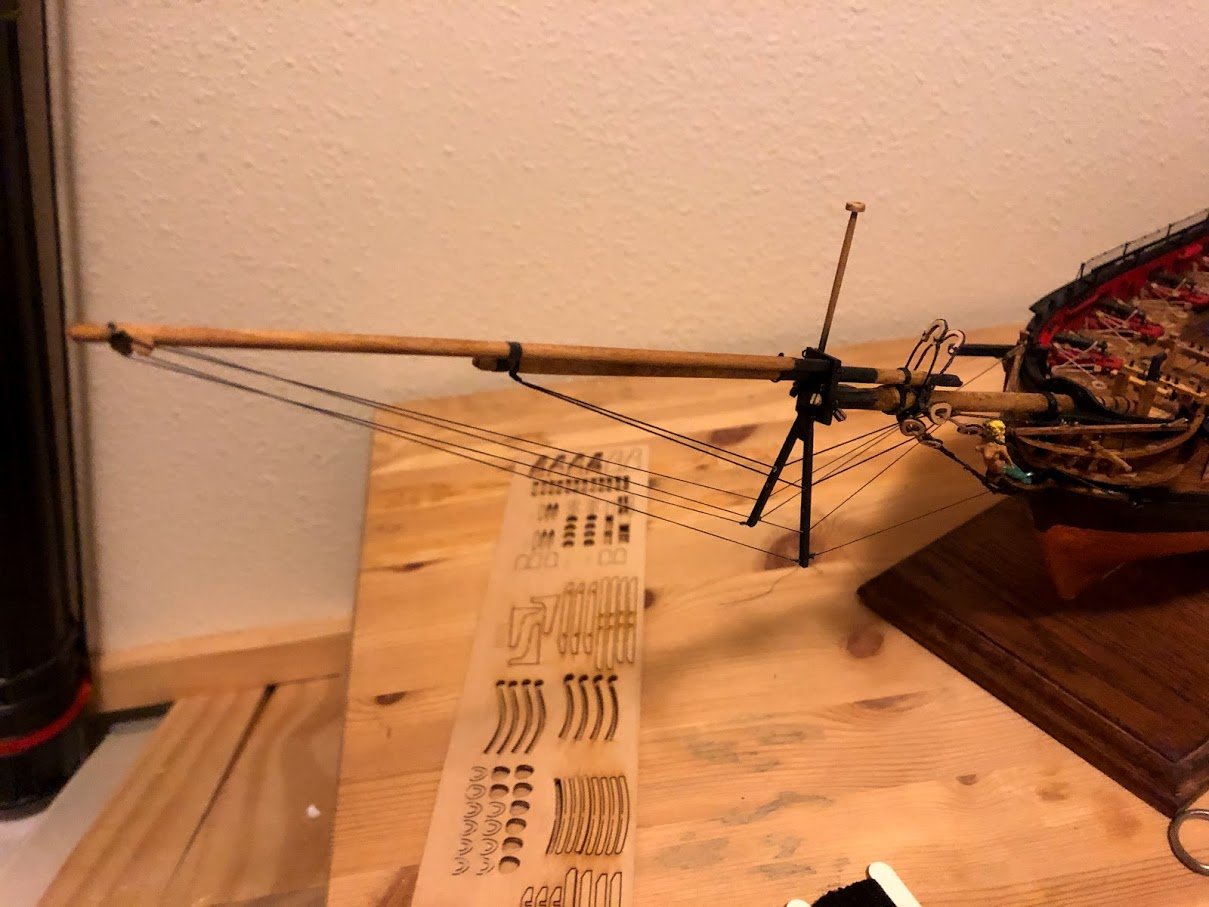
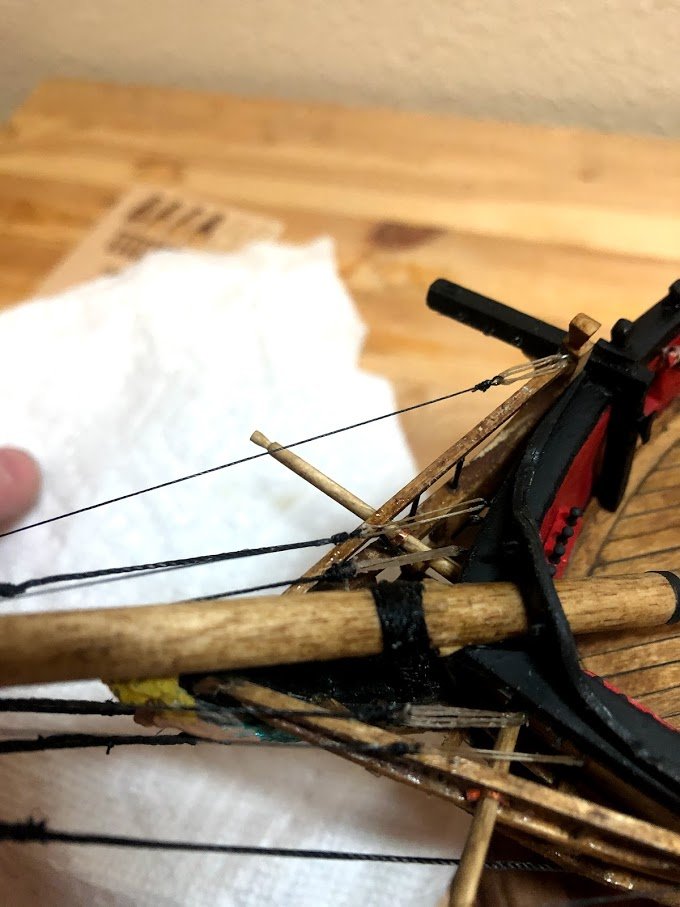
Next step the mast! and lots of learning.
-Joe
-
I apologize, I've fallen a bit behind on this build log but not on the actual building. I'll try to catch up over a couple of post. Reference my last post here are my completed hammock cranes with netting. I am very happy with how these turned out. I debated putting hammocks in them but ultimately decided against it. I like the look of the empty nets.
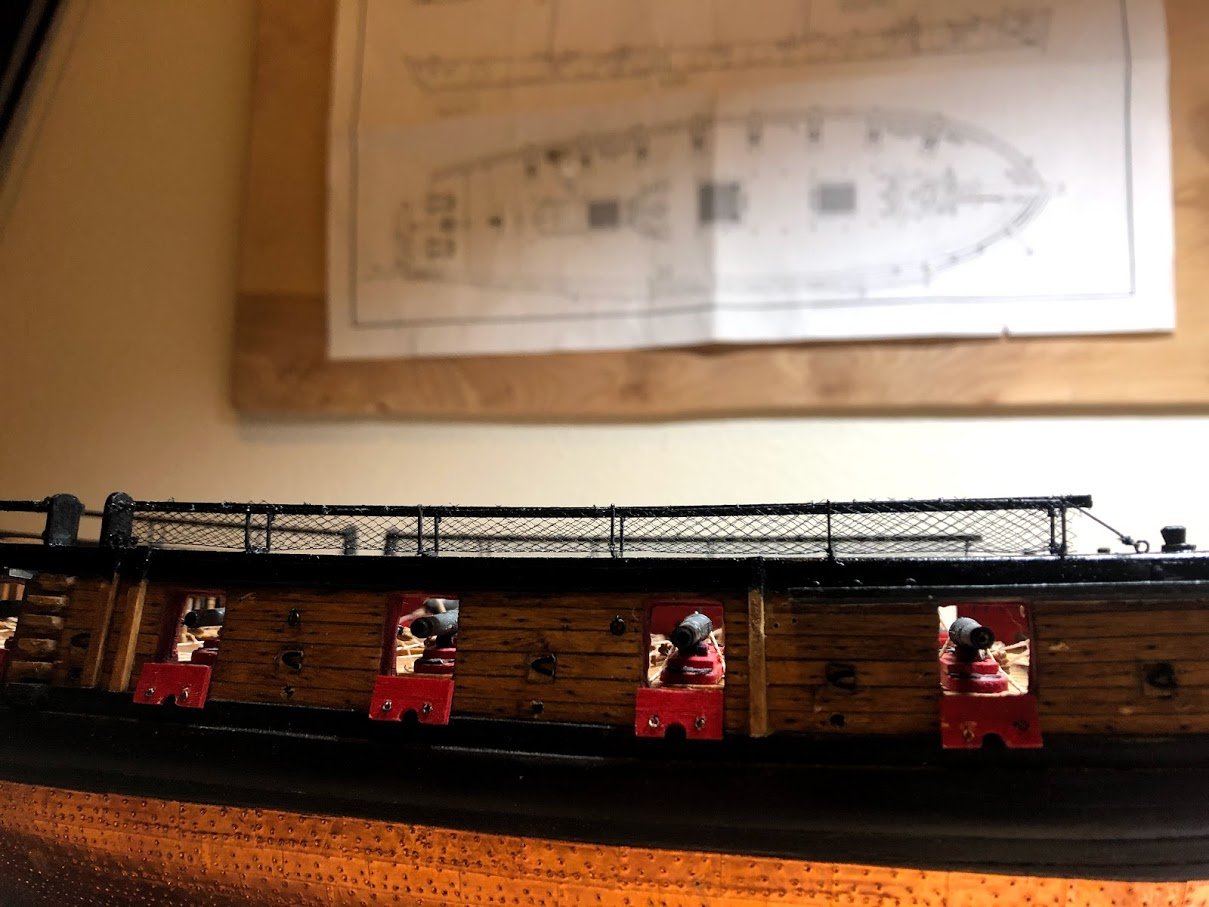
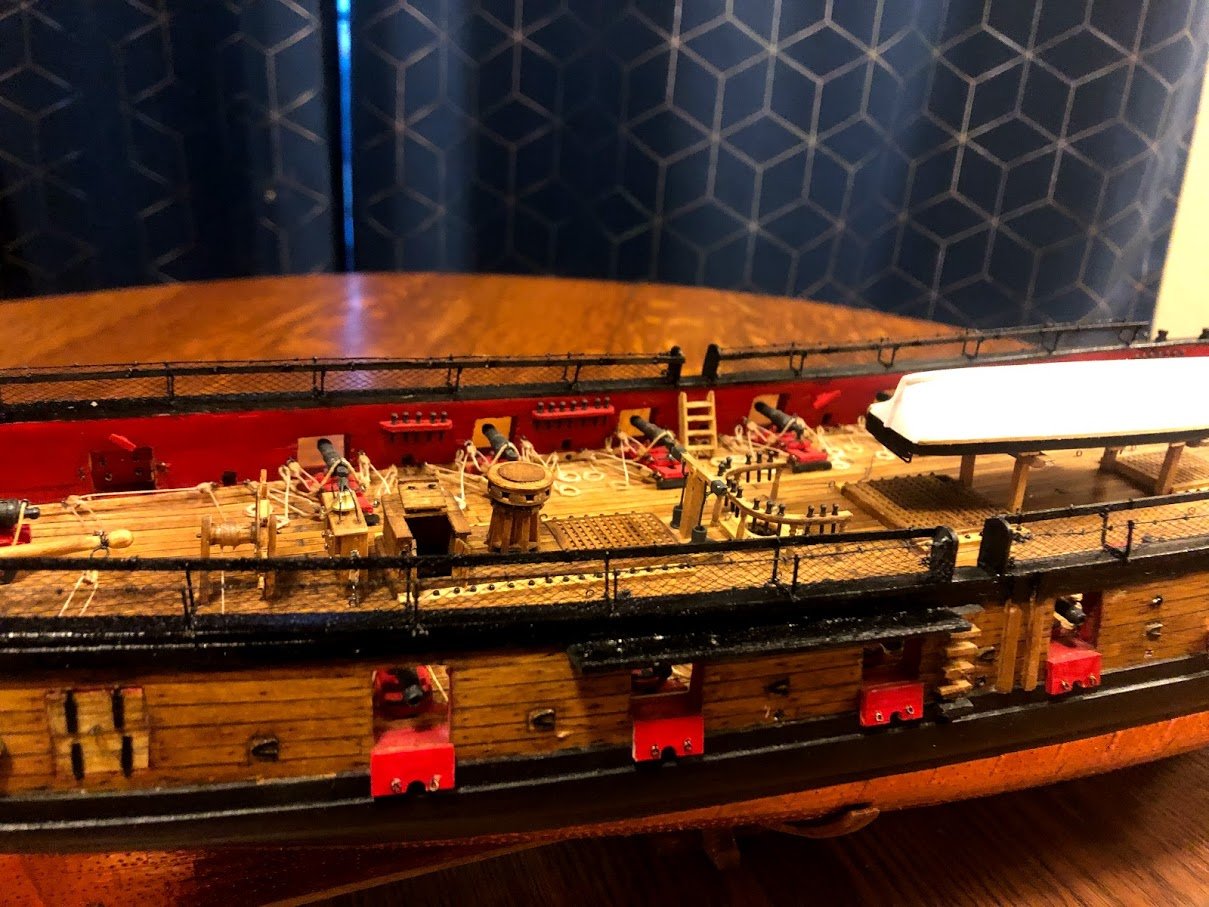
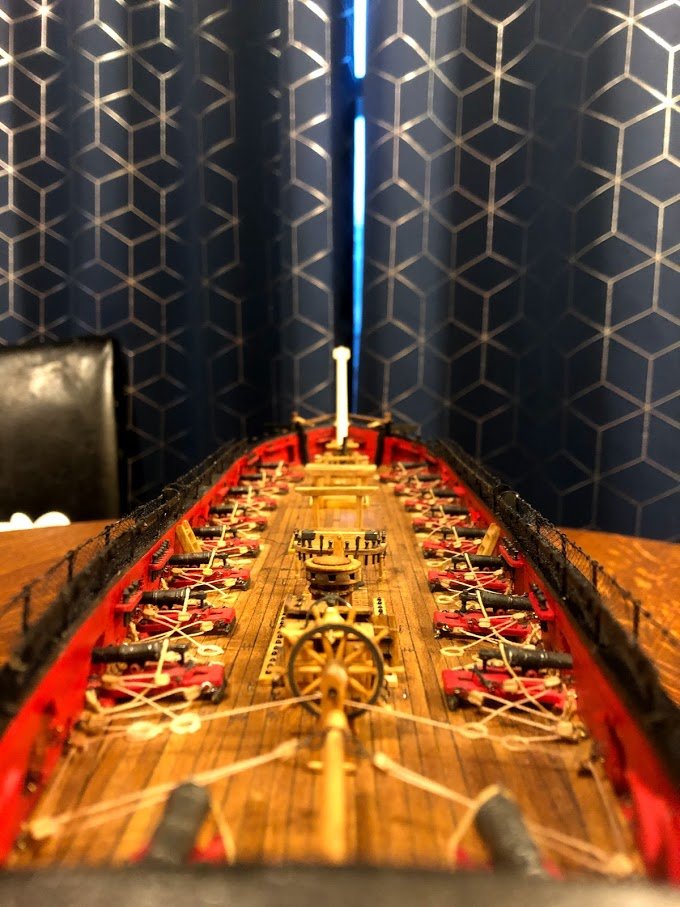 .2
.2
-
Started the hammock cranes last night. Still needs to be painted but I like how it's looking so far

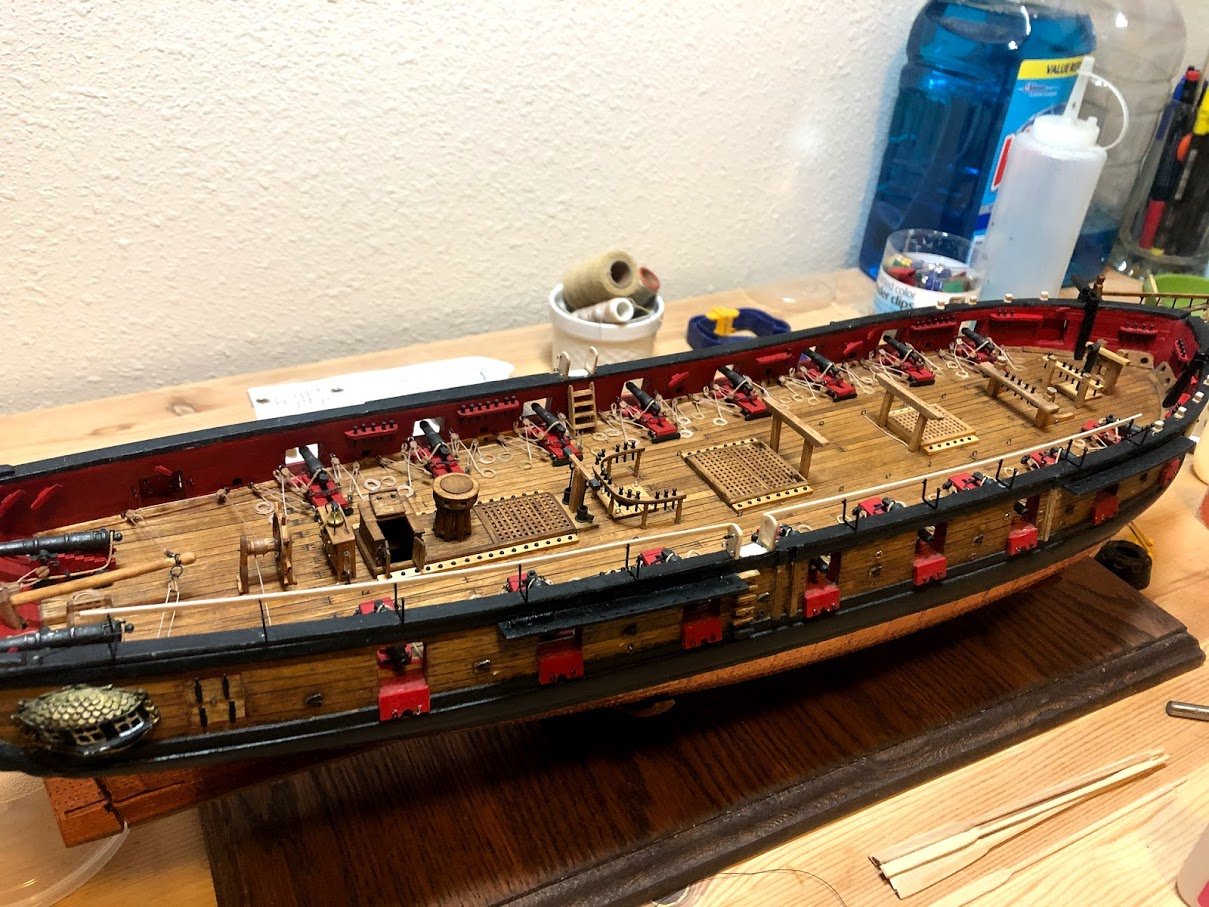
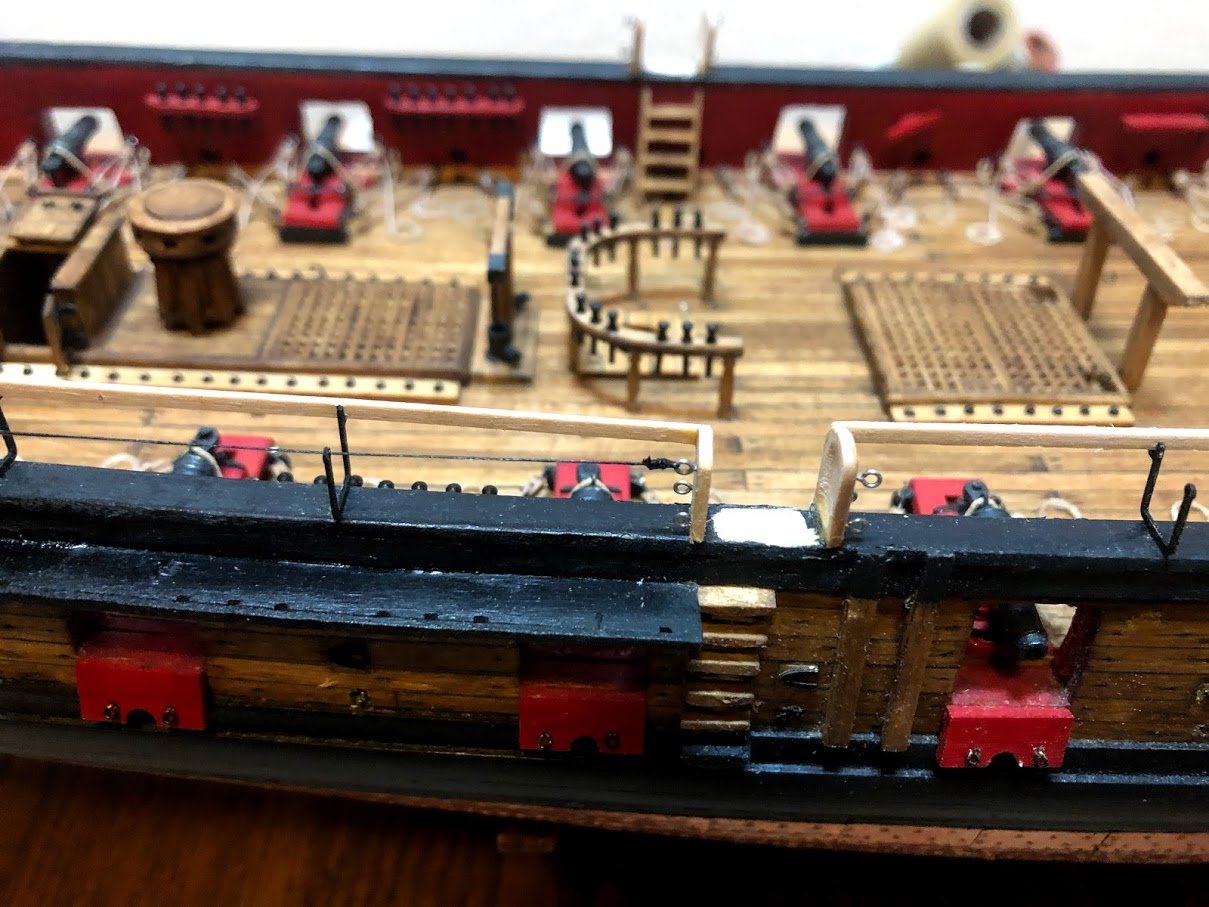
- Sgt_Hoser, Ryland Craze, CiscoH and 9 others
-
 12
12
-
Update on the ship, I have been a bit busy but I have made some pretty good progress finishing up the deck fittings. First up, here are the completed coils.
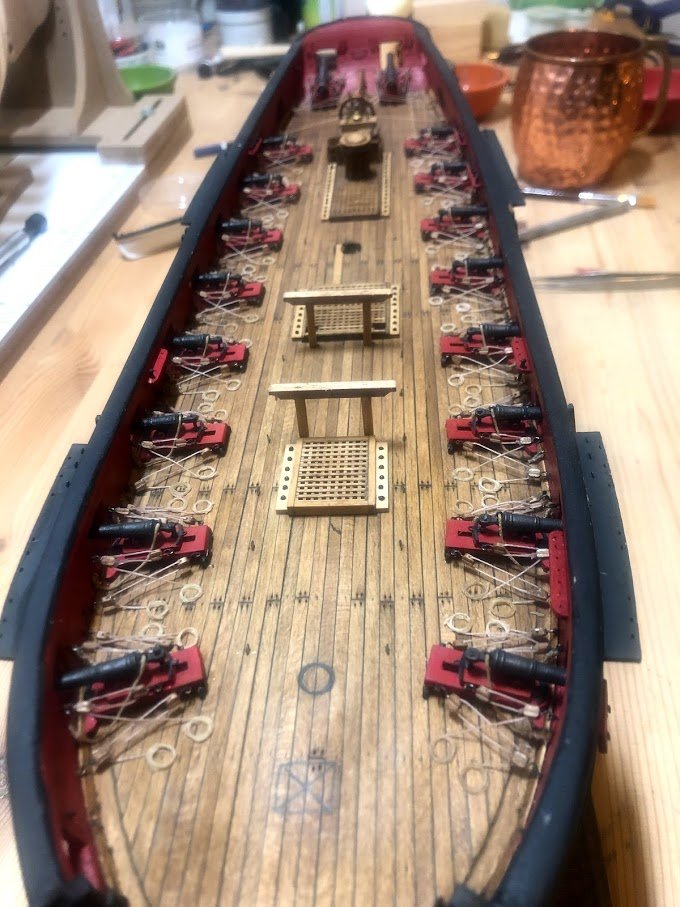
Next I knocked out the ships pump over the course of a few days.
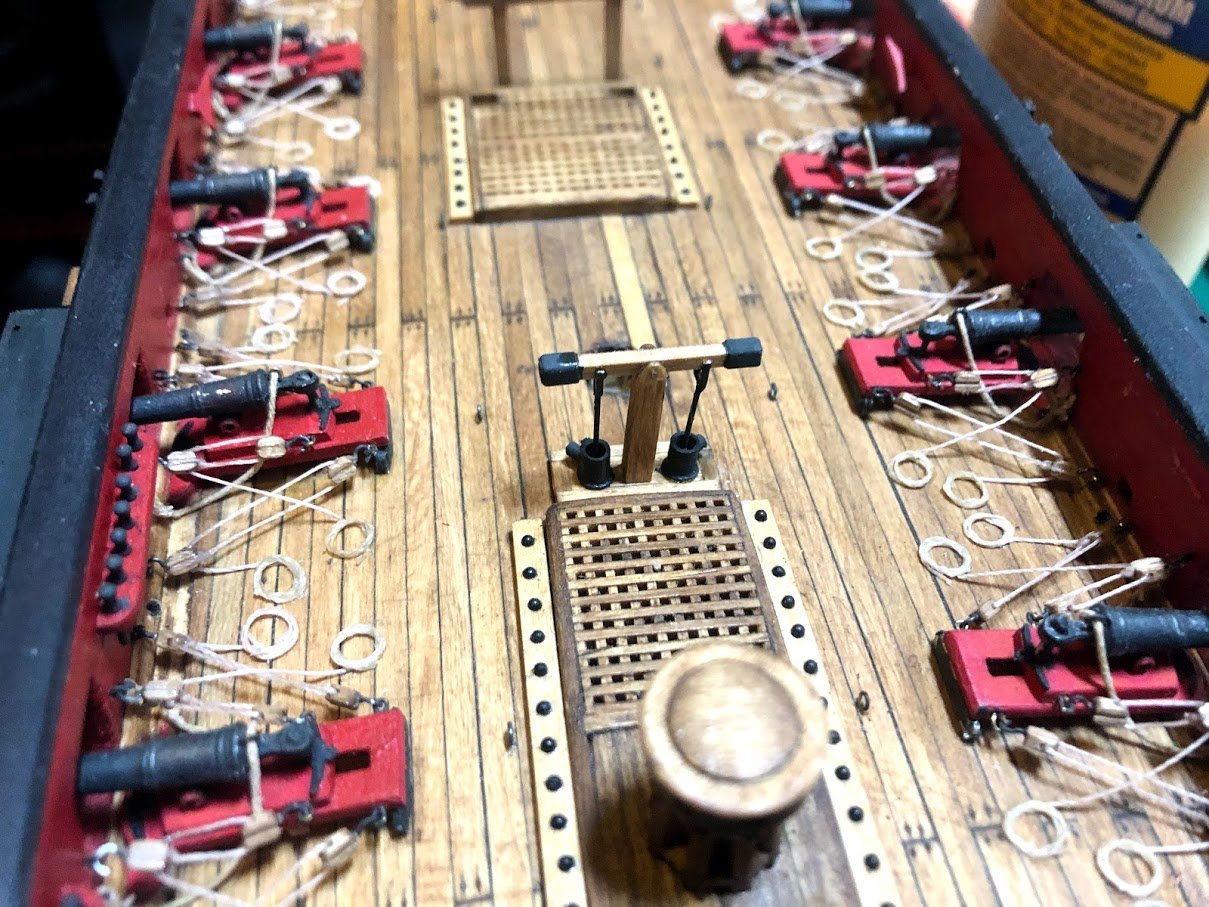
Next up, I completed the fife rail and boarding ladders. I'm very happy with the fife rail in particular the legs which I turned on my mini lathe.
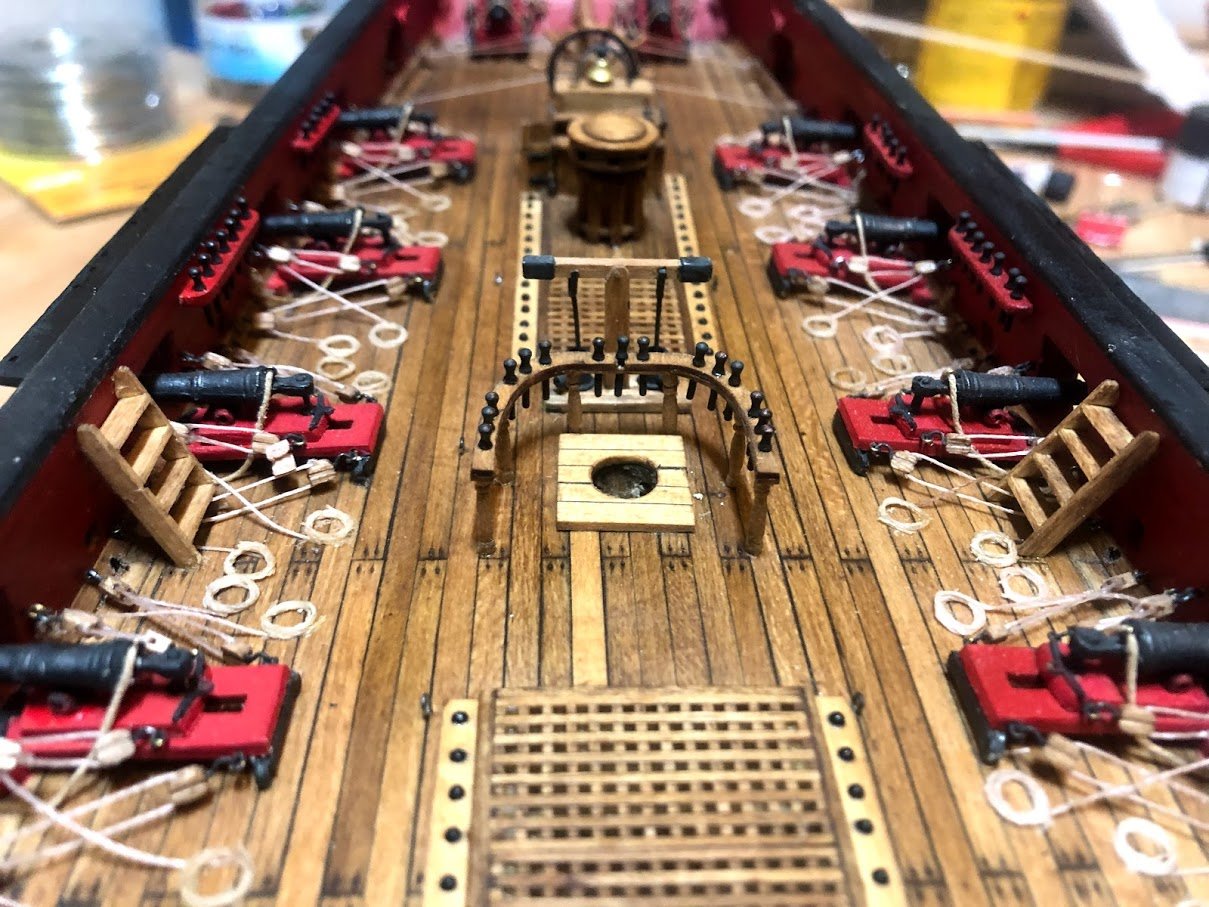
Finally the forward bits.
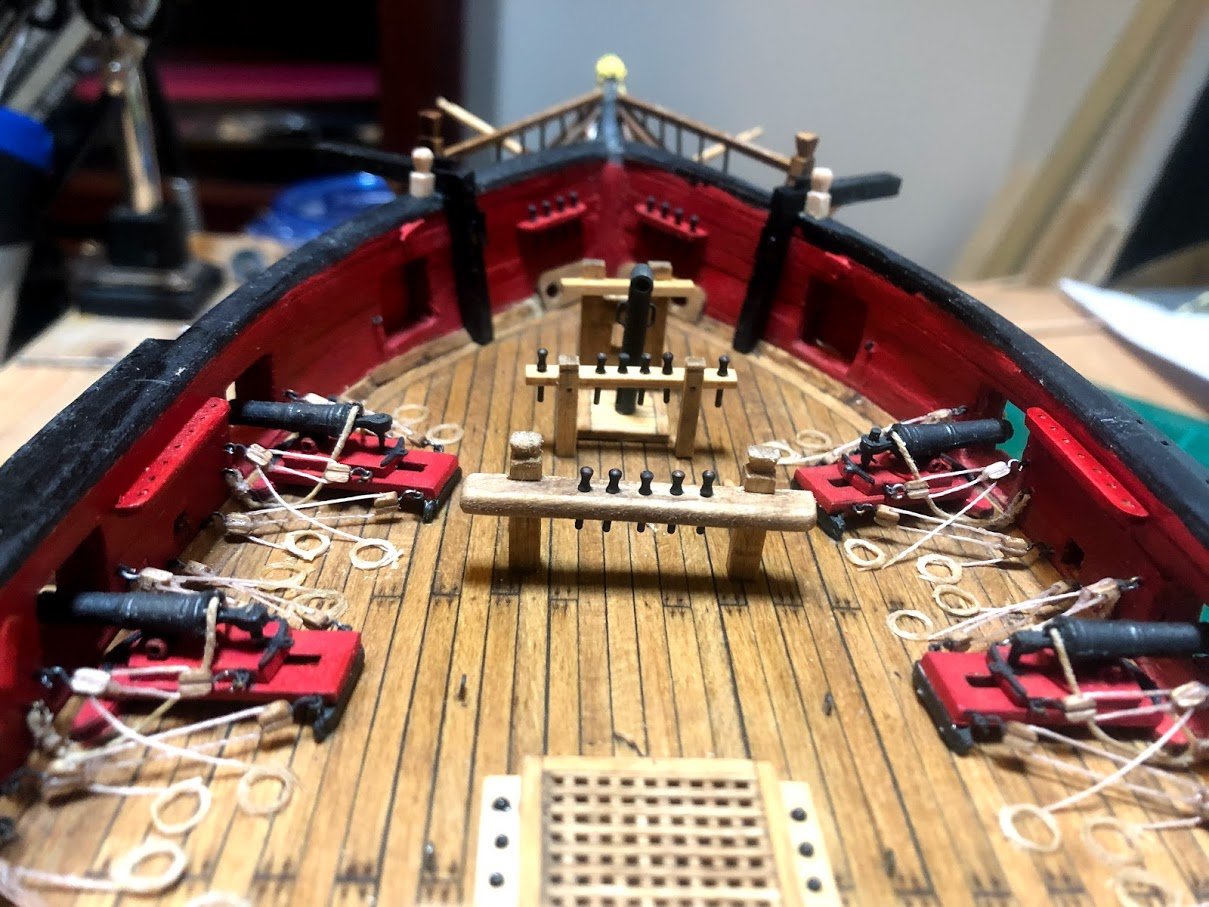
Finally the stern davits. These were optional, I like the way the look thou so I'm keeping them.
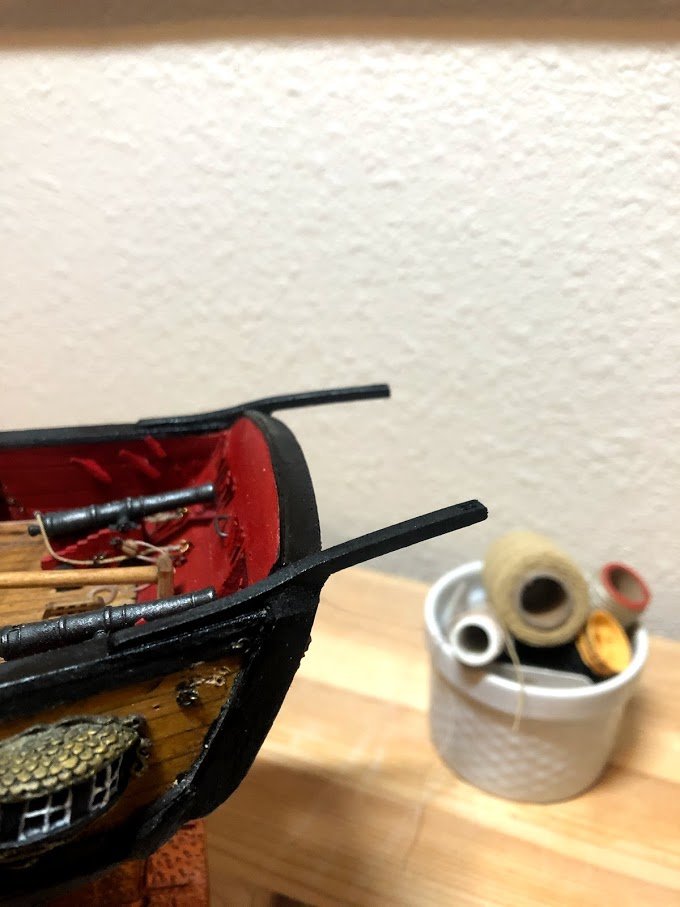
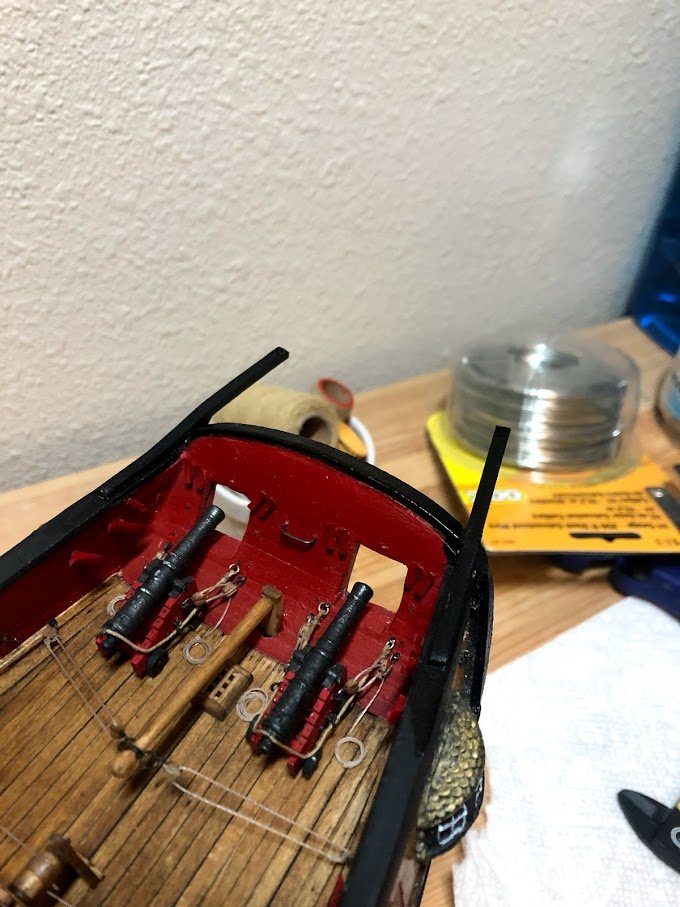
I do have one question for the group. I'm struggling with carving the timber heads. the larger ones in the last picture weren't difficult but the smaller ones that follow keep falling apart when I trim off the excess. Any recommendations are welcome.
-Joe
Just an Army dude who likes ships.
-
Back at the wooden ships after taking a couple of months to work on another project. I’m making progress on the Winchelsea and the Syren.
Tonight, between glueing bulkheads on the winnie, I knocked out some coils. I’m PCSing in a couple of months so I’m trying to get as far as possible with out starting the masts.
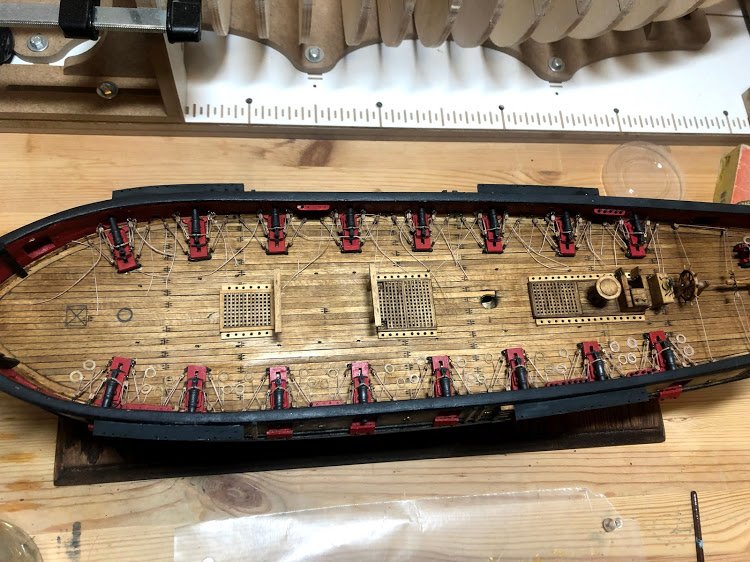
One side to down, one to go.
-Joe
Just an Army dude who likes ships.
- Edwardkenway, GrandpaPhil, JpR62 and 3 others
-
 6
6
-
Coming back from a several month break to work on another project for my Dad. I built a model of the USS Thorn dd-988 which he served on from 1984-87.
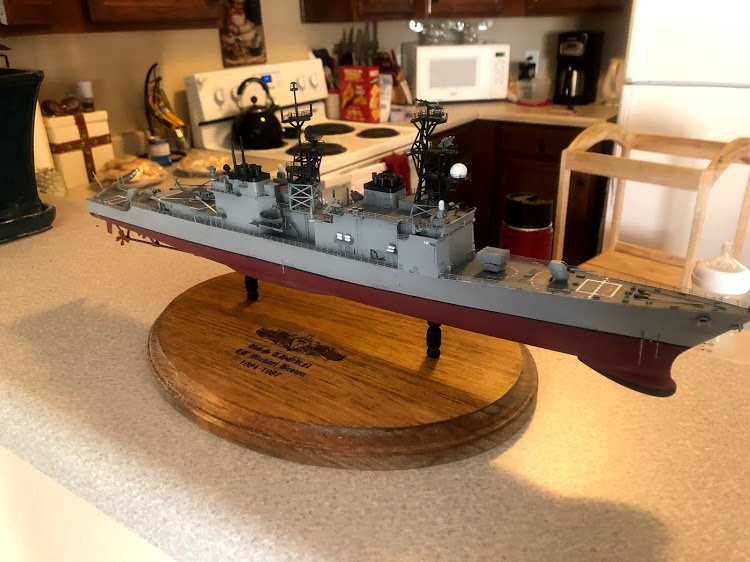
(note, I know it doesn't have have hull numbers in the picture, that was a whole other debacle that has now been fixed)
Fresh from the Thorn and chomping at the bit to resume my project on the Winchelsea with some new stuff! Happy to say, House Hold 6 has approved my purchase of a Byrnes Table Saw for the purpose of milling lumber for this project(and other stuff) and my Grandparents contributed a professional building Slip. Excited to get back after it!
-Joe
Just an Army dude that likes ships.
- FrankWouts, Rustyj, Chuck and 5 others
-
 8
8
-
-
Thanks for the rundown! Very helpful. Agreed, why would you spend the money to buy a BMW and not spend a little extra to get the leather seats.
Going forward, I think the most important pieces for me initially will be the zero clearance insert, the extends rip fence, and the micro meter. Why buy a precision instrument then add in error due to fat fingers? I will be reaching out to Mr Brynes to determine the right blade for my application, hadn’t thought to do that before.
I am not to the point in my project where a sliding table will be needed but in a few months, I think I can justify the 135 bucks to the Mrs. And it is very pretty.
Finally, I agree, the tIlting table top doesn't seem to be a commonly used accessory and is well down the list of items I want to purchase.
Thanks again for the feed back!
-Joe
-
So, I’m just about ready to pull the trigger on the saw after much deliberation. Planning to use it to mill my own lumber. As I’m looking at it thou, there are a ton of additional options/add ons and I wonder what you guys have found to be the most useful additions to the base saw and why? Really the only one I can see being critical is the micrometer.
-Joe
-
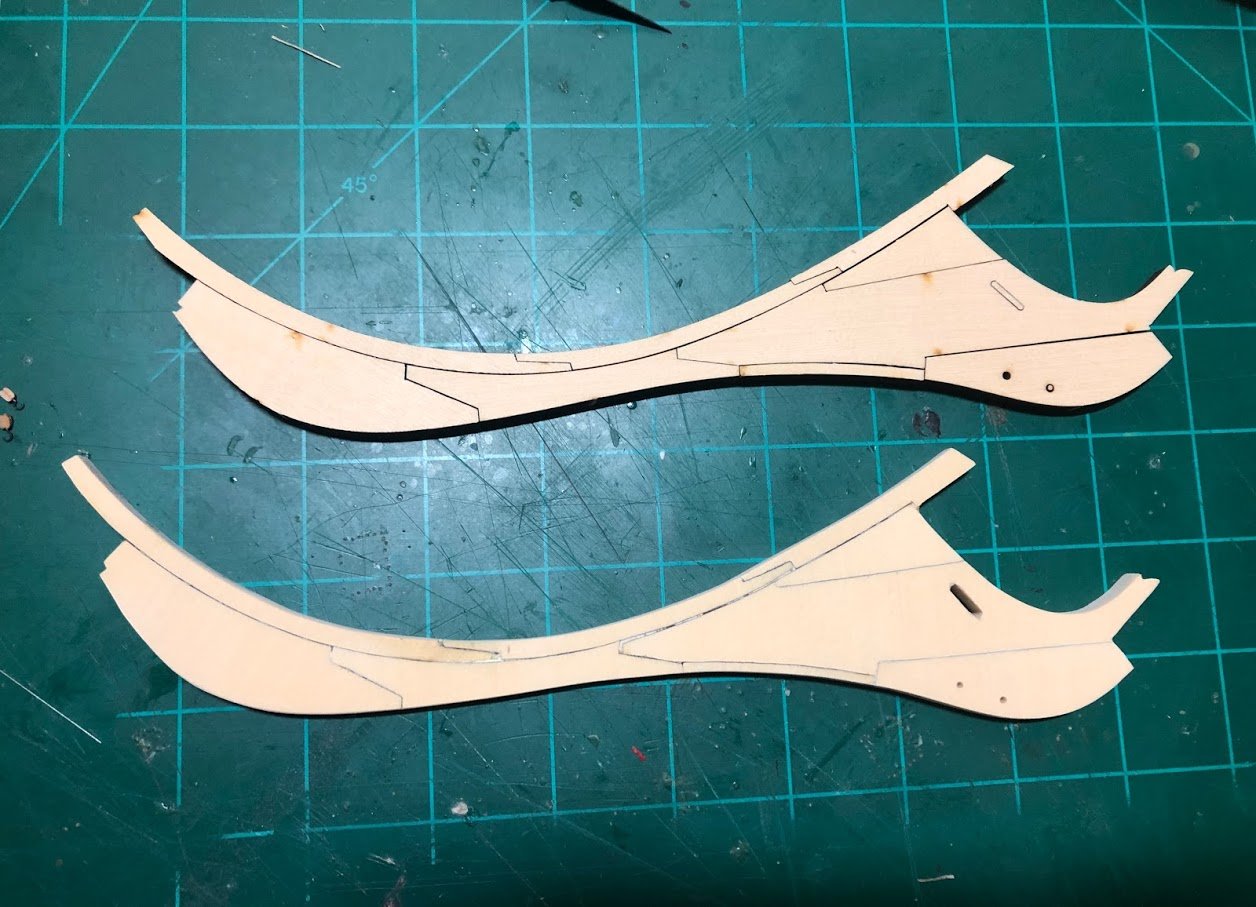
The laser cut parts arrived yesterday. I pieced together the knee and compare it to my scroll saw cut one. Laser cut on is on top and the scroll saw cut one on the bottom.
Gotta say, I'm pretty proud of how this turned out now. In my opinion there is a difference in the how nicely the joints come together and how crisp some of the parts are but it seems to only be a slight difference. Also as chuck pointed out earlier, a lot of these imperfections will not be seen as the knee is going to be painted.
So with that in mind, I am going to continue with the scroll saw cut piece keeping these laser cut parts in my back pocket. Thanks Chuck! now I gotta order some more 1/4" ceder since I used both boards experimenting with the knee...
-Joe
Just an Army dude that likes ships
- GrandpaPhil, Gregory, FrankWouts and 9 others
-
 12
12
-
Did a dry fit of all my bulk heads this afternoon, snapped one upright when I dropped it but otherwise pretty happy with how she is shaping up!
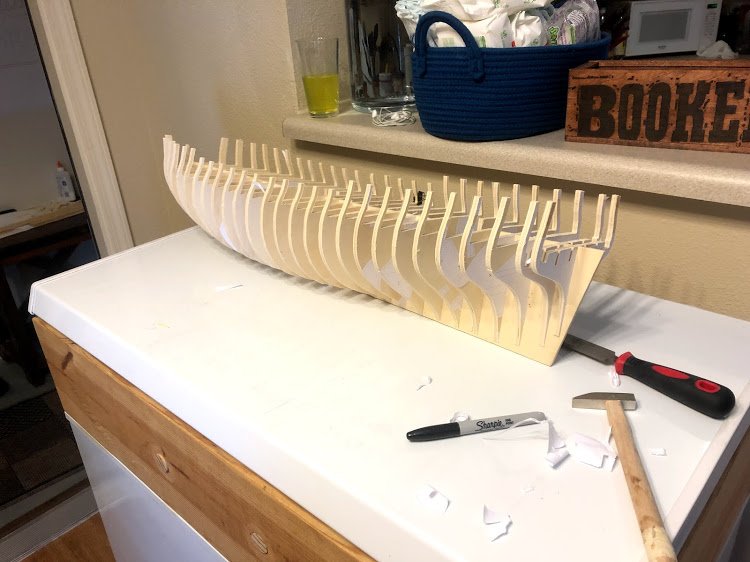
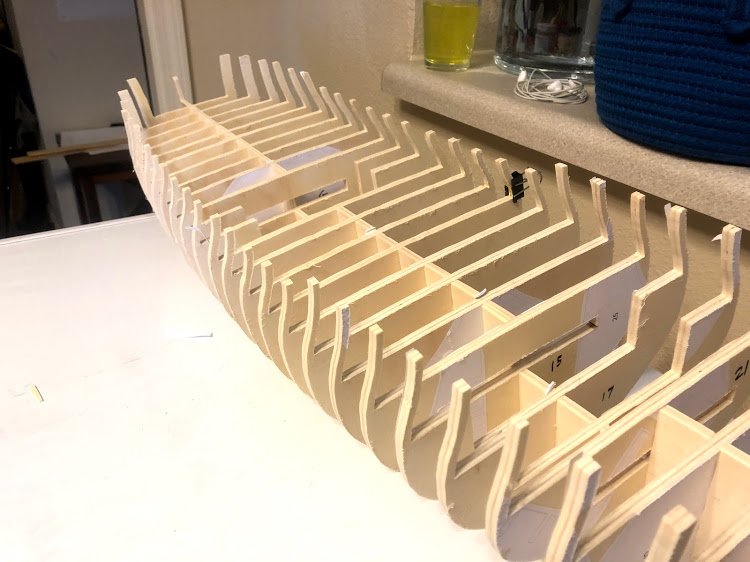
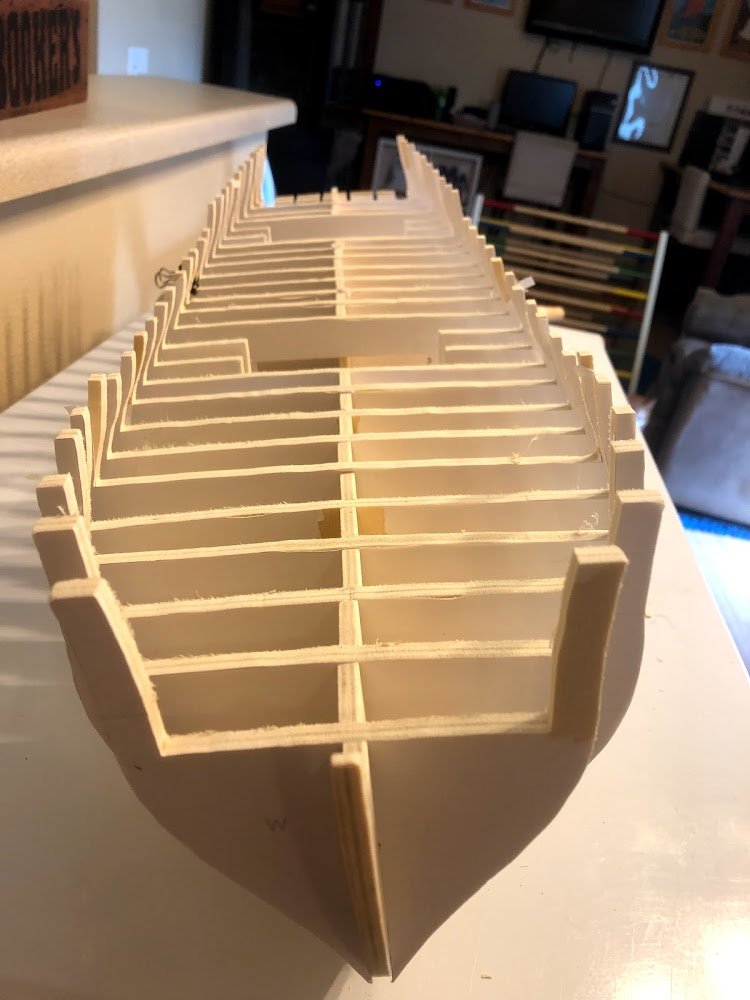
-Joe
- Gregory, Jim Rogers, Chuck and 7 others
-
 10
10
-
The Bulkheads are now complete! I’m feeling pretty proud right now

-
Hey Chuck, I noticed you did not put filler blocks between your frames as you did on the Syren and other have done. Any particular reason why not?
Now that you are well past this point, do you think that’s something you would do differently or recommend other do to further stabilize/square off the bulk heads?
-Joe
-
Purchased, I'm still going to cut as much as possible but at least I'll have it on hand If I need it and I can compare my scratch stuff to the laser cut parts.
-Joe
- mtaylor and FrankWouts
-
 2
2


Gutermann Polyester thread for making rope.
in Rope Materials and parts resources
Posted
Finally got my rope rocket up and running and I'm excited to share my rope! First off, thanks Chuck! the machine is super easy to use and your rope recipe your posted and the videos worked really well. For these I used the Gütermann Mara 30(Color 2899), 100 and 120 in color 854 as I couldn't find 2899 in the smaller threads. I'm hooked! When compared to the kit rope or the sewing thread I have been using this is vastly superior.
I also experimented with some black Gütermann both cotton and Polyester. The Cotton produced a very fuzy rope so I don't think I'll use that one again going forward.
Mara 100, color 854, for a .012 diameter rope.
Mara 30 on the left(color 2899, 1 TSP, 3S, not sure what size that makes, something slightly smaller than .018), Mara 100 (color 854, 1TPS, 3s) in the middle, and Mara 120 on the right (color 854, 1TPS, 3s).
For the more experienced rope makers, when I read the recipe for the mara 30 based ropes, it mentions multiple TPS, I'm assuming that's multiple lengths of mara 30 and you're not un twisting it to get the smaller strands mara 30 is made of.
thanks for taking a look.
-Joe