HOLIDAY DONATION DRIVE - SUPPORT MSW - DO YOUR PART TO KEEP THIS GREAT FORUM GOING!
×


src
-
Posts
2,300 -
Joined
-
Last visited
Content Type
Profiles
Forums
Gallery
Events
Everything posted by src
-
Thanks all for the good words and the likes. Russ, that is great advice. I keep telling myself I have to look at it and be ok with others looking at it. Most people will never know the difference. Slog, I used a special "forced perspective" lense. Actually the square is something I made years ago, it is surprisingly accurate considering its hand made. One day when I have a mill I will make a new one. Carl, you may call me Obe Mast Kenobe if you wish
-
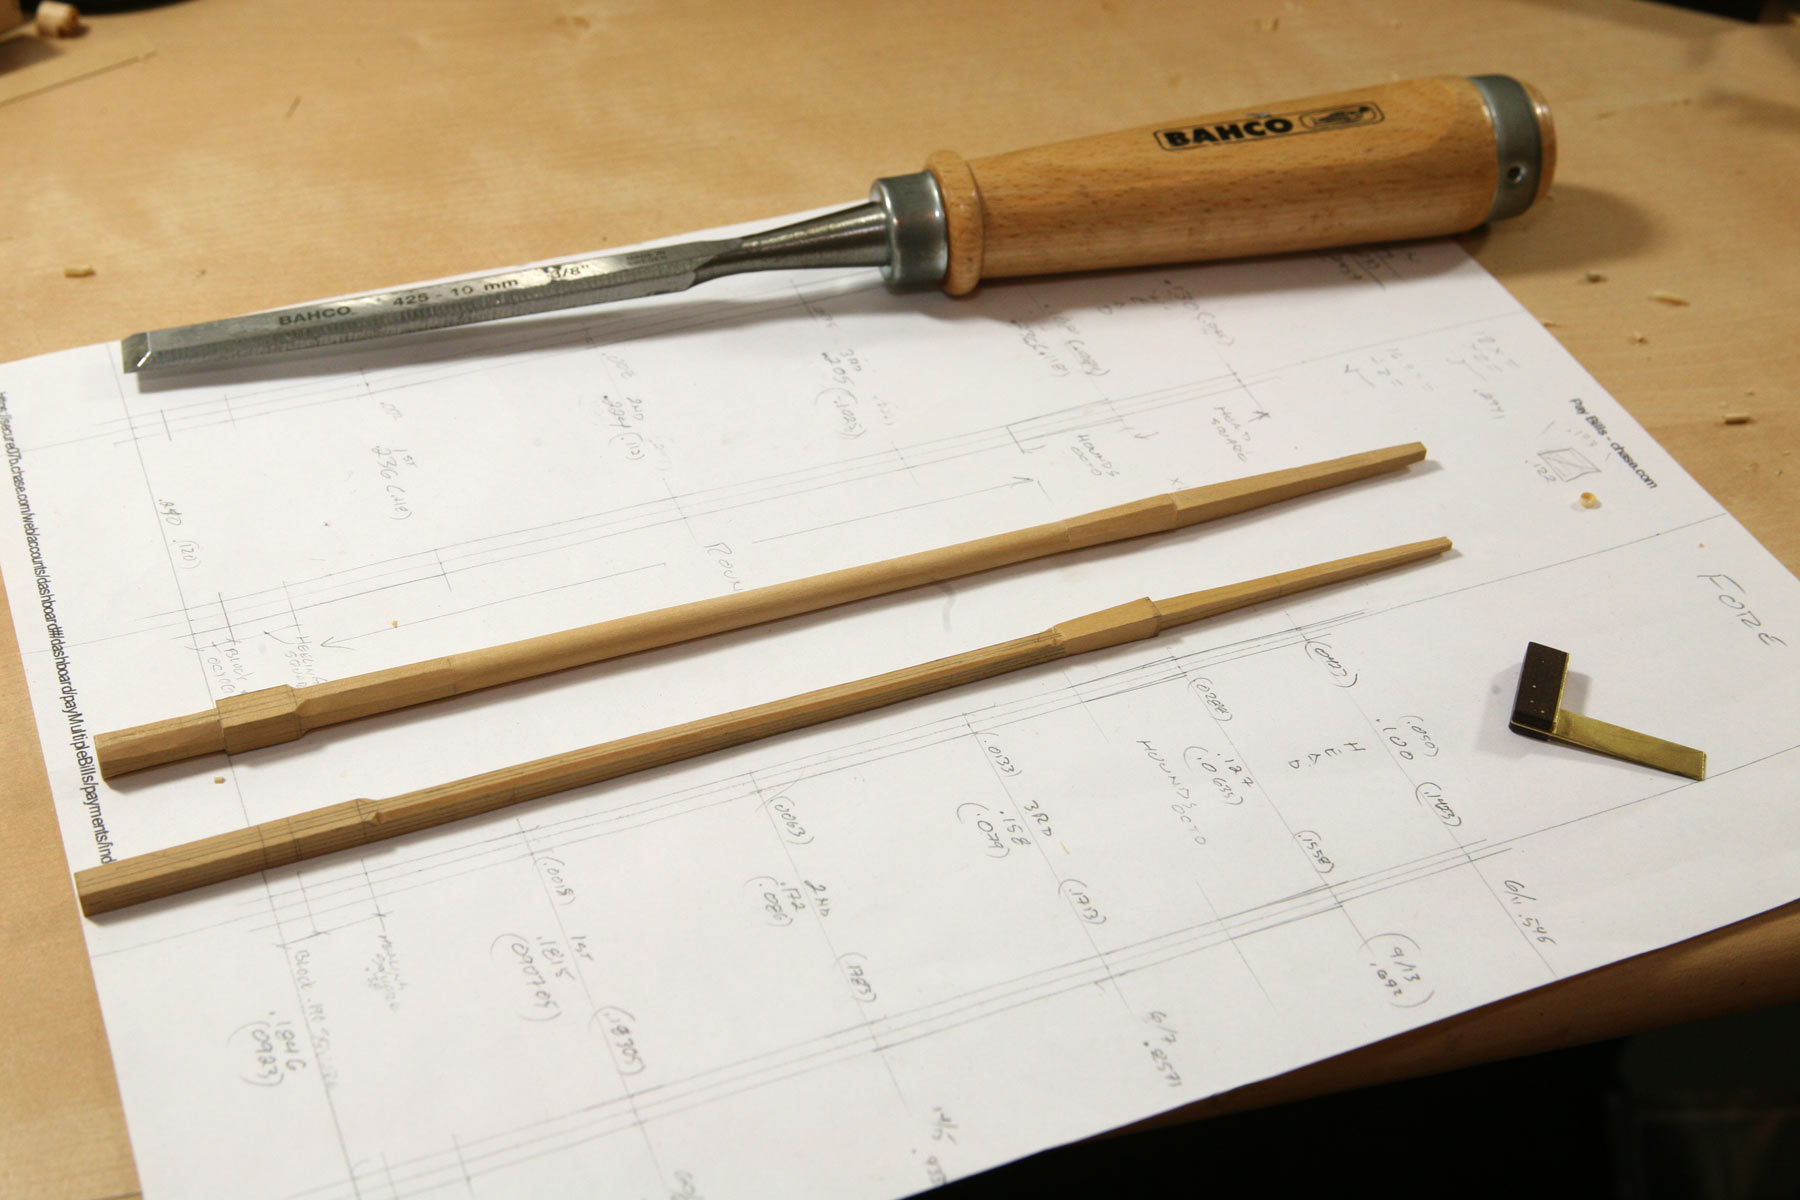
Mini update. I have finished shaping my Main Top Mast and am now tinkering with the Fore Top Mast. I still have a ways to go and as I commented above, build time is at a premium. I am getting 15-30 minutes here and there.The parts are still long, I will trim them down once I have all the adjusting and such done. I havent decided if I will go with the third mast up or follow instructions and stop with the top masts, I would like to finish this build one day. That being said, I seem unable to NOT tinker with things. Sam

-
Well done Sjors! I dont understand what is going on with your Stem area, are those bulkheads? Sam
-
Sam, It looks like they got the planking right. i see now what you are doing colOr wise. (Who ever heard of a U in color? ) Watch out for Carl when he starts talking about Aikido, the last time I discussed it with him my back went out..... Sam
-
Mindi, Welcome back, it's nice to see you building again. Sam
-
Carl, you are correct about the direction. Sam, link to a picture of the Akagi deck: http://expeditionportal.nauticos.com/ijn-akagi-island-1942/ Sam
-
Well done Rich, those lanterns look like they were pretty fiddly. Sam
- 414 replies
-
- 1
-

-
- caldercraft
- victory
- (and 1 more)
-
She is coming along nicely Mark. Doesnt matter if anybody sees the "Easter Egg" in my opinion, you and the Admiral are the ones who matter. Sam
-
Sam, I am hiding in a corner at work waiting for a surface coat to flash so in am apply the second coat, figured I would sneak A peak and see what is going on at MSW (shhhhh don't tell anybody) I stumble upon this pulling up a chair to watch. You asked about reference material/books, I don't know how much it will help the build, but if you want to know more than you will ever need to know about IJN flight operations check out Tully/parshel(?) Shatterd Sward. Sam
-
Continuing to tinker with top masts in my spare time. Thanks Carl, Our work is somewhat "seasonal" but it does seem as if we have been "on" more than off. She hasn't been able to find a job in her chosen field and finally accepted a position at the yoga studio she has been teaching at for several years.
-
I have been tinkering with my top masts, figuring out how they interact with the lower masts. TFFM and Masting and Rigging give lots of information but not everything, that or I am just too dense to comprehend what they are trying to tell me. On my second set of top masts. Nothing much to show though, work has kicked up again, back on 6/10 days until we go to 7/10's and beyond. Posting will be extra lite for the next couple of months. The boss took on a parade float re-hab. I forgot just how complicated they are, when you see one tooling down a parade rout you just dont realize how much cr@p is packed into these things!! Ridiculous engineering requirements, 1000's of pounds of batteries and literally miles of cable. I am grateful to have a good steady job though, better half just found full time work after 14 months, at 1/2 the salary. Until then!! Sam
-
Tools and Supplies for My "Shipyard"
src replied to daveward's topic in Modeling tools and Workshop Equipment
I LOVE Japan woodworker! Some unique stuff. If you are ever in Oakland you gotta make the stop. Plan on spending 2-3 hours, longer if you like to talk. I was only there once when my Better Half and i were visiting her sister one year. The people there were great, both the employee and the customers. Not just wood working tools either, kitchen knifes, sushi knives, gardening tools. They are what Home Depot and Lows want to be. Sam -
Jay, Looking at your picture of the cannon that fractured got me thinking. As I mentioned above, corian does not like to be cut with impact type blades - table saws, jig saws etc. When you were turning your piece, as you rounded of the corners fromm square to round you were in essence using an impact cutter. as the corners came around they hit the knife. I suspect that you may have introduced micro fractures in your material that later failed. Maybe try chucking a hole saw up in your tail stock to remove the corners and then turning? I imagine you would remove the center bit first. That would eliminate the impact question, keep in mind the end of your cut will be a stress riser and will want to break there. I am not familiar with metal lathes, perhaps there is a way after you could remove the square edge at the end of the cut. Do that then turn your piece. boar your muzzle at the very end. I think I would hesitate to put too much pressure with a live center, maybe just enough to keep the end from wobbling. Even after all that, it is possible that a solid surface part that small and detailed will just want to break, after all it was never designed for this. Good luck if you revisit and keep us posted. Sam
-
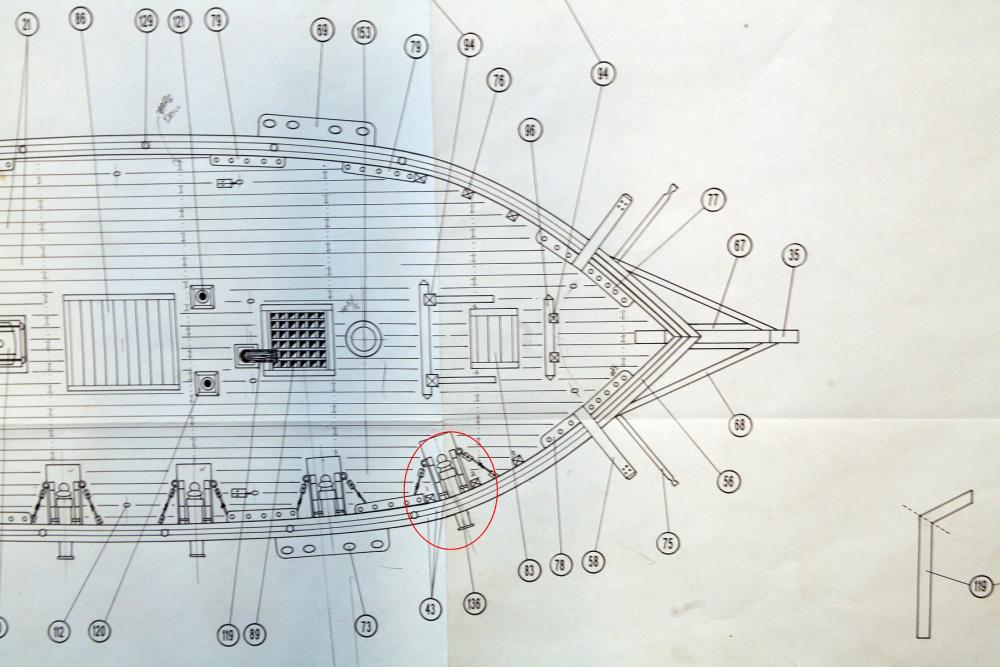
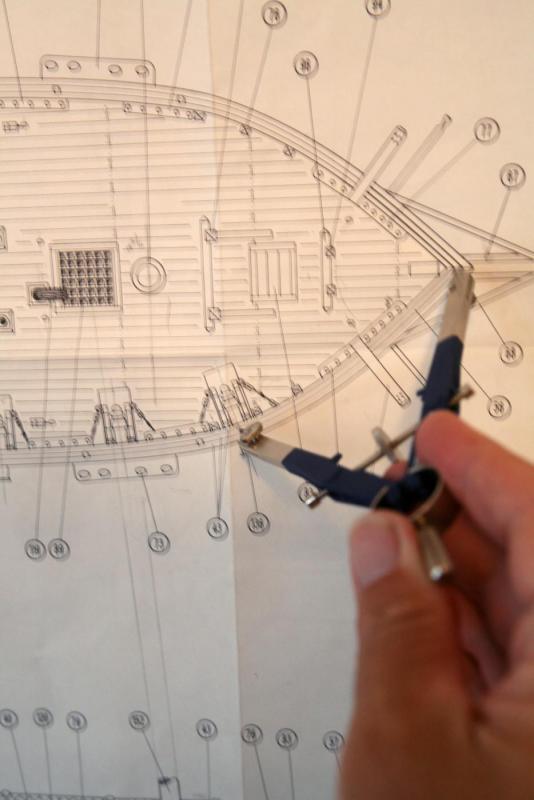
Chuck, I had this same issue when I laid out my gun ports. I used a combination of a beam compass, center finding square, straight edges and lots of patience and remeasuring. First I laid a line through the center of my barrels on the plans - hard to see in the picture but if you look closely they are there. Then I found a point on the plans that I could measure from, in this case I used the center of my cap rail where the port and starboard rails intersected. I opened my beam compass up to a point where it intersected my cannon center line on the cap rail making sure I was measuring to the center of the rail. I am using a regular compas in the picture as my beam compas is at work, or the cat has walked off with it... I dont have pictures of the next steps so I will try to explain. I am too far along on my build to try to show you the rest with pictures. With out changing the setting on my compass I found the same point on the model and transferred a mark to the center of my hull wall. (I know there is a name for that portion of the ship but it is eluding me) I did that for all the center lines then using a center finding square I marked a line across the wall perpendicular to the curve of the hull. I again used a center finding square to transfer that line down both inboard and out board. I now had a lines that were as close as I could get to being perfectly aligned. After that it was a simple matter to carefully measure out the same distance from my center line to set the width of my port cutouts. The height was set with a small combination square and a micrometer to strike a horizontal center line. Again carefully making sure I was measuring down the same amount on the inboard and outboard sides. After that it was a simple matter of going to my religious house of choice, doing some heavy praying and cutting out my ports. The more experienced may have a more accurate/efficient way of doing it, but that is what worked for me. I hope I explained it properly and that it helps. edit - Going off the center line like I did let me measure port and starboard with one measurement, ensuring my ports were lined up correctly Sam
-
That is some nice work Micheal. What are the threaded brass items next to the corian in the top picture? A supporting rod might help. I have never worked solid surface or acrylics at the scale we work at but my suspicion is that the slightest bit of chatter and the part will break. I dont have a mill or a lathe that can work at these sizes so I will have to watch and learn. I do know somebody who has successfully turned pens out of solid surface materials but other than the area where the ferule (?) attaches they are smooth. Sam
-
Enjoy your trip Jay. Yes the seams should be off set from the corners to lessen the chances of the joint failing and the inside corners should have a radius. As far as the adhesive its a two part MethylMethAcrlolate with a colorant added. I dont recall if the color packs are proprietary to to each manufacturer - Corian, Fountainhead, Avanite etc. I suspect you would have a hard time purchasing some. When I was fabricating you had to be certified, however, I have heard rumblings that that is no longer the case. Either way MMA adhesives are an expensive way to go. I suspect your best bet is epoxy or an acrylic cement like Weldon16 or Weldon40. Both Weldon products have Methylene Chloride in them so wear proper respirator. I would think you could add some dye to the cement or epoxy to help hide the seam. Someplace like Smoothon, SilPak or BJB Enterprises should have dyes. A talk with one of their techs should tell you if the dye will color epoxy. I did a quick Google search of "dyes for epoxy" and the top hit was StewMac.com He has two powdered furniture dyes that are for epoxy, they are made by Behlen. As I recall Behlen has a large lineup of tinting and touchup powders, mostly wood/earth tones but also primary colors too. They should blend in to epoxy as well as the Weldon products I mentioned. Good luck and have a safe trip. Sam
-
scarf joints
src replied to dennistestagrossa's topic in Building, Framing, Planking and plating a ships hull and deck
Agreed, although fro me at least I find a nice sharp knife point rather than a pencil works better, especially on dark woods. Changing from an HB lead to 4h helped but I still find myself scoring a light cut as a mark wherever possible. Making sure the backs of your chisels are flat and polished helps to see if you are on your line and perpendicular to your cutting surface. Sam -
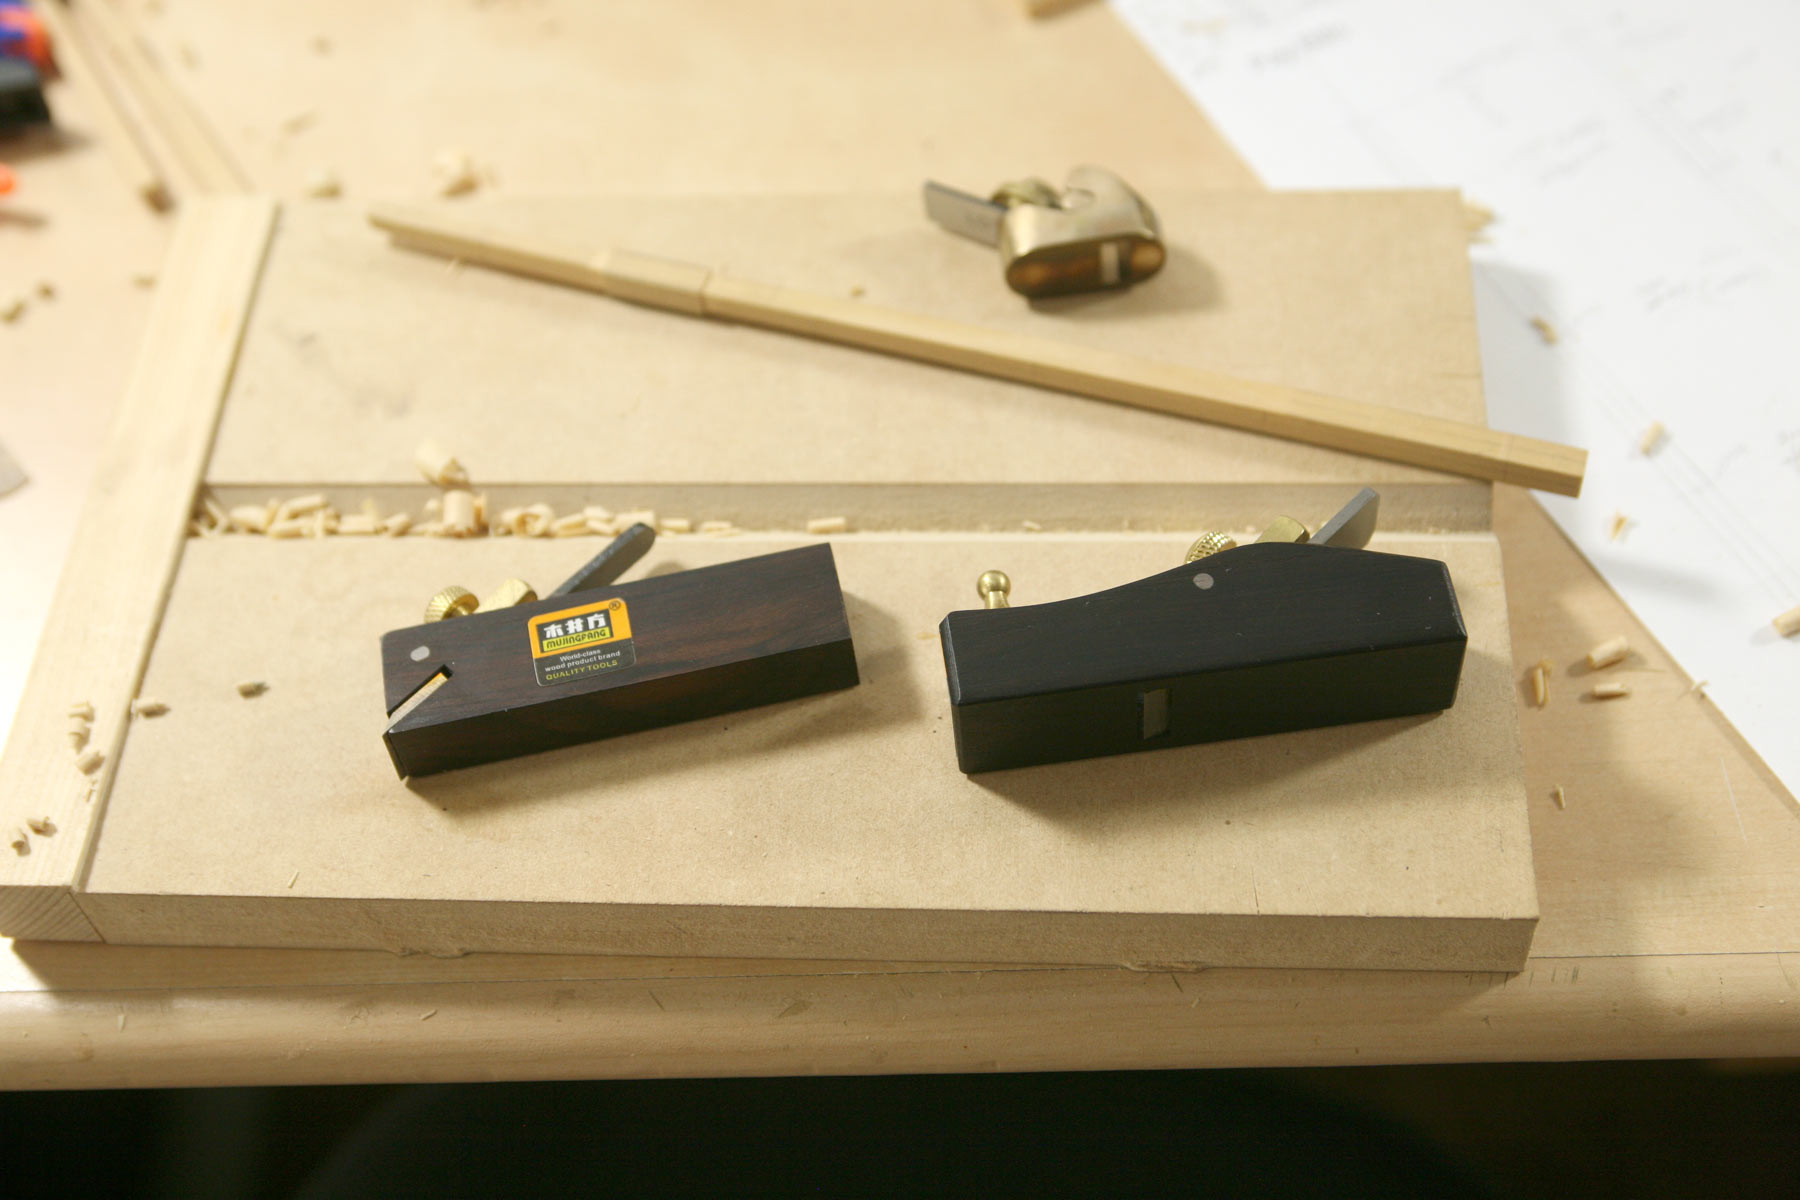
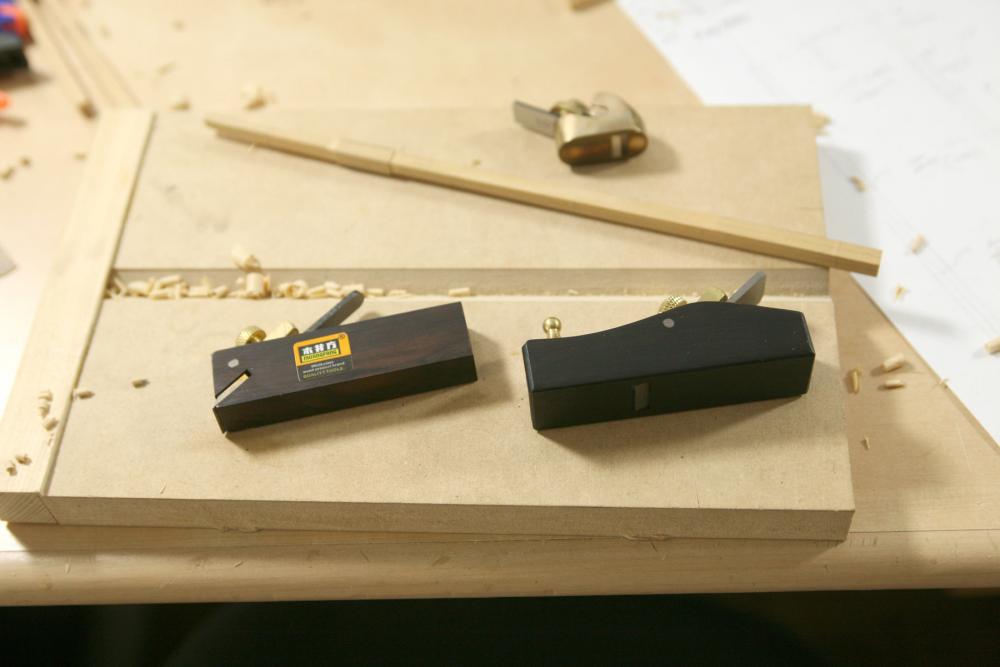
Carl, the fishing was relaxing except for having to learn how to cast...again. Something I go through every year as I only get one trip a year anymore. I am using the Ibex brass plane in the background quite a bit lately, its pretty easy to adjust, just like you described. The new plane, not so much. I have found that adjusting it like a large traditional wooden plane works somewhat. A lite tap on the back to decrease the cut and a lite tap on the top of the iron to increase. where the problem arises is tightening down the nut that holds everything together, it changes the depth of cut. I try not to bash an entire country, but things like this are what I have come to expect from tools with the "Made in China" sticker. You get what you pay for. Sam
-
Moxis, That sounds like the same material I know of as sign foam. I never considered doing the kind of modeling we do here with it, interesting. Sam
-
Jay, I am a little late to this but figured I would throw my two cents in, I have fabricated more than a few solid surface counter tops in my days as a residential cabinet maker. For adhesives we used an MMA product (Methyl Methacrilate) that was blended with a colorant to make the seams disappear. Weldon 45 is good also but at the sizes we are talking here its extremely expensive, a 45ml cartridge is $30 and then you need the tips and dedicated applicator gun. About $100.00 total. As you mentioned Corian is an acrylic product so Weldon16 might work, I think Home Depot sells it. Weldon3 is water thin, it might work. Weldon 40 should work also. I havent tried any of these three products with solid surface so take it with a grain of salt. Prep wise I was taught to never use an impact cutting tool - table saw, jig saw etc, the micro grooves left by the blade was supposed to create a stress riser that could cause a fracture. In practice though we used a 10" 60 tooth TCG blade with a -5 degree hook angle. Then all joints were cleaned up with a spiral router bit. We cleaned our joints with acetone before gluing up and just enough clamping pressure to bring everything together. You can turn solid surface materials, I think what might be happening here is the scale we work at, like you discovered it frigile. Also your cutting tool should not leave a sharp inside corner, that whole stress riser thing again. As you found it's heat formable, like acrylic sheets you just need to heat slowly and completely, an oven works best. IMO a heat gun is too fast and localized. It looks like you have abandoned the process but like I said I figured I would throw my two cents in. Sam
-
Sjors, Getting caught up here, well done, I agree with the others that is a lot of holes to cut. I would have not slept well. And the blue is a great choice. Sam
-
Sjors, Thanks for kind words and checking in. I am not sure where I was when you built yours, probably trying to lure your Masting Gnomes away from you!! THey are a very loyal bunch. They said to me "Nope! Sjores treats us well." Nothing to show at the moment, between opening up our house so a friend could have their 50th birthday party here and then heeding the call of the trout stream I have done nothing since the last post. Caught -and released - a bunch of smallish German Browns. Made repeated sacrifices to the great fishing god Katuna in search of landing The One That Got Away. I know my sacrifices were accepted, I would leave a lure on a piece of brush in the stream and it would be gone the next day. Alas, they werent enough, I caught nothing larger than about a pound and a half. I did receive a couple of small planes from Lee Valley. I am especially interested in the chisel plane for getting in to some of those areas that a regular plane wont reach. At the moment I am having trouble adjusting it to my liking, its either too course or wont cut at all. Ill figure it out though. The part in the back ground is my Main Top Mast V2.0 Thats all for now Sam the not always so wise.
-
That looks great Mobsie, give the seamstress a hug, and Carl to for that matter. One more reason why this is the only social networking site I belong to, the people are top notch. Thanks for detailing the sail making process, you answered some questions I didnt know I had and gave me some ideas. Sam
- 129 replies
-
- 6
-
-
- armed launch
- panart
- (and 1 more)
-
Slog, Those look great. Especially when you consider how small they are. What are they, 8-10 mm dia to the tips of the blades? That would make the hubs what, 3mm?? My little toenail is bigger than that! Well done. I for one LOVE that you take the time to explain how you go there, I keep picking up tidbits of knowledge that can be applied not only to my work bench at home but at my day job also. Sam
- 244 replies
-
- 5
-
-
- borodino
- dom bumagi
- (and 1 more)