HOLIDAY DONATION DRIVE - SUPPORT MSW - DO YOUR PART TO KEEP THIS GREAT FORUM GOING! (Only 13 donations so far - C'mon guys!)
×


cog
-
Posts
8,764 -
Joined
Content Type
Profiles
Forums
Gallery
Events
Everything posted by cog
-
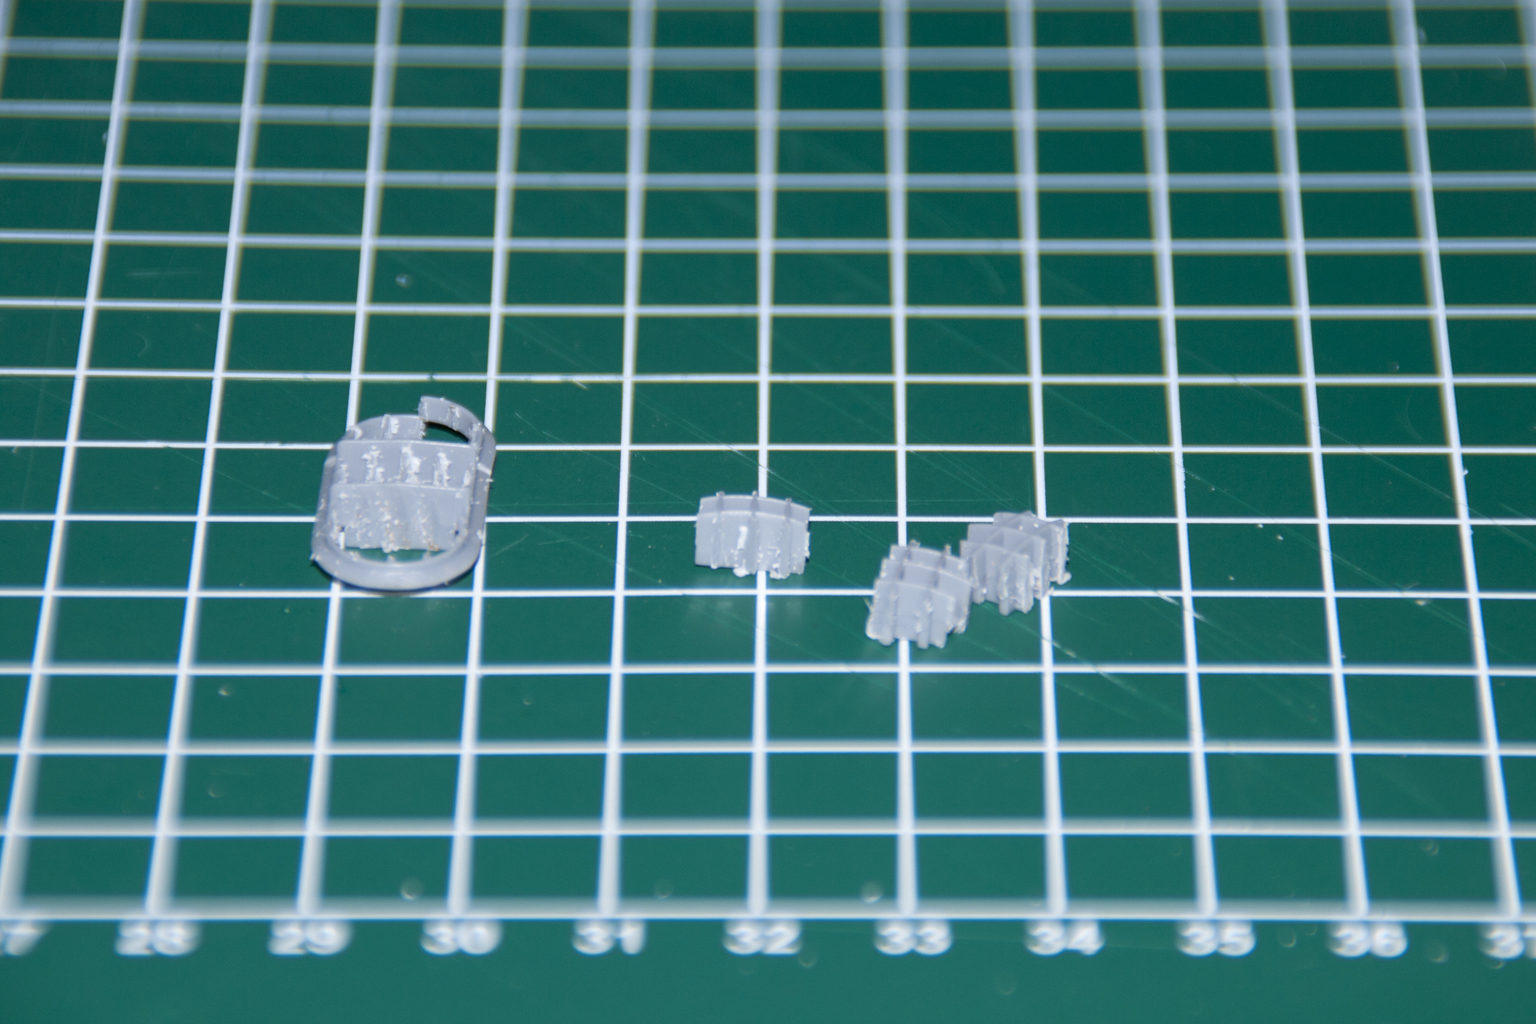
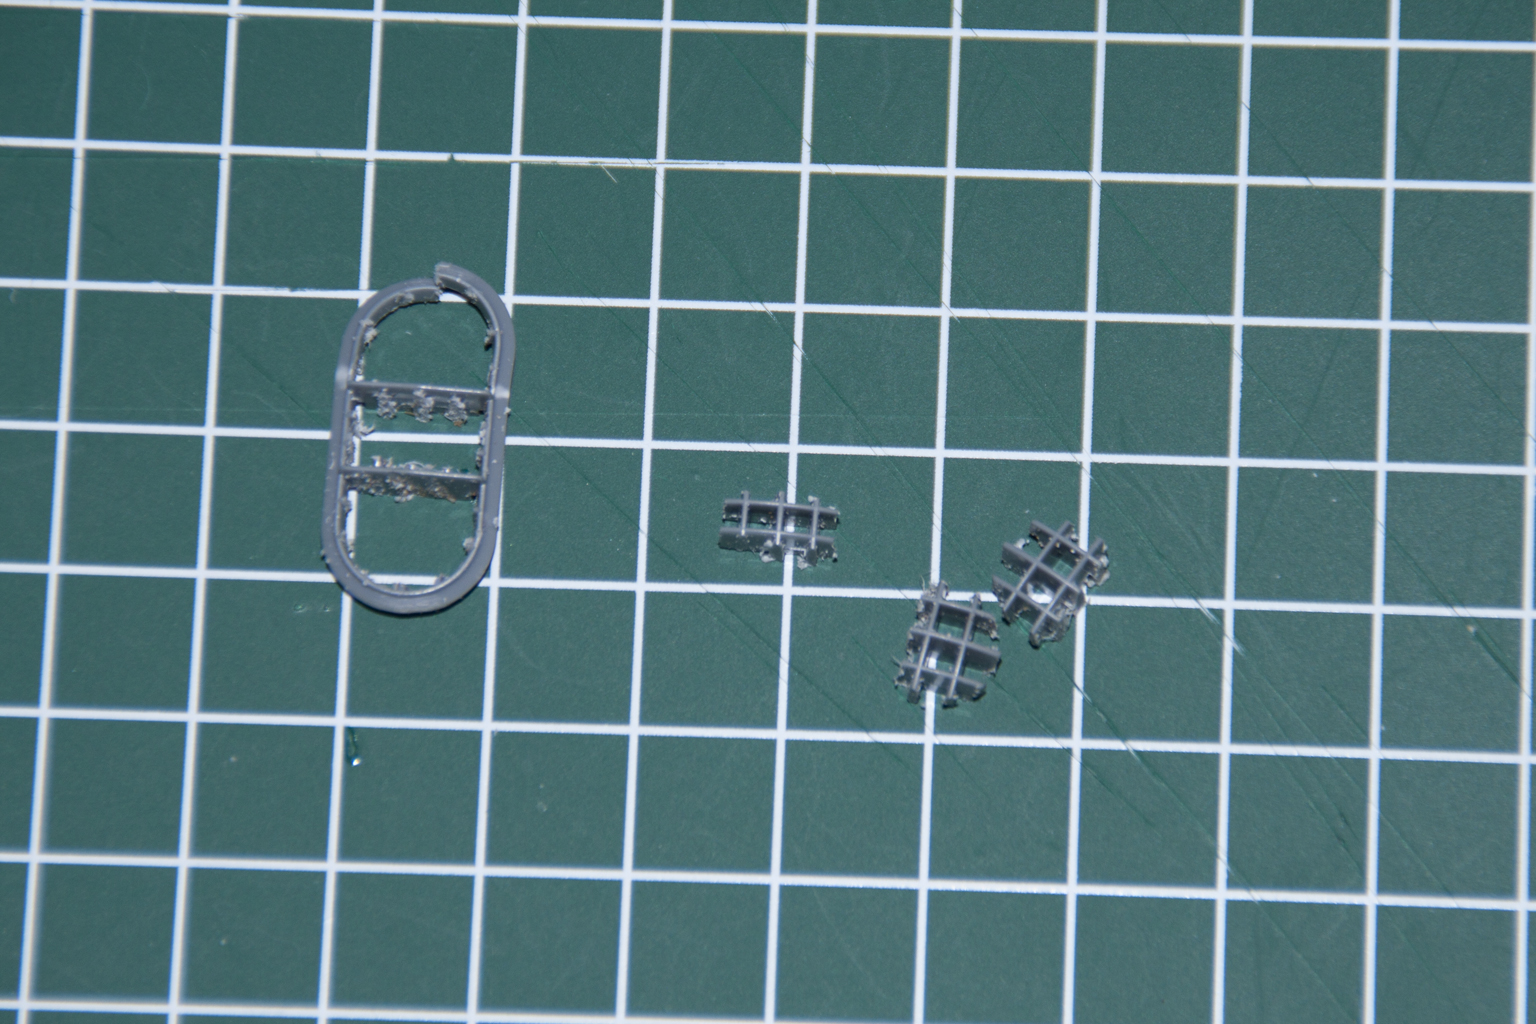
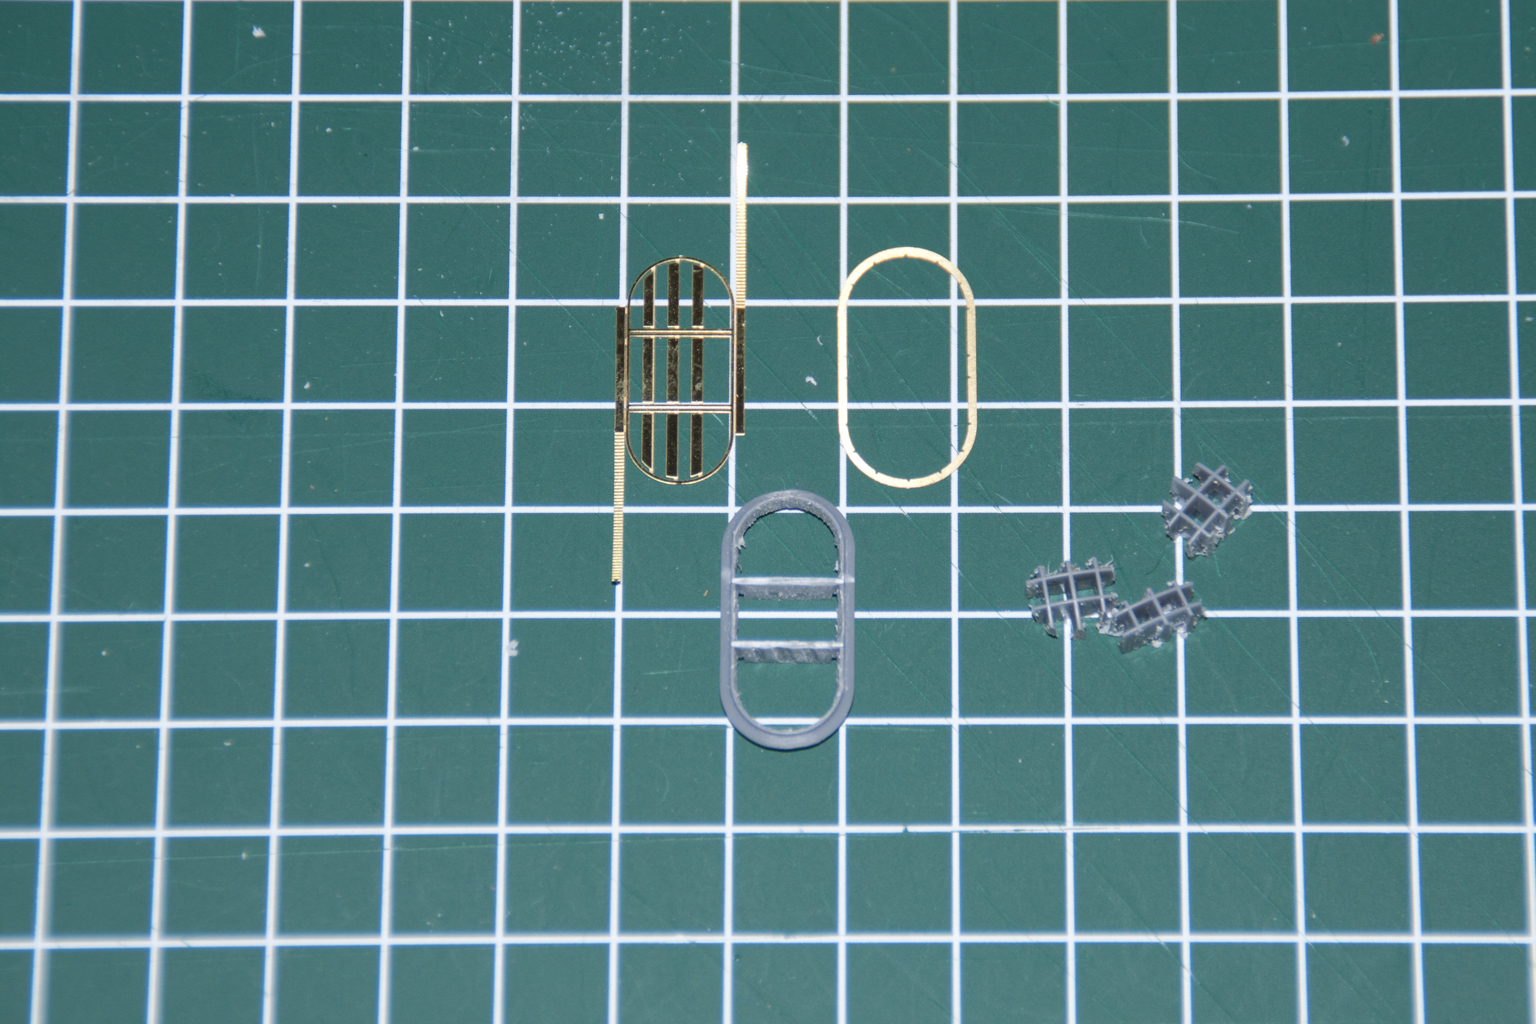
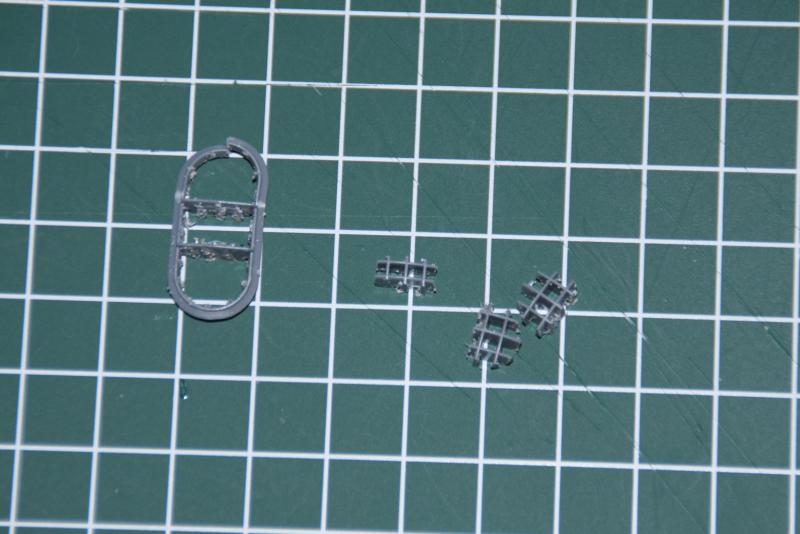
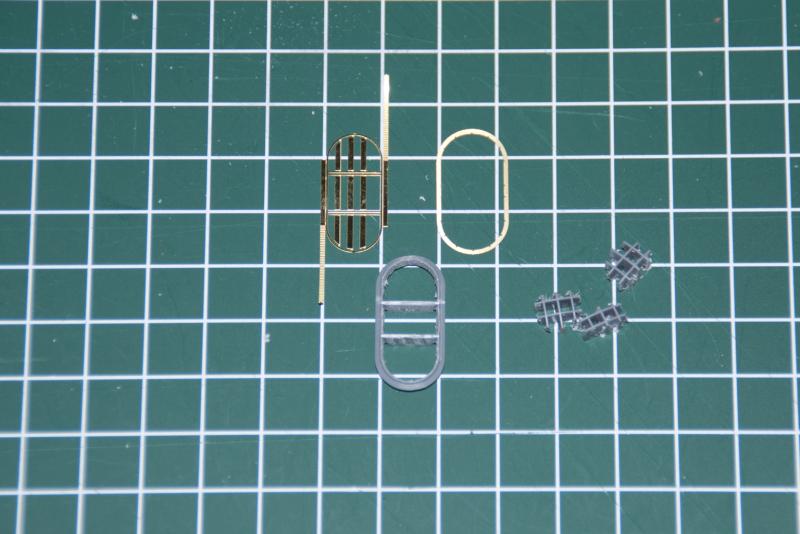
 Thanks Greg, as I feel yours Started on the funnel ... pontos has a brass ring which should go on top, but it is 2mm to wide. Fly Hawk's is different but seems to fit Pontos on the right, Fly Hawk on the left
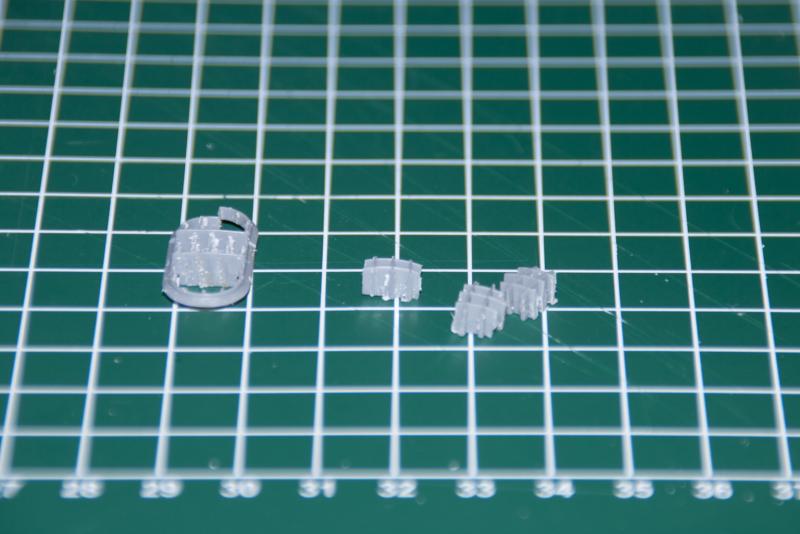
- 383 replies
-
- 12
-

-
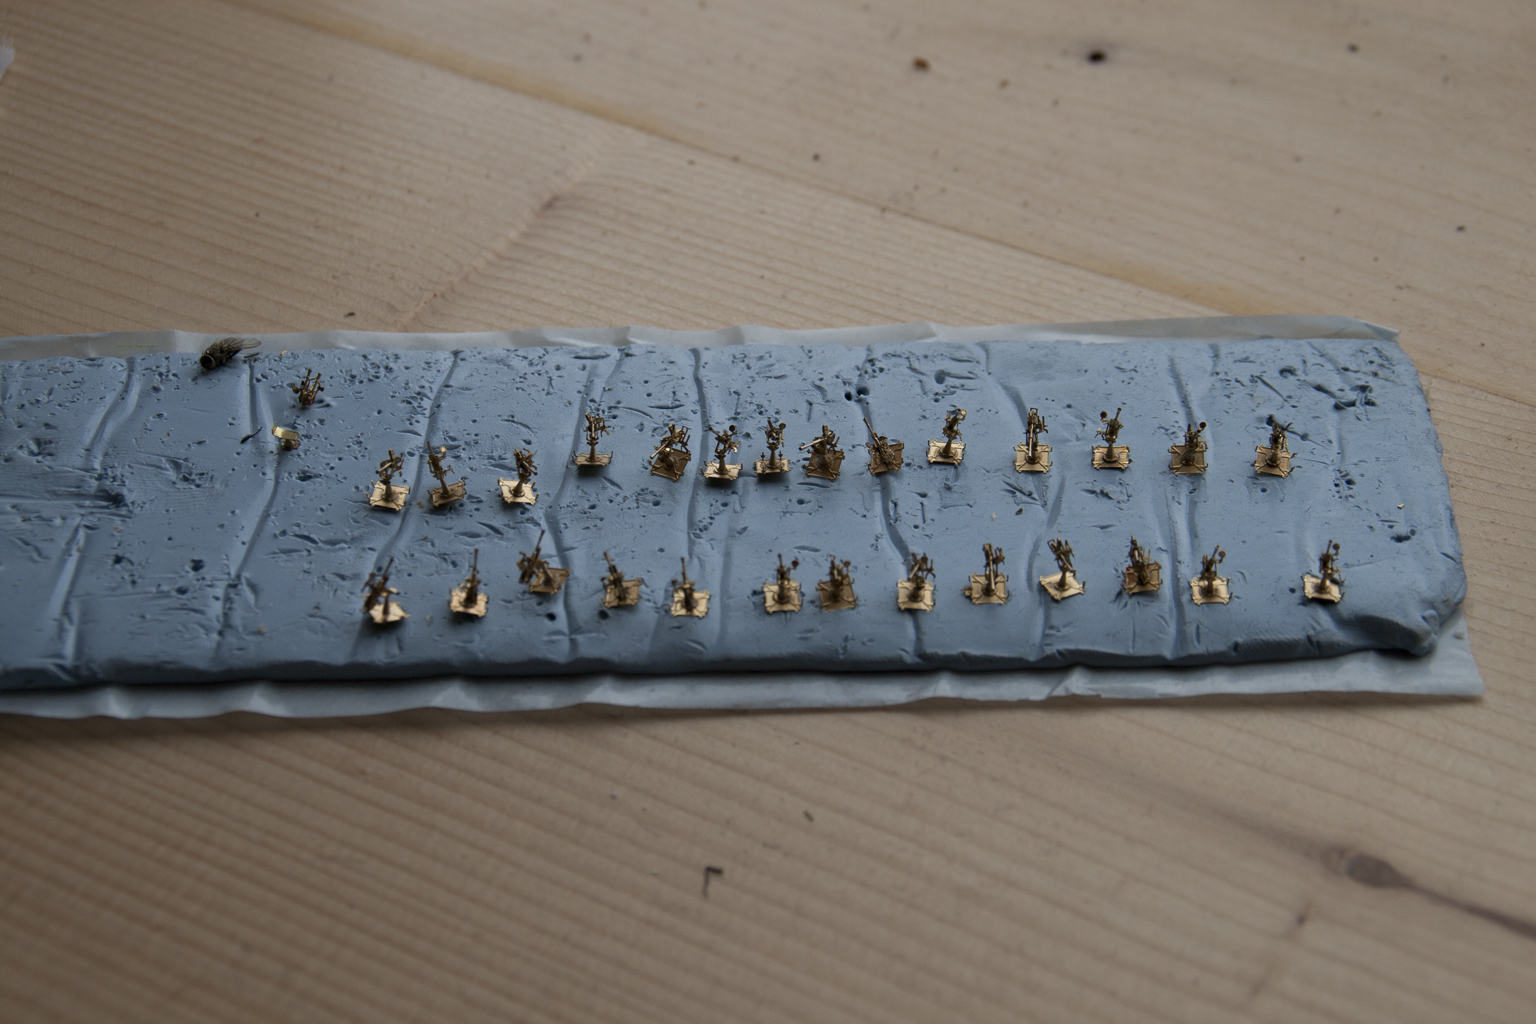
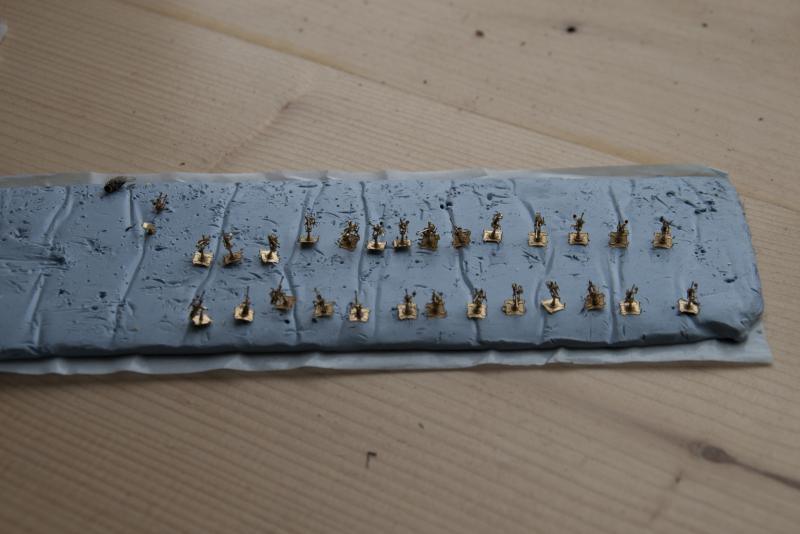
As Musashi sank in 1944, it didn't get the additional AA guns Yamato had, she still had a lot. What I'm building now, are the AA-guns mounted on a pedestal. I'll walk you through the armament when she was just released from the building slip, and any alterations afterwards. Primary armament: nine 46 cm (18.1") guns Secondary: four 15.5 cm (6.1") tripple gun turrets. Two removed in 1939-1940 refit twelve 12.7 cm (5) high angle guns twin mounted. In 1940 another six twin mounts were added AA guns 8 tripple mounted 25 mm (0.984") : + 24 pcs Sept 1943 4 additional tripple mounts: + 12 pcs Jan - April 1944 additonal 12 enclosed tripple, and 26 single mounted: + 62 pcs - Yamato had another refit in 1945 additonal 6 enclosed, and 15 not enclosed tripple mounts, 24 single removed: +39 pcs two 13 mm double on super structure So I'm more or less lucky. My build has a mere117 AA guns to build, whilst Greg's 1945 edition has 156 of those lovely brass miniatures to shape, bend and glue (I do so NOT envy him this task, but wish him a steady hand and patience)
-
Thanks Mr Bunny! You know the risk you run, entering someone else's territory ... besides flying low ... easy target
-
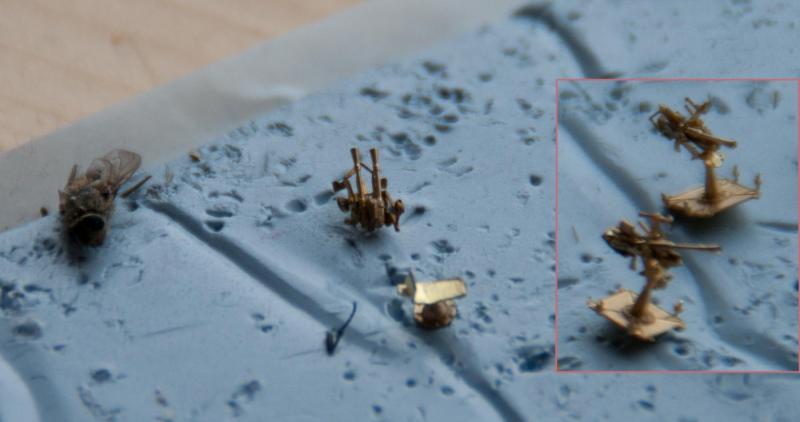
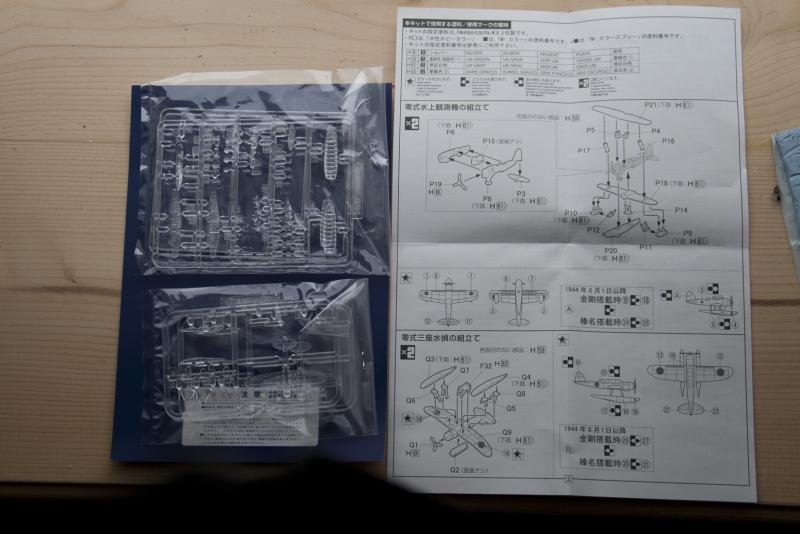
Thank you for your comments, and for the likes. Both much appreciated Yesterday evening, I finished the single 25mm AA guns, and am halfway a twin 13mm AA gun. From the latter ... there are only two, after this, chimney or the admiral's apartments to change the way my eyes cross. (The fly is for size ) When you look at the twin and both single AA guns those 13mm are quite small compared to the 25mm single barreled. didn't expect that Nearly forgot, I received two sets of clear plastic planes for this build Cheers

- 383 replies
-
- 18
-
-
Another milestone, Nils. She looks marvelous, with all the great detail. A pitty the interior is closed for the future ...
- 2,625 replies
-
- 5
-
-
- kaiser wilhelm der grosse
- passenger steamer
- (and 1 more)
-
When I look at your third hand, that one will be a stroll in the park, Michael
- 749 replies
-
- 4
-
-
- albertic
- ocean liner
- (and 2 more)
-
Nice work Kees, Will you put a brass tube over those fitted to the model now?
- 434 replies
-
- 6
-
-
- pelikaan
- beamtrawler
- (and 2 more)
-
A vast improvement on your soldering, Jack. Looks more like it. Thanks for showing the chainplates' mounting. Learned something new.
- 250 replies
-
- 4
-
-
- willie l bennett
- model shipways
- (and 1 more)
-
Sam, The soldering ... I'd probably sooner burn the brass. The piece I need to solder is 1 x 4 mm (0.0039" x 0.0157") Use of stretch sprue and ca took me long enough, the tip of my soldering iron is wider than 1 mm, and a torch far to hot. But thanks for the suggestion! Haven't come to the part on AA guns yet. Having seen ww2 fragments of AA guns on ships, I know it used to be sooner a lucky hit than anything else Cheers
-
AUCH ... I used the wrong size barrel!!! Pfffiew ... Could get them off in one piece, didn't even wreck a single gun ... some times lady luck smiles upon us poor brass benders ... Off for some shut eye
-
Thank you Marcus, Interesting. I'll browse the internet for them, if I can't find what I want, I can drop them a note ... Just send them a request for information on windmill drawings on scale ... we'll see Cheers
- 165 replies
-
- 4
-
-
- cape cod catboat
- Finished
- (and 1 more)
-
La Couronne by yancovitch - FINISHED - RADIO
cog replied to yancovitch's topic in - Build logs for subjects built 1501 - 1750
You shouldn't use it before applying it! The sock does, however, look far better, more realistic, than the other option Cheers- 213 replies
-
- 3
-
-
- la couronne
- 74 gun
- (and 2 more)
-
Jack, More brass ... Very nice work on the chainplates. Your soldering on the jack iron is a bit off. Can't win'em all the time. To me it looks as if the center eye from the jack iron should be flat, i.e. in the same plane as the other rounded ends Are you sure those chain plates should be on top of the wale, often they are behind it ... I, however, don't know the ships drawings and specs so it is just an observation
- 250 replies
-
- 3
-
-
- willie l bennett
- model shipways
- (and 1 more)
-
Nils, That ladder is the best so far, and very crisp detail on the tank. As mentioned by someone before: A model on itself. You make Remco's signature come true Cheers
- 2,625 replies
-
- 6
-
-
- kaiser wilhelm der grosse
- passenger steamer
- (and 1 more)
-
Hardly a dilema ... just go get it and build it ... Interesting project, the windmill, got an address for the society. Woiuld like to have a look at those plans ... They always do that ... give you a tool for your hobby ... I hate that ... and on top of that you must first make them all different kind of things ... even if you cannot use the tool for it they gave you ... Enjoy your new toy Cheers
- 165 replies
-
- 6
-
-
- cape cod catboat
- Finished
- (and 1 more)
-
A rowing camp, not just a team!!! You are a very brave man What type of Vallejo paint do you use? The model air, or the other one. Model Air is ready to use with airbrush, the other needs to be thinned down. Did you get the instruction DVD with it, or only the airbrush? I had some tryouts and painted some small items with the H&S but due to the weather here, I can't continue. I have another airbrush much like the H&S which I've used more frequent, so I do feel confident enough. Though the H&S is far nicer to work with. I might need to change my compressor as it is hard to change the pressure a.o.
-
Jack, You mean: Swamp them with everything you've got. Thus the Japanese learned that trick from you! That is why they swamped the markets ... not so sure it was the right tactic
-
Just getting the hang of it, Greg. Or as we say: You need to forge the iron when it is hot ... maybe watch me fingers ... I might start some work on the super structure, or process some raw pictures I took last Sunday ... In the end I have to get back at the brass ... What's the problem with the consistency of your shadows
-
Greg, The stretch sprue worked, still, hard enough on this scale, but doable. Today I added the barrels, and the amo thing. Tomorrow the last bit: Straps or harnesses ... a mere 22 to go. After that the twin 13 mm guns ... I keep on saying: Brass is fun, brass is fun, brass is fun, brass is fun ... Why on earth did those Japanese engineers have to install so many small guns ...
-
Marcus, Interesting to use aluminum as weight ... Sail looks very good ... what's left ... just the decals ...your sister will be thrilled when it's finished Cheers
- 165 replies
-
- 8
-
-
- cape cod catboat
- Finished
- (and 1 more)
-
Lovely looking turkshead Jack! At that scale your soldering looks good to me. I like your brass work. Well done Cheers
- 250 replies
-
- 6
-
-
- willie l bennett
- model shipways
- (and 1 more)