Mahuna
-
Posts
1,504 -
Joined
-
Last visited
Content Type
Profiles
Forums
Gallery
Events
Everything posted by Mahuna
-
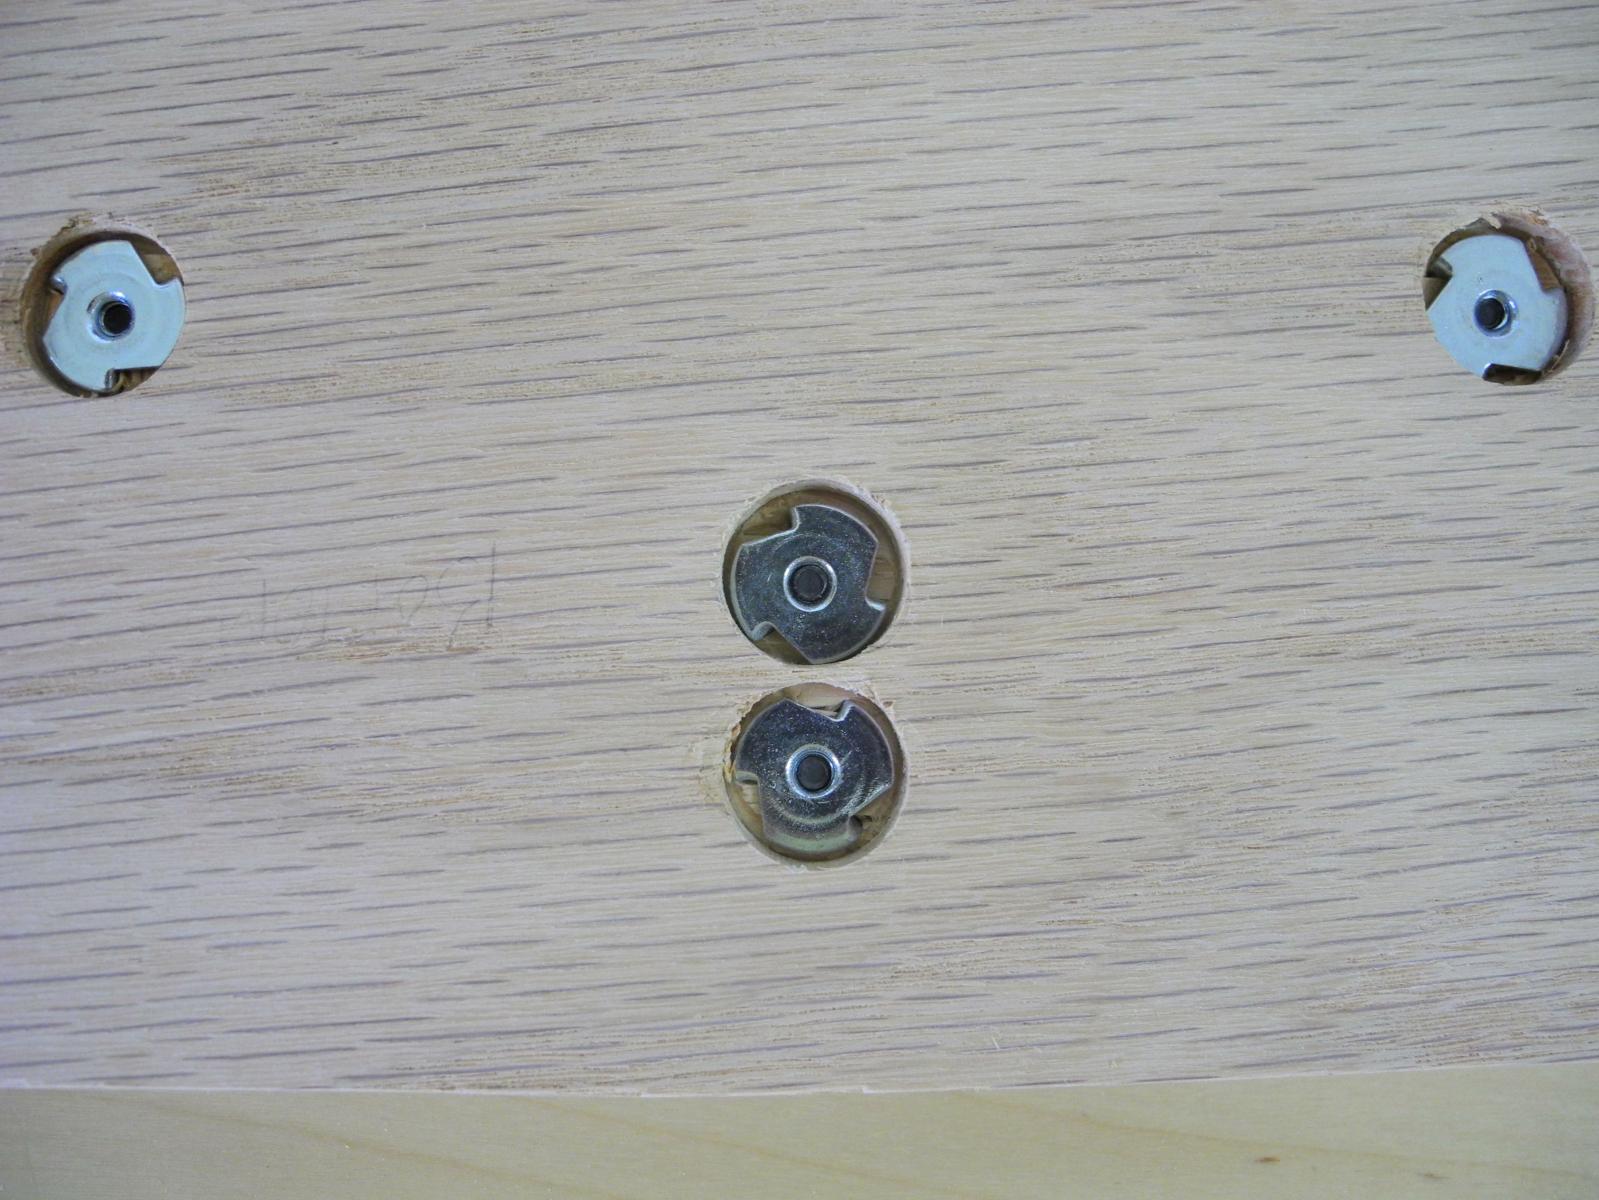
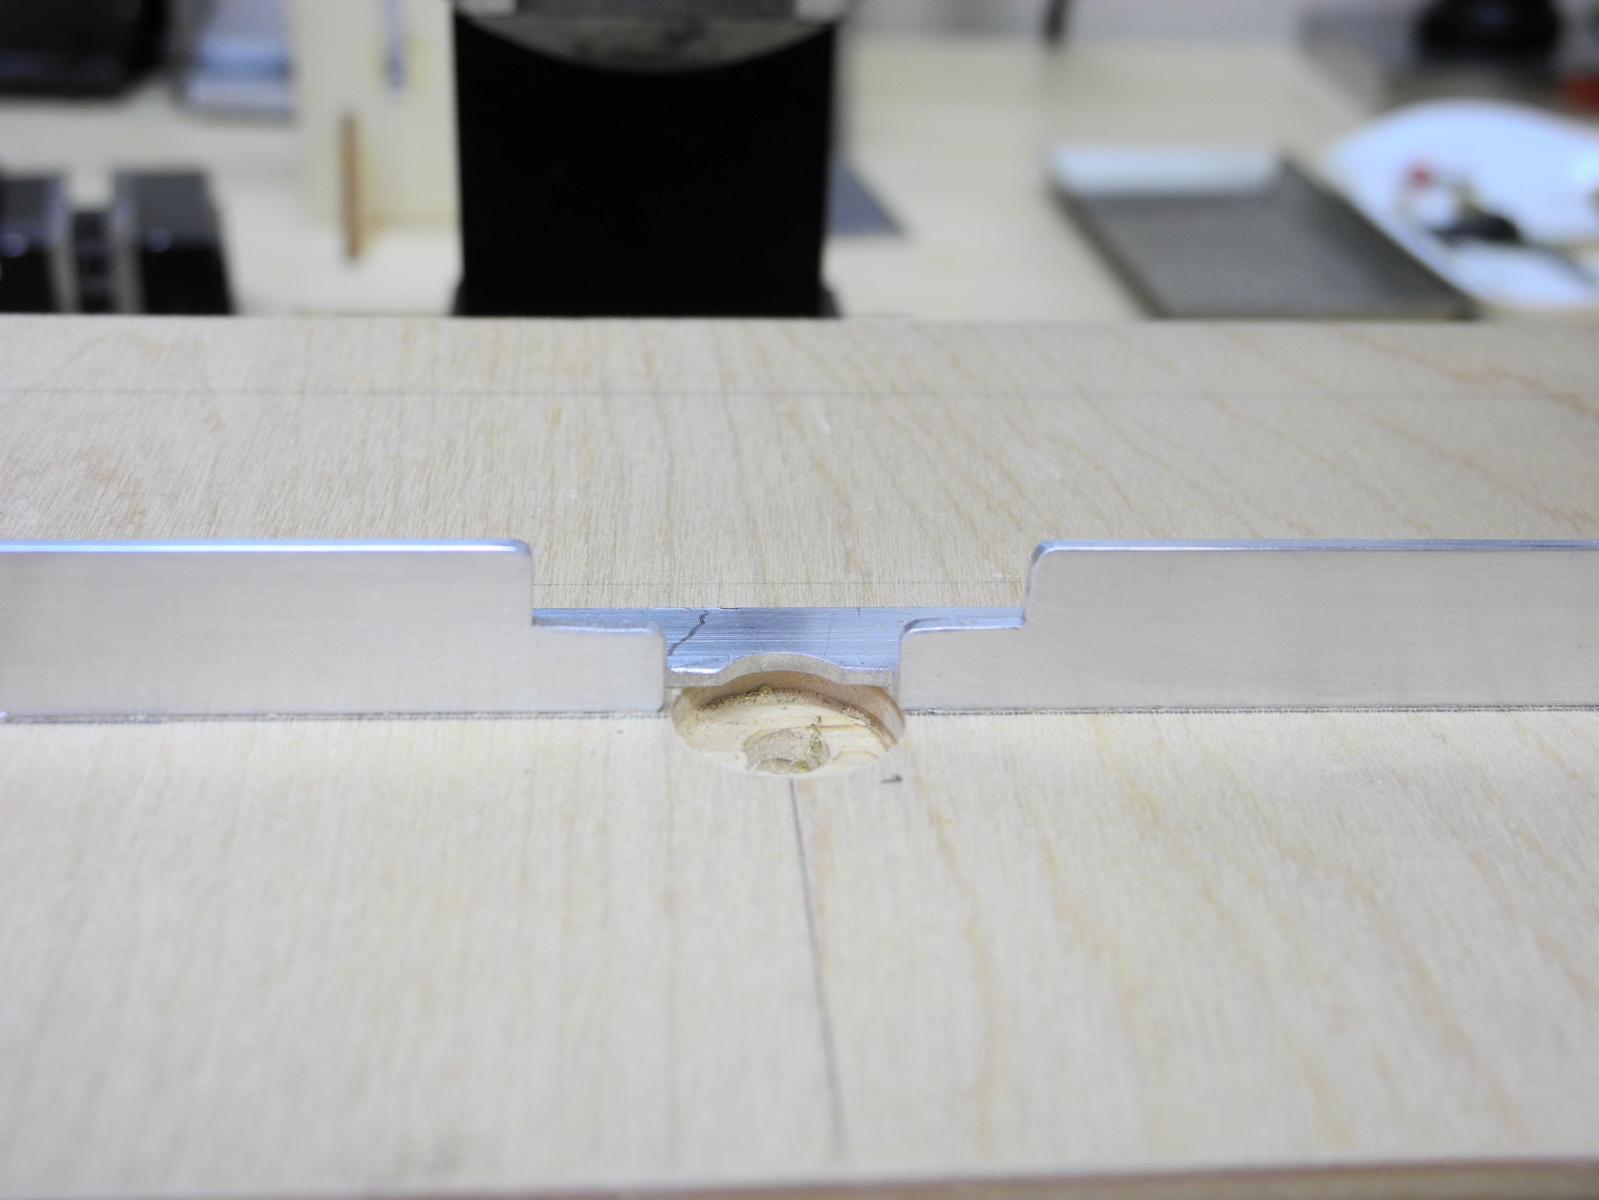
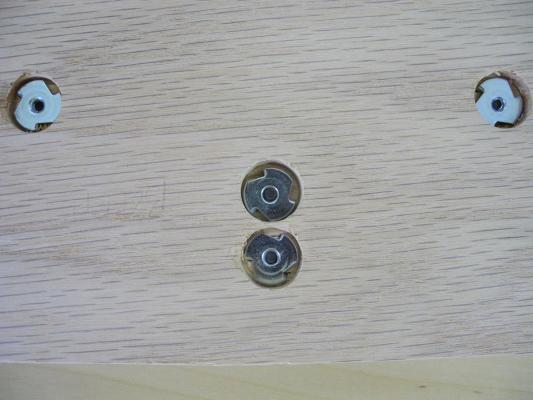
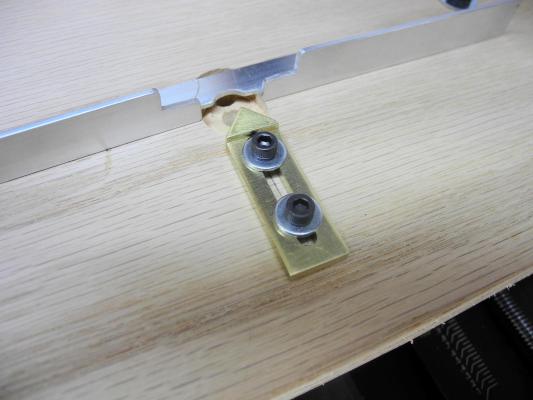
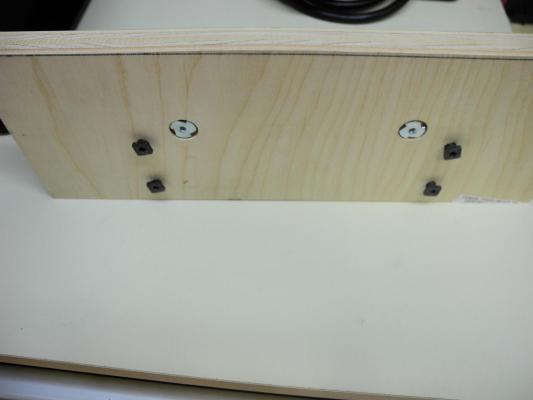
 Hi Jay: The 6-32 socket head cap screws that hold the guide are screwed into 6-32 t-nuts that are inset under the table. These t-nuts have small spikes which keep the nuts from turning and the narrow collar is threaded - in this case for 6-32 screws. Here's what the t-nuts look like: These t-nuts are inserted through the bottom of the table. I first use a 5/32 bit to make the hole through which the narrow collar will sit. Then I use a 5/16 spade bit to make the larger hole, and drill this deep enough to bring the narrow collar almost to the top of the table. Here's a view of the bottom of the table with t-nuts installed for the guide and for holding the fence. Hope this helps.
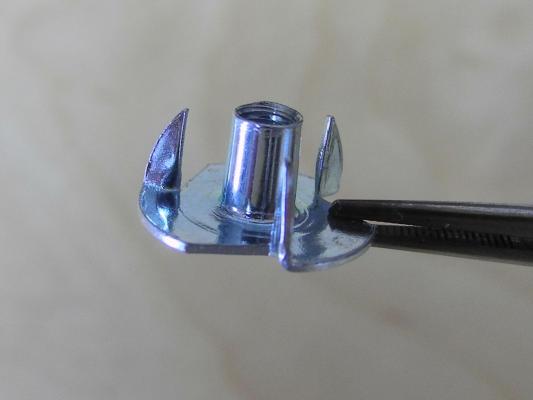
-
Hi Ron: I admire your patience and persistence. I can't help thinking that this work would be much easier on a small metal lathe using brass or aluminum. I was surprised to see that you have one and are planning to sell it. I bought a used Sherline lathe and mill, and wouldn't part with them. What brand is yours?
-
Hi Jay Thanks for the links. I have pretty much all of the shapes shown (I guess the real cheap ones are all knockoffs, so I shouldn't expect anything different). I may buy one of the cheaper sets anyway, and experiment with altering the tool shapes to match typical molding shapes. If that works, that would be great. I don't think tempering (or even the level of sharpness) is a big deal when shaping wood. I've shaped and sharpened pieces of hacksaw blades for hand shaping with no big problems. As for the credit card, I think you'd be safer using PayPal.
-
Hi Patrick Wonderful work - I wish I could do as well. Had the procedure yesterday (so far, the results are better than hoped for), and can't wait to get back to work on Paragon - maybe next week some time.
-
Very nice look - great job. It also looks like a quality kit.
- 45 replies
-
- 4
-

-
- yakatabune
- woody joe
- (and 1 more)
-
Hi Grant I thought about using a bearing, but the size of the 'featherboard' (maybe it would be better to call it a guide) is so small that I didn't even try. I didn't feel any binding when moving the wood through, so I don't think it would be much of an improvement. My next little project will be to make a saw guide similar to yours out of aluminum, and now I don't think I'll use a bearing in that either.
-
I couldn't wait, so I tried out one of the Dremel router bits. It did a great job. These bits will be much better than the smaller bits, especially for fancy cuts, but I'm sure the smaller bits will also come in handy.


-
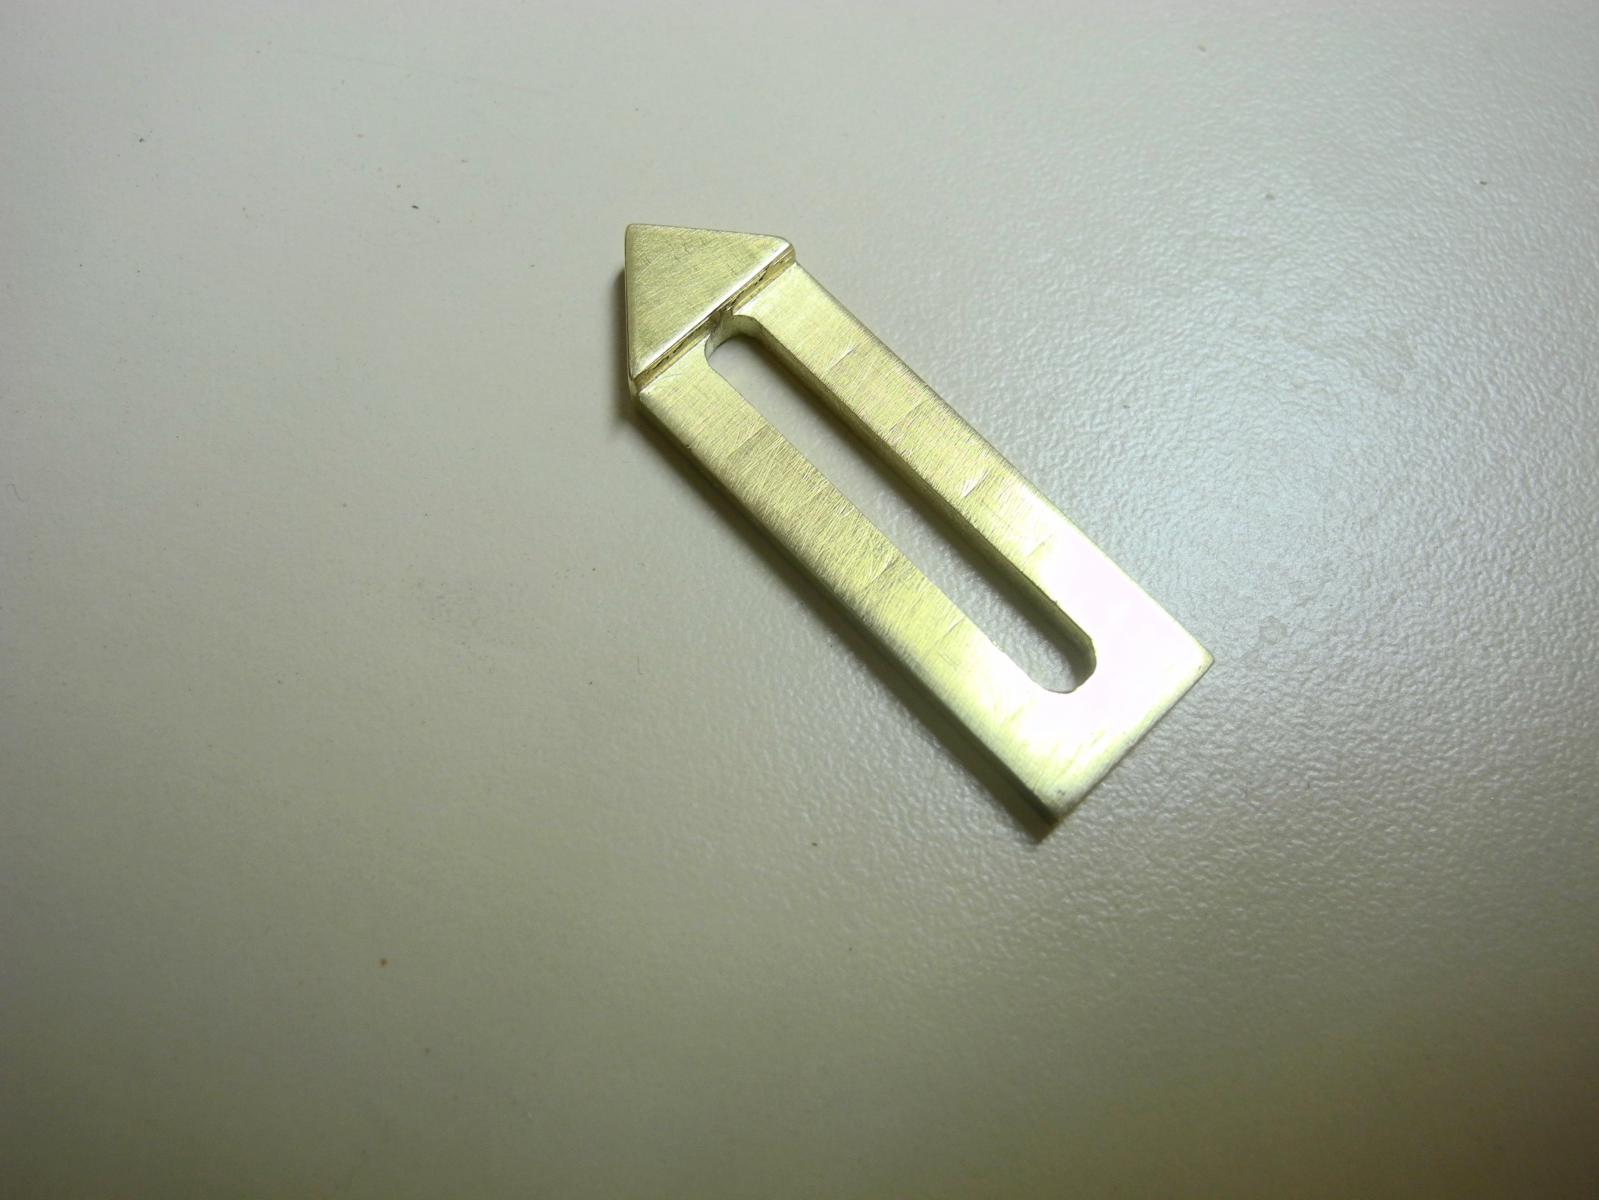
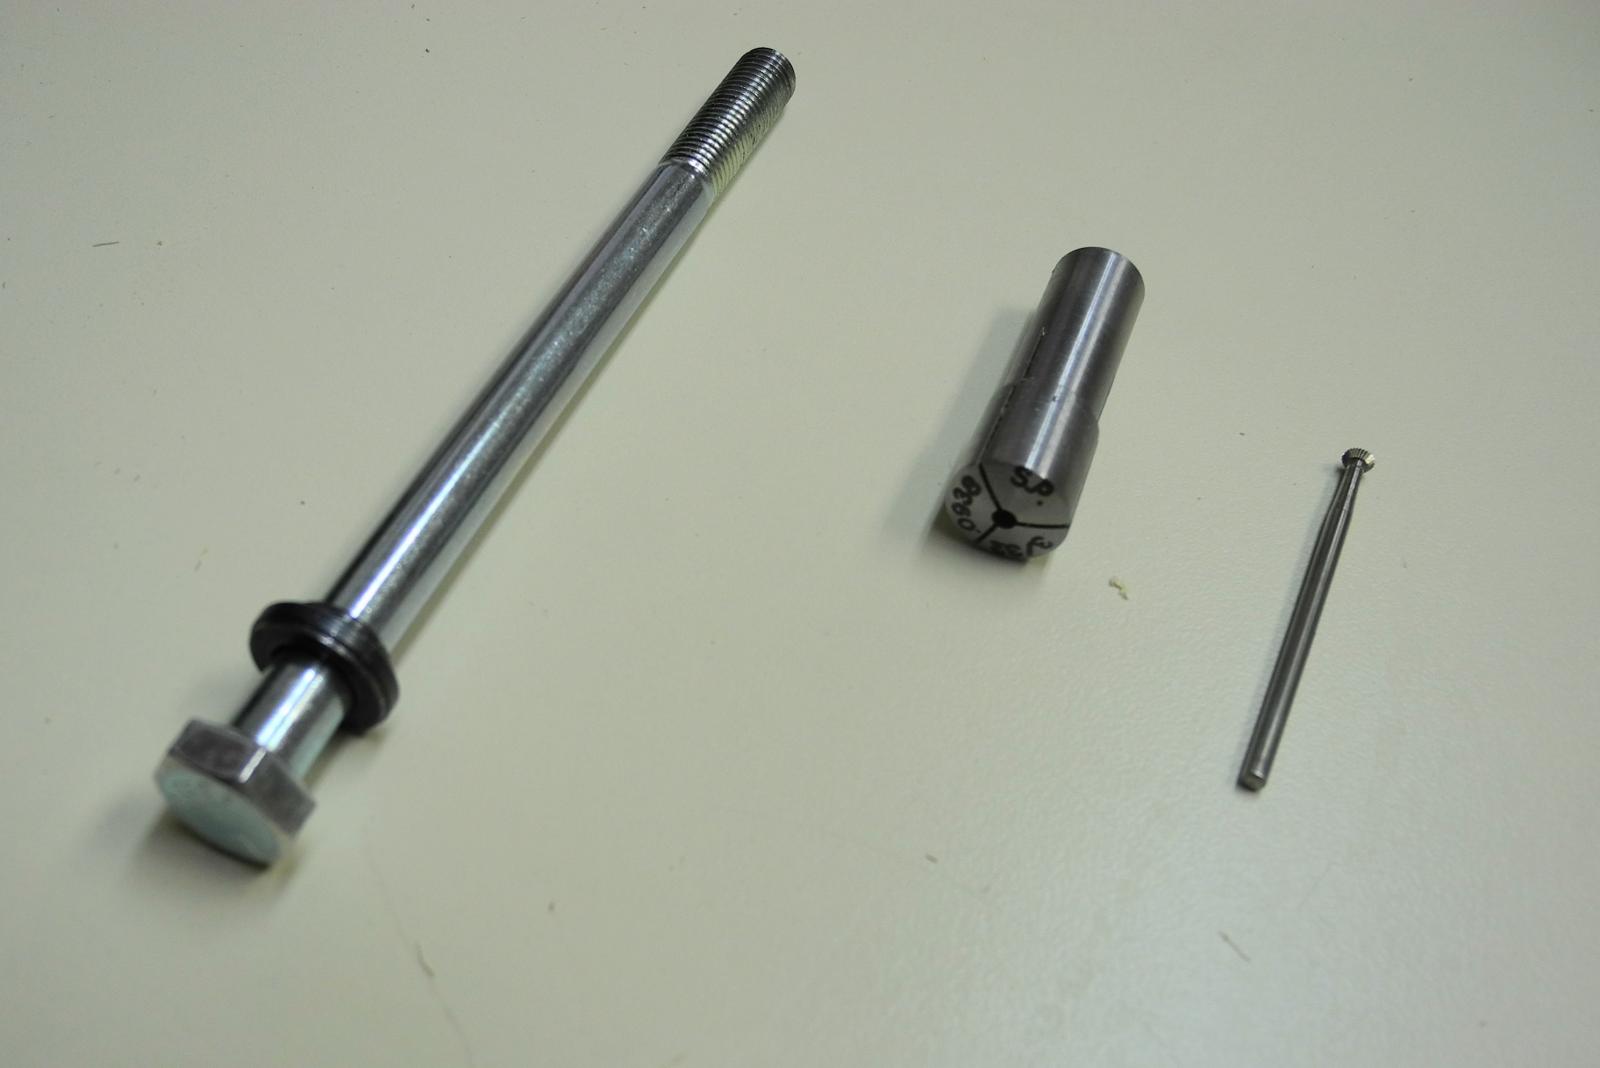
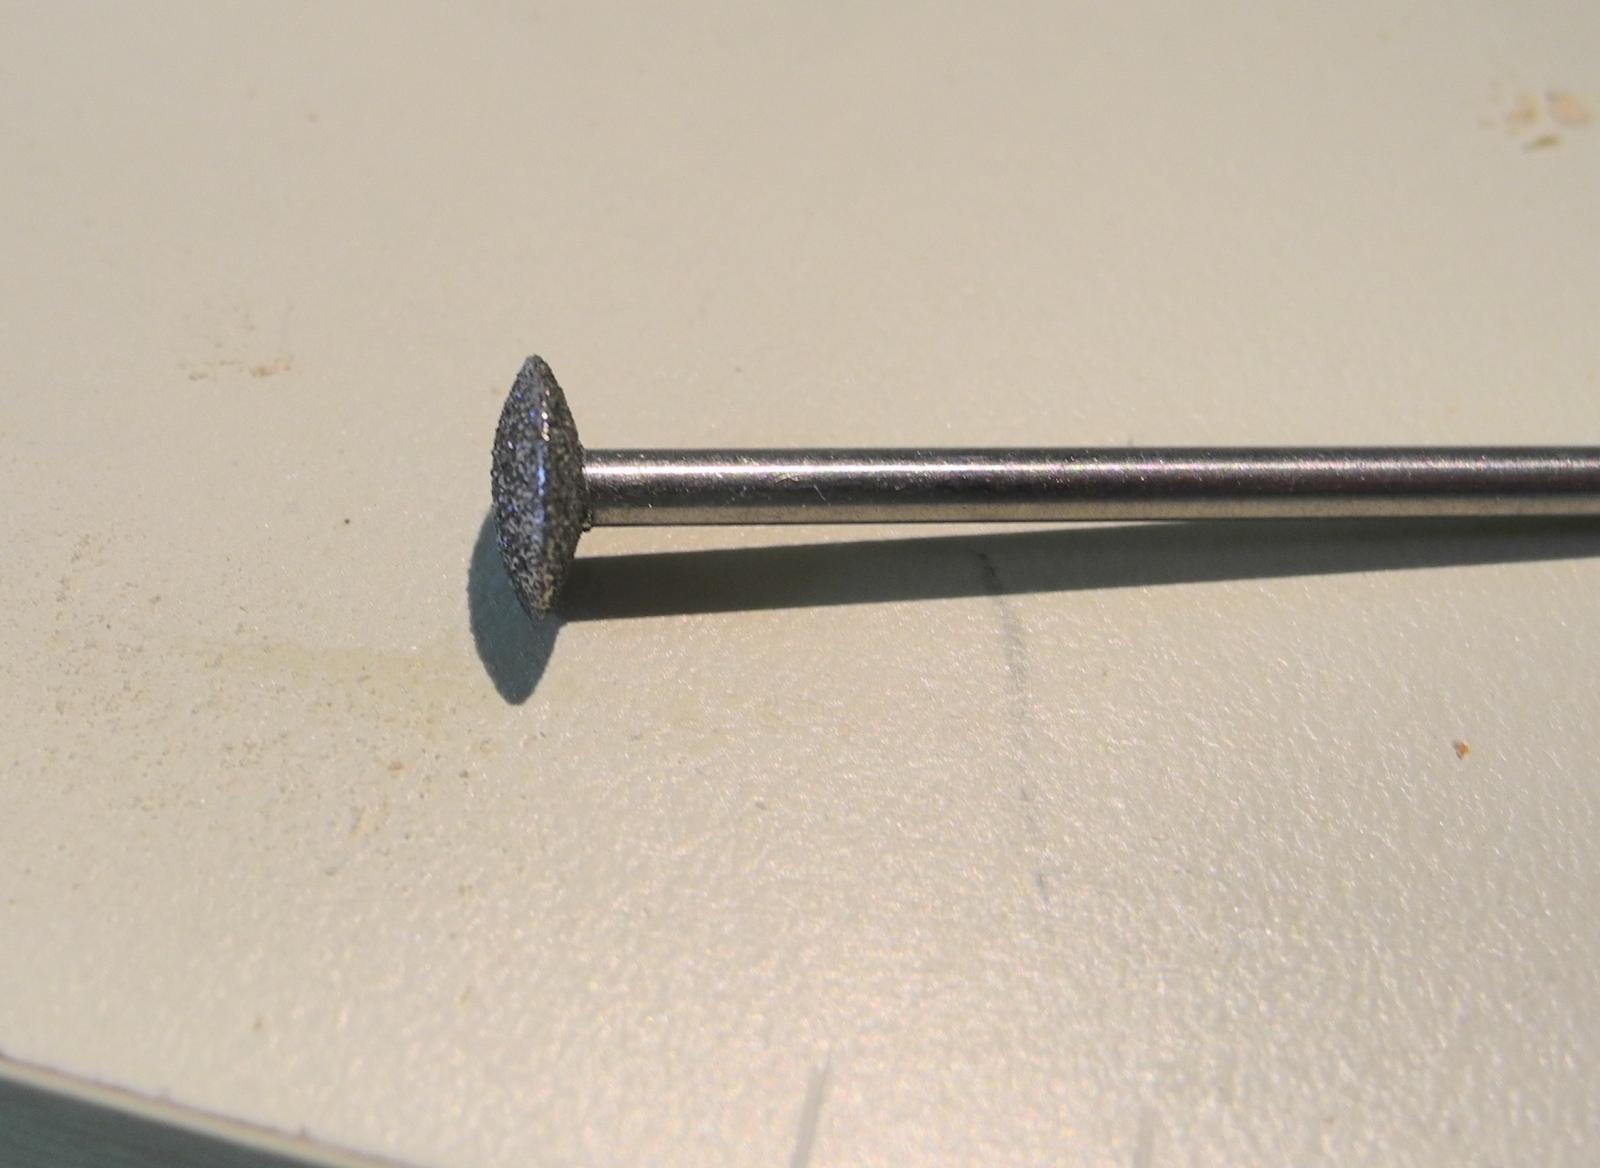
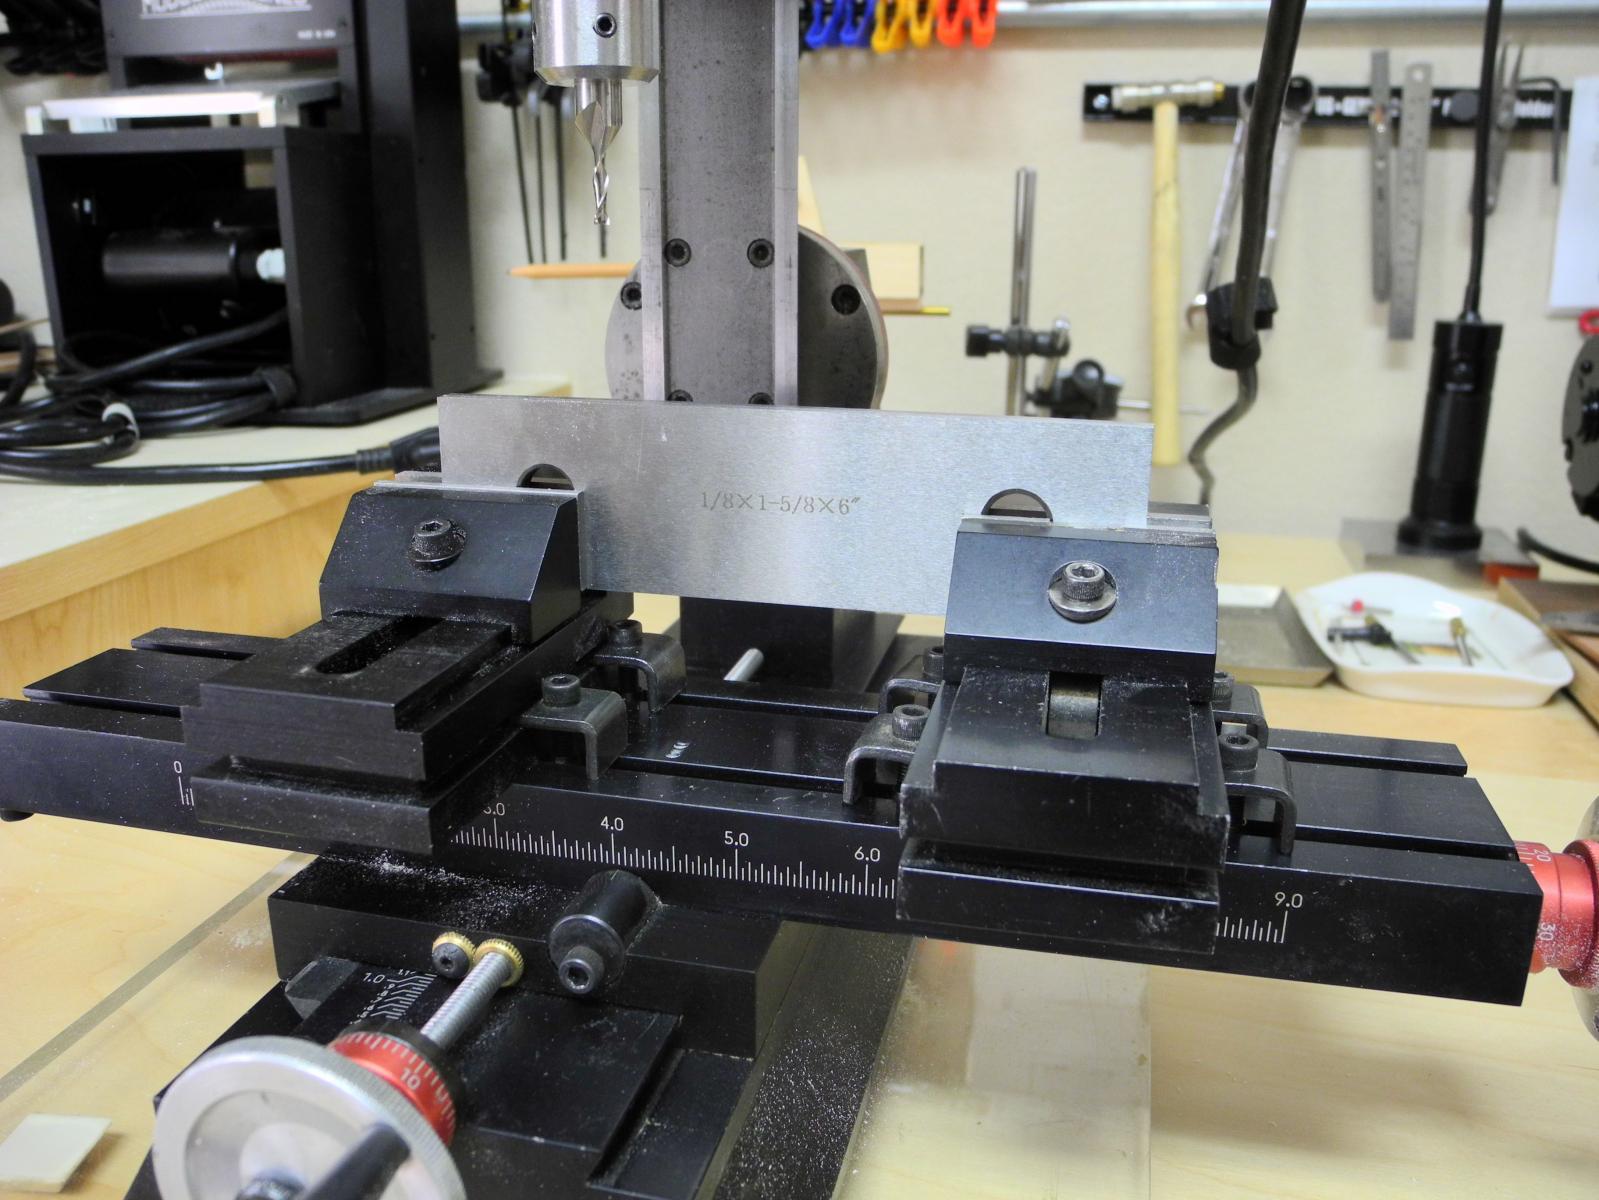
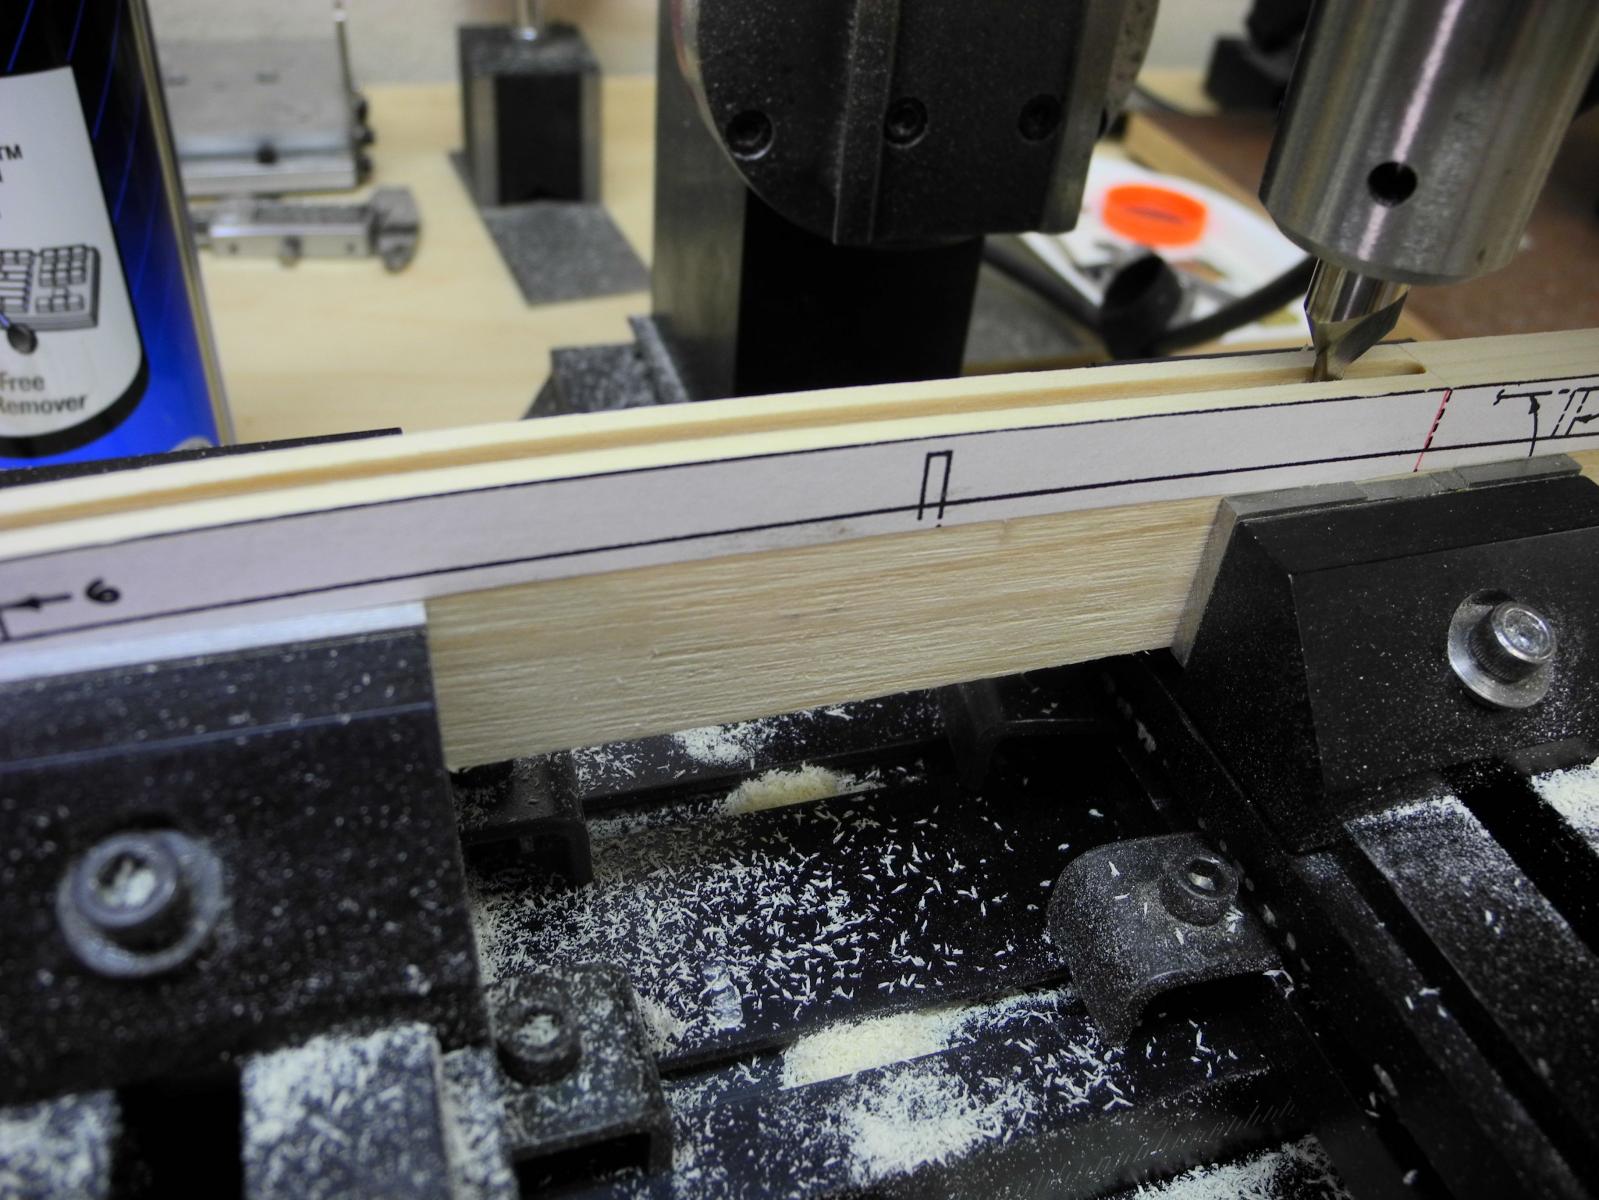
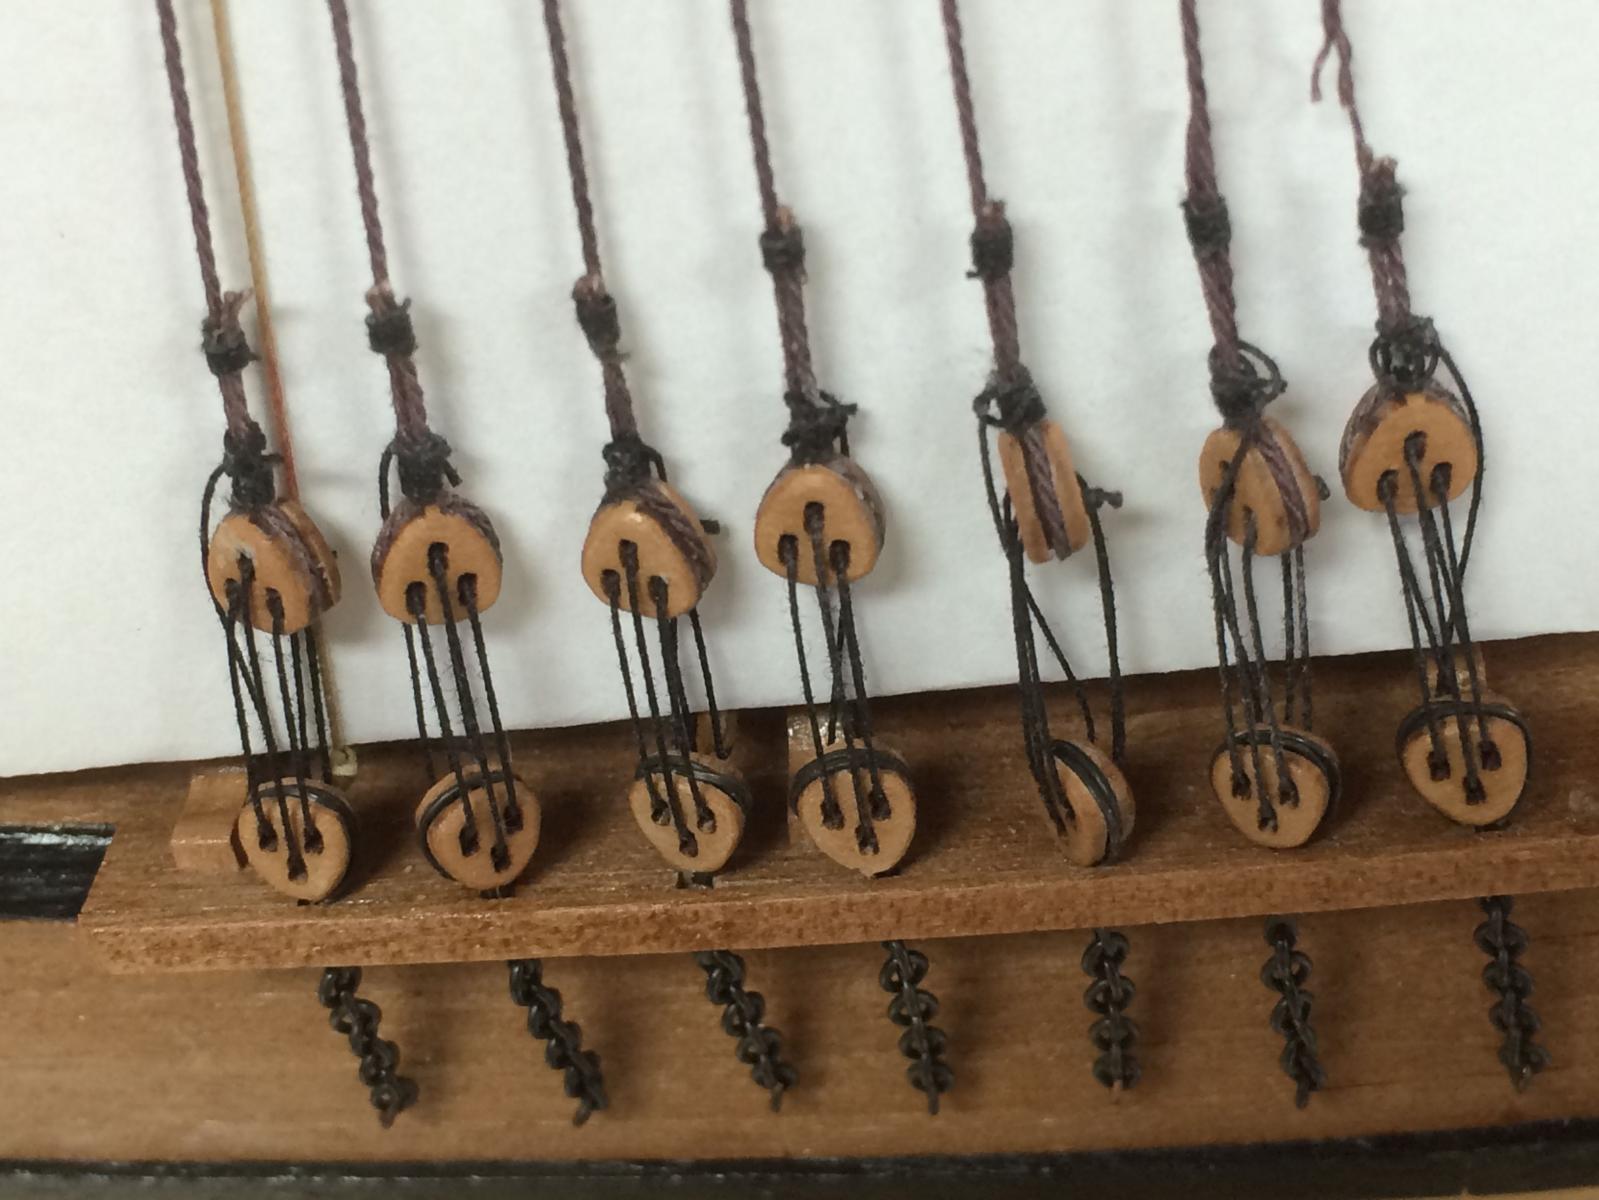
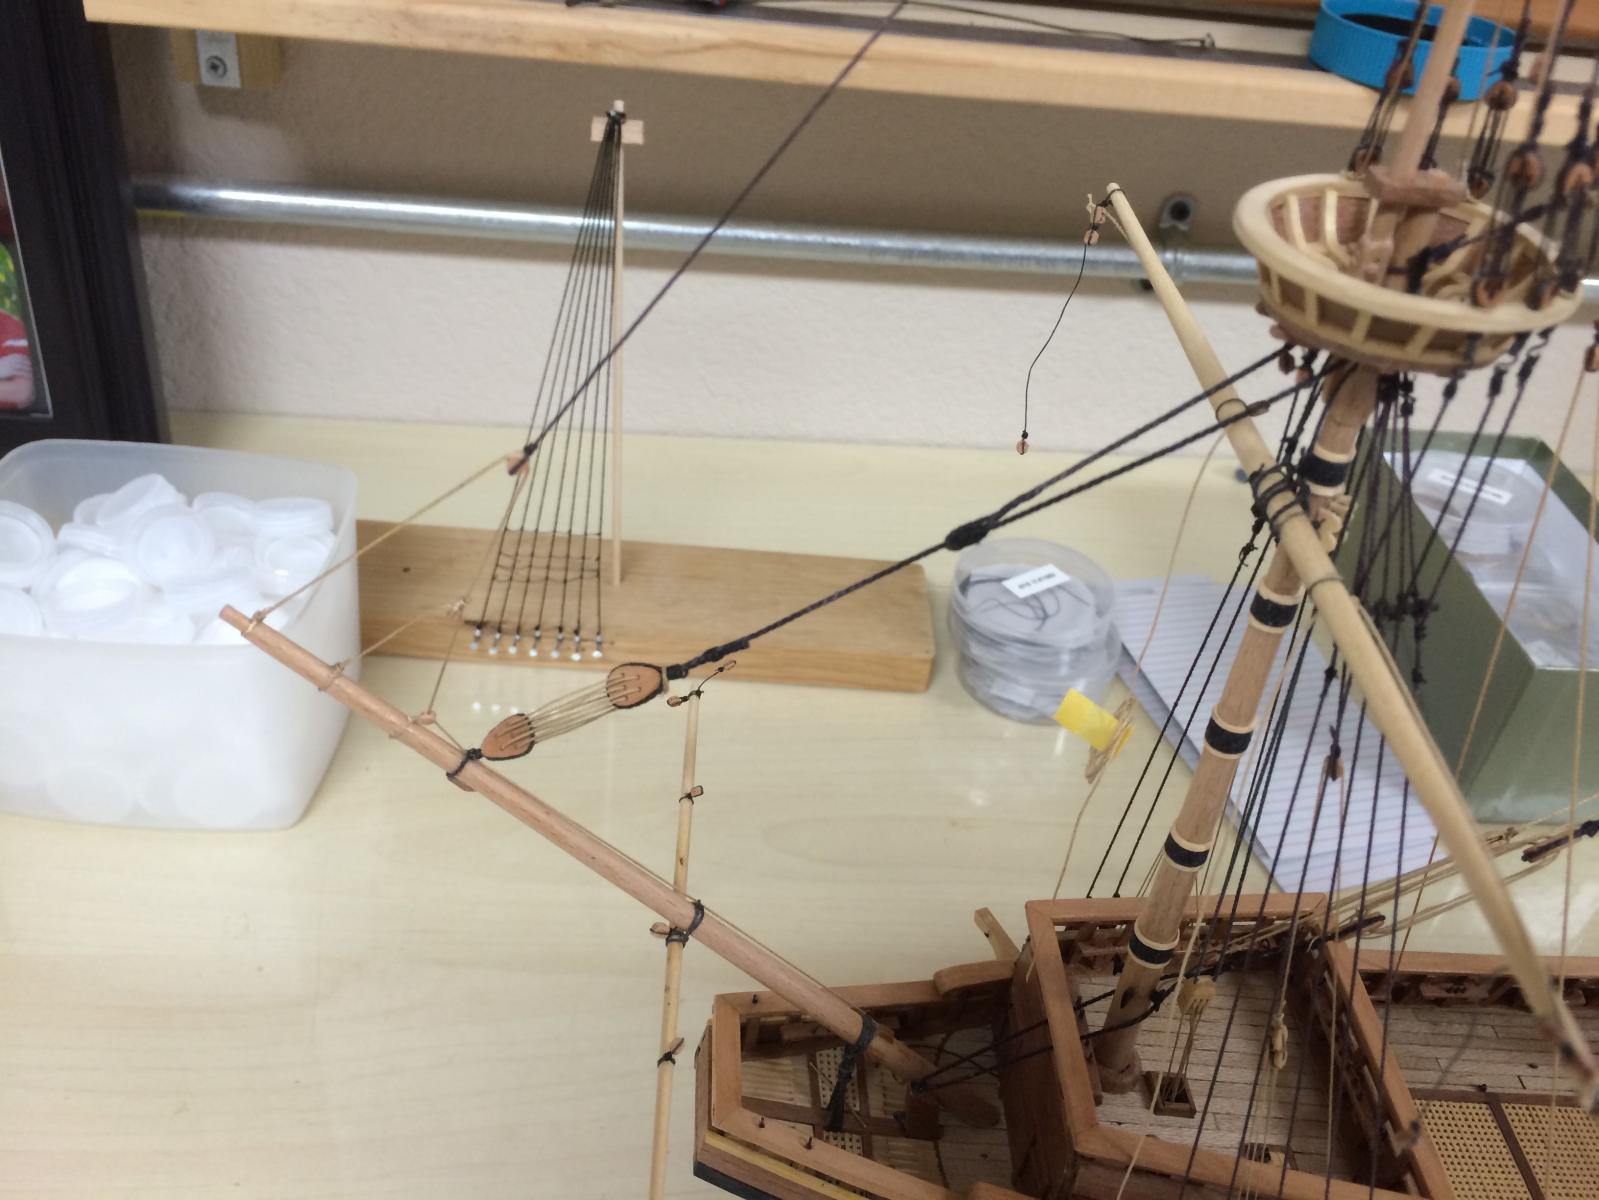
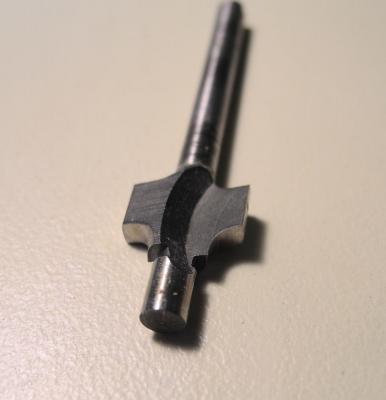
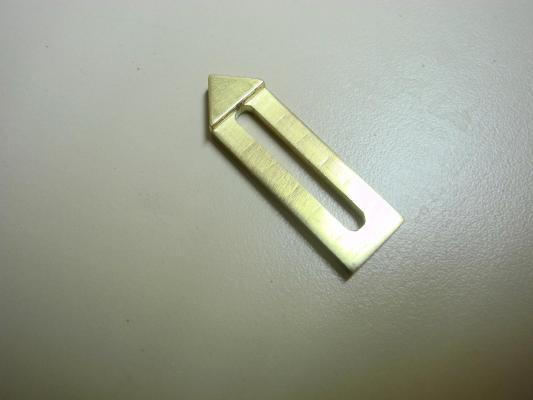
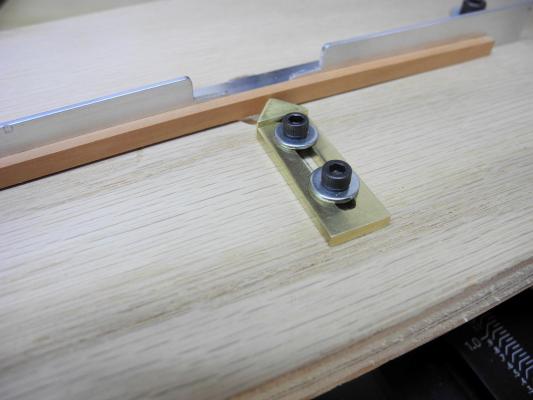
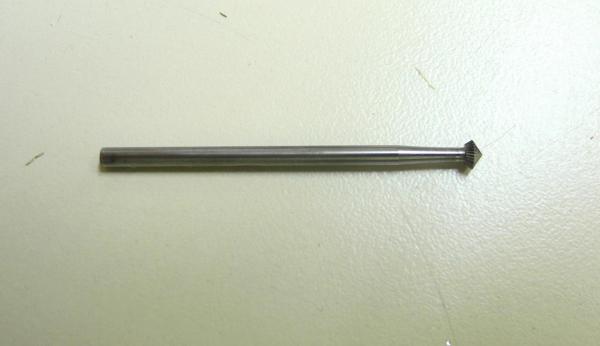
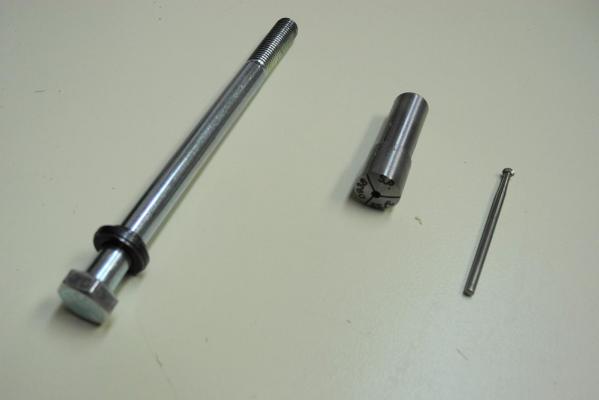
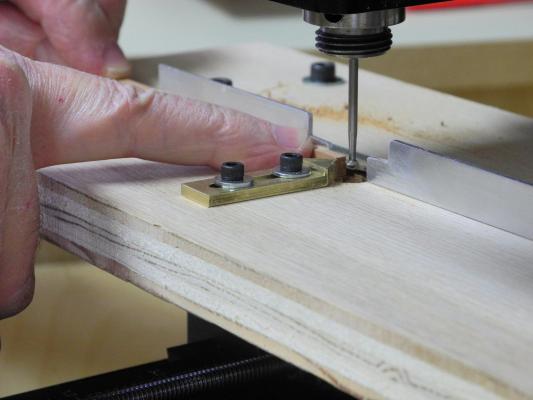
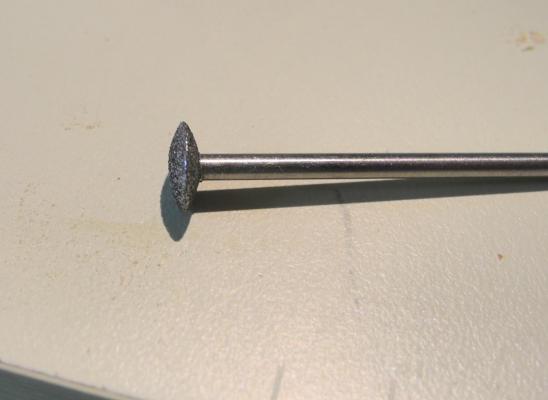
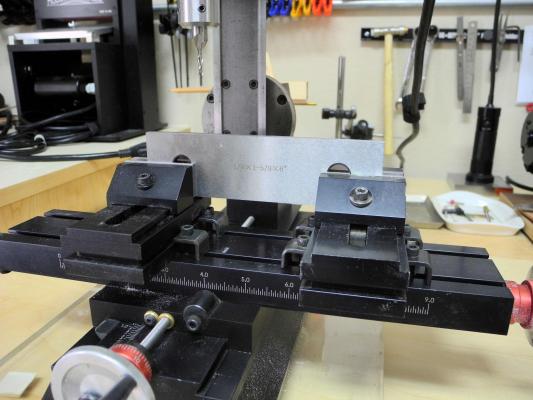
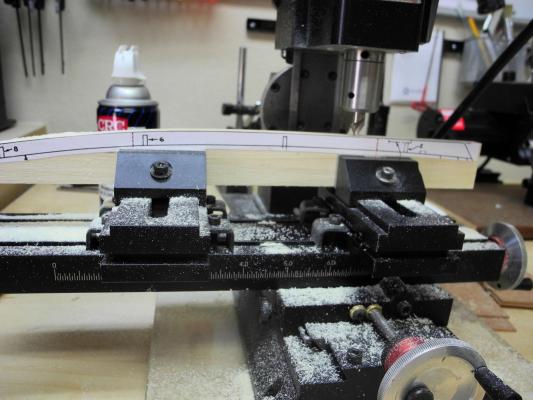
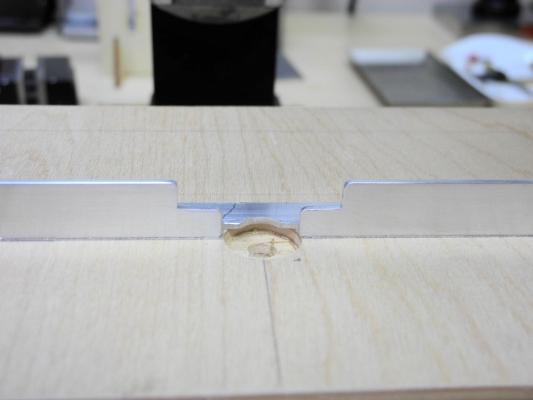
OK – so I finished the parts for the router table. I made the following item on the mill. It’s brass, and I used the rotary table to cut the arrow shape at the working end. I used a 1/8” four-flute cutter to cut the slot for the hold-down bolts. I had to move the y-table about 5 thousandths to make the slot wide enough for a loose fit on a 6-32 socket-head screw. Then I thinned down most of the body, leaving the arrowhead at the original height. I filed all of the corners clean with a #4 cut escapement file, then cleaned everything up with fine sandpaper and 0000 steel wool. I don’t know what to call it, but it functions like a featherboard to keep the work piece tight against the fence, so lets call it a featherboard for the time being. I used t-nuts installed under the table to hold the socket-head screws (also used for holding the fence). Here’s a photo of the ‘featherboard’ mounted on the table. In use, I first make sure that the featherboard is set so that it holds the workpiece against the fence. I used a carbide cutter that I got from my jeweler friend. This was mounted using a 3/32 Milling Collet. It gets mounted directly into the Sherline spindle, then is held fast and tightened around the bit using the drawbolt shown in the photo. In operation, the wood is fed left-to-right since the cutter is traveling clockwise (right to left). On a regular router table, since the bit is mounted on the spindle below the table the feed is right to left. On the mill, the spindle is above the table, hence the difference in feed direction. I used my right index finger to hold the wood down on the table, and pushed the wood with my left hand. I ran the mill at about 7500 RPM and got a nice clean cut (I used a piece of pear as the trial wood). It needed a little cleaning with an old toothbrush, but there was no ripping or burning that I could see. I then tried one of my diamond bits (I think it’s medium coarseness) to see if there was any burning. The only difference I could see was that the cutting tended to peal off, rather than becoming fine dust as with the carbide cutter. I ran this at the same speed, and there didn’t seem to be any burning. Thanks to this thread I now have a working 'router table'. I used 3/32" shank bits for the first test. I do have the Dremel 1/8" Router Bit set and a 1/8" Collet, so I'll probably try that next.


-
Hi Jay I haven't tried any of my diamond-coated bits on the mill, only HSS and carbide. After your demo I won't even try the diamond-coated. When carving I always used tupelo, which is a lot like basswood only finer grained. The diamond and ruby bits only burnt the wood when there was a small knot or other hard area, otherwise the cuts were nice and clean (and lots of dust). Based on this and your results, I would say the diamond bits aren't good when used in hardwoods.
-
Hi Jay: A good way to minimize burning when milling wood is to upgrade the mill with the 10,000 RPM pulley set. On a recent trip to Carlsbad, CA for a little vacation I brought the headstock and motor to Sherline and they upgraded the pulley set. All it cost was the price of the parts (I'm still not comfortable taking the mill apart to that extent). So now my mill and lathe can run at high speeds. By the way, every time I deal with Sherline I come away impressed with their customer focus. http://www.sherline.com/4335inst.pdf Hi Grant: I've been using the table mostly for drilling. I still need to make a device to stabilize a wood strip against the bit when using the table for routing. Now this thread will shame me into getting it done!
-
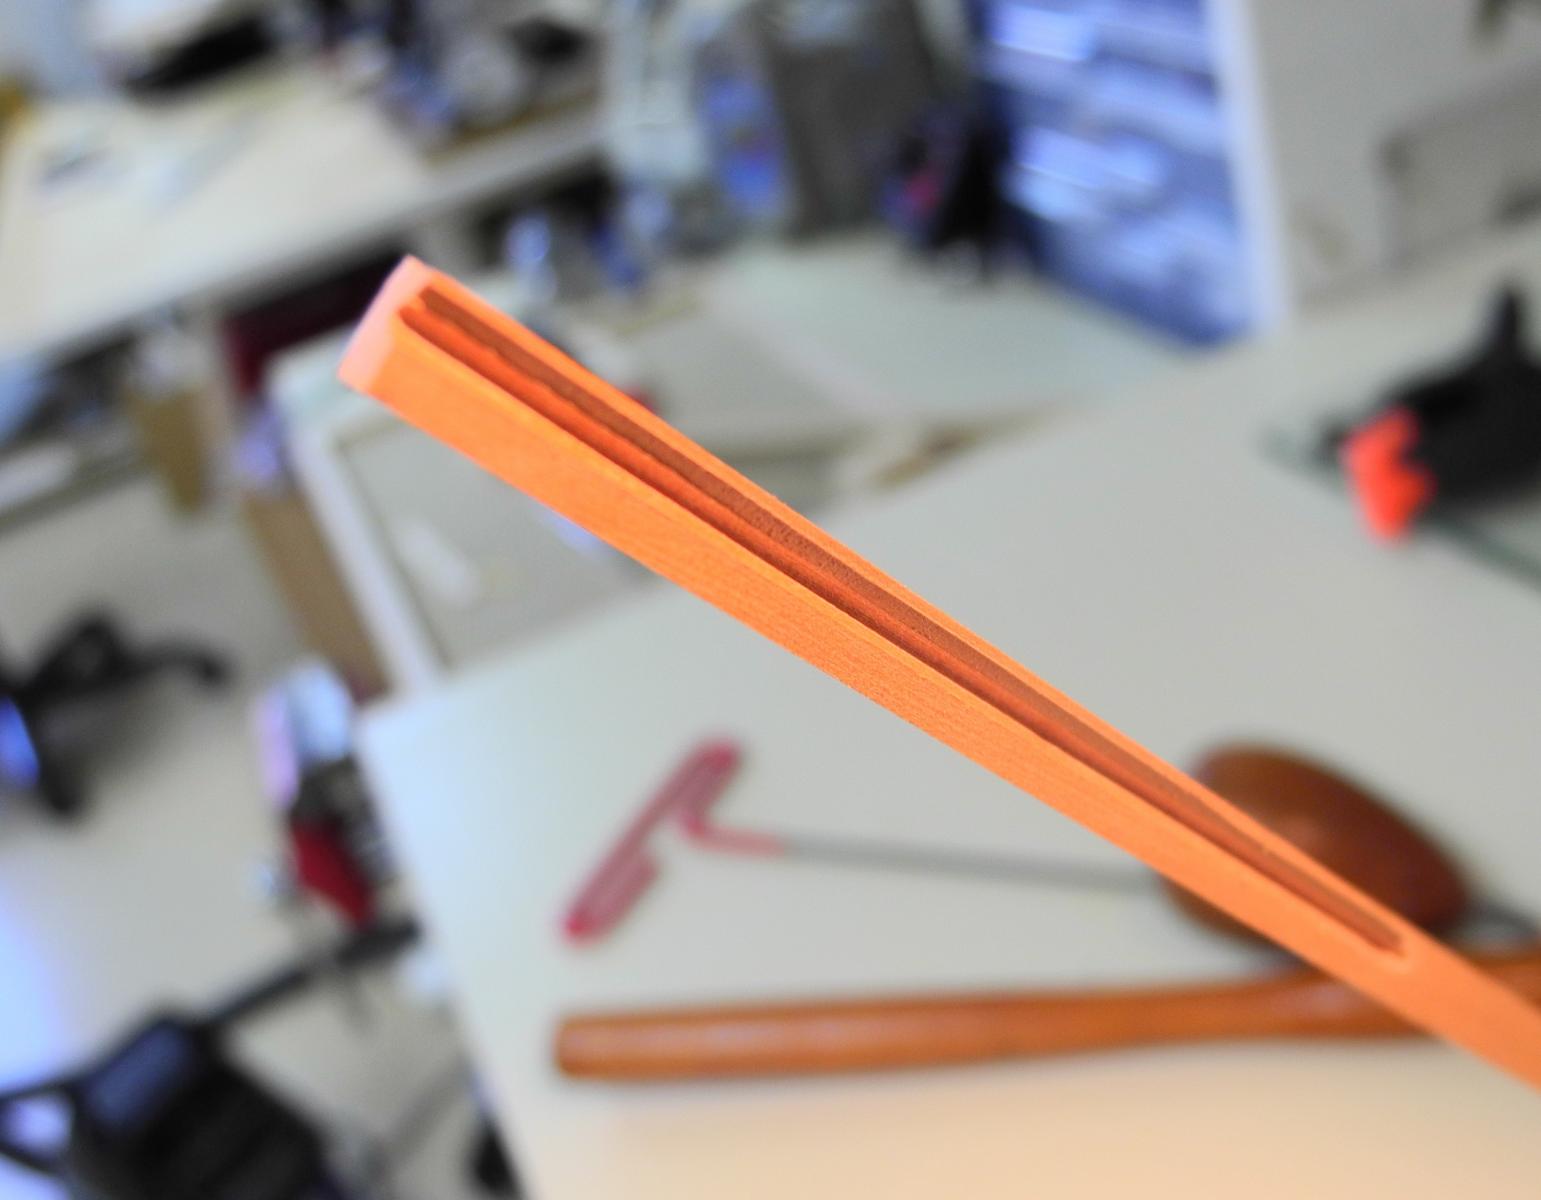
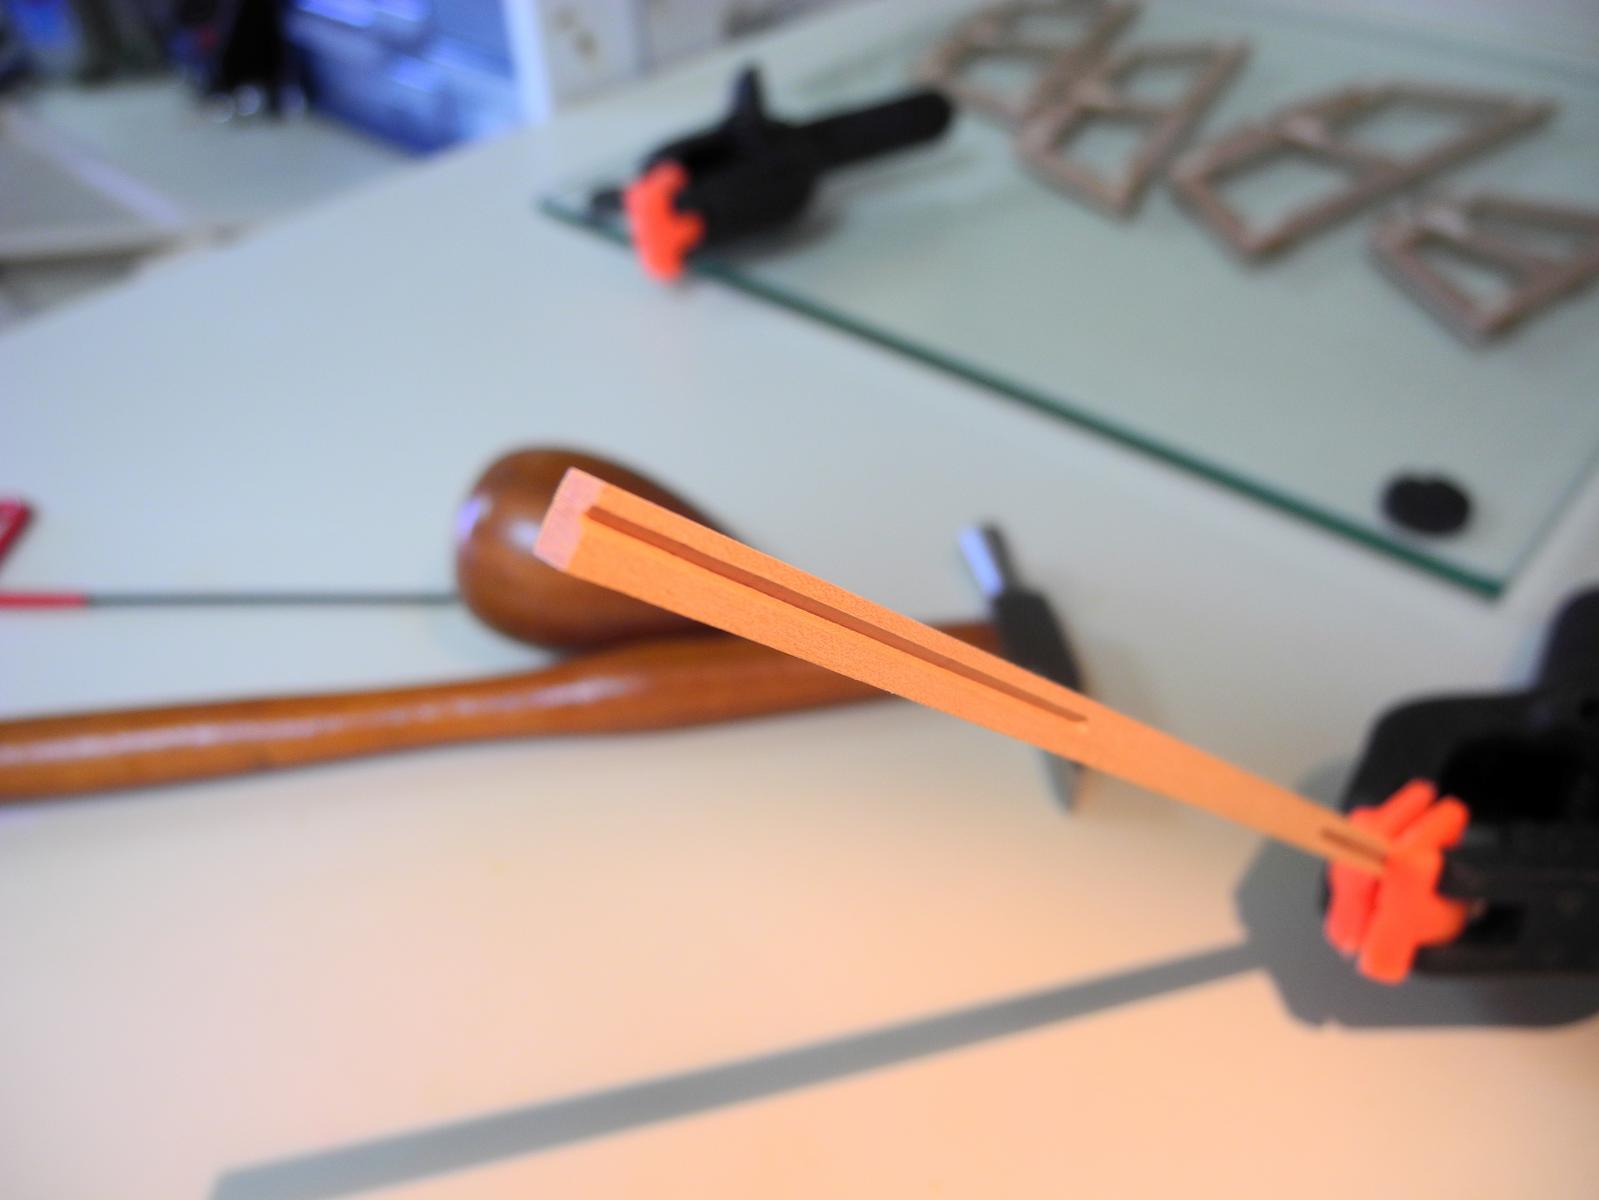
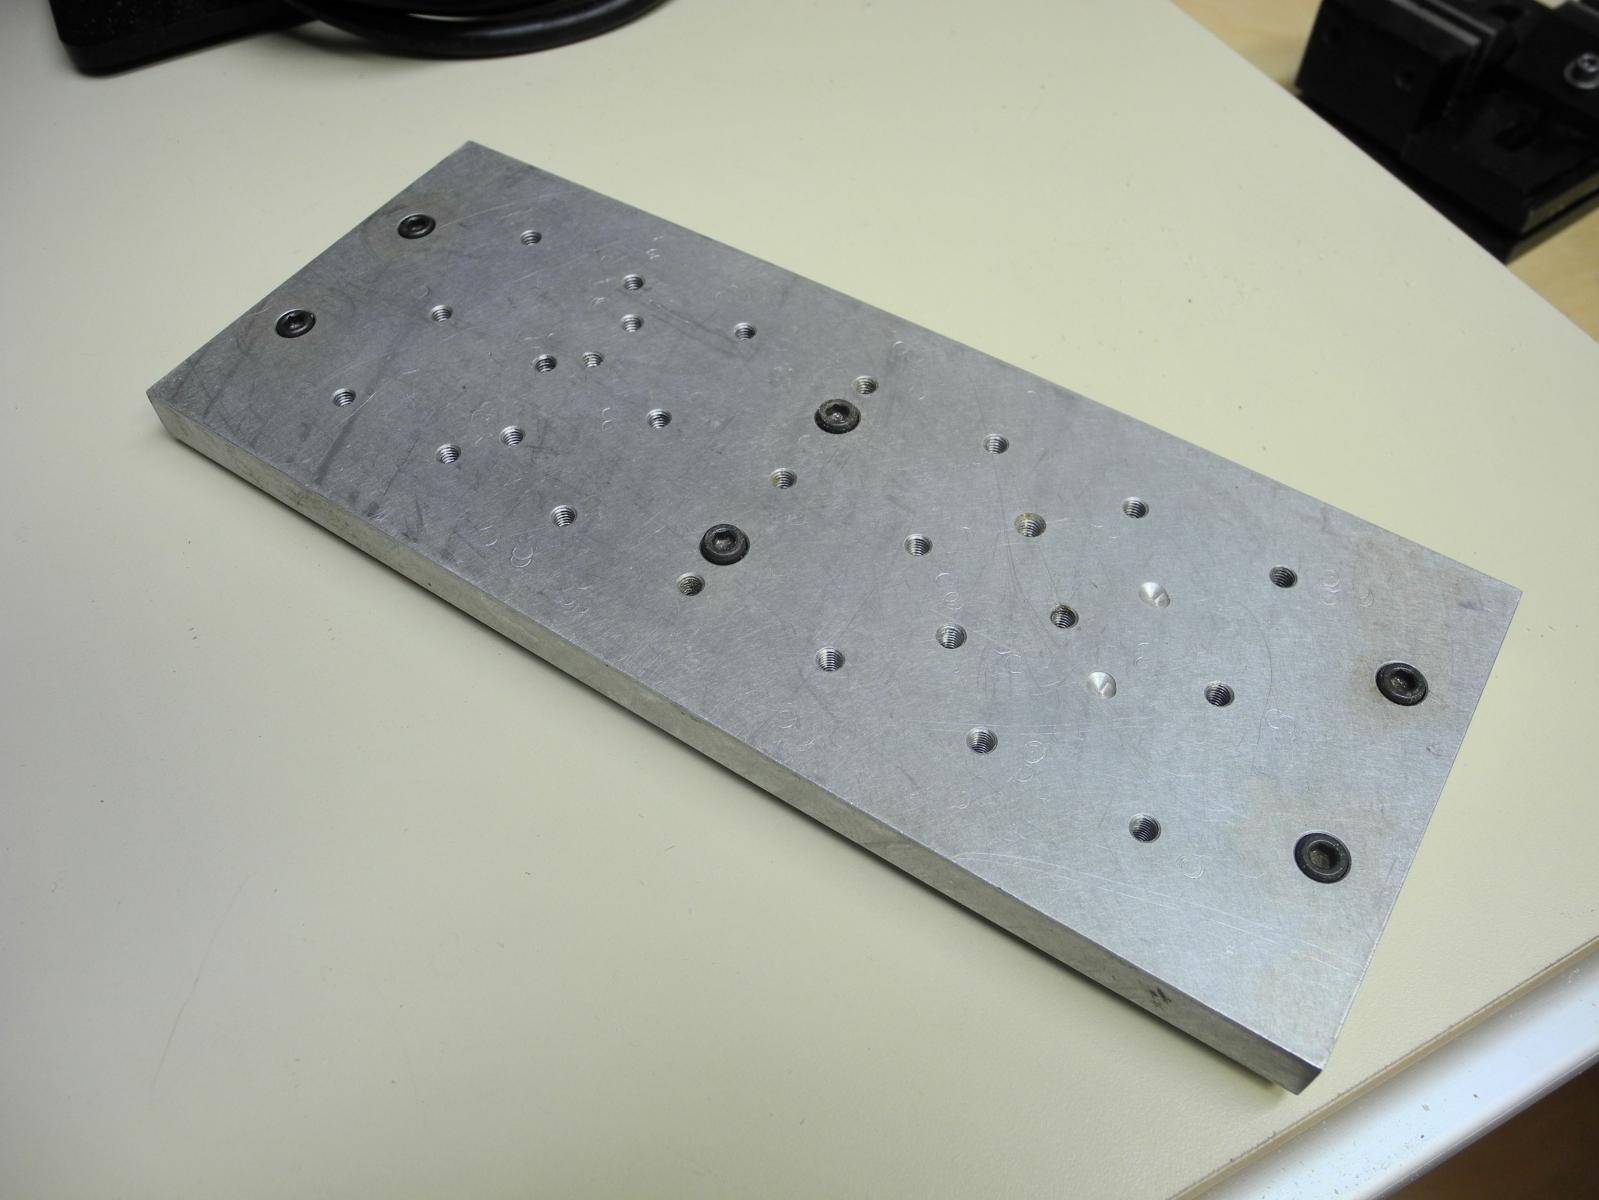
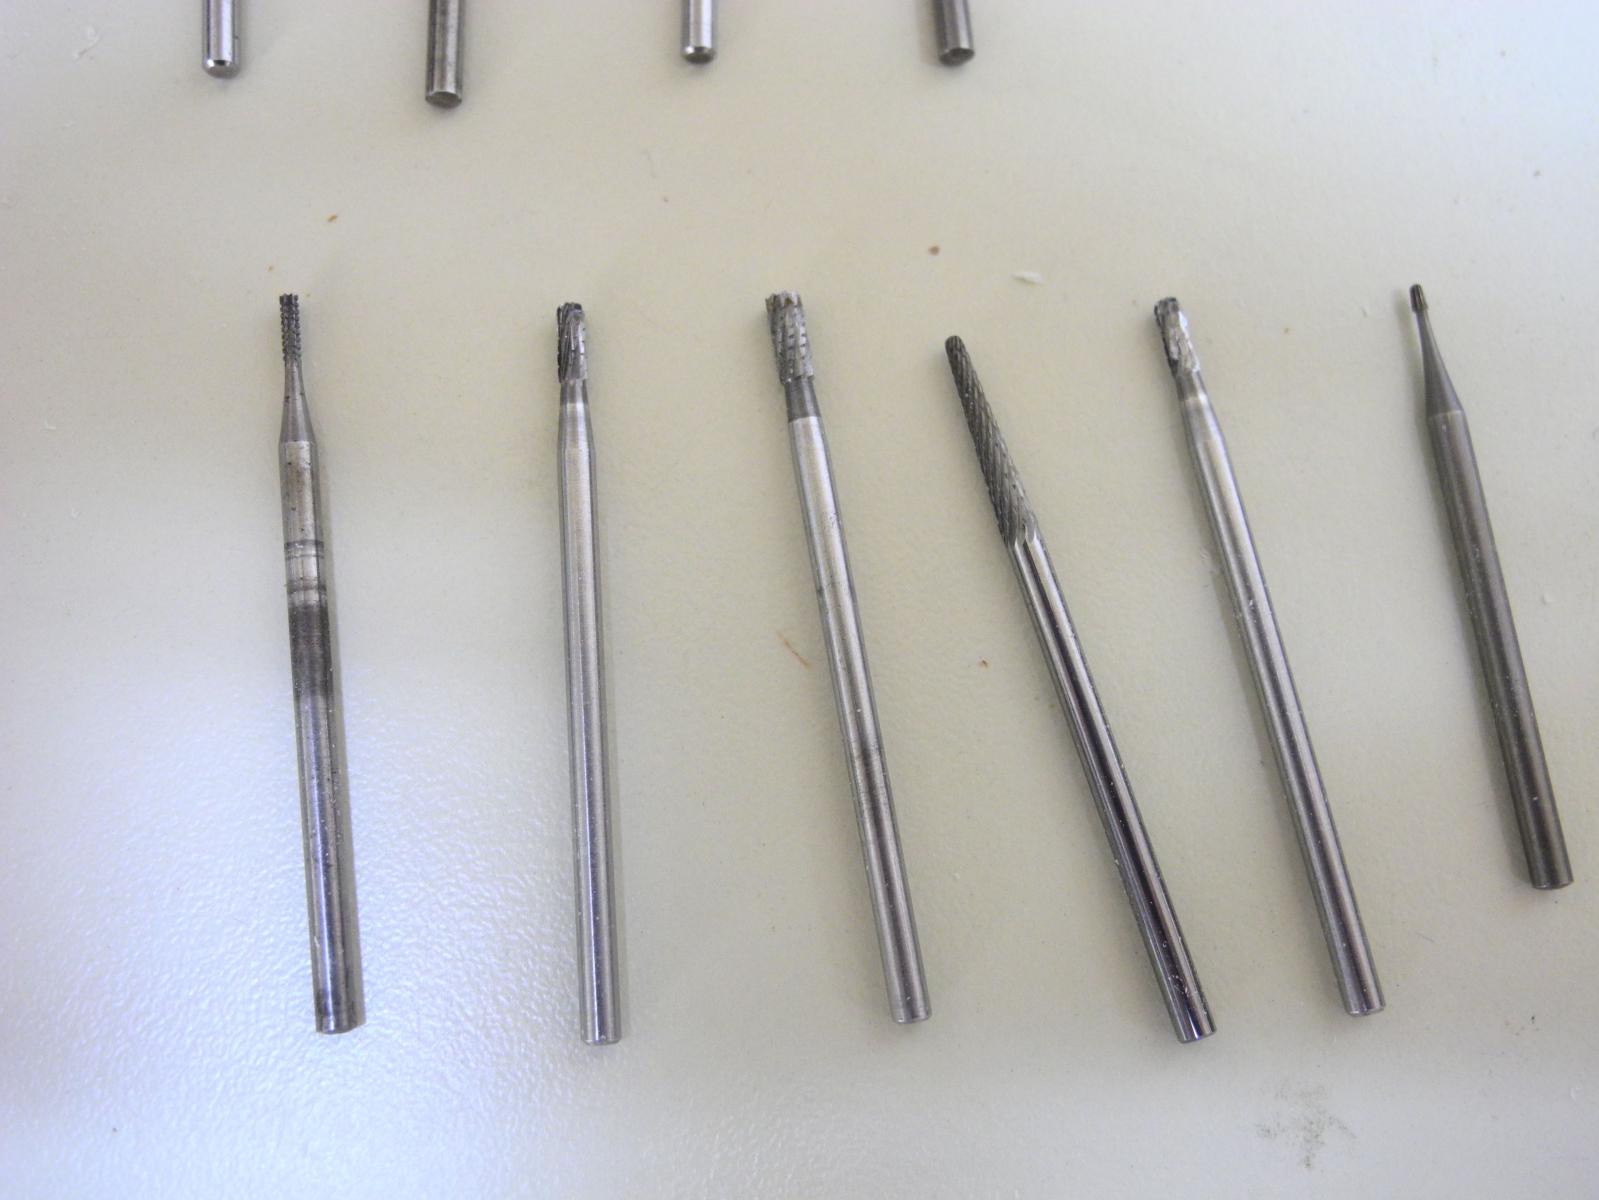
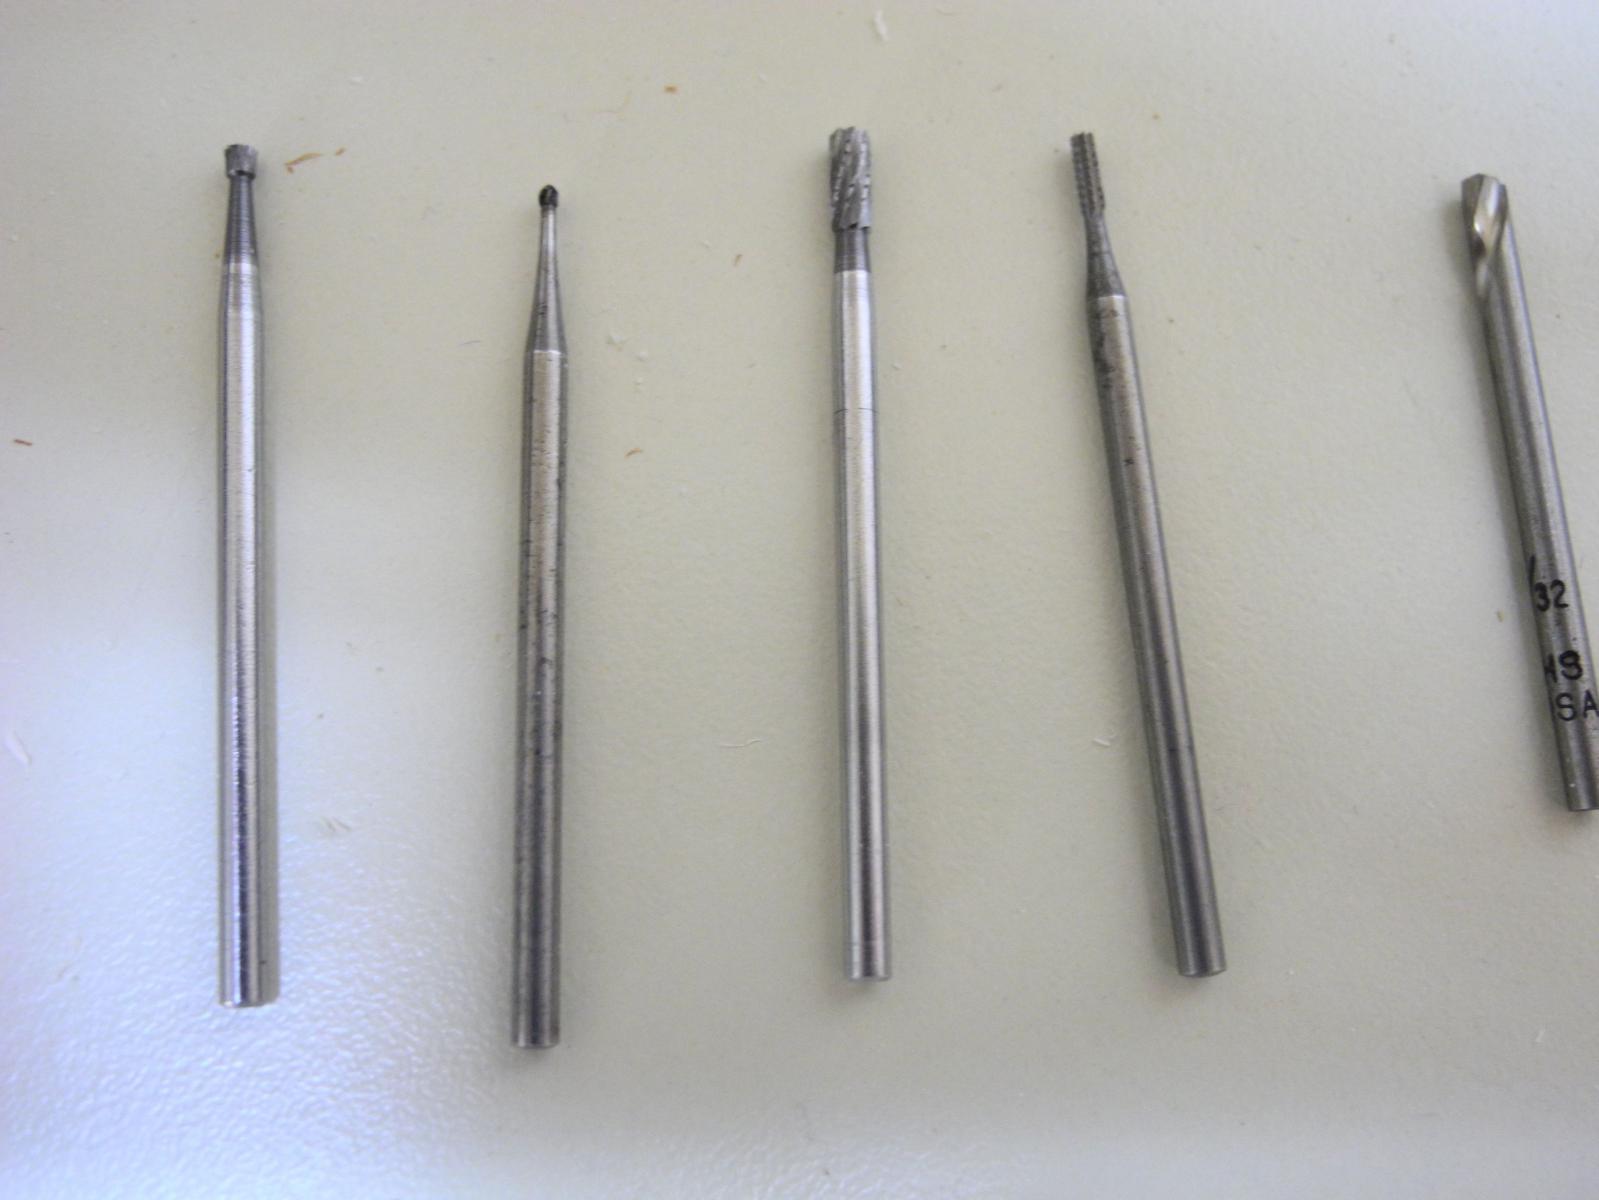
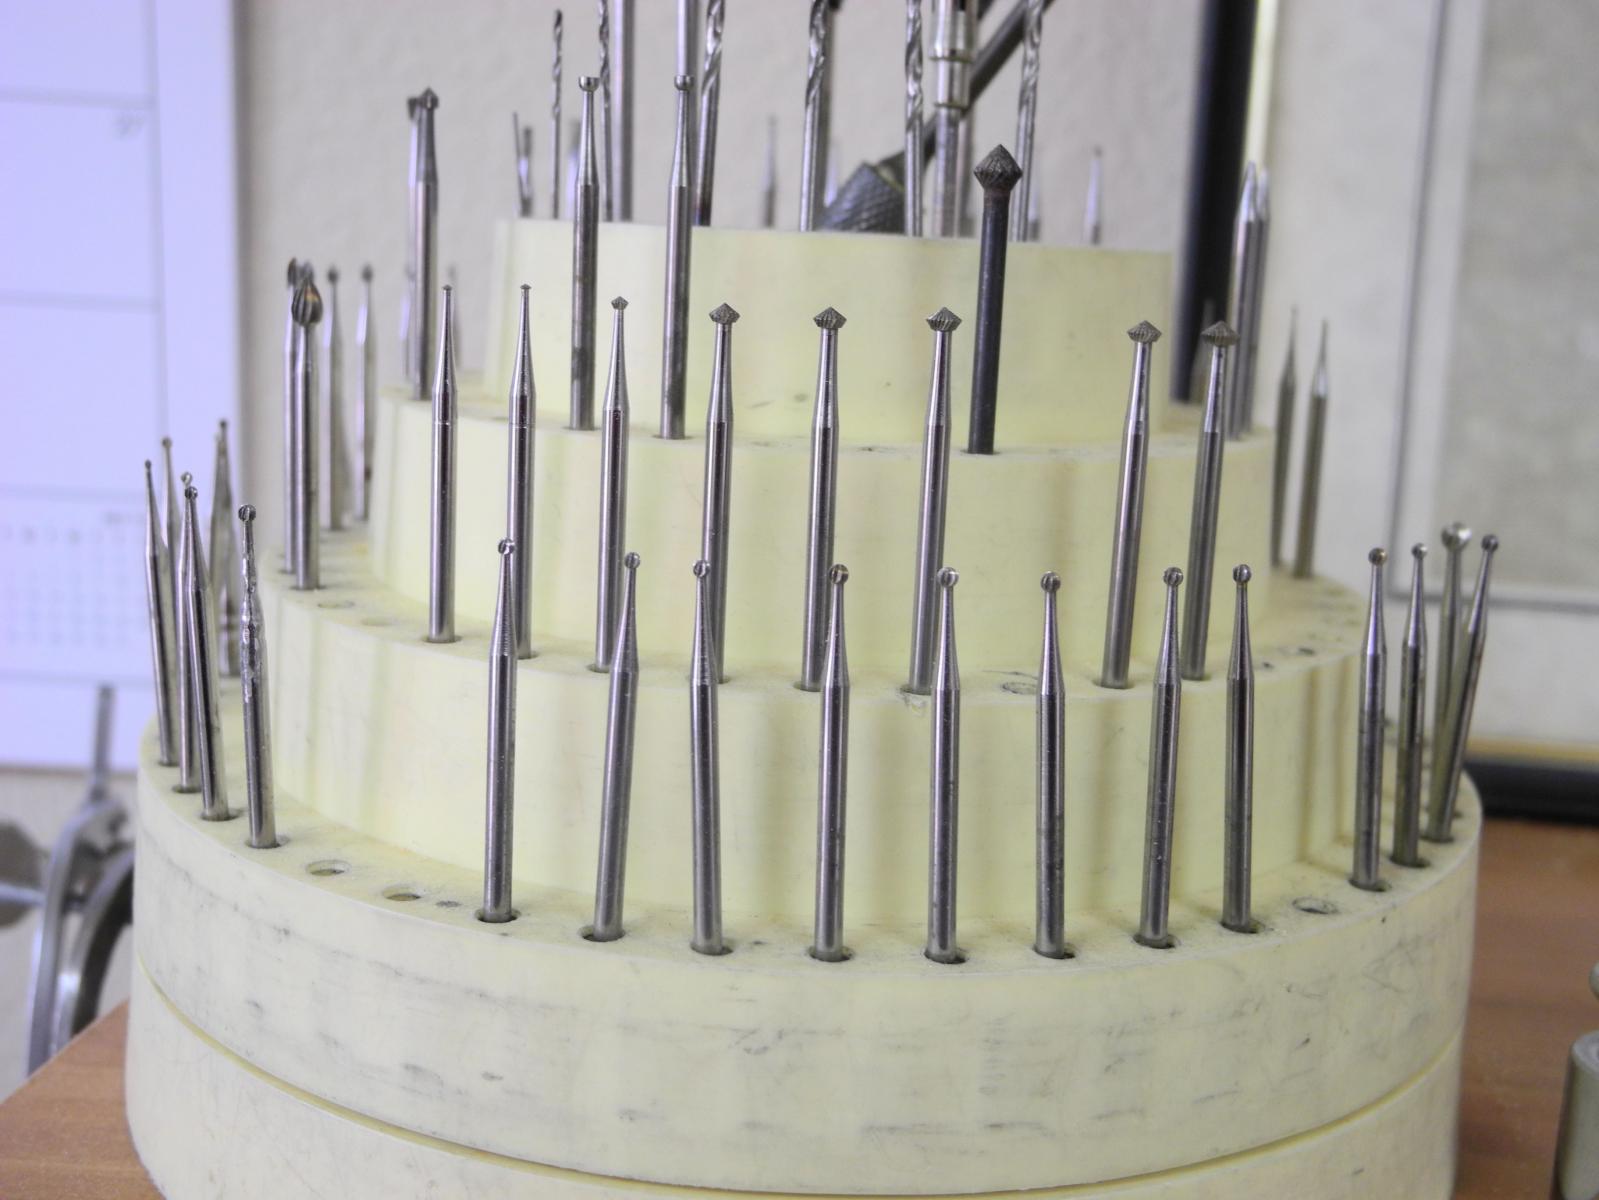
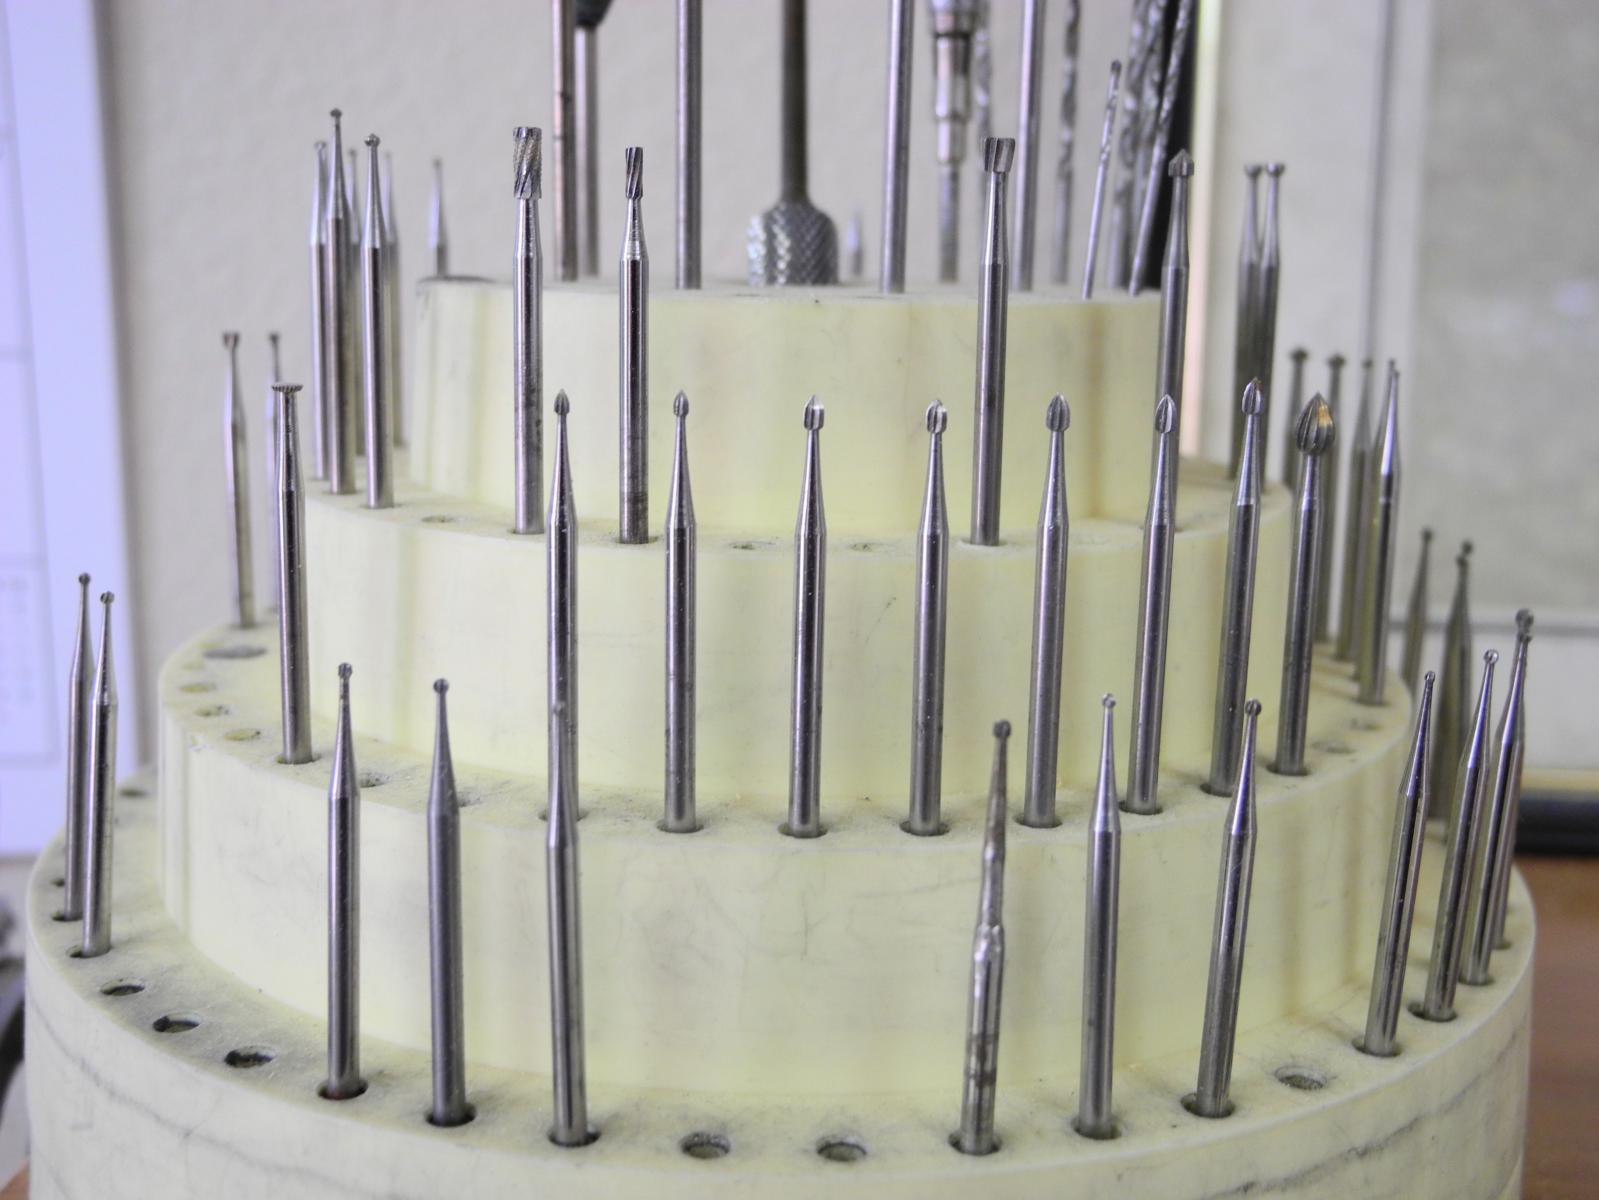
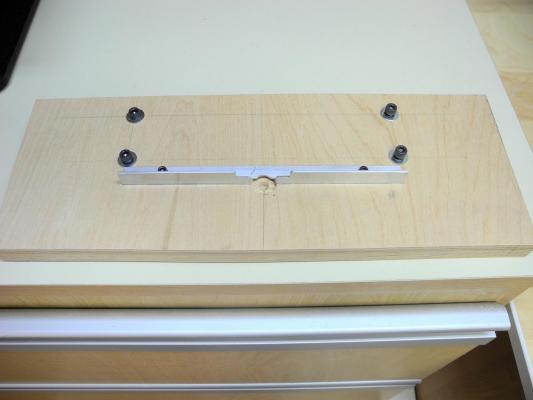
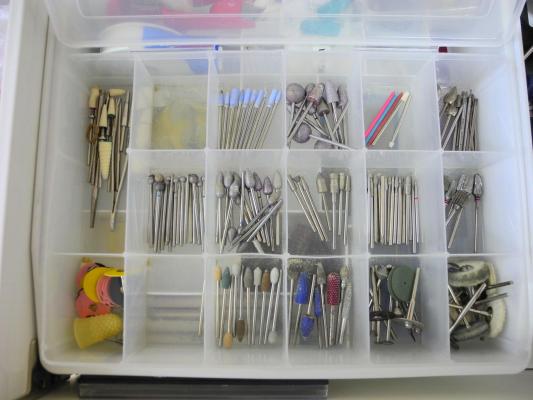
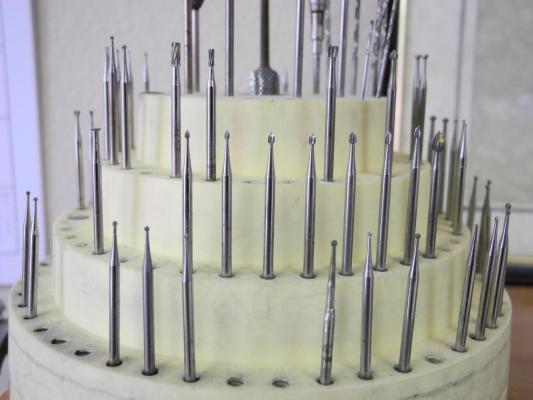
I needed to mill a slot for the centerboard in a keel for a Skipjack. I have two milling vises, so I used the two vises in tandem to hold the keel. First I held a couple of parallel bars in both vises, with the vises loosely attached to the table. I indicated in the vises so that they were in the same plane. Then I was able to mount the keel across the vises and mill the slot parallel to the sides and along the centerline. I have a tooling plate for my mill, which allows me to mount different pieces to the mill and save the x-table from inadvertent cuts. I borrowed this idea to make a ‘router table’ for the mill, using a thick piece of plywood that is perfectly flat. I drilled holes for cap screws and t-nuts to fit the channels in the x-table, and made a fence from an angled piece of aluminum. I also use this table when I’m drilling multiple holes that may sometimes drill through the stock – this saves the x-table. As for the bits I mentioned, this is part of my collection of 3/32 bits from my bird carving days. I accumulated this hoard over 15 years of carving. The bits in the photos below are very useful on the mill. I also recently received the bits in the attached photos from a friend of mine who owned a jewelry store and was retiring. I’m sure there are some bits in this treasure trove that will be very useful on the mill, and I don’t think I’ll be needing to buy more bits for the foreseeable future!


- 146 replies
-
- 10
-
-
I'm very happy for you, Ed. I don't know whether to wait until Mystic so I can get an autographed copy, or to order it now to satisfy my need for instant gratification.
- 3,618 replies
-
- 5
-
-
- young america
- clipper
- (and 1 more)
-
Sorry to hear about your family's troubles. Sometimes a hobby is a good way to take your mind off hurtful things.
-
There is a very wide variety of bits in 3/32 shanks. This appears to be the shank most often used in the jewelry and dental tools. As a bird carver I accumulated quite a number of 3/32 bits. Most of them are diamond or ruby coated, but I also have some HSS bits that will also work on the milling machine. The best way to mount them is with a milling collet for 3/32 shanks. I'll try to put together some photos in the next day or so.
-
Bilge Pumps 1870/80
Mahuna replied to GAW's topic in Discussion for a Ship's Deck Furniture, Guns, boats and other Fittings
Hi Gerald - I was able to open the gallery, and I'm amazed at the machines you built for this project. -
Thanks for the kind wishes Mark and Patrick. I plan to follow the post-operative orders to the letter. I have a great trip planned around the NRG Conference in October, and I don't want to mess it up. Besides Mystic Seaport, I plan to visit several museums in the Chesapeake area as well as the Naval Academy and Smithsonian. I'm also hoping to get aboard the recently rebuilt Skipjack Kathryn, which is in my future build goals. Lots of driving, walking, and standing, so the back needs to be good. Mark, as to the stay, the problem is in the length I allowed between the mouse and the splice. It should be fairly simple to replace the stay with a better one.
-
Hi All: Sorry I haven't posted in a while. I haven't been able to do any work on Paragon lately, and didn't want to turn this into a medical thread. I do have a little news to report on Paragon, but not good news. A little while ago I thought I might try resuming work, if for no other reason than to see if I could. When I sat down to Paragon I turned her around so I could try working on the port side ratlines. I had already tied the starboard side, even though I hadn't finalized the alignment and trimming. When I look closely at that side, I saw a couple of distressing things: The aft most main shroud has been unraveling. The only thing I can think of is that I must have inadvertently nipped the shroud when I was doing some trimming. I also noticed that a couple of the upper deadeyes on the main shrouds were turning out of alignment. My friend and mentor Peter suggested that this might be because my homemade rope wasn't wound tightly enough and was losing its set. I also left too much line between the mouse and the splice at the top of the Fore Stay, so this line needs to be redone. This will probably be relatively straightforward. I think the most difficult fix will be the aft most shroud, since I will need to replace the entire length under the futtock pole. So, it looks like when I do get back to work I'll need to do some surgery on Paragon. Speaking of surgery, I visited with an excellent spine surgery group here in Phoenix, after getting a new MRI for them to review. They identified the cause of my problems as a herniated disc, rather than the arthritis-caused stenosis that I thought I was dealing with. I'll be undergoing a procedure called Microscopic Discectomy, which is an outpatient procedure, on Tuesday 9/8, and my target is to recover sufficiently to be able to travel east in October for the NRG Conference. There probably won't be a lot of new activity on Paragon before that, but I plan to use the time developing my CAD skills and beginning drafting for my longer-term goal. When I can get some shop-time I'll probably be in the early stages of my next scratch build - the Willie Bennett. The woodworking required will be less difficult than close work like ratlines.

-
Hi Ron: Great research. You've answered a lot of questions I've had. I'll be visiting the Maritime Museum in October, and this post makes me look forward to it even more!
-
Adding accessories to your milling machine
Mahuna replied to Modeler12's topic in Modeling tools and Workshop Equipment
They also make a set of Indexing Blocks - $60 http://www.sherline.com/2045inst.pdf -
Carpet tape - double-sided and very strong - may work. I use it for all my sanding sticks.
-
Adding accessories to your milling machine
Mahuna replied to Modeler12's topic in Modeling tools and Workshop Equipment
Hi Jay Sherline does make an Indexing Attachment that is used for dividing. http://www.sherline.com/3200inst.pdf I have it, but haven't used it yet (when I bought my used Sherline setup it contained almost every attachment Sherline makes for the mill and the lathe). -
TurboCad Printing - NEED HELP
Mahuna replied to Mahuna's topic in CAD and 3D Modelling/Drafting Plans with Software
That was it, Ron. I hadn't thought of that wrinkle, so thanks much! -
TurboCad Printing - NEED HELP
Mahuna replied to Mahuna's topic in CAD and 3D Modelling/Drafting Plans with Software
Thanks Ron. I do have the scale of 1:1 set. There are four options for the tabloid paper, and I've only been using the 'Borderless Tabloid' setting. I'll try each of the others to see if it makes a difference.