Mahuna
-
Posts
1,504 -
Joined
-
Last visited
Content Type
Profiles
Forums
Gallery
Events
Everything posted by Mahuna
-
 Hi Patrick I like the color combination very much! From the patterns it looks like this model will be crammed full of goodies - can't wait to see them.
 -
Very nice work, Ed. I like the idea of using Castello to distinguish the binding strakes from the Holly deck planks.
- 191 replies
-
- 6
-

-
- young america
- clipper
- (and 1 more)
-
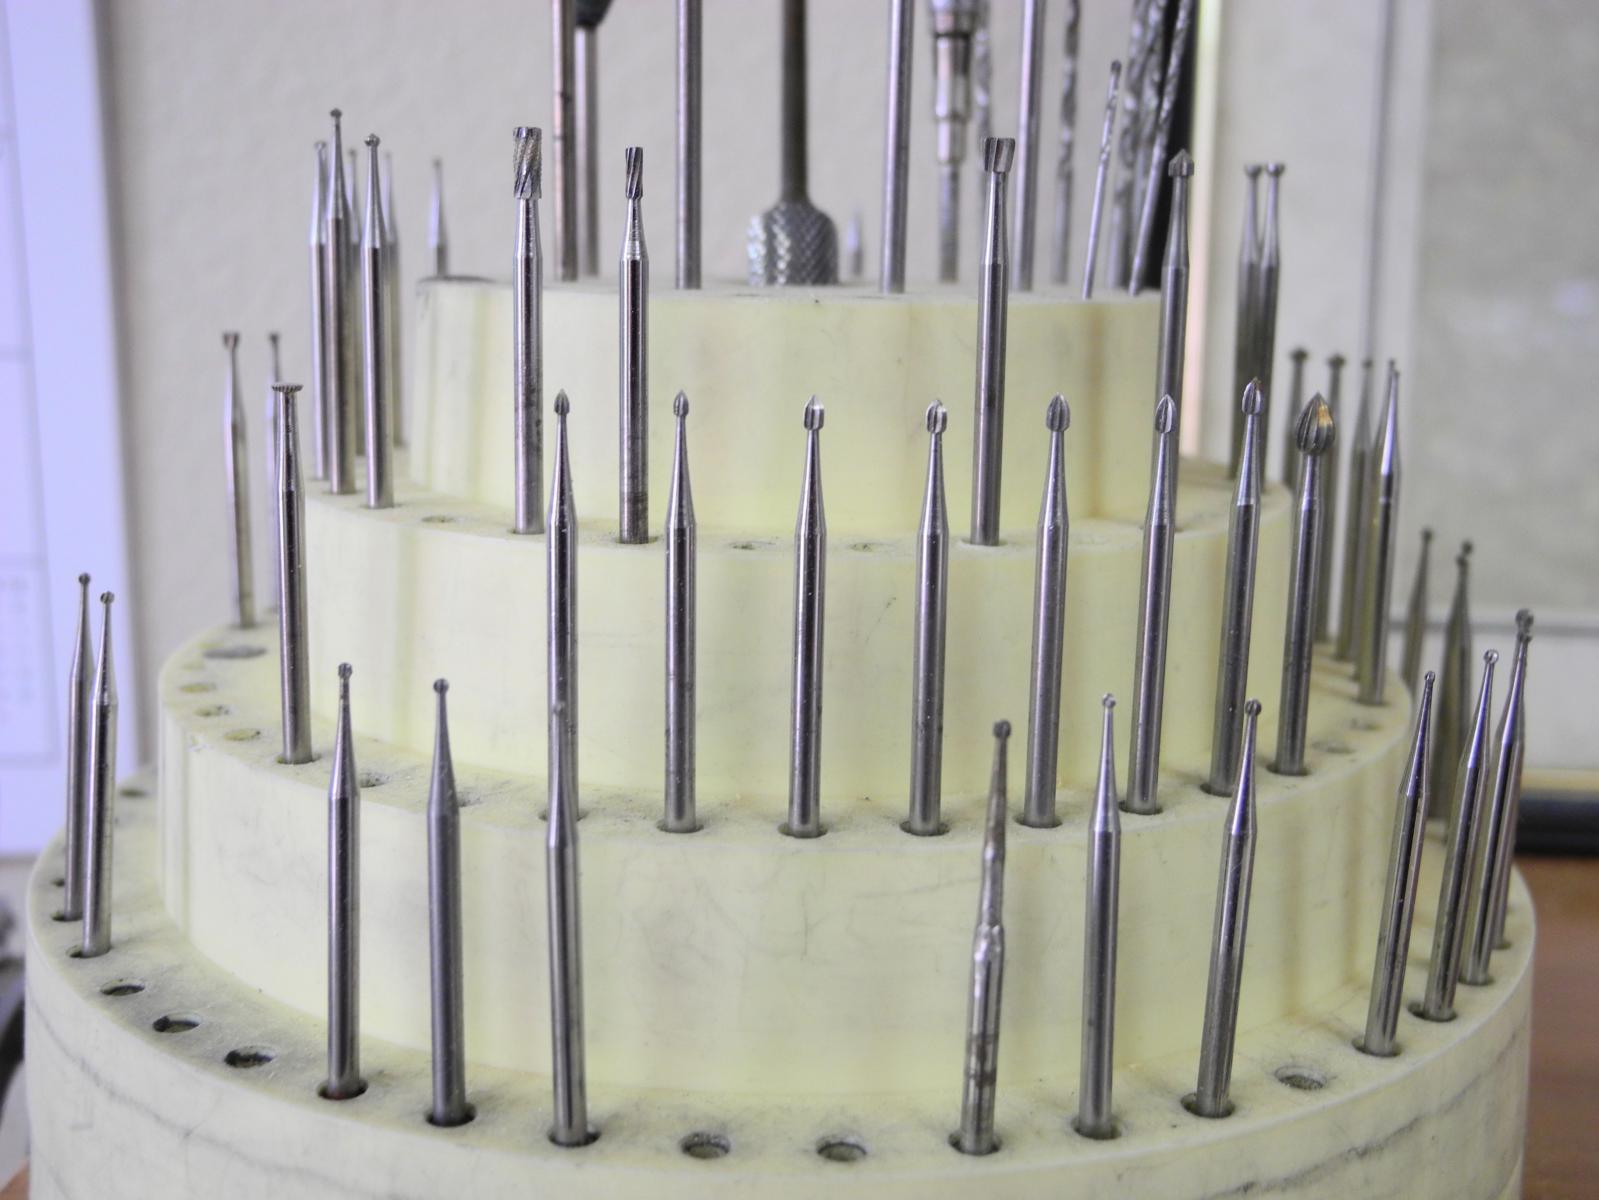
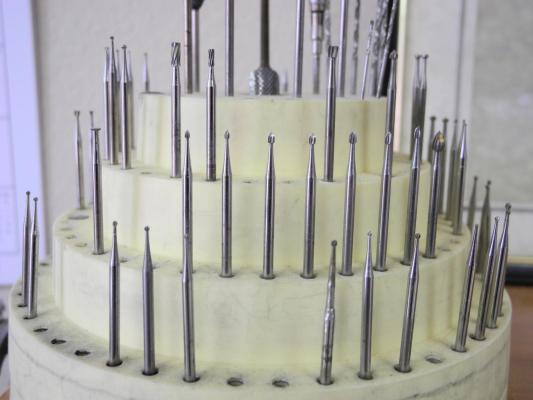
Another way to make small slots using a milling machine is to mount a small jewelers bit in a collet or chuck. I recently received a variety of very small bits from a friend who was retiring from the jewelry business. They all have 3/32 shanks and are a wide variety of sizes and shapes. Specific bits can be ordered from any number of jeweler supply houses. My favorites are Gesswein, Shor International, and Contenti.
- 3,618 replies
-
- 16
-
-
- young america
- clipper
- (and 1 more)
-
Hi Ed Enjoyed meeting you in Mystic. That's a very interesting use of the mill for cutting with a saw blade. Do you have the 2000 series mill, or did you use the Horizontal Milling table or Rotary Column attachment on a 5000 series mill?
- 3,618 replies
-
- 3
-
-
- young america
- clipper
- (and 1 more)
-
Hi Patrick I'm happy to see you fully recovered and back to work - I enjoy your builds, and am envious of the speed you work at. If I tried to accomplish as much in a short time my scrap bin would be overflowing. Looks like the Majellan will be a really interesting project.
-
Maybe I'll send you a special invitation to each so you don't miss it. Probably won't be for a little while yet.
-
Hi Bob Thanks. No, I don't plan on making sails. The rigging plans don't show the lines required for managing the sails, only the yards, and I don't have any experience for those lines without doing a lot of research. Even then I would only put furled sails on a model, especially a square-rigged one, since I think they hide too much of the work. Besides all that, I'm really looking forward to saying "I'm done!" and getting on to the next on the list.
-
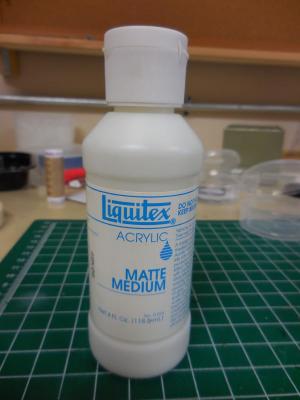
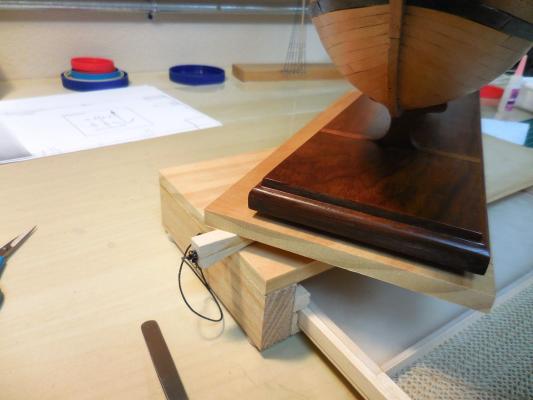
Hi Don: Thanks for the compliments - always appreciated. The acrylic matte medium can be found in any store that sells art supplies. Liquitex is the brand I had on hand, but I suppose any brand would suffice. When I needed the ship to be at a lower position for the top rigging I simply put the workstation on a smaller table, in this case a small folding table. You could also use a pulled out drawer with a board placed on top. I've seen a couple of posts on MSW where a modeler made a table that could be raised or lowered - very interesting, but not something I'd spend time on.
-
Thanks Brian and Patrick. It feels great to have reached this point. Next up are several things I'll work on at the same time: Skipjack Kathryn - need to start drawing the plans. Two models of Oyster Dredge Winders - a hand-powered winder and a motorized Hettinger winder. I want to model these in a larger scale as stand alone models, and will use the Hettinger version as a prototype for a smaller scale winder on the Kathryn. It's also an opportunity to play with a new toy - my resistance soldering unit. Sectional model of Dunbrody - need to start lofting the frames. I'll probably start up a build log for each when I've made a little progress.
-
I came down with the same thing. I originally blamed it on the chill I got during the NY Giants game (but hey, we won so it's OK), but now I'm thinking I got it from talking to you! Get well soon.
- 1,051 replies
-
- 5
-
-
- cheerful
- Syren Ship Model Company
- (and 1 more)
-
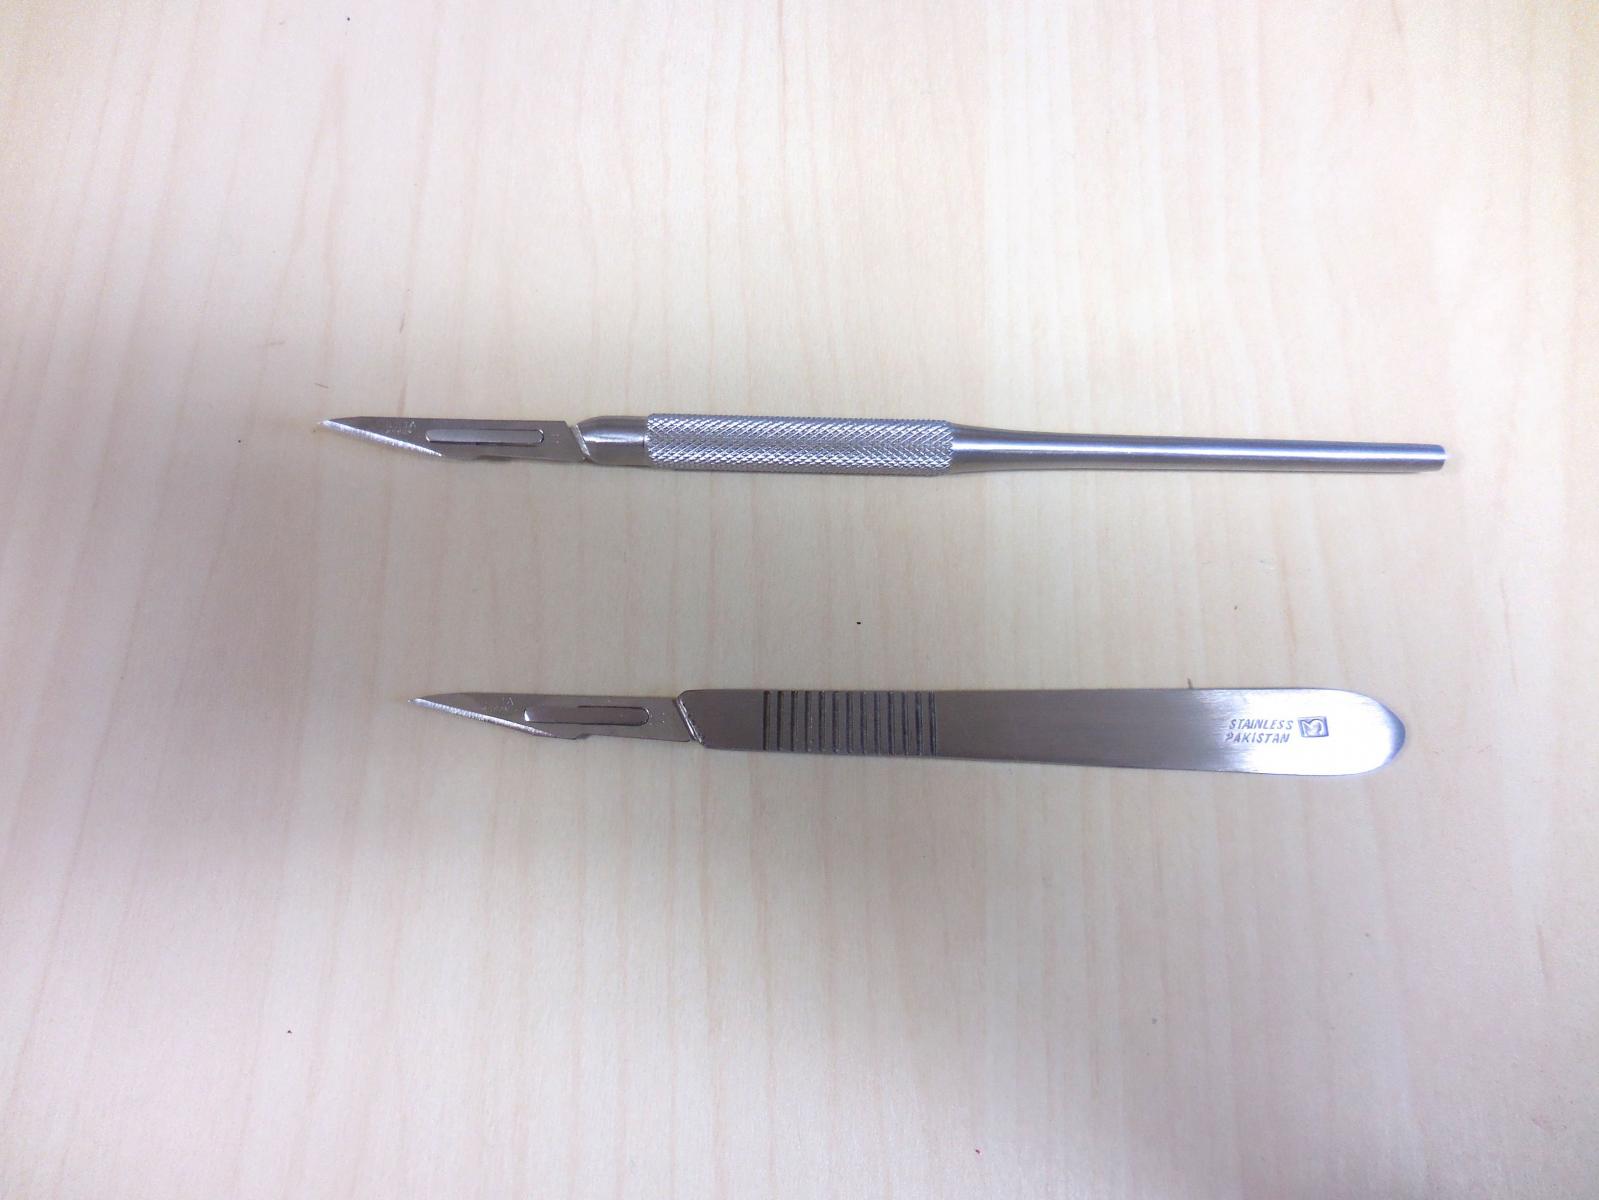
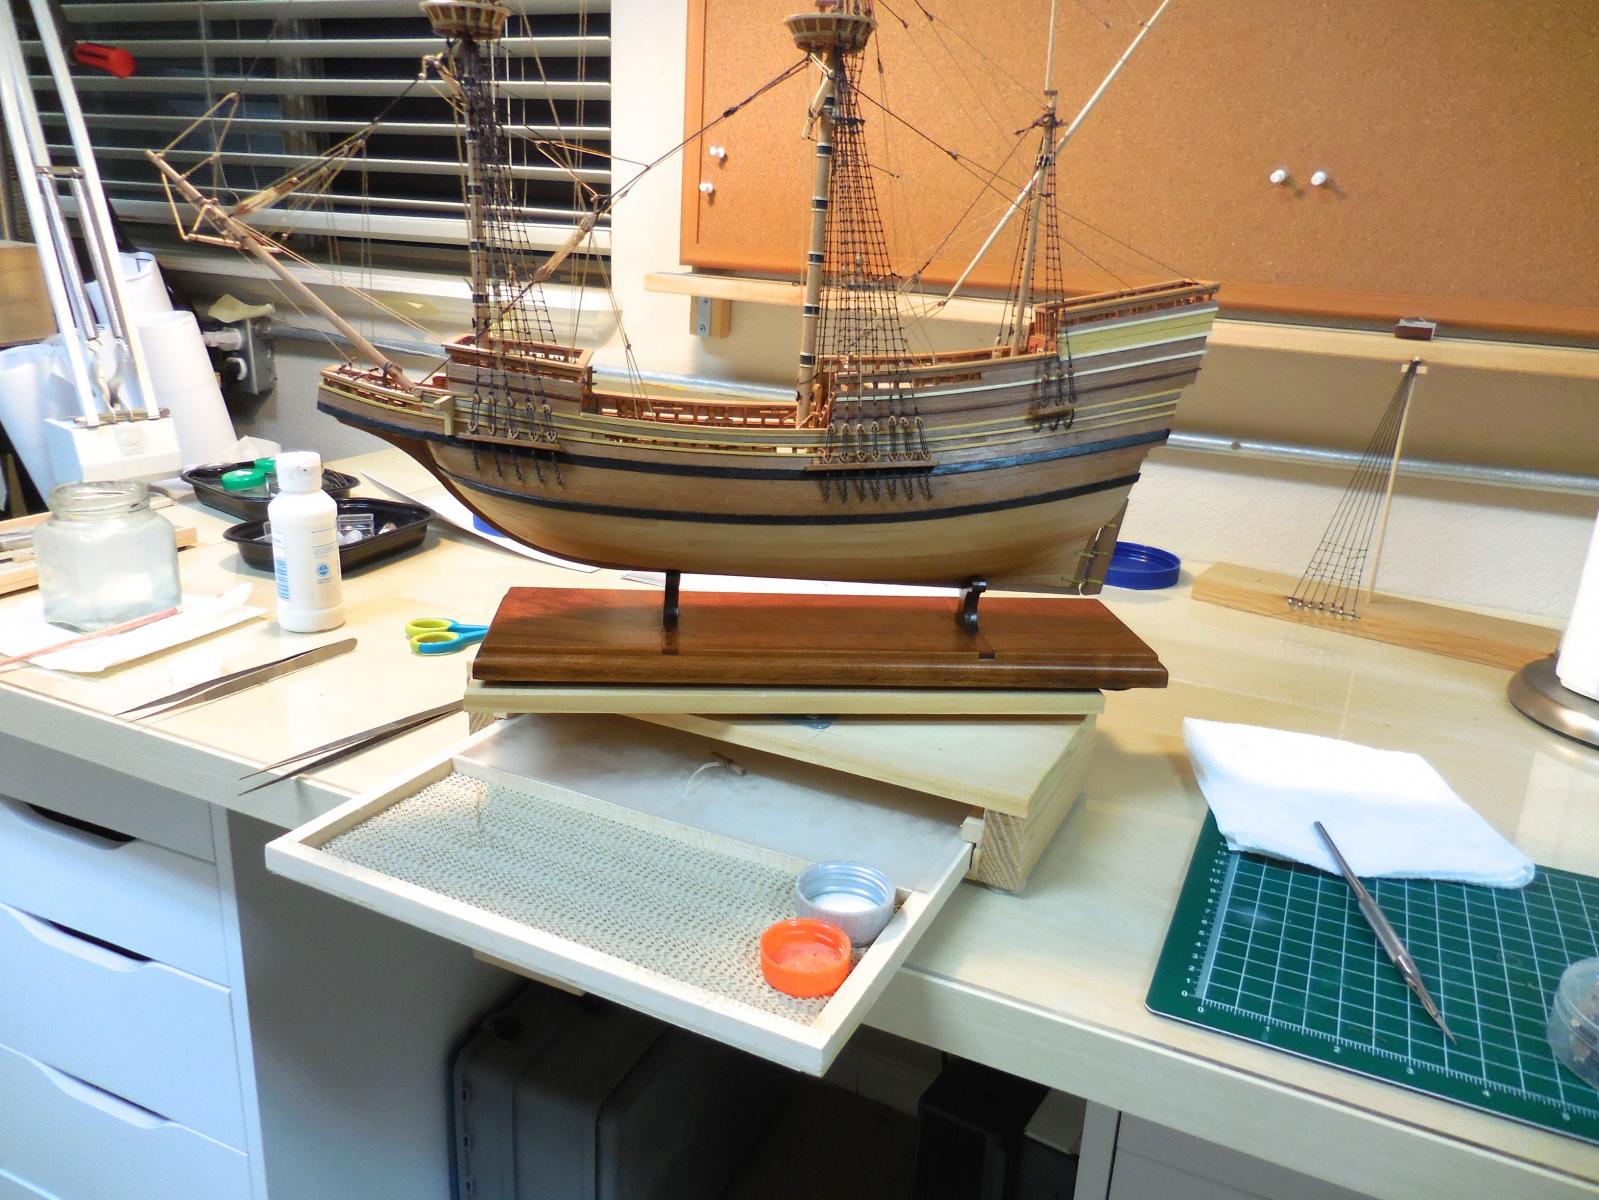
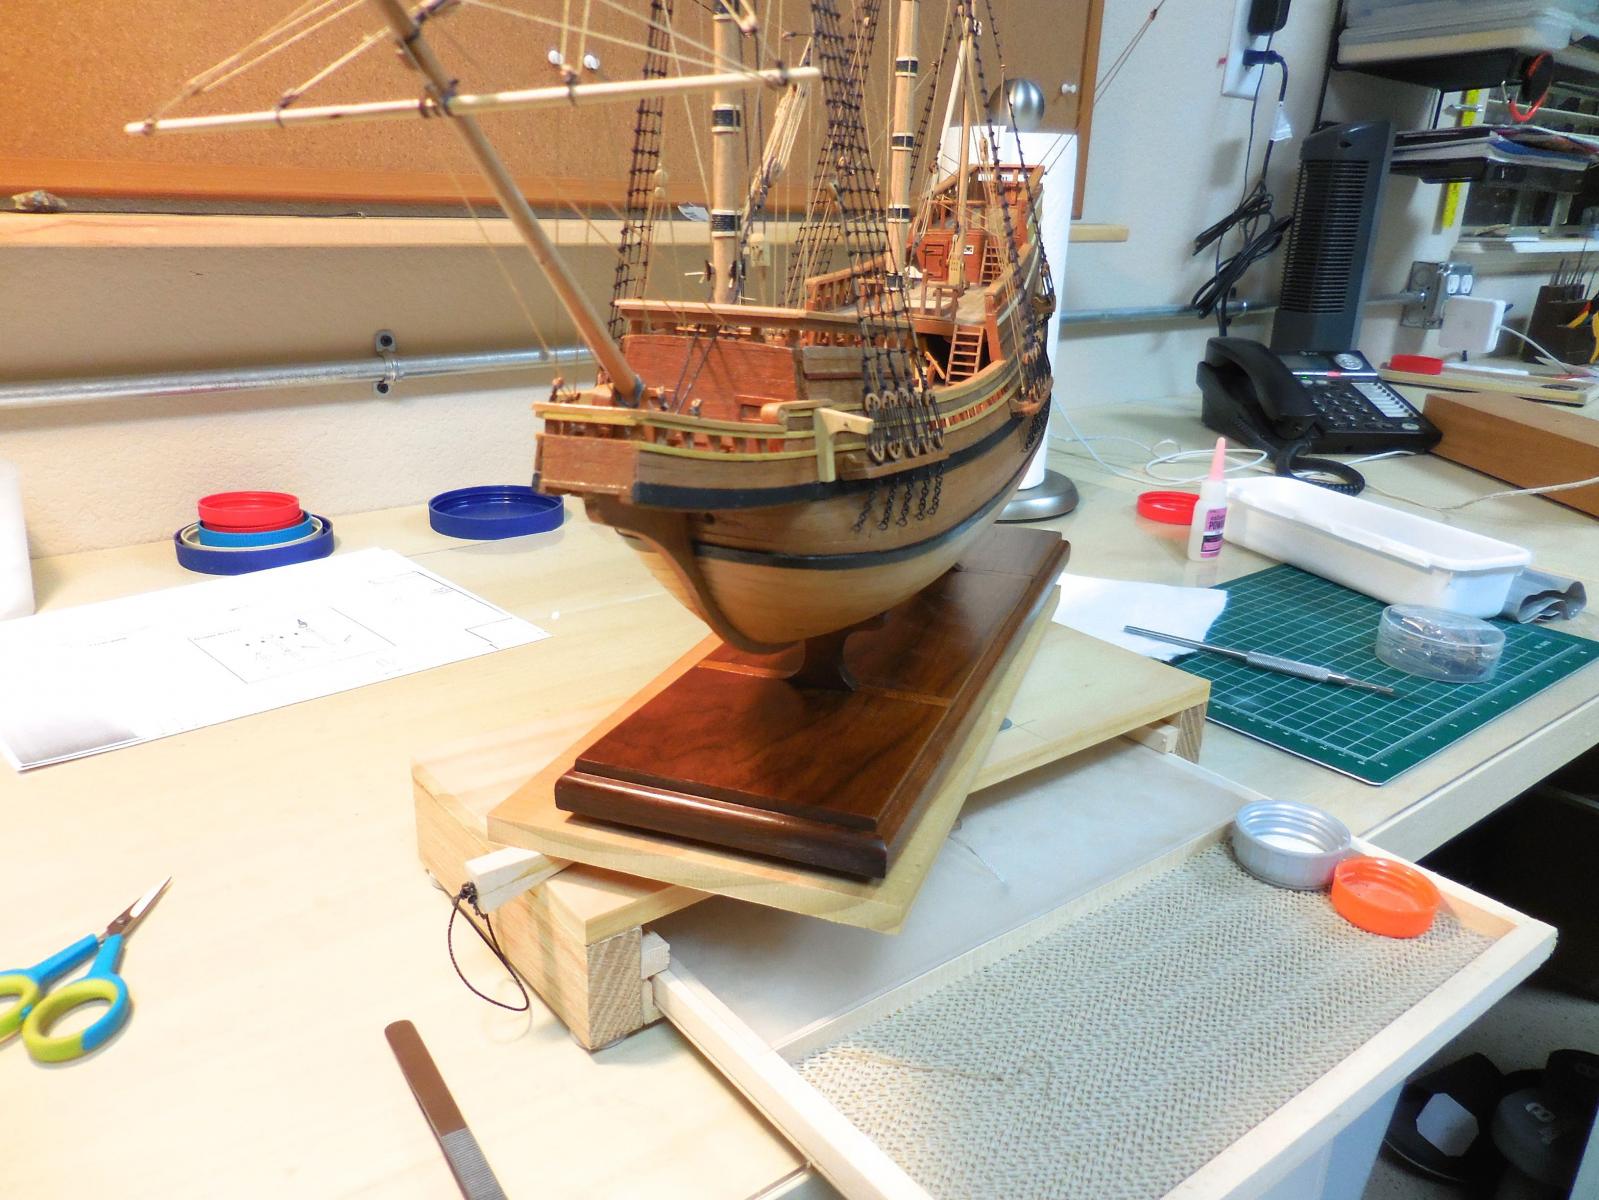
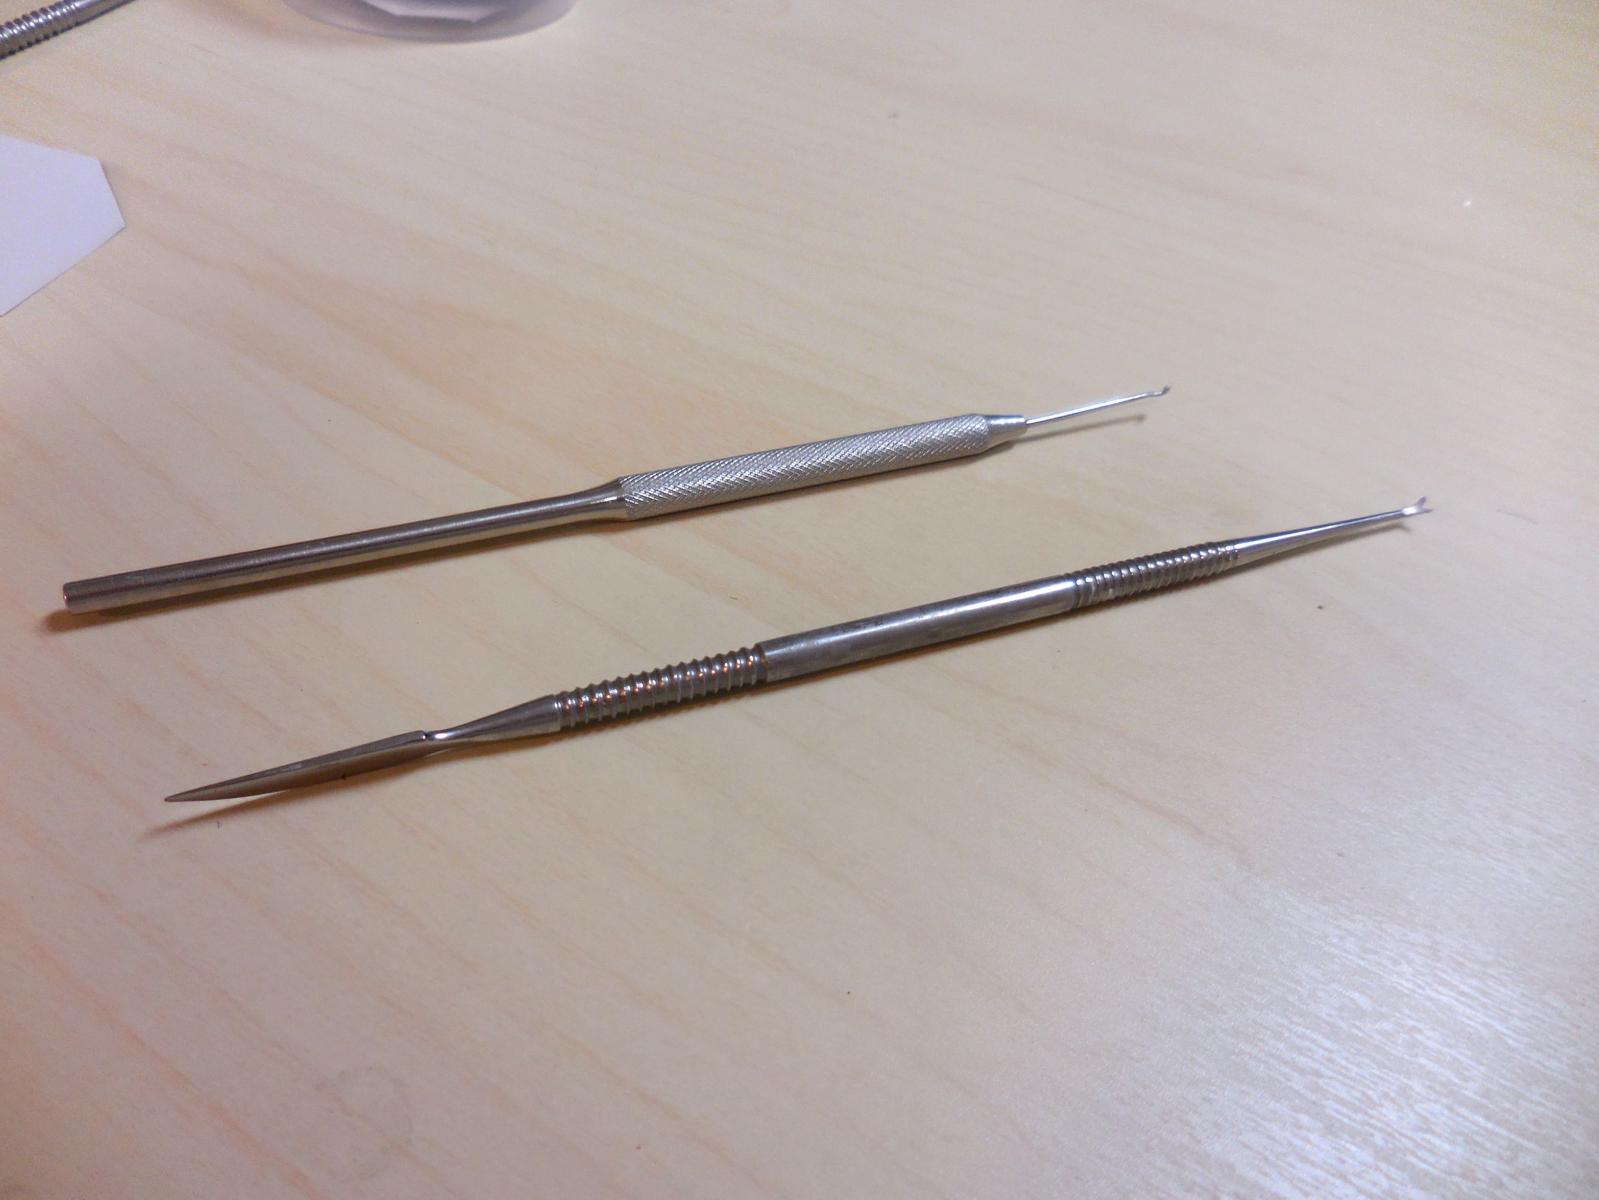
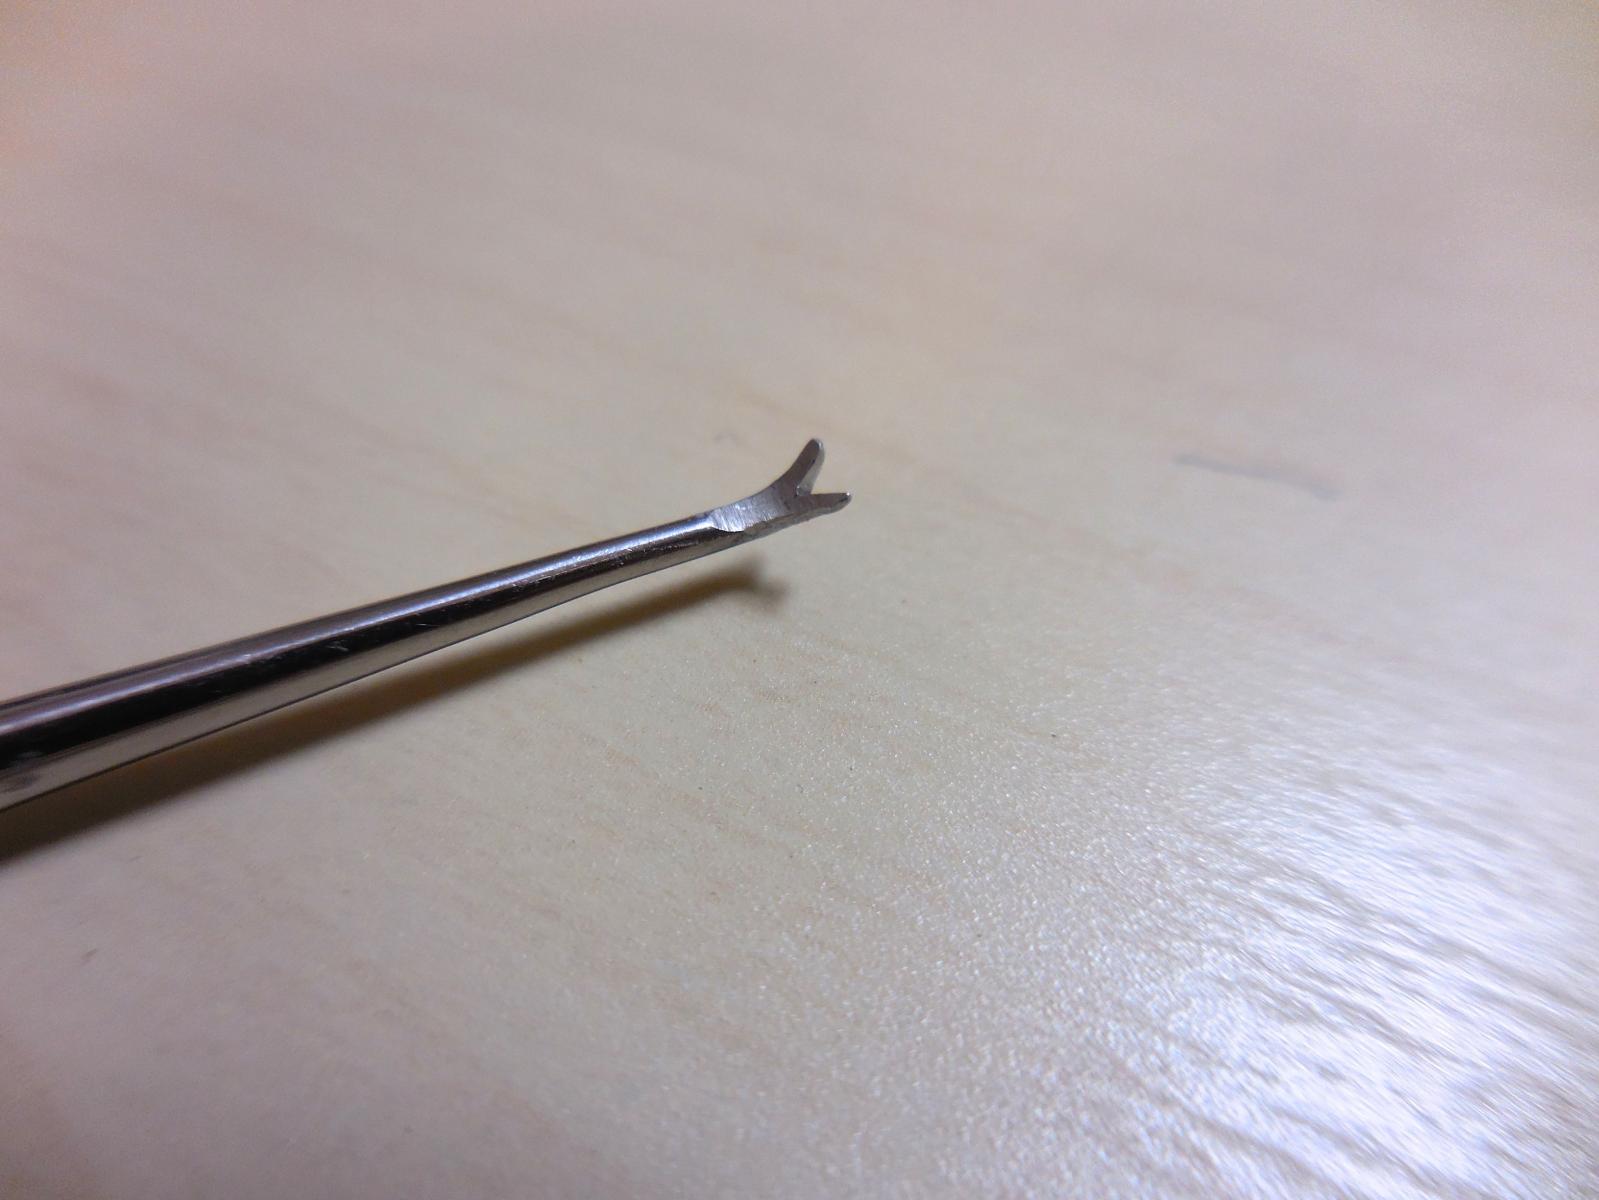
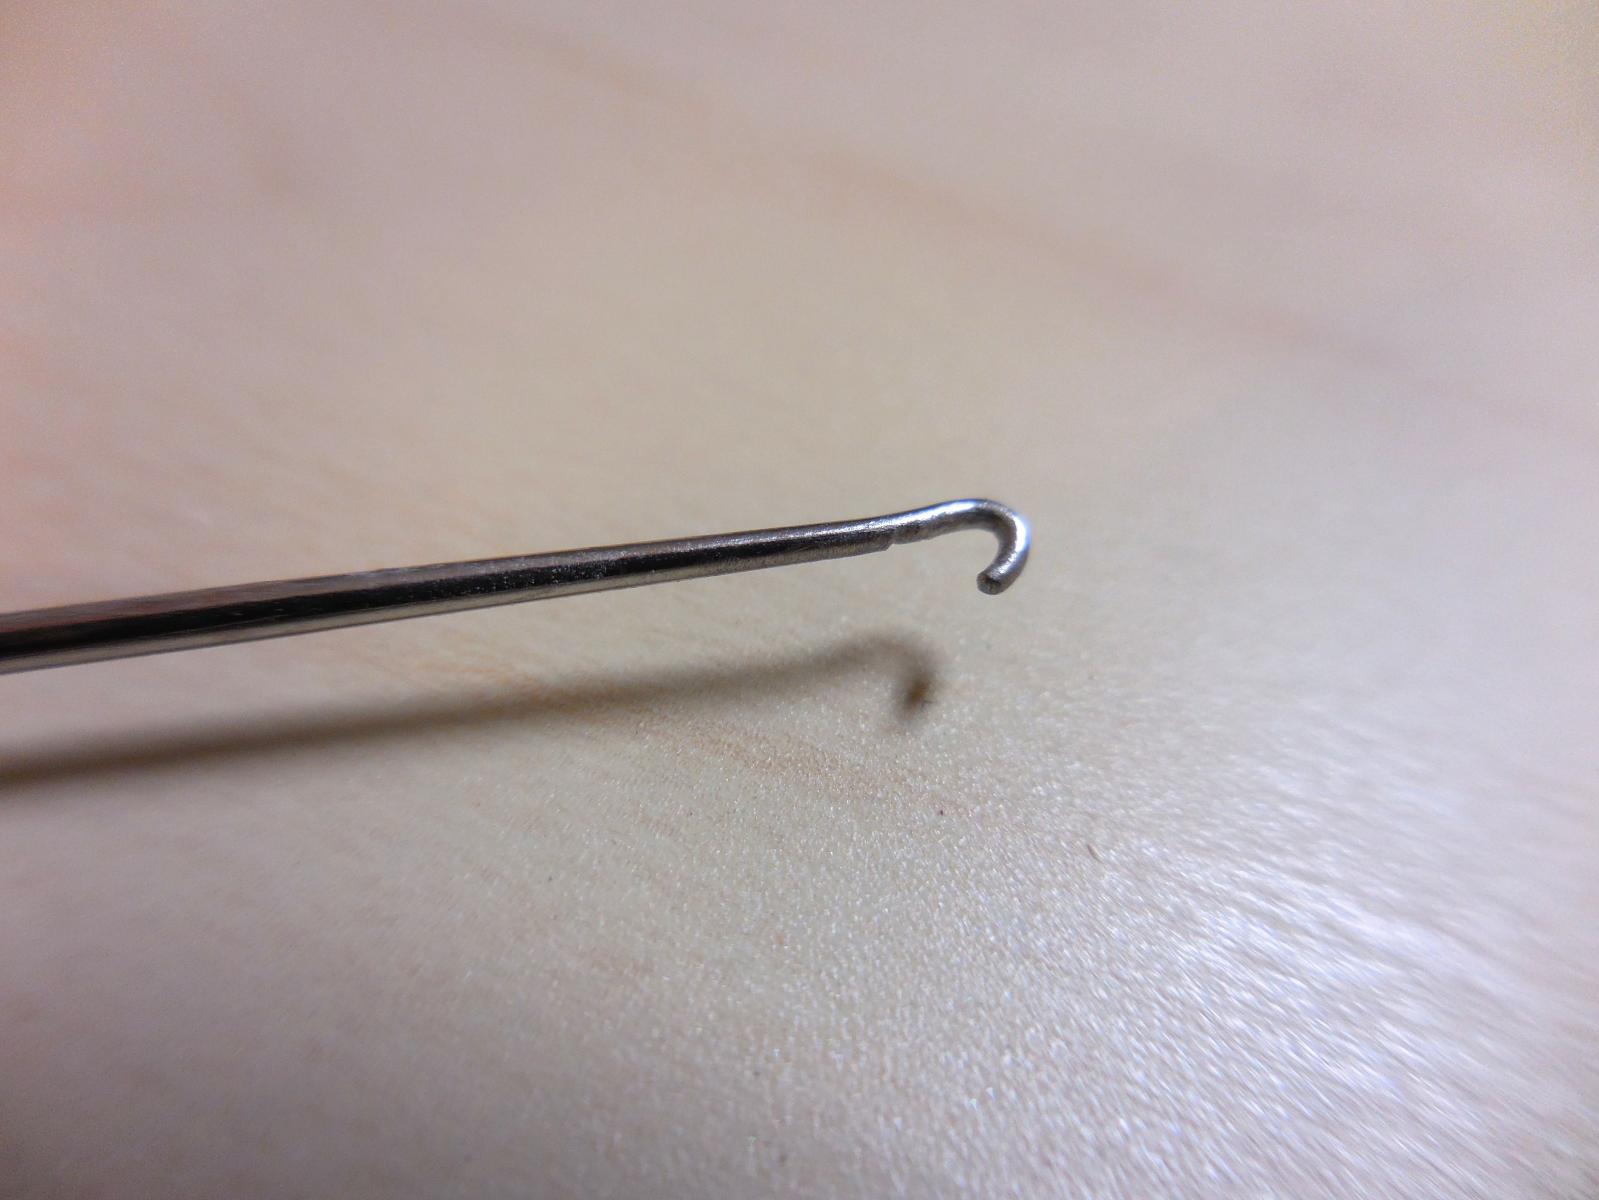
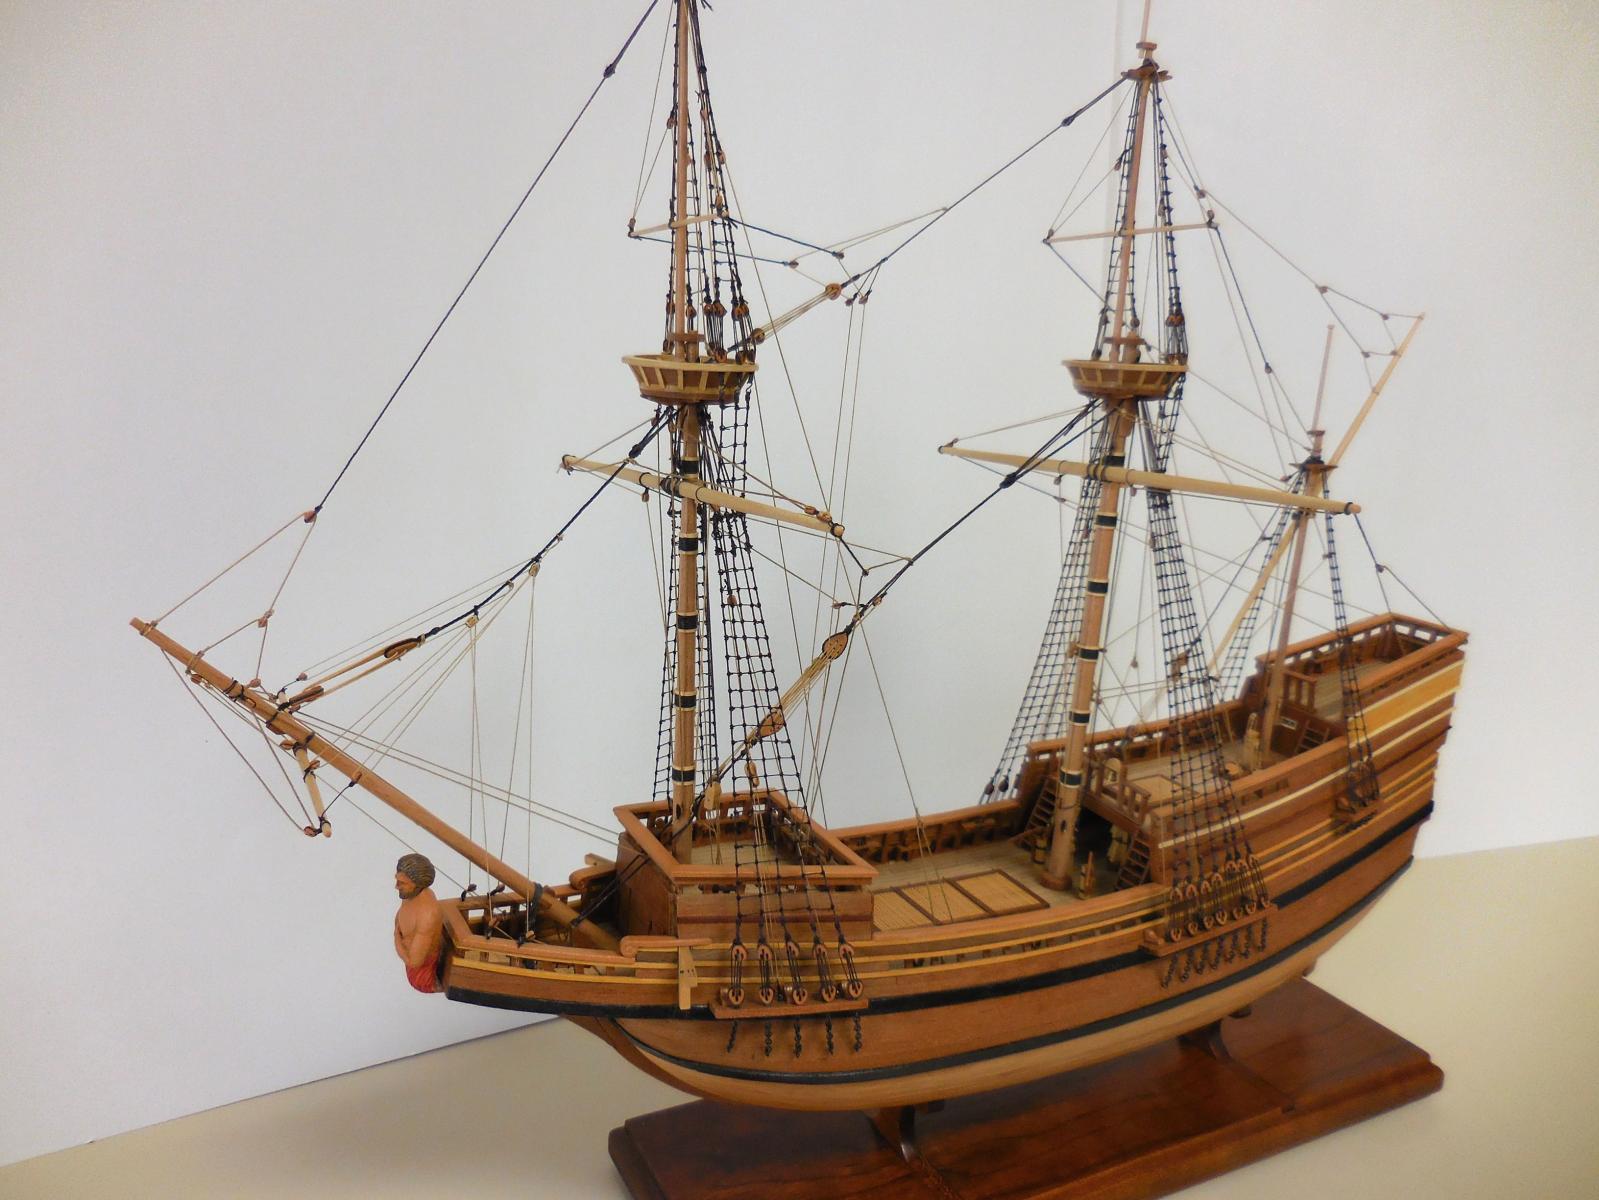
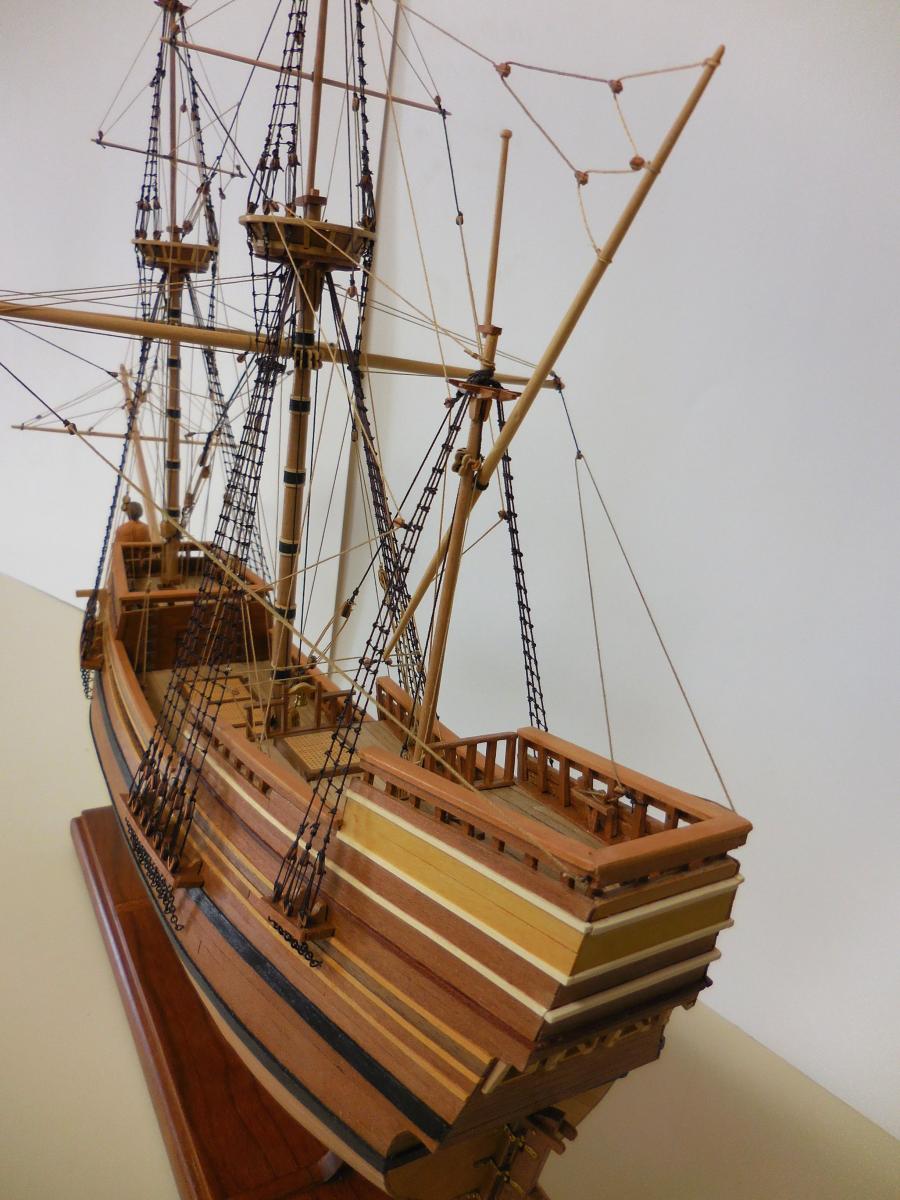
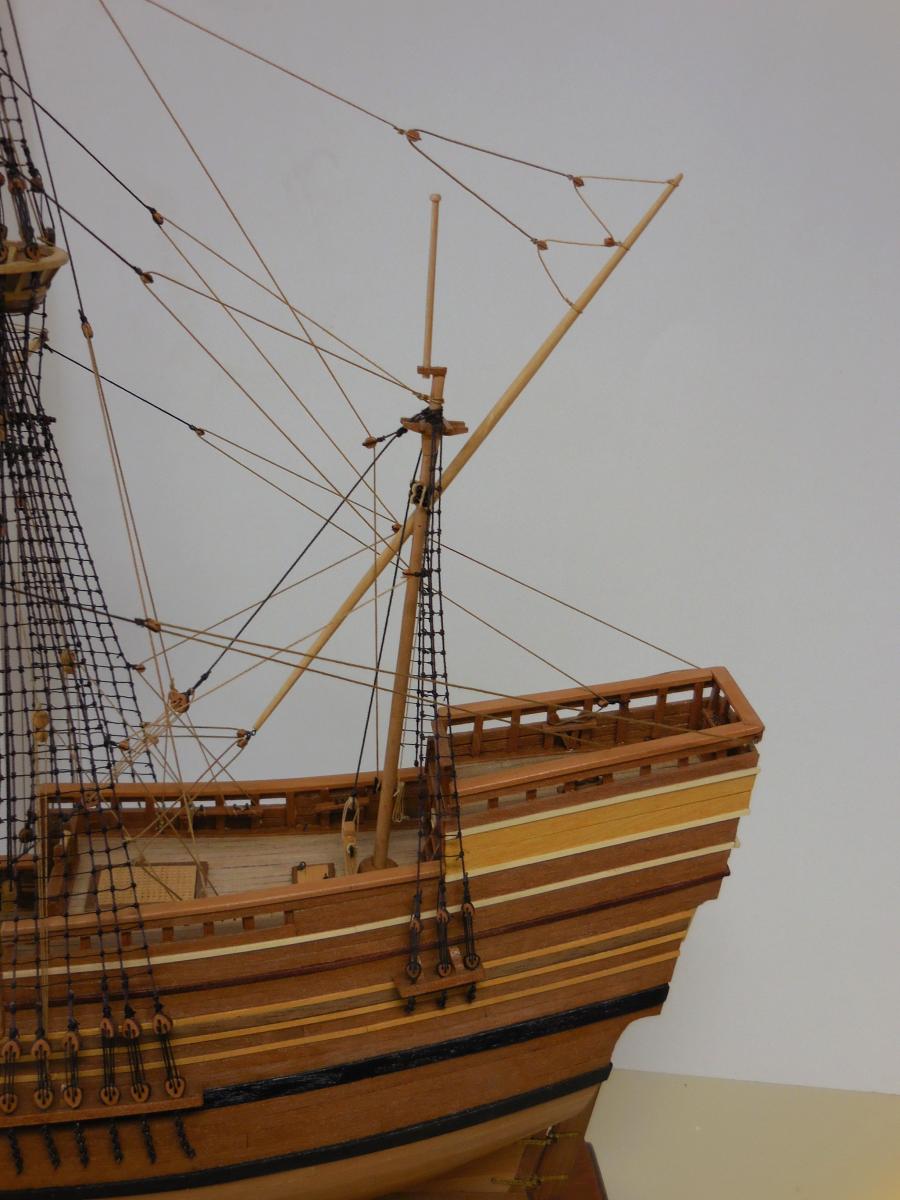
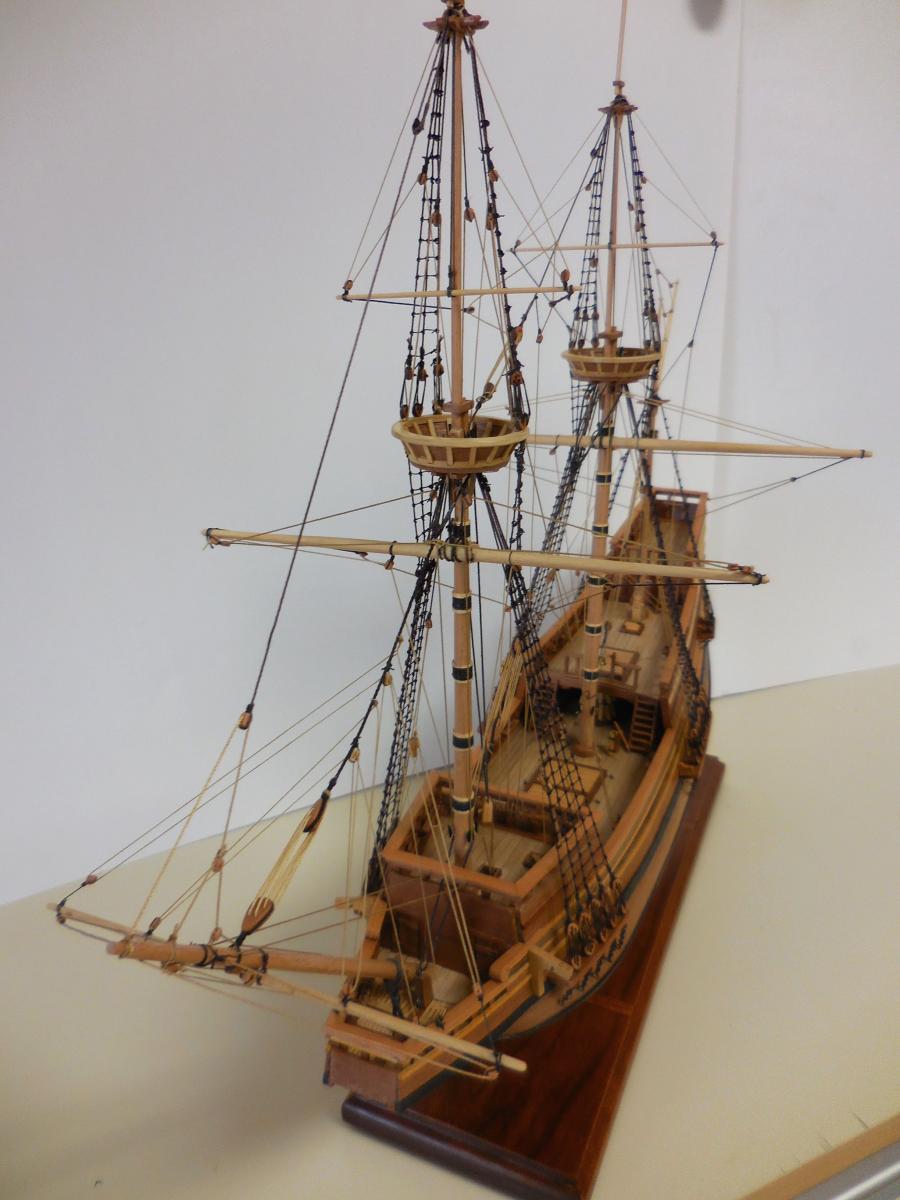
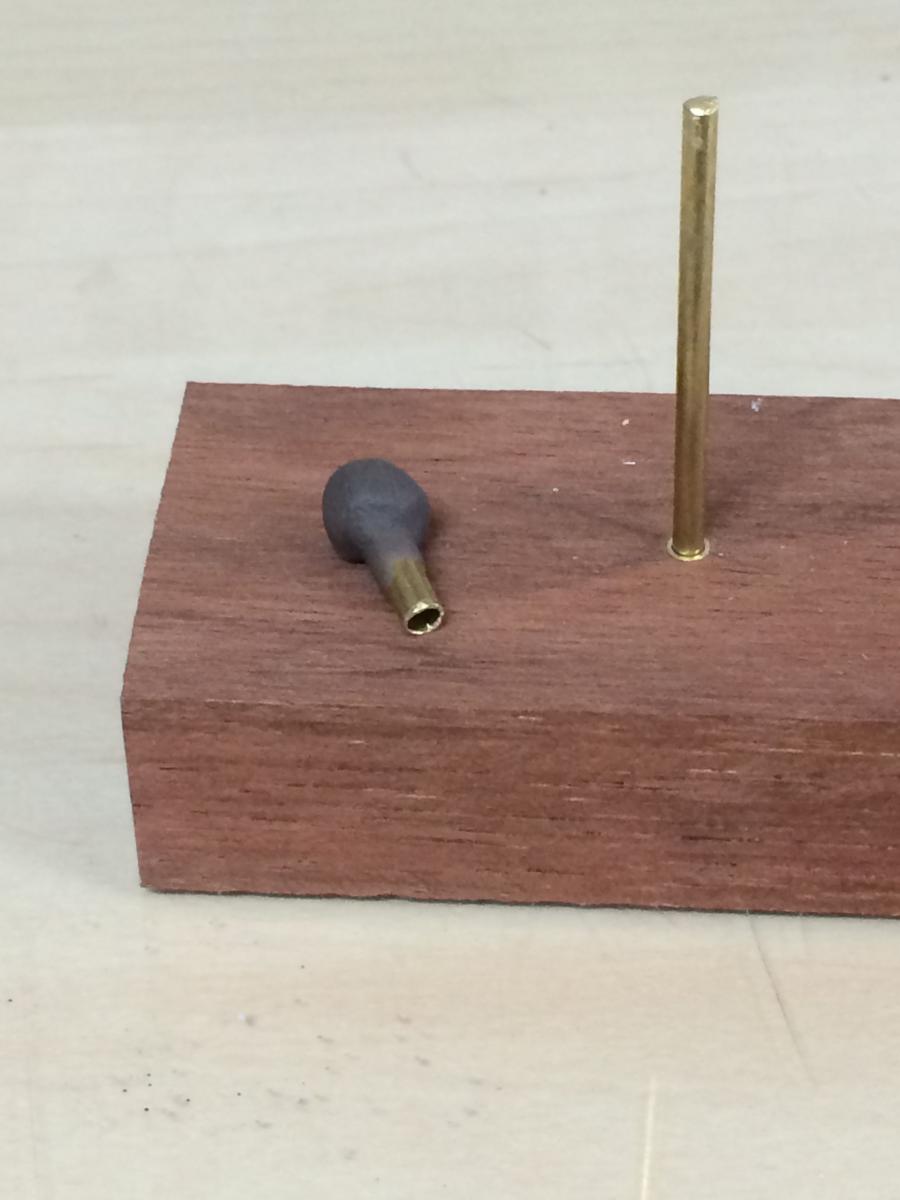
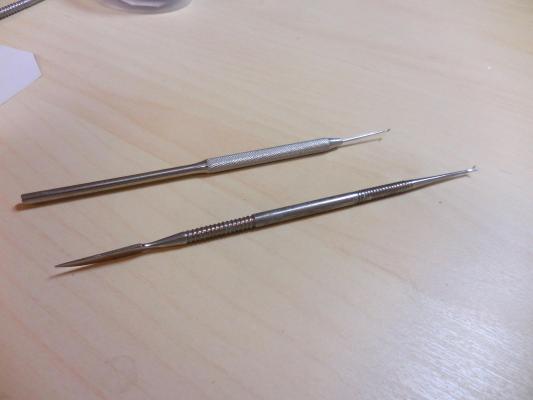
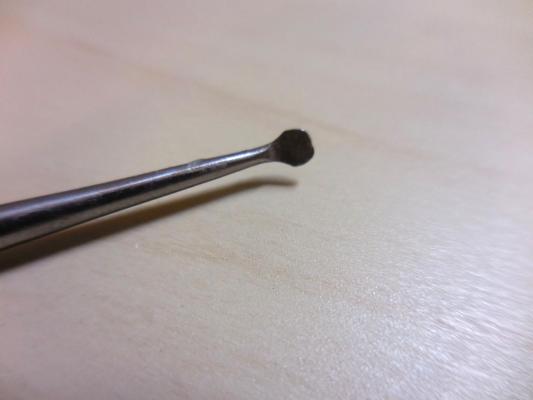
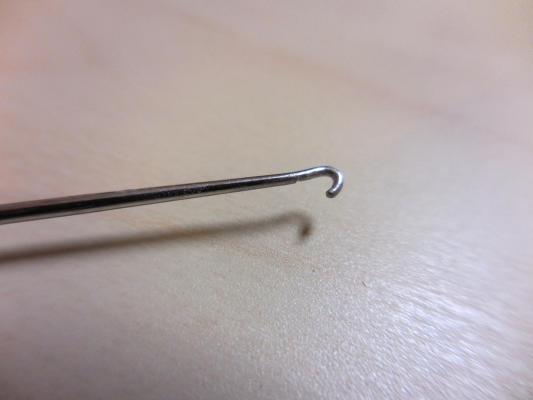
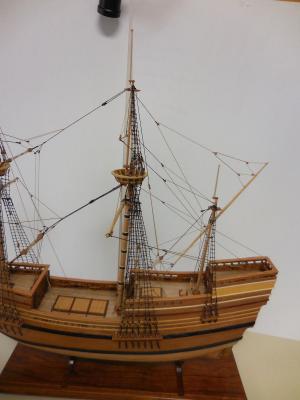
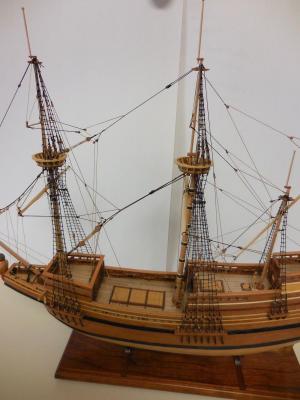
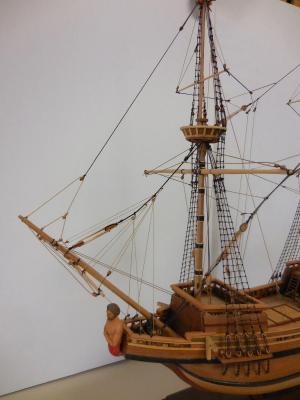
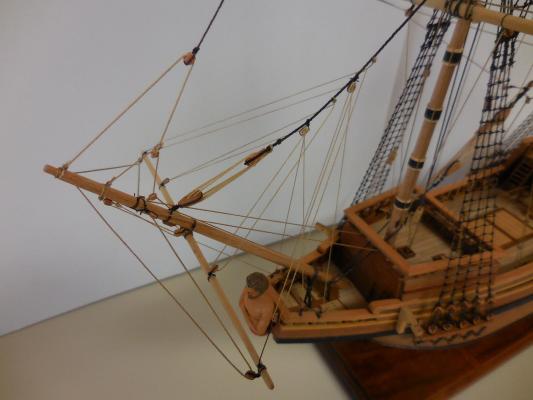
Paragon – a Modified Mayflower Part 22 – Running Rigging I didn’t get any rigging done before I left for my trip to the NRG meeting, so it has been a while since my last post. As an aside, the trip was great. The conference was very enjoyable, and I spent an extra day in Mystic to see the Seaport in detail. I also got to see several interesting museums during the trip: The Chesapeake Bay Maritime Museum in St. Michaels, MD; the Mariners Museum in New Port News, VA; the Smithsonian ‘On the Water’ collection, and the Naval Academy Museum at Annapolis. I also visited the ships that had participated in the Great Chesapeake Bay Schooner Race when they were docked in Portsmouth VA, and got to board and wander around on the Skipjack Kathryn at its berth in Deal Island MD (this will be one of my next projects). Also got to spend some time with family and a couple of good friends, and to top it off my son took me to the NY Giants vs Dallas Cowboys NFL football game, and our favorite team won. All told a great trip, but a little tiring – drove 2,000 miles in 11 days. OK – back to the Paragon build. As one of the conference’s roundtable sessions David Antscherl (Druxey) showed a few rigging tips and tricks, and a couple of them really helped. He uses Acrylic Matte Medium to seal the knots on his rigging. He uses this instead of diluted white glue because when dry there is no residue showing, as can happen with the glue. I already had some on hand and tried it, and I’m sold. We also noted that he uses a long and slender handle for his scalpel blades, and this looked interesting. I’ve tried scalpels before, and while they are very sharp I’ve always found the regular handles to be uncomfortable so I haven’t used them. I decided to look for the longer handle (a #7) on eBay, and found a very nice alternative – round and very comfortable. Here’s a photo of the new handle next to a more commonly seen handle. When I rigged my first model (MS Phantom) I made a workstation with a turntable that would allow me to rotate the model as needed, and to lock it into any position. It has a pull-out tray for holding tools and for catching tiny bits when they fall. The workstation is held in position by pushing a wedge between the table and the body of the workstation – simple, but it works. I also found that I needed to make some miniature rigging tools. I used a couple of clay modeling tools and customized them to suit my needs: The upper tool in the photo was simply bent to the shape I needed, then cut and filed to the proper size. The lower tool started with a small disk-shaped end. I shaped this end using a diamond bit in a rotary tool, then finished it off using files. This tool in particular quickly became a favorite for tying the lines around the tiny belaying pins in the model. Not much more to say about the rigging – just lots of trial and error. Here are the final results: Now that the rigging is completed I’m on the home stretch. I need to make and hang rope coils, make and install anchors, make some decorative pieces to enhance the model’s appearance, and do a little more work on the figurehead before installing it.


-
Hi Patrick Glad to see you back at the bench. I'm back as well, and will posting an update to my log soon. Instead of a mask (I don't like wearing those things) you could set up a small fan blowing over your shoulder, or use a small dust collector, or just stop breathing while you sand.
-
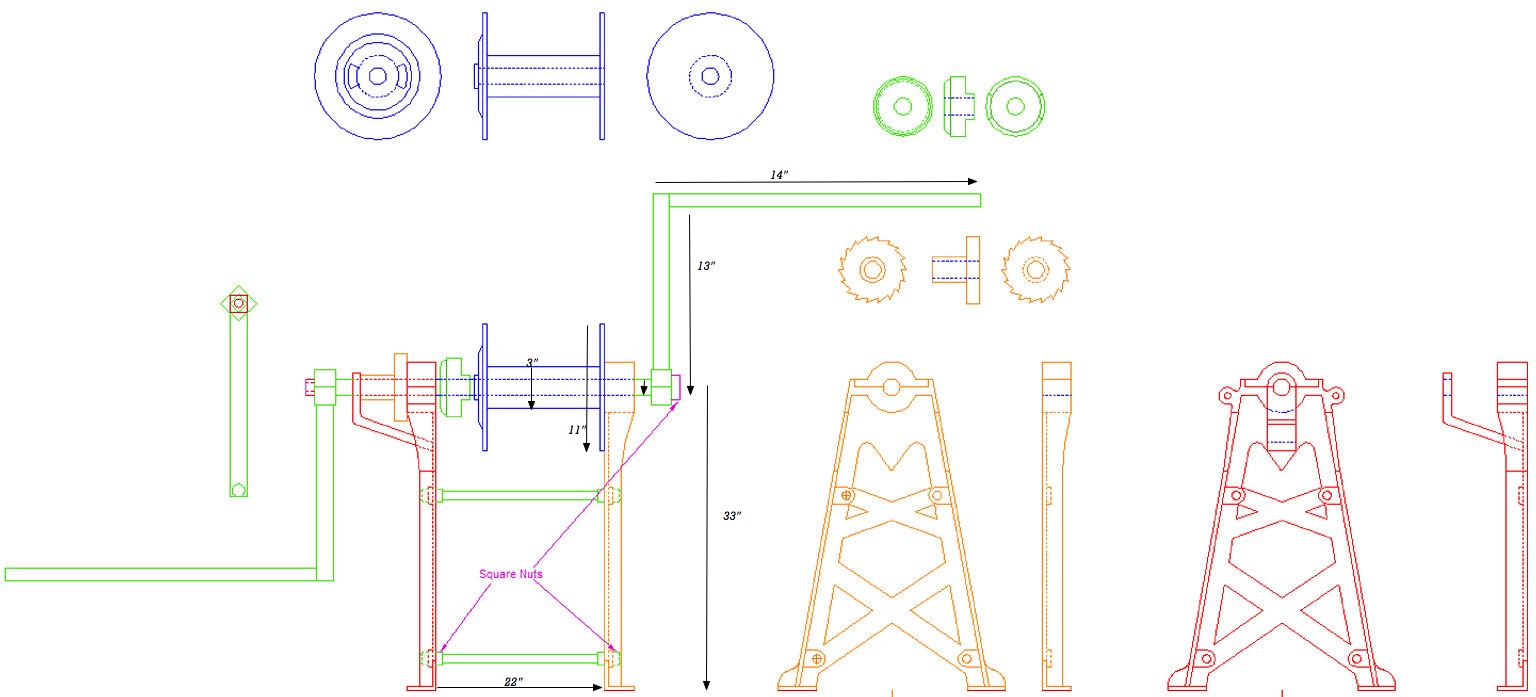
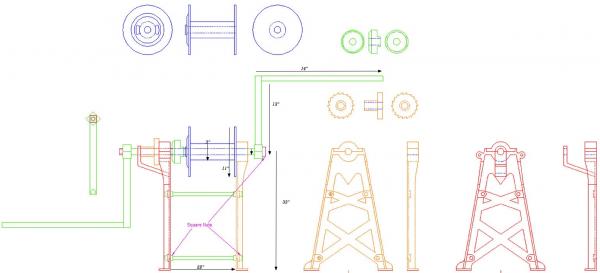
Hi Ron: I added the measurements to your drawing. It looks like your handles are probably bigger than they should be. Hope this helps. Your drawing certainly did help me.
-
Congratulations Brian!!! Great job, and a beautiful model. Should I bring some bubbly on Sunday?
- 831 replies
-
- 5
-
-
- Armed Virginia Sloop
- Model Shipways
- (and 1 more)
-
Looks great Chuck, and very good explanation of the process. I was happy to see the model in person (it's even better in real life, although your photos are superb) and to finally meet you at the NRG Conference.
- 1,051 replies
-
- 4
-
-
- cheerful
- Syren Ship Model Company
- (and 1 more)
-
Hi Ron: Great drawings! They'll be very useful for me when I get around to making a model of the hand winder. I took some measurements from that winder on a recent visit to CBMM, and I'll dig them out and send them to you.
-
Hi Brian Looking forward to seeing you and the model next weekend - I feel another award coming, your AVS is awesome! Also looking forward to our meeting and getting to see your shop.
- 831 replies
-
- 4
-
-
- Armed Virginia Sloop
- Model Shipways
- (and 1 more)
-
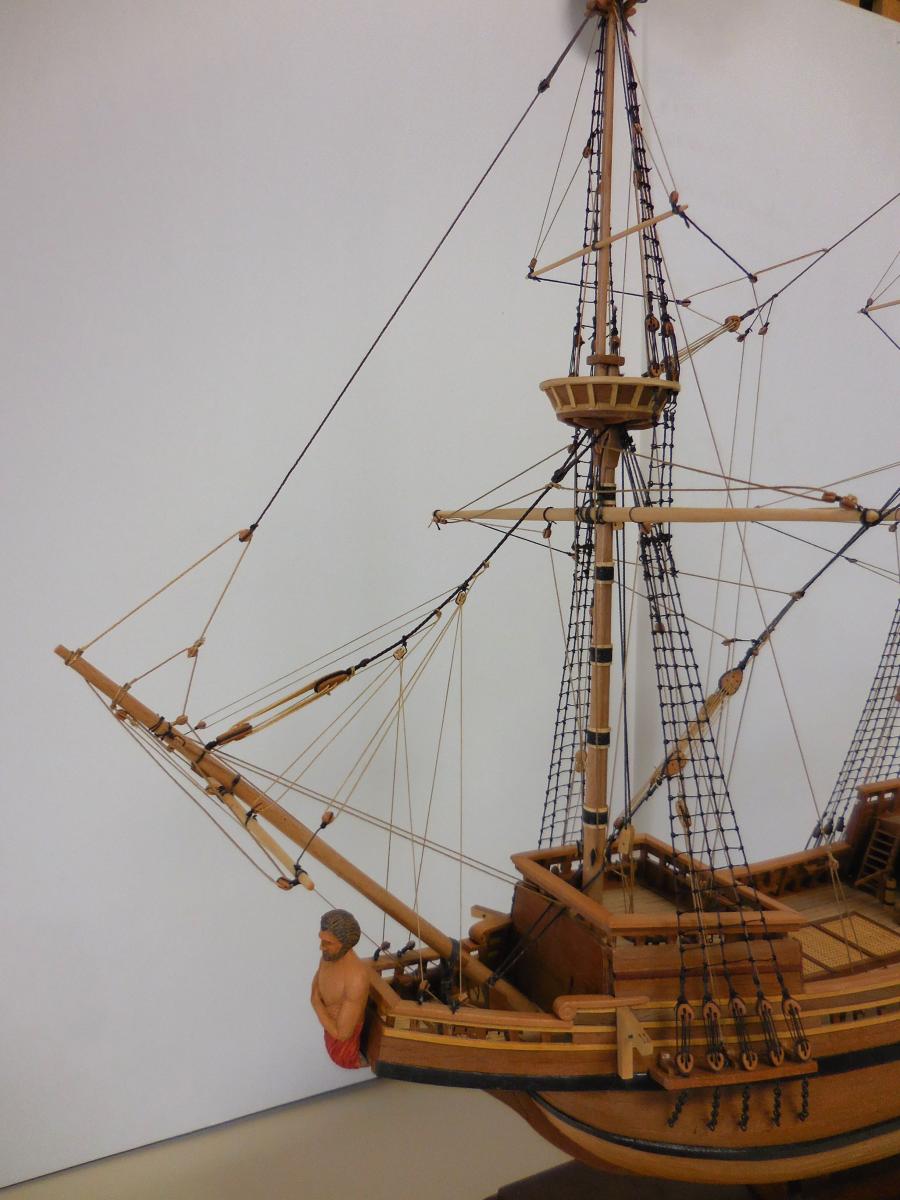
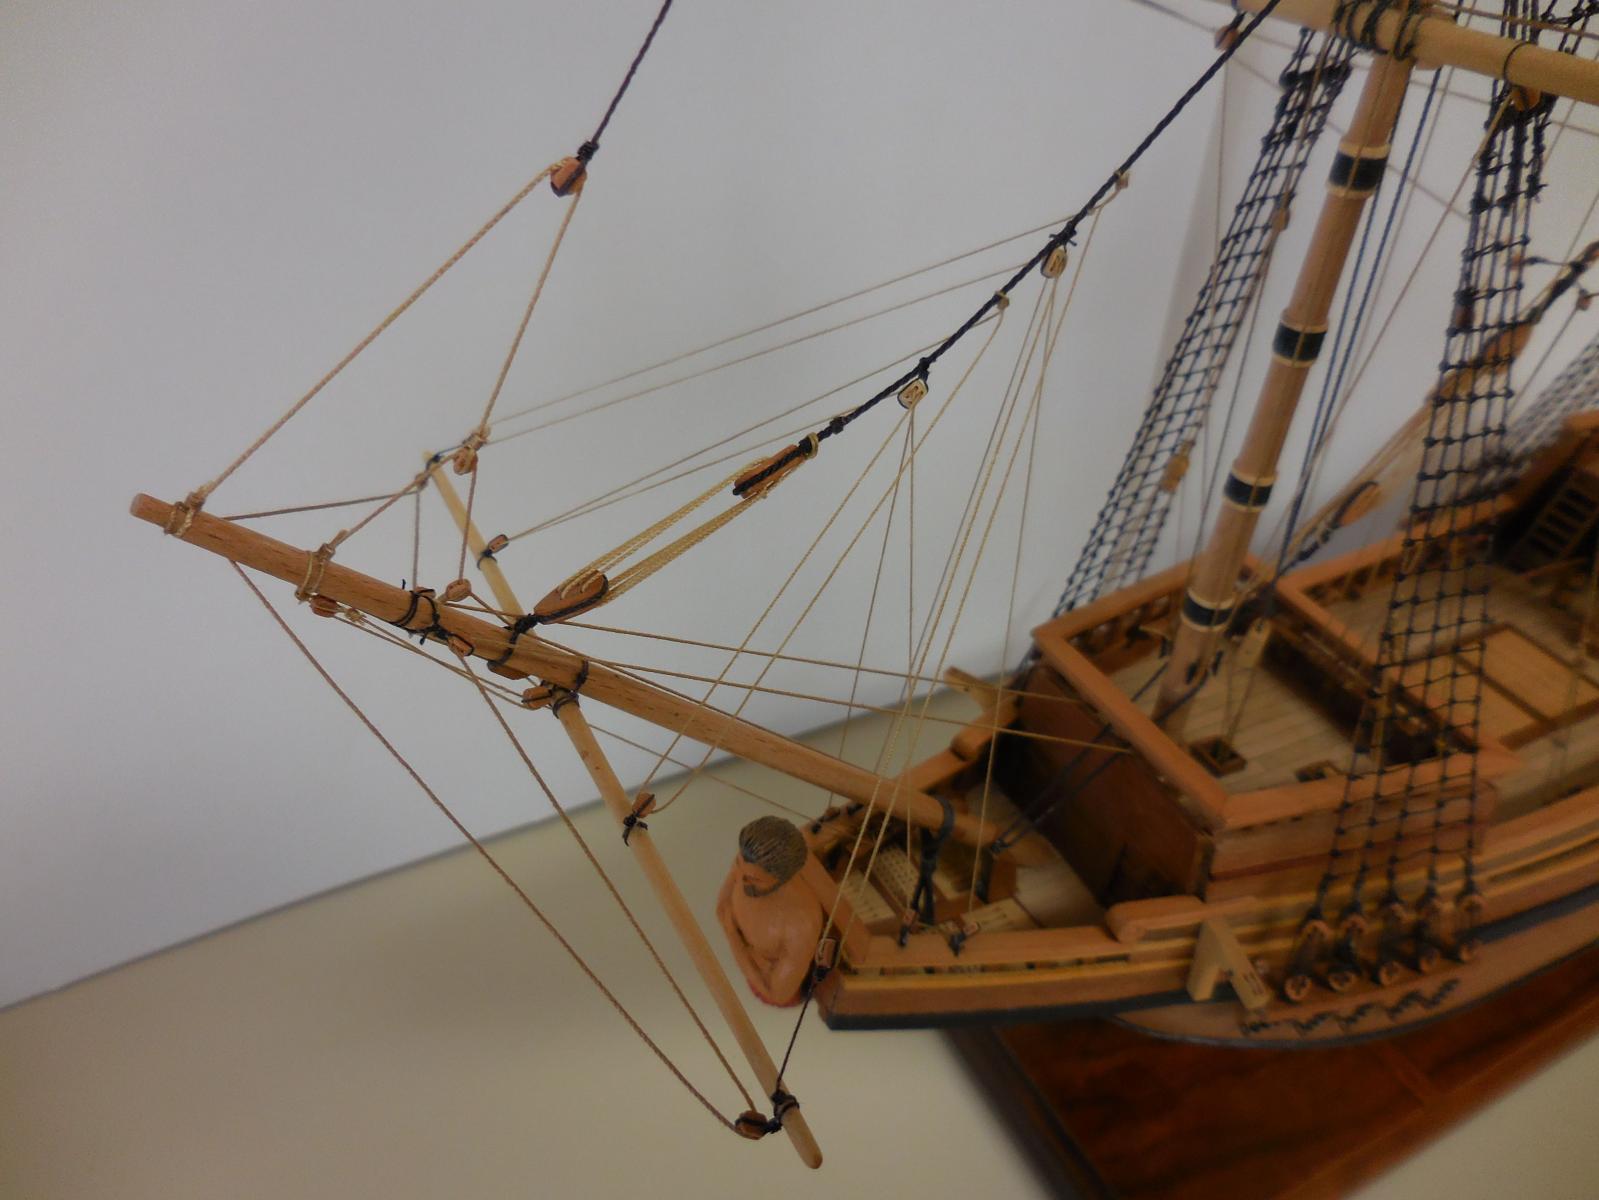
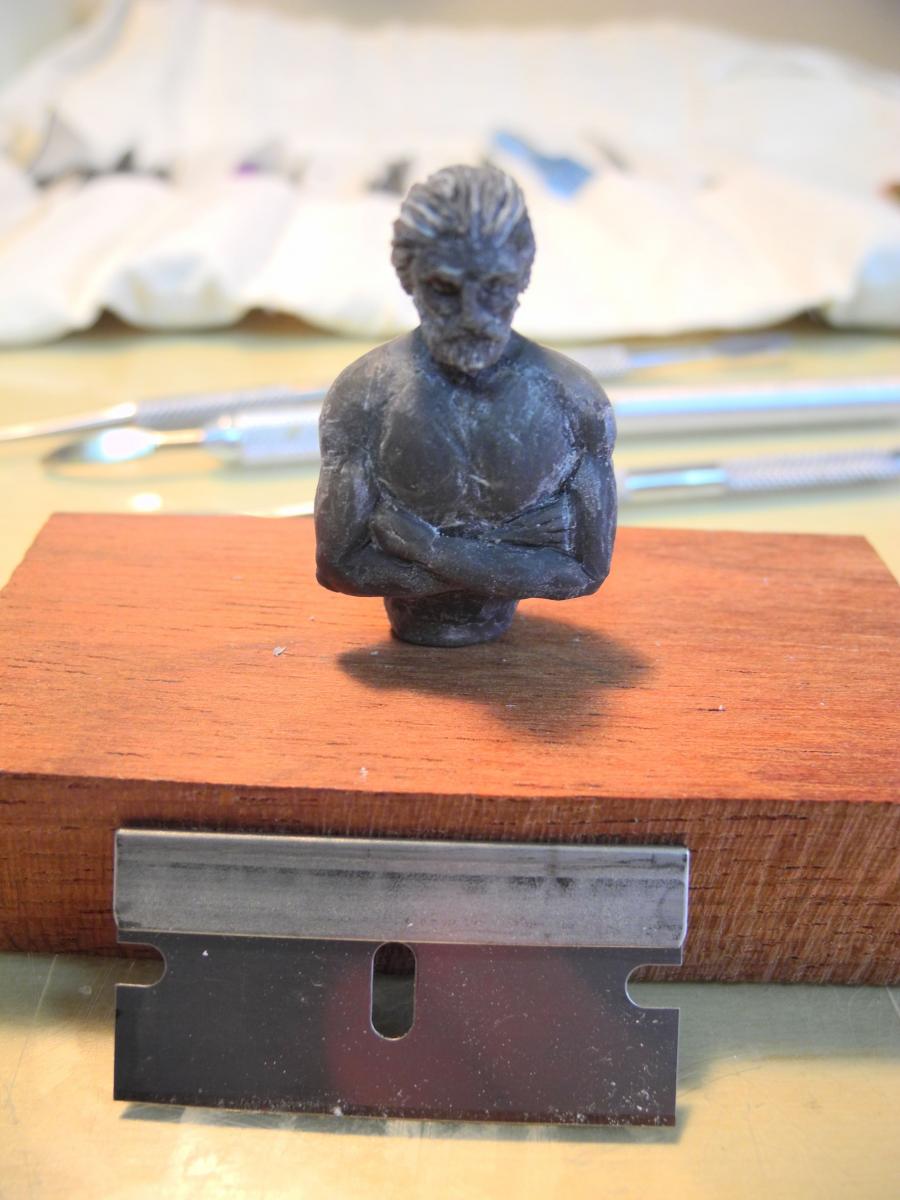
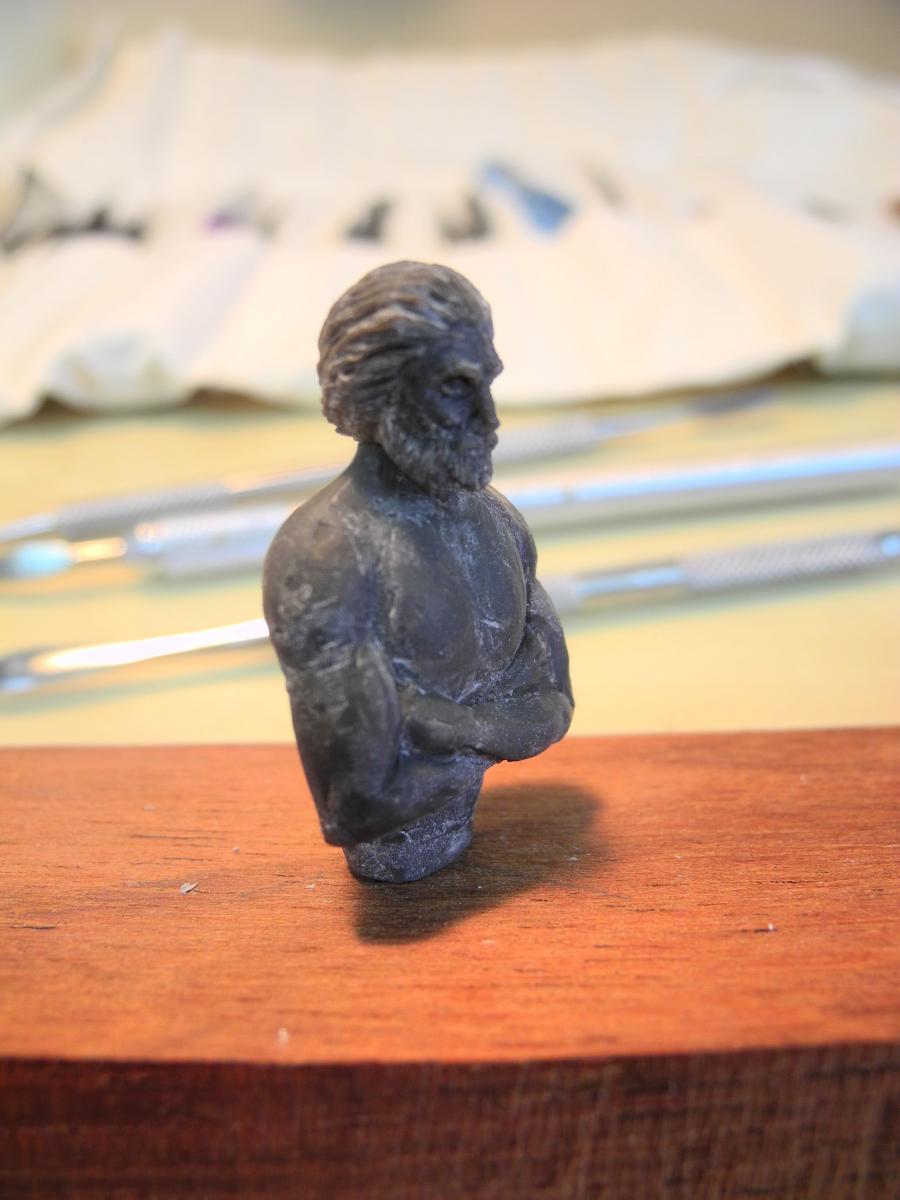
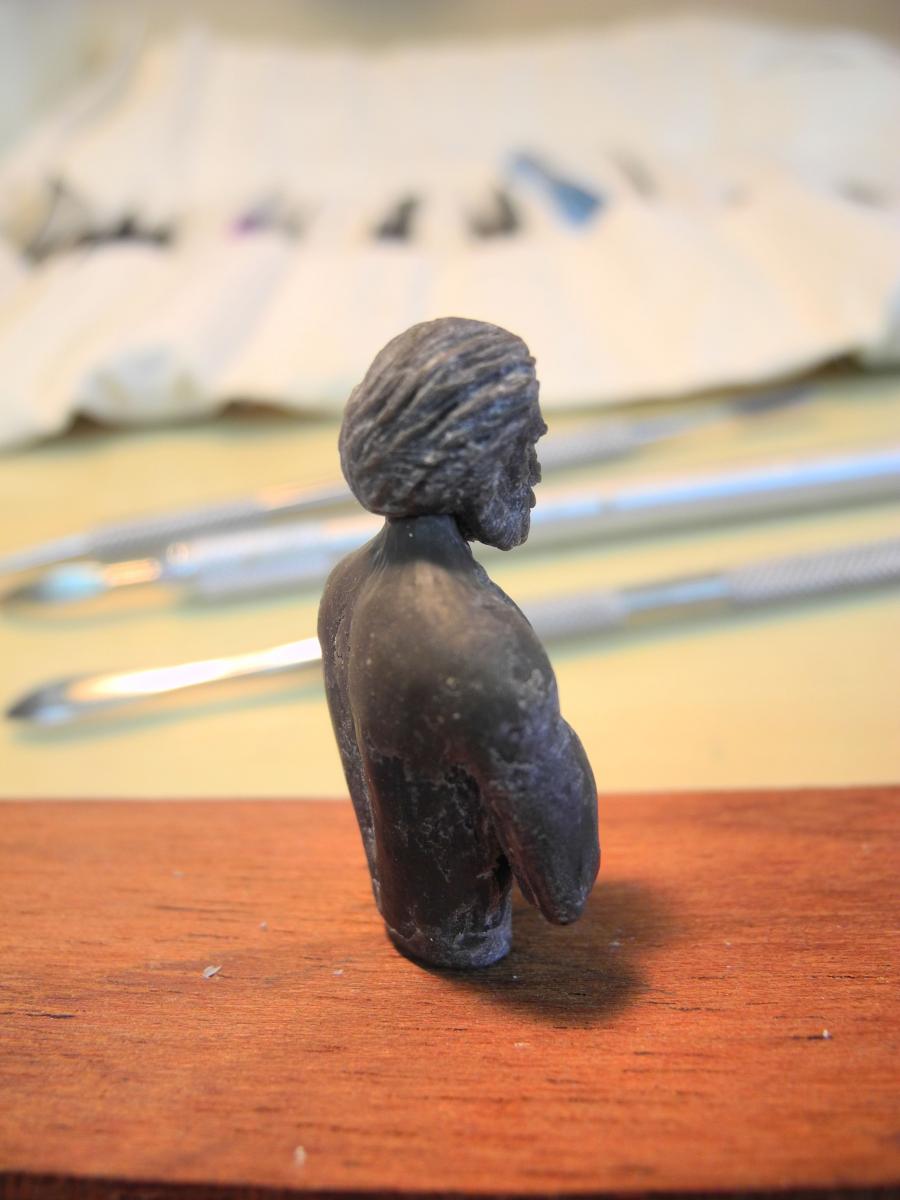
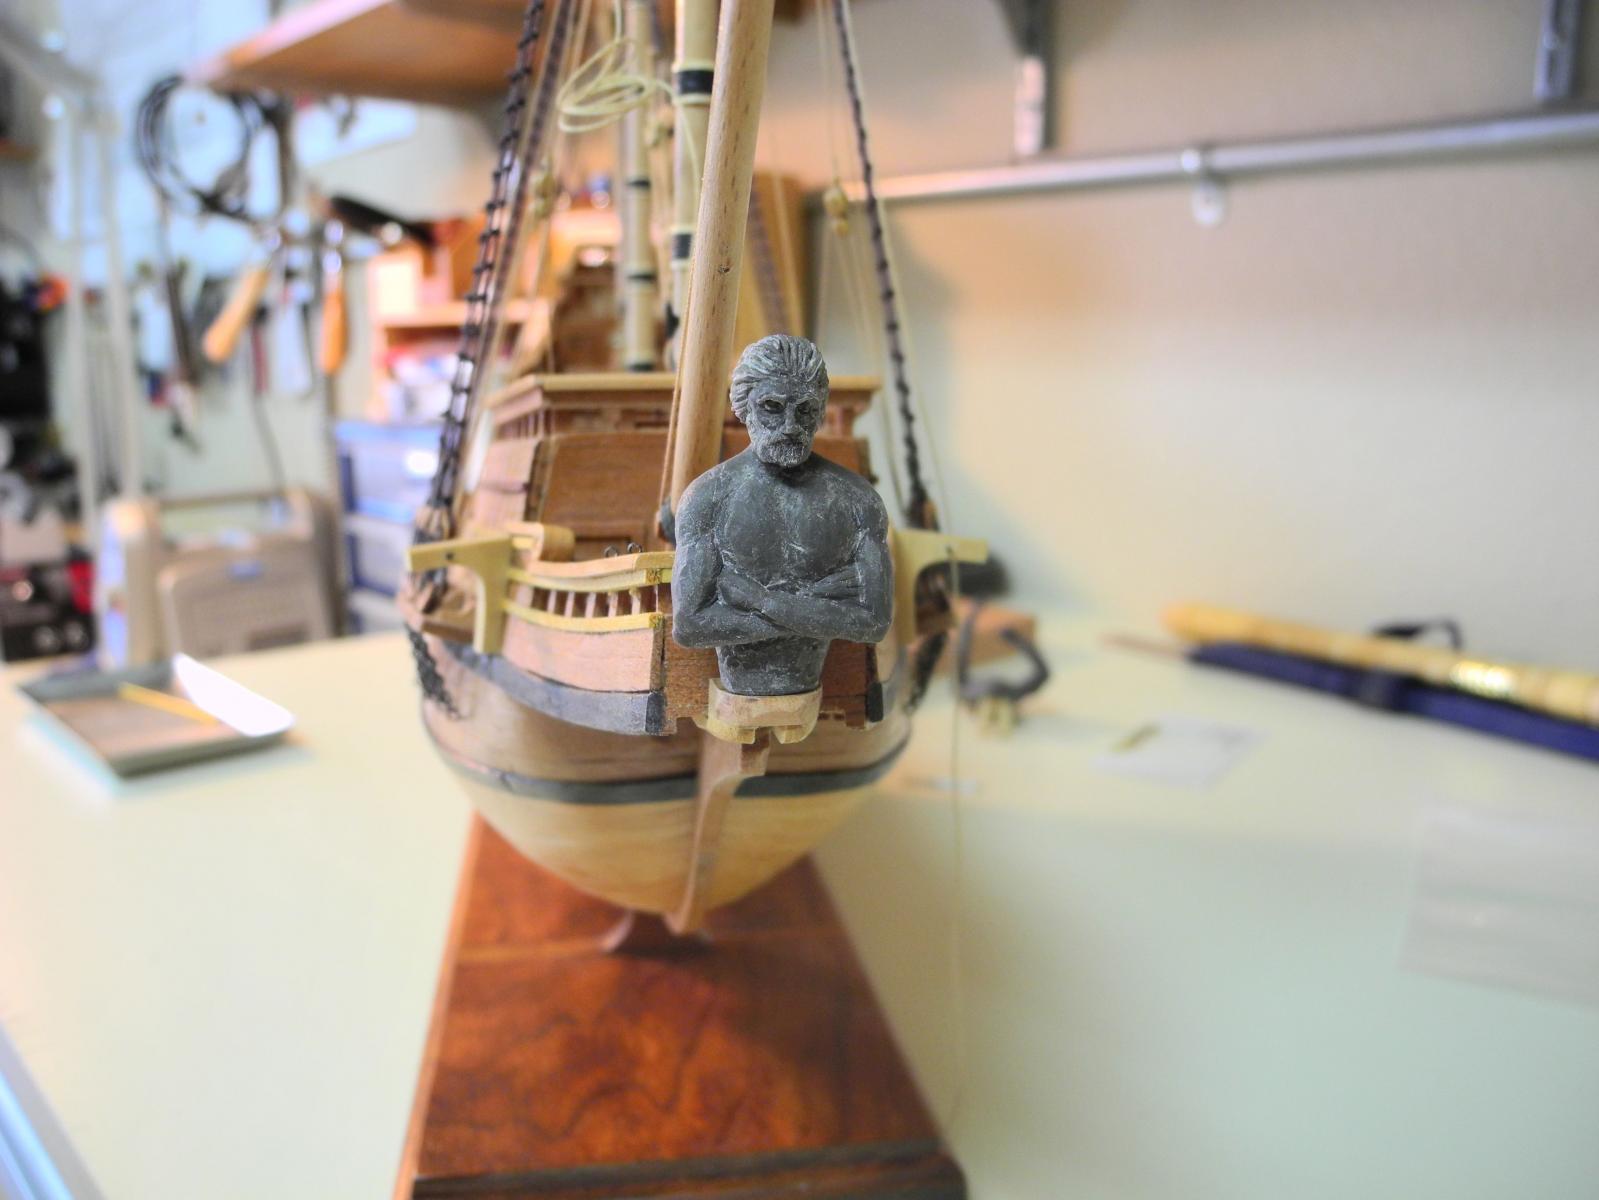
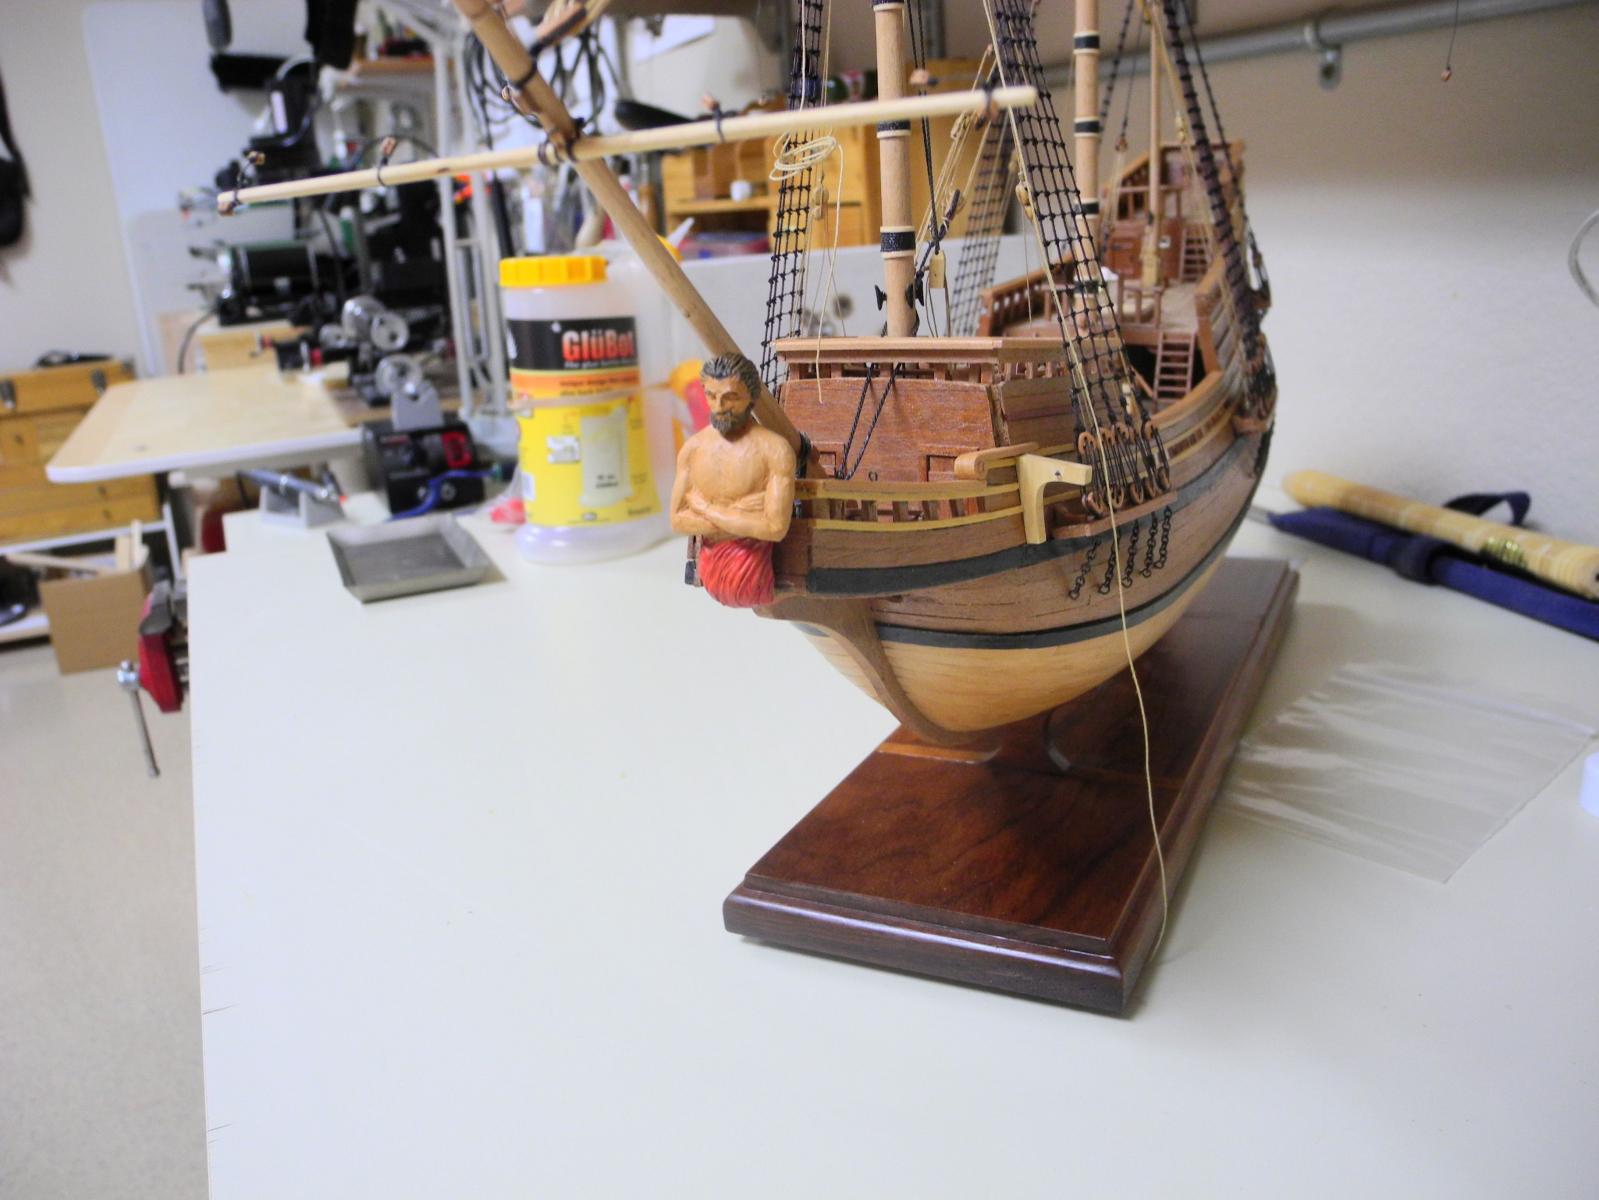
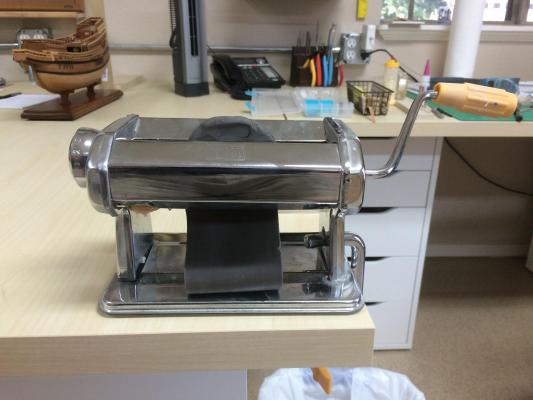
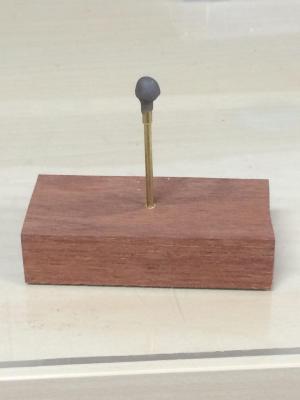
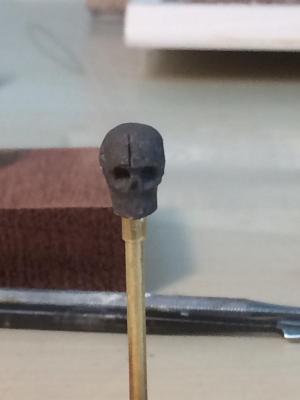
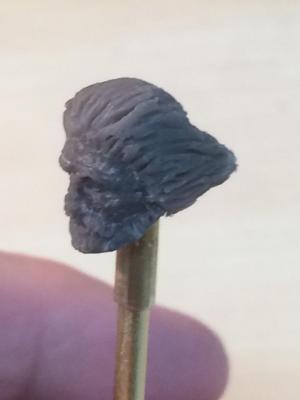
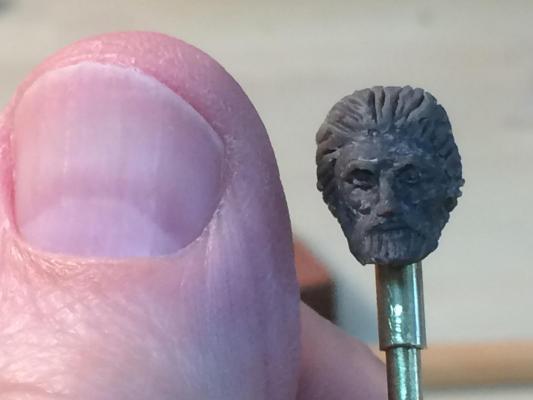
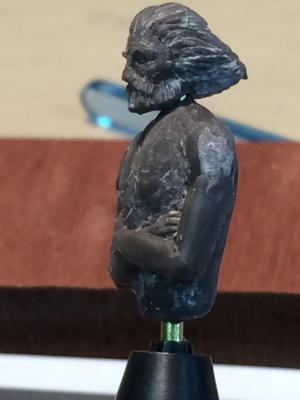
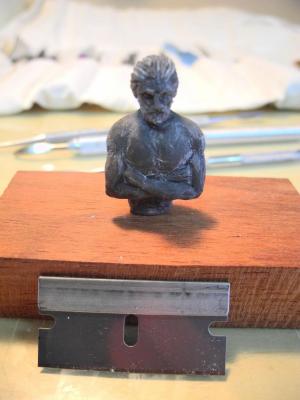
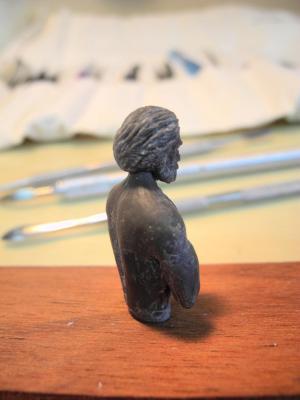
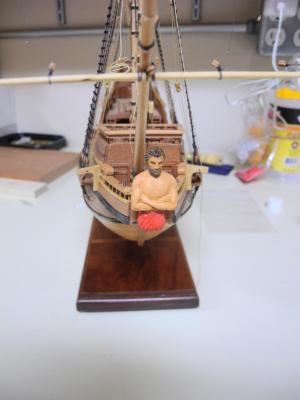
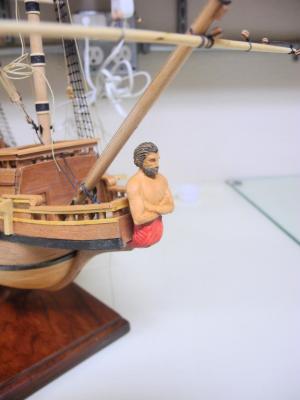
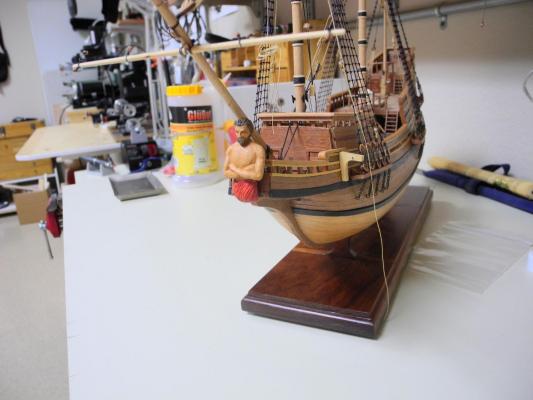
Paragon – a Modified Mayflower Part 21 – The Figurehead When I was about a year into the build I tried carving a figurehead from castello – it was a little frustrating because I had never carved the human figure before and I wasn’t thrilled with the results. So I switched to Sculpey – a clay that will harden when baked. With wood, if we cut off too much there’s very little that can be done about it. With clay, we can always put back what we take off by mistake. I’ve worked with Sculpey before, and I like the version called SuperSculpey for holding small details. It comes in a beige color, but unfortunately it gets transparent in those small details so it’s hard to see them. I learned to mix about 20% black Sculpey with the SuperSculpey – this turns it a dark grey but the details can be seen fairly well. The two clays can be blended by running them through a pasta maker – this is also how I soften the clay if it has been sitting around too long. I decided to build the figurehead in two pieces – the head and the body. I used a brass rod through the body to give it some rigidity, and I build the head around a small brass tube that fit over the rod. I started the head by baking a small ball of clay onto the brass tube – essentially forming an armature. After this ball was hardened I built a skull around it and then baked that. I also baked some very small balls that would work for eyes. This would give me a solid base for forming eyelids around later. I tried giving the figurehead a wind-blown look. This didn’t work very well and was changed later. Optivisors were a real requirement – here’s a comparison of the head with my thumb (and my hands are pretty small). I got to work on the body, and my first version was pretty skinny. Here’s the latest version – a little more beef on the bones. In the book this is taken from, Paragon the figurehead was strong and pretty aggressive, so my figurehead needed to look the part. (Note the new hairdo) While making the figurehead I was trying different ways to mount it on the ship. The first few attempts looked too much like a statue on a ship. In the book the figurehead was an integral part of the ship, so I needed a way to make it look like it was. The cover of one version of the book gave me the key to doing that. So, after a bit of painting the figurehead is done and I’m pretty happy with it. The closeup photos show a lot of blemishes, but the real-life view is pretty good. Now I can get back to finishing the running rigging. I’ll be heading to the east coast for the NRG Conference and other enjoyable things on Wednesday, but I hope to put in a few hours of rigging before then. If I make any progress I post an update before leaving.


-
Hi Patrick Good luck with the surgery. I hope you get well soon and back to work on your latest build.
-
onlinemetals.com has a good description of each type of aluminum, brass, and ferrous metals. These descriptions indicate the types that are best for machining. When you buy aluminum from a local store it often will be stamped with the type, and you can tell from this whether it will machine easily.
-
Hi Jay Great work on the barrels. I hadn't seen this log before, so I'll be following along from here on.
- 572 replies
-
- 2
-
-
- constitution
- frigate
- (and 1 more)
-
There are two Bluenose ships - the original and the Bluenose II. The Model Shipways (Model Expo) kit is for the original ship, and was designed by Ben Lankford. The instructions and plans are excellent. The planking material supplied is basswood strips, but if you're planning to leave the wood unpainted you'll probably want to replace these strips with other wood. One real benefit of using the Model Shipways kits is that they'll replace (at no cost) any parts that are missing or if you make a mistake and need to redo some work. The metal components need to be made from brass strips supplied in the kit, which will require some soldering skills which are easy to learn. Hope this helps. Good luck with whatever kit you decide on, and I hope you'll be posting a build log for it.