HOLIDAY DONATION DRIVE - SUPPORT MSW - DO YOUR PART TO KEEP THIS GREAT FORUM GOING! (Only 13 donations so far - C'mon guys!)
×

.jpeg.7d7eba14c97a2e1d9f79cd2c97f6424a.jpeg)
EricWilliamMarshall
-
Posts
986 -
Joined
-
Last visited
Content Type
Profiles
Forums
Gallery
Events
Everything posted by EricWilliamMarshall
-
.thumb.jpeg.fc5d633a7b34428fcf19419a73d56d55.jpeg) I have received all of the rasps: @gagliano1770's Auriou rasps as part of his downsizing and @Hubac's Historian's suggestion regarding the Nicholson #50 rasp. I have to say a) I believe these two purchases exceed my entire life-time total spend on rasps and files up to these two purchases, b) after poking about, gagliano1770’s sale of these was a gift/a give away - the list prices on these are insane! i thought I could do an apples-to-apples comparison, but the Auriou rasps are oranges in comparison to the Nicholson rasp’s apple. The thing that struck me after playing with all of these rasps is the ease with which they move across the wood. Similar to how fine-toothed sharp saws run smoothly in comparison to a slightly dull coarse-toothed saw. They don’t bounce or wander. If I can think of a way show a comparison I will. I’m glad I have them but it will take while to let their use seep into my thinking. Marc is correct, the #50 can remove material quickly while leaving a surface that cleans up quickly with a few swipes of a fine file. The other coarse rasps I have bounce around more and leave a hand full of scraped lines just a little too deep. While I’m impressed, I still would not suggest anyone spend $189 dollars on four Auriou needle files. (If you must, then here: https://www.leevalley.com/en-us/shop/tools/hand-tools/files-and-rasps/rasps/53821-auriou-needle-rasps?item=62W3034 )
I have received all of the rasps: @gagliano1770's Auriou rasps as part of his downsizing and @Hubac's Historian's suggestion regarding the Nicholson #50 rasp. I have to say a) I believe these two purchases exceed my entire life-time total spend on rasps and files up to these two purchases, b) after poking about, gagliano1770’s sale of these was a gift/a give away - the list prices on these are insane! i thought I could do an apples-to-apples comparison, but the Auriou rasps are oranges in comparison to the Nicholson rasp’s apple. The thing that struck me after playing with all of these rasps is the ease with which they move across the wood. Similar to how fine-toothed sharp saws run smoothly in comparison to a slightly dull coarse-toothed saw. They don’t bounce or wander. If I can think of a way show a comparison I will. I’m glad I have them but it will take while to let their use seep into my thinking. Marc is correct, the #50 can remove material quickly while leaving a surface that cleans up quickly with a few swipes of a fine file. The other coarse rasps I have bounce around more and leave a hand full of scraped lines just a little too deep. While I’m impressed, I still would not suggest anyone spend $189 dollars on four Auriou needle files. (If you must, then here: https://www.leevalley.com/en-us/shop/tools/hand-tools/files-and-rasps/rasps/53821-auriou-needle-rasps?item=62W3034 )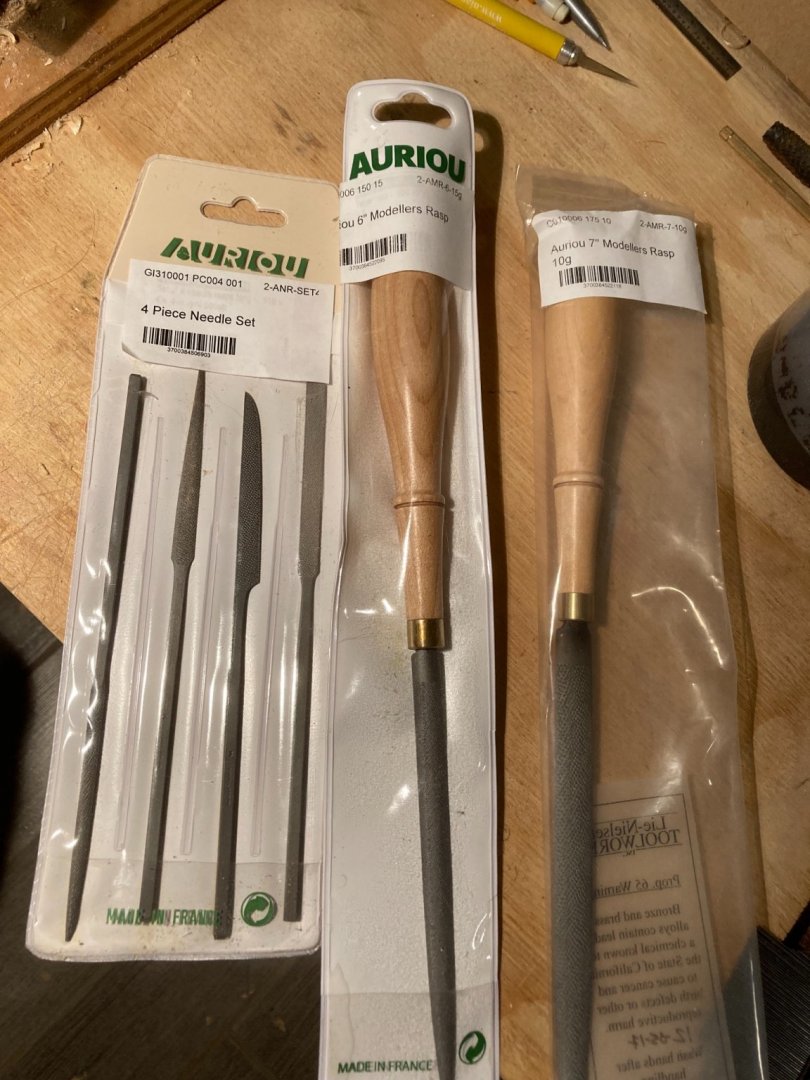
-
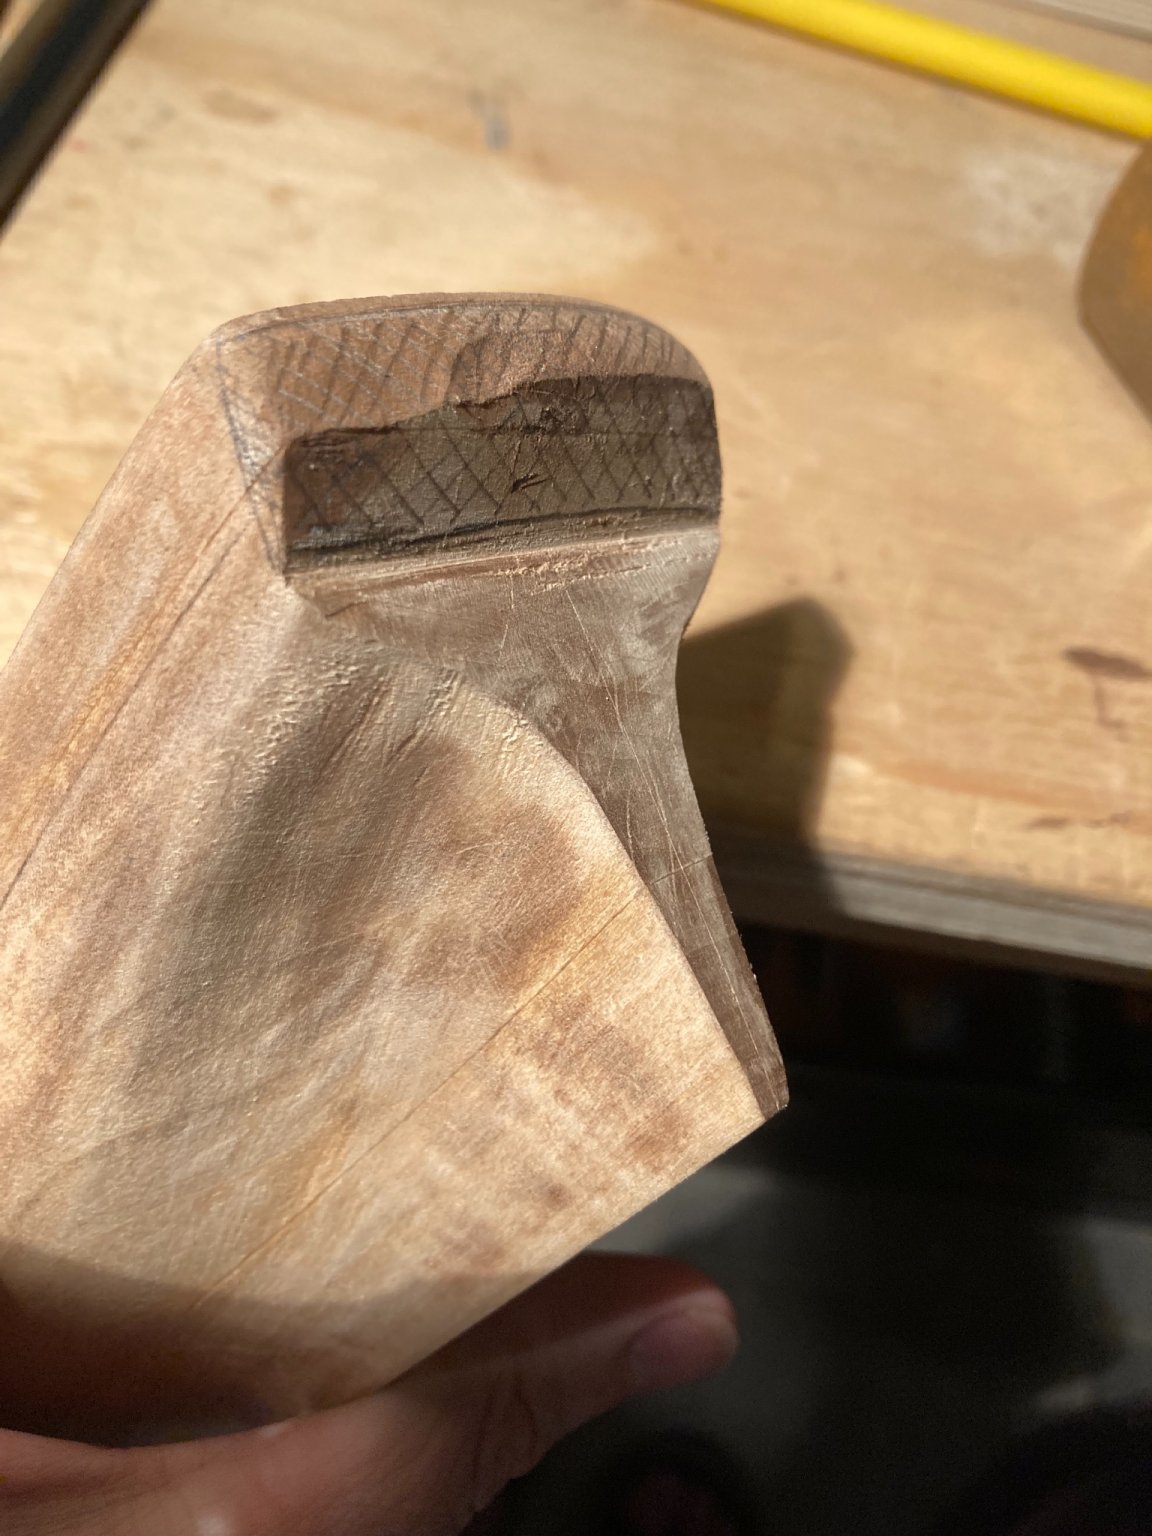
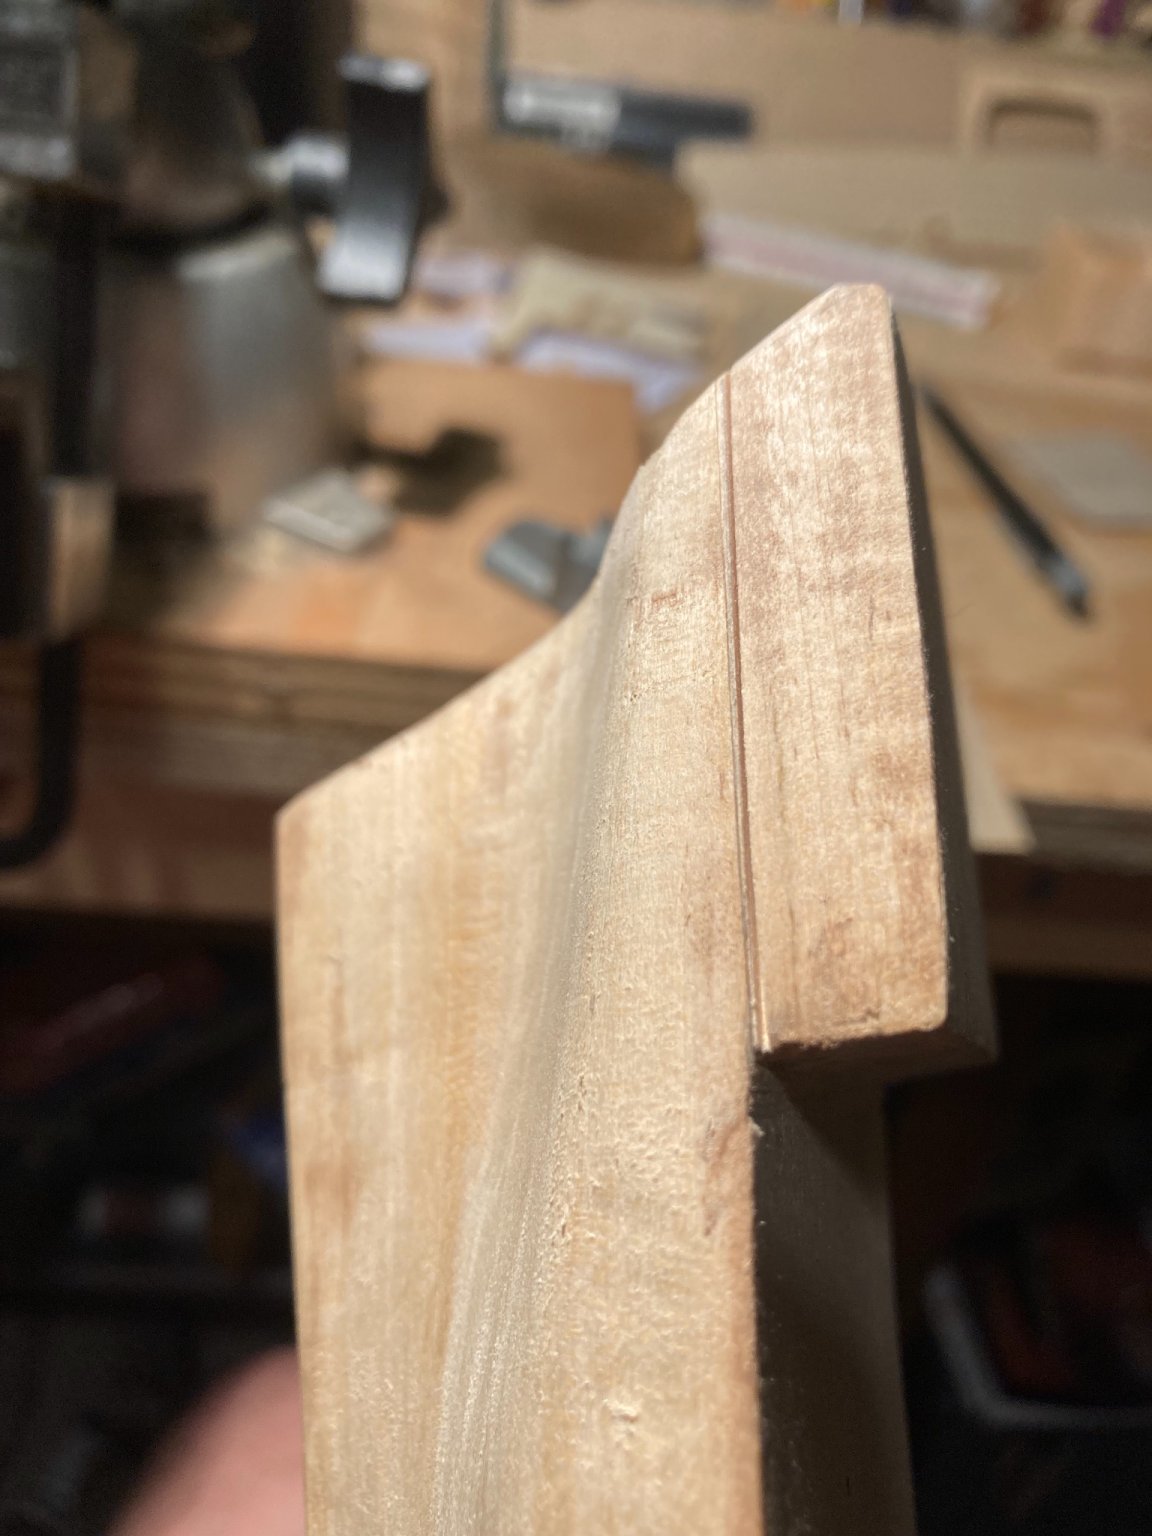
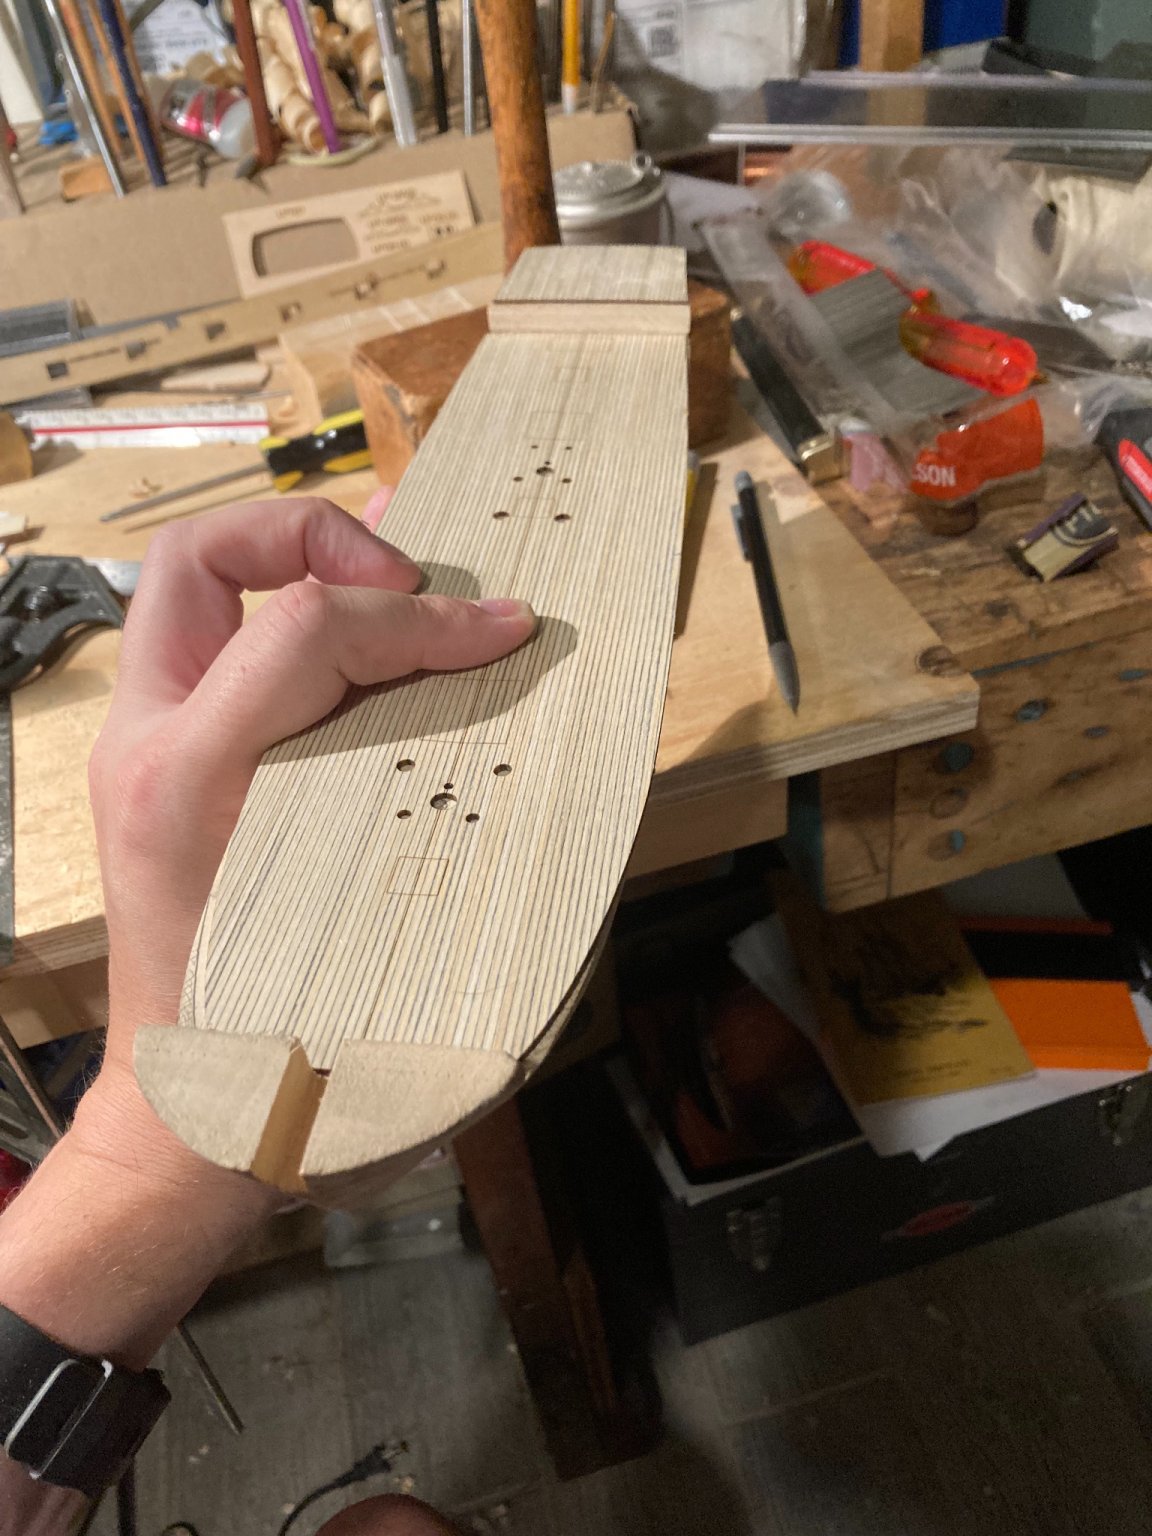
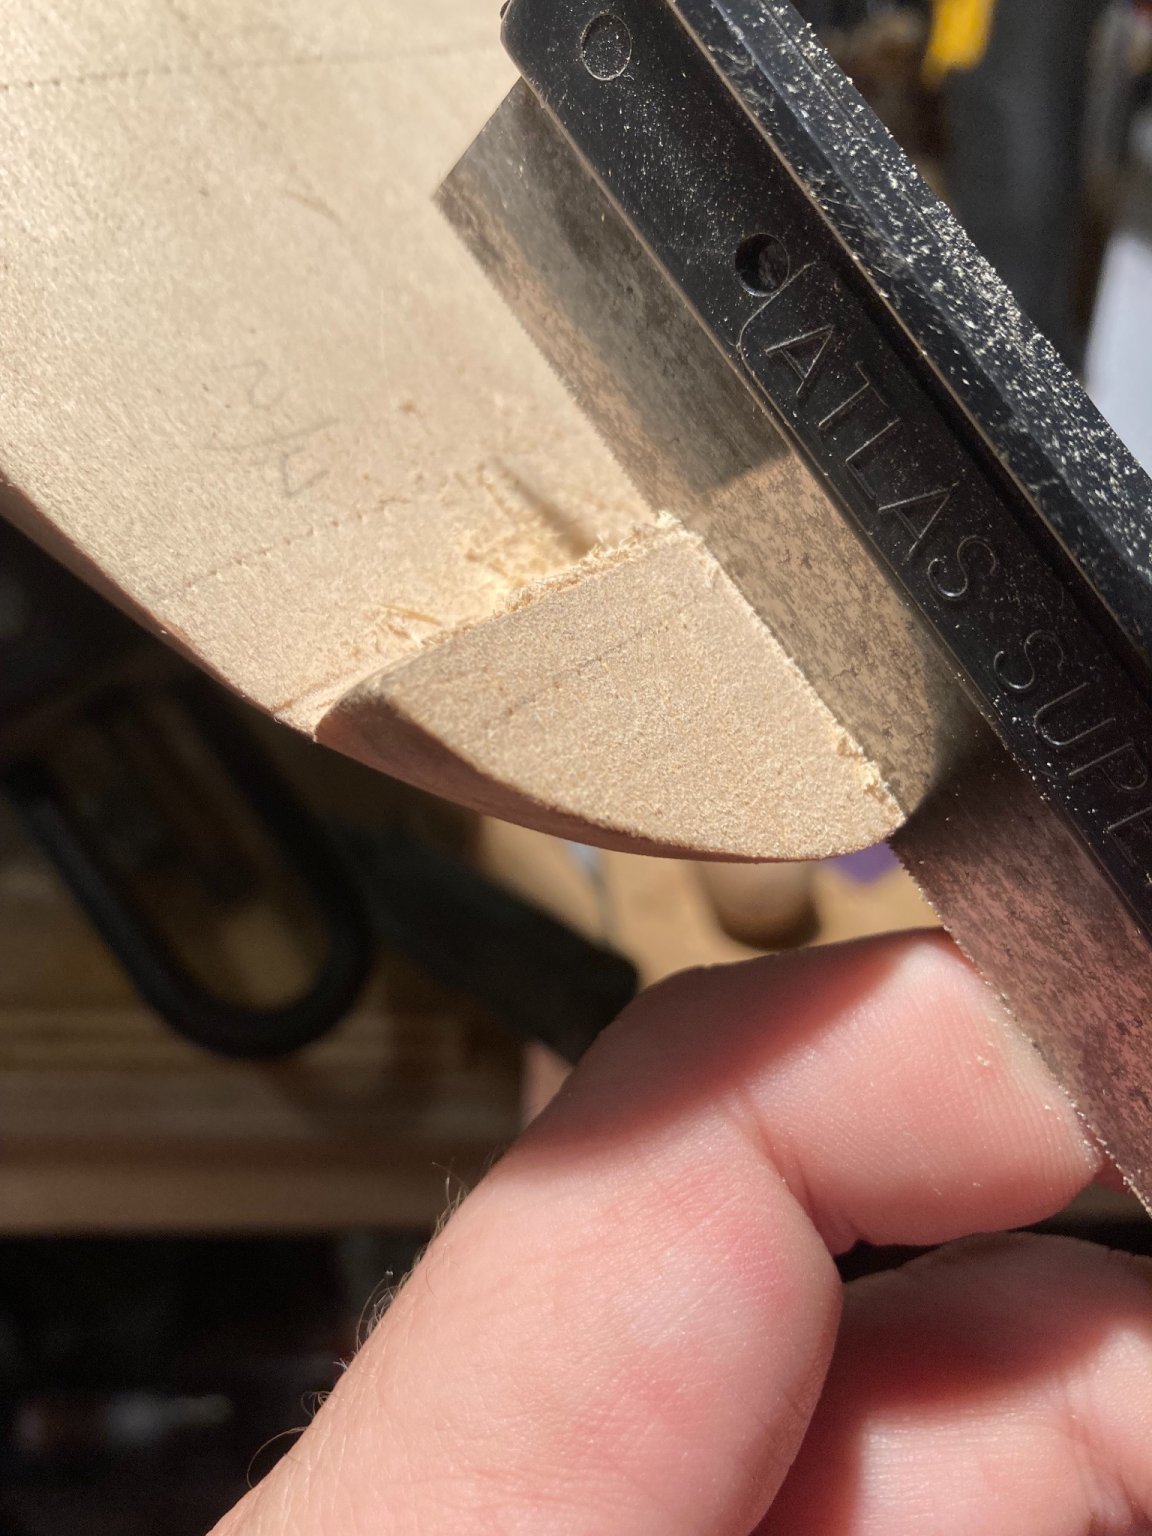
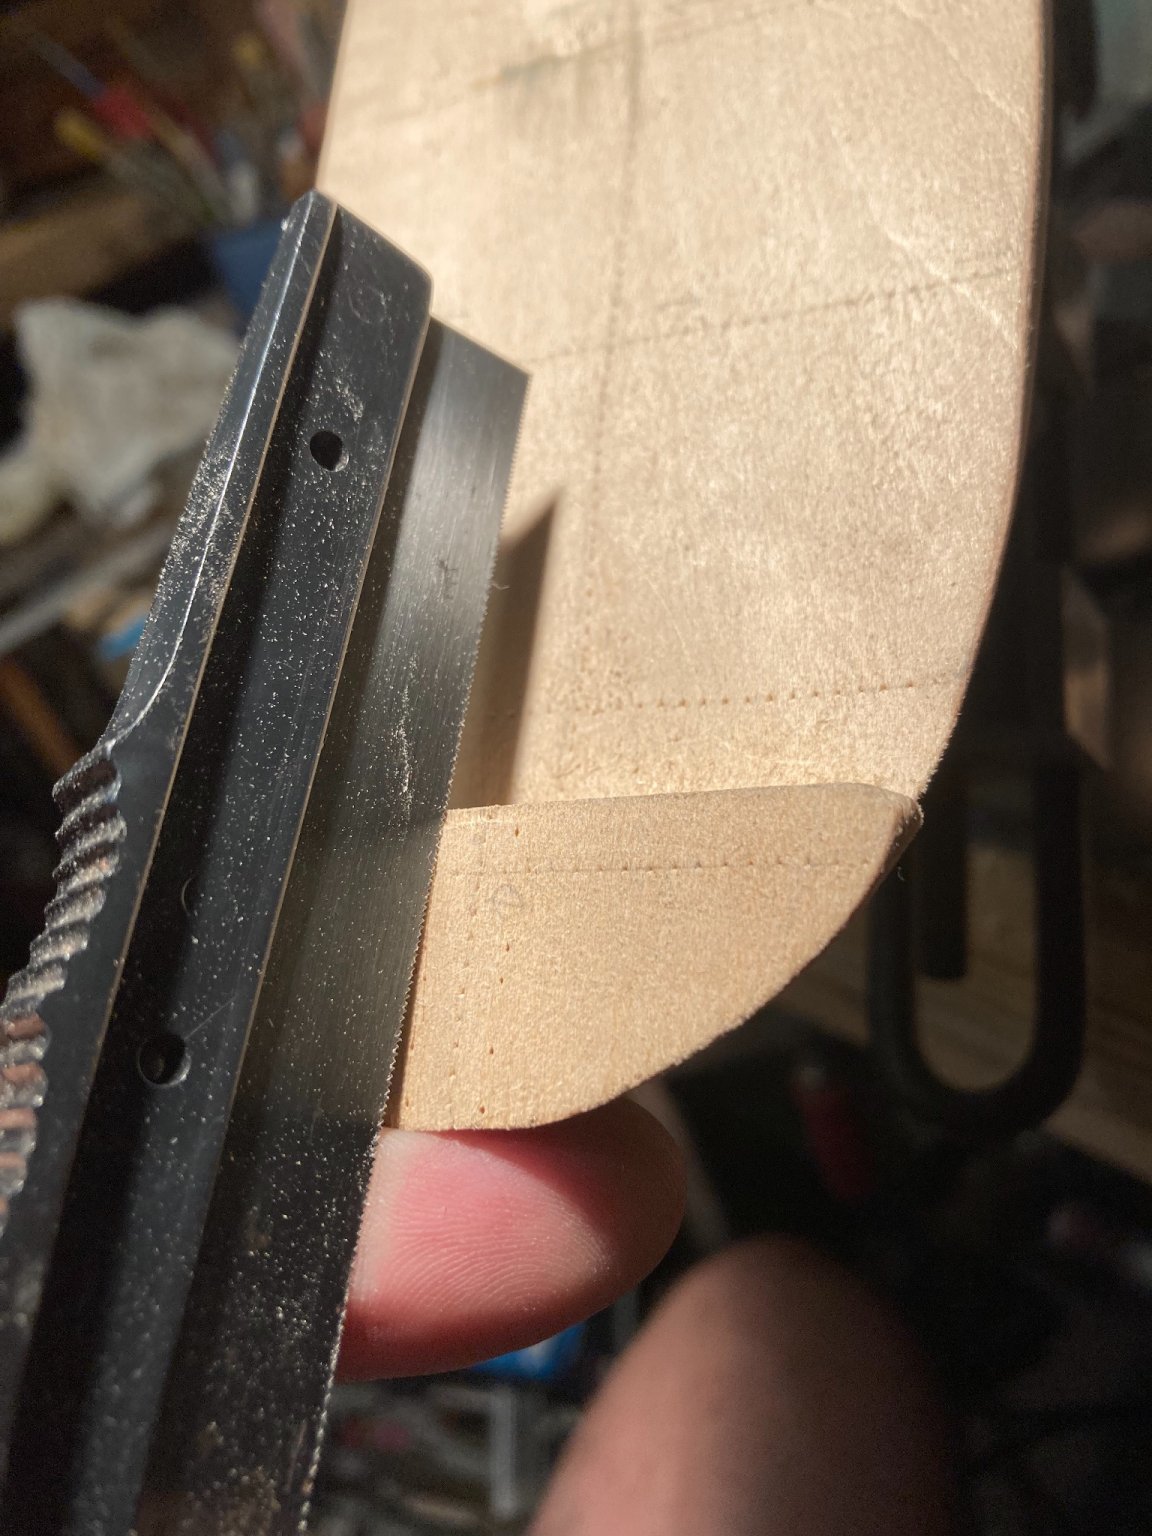
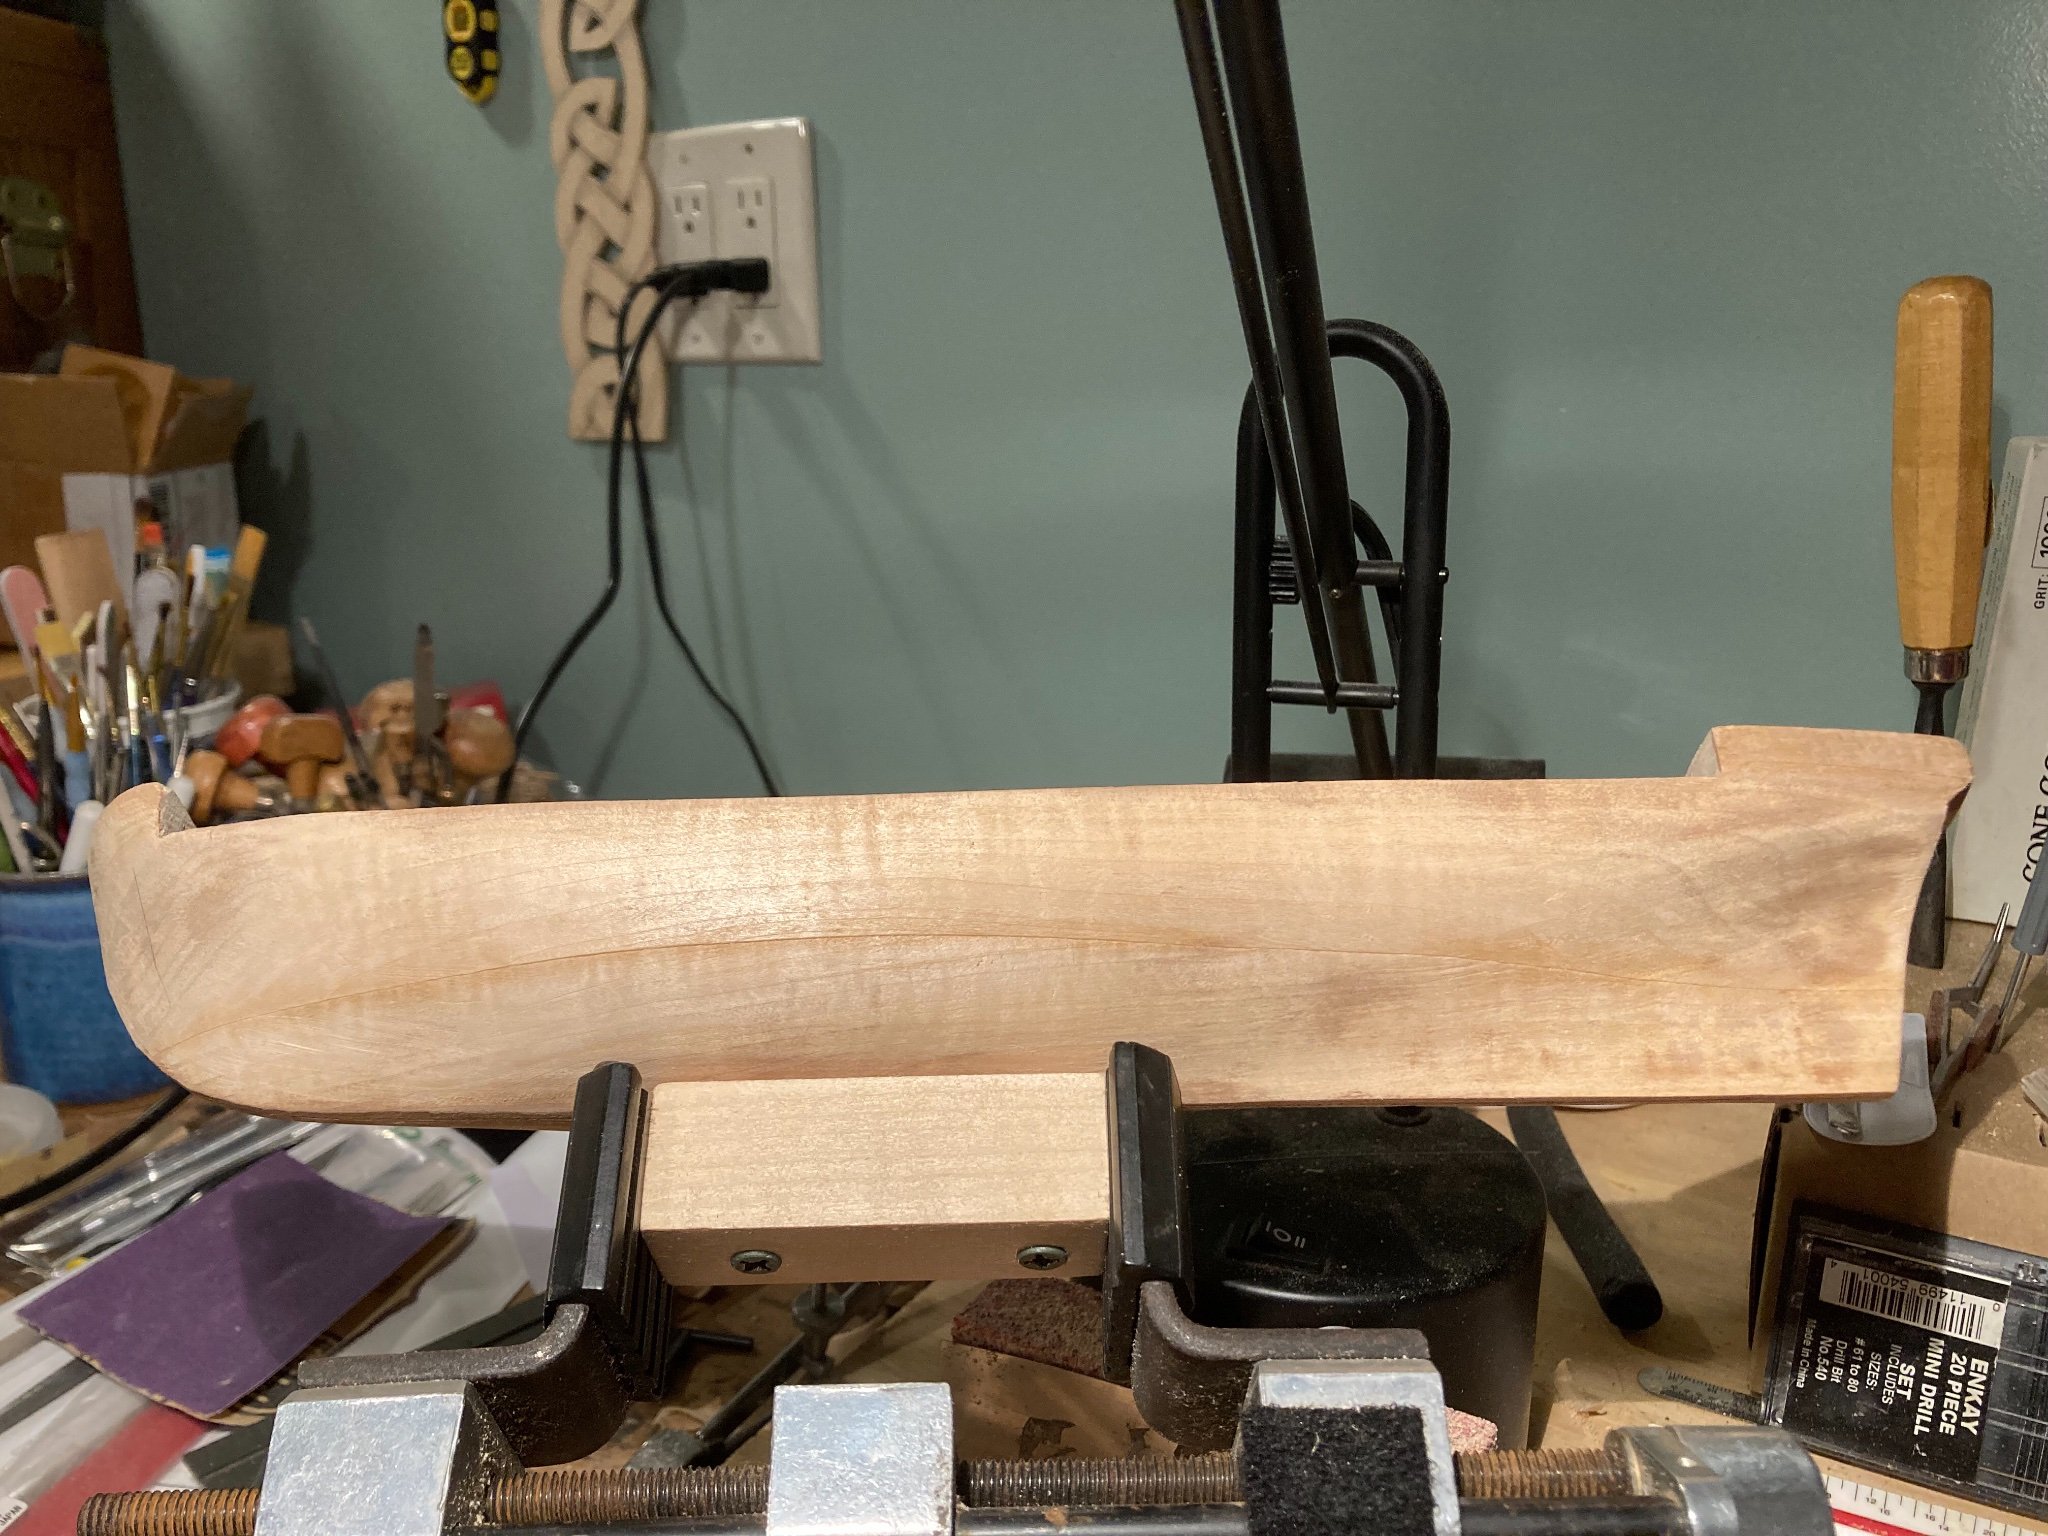
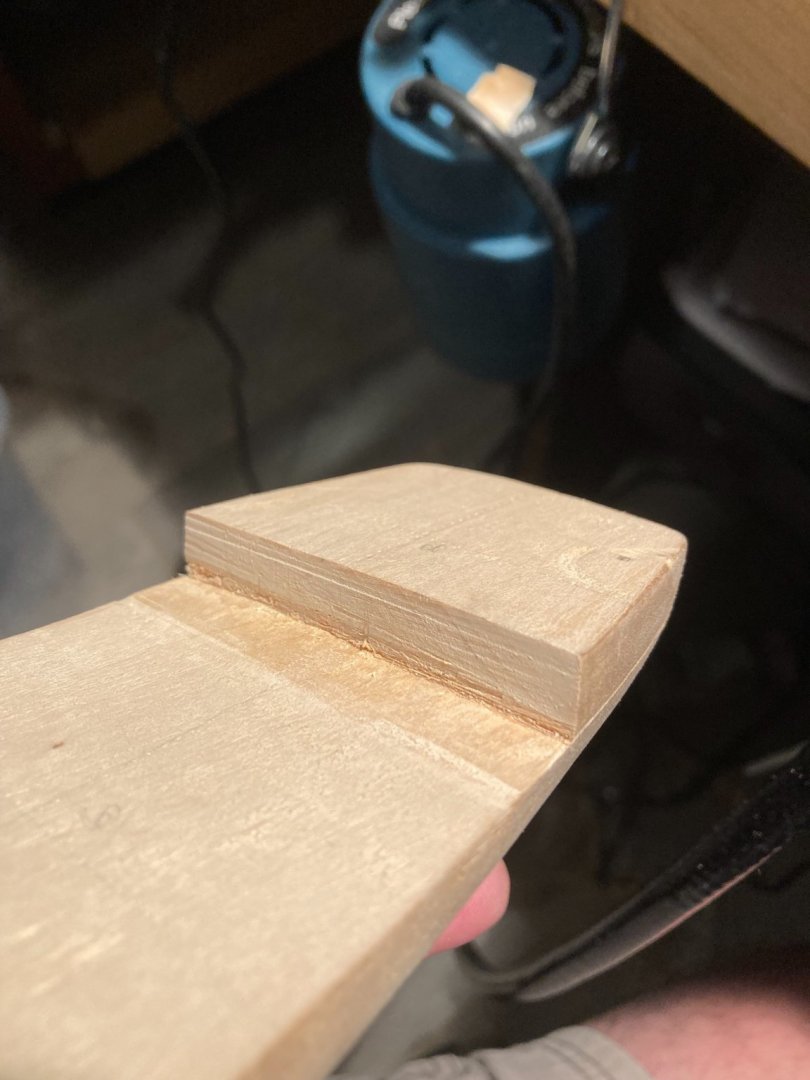
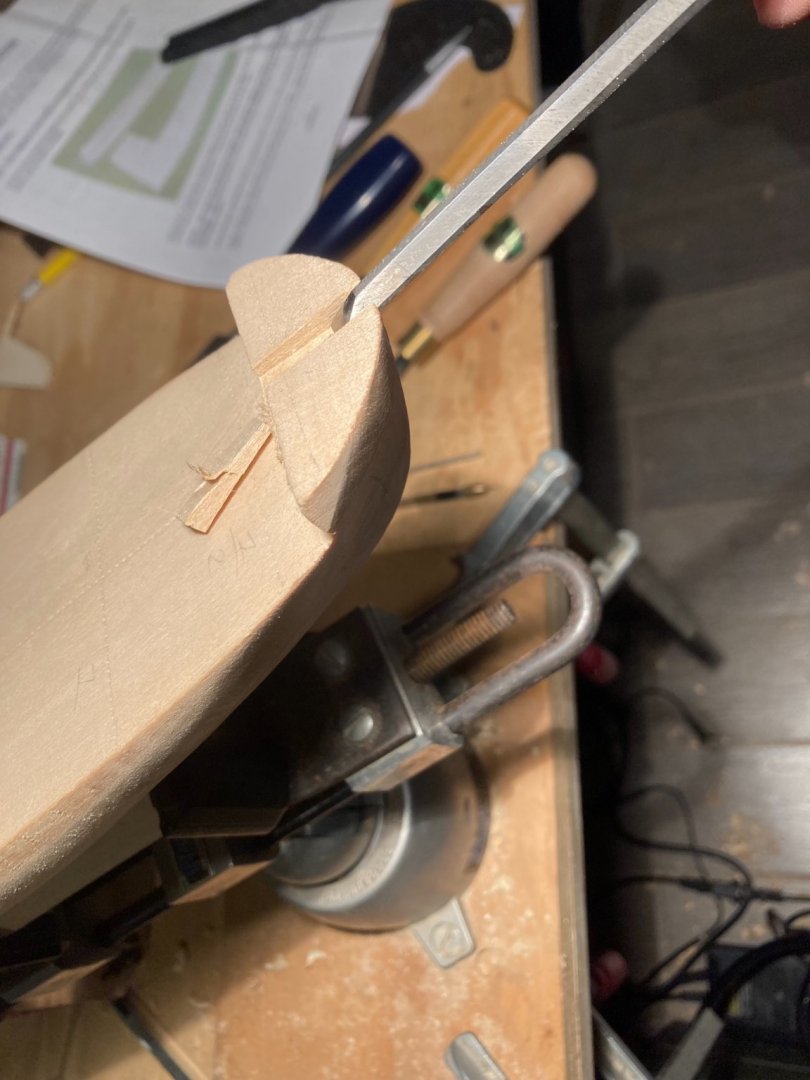
Not much to report: the bottom of the hull is in ball park (85% there) so I turned my attention to the top. After a bit of cutting, I can finally test fit the deck. If I was to do this again, I would have trimmed the fop to fit the deck before working on the bottom. All work done with a small toothed saw (an Atlas Super saw used by model train folks and a 1” flat chisel).


-
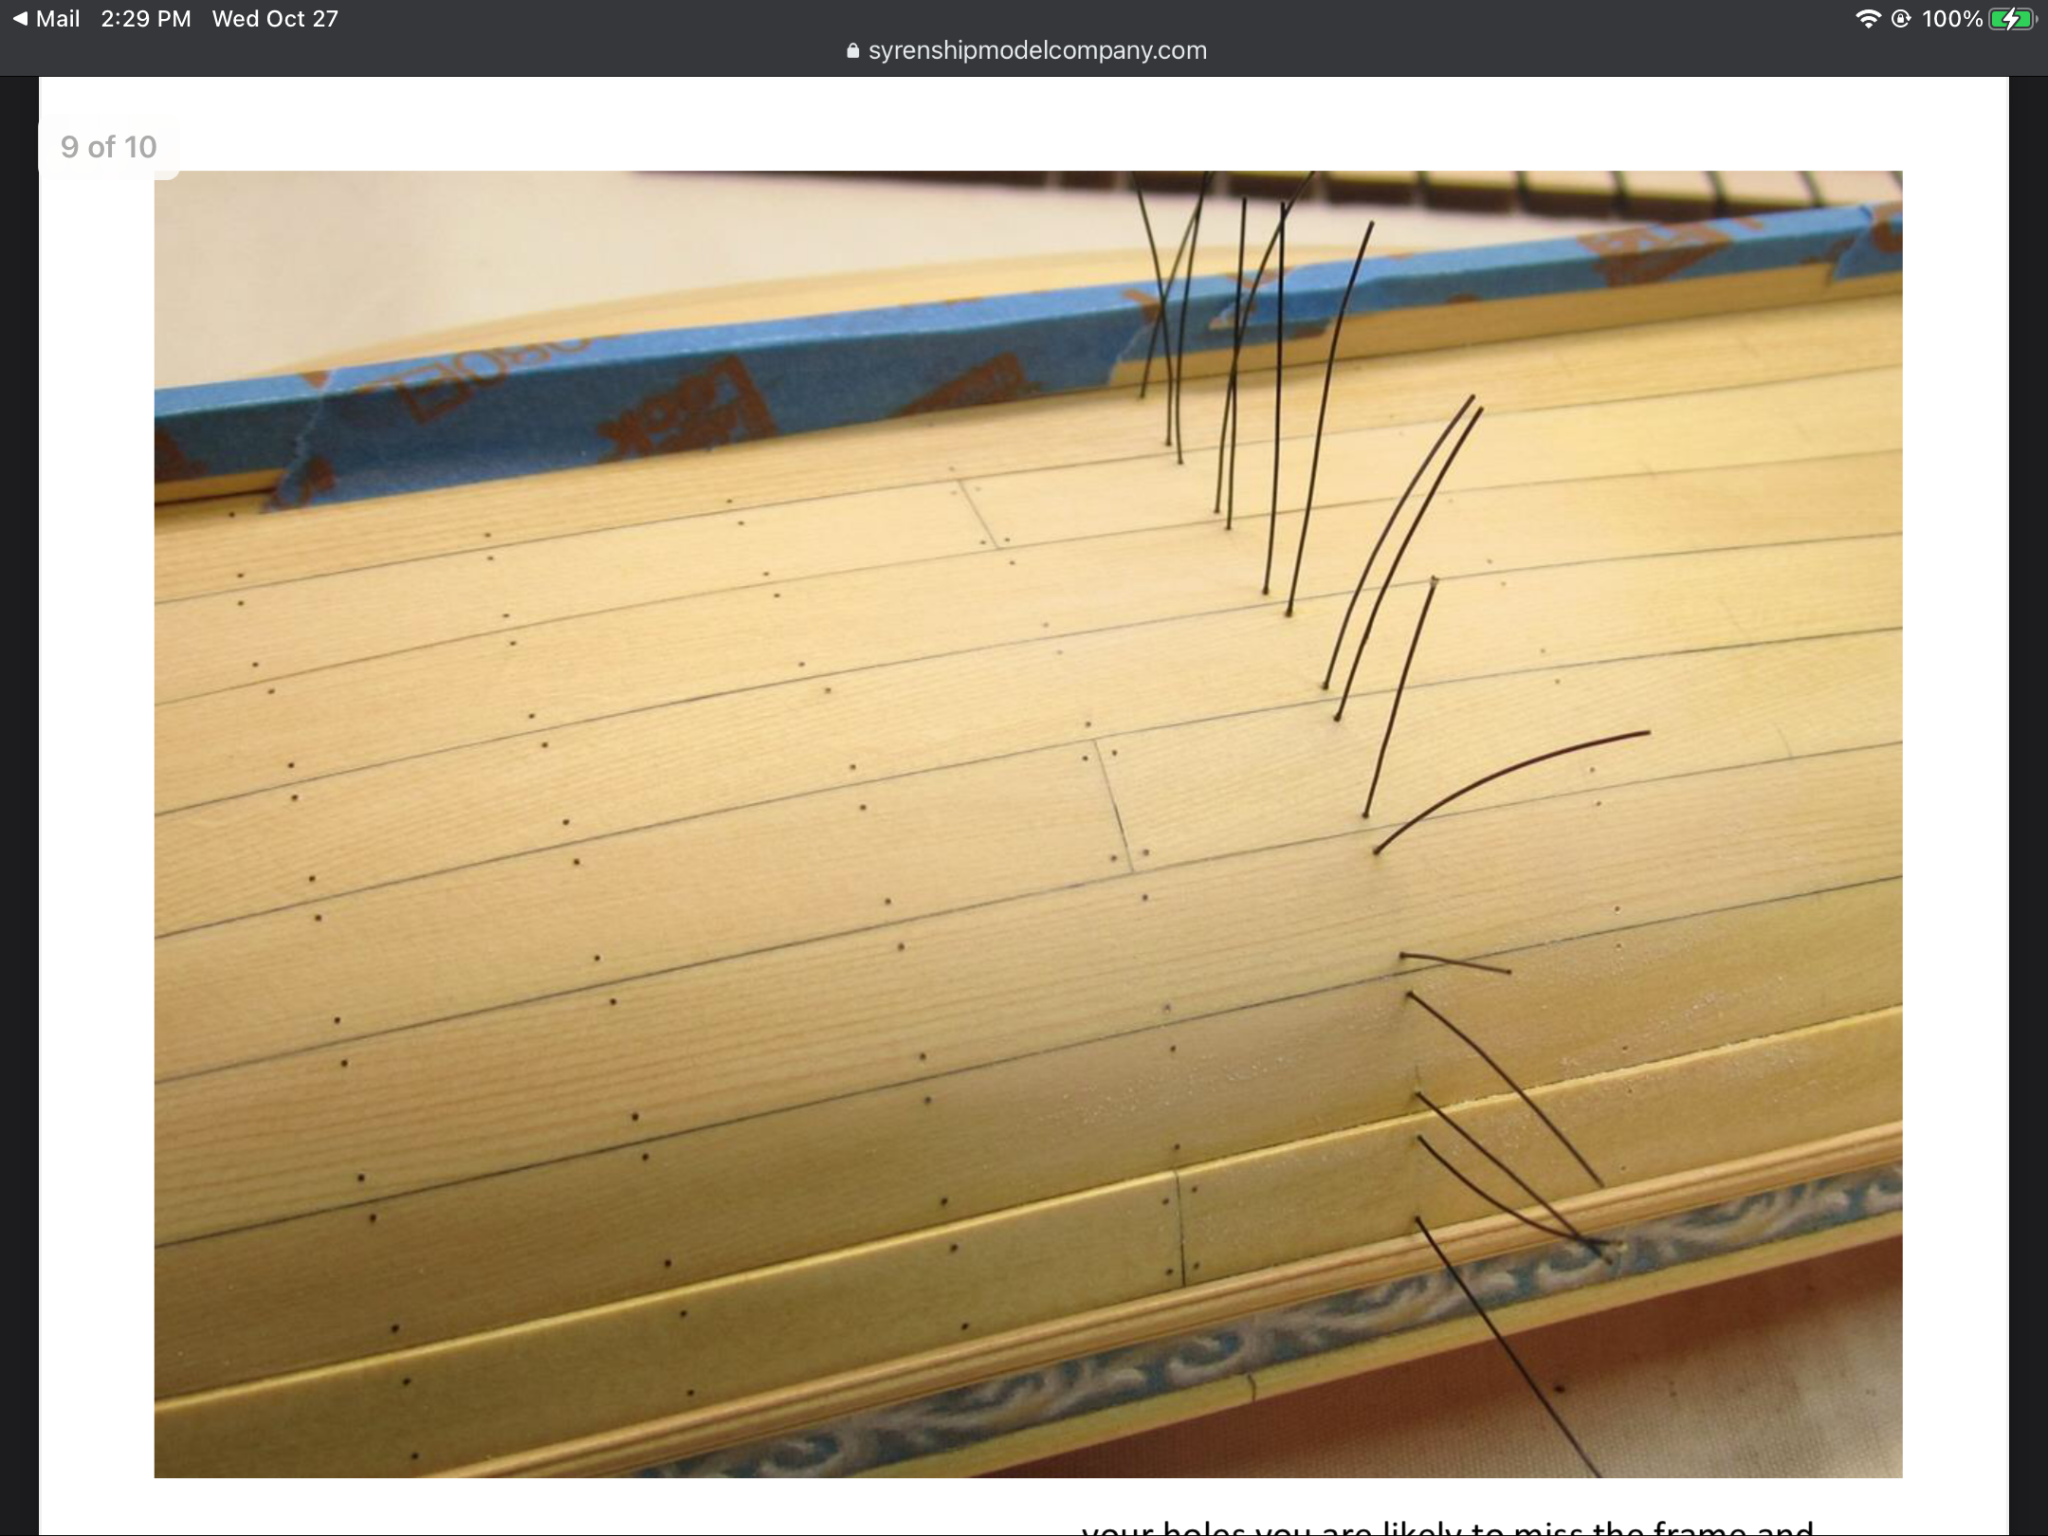
Looks great! Would there be any use to using copper wire and drilling in tricky areas instead? You may want to skim some of the Medway builds for that kit’s use of black fishing line to emulate nails, but that might be too far a field. https://modelshipworld.com/search/?q=Medway&quick=1 If it is of interest, part 3 of the instructions covers the details. Again, if this not to your taste, then ignore. But hopefully it may prompt a reasonable ‘lead’ to pursue which may provide you a final solution.

-
You can buy a jig from Lee Valley: https://www.leevalley.com/en-us/shop/tools/hand-tools/miniature-tools/110480-veritas-miniature-honing-guide?item=05P8520 or use any clamp can be used to hold the blade - you can make one out of wood with a screw to tighten. You also can just use a pair of vise-grips if in a pinch (a bit of cardboard will protect the blade from scratches if preferred).
-
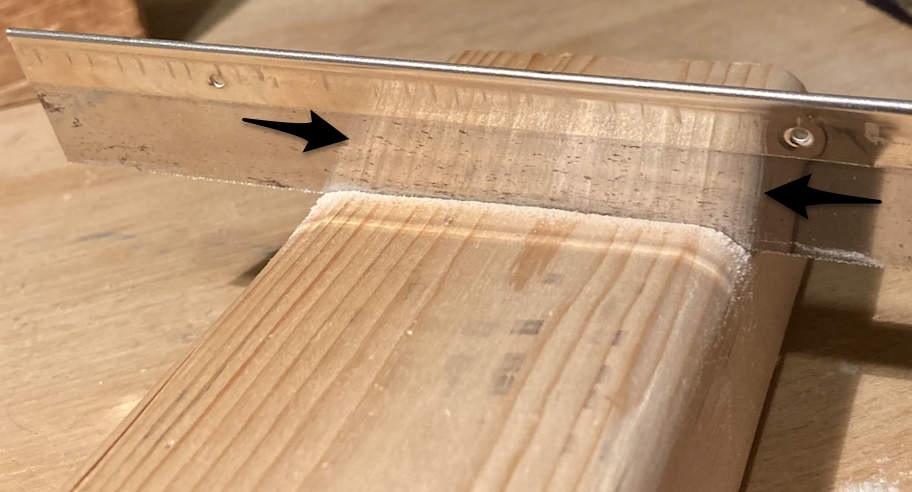
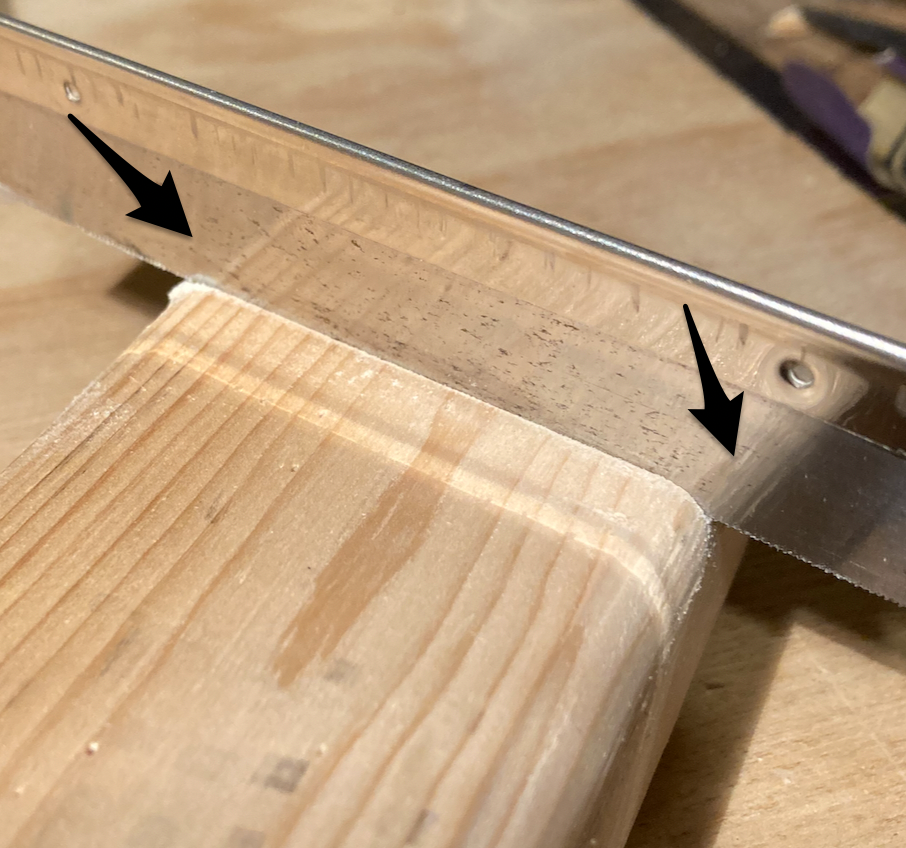
If both are aligned (i.e. perpendicular to both surfaces), you will see a continuous line in the reflection of the saw blade. This fact allows you to track and adjust if you stray quickly. You simply correct the blade until you see a straight line connecting the wood and the reflection in the saw. This also means you don't have to move your head or shoulders, which leads to a smoother, accurate cut. Does this make sense? Any questions?
-
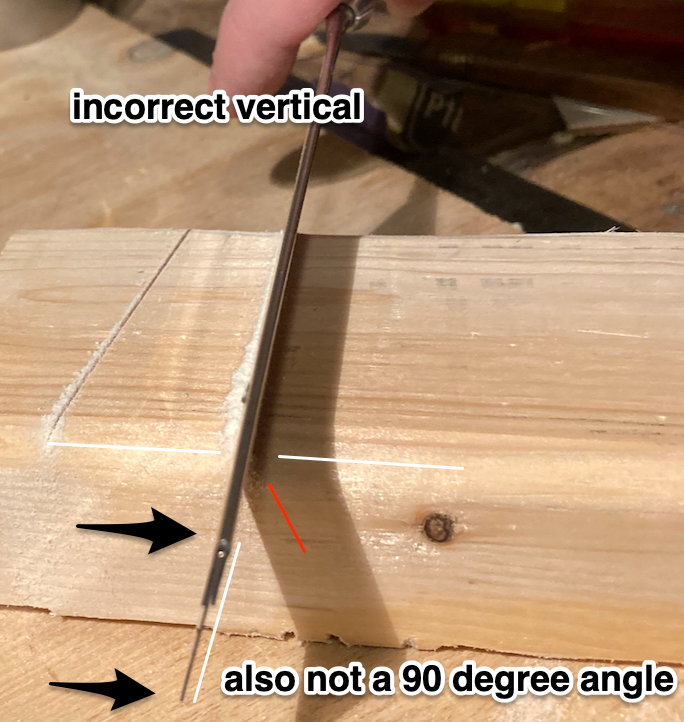
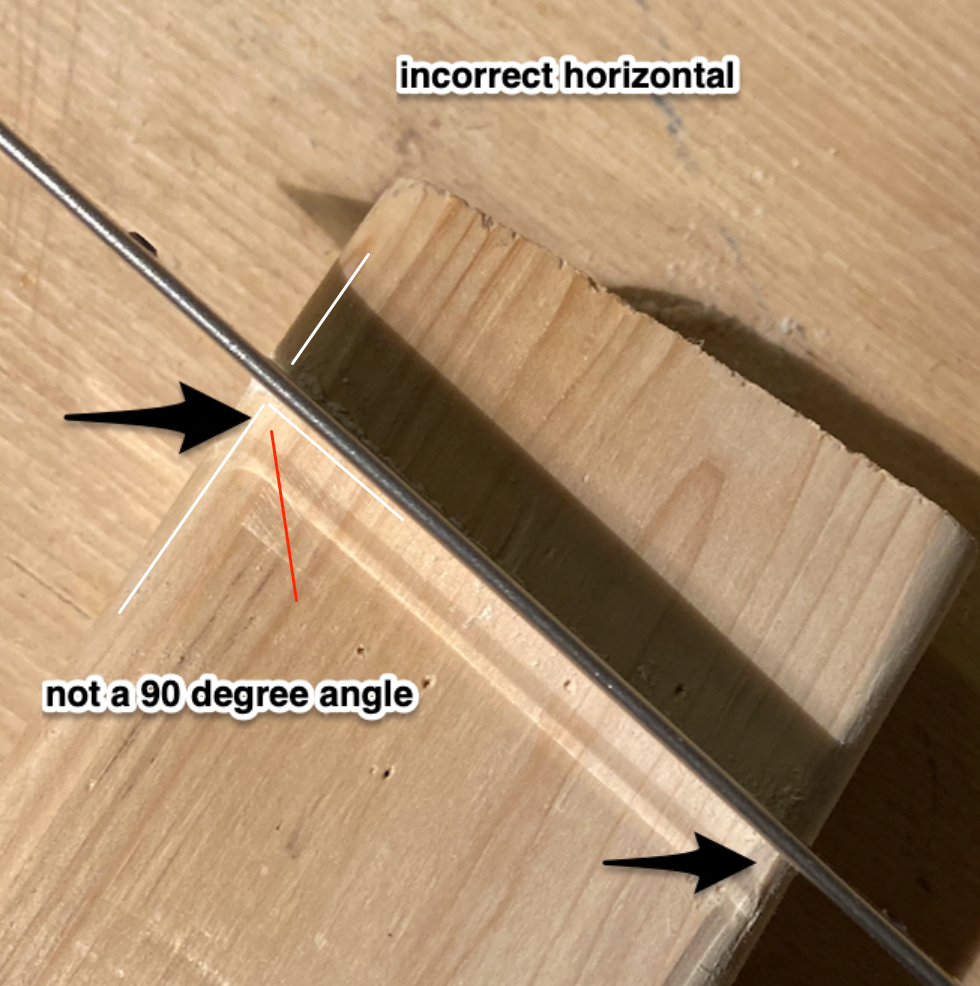
If the 'vertical' or 'horizontal' is off, you can see a misalignment in the reflection of the saw blade:
-
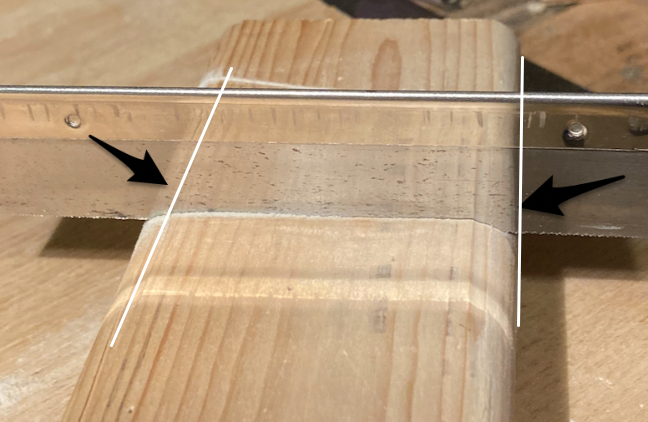
Stupid saw trick explained: When cutting with a hand saw, there are two directions to get 'right' which I will call 'vertical' and 'horizontal' as seen in these two images:
-
Sure, I'll post some pictures which make it more clear.
-
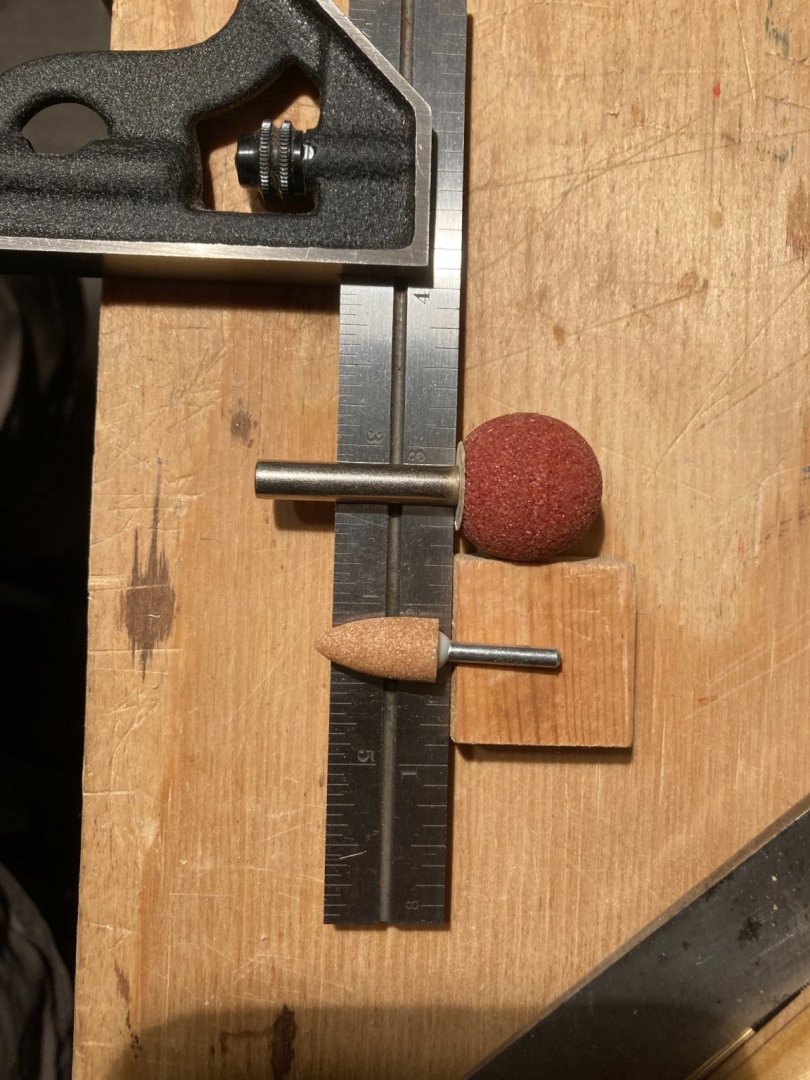
In my curiosity regarding rotary tools as applied to shaping hulls, I have found these videos of Frank Russell, a prize-winning carver of wildlife in conjunction with the Foredom tool company. I found them on Amazon for very cheap but my three dollars plus shipping was misspent. Here they are for free: https://www.foredom.net/woodcarving-demonstrations-with-frank-russell/ The first 30 minutes or so covers a bit of safety then a section on bits and would I watch the section on roughing out and watch a bit of the cutting of the fur to see how he anchors the hand piece for control (and safety). Pictured are the two types of bits he uses for roughing out.
-
Stupid saw trick: you can judge if the saw is 90 degree from the wood, looking at the reflection. If the reflected surface is line and matches then the blade then the saw blade is perpendicular to the wood.

-
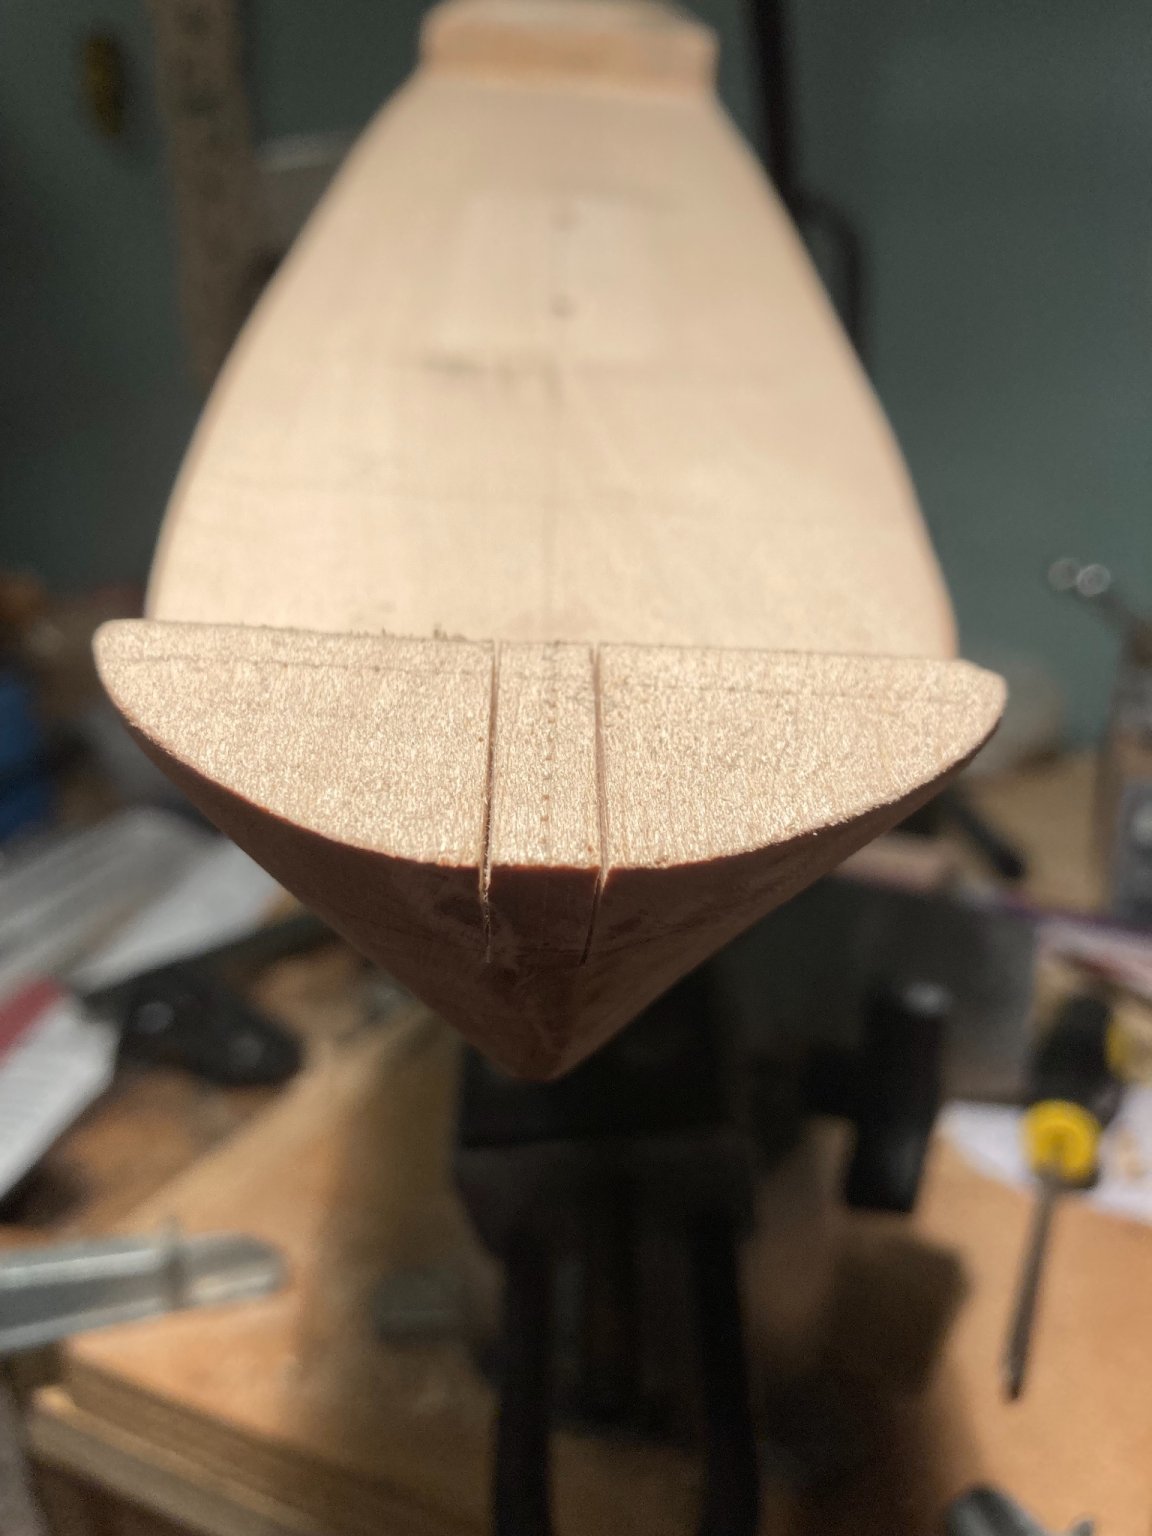
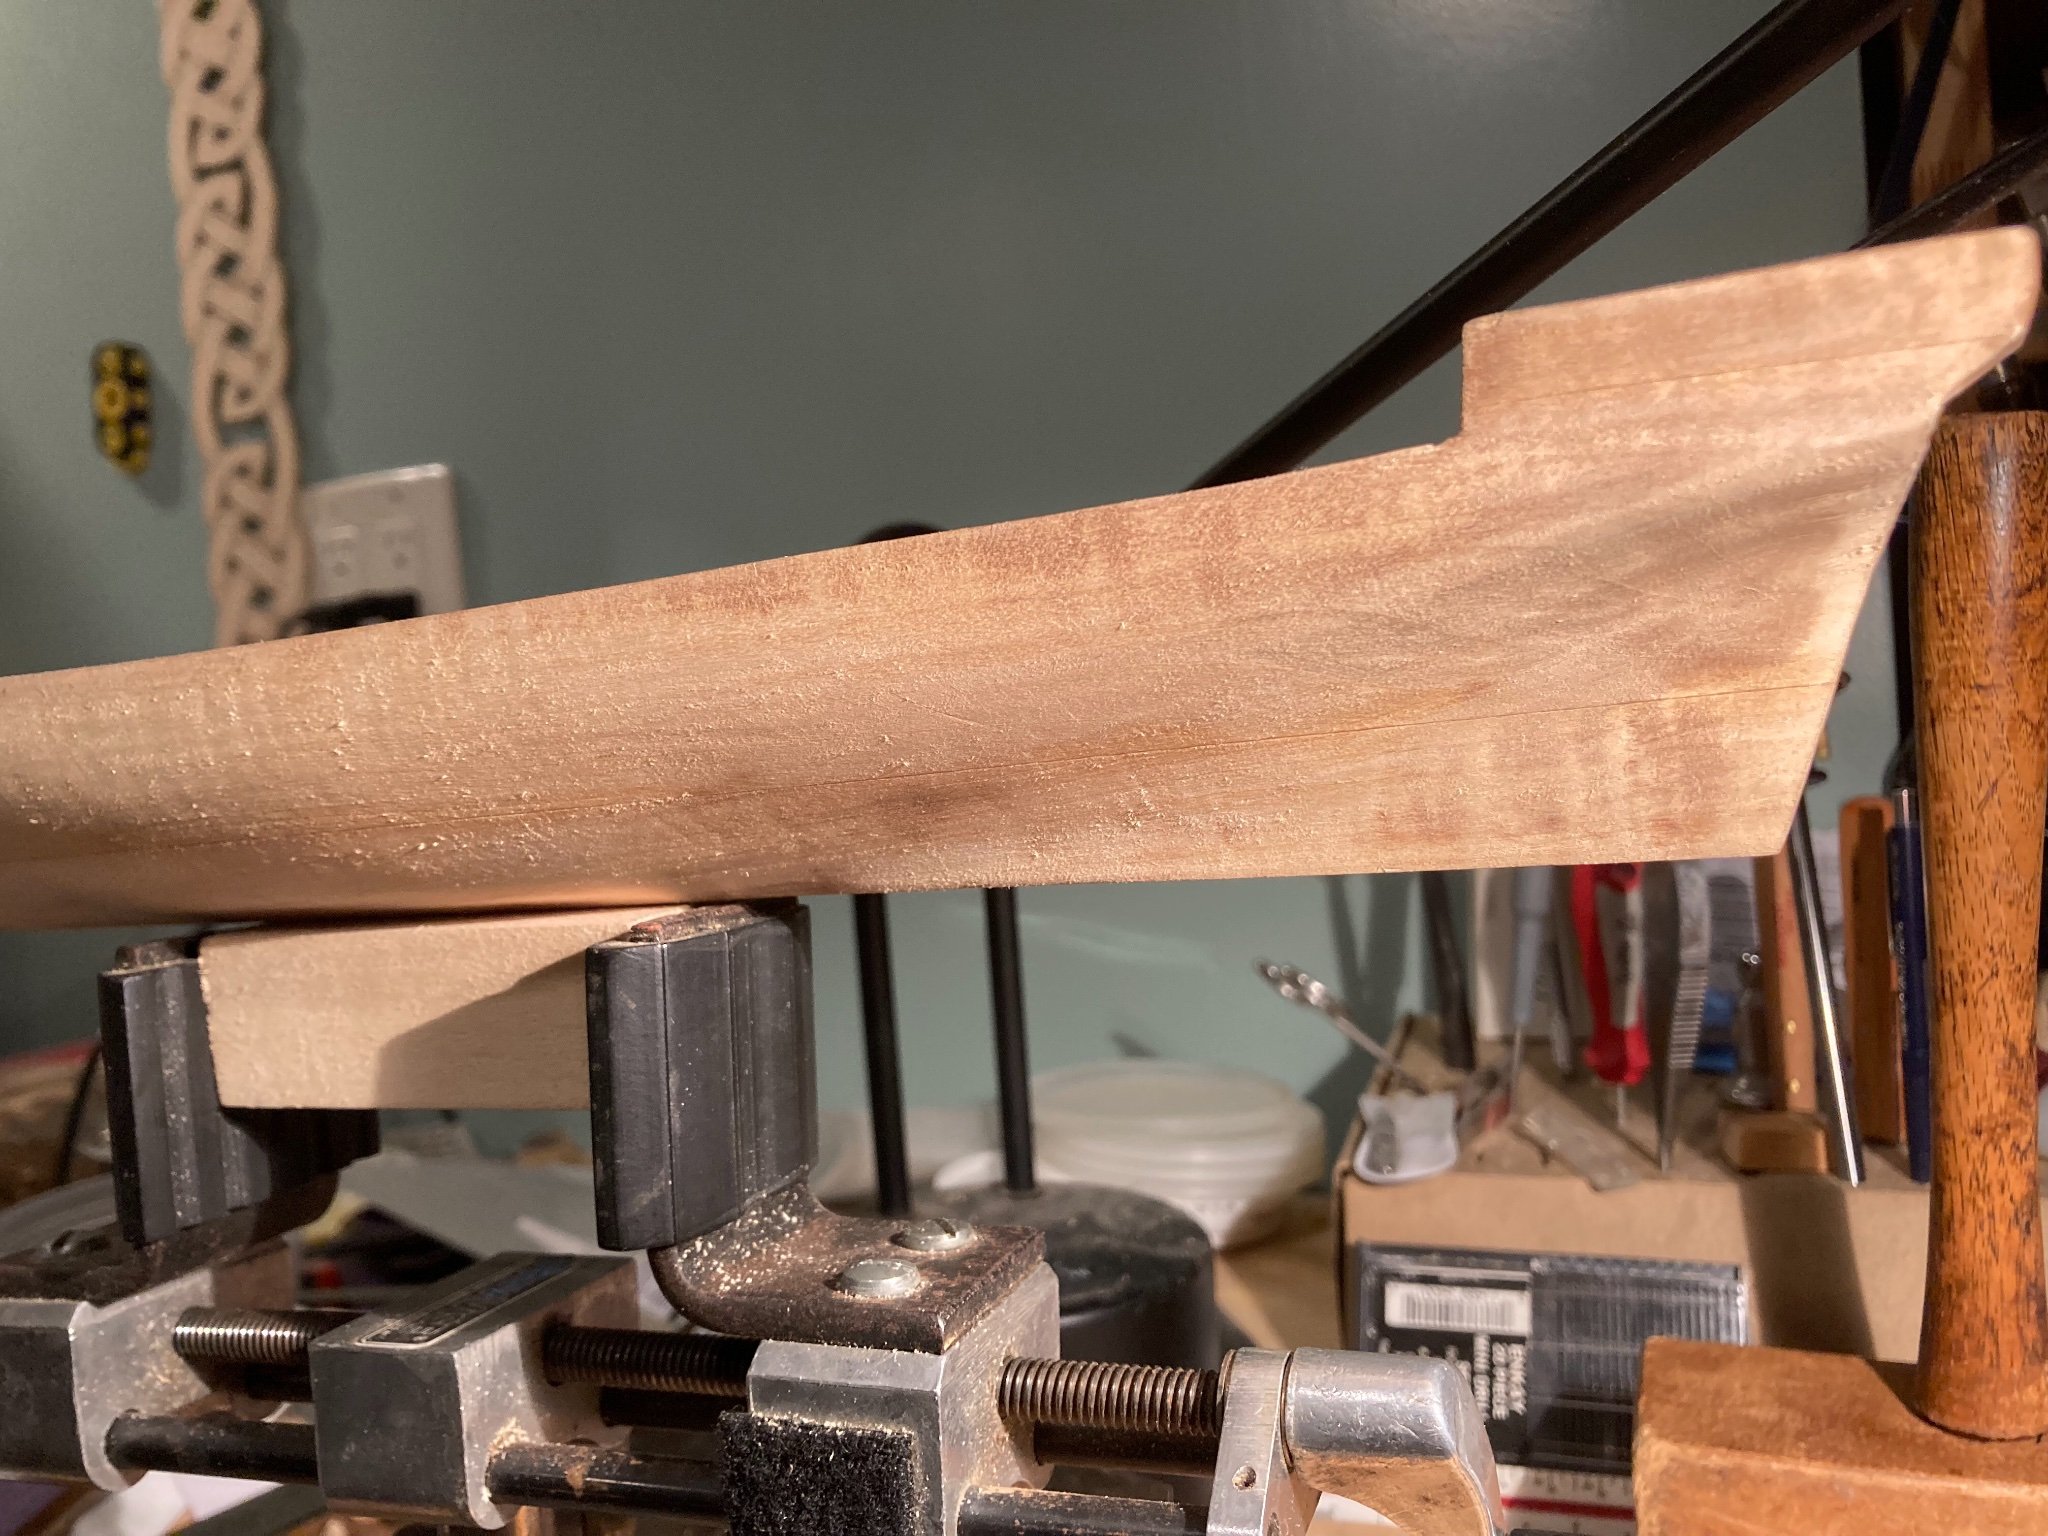
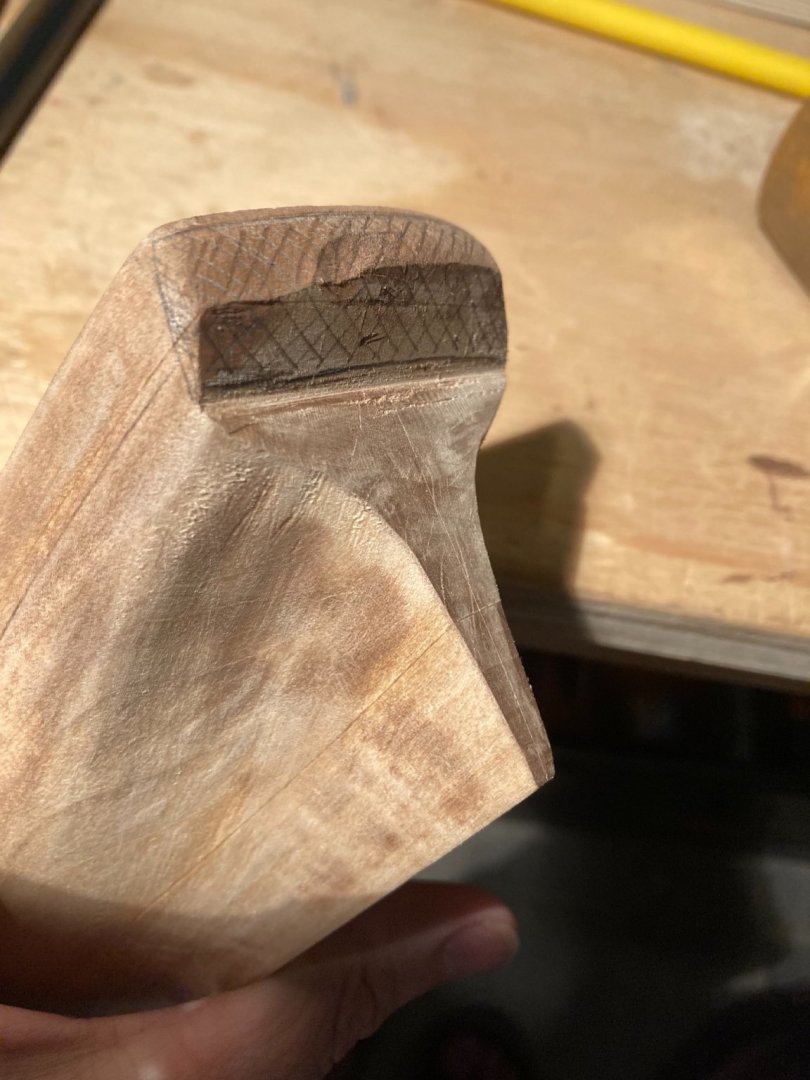
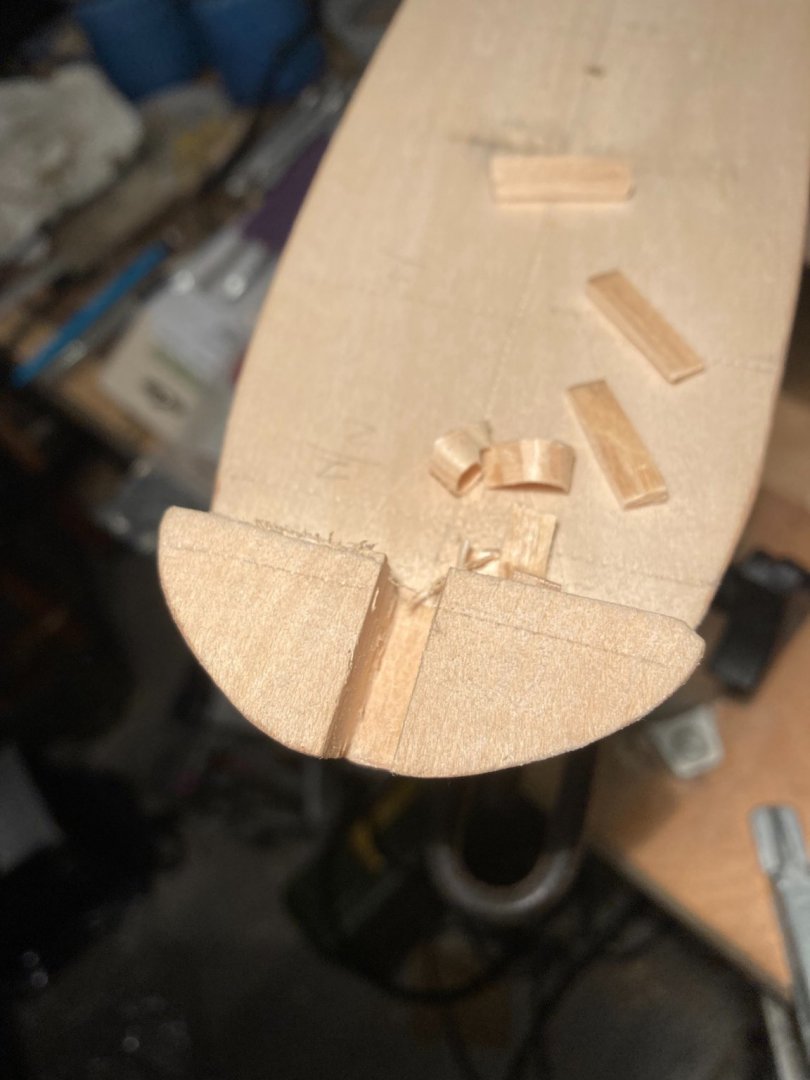
I added the holes where the keel will meet the hull. I also removed the center from the bow with two saw cuts and a


-
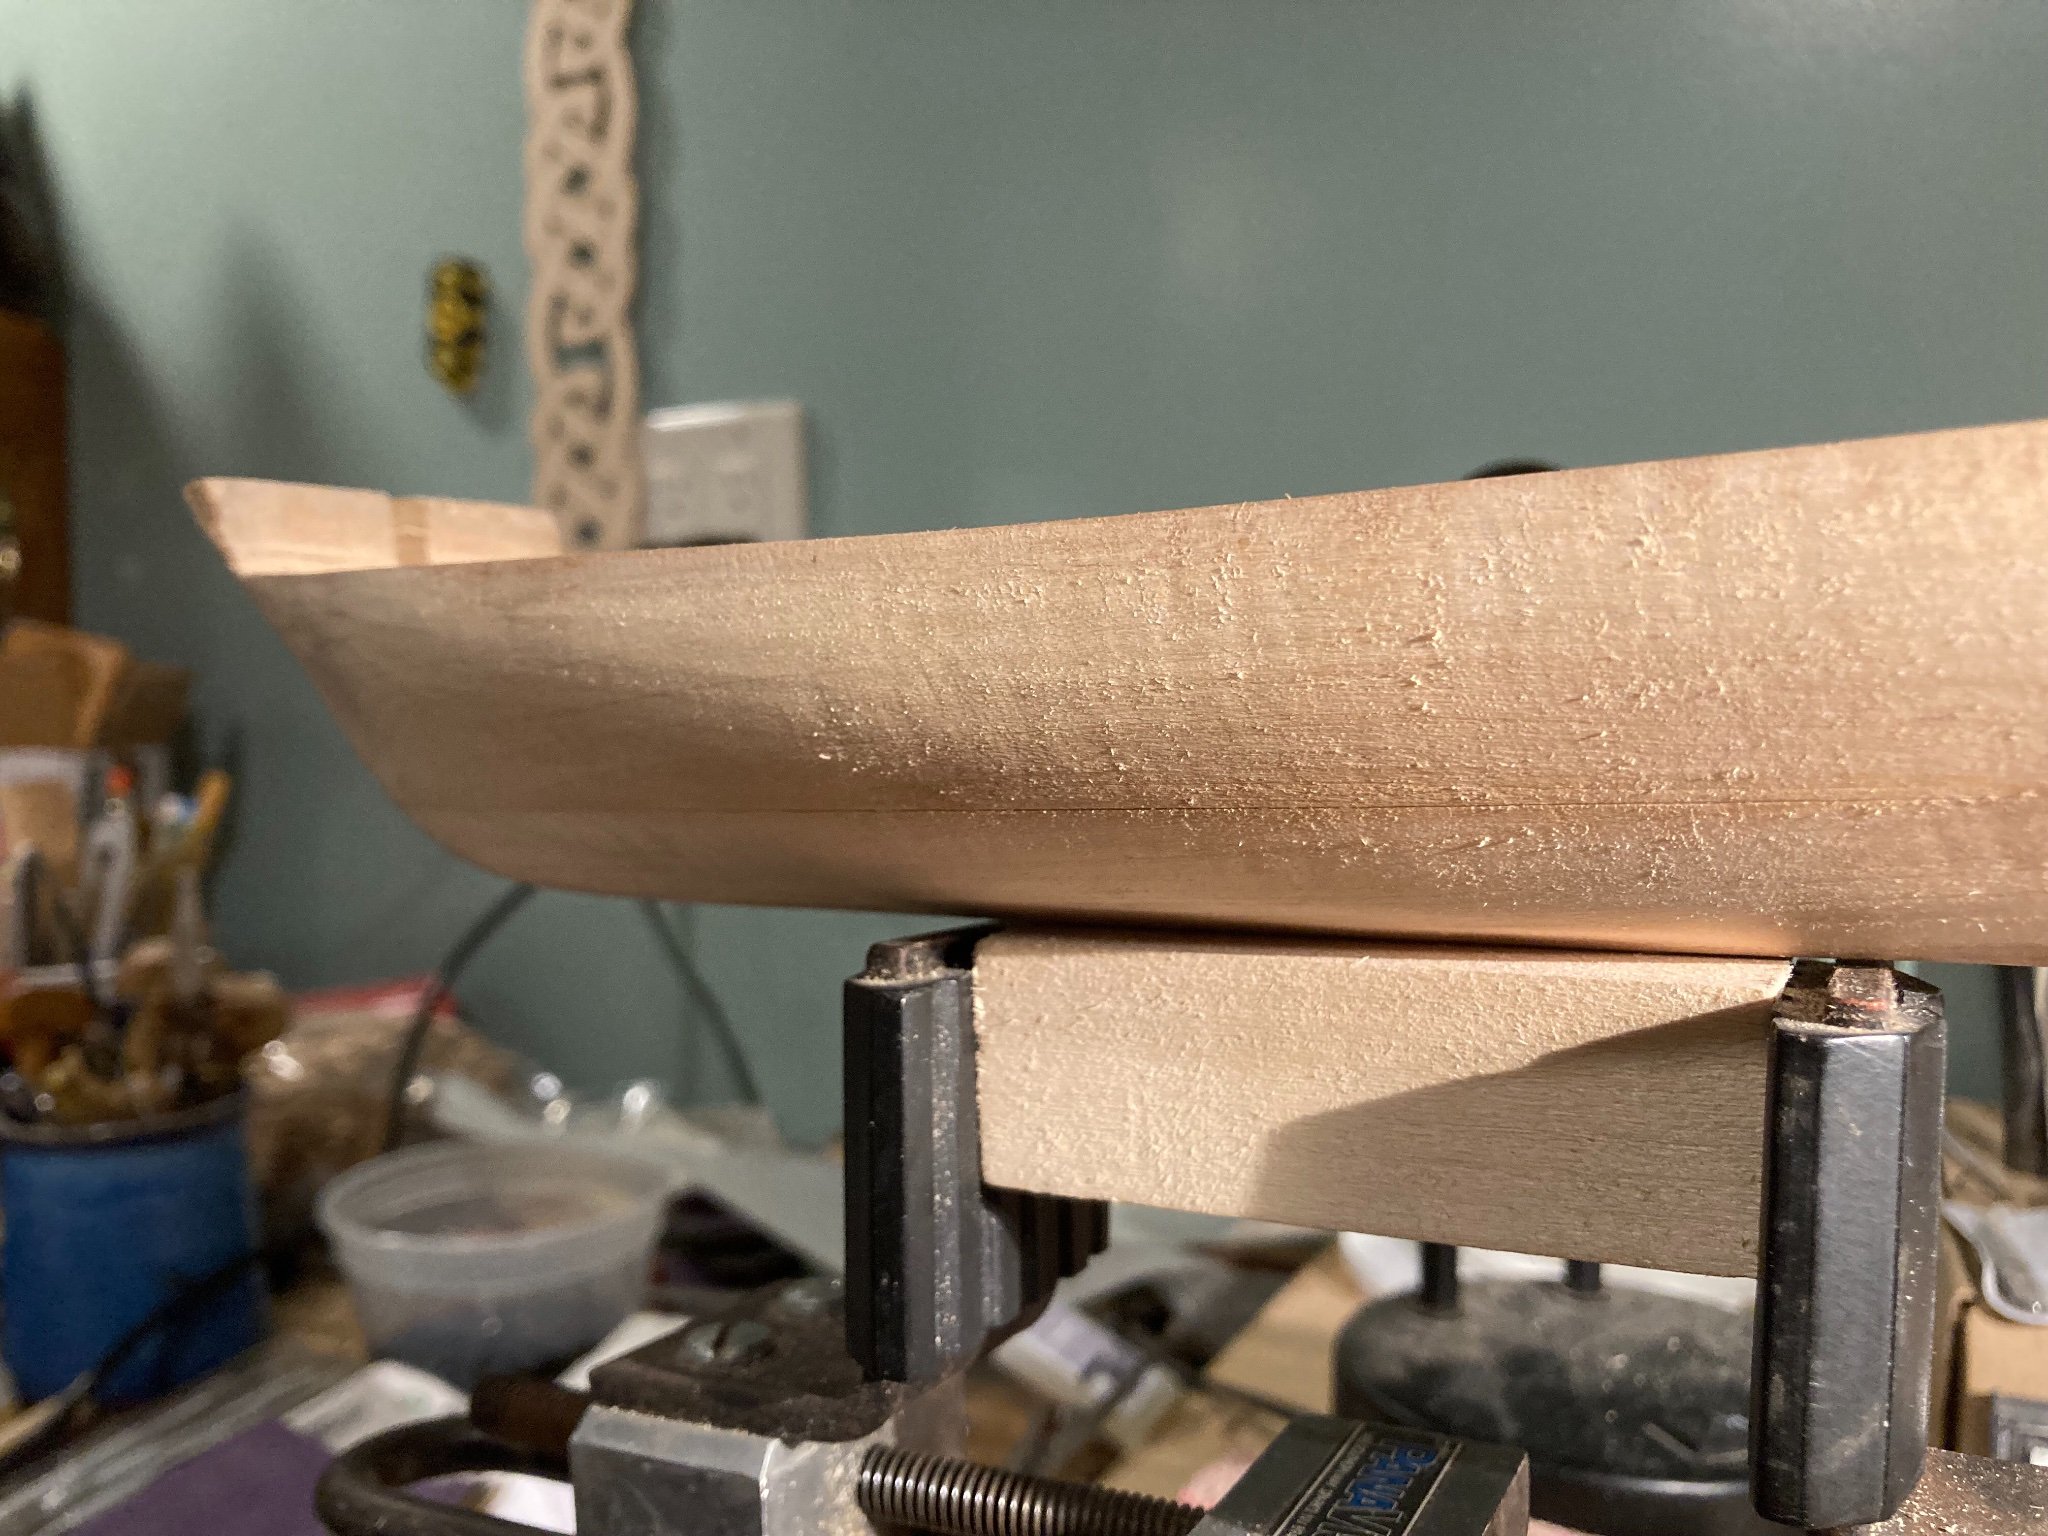
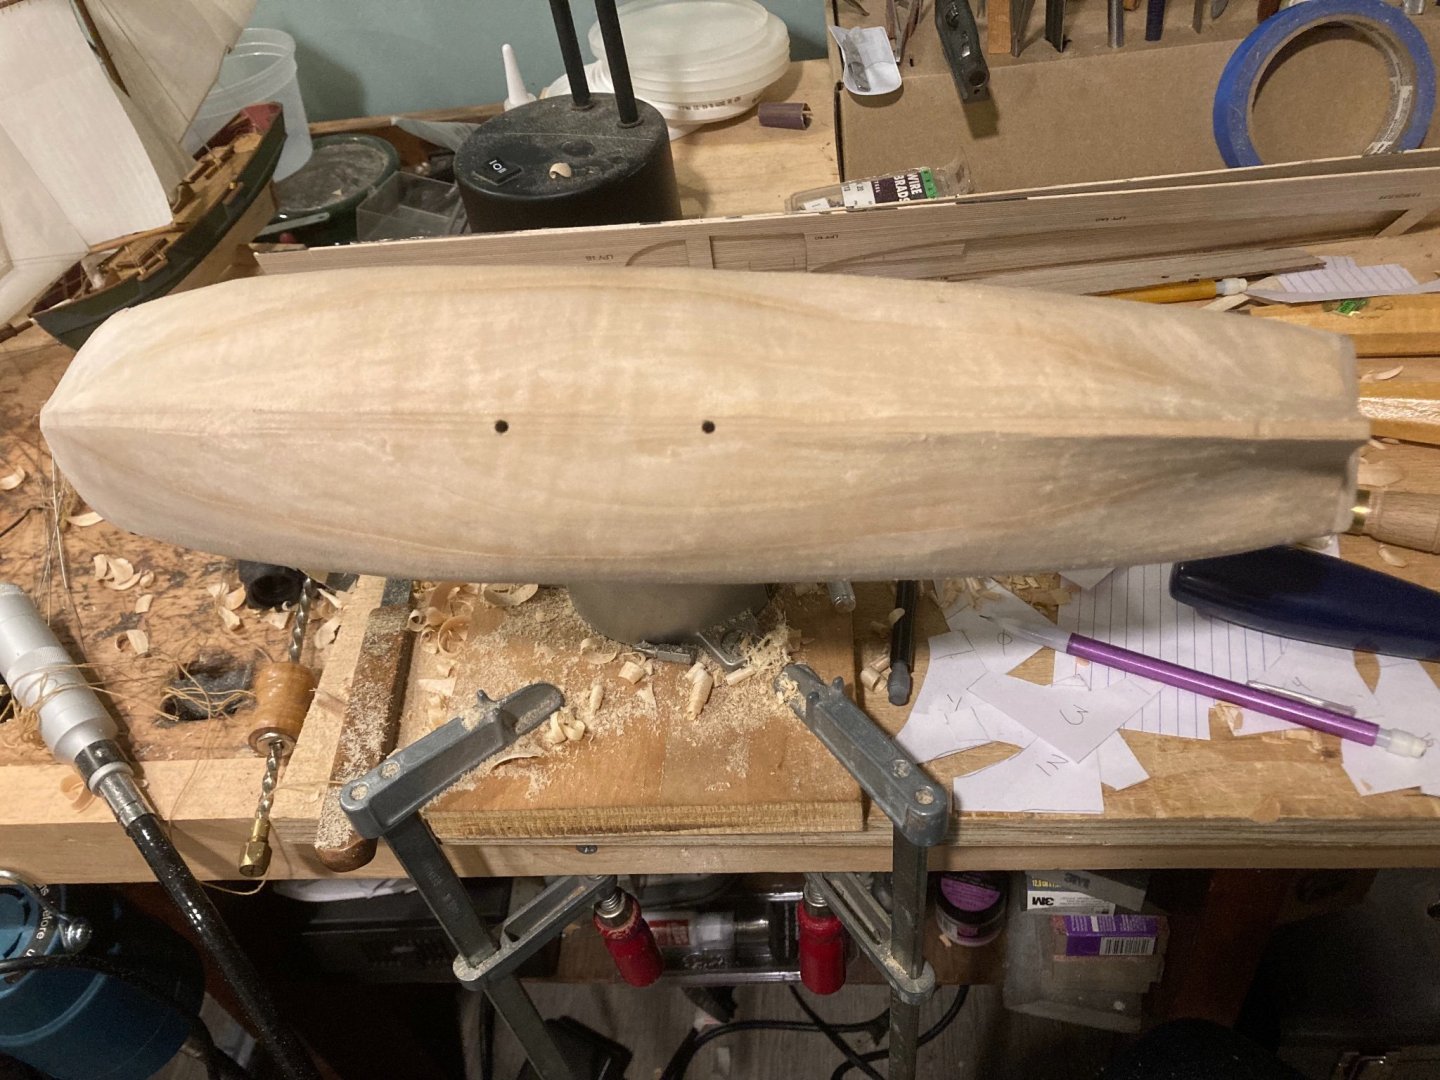
More work shaping the hull. I got bit faster at the roughing-out with a shallow gouge then mild cleaning with chisel and checking. Then scraping if the shape was correct. I put some time into dressing my scrapers as well.


-
Is this the thread you were thinking of, @wefalck? There is this from the article database as well: https://thenrg.org/resources/Documents/articles/ModelingSmallFigures.pdf And as mentioned, there are some wargaming figures that cover naval topics, for example (but in the wrong scale): https://newlinedesigns.co.uk/product-category/newline-designs-20mm-ranges/newline-designs-20mm-ranges-napoleonics/newline-designs-20mm-ranges-napoleonics-naval/ There is this as well: I found this to be a good introduction but it convinced me not to 'not go there': https://ospreypublishing.com/modelling-and-painting-figures-pb Generally there are not any easy options. This search may start your path: https://www.google.com/search?q=war++Modelling+and+Painting+Figures+book&sxsrf=AOaemvKuiIiy9FUfgVnOXk0r1ZI8RrHQlQ%3A1634745616377&ei=ED1wYcSJFo64ggeT5LGwAQ&ved=0ahUKEwjE0Yv-rdnzAhUOnOAKHRNyDBYQ4dUDCA4&uact=5&oq=war++Modelling+and+Painting+Figures+book&gs_lcp=Cgdnd3Mtd2l6EAM6CAghEBYQHRAeOgUIIRCgAToFCCEQqwI6BAghEApKBAhBGAFQzdUKWKOVC2DMmwtoAXAAeACAAYABiAHhB5IBBDExLjKYAQCgAQKgAQHAAQE&sclient=gws-wiz Also wargames and role-playing game have spawned a number of videos and sites regarding modding and creating figures or even 3D printing them: https://www.google.com/search?q=make+your+own+tabletop+miniatures&sxsrf=AOaemvLyQmCKpUAk9dmDU_qJ1qFY-OAa7A%3A1634745998370&ei=jj5wYaGAFrG-ggeFwbSQCA&oq=make+your+own+tabletop+miniatures&gs_lcp=Cgdnd3Mtd2l6EAEYADIFCAAQgAQ6BwgAEEcQsAM6BAgjECc6BggAEAcQHjoICAAQCBAHEB46BQgAEIYDOgYIABAIEB46BQgAEM0CSgQIQRgAUJHtAVi5_gFg8Y8CaAFwAngAgAHRAYgBmAaSAQU4LjAuMZgBAKABAcgBCMABAQ&sclient=gws-wiz Good luck!!
-
And a trace amount of progress was made regarding the shape of the hull.
-
I like to think this is true of everyone to some degree. The right tools are often expensive and often not here right now! And how often will you use that left-handed skewed 1/8" dogleg chisel any way? And until the advent of internet shopping, where would you find such an item? (And how long to find that item?!?) Most of my work in the past didn't need rasps, so sandpaper or scrapers were used since the folks I worked with and learned from use those (which was for furniture making or light decorative carving also for furniture). But I never worked with "hardcore" carving-in-the-round "artsy" folks, instrument makers or pattern makers, who have differing methods. I also worked with a few folks who would work only with chisels and gouges 99% of the time and never ever 'spoil' the lustre of the wood with abrasives, files or rasps. I deeply admire that approach to the work but I don't have those carving 'chops' (and probably never will!) [Pardon the pun ;)] My personal experiments have been few and far between (and more with metal) so I'm looking forward to trying 'em out. @Hubac's Historian, I would also guess that you have done a lot of unique one-off work, regarding your carving. If your day job was grinding out a hundred yards of hand carved egg and dart mouldings or the same eight carved flowers for picture frames everyday, you would know exactly what tools work best for each of those scenarios!!
-
A merely gentle nudge - you are so close!
-
I also snagged @gagliano1770's Auriou rasps as part of his downsizing. (I wish all the best in his new adventures!). The Auriou rasps have similar raves similar to @Hubac's Historian's suggestion regarding the Nicholson #50 rasp. Perhaps a bit more even, since the Auriou company has a bit of a mystical rep among those who hand-build furniture. Both have strong support and both (as far as I know) are still handmade! I have avoided buying either having never seen either 'in action' nor seen them at discount/used/etc. but now in my dotage I can spend my lunch money on such items occasionally. So I'm looking forward to a bit of a 'bake-off' among the rasps and hopefully my worldview will shift as well that have won these rasps such fans. Here is woodworking vid with Chris Schwartz showing why furniture folks might uses such tools. I believe most modellers won't need these tools except for solid hull models or bread, butter hull models and 1:1 scale projects. But I speak as an uninitiated acolyte.
-
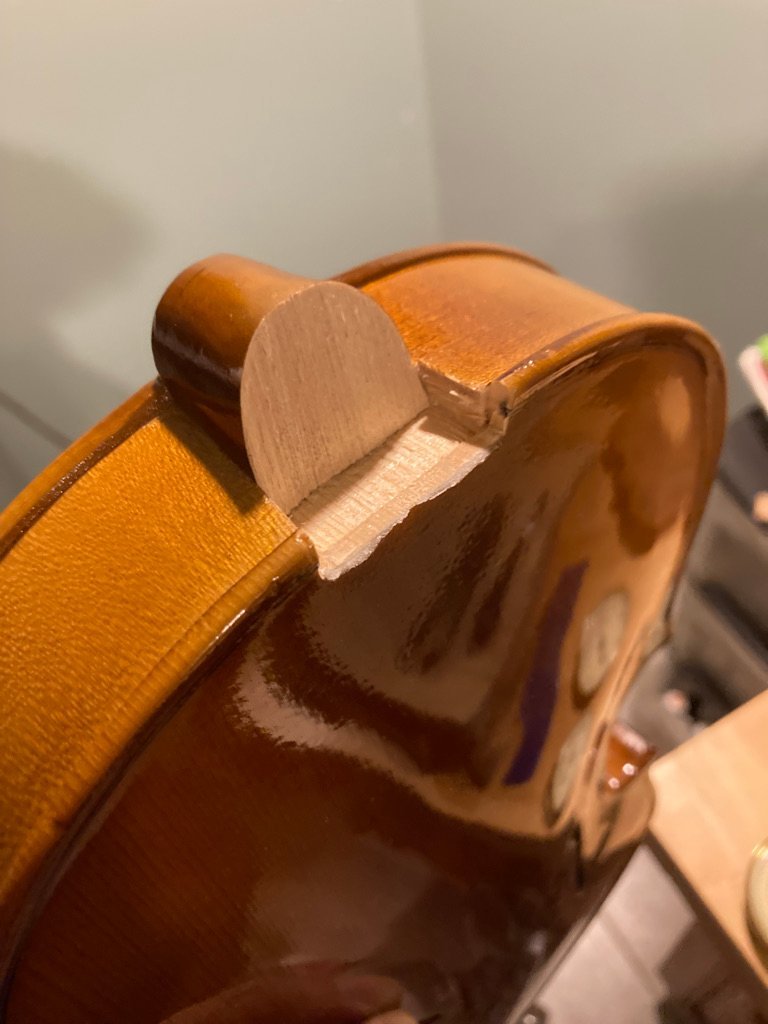
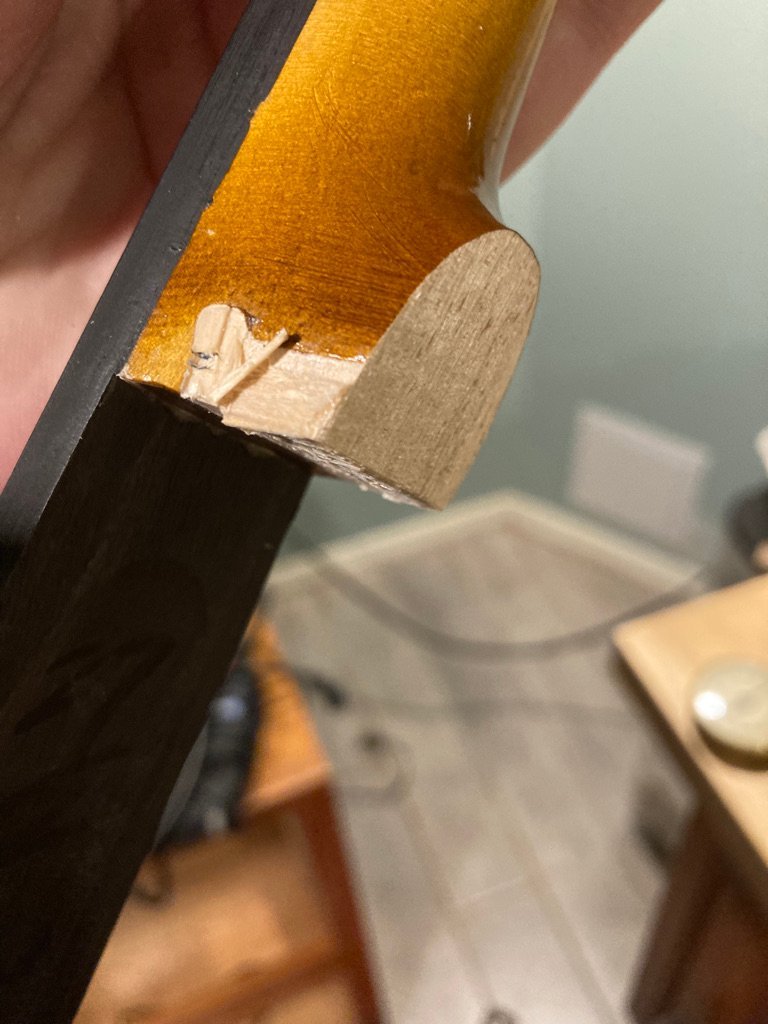
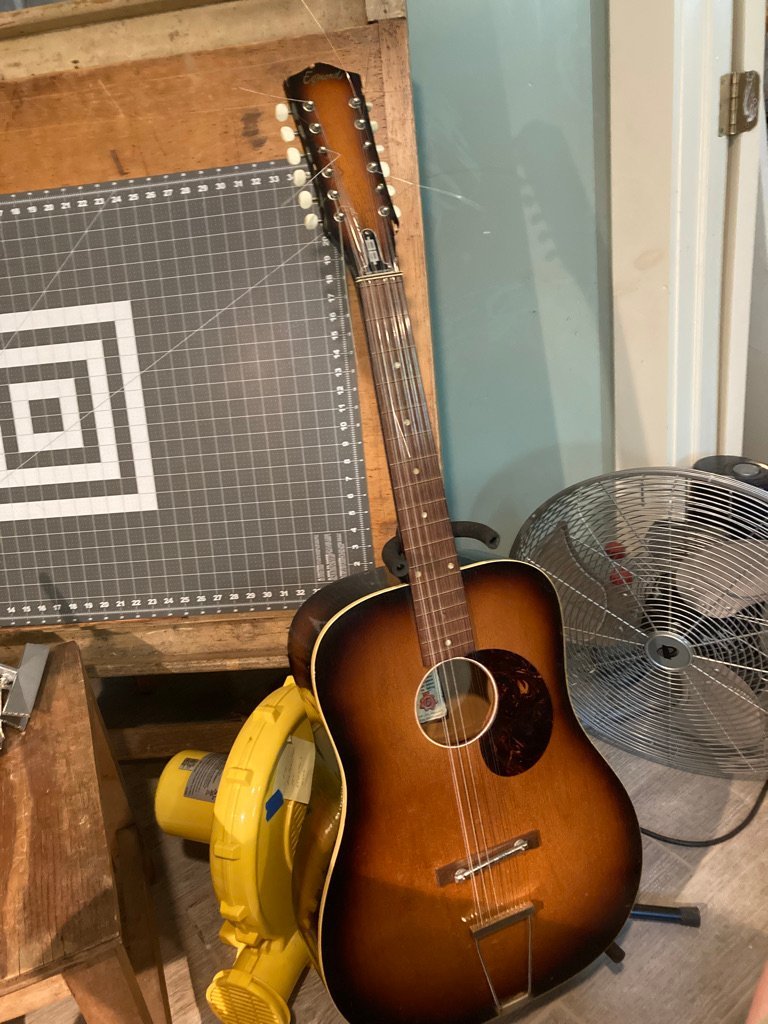
This weekend was spent finishing the cleaning of the rest of the basement, finding some replacement furniture and getting a couple of other projects off the bench: a neighbor's 12 string guitar (which spent an evening floating in a flooded basement and had some neck issues) and a busted violin (which also had some neck issues). The neighbor as pleased as punch!

-
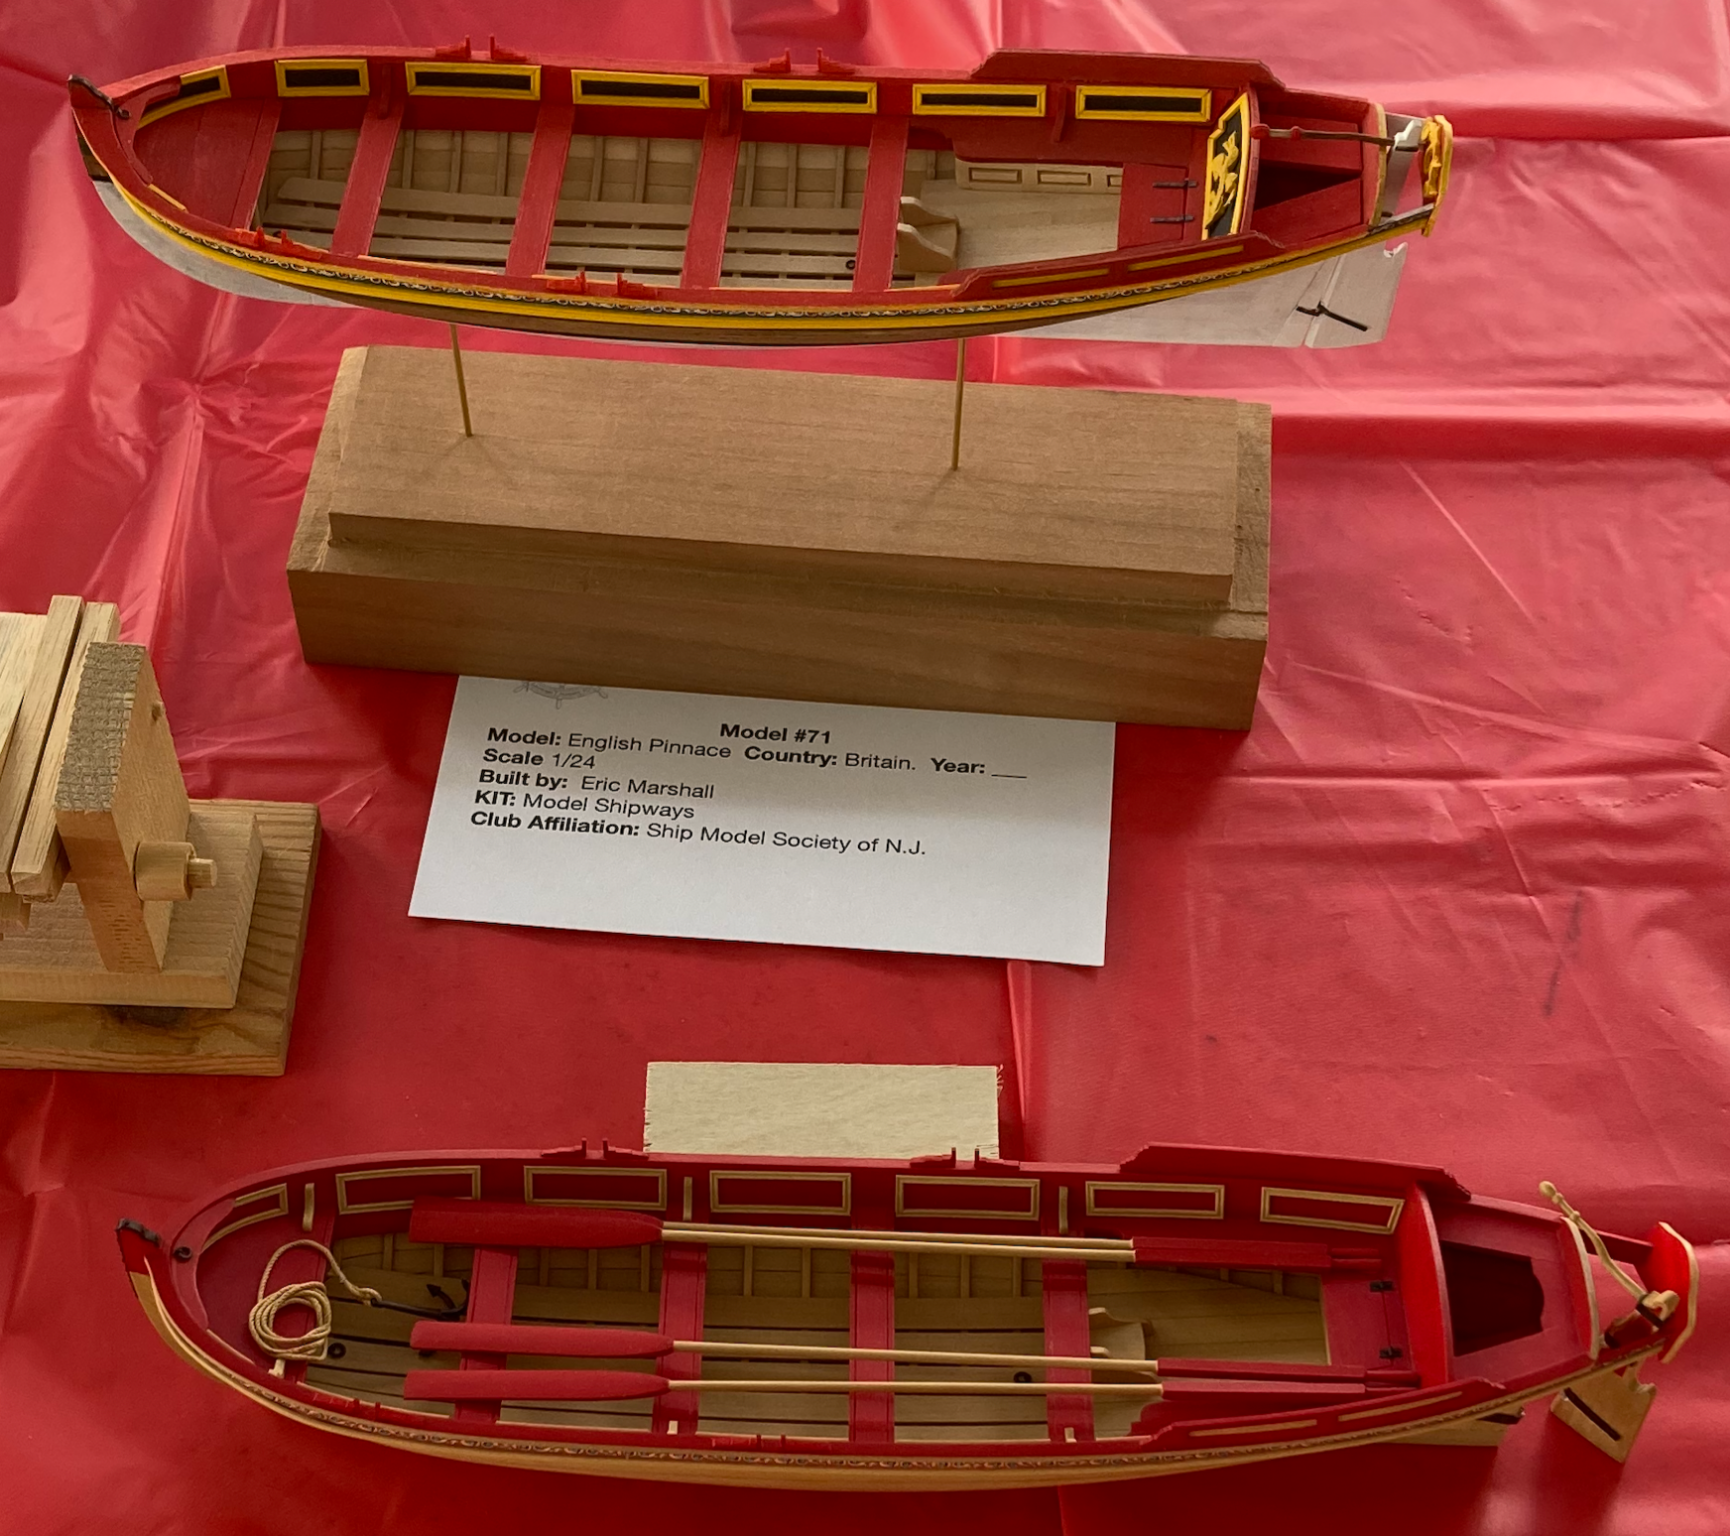
I meant to share this earlier; this is snapshot of my pinnacle with the one built by @Chuck himself! All were at the Model Con 2021 on the battleship, USS New Jersey in August. My thanks to Philadelphia Ship Model Society and the Battleship New Jersey Museum and Memorial for arranging and hosting the event.

- 123 replies
-
- 8
-

-
- Model Shipways
- Pinnace
- (and 1 more)
-
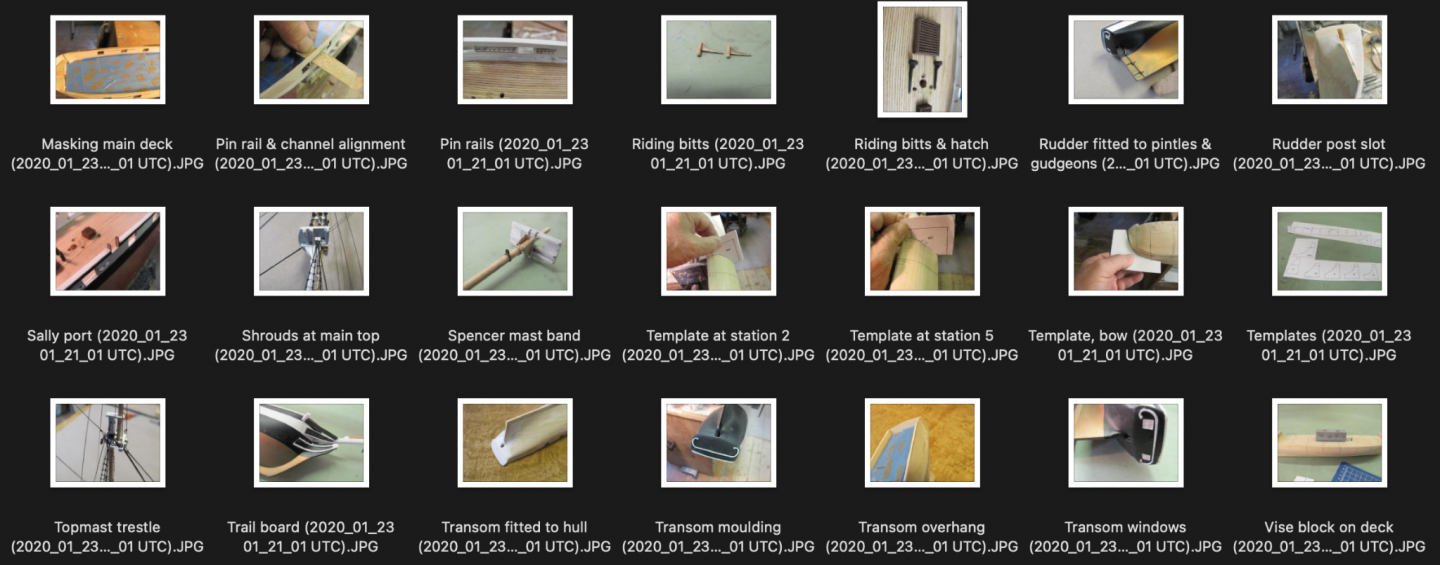
I received copper plates and the photo CD-Rom ordered from the fine folks at BlueJacket Shipcrafters. For the curious, the photo CD contains 84 images of in-process building and 32 of the finished model as jpegs and each image is named. For example: Main mast lower deadeyes or Masking main and quarter decks. All in the matching 'style' of the photos in the instructions and of higher resolution (better then the images in this blog). For example the image of the Main top components is about 2.1MB in space and 3648 x 2736 pixel dimensions. The files also include some embedded metadata like focal length and exposure if you are curious. The whole lot is about 242MB. I've attached a teaser of some of the thumbnails. The images are taking with an eye for rigging details or various assemblies and function almost as build log. I believe these will prove useful where I'm not understanding the printed English and later, when I get to the rigging.