-
Posts
3,271 -
Joined
-
Last visited
Content Type
Profiles
Forums
Gallery
Events
Everything posted by realworkingsailor
-
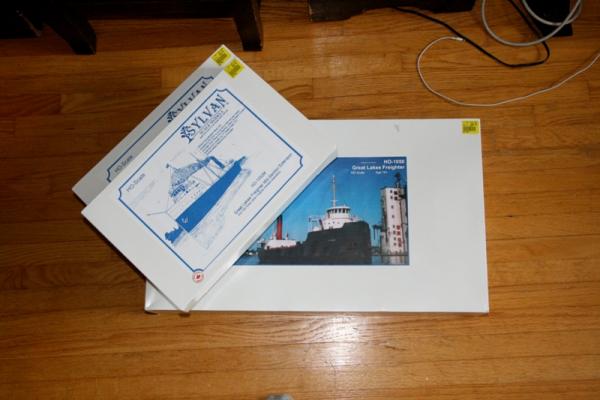
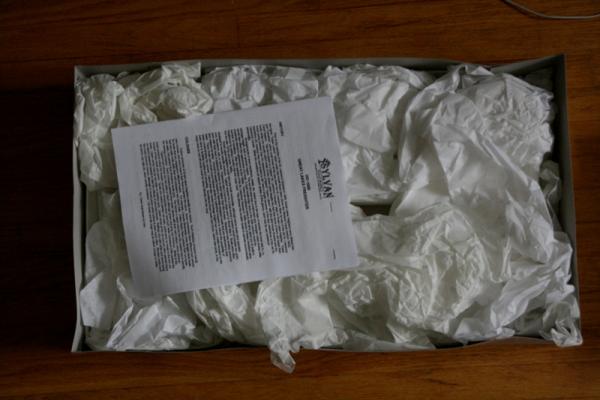
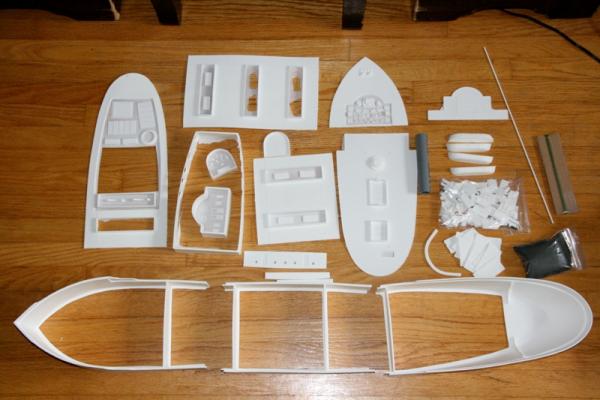
I had ordered the basic kit, as well as two midsection extensions back in September. They were all waiting for me upon my return home earlier this week. Whoever thought is was a good idea to package white resin parts in white tissue paper should be shot. Anyway, a quick check and it appears all parts are there. The kit itself is fairly simple, at least as far as number of parts and basic assembly. The real challenge in dealing with resin is how the clean up, preparation and detailing goes. Many parts come warped out of shape. This is fairly easy to fix with a quick dip in hot water. Most parts don't fit together with the laser cut precision of wood kits (or other plastic kits for that matter). There will be much filing, filling, sanding, checking and re-checking of parts Andy
- 382 replies
-
- stadacona
- sylvan scale models
-
(and 1 more)
Tagged with:
-
Well... I think it's safe to say the storm has blown over, and the skies are clearing. In that light, I'll start a new log for something completely different. Sylvan scale models are known more to the model railroad community, producing resin kits of vehicles, structures and rolling stock. They also have a small line of marine models. Mostly waterline models for layout display. For those of you who are not aware, I am a member of the Railview Model Railway Club, operating in Marham ON. An older club (of similar name) recently disbanded, and a few of the old members, and a ton of new members have taken over the lease of 3 office units in Markham (3400 square feet). This new club is very busy renovating the space and will be constructing a new layout shortly. Getting closer to the topic at hand, part of the layout will depict operations at Hamilton, ON. including the large Stelco steel mill. I've been there many times in the past on ships, unloading iron ore, and I thought is would be a great idea, as a scenic element, to depict the same. Starting with the basic Sylvan "Canaller" model I intend to extend the hull and scratch build a self unloading system. The intent is to make a model that will look superficially similar to a vessel operated by Canada Steamship Lines from the late 1920s to the mid 1960s, and Later by Reoch Transport until around 1984. Trying to replicate the full sized vessel would be an excercise in madness, and would be too large to fit in the space alloted on the club layout. Doing a quick check, the dimensions of the model I will be producing, I will end up with a model that will be roughly 70% the size of the real ship (in scale). As such the model will be over 4.5 feet long as it is. All I can say is thank G** I don't have to plank it. So without further a-do, the start of my next project.
- 382 replies
-
- stadacona
- sylvan scale models
-
(and 1 more)
Tagged with:
-
I don't think is was as much the weight of the gun, but rather the recoil, straight down. I can't imagine how those small ships would shudder every time one of those things fired. A very interesting build. Andy
- 421 replies
-
- granado
- bomb ketch
-
(and 2 more)
Tagged with:
-
Easy enough to do, and you really don't need too many for the task either. Something I may consider when my time comes...
- 2,191 replies
-
- confederacy
- Model Shipways
-
(and 1 more)
Tagged with:
-
Looks really nice. I wonder if if would be worth trying what Chuck did on his Winchelsea build... (You remember?) with the planks that widen under the gunport sills? Just a thought... Andy
- 2,191 replies
-
- confederacy
- Model Shipways
-
(and 1 more)
Tagged with:
-
I'm with everyone else, I'm really enjoying watching your build take shape. Getting a lot from the historical information you're adding in as well. Fascinating. Andy
- 3,618 replies
-
- young america
- clipper
-
(and 1 more)
Tagged with:
-
Looks great, Randy! And you're right about the full sails making her look more alive!. It may be too late, but normally the spritsail would be more vertical, rather than being trussed up like a hammock (of course if that was the intention, I'm sure the idlers and loafers on your ship are thanking you profusely ) Andy
- 384 replies
-
- san francisco ii
- artesania latina
-
(and 1 more)
Tagged with:
-
Nice job so far. Just a thought, you might want to hold off on attaching the stern post until after you're completed the planking. It will make it easier to fit overlong planks and trim them neatly afterwards, rather then trying to wedge them in. Andy
- 304 replies
-
- niagra
- model shipways
-
(and 1 more)
Tagged with:
-
Thanks, Lawrence. A couple more days to go, with any luck..... Andy
- 1,148 replies
-
That looks really good. I find sometimes it helps to mock up the collars with a bit of cut off light coloured line and a black fine tipped marker. For my double shroud collar, I managed it in one attempt by measuring like that first. To serve the eye, first start by serving only about 8mm (for a 4 mm eye). Tie off the serving and form the eye, making the throat of the eye where the serving stops. Measure off the length of your collar and serve another 8mm. Make your second eye. Then serve the line between the eyes. I find it helps also to start your serving by tying to the short side of the eye and wrapping the throat. This will, not only, provide a smoother transition, but it will firmly lock the pseudo eye splice in place. Andy
- 800 replies
-
- snake
- caldercraft
-
(and 1 more)
Tagged with:
-
As has been mentioned, the lashing goes just between the eyes. You're probably going to need a needle and a good set of tweezers. I also find for jobs like that a dental pick is invaluable as a sort of hobby sized marlin spike (with a 1:1 handle). Andy
- 800 replies
-
- snake
- caldercraft
-
(and 1 more)
Tagged with:
-
The collars should be rigged as drawing "A" I found with my build, it really came down to a space issue whether or not I did one collar for each lashing or a single collar for both (which is the option I went with). Andy
- 800 replies
-
- snake
- caldercraft
-
(and 1 more)
Tagged with:
-
Dovetails? You're kidding right? You really got those out of some old Mennonite made kitchen drawer..... tell the truth now... :P All kidding aside, a very nice touch Andy
- 2,215 replies
-
You're Welcome Paul. And thank you Gerty and Adam Andy
- 1,148 replies
-
You're welcome, Paul I almost forgot about the canons. I used the kit supplied ones, which are OK. But if you want to replace them, I'd go with Chuck's. Get his carriages as well, they will better match the guns than the Amati ones. Andy
- 1,148 replies
-
Well.. the Mataafa was wrecked in 1905. But you are correct, the mystery boat is the Daniel J Morrell. Wrecked off Harbor Beach, Michigan in November 1966. Only one Survivor, Denis Hale (he's still alive BTW) http://en.wikipedia.org/wiki/SS_Daniel_J._Morrell
-
Not quite that far back.
-
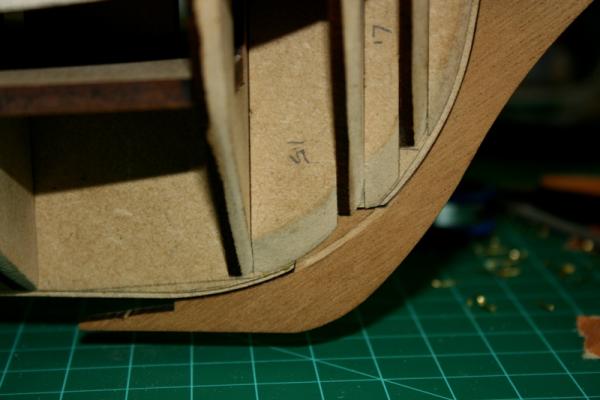
Hi Paul, For tapering at the stern, I marked out the bearding line and used a small plane for the largest area, working down to a file for the smaller sections. If I had to do it again, I would go even a bit further with my tapering than I did. In the end I had to sand down a good chunk of the first planking to get the second planking to fit nice against the keel. Some builders go as far as to avoid putting any first planking over that area of the bulkhead former (see Spyglass' build log). Whichever method you choose is up to you, both seem to work well. I cut the rabbet using an ordinary craft knife and steel ruler. At the bow and stern, be sure to taper the inside edge of the rabbet to accept planks entering on an angle. You can pretty much follow the bottom edge of the bulkheads for the depth of the rabbet. it's also easies to do all this before you glue on all the bulkheads. Rabbeting at the bow is a bit more of a challenge, but not impossible. Just take your time (and watch your fingers). For the small part of the walnut stem, I used a small cordless Dremel and a cutoff wheel. Careful light passes and you should be ok. One thing I did find, I needed to add a shim strip along the rabbet as the keel pieces did not sit tight in the scarf joint with the stem. This helped increase the depth a touch, and when it came time, the first planking snapped right in and held quite securely. Hope that helps, at least a little bit. Good luck with your upcoming build. Andy
- 1,148 replies
About us
Modelshipworld - Advancing Ship Modeling through Research
SSL Secured
Your security is important for us so this Website is SSL-Secured
NRG Mailing Address
Nautical Research Guild
237 South Lincoln Street
Westmont IL, 60559-1917
Model Ship World ® and the MSW logo are Registered Trademarks, and belong to the Nautical Research Guild (United States Patent and Trademark Office: No. 6,929,264 & No. 6,929,274, registered Dec. 20, 2022)
Helpful Links
About the NRG
If you enjoy building ship models that are historically accurate as well as beautiful, then The Nautical Research Guild (NRG) is just right for you.
The Guild is a non-profit educational organization whose mission is to “Advance Ship Modeling Through Research”. We provide support to our members in their efforts to raise the quality of their model ships.
The Nautical Research Guild has published our world-renowned quarterly magazine, The Nautical Research Journal, since 1955. The pages of the Journal are full of articles by accomplished ship modelers who show you how they create those exquisite details on their models, and by maritime historians who show you the correct details to build. The Journal is available in both print and digital editions. Go to the NRG web site (www.thenrg.org) to download a complimentary digital copy of the Journal. The NRG also publishes plan sets, books and compilations of back issues of the Journal and the former Ships in Scale and Model Ship Builder magazines.


