


mikegr
-
Posts
579 -
Joined
-
Last visited
Content Type
Profiles
Forums
Gallery
Events
Posts posted by mikegr
-
-
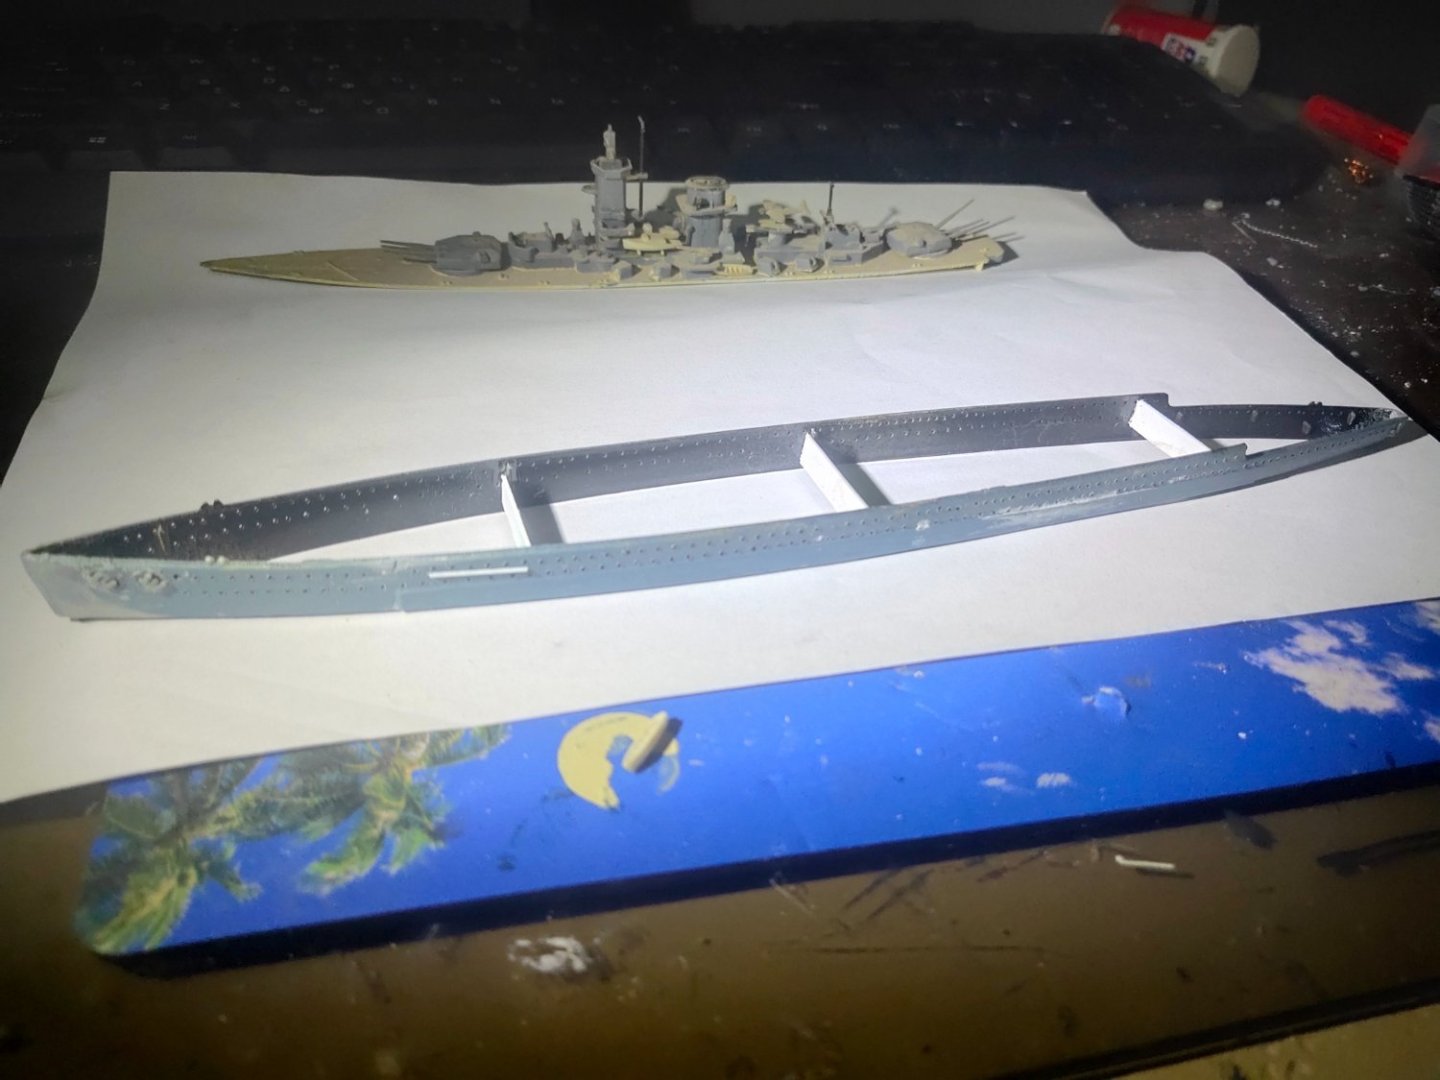
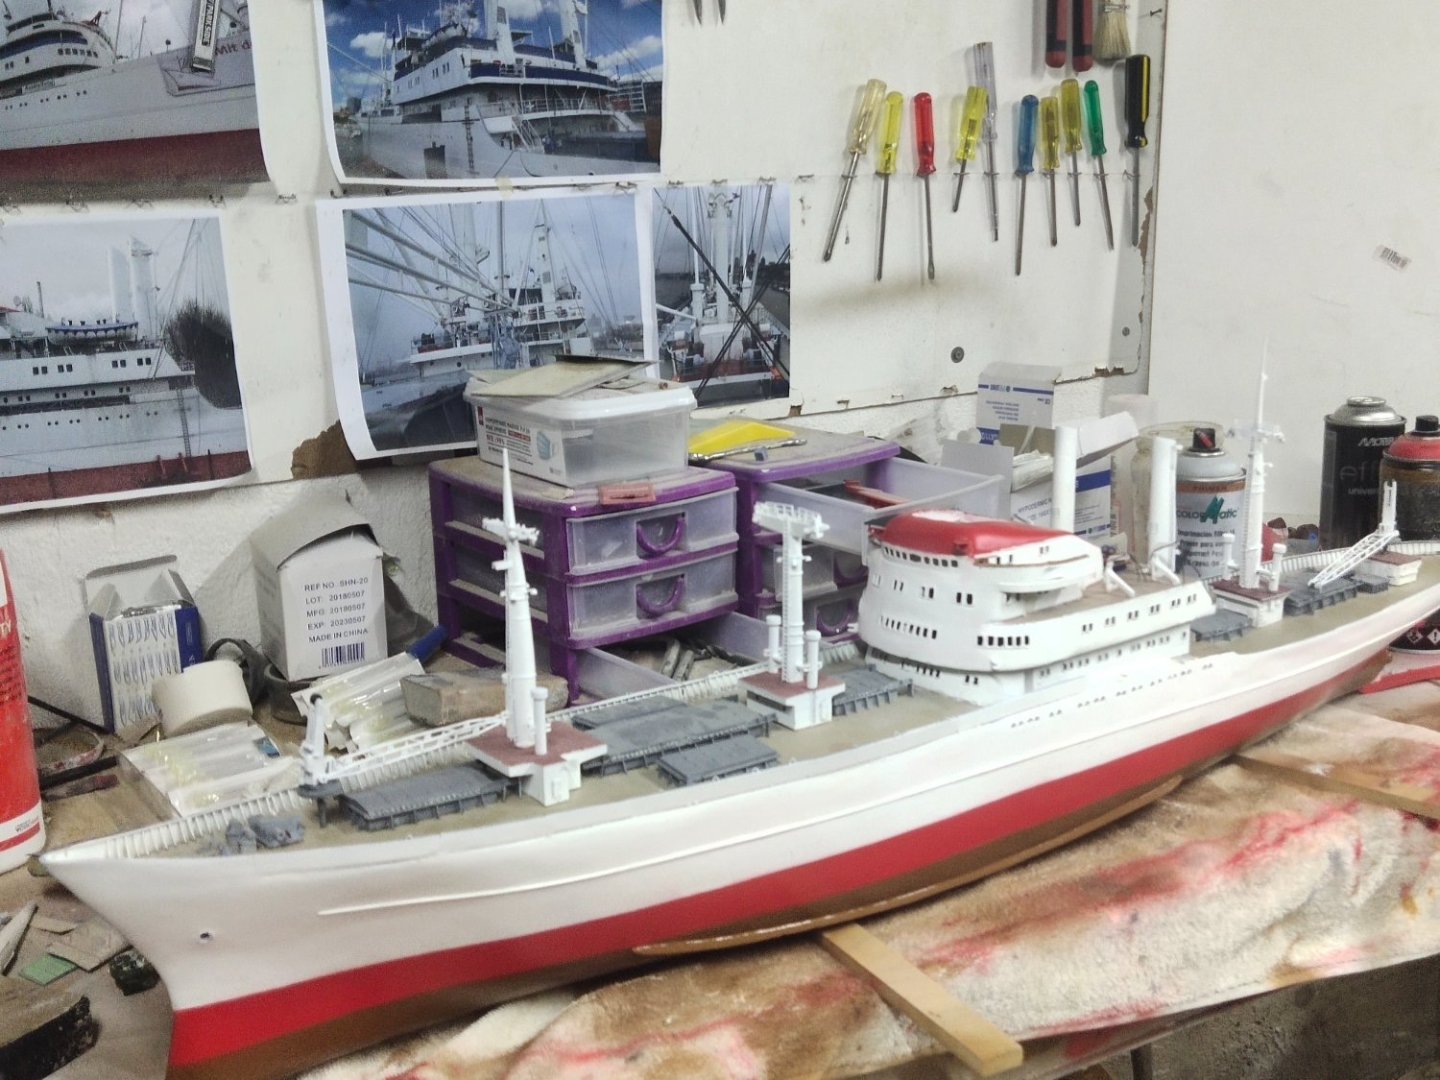
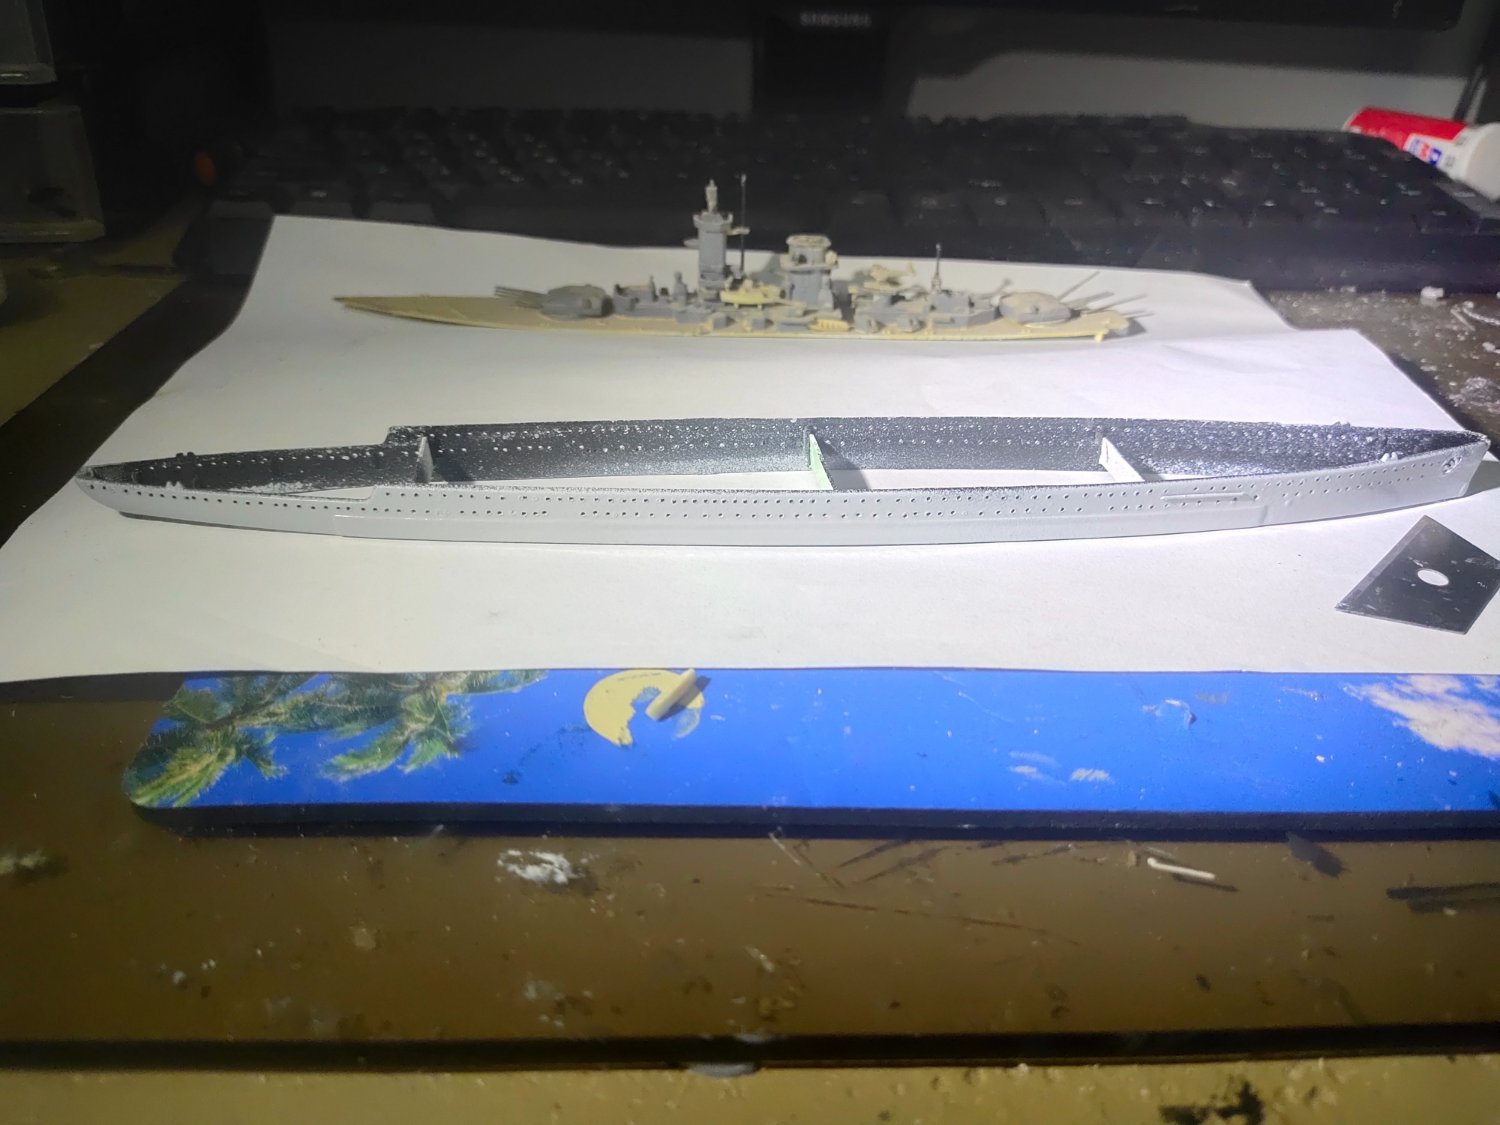
First job was to drill the portholes. Though they were premarked it was a tricky process and few were misaligned so i filled them with putty instead.
To make the tiny holes more visible I sprayed the inside with black, thus creating a contrast. New anchors installed and the embled in front of them was deleted as it will be replaced by decal. Finally as I don't have a bottom, support frames added to increase the gluing strength. These plastics are quite old they are as flexible as potato chips. Finishing with grey color

- Old Collingwood, mtaylor, yvesvidal and 4 others
-
 7
7
-
Next. Admiral Graf Spee from Matchbox. I'm not fan of German ships but I got a PE set for a dollar so I decided to give it a shot

-
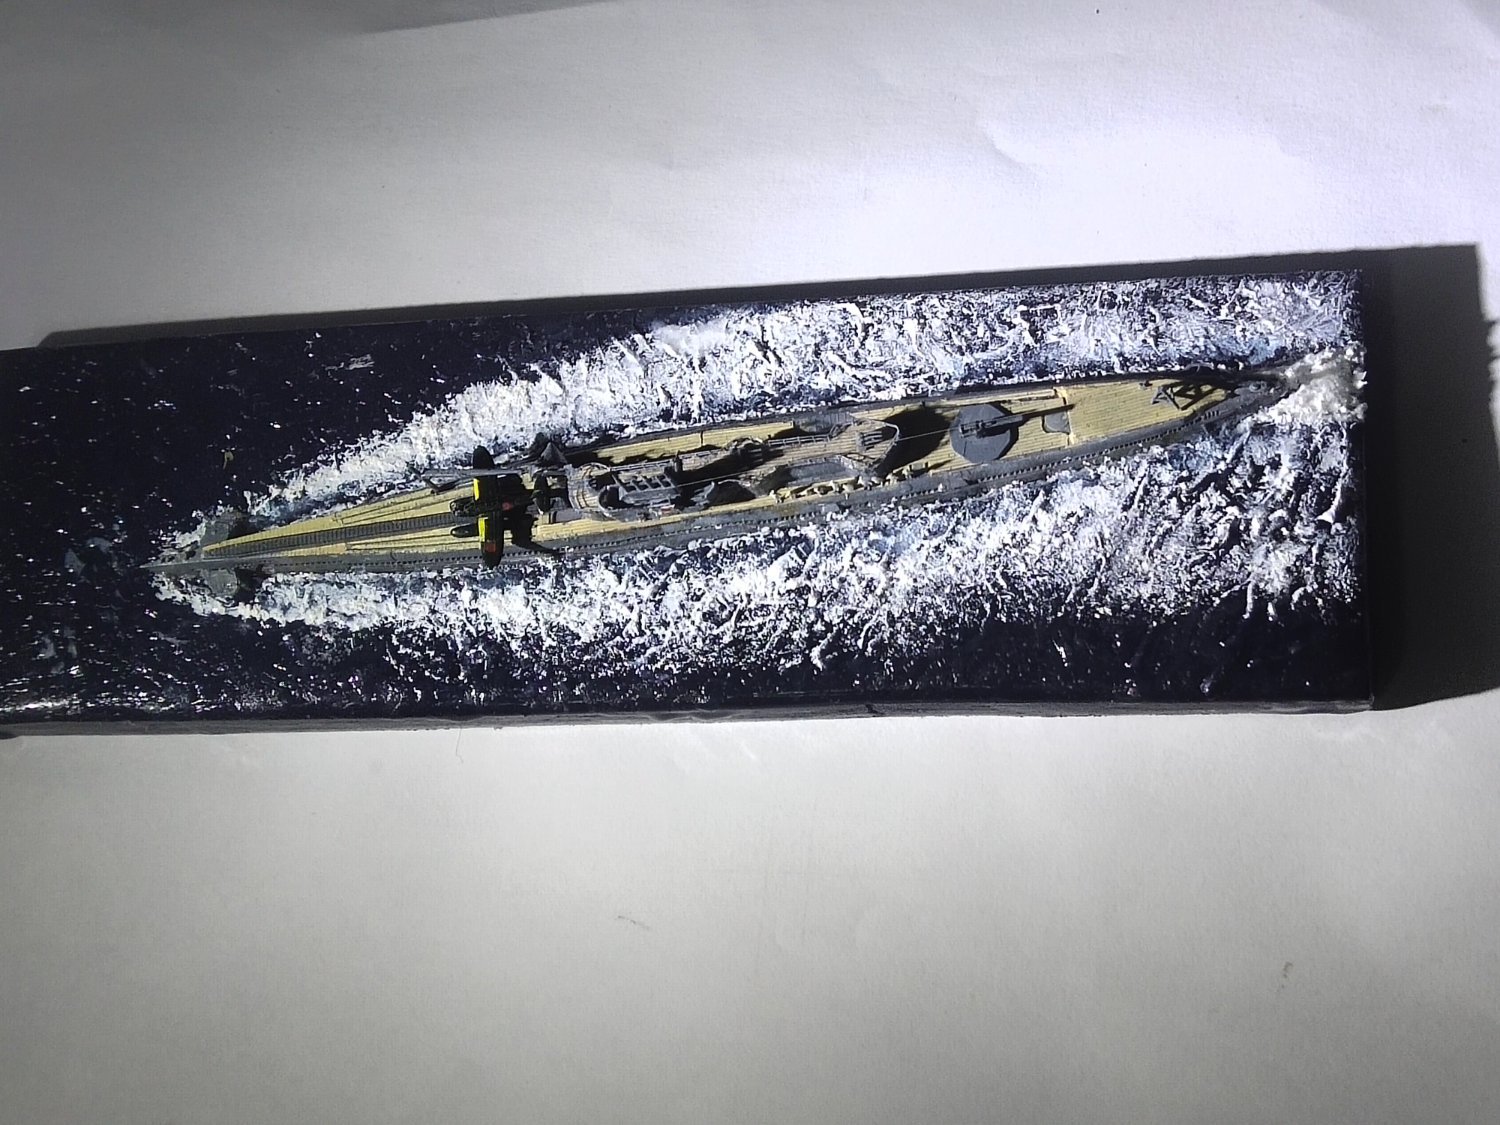
I applied the water splash effect gel and have it 48 hours to dry. Not all of it became transparent, maybe for the thicker areas more time is needed, the weather is humid also.
Next I formed the waves by adding snow paste like previous time. A bit of glitter on the white foamy areas to give a bit shiny effect and its over


-
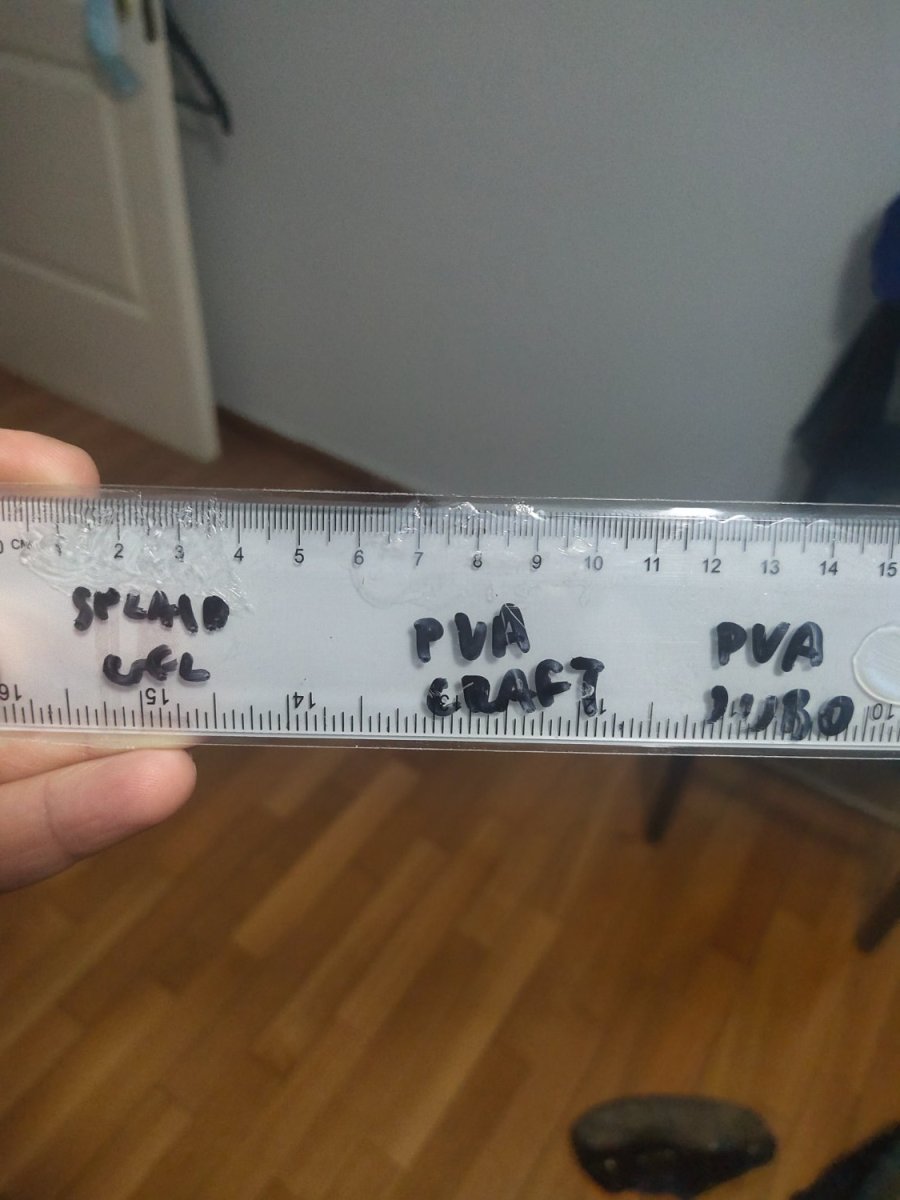
What's the point of using crystal clear resin if the material above its not transparent enough? I did some test with materials on hand. Over a nylon ruler case I layered the materials and tried to see how the clear the numbers look underneath
Splash effect on the left, PVA and cheap PVA on the right

Water splash and cheap PVA gave the clearest effect. Heavy gel on the other wasn't that clear.

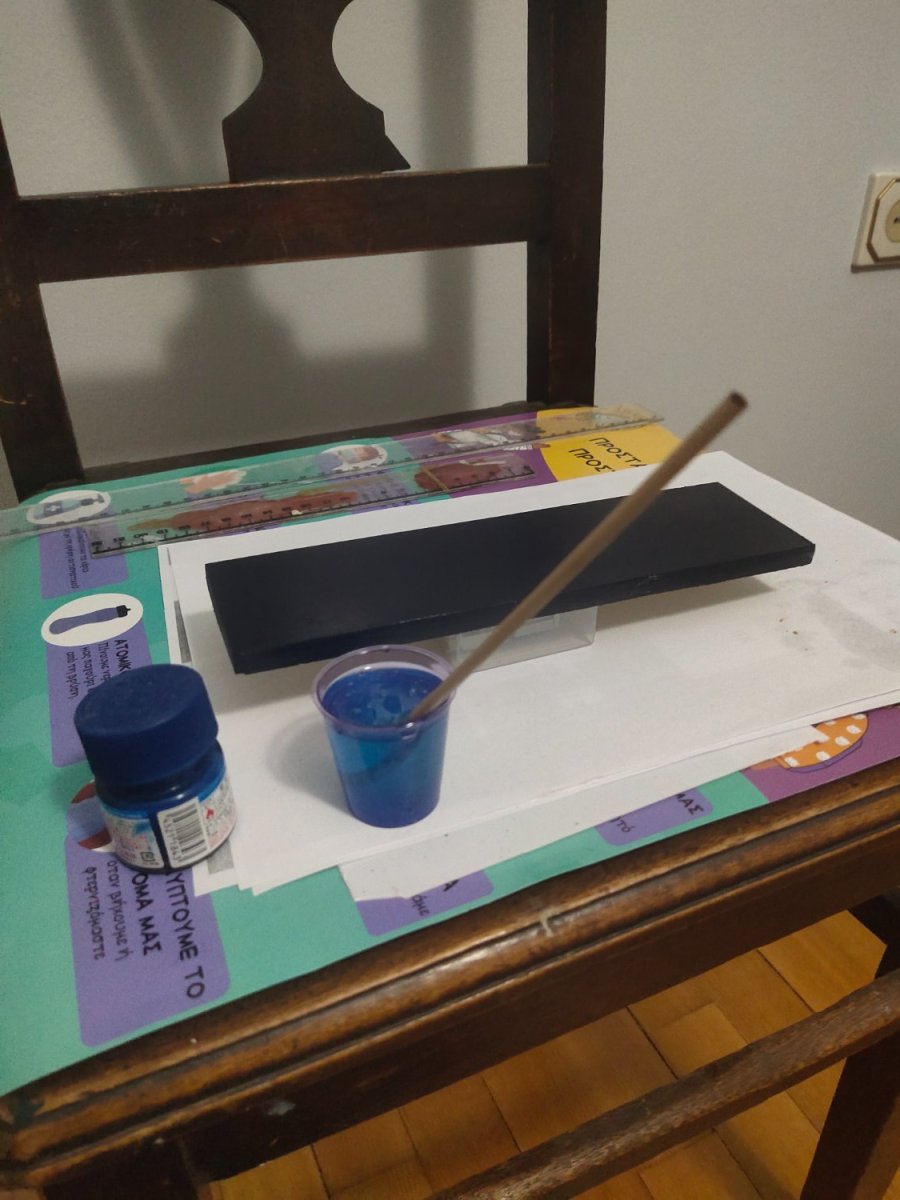
While trying to configure the materials used, I simply sealed the hull with acrylic putty
- Old Collingwood, Canute, mtaylor and 2 others
-
5
-
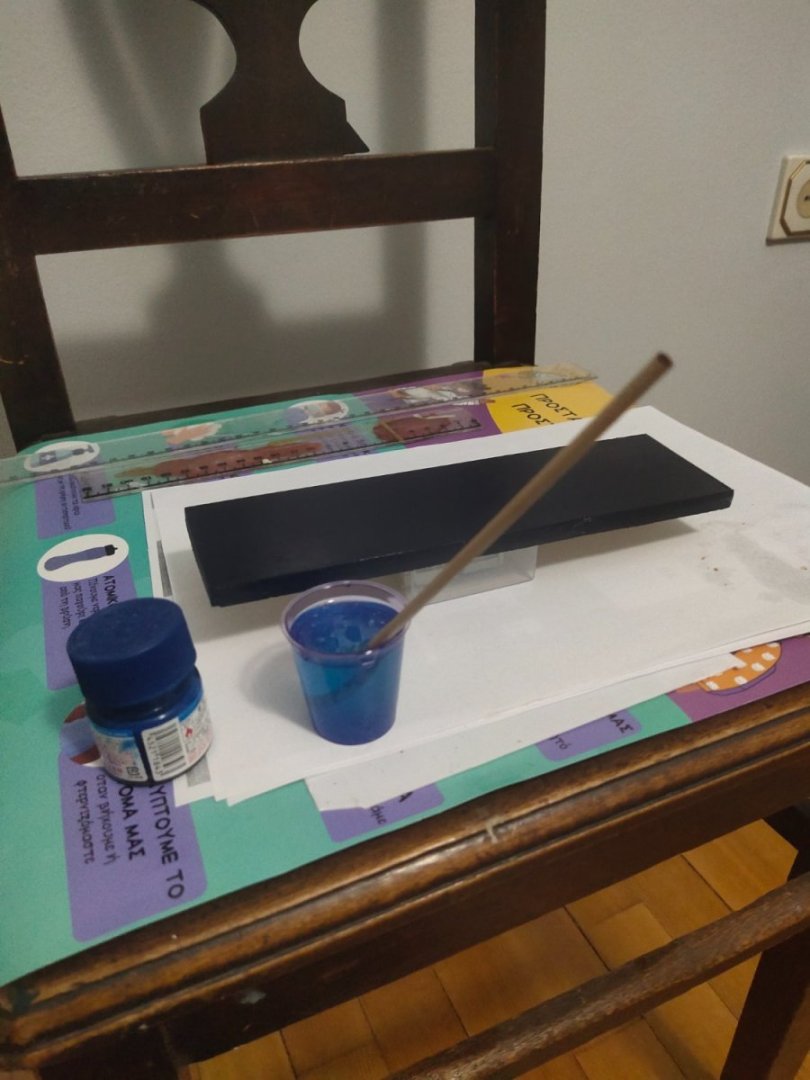
Resin preparation.
Surface leleved and raised. Underneath some paper to avoid spill accidents.
Resin preparation in accurate proportions. A bit of Tamiya clear blue paint is added. This will add depth to the resin without loosing transparency. On thin layers like this however won't play significant role, mostly on thicker resin layers.
After pourung the mixture the model was placed. Some material was displaced. Ancient physics.
I Checked for air bubbles and placed a fiberglass cover. Will rest over night this is a normal drying time, material

- mtaylor, Canute, king derelict and 4 others
-
7
-
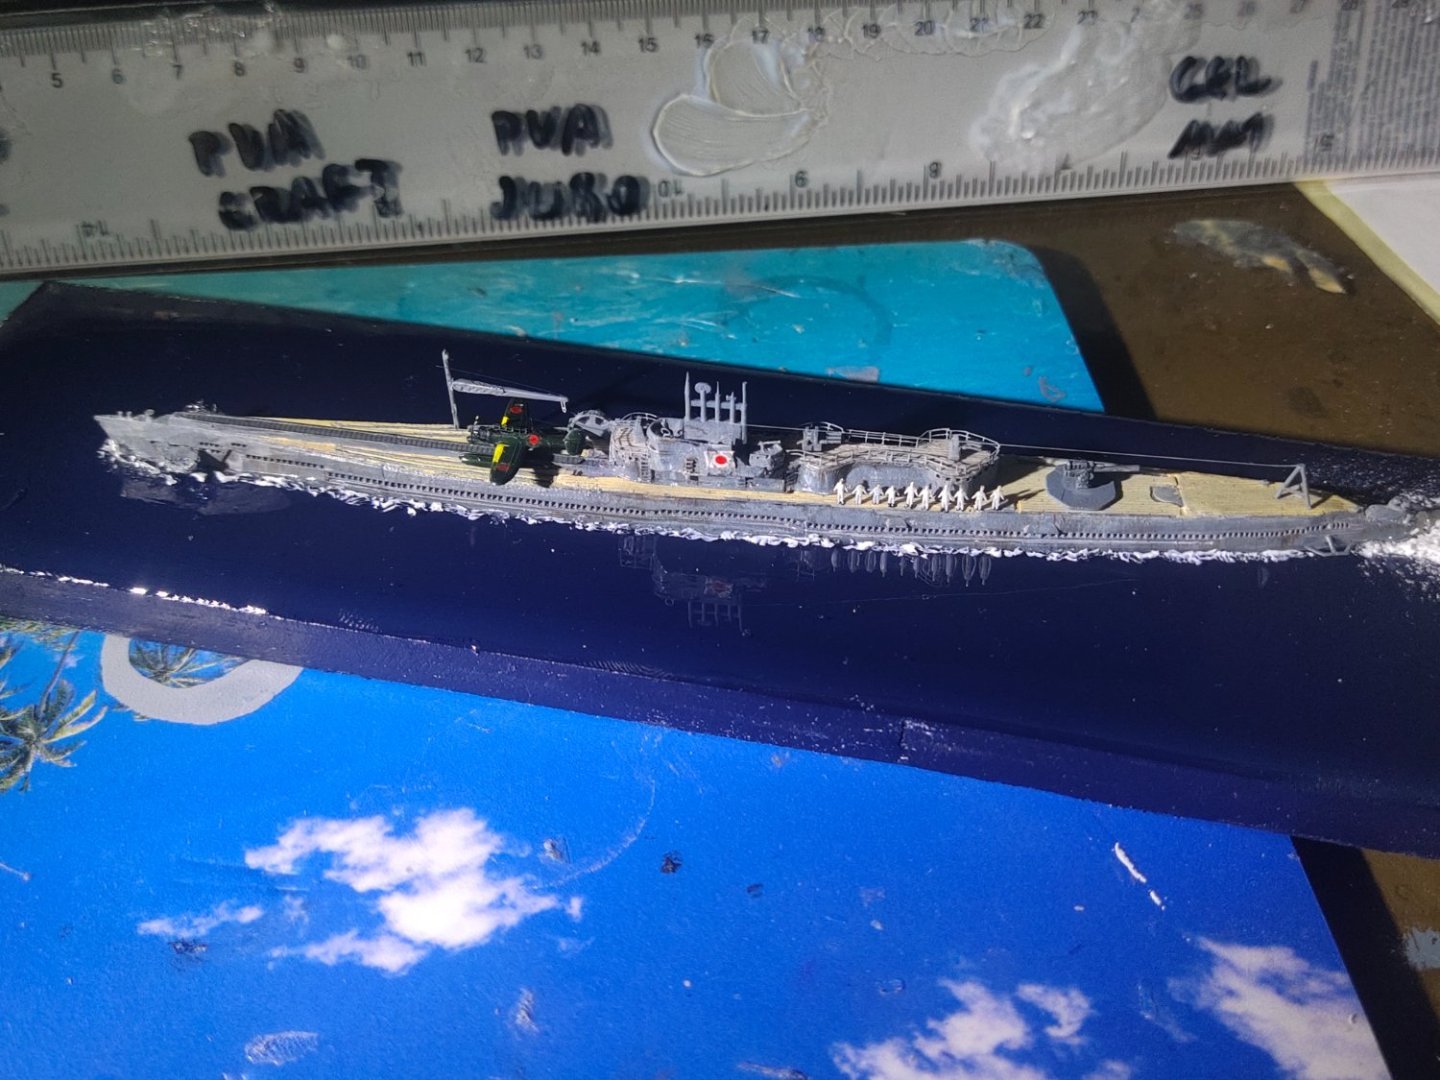
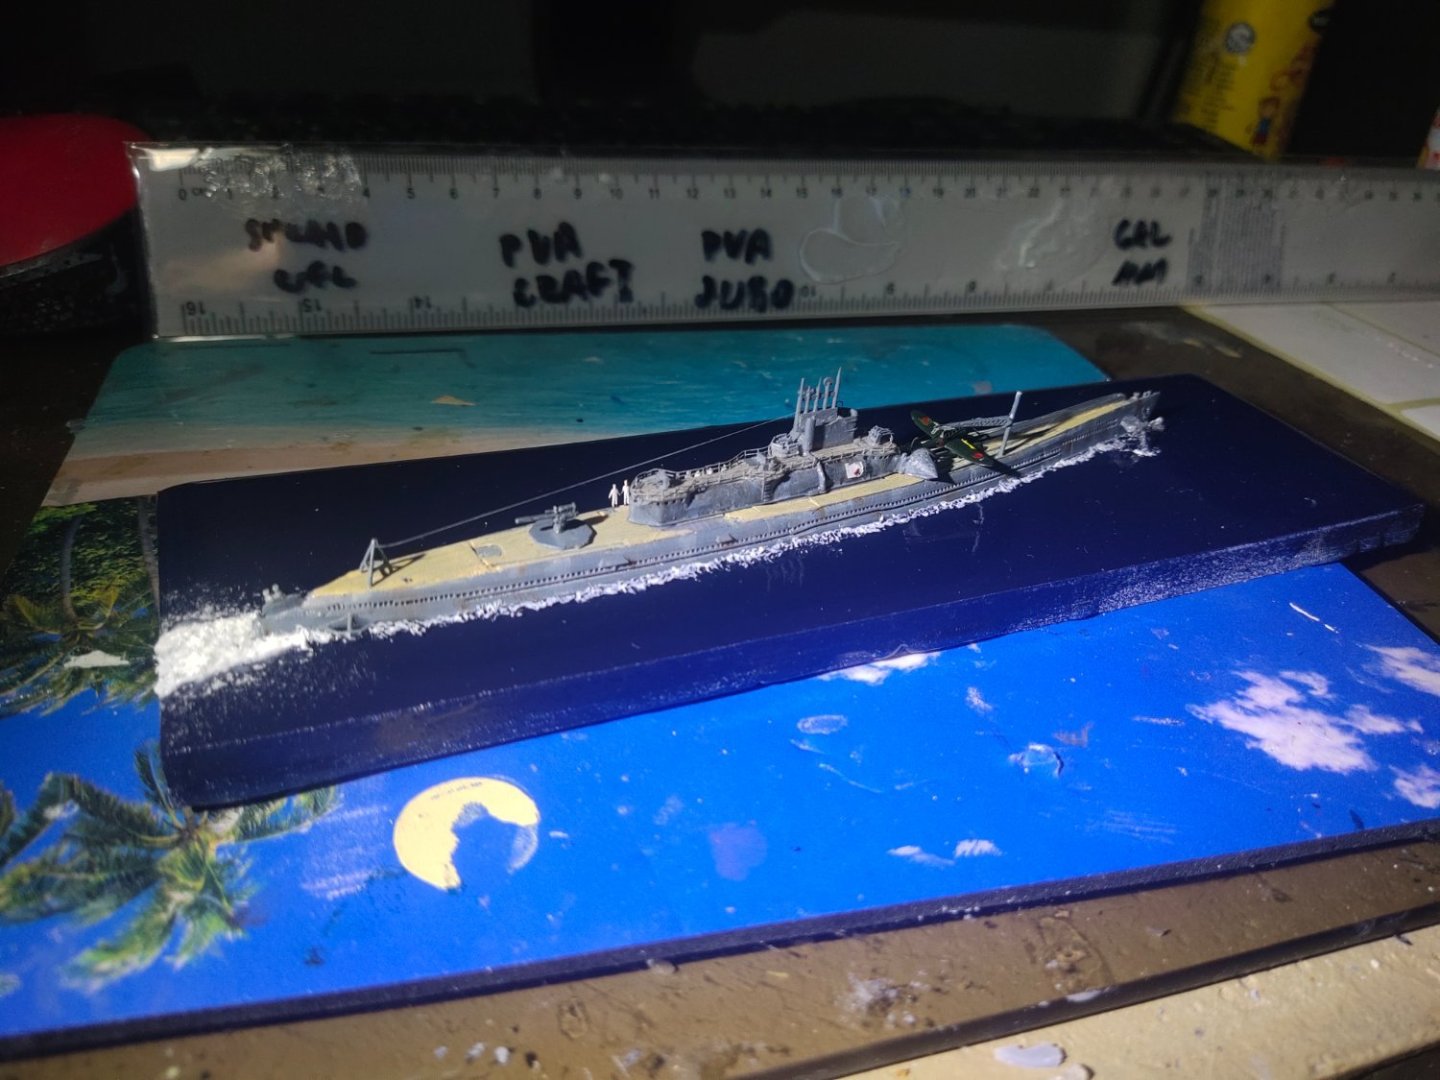
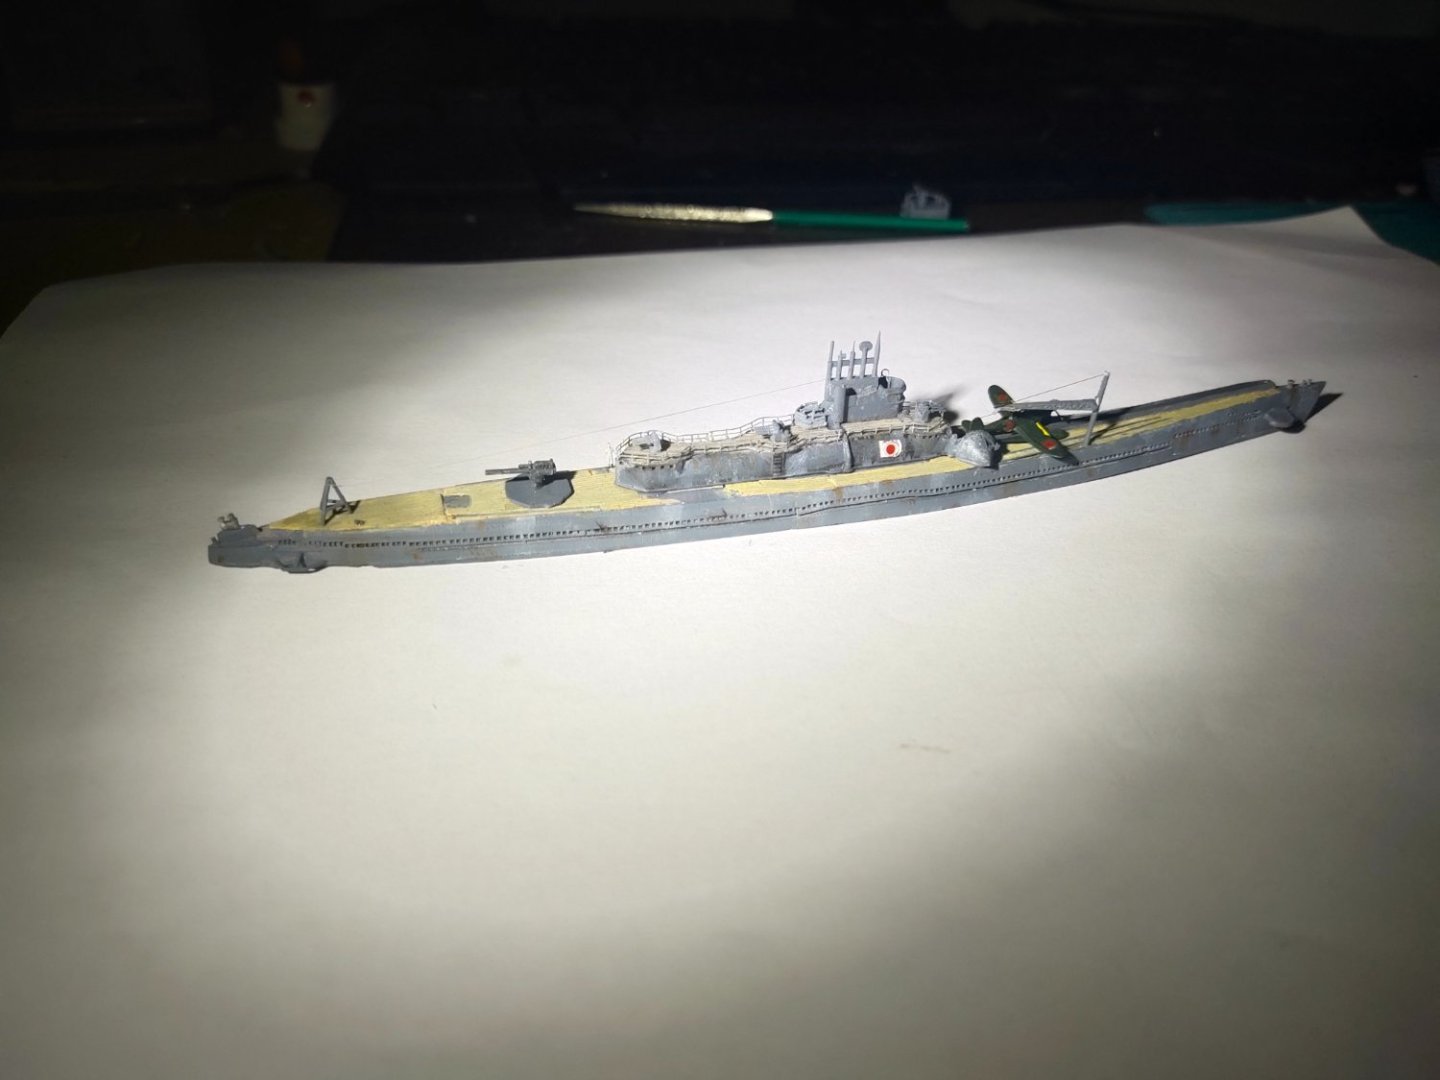
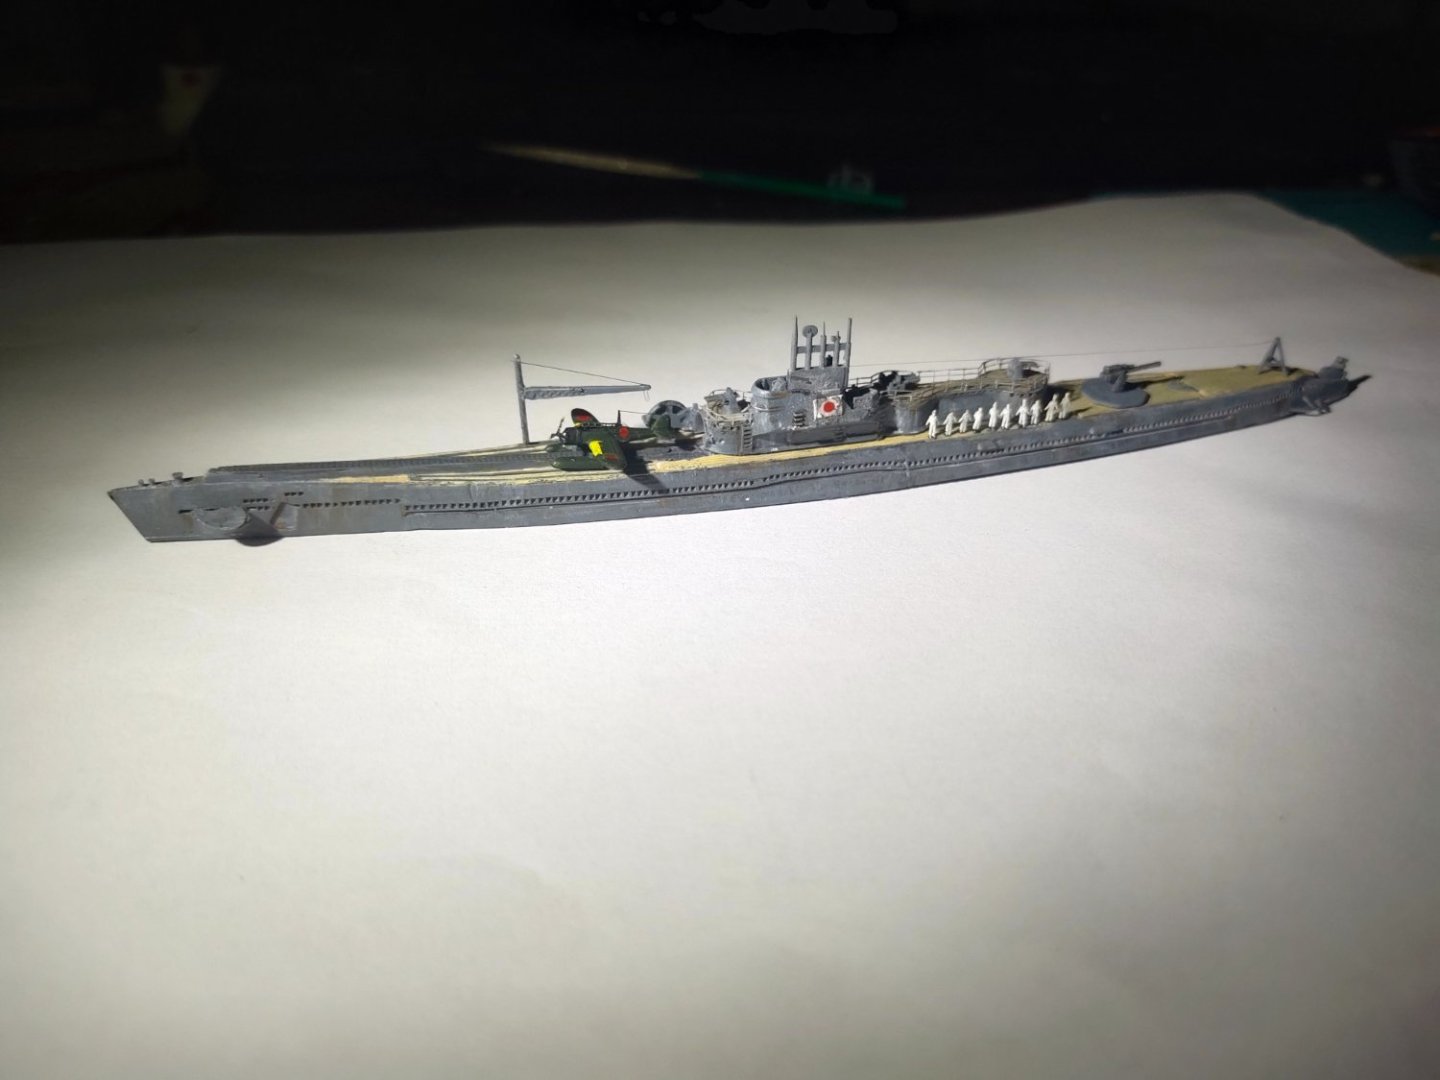
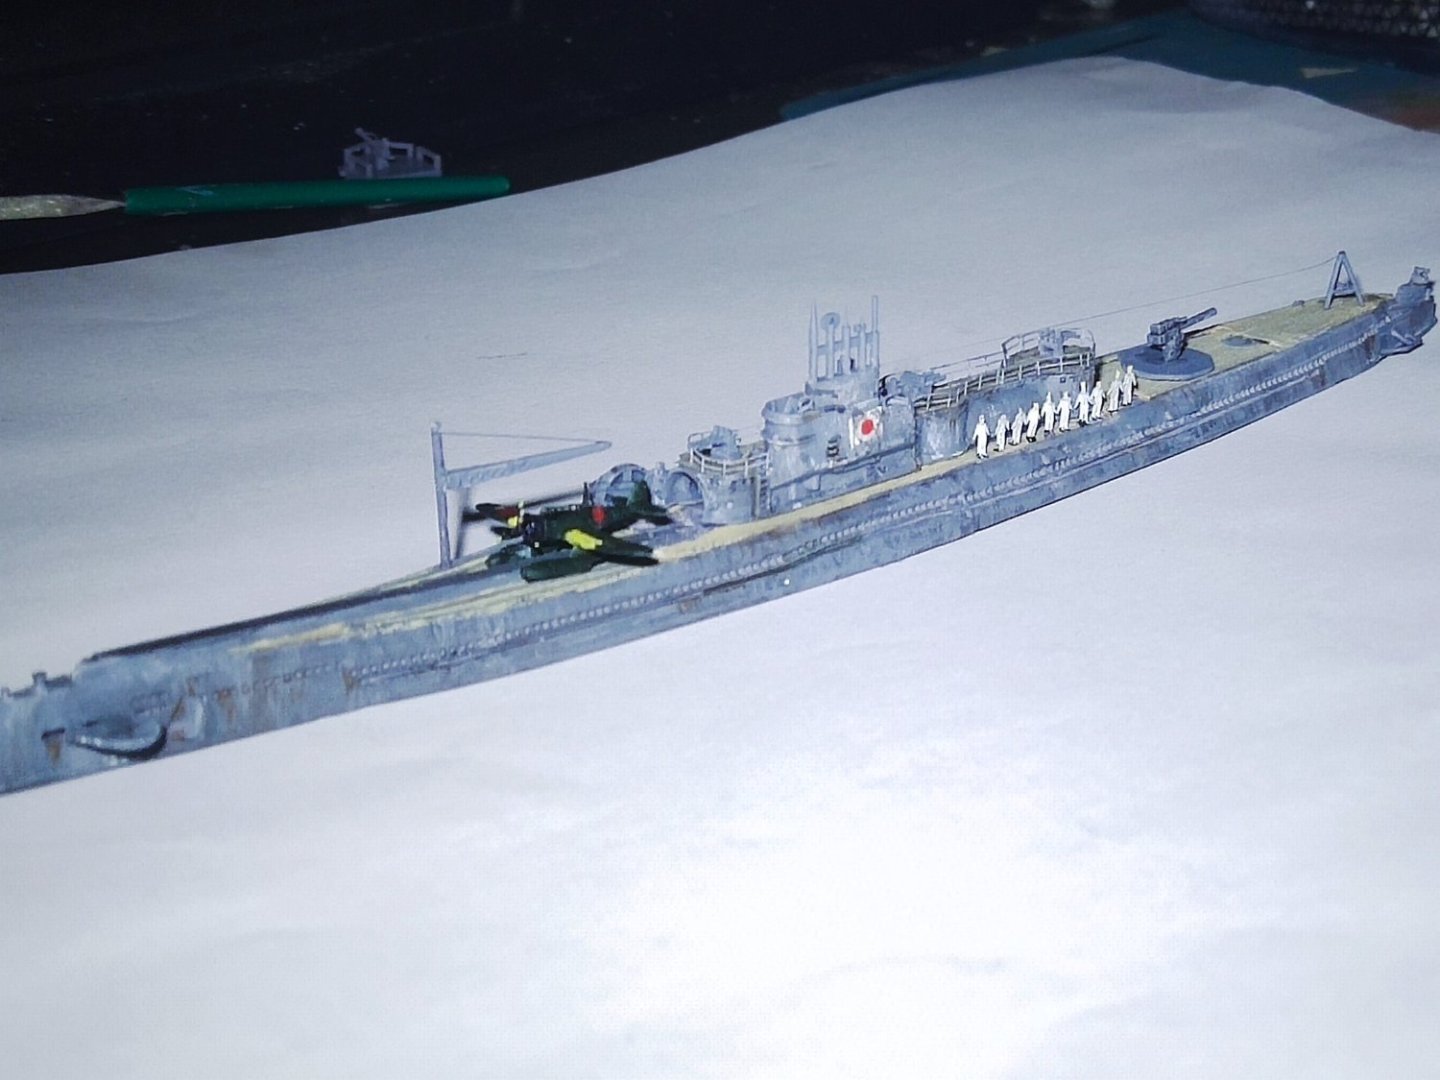
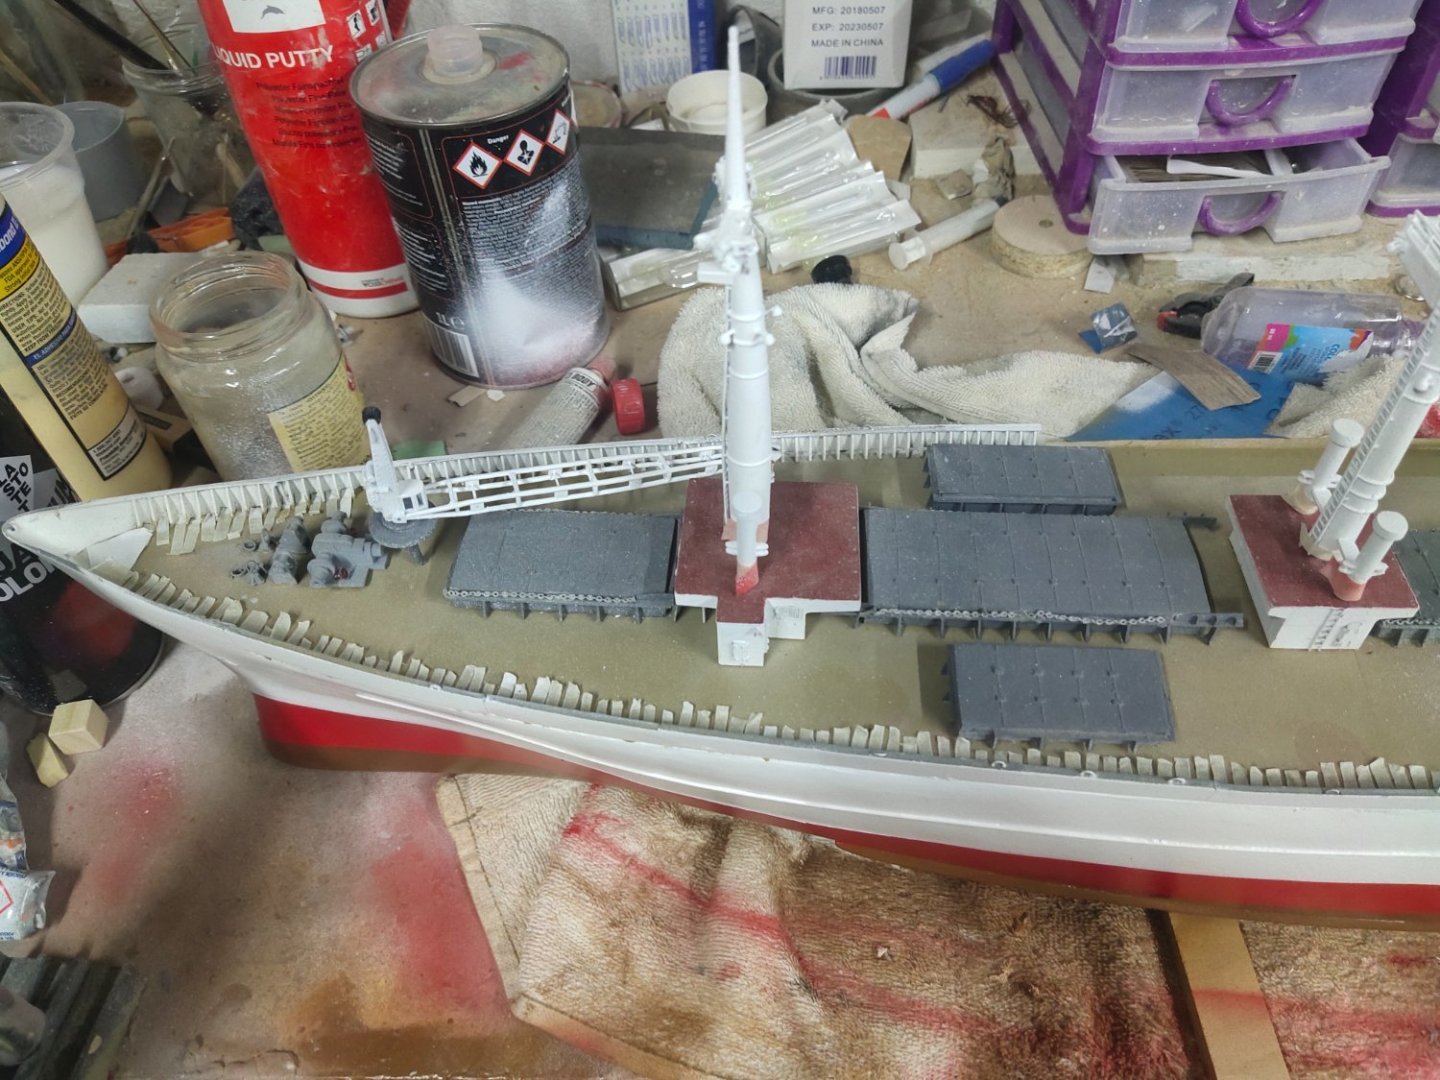
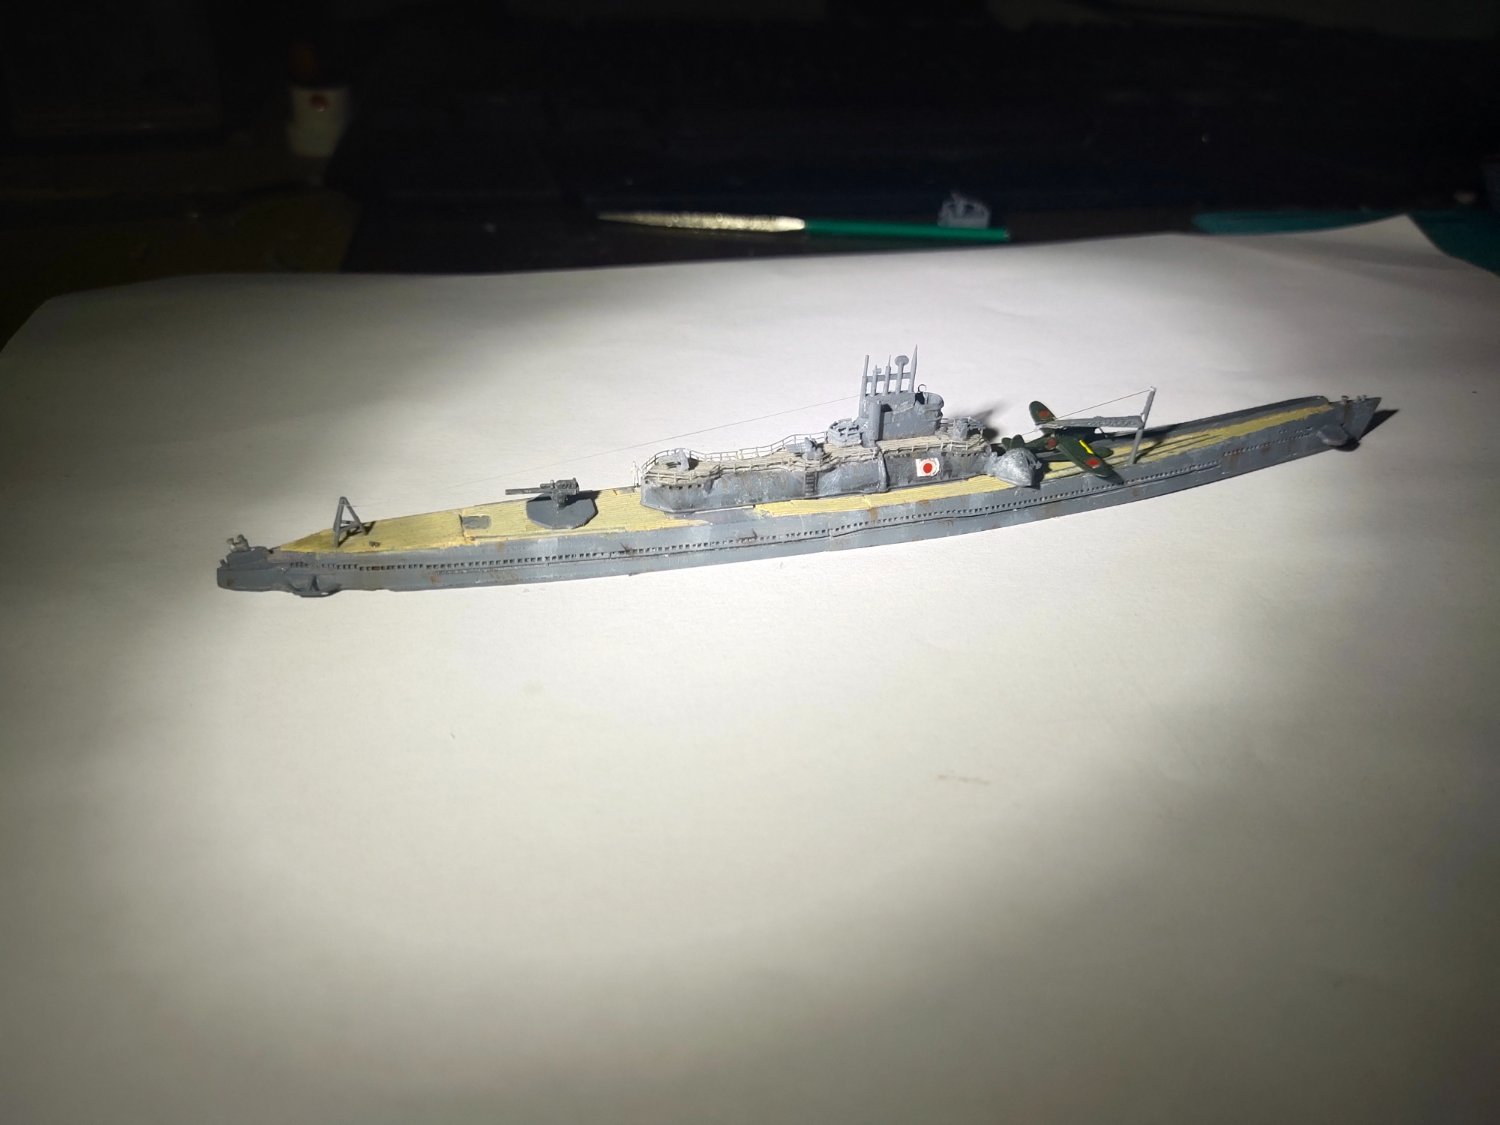
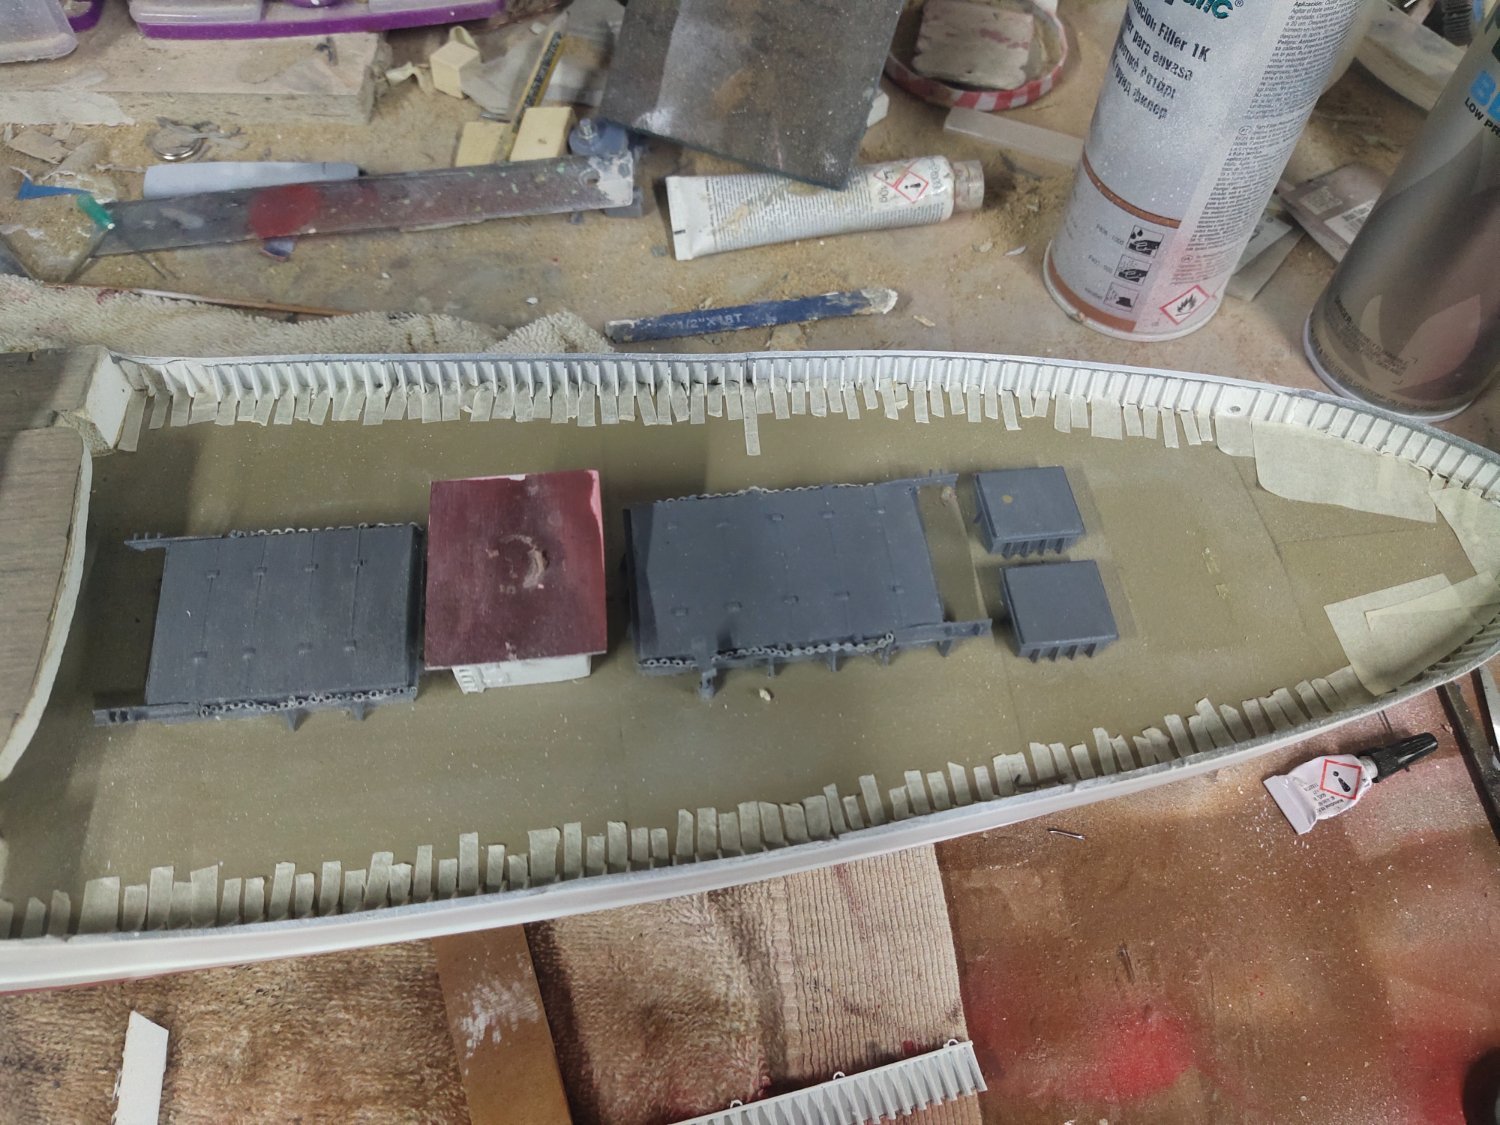
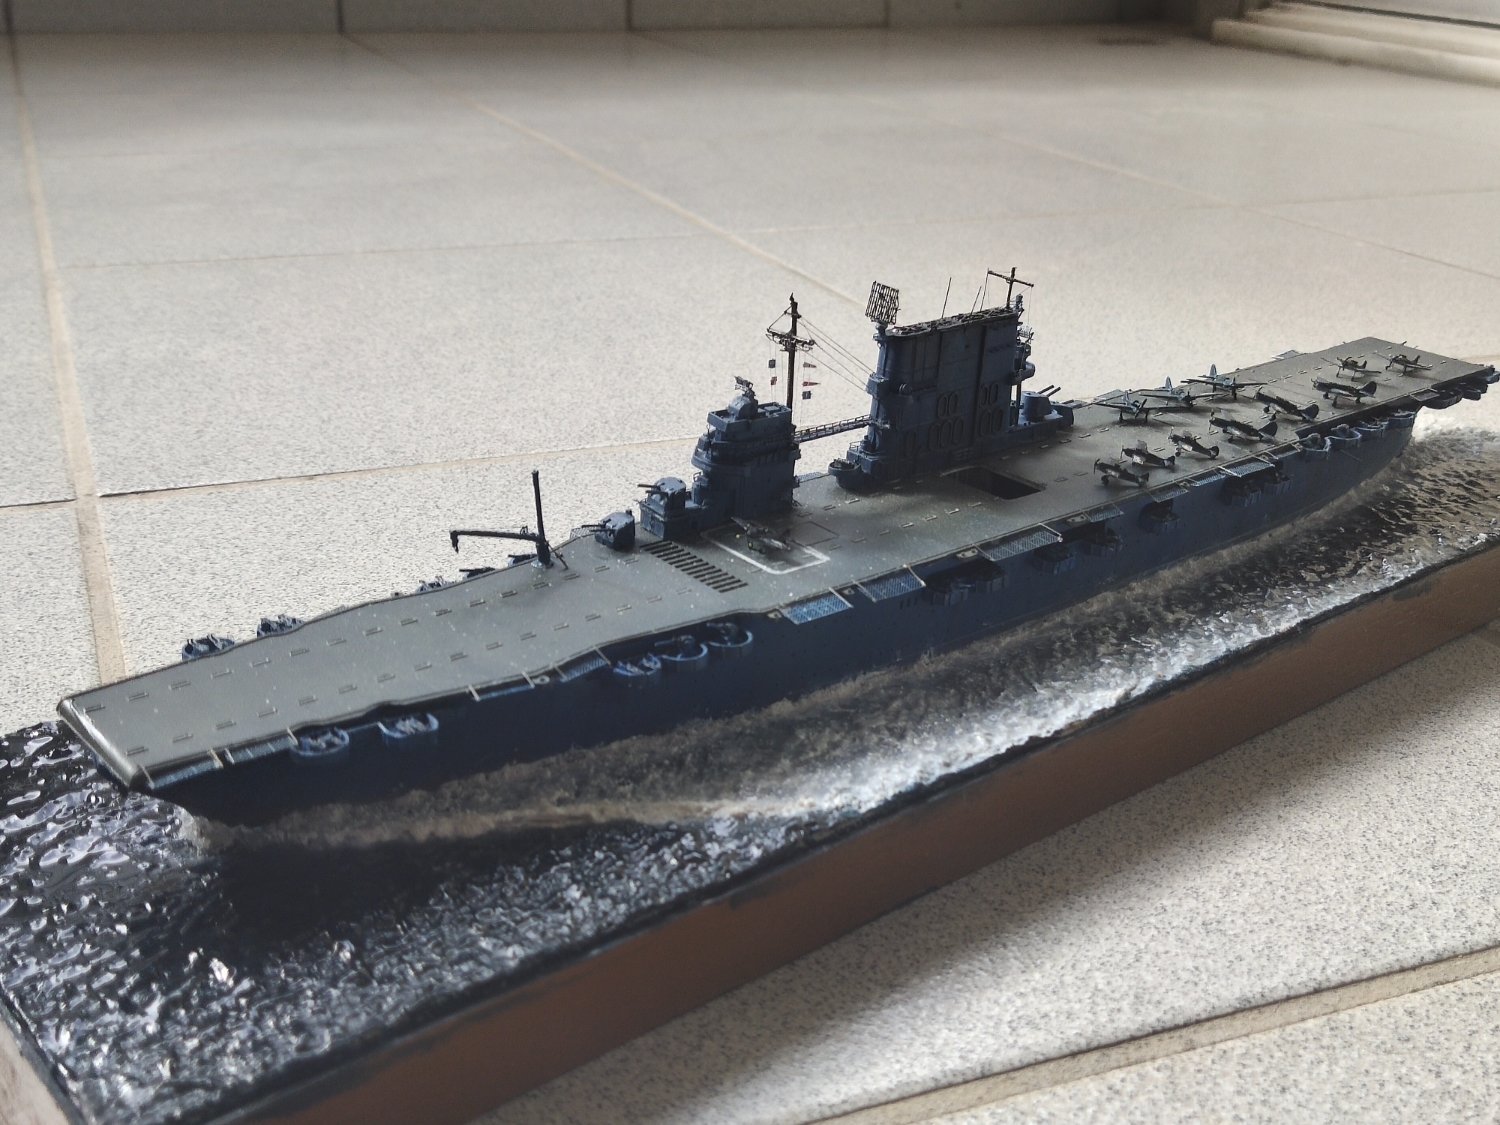
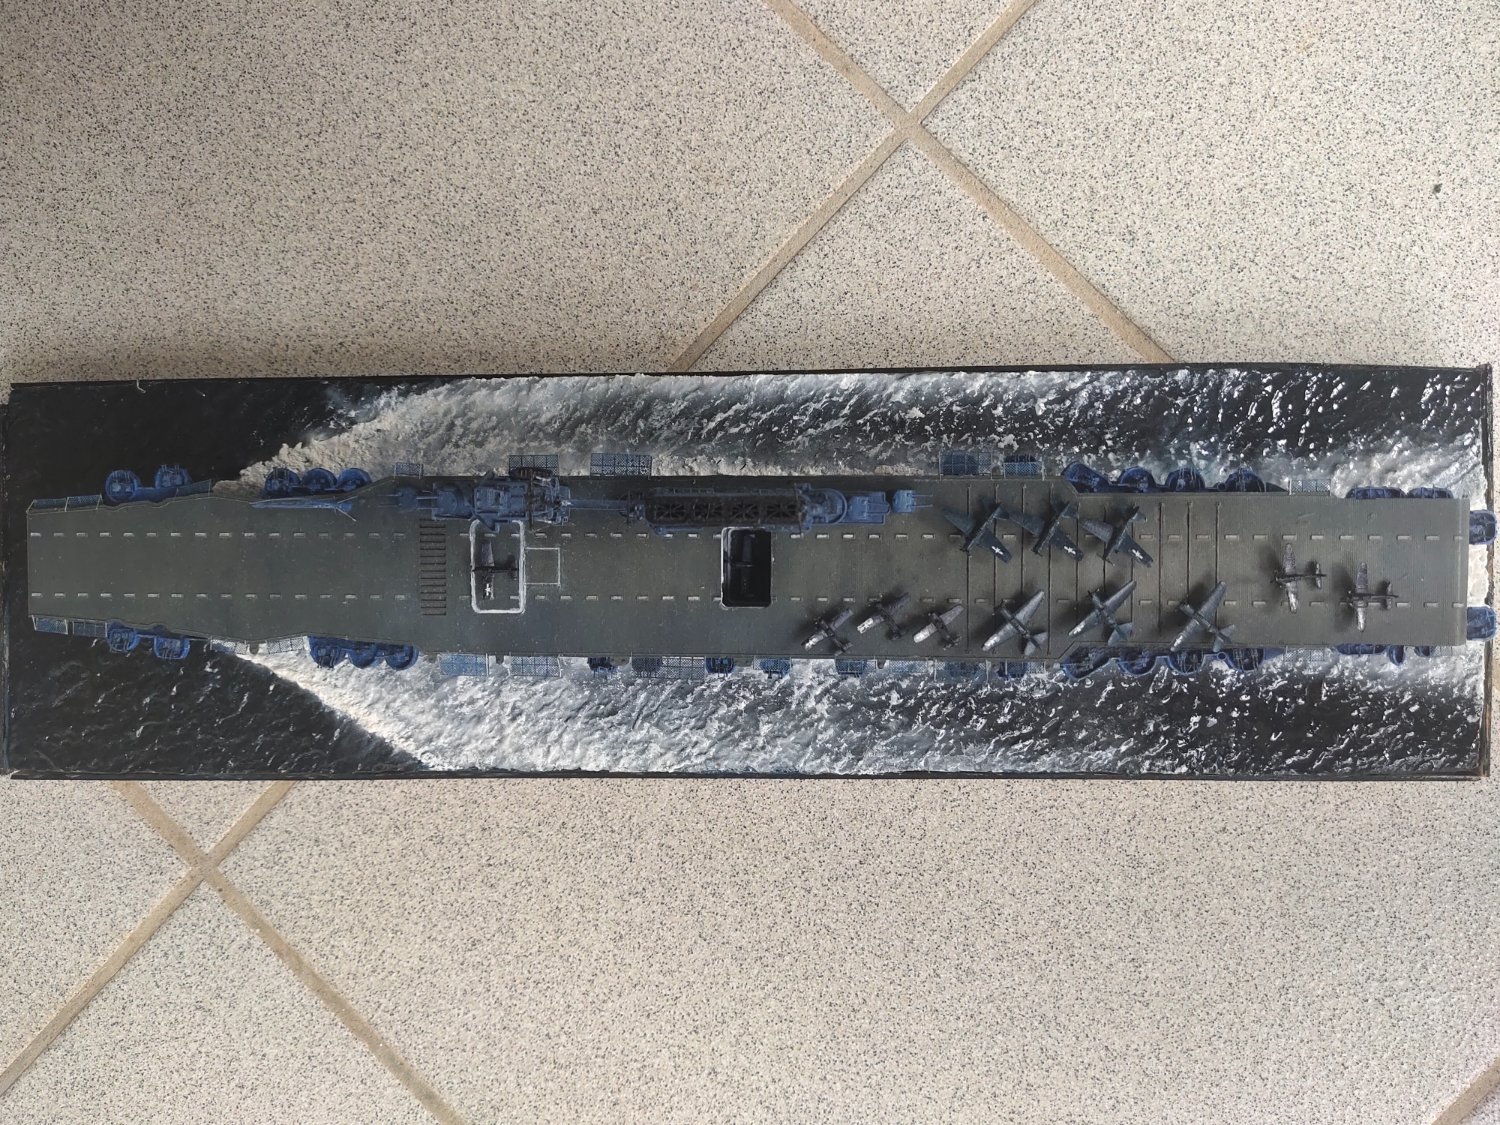
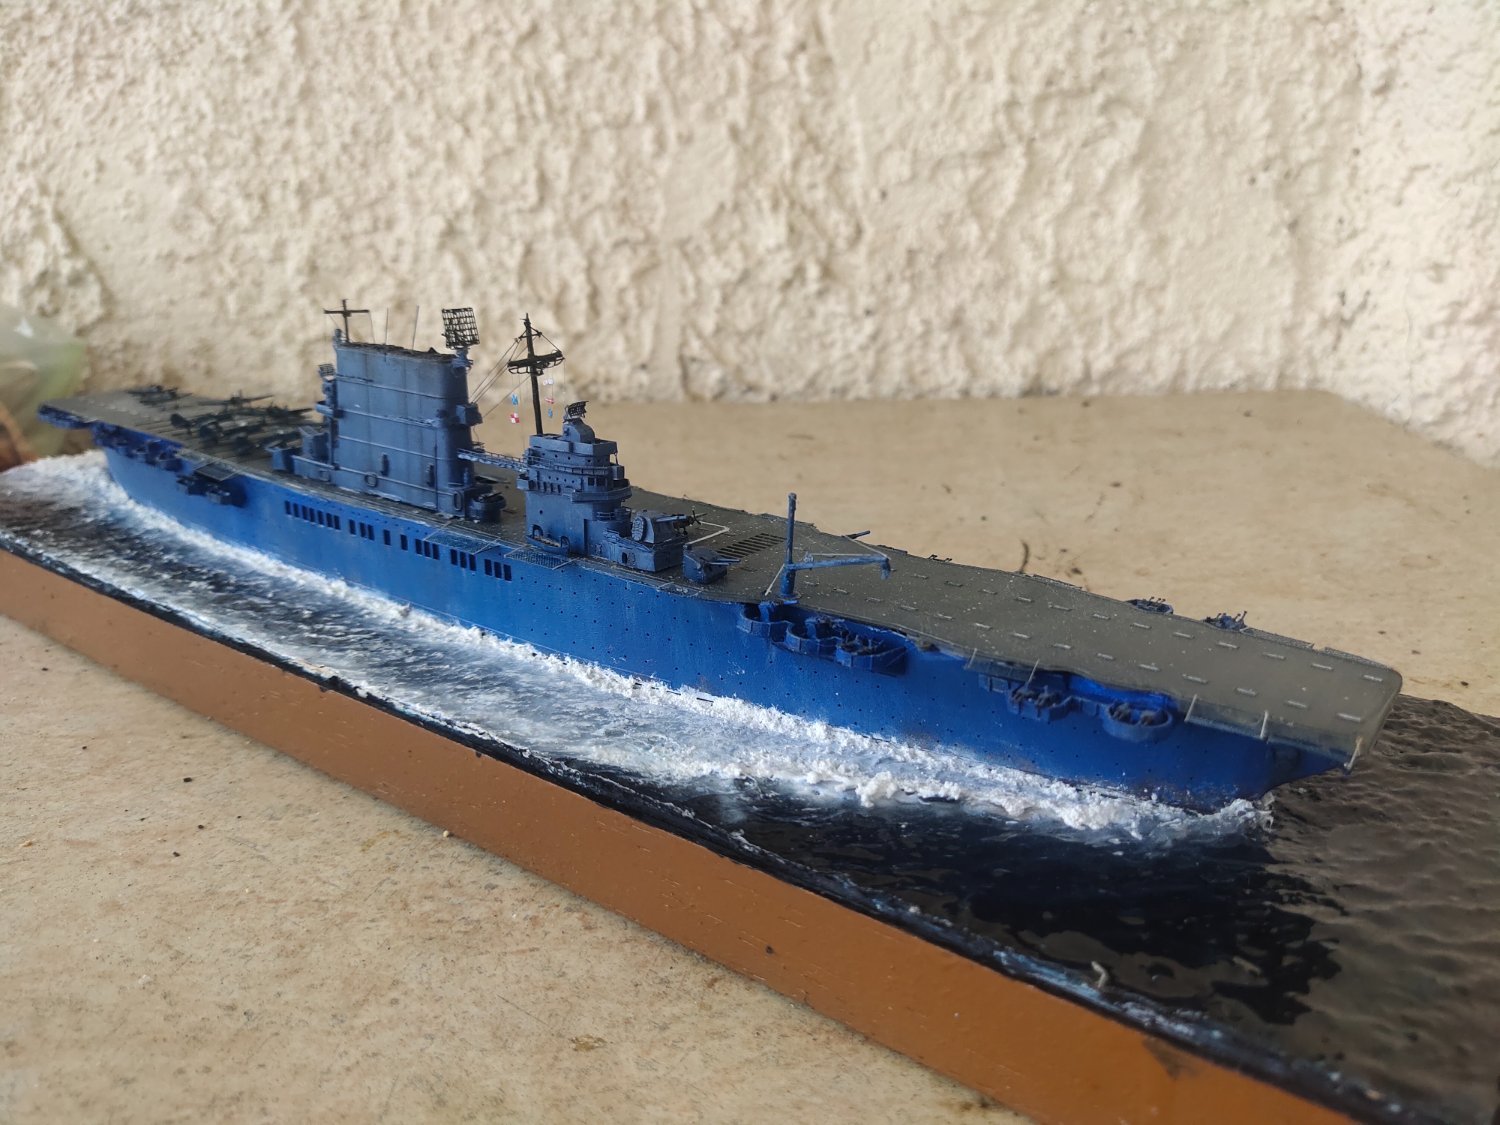
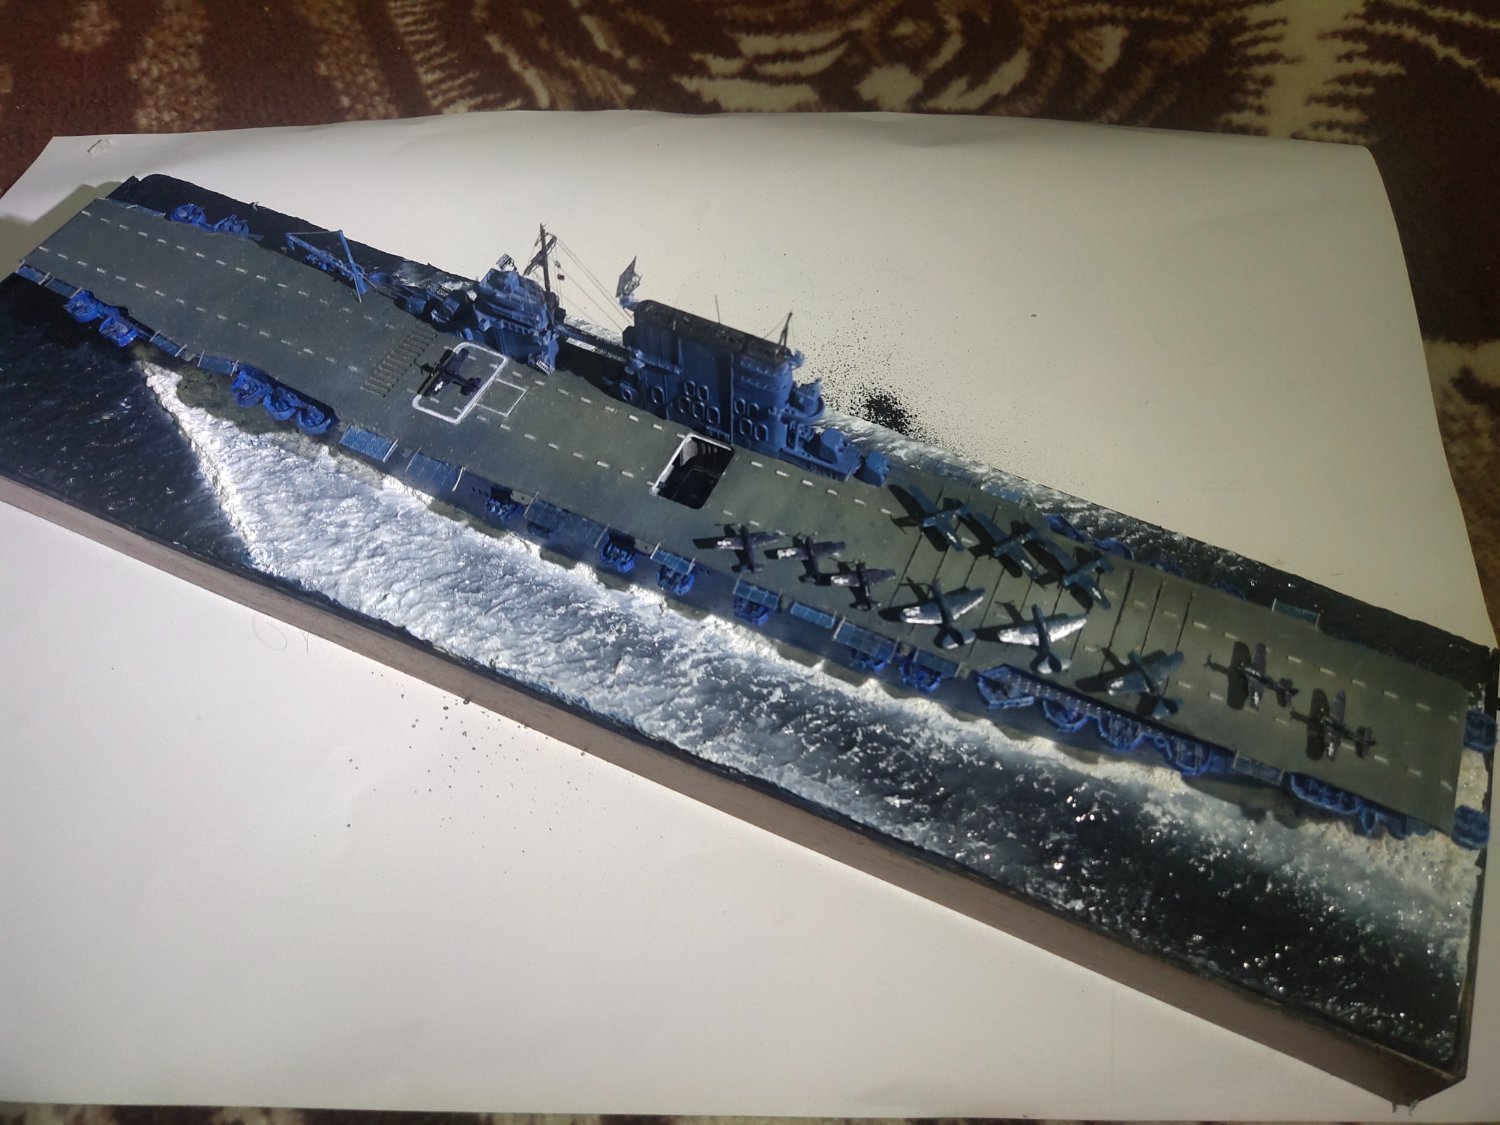
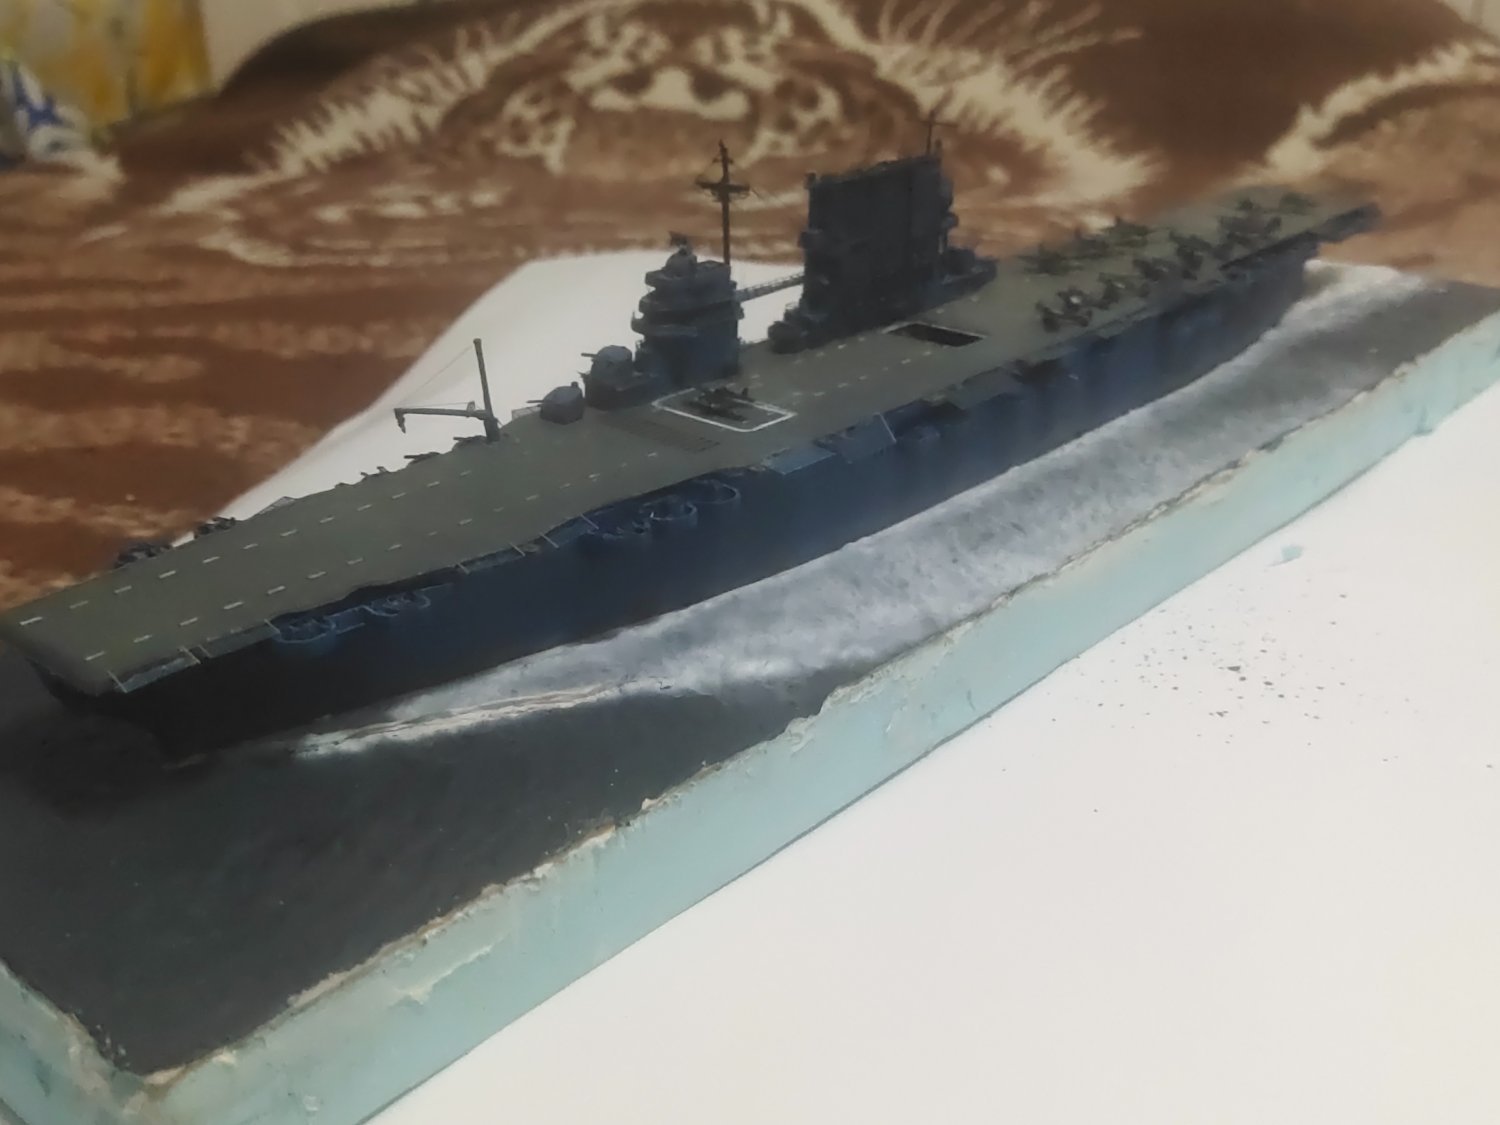
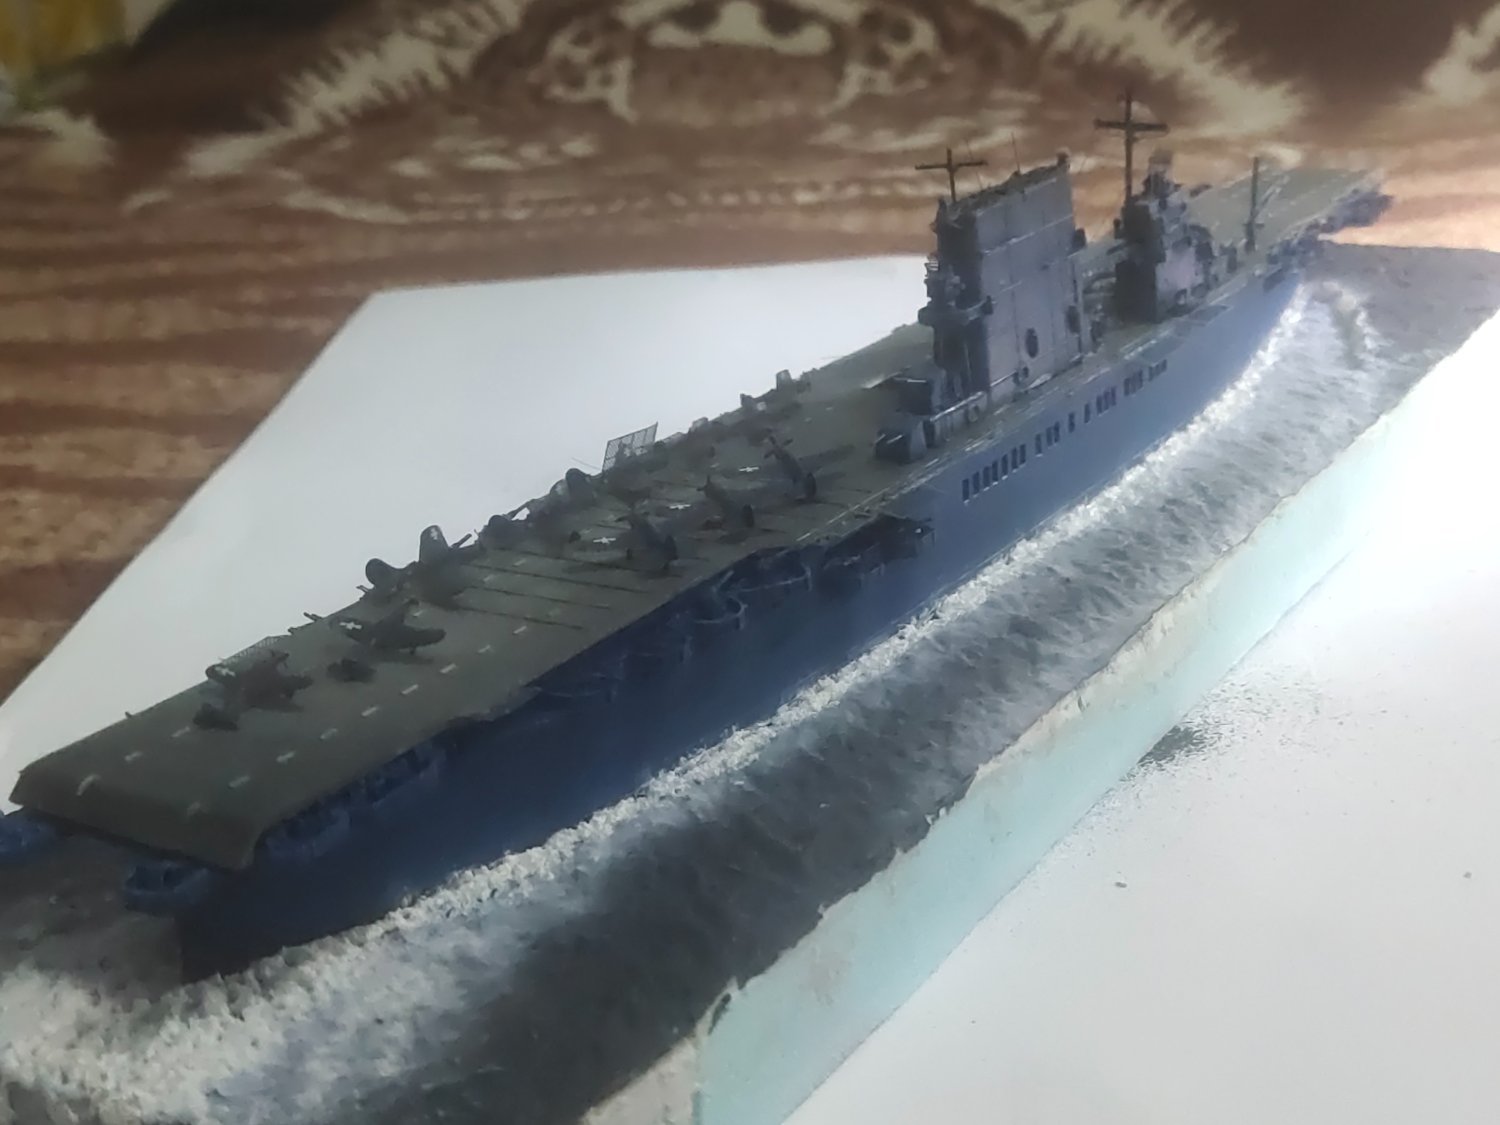
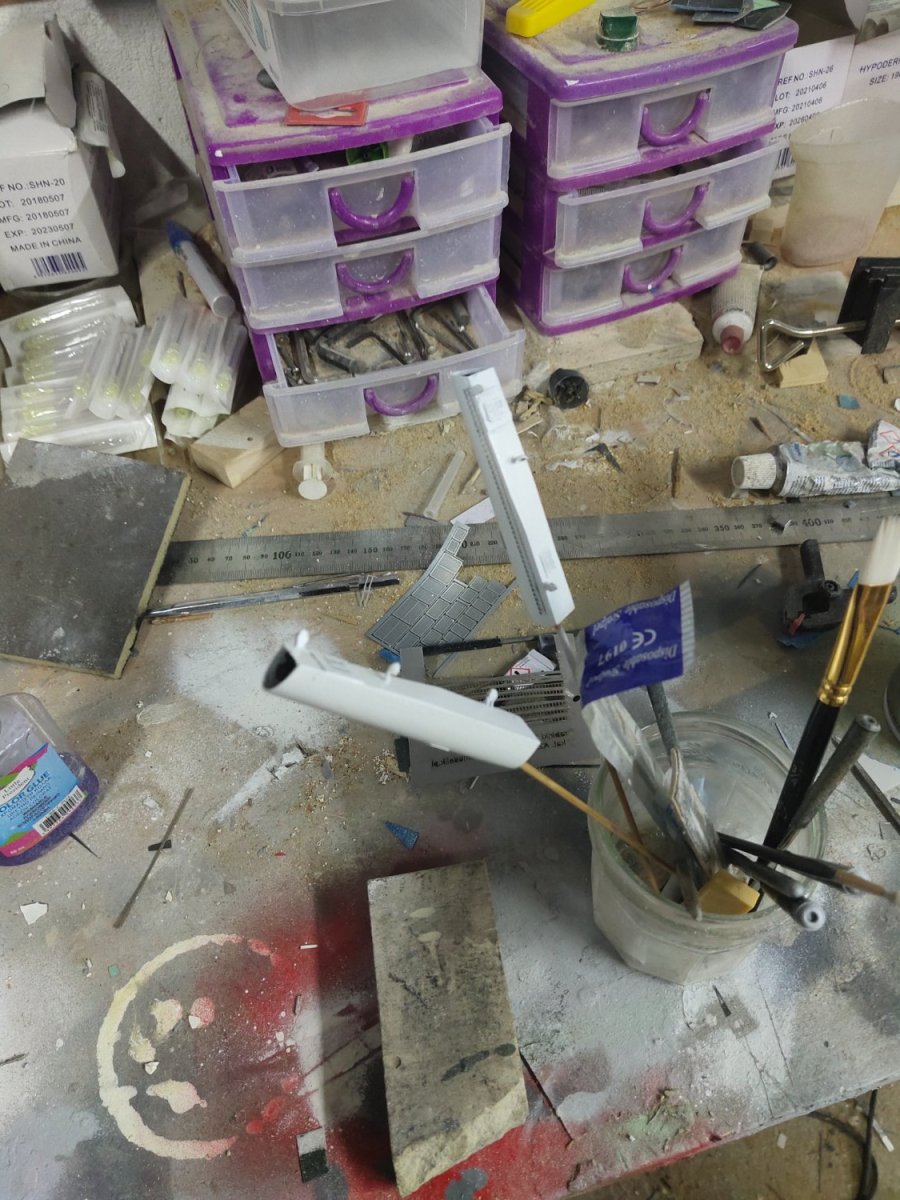
Time to add the final details
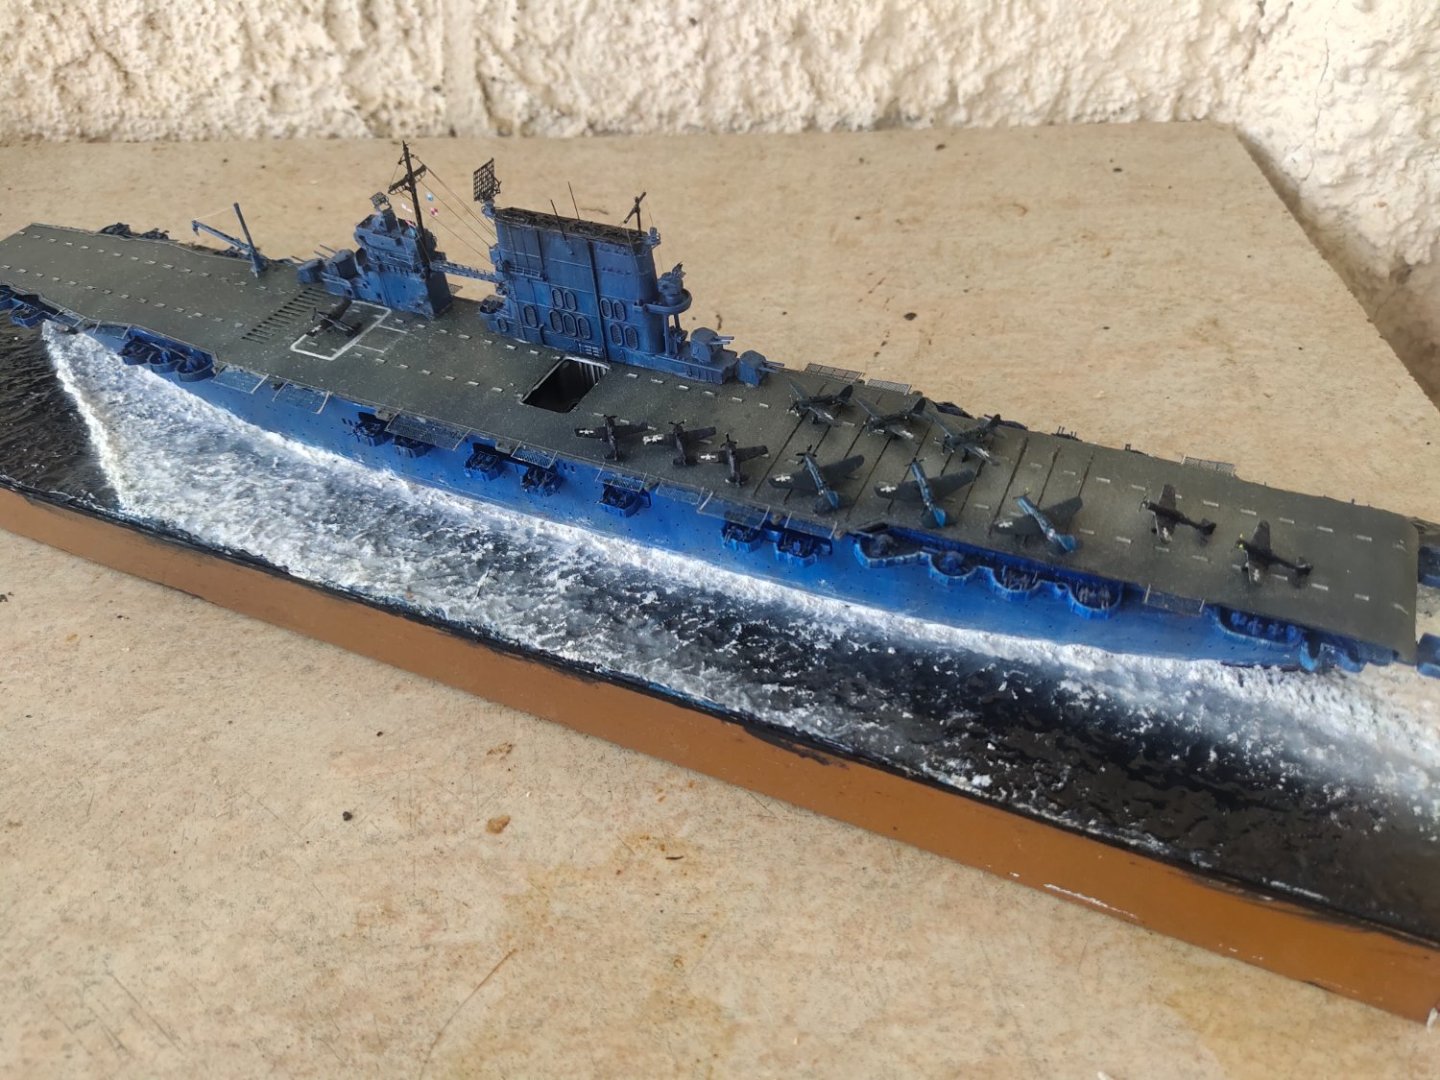
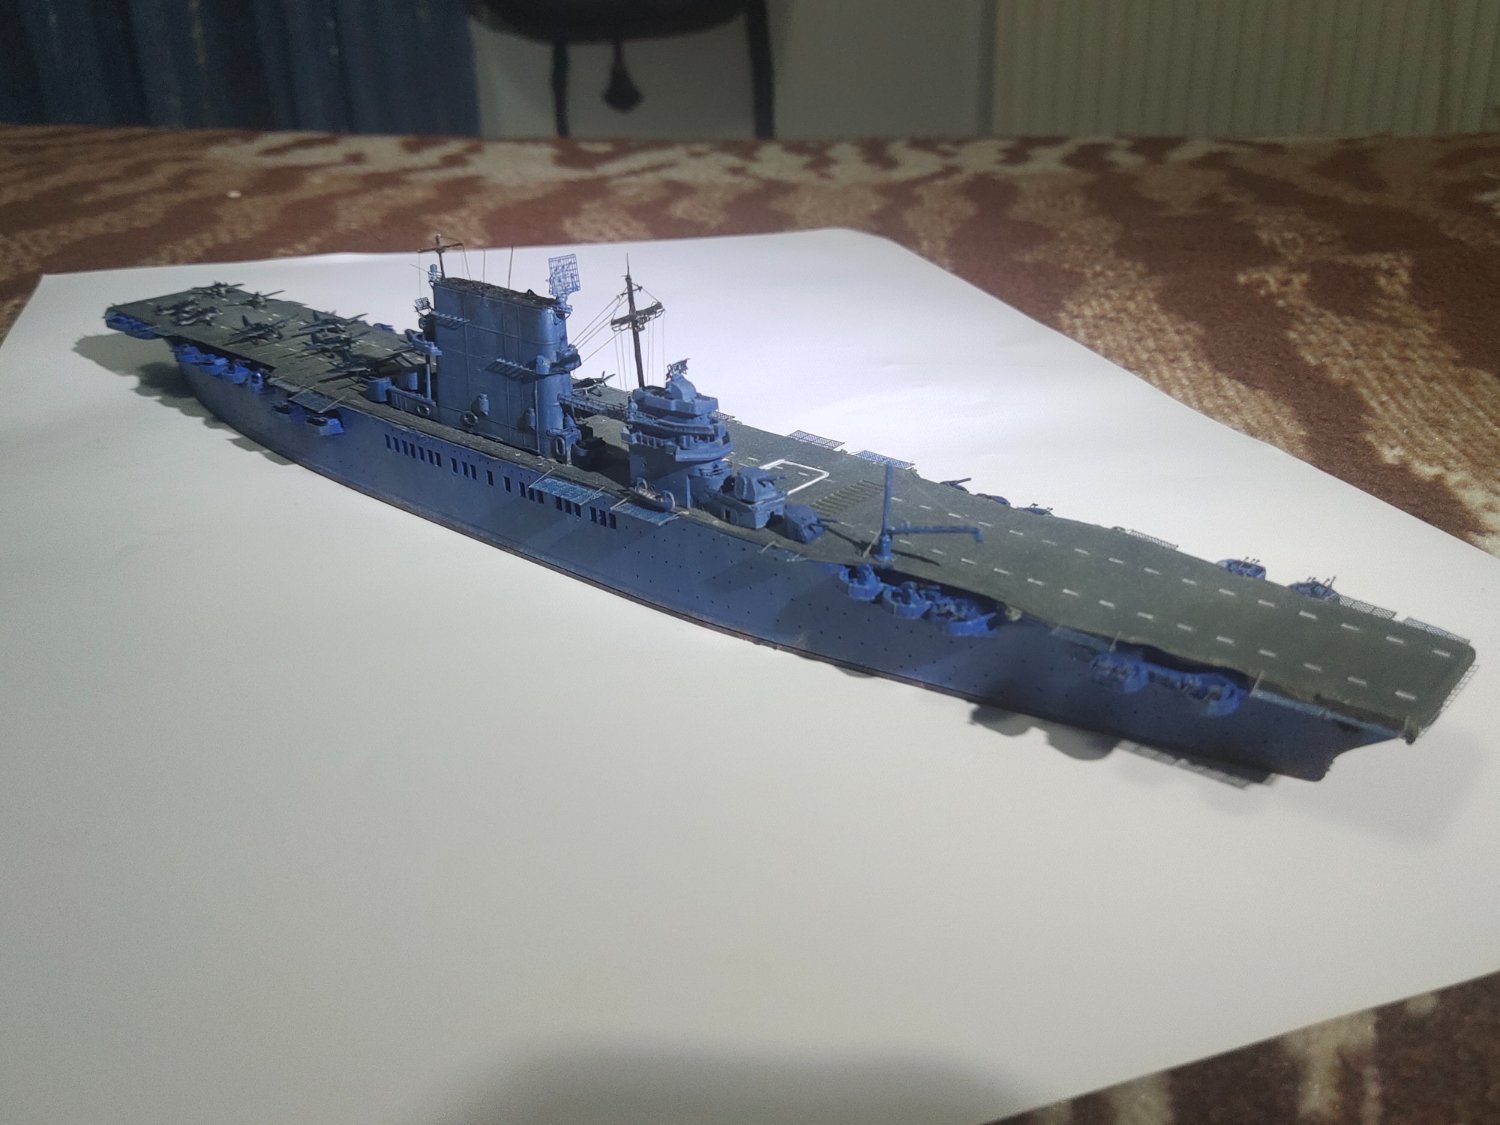
The plane, the crane. The armament and bit rigging. The Japs are 3d printed. Everything except the massive rear gun. I will work a bit more on the model and make it available for anyone wish to download
First I will need a sea for this
- thibaultron, Baker, Old Collingwood and 4 others
-
2
-
 5
5
-
On 11/6/2023 at 11:22 AM, Mirabell61 said:
Many thanks for your kind advice Yaleriy,
Nils
I have worked with several automotive industry putties. There's a German company that makes a liquid easy to apply product like a toothpaste thick.
Easy to work with, zero shrinkage and smooth finish. Need good effort on sanding but grip is also great
- Valeriy V, Mirabell61, Keith Black and 5 others
-
8
-
I printed the the part after the 3rd attempt. I painted it, added some chipping effect and oil washes. Test fitted on the boat relatively well.
Next step is the add of periscopes, guns, crane, planes and railings


- Canute, Baker, king derelict and 4 others
-
7
-
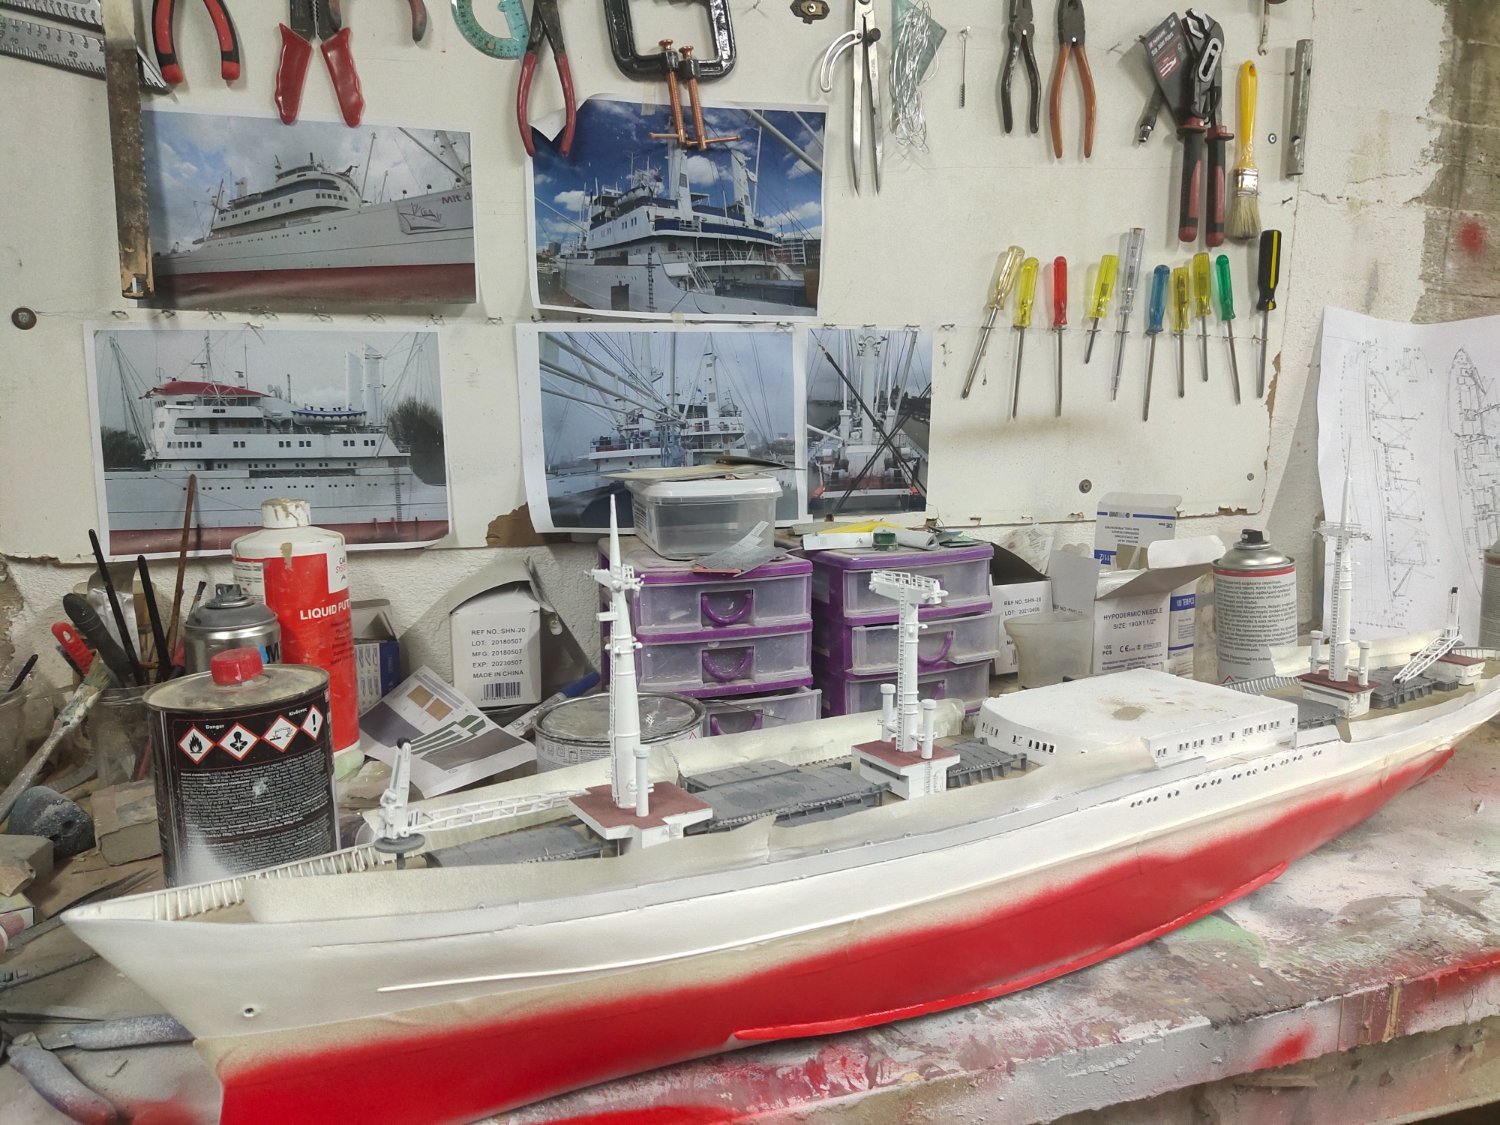
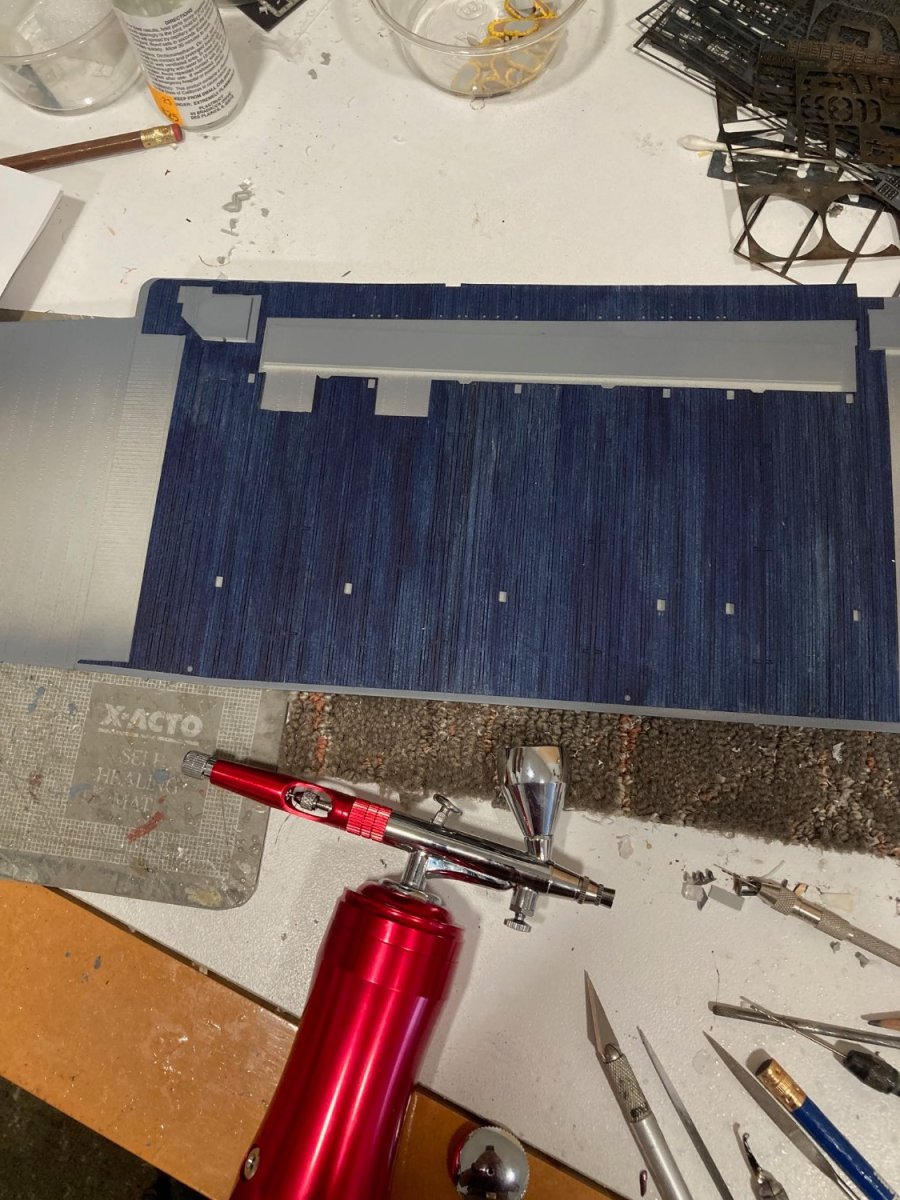
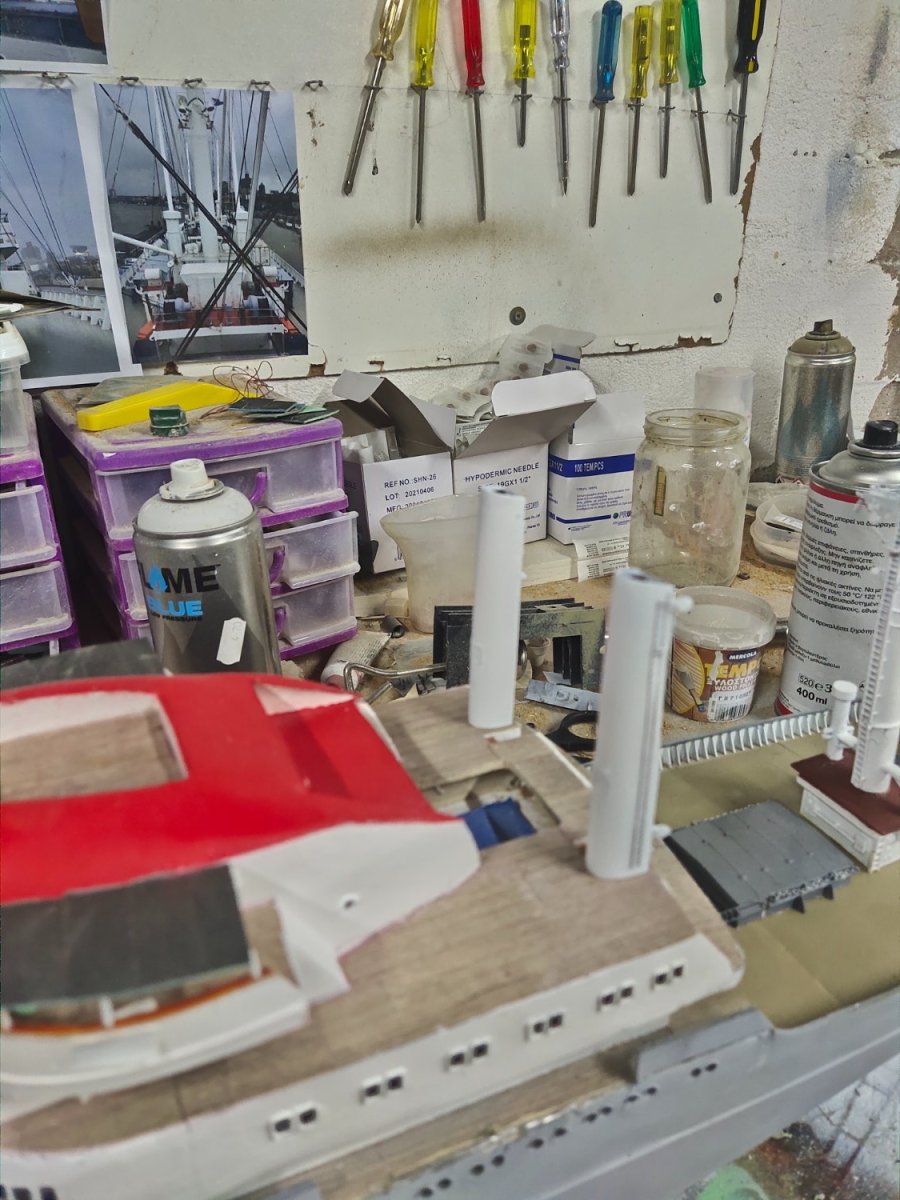
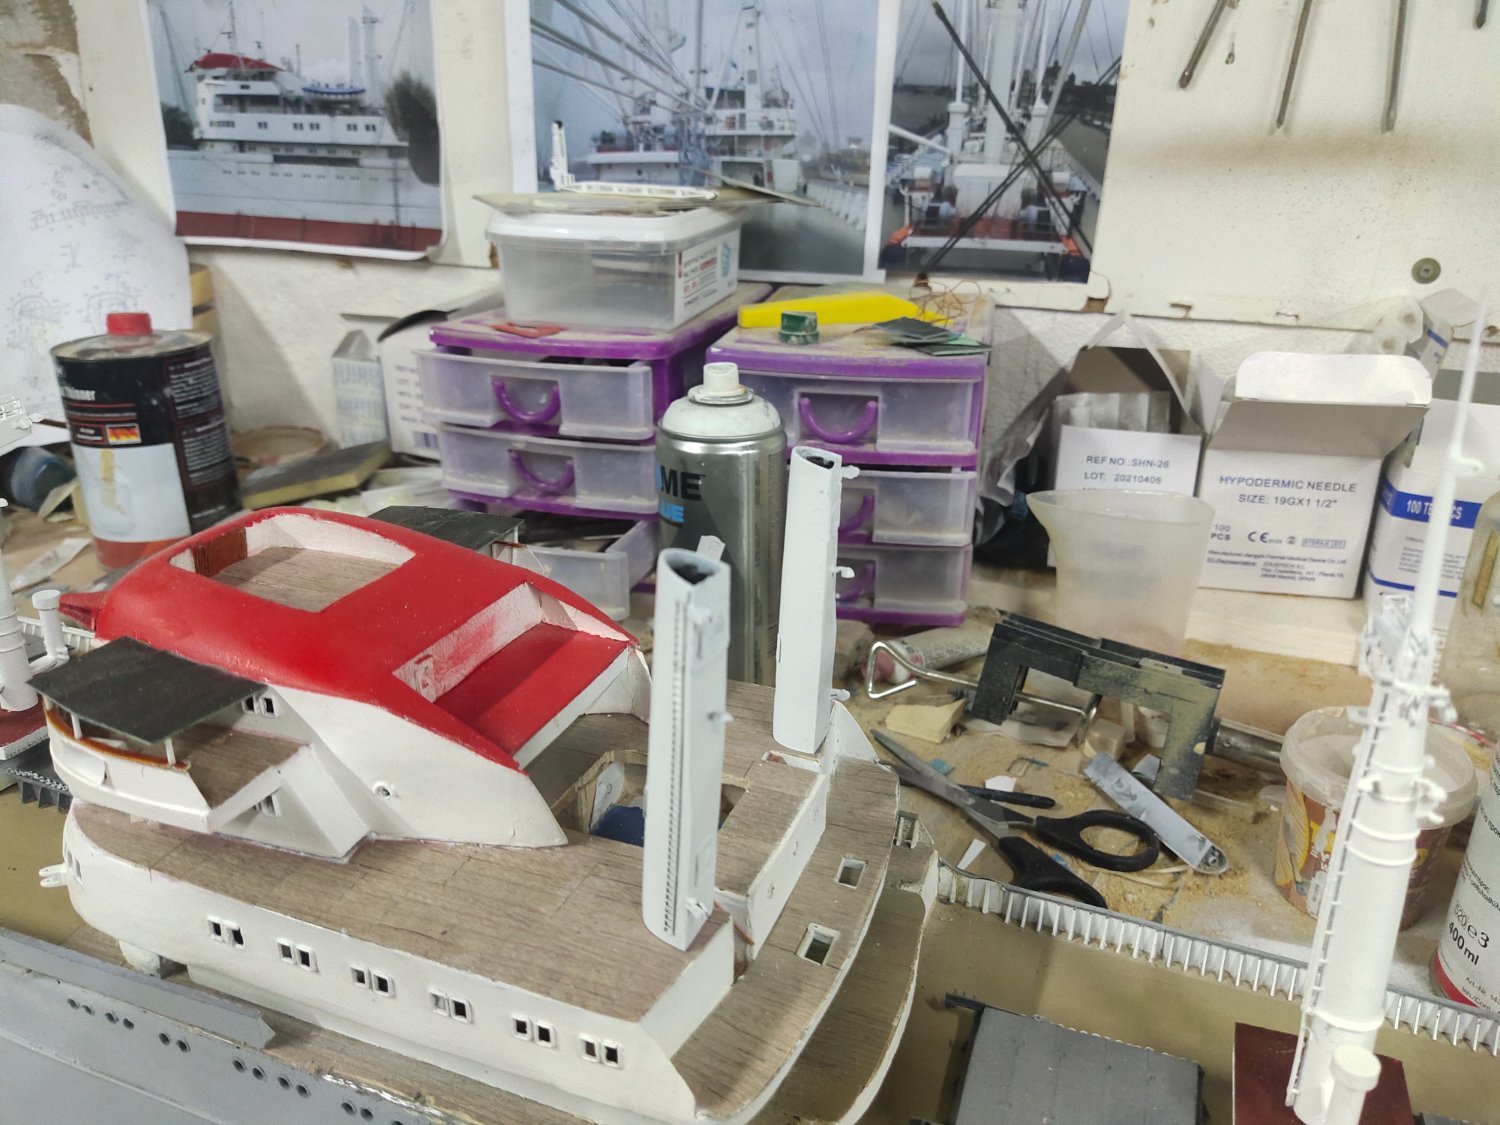
After priming and painting the wood like sticker deck was attached.I had to add it in pieces. Used tiny bits of putty to fill the gaps then painted with tan color. I used the same color for oil washing along with some black.I will do the same for the hull will working on the bridge part

- Old Collingwood, yvesvidal, Baker and 3 others
-
6
-
As it was expected with so much paintwork a mesh was causes plus I had left some detailed job unfinished. I started with the stem section

Now I have to work the front area
- KeithAug and GrandpaPhil
-
2
-
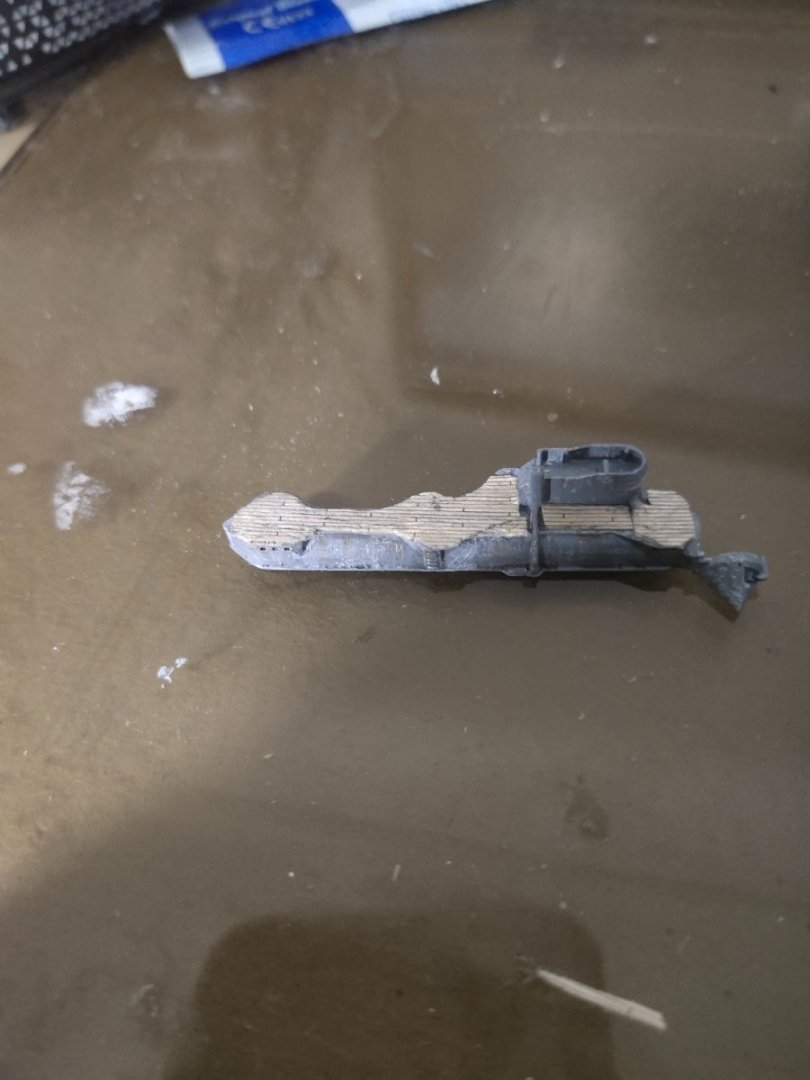
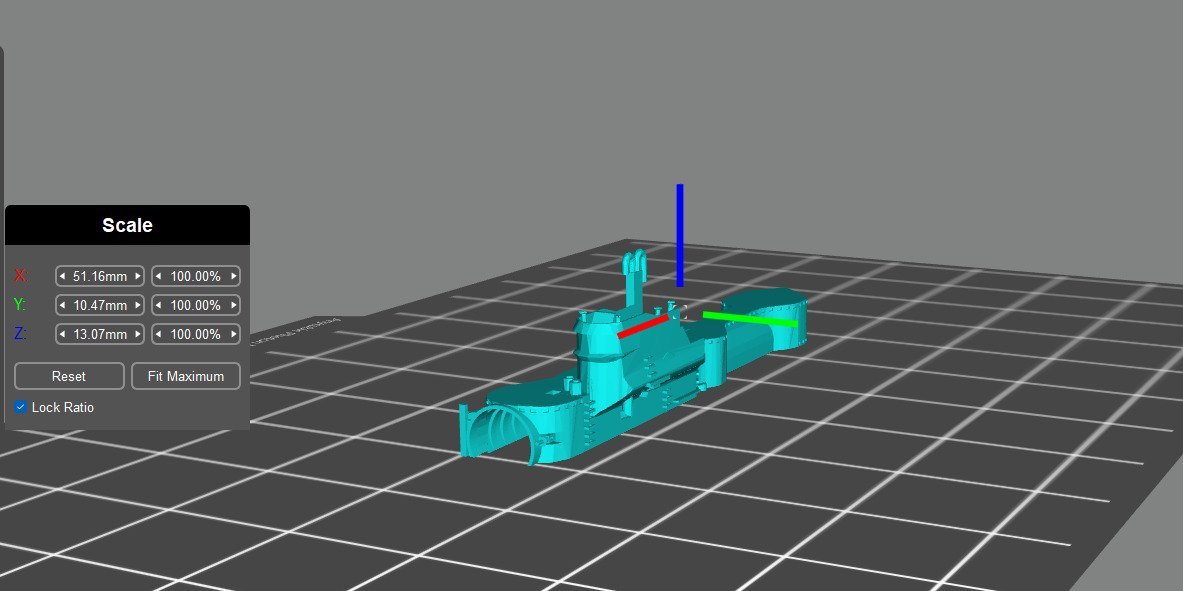
Was looking at the hull only to find out that some details like side vents are not very visible. Also the wooden deck on not incorporated into main body, instead its a ridiculously separate thick piece on top of it.
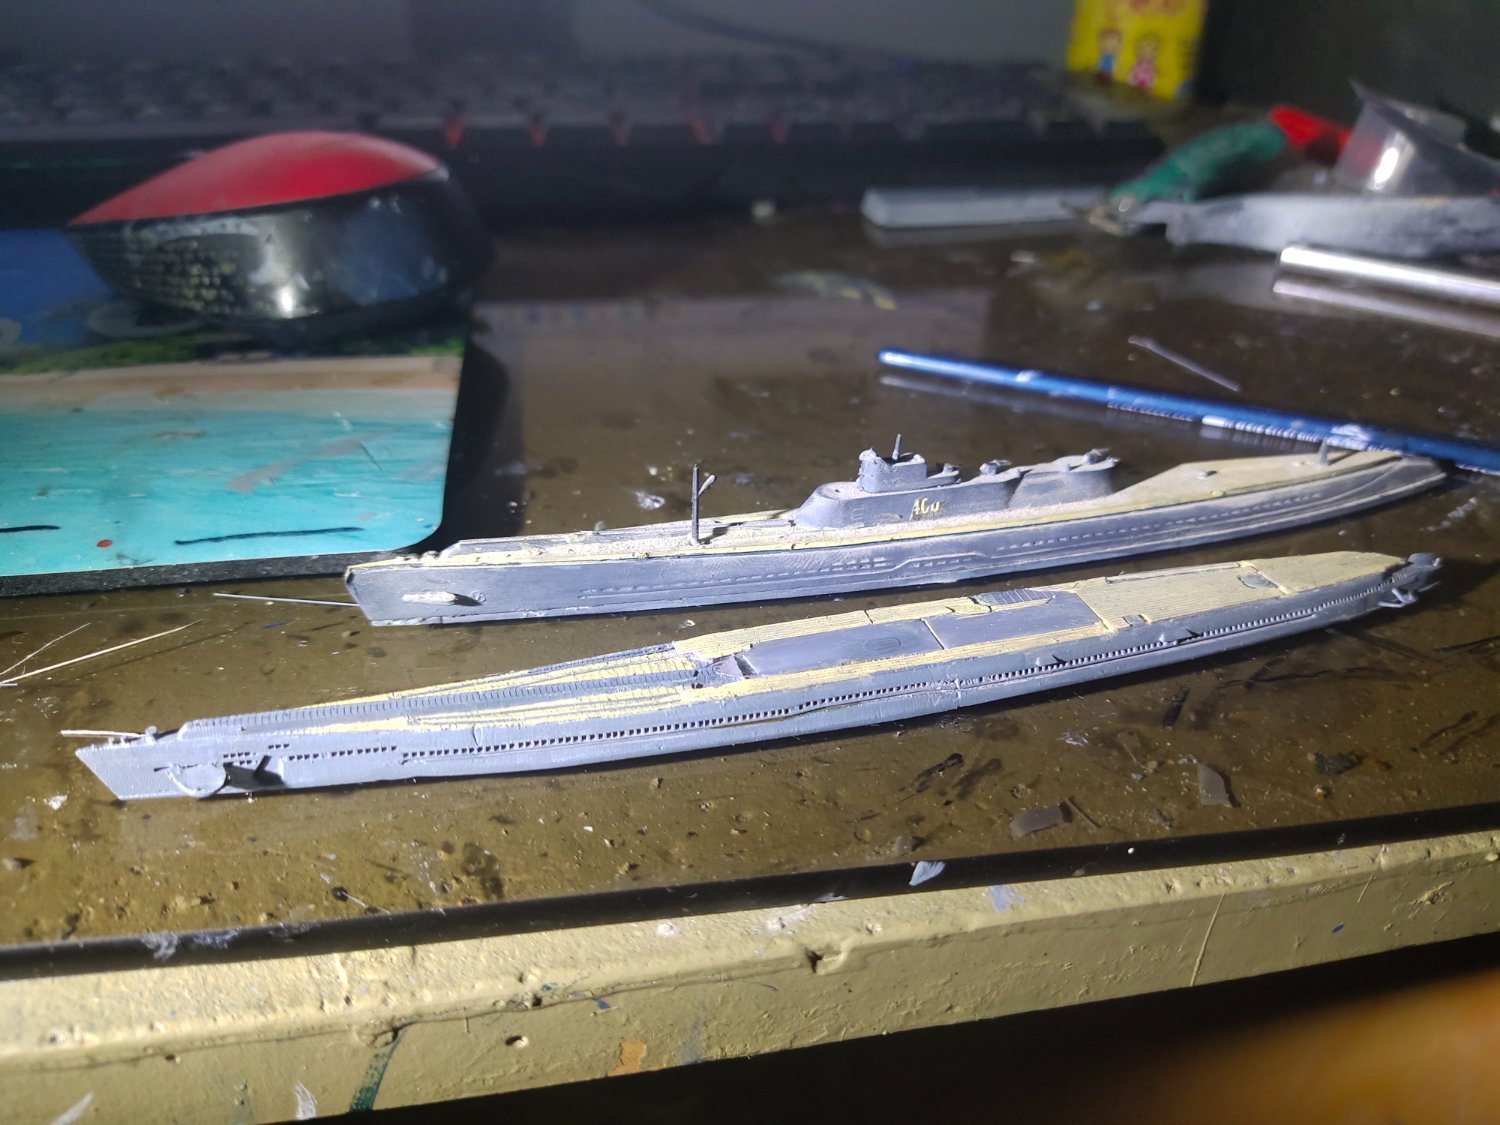
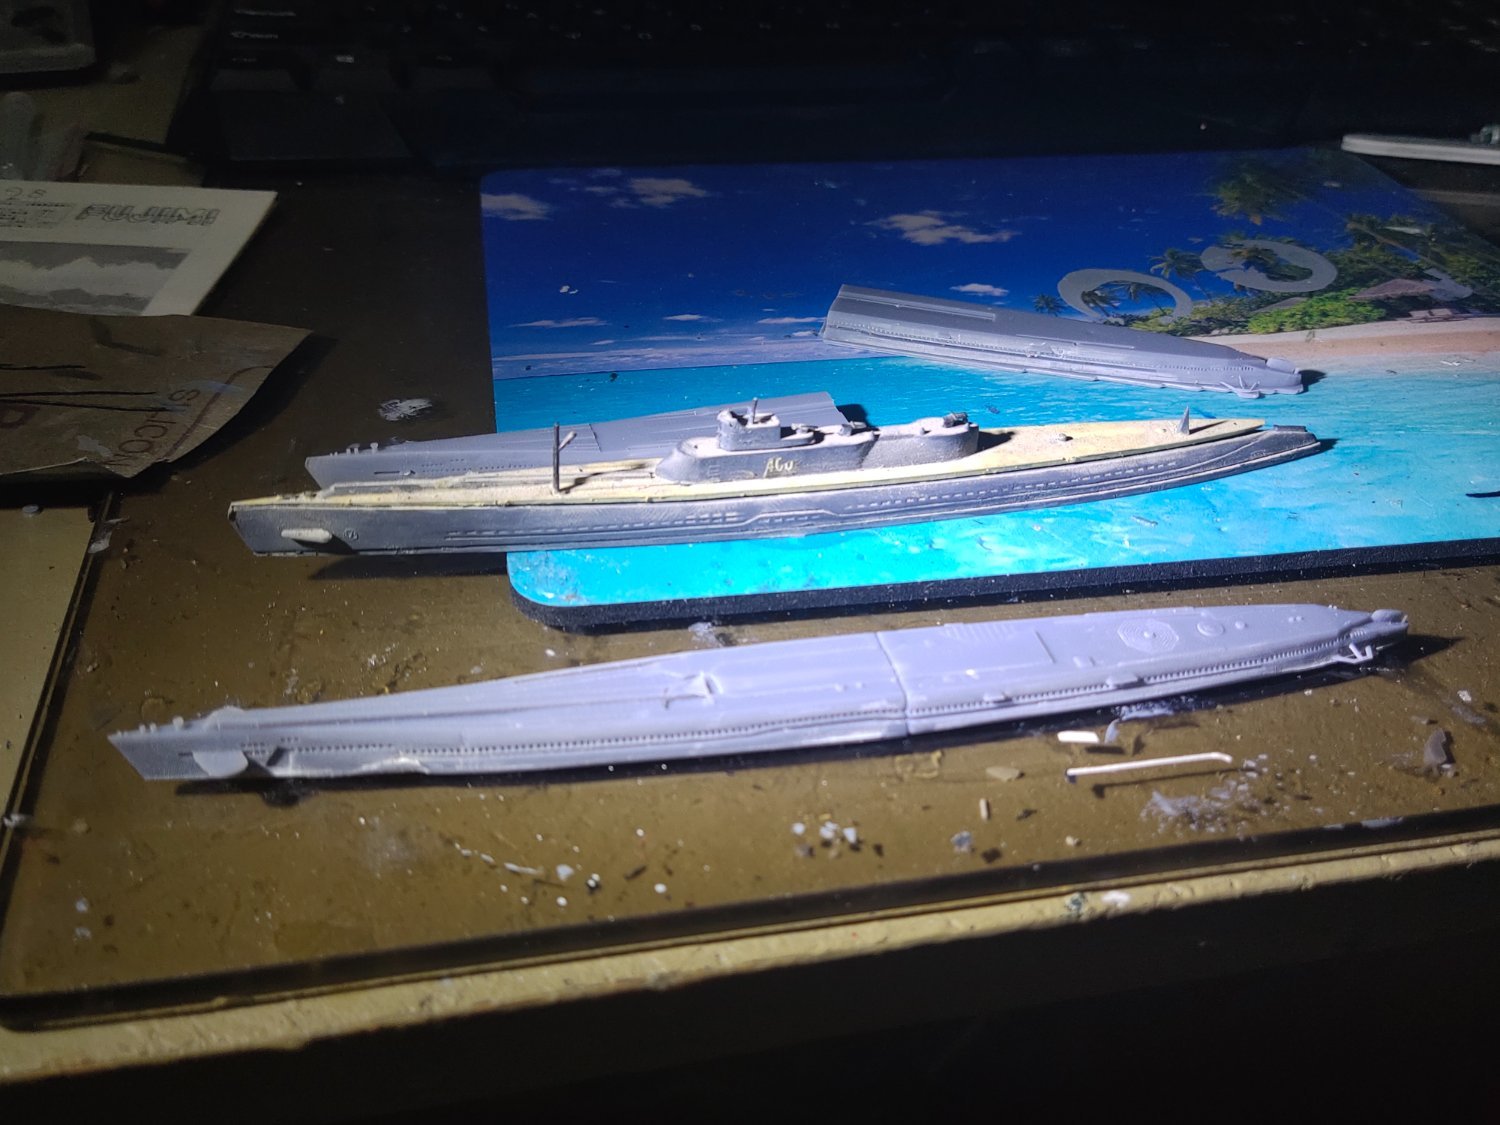
While browsing online I found good information, drawings and plans as well a 3d file of the sub. After some modifications and test I printed the hull in two pieces ,as it was too big to fit on my smallbplate, with good and accurate detail. Not sure if I restore the old kit, maybe use it as a guide for a new kit, it will be my first attempt in a fully printed kit
Hull was glued and gap was filled with CA. Tomorrow will prime it and move on

- mtaylor, thibaultron, Canute and 4 others
-
7
-
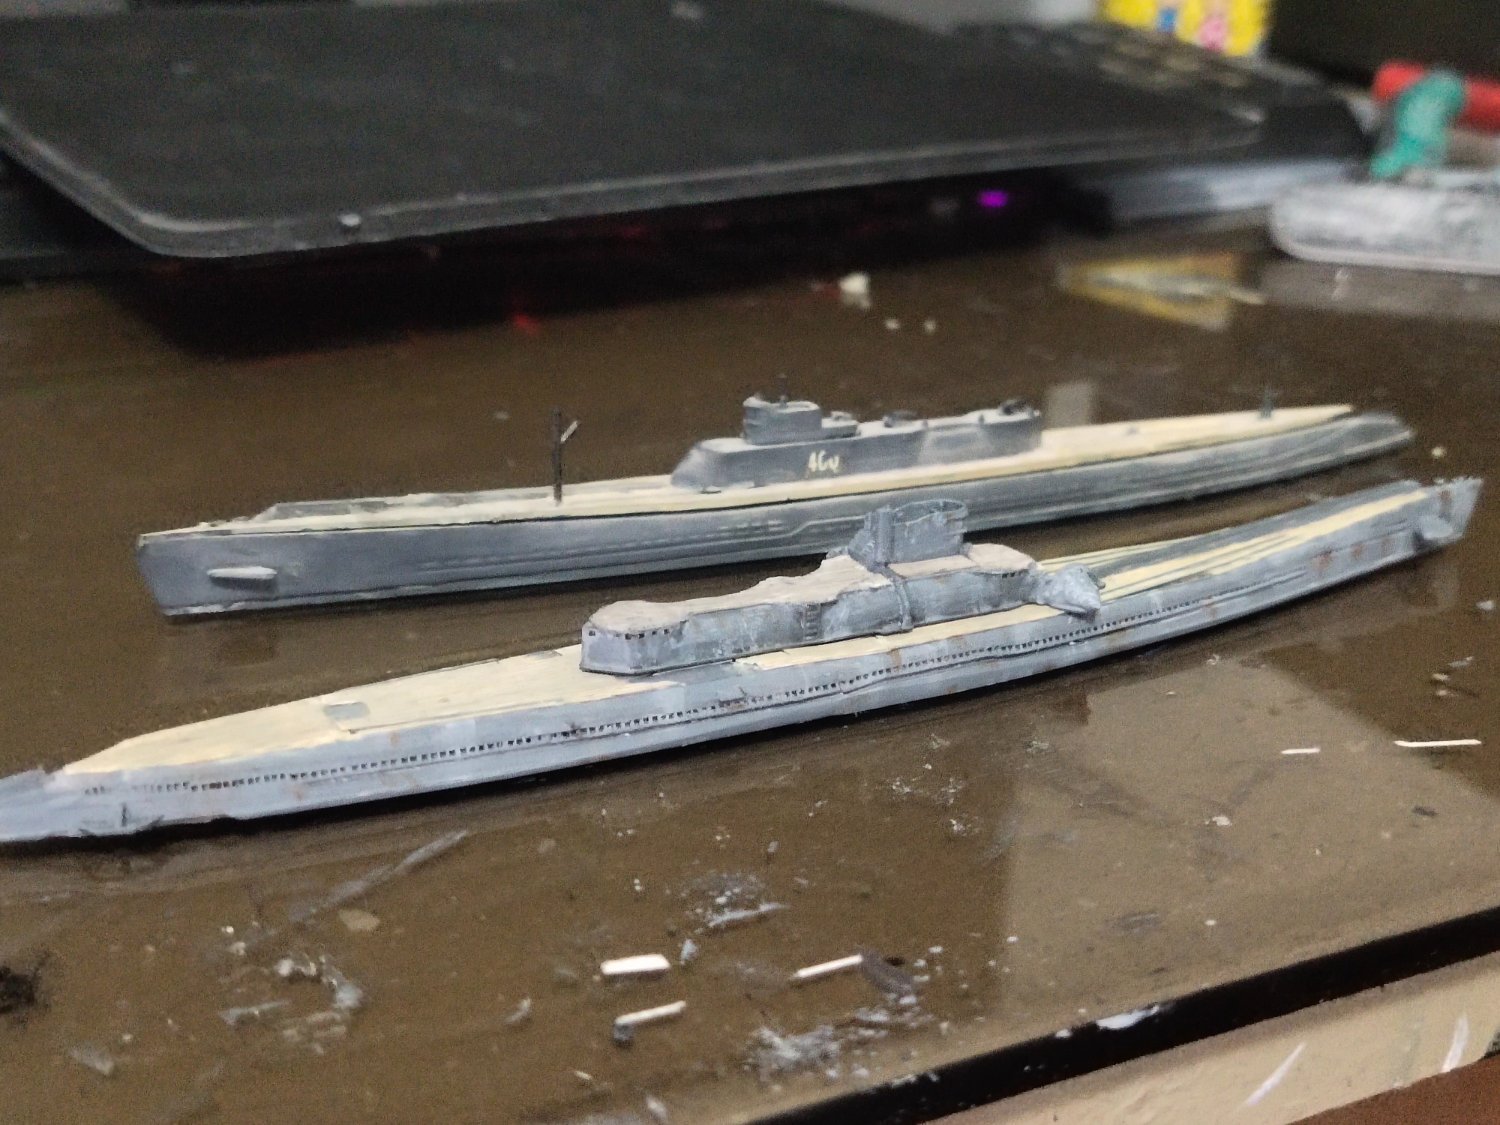
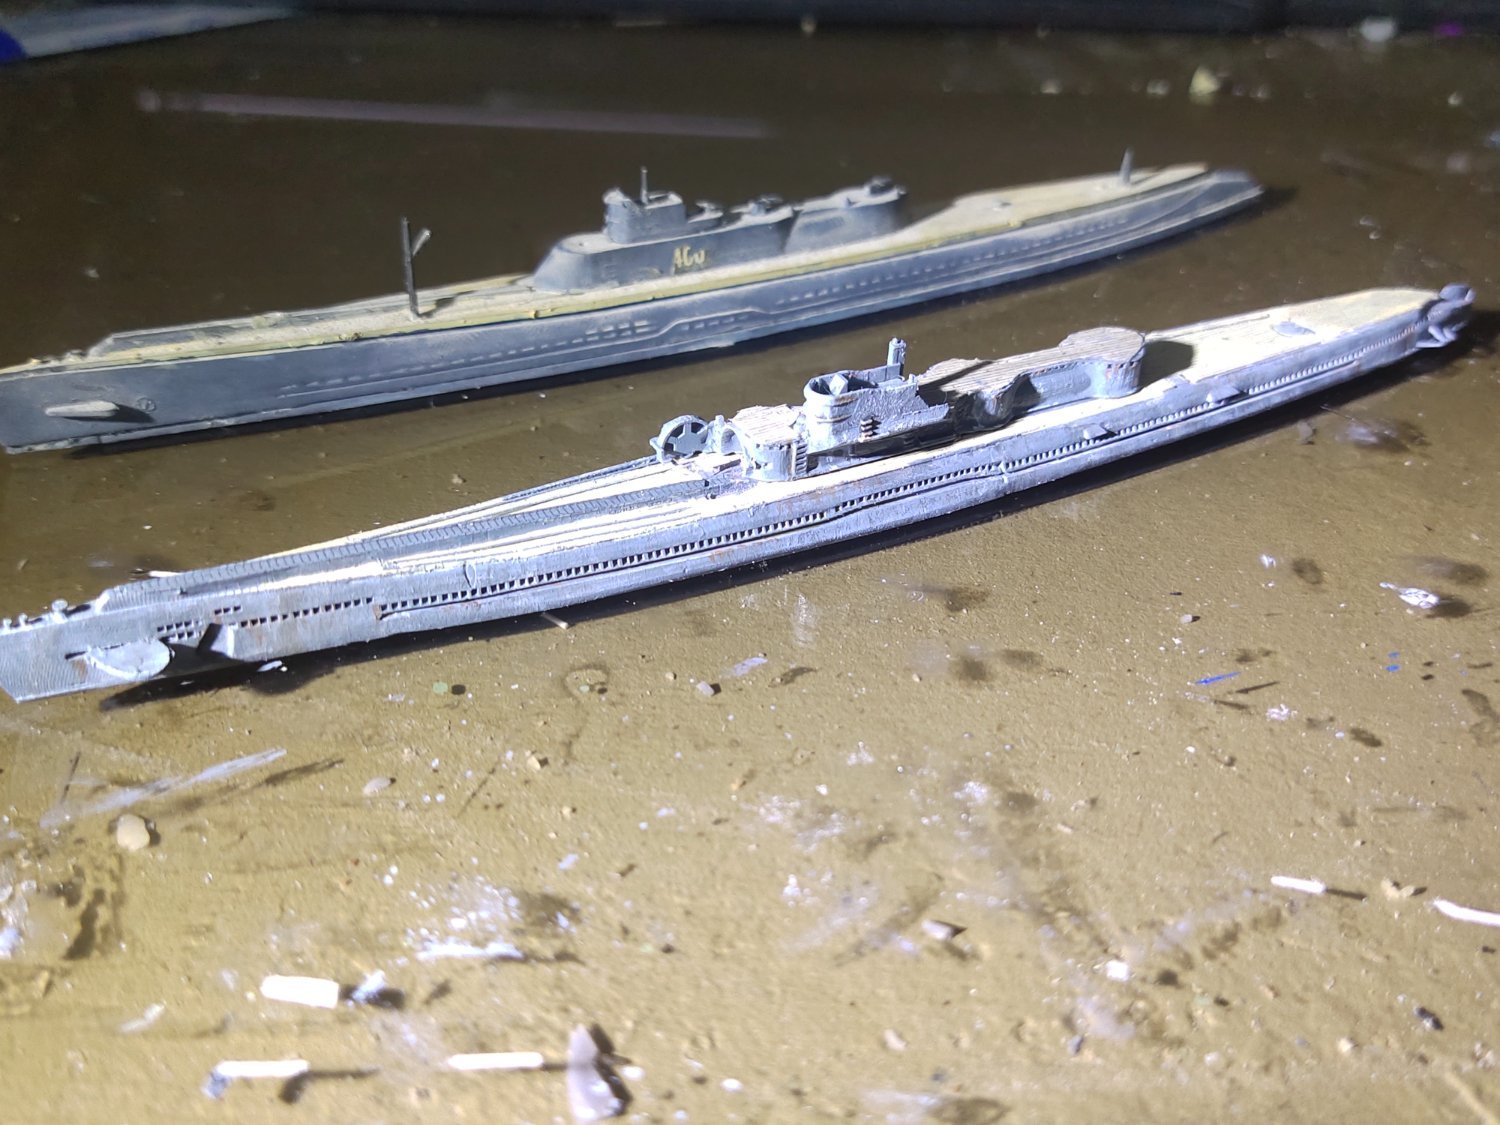
After the big project a small one.
i400 submarine by Aoshima
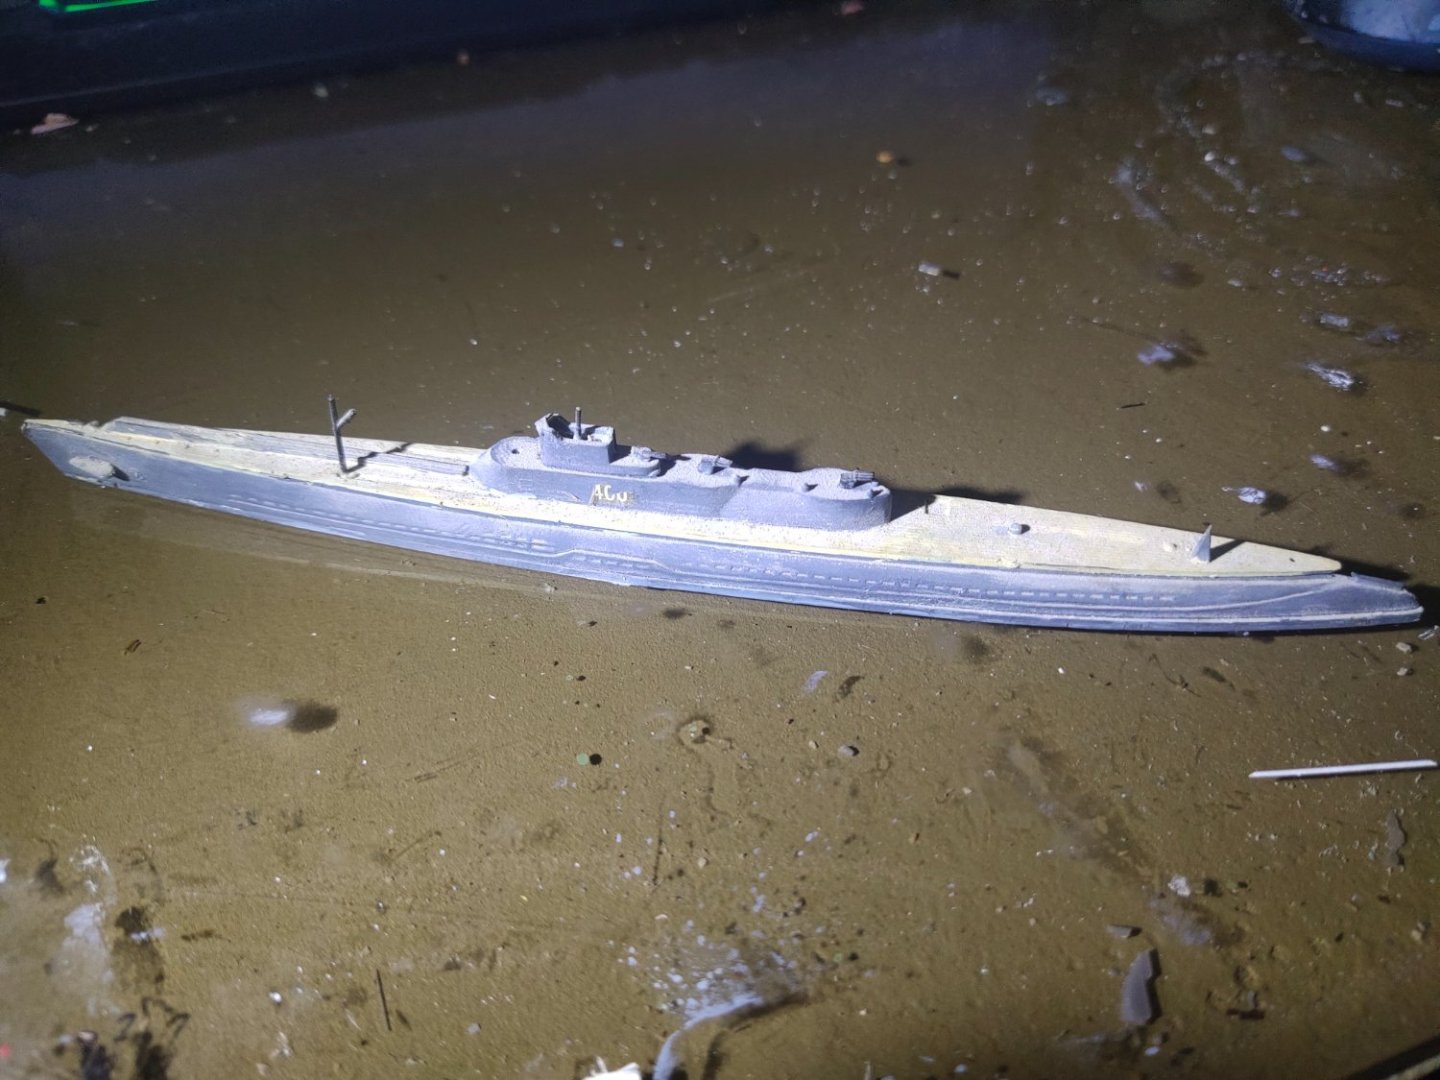
- thibaultron, yvesvidal, mtaylor and 3 others
-
6
-
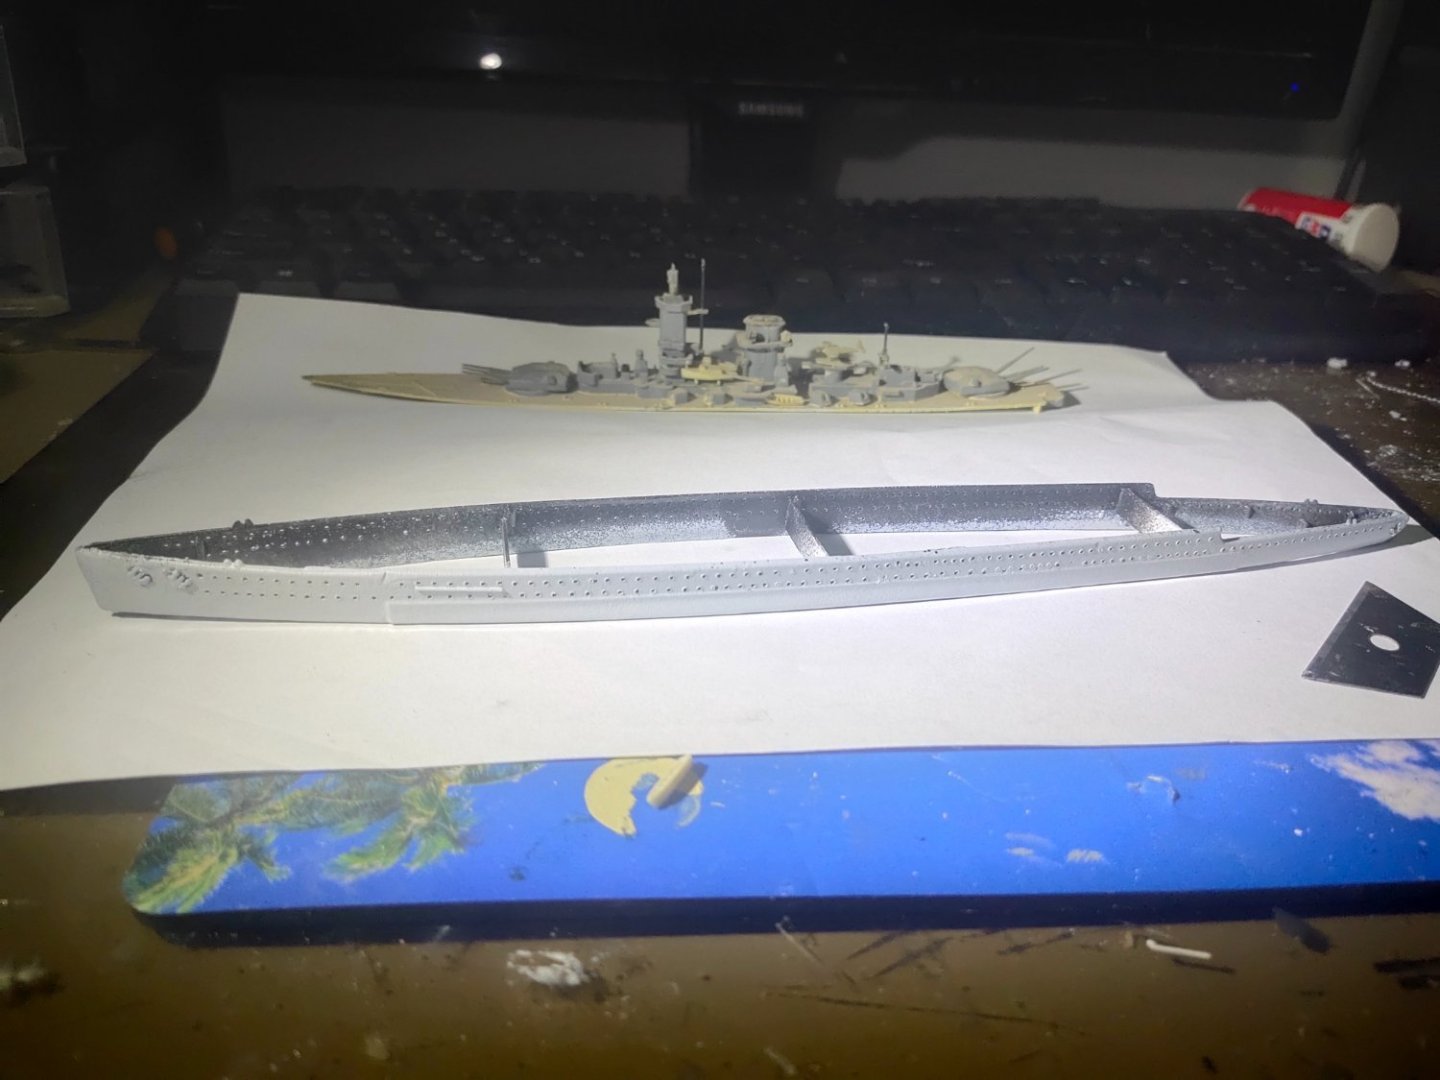
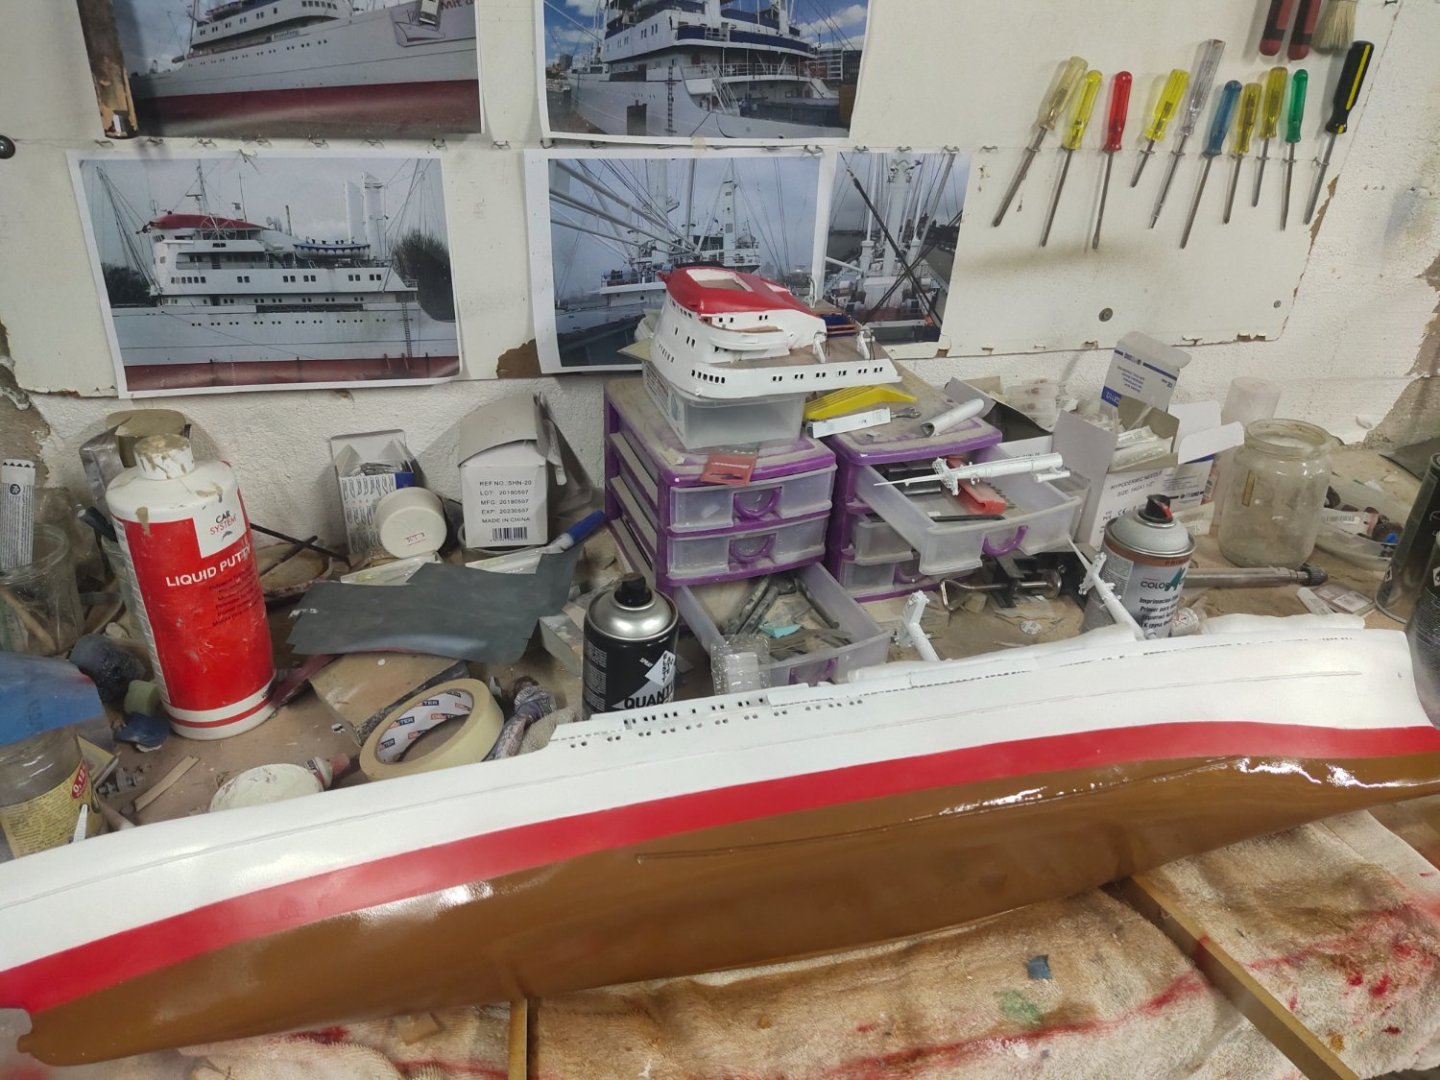
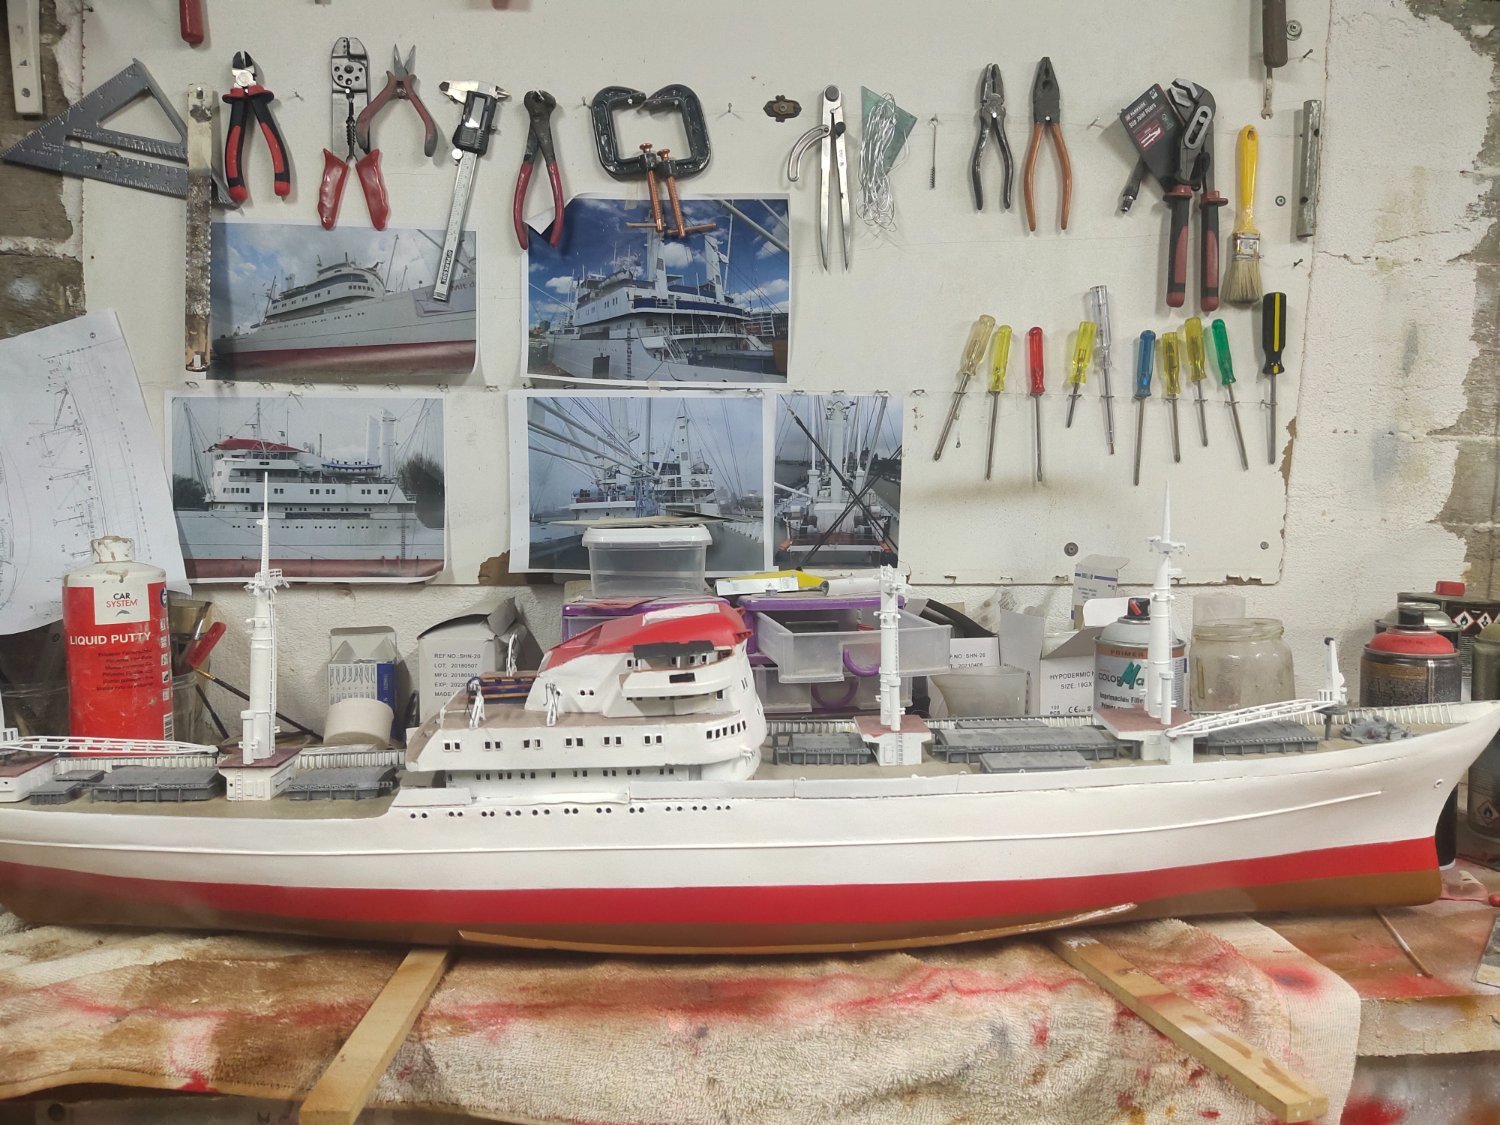
It was about time to do what I avoided to do lately. To paint the hull.
Body was prepared by sanding it with 400,600 and 1500 grit sandpaper.
For this size of hull an air compressor with a medium pistol would be ideal. Spray cans are far away from appropriate. The museum models are painted with colors from automobile industry therefore looks so impressive even bit unnatural.
Then I layered tape strips and start spraying. The curved rear area was troublesome to tape. This hull also requires 3 colors, white, red and brown.

After finishing the layers it took me another week working on evenings to get the desired outcome. Finally a medium gloss varnish was used.

-
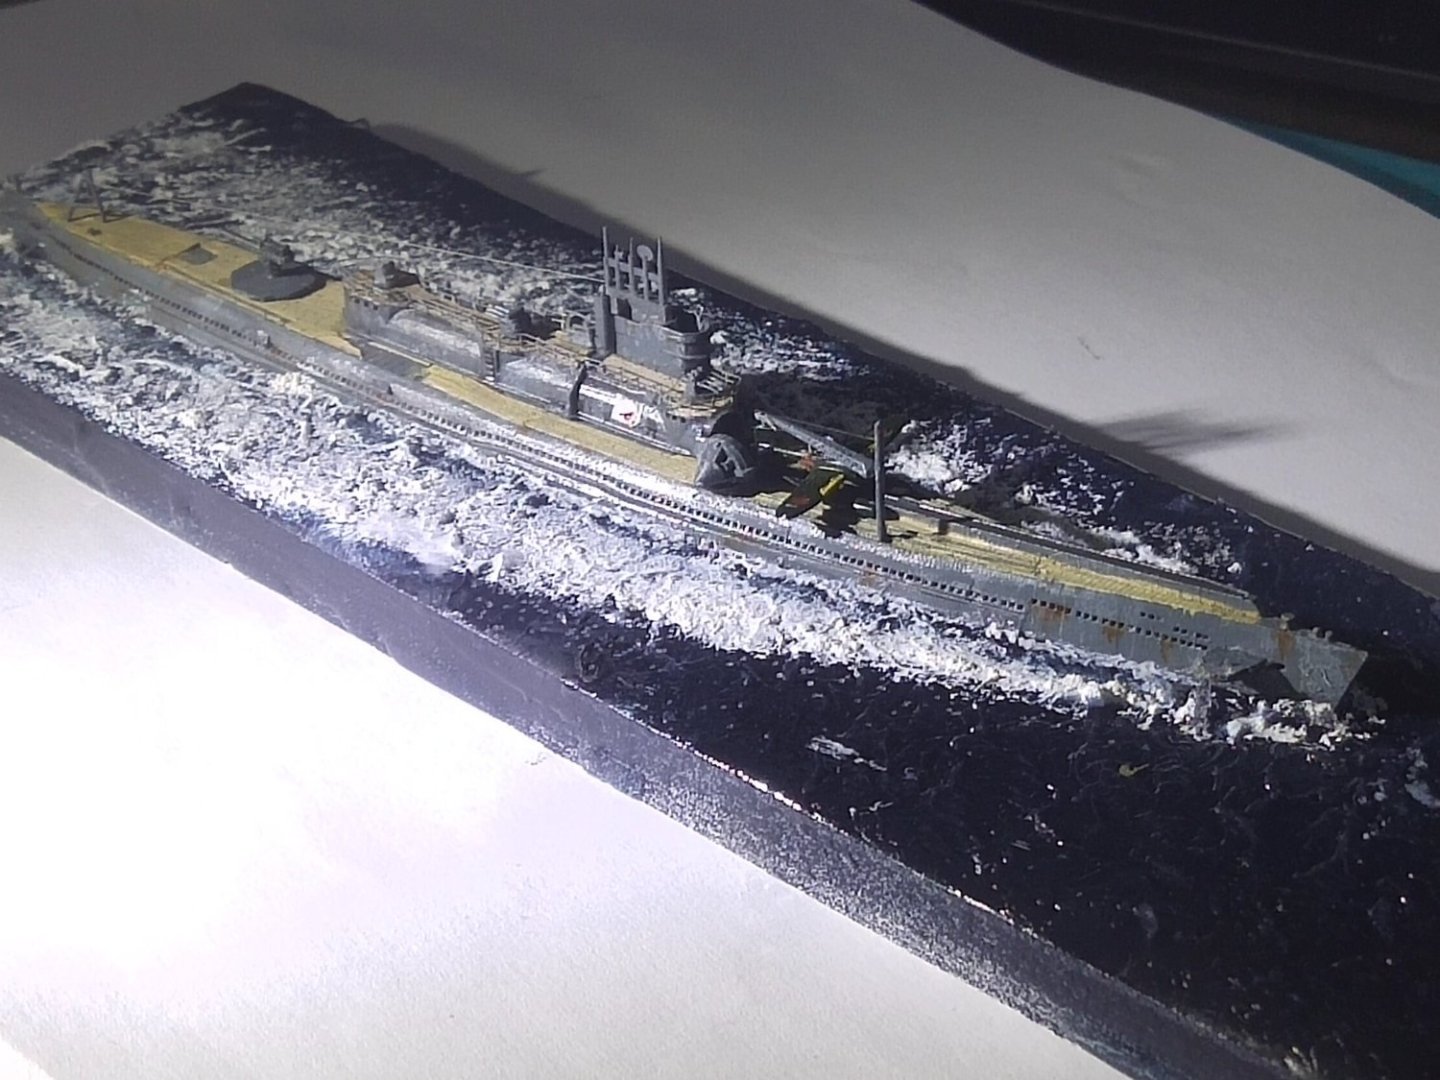
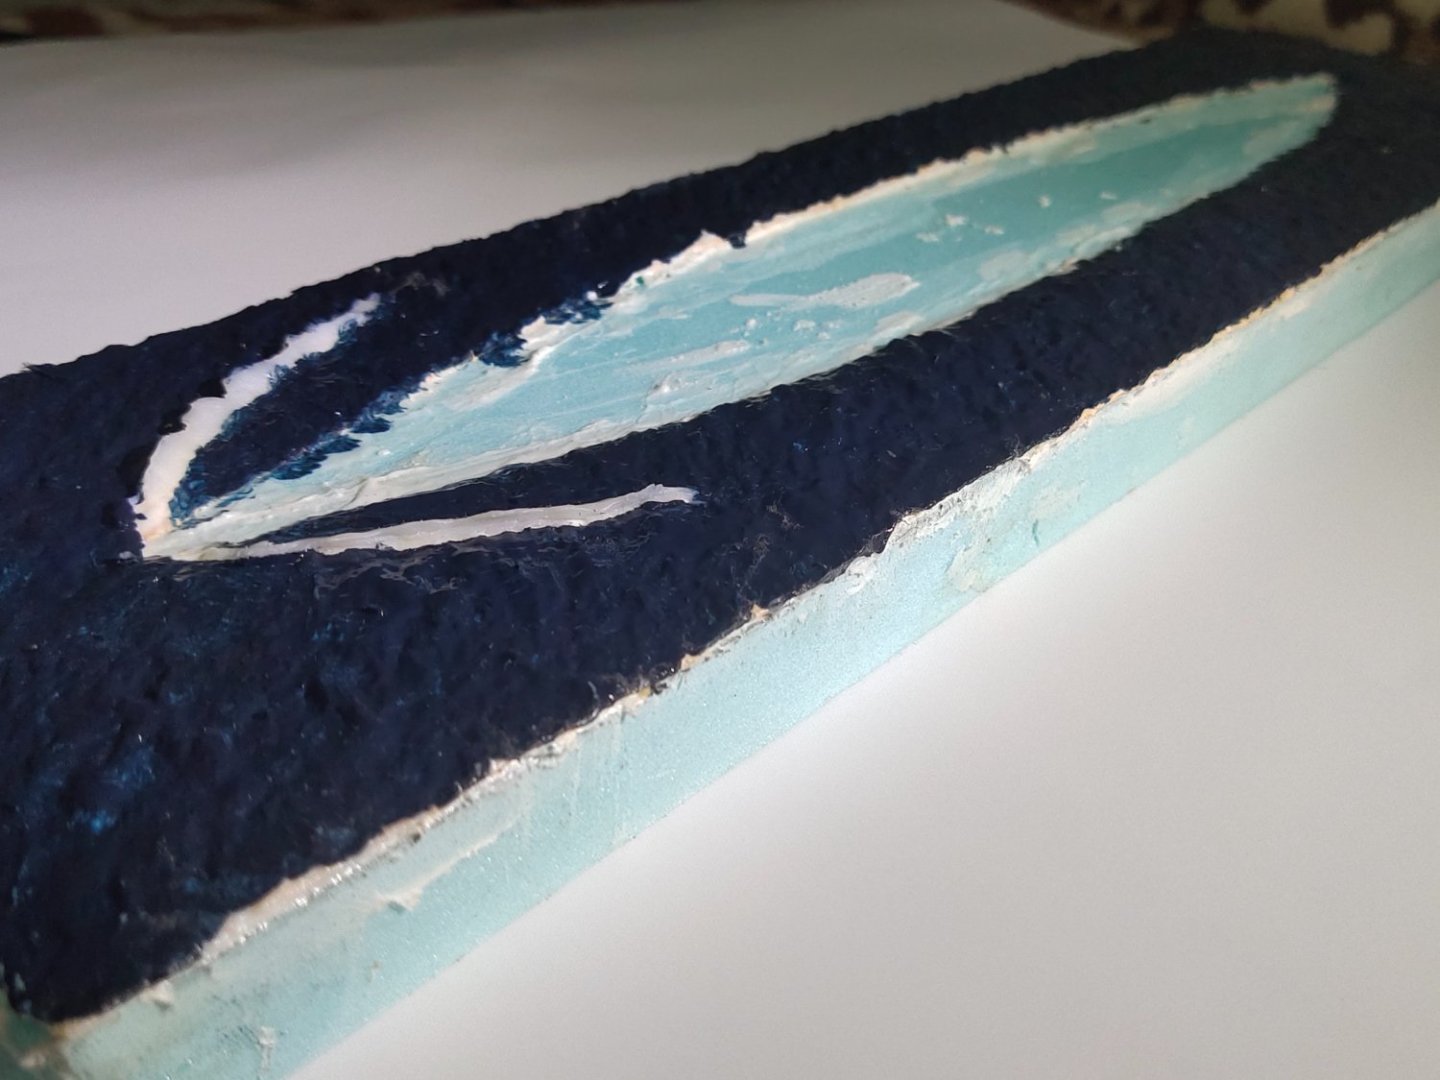
I filled the gap on the waterline.
Next, was to whiten the space between the two long wakes. It was easy because the sea texture, the first step, was completed successfully. I shaped the bow wave with silicone. Finally, gave a couple of coats with high quality gloss and will still sticky I sprinkled few glitters on white surfaces to give a reflective effect under light.
Overall after many attempts I feel like this was not a repeated work but an improved one over the previous. Therefore I feel more happy than pleased. The surrounding balsa wrap is ugly but it ok with it, last time I use it on a Styrofoam base


-
I went to a friend with proper compressor and i managed to preshade the wakes. Next the buffles were created by acrylic putty formed with pin and small fork. To eliminate the "gap" between strong white and prepainted faded area I sprinkled some microballoons.
Next step was to place the ship. Waterline gap was covered with snow paste and a bit of PVA glue. I used a pin to spread it while I had a wet brush stand by to clear the hull from excess white paint.


- king derelict, thibaultron, mtaylor and 4 others
-
5
-
2
-
On 10/29/2023 at 5:10 PM, ted99 said:
Setting up work on the flight deck. I stained the wood-colored deck that came with the Mk 1 detail set with "Navy Blue" Minwax semi-transparent stain. Oil based, so no warping of the wood. Primed the SS PE deck detail sheets with Tamiya light gray primer and then air brushed with Mission Model "US Navy Flight Deck Blue" using the Micro-Mark battery-powered air brush. The air brush worked out OK. I'm sure it's not as good as a real air brush, but it's ideal for my situation in a Retirement Home condo. Especially as I can use paint colors that are not available in spray cans.
I'm going to start on the decking at the center island where I'm sure of the location and can use it as the register for the subsequent pieces being added. The picture shows it dry-fitted. Lots and lots of PE pieces interior to the wood deck and it's going to be a learning process as I go forward. air brush sitting below the flight deck.

how does this battery operated airbrush performs? And what type of paint are you using?
-
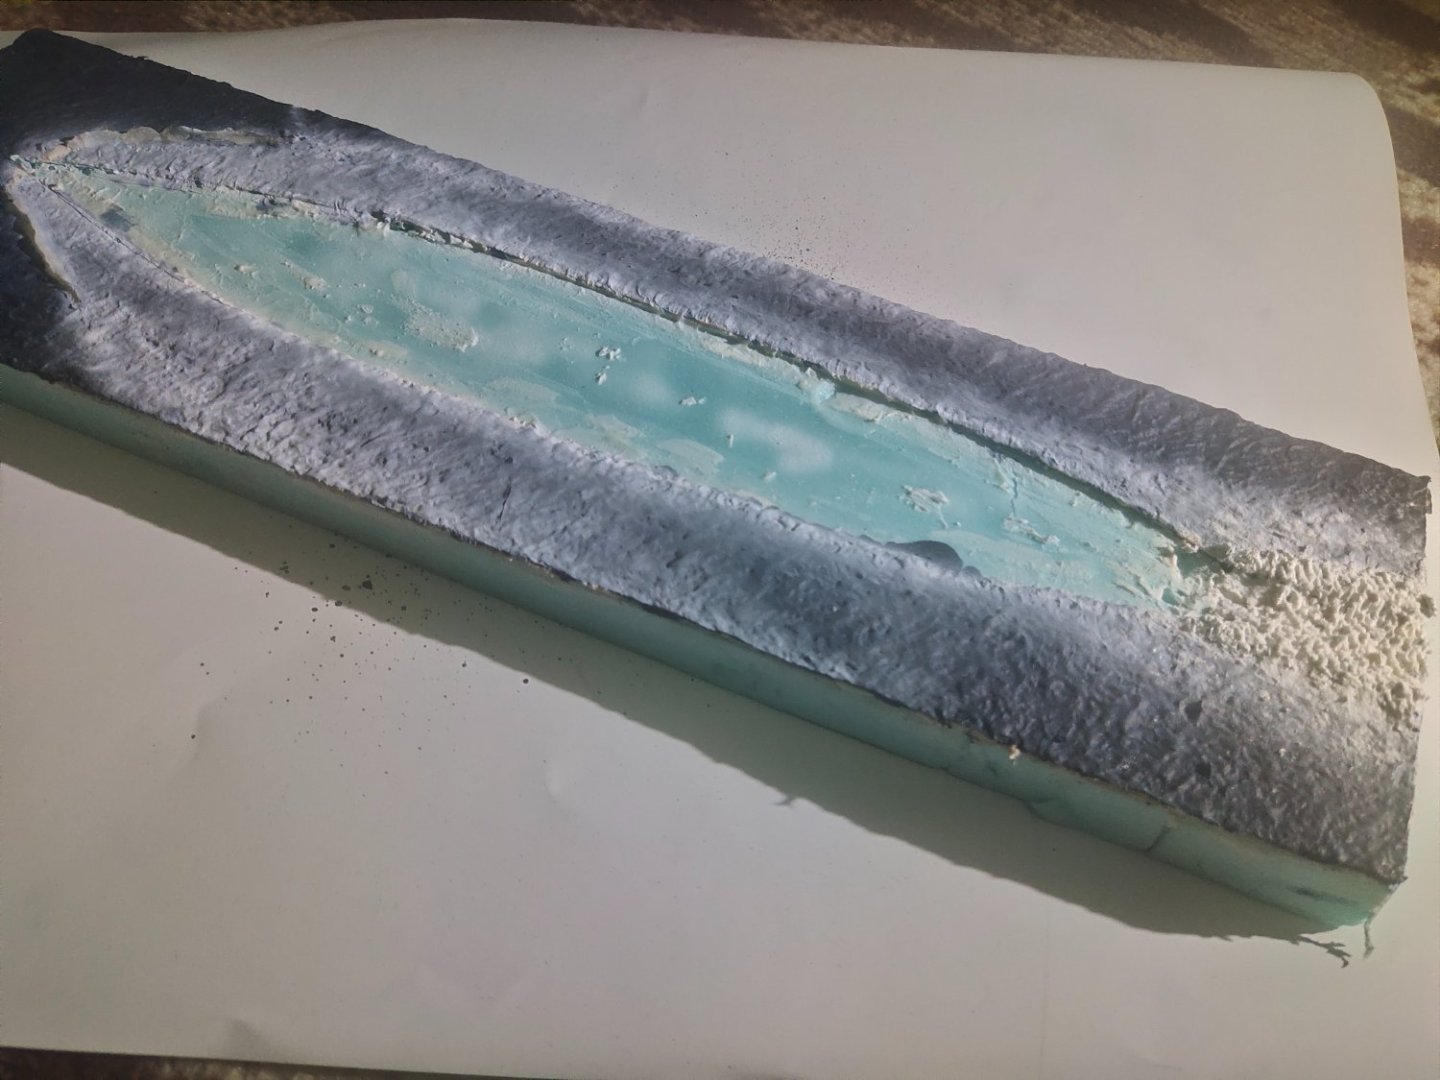
So I did a lot of research before starting the base. As always I will try a new method.
What is very essential in a water layout is the texture.I have long time quited the random pattern created by foil sheet and create mine. Today an artist paper will be used with wavy rough surface which still need some modification.
So I cut the paper and glued it on a 2cm Styrofoam piece.

Next, I gave it a couple of thick primer coats with brush to smoothen it up a bit. The result was mediocre so process was repeated with heavy gel instead of acrylic. This also gave me the chance of reshaping the surface in some areas by creating waves in the same direction of the preformed ones.
Then i took a few hours off to research about bow waves. My target is a higher speed ship on a light - moderate weather. Curling a semi dried piece of gel glue I managed to get a desired shape.
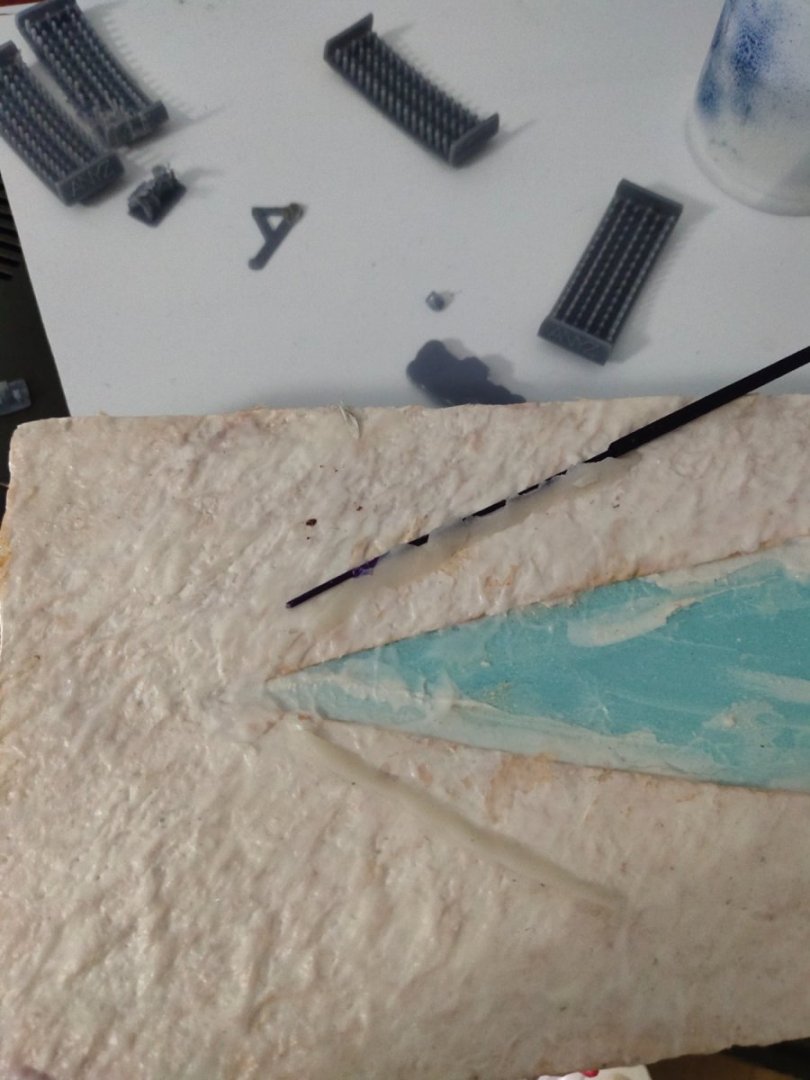
Next phase was an initial layer of dark blue acrylic and take a photo while its still wet to appear a temporary glossy effect
- mtaylor, thibaultron, Canute and 3 others
-
6
-
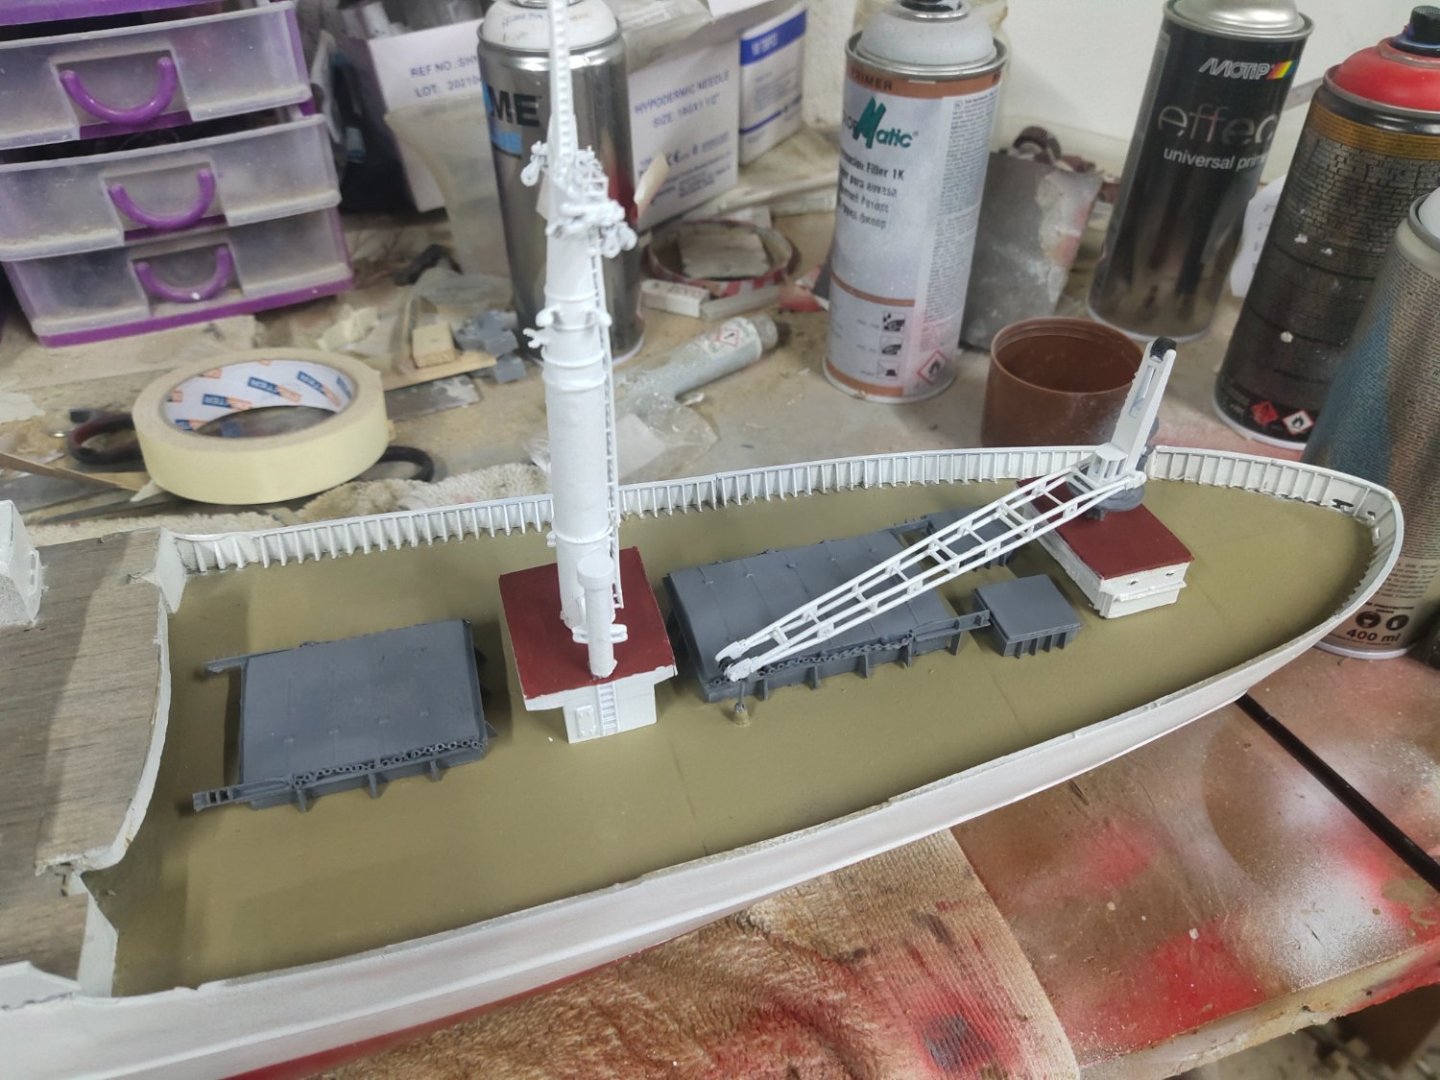
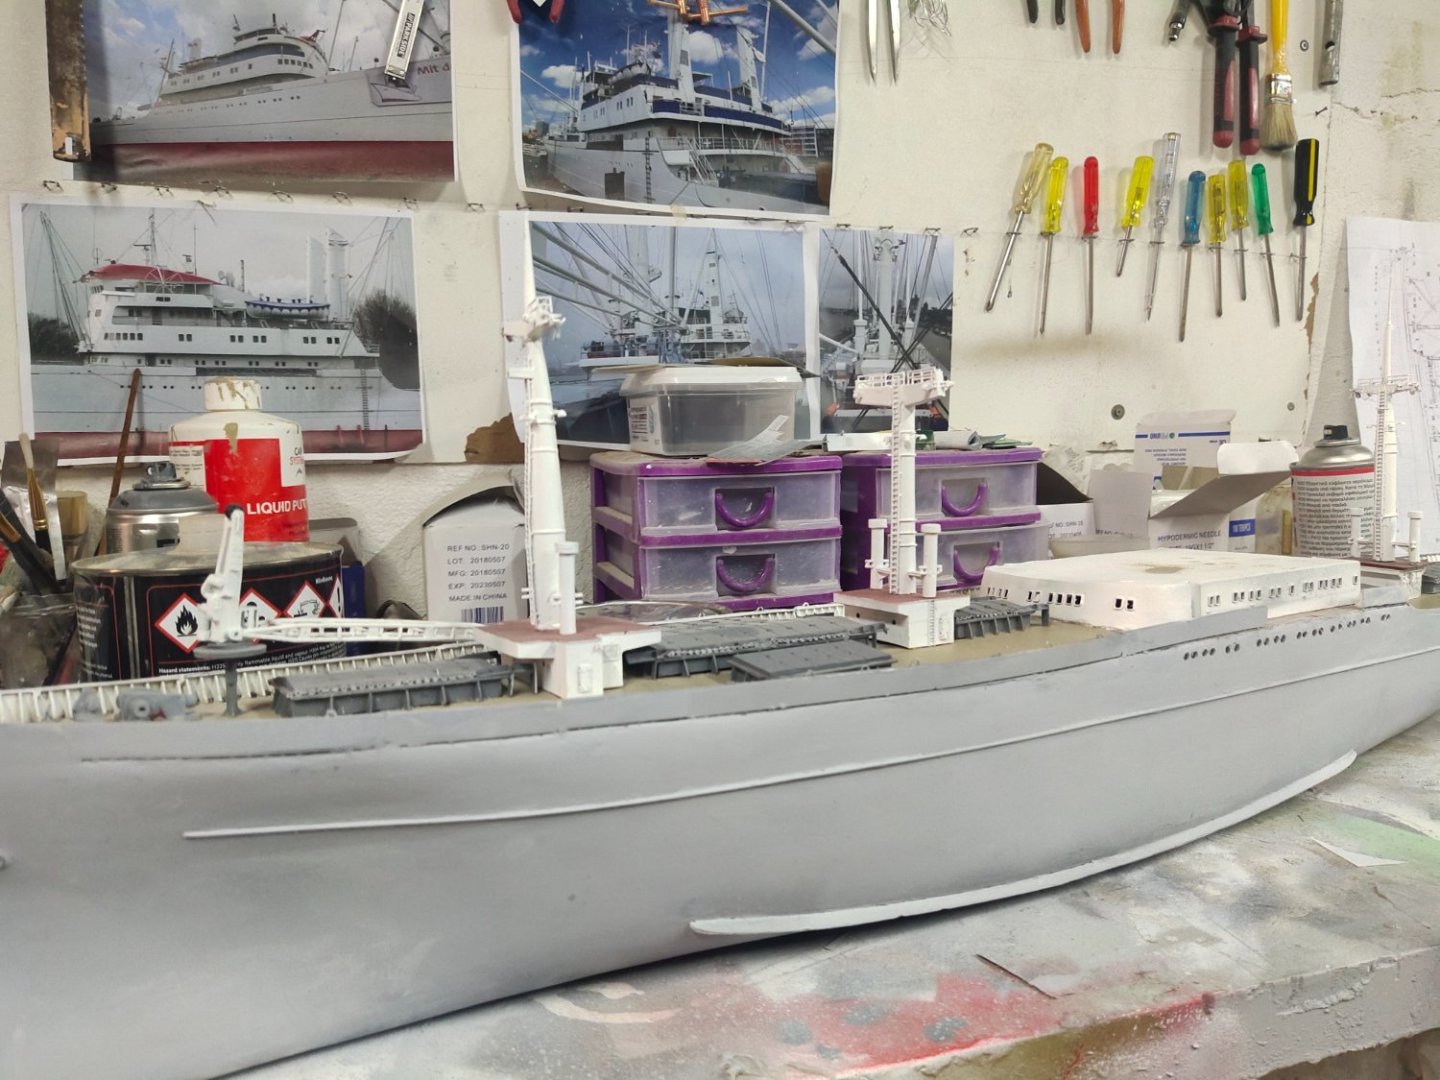
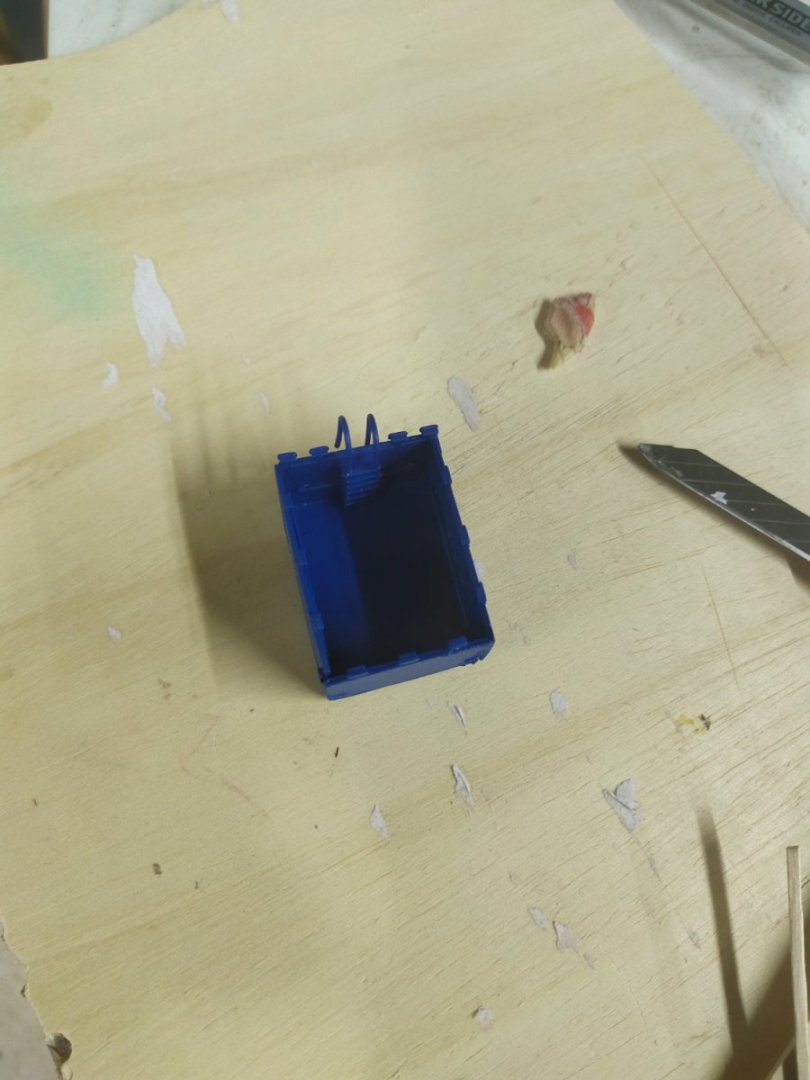
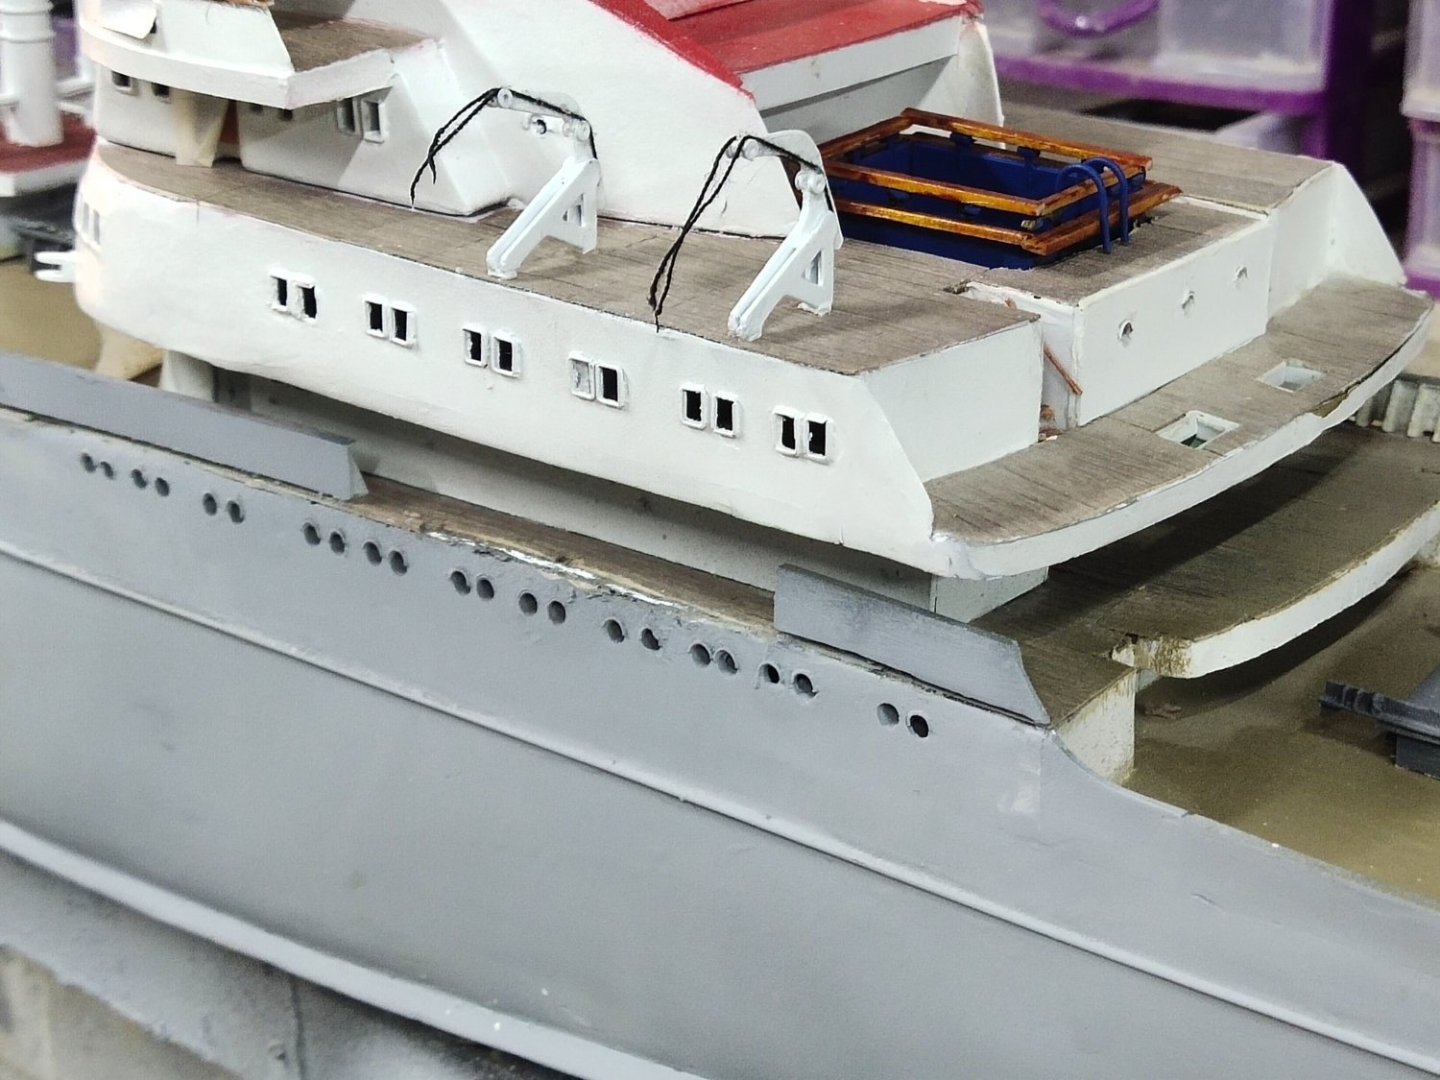
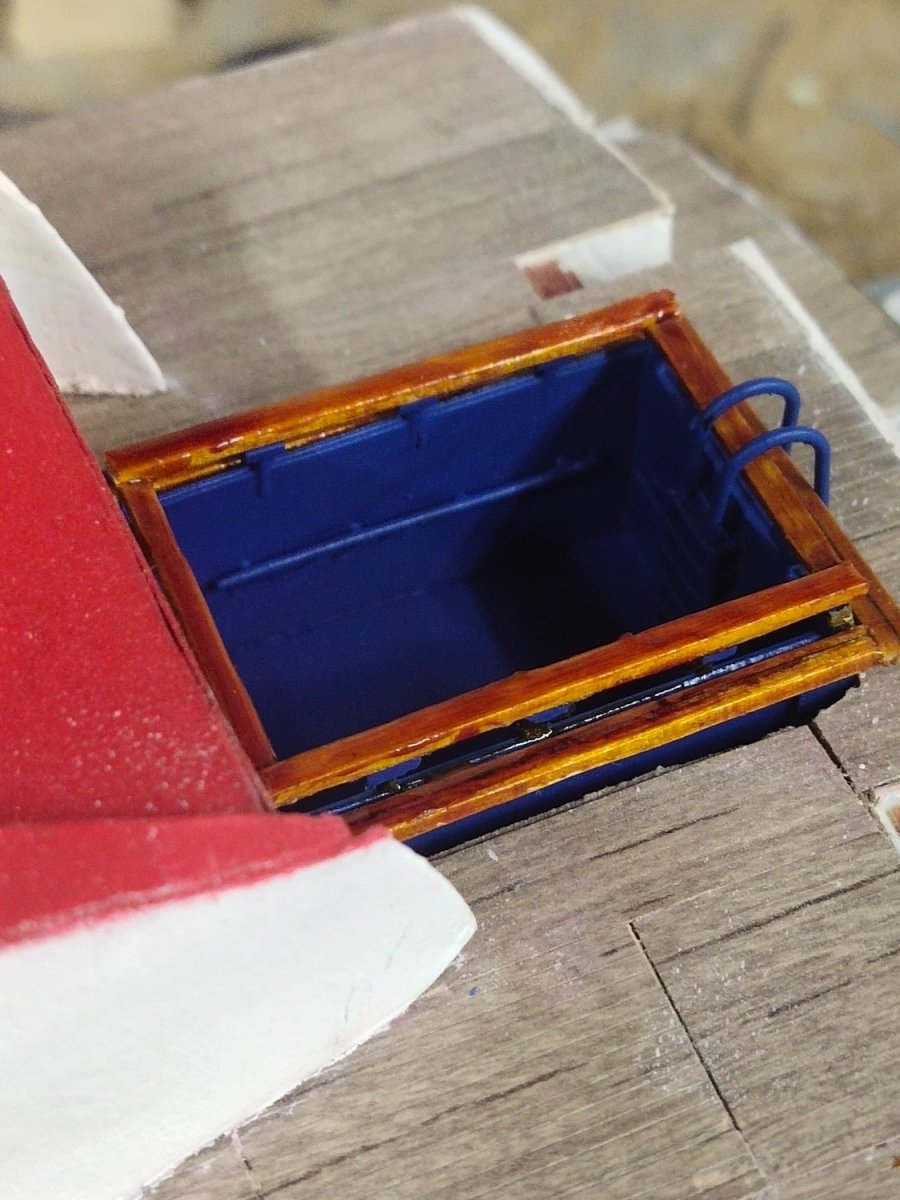
Next was to replace the swimming pool. I printed the walls, glued them together. Wood fillet chopped ,varnished and put on.
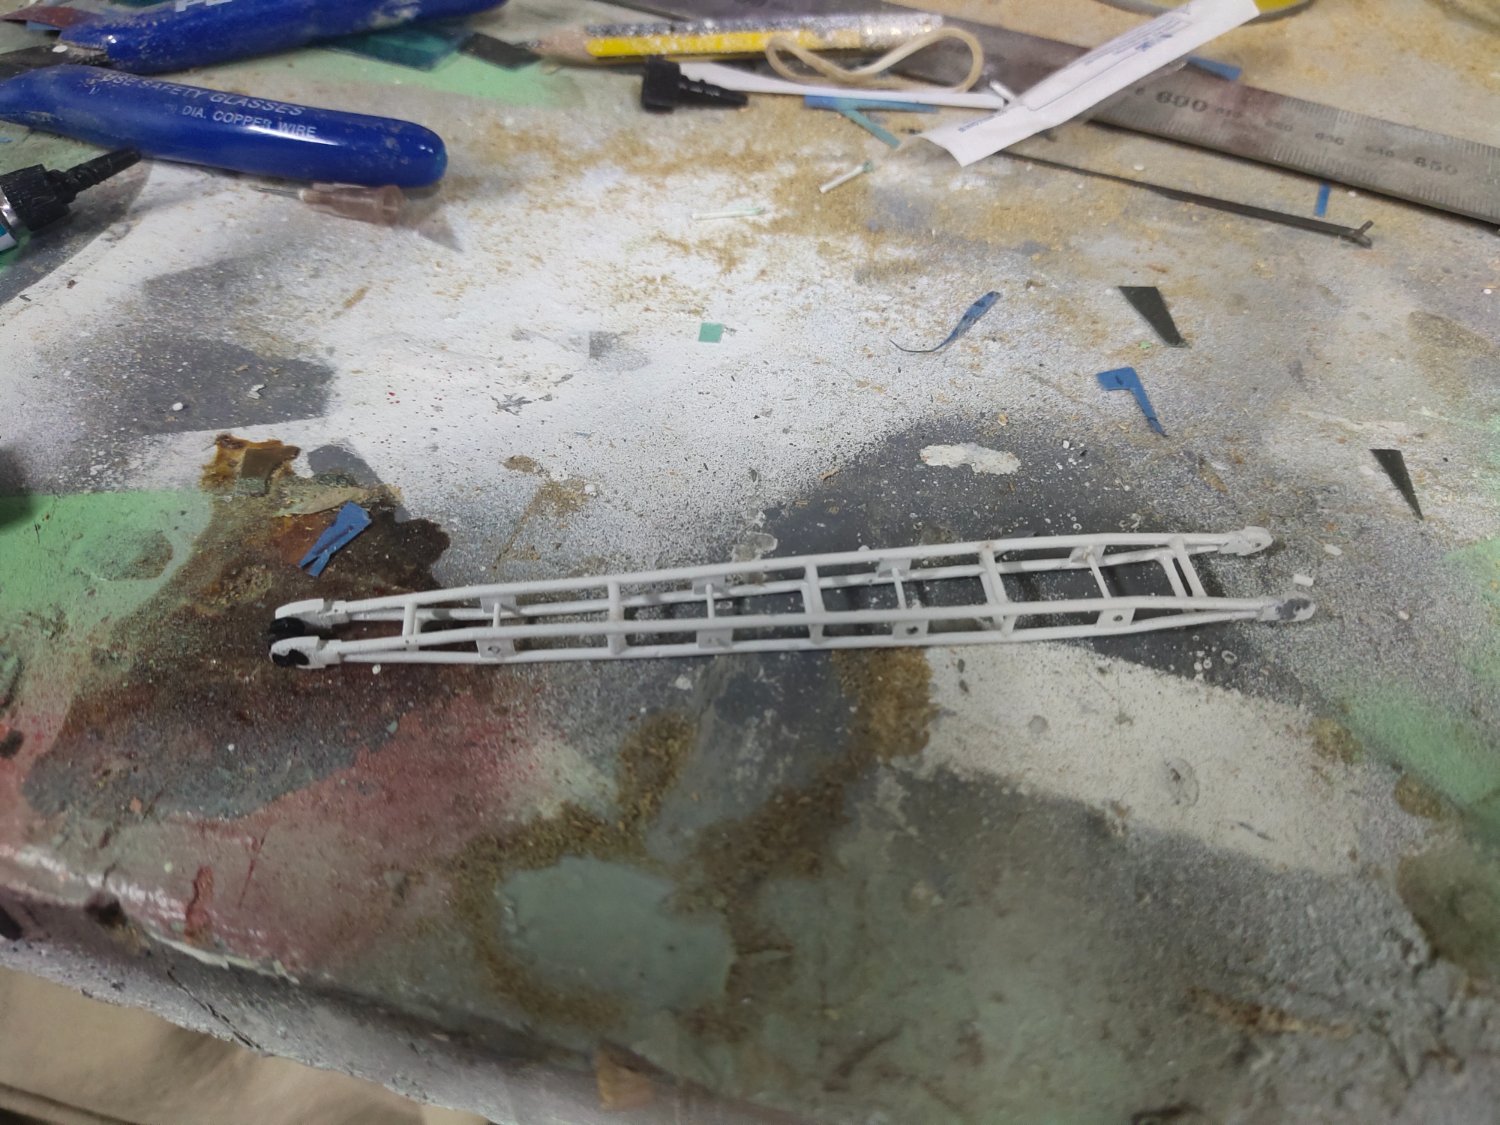
Next step was the davits. The base was 3d printed but the upper part was a bit hard to draw so it was scratch built from 1mm styrene. Then 2.5mm reels added.


- mtaylor, GrandpaPhil, Mirabell61 and 1 other
-
4
-
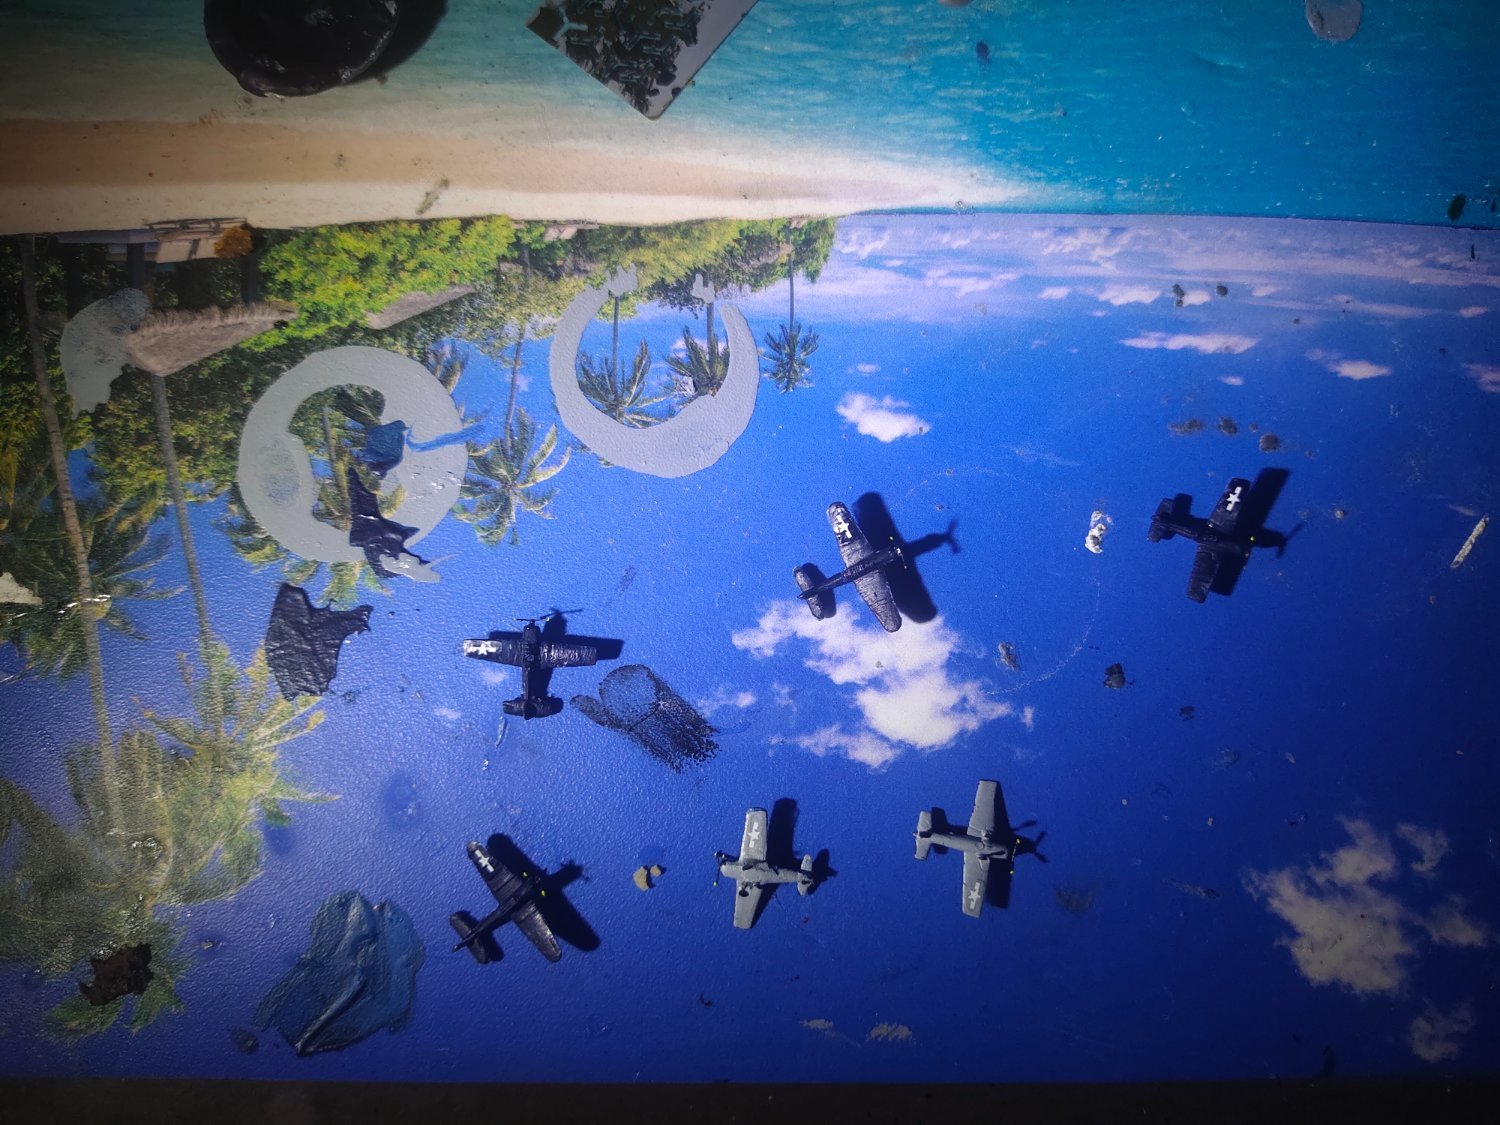
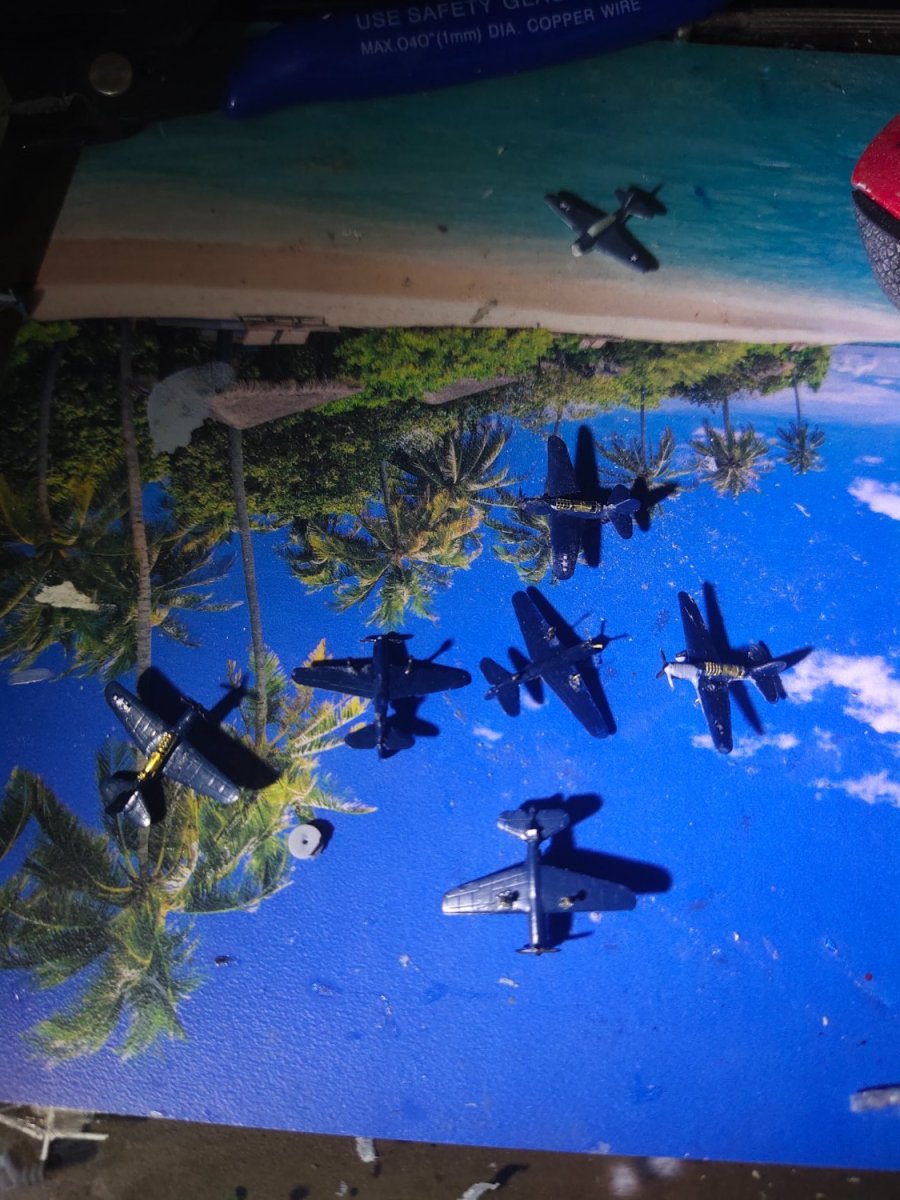
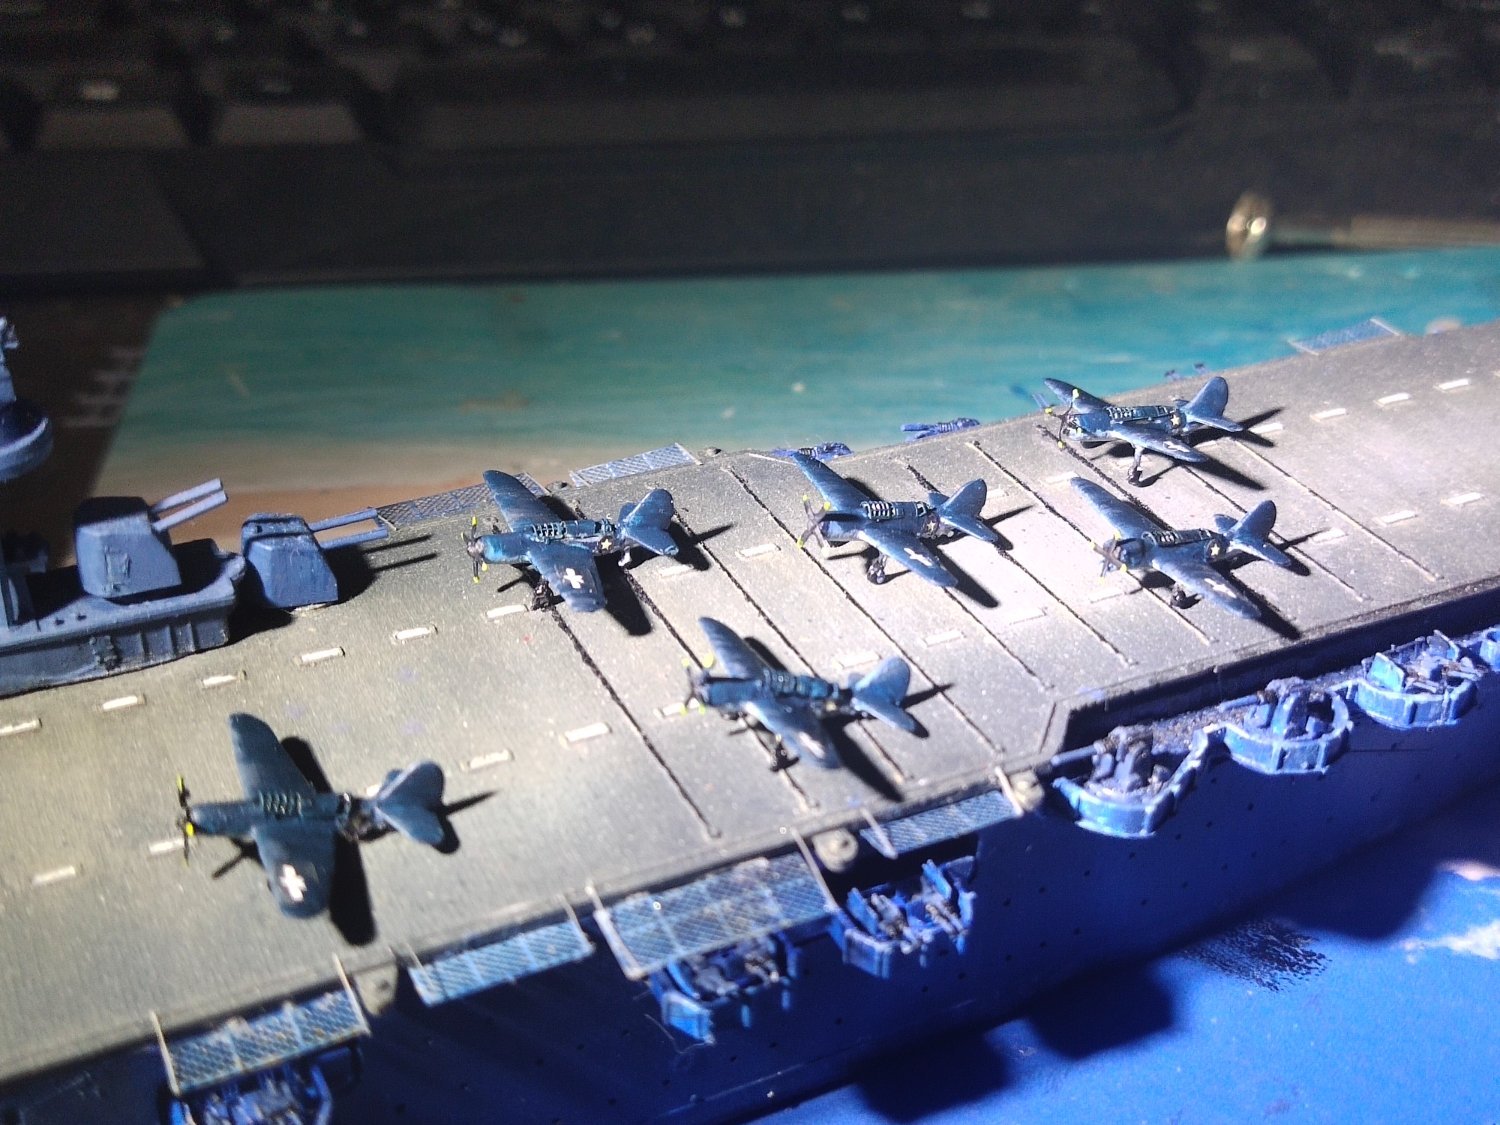
Airgroup is done. With 4 Hellcats and 2 Devastators. Its the first time I use all the PE upgrade parts, canopy, propeller, landing gear, even rear single gear. Added some weathering and put on deck. A few minor work tomorrow and I will proceed to the water base

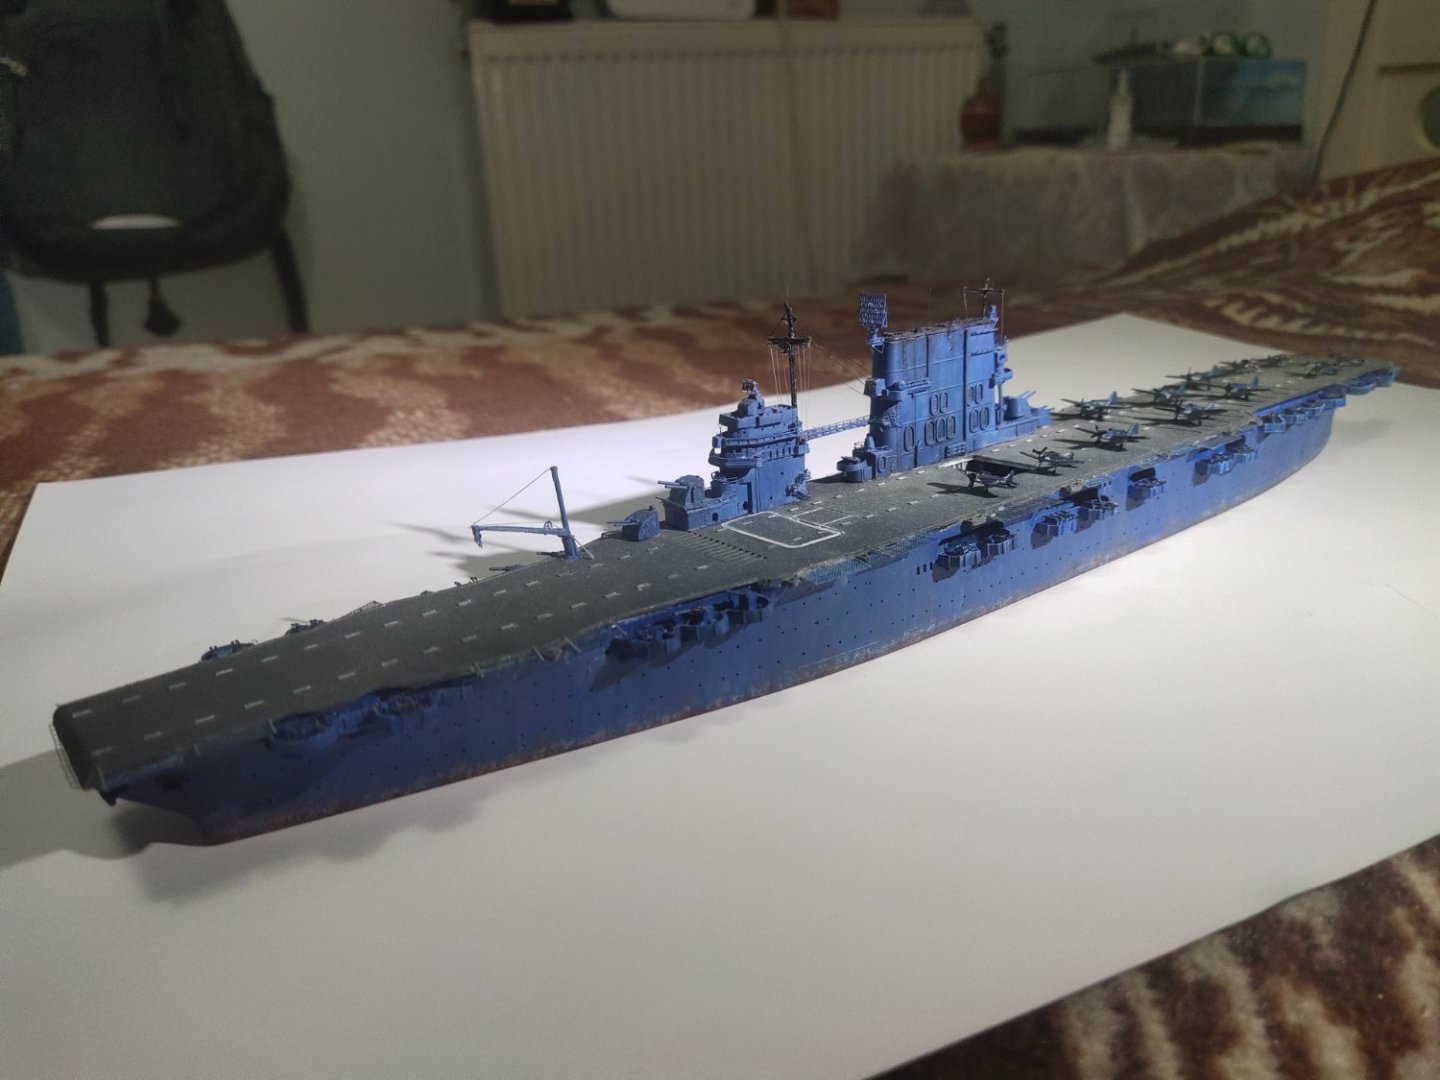

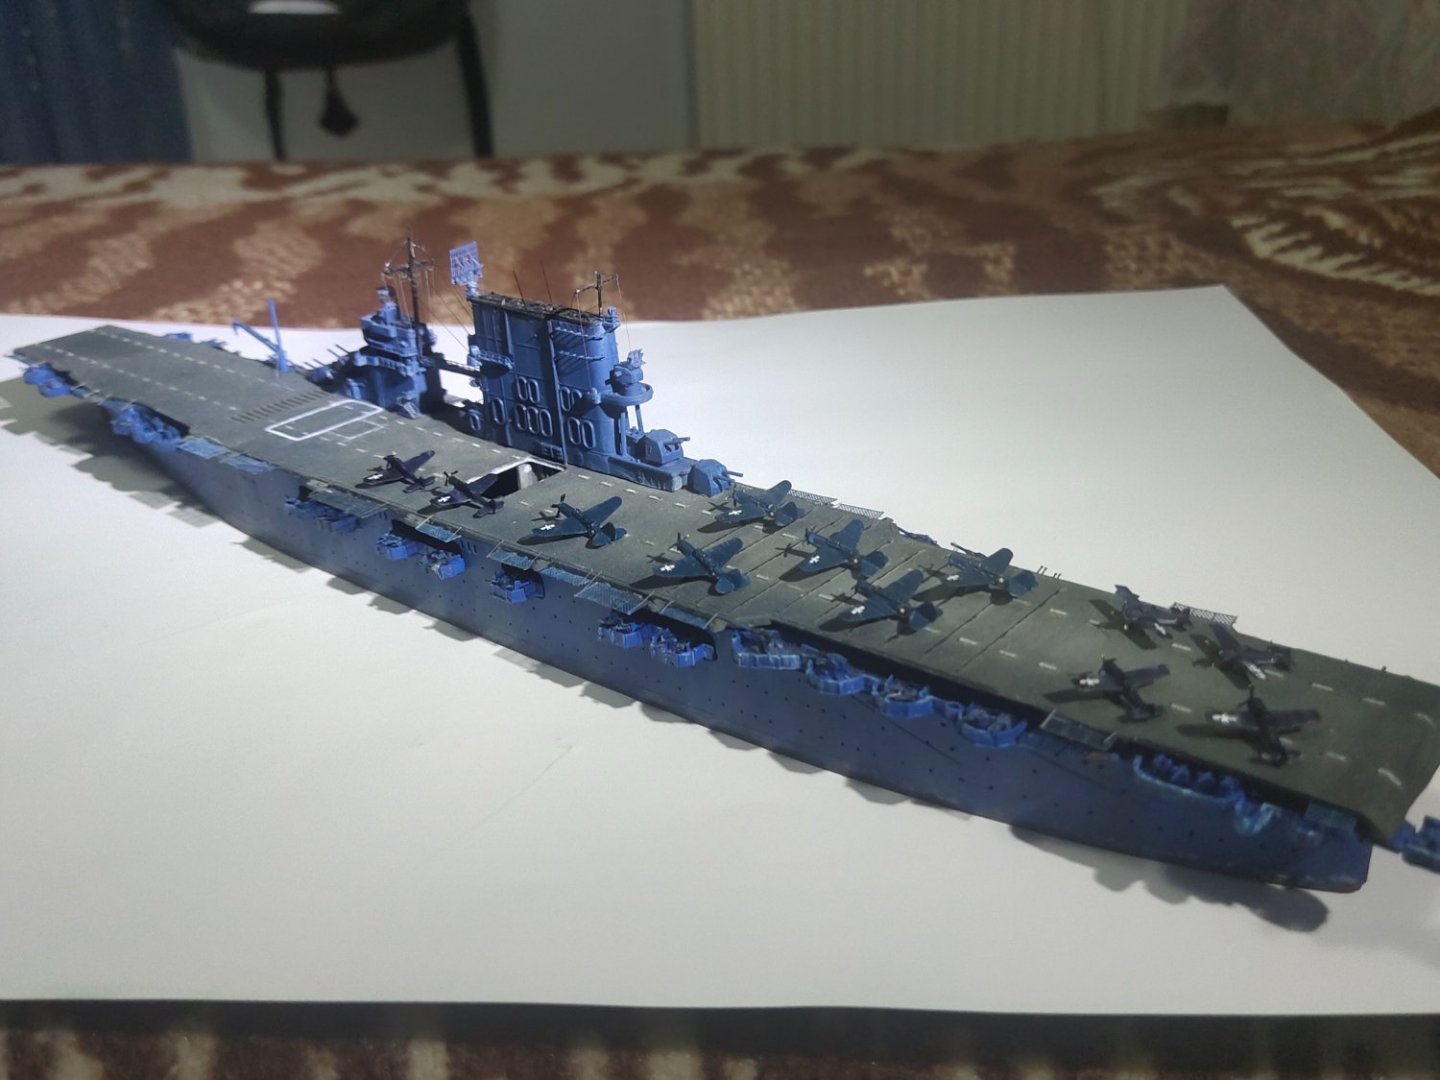
- Baker, mtaylor, thibaultron and 2 others
-
5
-
-
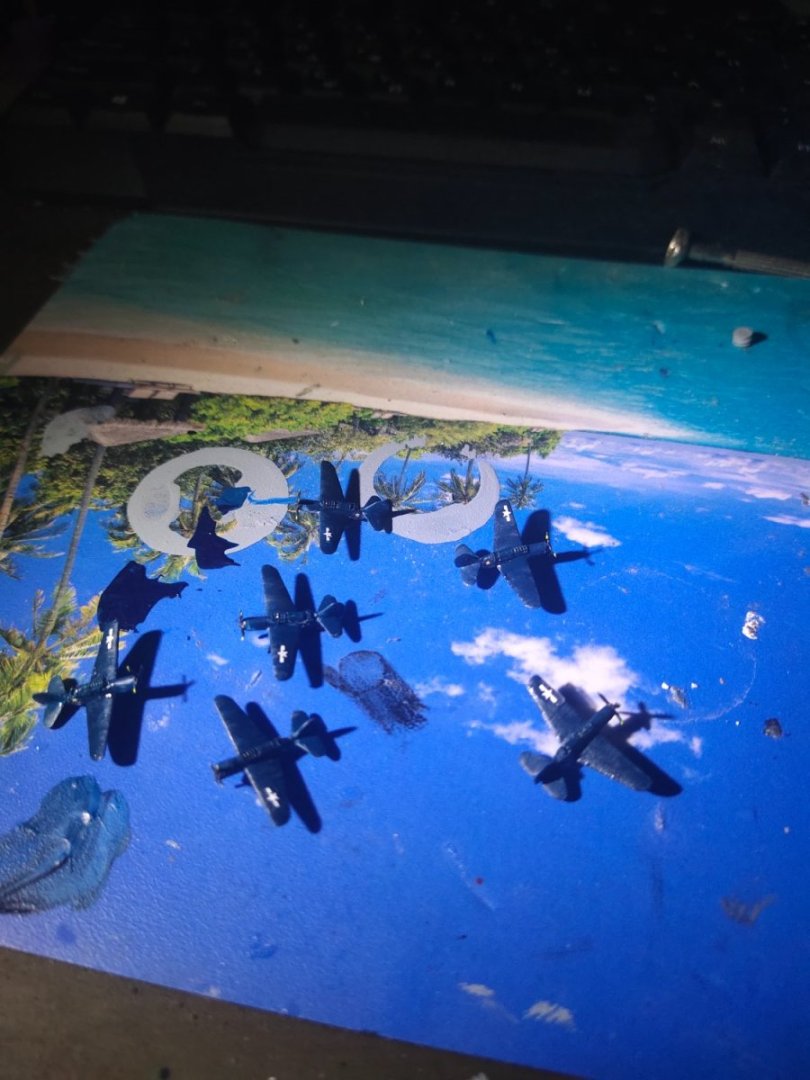
I am building the air group.
First wave is a six pack of SB2c. I added some PE work and paint them a 3 color camouflage with brush. Some weathering, oil brushing and mat varnish. In my new builds I will use high detailed 3d printed ones. There is not much space for improvement on these oldies


- king derelict, thibaultron, Baker and 3 others
-
6
-
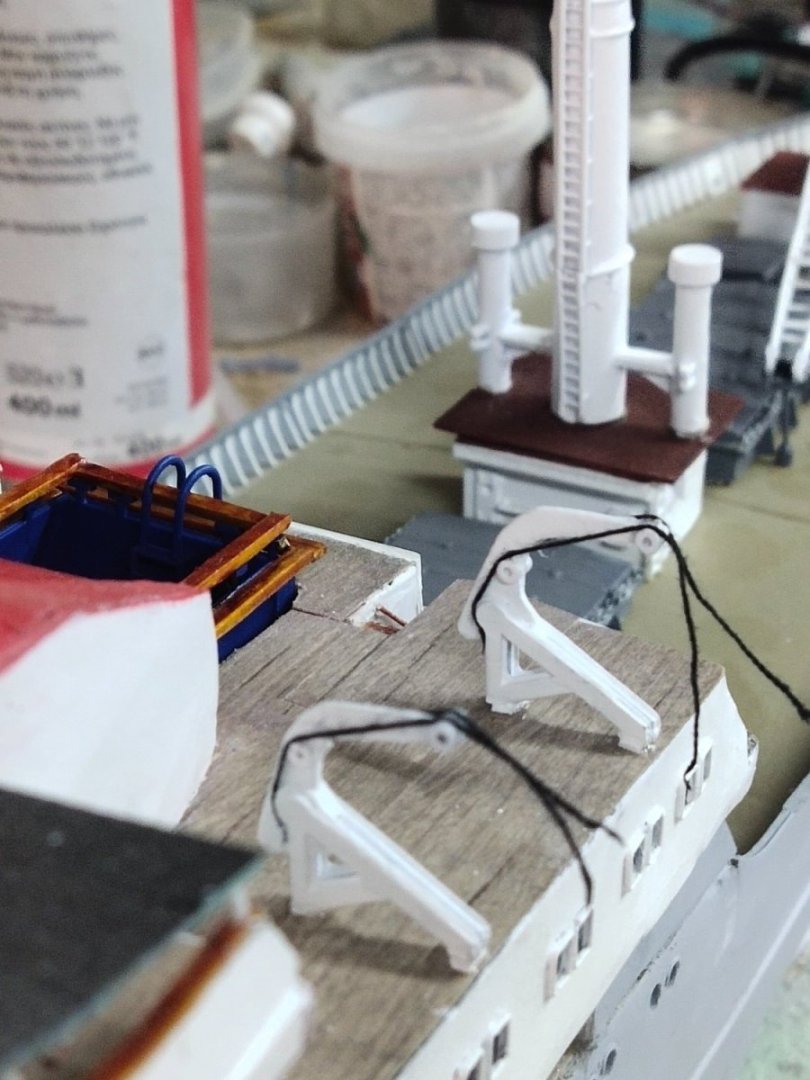
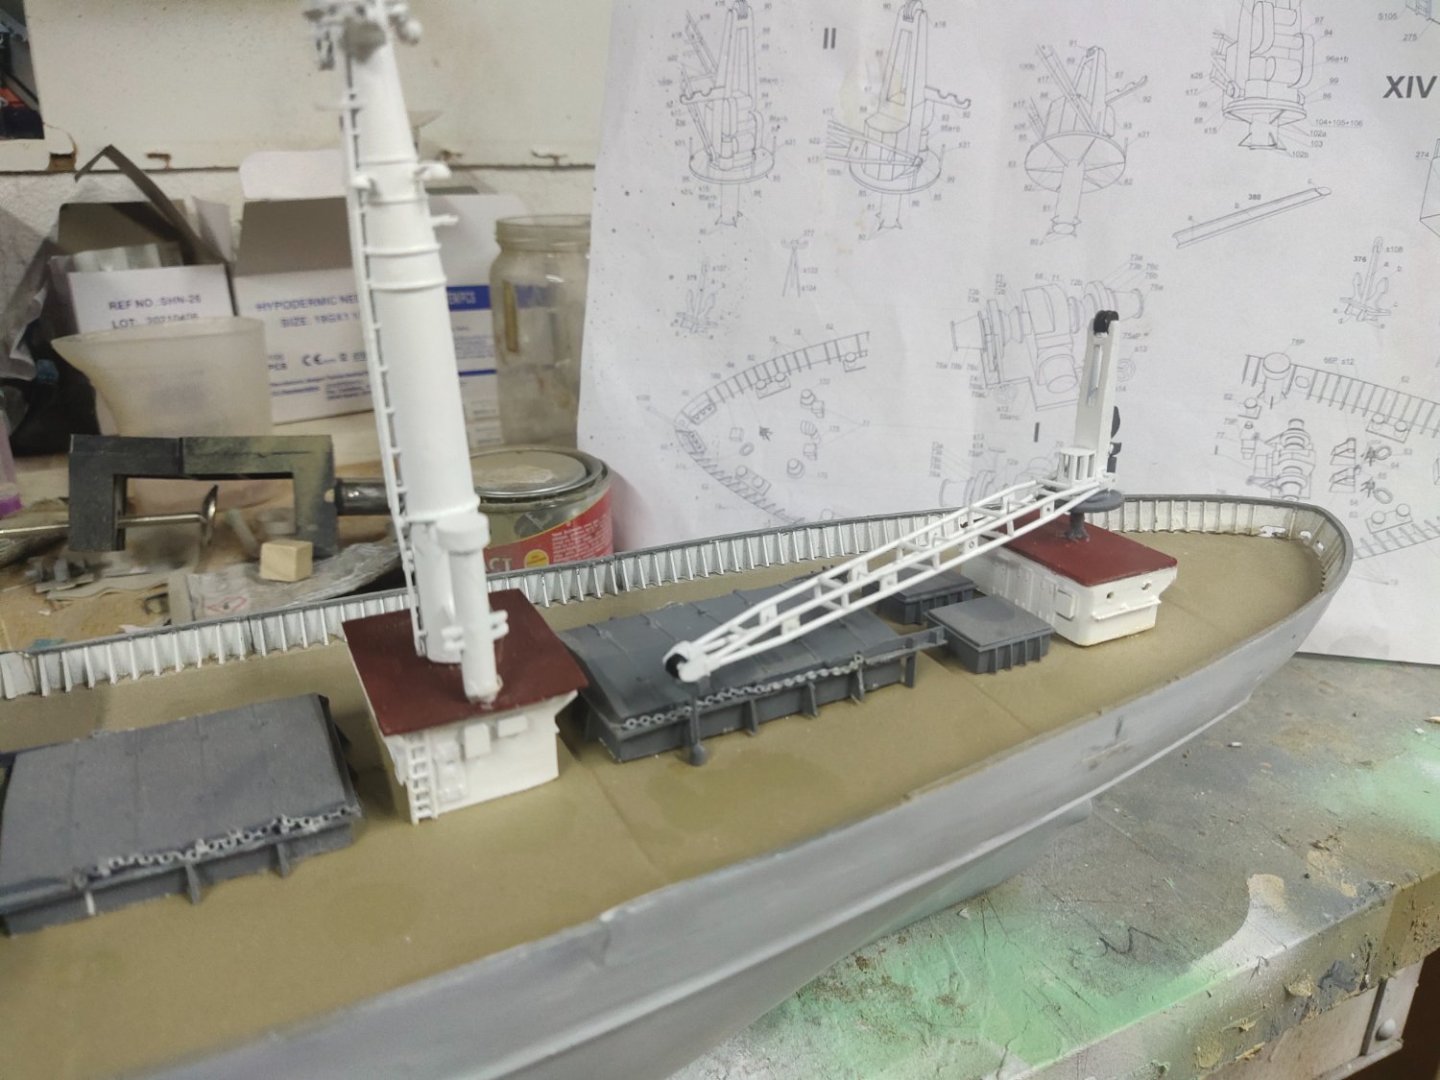
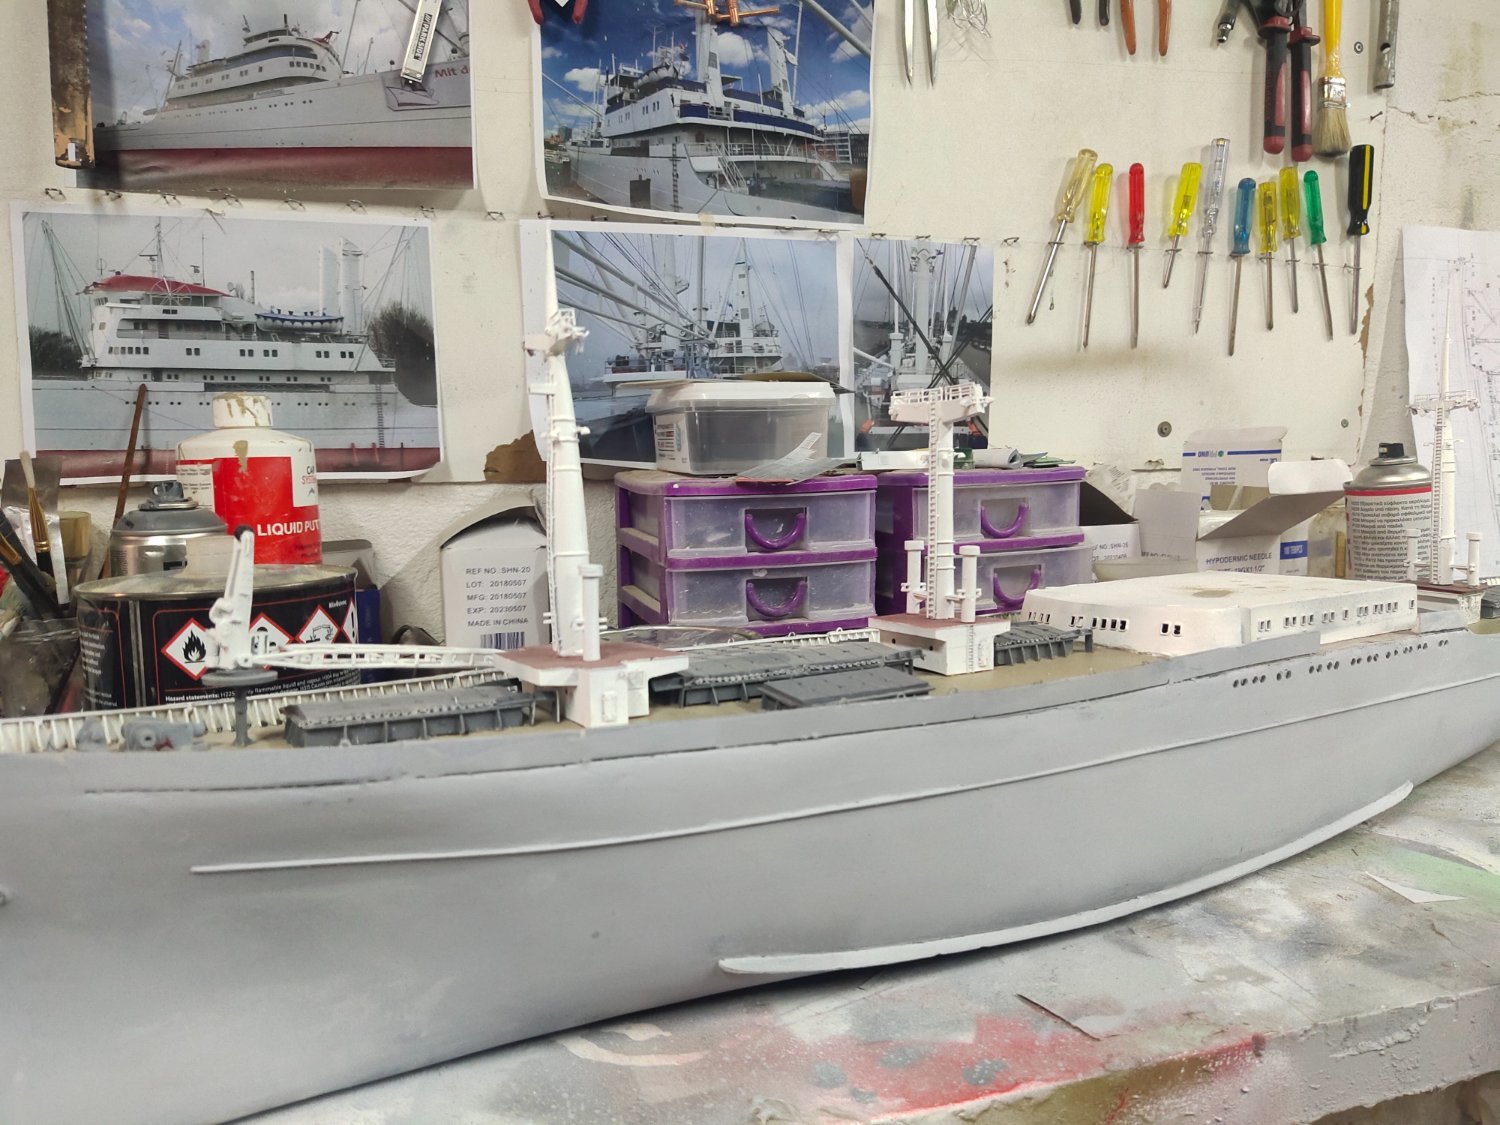
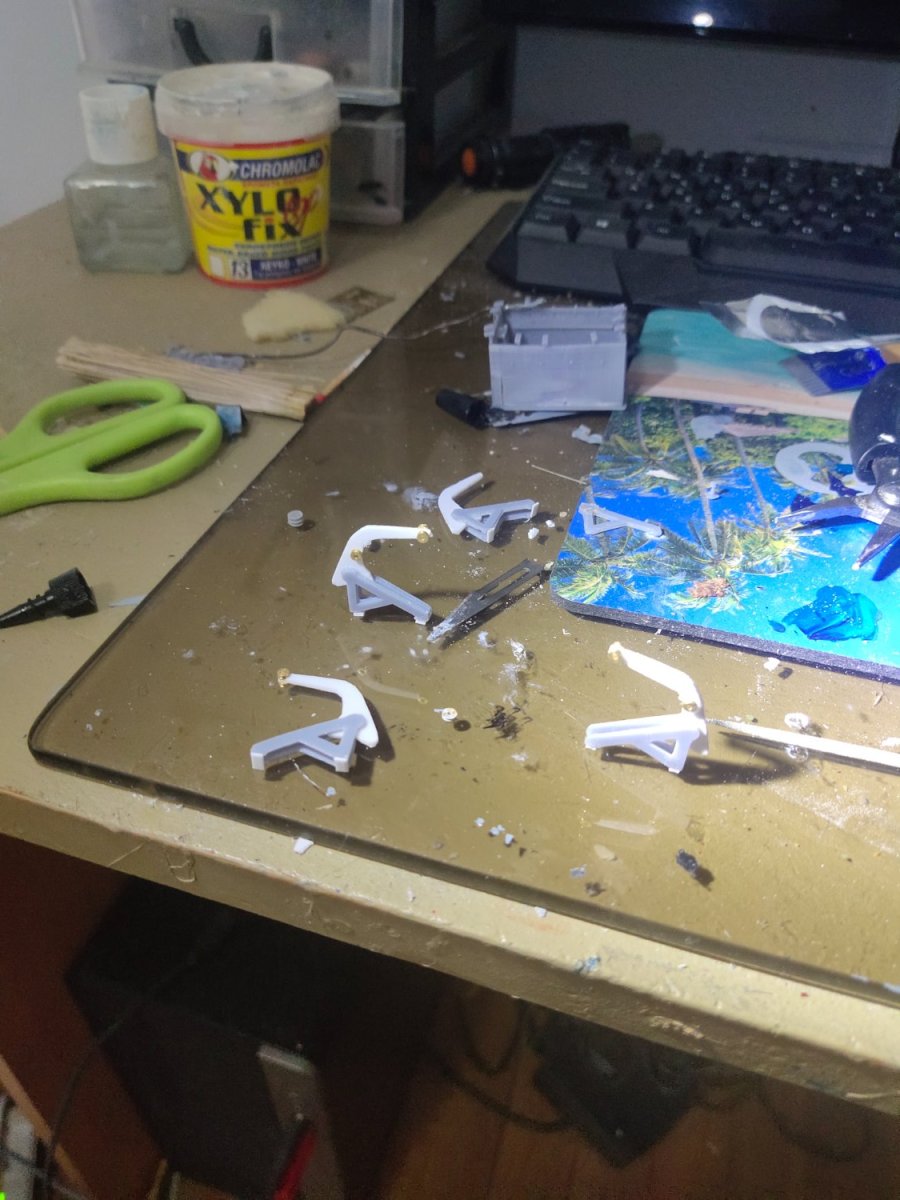
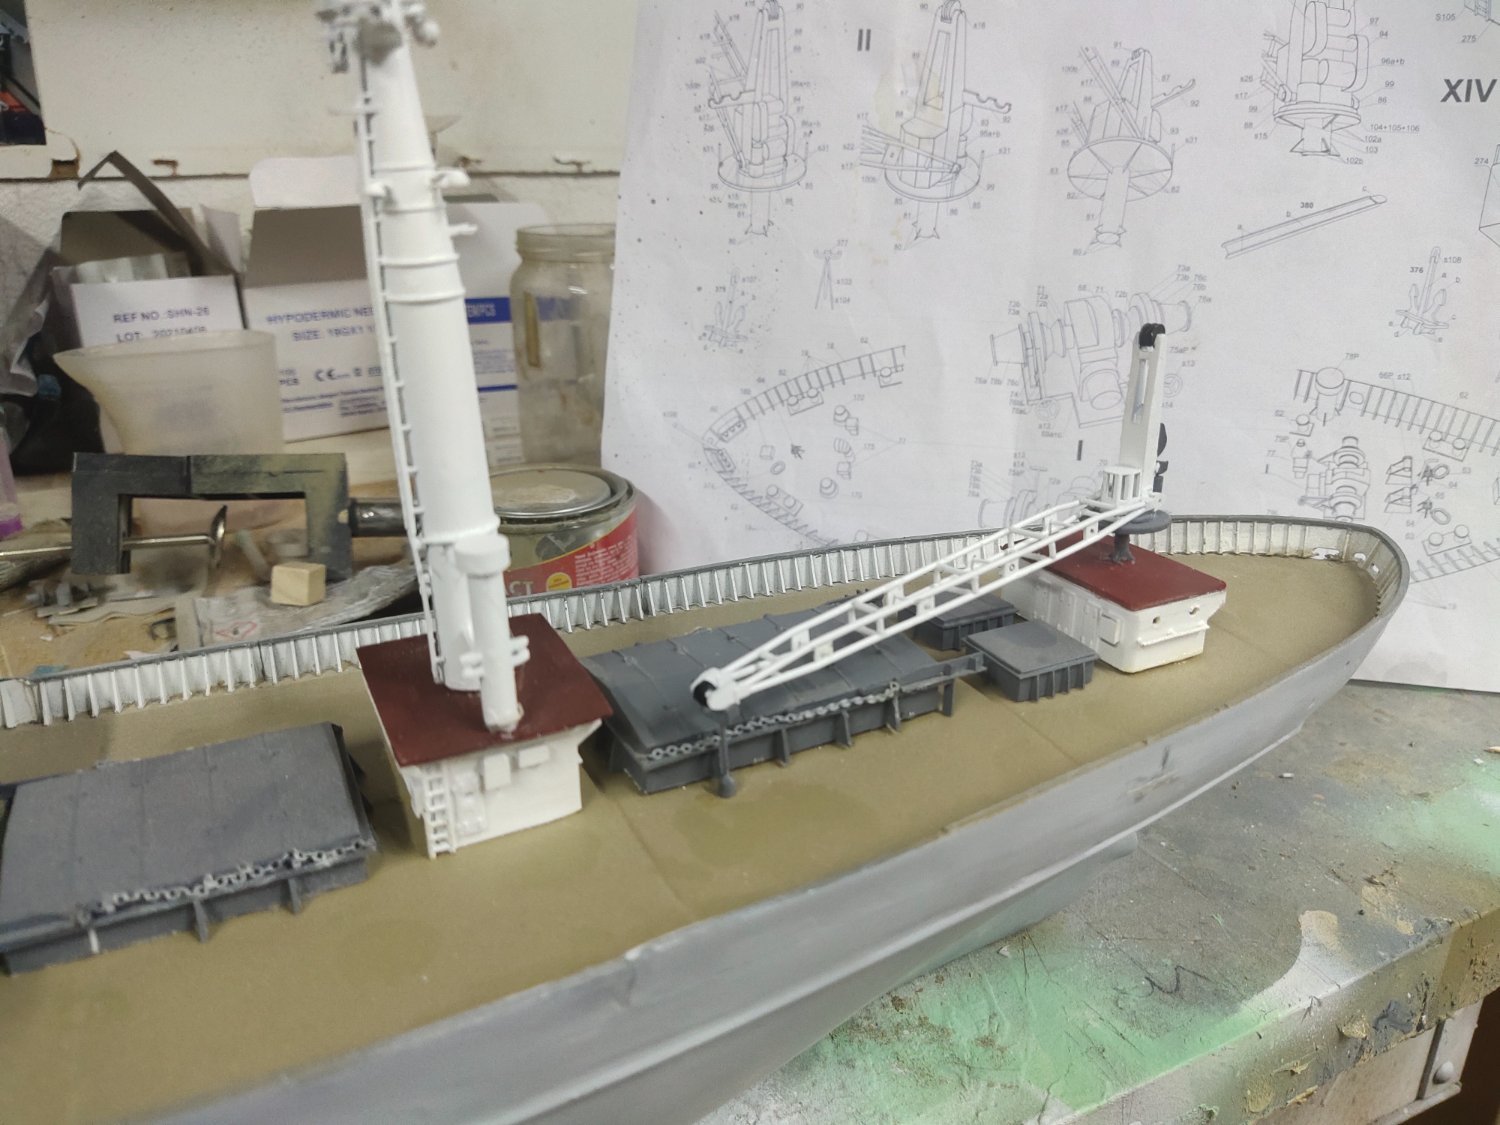
Work on cranes started. I printed the parts. Then assembled together and paint. Put crane frame supports using 1mm chopped plastic rod. After the fitment I scratch built a crane holder and glue it on port side on deck. It was difficult because my scratch built skills have been deteriorated since I spent most time on 3d design than making my parts by hands


- Mirabell61, GrandpaPhil, mtaylor and 2 others
-
5
-
On 9/21/2023 at 5:04 PM, Javelin said:
She's a very gorgeous ship. Your model does her justice. She'll look awesome with some colour as well.

Thanks for the comment. I did avoid early painting to avoid any accident as I am quite messy
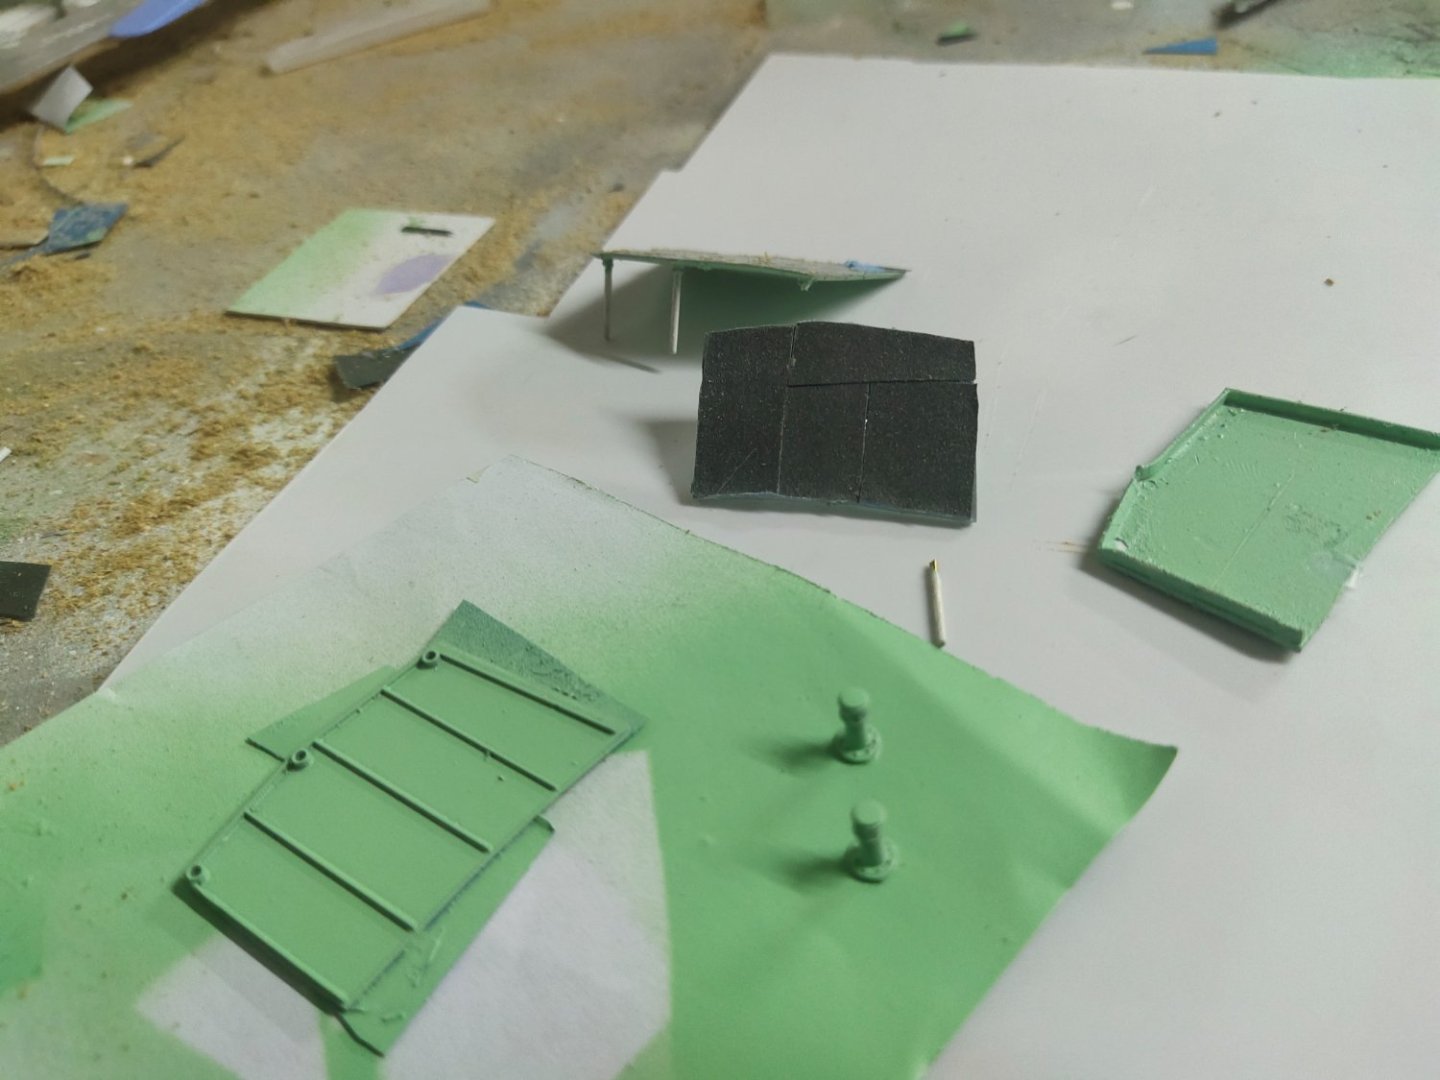
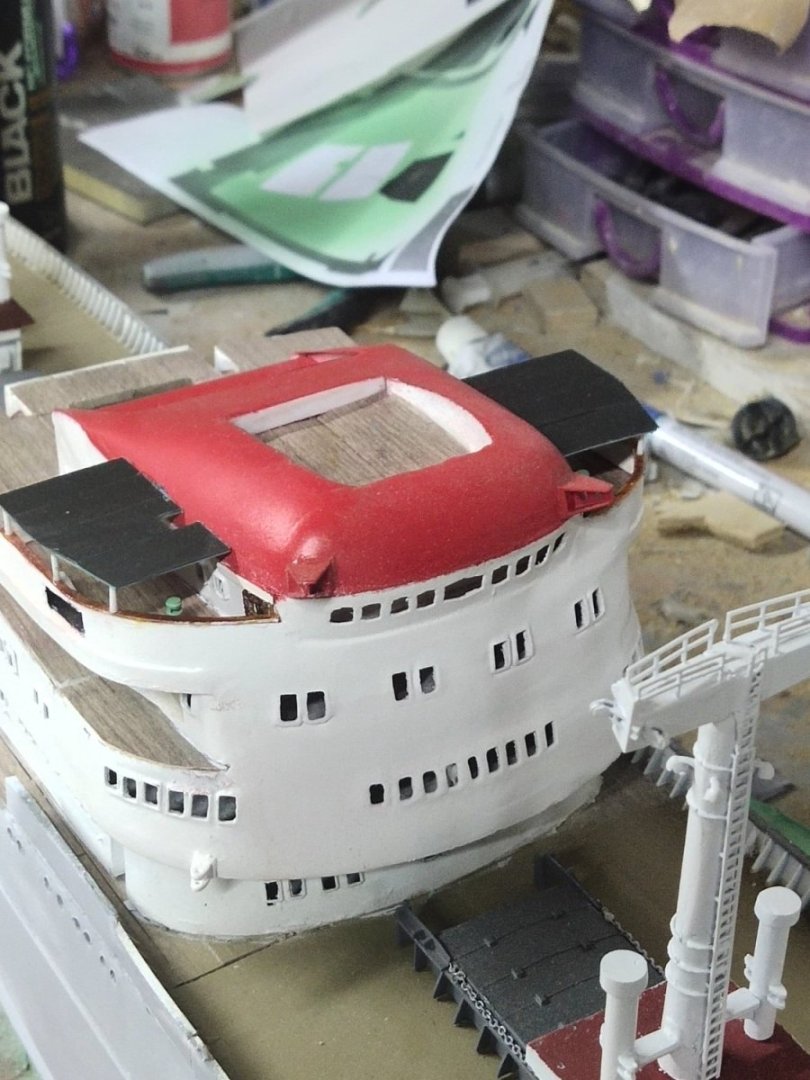
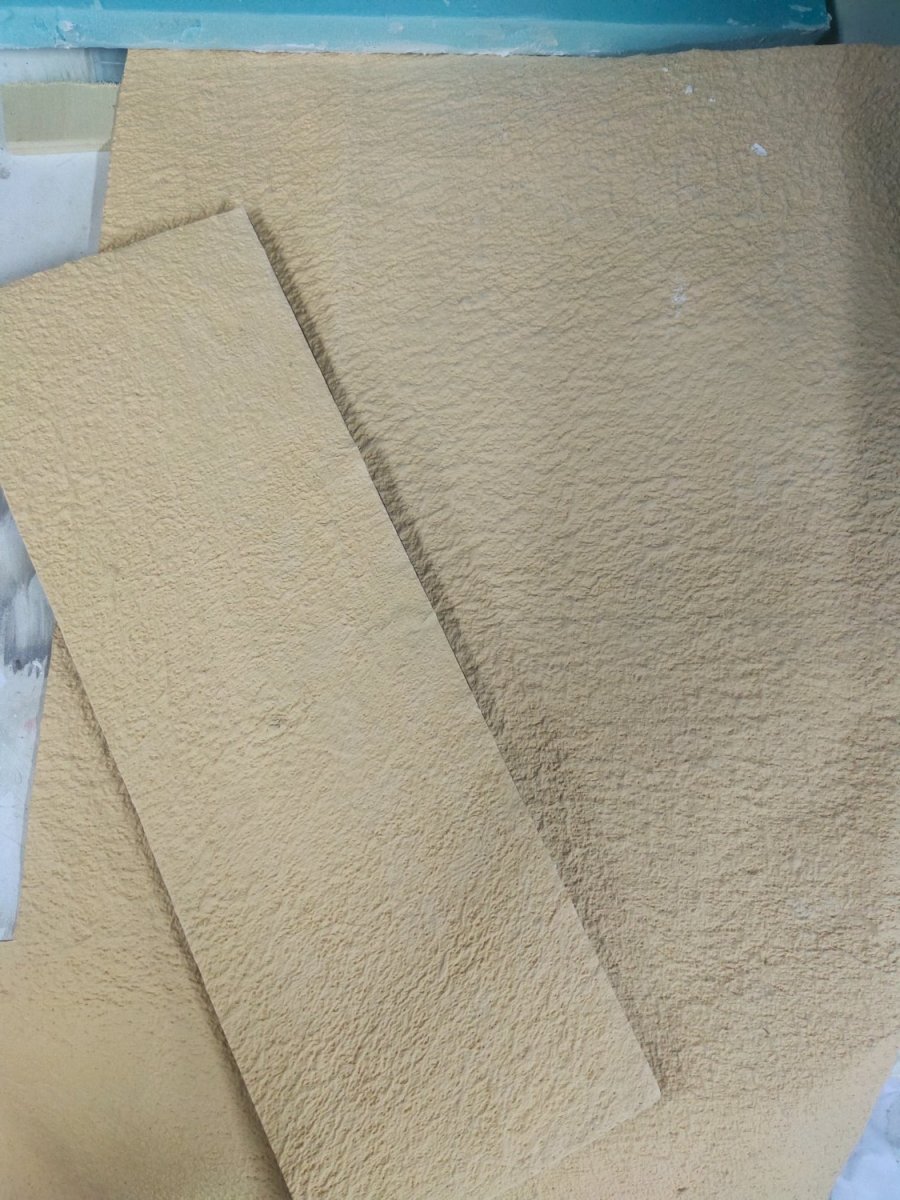
Too much trouble for little progress. I added some shelters on bridge deck. Started with scratch building then decided for a more delicate job so I just printed them. Still measurements were incorrect, so multiple couples were tried to get the final fitment. On the top I used sandpaper 280bgrit pieces to simulate the material show on first pic. Before installation, a pair of compass were fitted one of each side of the bridge

- wefalck, Valeriy V, GrandpaPhil and 1 other
-
4
-
2 hours ago, JKC27 said:
Looking great! I sure wish I had the capability/knowhow to 3D design/prints parts. Great attention to detail and again a build I a following closely.
Thank you
Actually a year ago I was no related to 3d design either. And 3 years ago I was wondering how people could make ship models without a kit, just only from plans


Rebuilding the fleet by mikegr - 1/700 - restoring old plastic models
in - Kit build logs for subjects built from 1901 - Present Day
Posted · Edited by mikegr
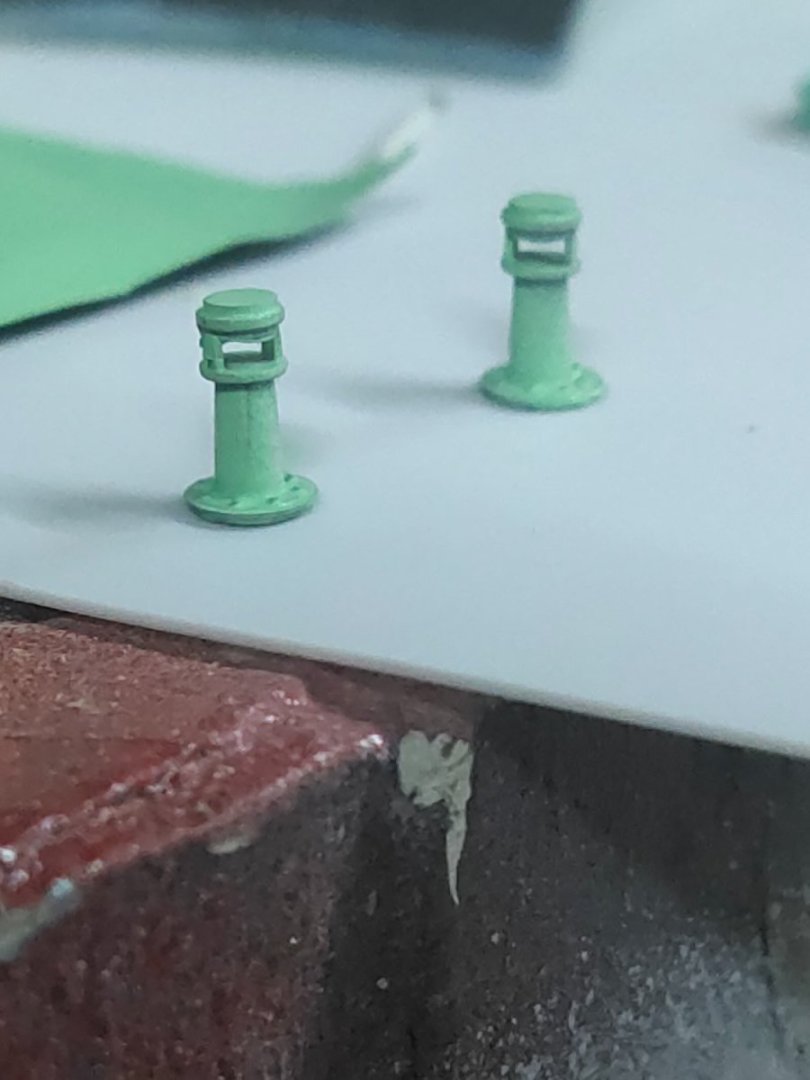
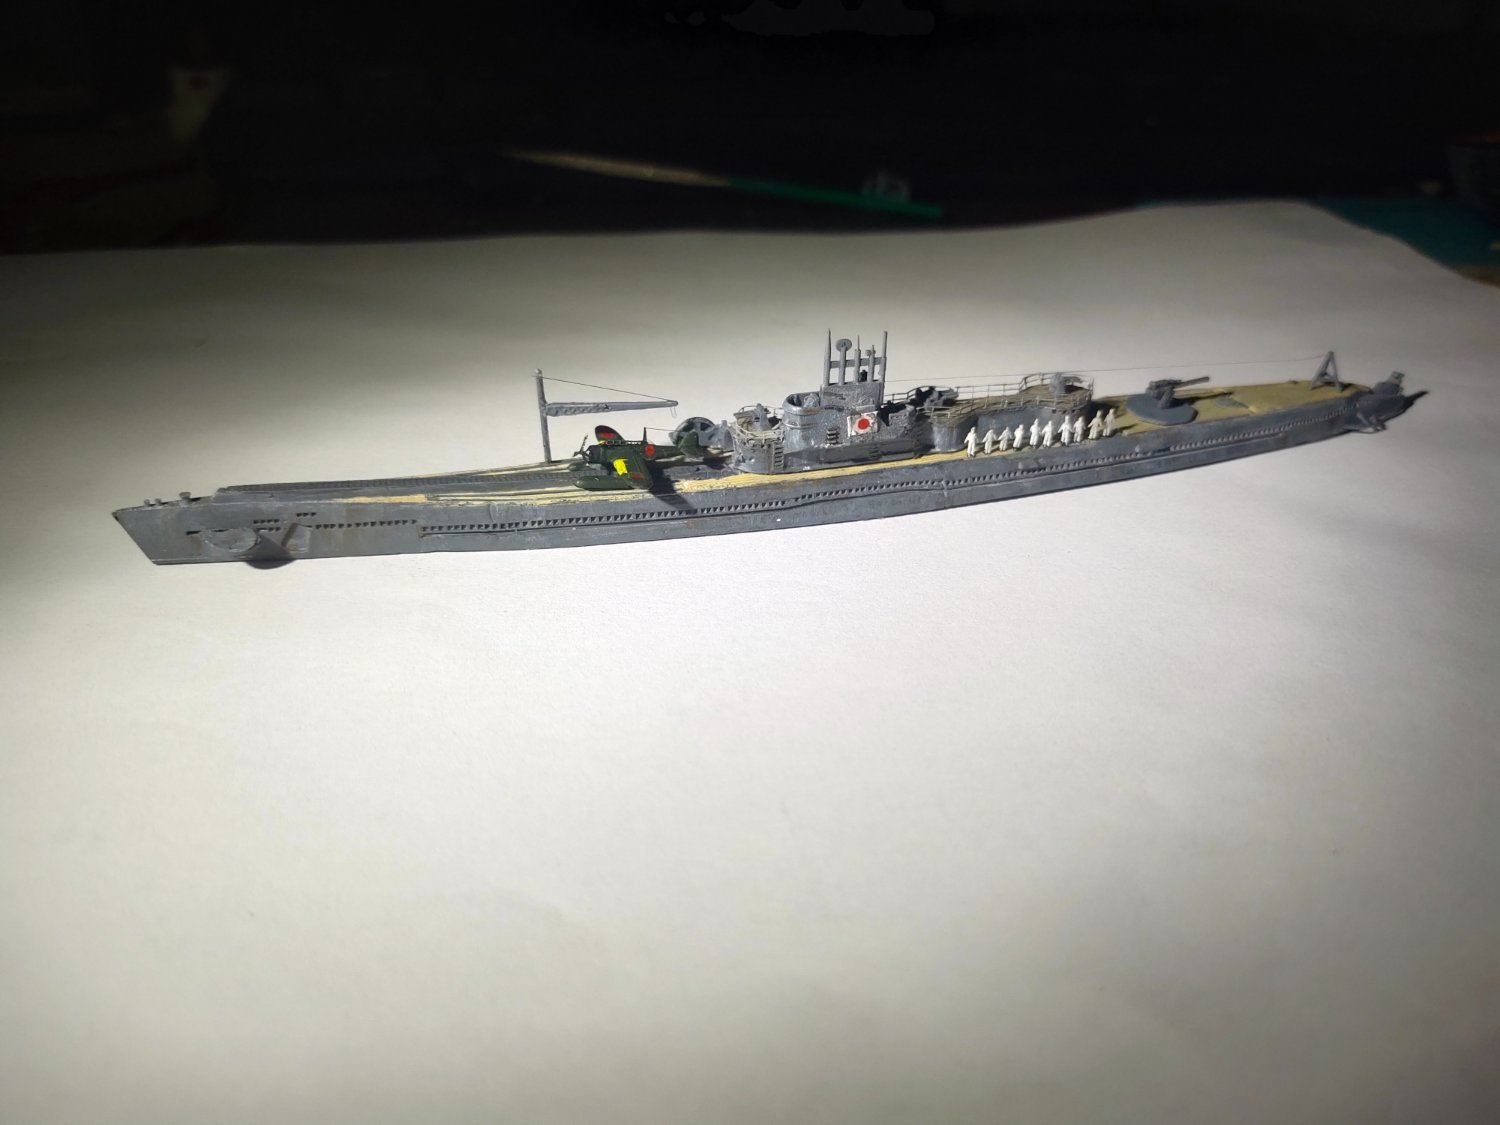
Next I start work on the quarter deck only to find out that it was glued upside down 30 years ago. I removed the torpedo tubes and layered a wood sticker. New 3d printed torpedo tubed added and some other details like bollards.
I realized that the easiest way to cover wood film on the main deck is to scratch build a new one and to add after the application the main pieces along with the smaller ones like anchor chain, bollards etc. Then I will work my way upwards to the bridge and masts