


mikegr
-
Posts
585 -
Joined
-
Last visited
Content Type
Profiles
Forums
Gallery
Events
Posts posted by mikegr
-
-
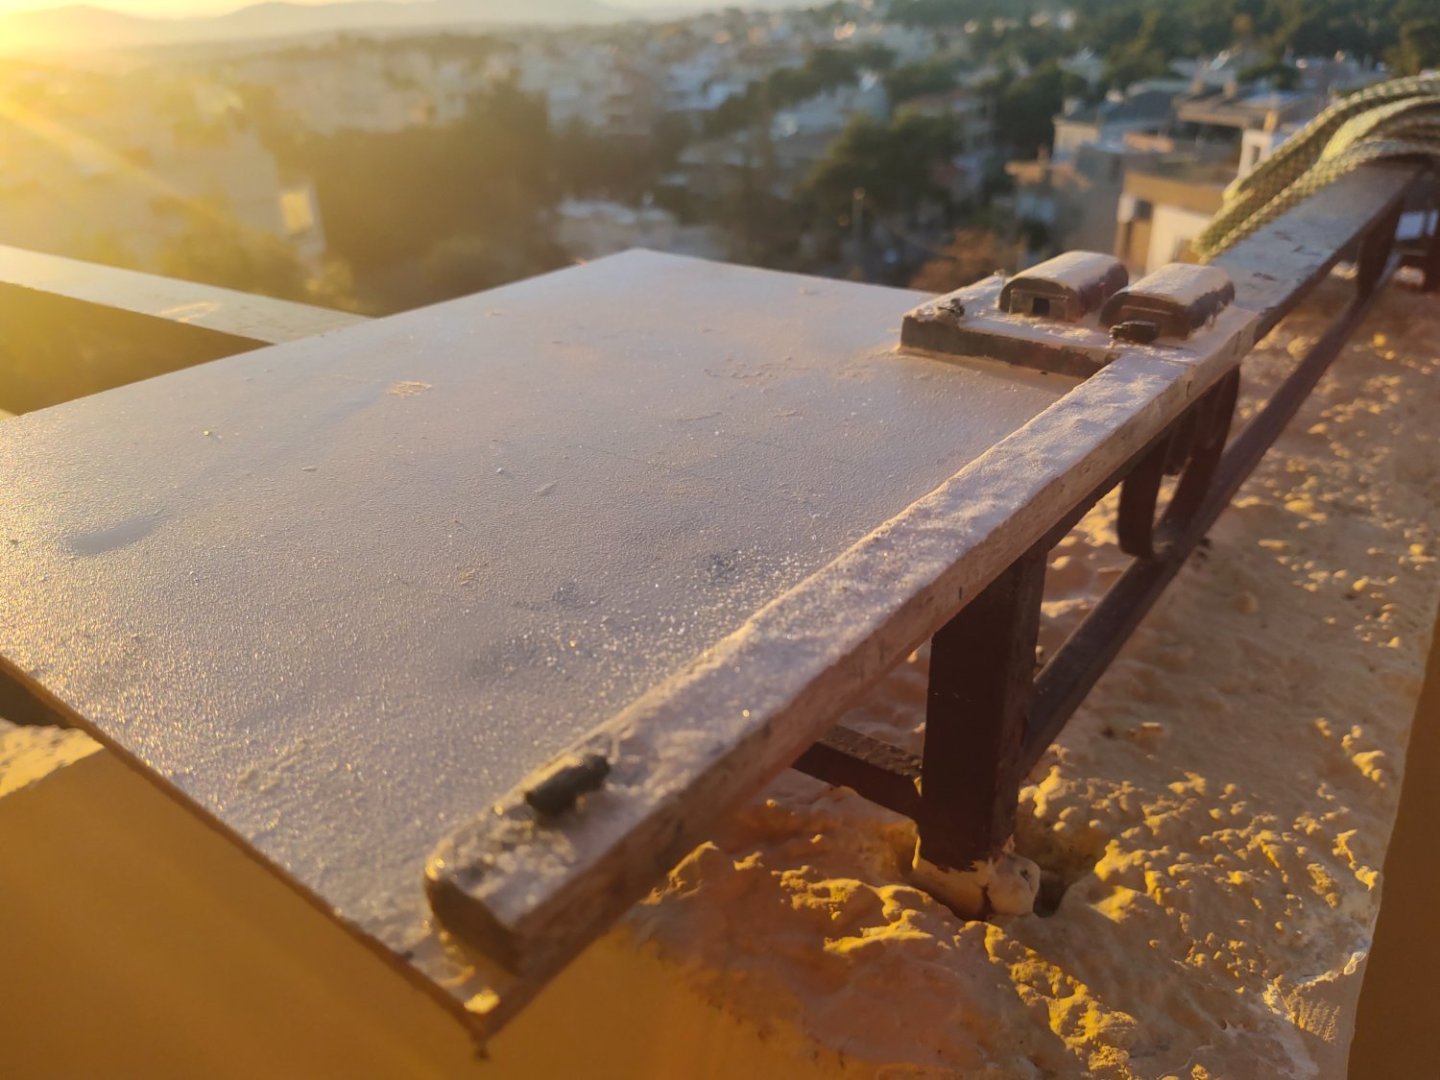
I put some white paint in most areas then PVA glue then microballoon sprinkle. There should be a machine that could spread it evenly like the one they use to coat with grass, train layouts.
Today its a shiny Christmas day with 18 celcius so i took some pics on the balcony on shadow and on sunlight

-
-
Thanks for the encouraging comments and likes. I need to experiment a lot because it is the same materials that will be used for making sea waves.
I decided to add some motion but figures at that scale is out of question. So I added some vehicles. A light coat of gel was given, then microballoons sprinkled over , thicker in some places, less in other. A bit of white glitters added, I like the shinny effect on light.
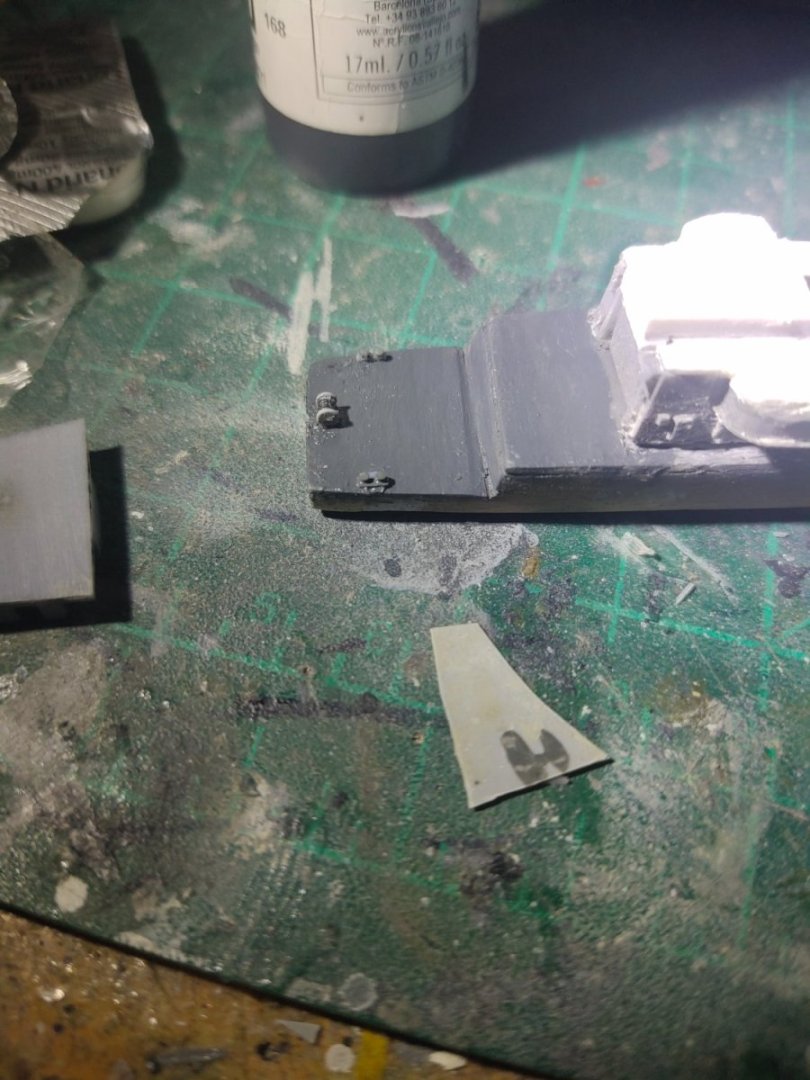
Some putty on the base to fill a gap.
Gel is not dried yet but I couldn't wait for tomorrow pics were taken today.

- mtaylor, Roger Pellett, yvesvidal and 2 others
-
 5
5
-
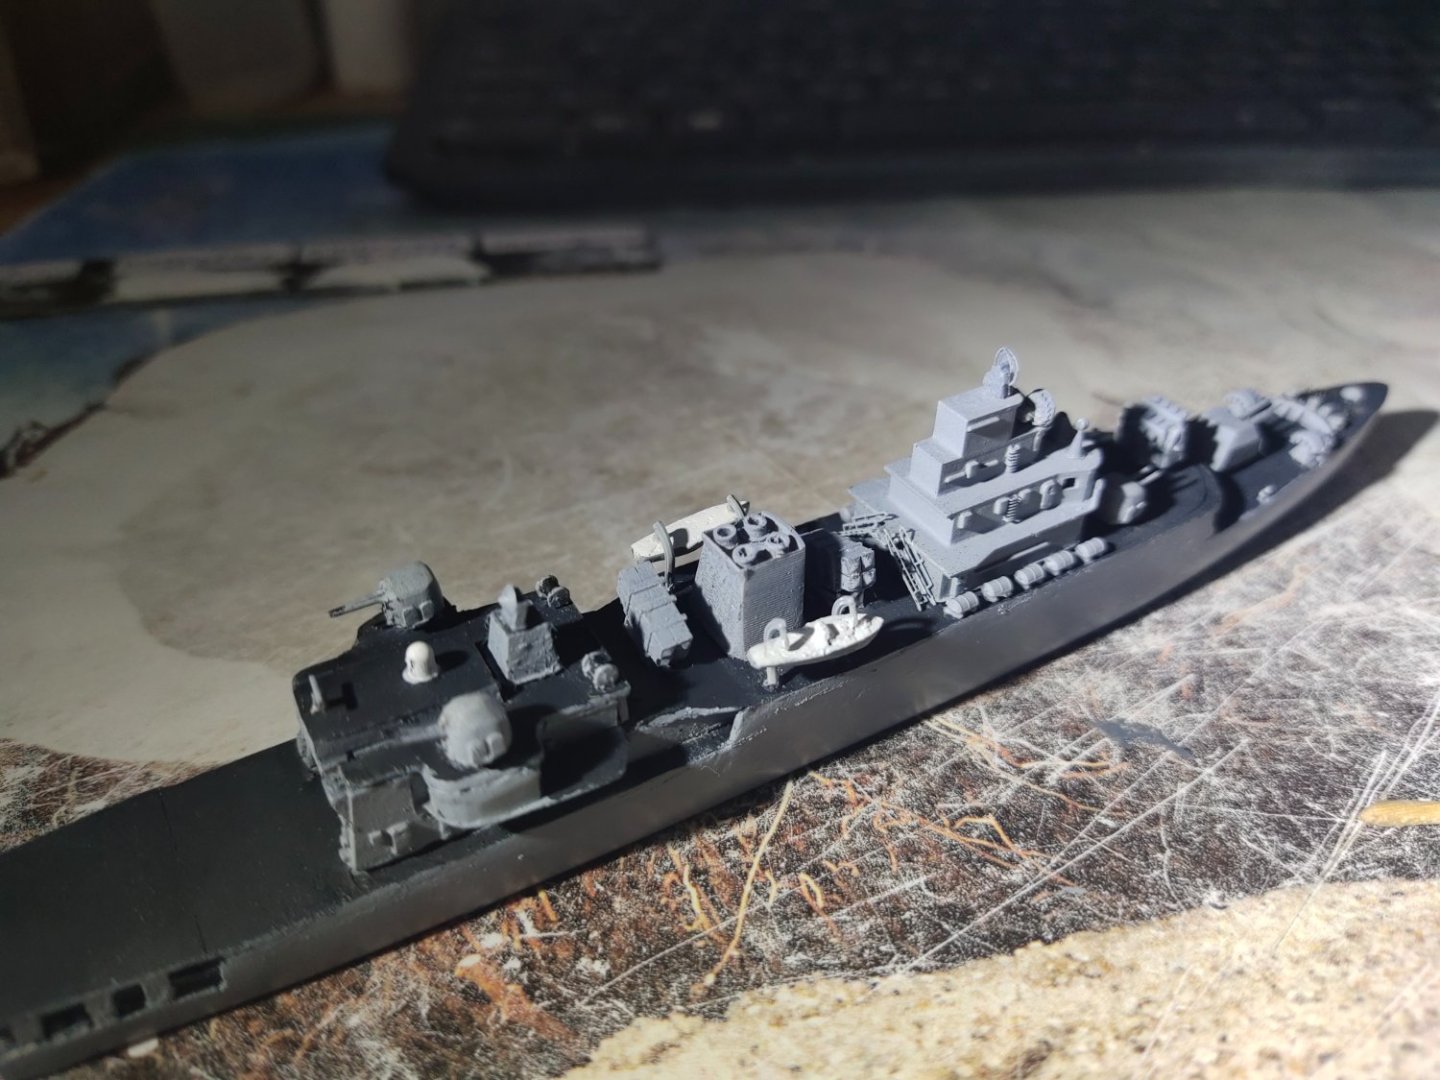
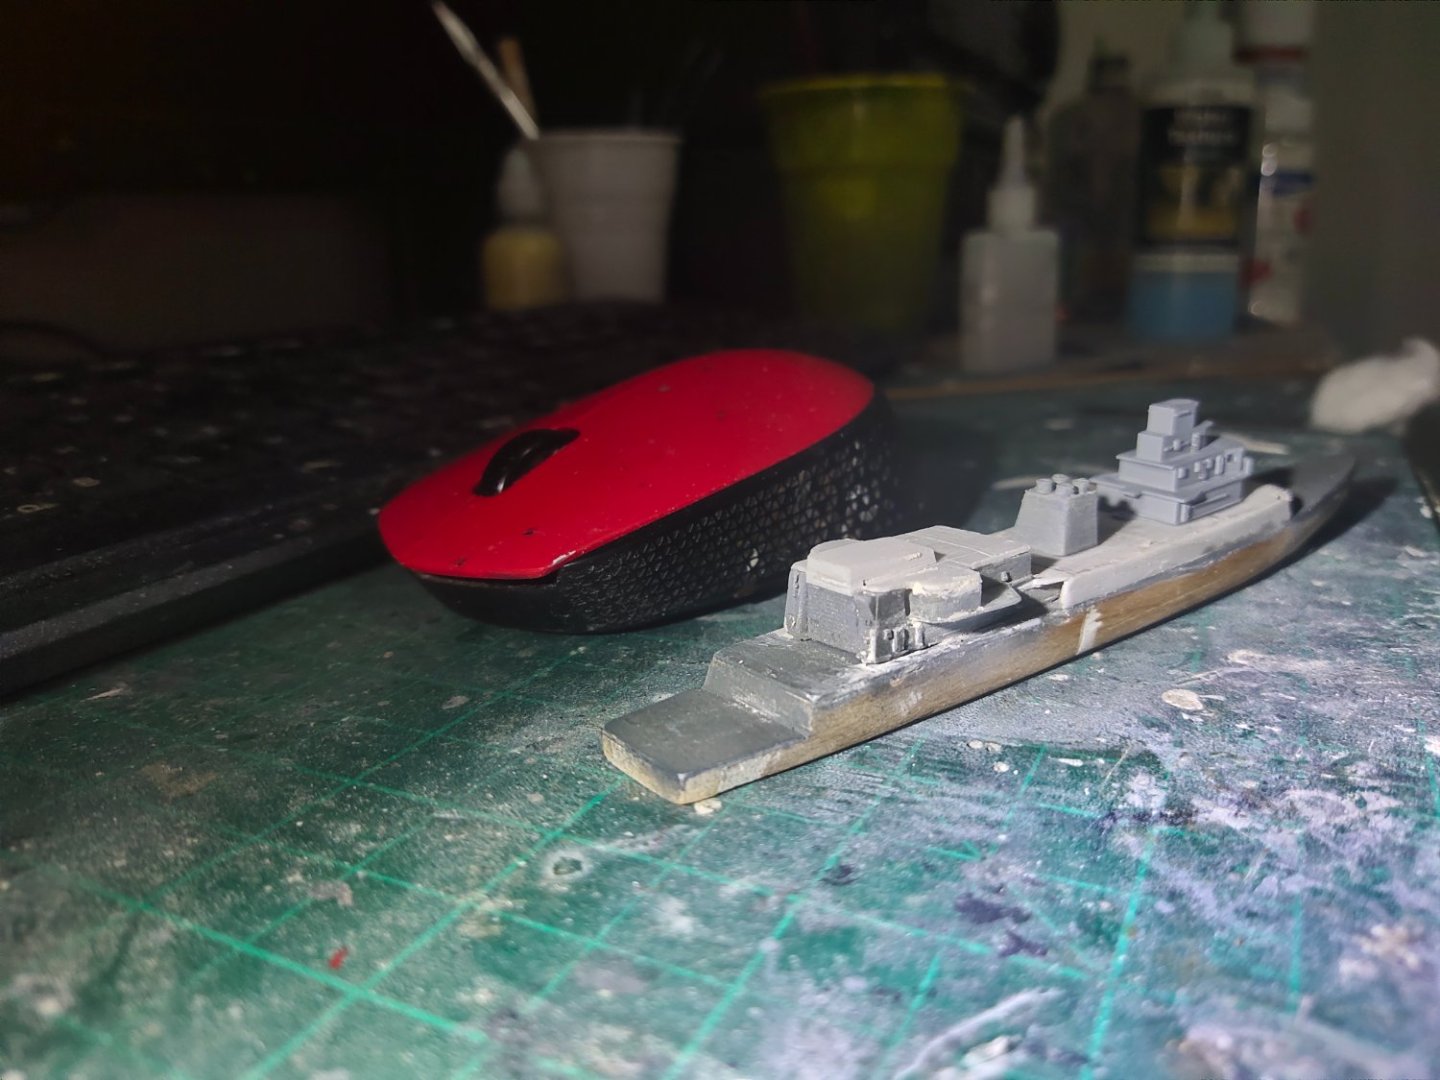
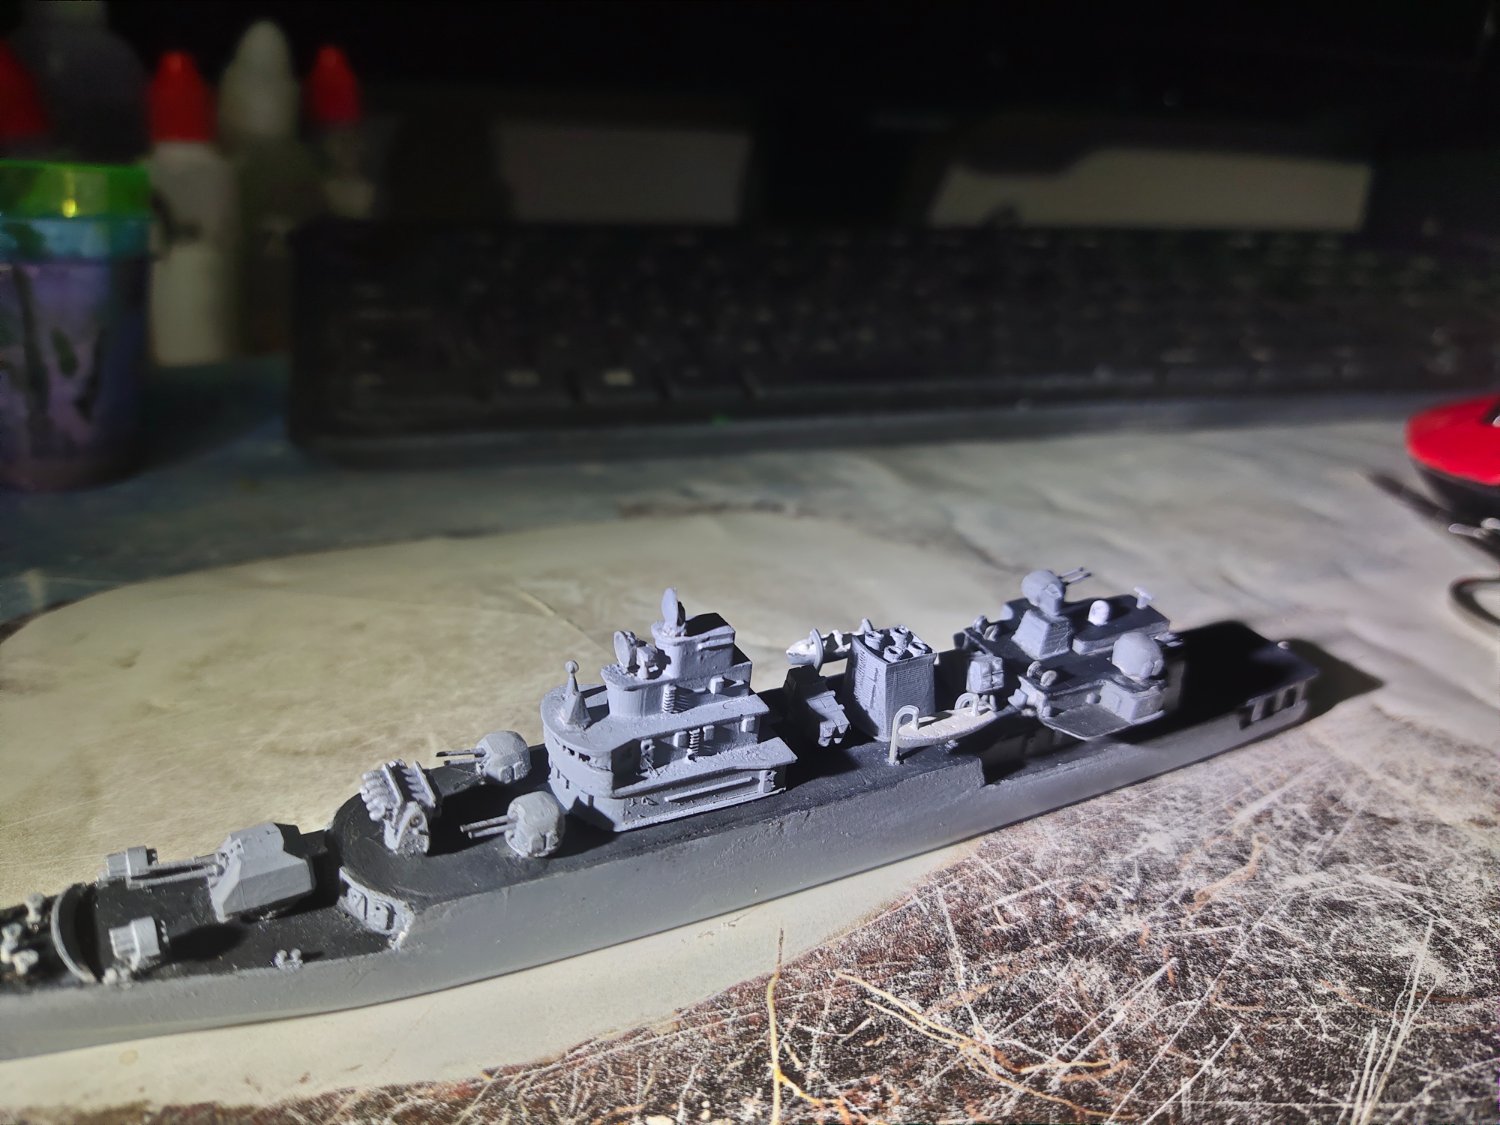
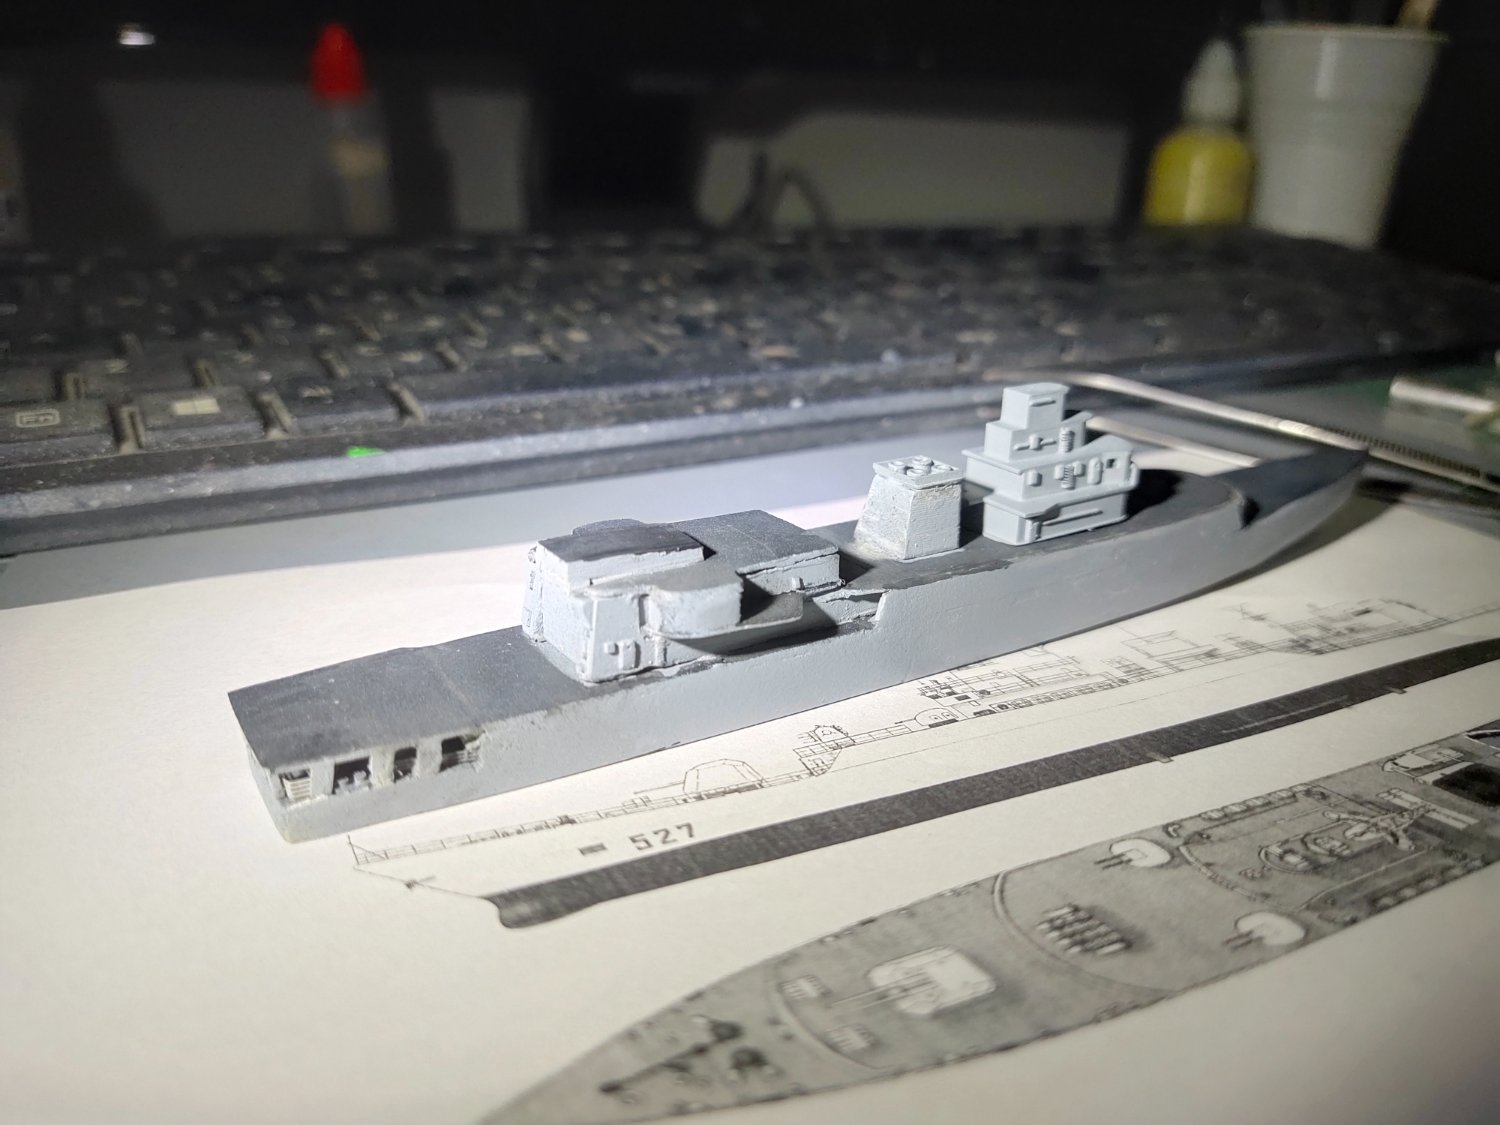
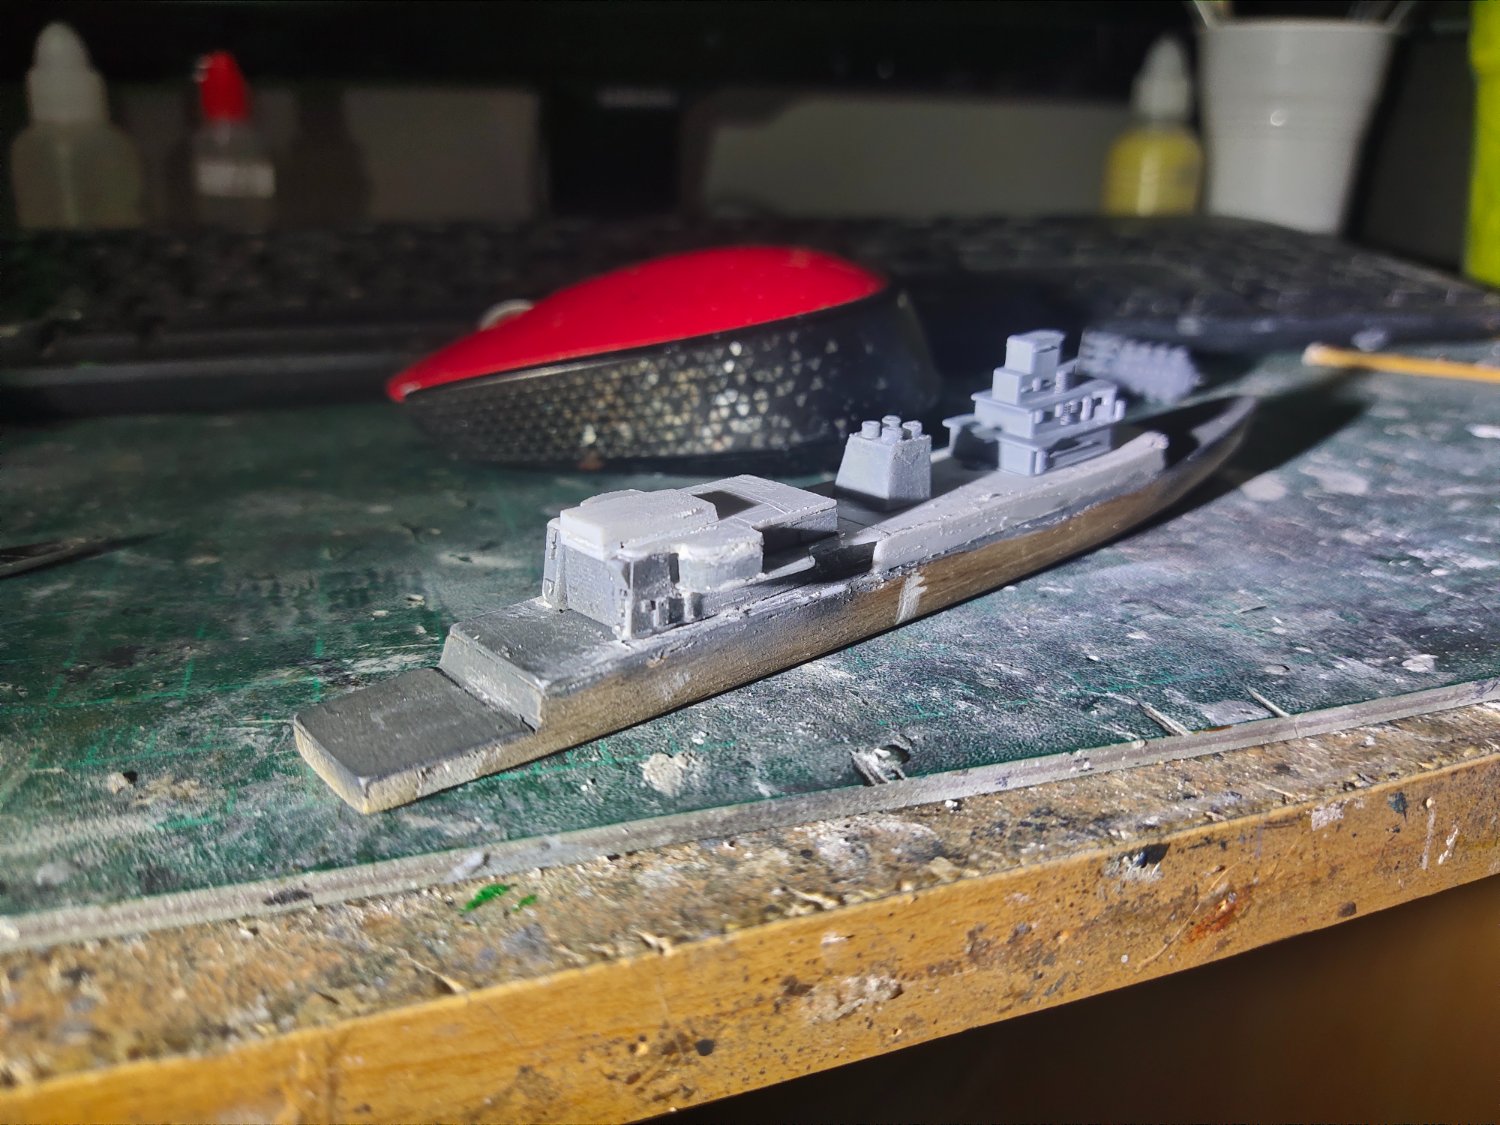
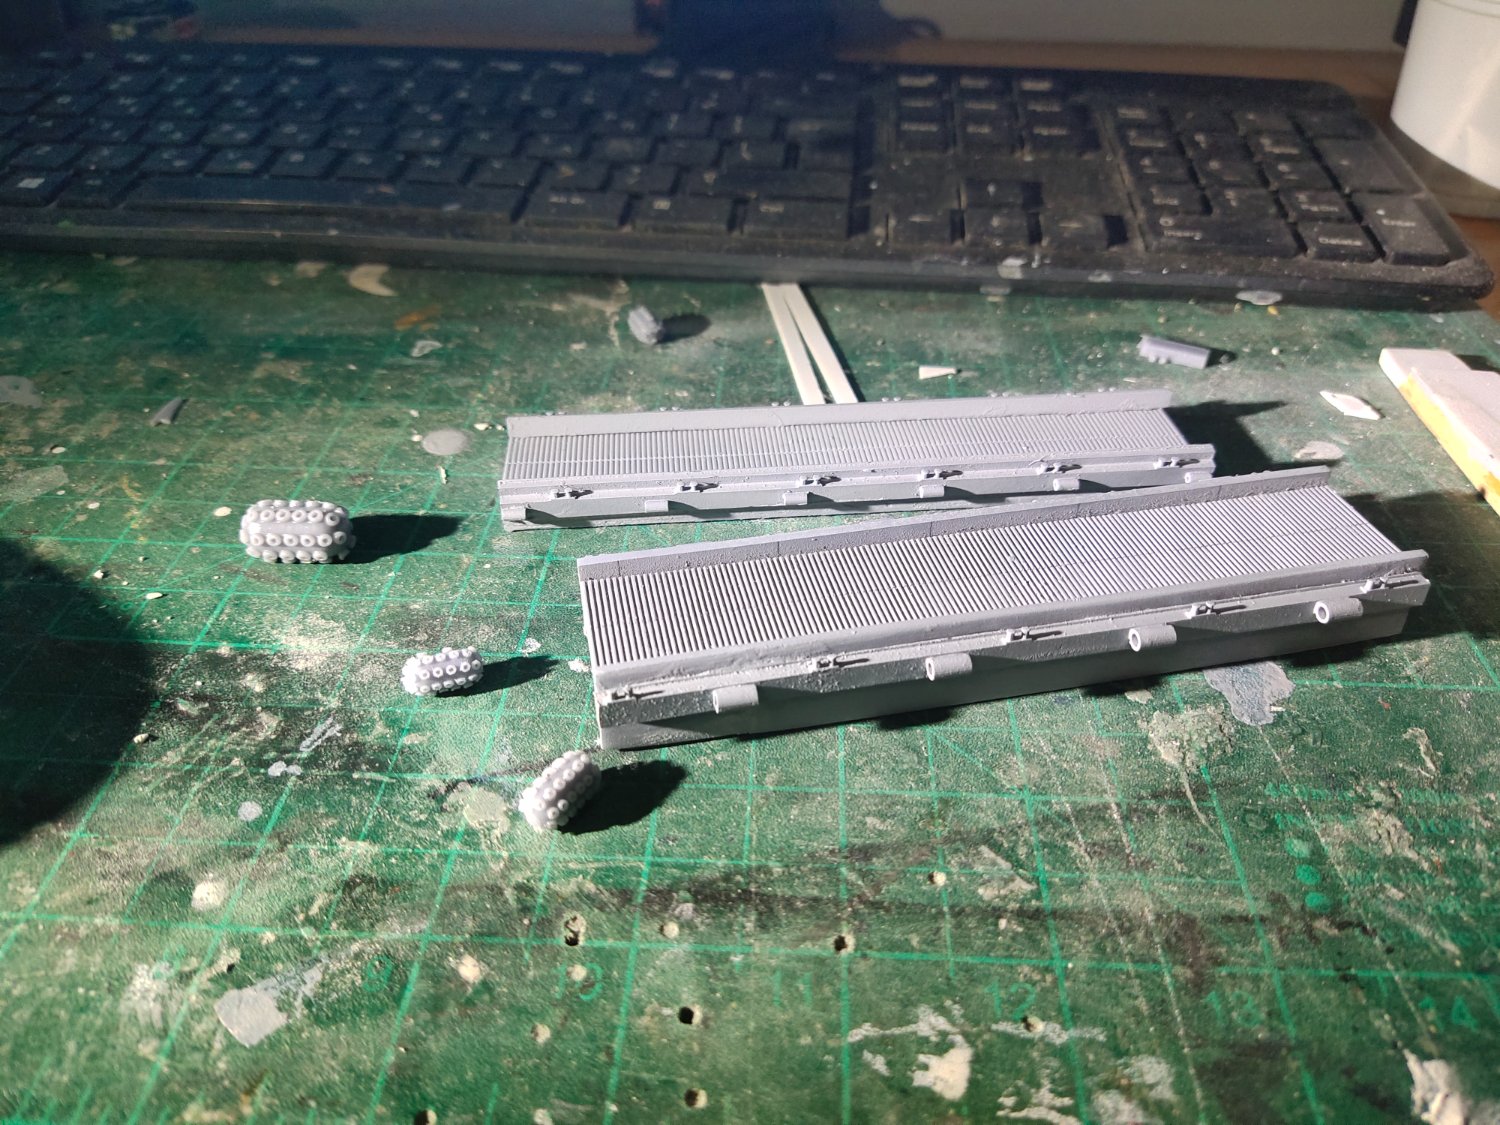
I almost done railings today. More work than I estimated. Fortunately there won't be any in my next project. After installing them I had to check carefully for shiny brass spots and repaint them over with tiny brush.
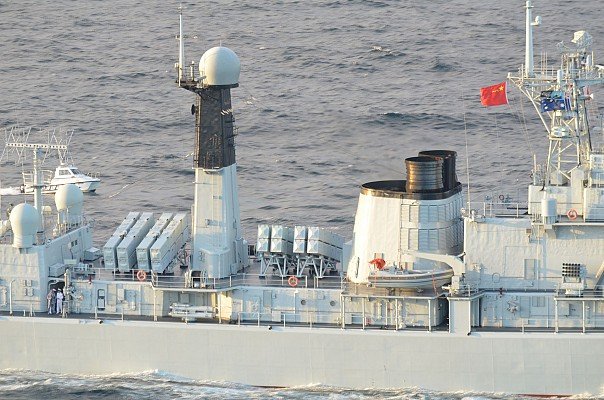
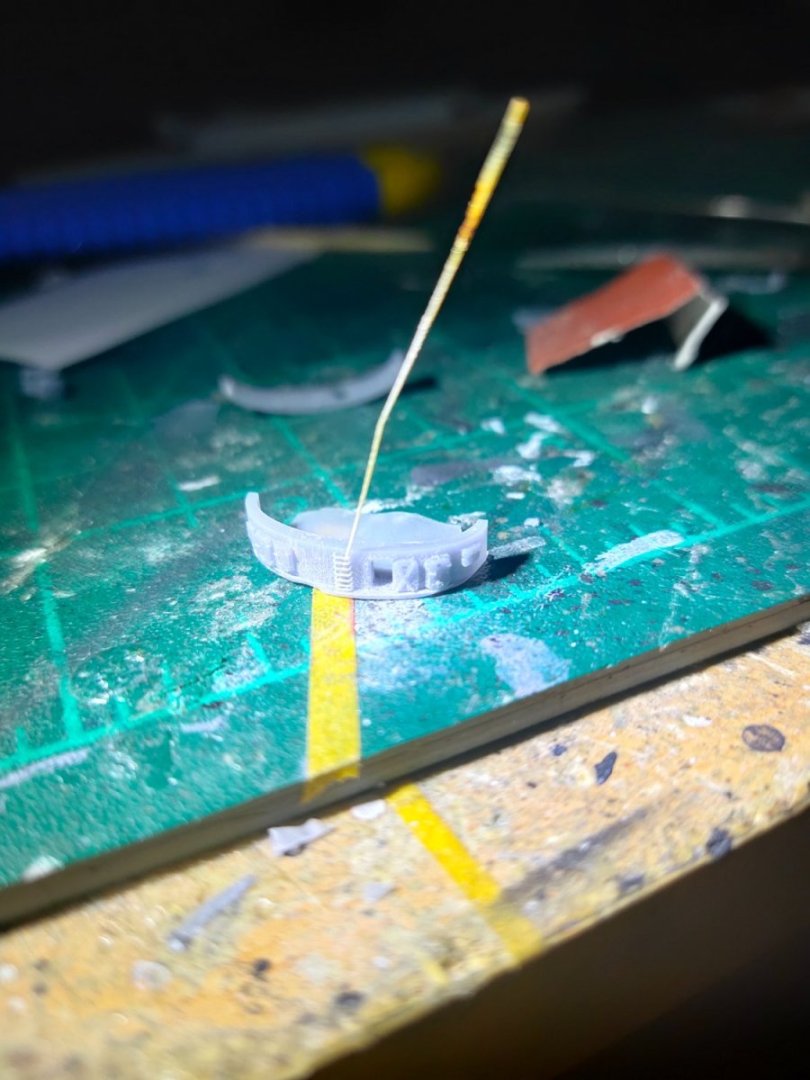
I also printed the rear type 517 radar but it will be placed upon completion since it looks quite fragile.


- Prowler901, GrandpaPhil, KeithAug and 3 others
-
6
-
Apart from some minor paint improvement with 000 brush the progress of the day was the addition of barrel liferafts and the stairs behind the superstructure.

- GrandpaPhil, KeithAug, Canute and 3 others
-
6
-
Because I work with resin therefore o use CA this makes a mess on painted decks. This gives me an idea of how special resin kits must be treated.
After making some paint corrections with brush I added more details, like bollards, anchor chain and machinery as well as secondary antennas over hangar. What left is 4 ladders and railings. Then I have to deal of how to make the main radar mast as well as the unusual shape of rear type 517 radar


- mtaylor, GrandpaPhil, Canute and 4 others
-
7
-
Some pics on daylight.
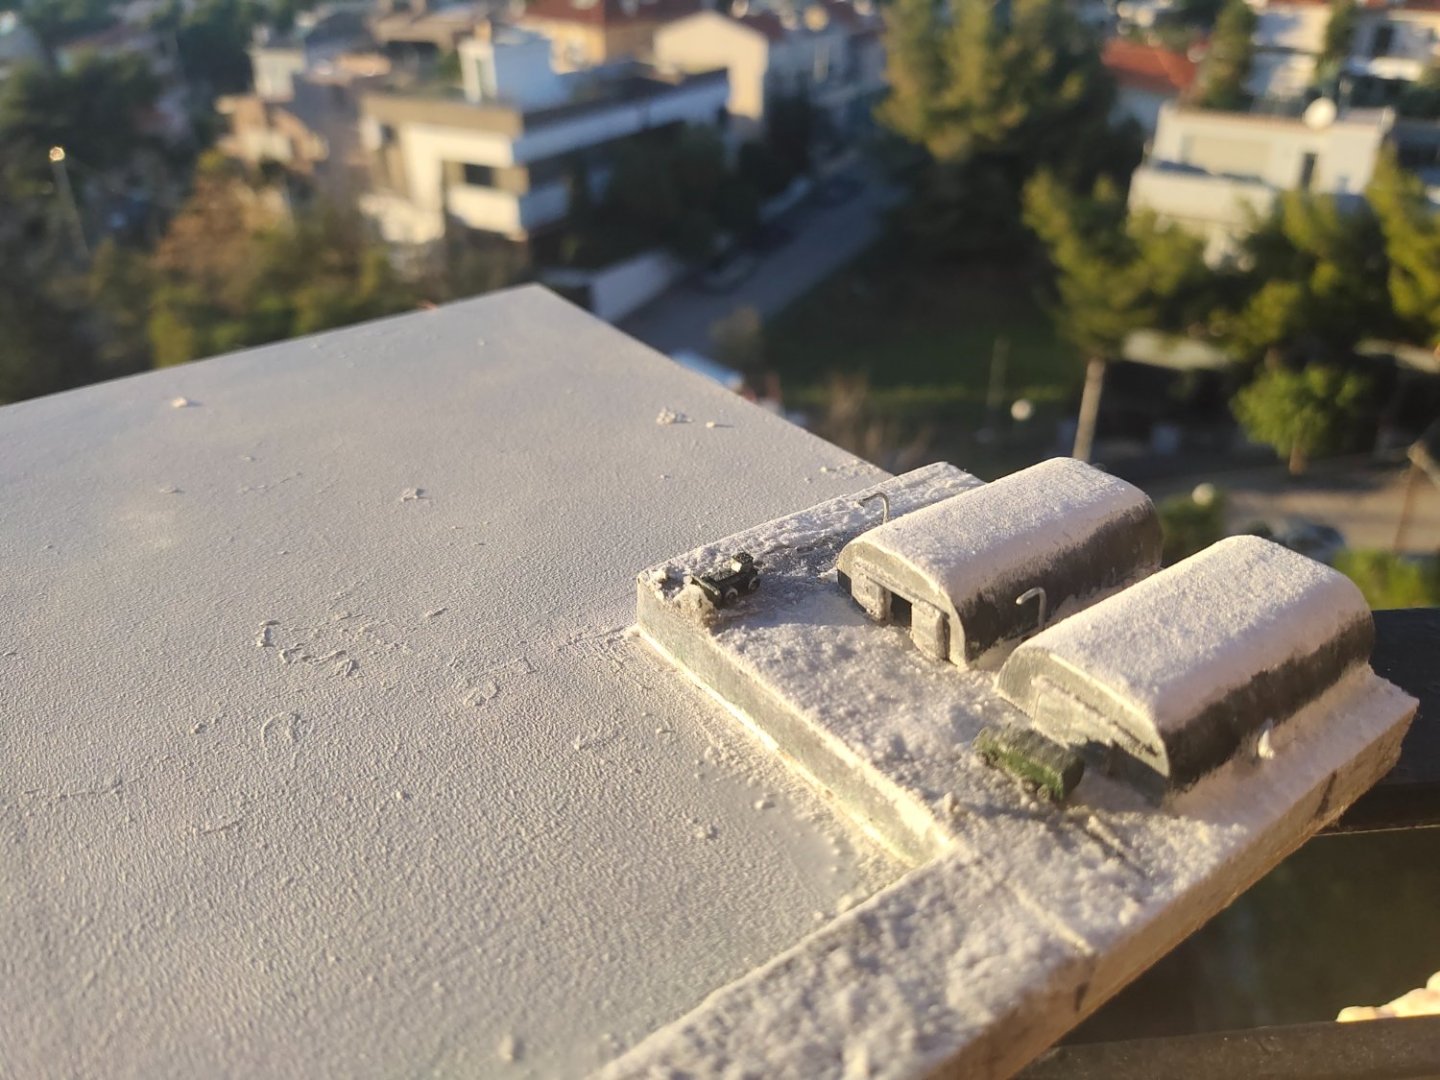
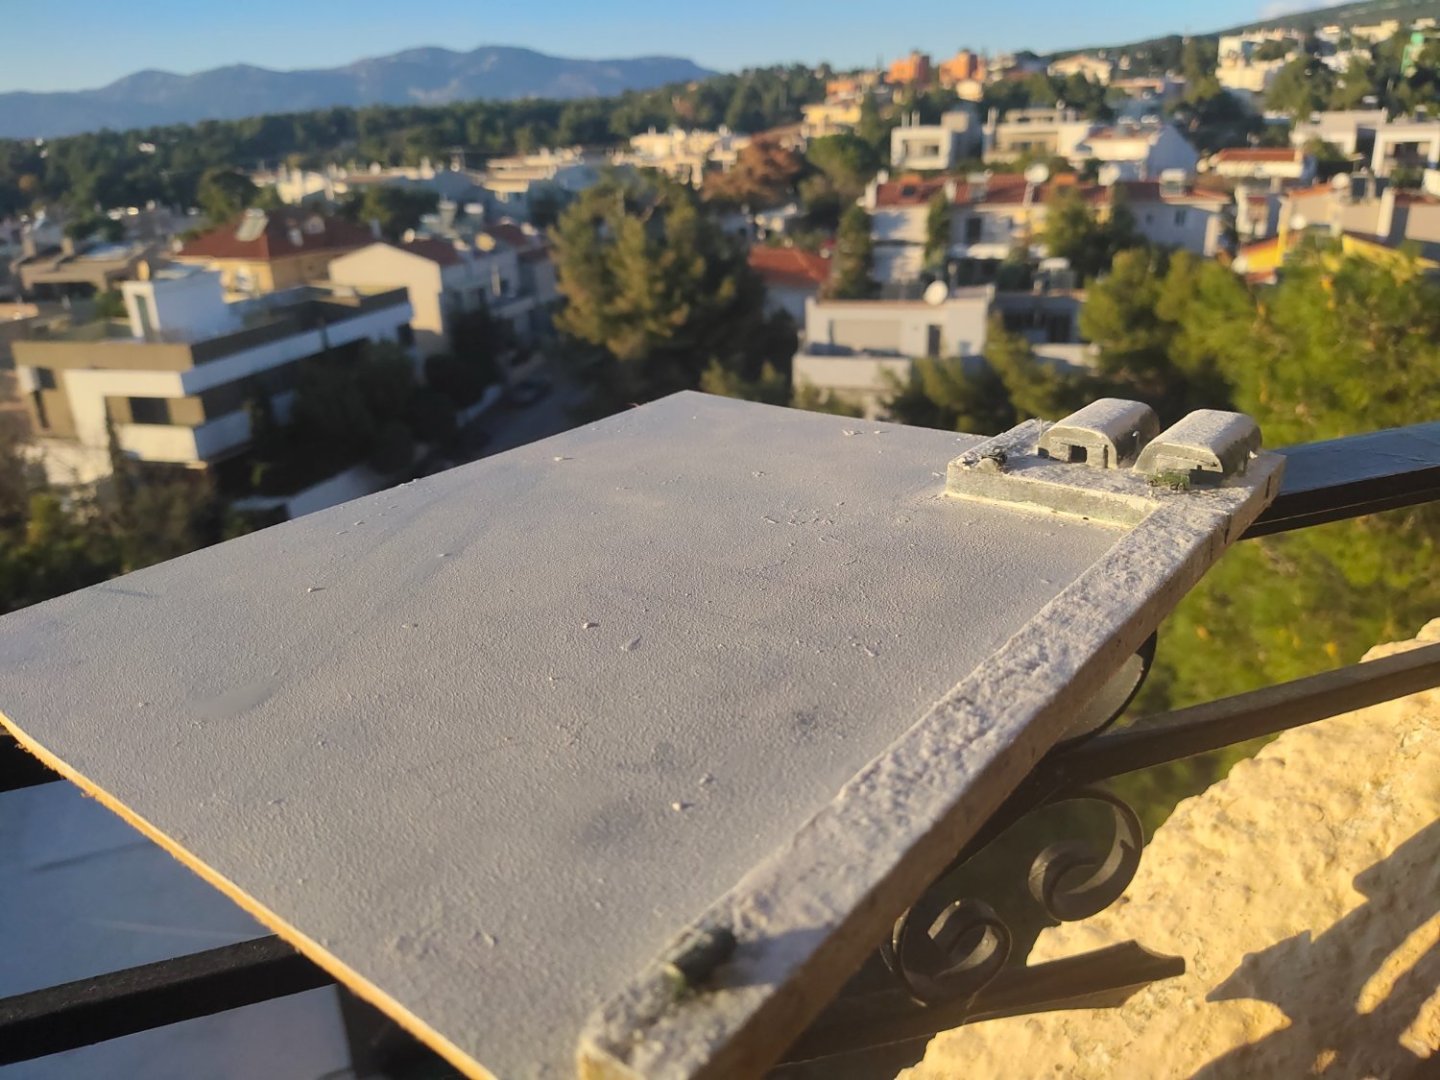
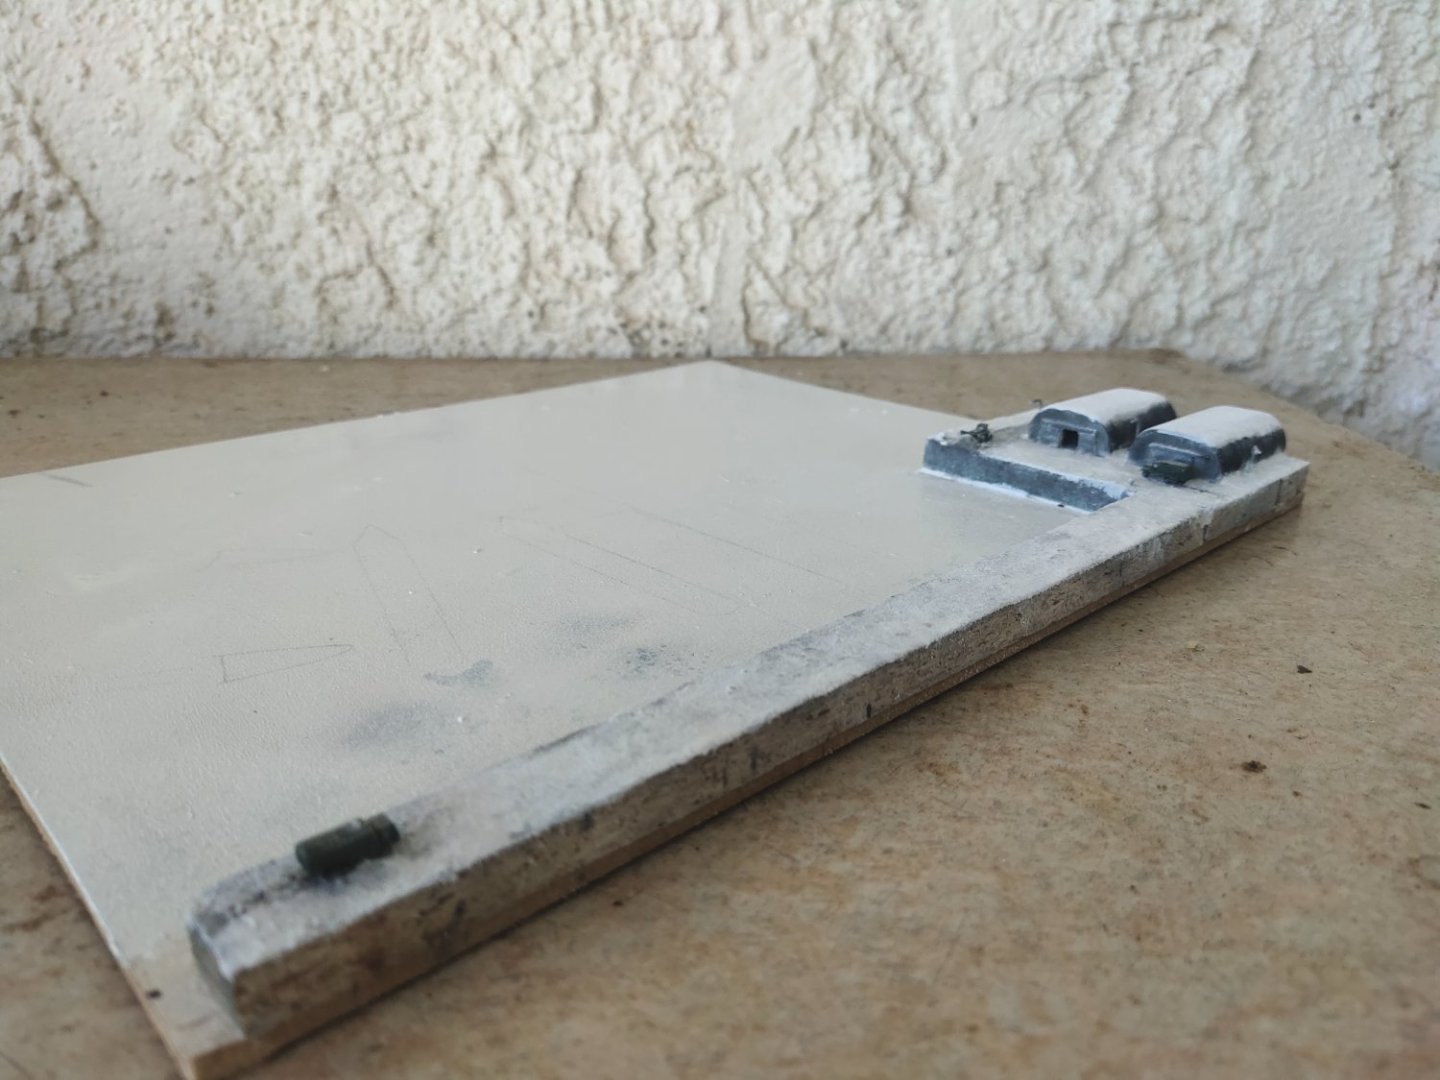
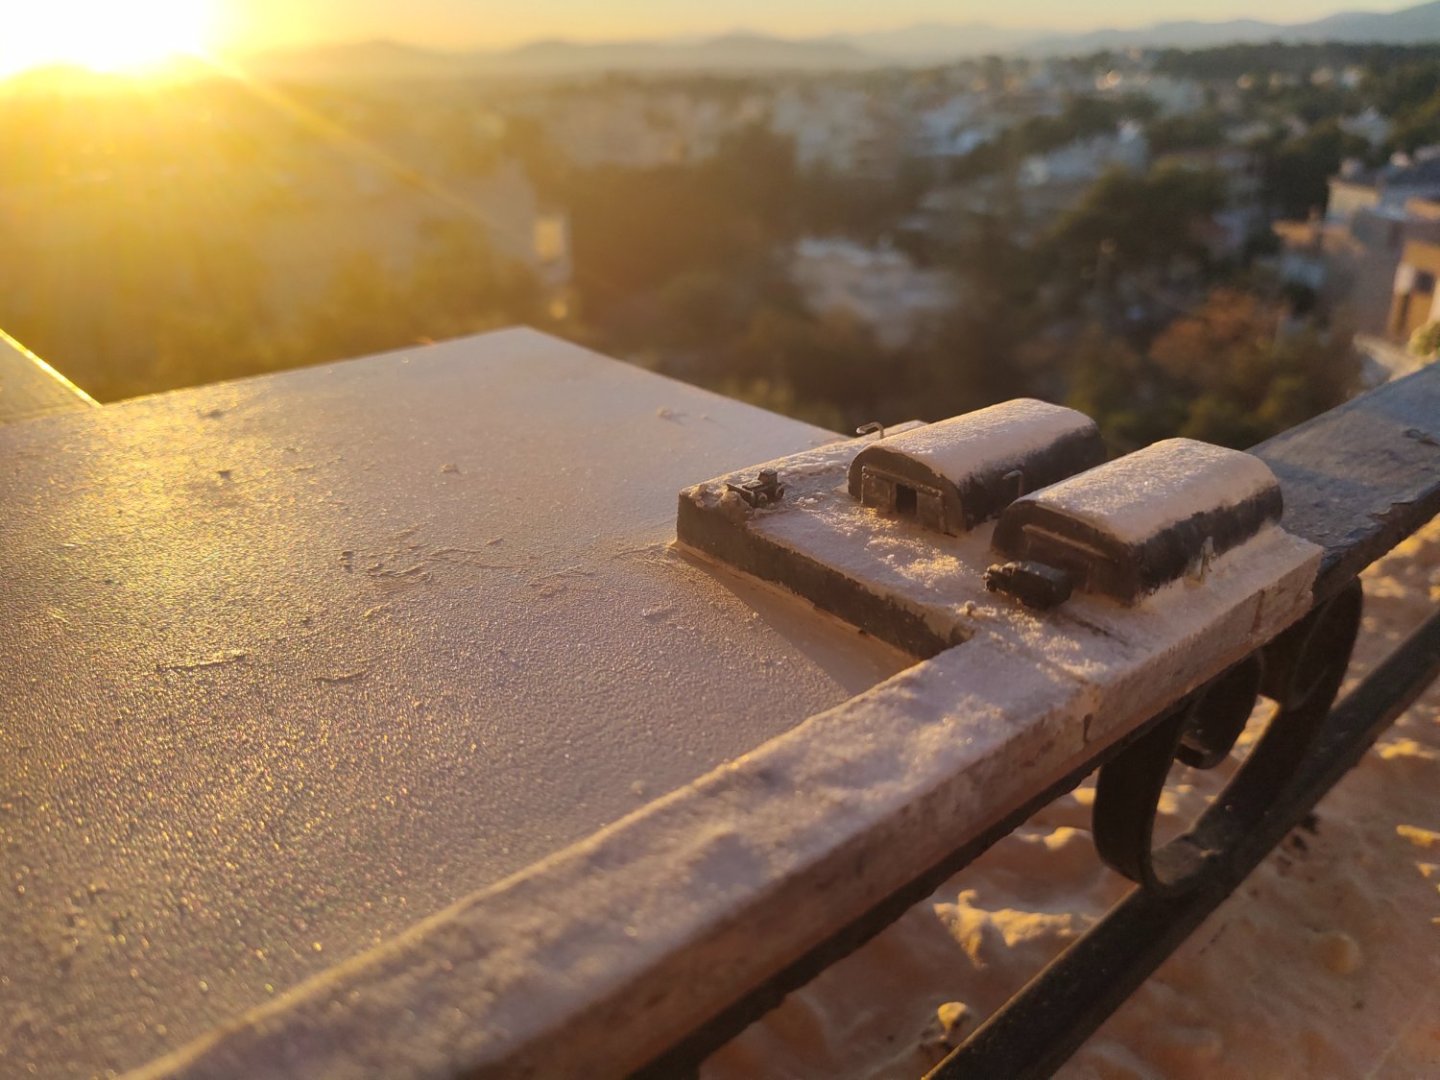
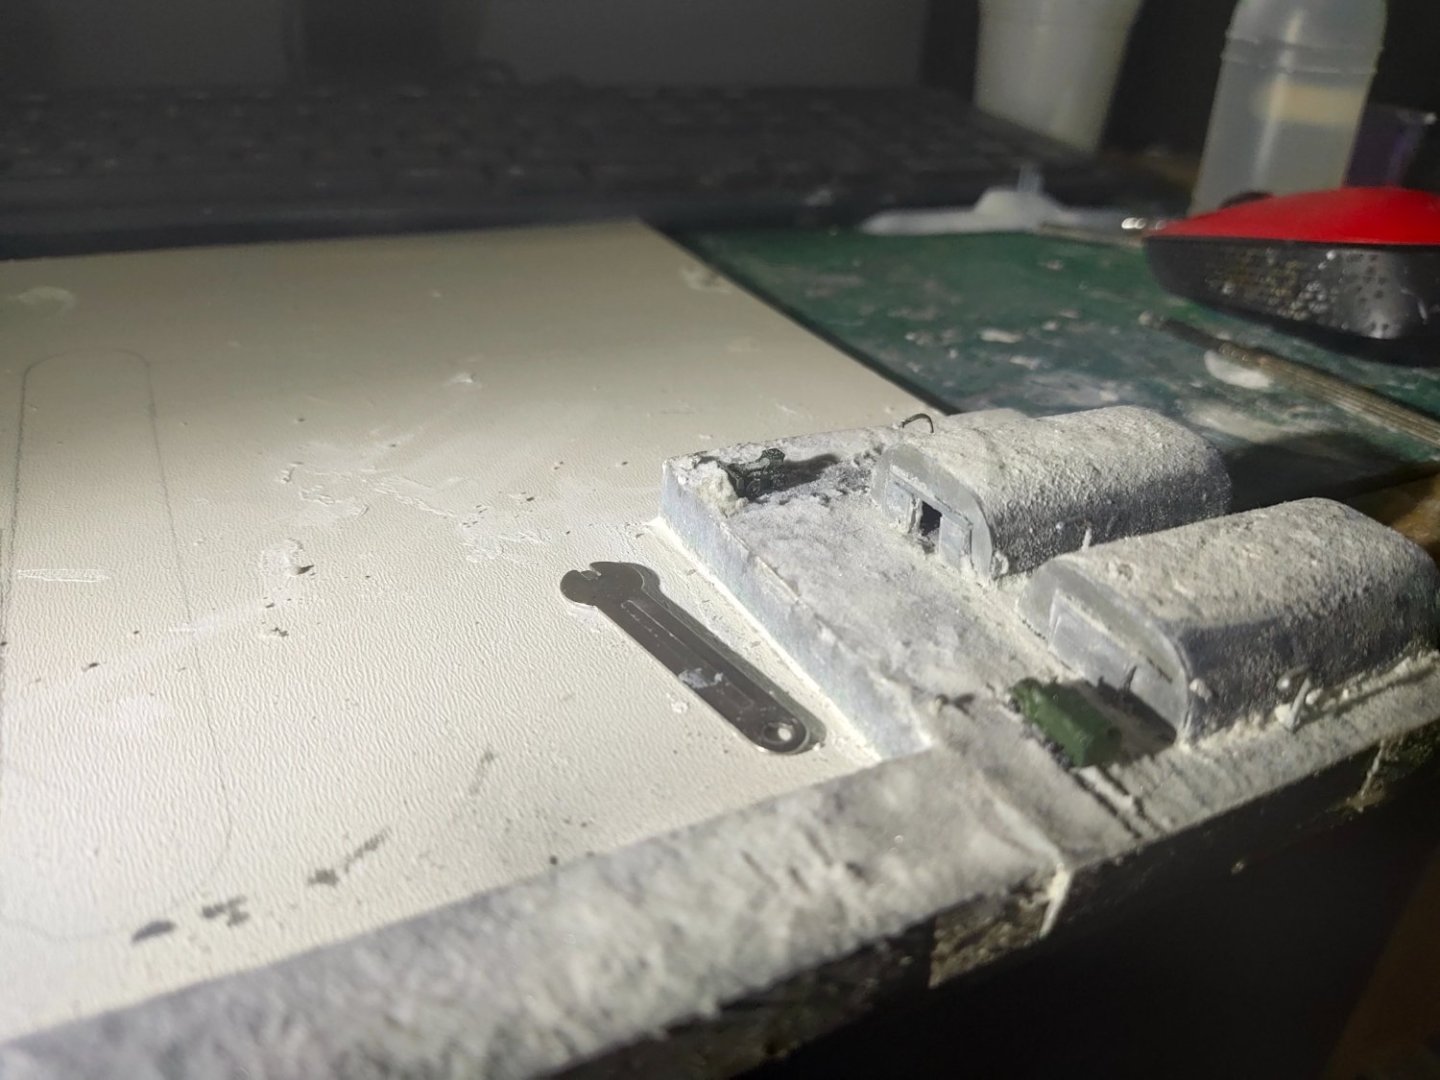
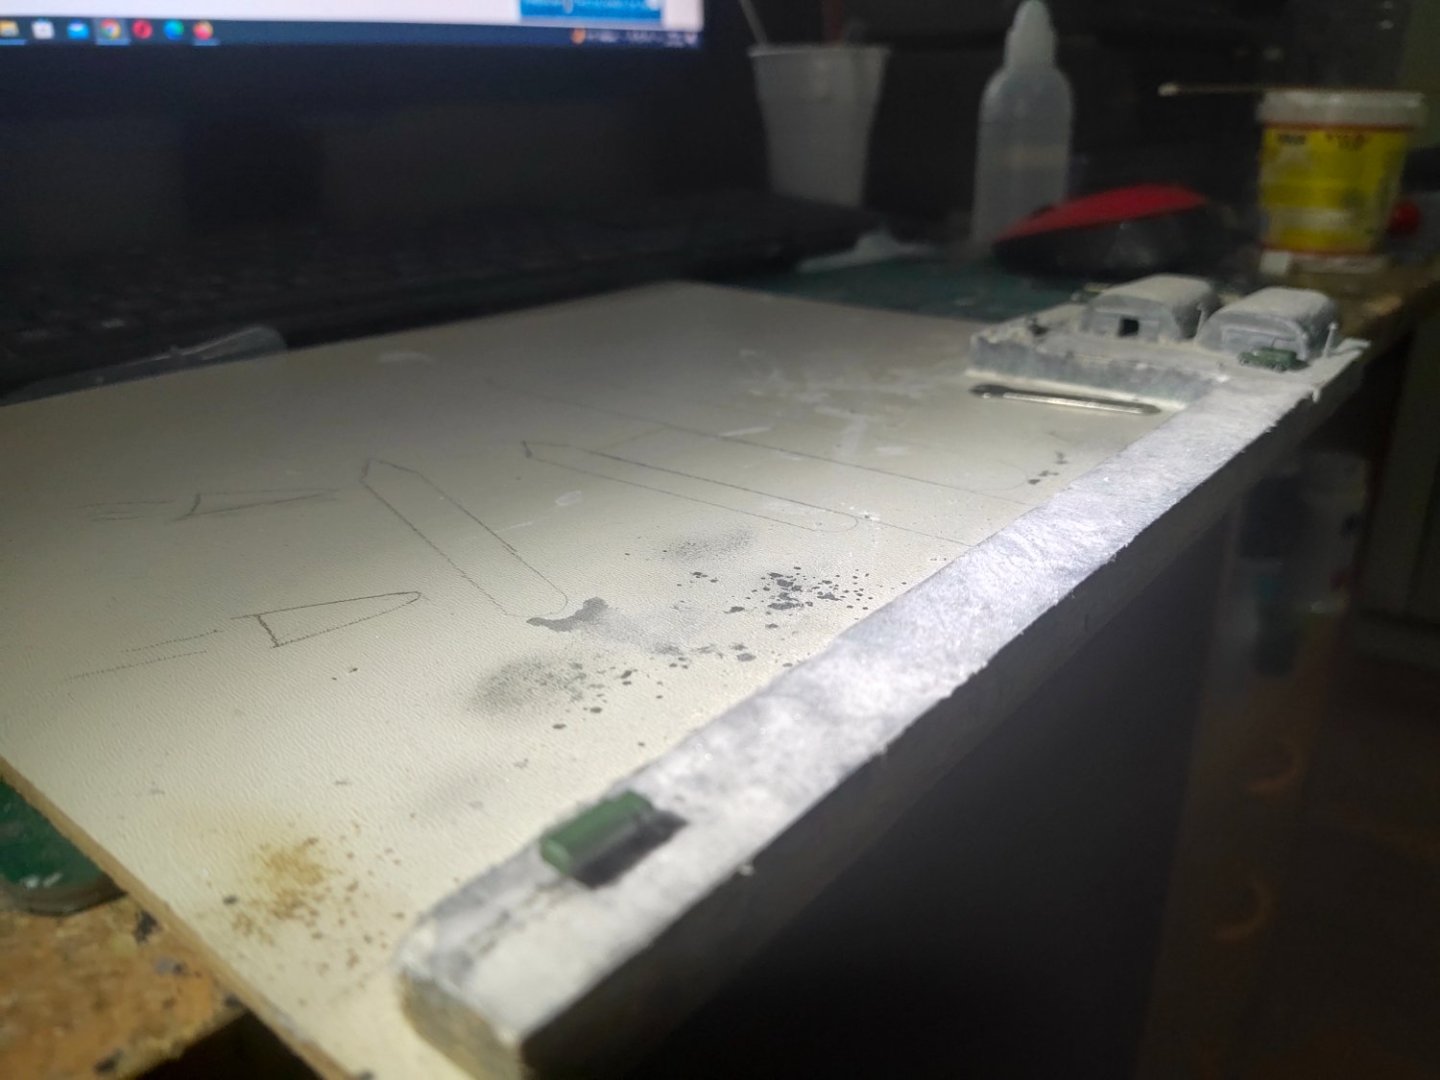
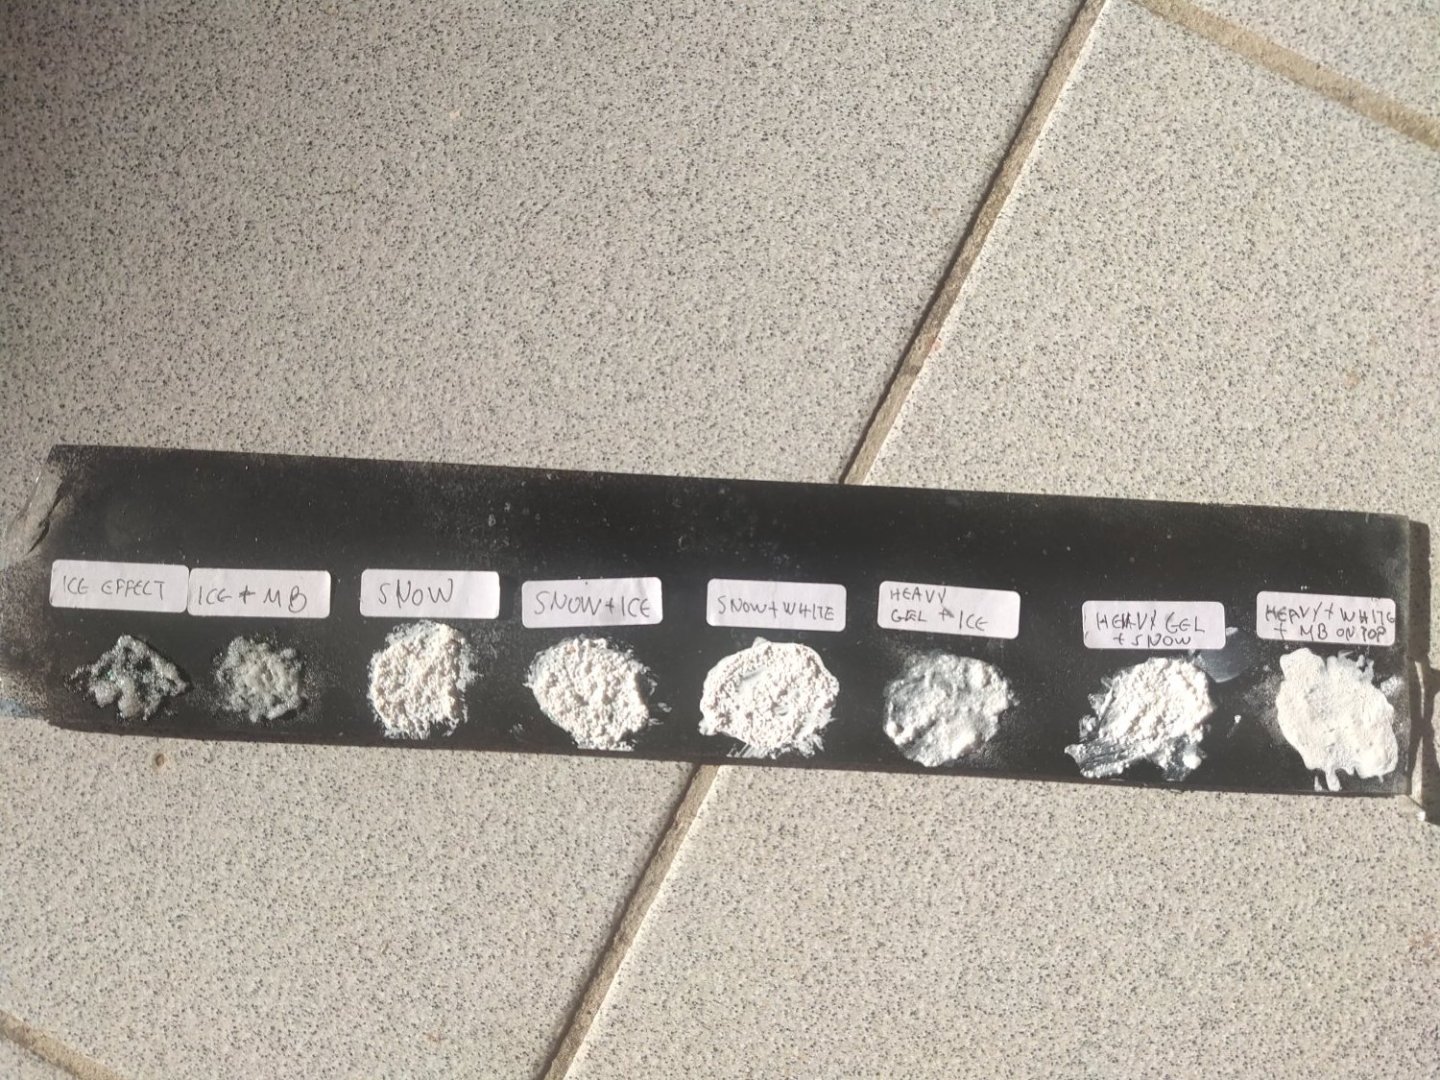
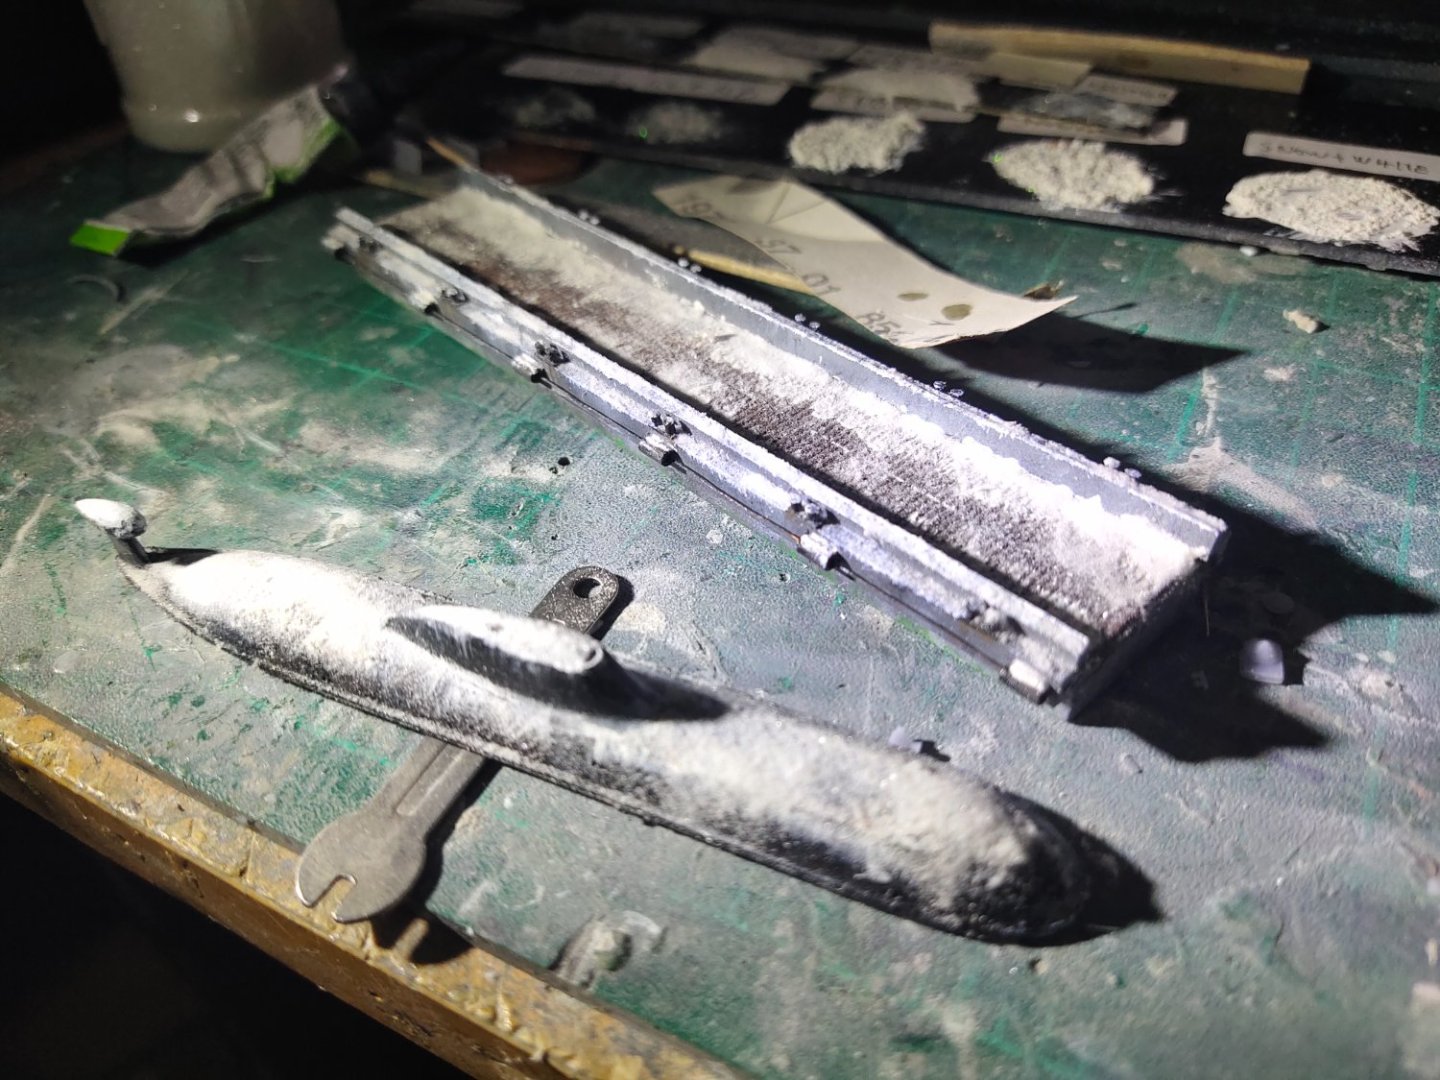
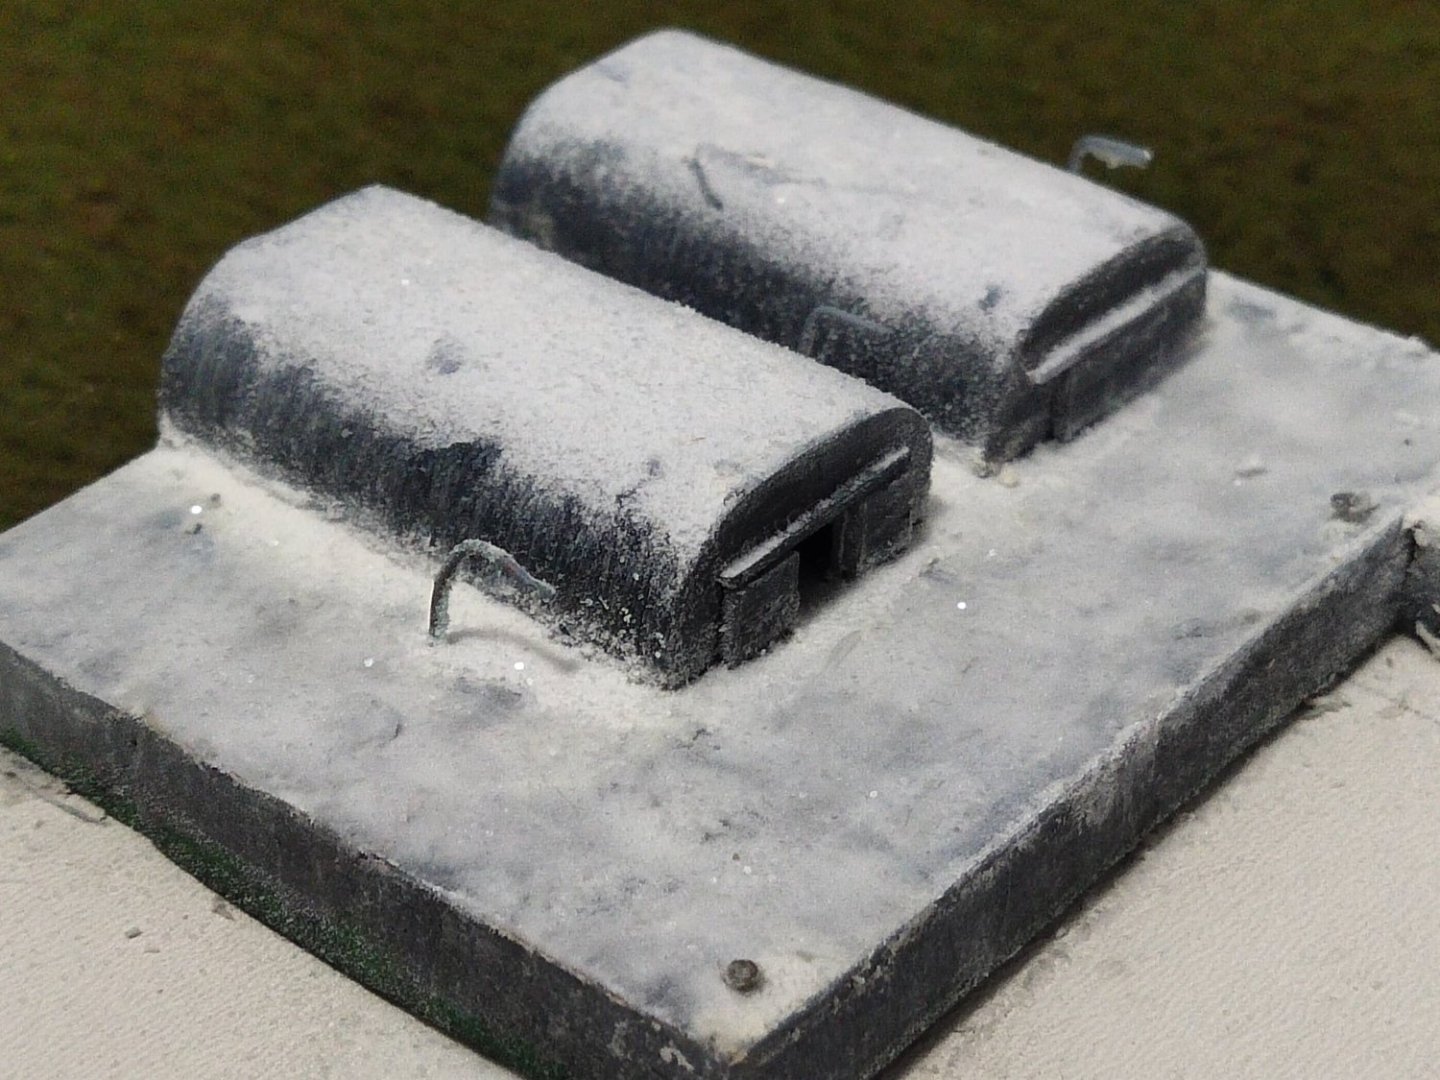
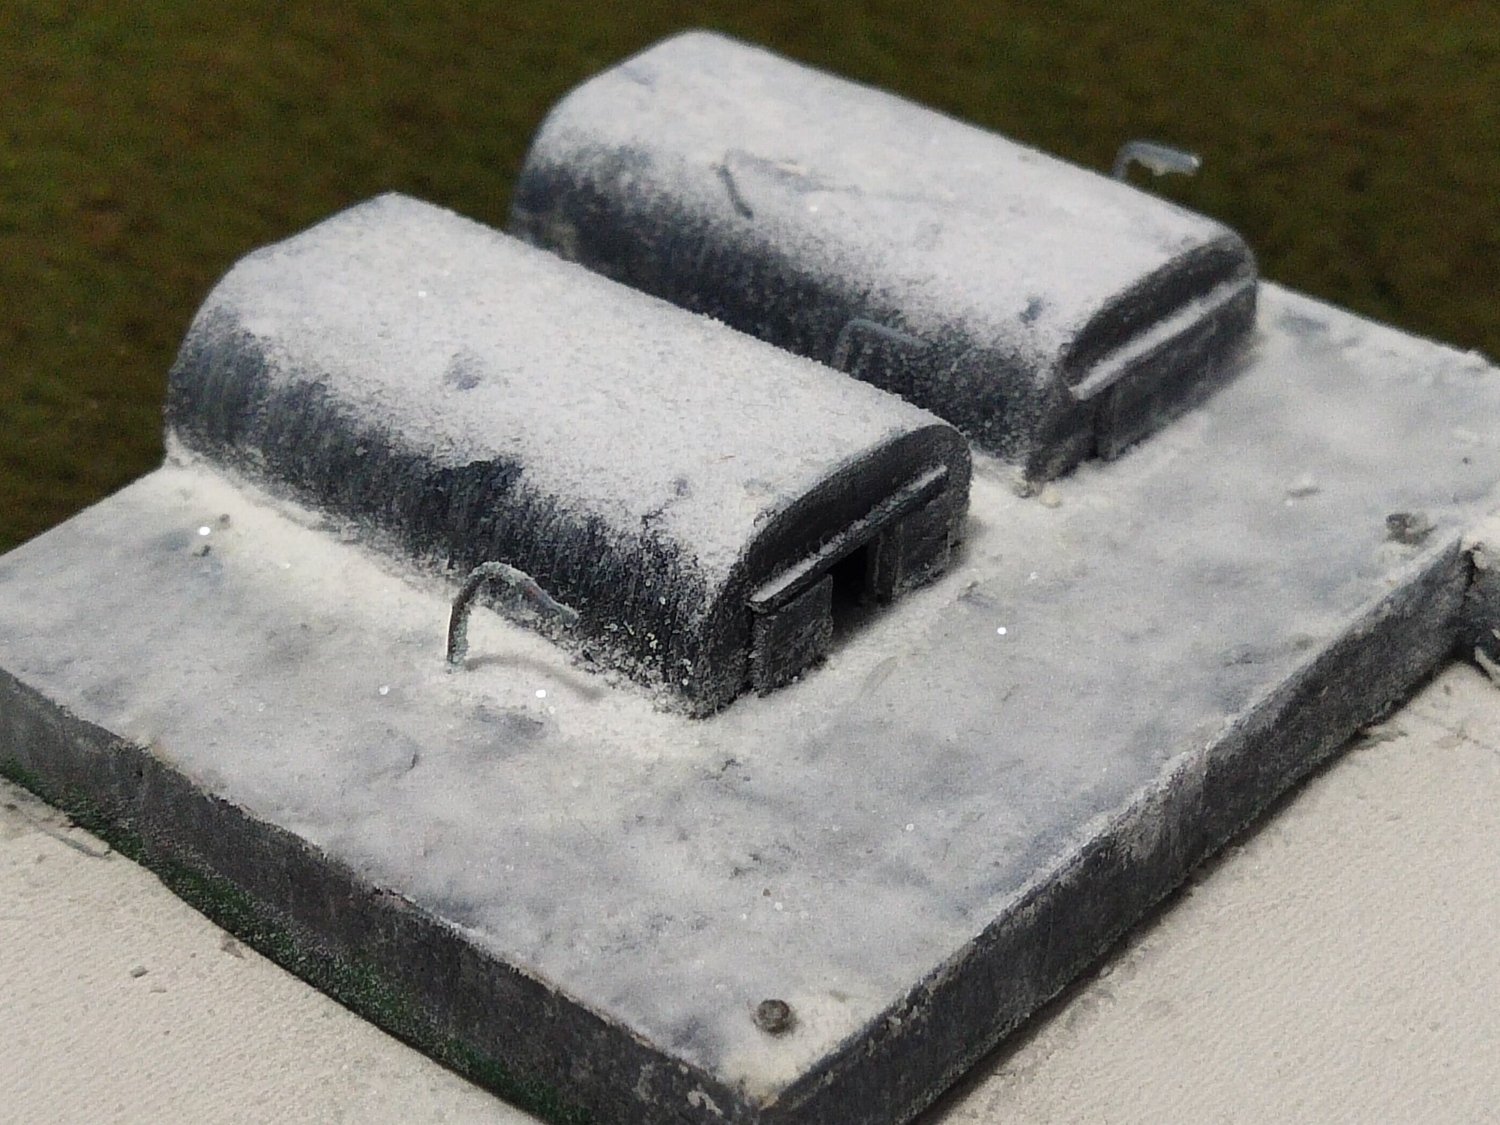
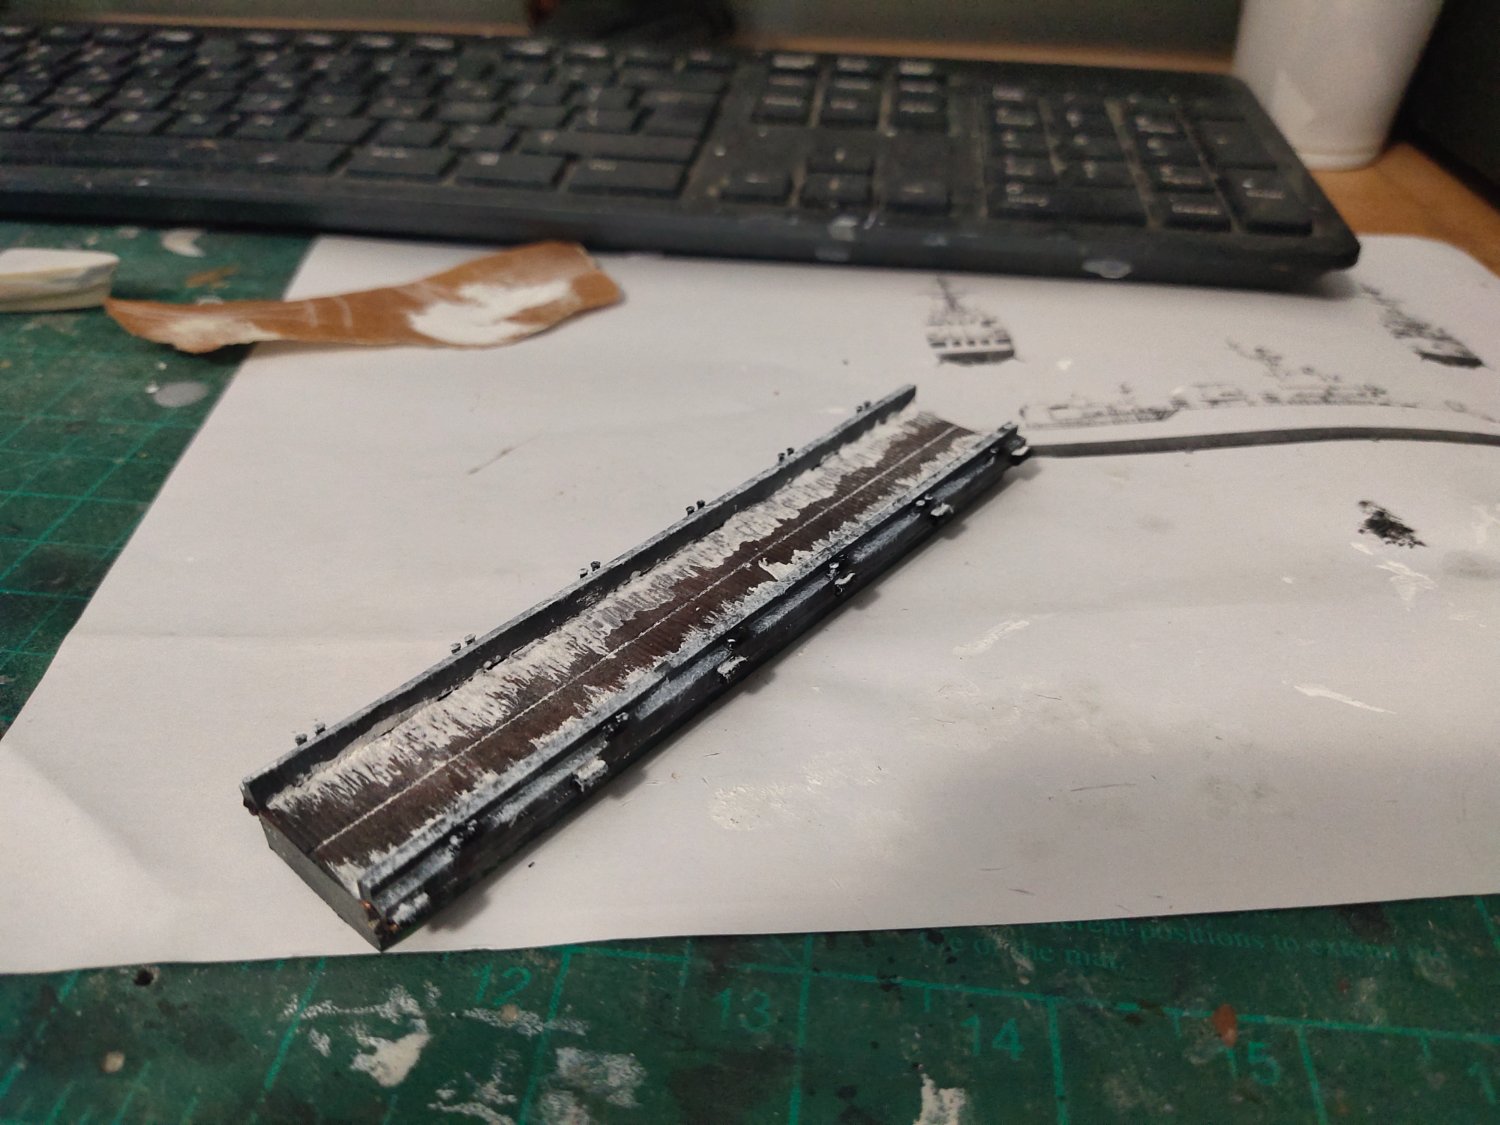
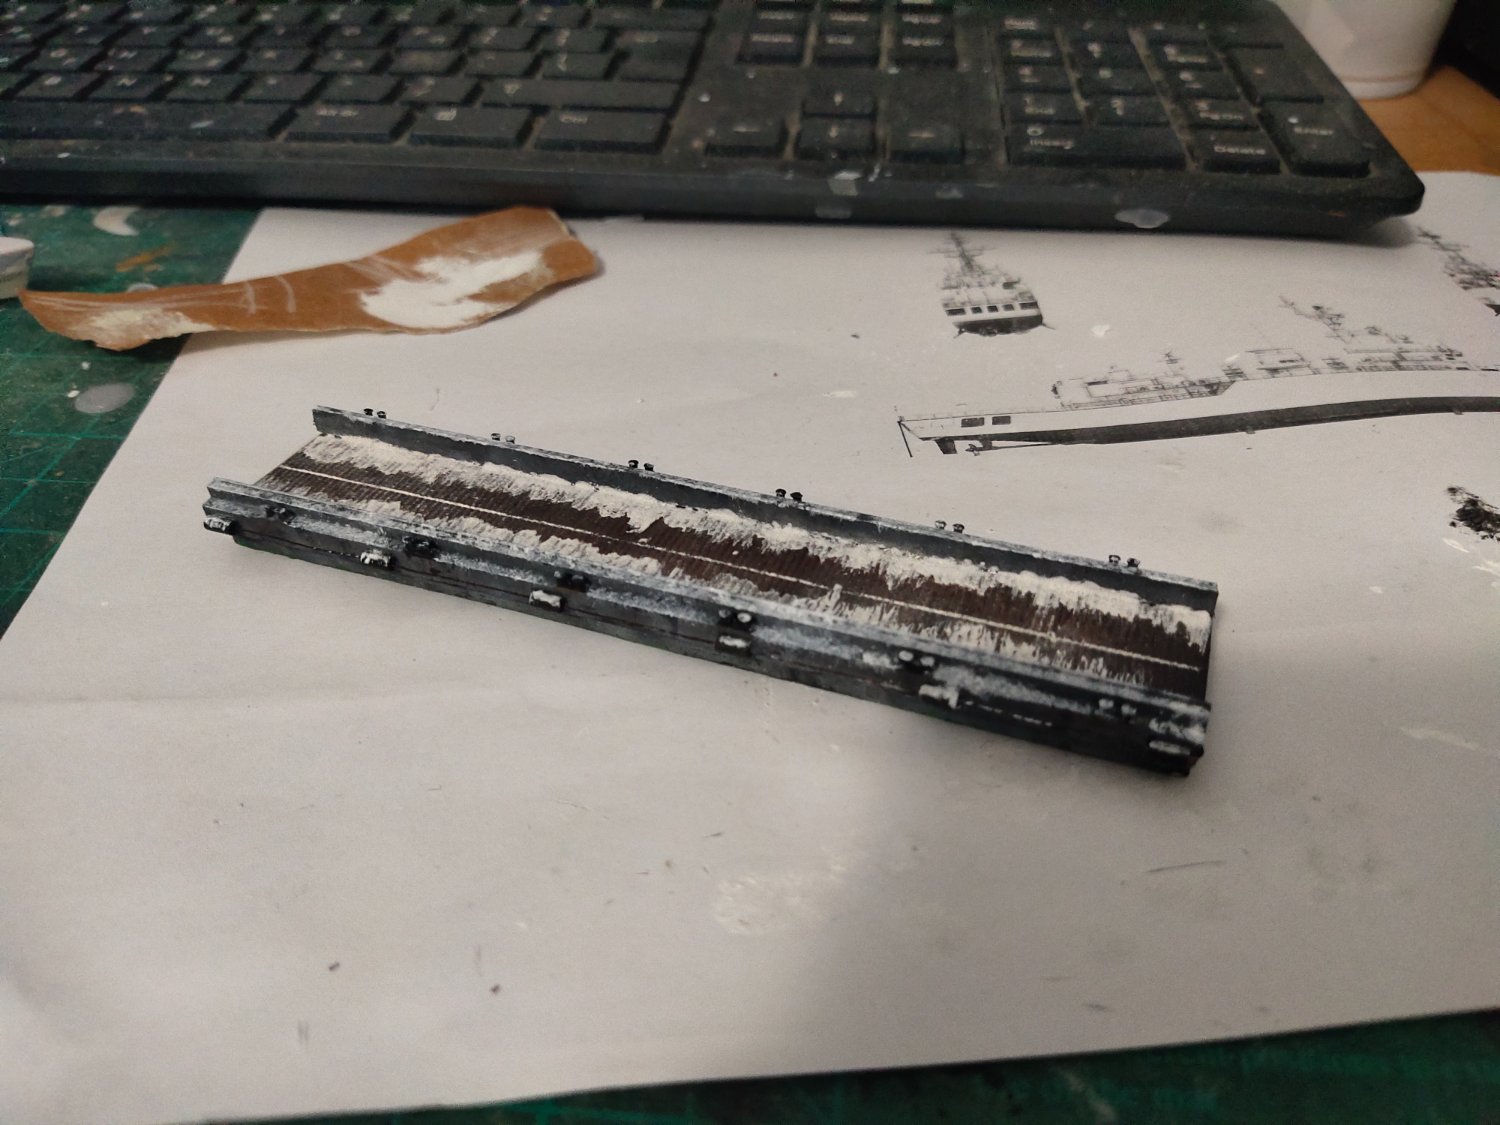
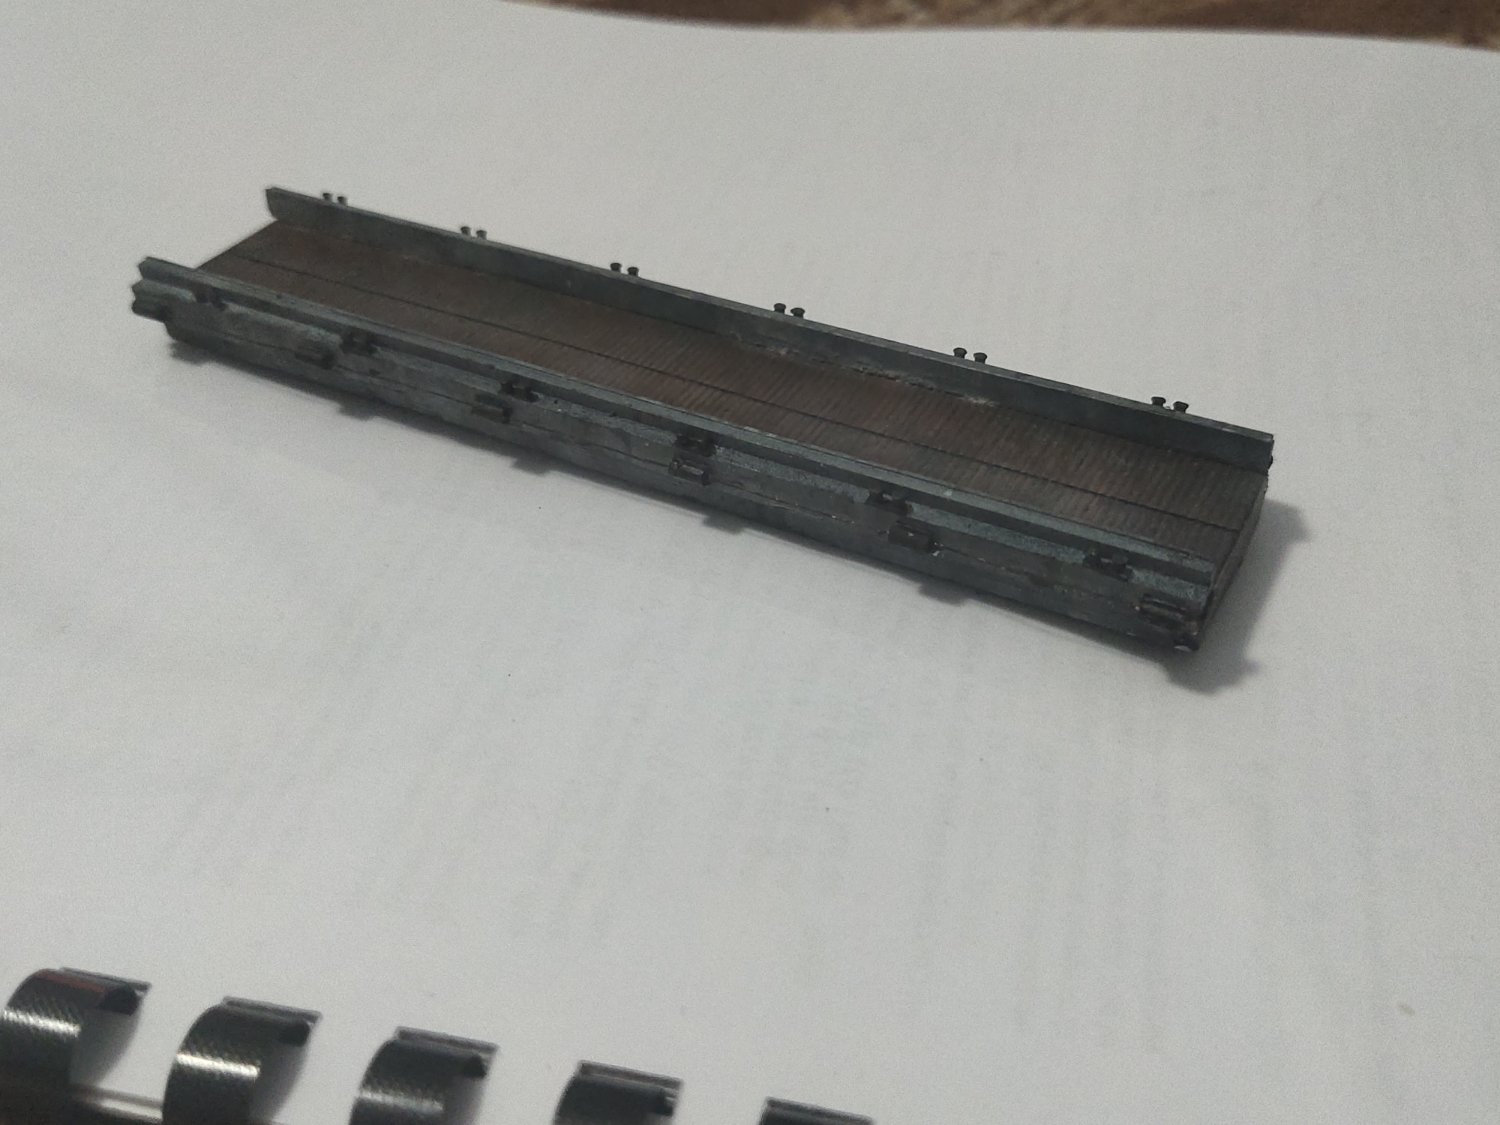
I added some gel and microballoons at the middle of the dockyard to create an ice effect. At the edges I poured microballoons over paste to represent snow accumulation. A small amount of white glitters added for extra shine effect. Extra snow added on Akula as well.
For the roof top microballoons plus few glitters over paint did the job.
I will restart the base, with less snow and more icy surfaces. Typhoon needs to be re worked also.
Note on Akula, resin has warped already.
-
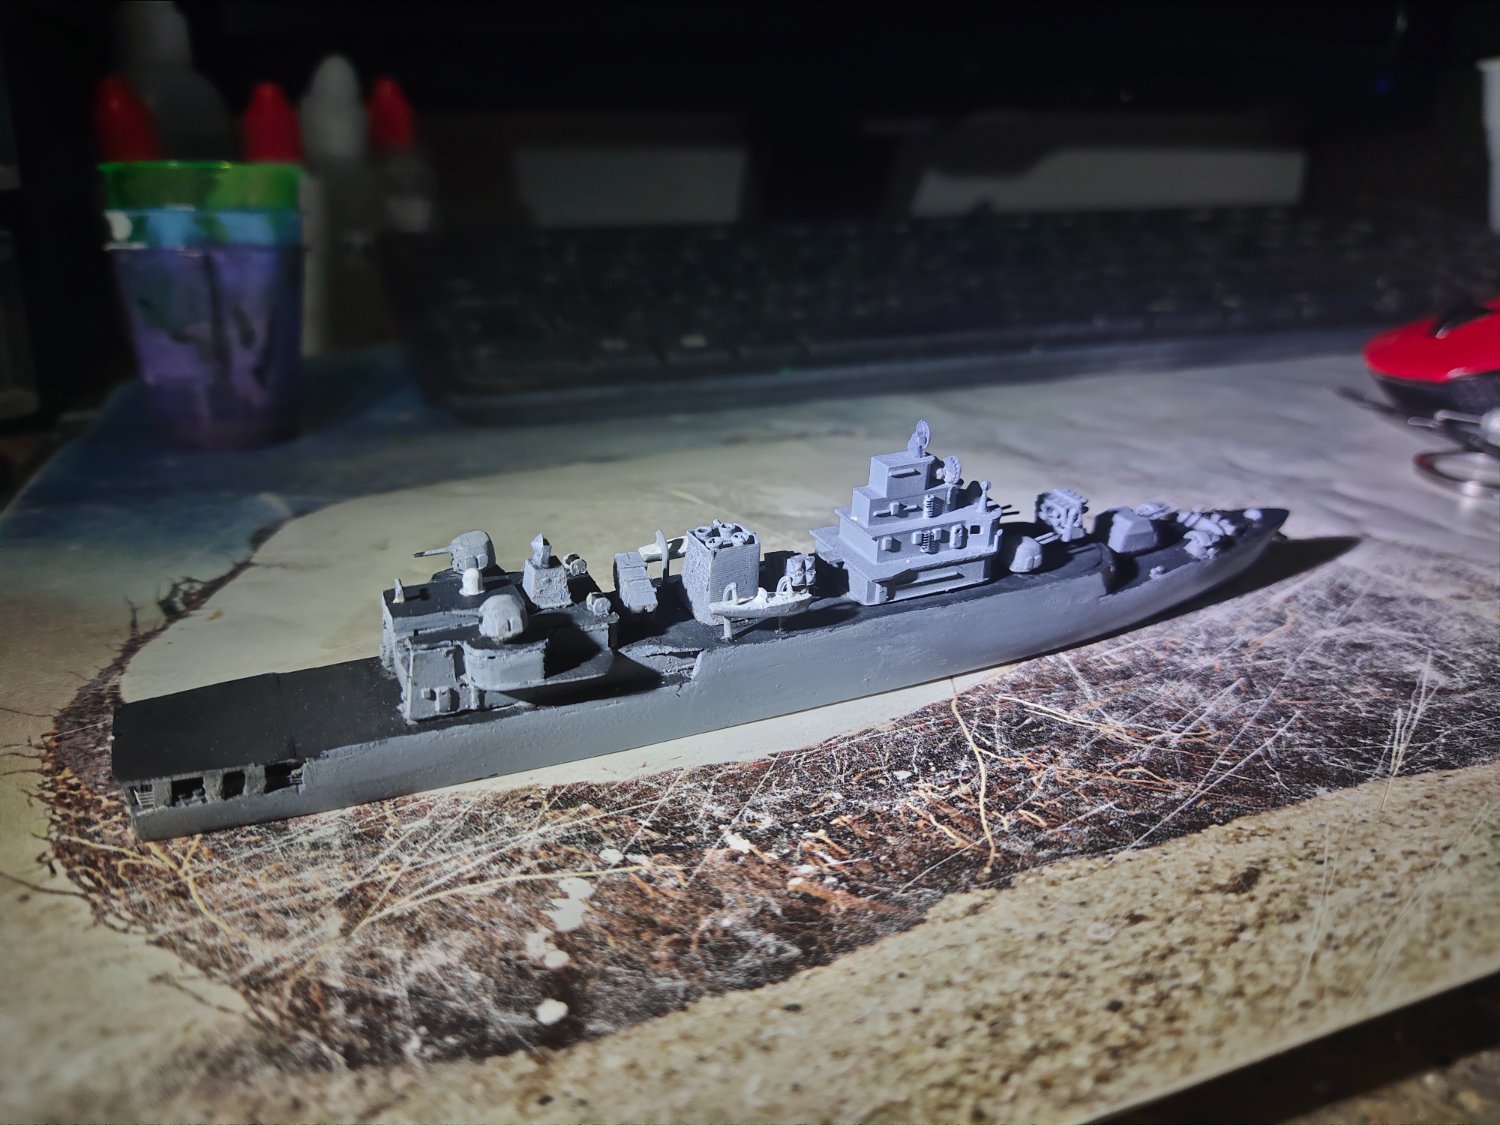
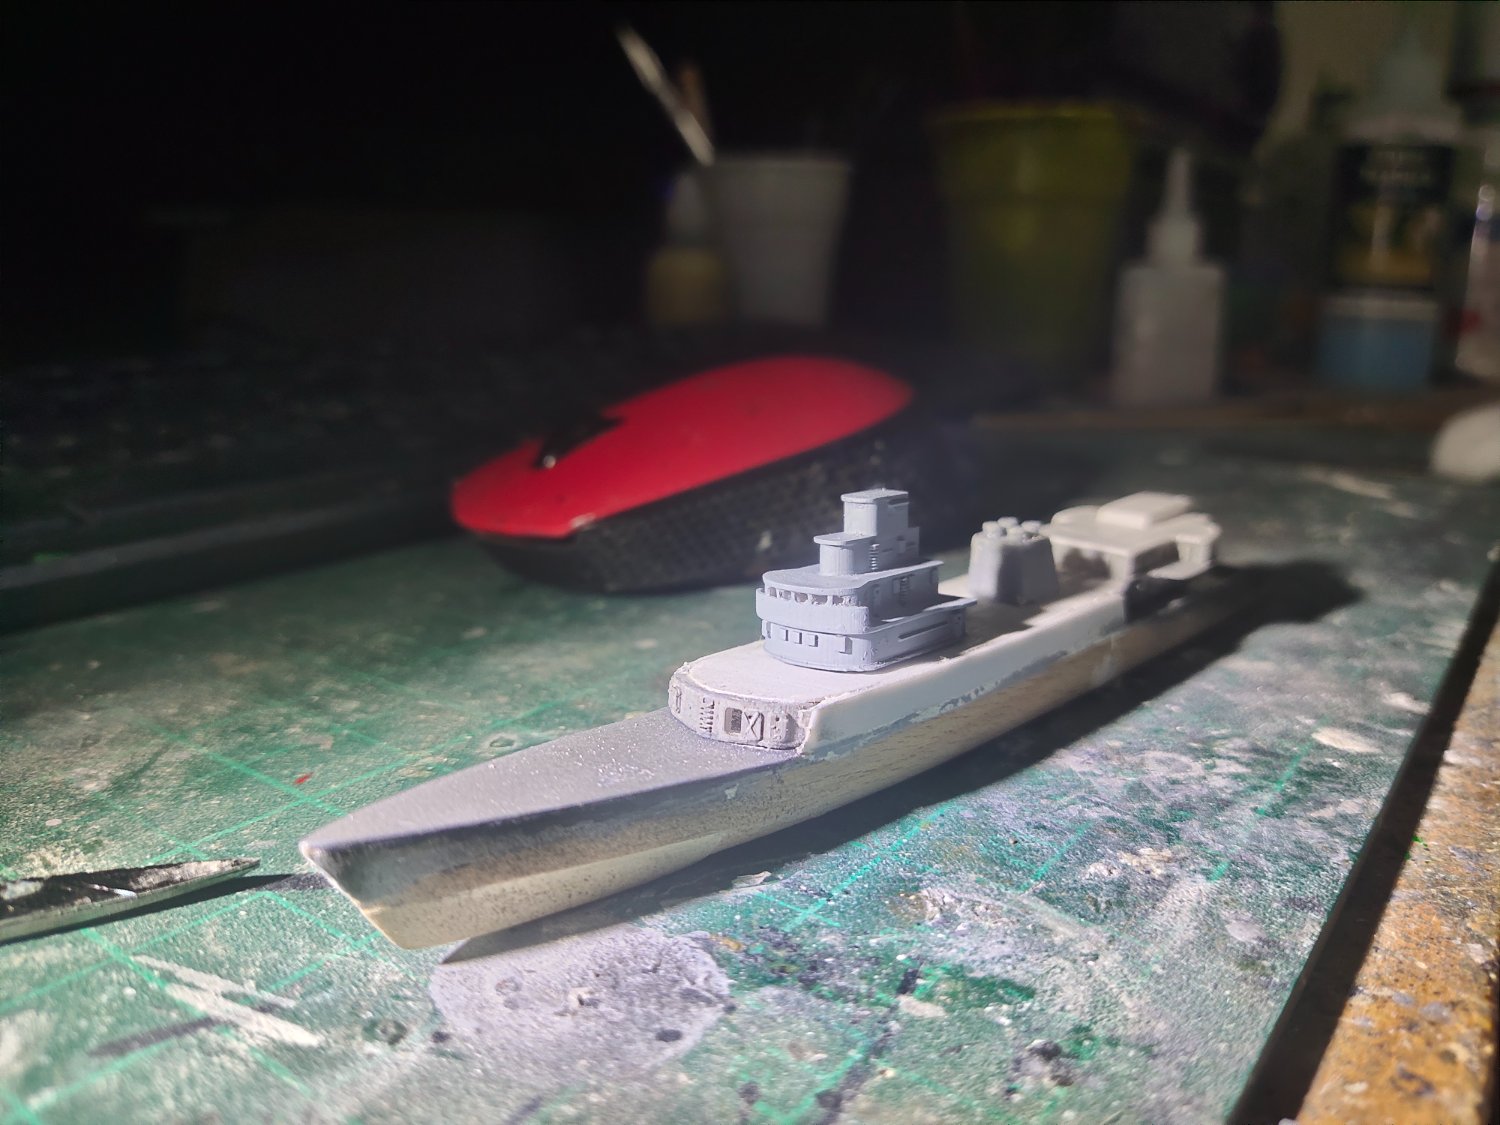
Fitting doesn't lie. Hangar proved too long thus space between this and funnel wasn't enough for the SSMs to be fitted. I had to shorten it by whole 5mm. Funnel had to be repositioned as well. Not easy process when deal with CA glue and resin. Plastic deck broke and had to be repaired. Funnel was re printed with added details, hand ladder and grills. Also SSM boxes were reprinted 1mm narrower. The base is a separate piece very delicate, almost transparent. Its shorter, to give a correct lower firing angle. Also secondary AA was given a haircut by one mm. Finally their type 345 radar was fitted as well as the 347G radar for the main gun, at the very top of the superstructure.


- Canute, KeithAug, GrandpaPhil and 3 others
-
6
-
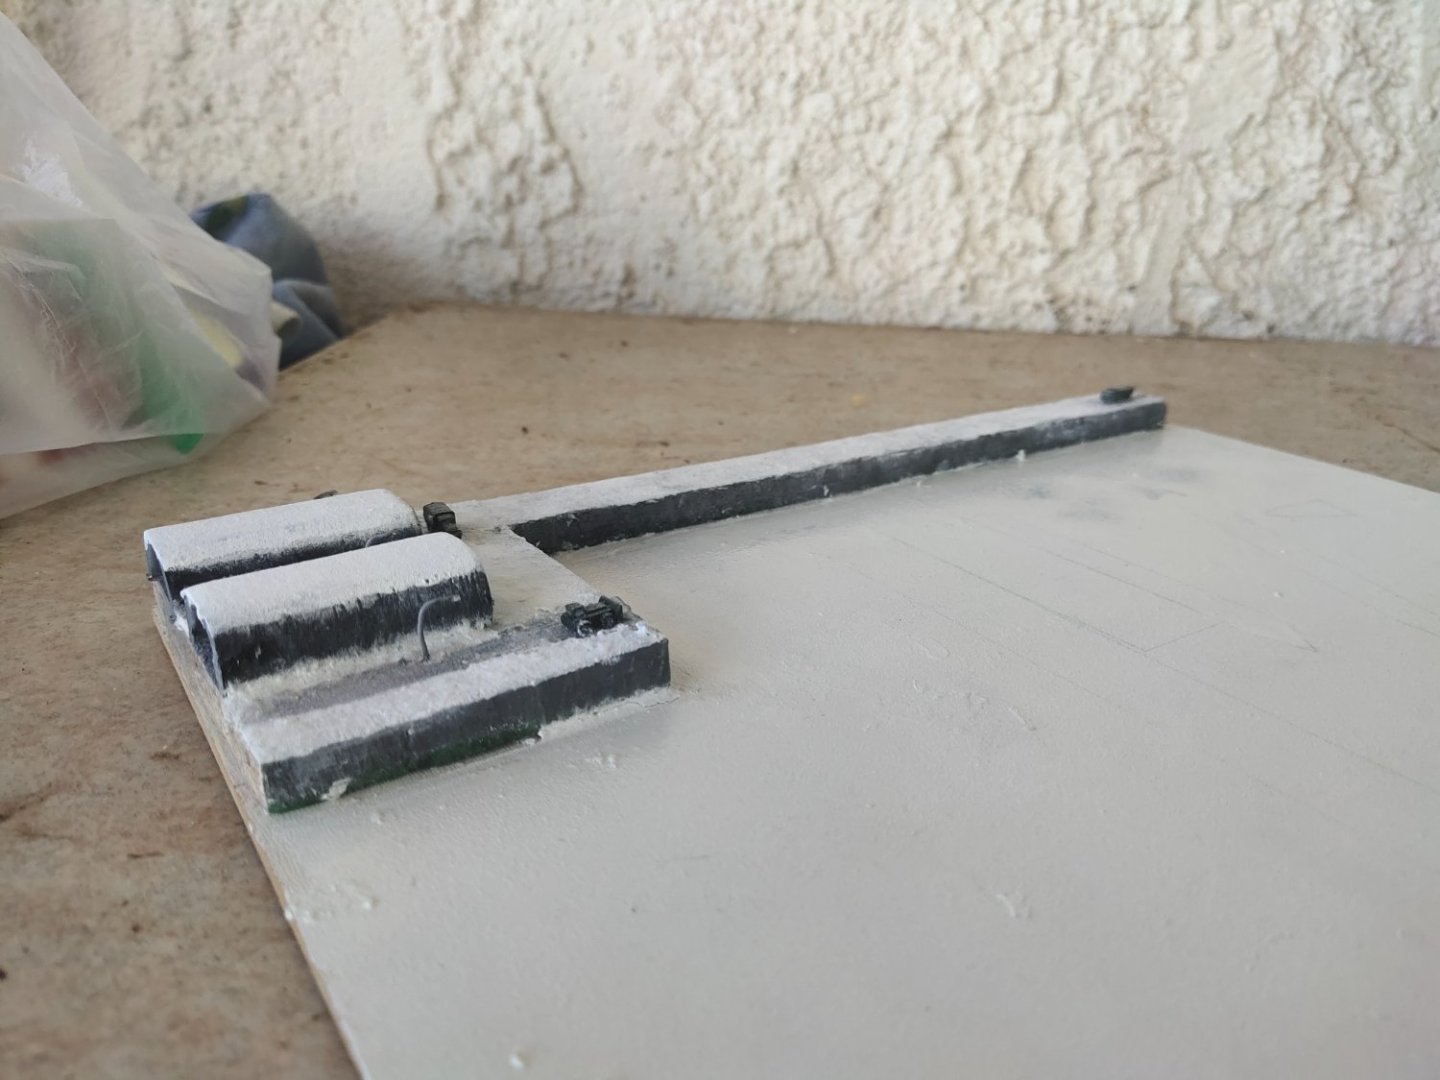
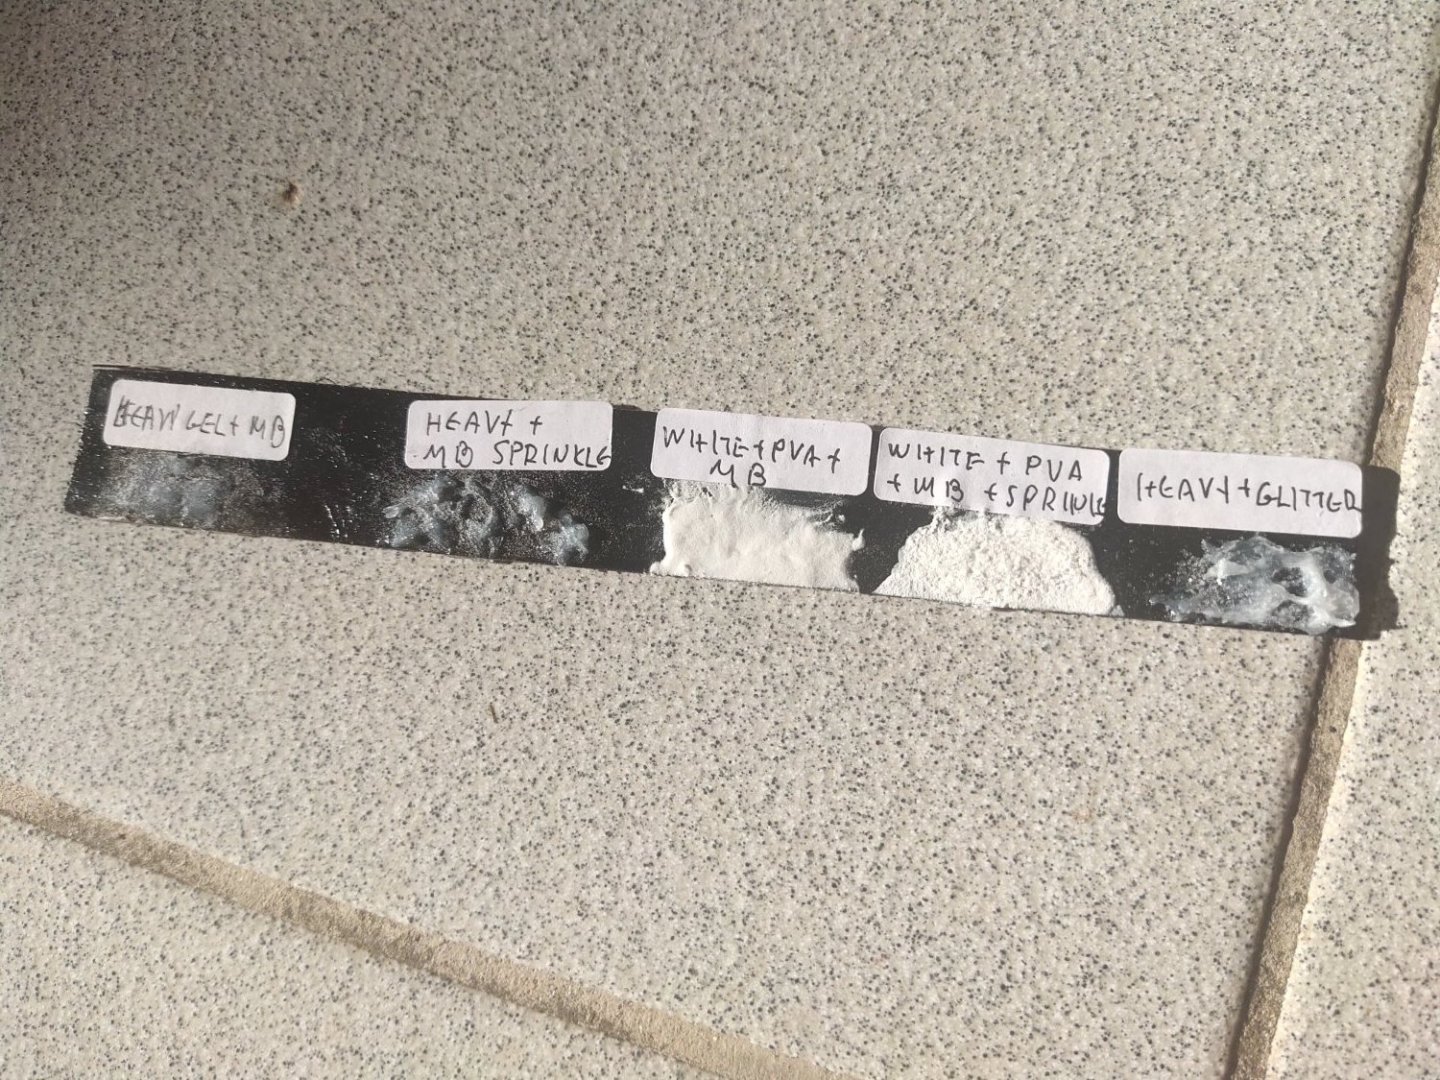
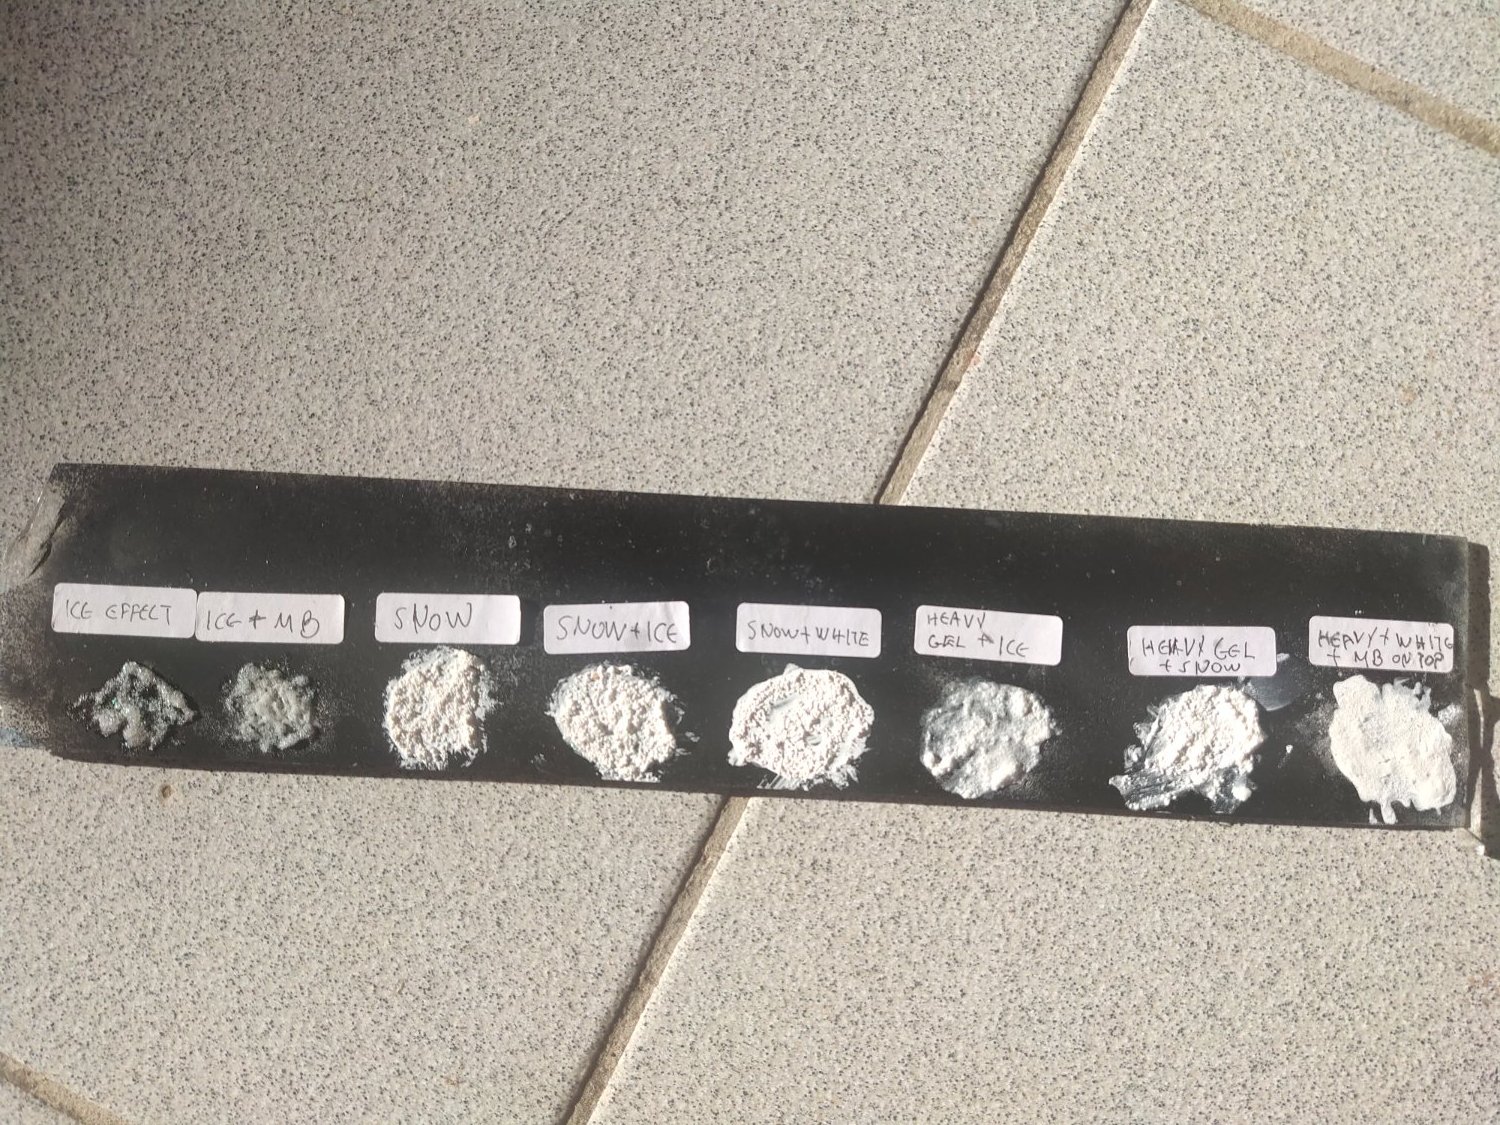
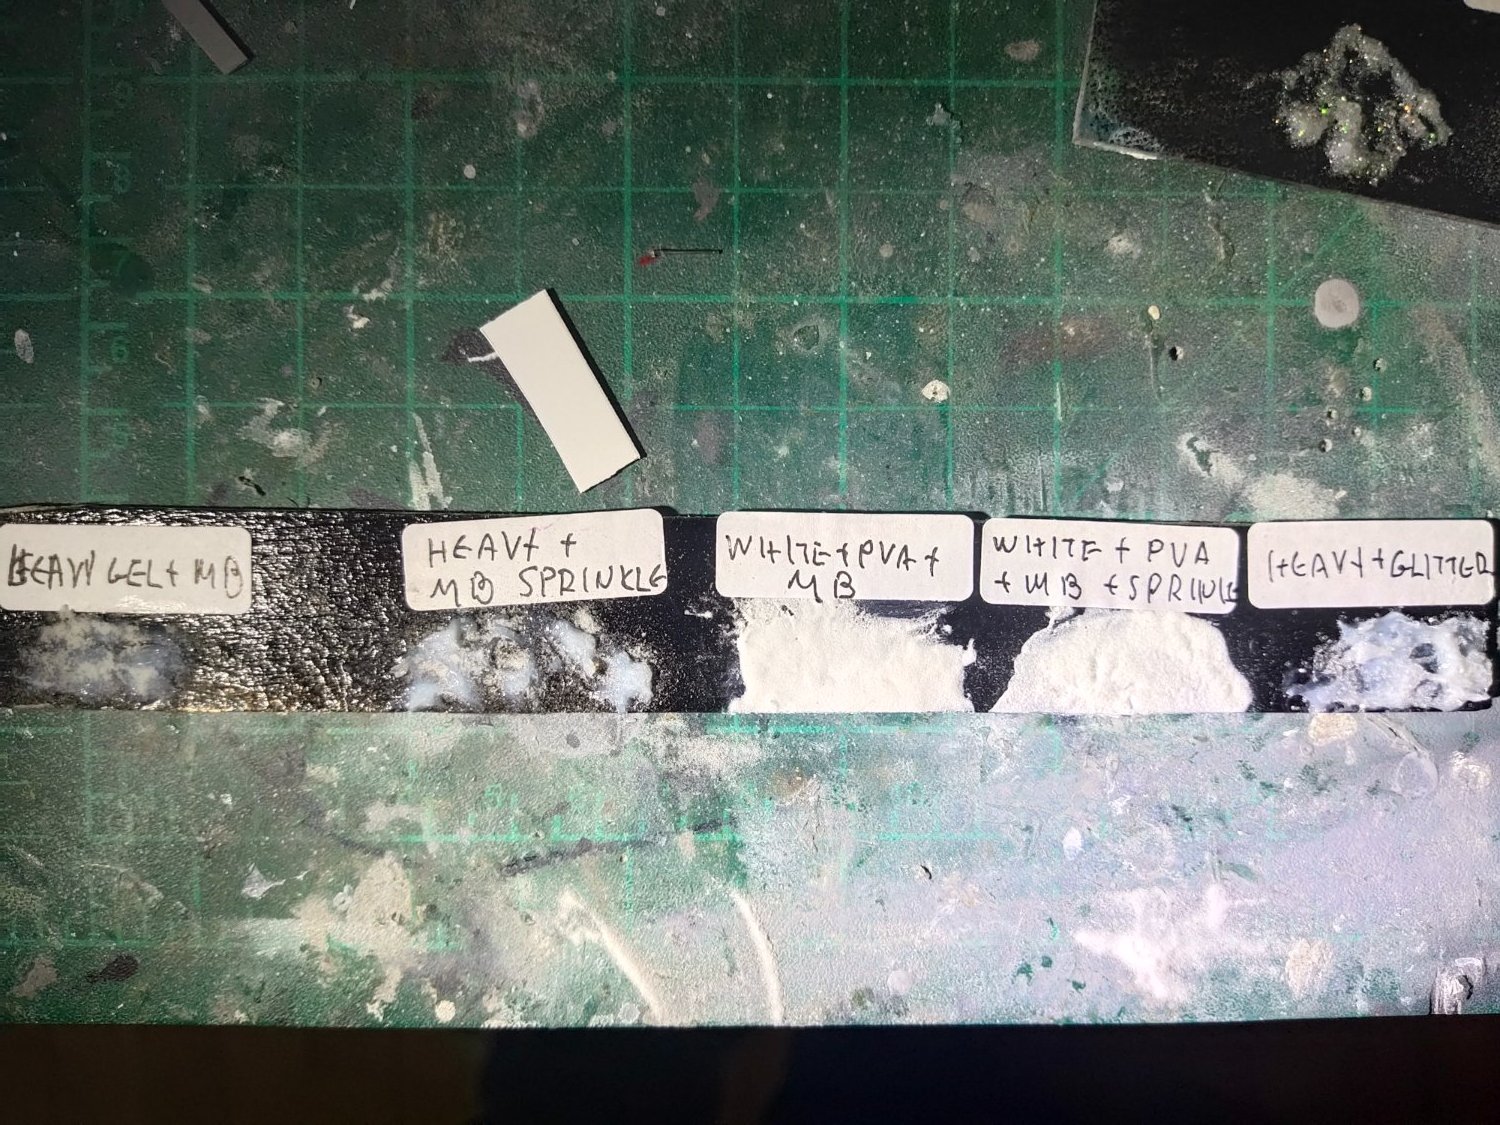
Progress has paused because I decided to have some education about ice and snow. At large surfaces even in that small scale I find that it takes more that paint job, no matter how perfect will be.
I got some extra materials on hand. Ready made snow paste, ice paste and micro balloons. I added some more usual staff like heavy gel, PVA and paint.
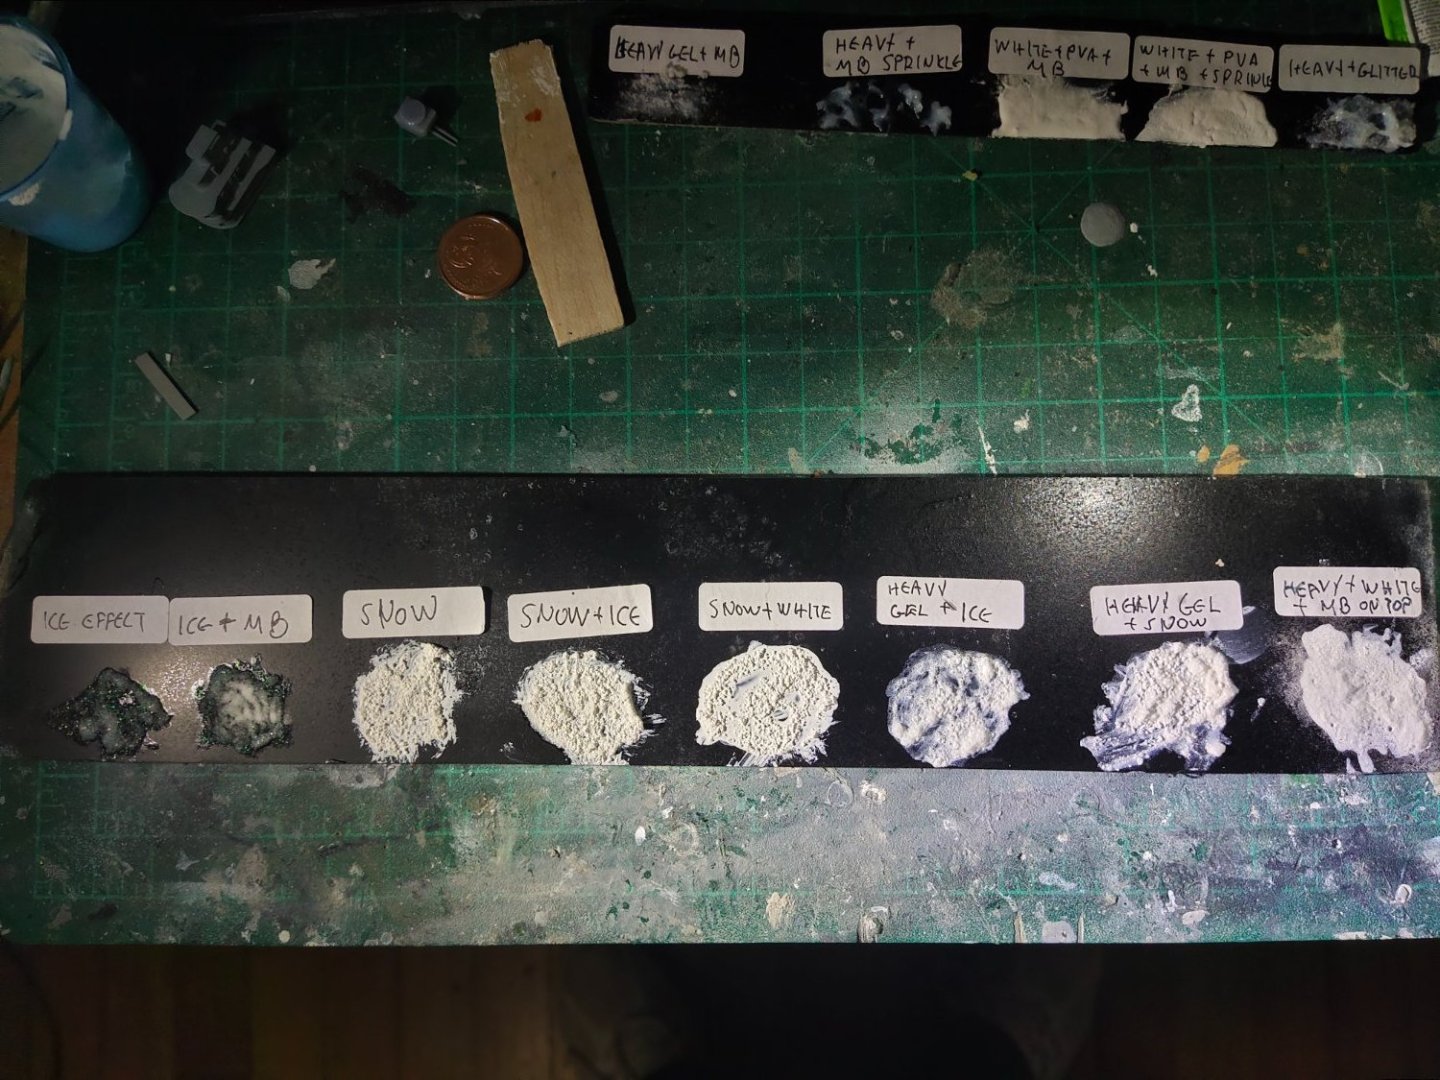
From left to right
-Ice paste
-Ice paste with microballoons
-snow paste
-snow and ice paste
-heavy gel and ice paste
-heavy gel and snow paste
-heavy gel, paint and microballoons sprinkle on top

-Heavy gel and microballoons
-heavy gel and microballoons sprinkle
-paint, PVA and microballoons
--paint, PVA and microballoons sprinkle
-heavy gel and white glitters.
Ice paste gives a good shiny transparency but big colorful glitters reduce realism. This is an artcraft paste not a modeling one.
Microballoons proved a fantastic material. White and shiny like crystal because its actually crystal powder. Gives a nice effect when sprinkled on other pastes but even if added alone.
Tomorrow I will post more pics on day light.
- mtaylor, Canute, king derelict and 2 others
-
5
-
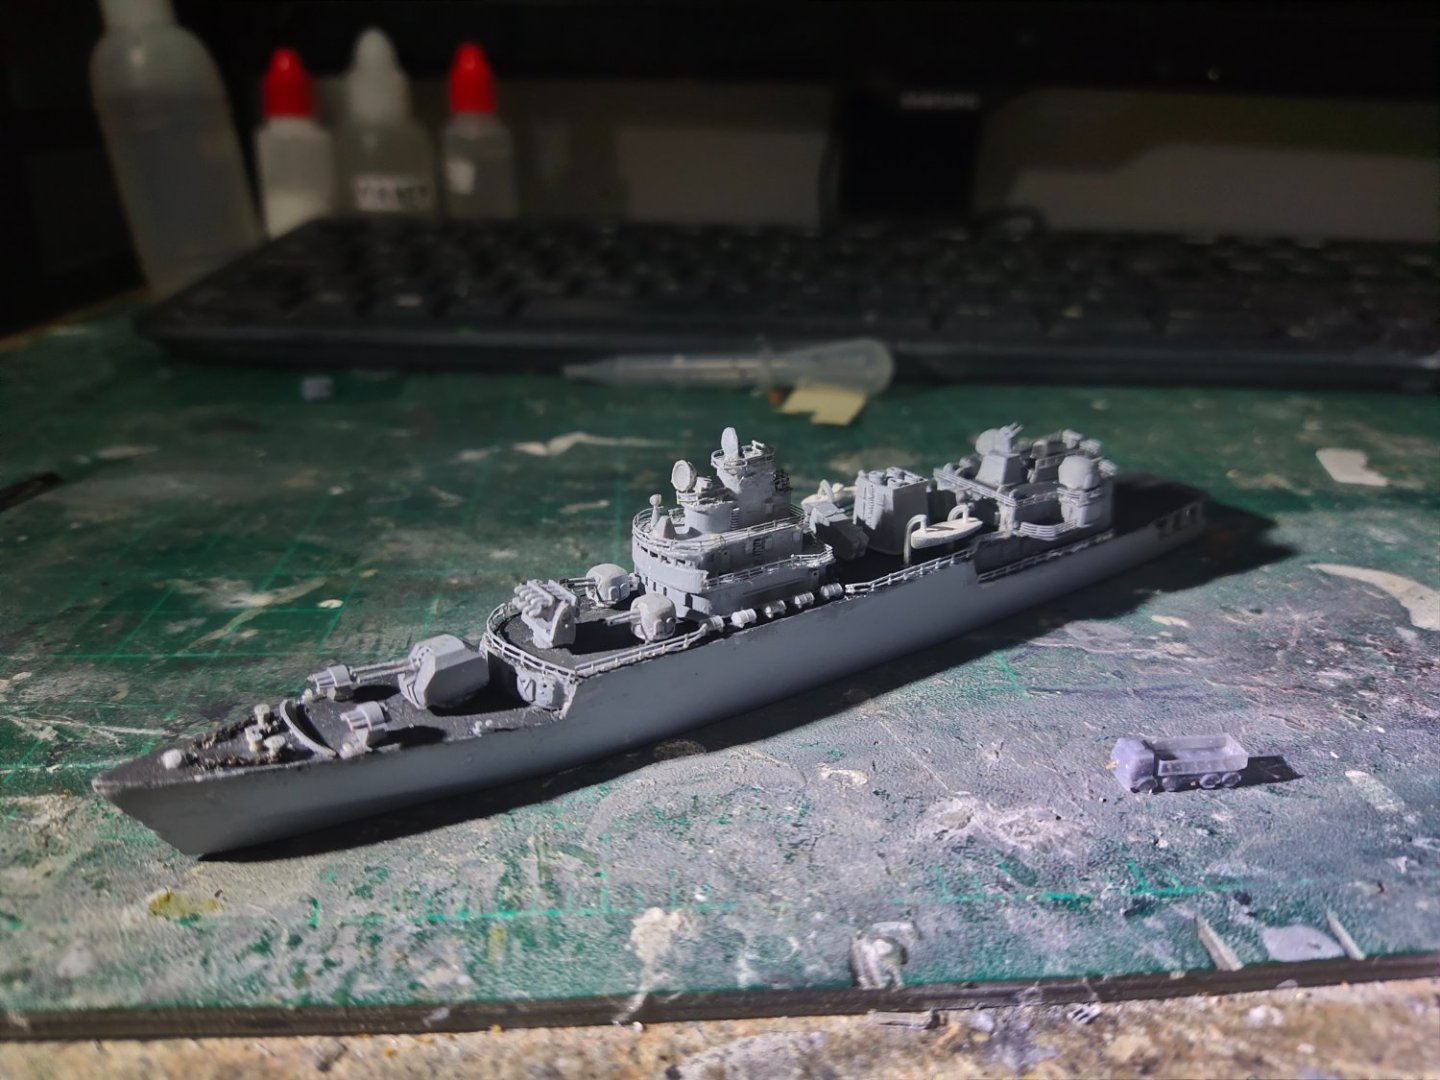
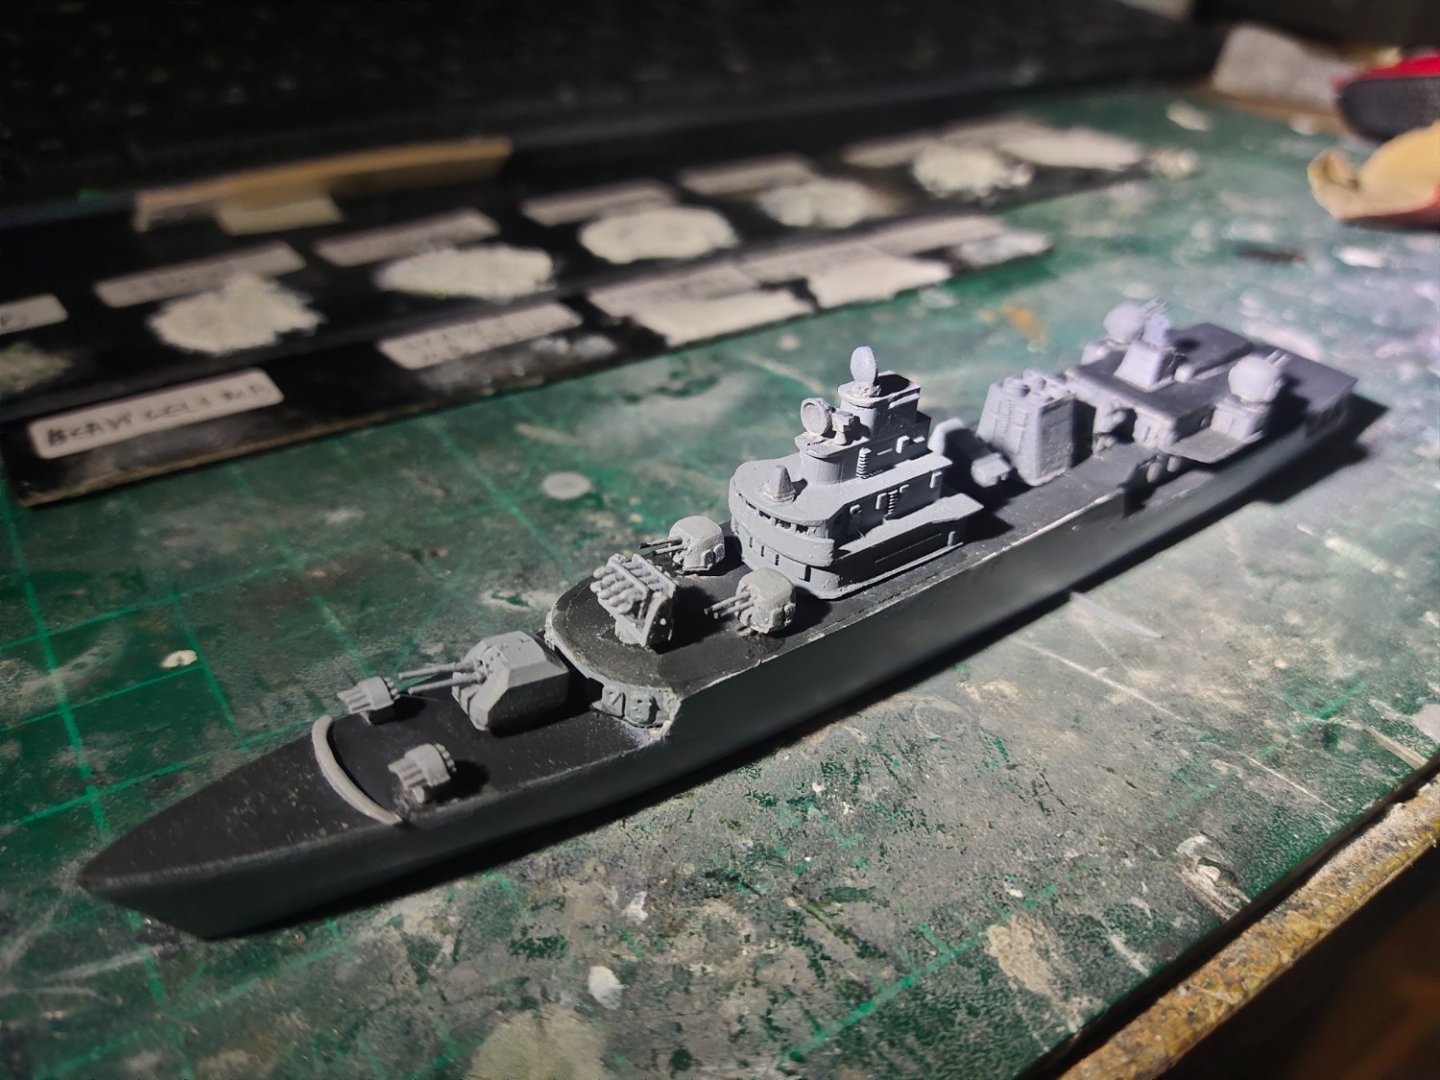
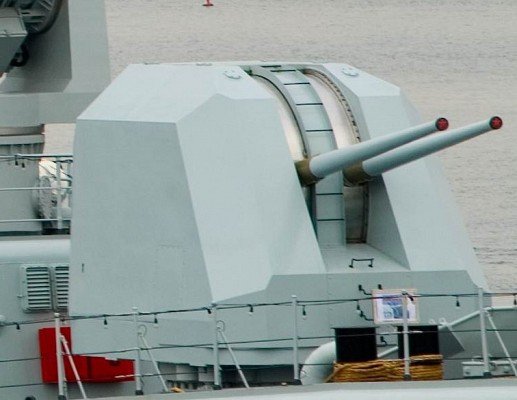
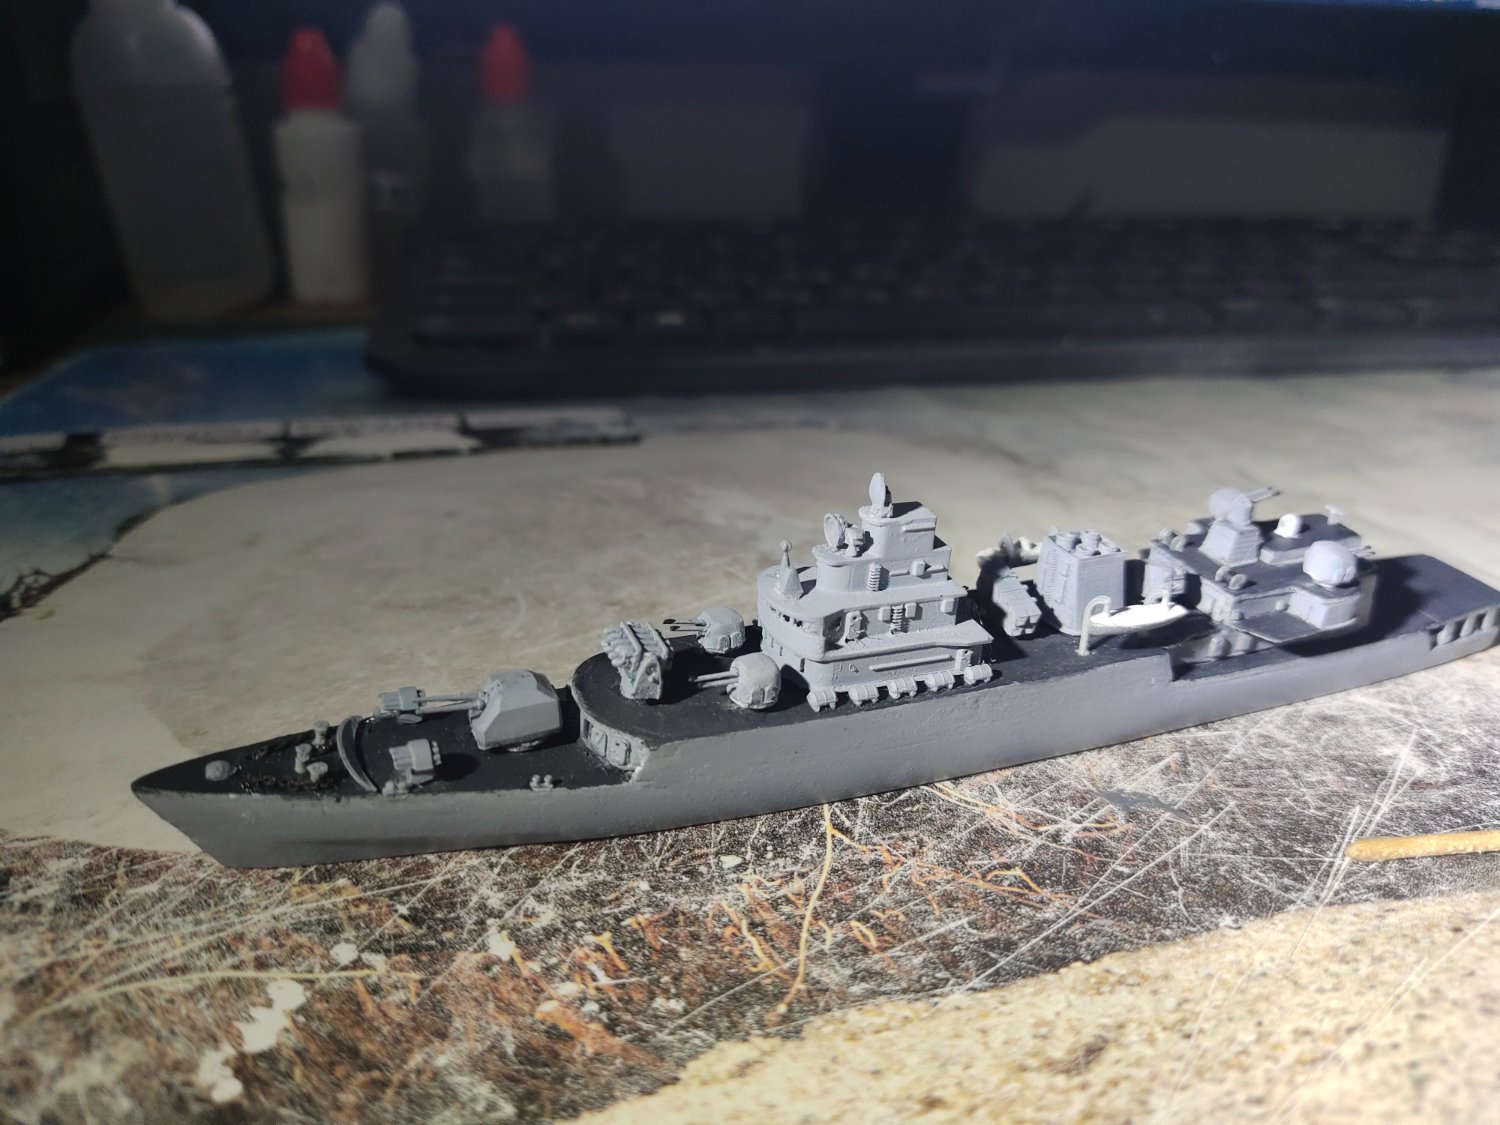
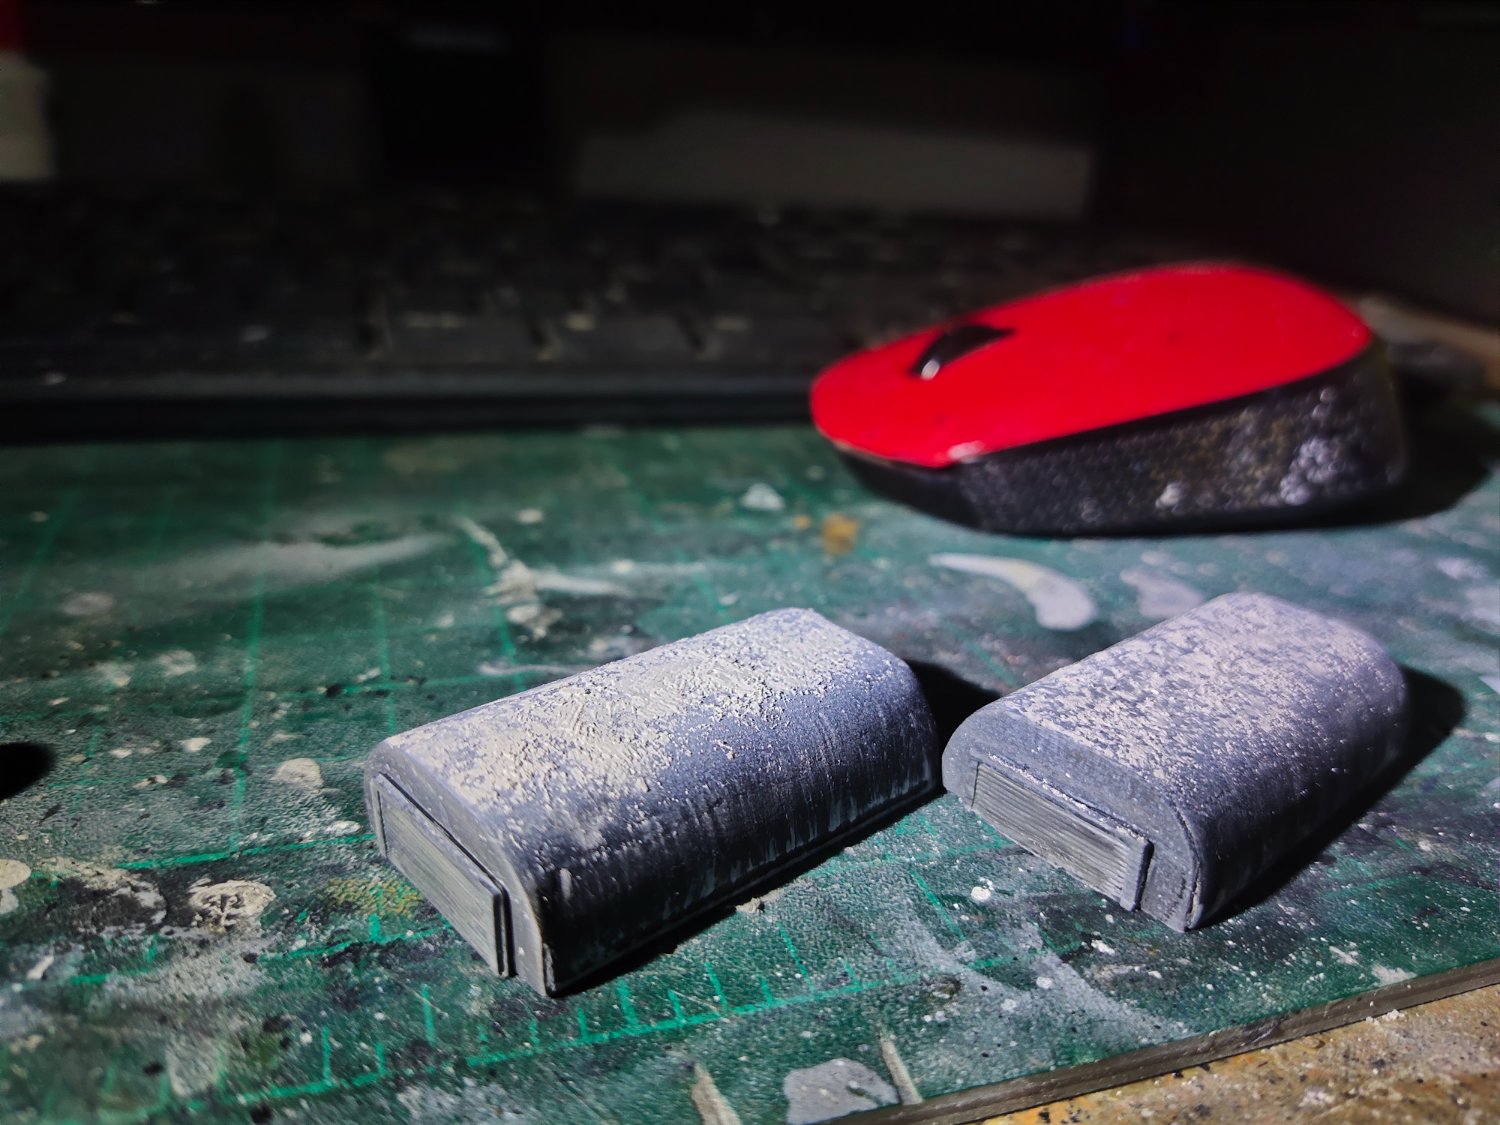
Armament.
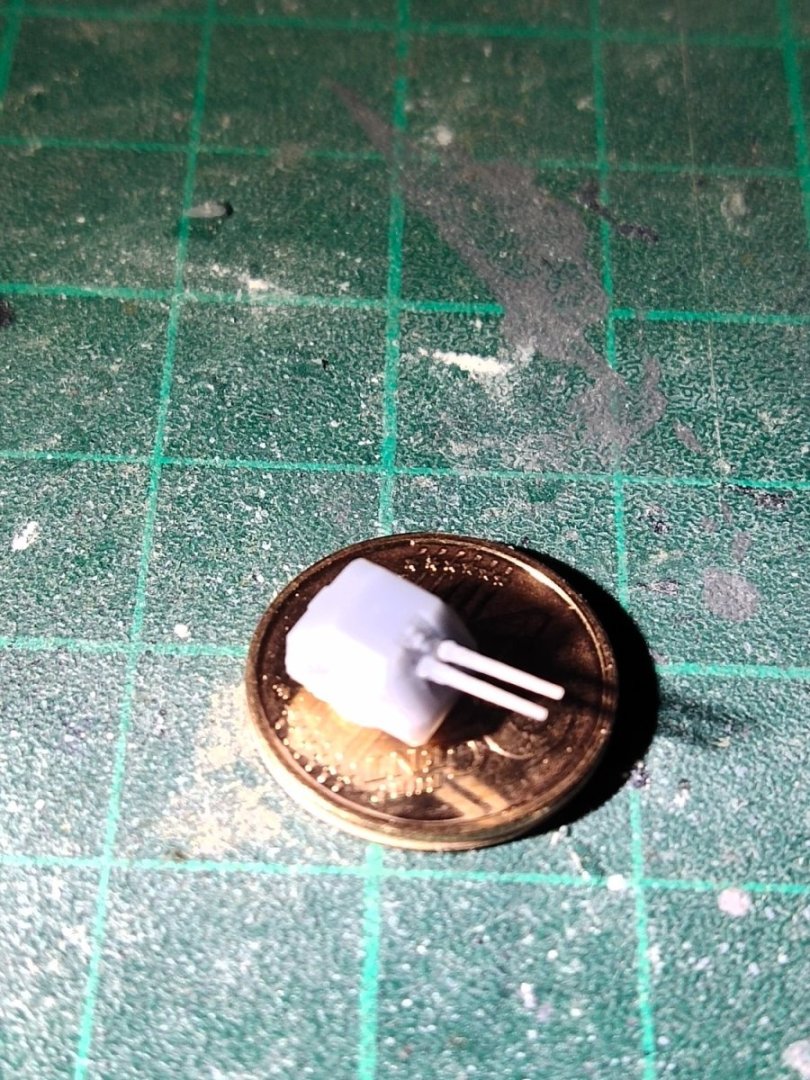
Type 79 4" Gun. This is the improved second stealth version thus the complex shape. I took a Mk38 5" gun file and modify it. Although proved too complex for my skills it turned close enough to the real thing. Barrels shape was also good and conical
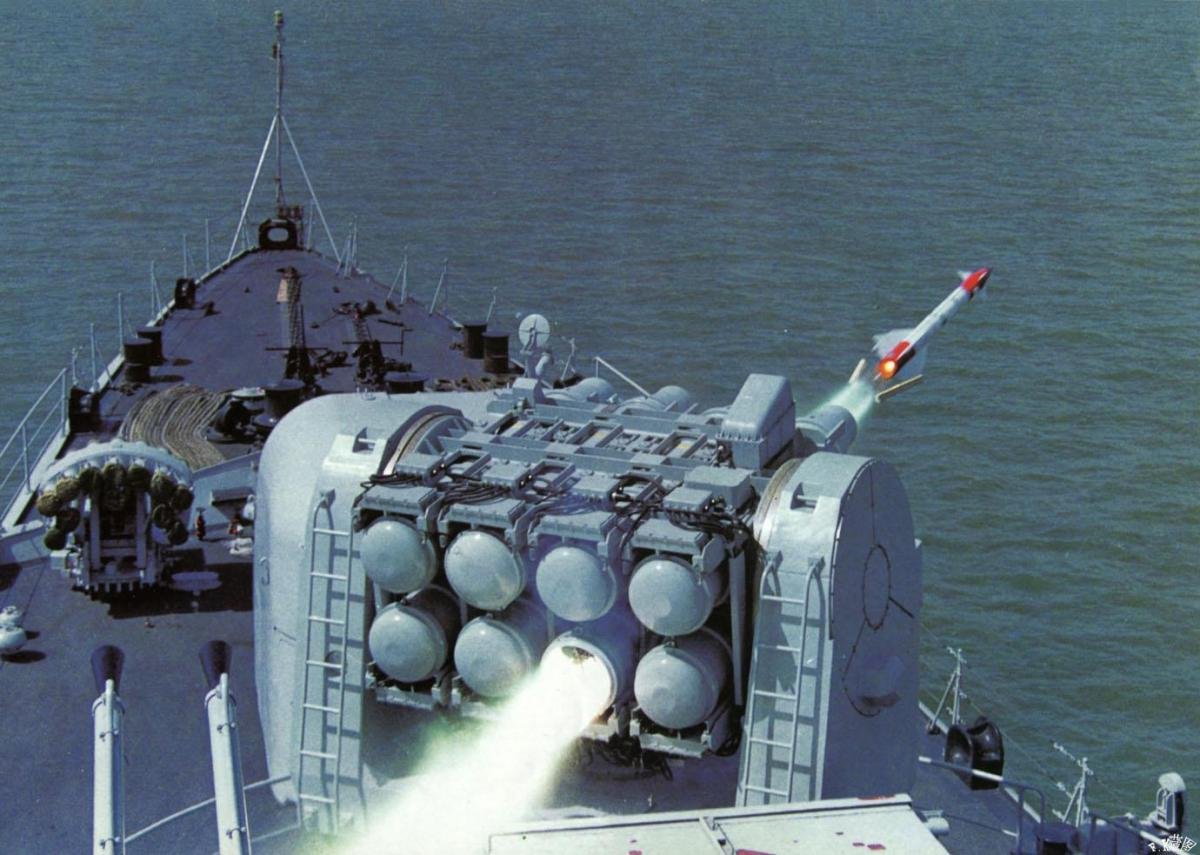
Next was the YJ 83 SSM Launch boxes. I made them a bit wider to make sure that every detail would be printed. I was happy to see that the base was printed with good accuracy so no PE parts would be needed

Next was the HQ 7 short range SAM. This is replaced by HQ 10 a RAM style weapon. Easy to design and print.
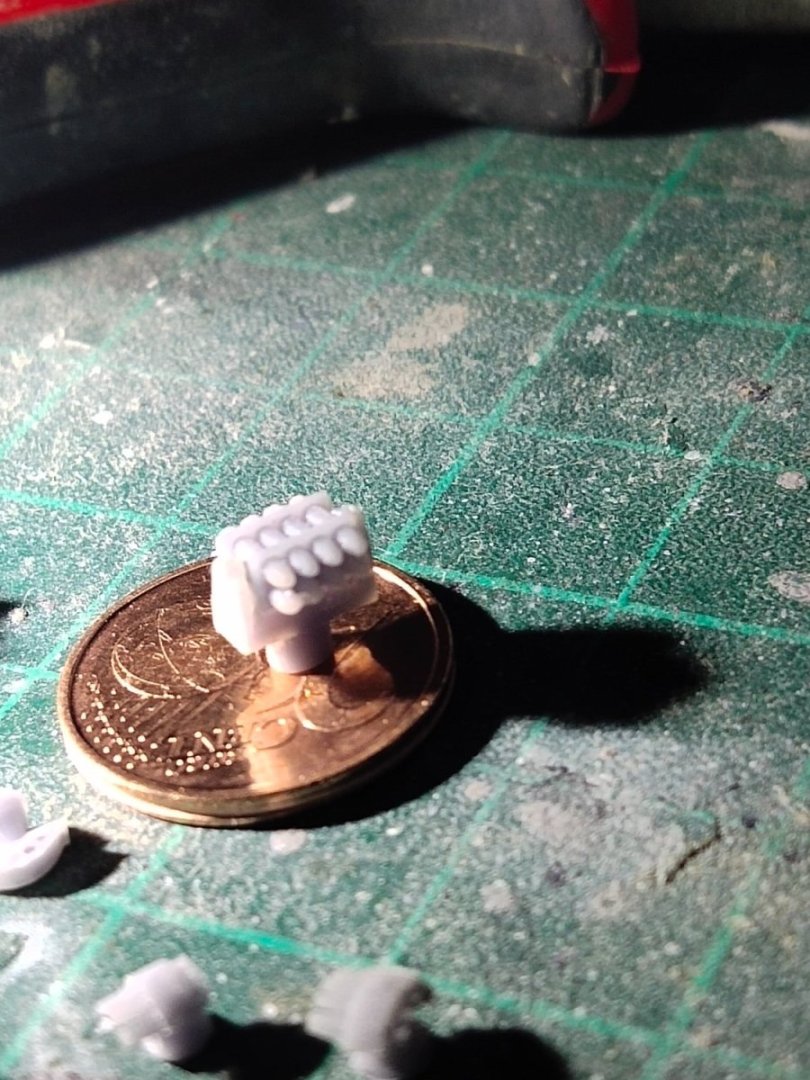
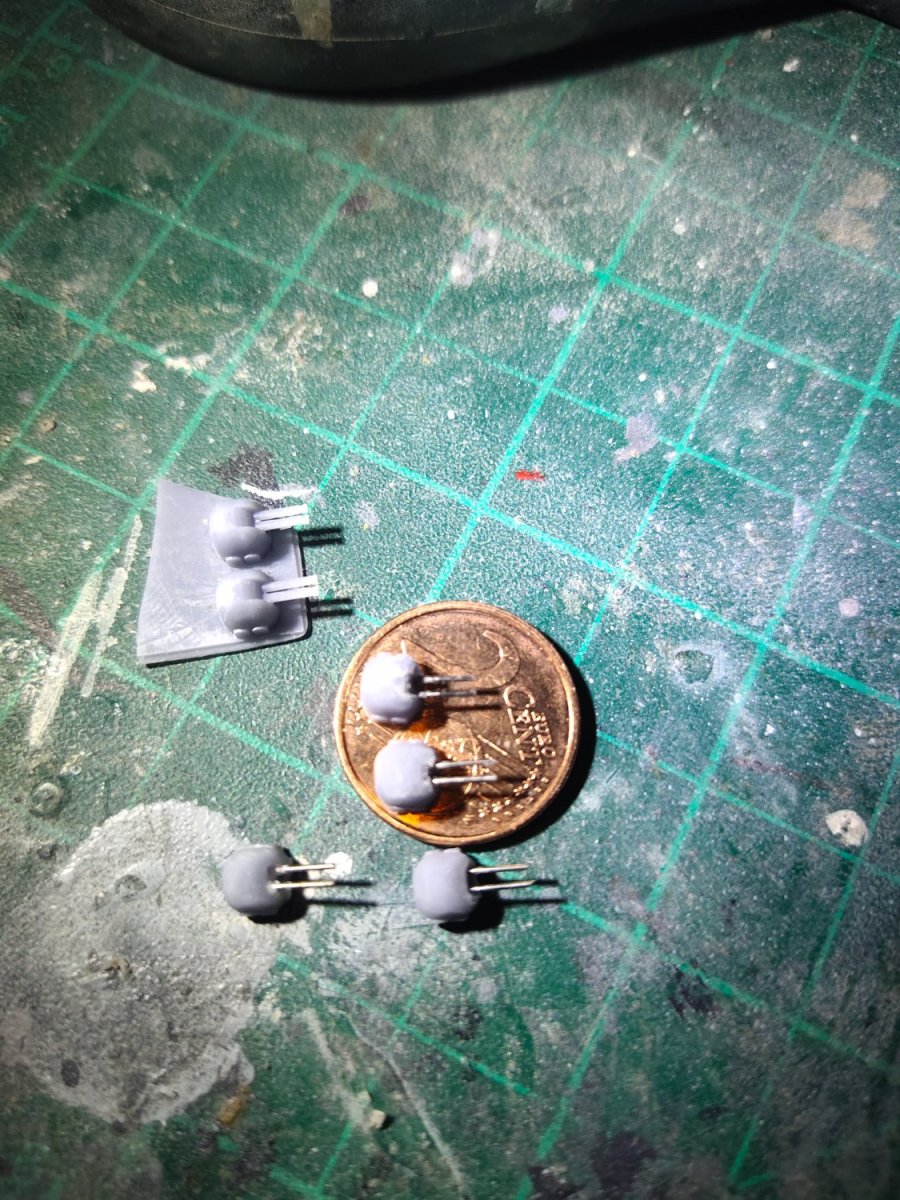
Air defence provided also by Type 76 37mm twin gun. Its elliptical shape proved too much for my design skills. After a week of trouble I printed a hemisphere shape and sanded it down with 600 grit sand paper. I replaced barrels with 0.4mm sterile needles and you can see the difference.

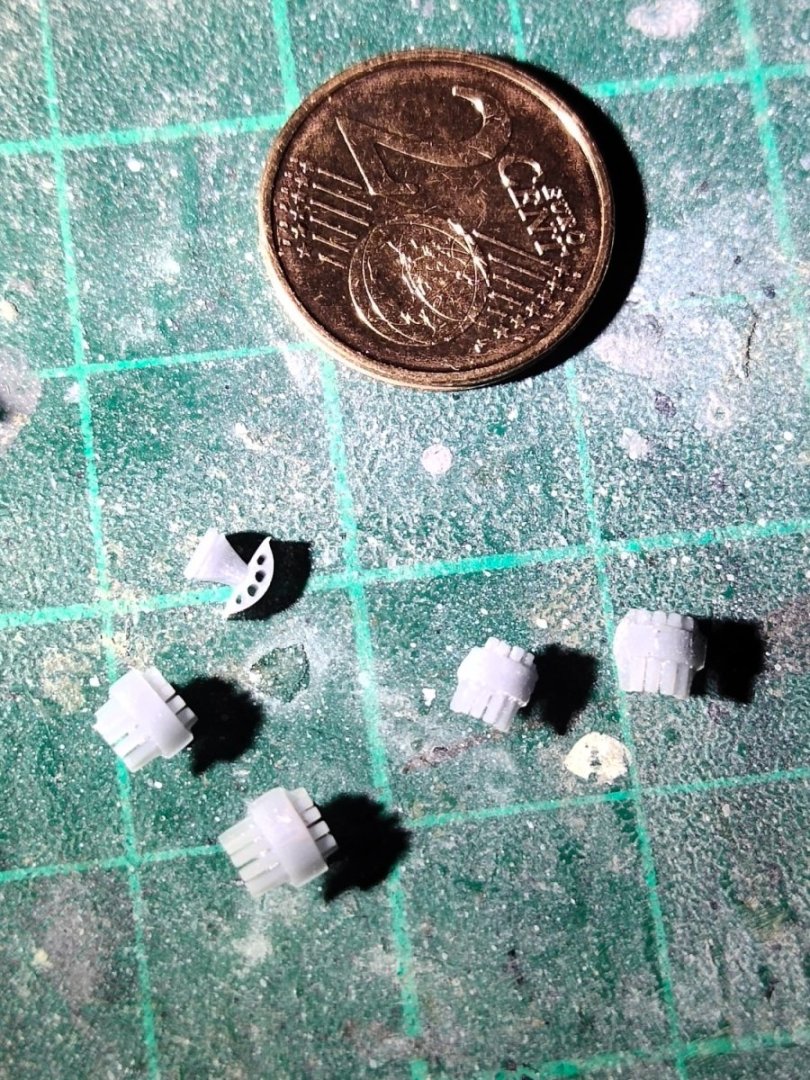
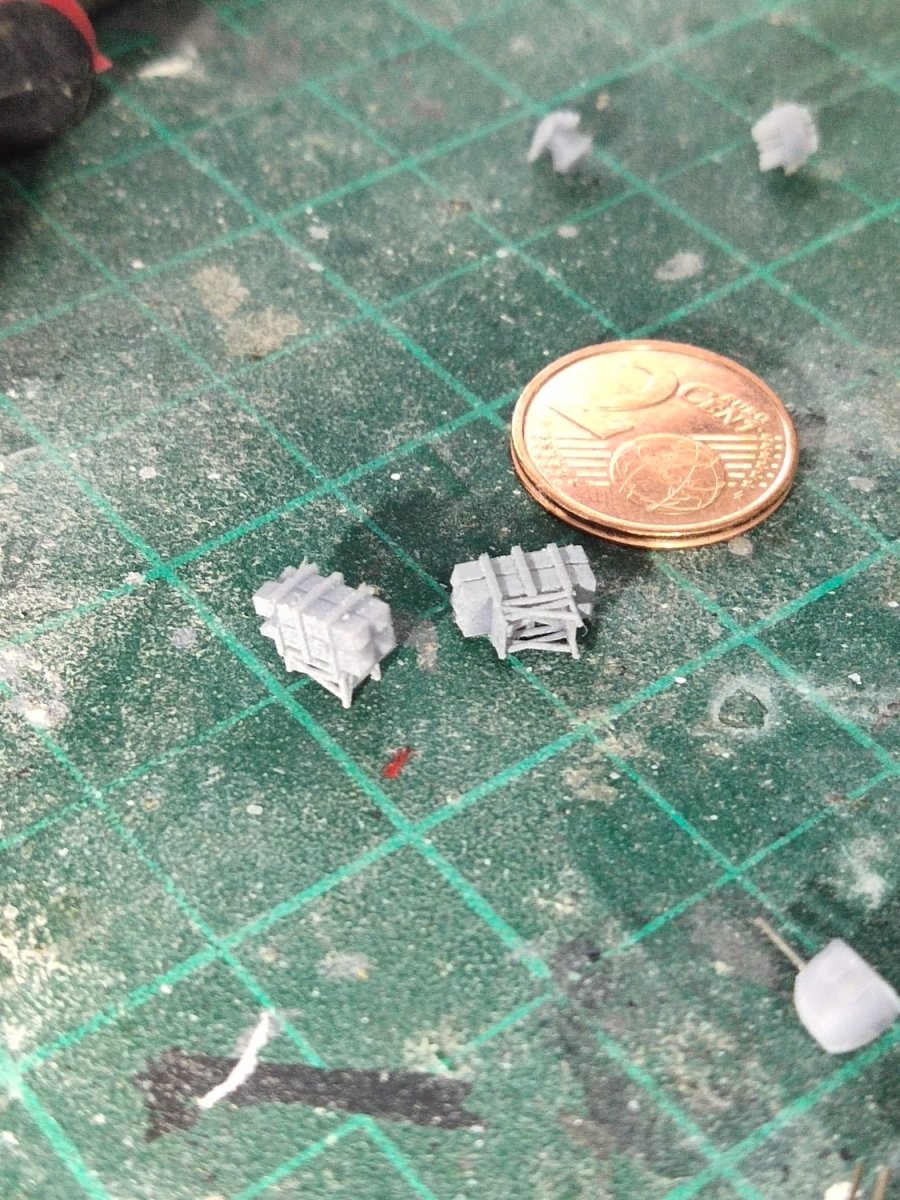
Finally the 3200 ASW Rockets. Printed in 2 pieces. Plan was to fit 6 individual needles at the holder but holes proved to fragile. Not for my skill. I reprinted in one piece then printed again 15% bigger to have a better detailed quality. Hard to achieve accuracy without some over scale, thats why model companies can't avoid it I guess
- mtaylor, Old Collingwood, Canute and 2 others
-
5
-
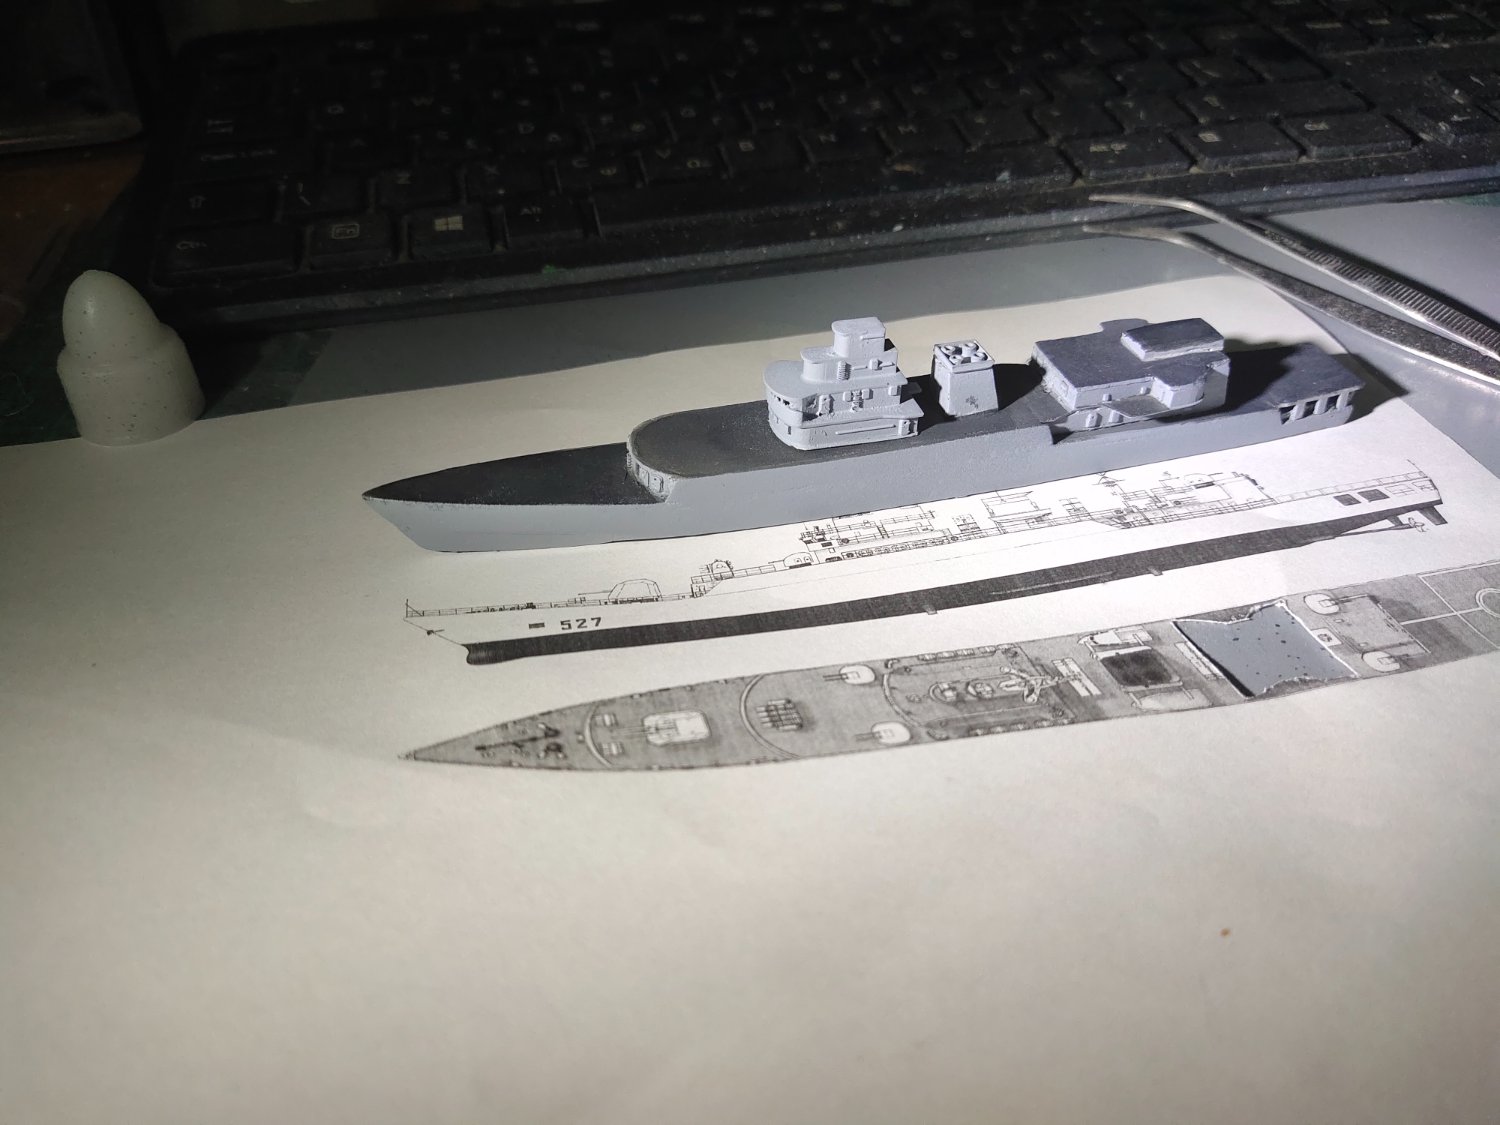
I have basically completed the main body of the ship. Also did the painting minus some details to be corrected.
Im pleased with result as well with the speed of the progress because the armament is also ready and will be shown in the next post
- Canute, GrandpaPhil, KeithAug and 4 others
-
7
-
A not so used bult in this forum.
Sounds exciting.
- mtaylor, Canute and Old Collingwood
-
3
-
I continued building in the same way. Some 3d printing and some scratch work. All in all, the main silhouette of the ship is complete. Helicopter deck must be added but before this, all detail work on quarter deck beneath it must be done as well as painting.


- KeithAug, Old Collingwood, Canute and 3 others
-
6
-
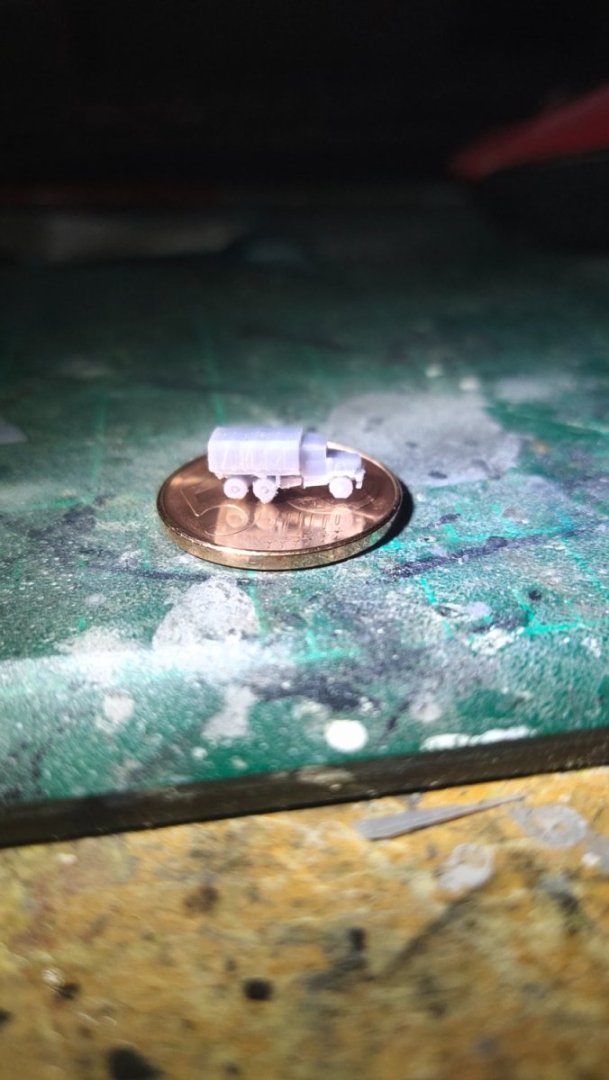
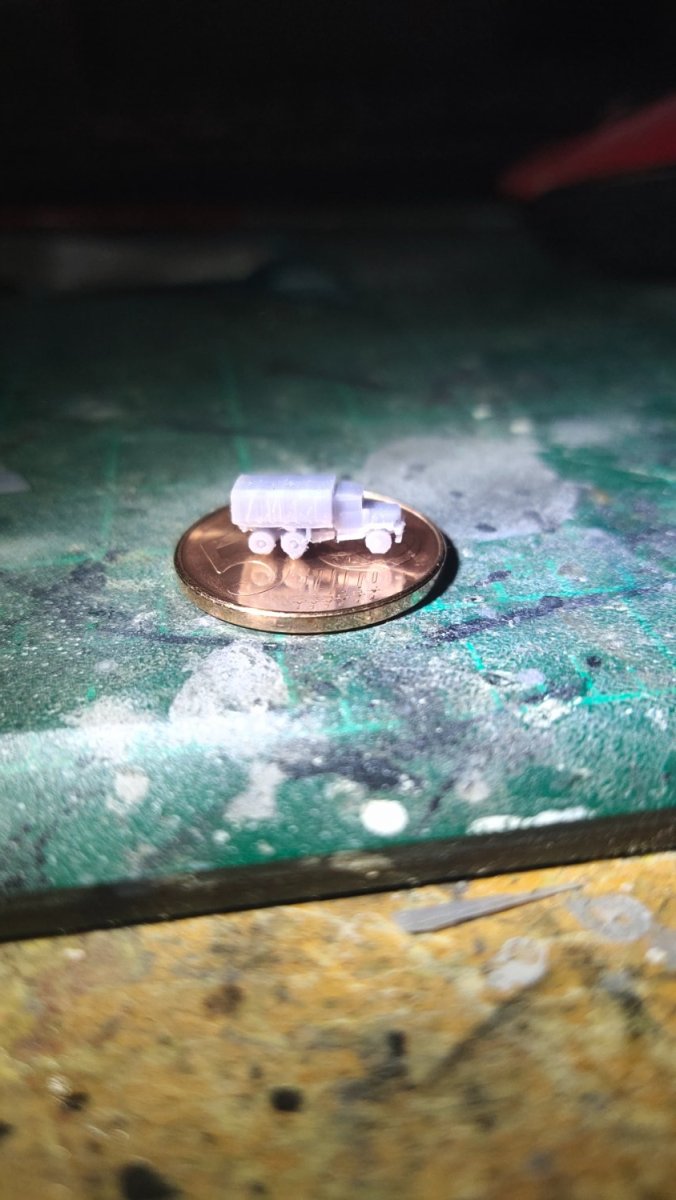
While working at the dock I printed another closed truck with great accuracy. Painting was painful as usual but it came out nice

-
Thanks for comments and likes
Instead of using problematic white I used a spray can to paint the dock. Then I will use shades of gray, gradually to erase the snow. So basically its the opposite technique comparing to submarine painting. Let's see of this works well.
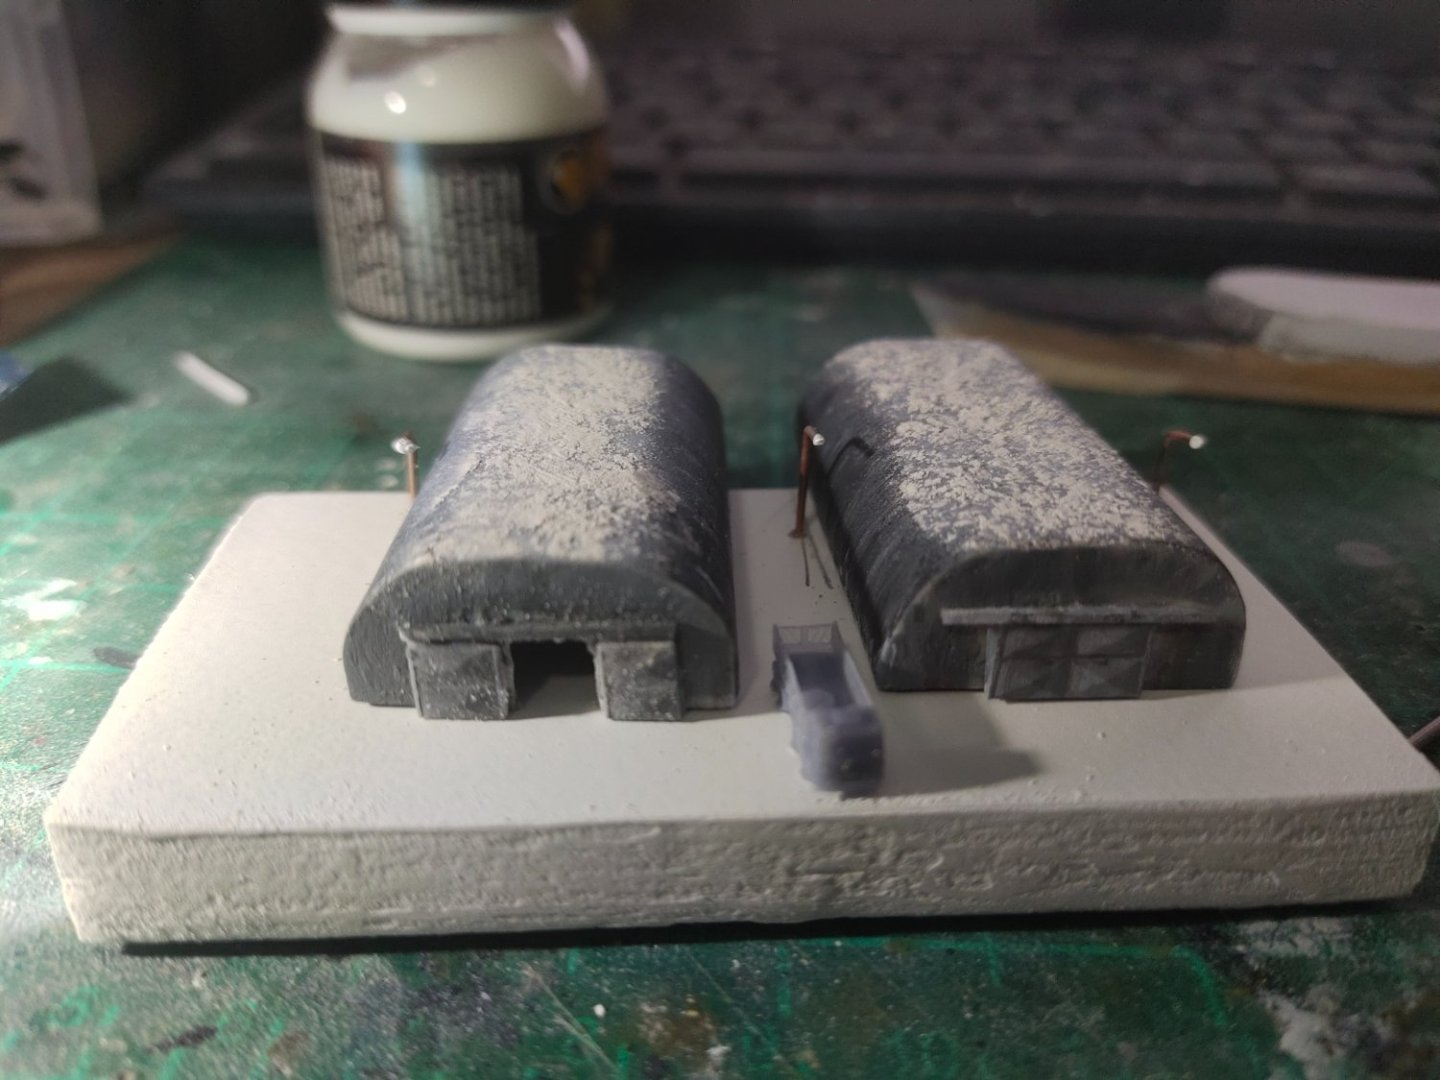
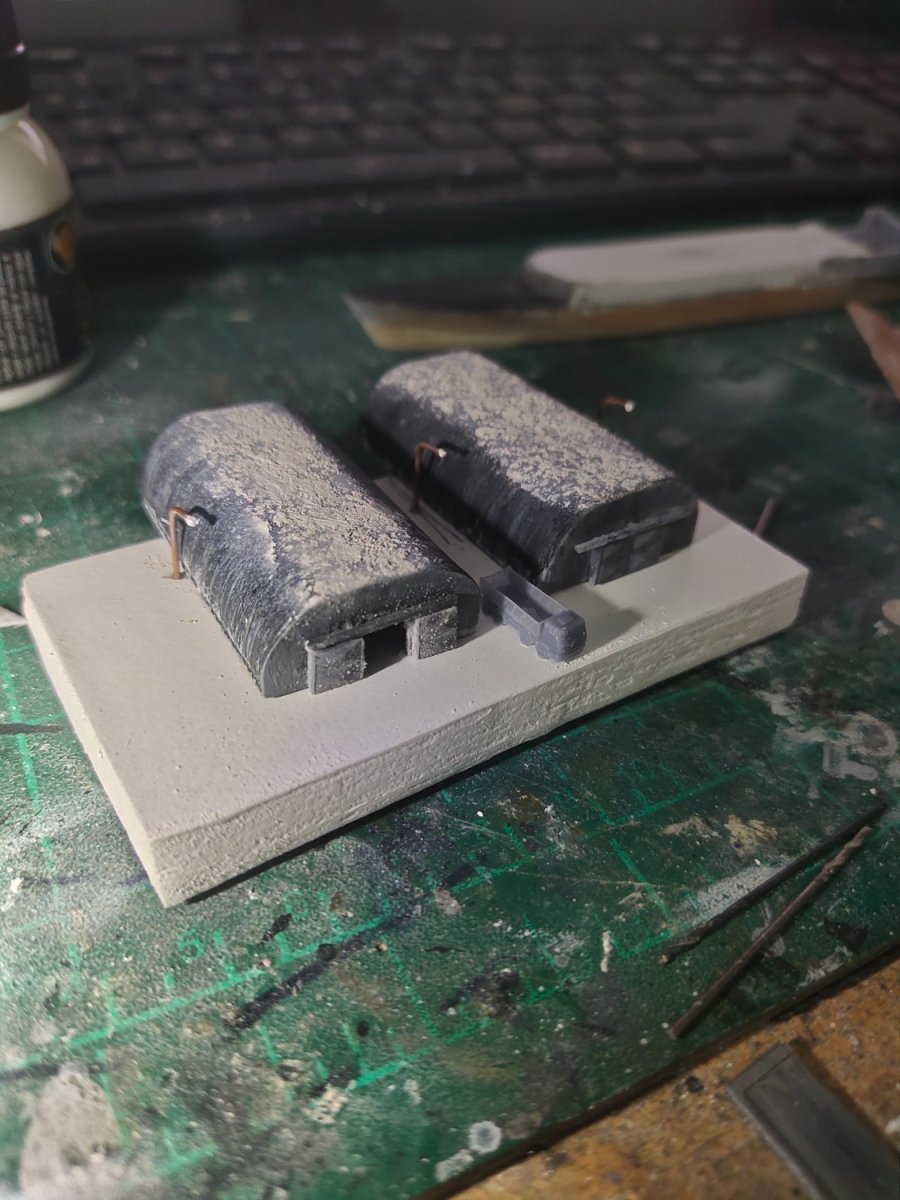
Doors on shelters replaced with other type. Light were added. I need to extend the dock because the truck can't turn and the buildings won't fit

- Coyote_6, mtaylor, Old Collingwood and 3 others
-
6
-
Now that the hull is almost done time to move upwards for the main deck area. I printed the front area of it with satisfactory result, you can see comparing to a single brush hair

-
After experimentation and research i found out that the mini compressor is not working good enough with acrylics. They need to be thinned a lot for a proper flow. That means extra thin white is quite hard to cover dark surfaces. In my next diorama i will be using a new compressor which I hate because of the size and noise.
So finally I did it
I turned the two quartet hulls into warehouse, bunker, shelter, call it whatever you like it. Space for land construction is reduced in favor of more sea and faster progress. Need to speed up a bit


-
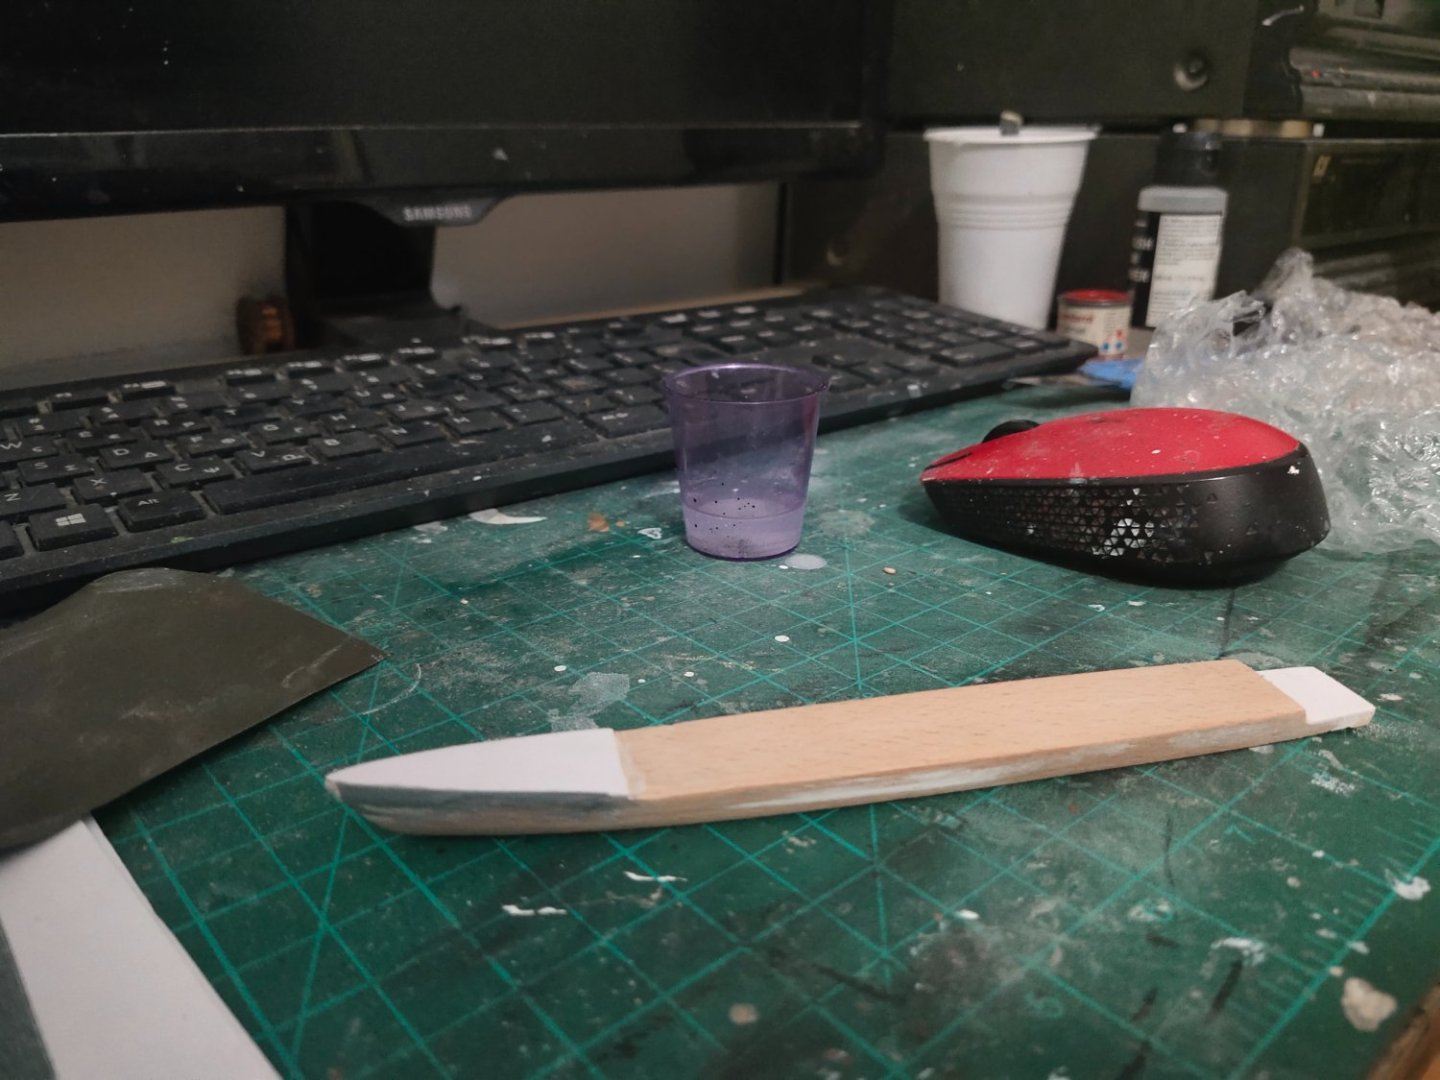
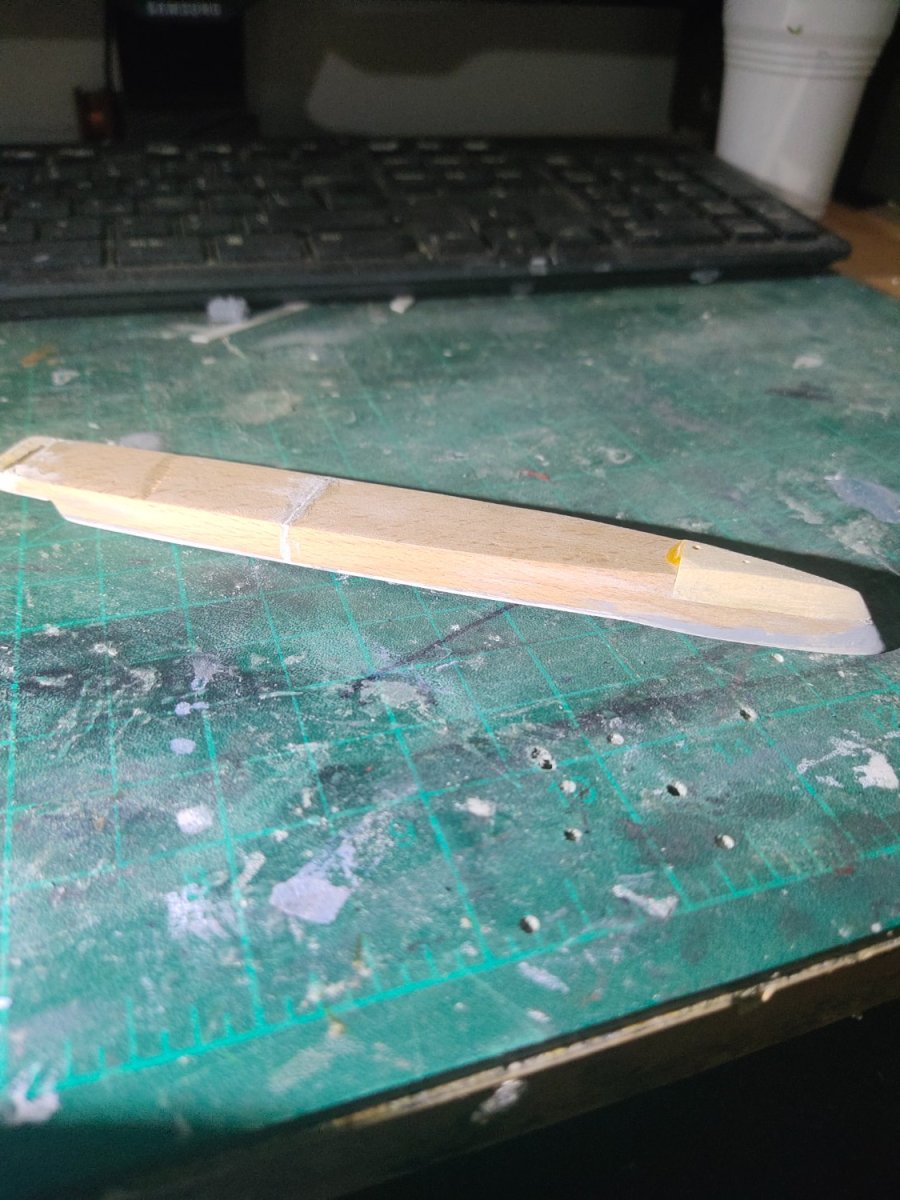
The work on the hull is almost done.
The bow looks like Virginia Class nuclear cruisers. Rounded at the upper half, tighter and more straight lower. I was thinking to shape it by sanding. But I am a better butcher than a surgeon. I simply cut the lower part of the hull and replaced with a triangle one. The shaping effort now was tremendously less

- ccoyle, king derelict, GrandpaPhil and 5 others
-
8
-
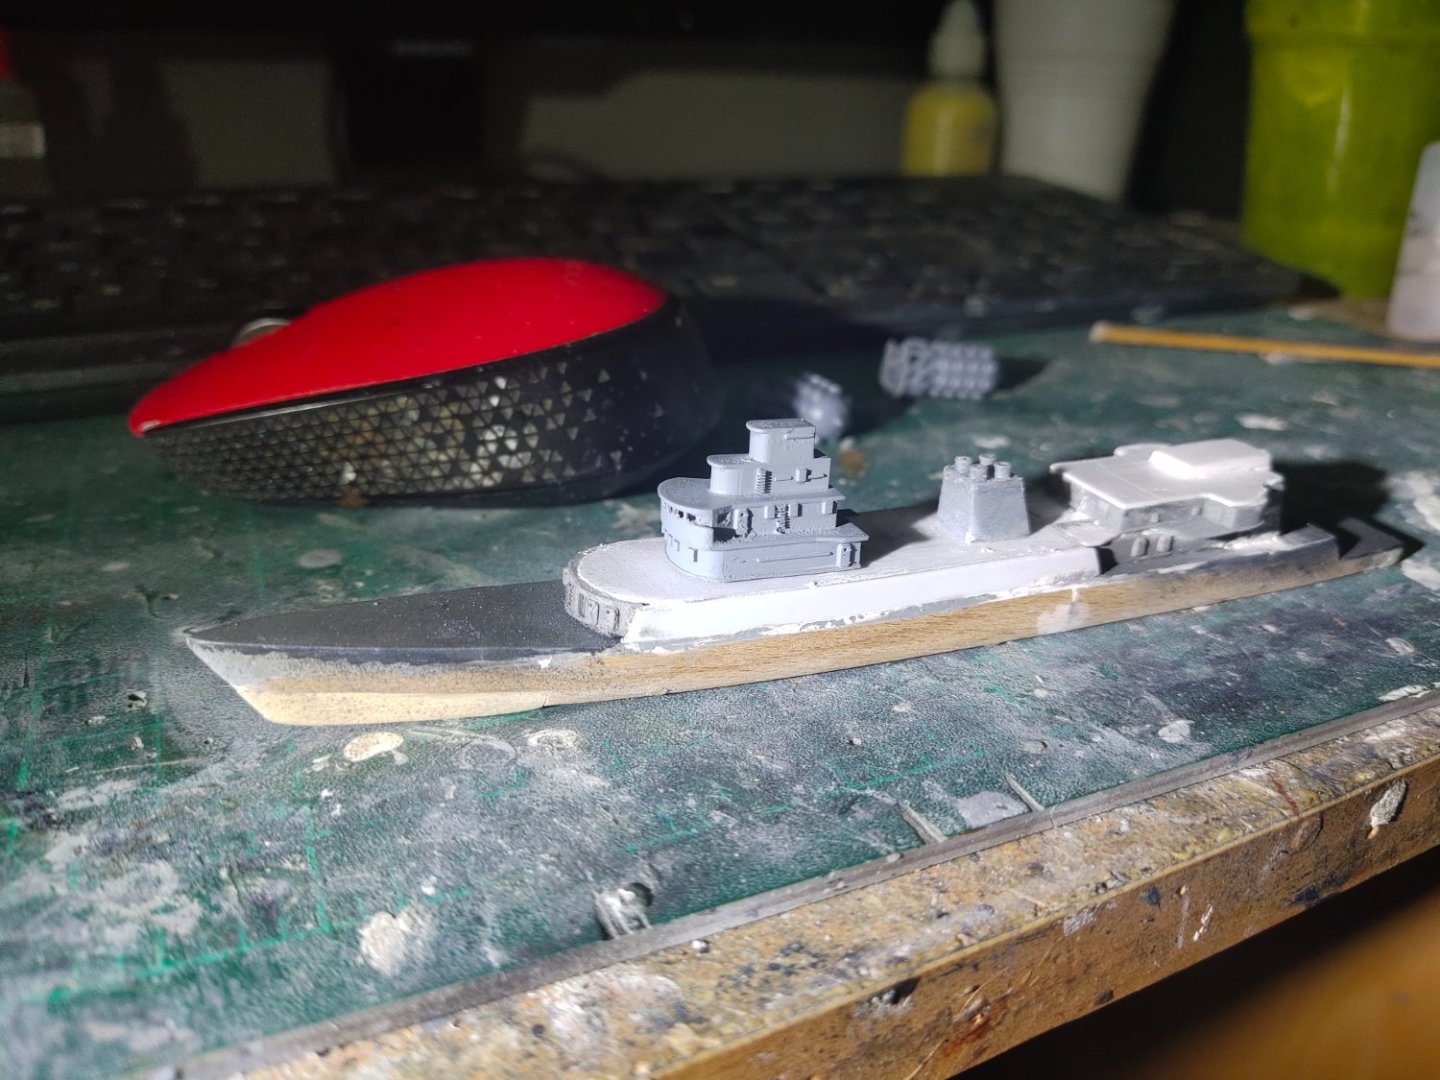
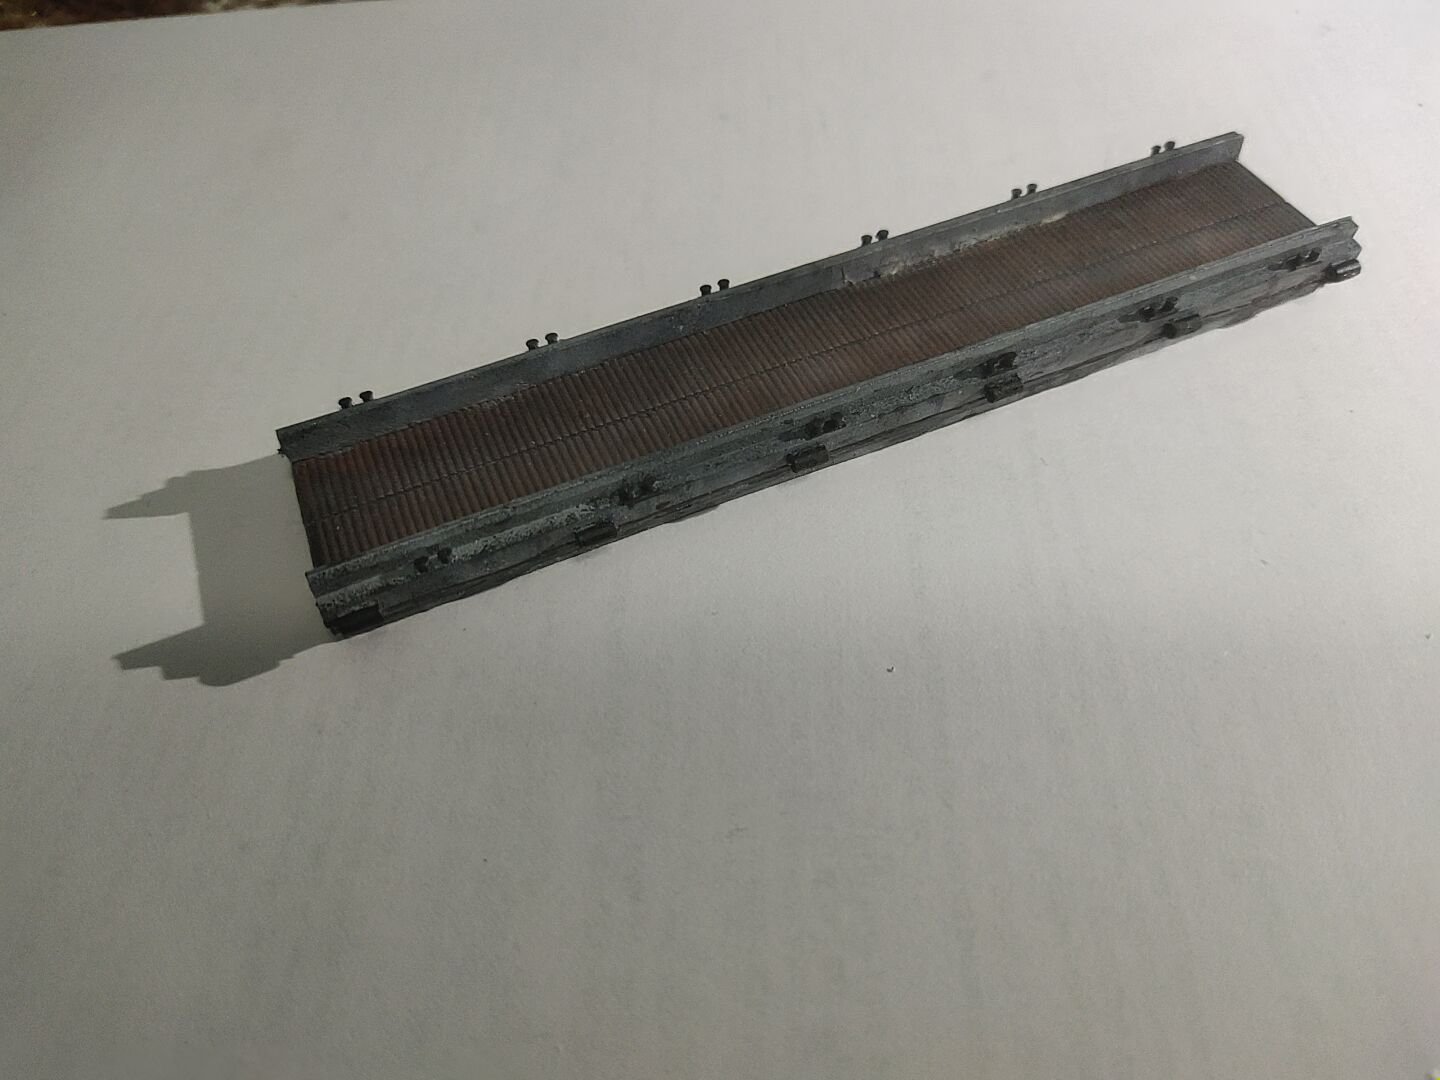
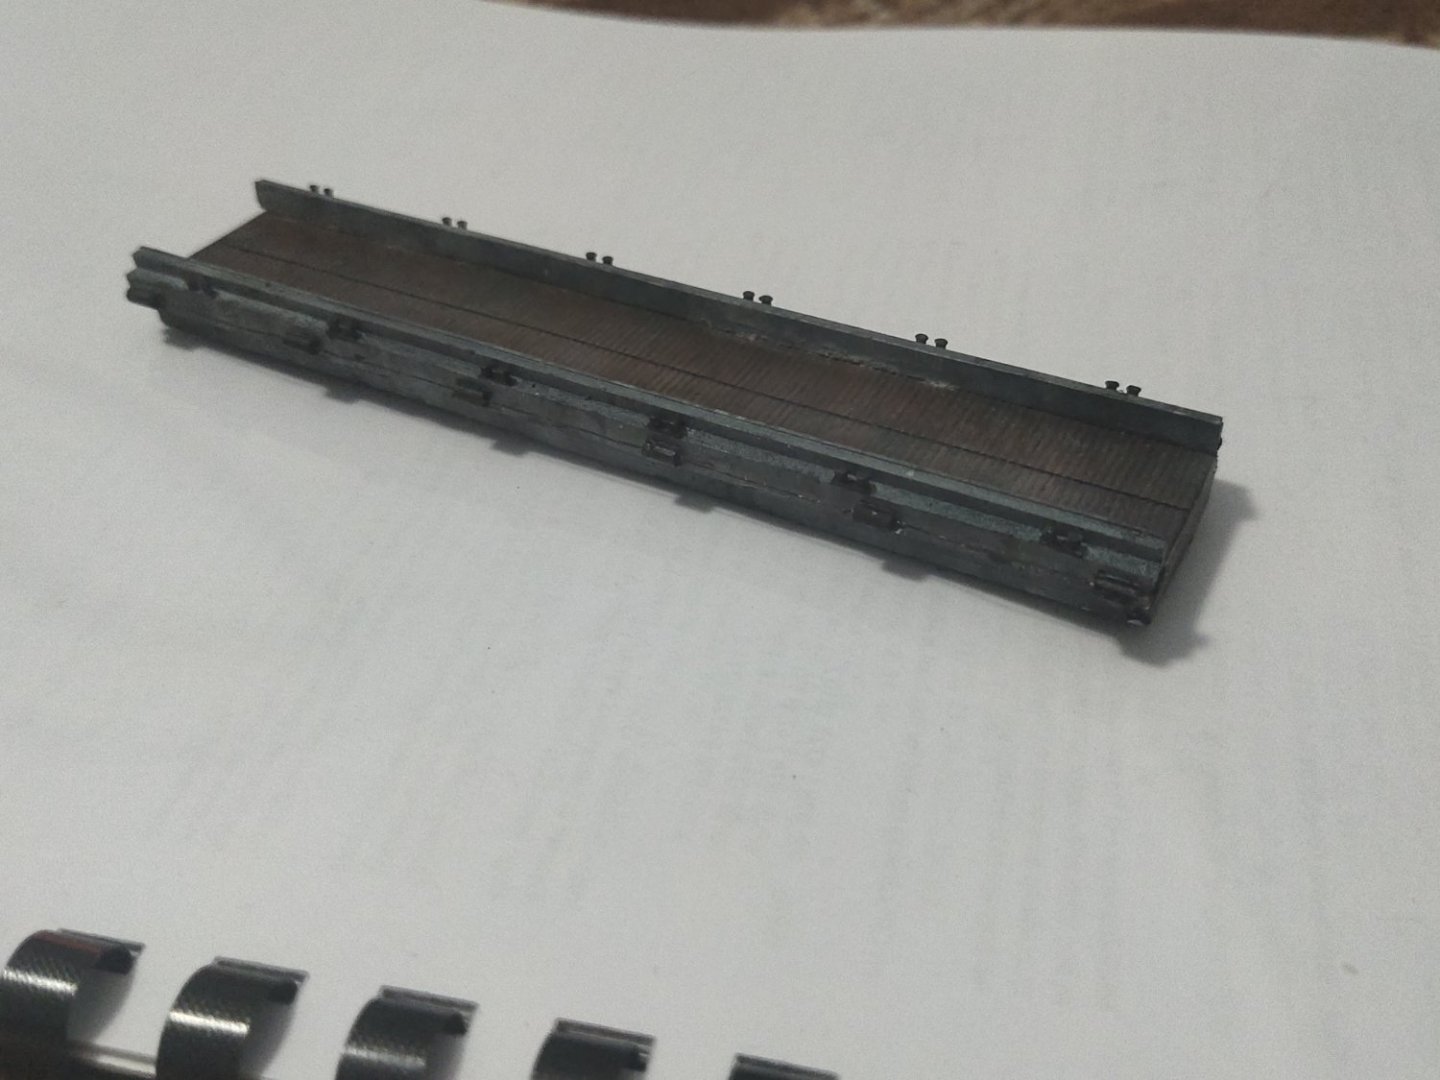
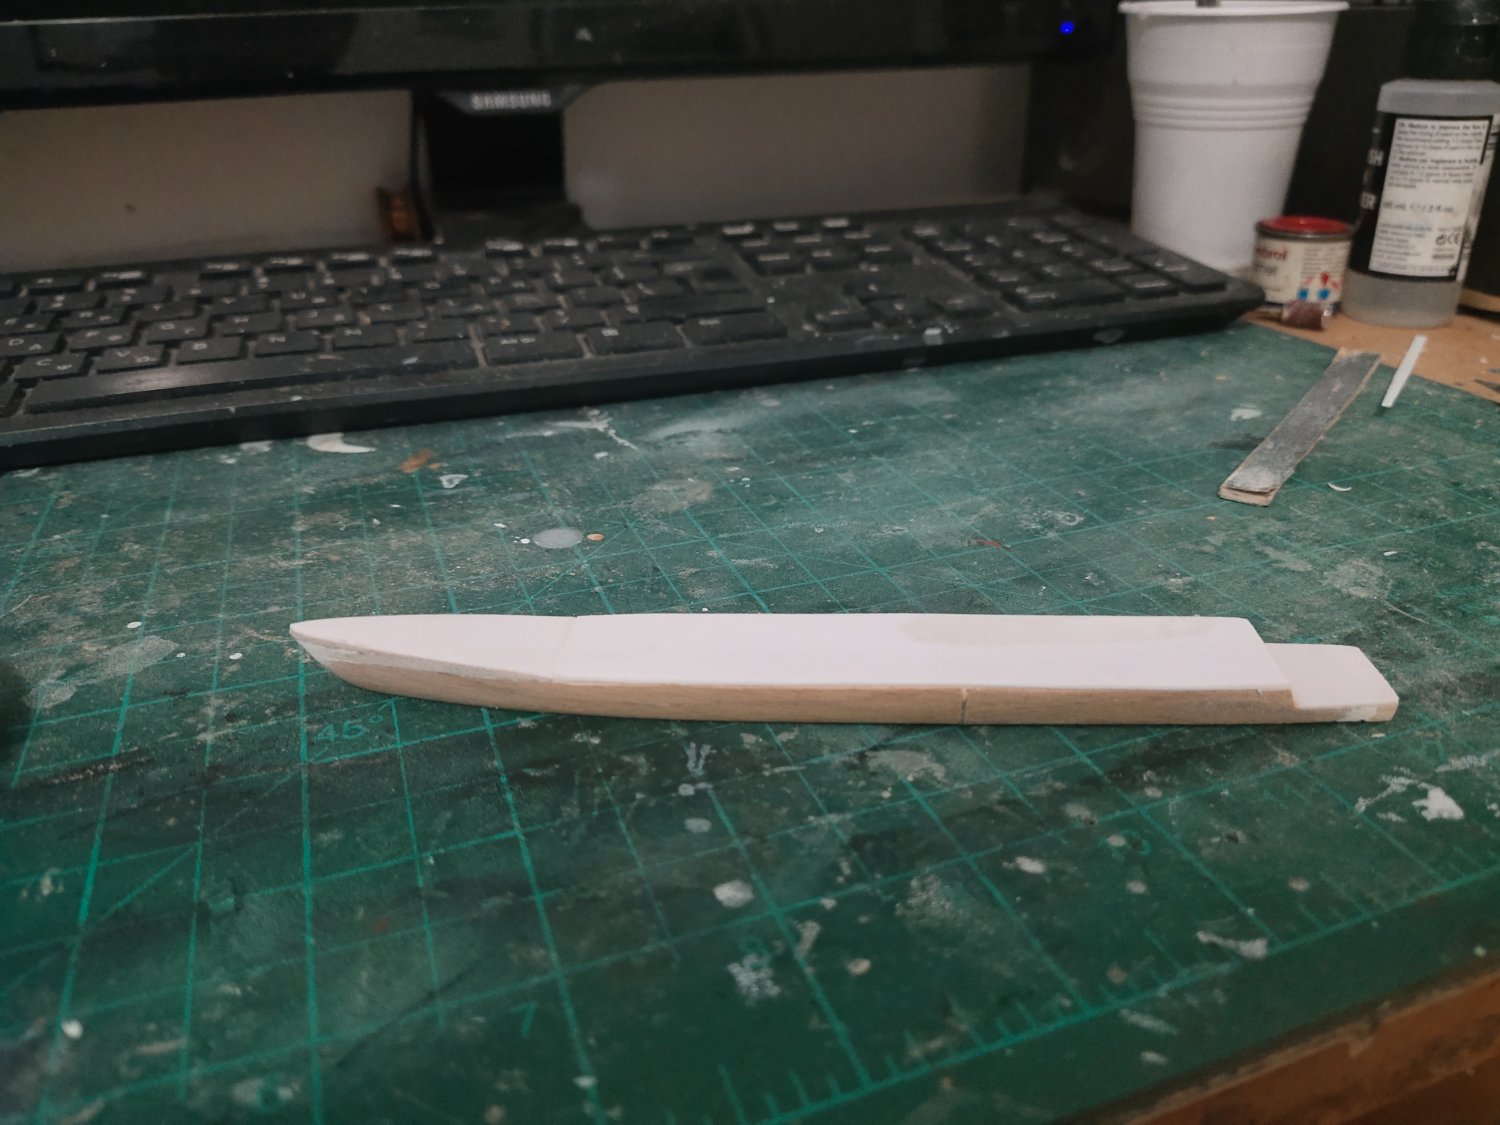
This is the hull after a few hours of work. A plastic sheet was glued as a main deck. I need to work on details and give the bow the right shape.
If I was given this in the age of 10 I would probably be the happiest child and would go straight for bathtub tests.
But im a greedy adult and i need mode detailed work, rigging, photo etching and more, to satisfy my self

- yvesvidal, ccoyle, Prowler901 and 4 others
-
7
-
-
Done painting the dock.
Epoxy primer, grey paint, (red brown road), dark weathering, light weathering, black wash. Finally put the cable holding the rubber fenders. I may add some green at the base were dock meets the water. And some light rust streaks at the base of those black things that ships are using to tie the ropes which I can't recall the name and I am too lazy to google it
- Roger Pellett, Coyote_6, mtaylor and 3 others
-
6
-
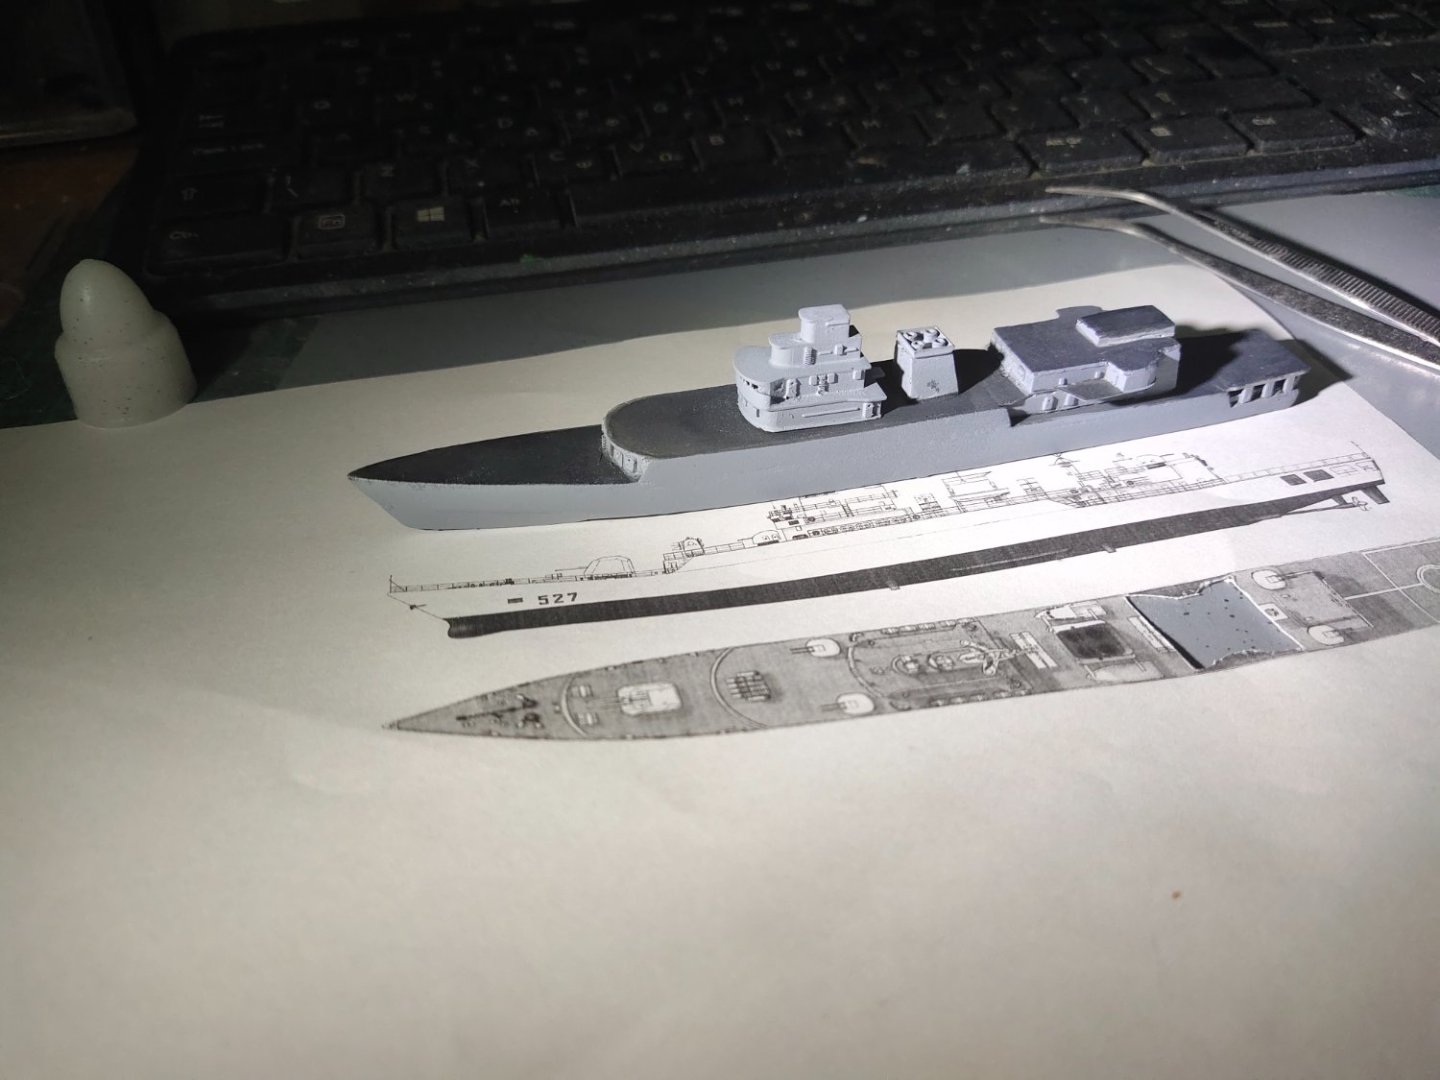
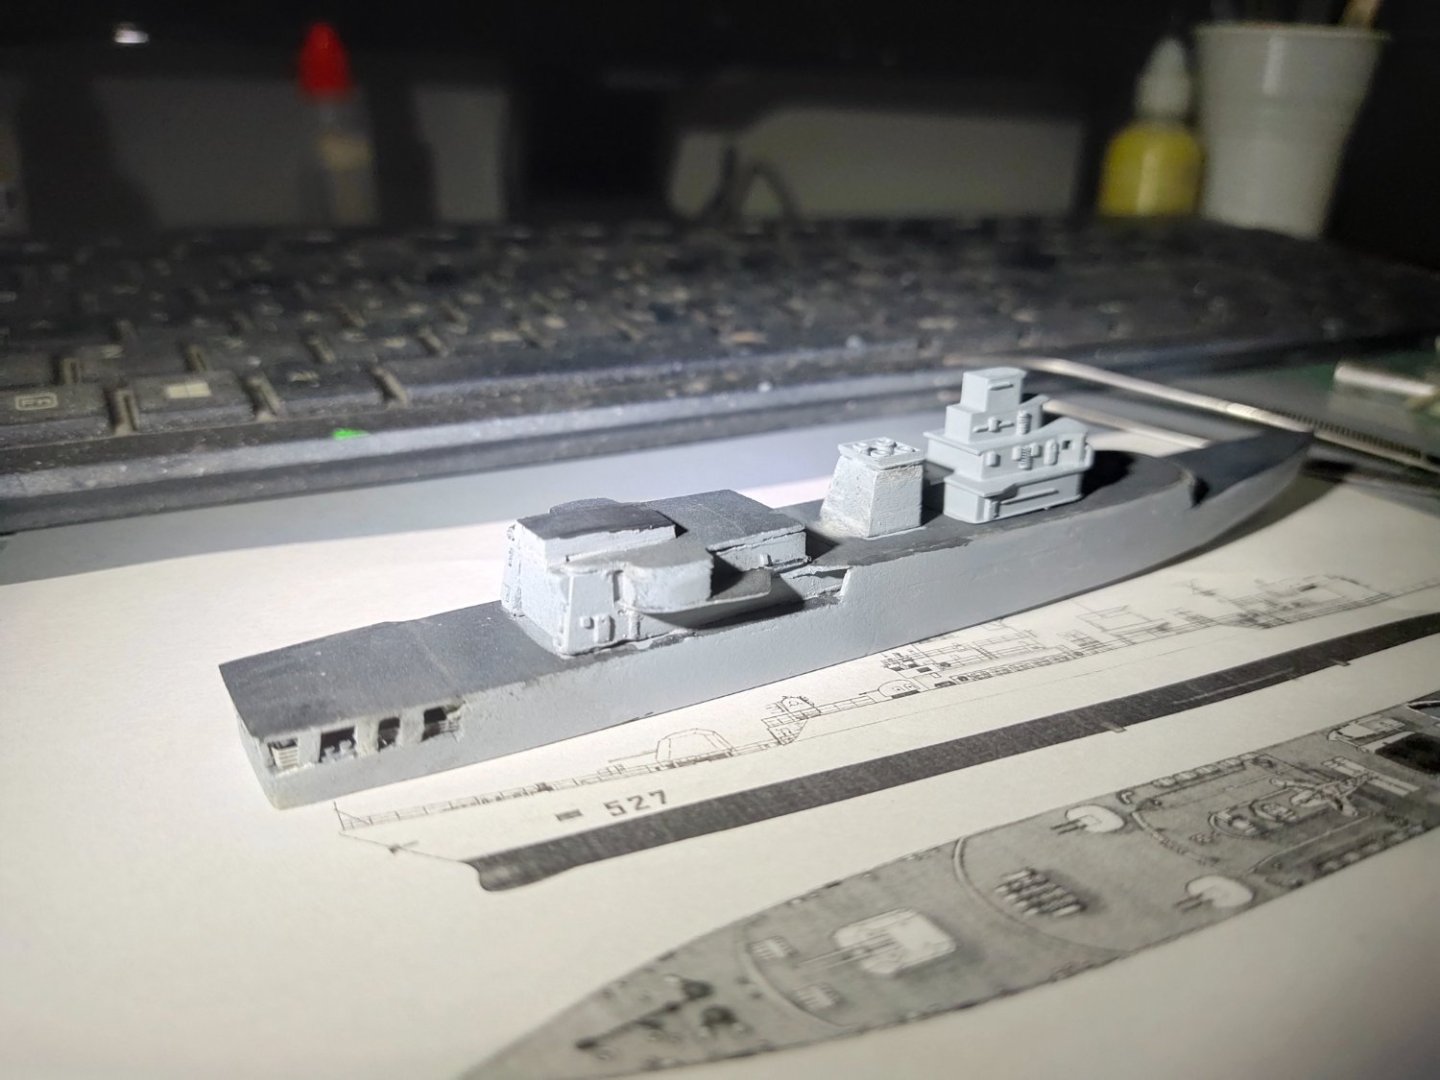
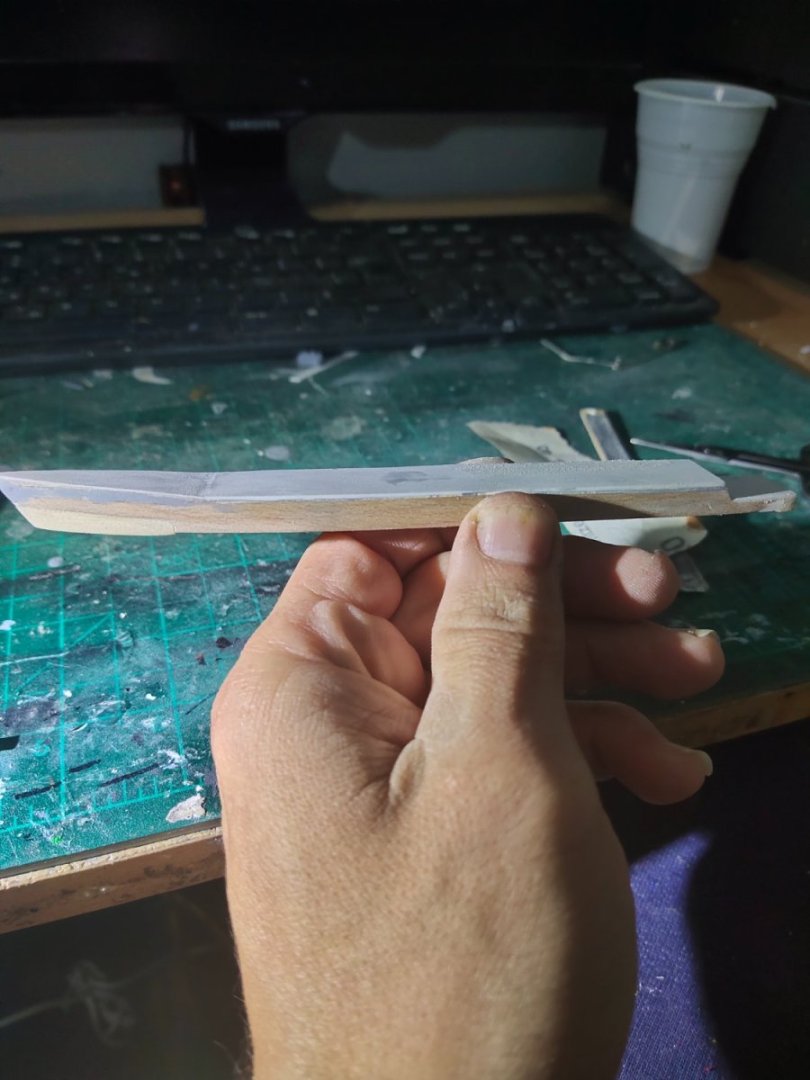
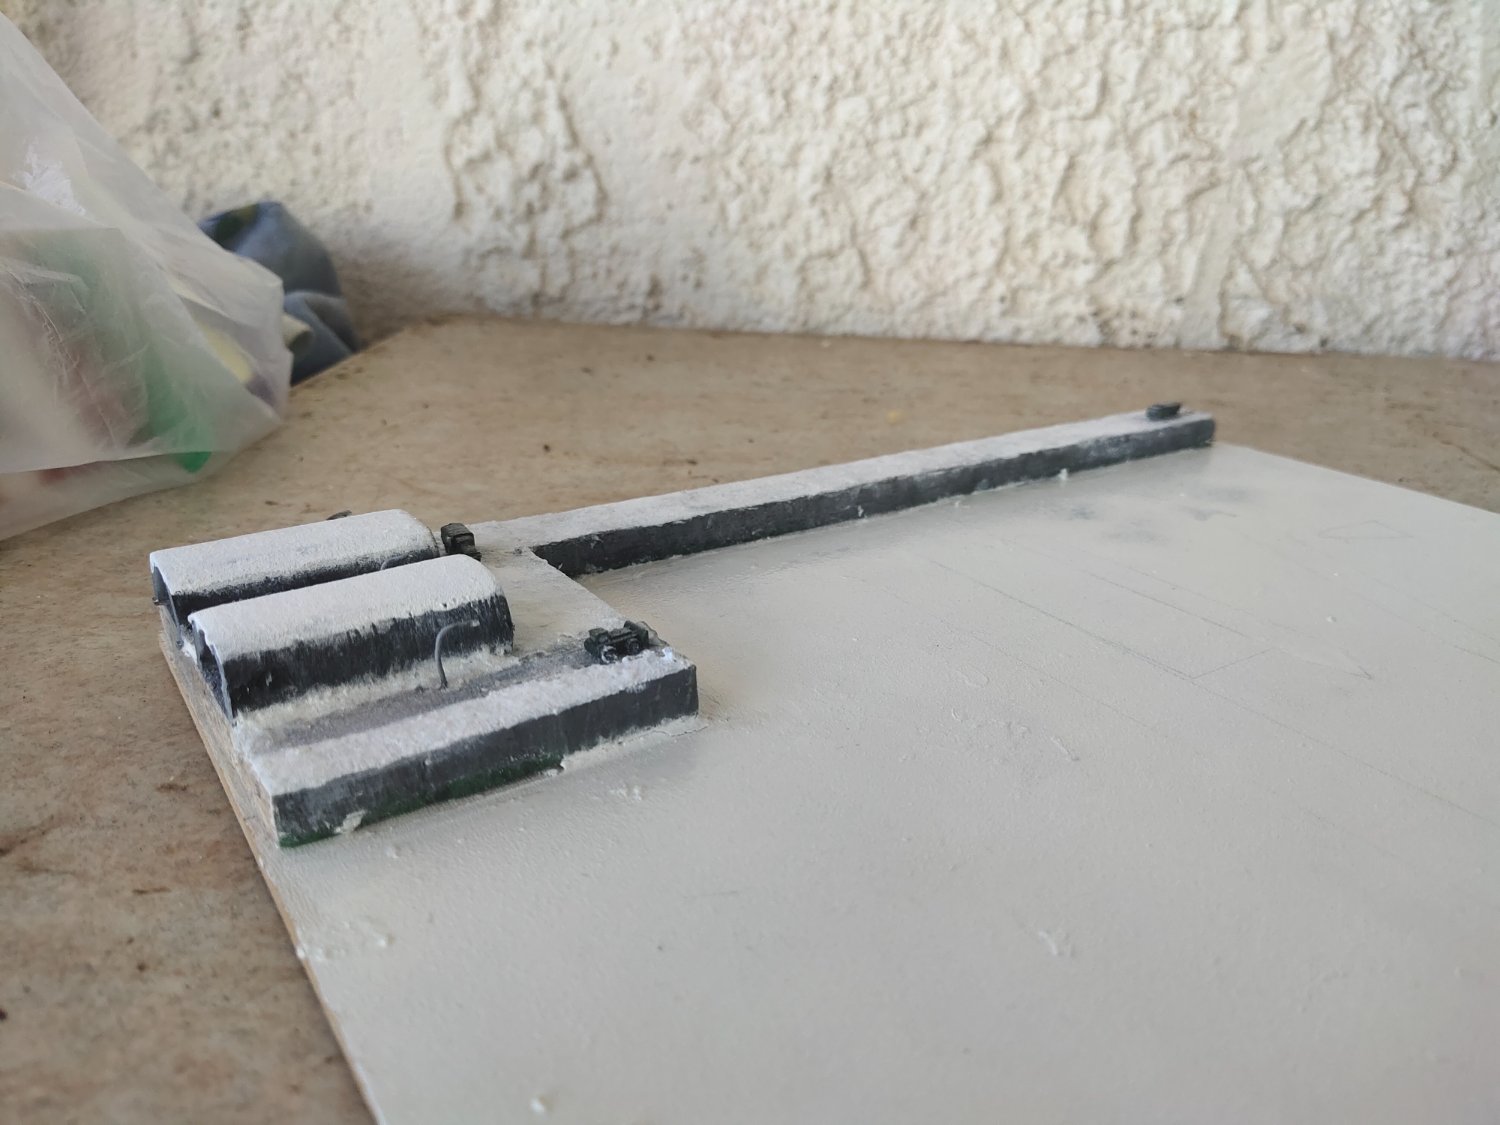
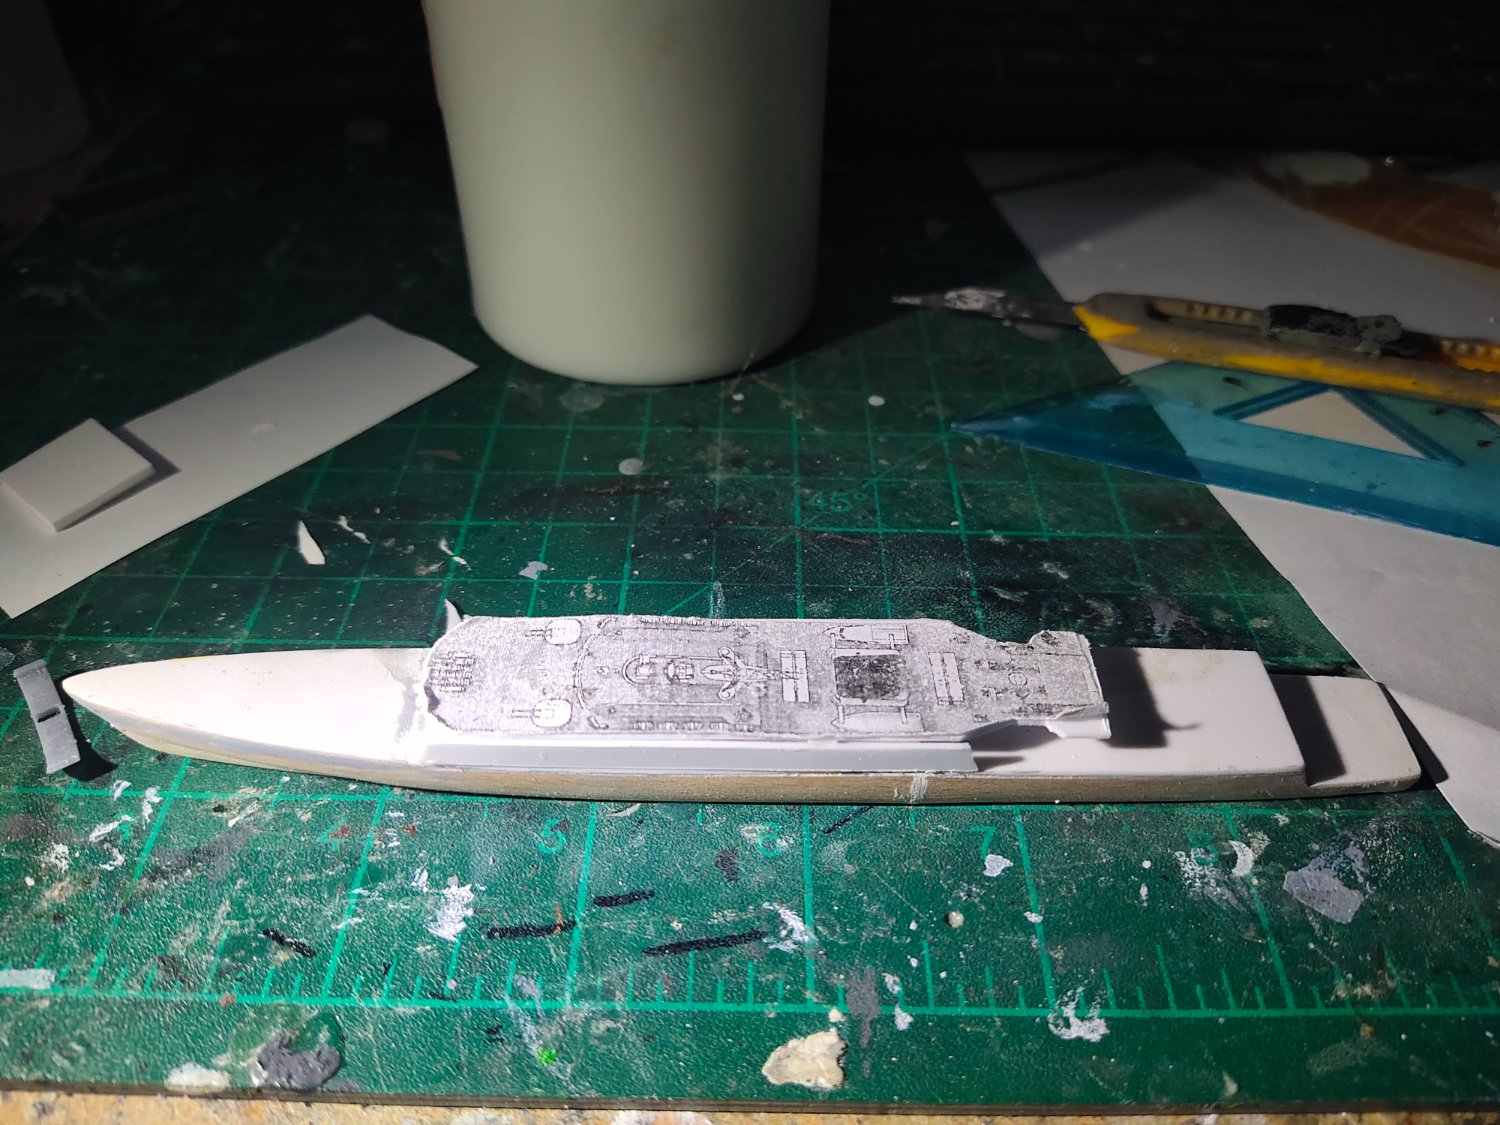
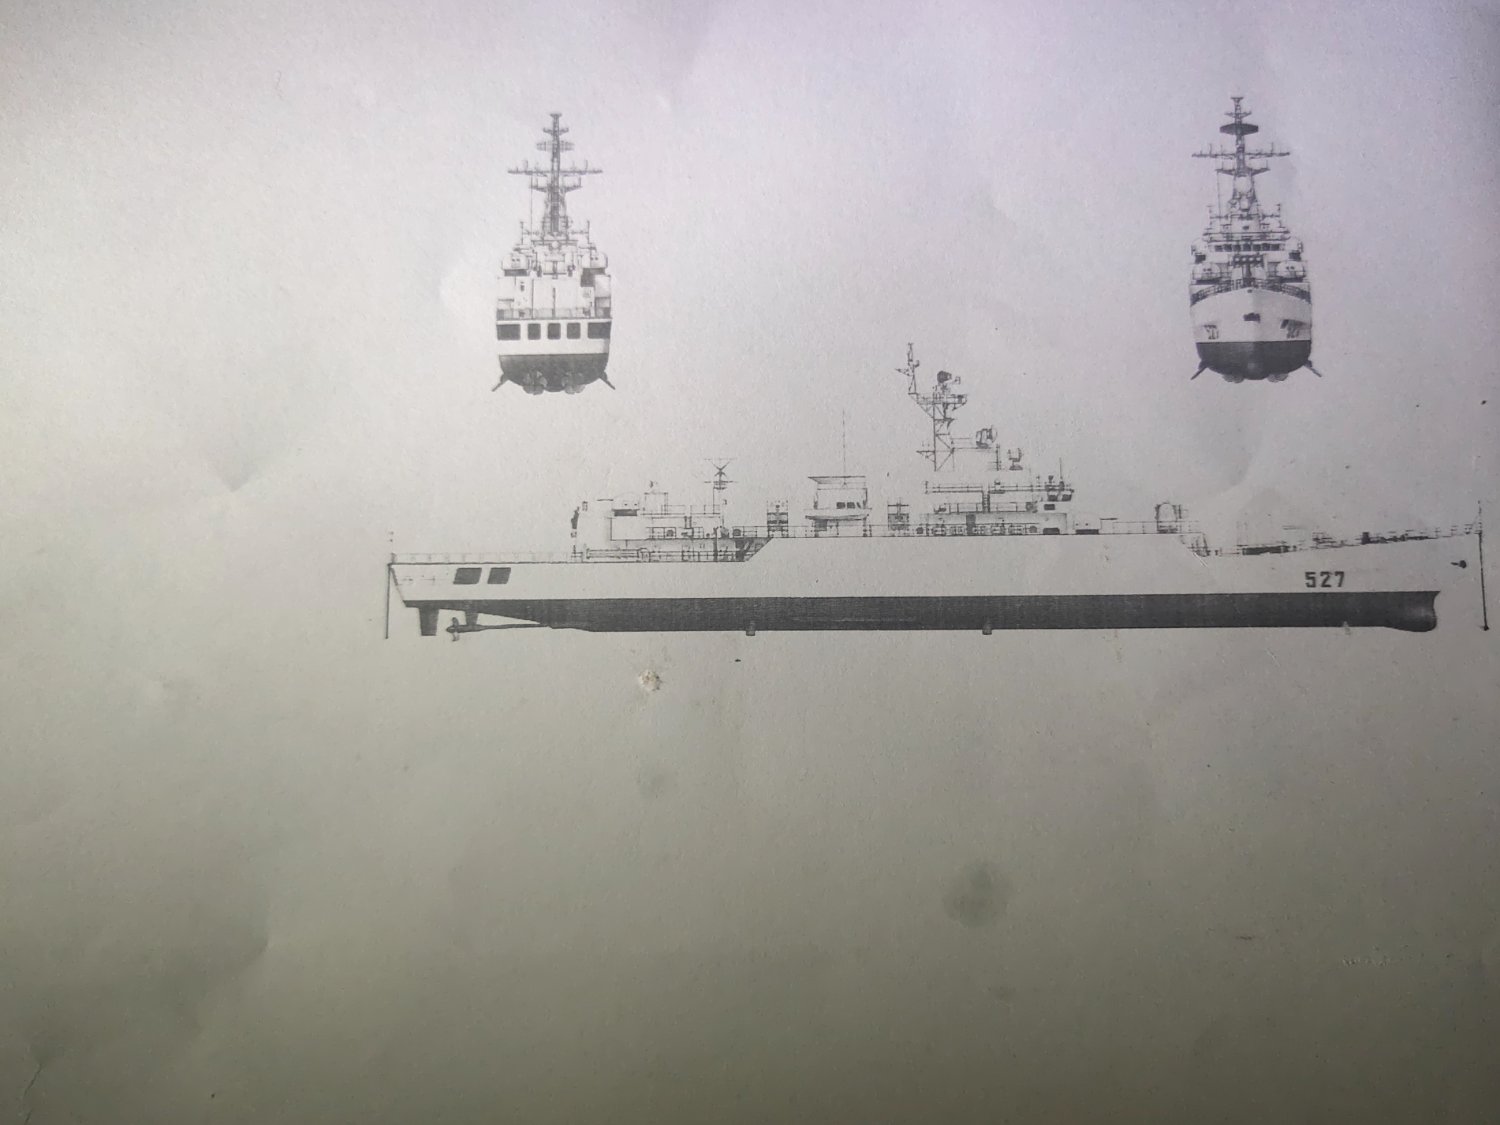
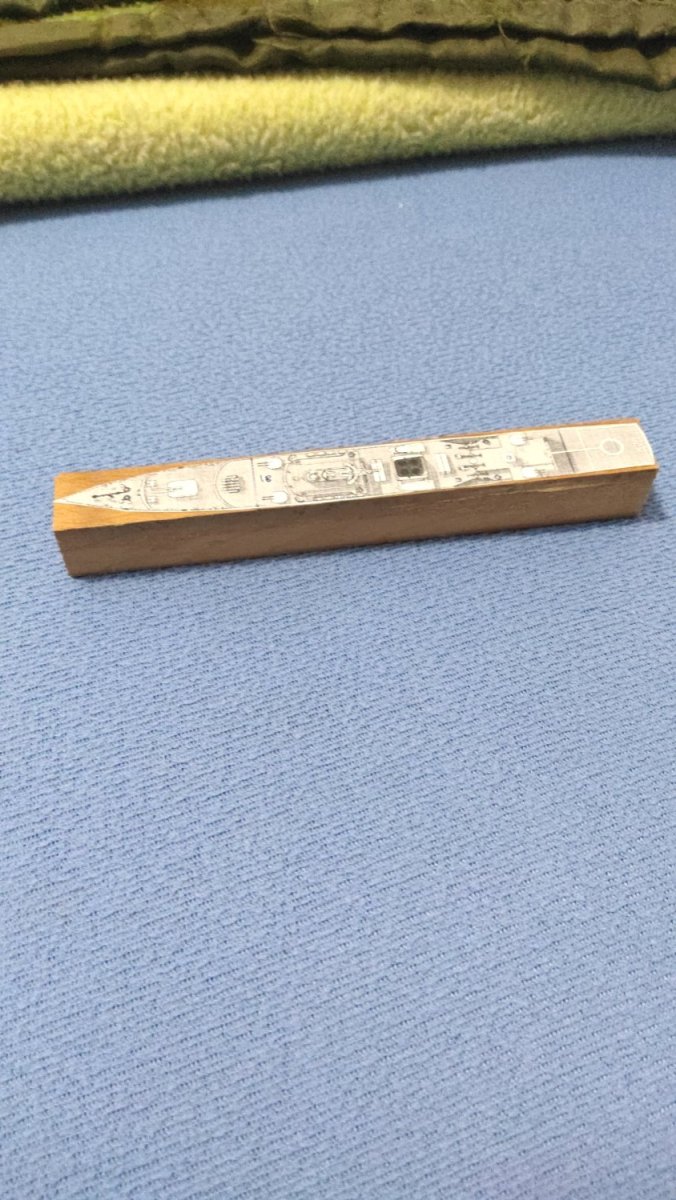
So I decided to print the hull. But the shape is not that simple as in Horizon class or like type 45 Destroyer that I was looking. Spend quite some time without having the desired effect.
After printing drawings to 1:1 scale, hull was estimated to 16 cm. Deck plan was glued to the most -close dimension- piece of wood I could find.
The smell of sanded wood filled the air replacing the resin odor. I kinda missed that. Let the fun begin.

- GrandpaPhil, ccoyle, Canute and 5 others
-
8
-
Normally this is a scratch built not a model. However its too small compared to other mega projects here and I like to have it in the same section with my other 1/700 built, with mods permission.
Not sure how I came up with this idea.
, probably found some detailed drawings while searching online for modern frigates info material, so I convinced my self to give it a try. Modern ships are easy to be built especially as waterline models, cause of the less complicated lines.
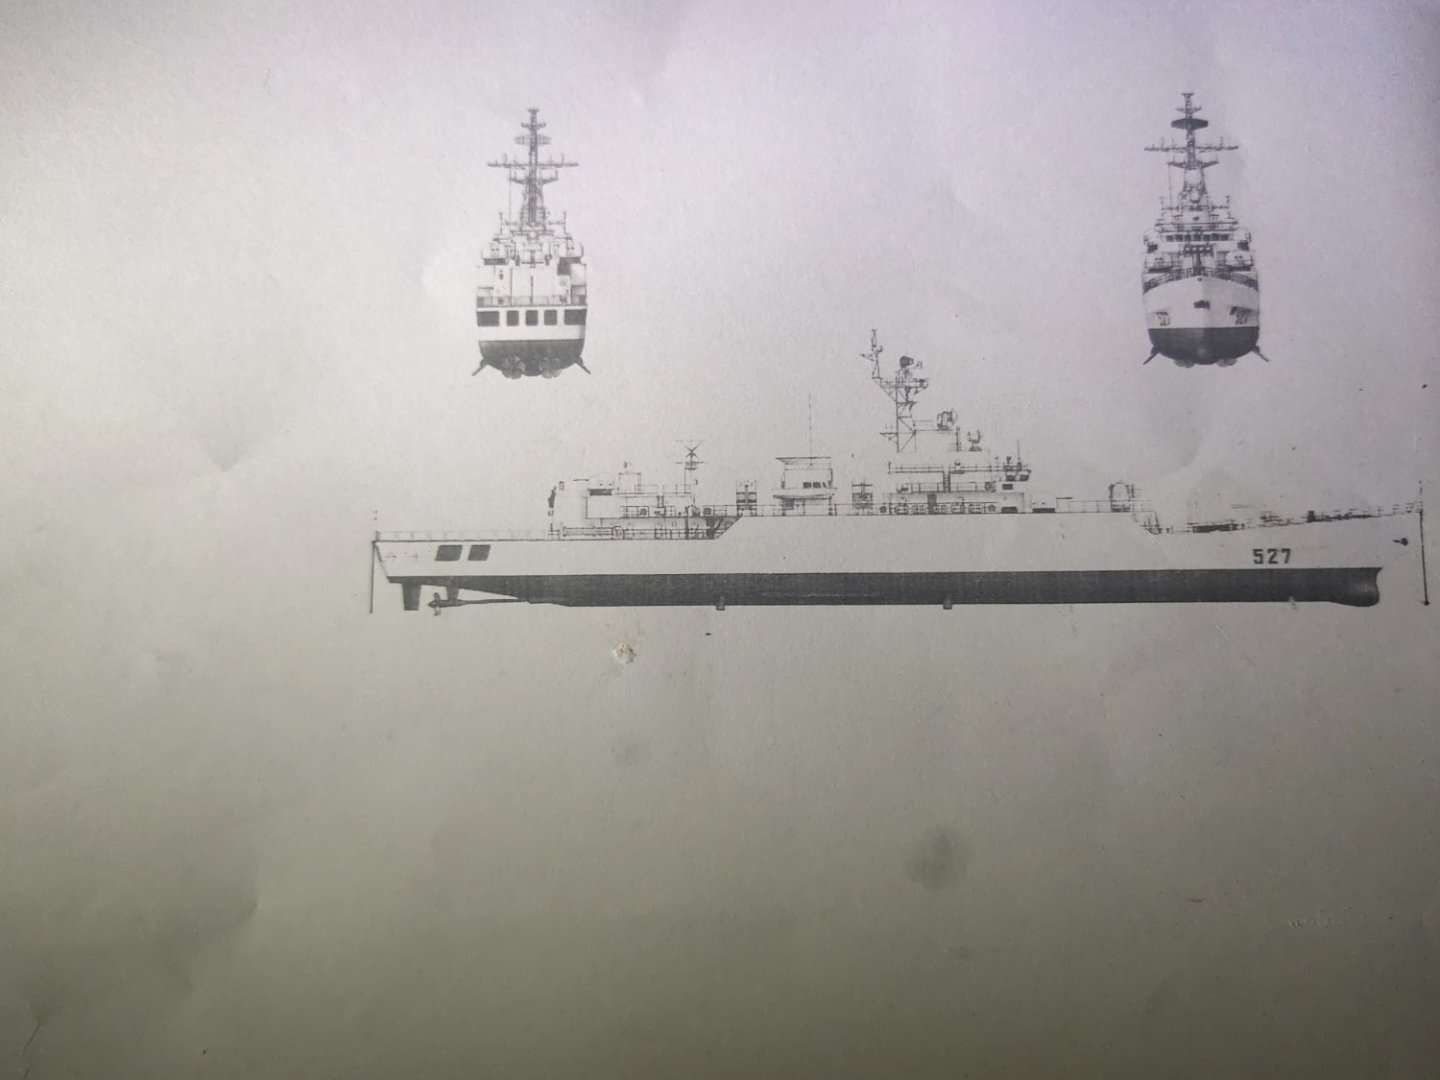
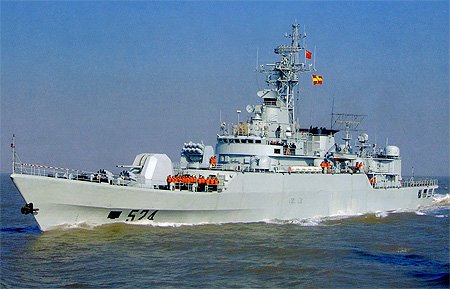
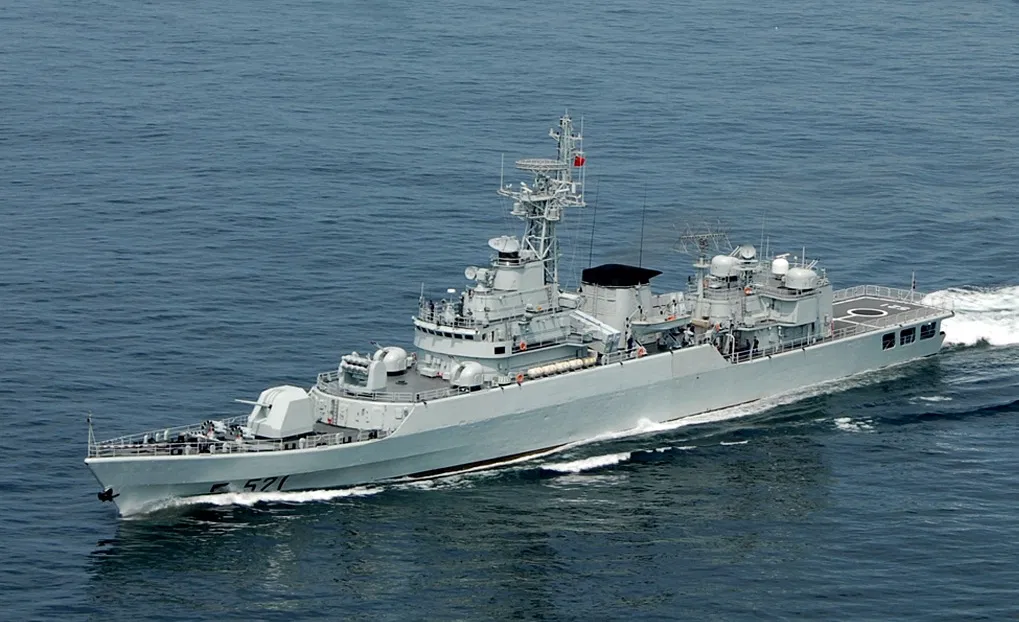
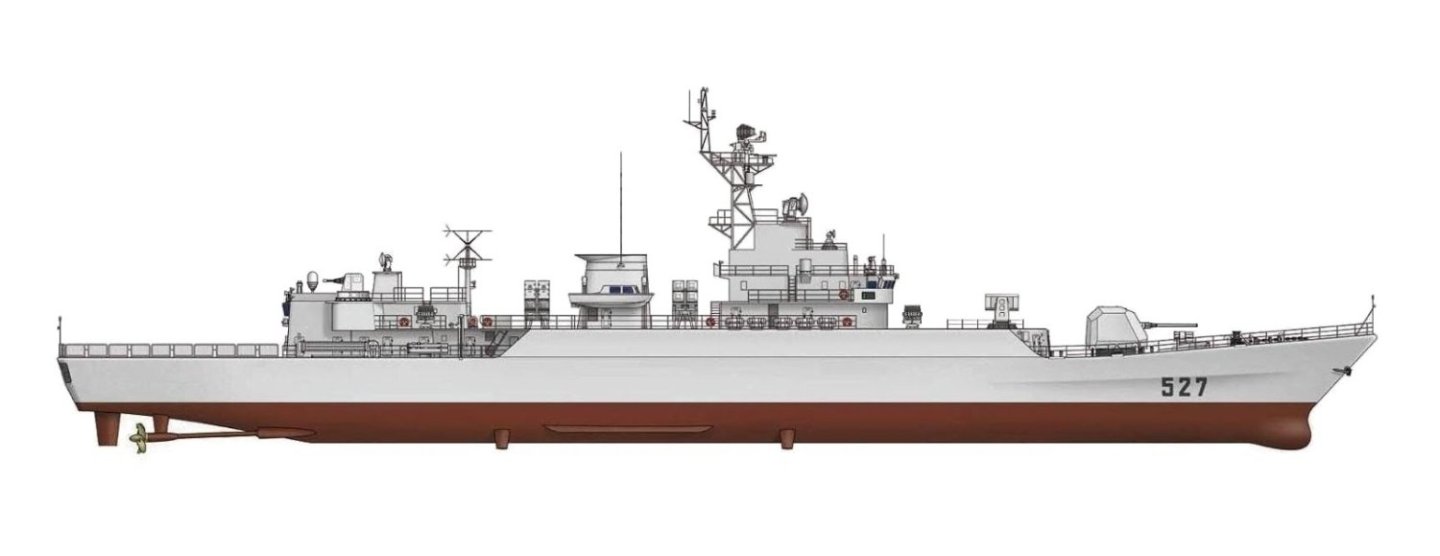
The Type 053H3 (Jiangwei II) is the first multi role frigate of the PLAN Navy. They displace 2.500 tones at 112 meters long. They are replaced by type 054 frigates.
- mtaylor, yvesvidal, Old Collingwood and 2 others
-
5
-


Type 53H3 Jiangwei-II by mikegr - FINISHED - 1/700 - PLAN frigate
in - Build logs for subjects built 1901 - Present Day
Posted
While looking for the mast , railings were done and I printed some life ring which were put in place