Mirabell61
-
Posts
7,417 -
Joined
-
Last visited
Content Type
Profiles
Forums
Gallery
Events
Everything posted by Mirabell61
-

Cutty Sark by NenadM
Mirabell61 replied to NenadM's topic in - Build logs for subjects built 1851 - 1900
Hi Nenad, perhaps the hollow-room dowel for M3 screw may be useful for your purpose..... replace the hook by a M3 screw http://www.eibhandel.de/Schneider-1241009-Hohlraumduebel-DUO-MAX-X6mm-Hkn-M3-rot Nils- 4,152 replies
-
- 6
-

-
- cutty sark
- tehnodidakta
- (and 1 more)
-
Nigel, thank you very much for your nice comment .... Nils
- 2,625 replies
-
- 2
-
-
- kaiser wilhelm der grosse
- passenger steamer
- (and 1 more)
-
many thanks to John and Piet, and all the "likes", for your appreciations.... John, it will take some time to do all the intended forecastle fitting out (much trying out...) Also many thanks for giving in the correct term "gypsy", I am thankful for every hint in learning the English nautical terms, as they are not found in a regular dictionary Piet, thanks for your word, yes those fine structured railings have to be treated like raw eggs Nils
- 2,625 replies
-
- 3
-
-
- kaiser wilhelm der grosse
- passenger steamer
- (and 1 more)
-
Many thanks Pete and Johann, your kind comments are very much appreciated.... Nils
- 2,625 replies
-
- 4
-
-
- kaiser wilhelm der grosse
- passenger steamer
- (and 1 more)
-
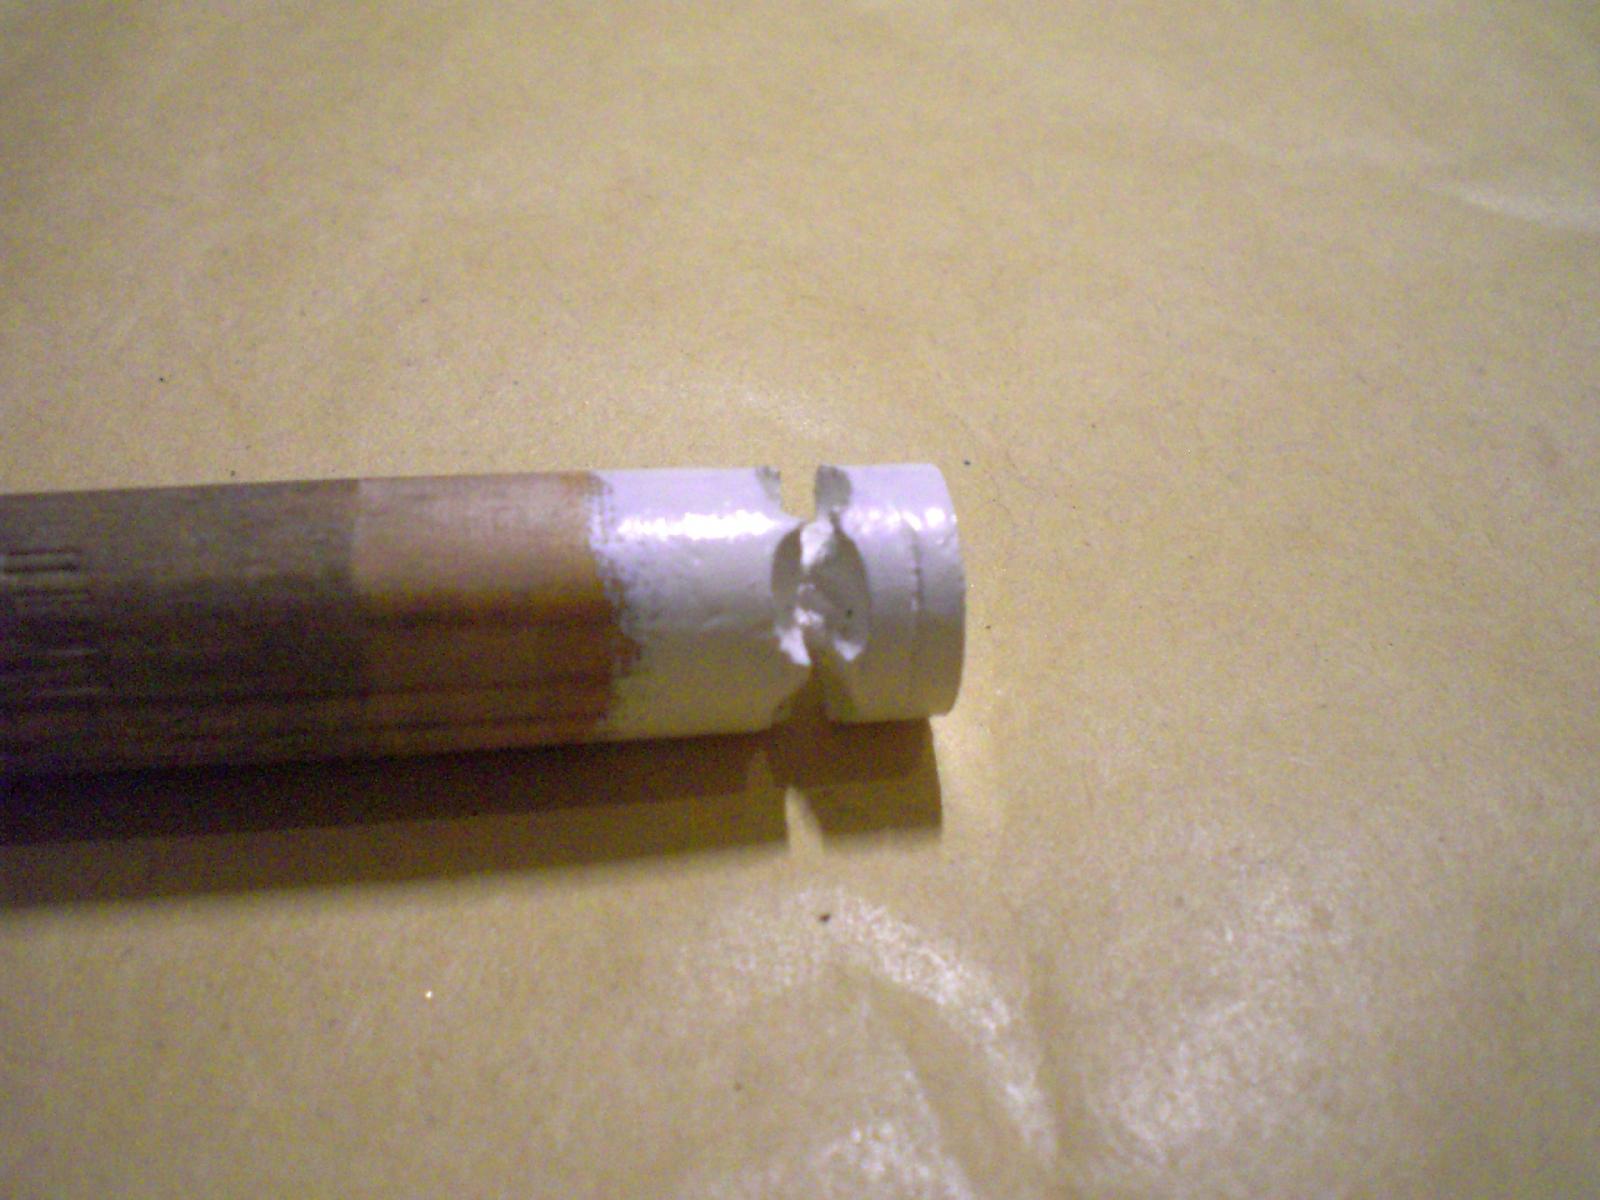
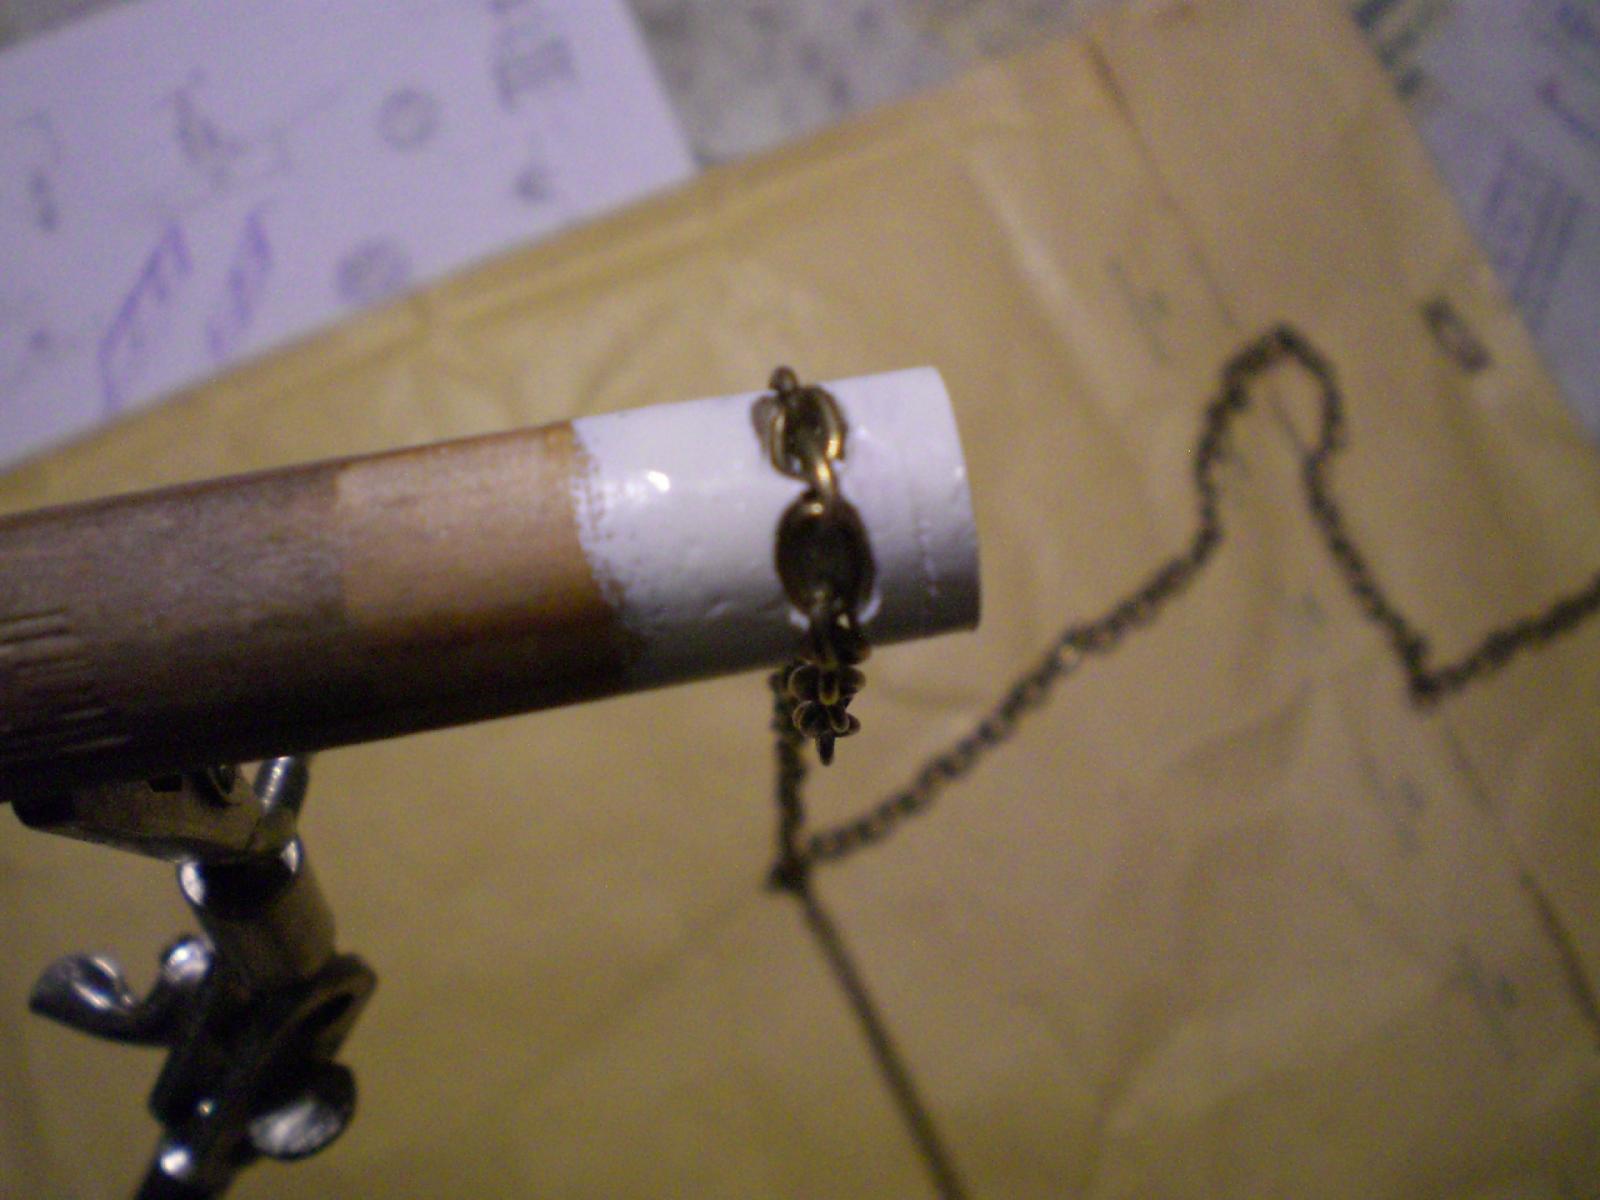
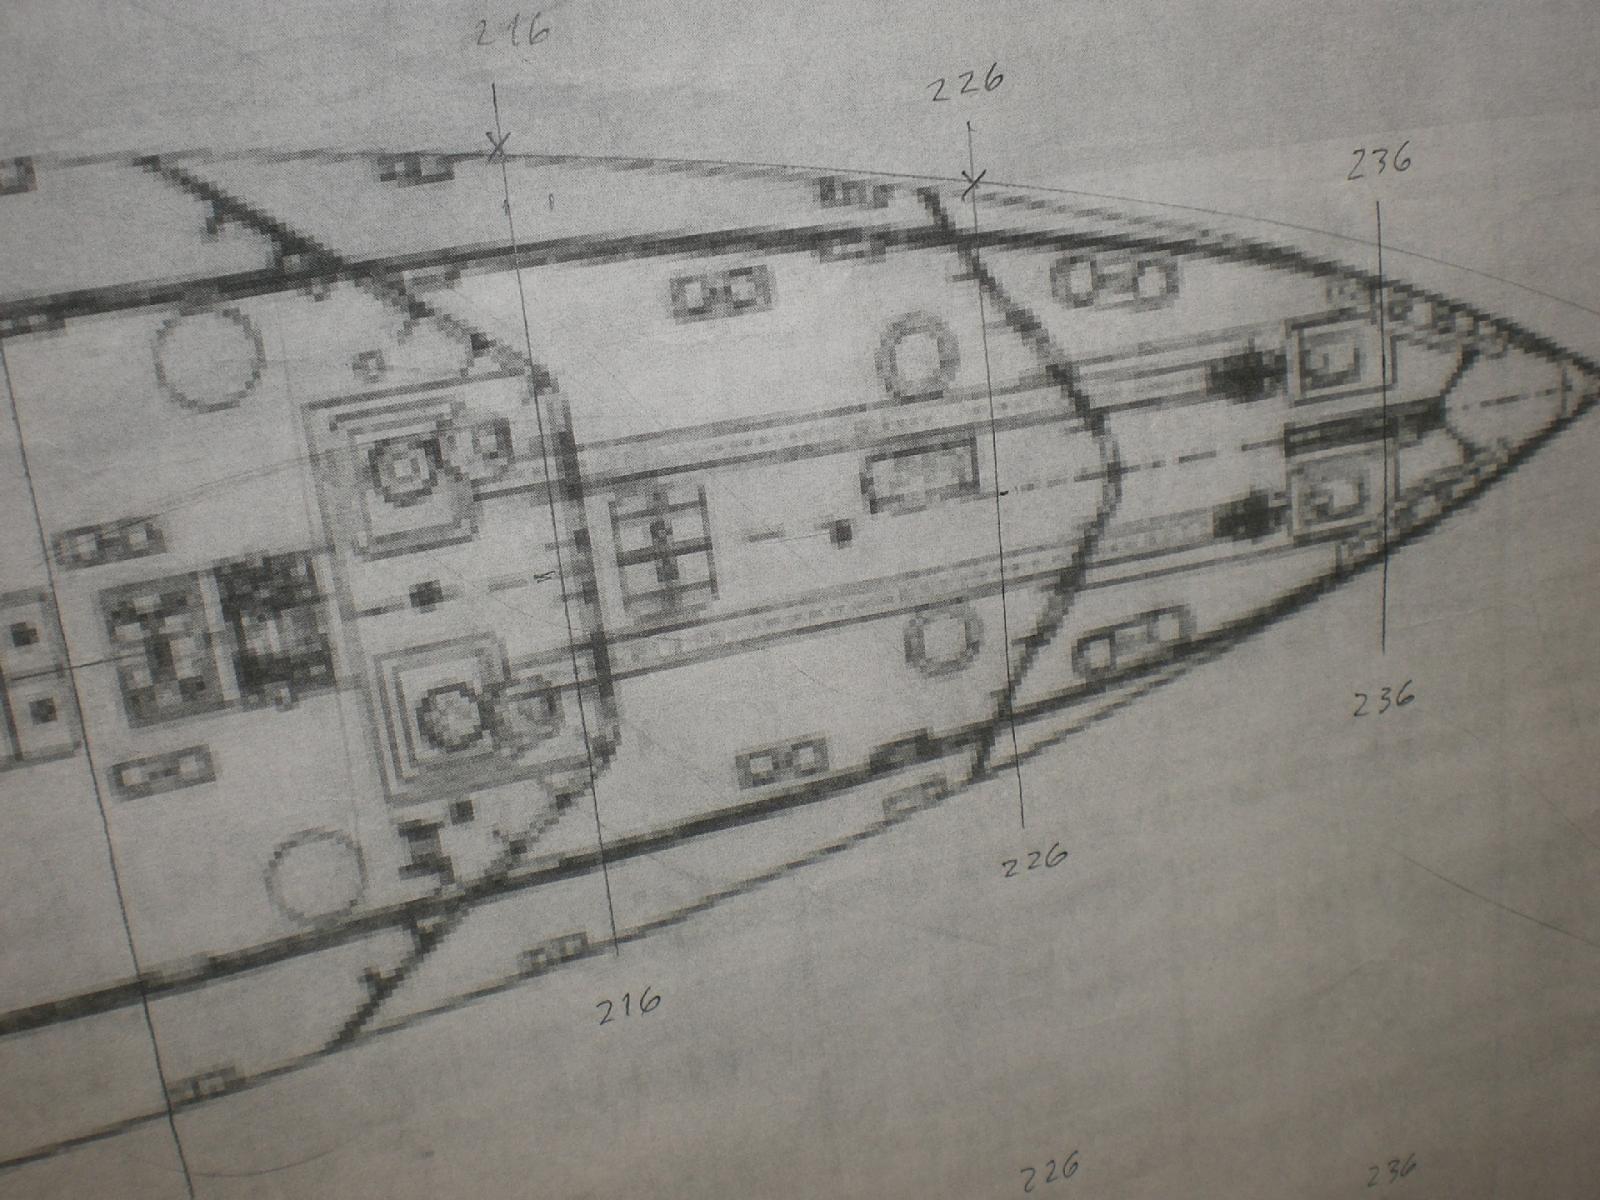
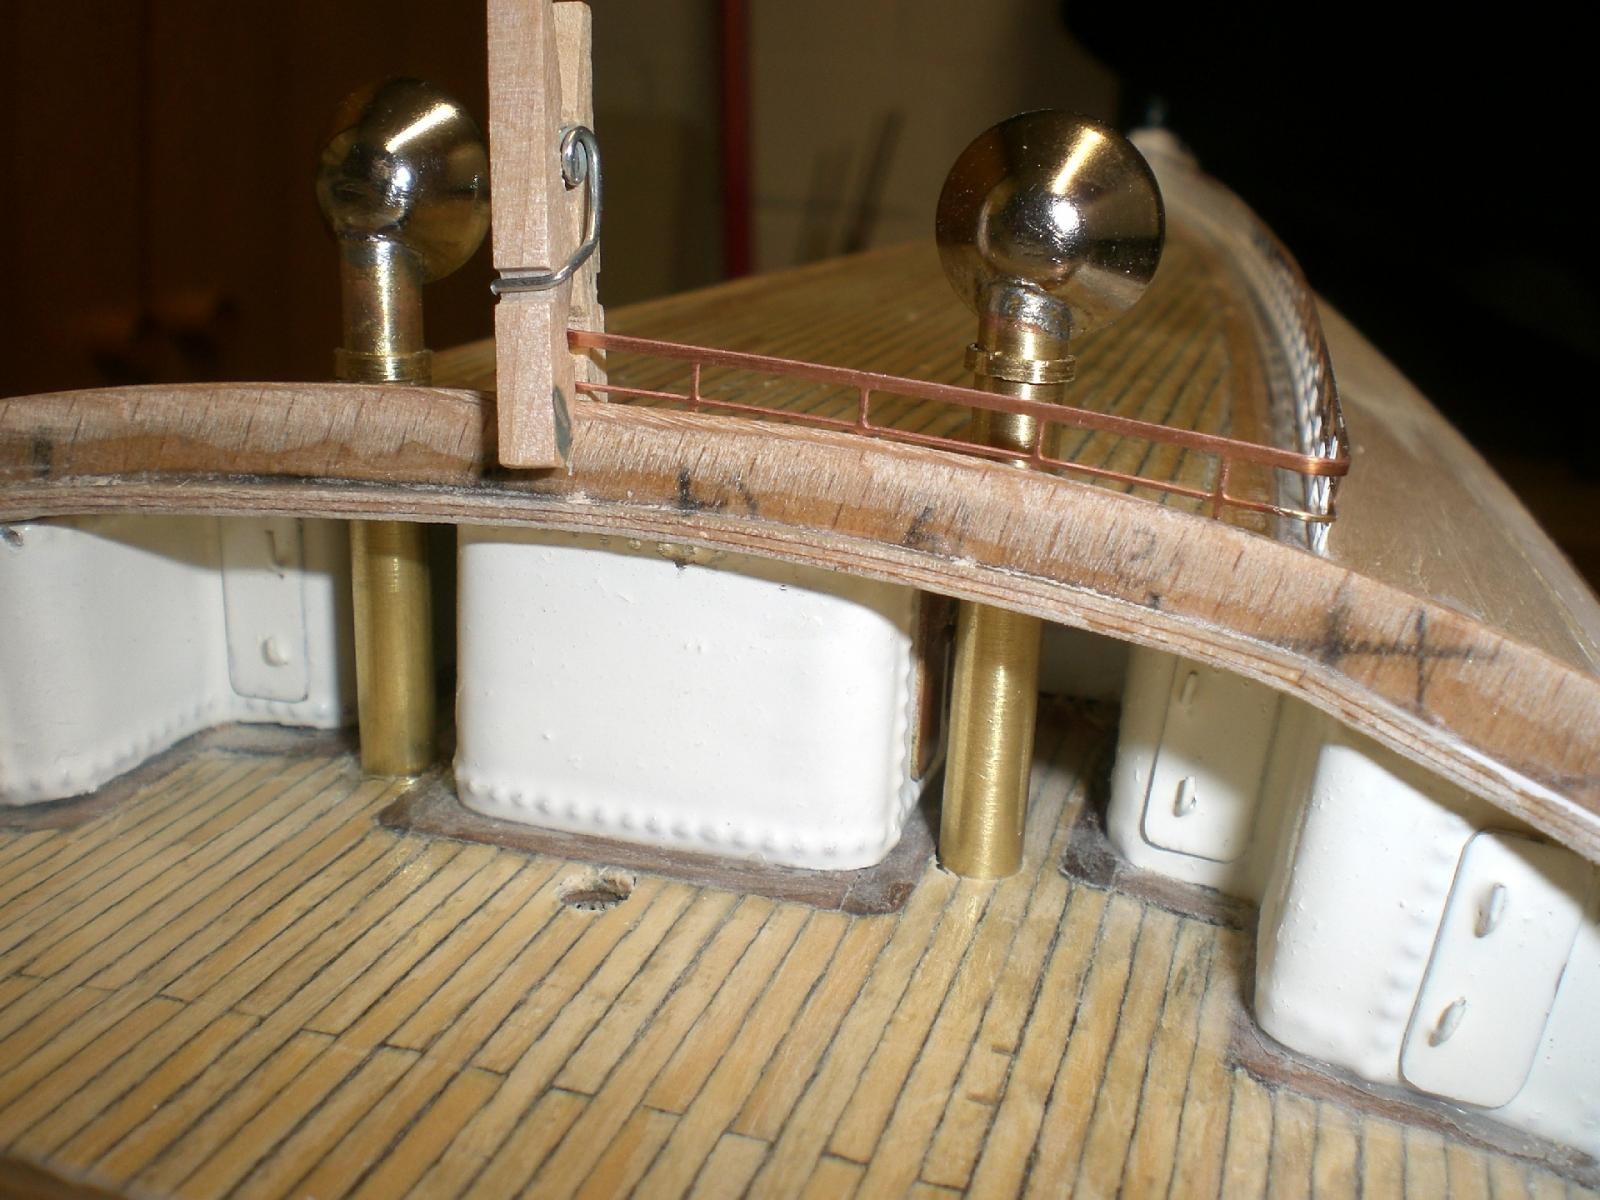
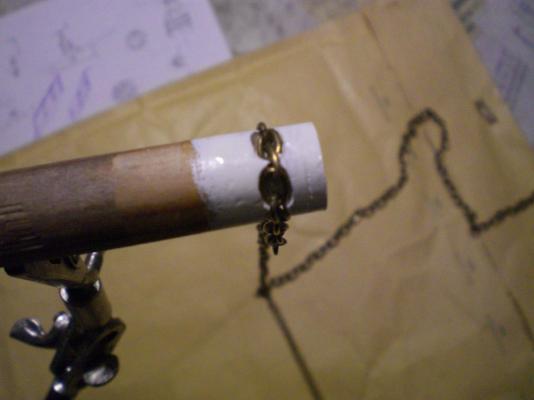
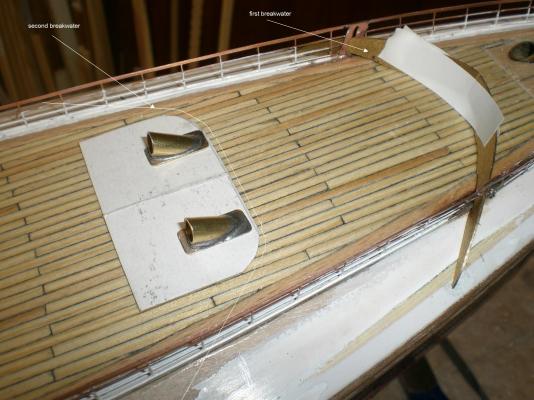
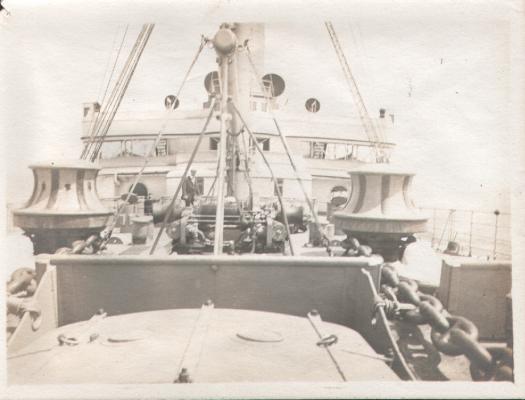
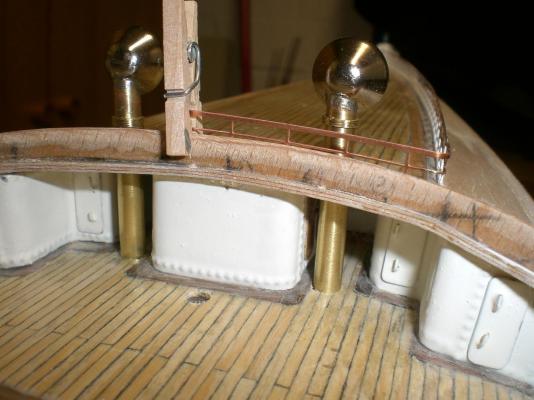
Update I`m planing the arrangement for the staggered two breakwater barriers, the the elevated guide / slide rails for the heavy anchor stud link chains, the two large forecastle capstan winches with incorporated horizontal turning chain sprocket wheels. These wheels will get a 180° wrap angle, before the chains are led down through the deck into the chain hold. Thanks to Peter (Mr. Hollom) there is a lovely photo of this detail on the actual ship, also showing the outcuts for the chain guide rails in the upper section of the second breakwater, next to the mighty capstans in the background. The chain sprocket grooves ought to be made from castings, but because that is beyond my capability, I made a dummy from a wooden dowel, in order to determine the geometrie, of diameter, groove size, etc. to close fit the chain links well in a 180° wrap. The chain is also a dummy, until I receive the ordered stud link chain in same dimensions An earlier little failure in planing caused quite a lot of fiddily recovering work : the forecastle railings should have been mounted after the two breakwaters are fixed in place. Now I ca`nt make them in one piece, I just do`nt get them stuck in and through the railing (now made in two halves....., wich ca`nt be soldered sufficiently without damaging the deck. Have to find a solution on this feature later on Nils


- 2,625 replies
-
- 32
-
-
- kaiser wilhelm der grosse
- passenger steamer
- (and 1 more)
-
very inspiring detail work Ed, those chock-cleats, look great, thanks for sharing ! Nils
- 3,618 replies
-
- 5
-
-
- young america
- clipper
- (and 1 more)
-
good work Bob, nice progress on this beautiful "scratch build" steamship.... Nils
- 348 replies
-
- 3
-
-
- pequot
- cable ship
- (and 1 more)
-
congrats, very nice work Grant, also the racks in the bomb-magazine look great...... Nils
- 456 replies
-
- 5
-
-
- finished
- bomb ketch
- (and 2 more)
-
Very nice progress Francesca, the decks and cabins are well thought through and built.... Nils
-
Piet, those anchors look great, nice metal work ! Nils
-
beautiful model S.V. the color giving above the wales looks great.... Nils
-
Michael, this looks excellent, must be fun, just like building the real thing Nils
-
very nice work Mehmet, that`s a real rough treated workboat, lovely Nils
- 83 replies
-
- 3
-
-
- sponge boat
- finished
- (and 1 more)
-
Hi Dafi, there`s real life action on your decks,.........looks wonderful with all those little guys Nils
-
ancre La Salamandre by tadheus - 1:24
Mirabell61 replied to tadheus's topic in - Build logs for subjects built 1751 - 1800
Hi Tadeus, that is a very nice built model you`re working on, love it, keep those pictures coming Nils -
Hi Druxey, what a wonderful project ! It looks like a very ambitious build. Love those fine sharp lines, and that you will be clinker planking the plug you are momentary at..... Am already curious how you will do the carving job for all those sweet decorations Nils
- 641 replies
-
- 2
-
-
- greenwich hospital
- barge
- (and 1 more)
-
Ed, those pump flywheels are brilliant, super work !!! Nils
- 3,618 replies
-
- 5
-
-
- young america
- clipper
- (and 1 more)
-
Hi David and Patrick, and all the many "likes" recently, for appreciations and kind comments..... David, unfortunately I have no experience with resistance welding....... For clean soldering results I prefer gas torch welding as far as accessibility allows, the possibility for controlling the heat flow, the moment the solder melts and creeps into the foreseen place allows quite accurate work. Alternatively I use the good old electric soldering iron Patrick, the lettering is of 0,3mm thick etched brass and has to be attached with high viscosity CA Nils
- 2,625 replies
-
- 5
-
-
- kaiser wilhelm der grosse
- passenger steamer
- (and 1 more)
-
Thank you very much Bob, sometimes it`s just trying out ideas...... Nils
- 2,625 replies
-
- 5
-
-
- kaiser wilhelm der grosse
- passenger steamer
- (and 1 more)
-
Thank you Dirk, do you perhaps have a pic as an example, how you do it (would like to see how others do it in 1:144) Nils Thank you Pete, it was an idea of doing it that way, in order to get enough stability into it Nils
- 2,625 replies
-
- 6
-
-
- kaiser wilhelm der grosse
- passenger steamer
- (and 1 more)
-
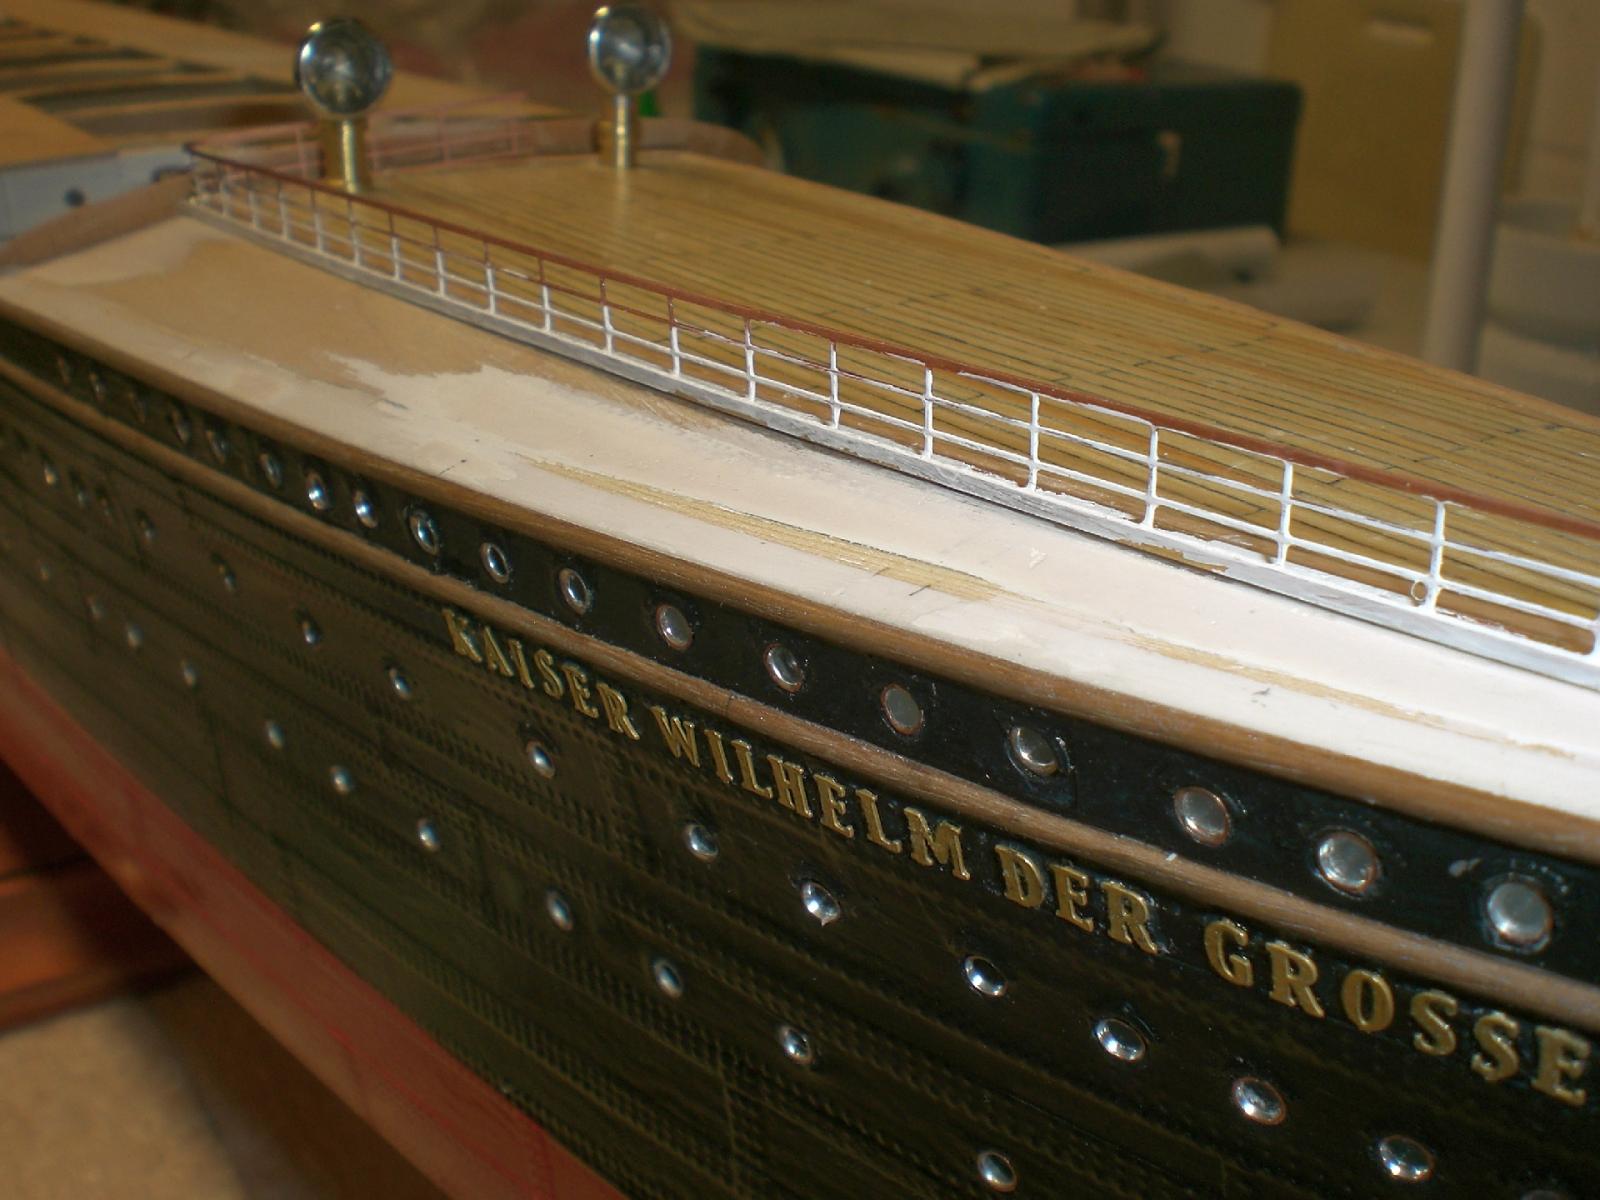
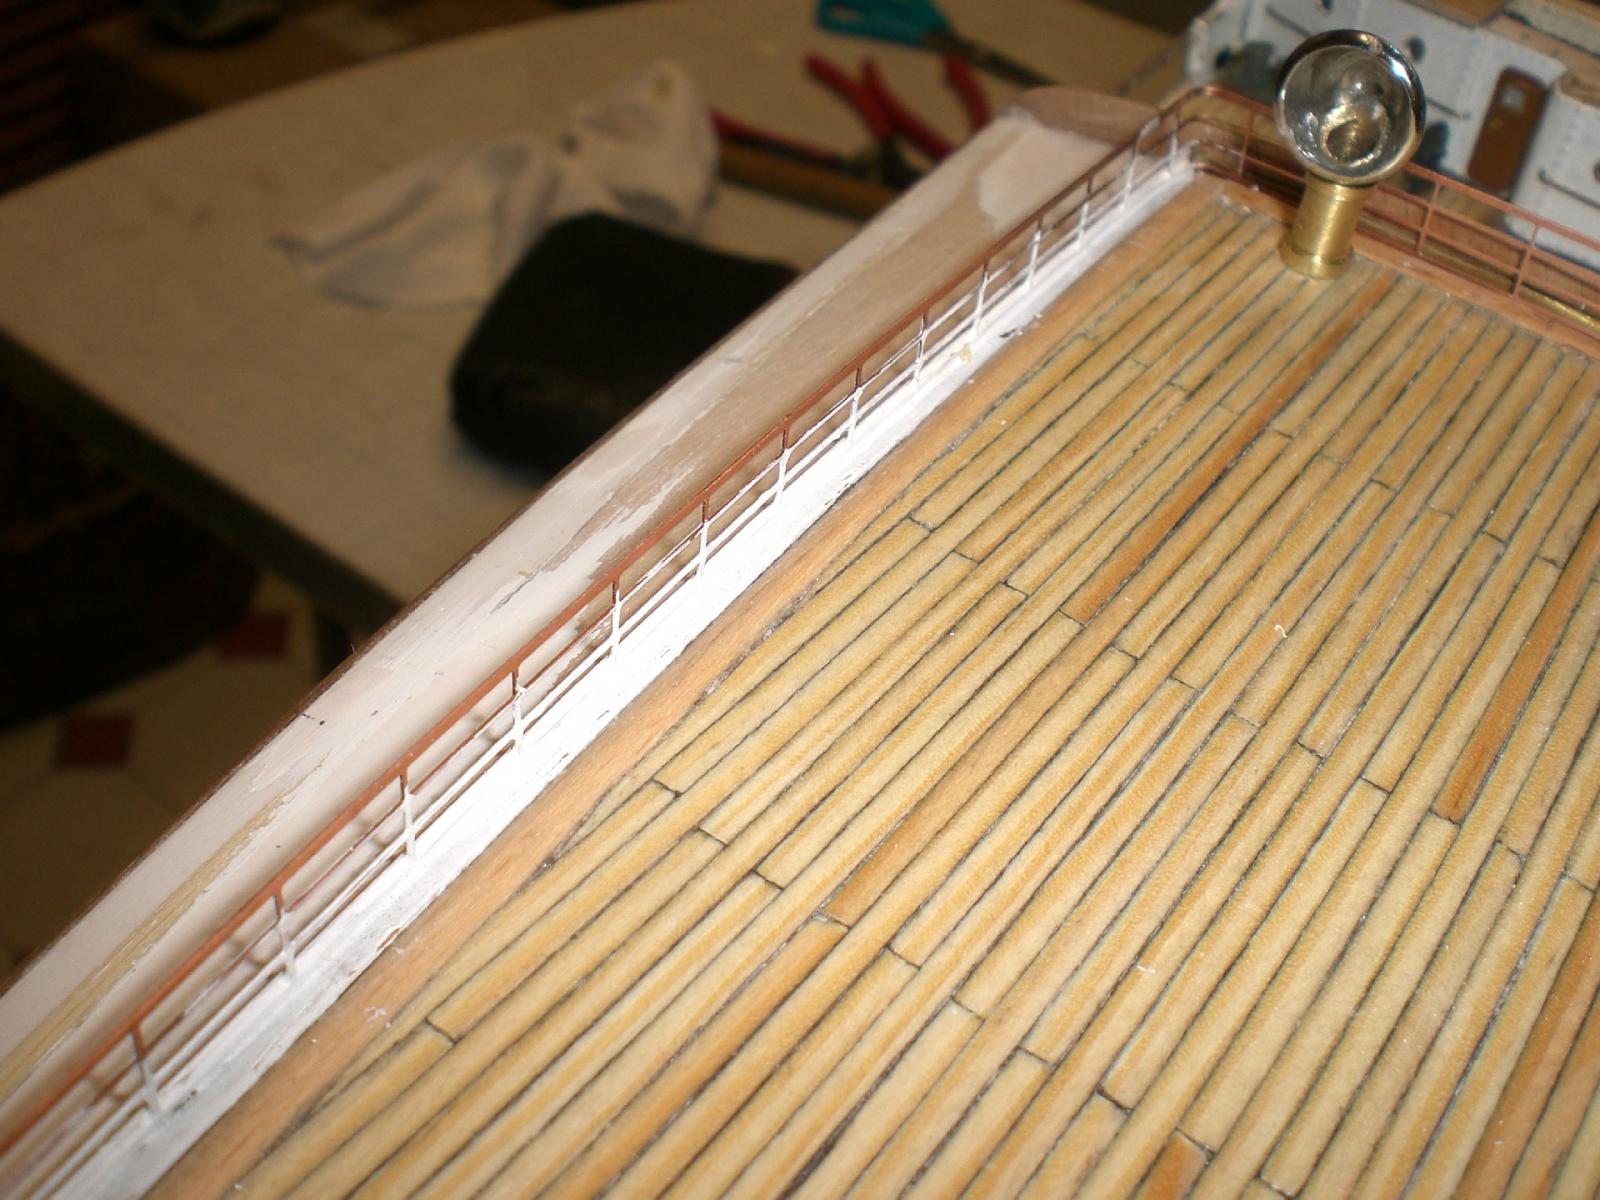
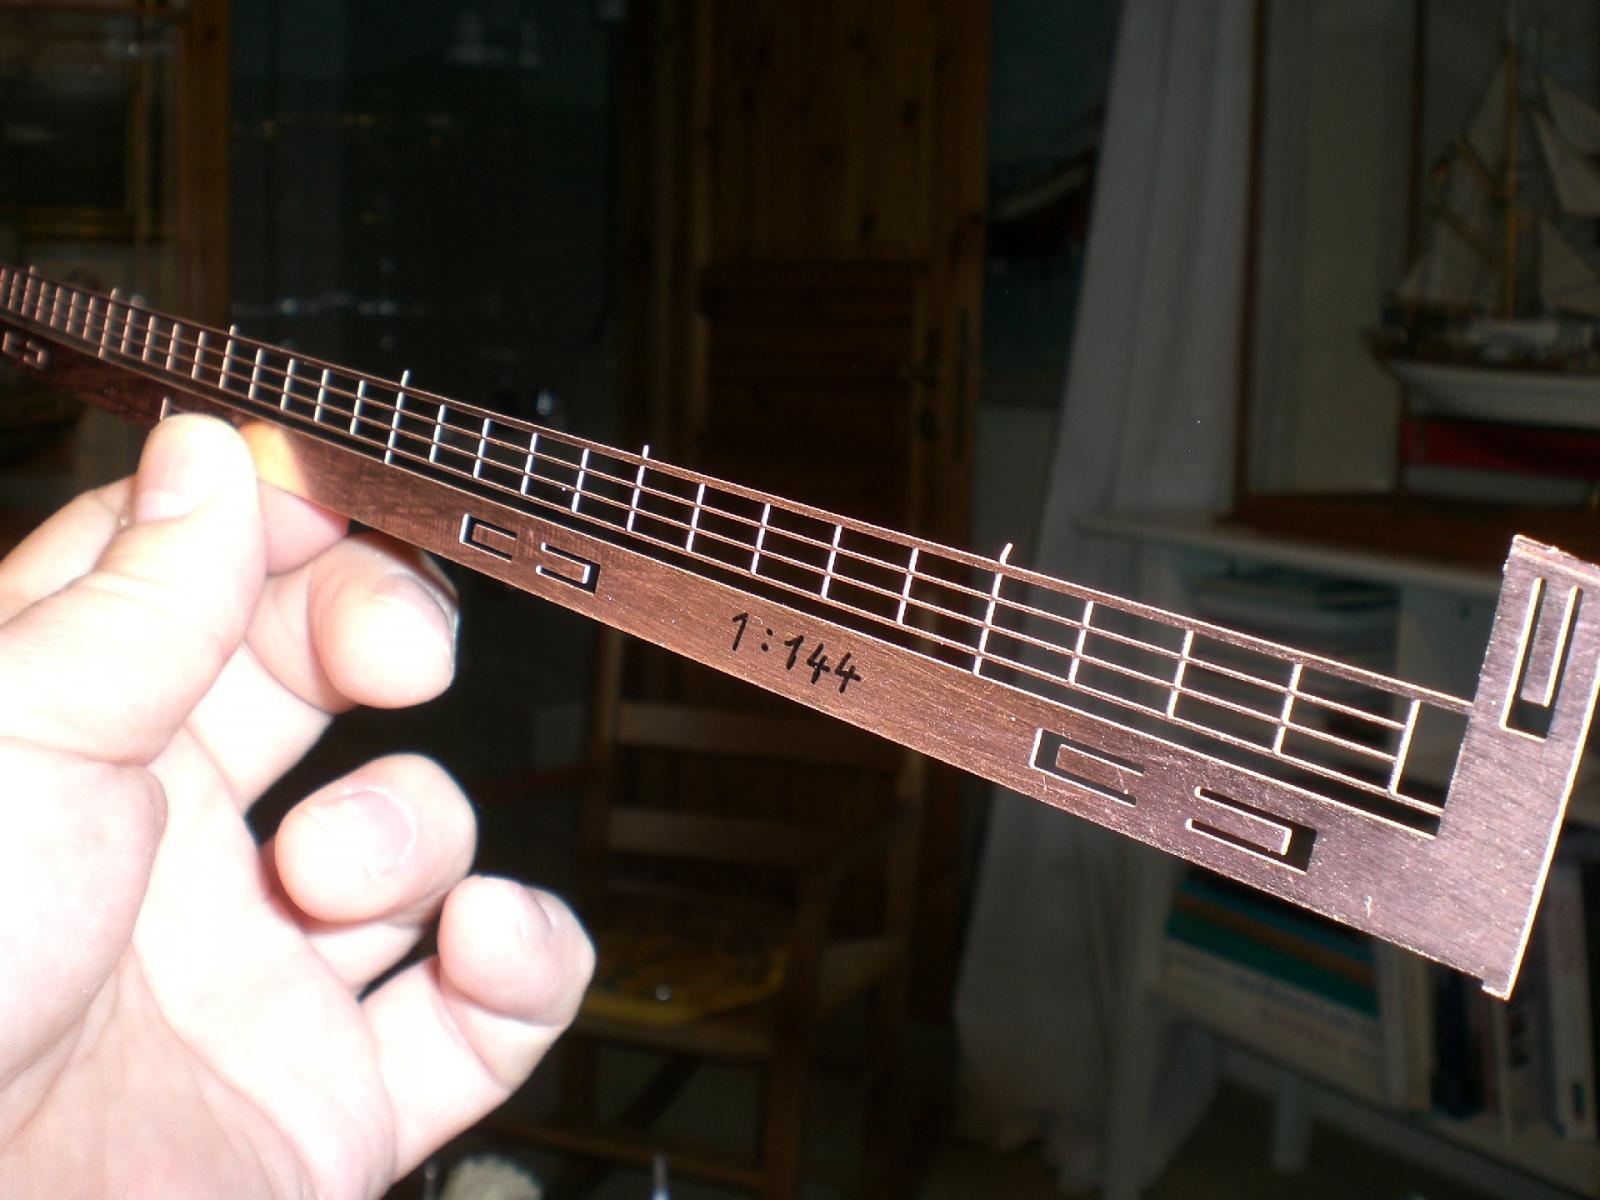
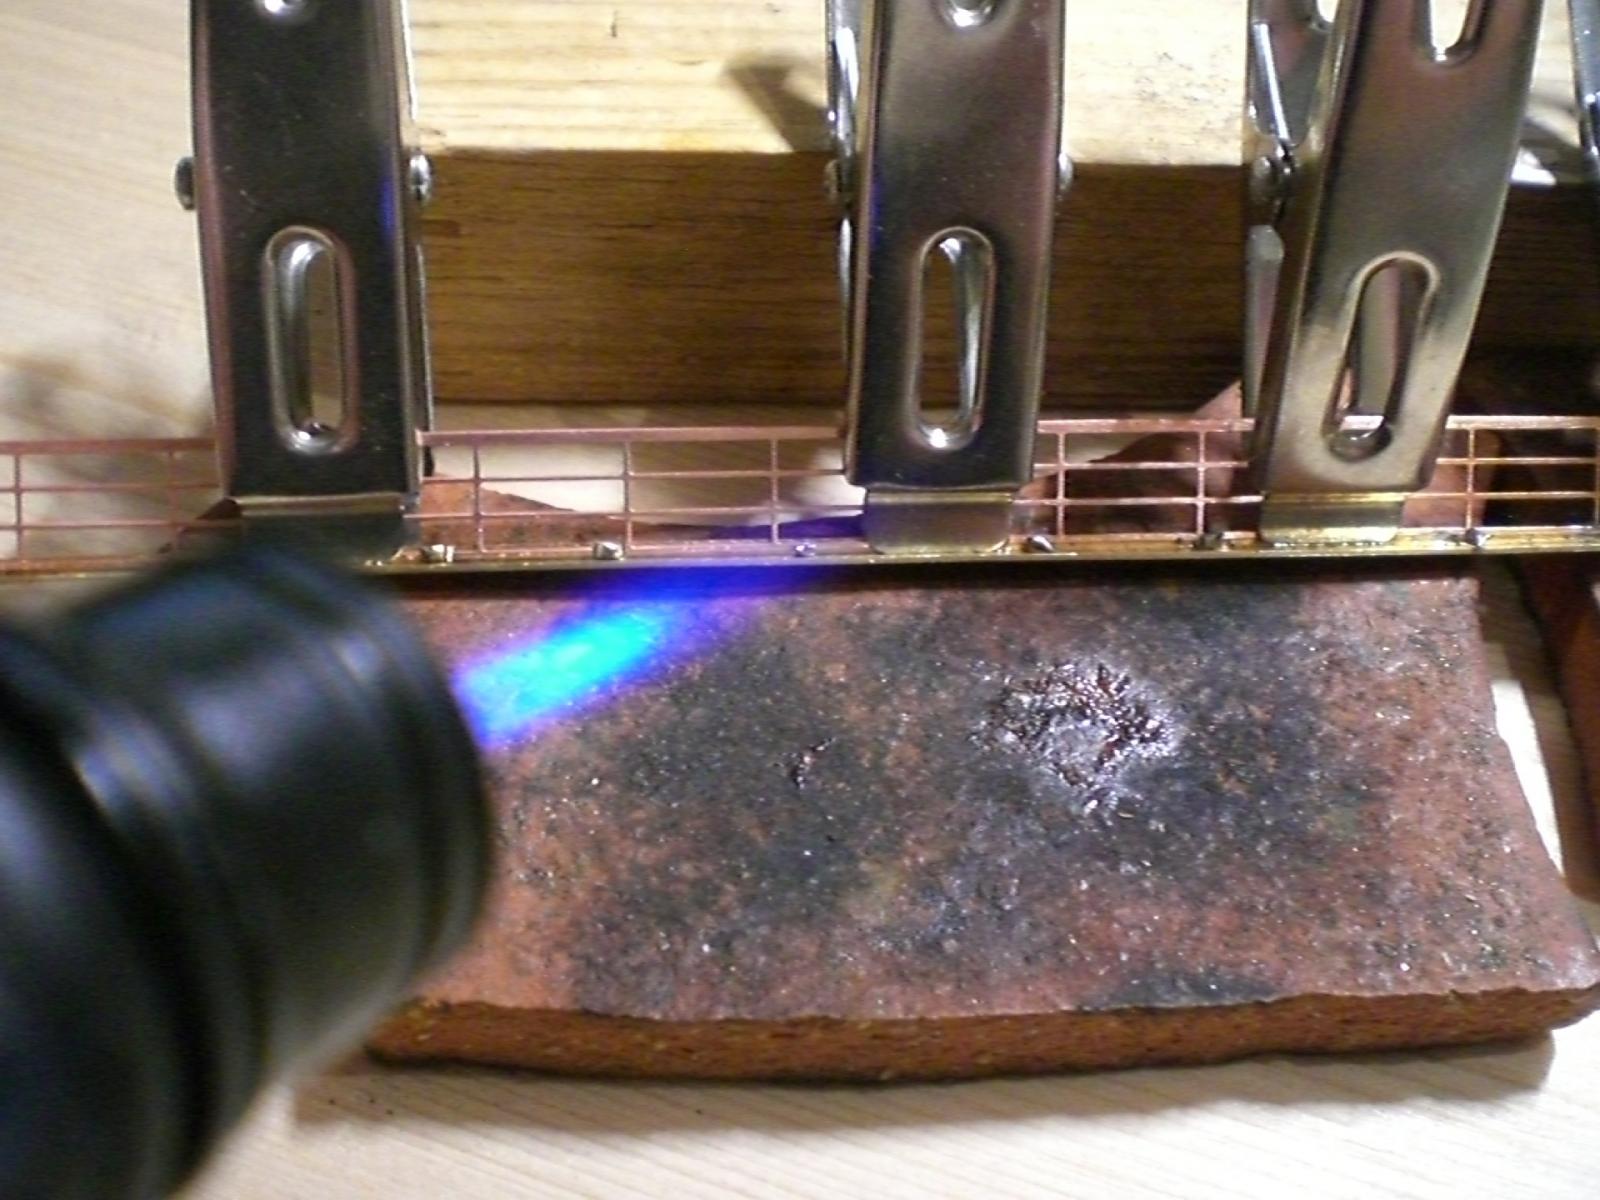
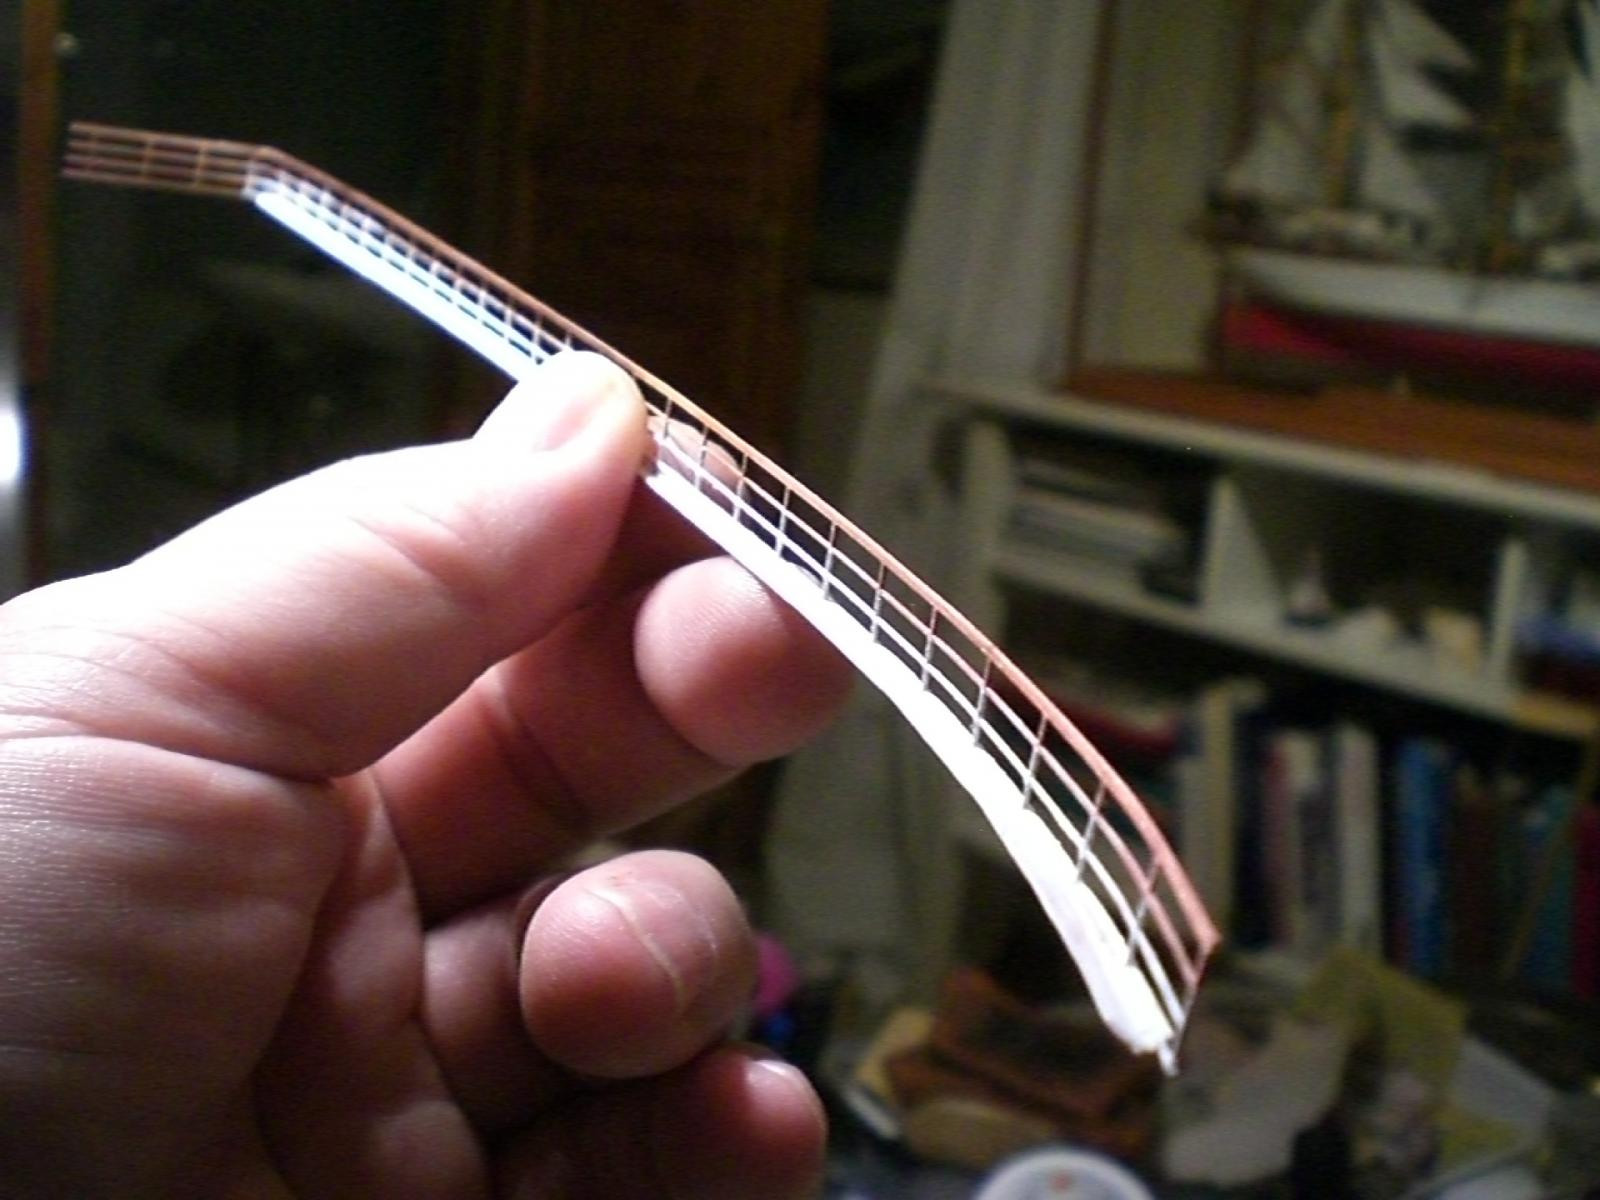
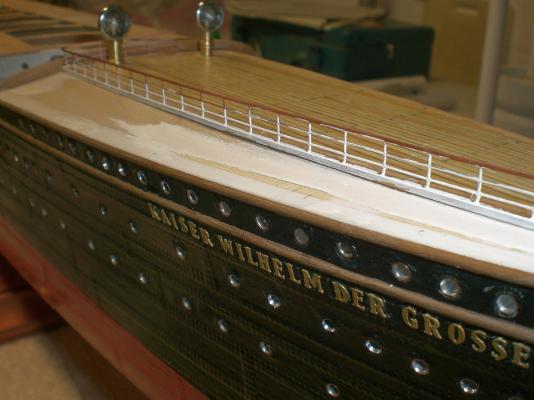
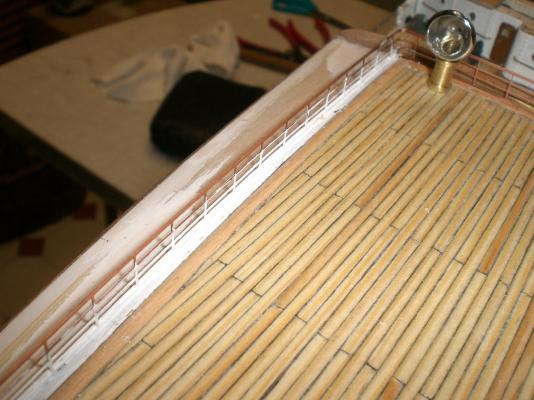
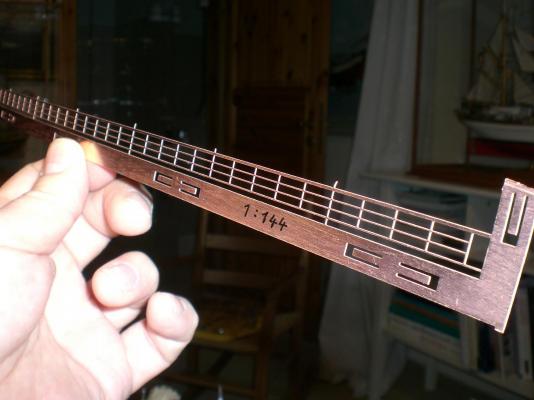
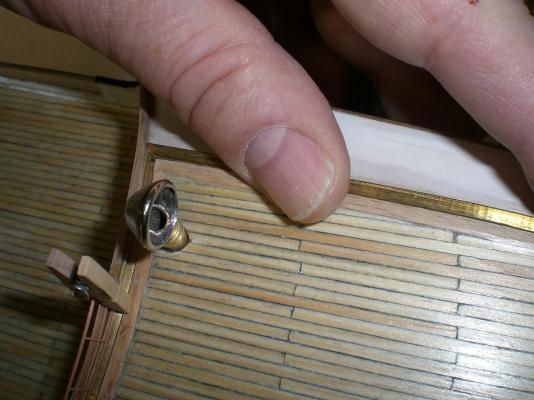
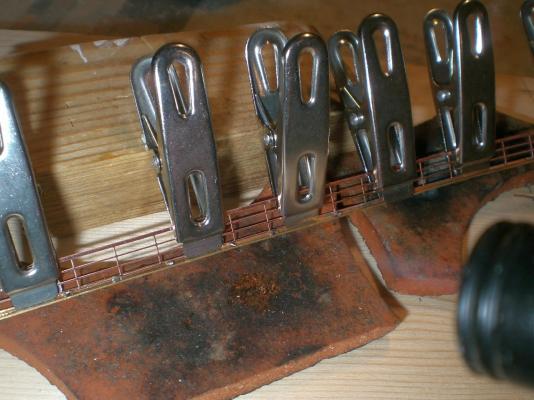
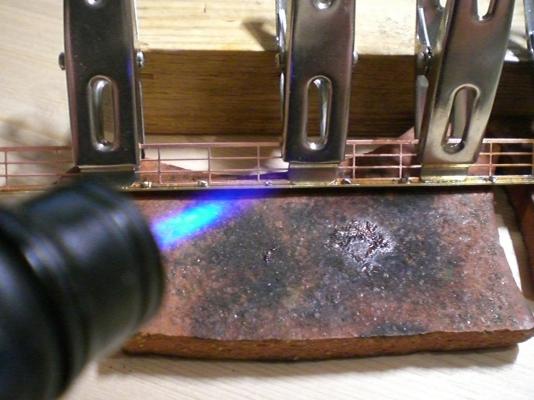
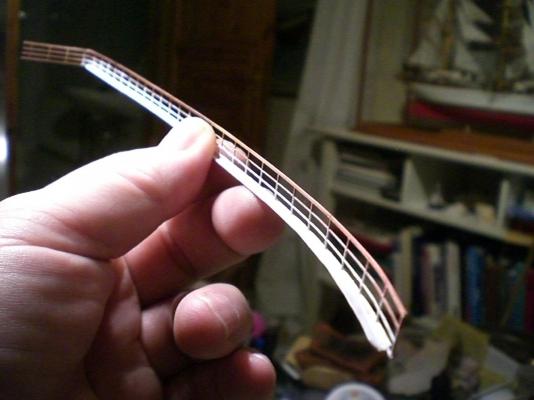
update Build log part 30 today I`m starting with the forecastle railing, 8mm high in scale 1:144. Base for soldering on is a L-shape brass profile, the railing is from 0,3 mm thick photoetched copper, the soldering is done with the small gas tourch, electronic solder and paste-typ flux The brass L-profile is gently bent to follow the rim of the deck planking Nils L-type profile 0,3 mm photoetched copper railing Shaping / bending the L-profile positioning for to solder, little bits of solder every 15 mm appart carefuly handling the heat flow..... soldering done, and primercoat applied the aft side (forecastle) still needs to be dressed trust this shall be a sufficient way of fastening the railing

- 2,625 replies
-
- 28
-
-
- kaiser wilhelm der grosse
- passenger steamer
- (and 1 more)
-
beautiful made hatch / grating coaming Hartmut, Nils
-
Many thanks for your comments Piet and Druxey, Nils
- 2,625 replies
-
- 3
-
-
- kaiser wilhelm der grosse
- passenger steamer
- (and 1 more)
-
Patrick, there are quite a lot of model engines (Revell, etc....) on the web, but all in too large scales. You mentioned once ..."rough guess about 1:200", for your model there seems to be a vacuum for availability model wise. Perhaps there are some resin tank-models with visible engines for kits. It looks like you will need to build your own engines, but that`s challenging and fun as well. Nils