Mirabell61
-
Posts
7,418 -
Joined
-
Last visited
Content Type
Profiles
Forums
Gallery
Events
Everything posted by Mirabell61
-
 A nice Illustration, many thanks Crackers, all people seem to be happy about dad`s b-day event... Nils
- 2,625 replies
-
- 5
-

-
- kaiser wilhelm der grosse
- passenger steamer
- (and 1 more)
-
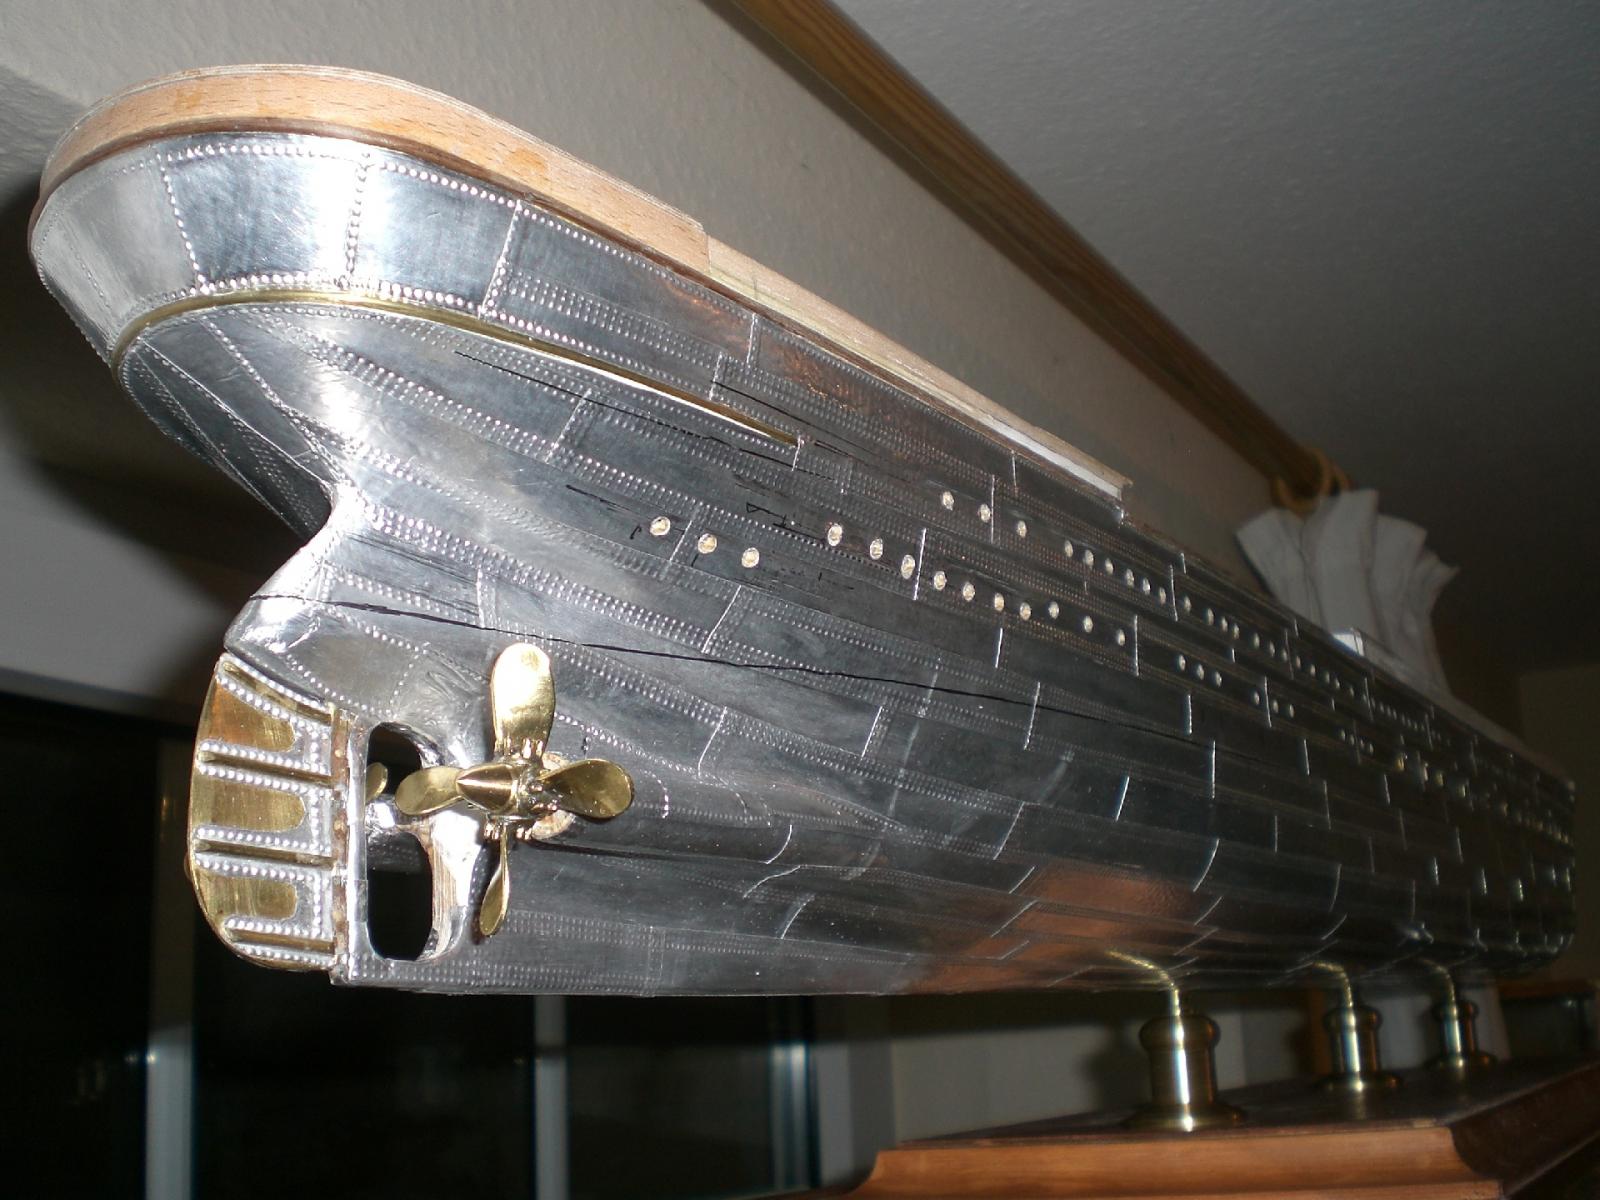
HI David, the hull above the waterline will be in dull black resp. anthrazit (charcoal, dark Grey), including These doors.. Nils
- 2,625 replies
-
- 4
-
-
- kaiser wilhelm der grosse
- passenger steamer
- (and 1 more)
-
phantastic Work Albert, like a visit in the 1797 shipyard. Your framing and joining work is 1A, and the wooden composition (tones) of decks and timber work is super Well done Nils
-
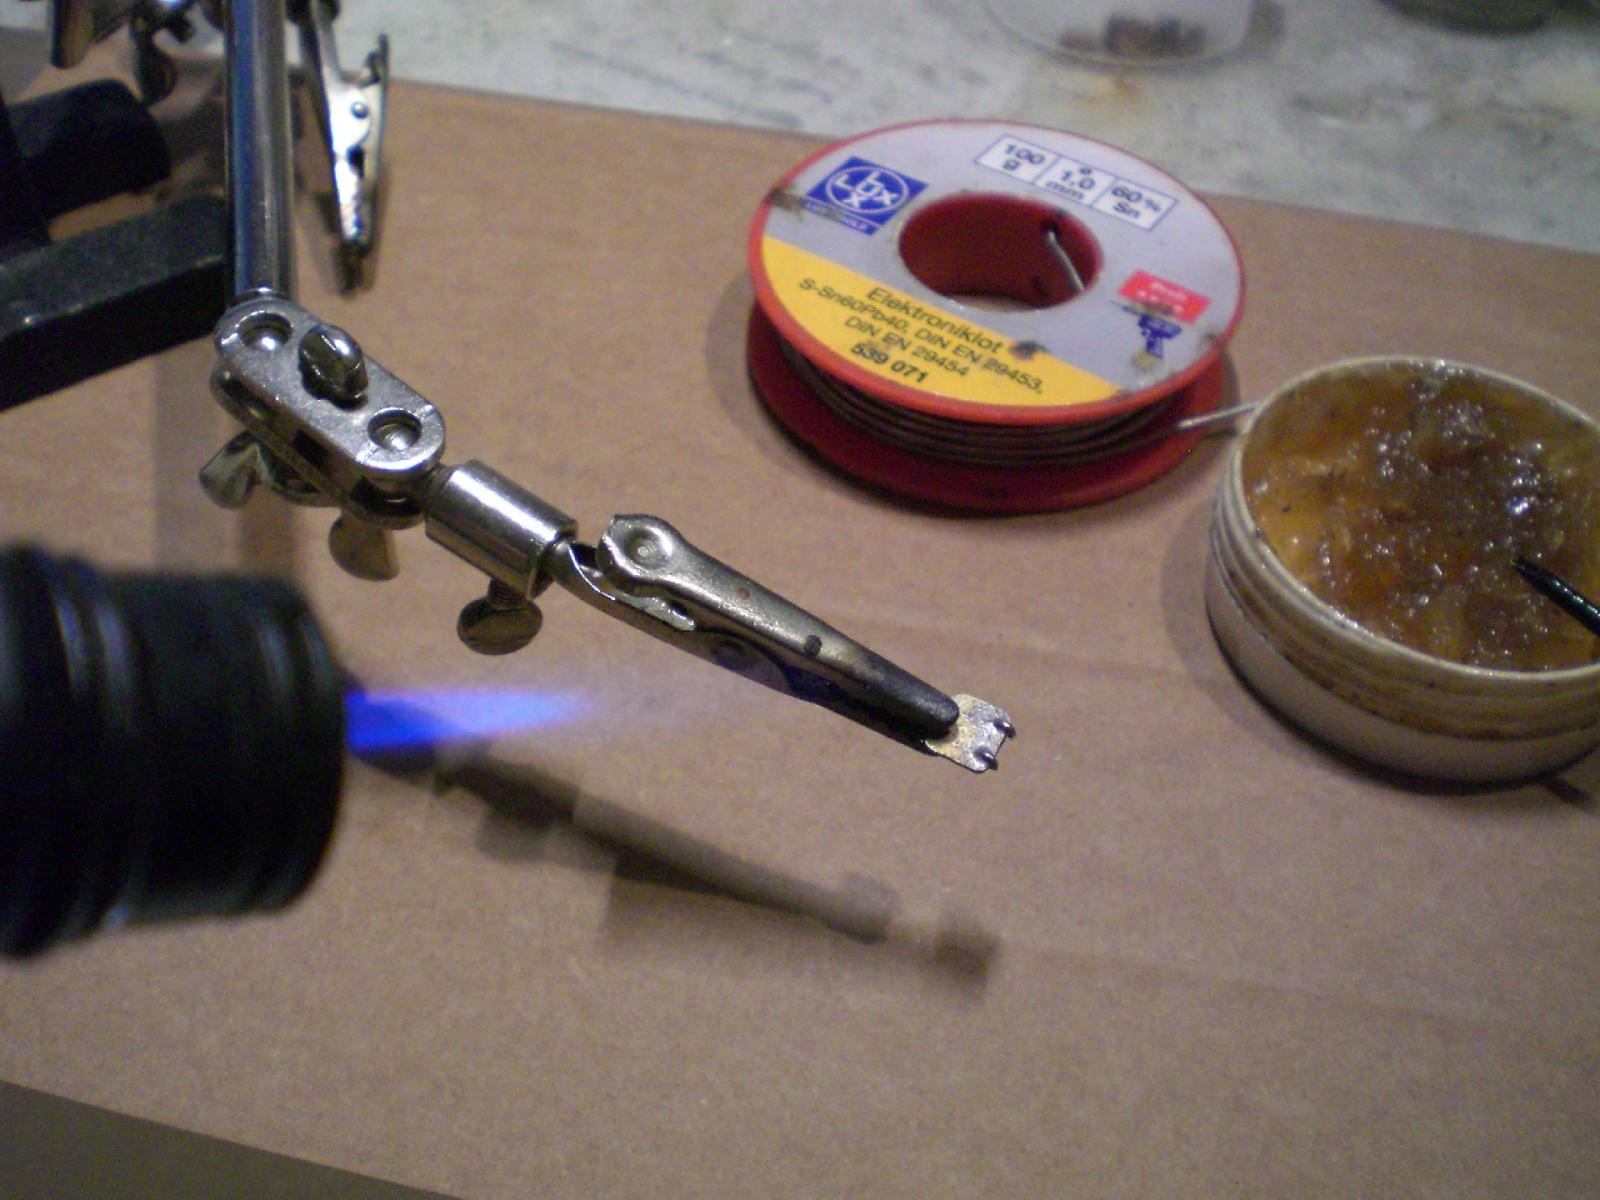
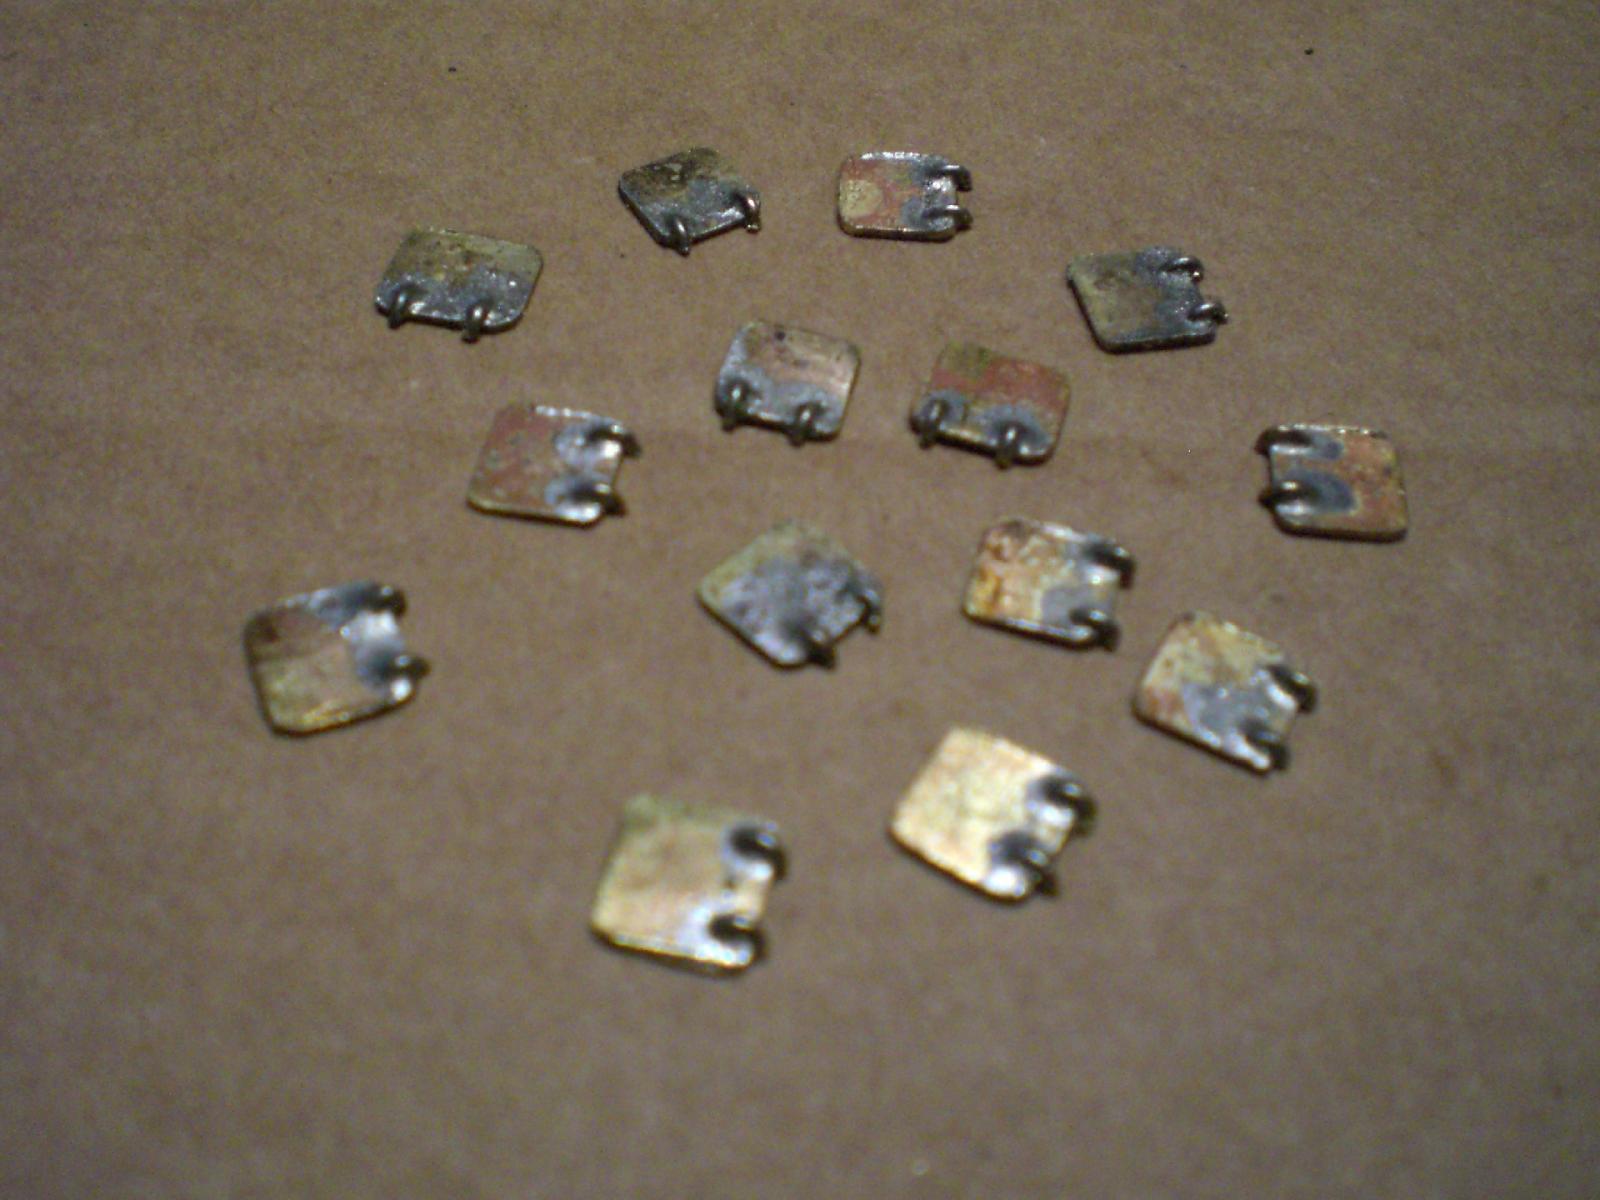
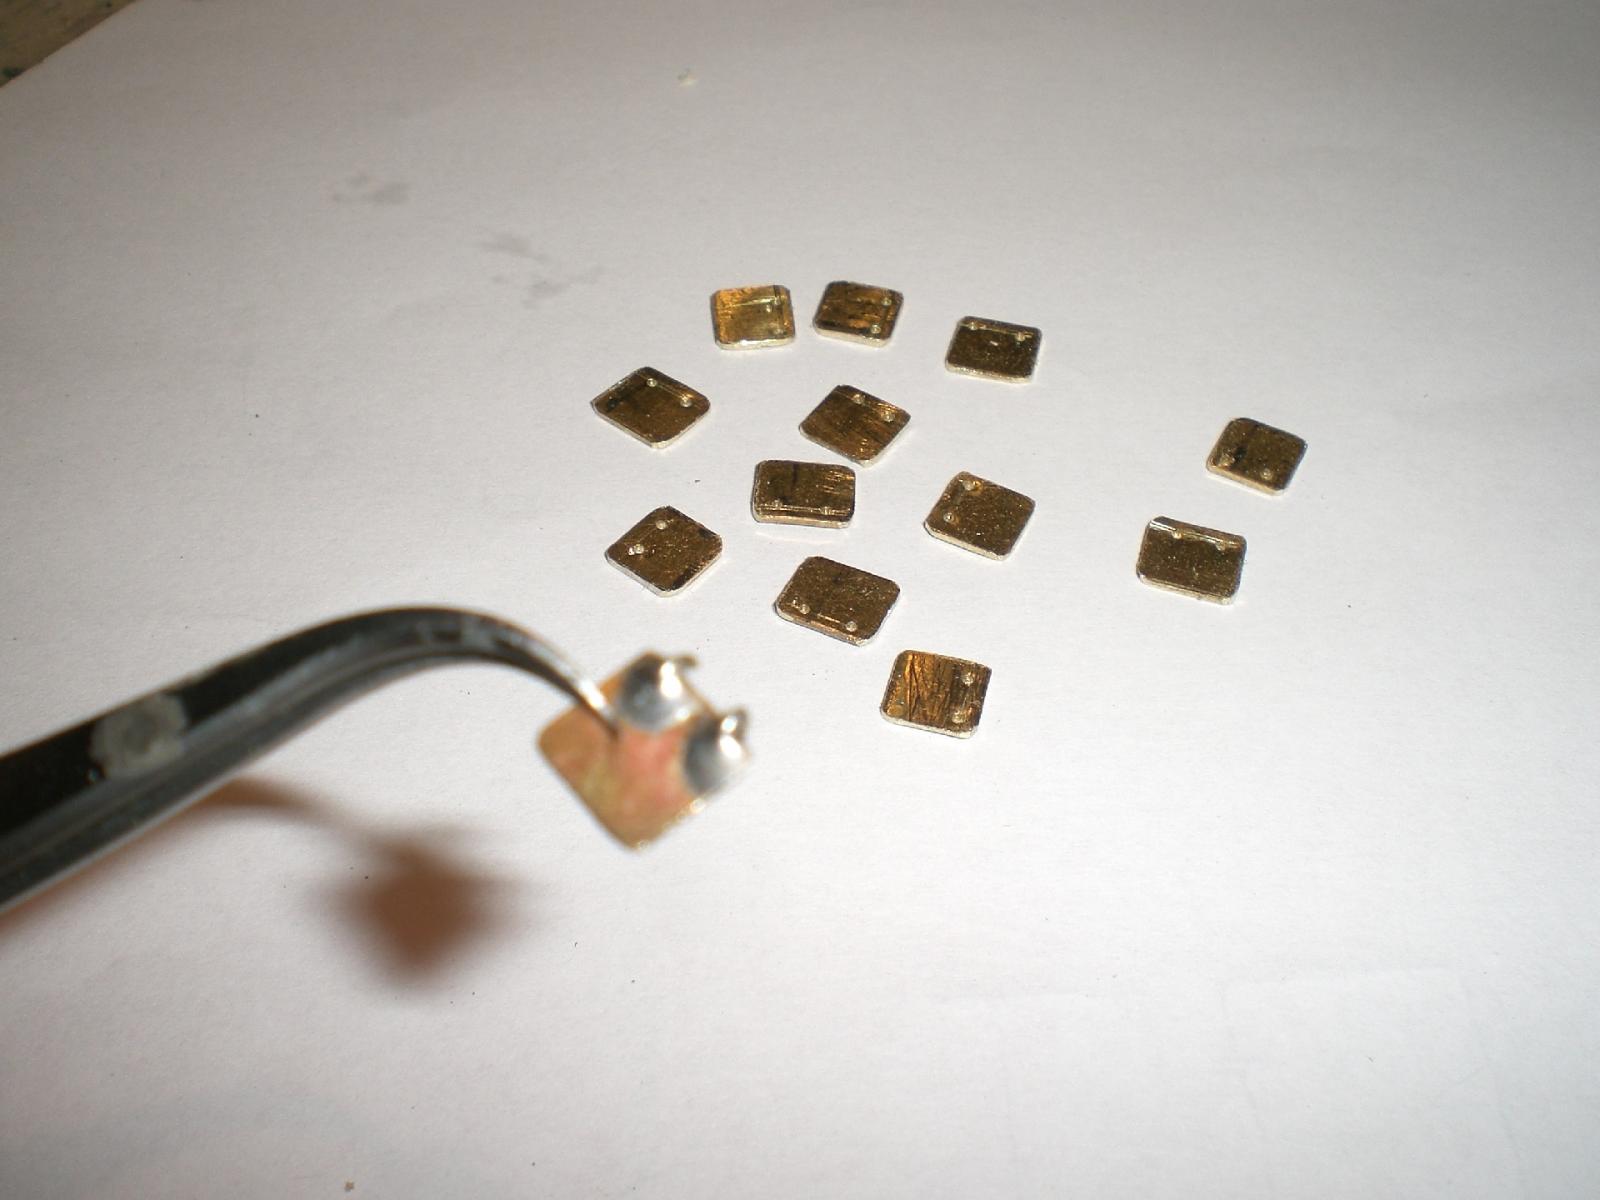
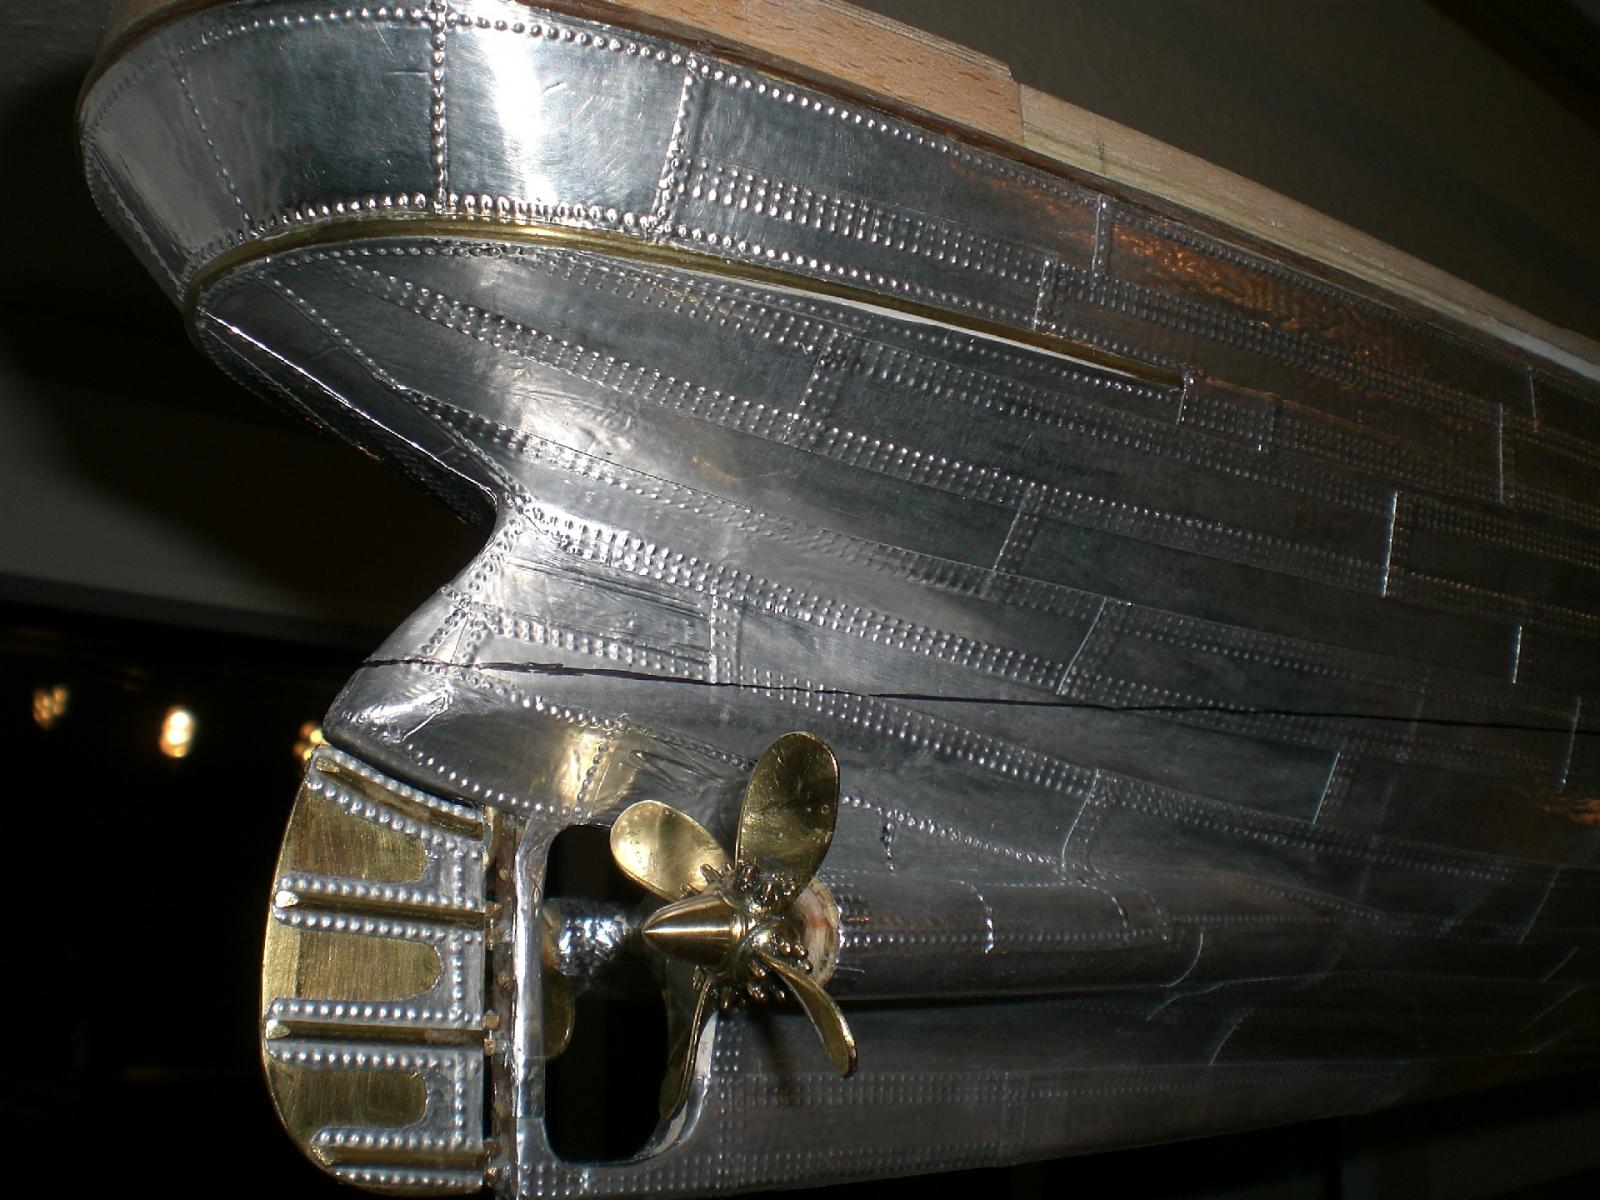
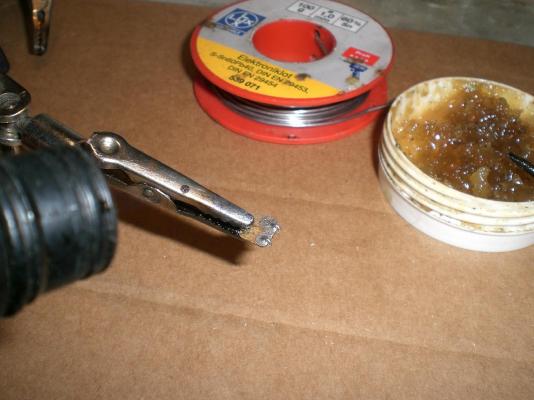
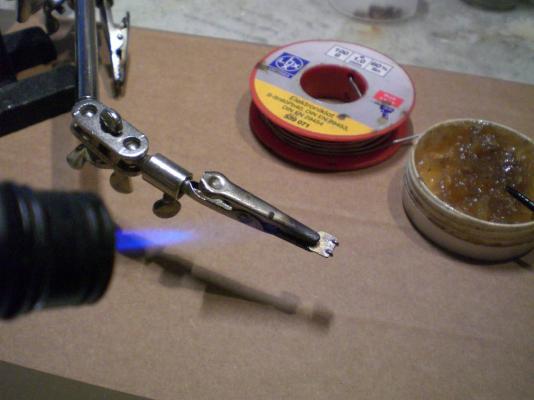
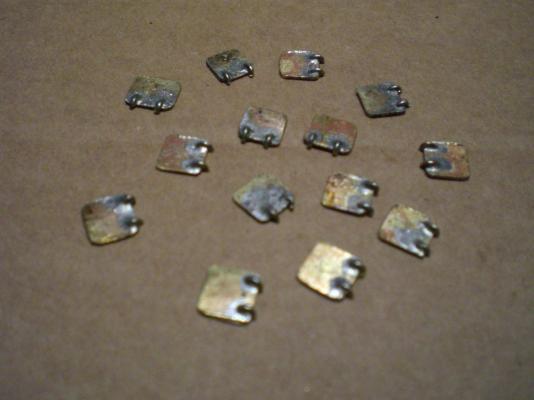
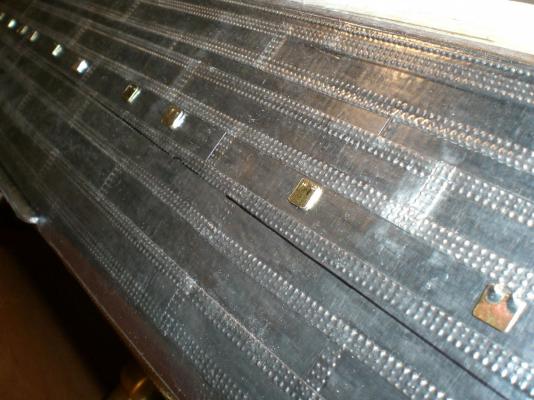
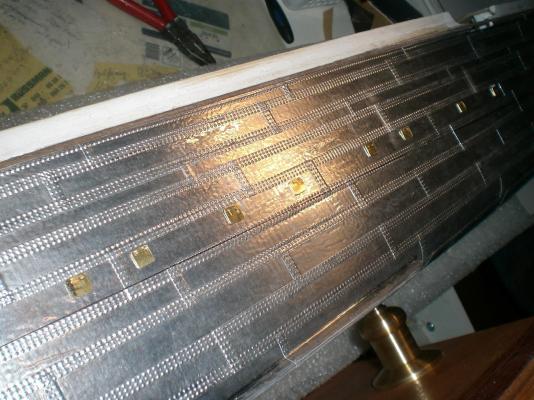
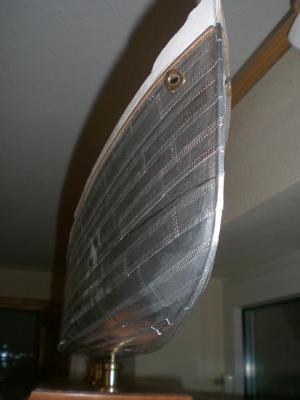
only a small update today... soldering the 14 ea. port side coalport doors, the starboard ones are already mounted... Nils the holding device is of good help when soldering with the flame clean surfaces, the right amount of flux and careful, steady heating up provides a good joint all 14 doors done, a cleaning with aceton shall follow next
- 2,625 replies
-
- 19
-
-
- kaiser wilhelm der grosse
- passenger steamer
- (and 1 more)
-
Thank you very much Bob, for your comments, I`m glad you like it... Nils
- 2,625 replies
-
- 2
-
-
- kaiser wilhelm der grosse
- passenger steamer
- (and 1 more)
-
Beautiful deck ballastrades and staircases Dimitris, guess you are now gathering all your Fitting out parts, deckhouses, etc. in your collection box with ready parts... Nils
-
Thank you very much Bob, Dimitris and Dan, For appreciations and comments as well as all the "likes"... Bob, thanks Bob, there are some mis-alignment borings, that moved out a bit, which were obviously not able to be prevented whilst drilling (except with a not existing jig tool). Hopefully I`ll do better on the other hull side Dimitris, I also used RB portholes on my Pamir and Gorch Fock, a good source choise. They shall look fine on your AV Dan, with Jan`s help (identifying one of the appropriate Frames, showing the way of opening for the coalports) I could put the hinges on the top side. Yes, the "hinges" are soft soldered, and then glued on to the hull skin Nils
- 2,625 replies
-
- 5
-
-
- kaiser wilhelm der grosse
- passenger steamer
- (and 1 more)
-
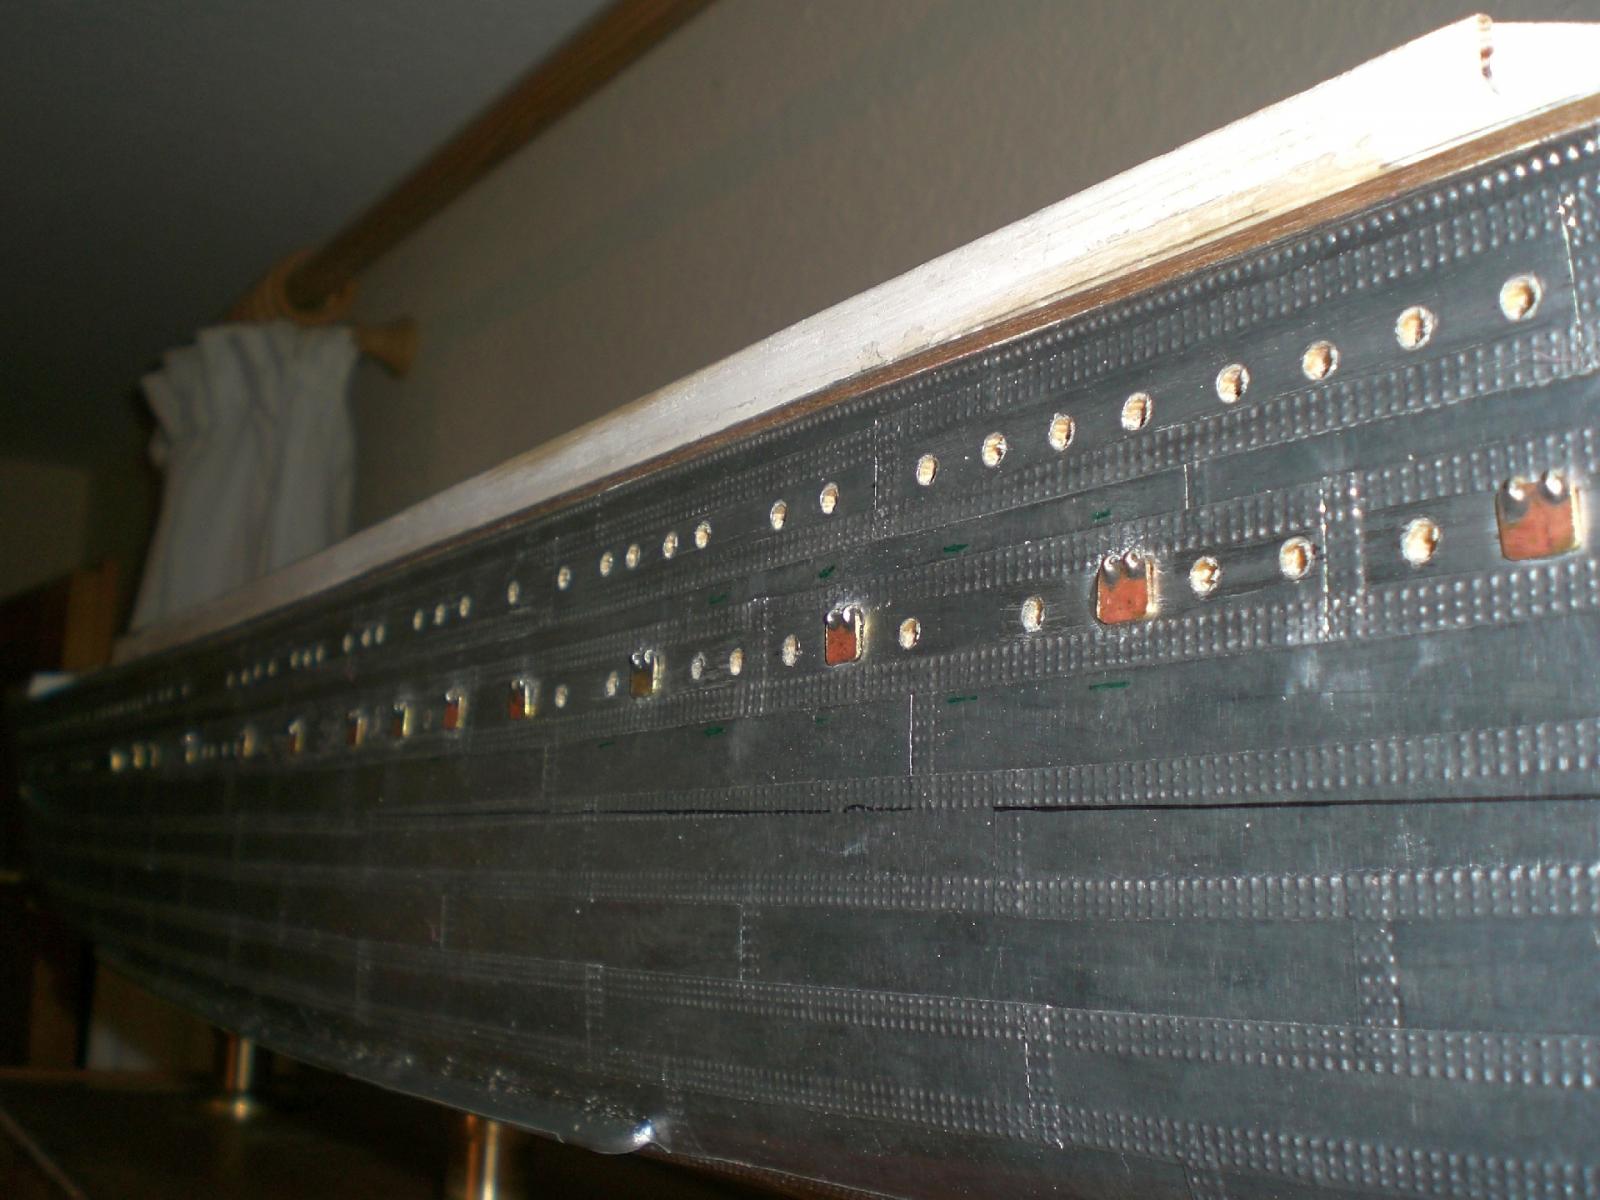
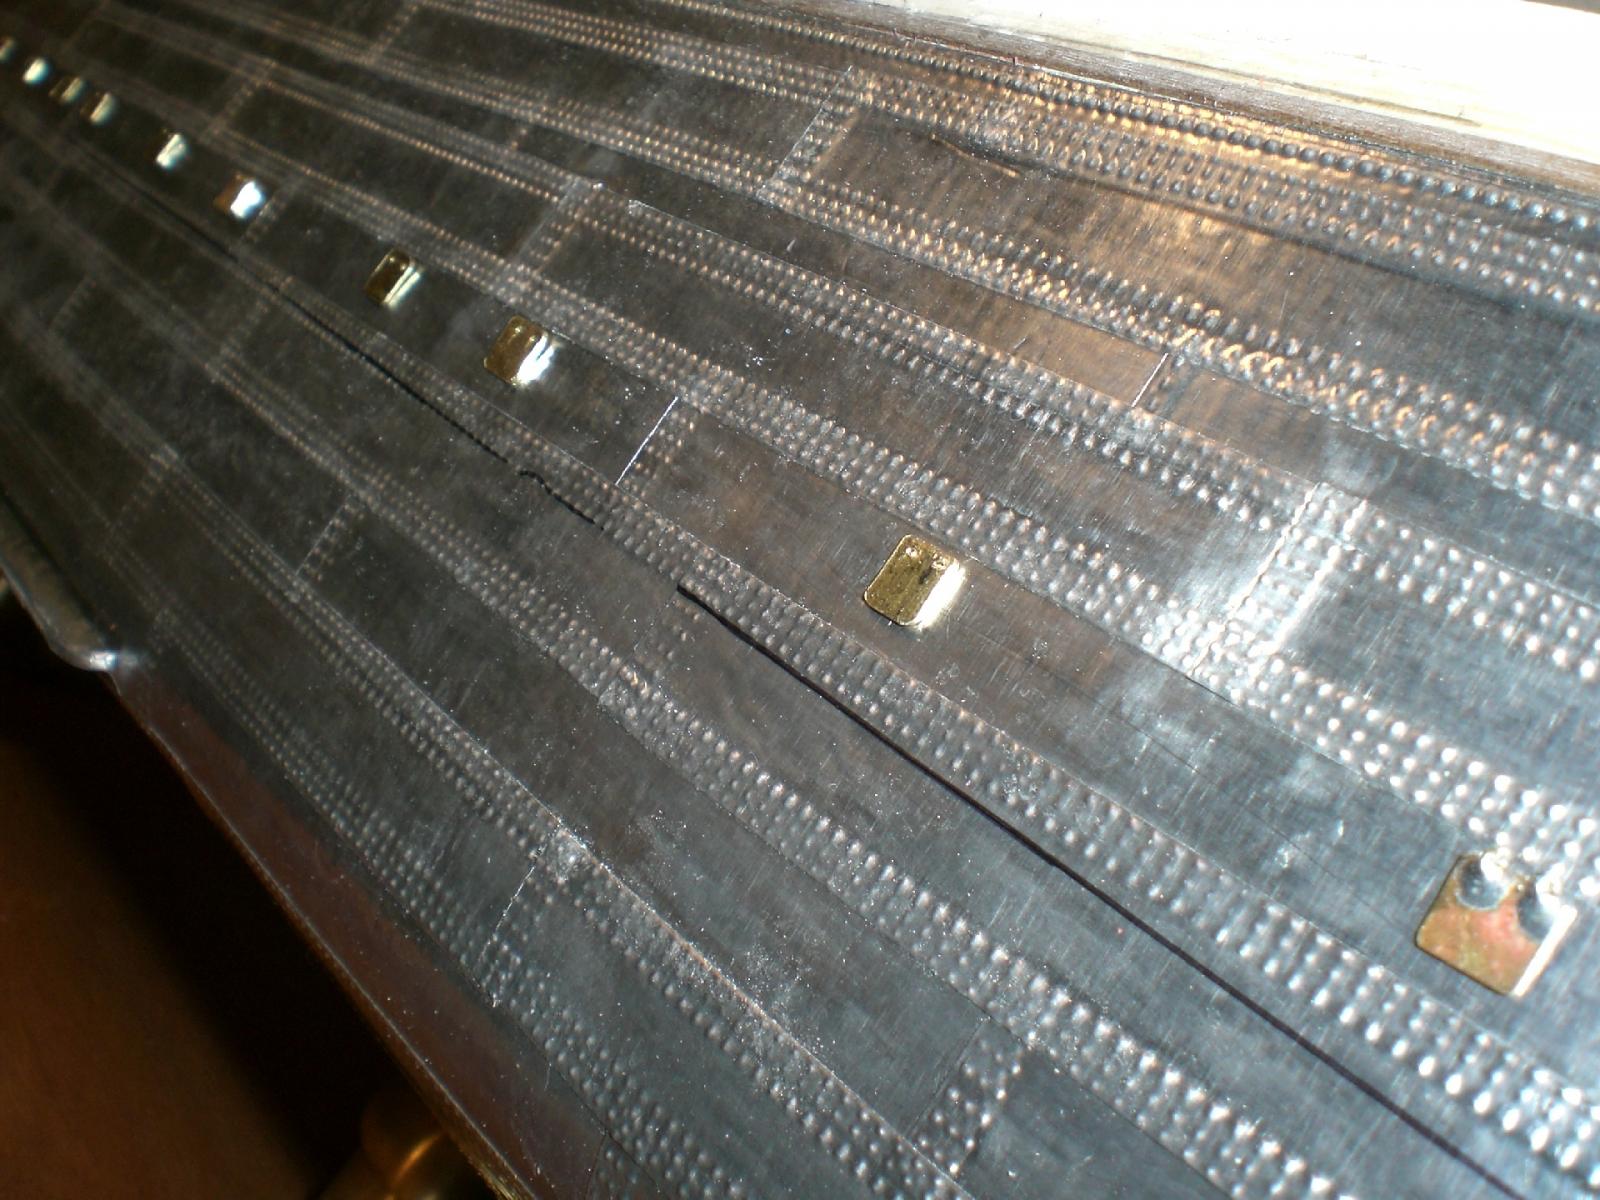
Hello Paul, I just drilled the portholes (not all yet) for the KWdG, and think now I know what you meant with ".. the worst nightmare for us modelers...", and why you recommended to make and use a jig tool for doing so. Although I was utmost careful with the drilling ( no Jig used ) there were some that fell a little bit out of the alignment. For the first upper two rows I will try to mount "eyebrows", also here your comment of the last chance to get the optic a little better are still well in my mind As I`m using the porthole inserts without flanges on the outer hull skin, I wo`nt be able to file the holes a little oval in the right direction, in that case there could have been a covering of the "oval hole" by the flange to a certain degree Nils it is important to cut a clean hole through the metal plating foil before the wooden planking is carefully drilled through. it gets tricky if the drill partialy hits a frame or a stringer inside the hull. This must be avoided by check before the hole-positions are marked for the alignment at bow and stern there is a bit of vertical offset acc to the drawing and the museum model shown and built by others earlier in this log there are 14 coalports on each side, in the largest coal bunker areas there will be no portholes on the lower porthole level. The upper side-portholes just below the promenade deck are neighther plated nor drilled yet, because the deck must be put on first.


- 2,625 replies
-
- 33
-
-
- kaiser wilhelm der grosse
- passenger steamer
- (and 1 more)
-
Cutter Cheerful 1806 by rafine - FINISHED
Mirabell61 replied to rafine's topic in - Build logs for subjects built 1801 - 1850
beautiful pictures of very beautifil work Bob, it is a treat for the eyes to look at... Nils- 525 replies
-
- 4
-
-
- cheerful
- Syren Ship Model Company
- (and 1 more)
-
thank you very much Martin, Nils
- 2,625 replies
-
- 1
-
-
- kaiser wilhelm der grosse
- passenger steamer
- (and 1 more)
-
Thank you all so much... Dirk - Steve - David - Denis - Daniel - Christian - Bob - Marc , for your Kind birthday greetings yesterday and for your nice appreciations and comments best regards, Nils
- 2,625 replies
-
- 2
-
-
- kaiser wilhelm der grosse
- passenger steamer
- (and 1 more)
-
Dan, shaping arranging and mounting of those rails and railings are fantastic (wow in that scale !) very well done.. Nils
- 108 replies
-
- 5
-
-
- andrea doria
- ocean liner
- (and 1 more)
-
Hi Daniel, Thanks for visiting the KWdG log, and many thanks for your kind words... Nils
- 2,625 replies
-
- 3
-
-
- kaiser wilhelm der grosse
- passenger steamer
- (and 1 more)
-
Dimitris and Patrick, thanks very much for your birthday greetings, much appreciated... Nils
- 2,625 replies
-
- 3
-
-
- kaiser wilhelm der grosse
- passenger steamer
- (and 1 more)
-
super looking boats Christian Nils
-
Thanks Bill, would be nice, I wish you luck in tracking the model you built, even if it was sold....after 18 years, not an easy Task Nils
- 2,625 replies
-
- 5
-
-
- kaiser wilhelm der grosse
- passenger steamer
- (and 1 more)
-
lovely Progress Boyd, also the Launch Looks very nice.. Nils
-
Thank you Pete, I`m happy that you like the build as it is to date... Nils
- 2,625 replies
-
- 3
-
-
- kaiser wilhelm der grosse
- passenger steamer
- (and 1 more)
-
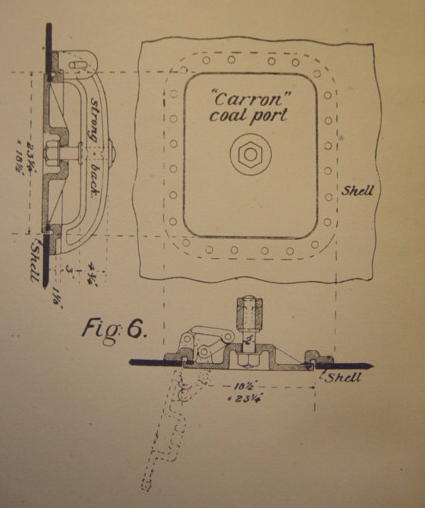
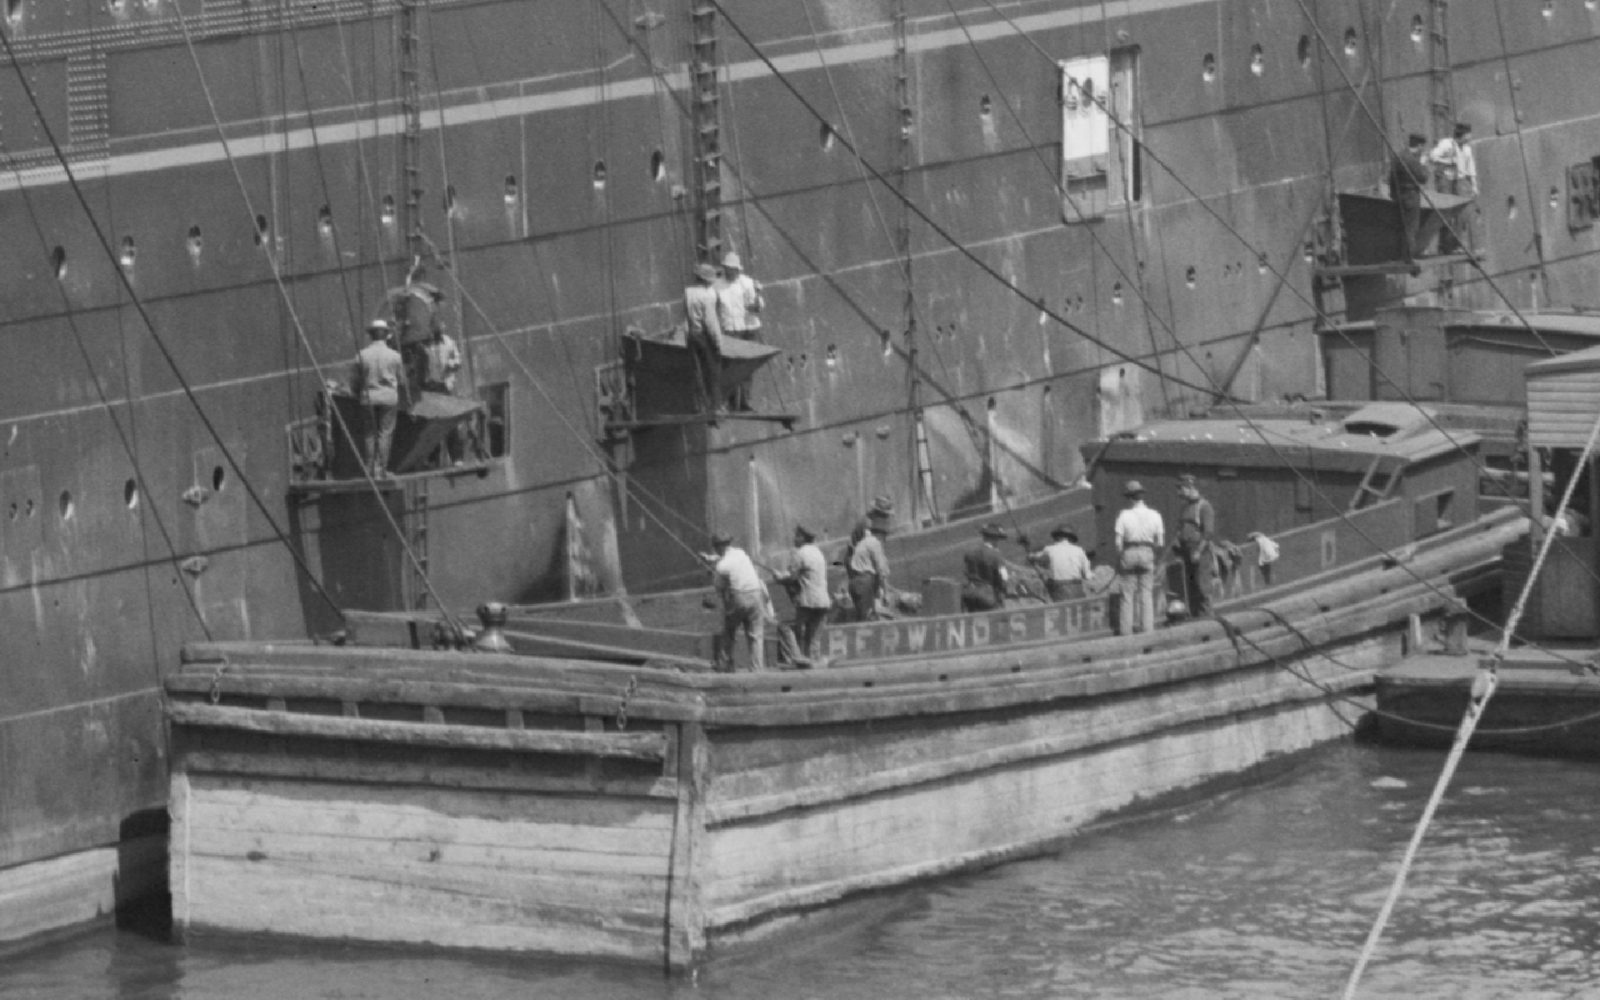
Many thanks to Bill, Johann, Crackers and Jan, and all who expressed their "likes" by hitting the appr. button... Bill, that is very interesting of the 53" Titanic, must be scale 1:200, do you have any pics of the building Phase and the completed model? How was your experience with the French plans set Johann, thanks for your nice words, much appreciated Crackers, nice comments, thats a real smooth treat for the toungue I guess, glad you follow the build log... Jan, thanks for your Input. Those doors have a real good kinematic Lever System in order to lock and seal tight against rough seas. Hopefully one of our fellow builders may hold a good pic of the KWdG showing the bunker doors, and perhaps even taken from the waterside when bunkering at the pier Nils
- 2,625 replies
-
- 5
-
-
- kaiser wilhelm der grosse
- passenger steamer
- (and 1 more)
-
Hi Bill, amazing how well you thought about the hinge positions, you are reflecting exactly my own thoughts this morning, The only reason for "hinges on top" was for the pattern shown on the card KWdG in scale 1:250. which I sometimes use for checking dimensions... I also asked myself if it were not better to place the hinges at the bottom. I remembered the pic of bunkering at Hoboken, where the the liner seems to have the hatch covers in two doorhalves that each swing open to 180 °, this allowing the coal funnels to be set in quite easily, in case they were not built in here hinges on top, but it may be wrong, who knows ? Nils
- 2,625 replies
-
- 13
-
-
- kaiser wilhelm der grosse
- passenger steamer
- (and 1 more)
-
Thanks very much Nigel Nils
- 2,625 replies
-
- 5
-
-
- kaiser wilhelm der grosse
- passenger steamer
- (and 1 more)
-
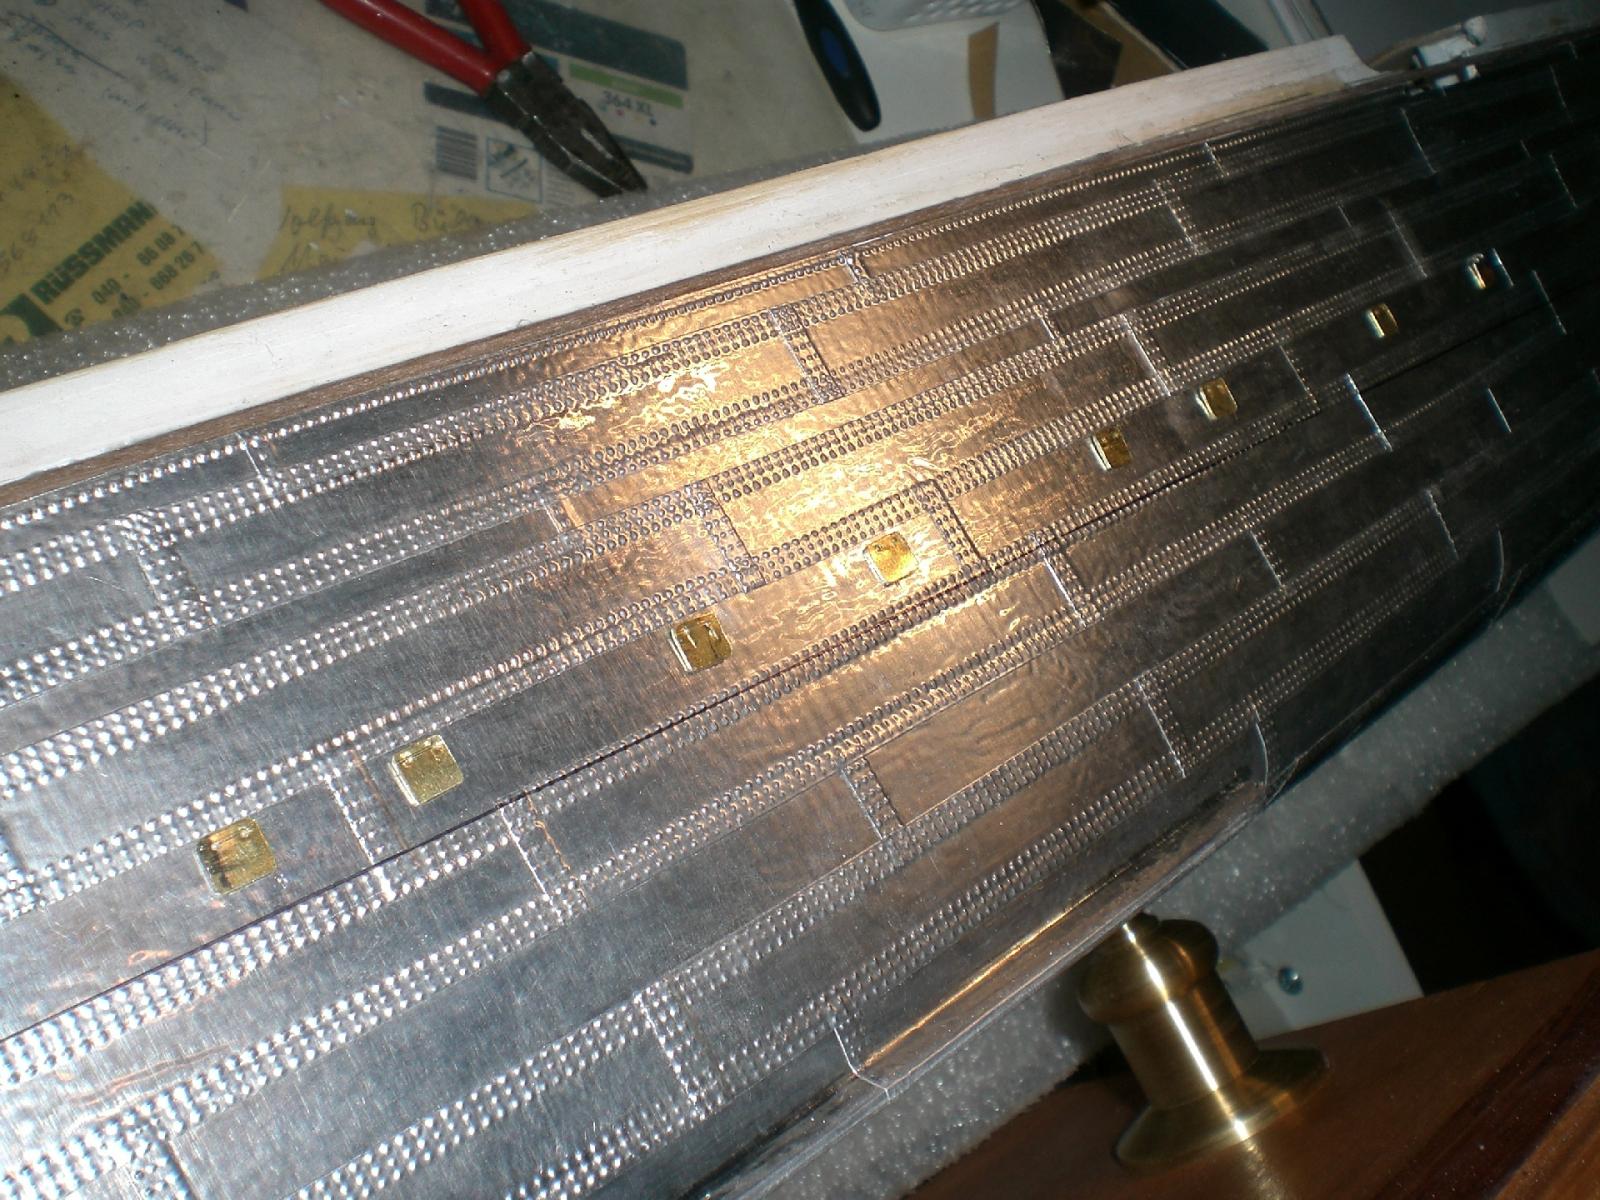
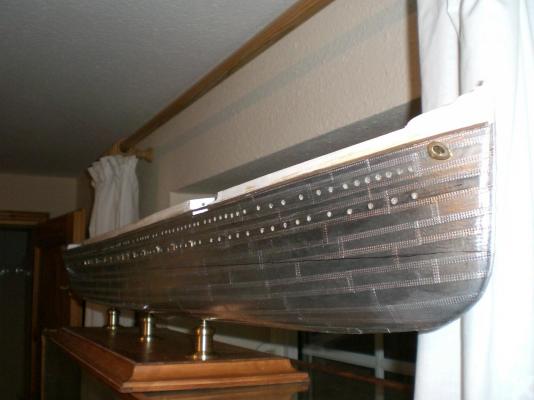
Little update... These little hatch doors will cover the openings for bunkering coal, ( 13 on each side) where the slide-chutes are placed ..... Hull is now covered with plating, and the waterline is marked, (for applying the masking tape, when painting), with an permanent ink marker Nils this, borrowed from the web, shows a dutch liner being bunkered with coal at NY Hoboken piers the bunker hatches will bear the hinges on the top sides The black marking is the waterline doors not permanently mounted yet, have to coordinate the correct positions together with the portholes on that level. Just noticed, it must be one level (belt) higher, and not so near to the waterline


- 2,625 replies
-
- 31
-
-
- kaiser wilhelm der grosse
- passenger steamer
- (and 1 more)
-
Beautiful build NIgel, I like very much that you avoided painting the Wood, it Looks so good with the natural Wood... Nils
- 270 replies
-
- 5
-
-
- red dragon
- artesania latina
- (and 1 more)