Mirabell61
-
Posts
7,418 -
Joined
-
Last visited
Content Type
Profiles
Forums
Gallery
Events
Everything posted by Mirabell61
-
 thanks very much Patrick, Nils
- 2,625 replies
-
- 1
-

-
- kaiser wilhelm der grosse
- passenger steamer
- (and 1 more)
-
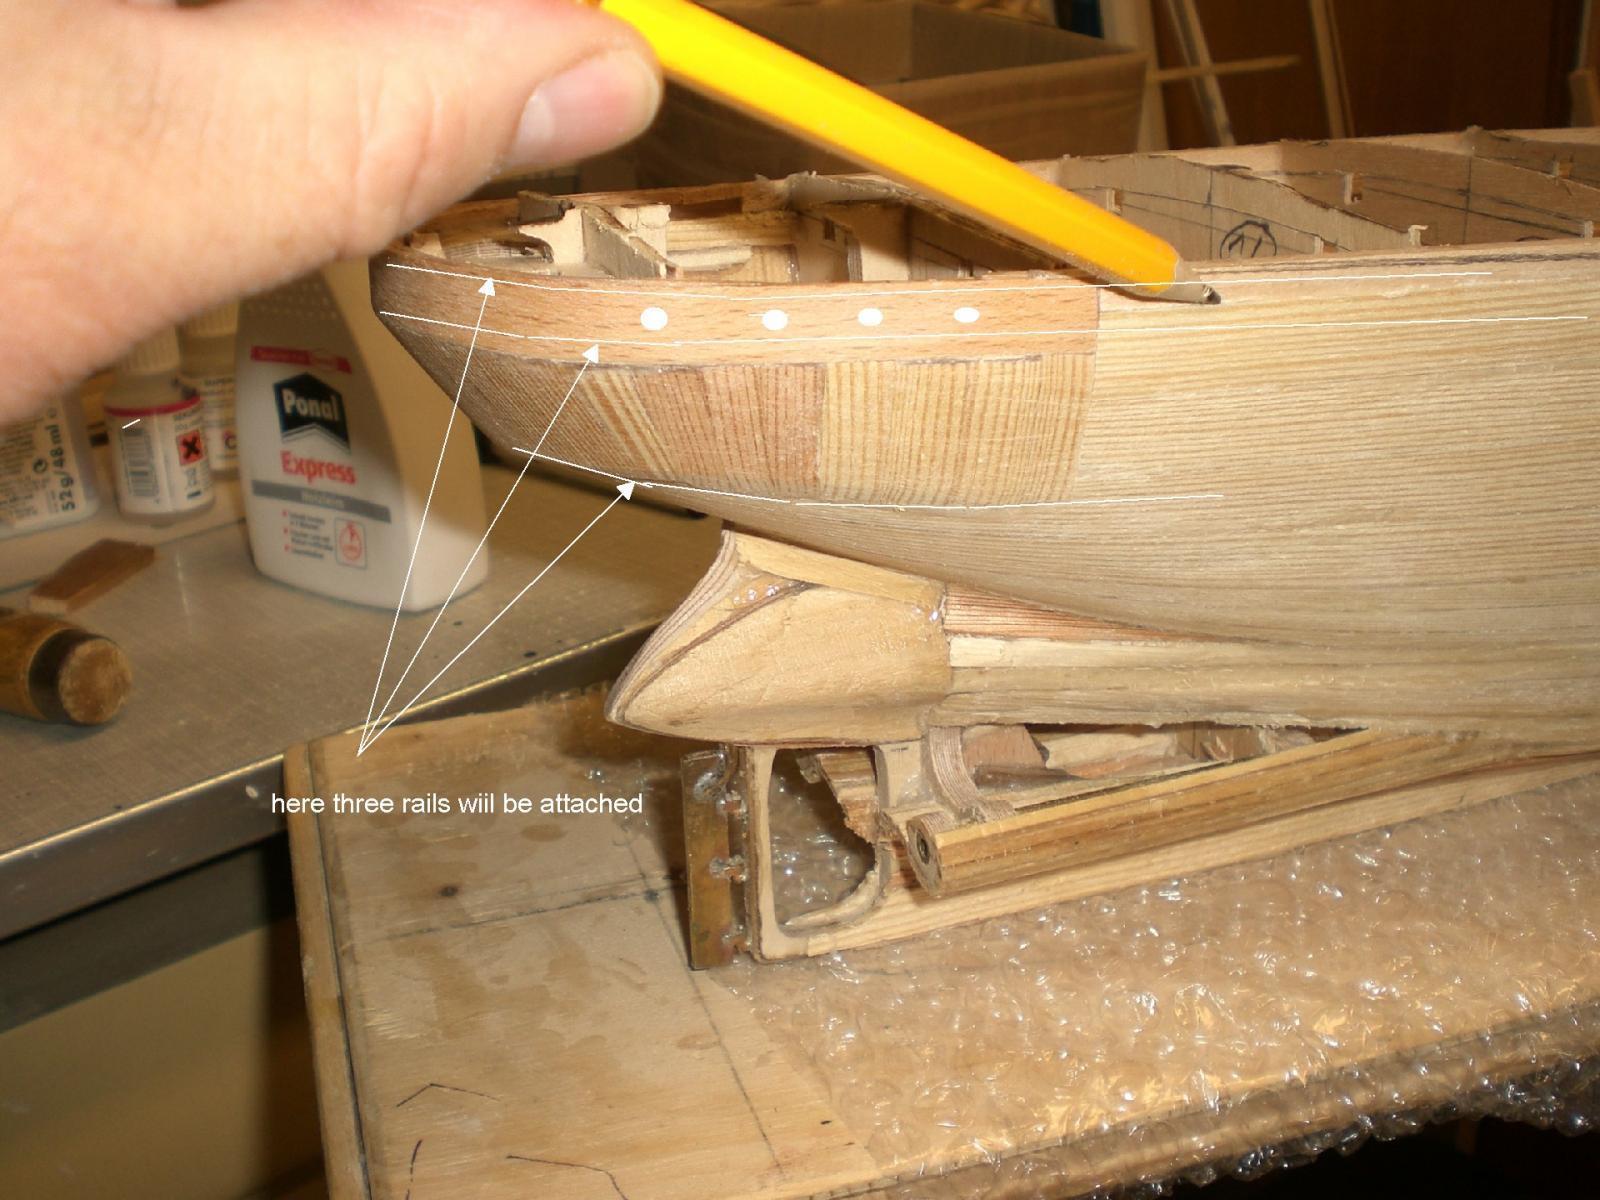
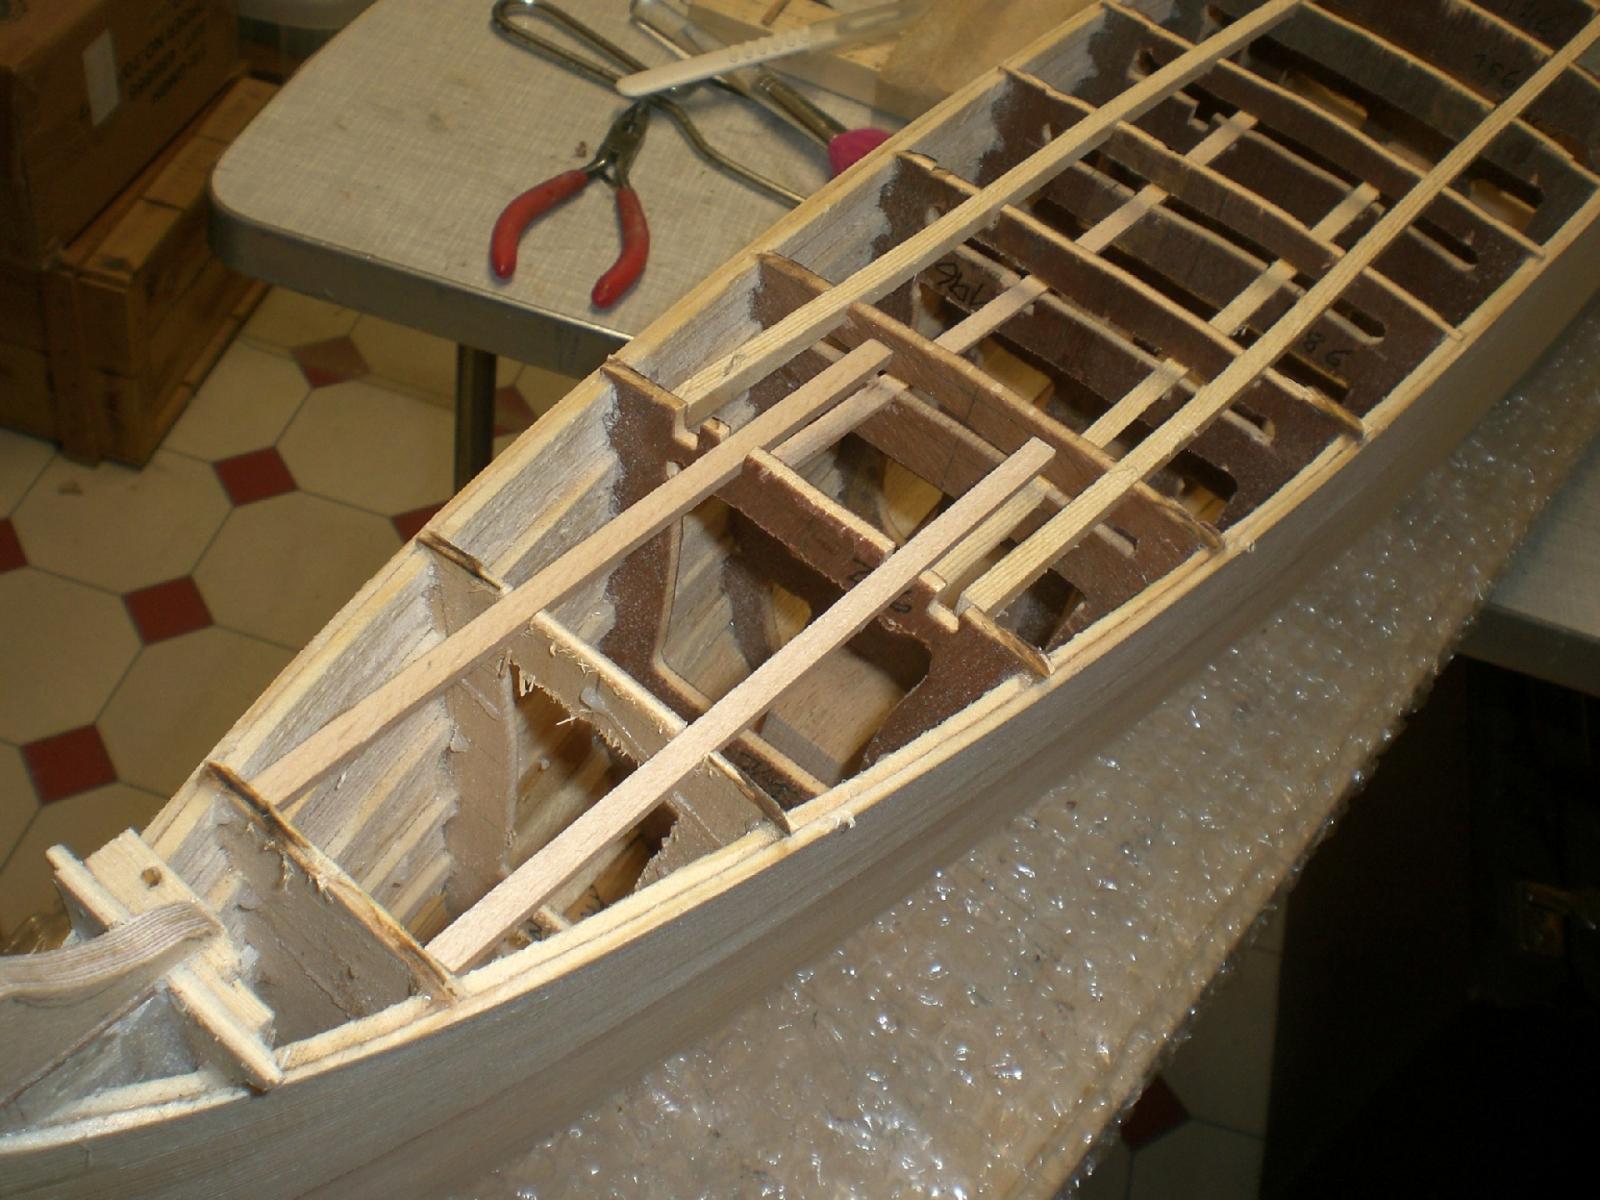
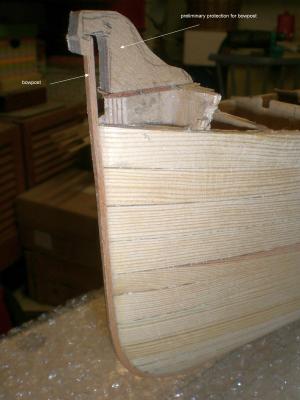
Build log part 11 some progress on building the hull.... Nils this is no convertion to a viking longboat, but temporary protection to the prolonged bowpost until the upper bow bulwark is ready for attaching my wife asks me this morning, if I`m sure the ship is not much too narrow... All the overstanding frame hights have been cut off between the second and the third rail (stern) I need enough place for attaching the decoration and the name, and homeport. For providing adequate space for the portholes around the poop and perhaps some "eyebrows" over the portholes, I had to increase the hight of this (round the stern) plank accordingly as well as a good transition of the sheer in foreward direction these are preliminary deck-stringers, for dry fit. There will be a pit right down to the lower deck, just behind the later forecastle bulwark


- 2,625 replies
-
- 25
-
-
- kaiser wilhelm der grosse
- passenger steamer
- (and 1 more)
-
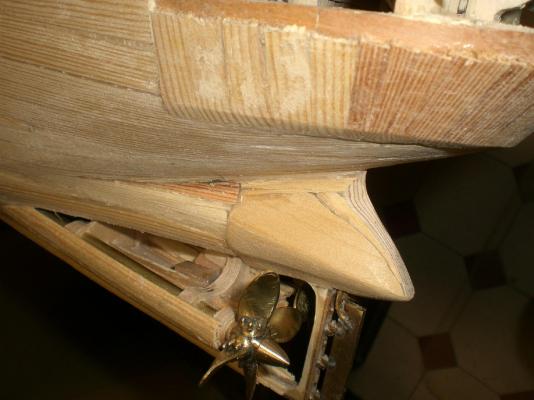
Many thanks Mark, appreciate your tip for portholes Simulation, that is actualy the solution I`m going after by using hollow rivets DIN 7340 Form "B" I also found an in diameter suitable solid Nylon cable (like used for a rotating grass cutter) to slice / cut the glassing inlays from. Hope ist works well.... Nils
- 2,625 replies
-
- 5
-
-
- kaiser wilhelm der grosse
- passenger steamer
- (and 1 more)
-
Cutter Cheerful 1806 by rafine - FINISHED
Mirabell61 replied to rafine's topic in - Build logs for subjects built 1801 - 1850
Bob, your build sequences look clear, straight foreward and very well executed. You`ve got a real "gem" of a cutter on your slipway... Would it be worth a thought to do the hull below the wales in lapstrake planking ? (like Lee had Chosen for his cutter "Alert" ) Nils- 525 replies
-
- 3
-
-
- cheerful
- Syren Ship Model Company
- (and 1 more)
-
beautiful build Clarence, those metal paddle wheels look great Nils
-
Hi Rod, thats a fine kit, especially those metal parts are eyecatchers,..... In your post #1, pic 6 it is showing etched, rivet-plates, is this including plates for the hull as well ? Your build Looks very well done to date... Nils
-
Bob, how about fliping a coin or tossing the dice...... the winner chooses the display Location for the sloop....for a years time, and then the game is repeated. For sure you`ll have your Dragon ready by then anyhow Nils
-
Hey Crackers !, I`m very much flattered with such fine comment of yours, stay tuned and enjoy.... Nils
- 2,625 replies
-
- 1
-
-
- kaiser wilhelm der grosse
- passenger steamer
- (and 1 more)
-
Congrats Bob to completion of your wonderful Sloop, guess you already looked out the adequate display place for this Beauty in your home Nils
-
Thanks very much Denis, I`m just searching the web / Ebay in order to find suitable hollow rivets from which I intend to make the appr. 400 brass hull portholes from. Think I`ve just found something this afternoon, We`ll see.... Nils
- 2,625 replies
-
- 2
-
-
- kaiser wilhelm der grosse
- passenger steamer
- (and 1 more)
-
Hi Peter, the scuppers look nice, flush with the wales, how did you blend out the (tubes ?) on the deckside ? Nils
-
Jason, beautiful rigging at foretop and fore Yards, well done ! Nils
- 800 replies
-
- 1
-
-
- snake
- caldercraft
- (and 1 more)
-
Thank you very much Martin and Grant, Martin, tho òl deckhand is enjoying every day of his pensioneer`s life Grant, thanks Grant, that`s a good Feeling to hold the hull free in Hand turn it around, and observe it from all sides.... it`s so great knowing that fellow modelers from all corners of the world find interest in what I am doing. it gives me very much motivation. Thanks so much for your appreciations.... Nils
- 2,625 replies
-
- 5
-
-
- kaiser wilhelm der grosse
- passenger steamer
- (and 1 more)
-
Very nice looking lines on that "Fair American Jeff, you did a good planking Job, and the trick of the double dense Frame Setting within the Skin outcut is a very smart idea, well done ! Nils
-
Thank you so much for your Kind words Pete - Bob - John - Lee- and all the "likes".... Pete, It all requires the time it takes, and many ideas for the continuing sequences come as I do the progress Bob, thanks for your appreciation, I`m glad you like it. I Need quite some space in hight for fitting on those "golden" ornaments to the round Stern transom, and for putting adequate portholes just under the aft deck-Counter, so I might need to increase the deckbeam hight on the aft-ship a bit John, trust the hull will be the less difficult part of this build. For all the superstructure I have`nt made any scetches or plans yet, will probably do them to suit the build sequences as they come Lee, Thanks for your words Lee, I think it may be wise to connect the upper decklines to the sides first, in order to get a better looking transition for the plating Job and when integrating the rails..... Nils
- 2,625 replies
-
- 1
-
-
- kaiser wilhelm der grosse
- passenger steamer
- (and 1 more)
-
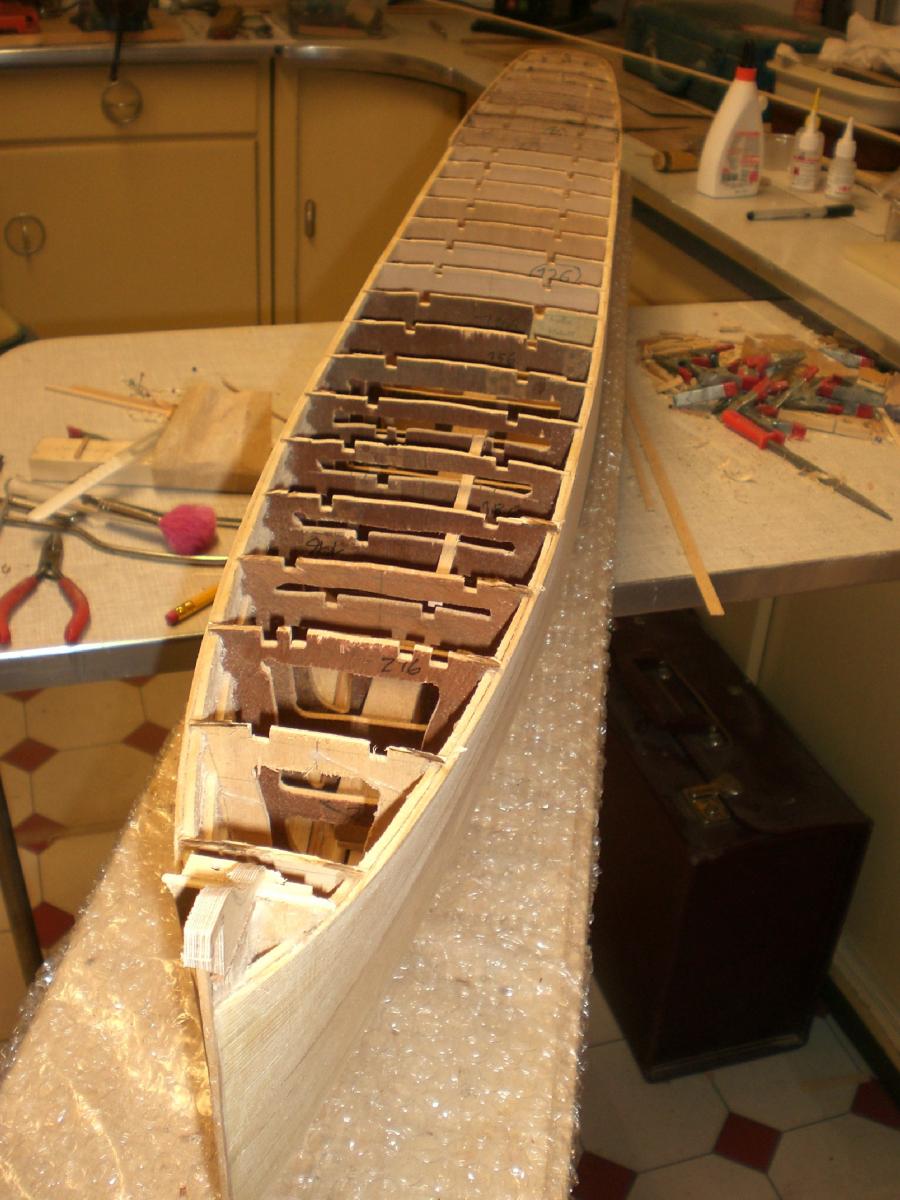
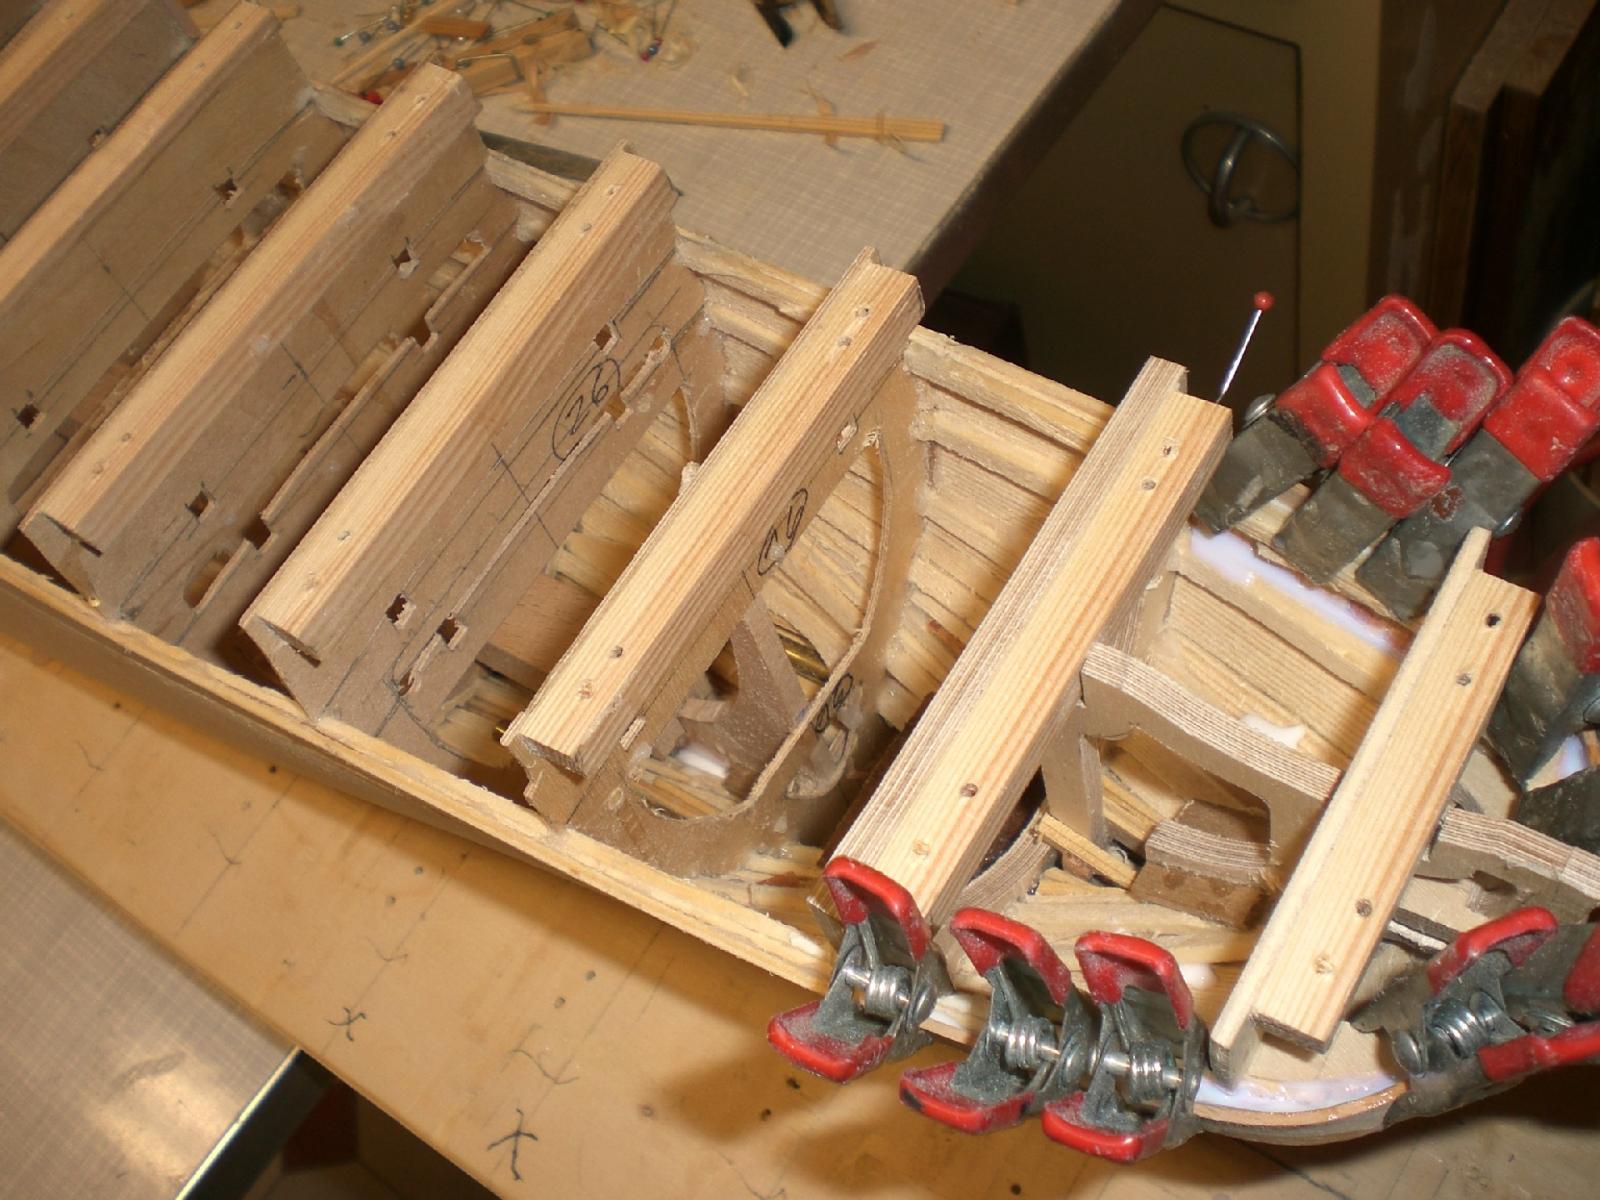
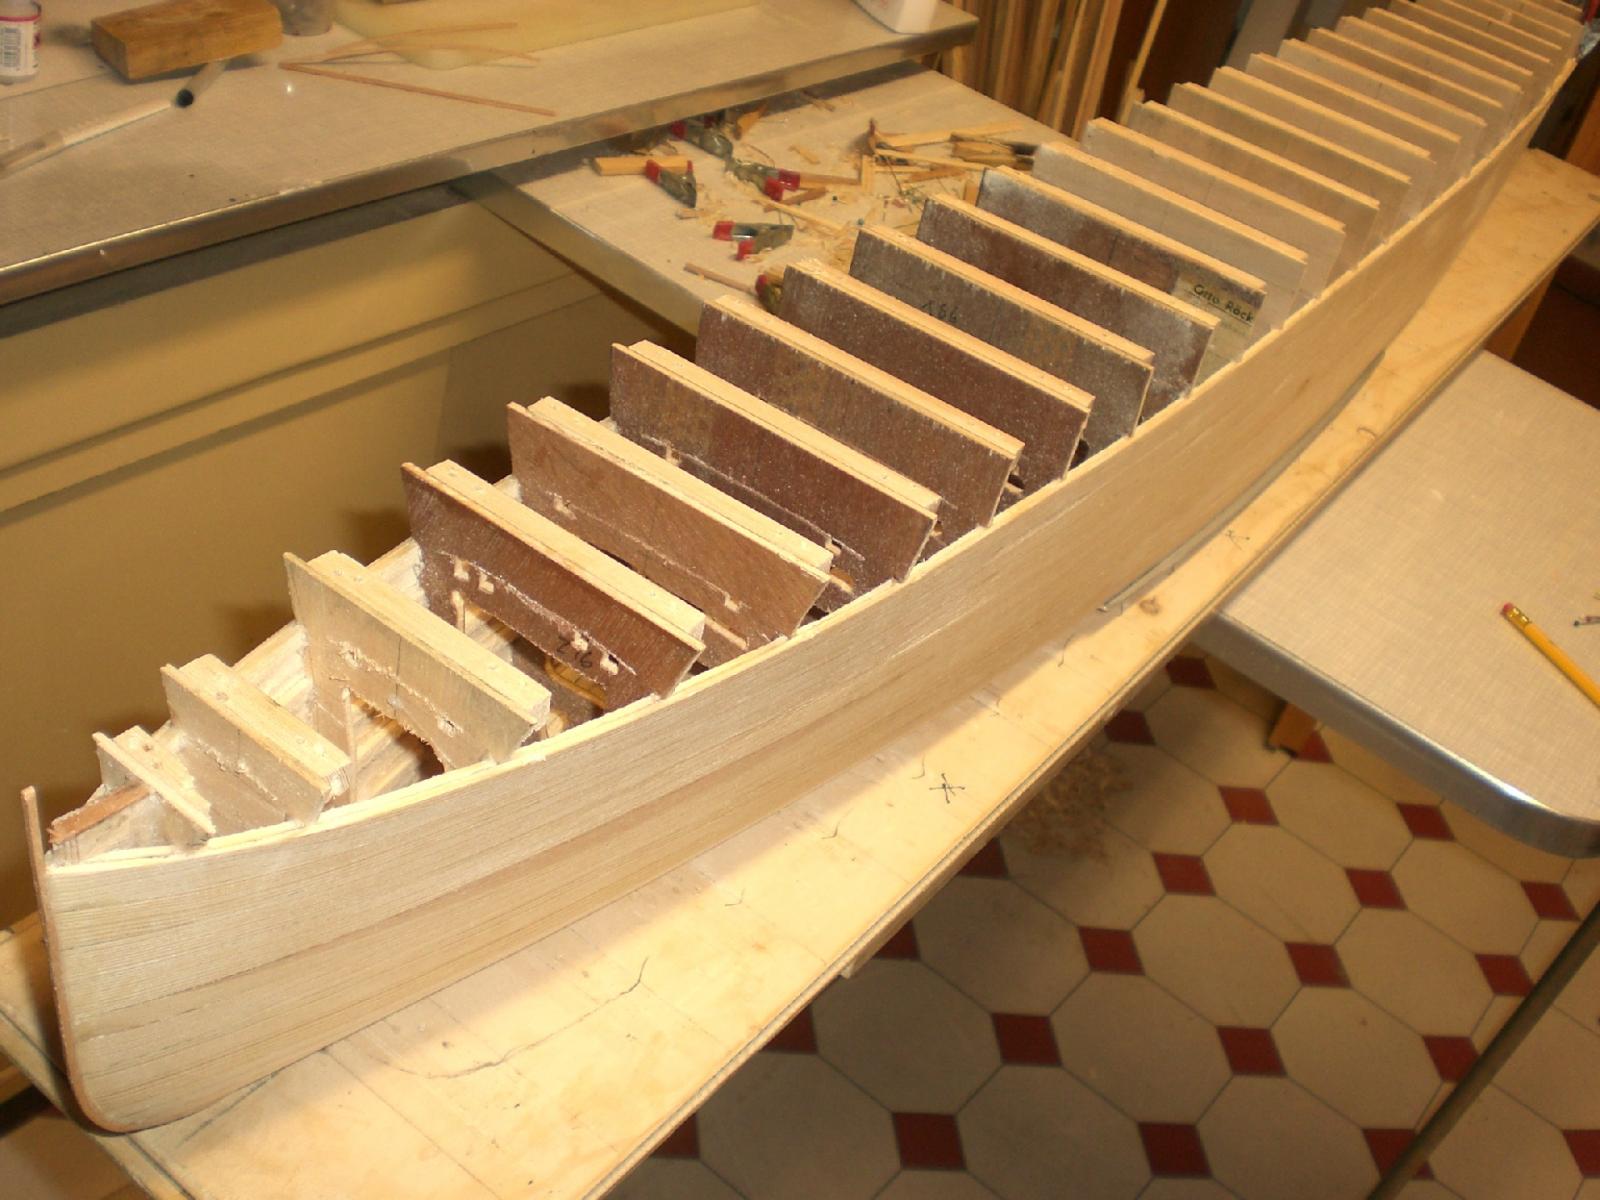
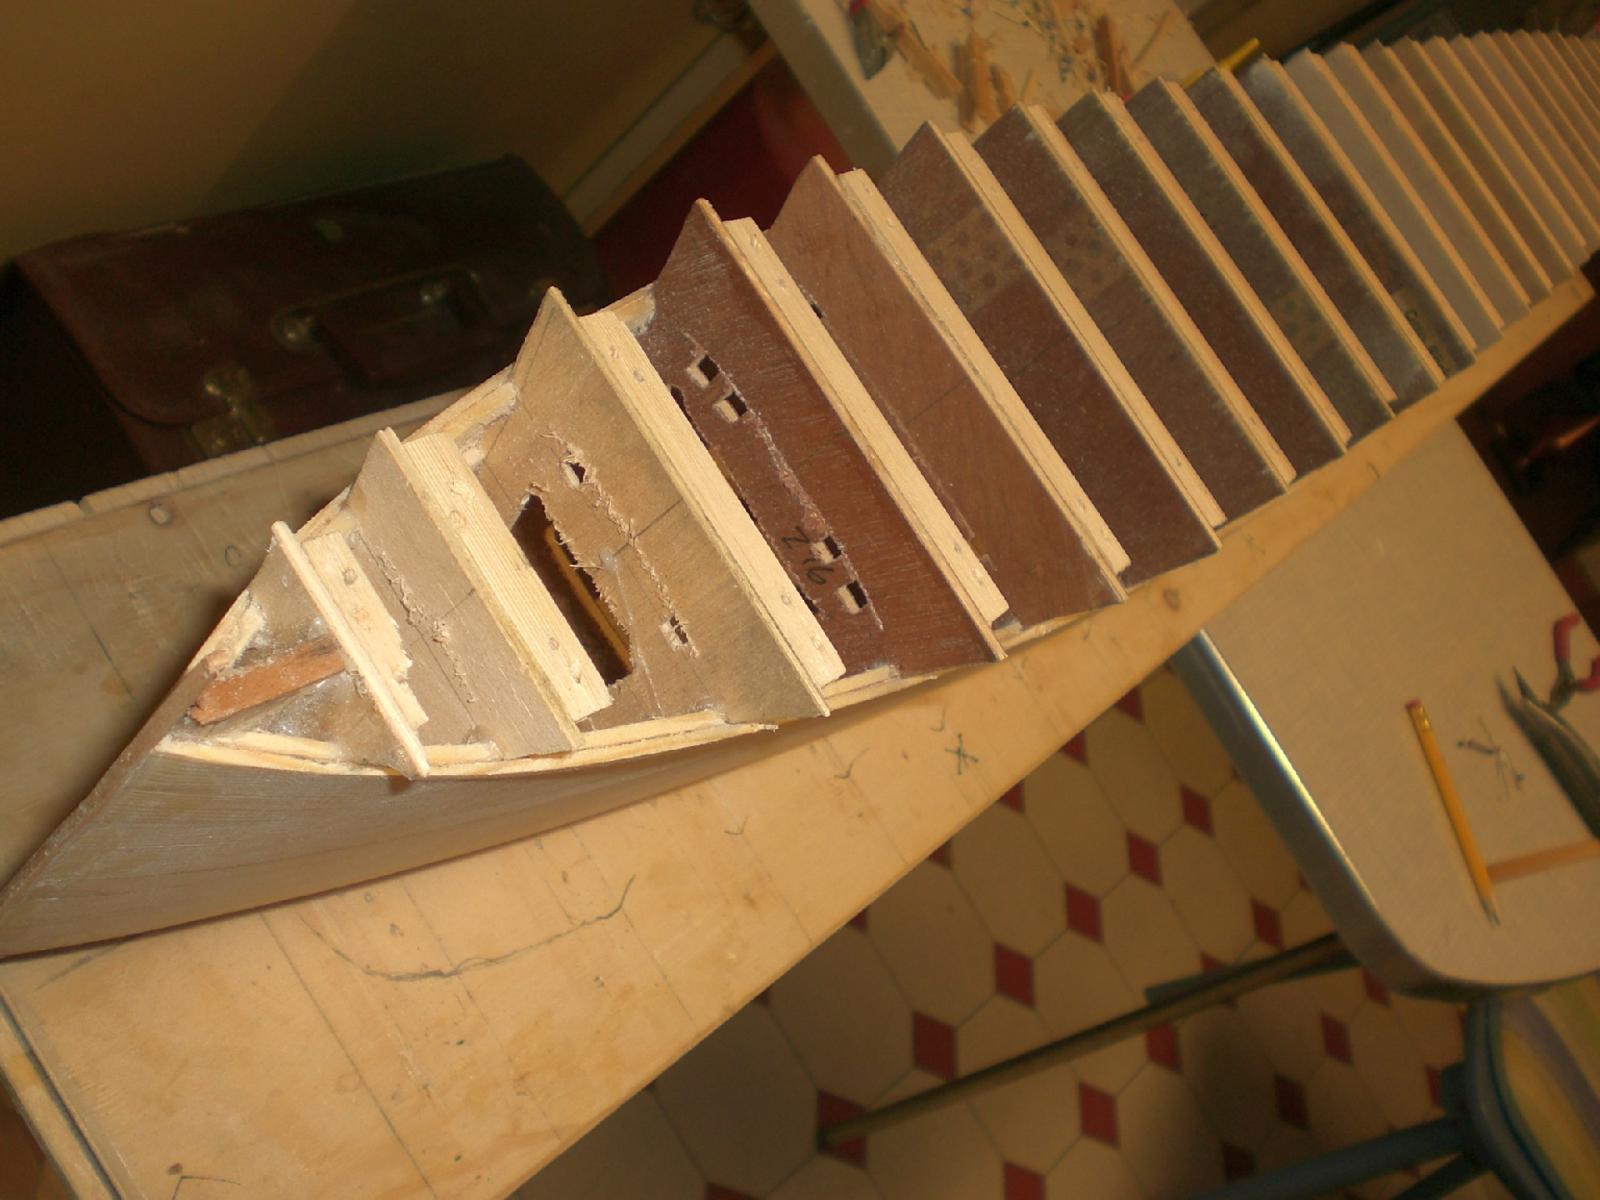
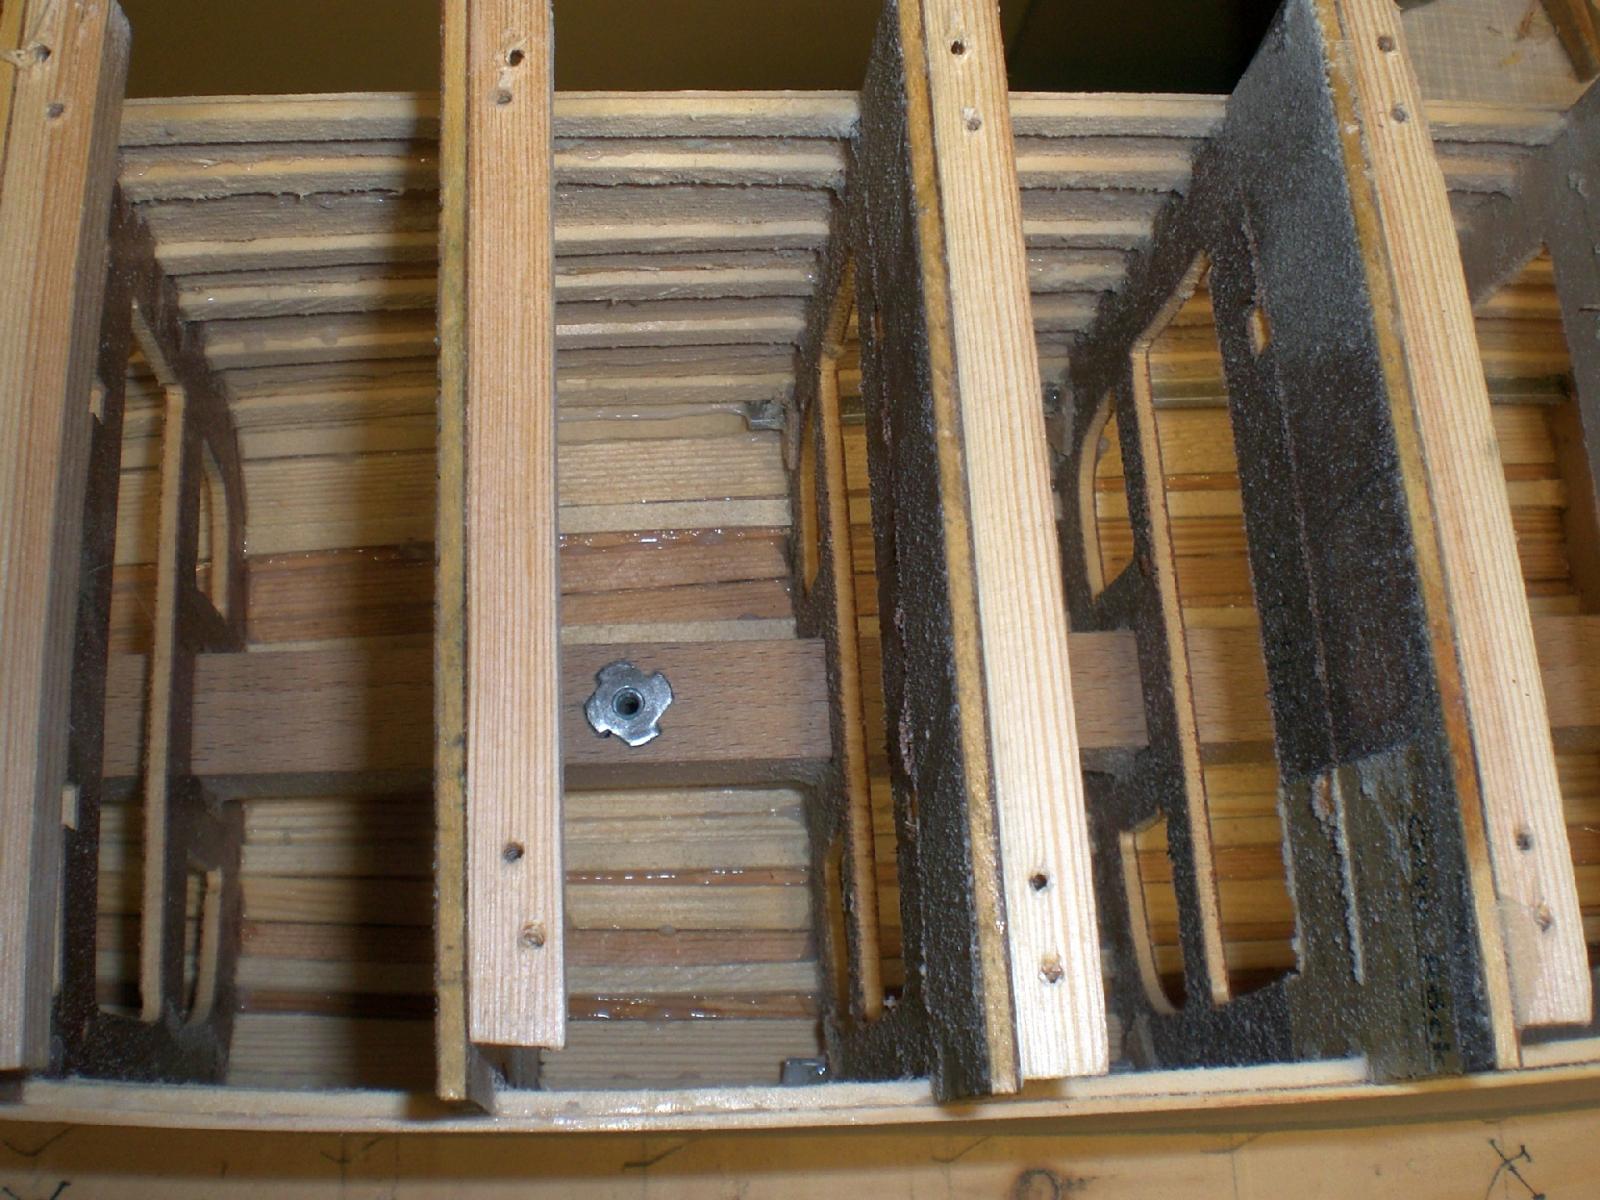
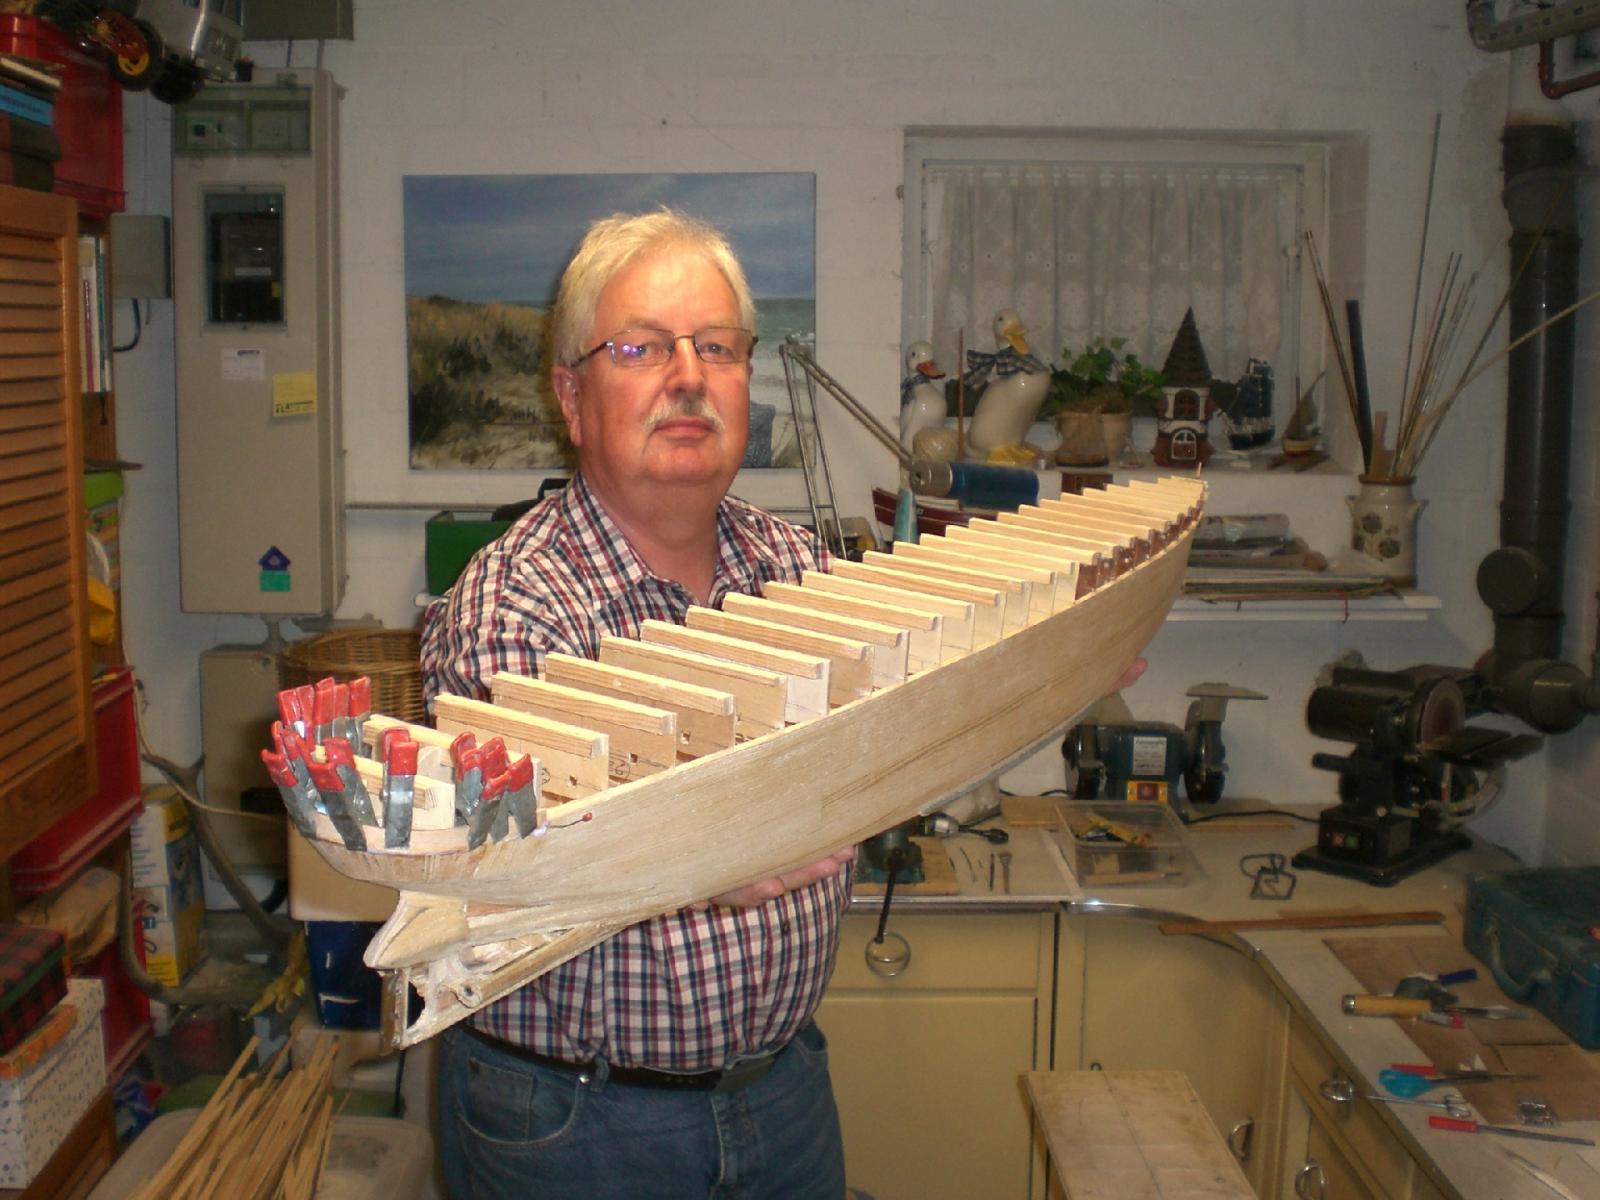
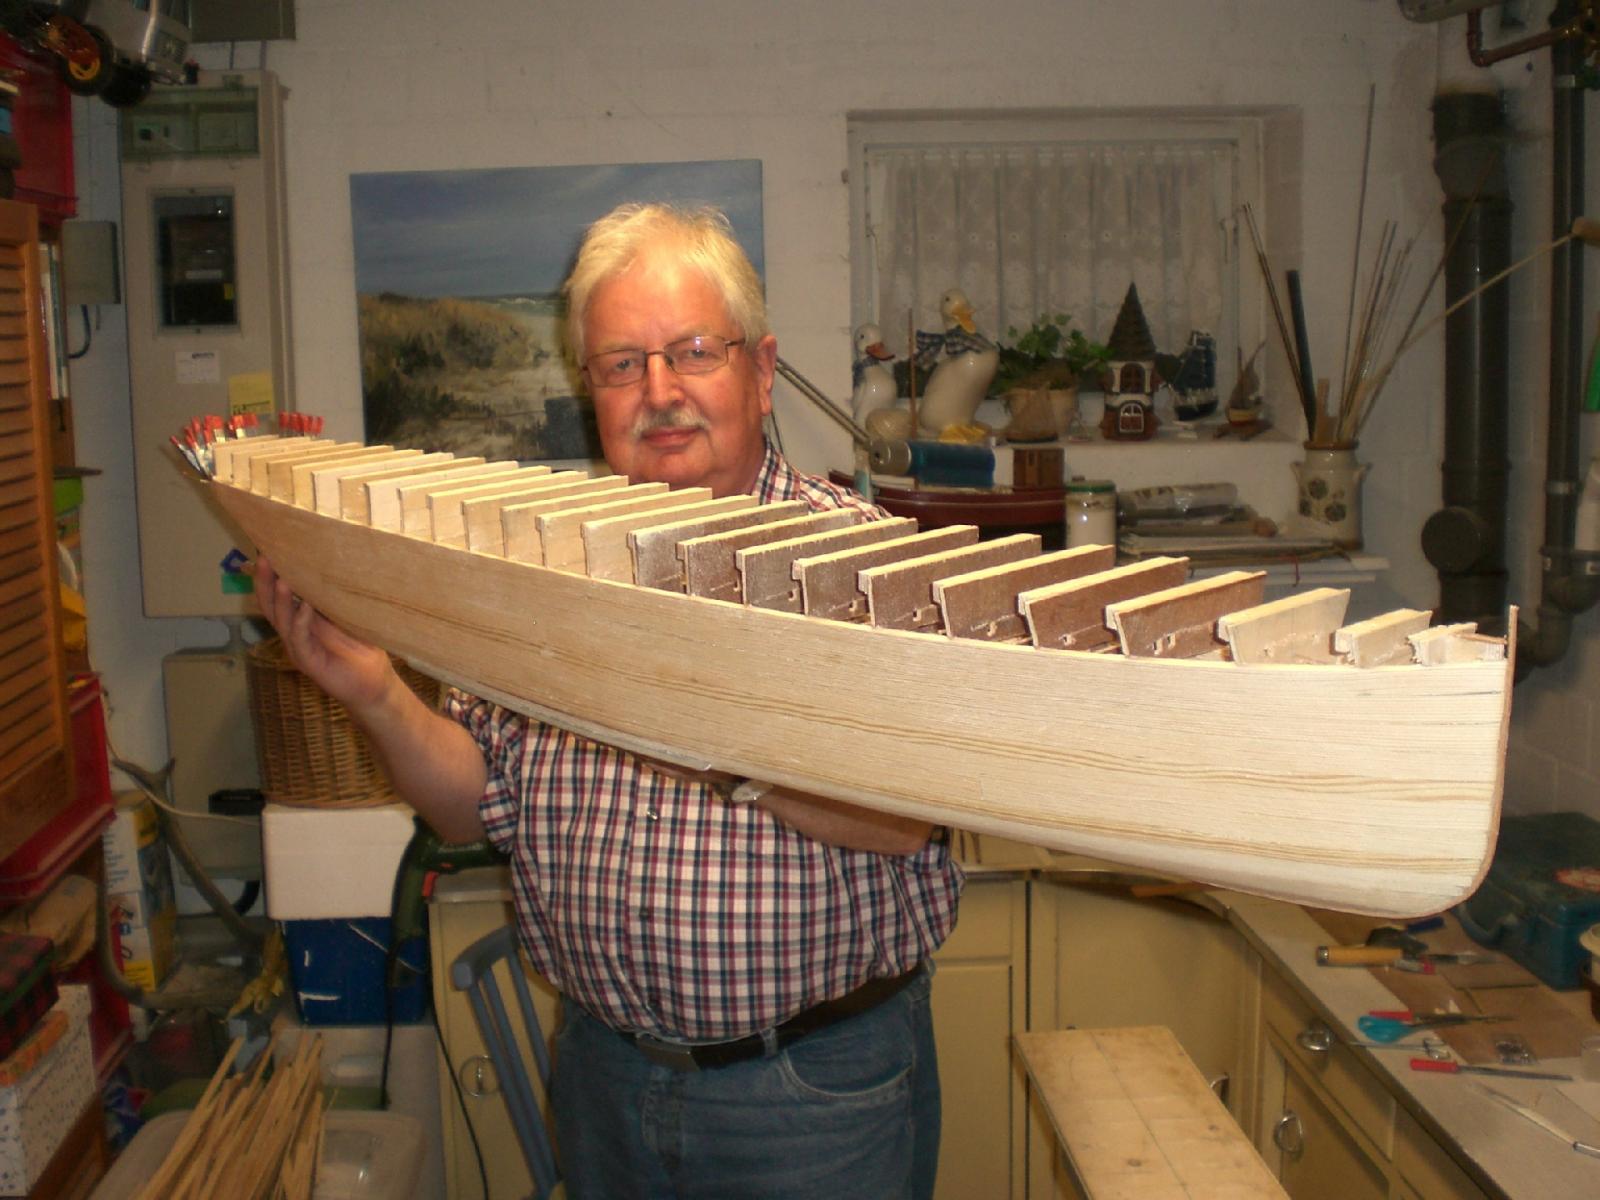
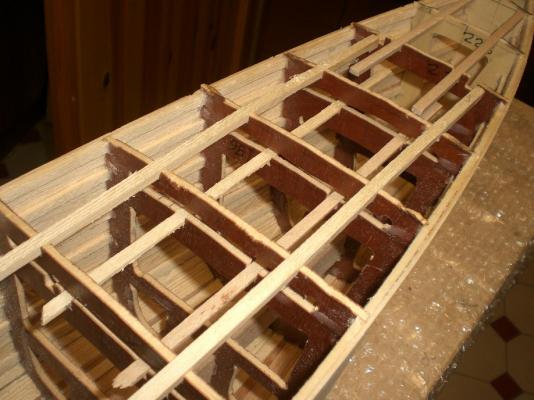
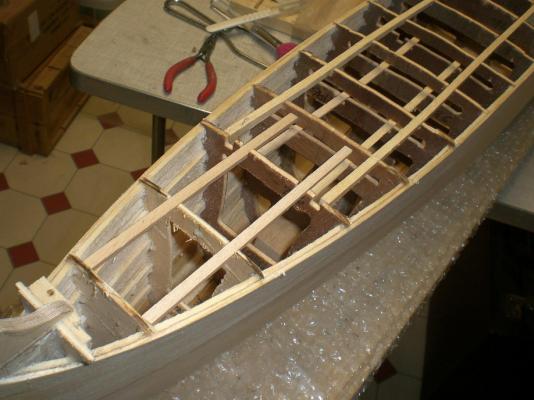
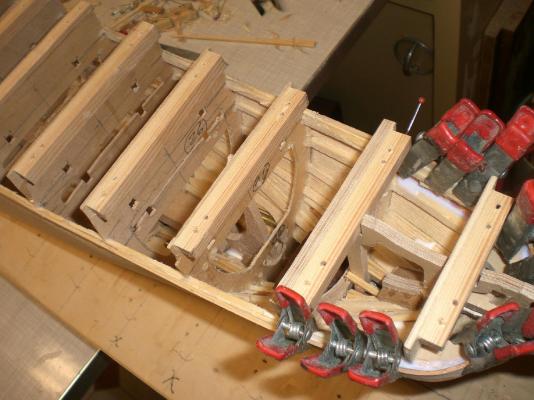
Many thanks Patrick and Mick, and all the "like this" button activators... Patrick, Thanks for your appreciation, I took her off the board this afternoon and was delighted of the work so far, a straight symetric and light hull like it should be. All the overstanding frame hights will be removed (cut off) and the upper deck stringers put on. The slot places are integrated alrteady when I cut the frames I am including some pics of this milestone moment.... Mick, Thanks for your words ,.. For plating I shall use self-adhesive aluminium foil stripes which will be ponced from the rear side to resemble the riveting Before the plating comes on, there is still some filler application work to be done, and several semi-round rails must be attached to the ouside hull skin. removed from the board and put on the upper end-cap plank 180° around the stern. Stb aft view... stb front view view into the aft ship hull. The outcuts for the deck stringers can be seen here the "deck-beam" upper lnes are pre cut, so only the outer sides of the frames need to be cut. In this way the decks will have a positive curvature in width direction one of the three lock-nut devices for the stand`s pedestal-spindles (through the keel and anchored in the "backbone" ) removing some old hardened glue drops out of the hull


- 2,625 replies
-
- 36
-
-
- kaiser wilhelm der grosse
- passenger steamer
- (and 1 more)
-
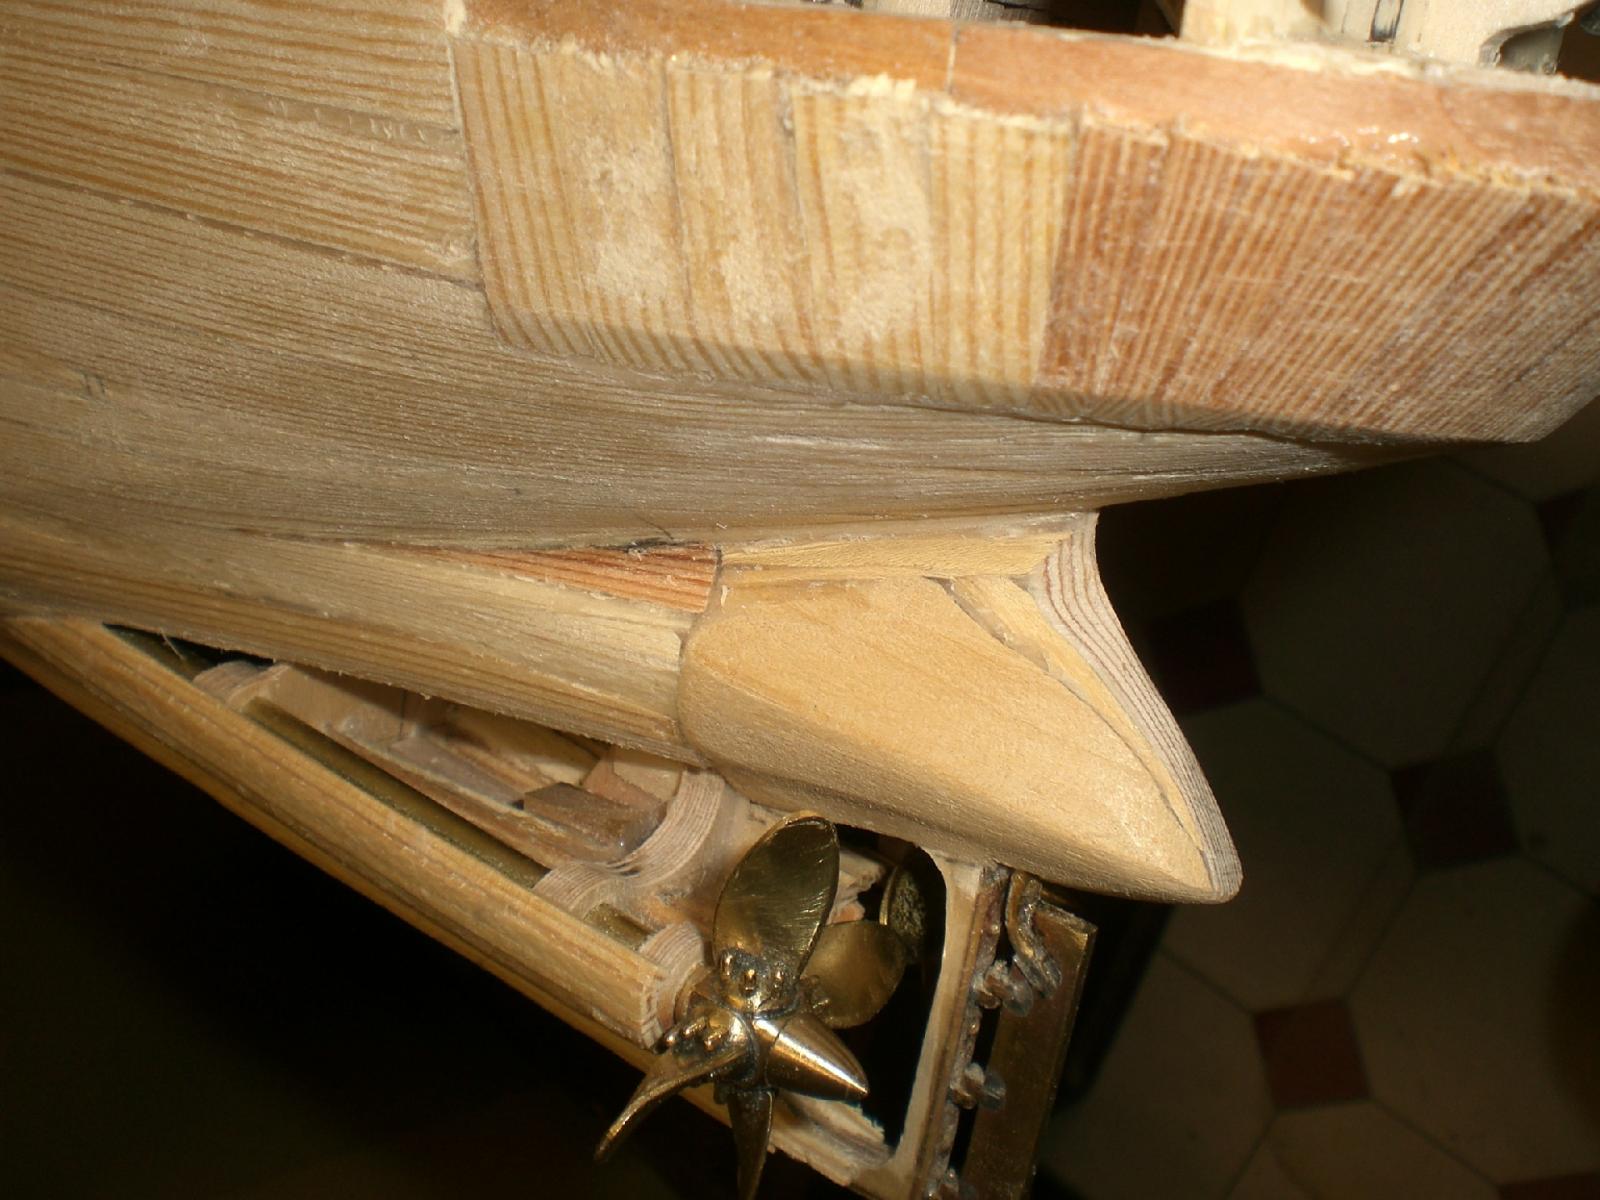
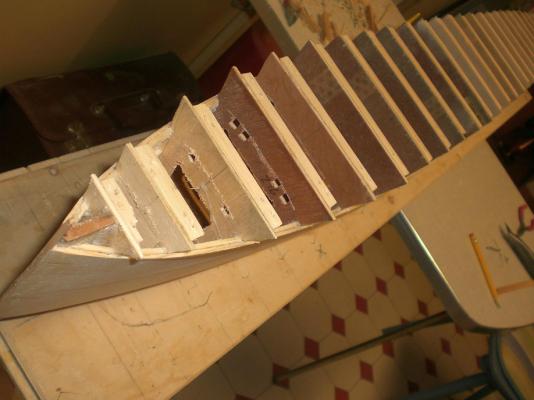
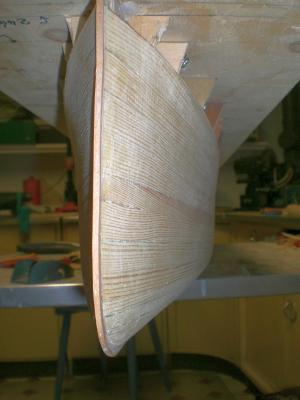
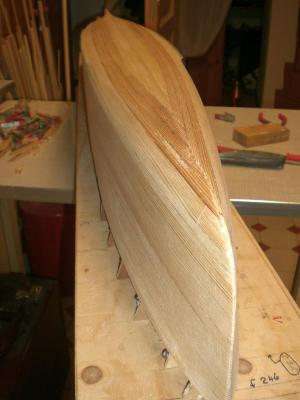
Build log part 10 bow post and vertical stern planking put on... Nils the upper portion of the stern rounding will be horizontal planking The upper propshaft housings still need to be planked, and the whole stern area requires fairing and blending for smooth transitions afterwards the bow post (beech wood) where the plates are riveted to later on, gives the nostalgic touch to the rather sharp bow its time to take the hull off the board now....
- 2,625 replies
-
- 28
-
-
- kaiser wilhelm der grosse
- passenger steamer
- (and 1 more)
-
Patrick, reminds me a bit of the upper cabin Level of a luxurious 747 Special Fitting out for 1st class.... wonderful work Nils
-
Thank you for dropping in Christian, and for your comment, you`re always welcome... Nils
-
Thanks Denis, yes, I did the fairing outside under the car port, was a strong wind, that blew away the dust. Am quite pleased with my triangle vibratory sander, in appr 2 hours the sanding was done. Some of the few pits and scars in the Planks will be treated with filler Nils
- 2,625 replies
-
- 2
-
-
- kaiser wilhelm der grosse
- passenger steamer
- (and 1 more)
-
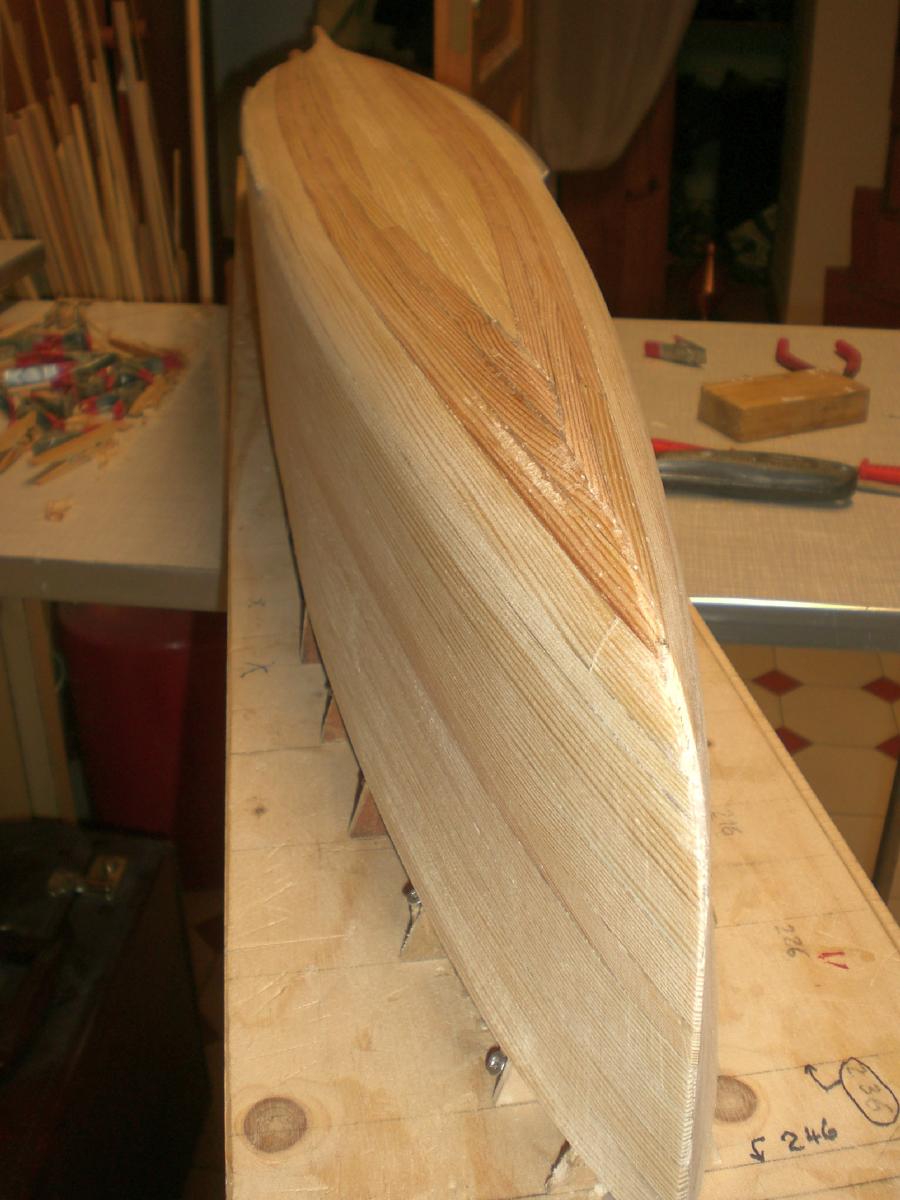
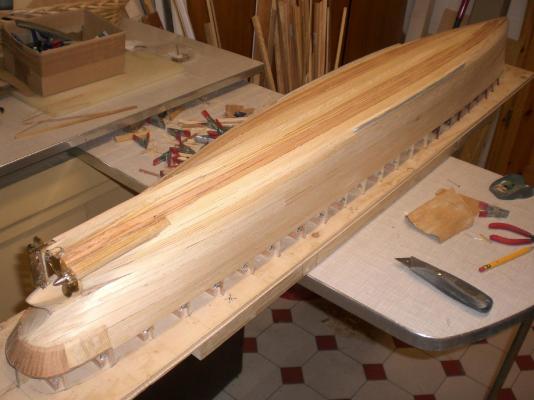
Little update.... the last plank for the hull was put on today, and the outside skin first faired with a viratory sander because due to the accumulated overload of the postworkers strike I still did`nt get that ordered spokeshave... Nils next, is to put on the bow post, straight stem and around the bend to the keel in bow area. I think I`ll take it off the "slip-way" then and plank the upper stern bulwark area vertically
- 2,625 replies
-
- 24
-
-
- kaiser wilhelm der grosse
- passenger steamer
- (and 1 more)
-
Beautiful built hull John, Framework, planking and deck look great... Nils
- 745 replies
-
- 1
-
-
- francis pritt
- mission ship
- (and 1 more)
-
Patrick, your Fitting out of the Synphony interior is looking fantastic, well done Nils
-
Thank you for dropping in and your words Kees, It still will take me some time to get the hull-planking completed and the fairing of the rather thin outer Skin afterwards... Nils
- 2,625 replies
-
- 1
-
-
- kaiser wilhelm der grosse
- passenger steamer
- (and 1 more)