Mirabell61
-
Posts
7,418 -
Joined
-
Last visited
Content Type
Profiles
Forums
Gallery
Events
Everything posted by Mirabell61
-
 Very nice Work Hartmut, a flat bottom jacht for the shallow Dutch tidal Waters, well done... Nils
 -
Karl, thanks to you for sharing and introducing Ivan`s "flying horse", with rider and drums beautiful , awsome, one can feel the dynamic going out from that incredible piece of carving art... Nils
-
Many thanks to Bob (cap`n), Vic and Dirk..., for the fine words... Bob, I do hope that the "Magic" dos`nt let me down when the tricky things start, there will be so many details I do´nt even know know in the moment how I will do them later... (golden stern decor, railings, vent Hoods, funnels. etc....) Vic, Thanks for dropping in.... as I mentioned in the introduction to this log, this build is going to be my most ambitious one, but I trust I`m quite good in the Timing. I have to make a break when the hull is plated, in order to finalize my HMS Pegasus.... Dirk, Danke Dir..... hope you shall have pleasure in dropping in now and then, regards out of the greater Hamburg neighbourhood area,... I love your build "Maria", you`re making a real gem out of that kit... Nils
- 2,625 replies
-
- 5
-

-
- kaiser wilhelm der grosse
- passenger steamer
- (and 1 more)
-
Dragon II is good under way Bob, a very nicely built keelboat, and beautiful planked deck.... Nils
- 127 replies
-
- 5
-
-
- dragon class
- yacht
- (and 1 more)
-
Hi Martin, Thank you very much for looking in again and for your nice comment. ... In the moment I`m just figuring out what semi materials there will be required in brass for the coming sequences, so its a bit of thinking ahead, determining possible alterations how to do certain details before spending the money. There will also be much soldering involved. The scale 1:144 is quite a task, but also fun to find solutions... Nils
- 2,625 replies
-
- 3
-
-
- kaiser wilhelm der grosse
- passenger steamer
- (and 1 more)
-
Thanks Ed, yes, I`ll be looking into a different shore hardness for the rubber pad I use underneath Nils
- 2,625 replies
-
- 1
-
-
- kaiser wilhelm der grosse
- passenger steamer
- (and 1 more)
-
many thanks - Kevin,- Druxey, - Nenad, - John,- David,.... and the "likes"... For all your kind comments Kevin, a good comment, but not general practise, ....if there are certain details I find its worth doing a trial before doing repeatable objects, I do it, and possibly see where it can be improved, this has saved me much time work at the end. On the other hand I would be happy if I could see trials and thoughts (in pics) from fellow builders as well, i find this makes the "spice" of a builder`s forum comunity like this Druxey, the resembled rivet size depends on the tooth-module I use on my poncing wheel. Here I used double thick aluminium foil, because I had some scrap strips left over. I thought I would have to put more pressure on the ponce wheel. Will probably flatten the the rivet head a wee bit, but thats why it`s a trial,...improvement pending Nenad, glad you like it, its only making use of what I had already experienced in some way before and to my own satisfaction John, Thanks for that nice pic relating to rivet joinings at the bridge cab. Have you been officer on the "MV. Meringa", a nice ship David, for deck planking I use 2 x 0,8 mm precise cut pine strips. The basic material is probably machine cut pine veneer. Unfortunately I ca`nt cut that precise in those dimensions myself. The strips are glued to the raw deck made of 0,8mm plywood. This way the total deck thickness is around 1,5 to 1,6 mm Nils
- 2,625 replies
-
- 4
-
-
- kaiser wilhelm der grosse
- passenger steamer
- (and 1 more)
-
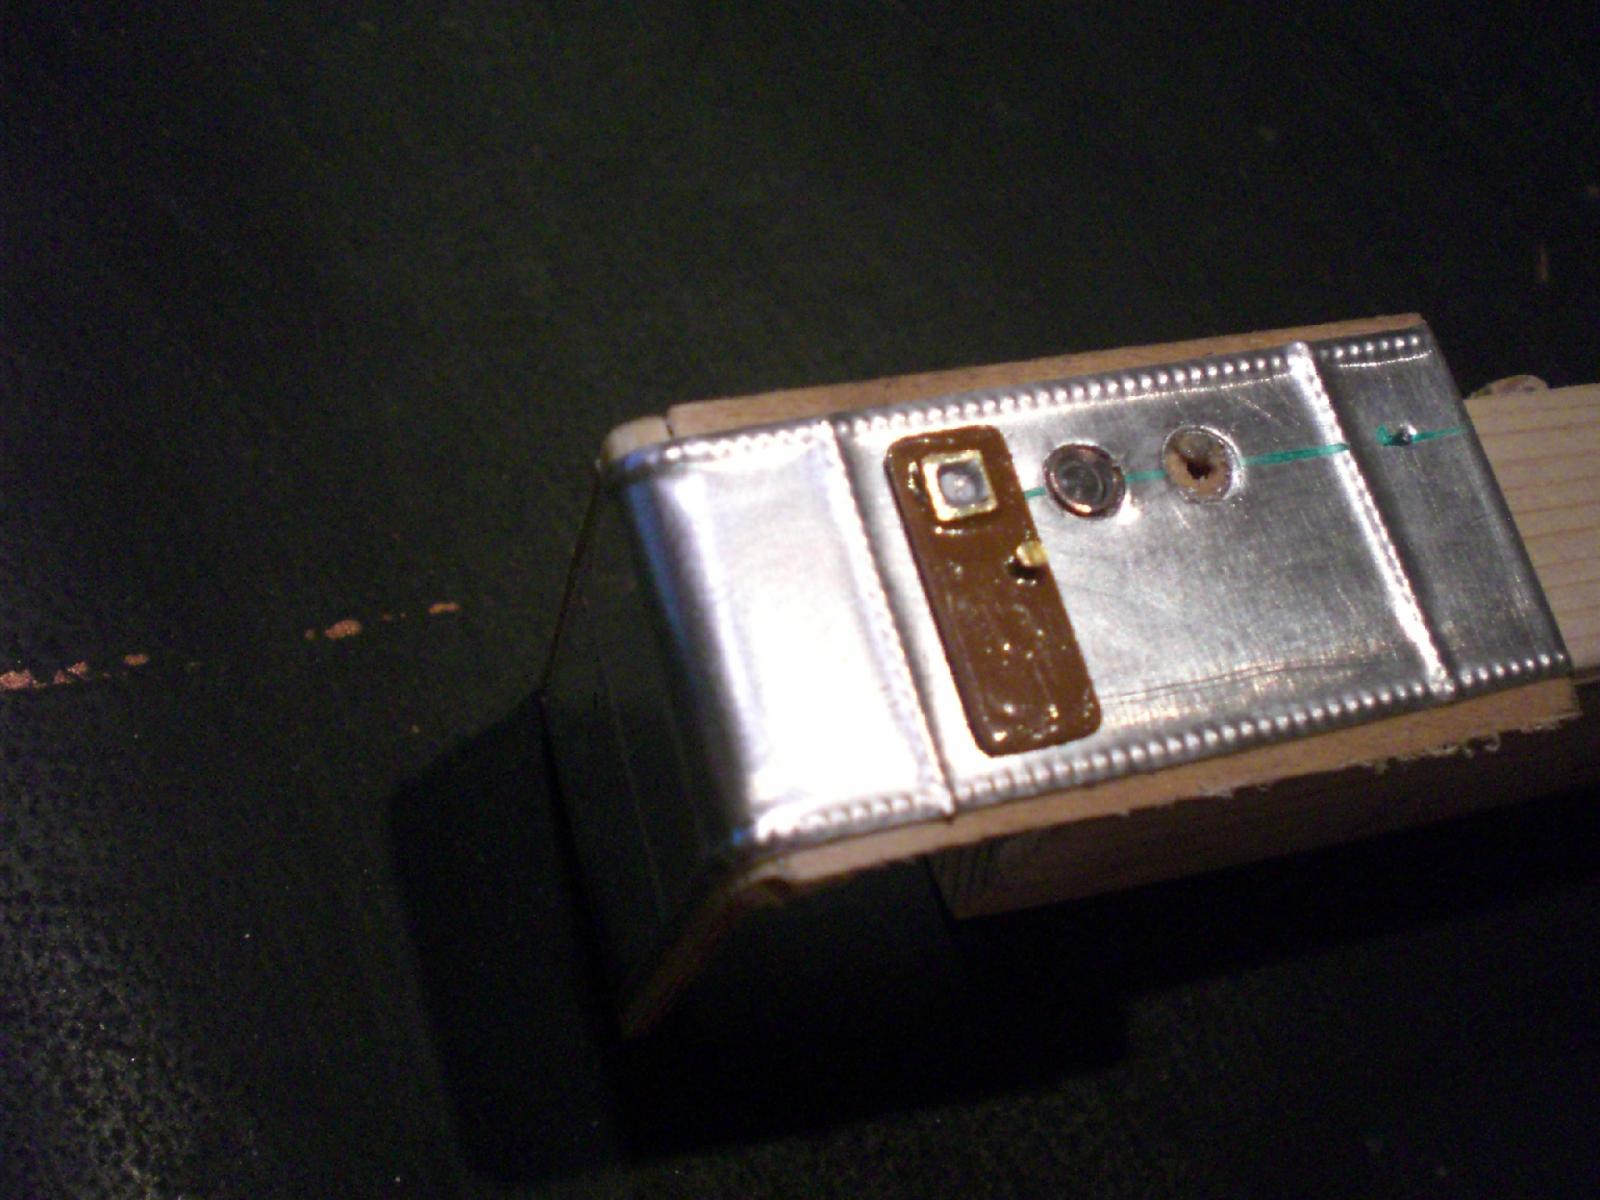
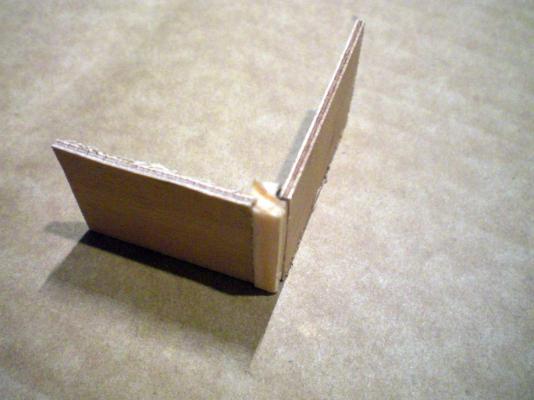
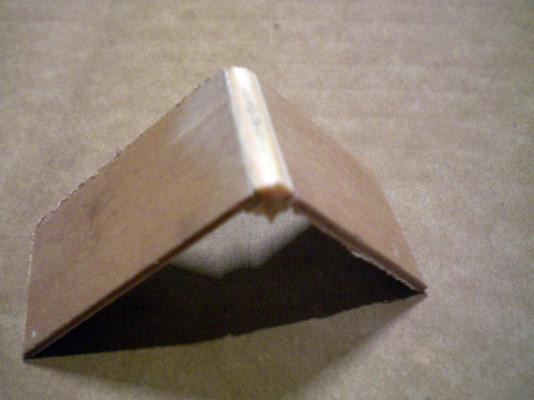
Hi Kevin, correct, its only a mock up for getting a good round "Corner", the silver plating indicates the hight of the walls (19 mm between the decks) Nils
- 2,625 replies
-
- 6
-
-
- kaiser wilhelm der grosse
- passenger steamer
- (and 1 more)
-
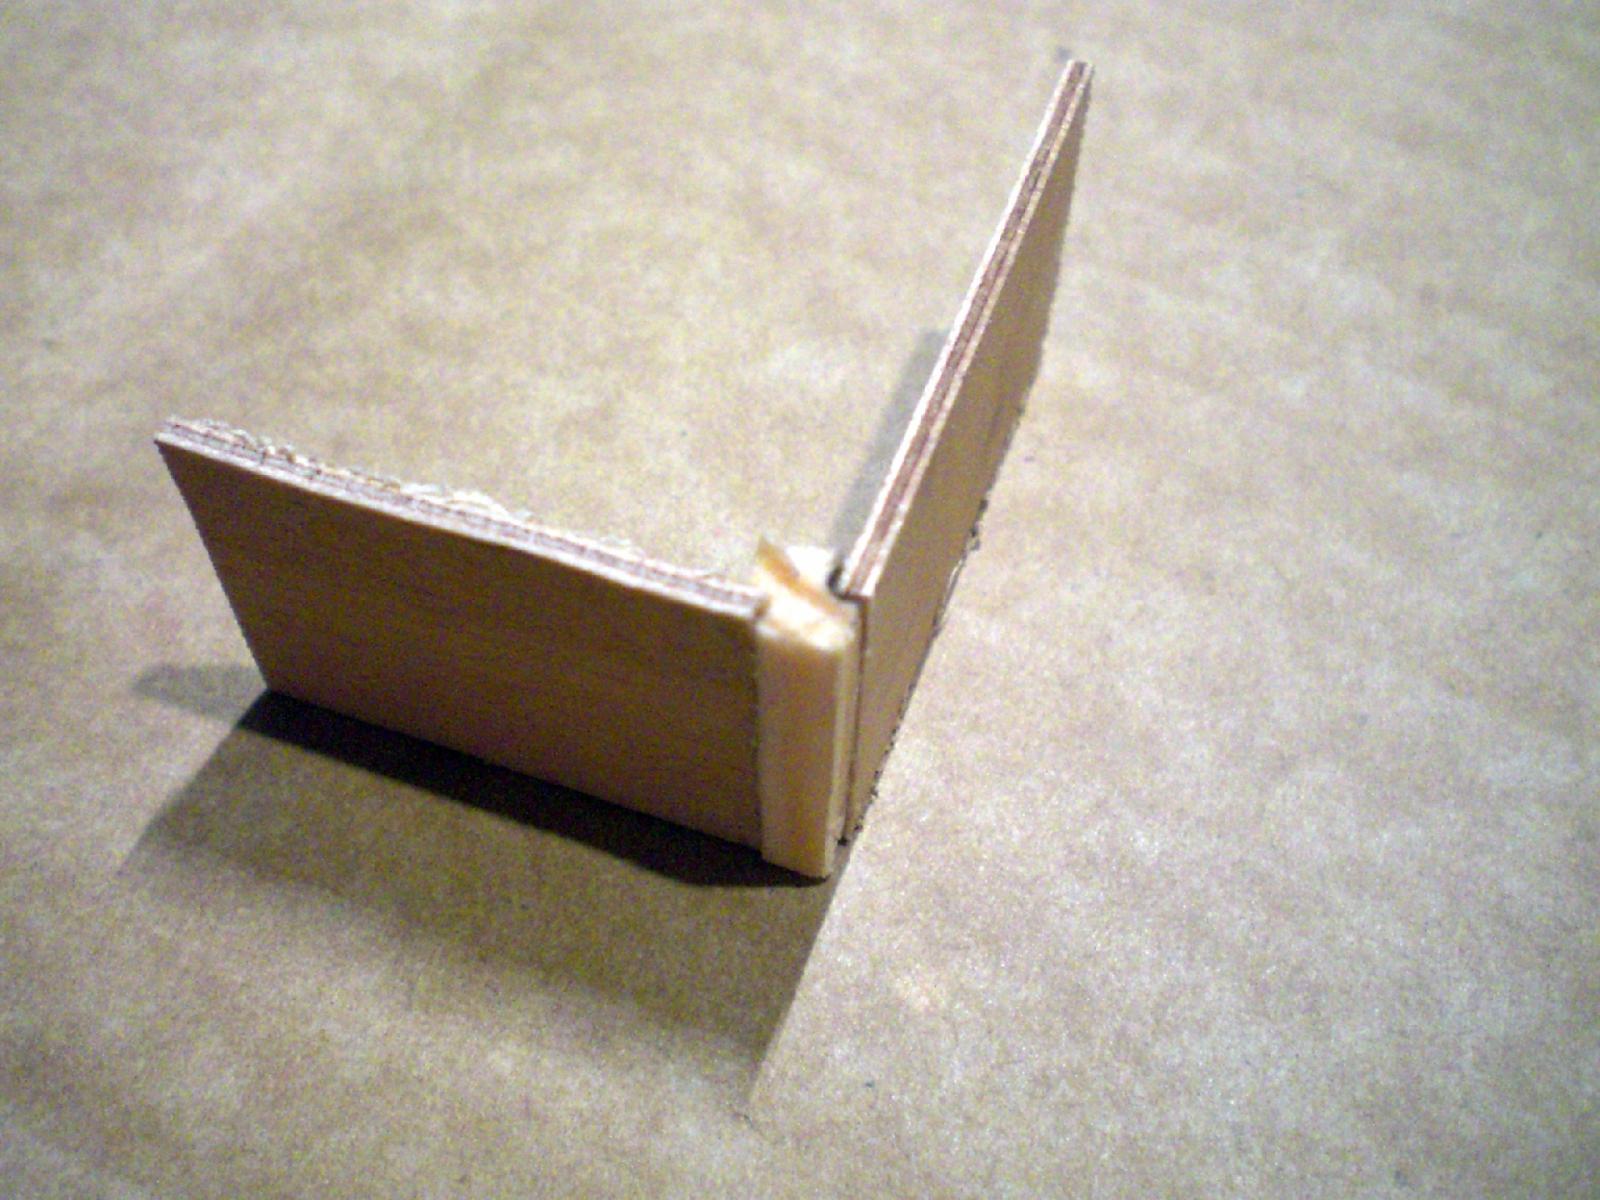
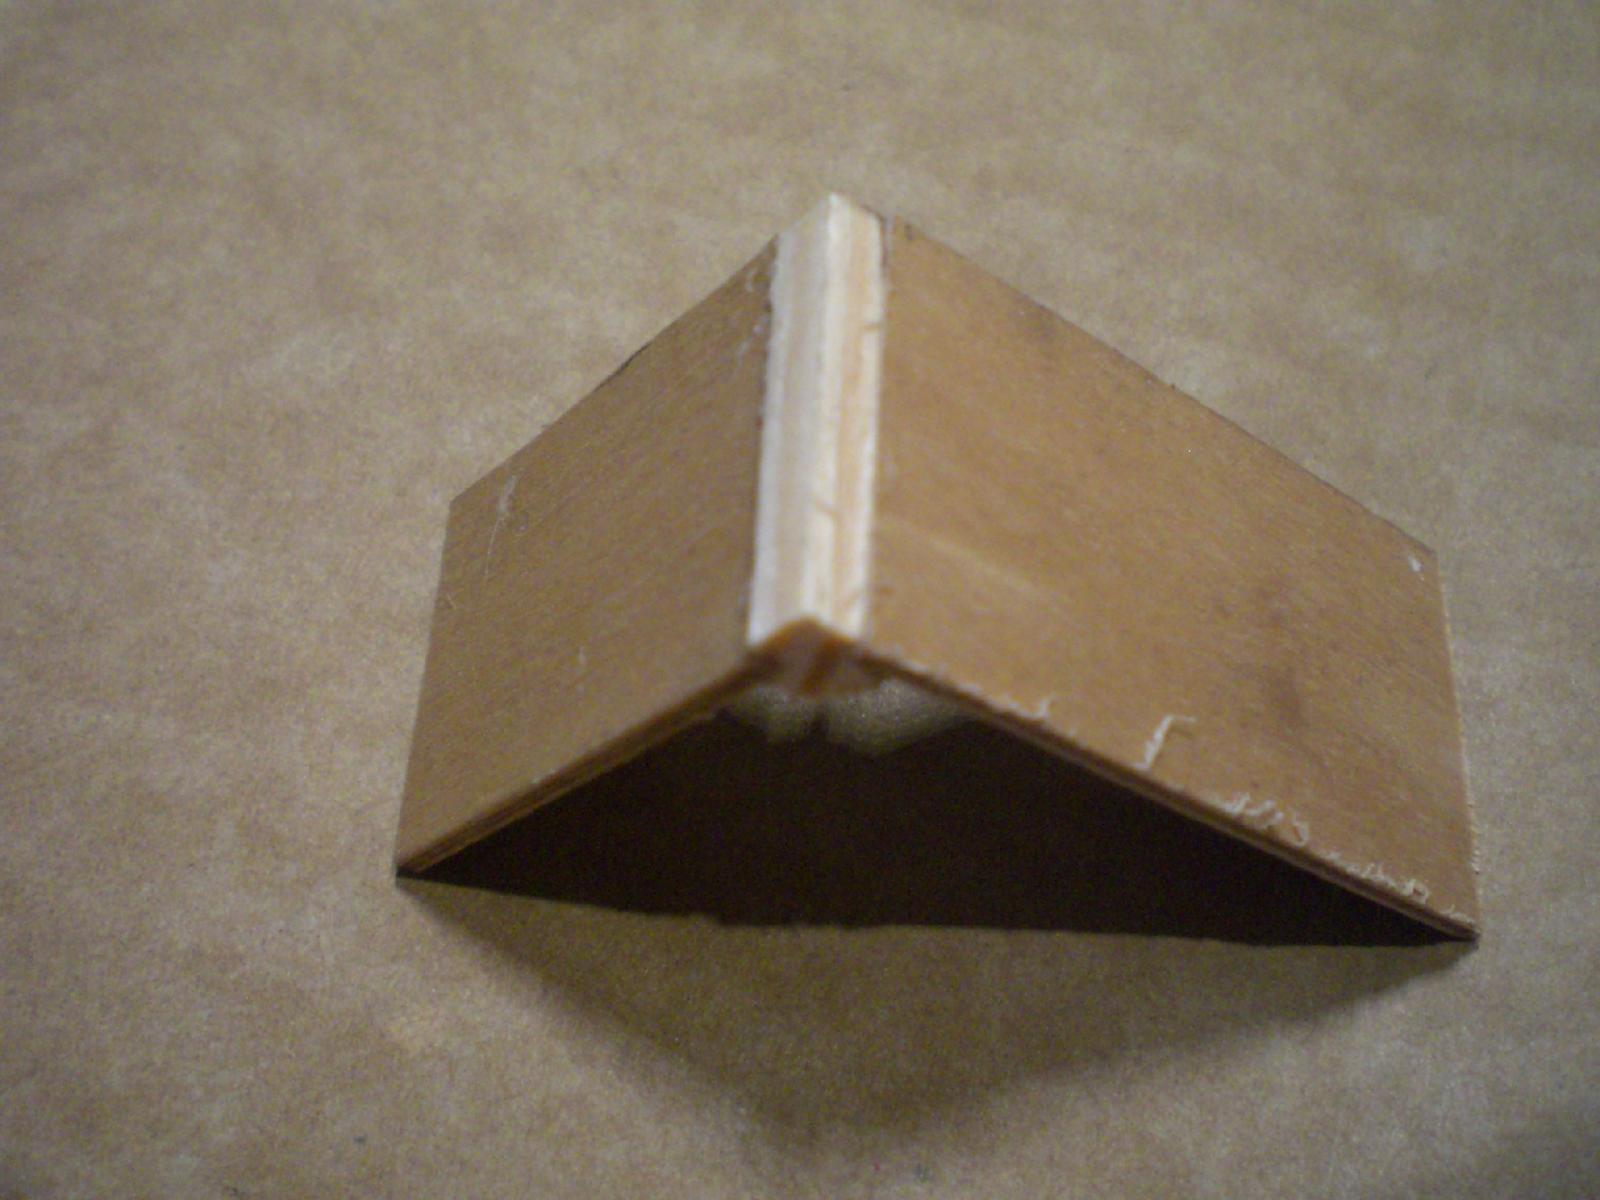
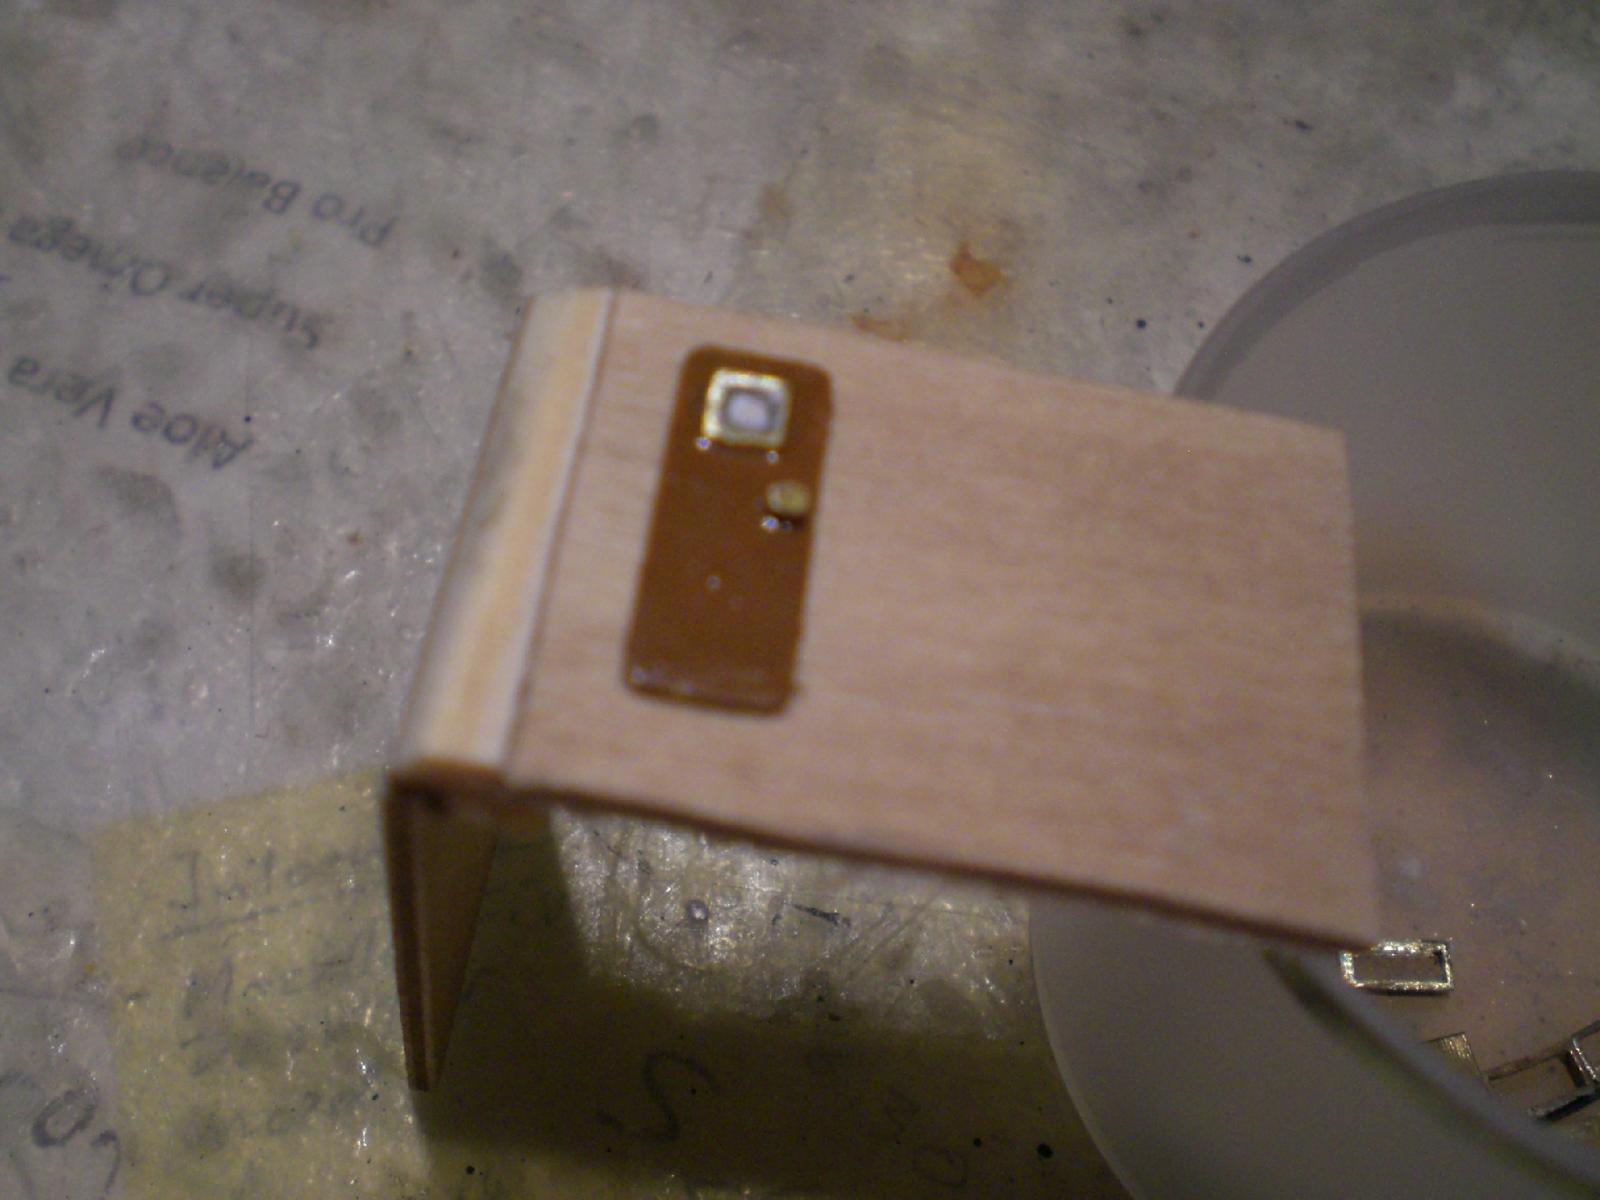
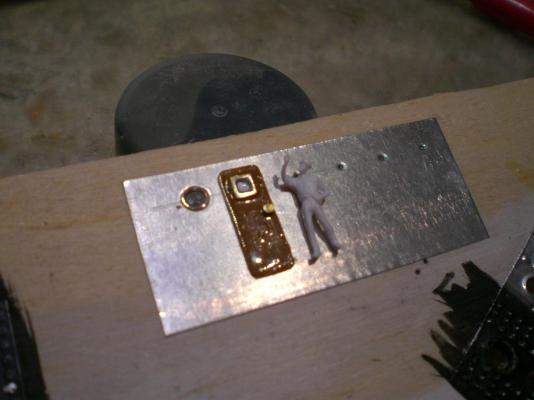
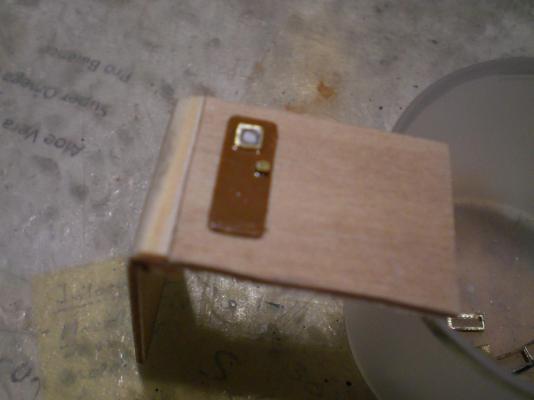
Build log part 16 did a trial mock up today for for rounding the 19 mm high cabin wall corners. The doors are 15 mm resp. 14 mm high depending on position of mounting Nils doors with window frame, and doorknob are of brass cut a profile bar for the corner- fitting of the cabin wall plates easy to round and blend out a good base for the plating.... gives a nice smooth corner connection door and porthole fitted


- 2,625 replies
-
- 25
-
-
- kaiser wilhelm der grosse
- passenger steamer
- (and 1 more)
-
beautiful built model Mark, thanks for sharing youzr work and for the actual boat... Nils
-
Thank you very much John, Piet and Kevin... for your kind appreciations Nils
- 2,625 replies
-
- 1
-
-
- kaiser wilhelm der grosse
- passenger steamer
- (and 1 more)
-
good looking hull Michael, I like the lines, and your nice workmanship so far... Nils
-
Hi Nigel, I like that chequered floor Piece its very well done... Nils
-
Many thanks to Patrick,- Grant, - Popeye,- Bob, - and all the "likes".... Patrick, I`m also glad that this is overcome now.. Grant. yes. that was a lesson related to high humidity air getting into the room Denis, thanks for your nice comment Bob, I`m also quite happy with the deck planking. The smaller the plank dimensions get, the more fragile the plank edges are whilst cutting to length and after laying and sanding. It gives a little messy deck surface with the slight remains of white glue, sanding dust, and pencil-caulking charcoal Nils
- 2,625 replies
-
- 2
-
-
- kaiser wilhelm der grosse
- passenger steamer
- (and 1 more)
-
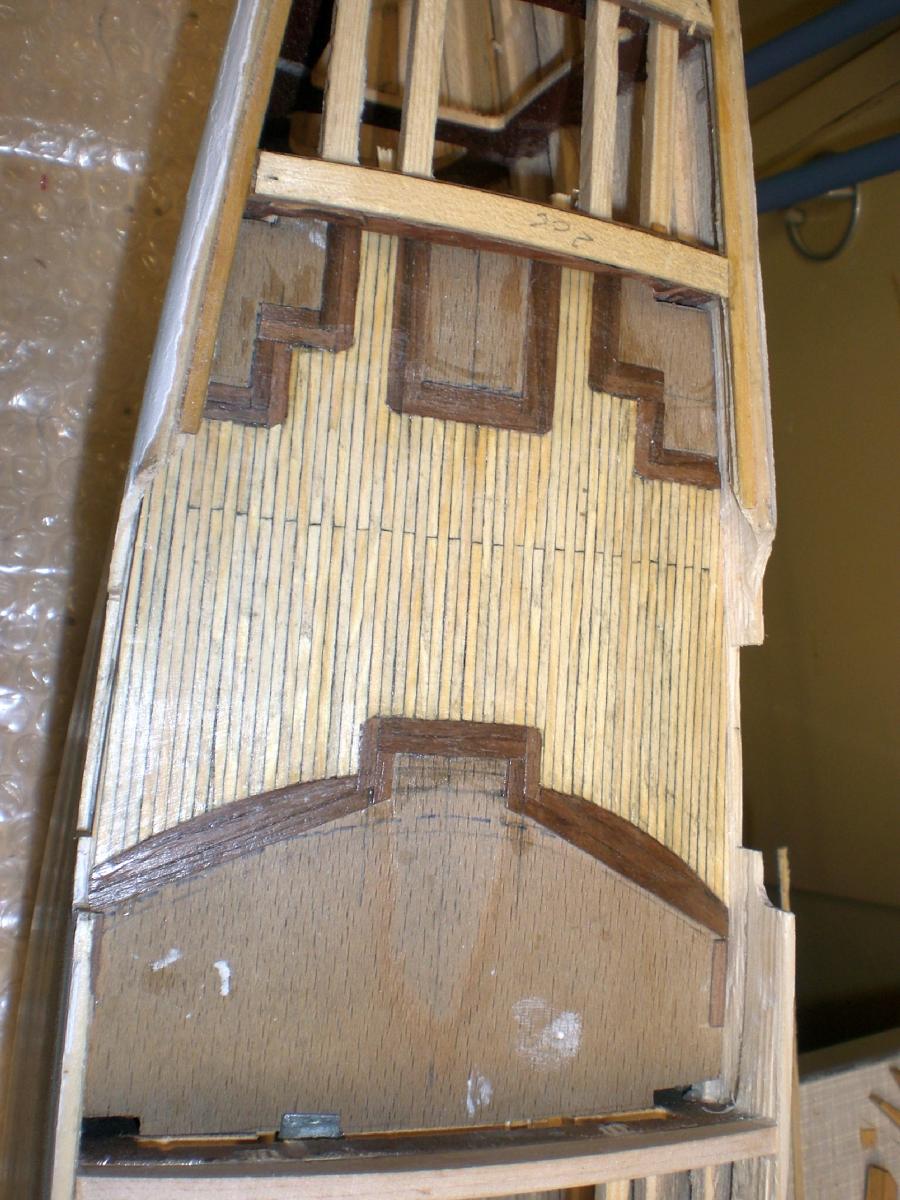
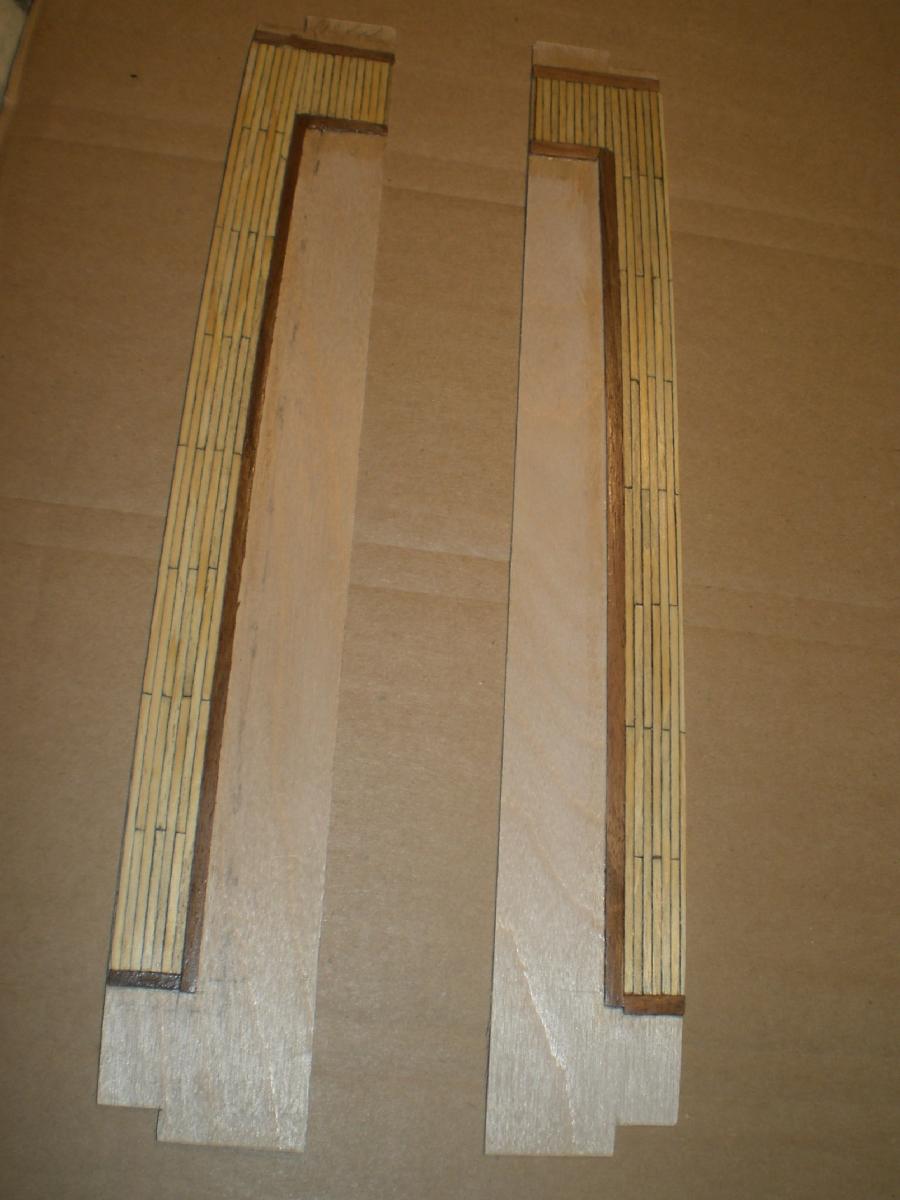
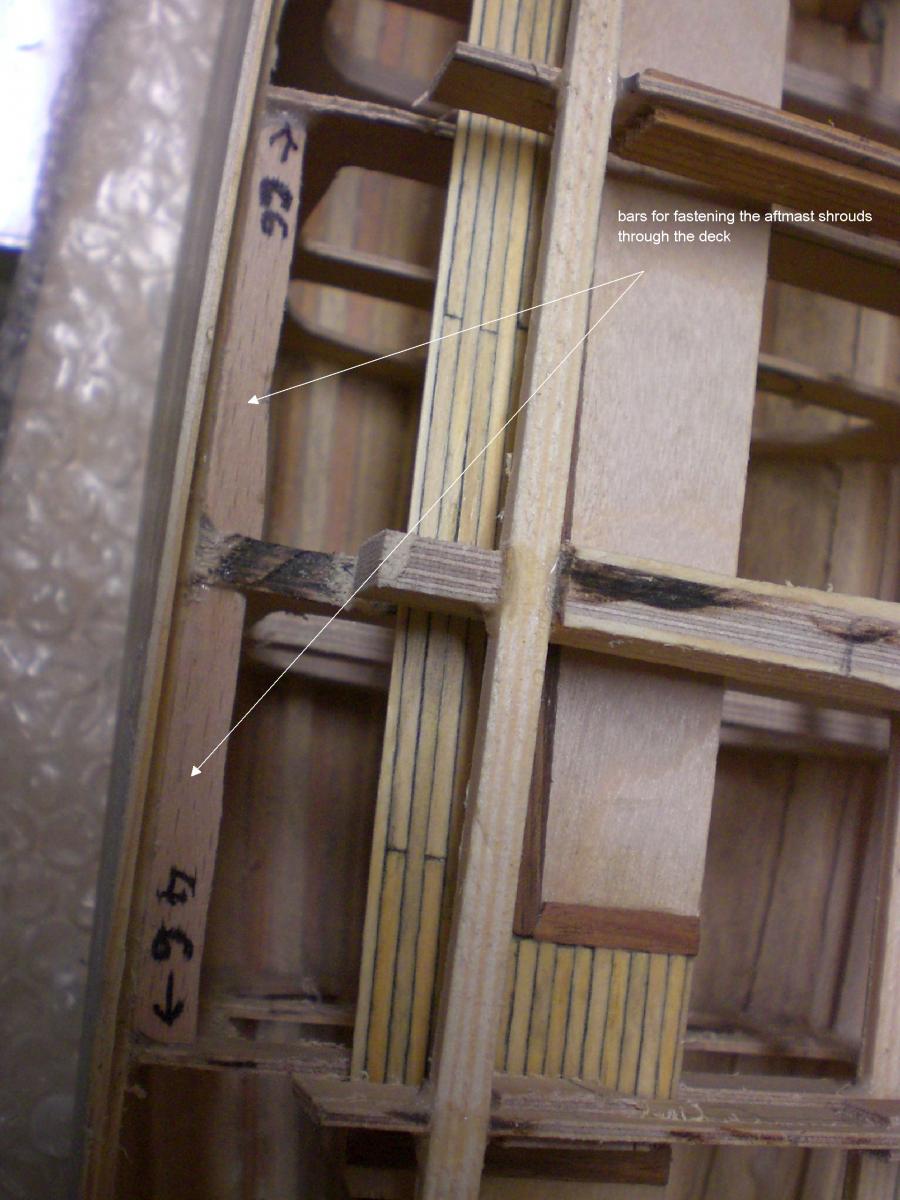
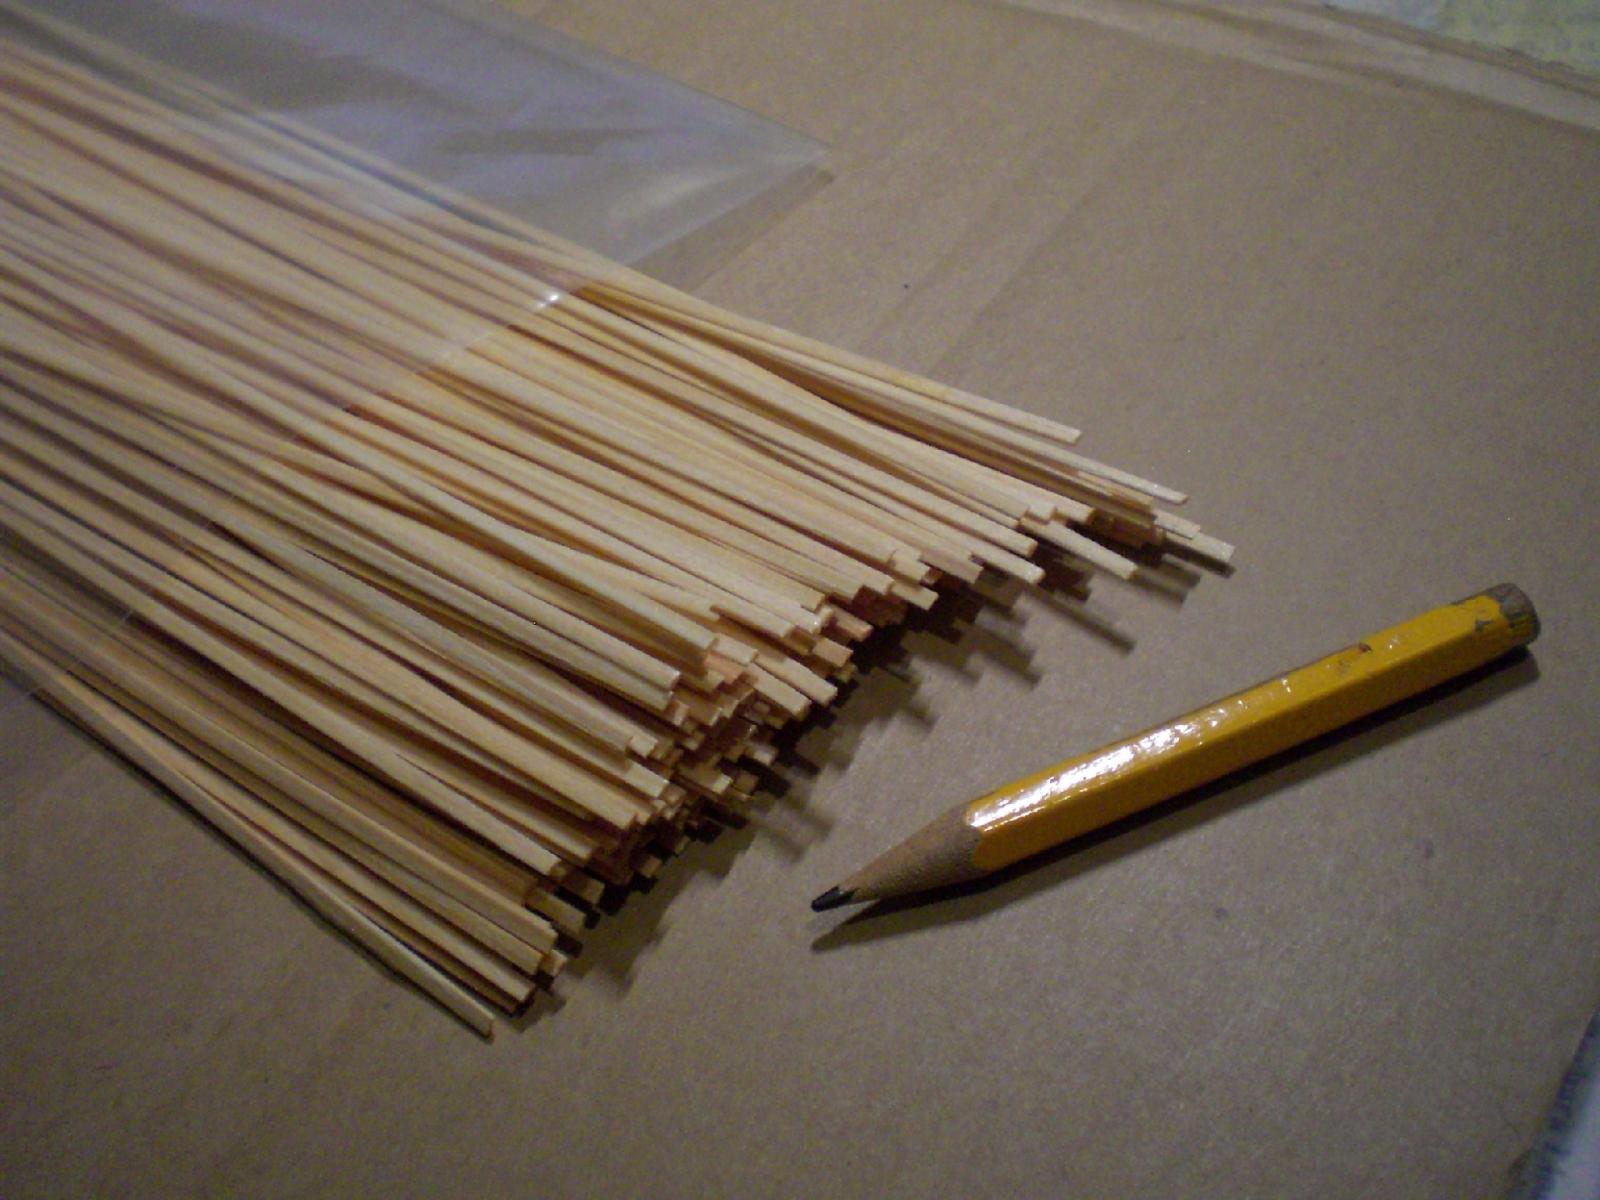
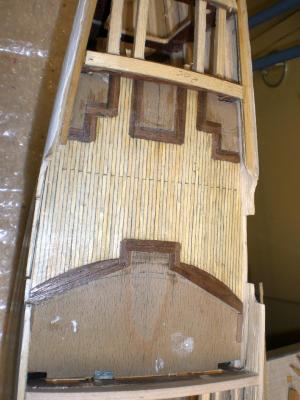
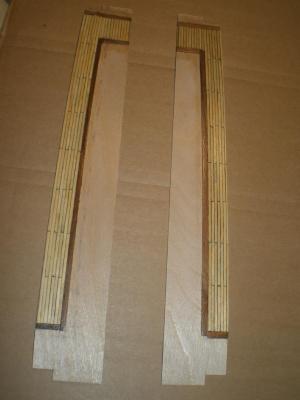
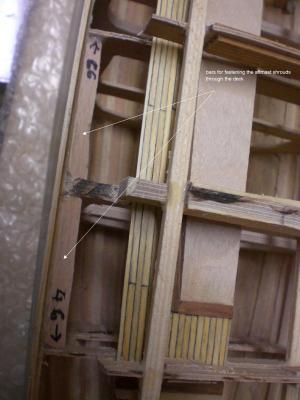
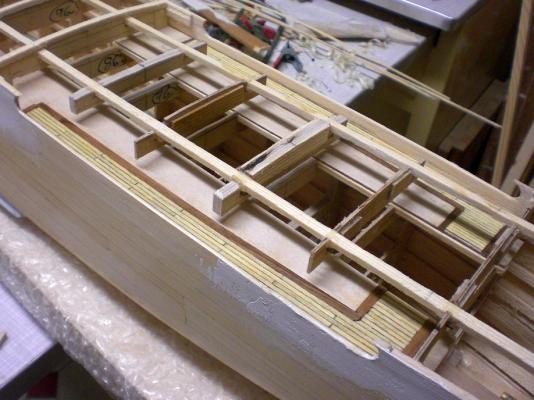
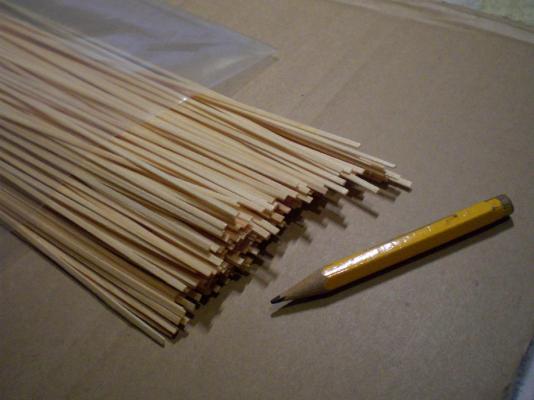
Thank you Denis, it really looks like the glue-swelling out went back over the week. Quite good that I did`nt remove it, otherwise there would be pits in the "skin" now.... I`m working at the decks in the waist areas now, after finding a supplier for wonderful precise cut mini pine planks 2 x 0,8 mm. The "caulking" is done with a soft dark pencil along the planks edges Nils a set of 300 fine cut pine-planks 2 x 0,8 mm planked forward waist area the lower aft waist deck stripes will do the shrouds for the aft mast later on with buckle screw fastening / tensioning , therefore sufficient bases for anchoring points beneath the deck stripes the promenade deck will cover these outcuts in the sides later on


- 2,625 replies
-
- 22
-
-
- kaiser wilhelm der grosse
- passenger steamer
- (and 1 more)
-
Denis, a nice Progress to be seen, and looking better every time I visit your log... Nils
-
nice work on ship and sails Bob, not so far to go any more... Nils
- 47 replies
-
- 1
-
-
- carmen
- constructo
- (and 2 more)
-
Congratulations Danny, your "HMS Vulture" is an awsome Milestone Setting build in the modeling comunity. It was such a delight to watch this "Swan Class" ship grow to it`s full blossom as it is presented today.... Very,very well done, and many thanks for sharing all your experiences, your thoughts and your so skilled handcraft work Nils
-
thanks Patrick, the work now is quite a long haul job to get all the decks to fit. I plank the decks before mounting them, so they can be sanded smooth and sealed with a dull varnish. All walls, deck bulwarks and -housing go on top of the planked decks. When the decks are on for permanent, there will be several rails to the upper hull sides. The metal plating does not go over the rails but fits neatly in between these. I had a upsetting experience last week, when I had tilted the window of my basement workroom to allow nitro fumes of the wood sealing primer and it`s nitro smell to escape over night ...... In the meantime we had much rain and bad weather, so that the high ambient humidity fell through the tilted window into the basement room just looking to settle on and in my hull. Next morning some of the longitudinal white glue joints (planks glued together at the edges as well) suffered swelling from the moisture a bit, and the nice smooth hull felt as if it needed a sanding and fairing session again I decided to leave as is, watch it over the week, hoping the glue swell will go back by itself. and to use watertight white glue (propeller glue) next time. Its getting better now day by day Cheers, Nils
- 2,625 replies
-
- 7
-
-
- kaiser wilhelm der grosse
- passenger steamer
- (and 1 more)
-
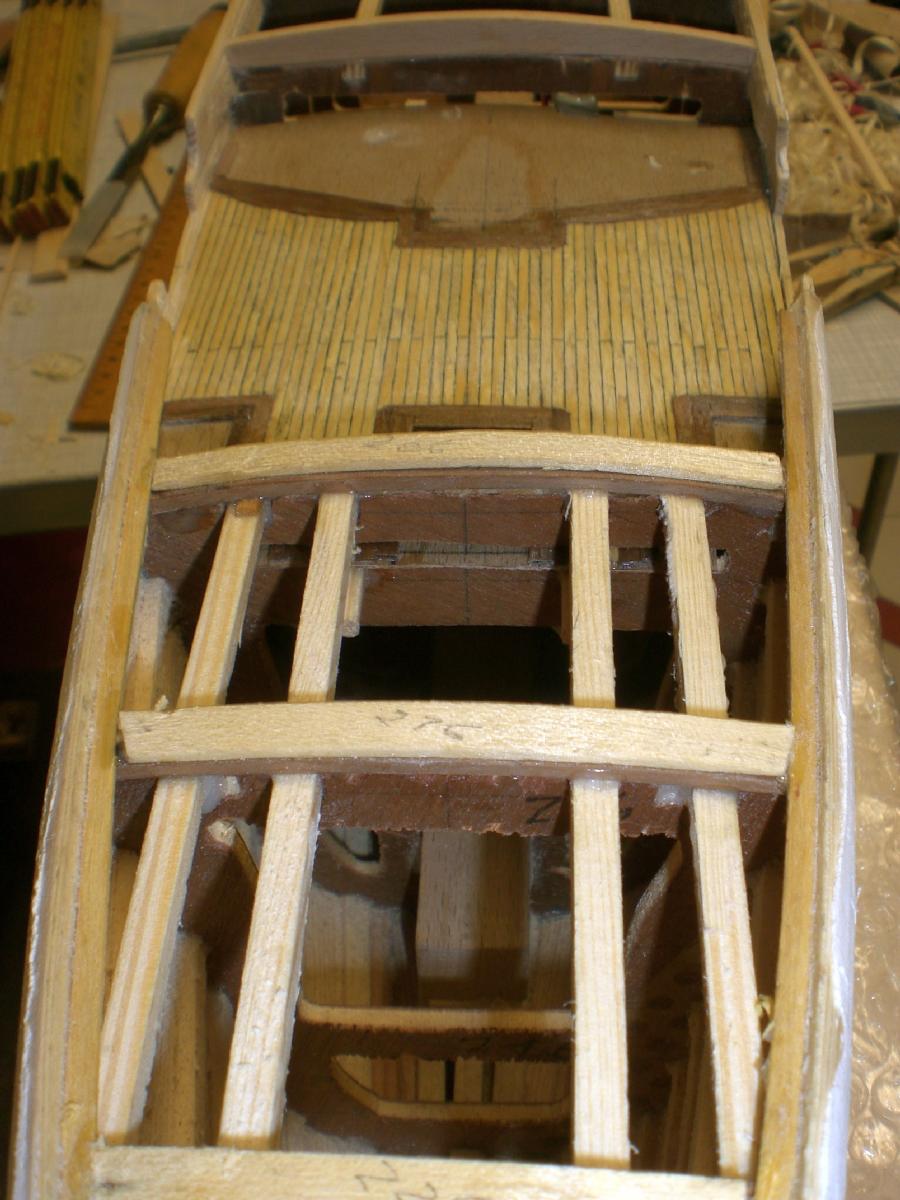
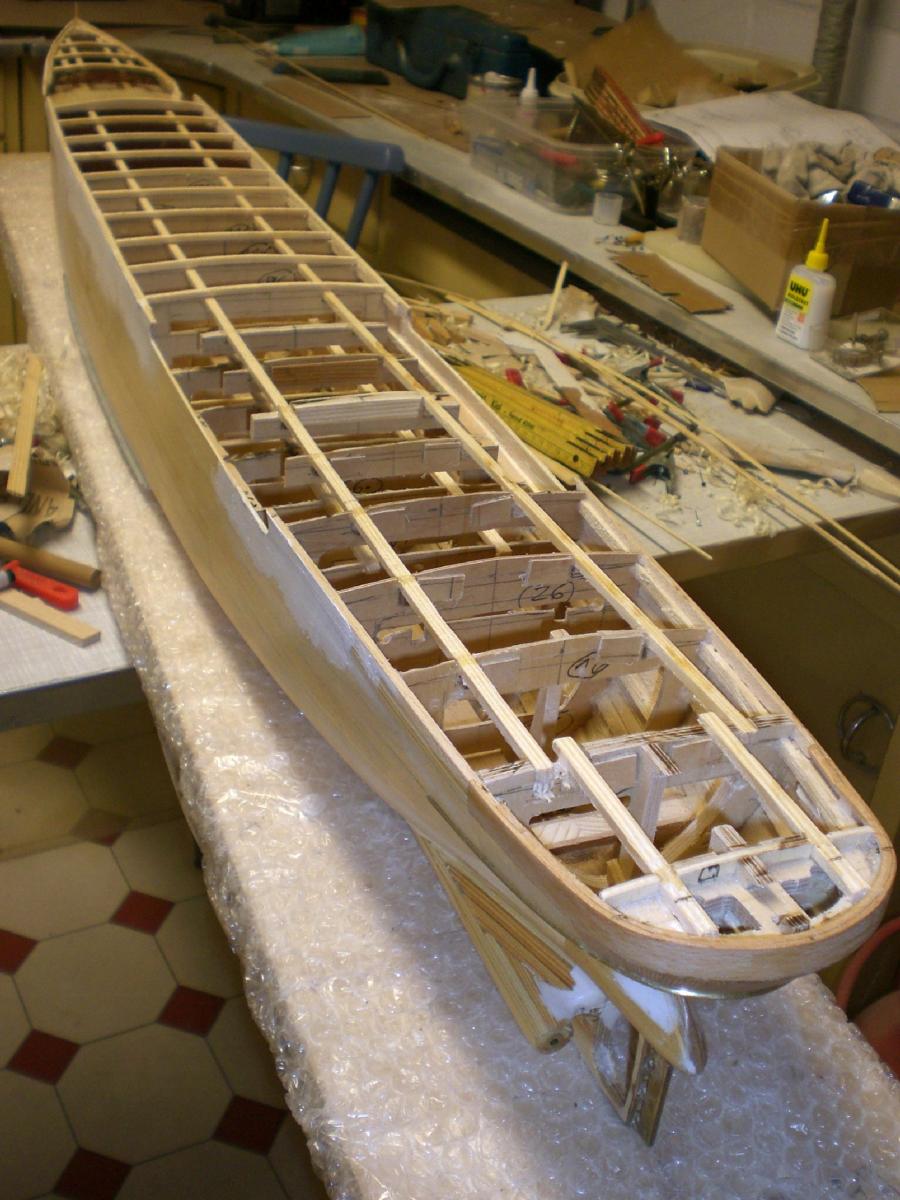
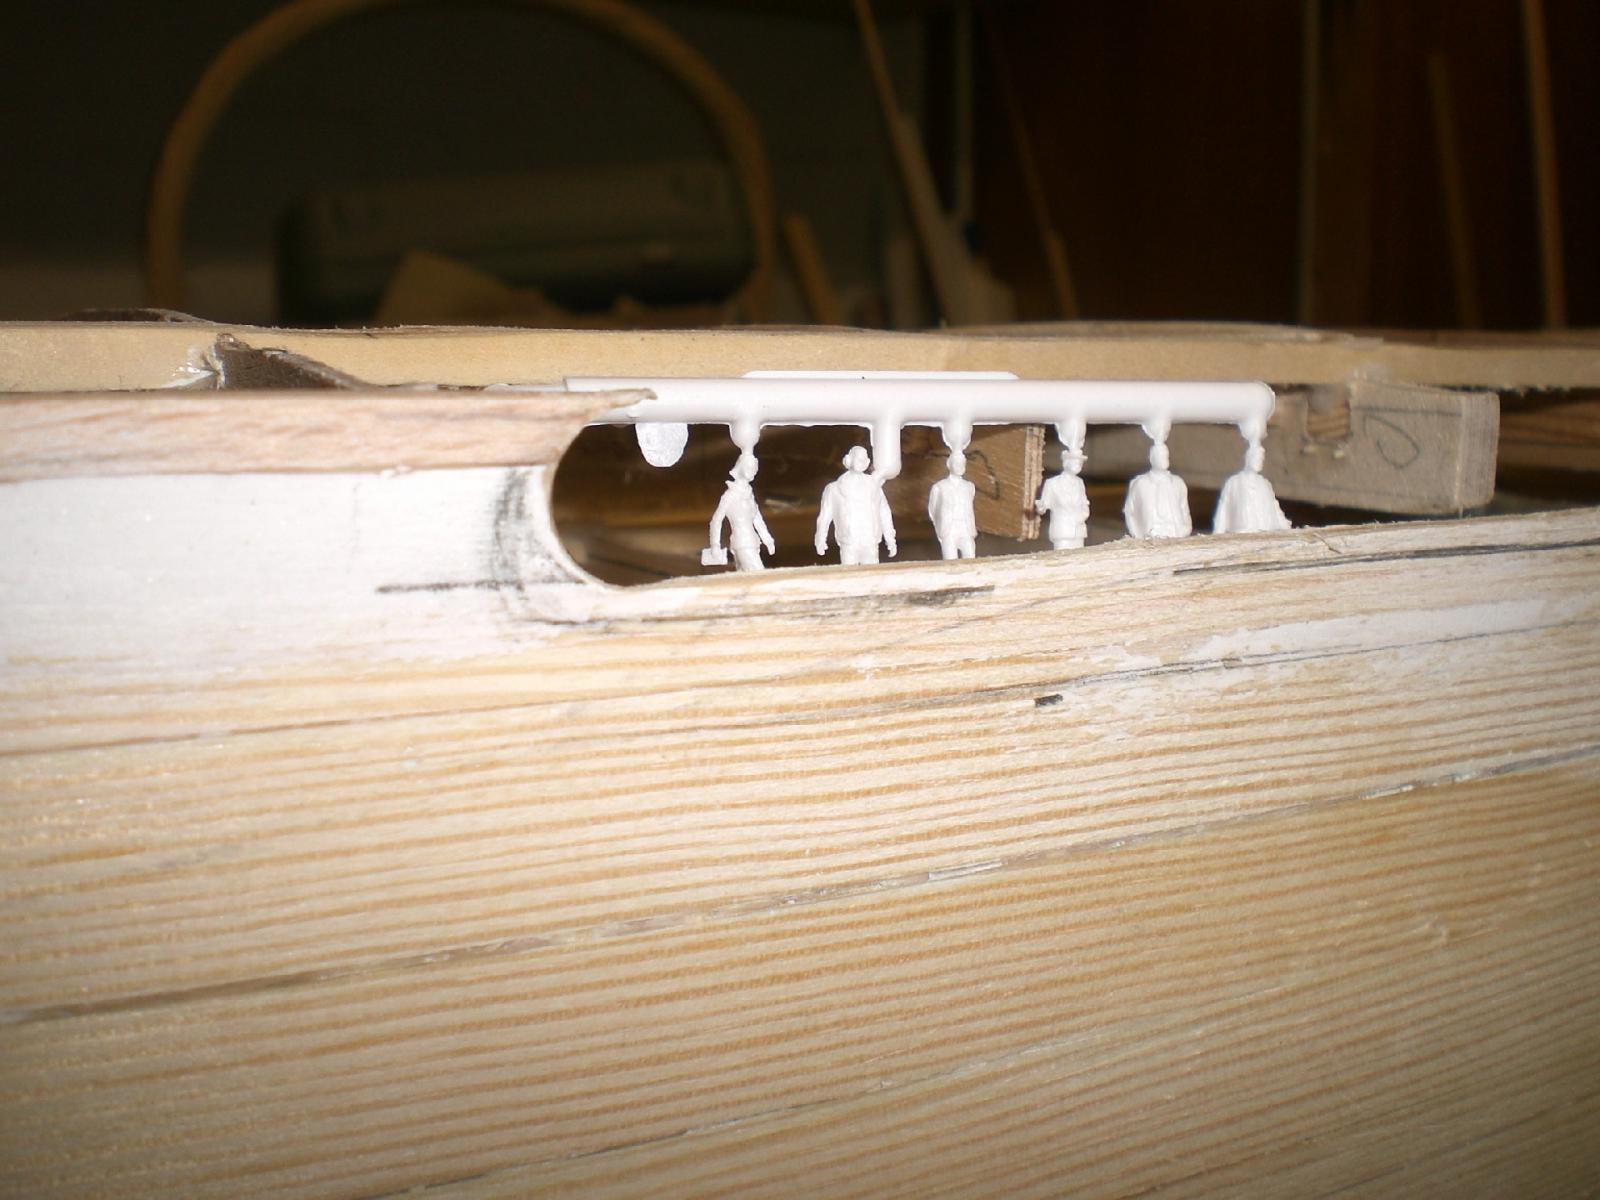
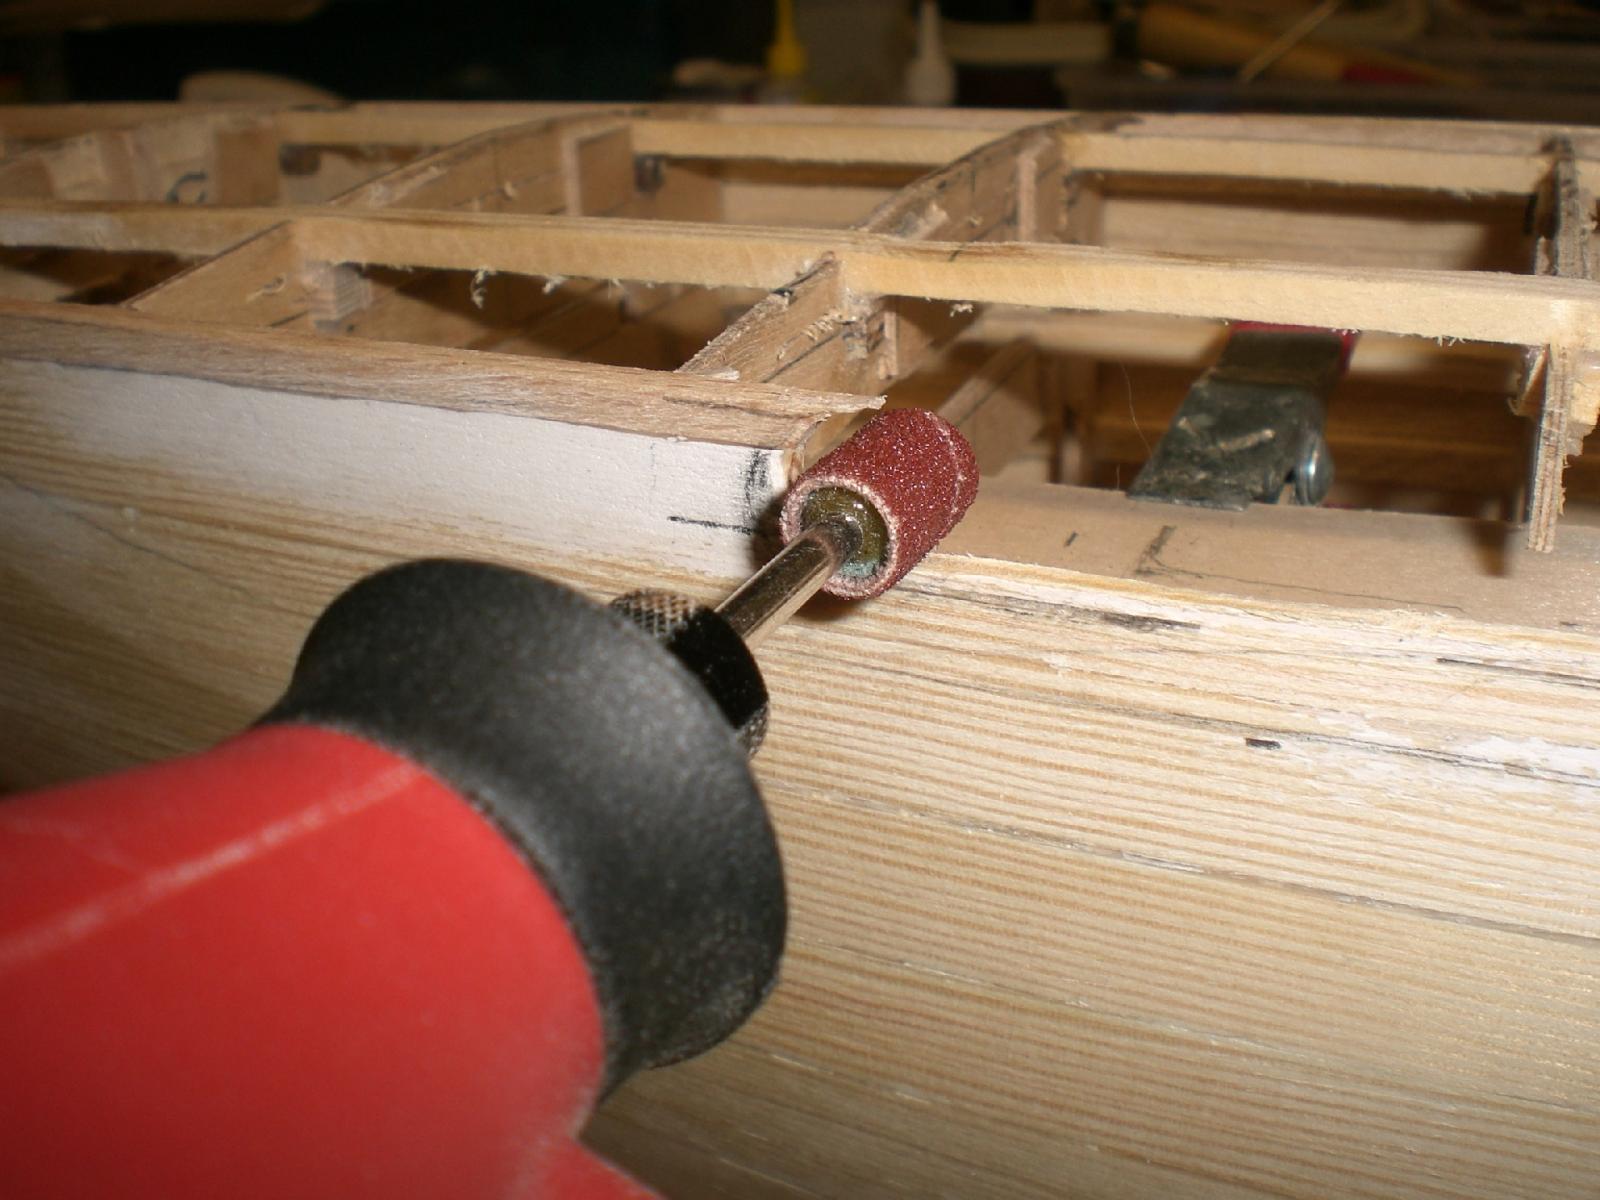
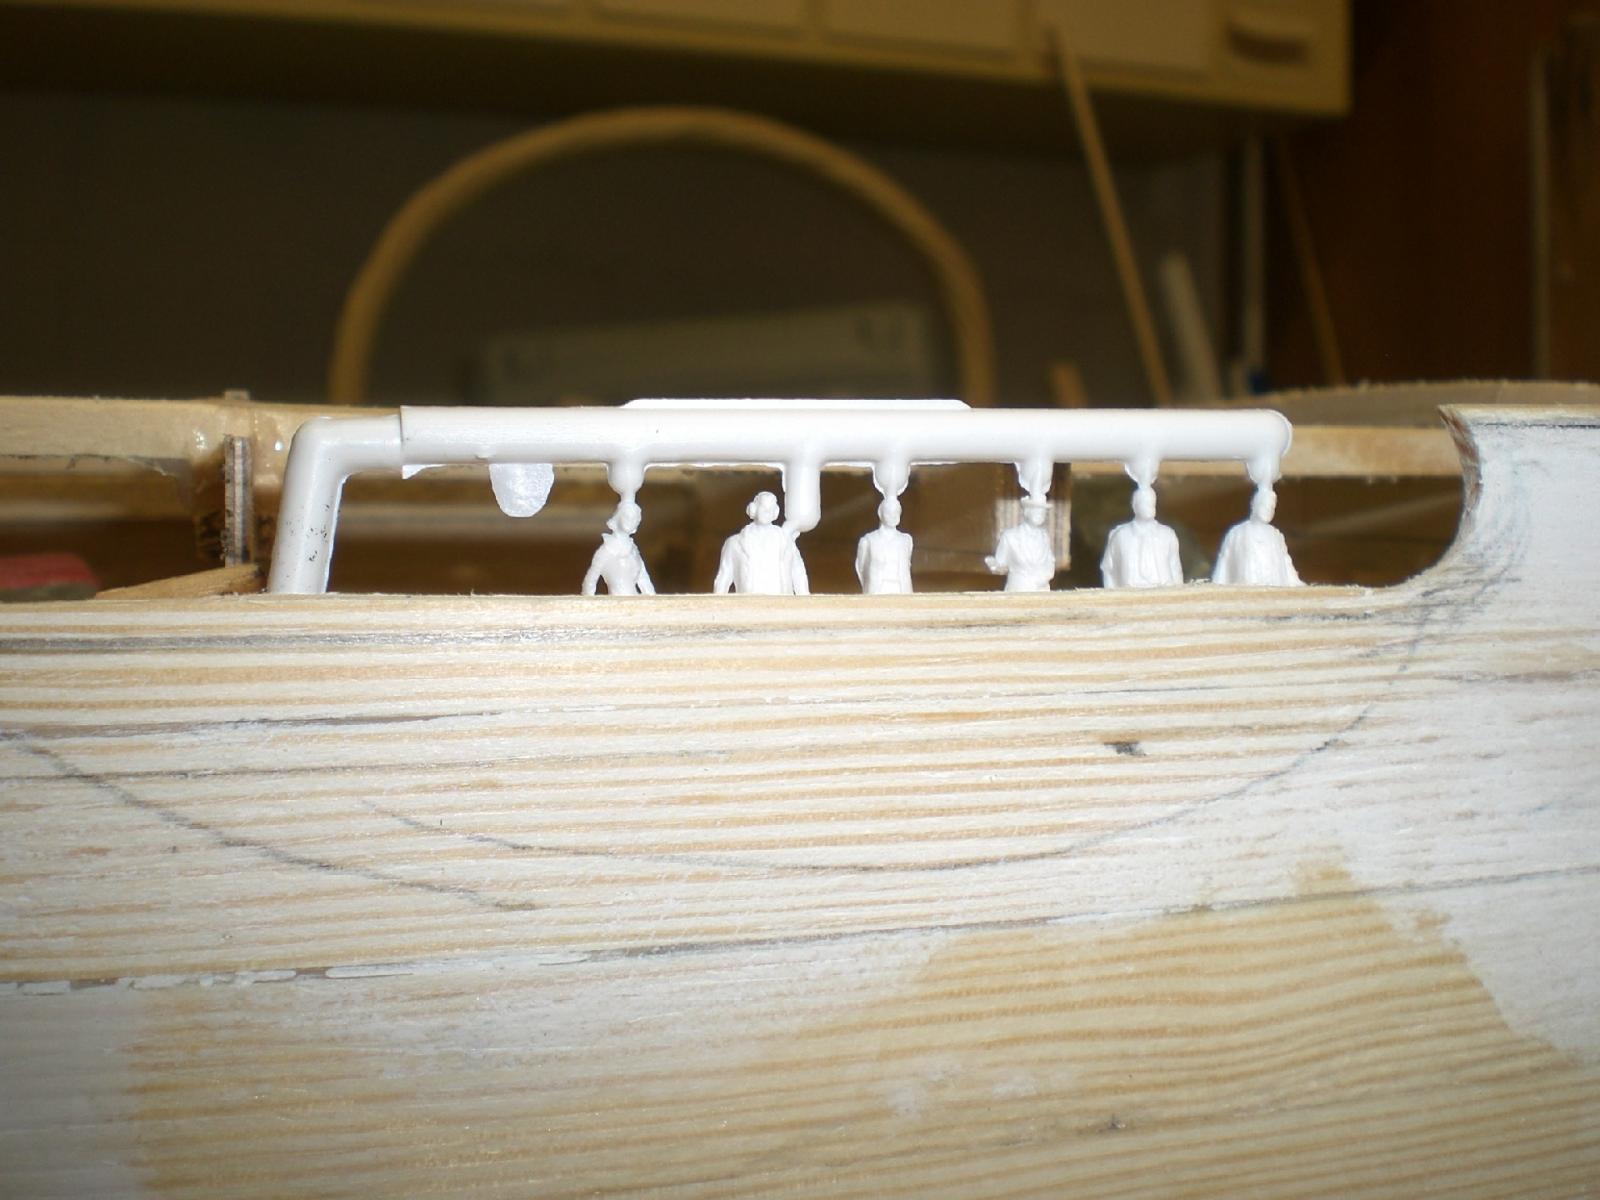
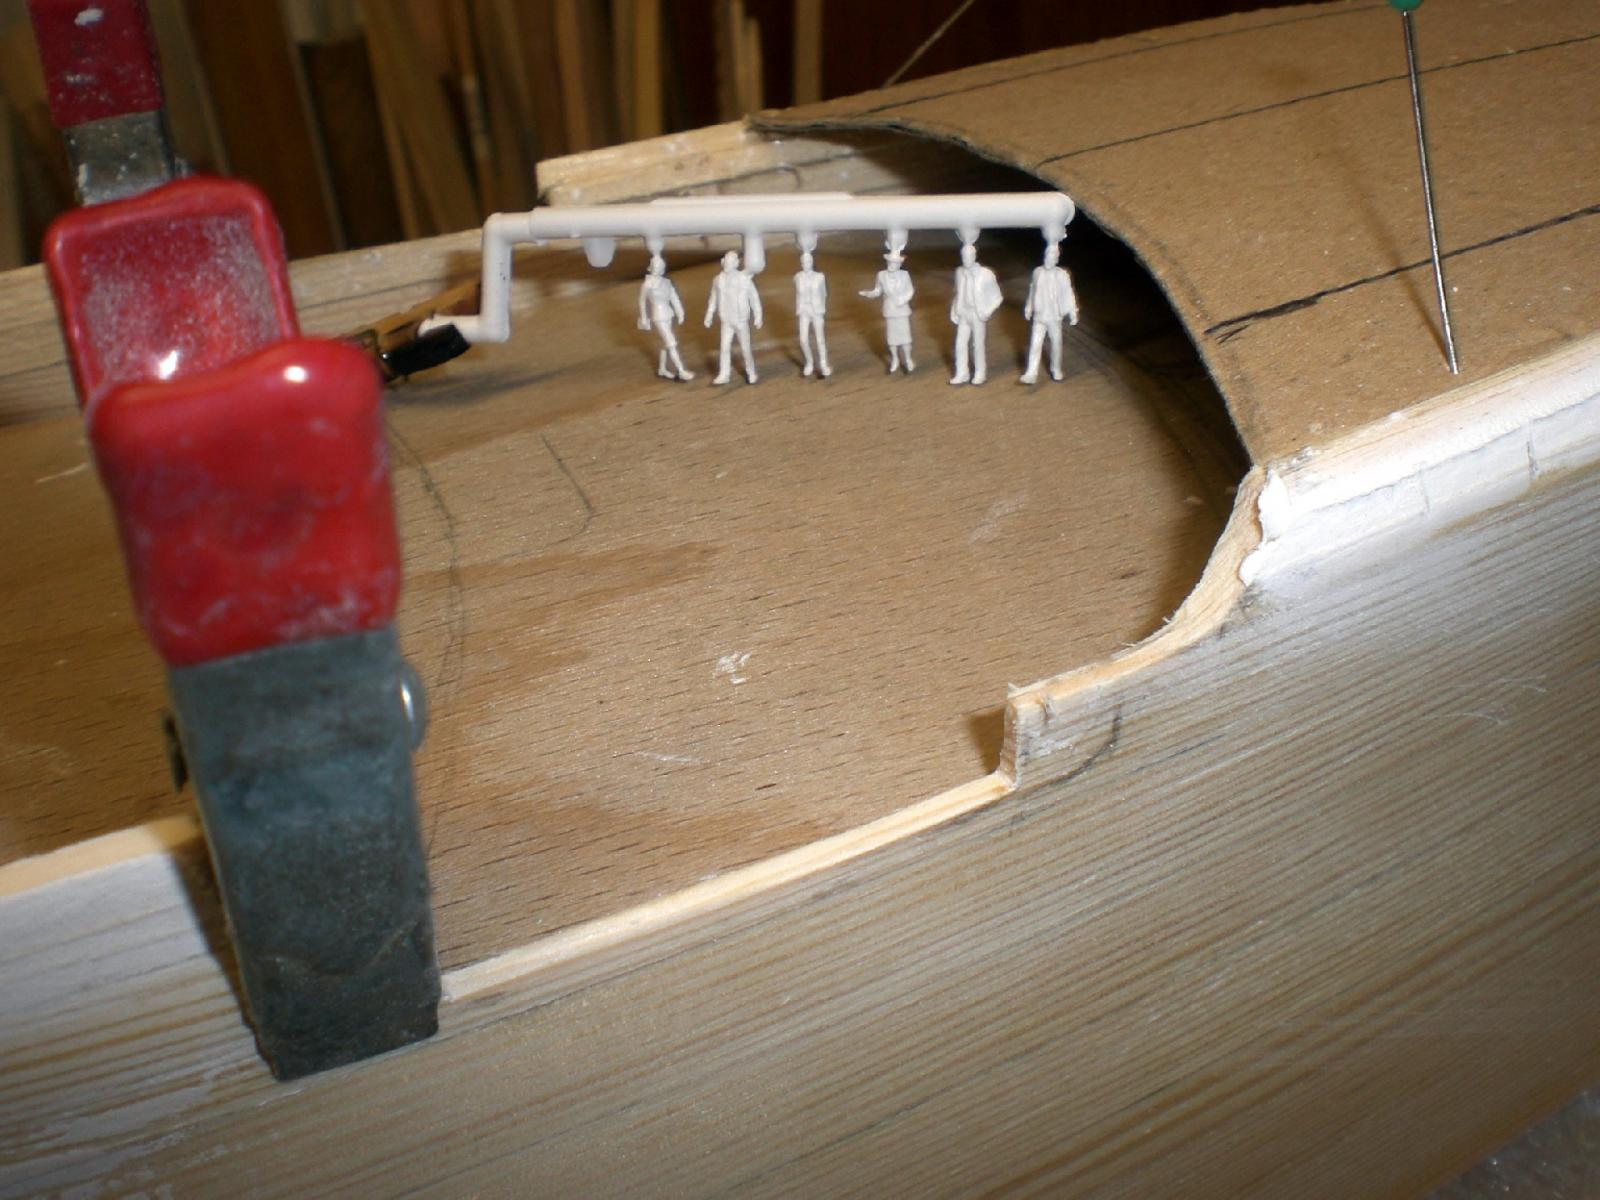
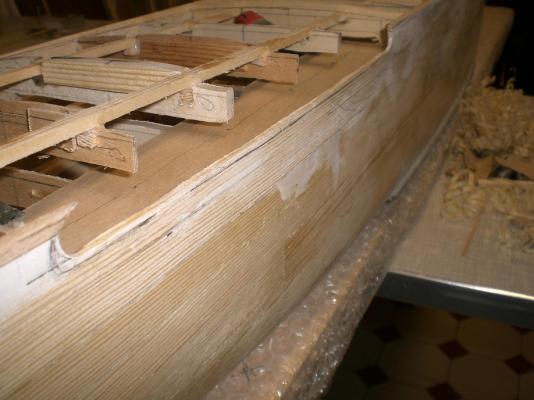
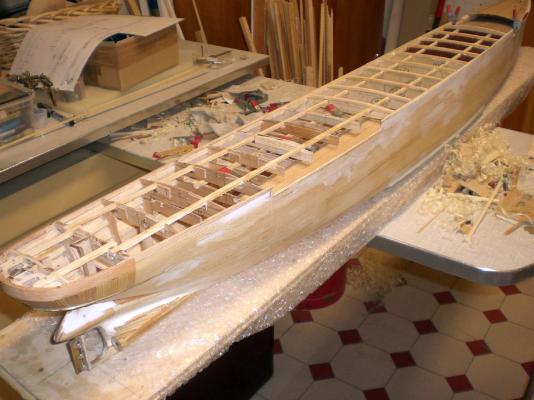
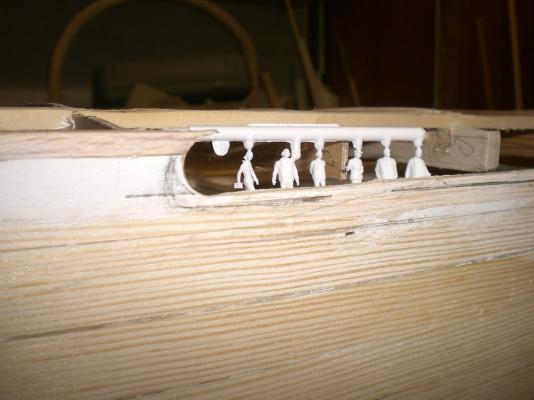
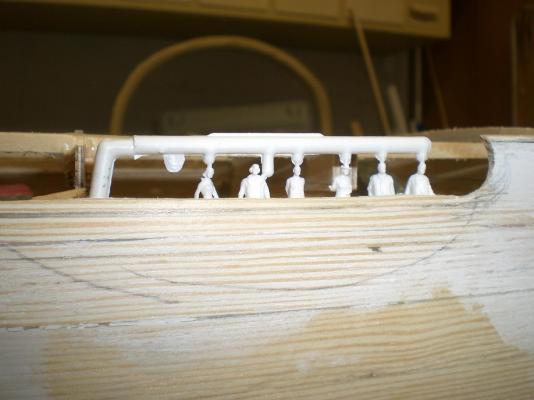
Build log part 15 Status update: today I cut into the hull sides at the waist areas, the front area lowest point, right down to the deck and the aft Area, leaving an 8mm high bulwark standing. Next will be the deck-planking job in these waist areas. The raw decks were dry-fitted and are ready for planking Unfortunately I found no figurines in scale 1:144 in fashion of 1900 clothing, pleas, does anybody know where to find some ? The only ones I found are out of the airlines scale figurines, and I`m not so fond of military figurines, but I´m happy to have some at all for dimension checks Nils a Dremel grinder is good for this work the second raw deck is laying on the second stringer from top, the upper stringer has been cut away, so the remaining bulwark is flush with the inside of the side planking the port side will have to be brought to the same status the 8mm raw-bulwark is in hight slightly above figurines waist hight, handrail still to be fitted the forecastle deck is still a card template


- 2,625 replies
-
- 21
-
-
- kaiser wilhelm der grosse
- passenger steamer
- (and 1 more)
-
Mike, looks like this "Primocon" stuff is the right way to deal with. I`ll look out for that one. I remember priming my former actual sailing Dinghi with a white 1 component primer before putting the antifouling paint on. When scraping / replacing the antifouling appr. every two years, all came off, but not that primer, it seemed to have been married with the gelcoat. Unfortunately I did`nt save the empty can or wright down the name, now I`m desperately looking for a good primer to stick to the shiny aluminium foil of my model`s plating. Ordenary primer comes off to easy together with the paint covering it Enjoy your holiday... Nils
-
Mark, nice clean work on Hull and masting, this will be a very good looking cross section Nils
- 172 replies
-
- 4
-
-
- druid
- sloop of war
- (and 2 more)
-
Hi Kester, ist good to hear that you are back to work on the SL, looking foreward to the first pics... Nils
-
Thank you for your Input Larry, maybe I`ll go for your suggested solution,...... but I`ll try the use of a mini L-angle brass Profile to the deck , so that the railing stripe can be carefully spot soldered to it, if it wo`nt look too messy afterwards. if the L-rail perhaps is soldered on to the railing stripe first, the other flange of the re-drilled profile could be pinned to deck for fastening (going to be a tricky excercise anyway...) Nils
- 2,625 replies
-
- 3
-
-
- kaiser wilhelm der grosse
- passenger steamer
- (and 1 more)