Mirabell61
-
Posts
7,406 -
Joined
-
Last visited
Content Type
Profiles
Forums
Gallery
Events
Everything posted by Mirabell61
-
 Nice words David, probably the later would be applying in your opinion, smile... Thanks Nils
 -
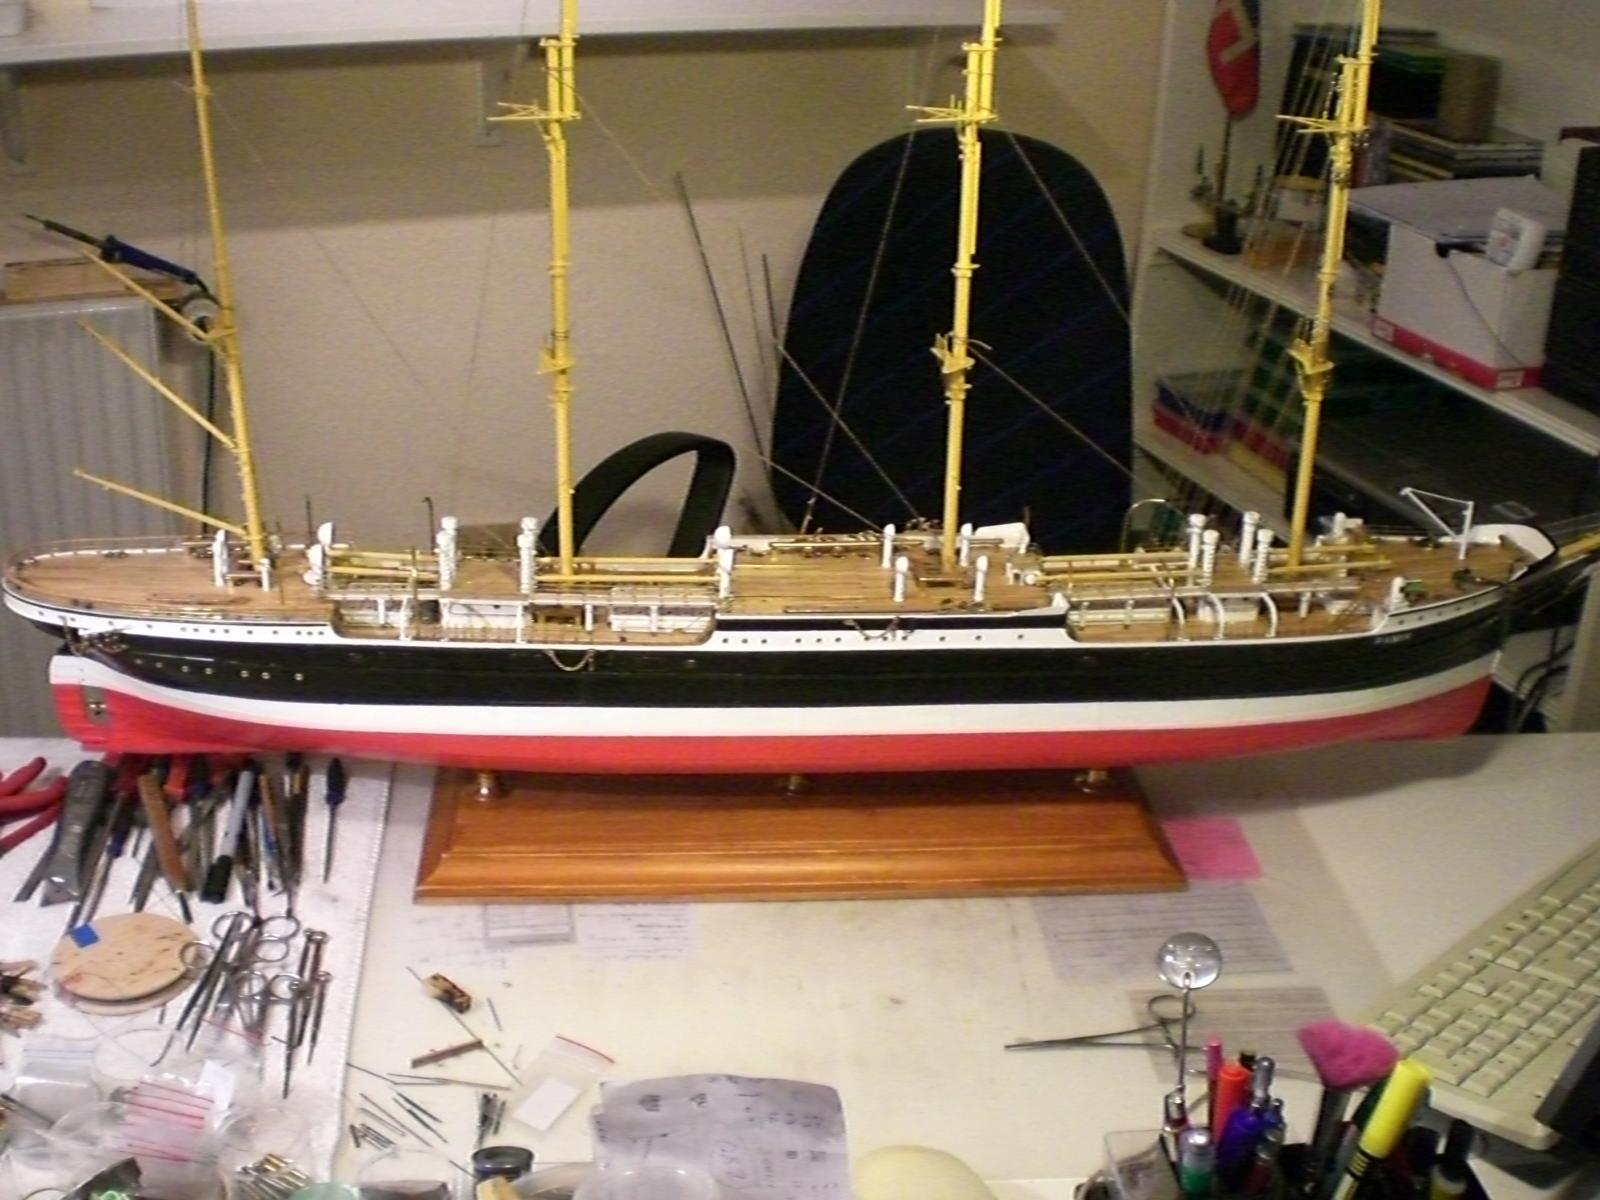
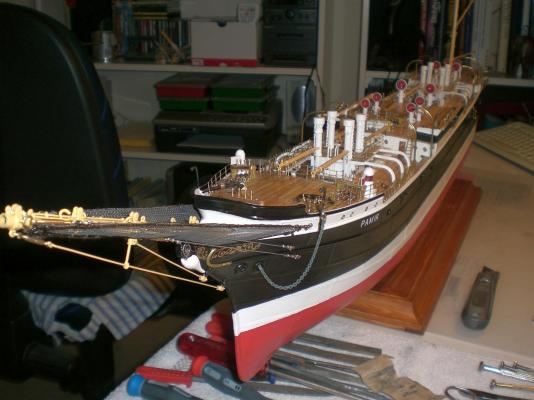
Yes Nenad, my Pamir will be carrying a full set (32 single sails) each sail fully rigged with running rigging, I know it is hard to imagine this,in my scale Chosen, but that was one of the challenging obligations I set to myself, as well as sewing the sails myself, because I found nobbody else who would do it for me. It was also an excursion into Tallship sail rigging, and what all was needed to control, hoist, lower, reff, those sails, when doing the necessary Research hereto. The build log shall end up with the Pamir completely rigged and with a full set of sails, and braced to the shrouds, as if going in a stiff breeze. Just peep into my Album of the "Pamir 4-mast barque" in MSW Topic "Gallery of completed scratch built models" if you wish upfront to see the final result at this stage already have fun with the coming build log parts Nils
-
Very nice build Jason, splended Job also on the deck planking, well done ! Nils
- 800 replies
-
- 1
-

-
- snake
- caldercraft
- (and 1 more)
-
A nice comment Nenad, Thank you Nils
-
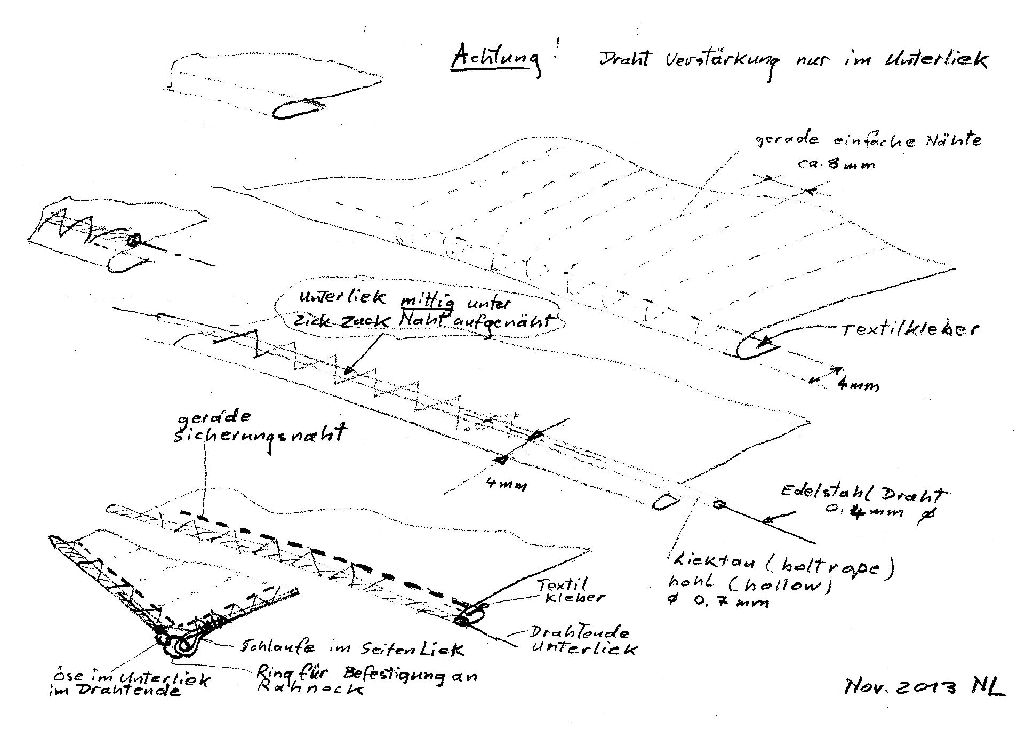
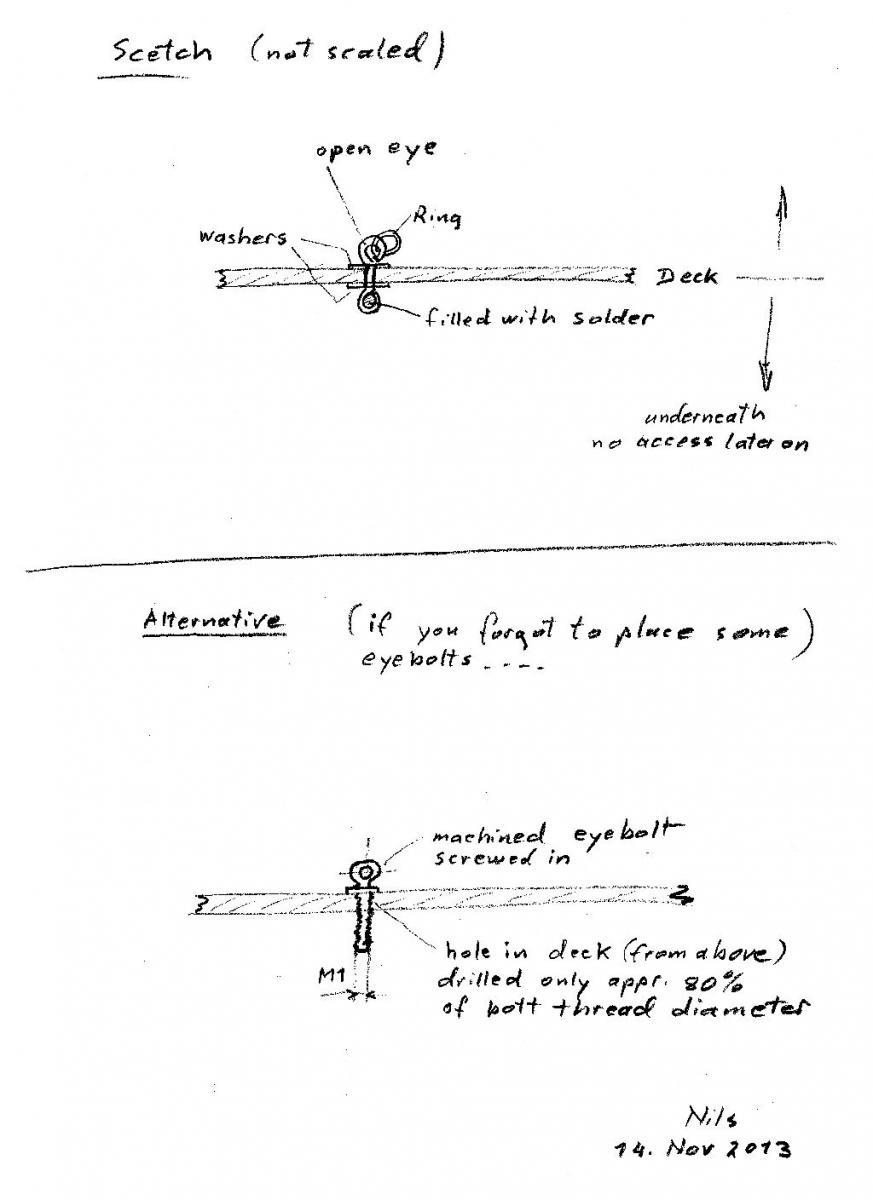
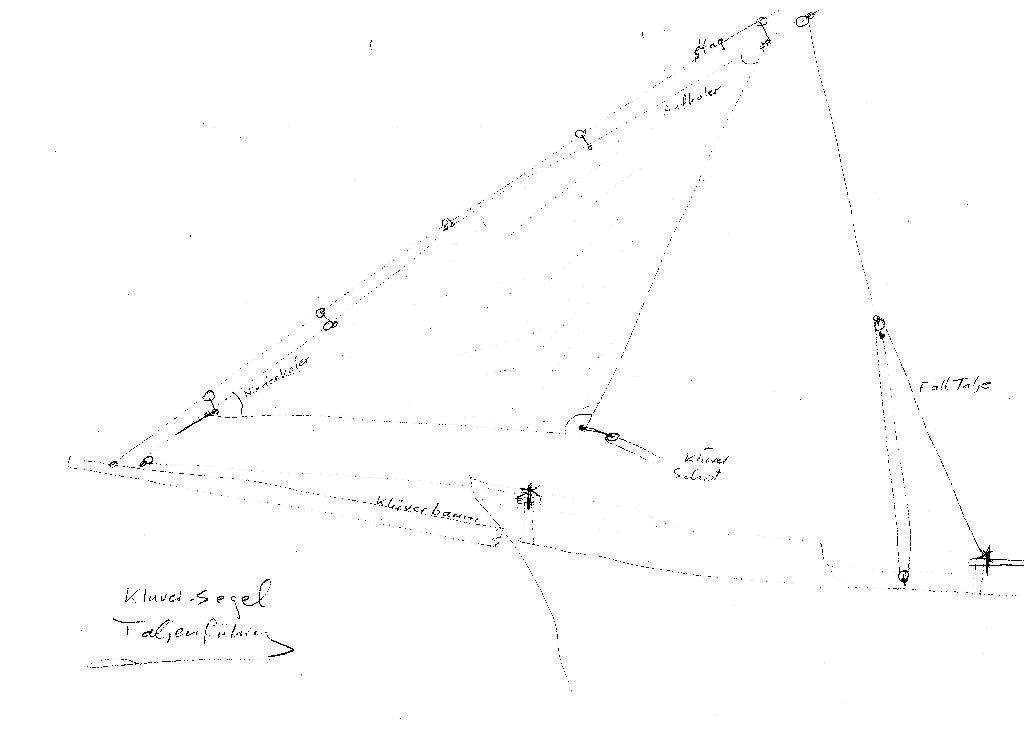
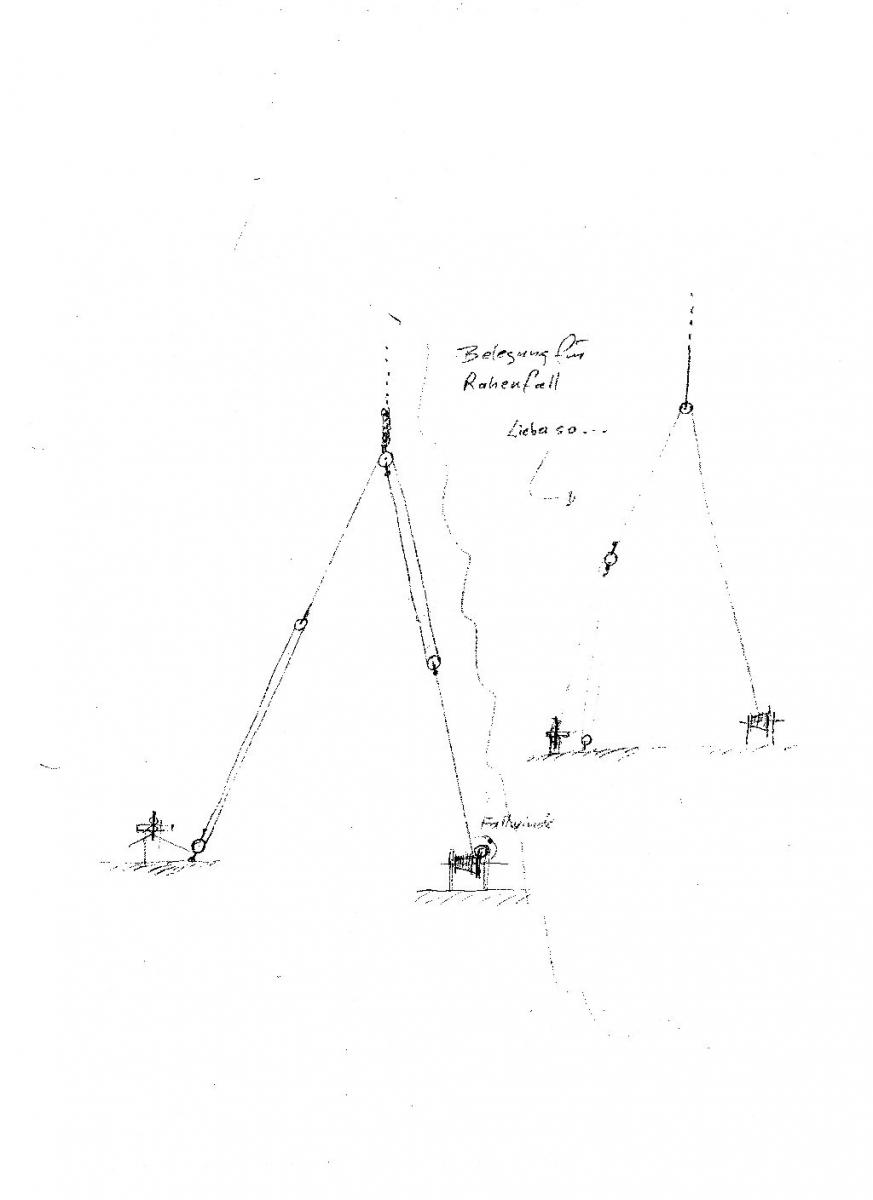
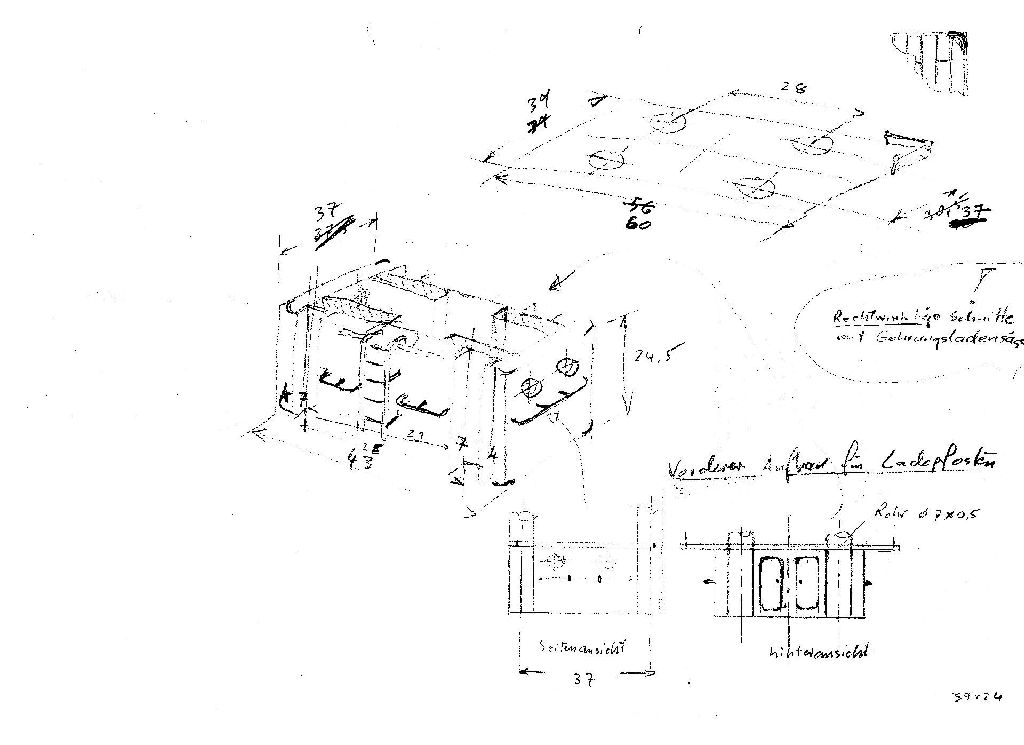
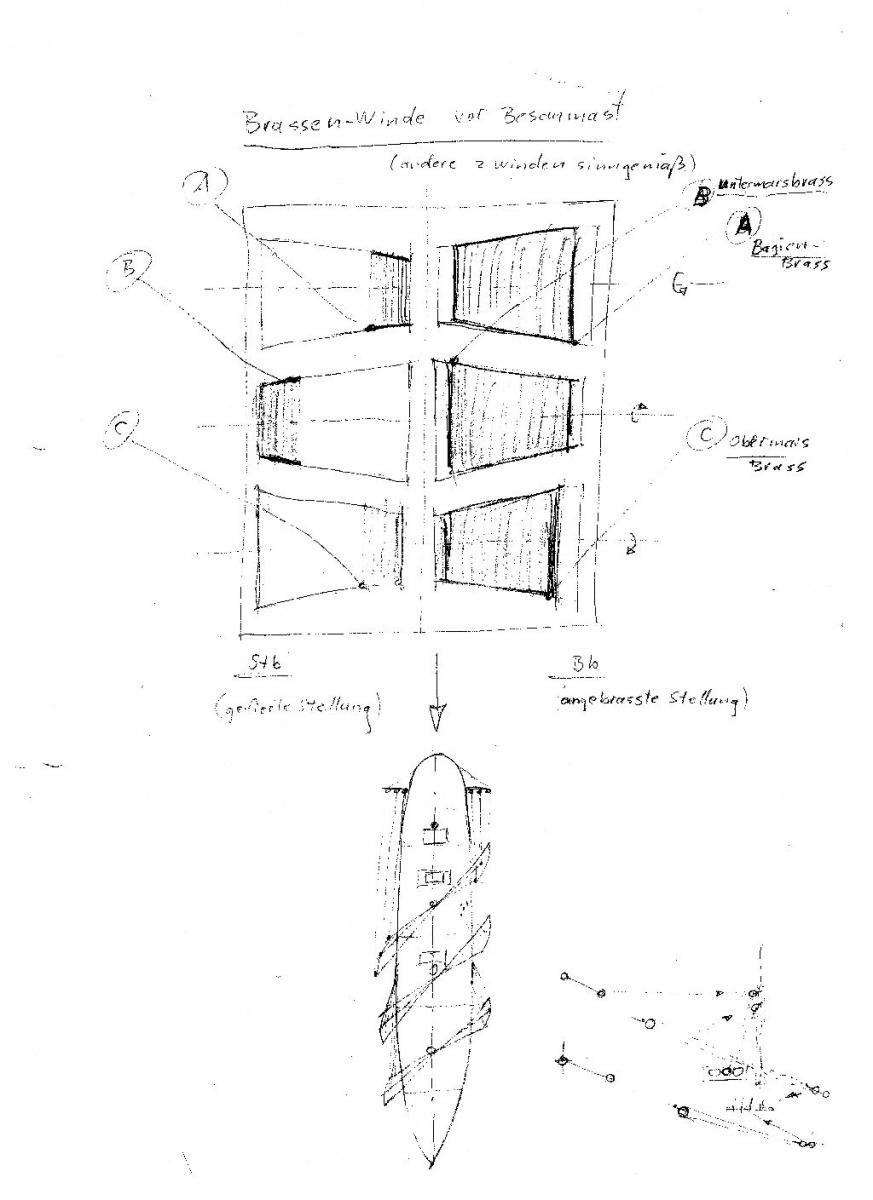
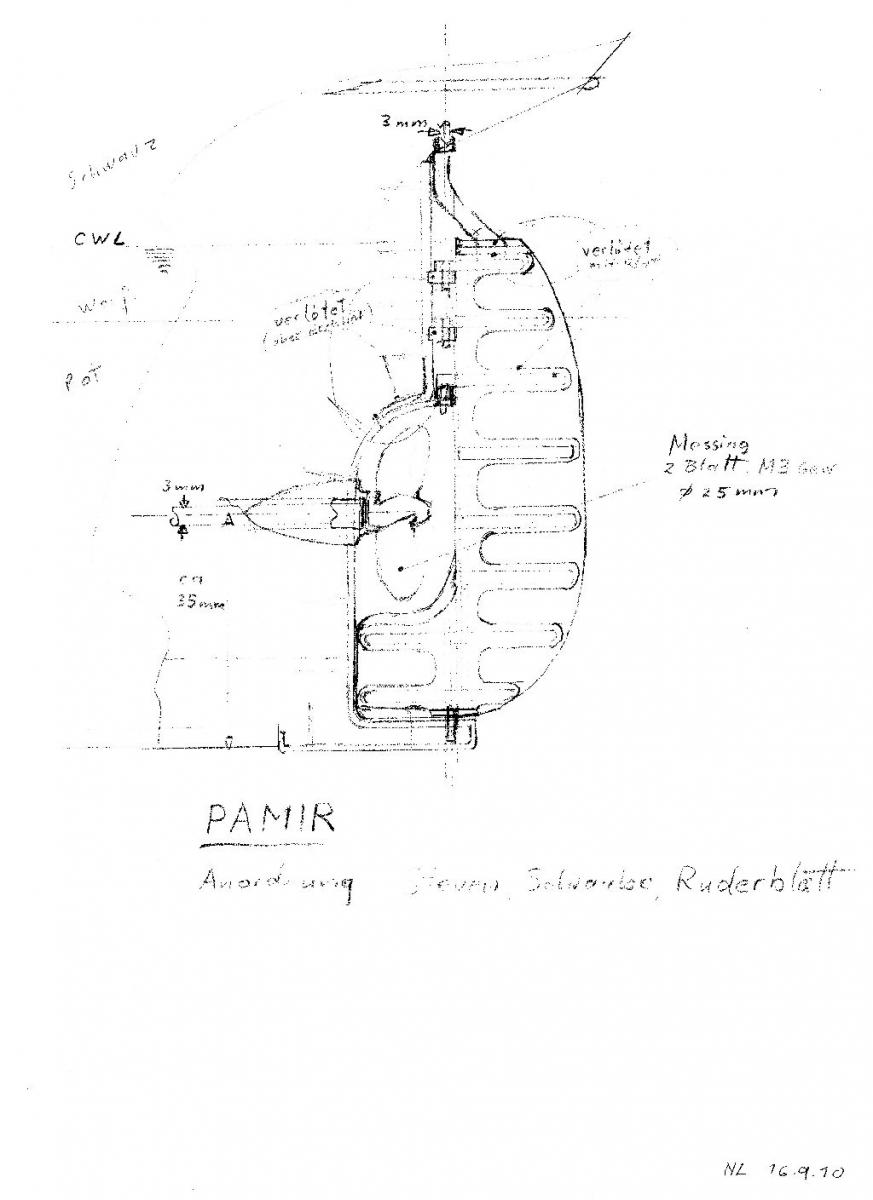
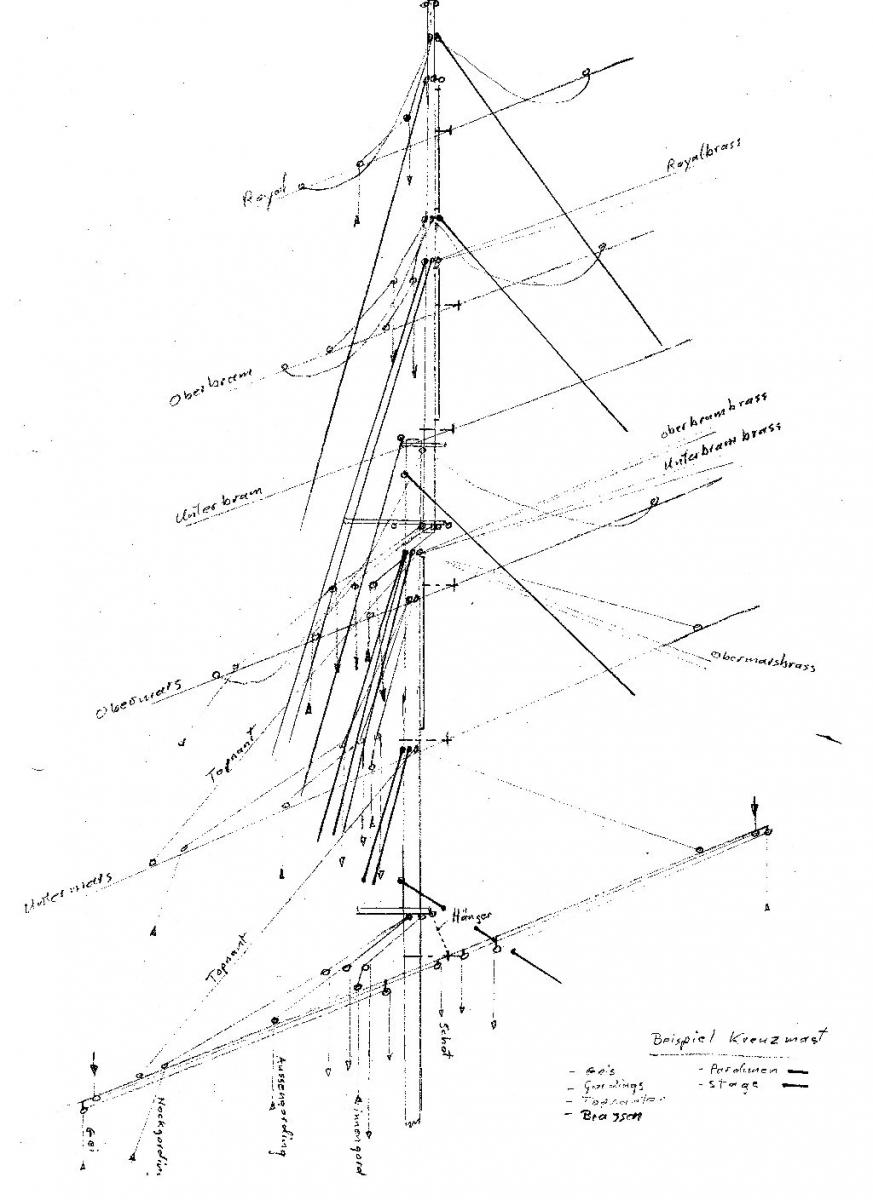
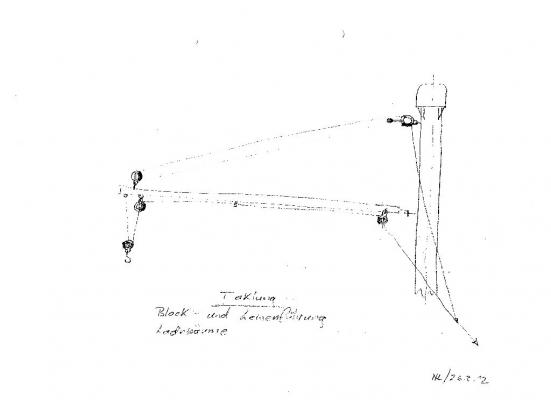
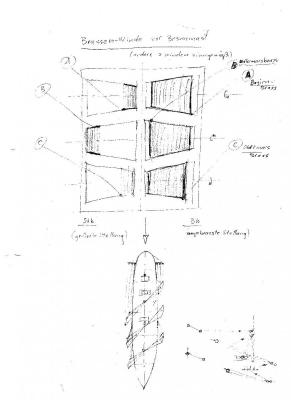
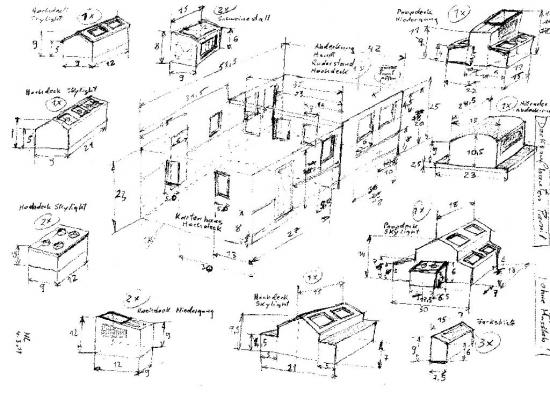
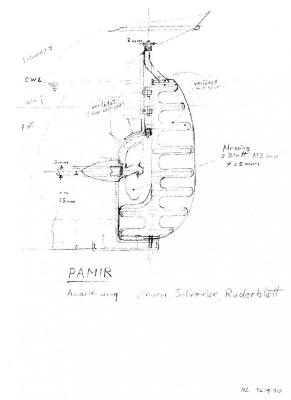
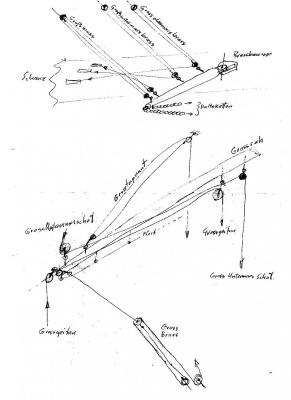
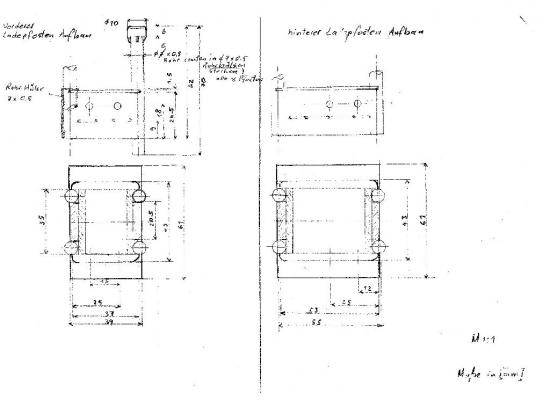
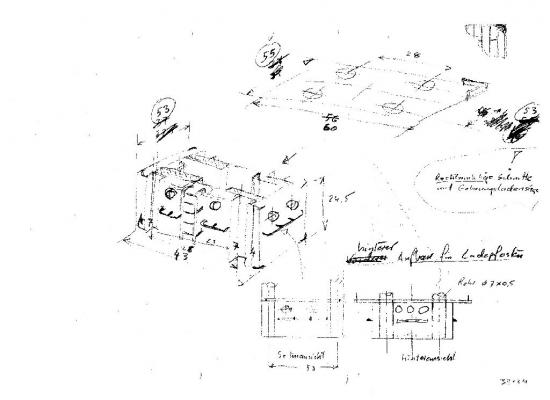
I have gathered some of my build accompaning handscetches for those of you who would like to see some of the thoughts brought down to paper, not necessarily Showing the last executed Version but Trial scetches, etc.... Sorry if the Quality of the pencil scetches is not the best, but here the Pixel size for posting is limited to 1200 x 1600, it would`nt work otherwise Trust the Content is self explaining Scetches part 1 12 more scetches to follow Nils


-
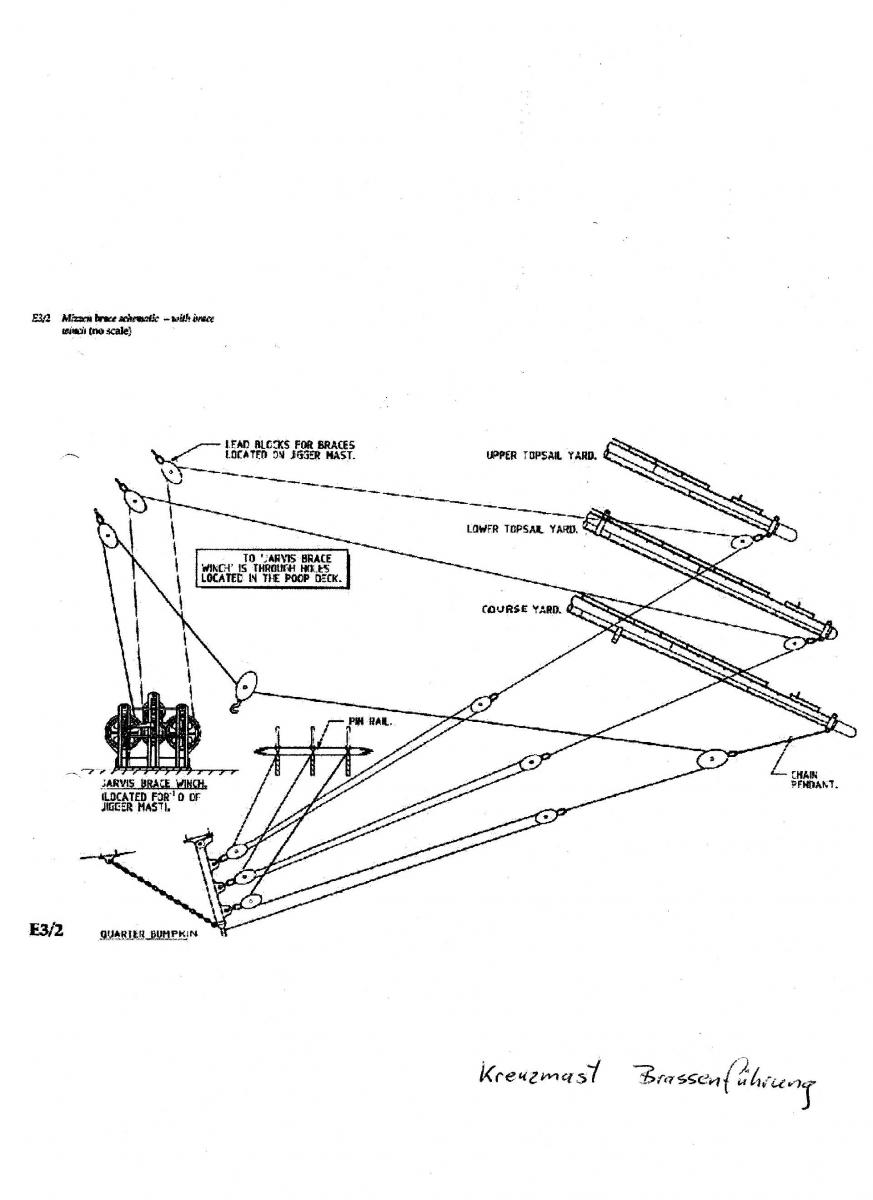
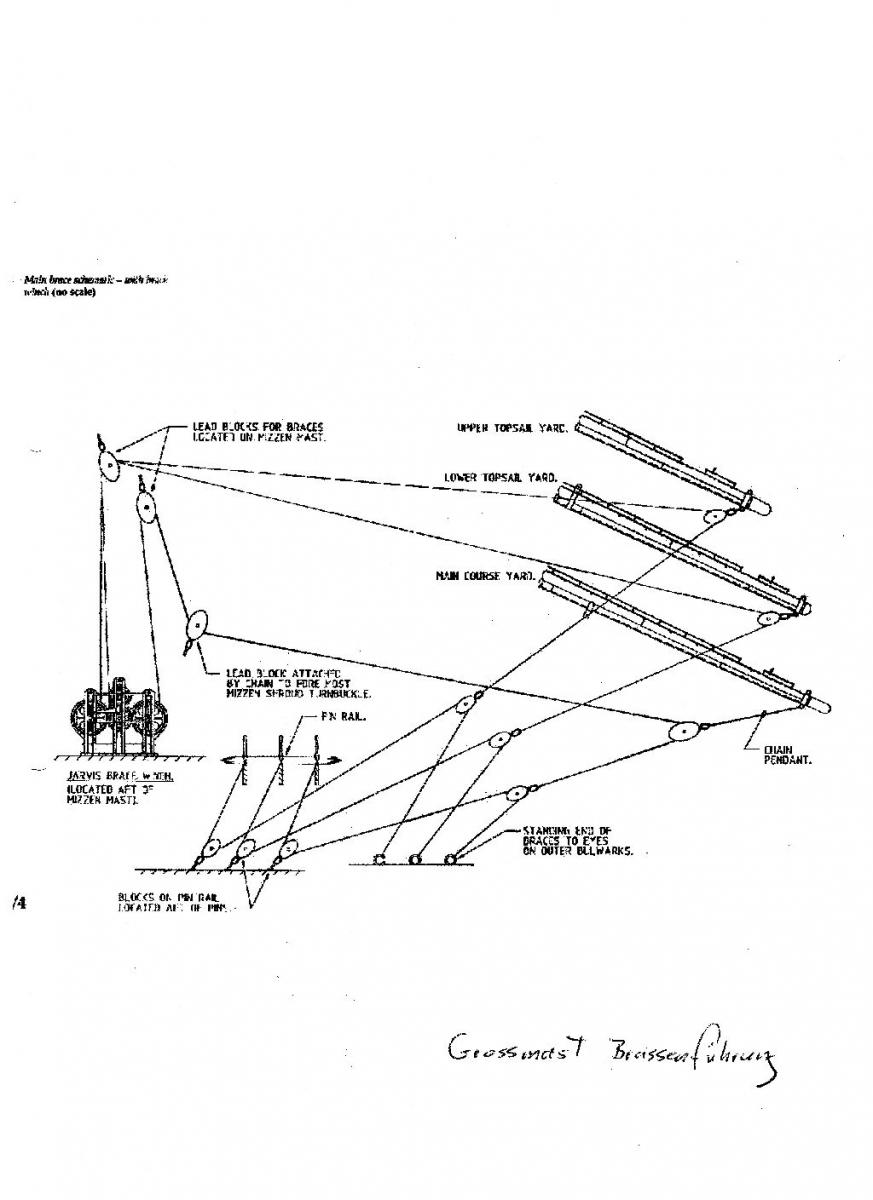
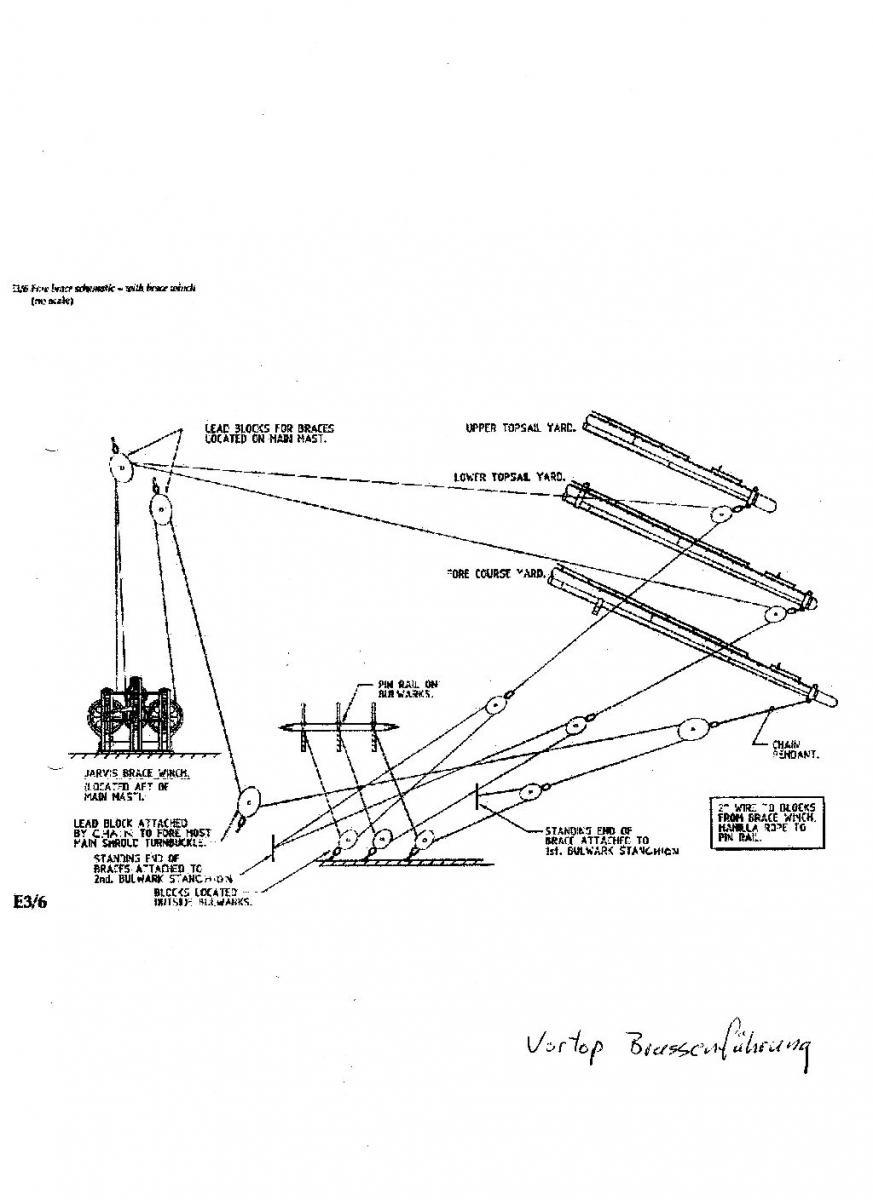
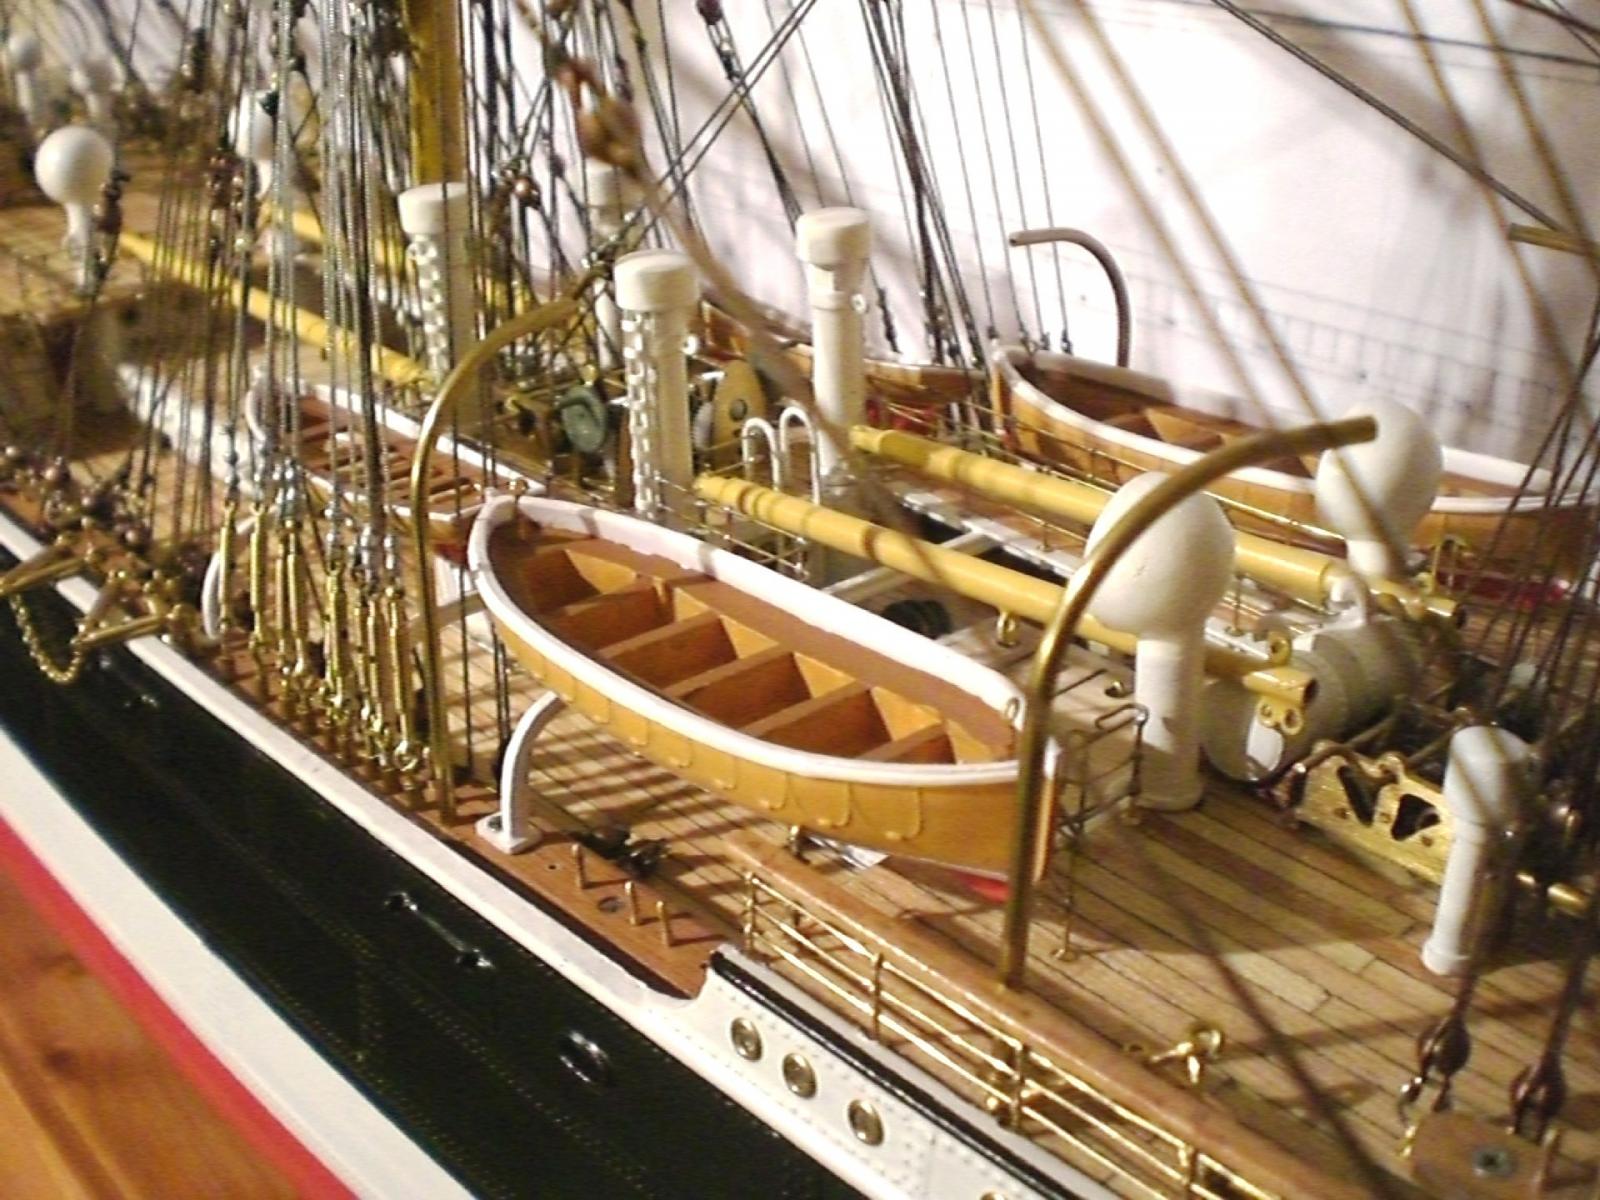
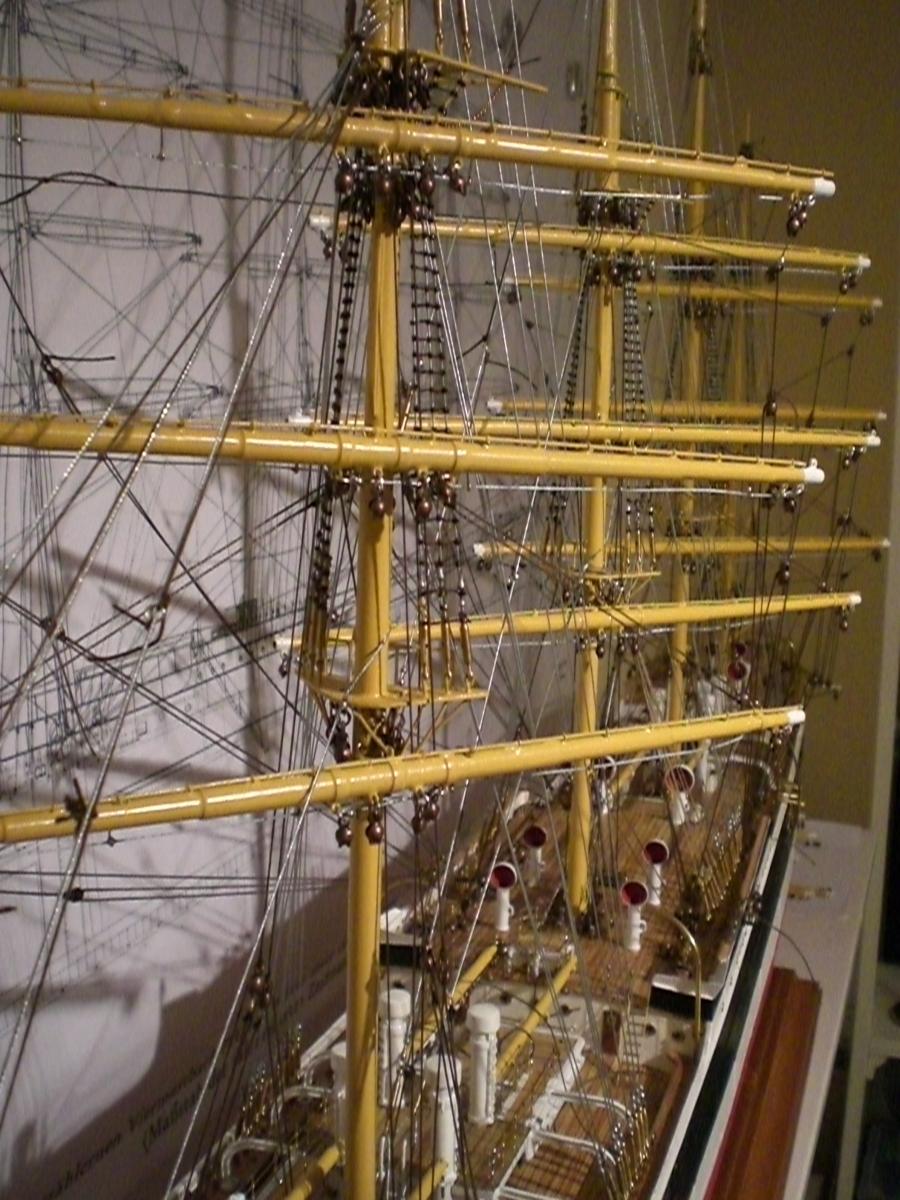
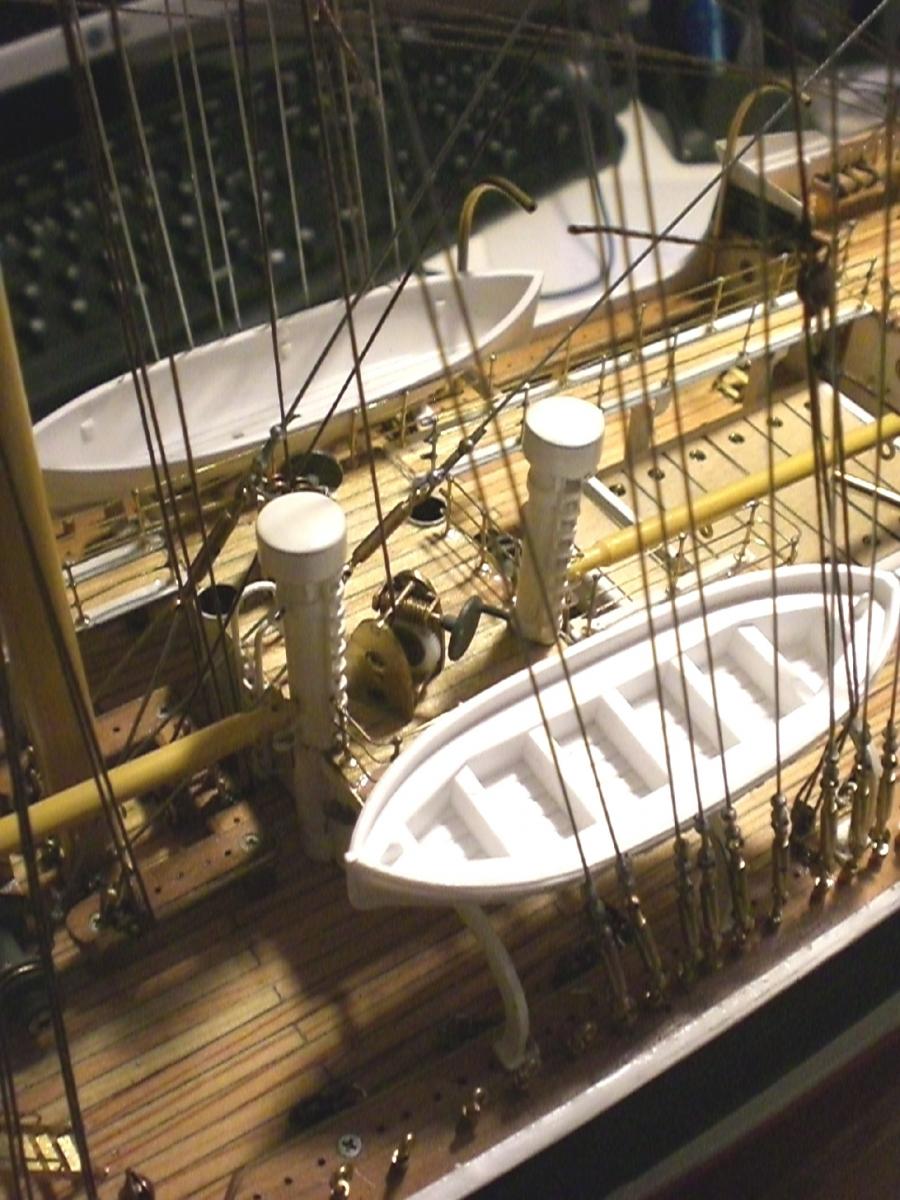
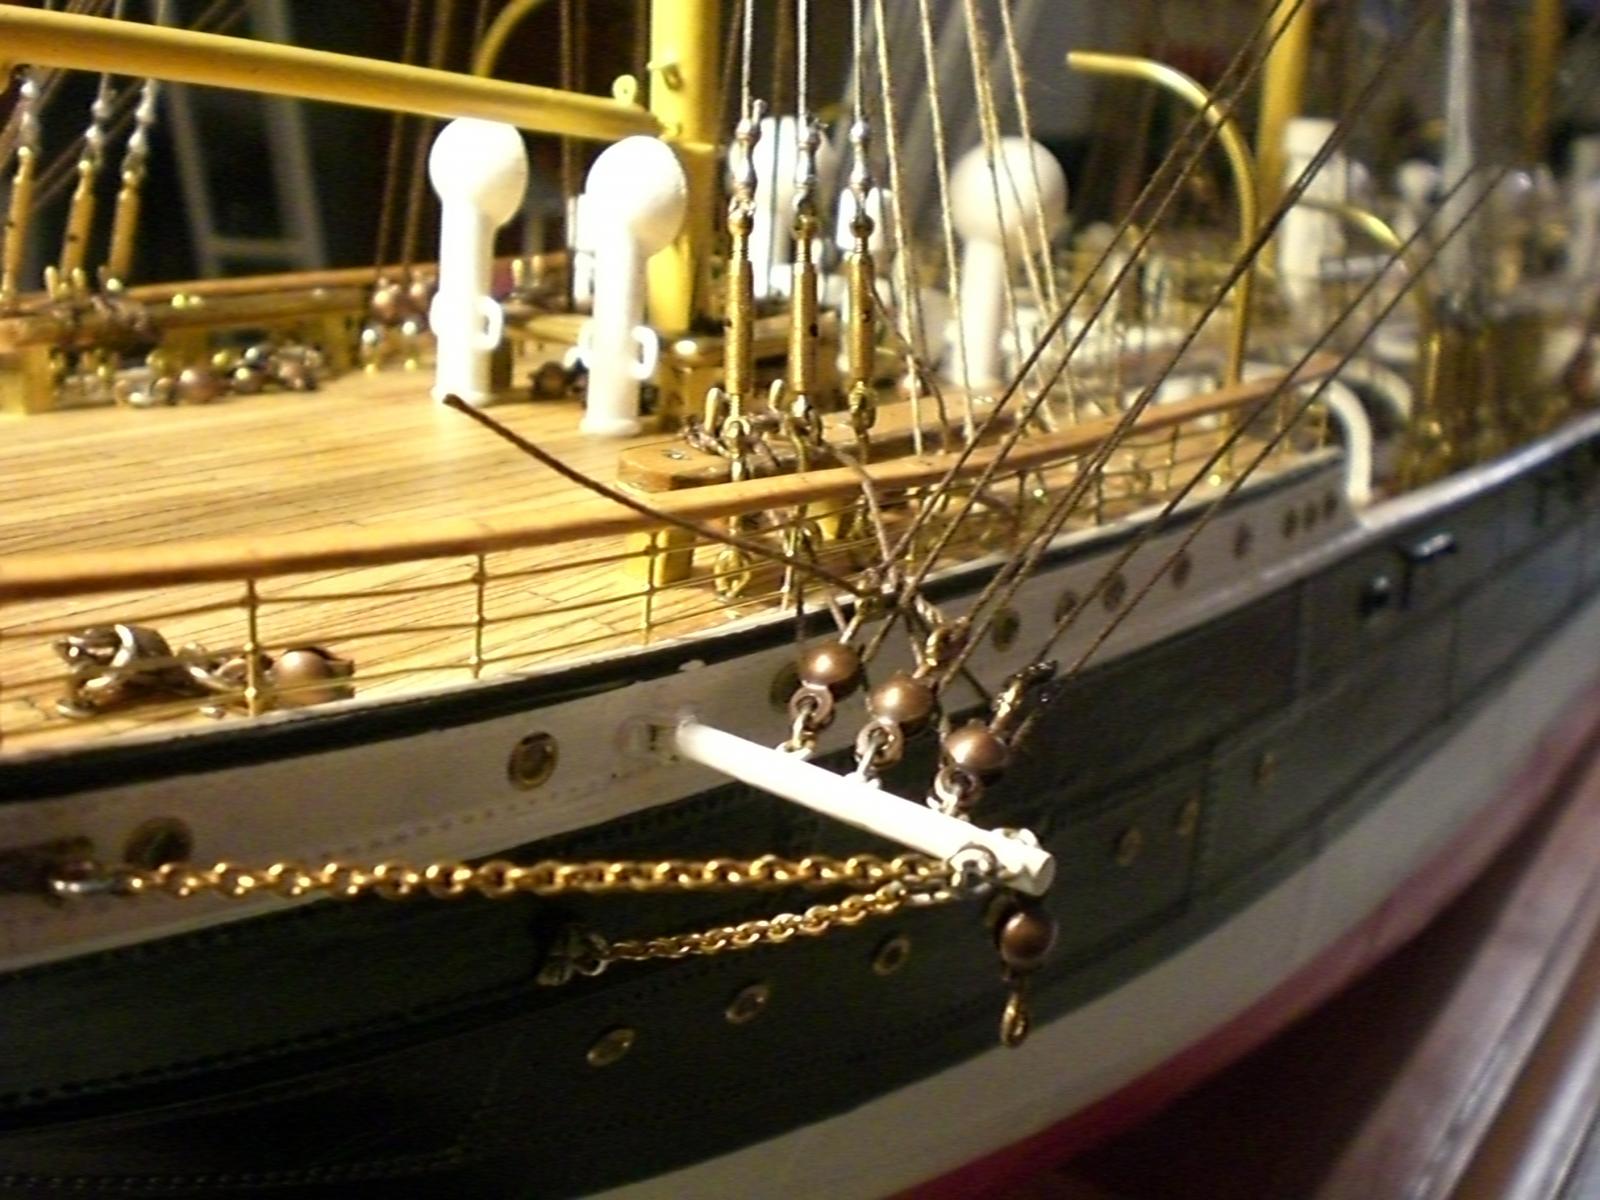
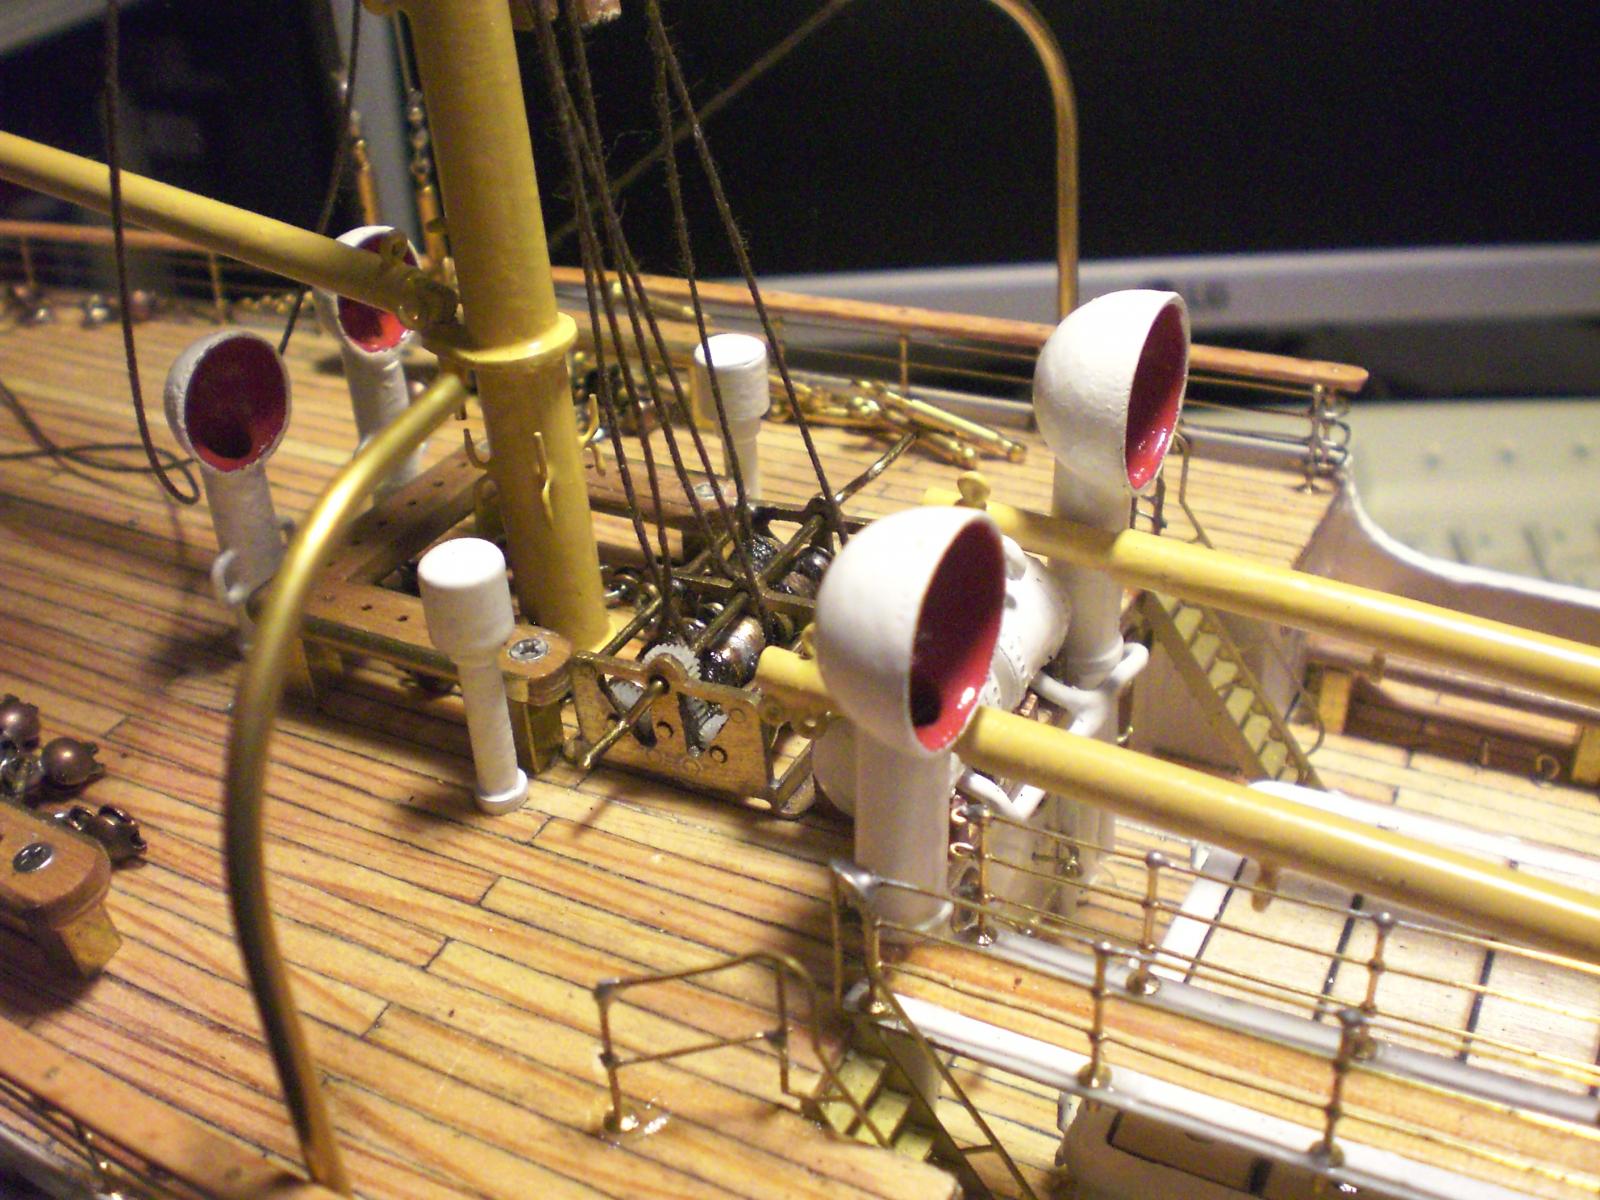
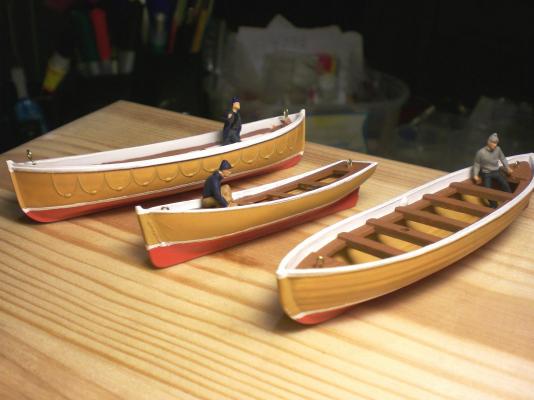
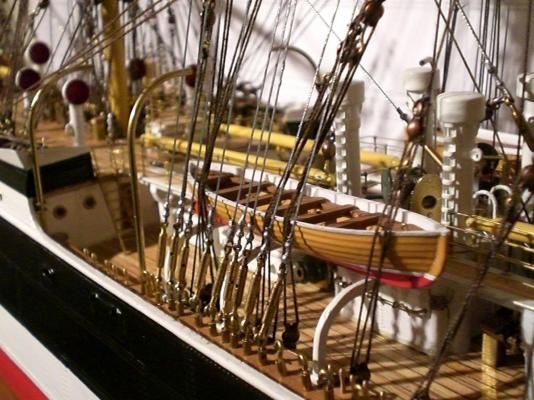
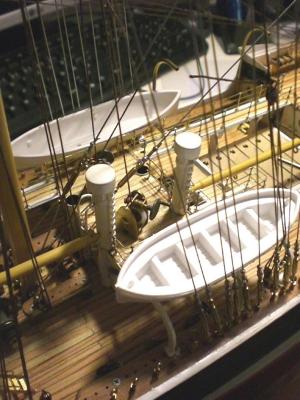
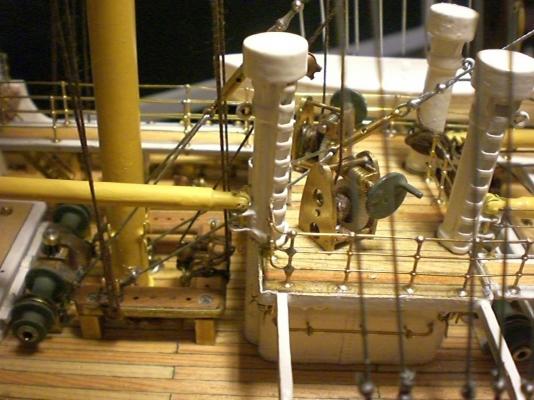
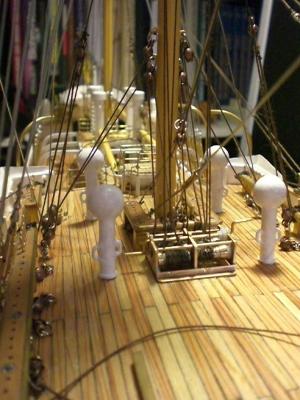
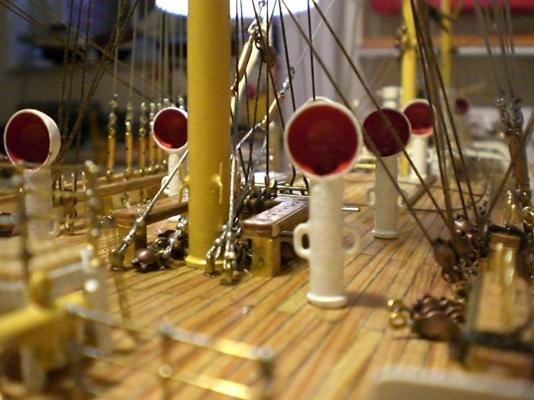
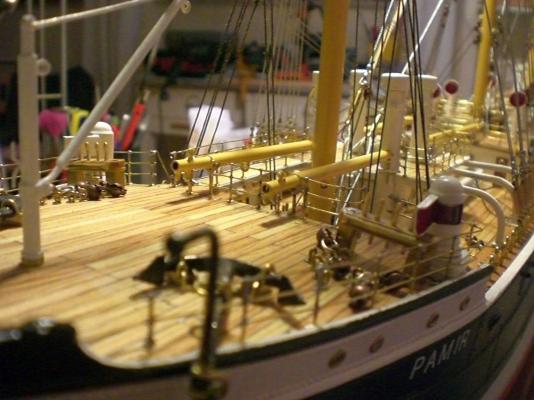
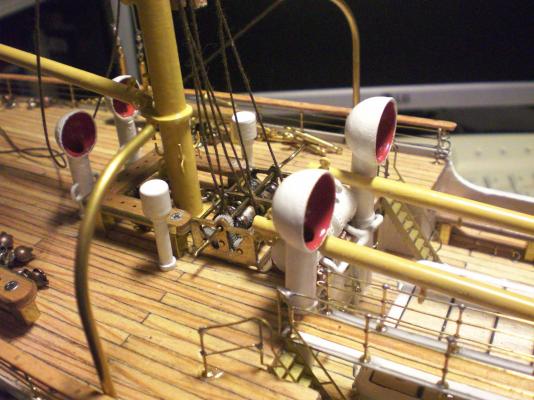
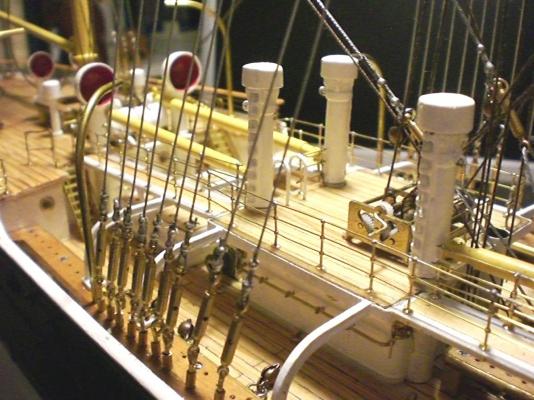
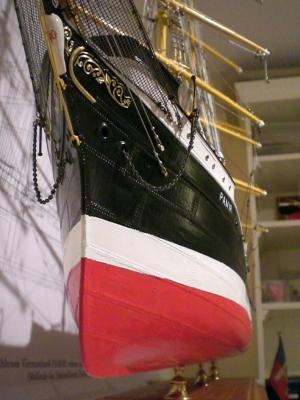
Build log part 32 with every new Progress in rigging it has to be considered carefuly, if there still will be enough Access to the running rigging, the sails operational ropes, the belaying Pins, for the soldering iron for wire Connection Points, etc..., especially the belaying Points around the mastfoot racks are critical many of the masts and Yards Tacklings are pre-belayed to the decklevel pinracks and sheaved through blocks mast spaces, Yard tackles an then with Surplus rope-end rolled on to a smáll Piece of Wood, until the sails are ready to be fitted, the rigging seem never to end... unmistakeable... a P-Liner in Laeisz colours the Yards racks allow spheric move in relation to the mast boat cradles not mounted yet the bracing tackles go from the Jarviswinches to blocks at the mast then down to bulwark Level and from there to each the 3 lower mainyards of the three mainmasts, (shall Show this Tackling in scetch later on) preparing the boats (acc. to coloured historic photos of the wrecked boats) portside looking foreward, the aft Davit for the larger boat is situated on the poopdeck the front smaller boat (welldeck boat stations has to be pushed backwards under the larger boats Davits, when bringing out the foreward boats, inwards behind the backstays, (since 1951 changes) have to be pushed back under the free space where the Davits are. The skid-cradles shall conform to the actual ones, still to be fitted Build log part 33 to follow.... Nils


-
Thank you John Nils
-
Thank you John Nils
-
Hi Tony thank you for visiting my build log, and for your nice comments, as for the plans and Basic documentation for this model, please refer to part 1 of this build log giving the answer... cheers Nils
-
ROYAL CAROLINE 1749 by Doris - 1:40 - CARD
Mirabell61 replied to DORIS's topic in - Build logs for subjects built 1501 - 1750
Those gunbarrels Doris, wunderbar, unbelievable !! not only for bringing cardboard in shape of modeling art, but the technique in which you do so for a result that wihout objections matches finest Investment castings. very well done ! Nils- 883 replies
-
- 3
-
-
- royal caroline
- ship of the line
- (and 1 more)
-
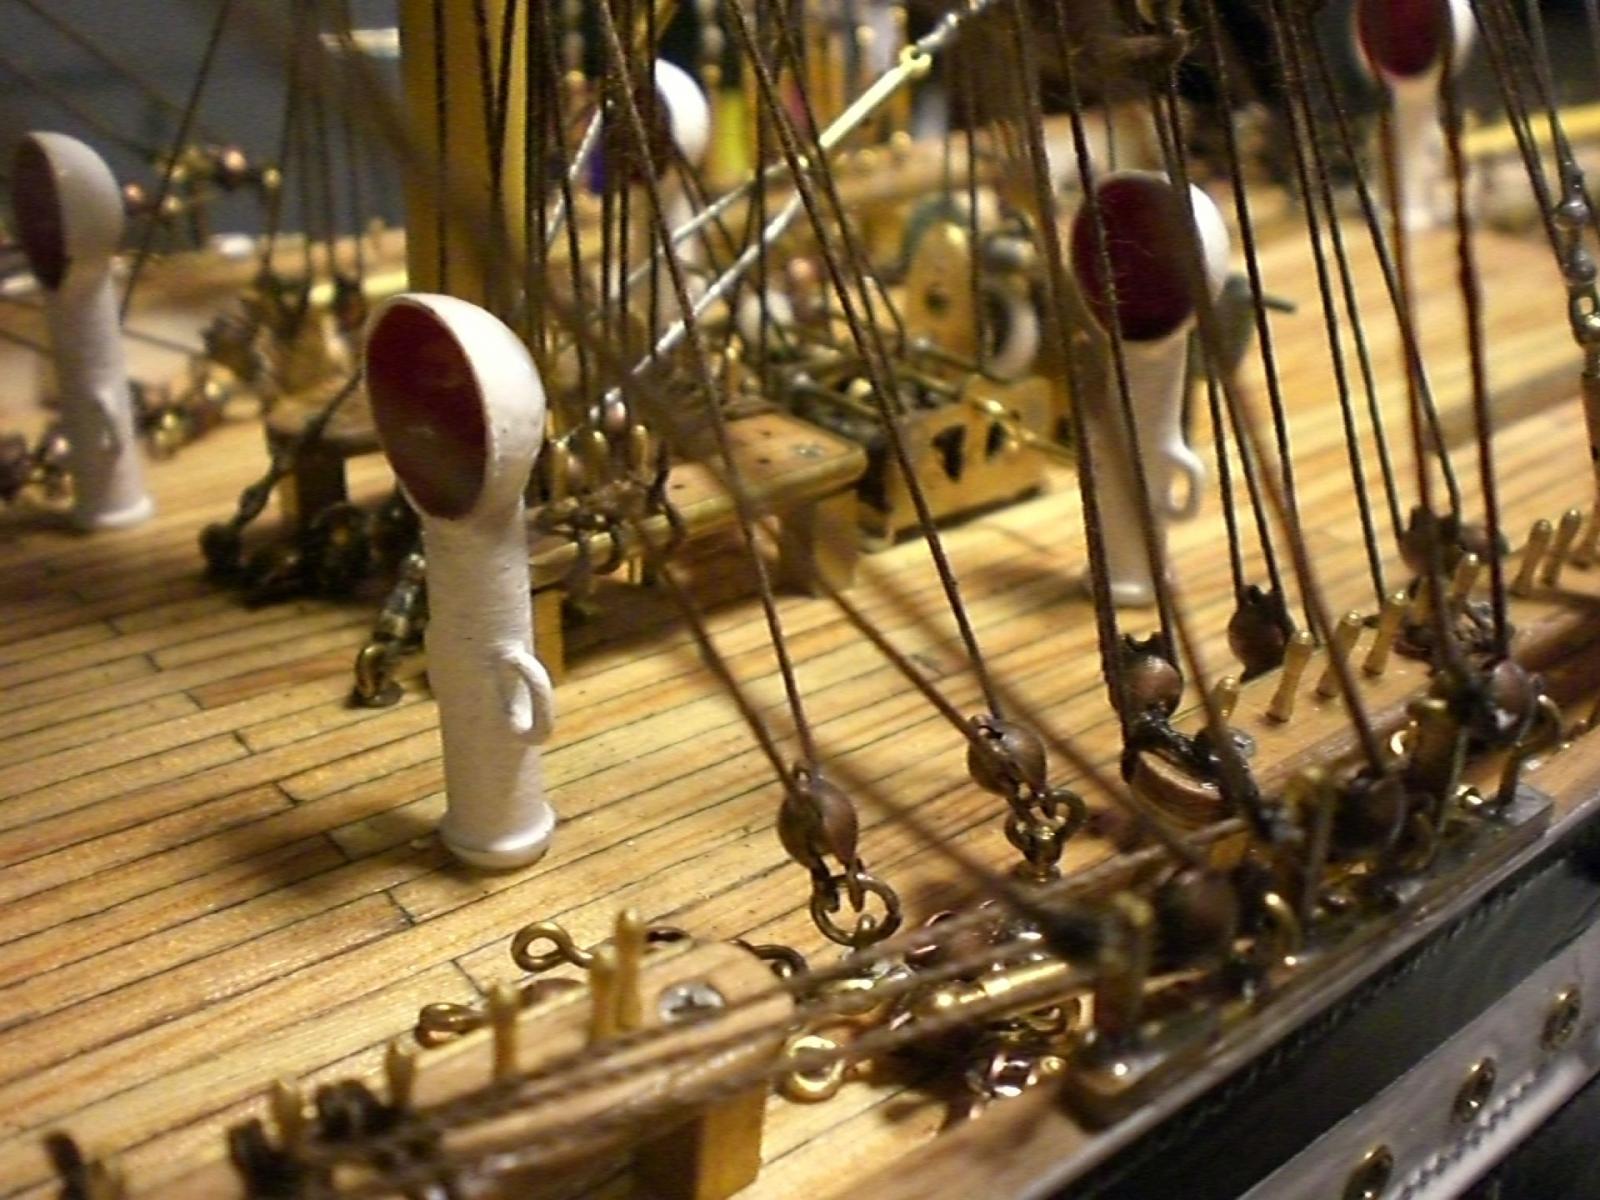
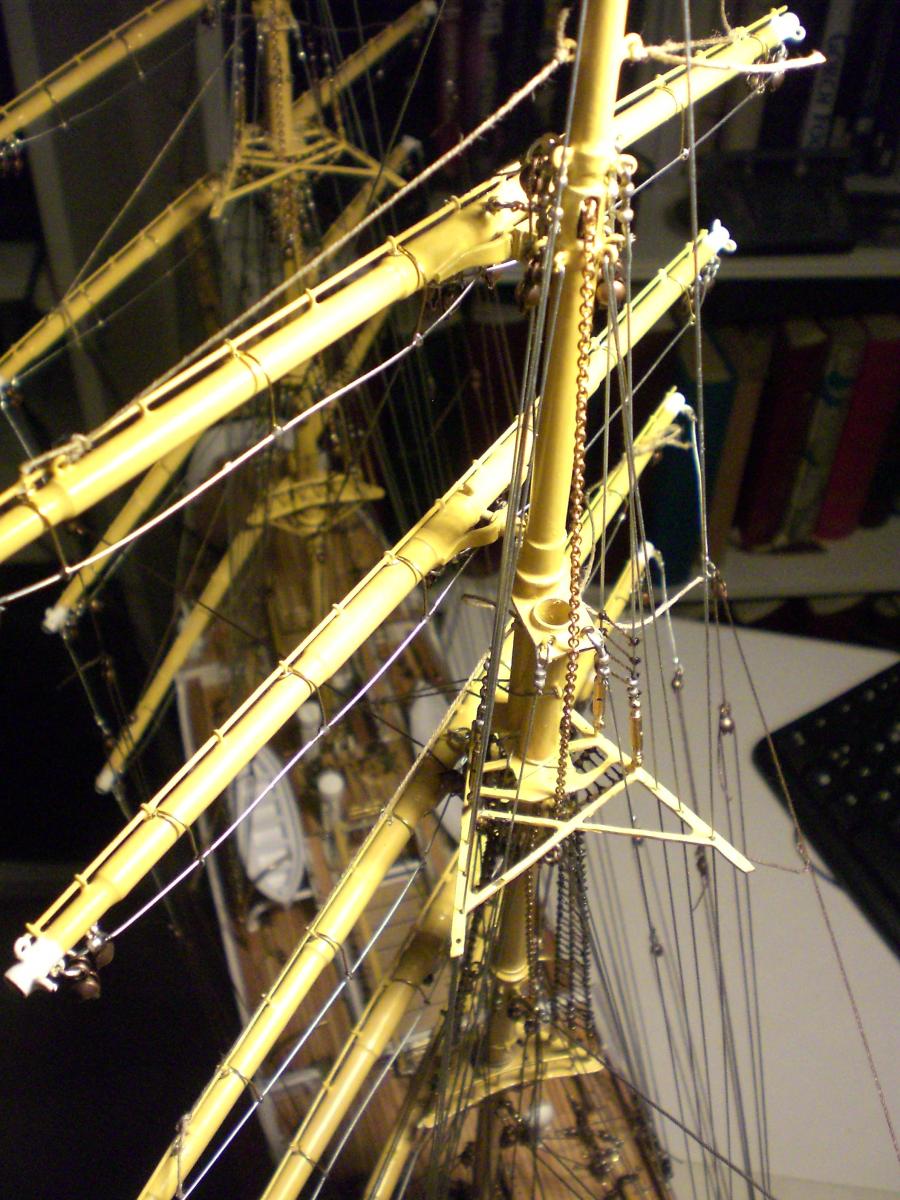
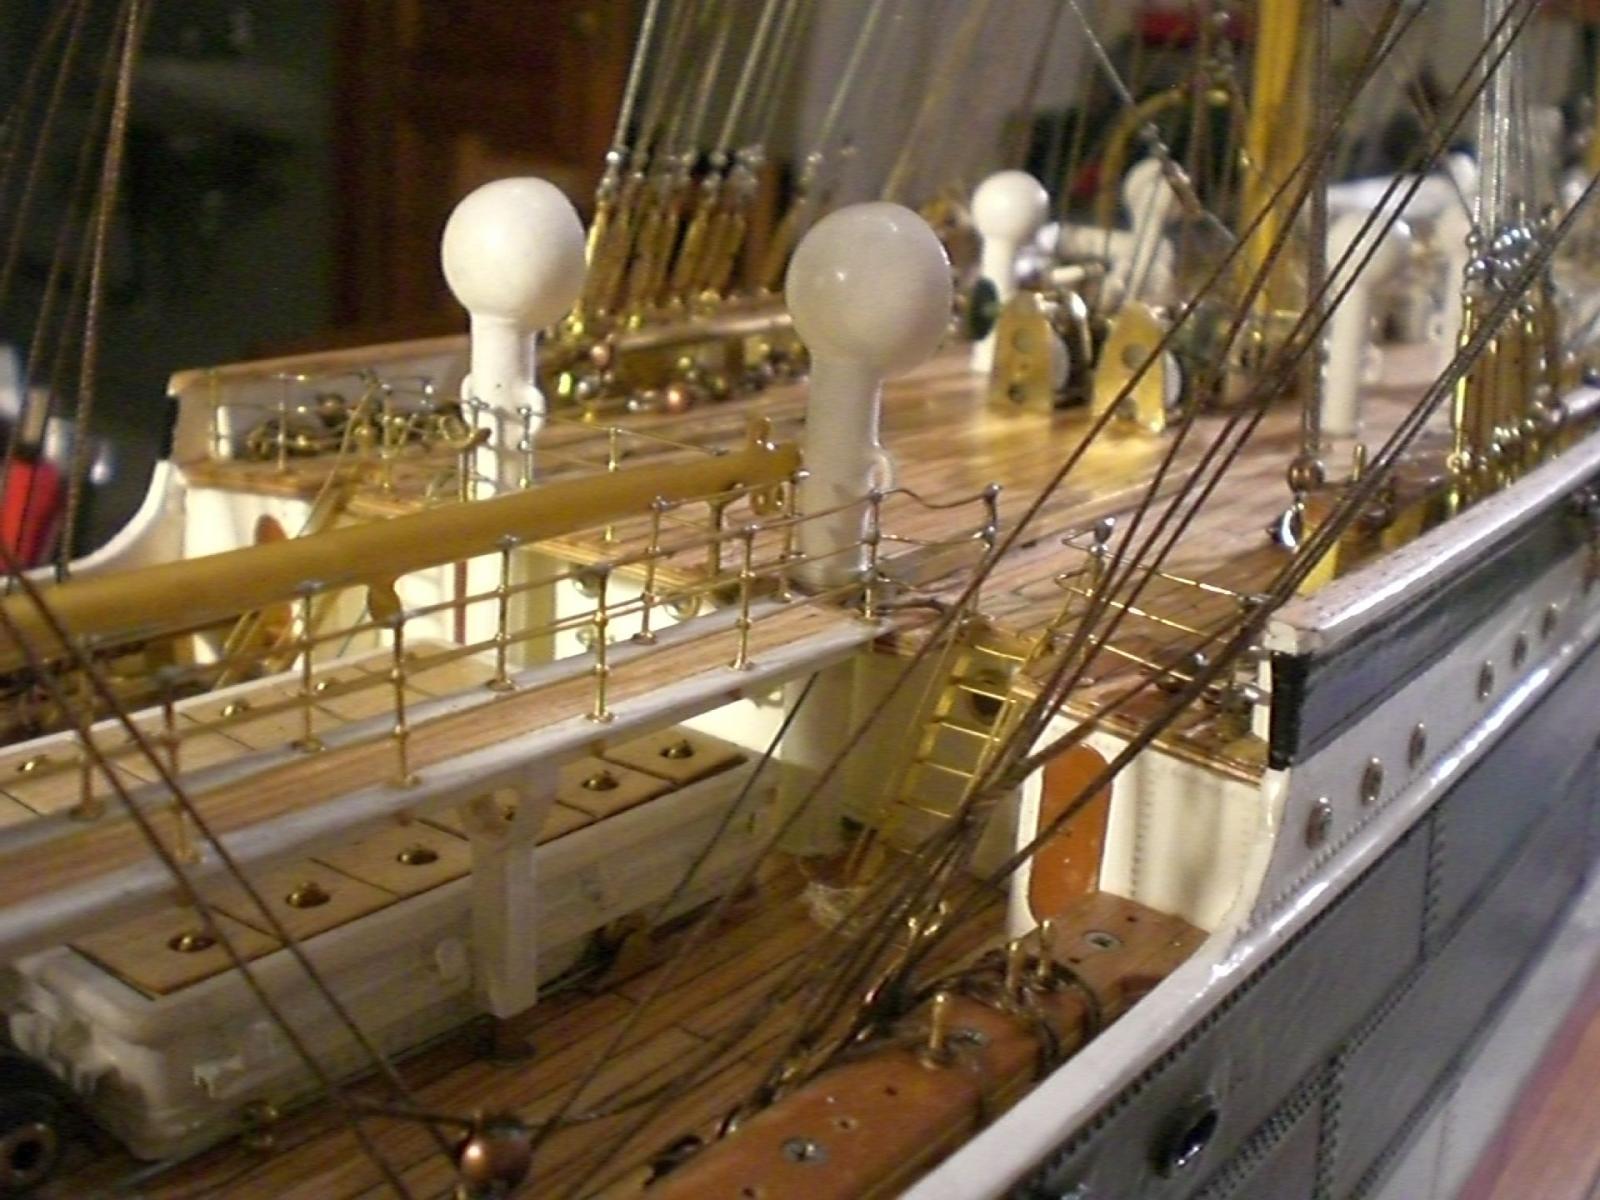
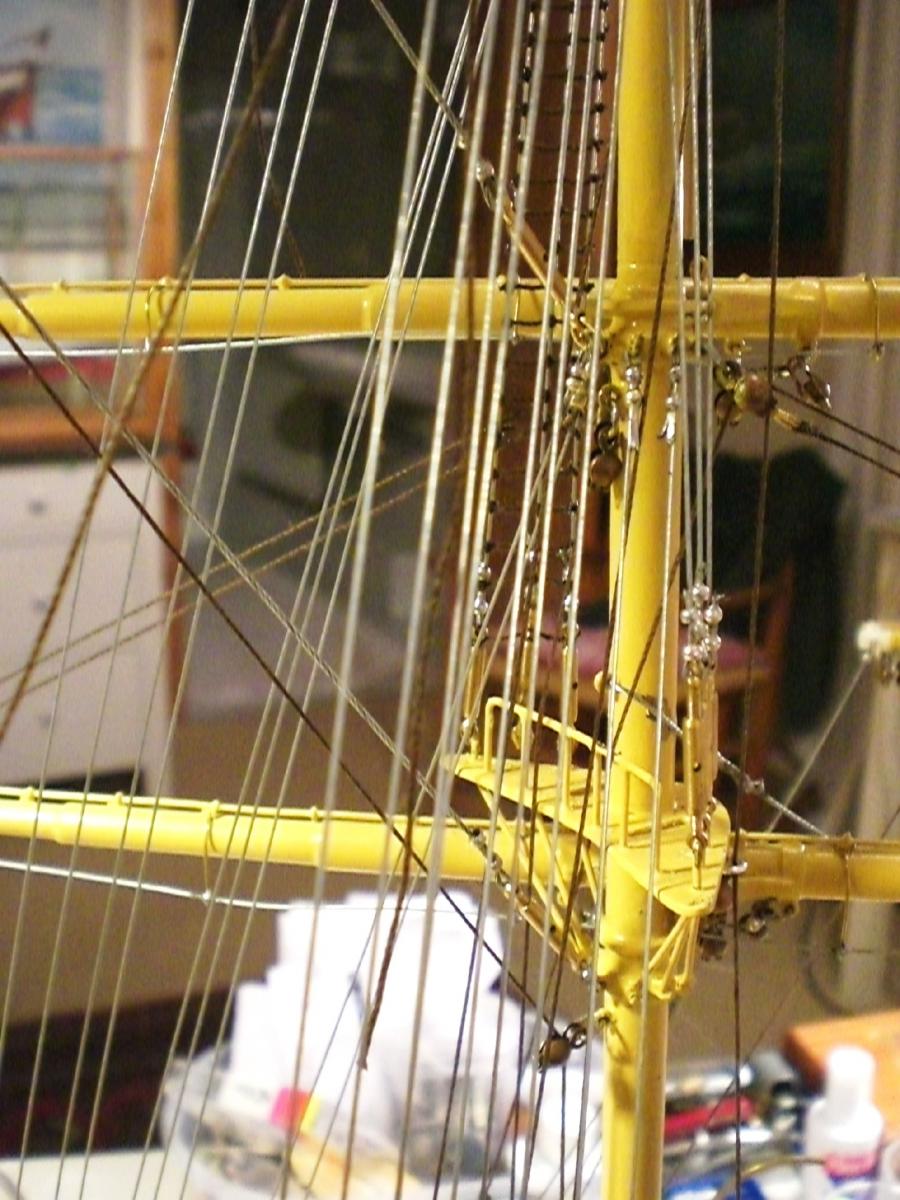
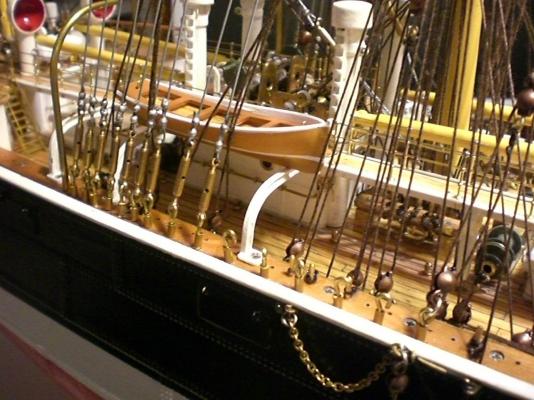
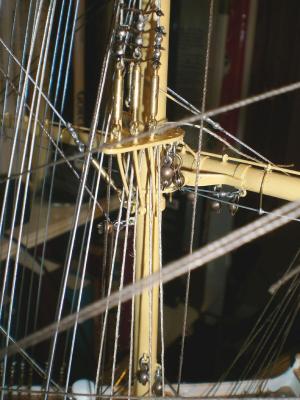
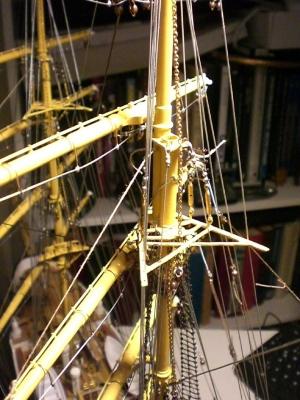
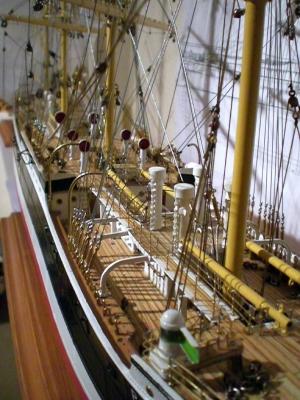
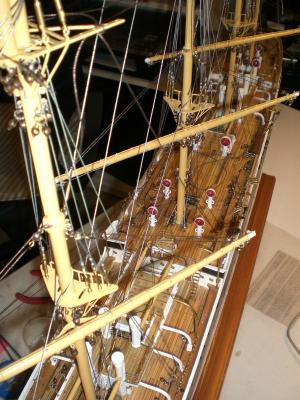
Build log part 31 using ordinary string to simulate the shroud wires best fit and spaces (get even spacing for neat ratlines) here gaff sail booms of the mizzen mast put ratlines to the 2nd Level shrouds, I am getting a bit worried about if there would remain enough space to fit the running rigging, and to sheave to the deck blocks well, next to having Access to all the pin belaying in this scale 1:96 ... the chains go through the mast (integrated rollers)one end connected to the vertical hoistable Yards, the other end connected to the appropriate tackles and the wormgear winches the backstay wires go through the gallant platforms guide holes the Forward boats go behind the backstays, the skids and cradles still to be mounted on the supports although the welldecks hardly have spare spaces, there remains still sufficient room for the Crew at work the Tackling for the third mast bracing rig goes to the poopdeck pinrack via this bumpkin and its blocks These catwalks provide Swift Crew-transfer from poop to forecastle, due to waist-high railing even in rough weather an espcially with overcoming seas on deck the masts stays are anchored at deck bothsides of the appropriate mast in front Build log part 32 to follow.... Nils


- 269 replies
-
- 10
-
-
A very nice looking Version of the CS Giancarlo, Well done so far ! As Nenad already said, the best is yet to come, Trust this is quite a ambitious Project, shall follow with great interest Nils
-
Thanks for sharing your tip Ray, those coils look really fine indeed Nils
-
Wonderful work Ed, that iron strapping is an interesting Feature I never saw documented before, has that realy been done on the actual ship? it must have provided immense strength to the hull at all times, not only in battle. Your joining work is also very clean acurate and impressive, nice to look at Nils
- 3,618 replies
-
- 1
-
-
- young america
- clipper
- (and 1 more)
-
A very nice and handsome build Bob, it is a delight to follow you build log well done! Nils
-
Wonderfull Fitting out of your Swan-Class Remco A real delight to see.. Nils
-
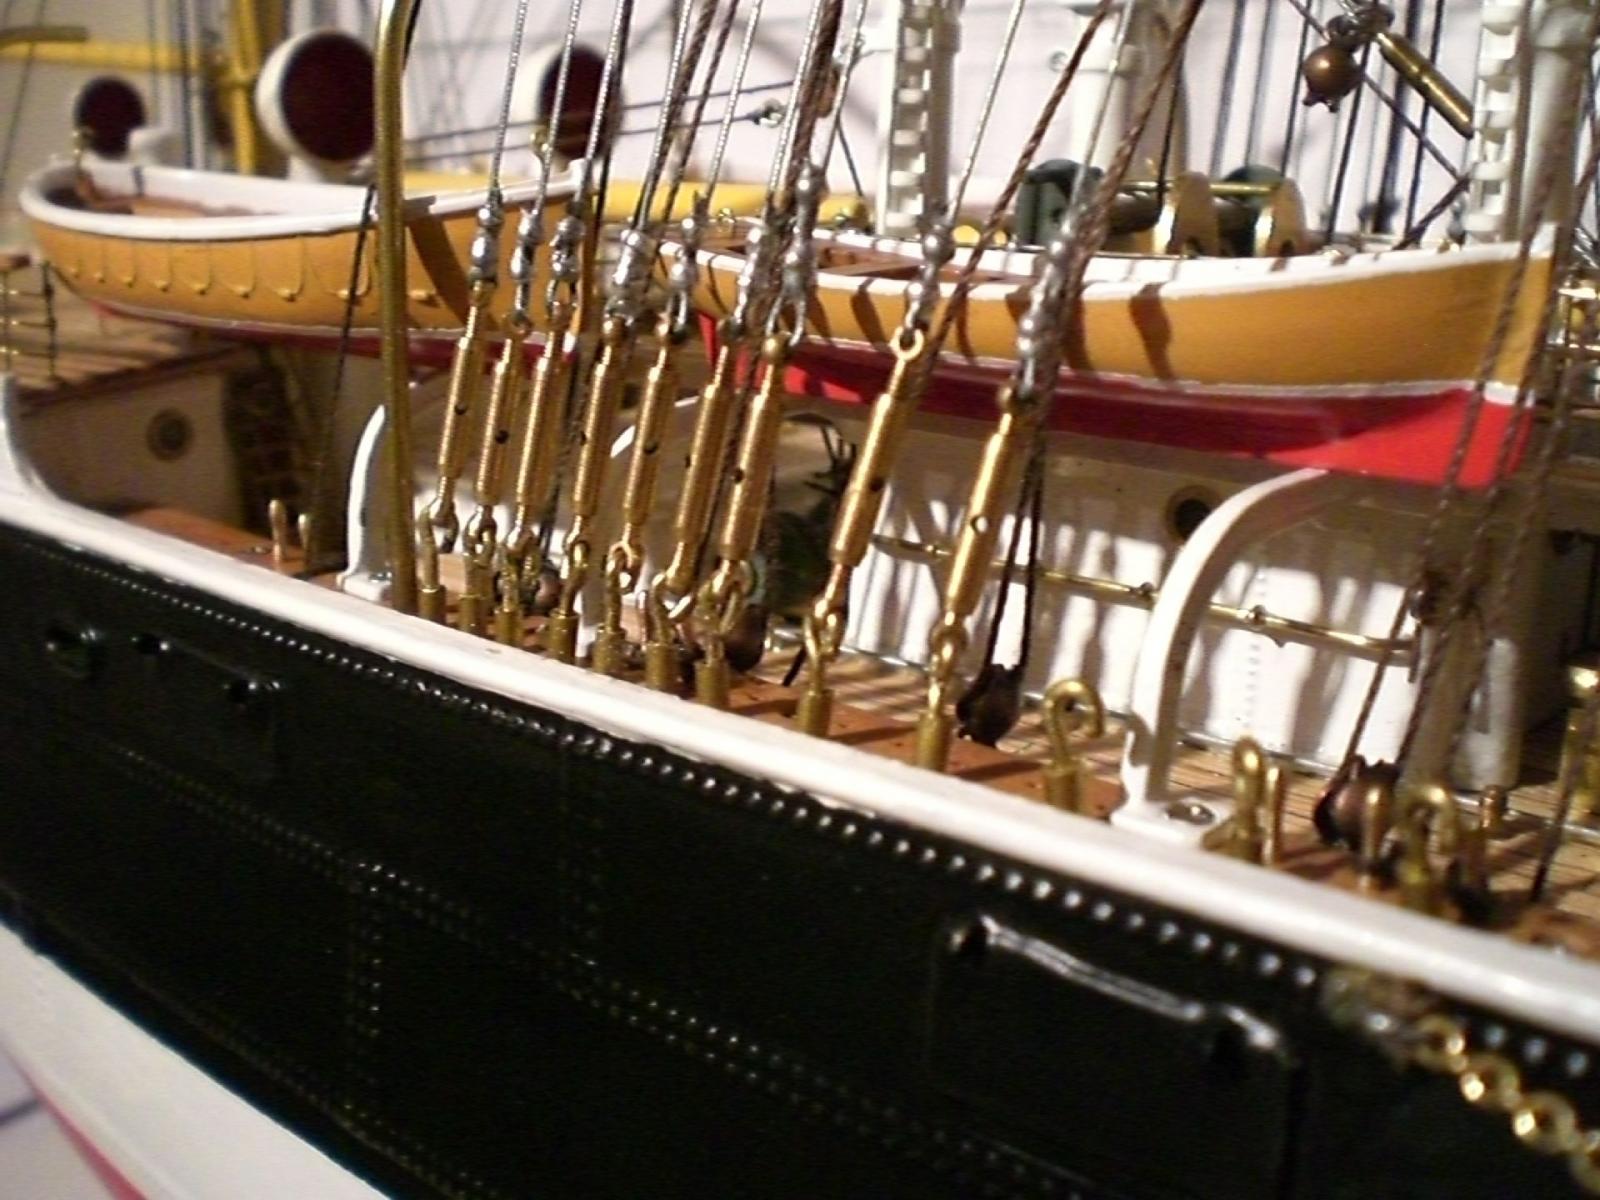
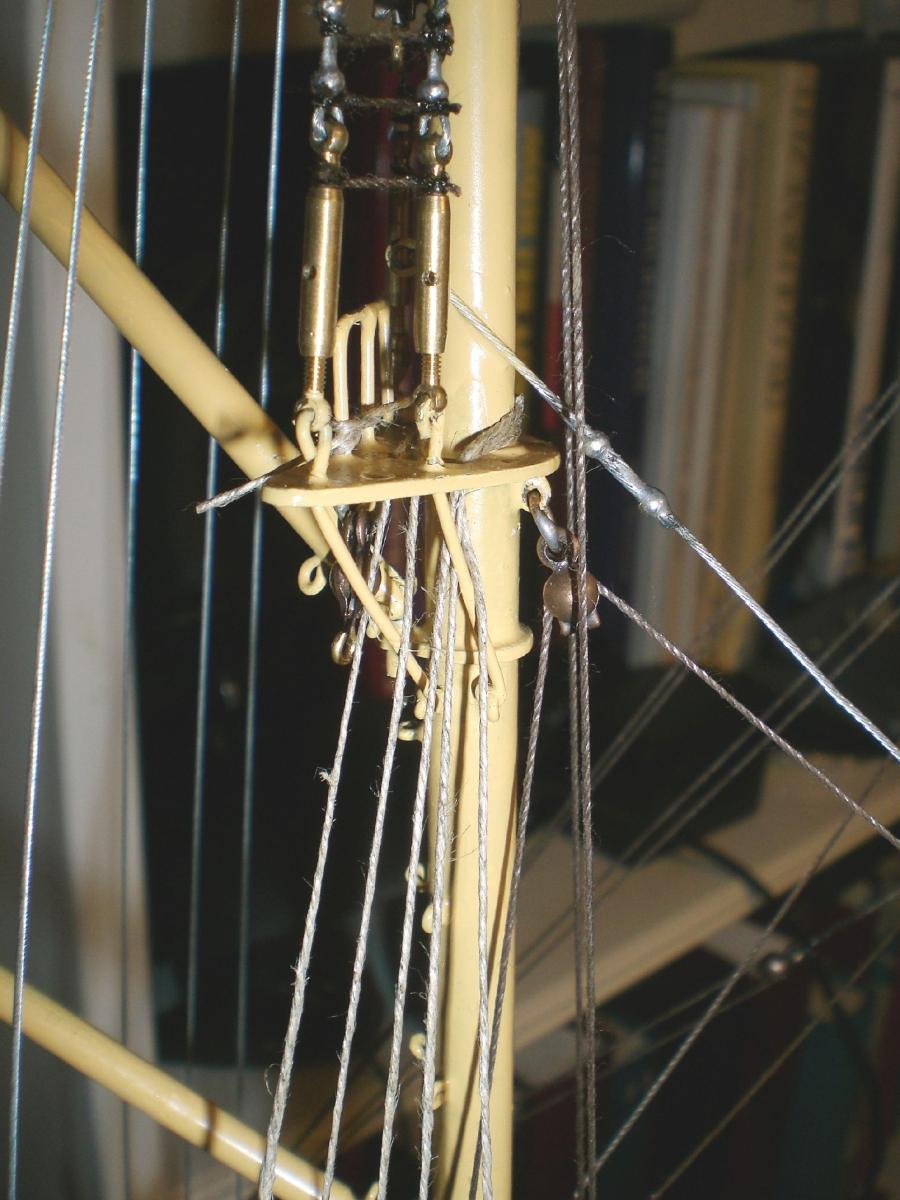
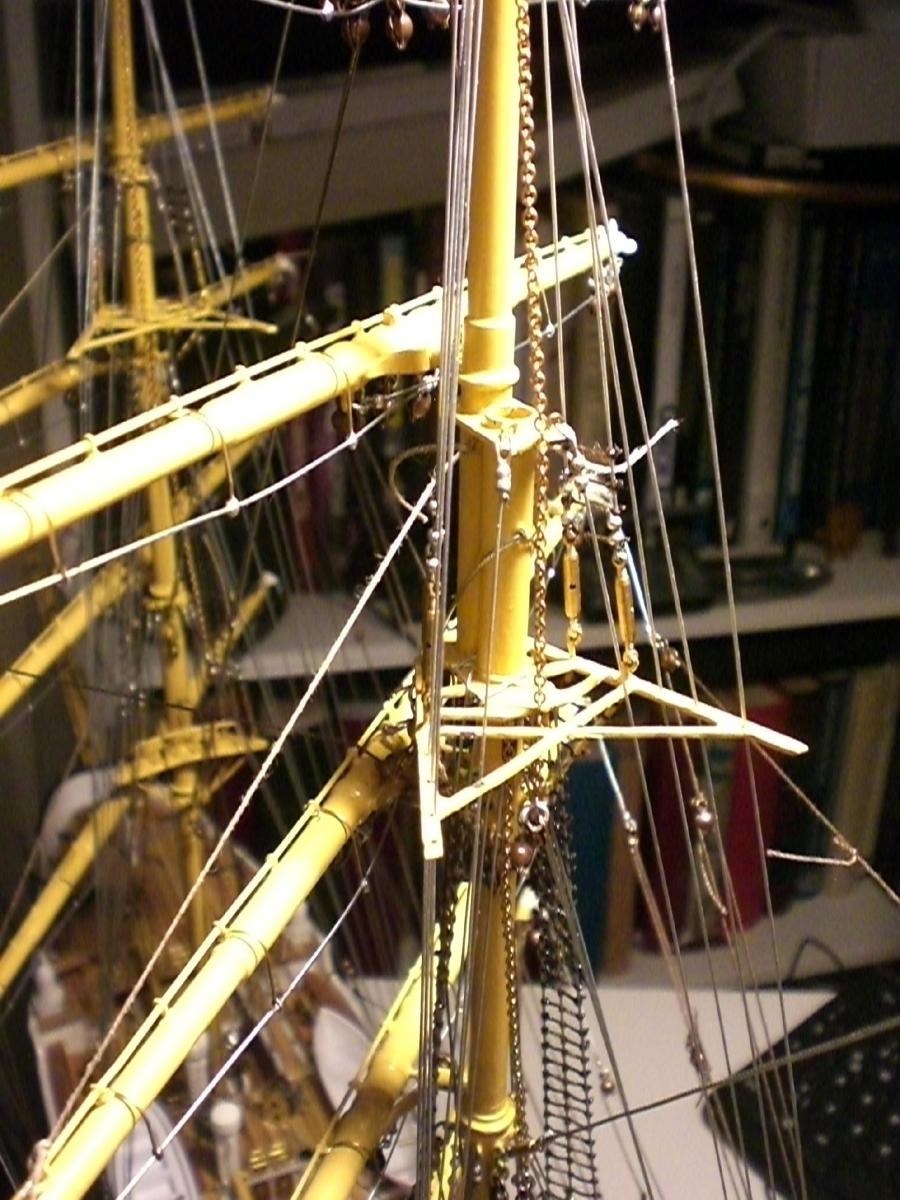
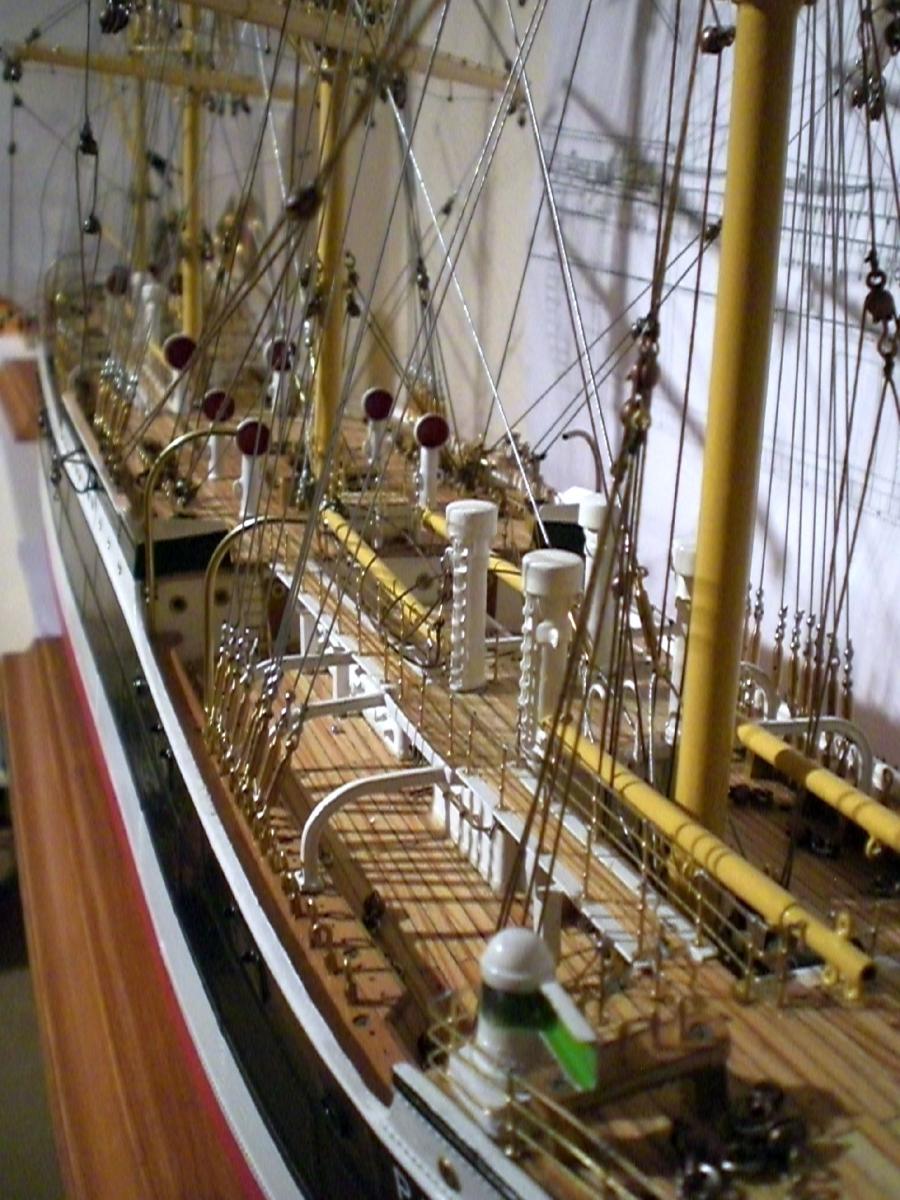
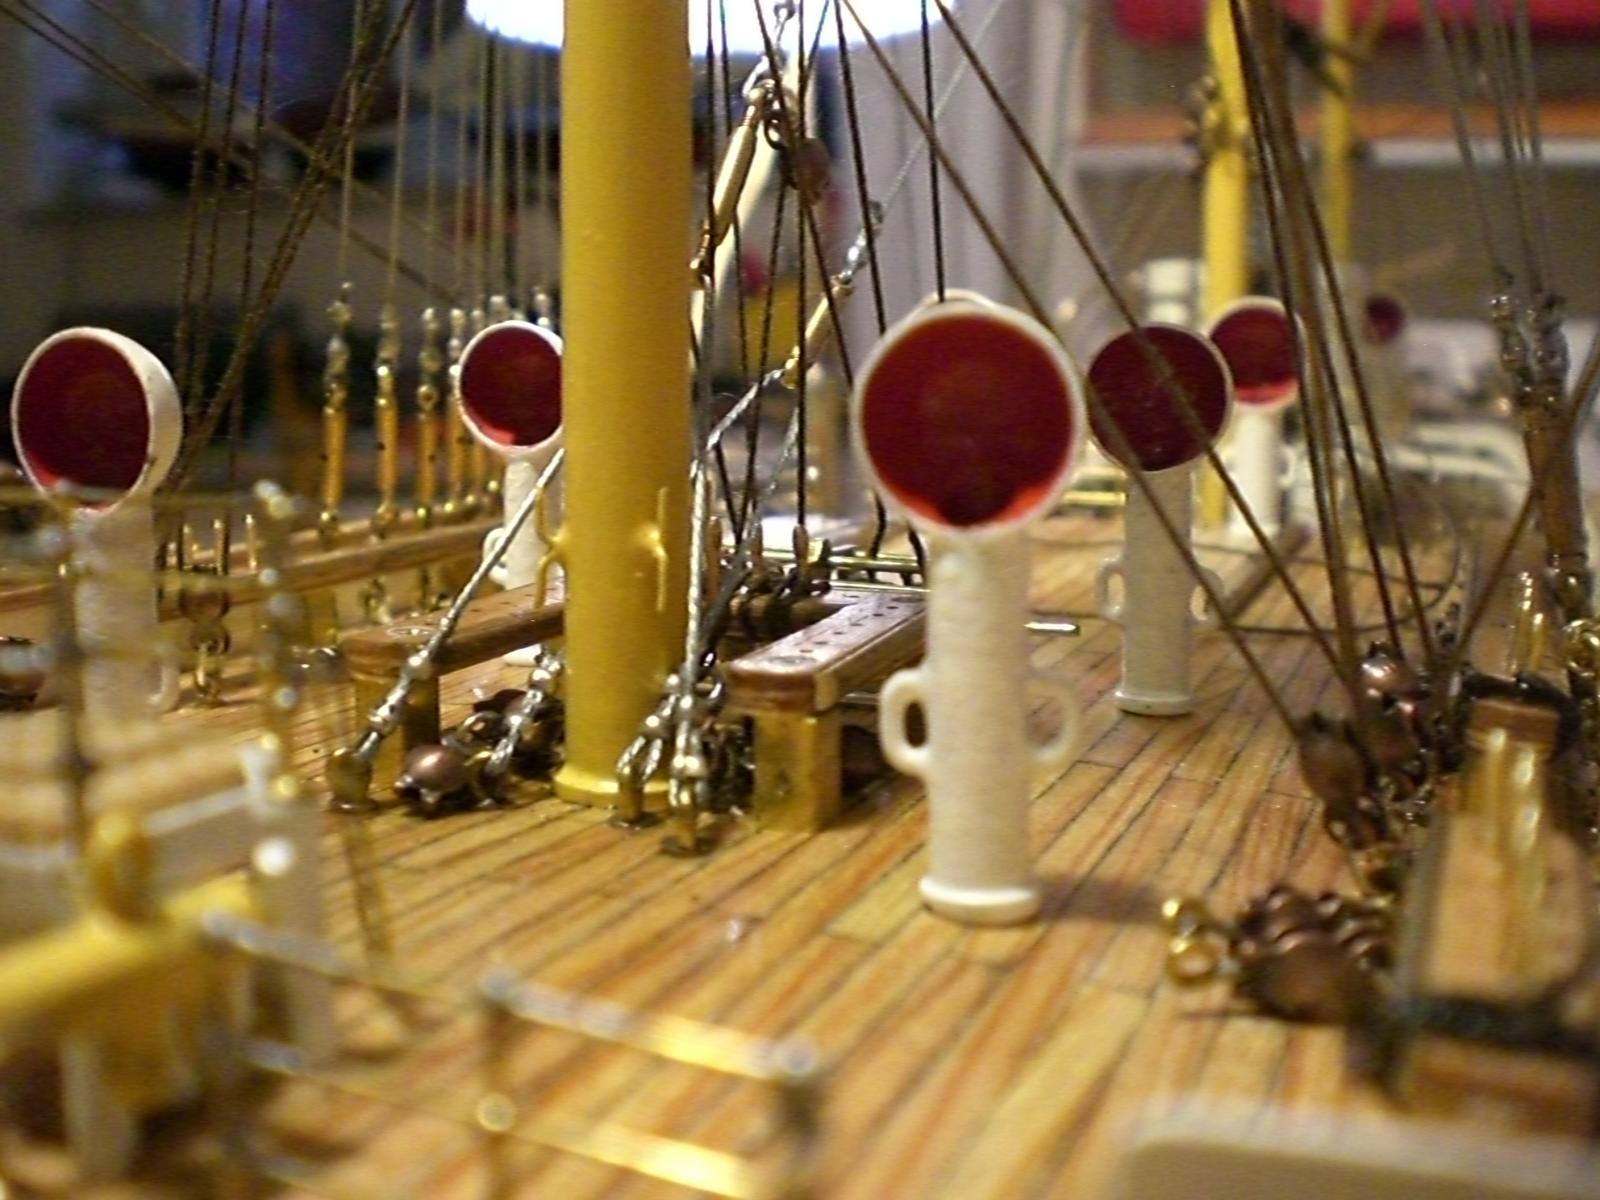
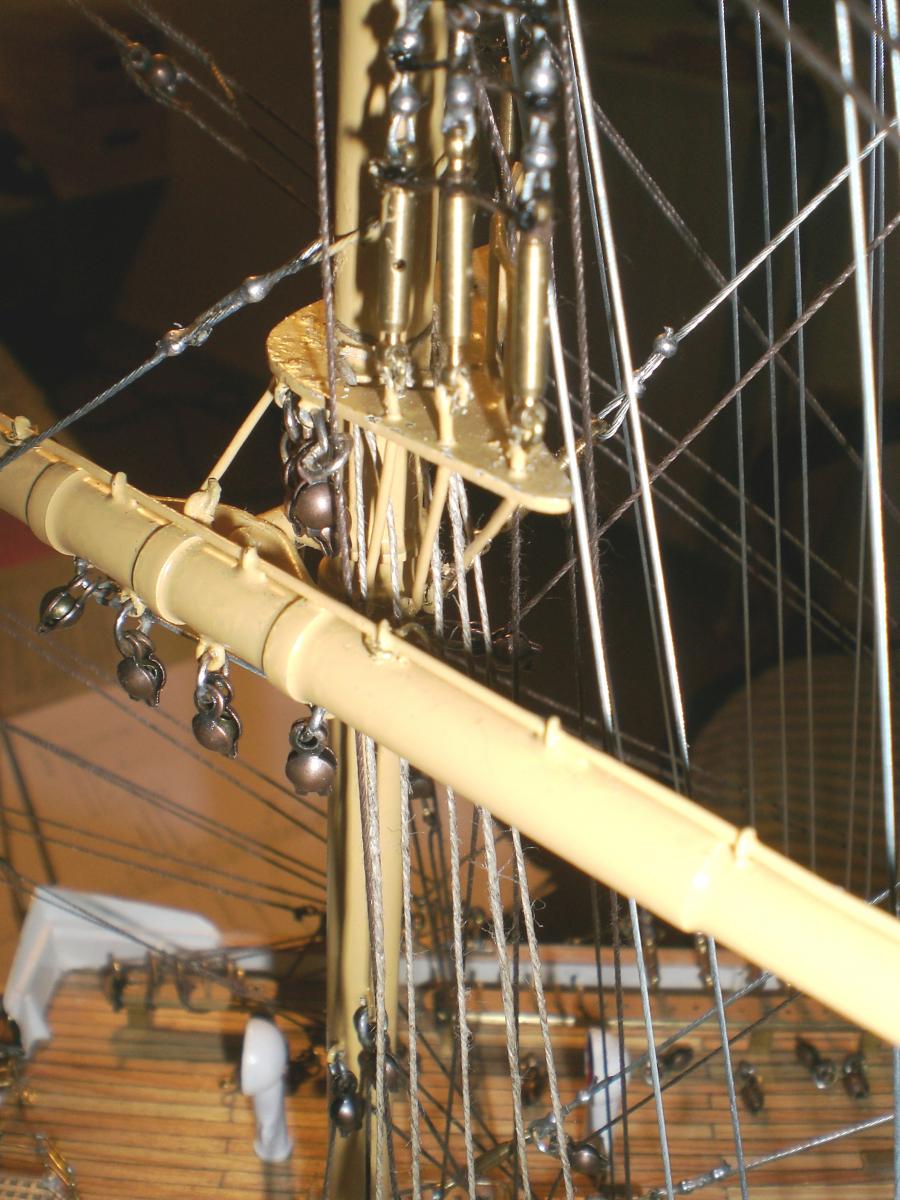
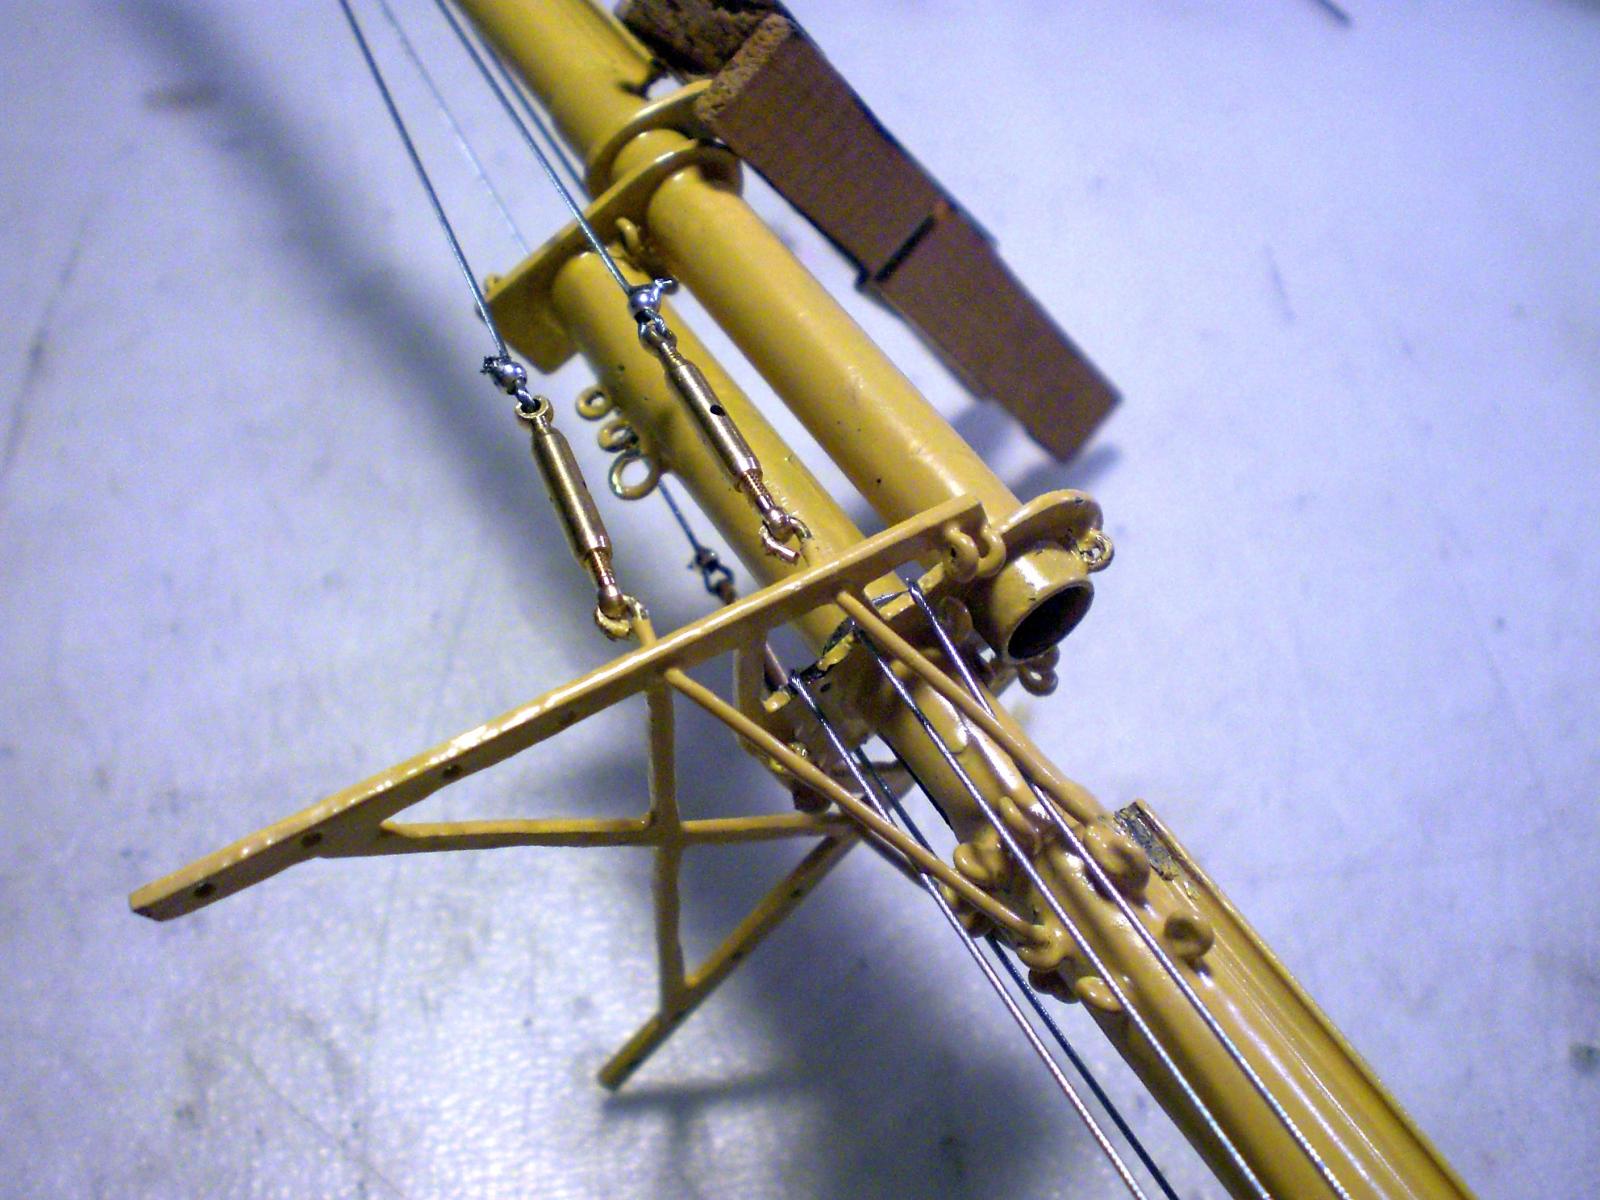
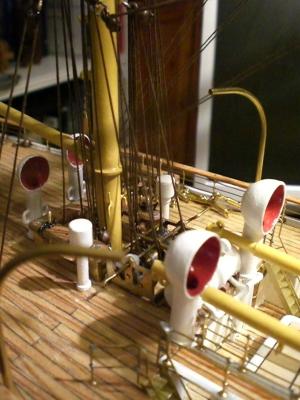
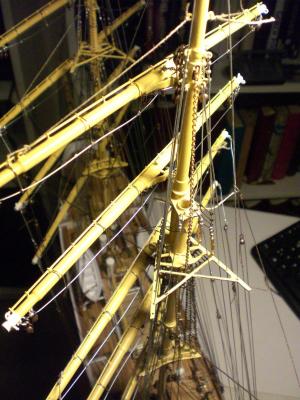
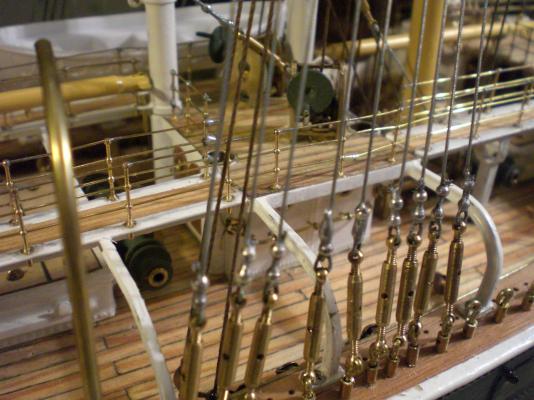
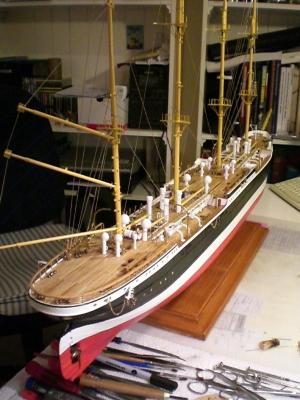
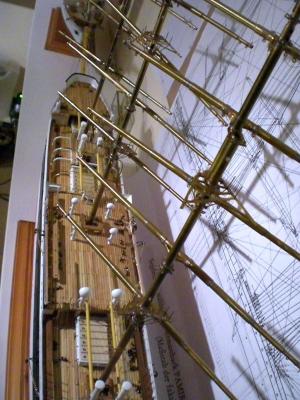
Build log part 30 ongoing rigging operations wire chord stays and backstays beginning Tackling for bracing (including the Jarvis winches) in backgroung some of the backstay spanners to be seen spanners for shrouds laying ready to be tackled the bracing winch for the third mainmast is on the poopdeck, note, the vents have been moved aside slightly stays and backstays already under tensile stress, masts to be kept in alignment carefully, continious crosscheck every now and then Yards are braced "to the shrouds" in staggerd angles for the different Yard elevations Mars top platform of the second main mast Build log part 31 to follow.... Nils


- 269 replies
-
- 11
-
-
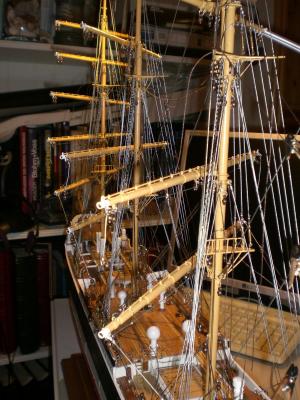
Build log part 29 one of the tree masttops topgallant platform painted upper shrouds being fastened beginning with stays and backstays anchorcrane on forecastle deck some of the Yards, the openings shall be closed with semiround caprivets later on beginning to rig the yards forestays and their spanning devices Drydock view Build log part 30 to follow.... Nils


- 269 replies
-
- 12
-
-
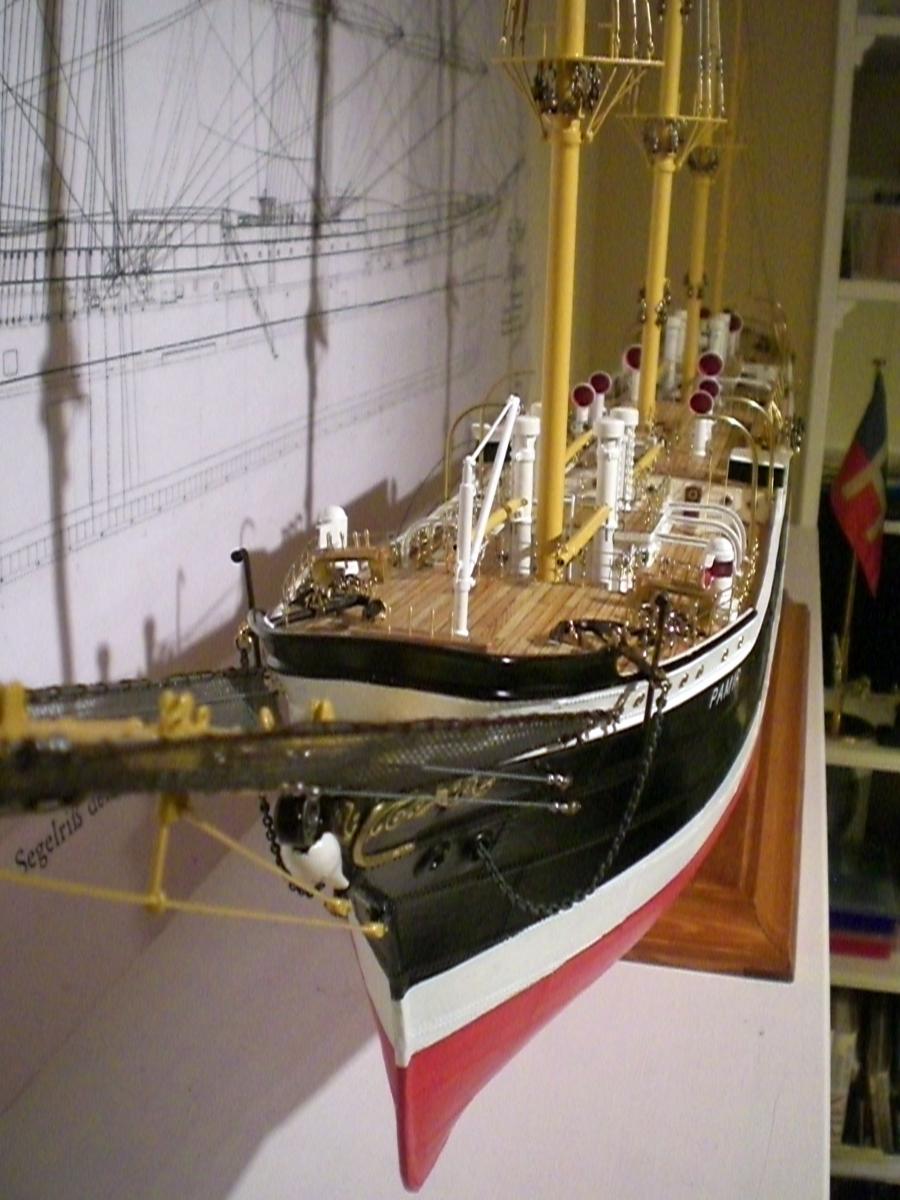
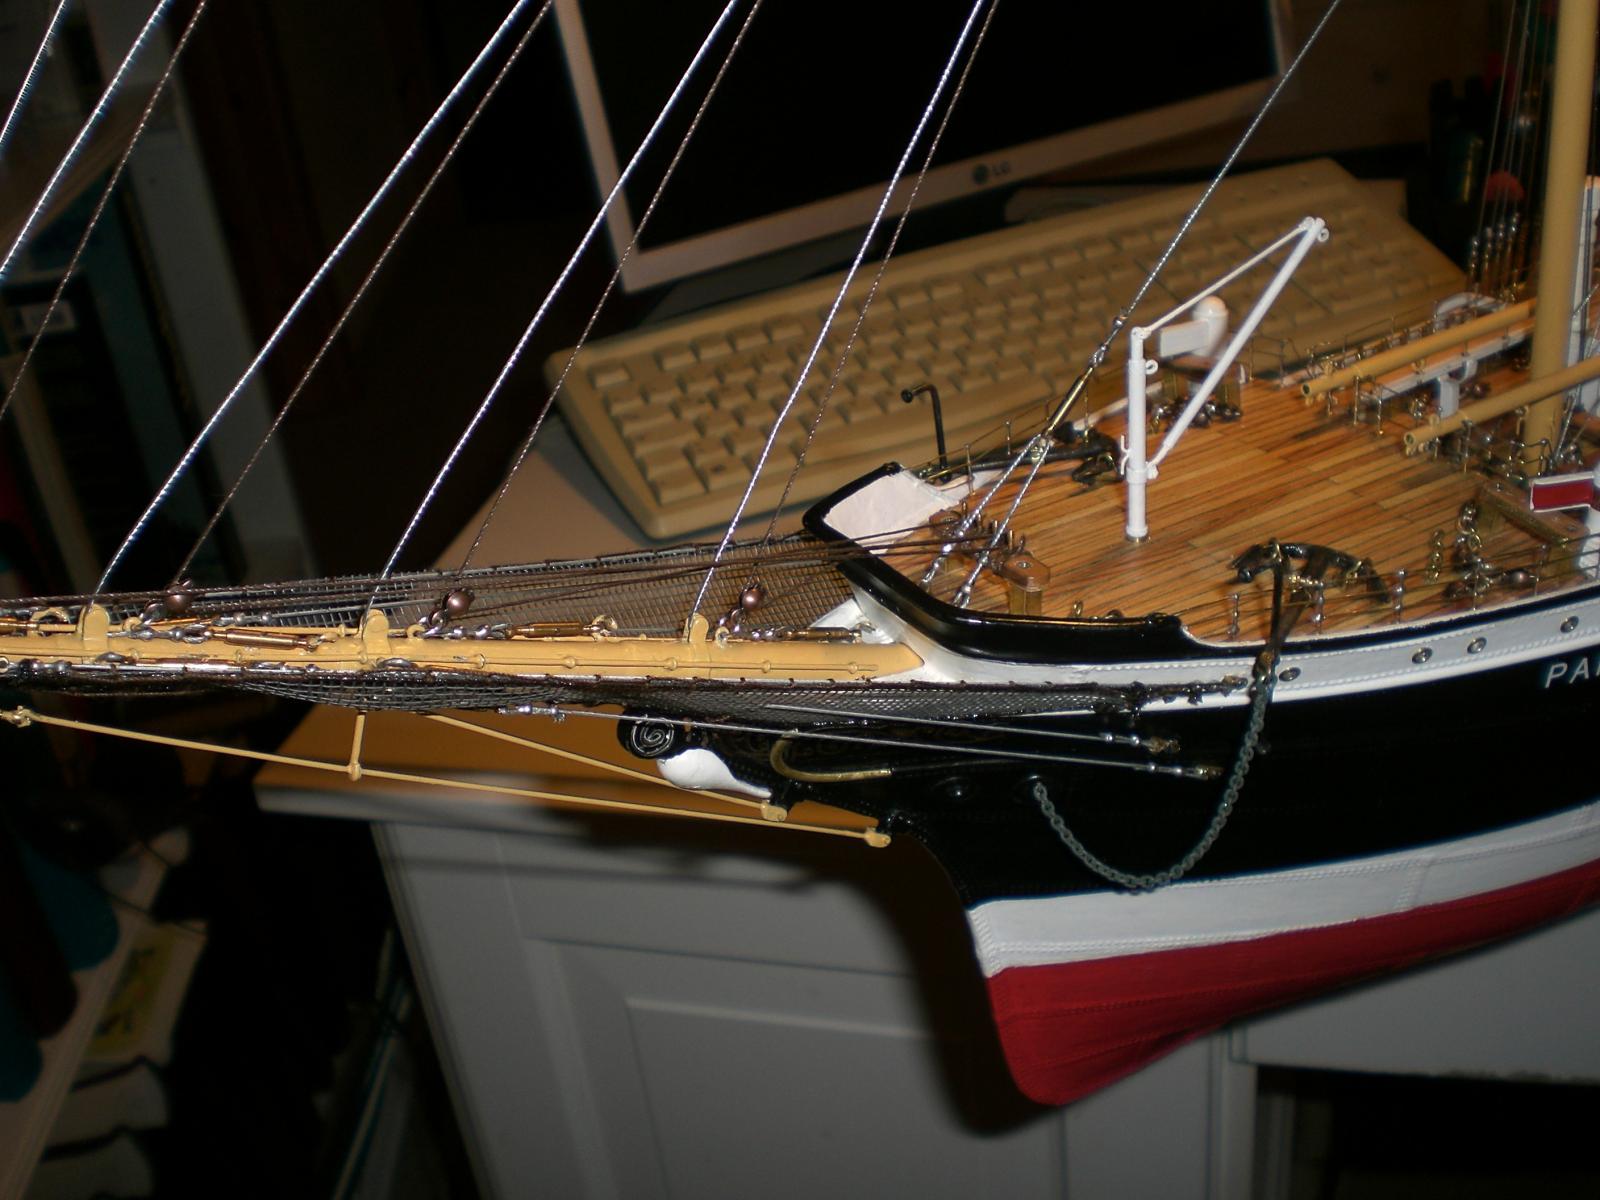
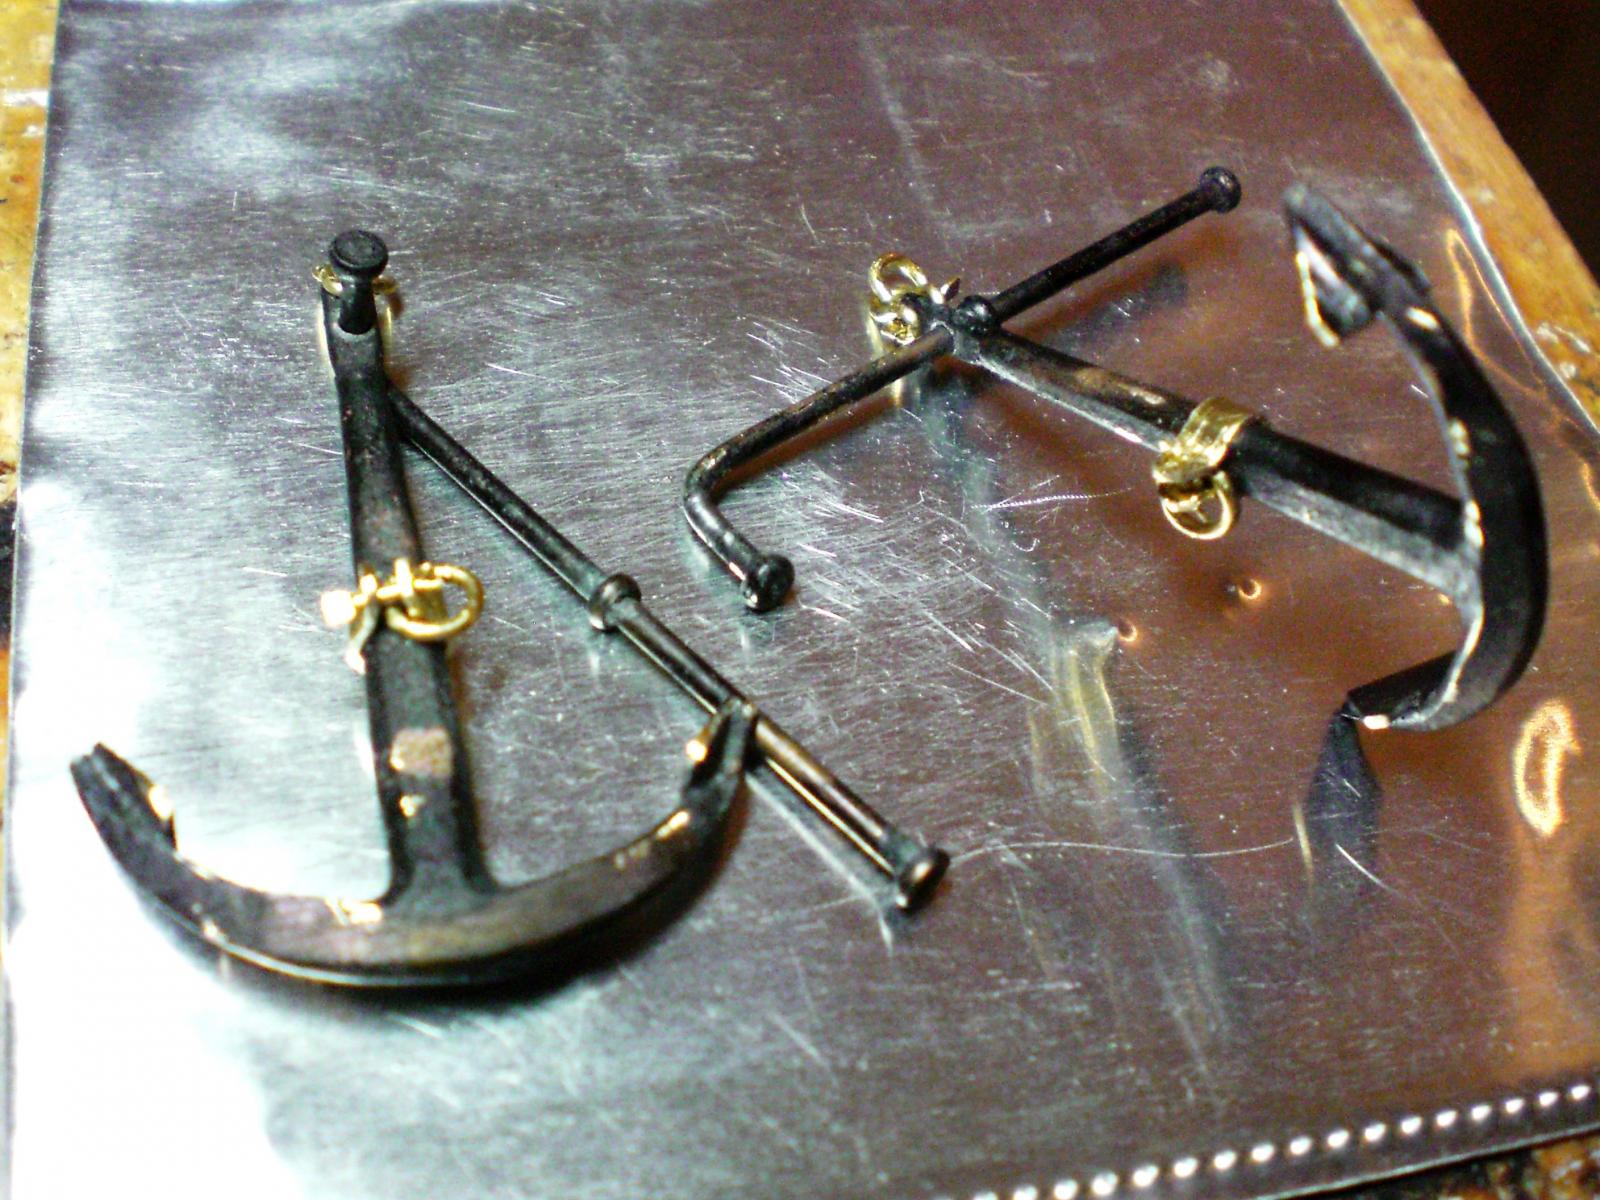
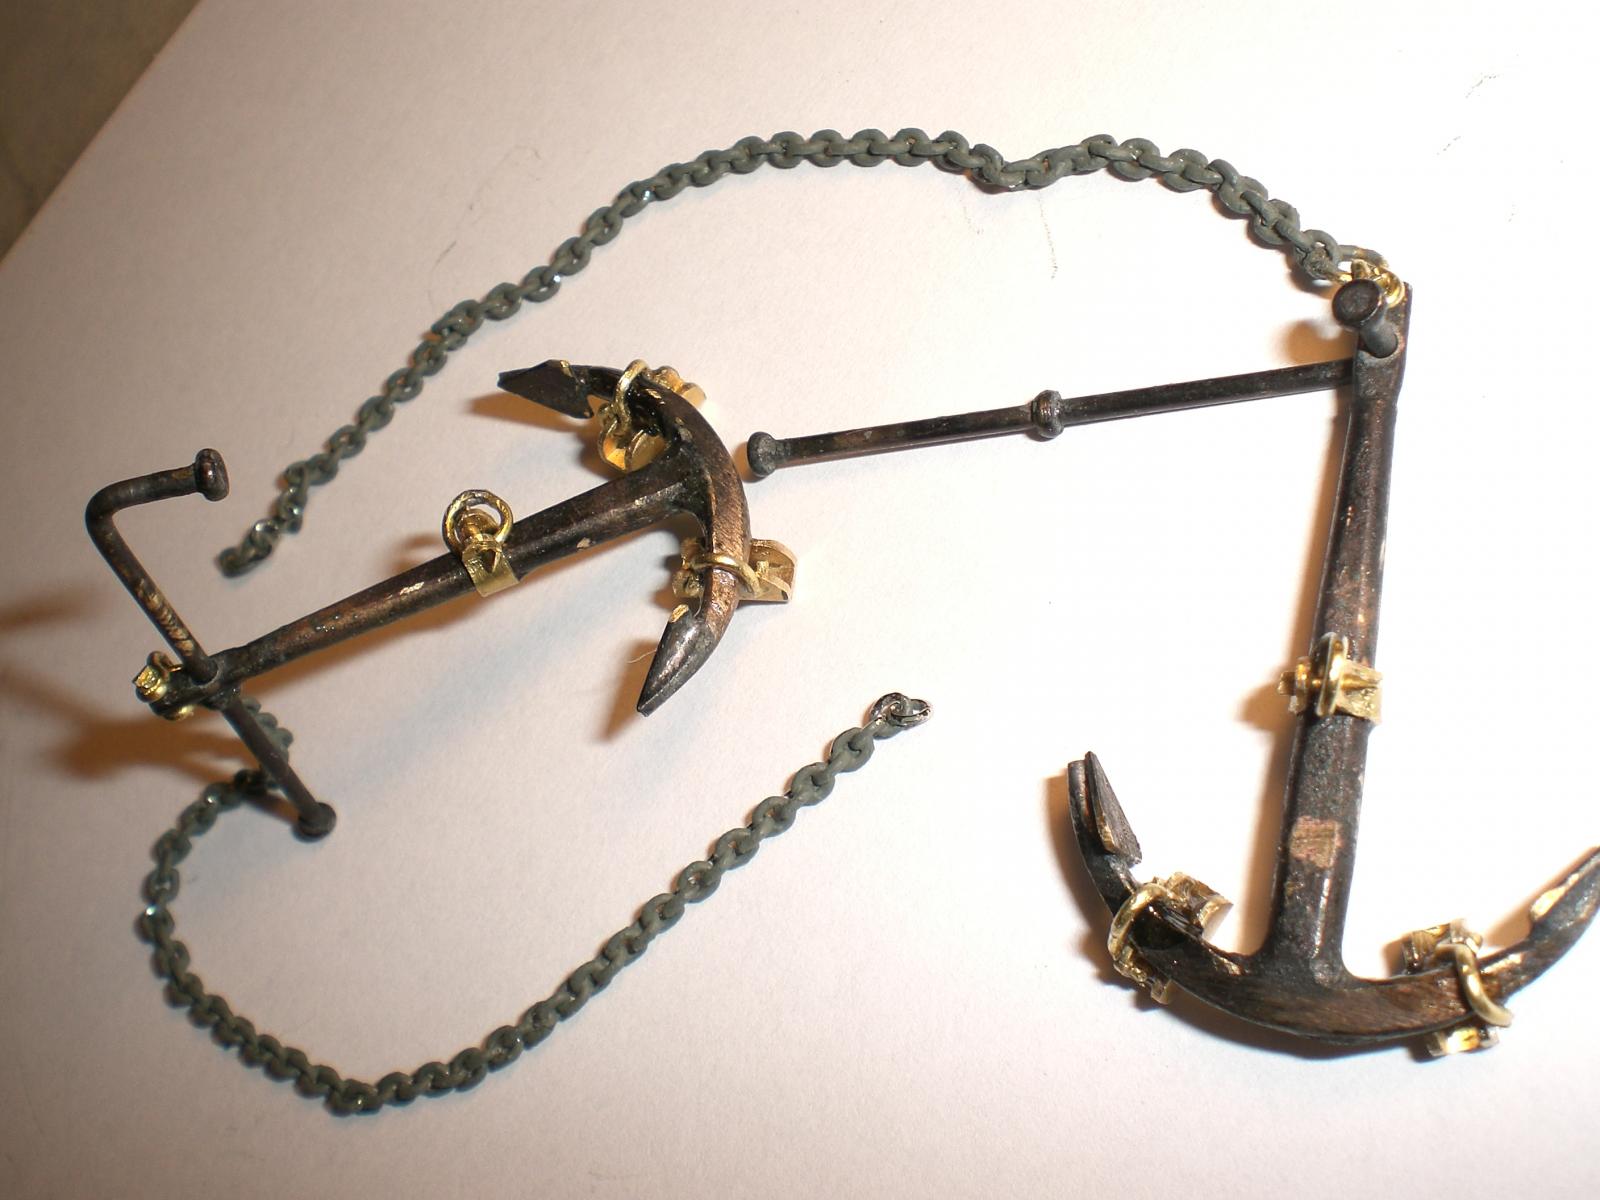
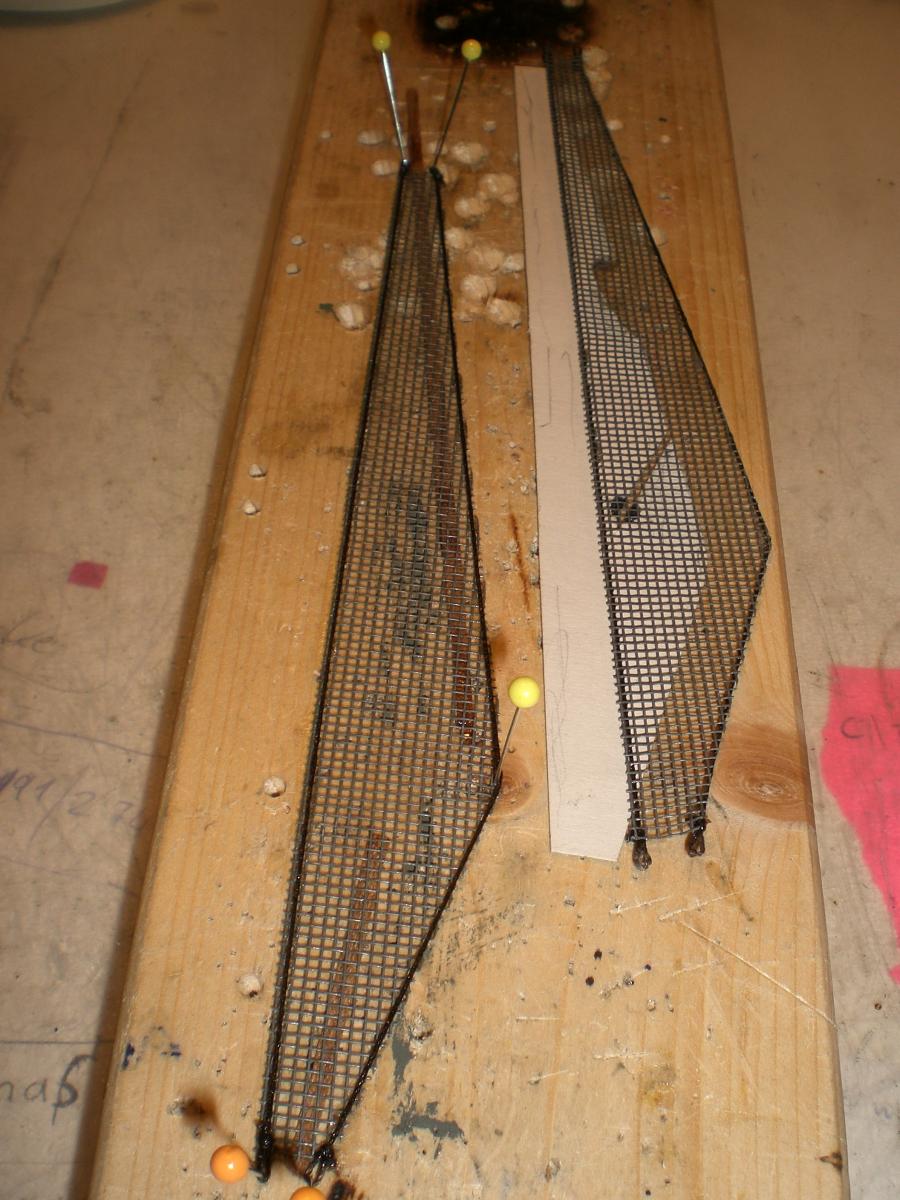
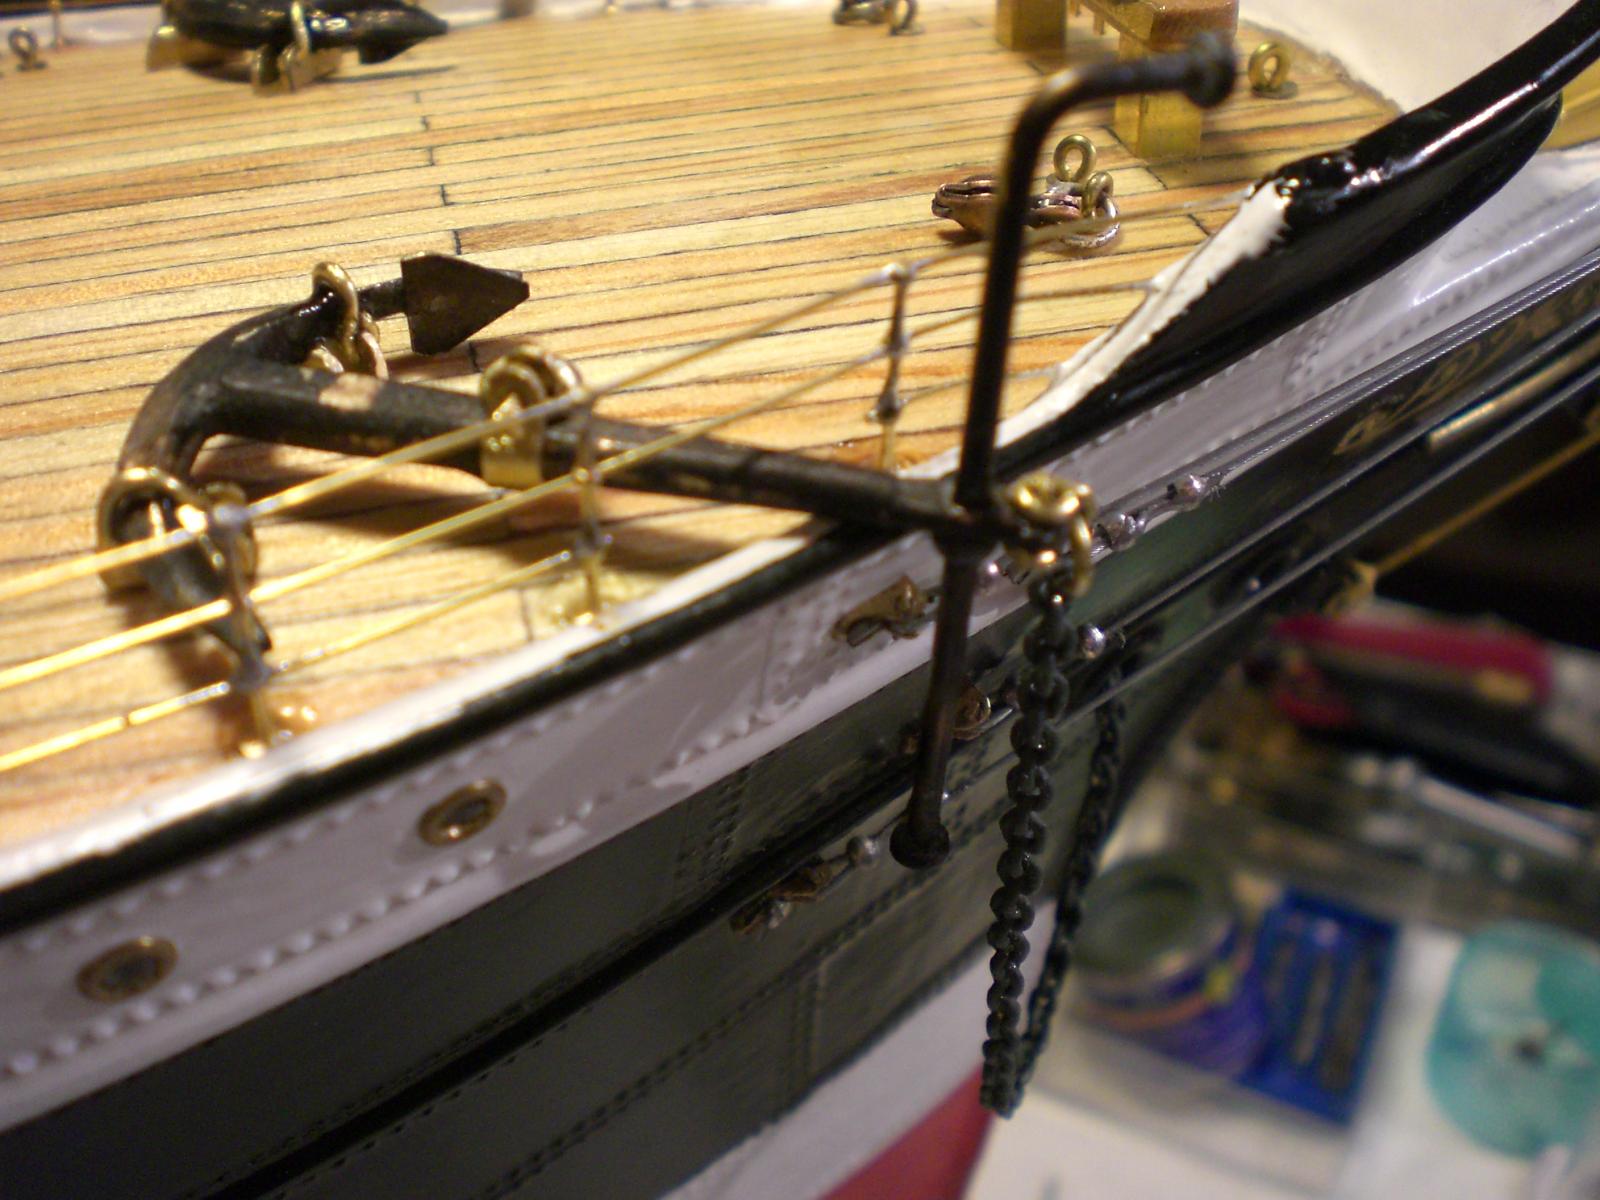
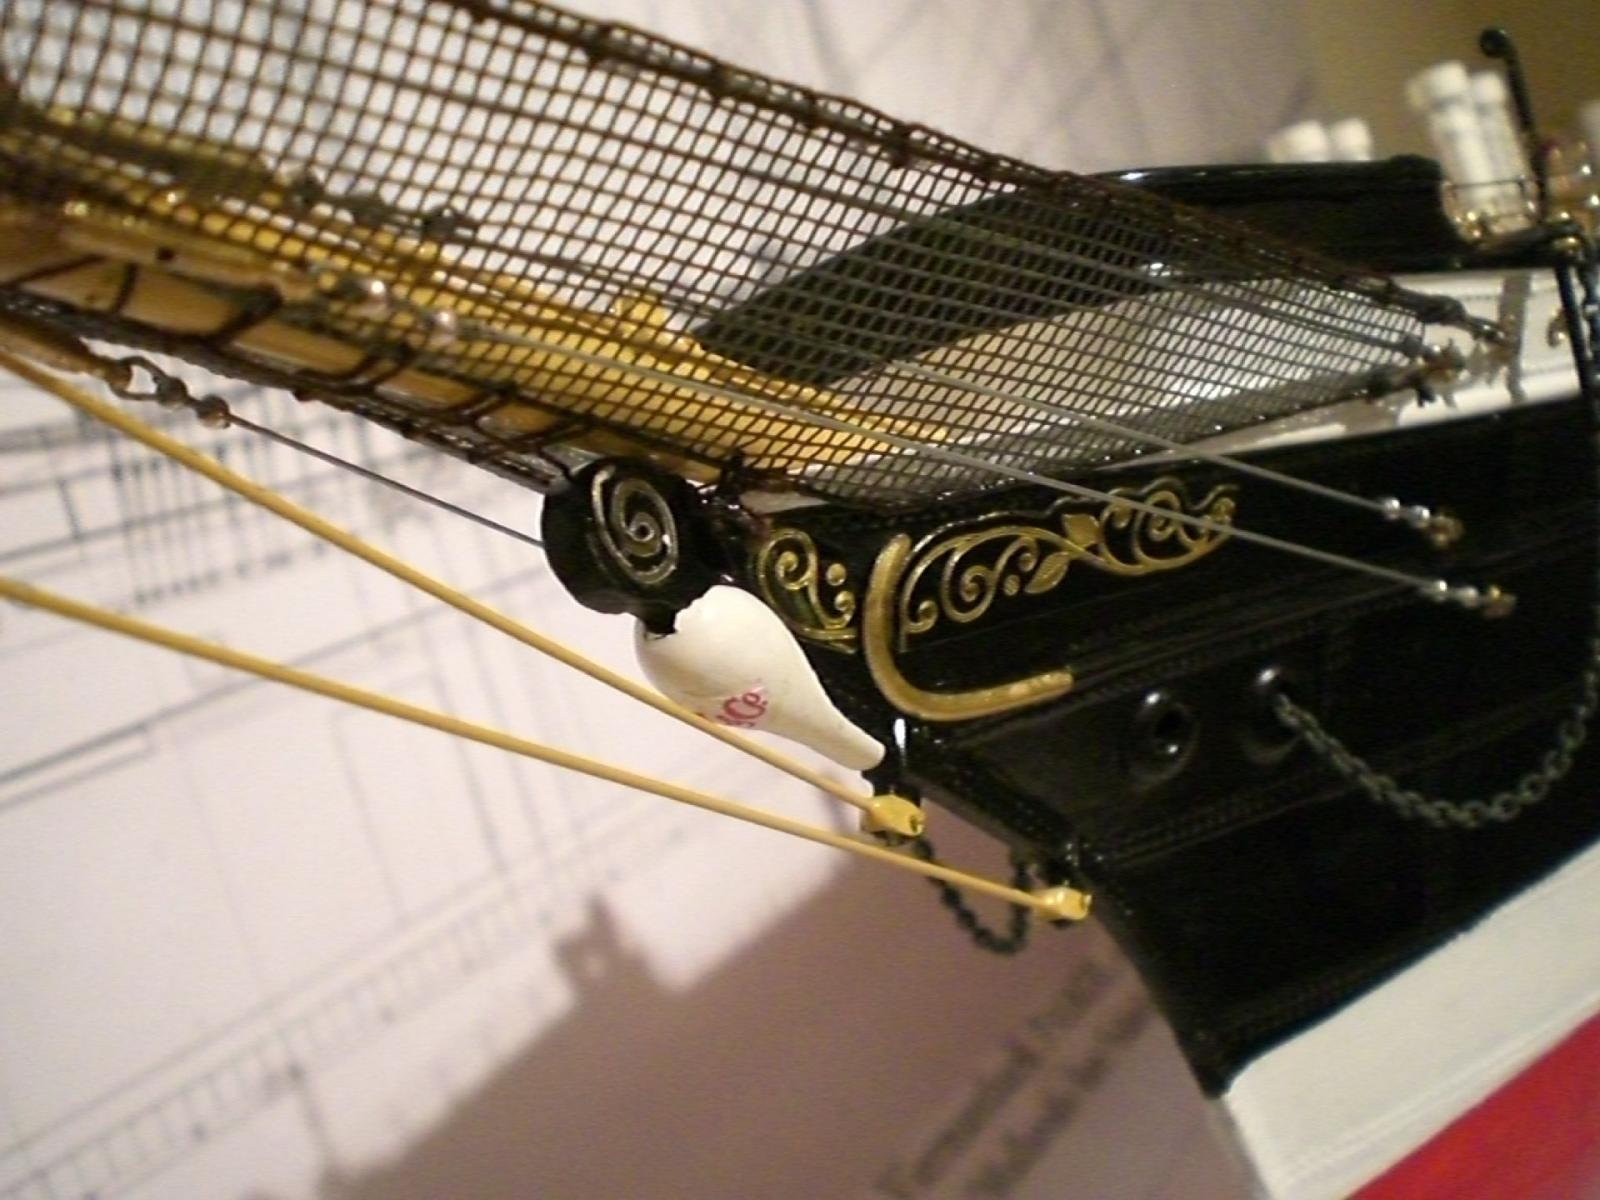
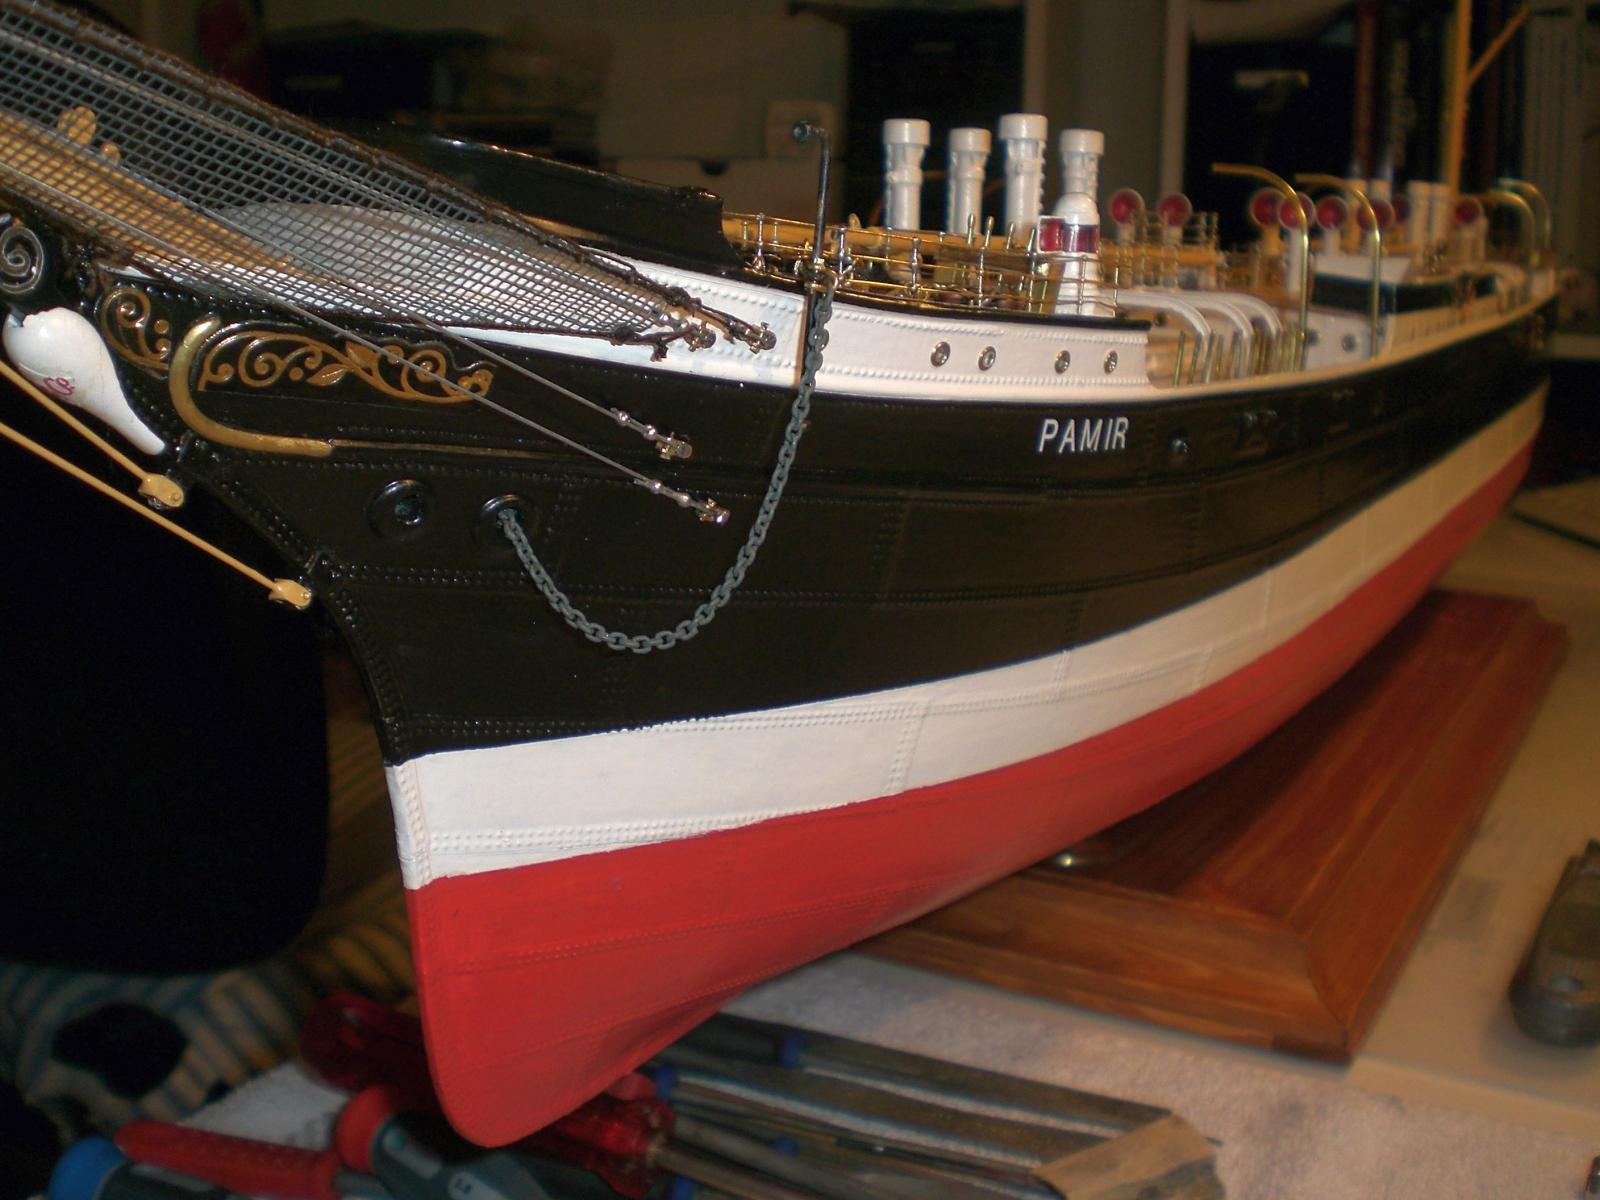
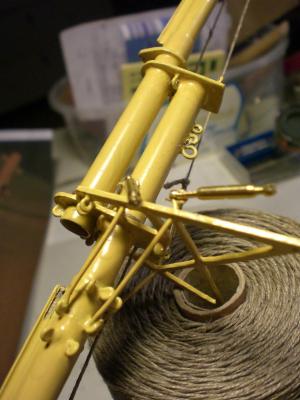
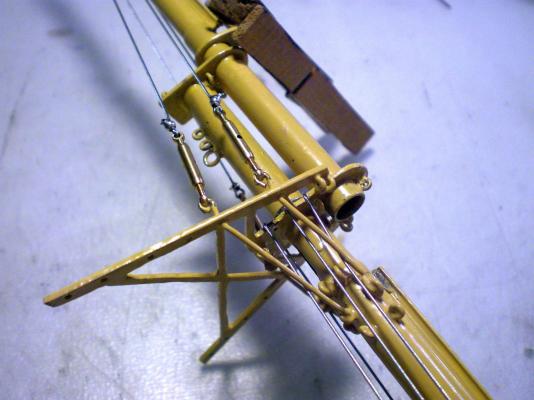
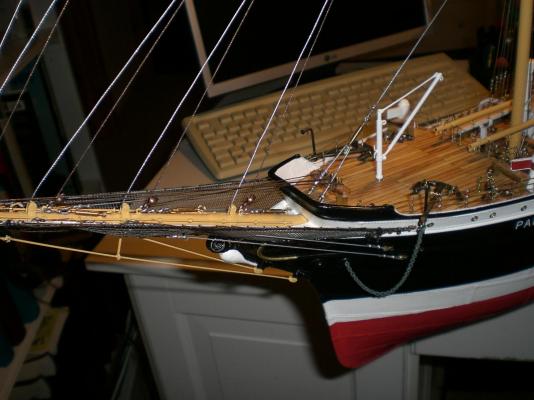
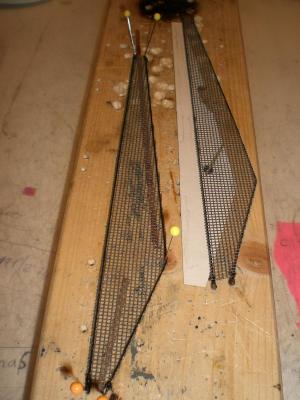
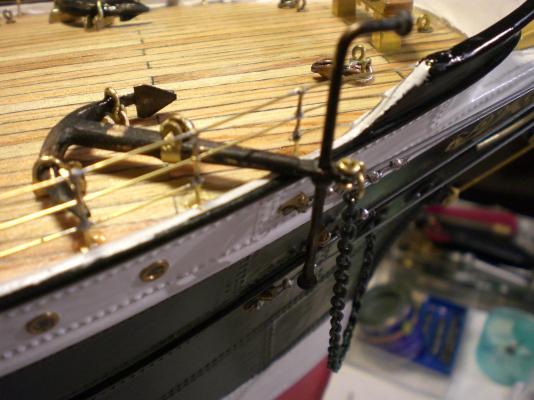
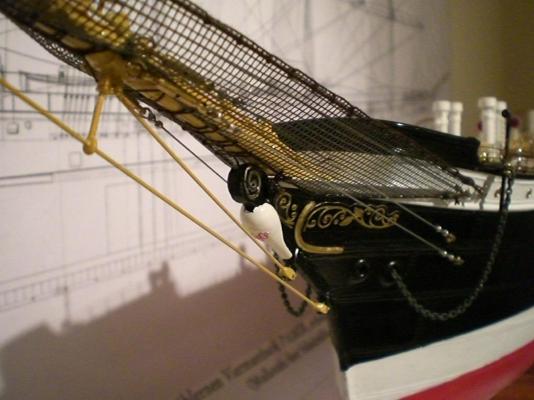
Build log part 28 quite a lot of brass on board... anchors have been upgraded... Anchor chains attached jib boom Network gets its boltropes anchor find ist place on foredeck Scroll work, "Krulle" and, jib boom stays and bopstays latest Progress to be seen Build log part 29 to follow Nils


- 269 replies
-
- 15
-
-
Hi Mates and Ladymates, I have a question: I am intending to post some handscetches that I scaned in in . JPG Formate and saved on my PC. These scans each are all well less than 2MB and not more than 10 a time, but when choosing them (to add to post) the posting preparation crashes. Does anybody perhaps know why ? because I have non such issues with regular .JPG Photos Thanks Nils
-
Thank you Mark Nils
-
Thanks Bob thats a good question I have to think back how I did (do) it.... I mainly use wooden laundry clamps large and small ones, even if I am soldering per gastourch. The clamps easily catch fire sometimes, but I just blast the flame out then, Need some new clamps now and then... On the other Hand it gets a bit more complicated if many small items have to be soldered after one another, actually building up the final part by adding (eg : all the jackstays eyelets to the Yards). There I use "heatsuckers", metal masses, next to the Areas where the heat (flame)is to be brought in quick and concentrated, in order not to loosten already soldered Joints again. Nils Nils