


Ras Ambrioso
-
Posts
603 -
Joined
-
Last visited
Content Type
Profiles
Forums
Gallery
Events
Posts posted by Ras Ambrioso
-
-
Well, well well. I am thrilled at the response that y'all had on my ships boat building. I want to thank each and everyone of you for your support.
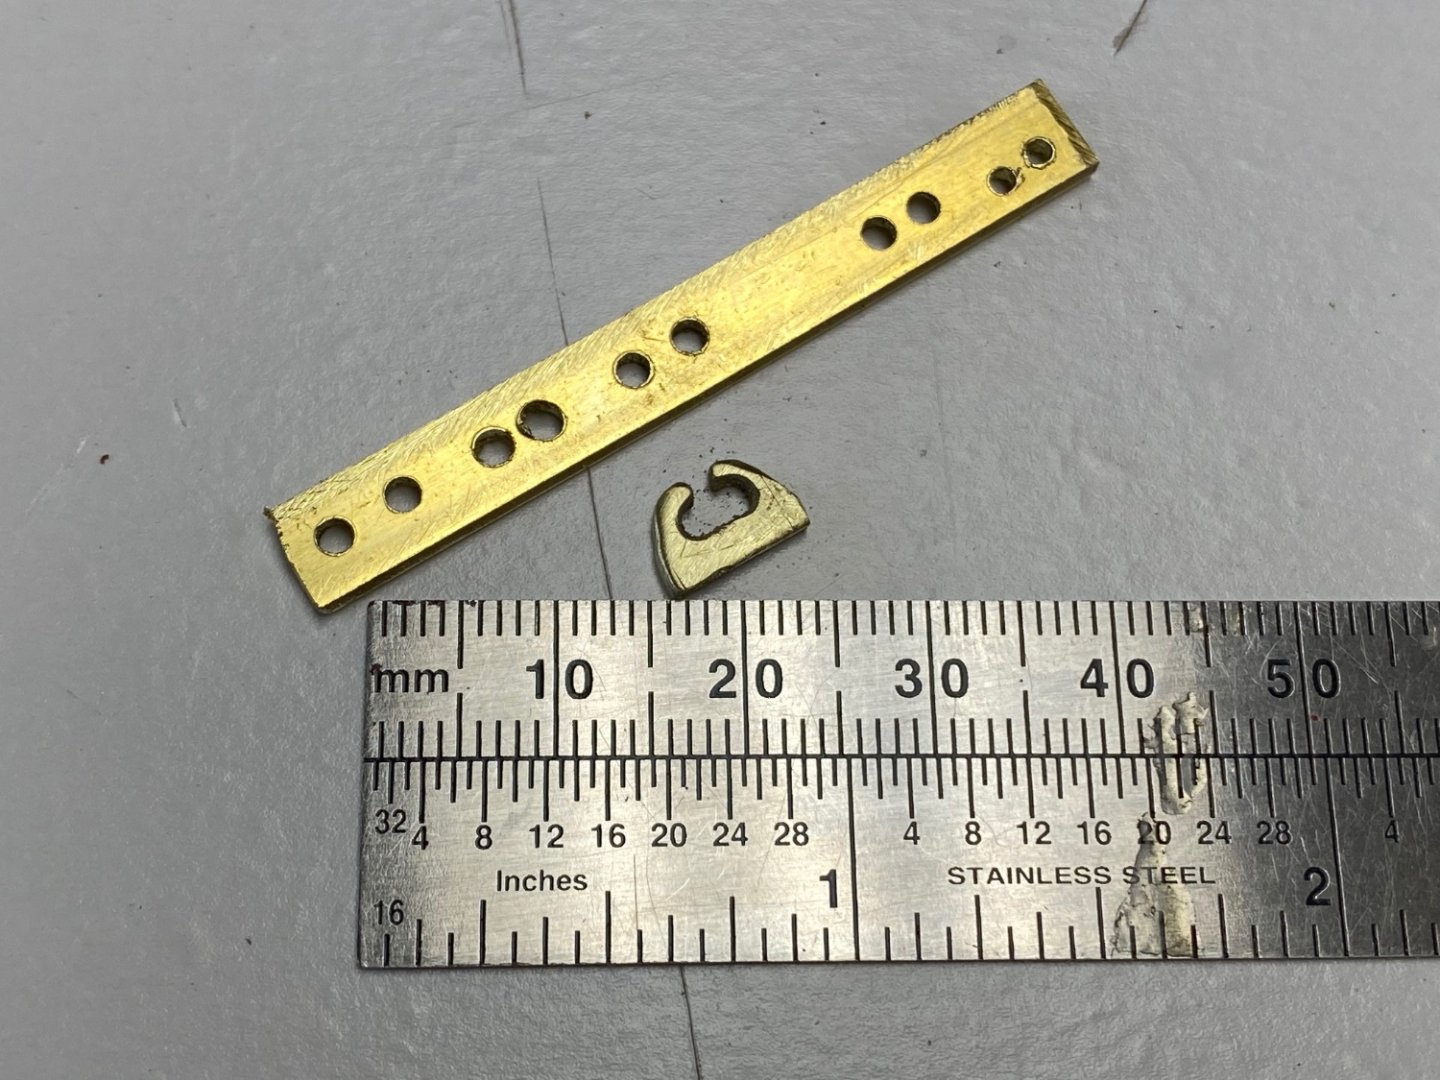
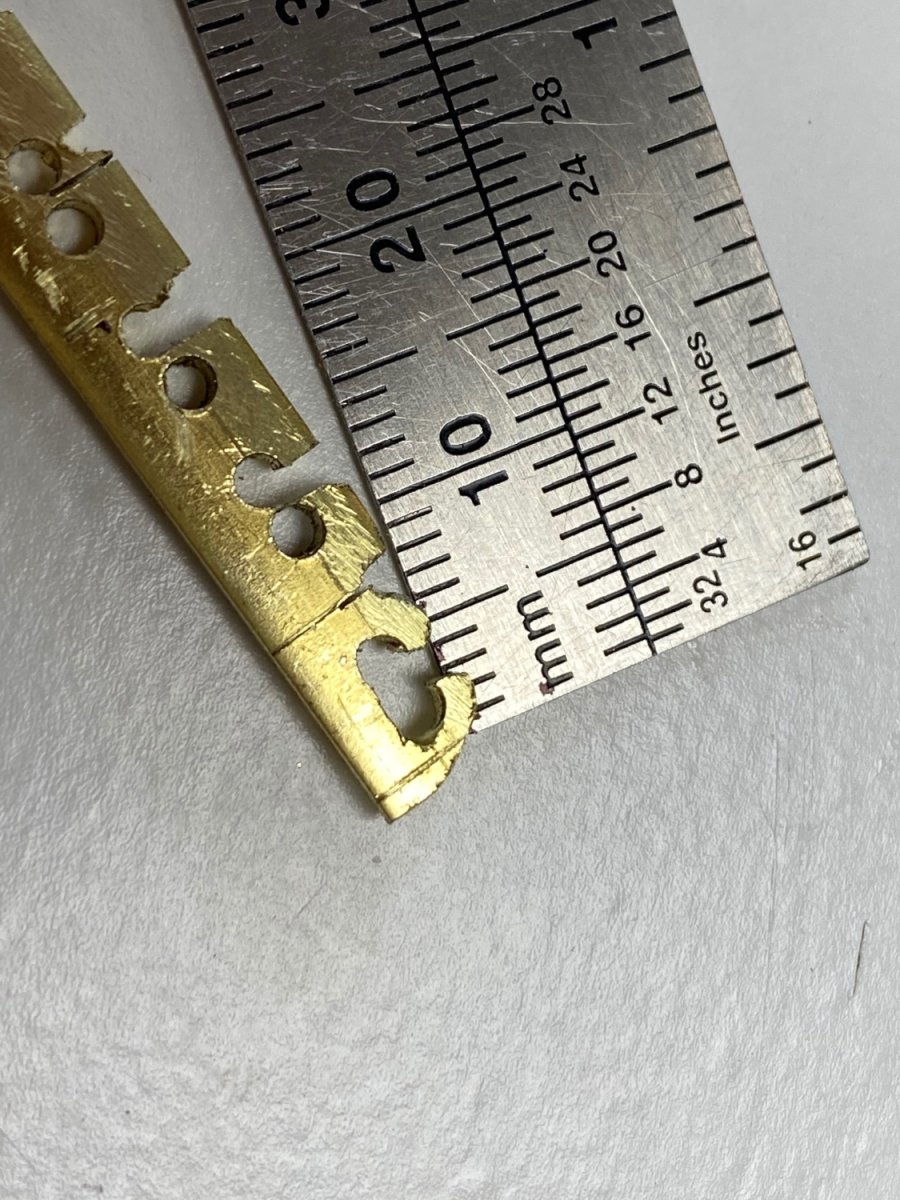
To mcb: Yes, the material I used for the fairways was 1/4"X1/16" brass bar available at Ace's hardware stores. My biggest problem on this item was to get four of them the same size. Later I realize I could have made the fairways easier with an elliptical hole as shown in the photo.
To Bob: good advise. Will try the tissue paper route and the saran wrap ideas. As a matter of fact, my first thought for these boats was to make them out of "papier-mache". Besides, this, being my first scratch built, is a testing and learning project.
To Valeriy: again thanks for your comments. The photo of the stocking under tension is great.
To Wefalk: I have been following you "ships boat" building and found it fascinating. Your idea to show the boats under cover is very accurate in the real boats and saves innumerable hours of detailing for the interior at small scales. I will probably do it on the two large boats on Amapá and detail the little dinghy.
To Roger: again thanks for you comments and I will be looking for your tutorial on NRG. Like I said before, this model is my scratch build education.
-
Glad to hear you are well. Your little boat is precious. I am close to that to doing a similar job on my Amapá.
- FriedClams, druxey, mtaylor and 2 others
-
 5
5
-
Thanks to Roger for the advise and to Valeriy for the re-tweet.
- Keith Black, Valeriy V and mtaylor
-
3
-
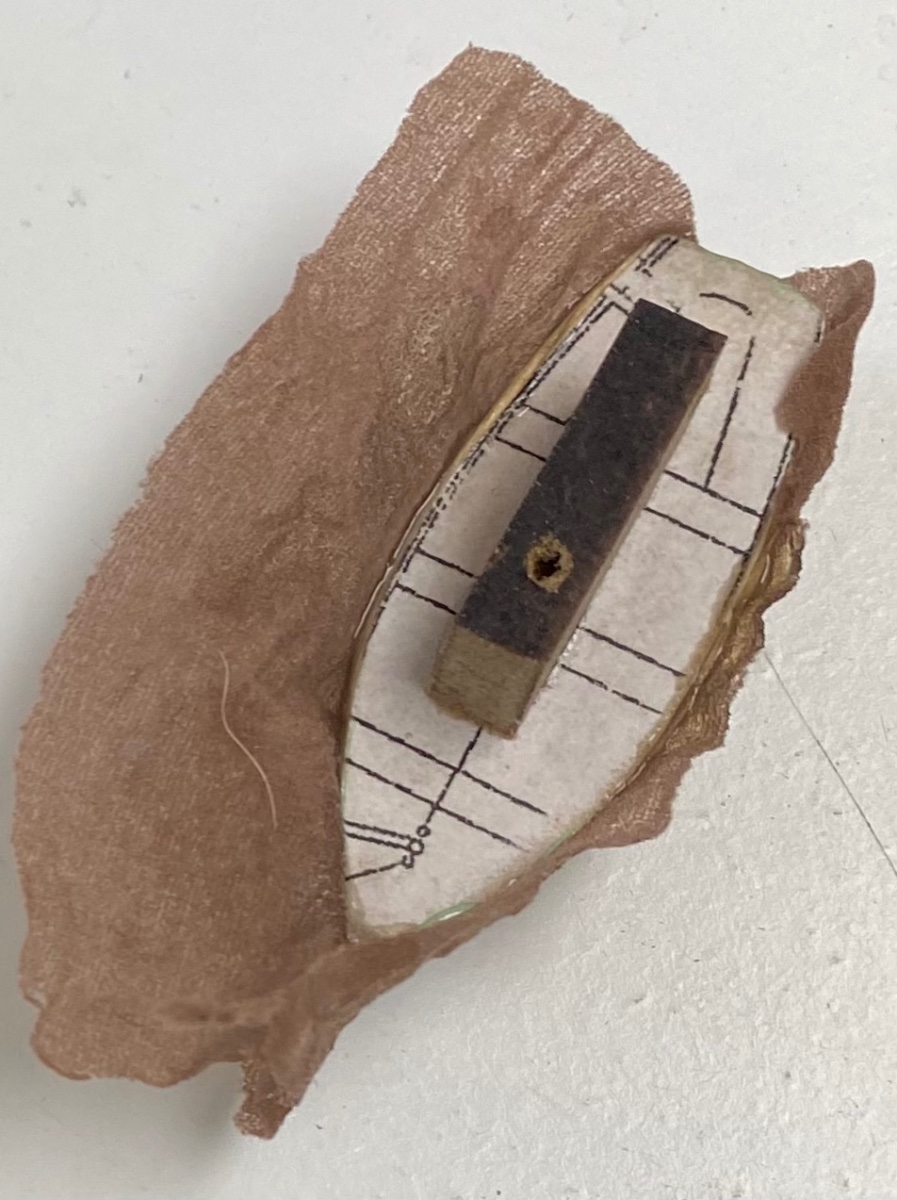
I proceeded with the idea of making the ships boats out of reinforced resin. I made the molds and and finished them with three coats of shellac with fine sanding in between. When properly dried, I applied carnauba wax to the mold in two layers. Then using the hose stocking's material, provided by the Admiral, I applied the resin.
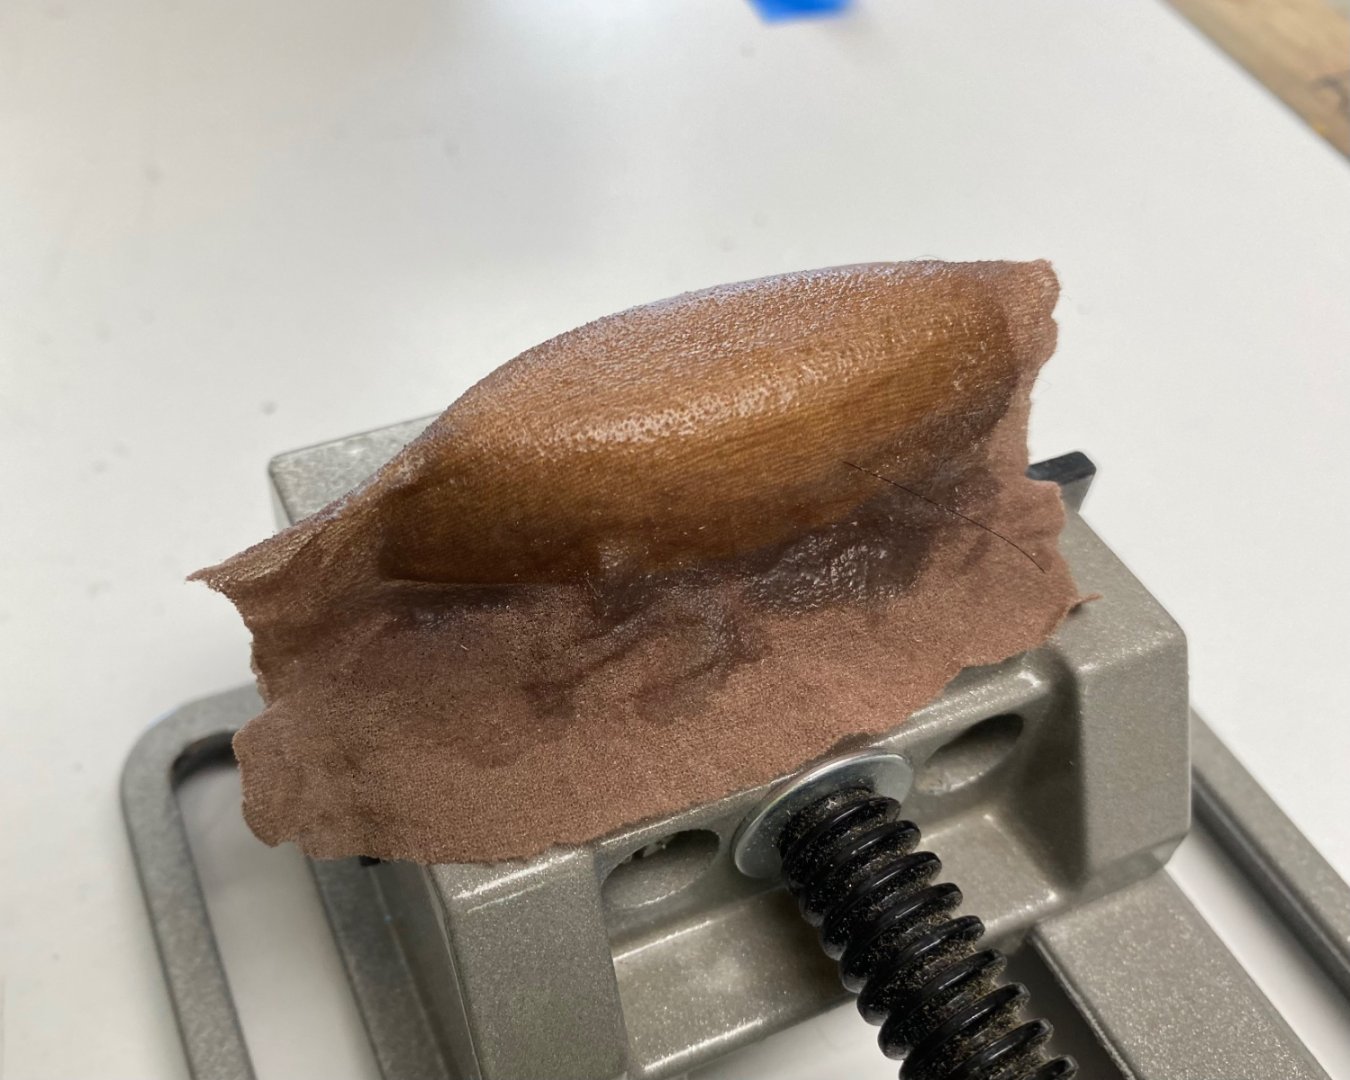
I tried to smooth it out the best I could and left it to dry 24 hours.

Then catastrophe!!!
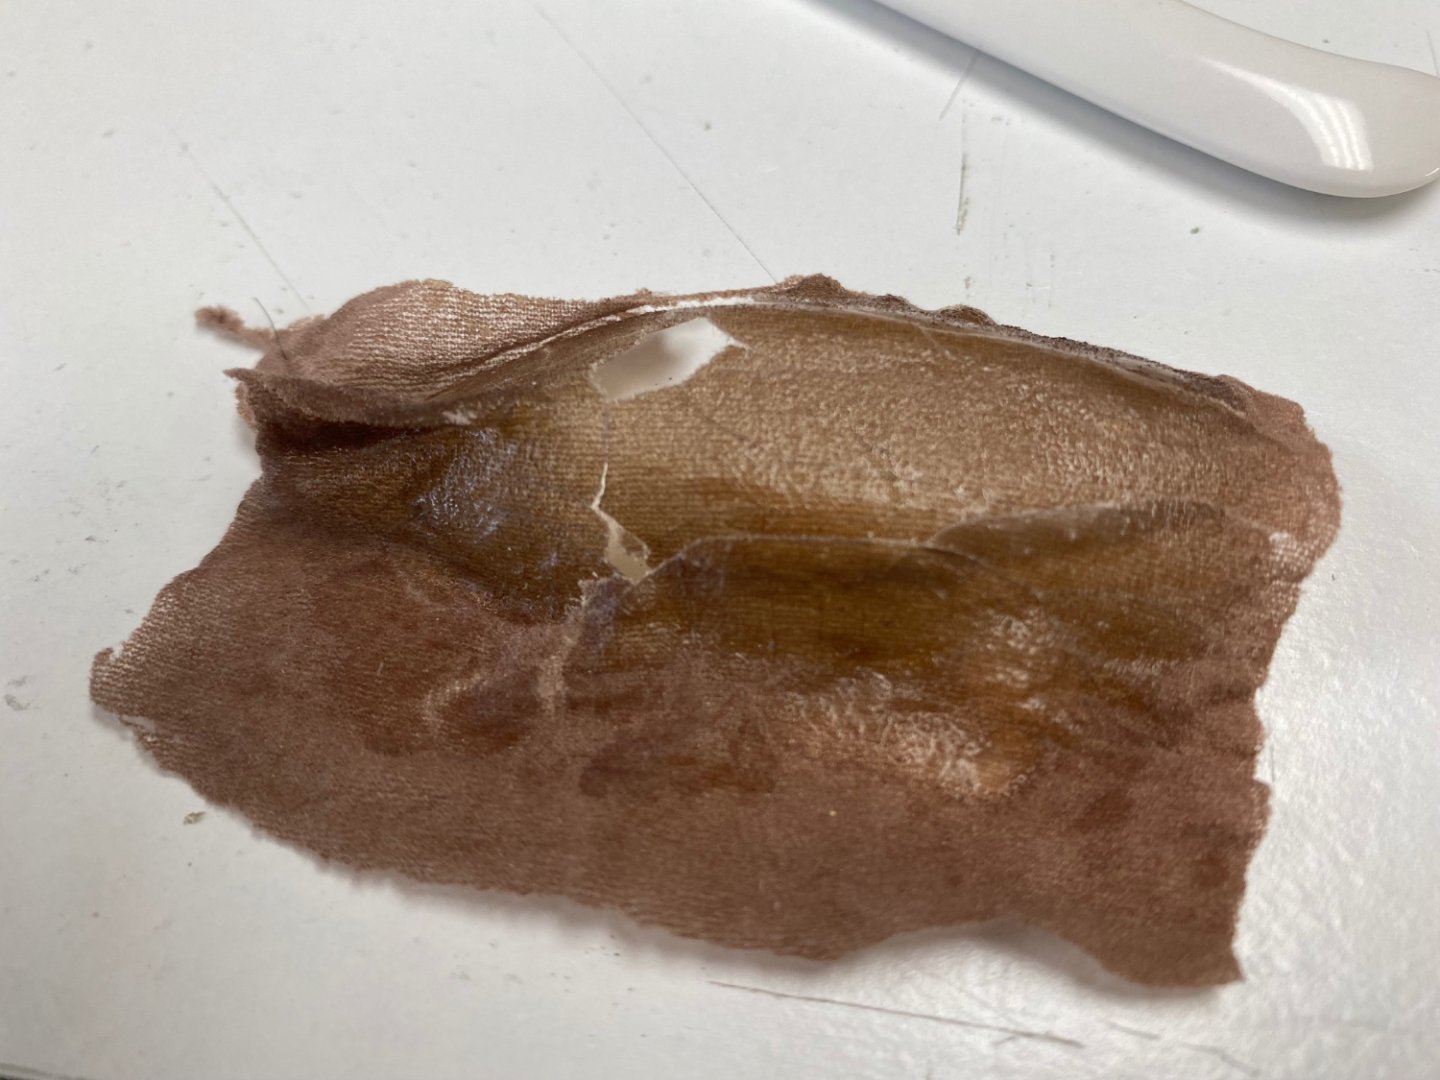
As I tried to remove the hull from the mold parts of the hull where still adhering to the mold and I could nor get a clean casting.
I will rest for a while and figure it out. Initially I think that my mold release was not sufficient, that I should have trimmed the cloth more around the mold and that, perhaps should use two layers. I would appreciate your comments and suggestions.
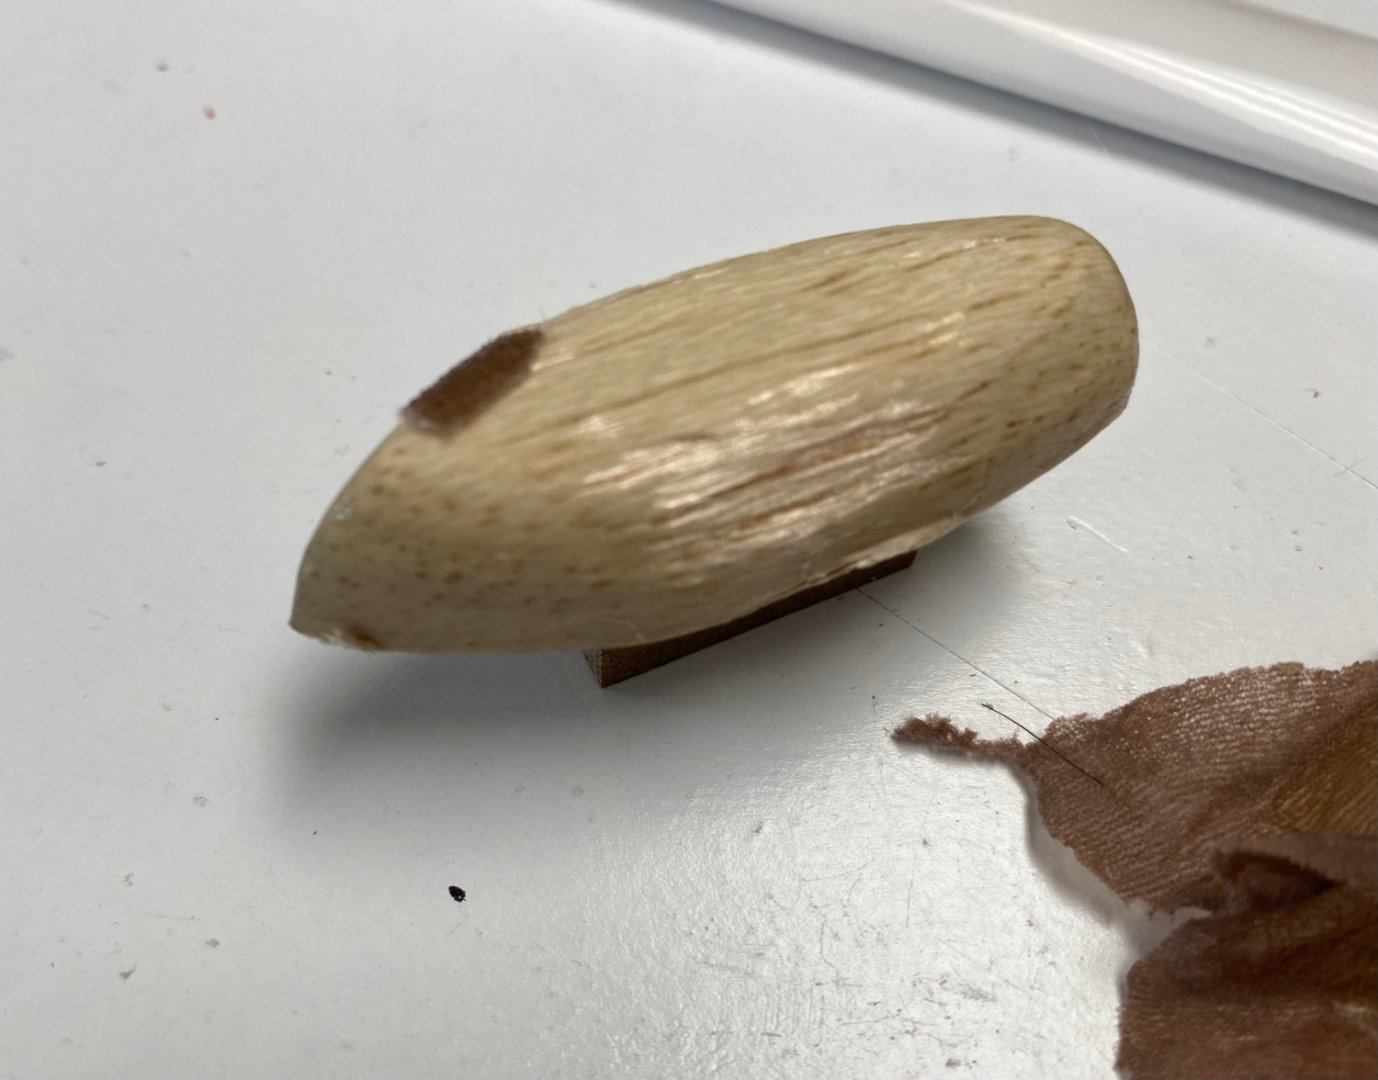
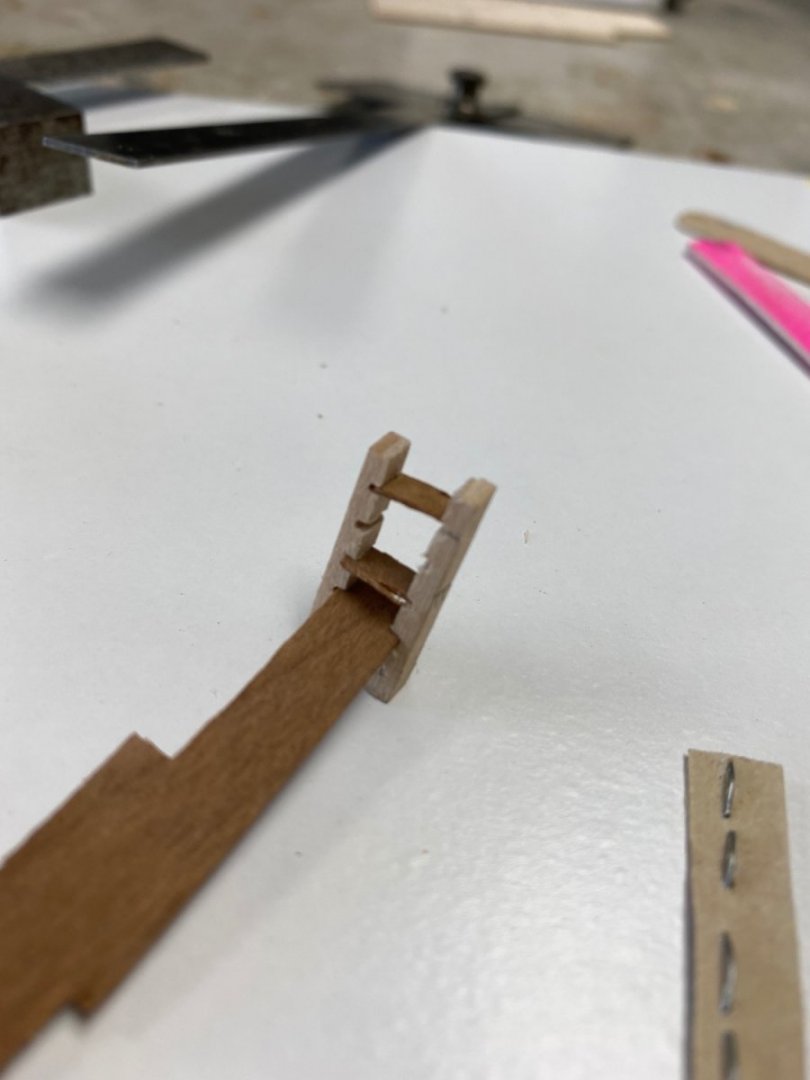
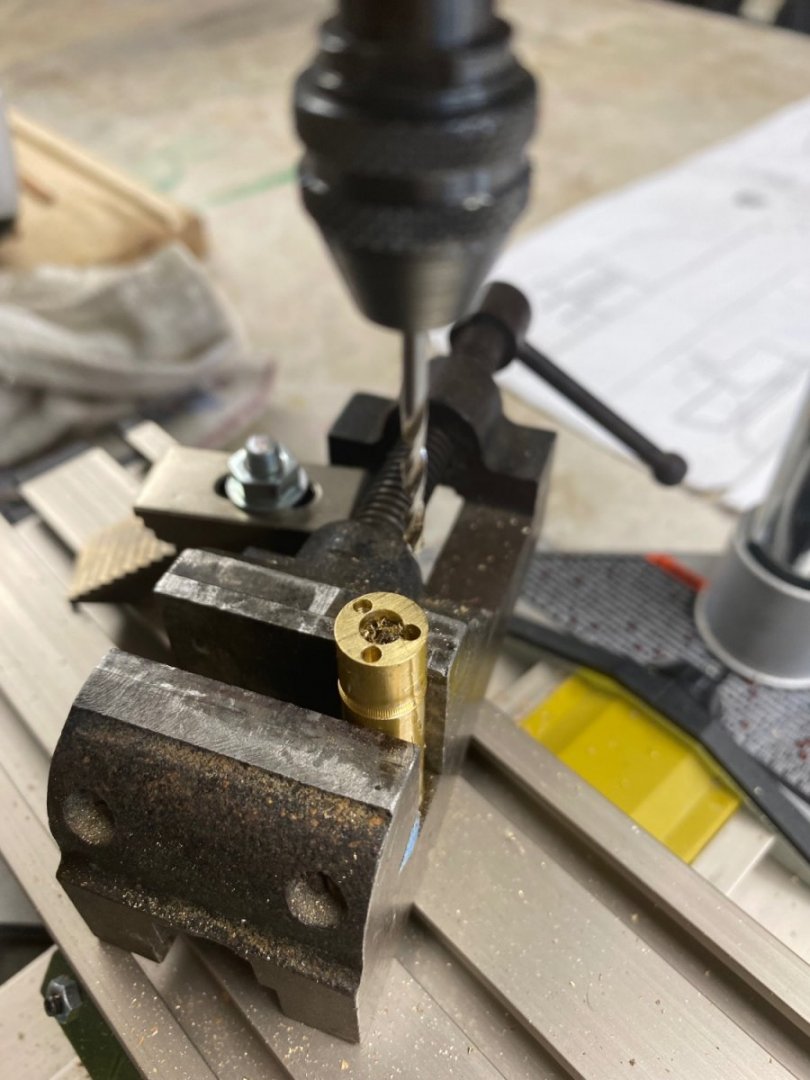
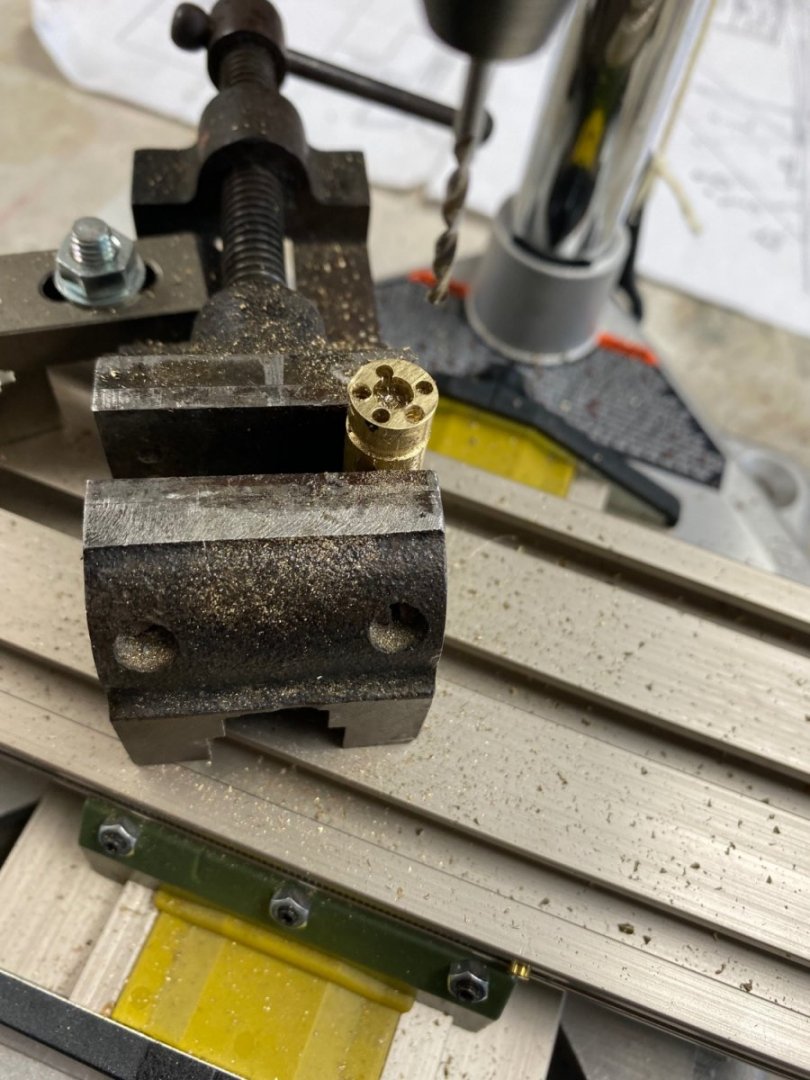
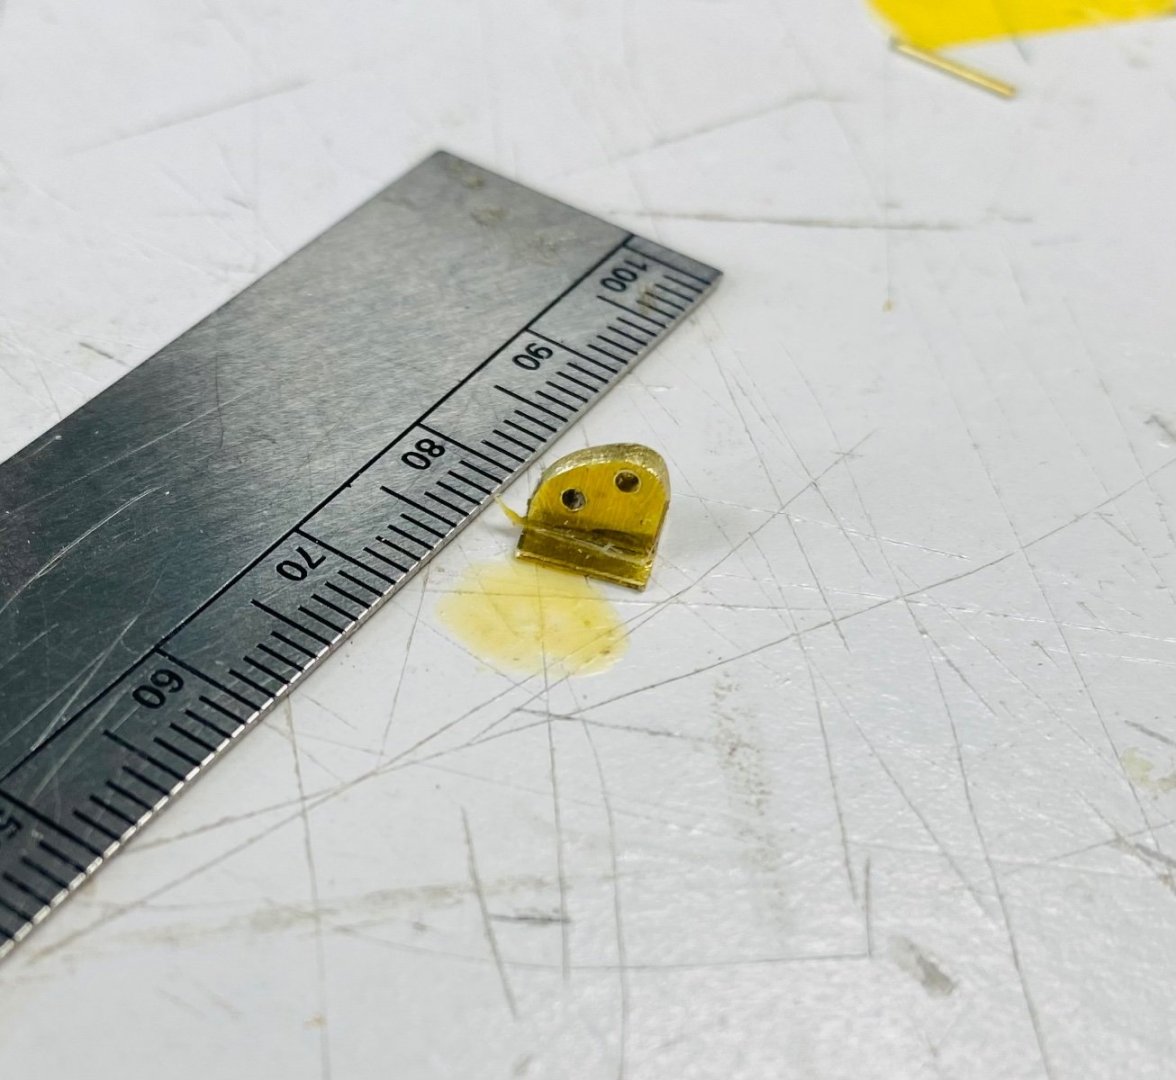
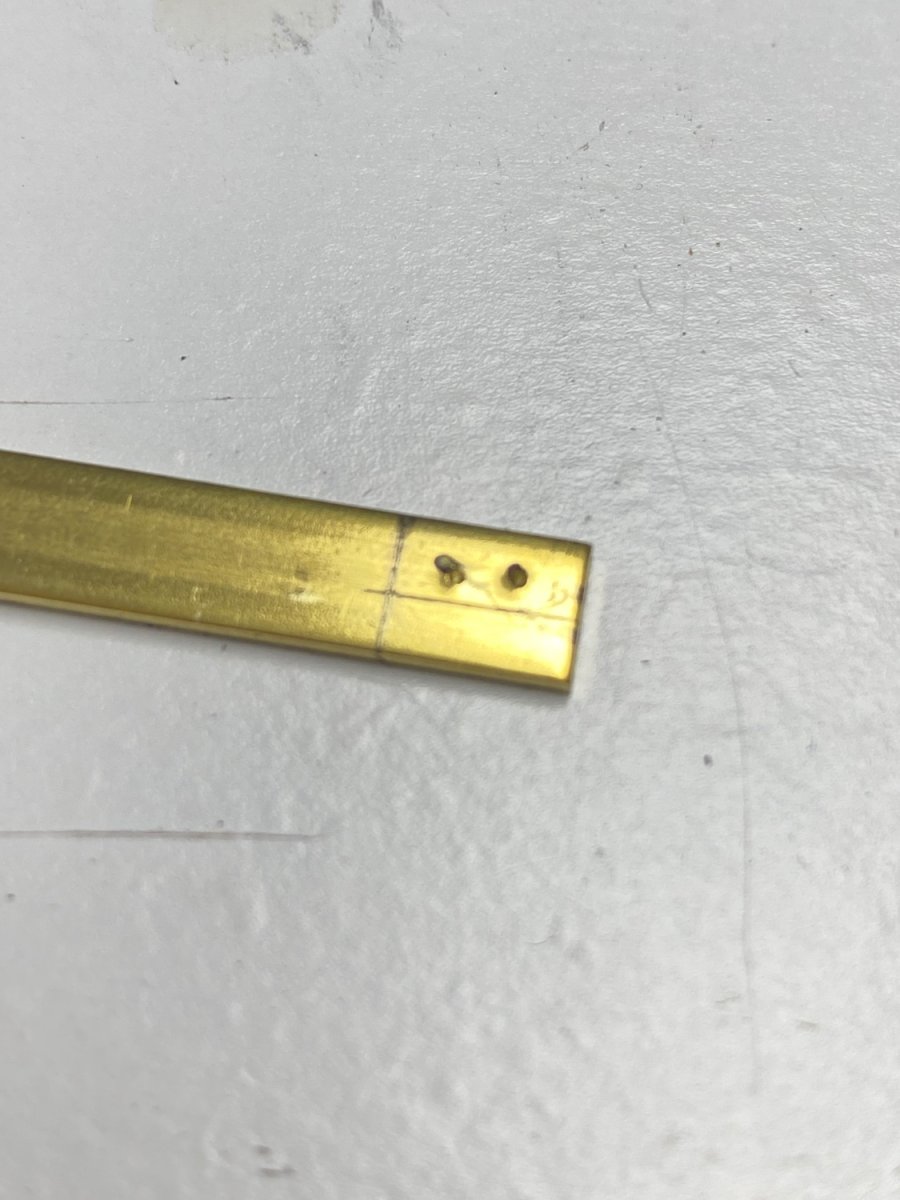
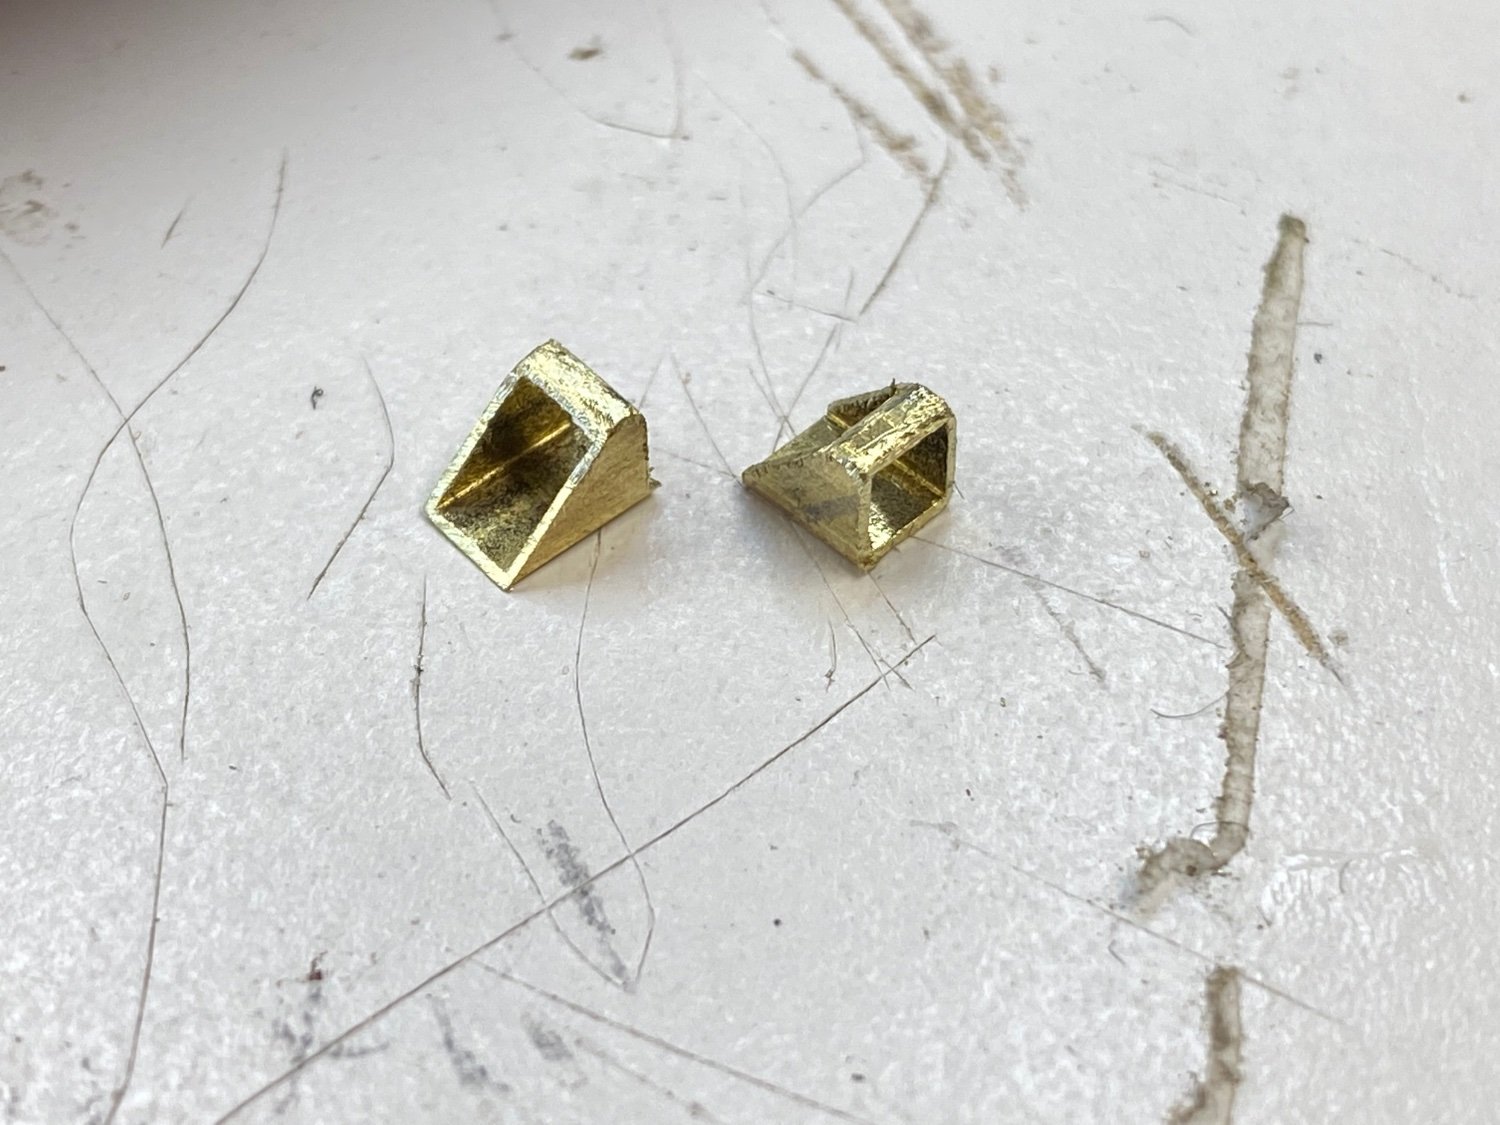
But still more remains to be fabricated. The finished bollards need their fairleads. Following is the method I used:
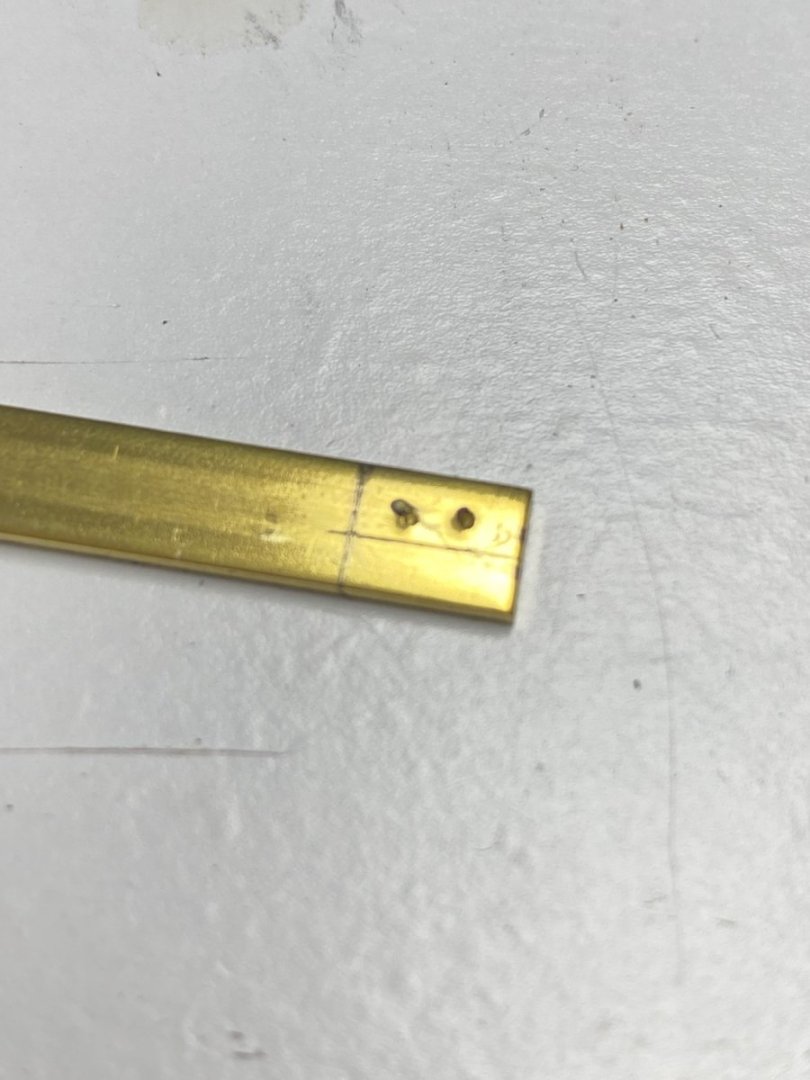
After drilling two holes in line I carved the fairlead shape with jewelers files

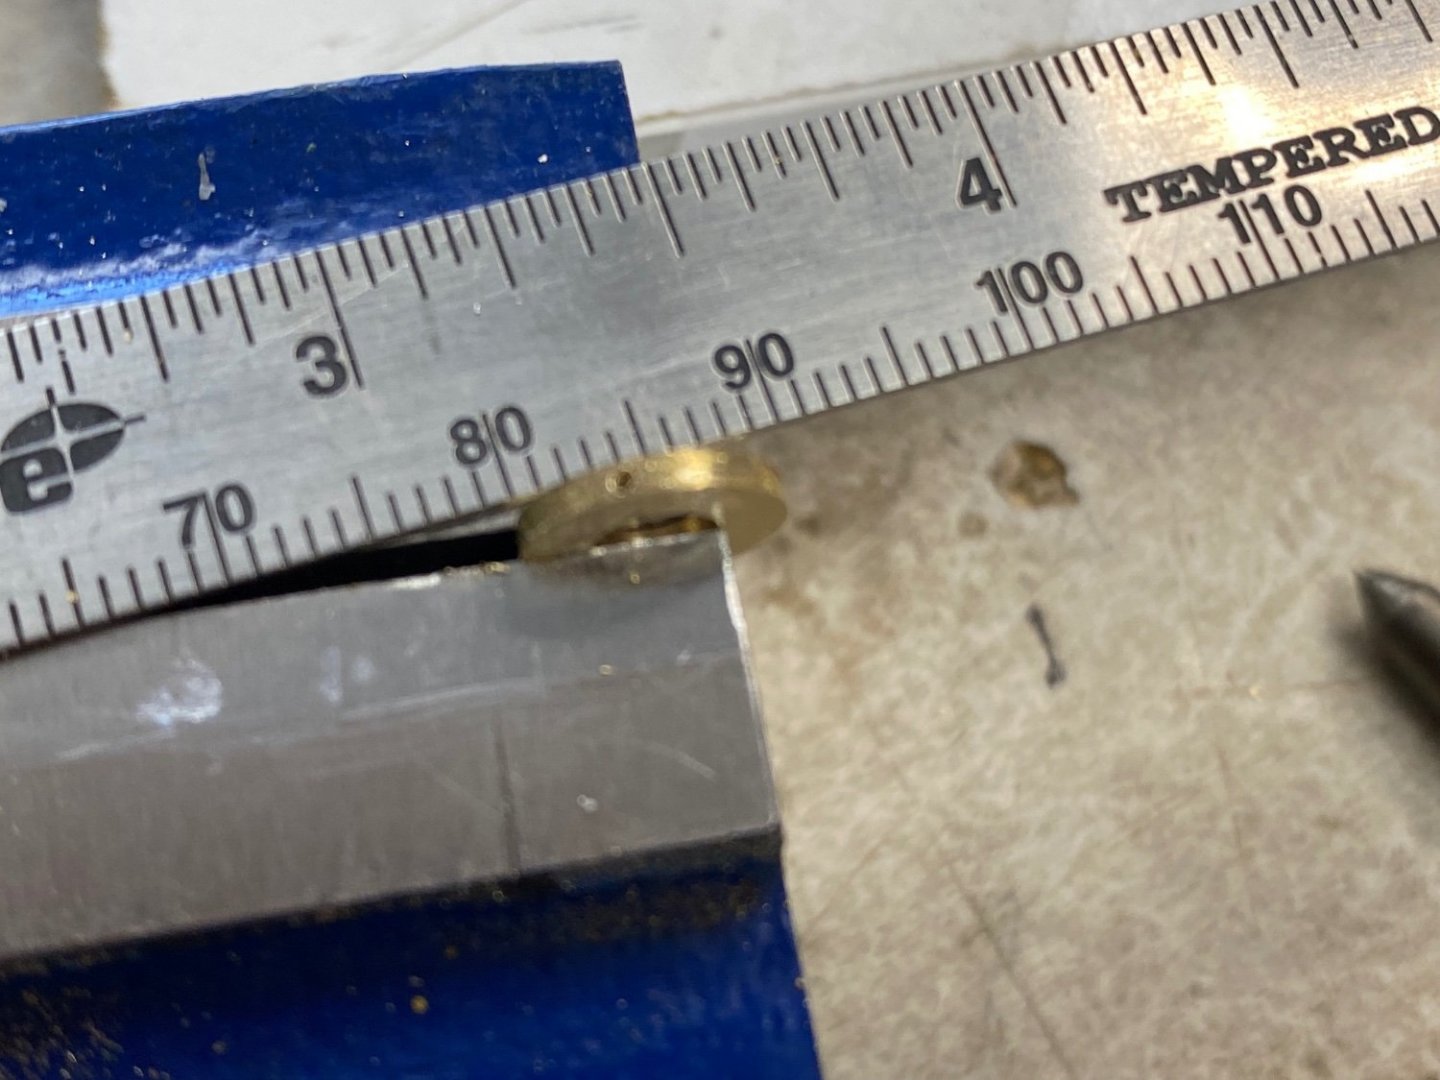
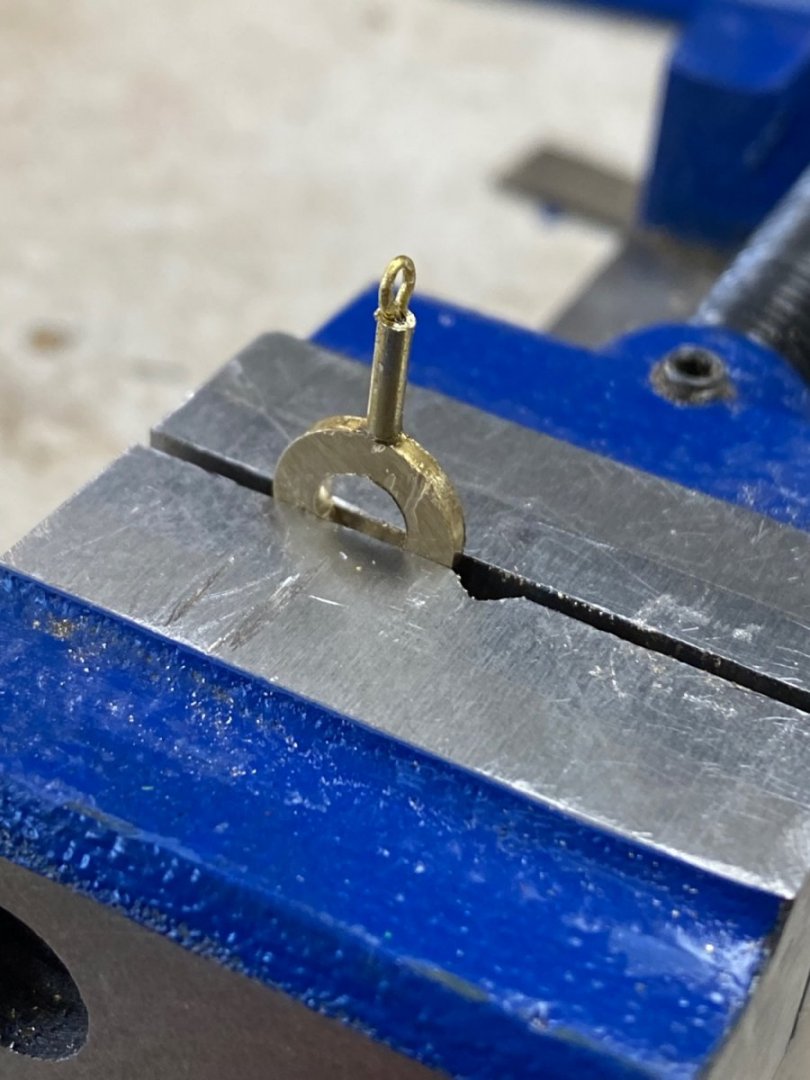
And this is the result. Success
All I need now is to make the other three I need, reduce their height a bit and glue them their bases.
Now the cold beer is waiting. Another day in the life of a model boat builder.
-
Glad to hear you are Ok. The cutter looks great. Saturday I epoxied the little dingy for. Amapa. Hope it comes out well.
- mtaylor, Keith Black and FriedClams
-
3
-
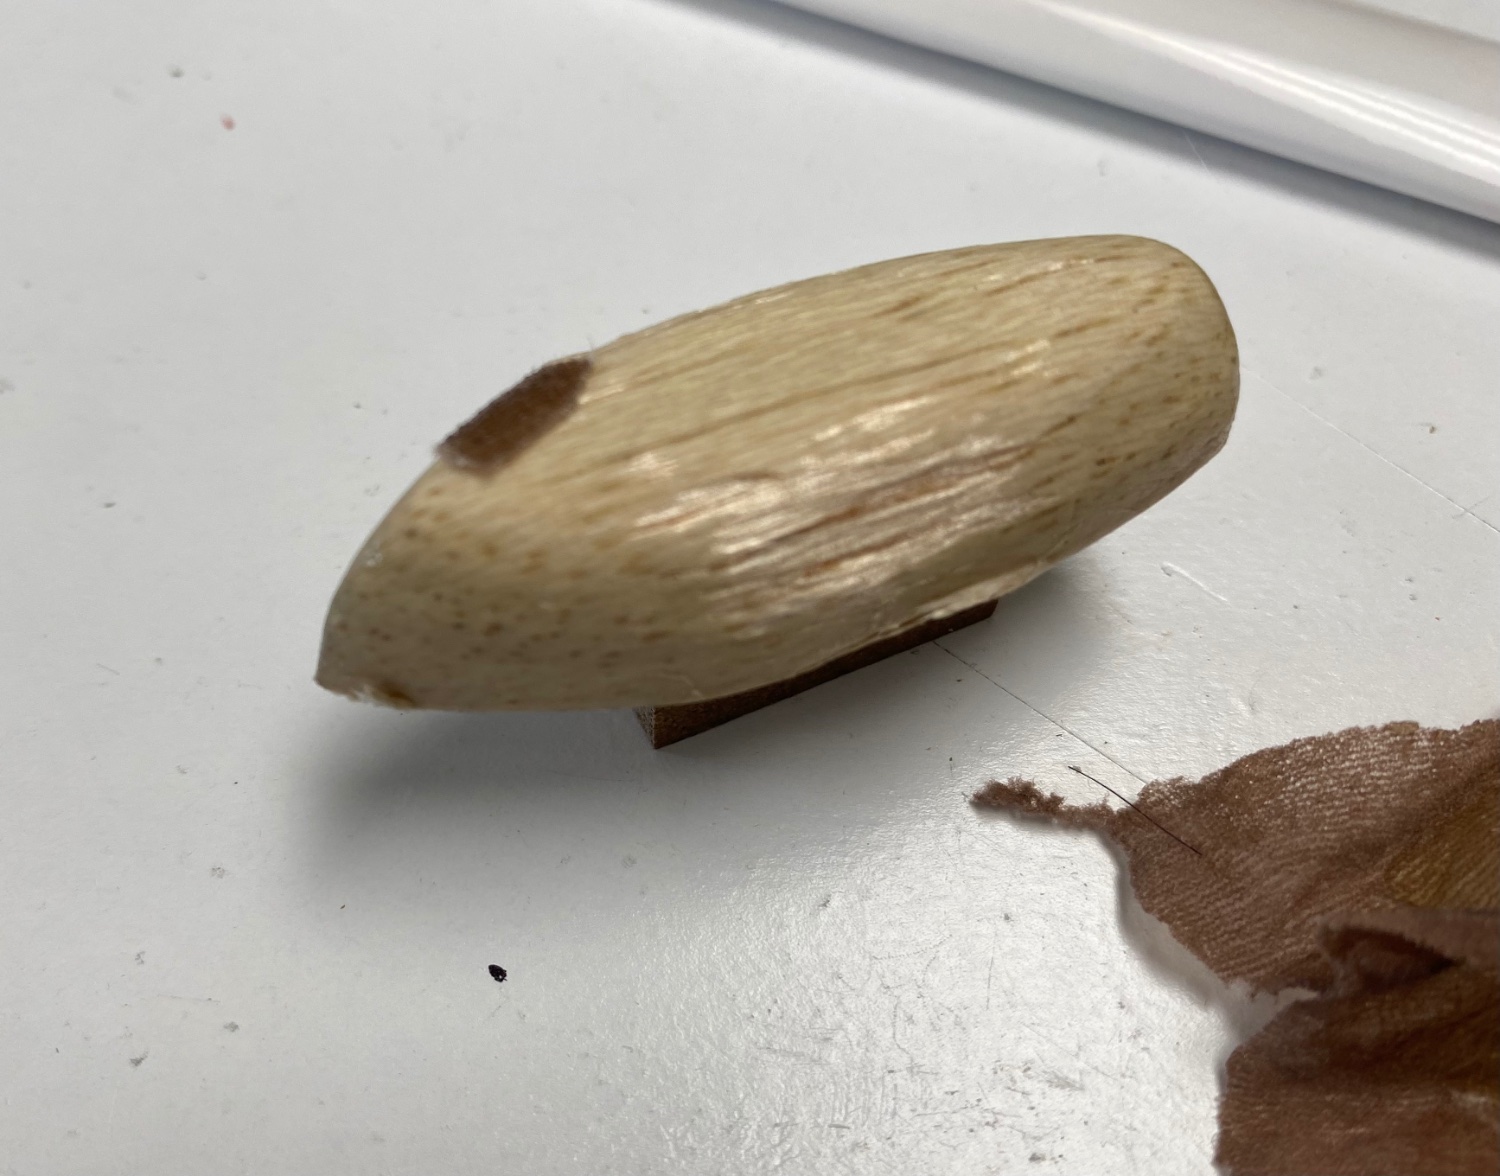
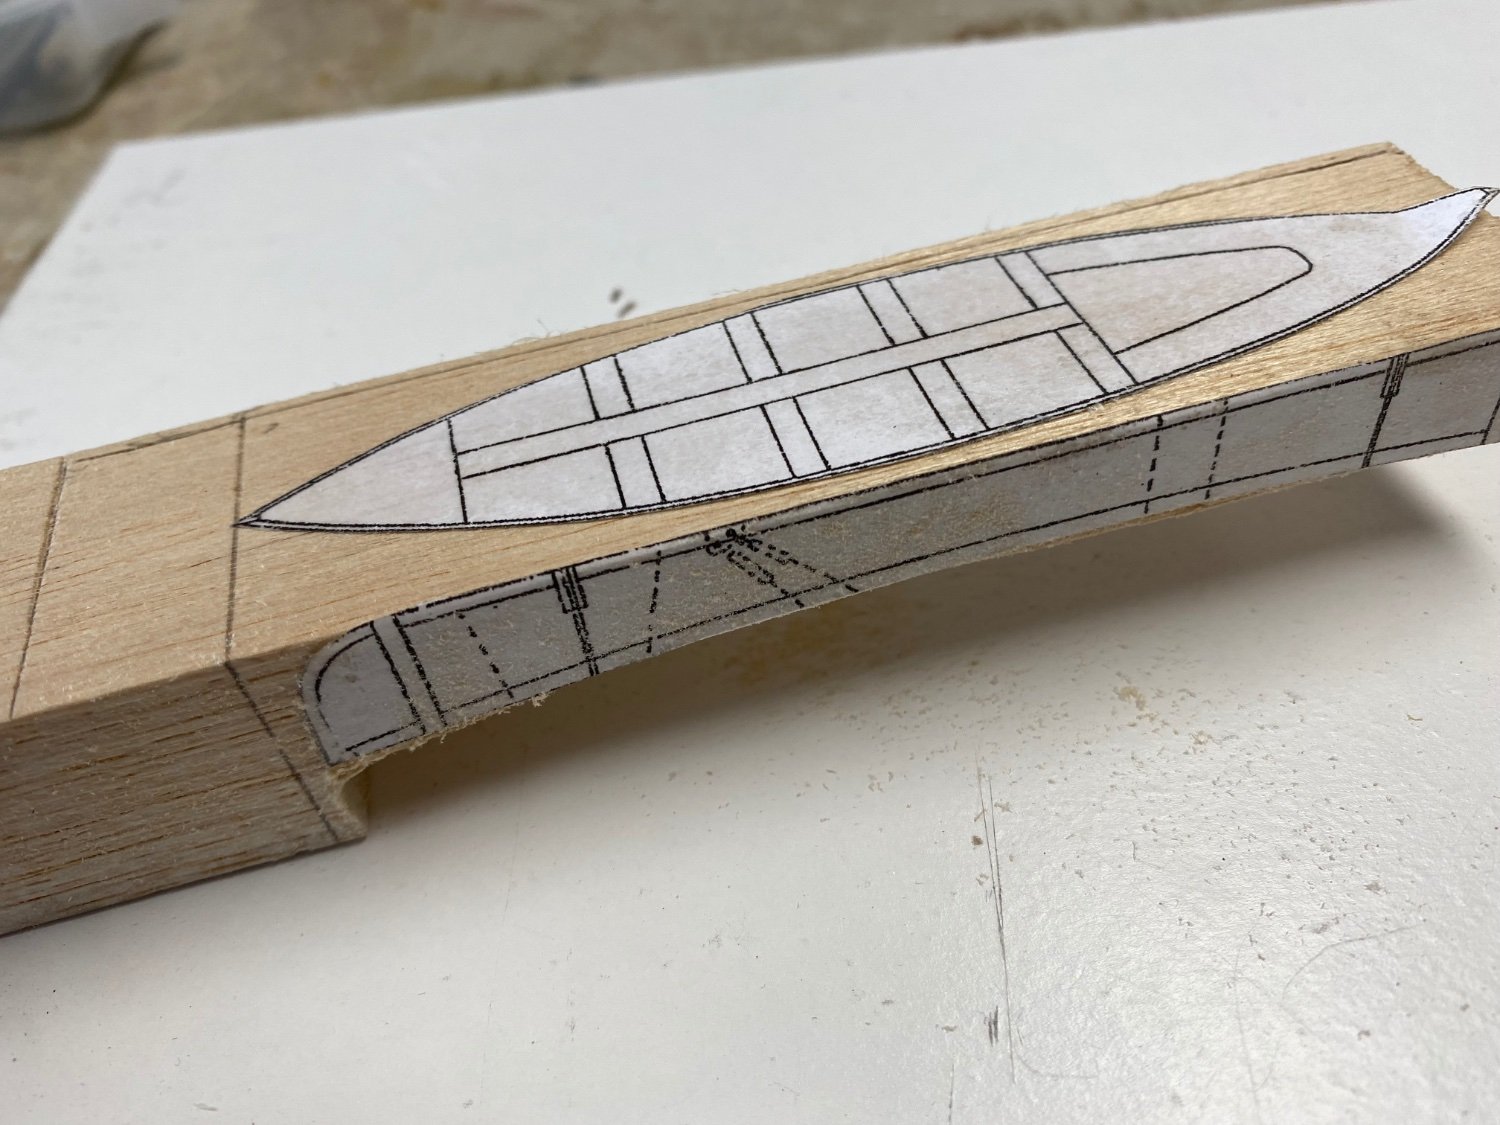
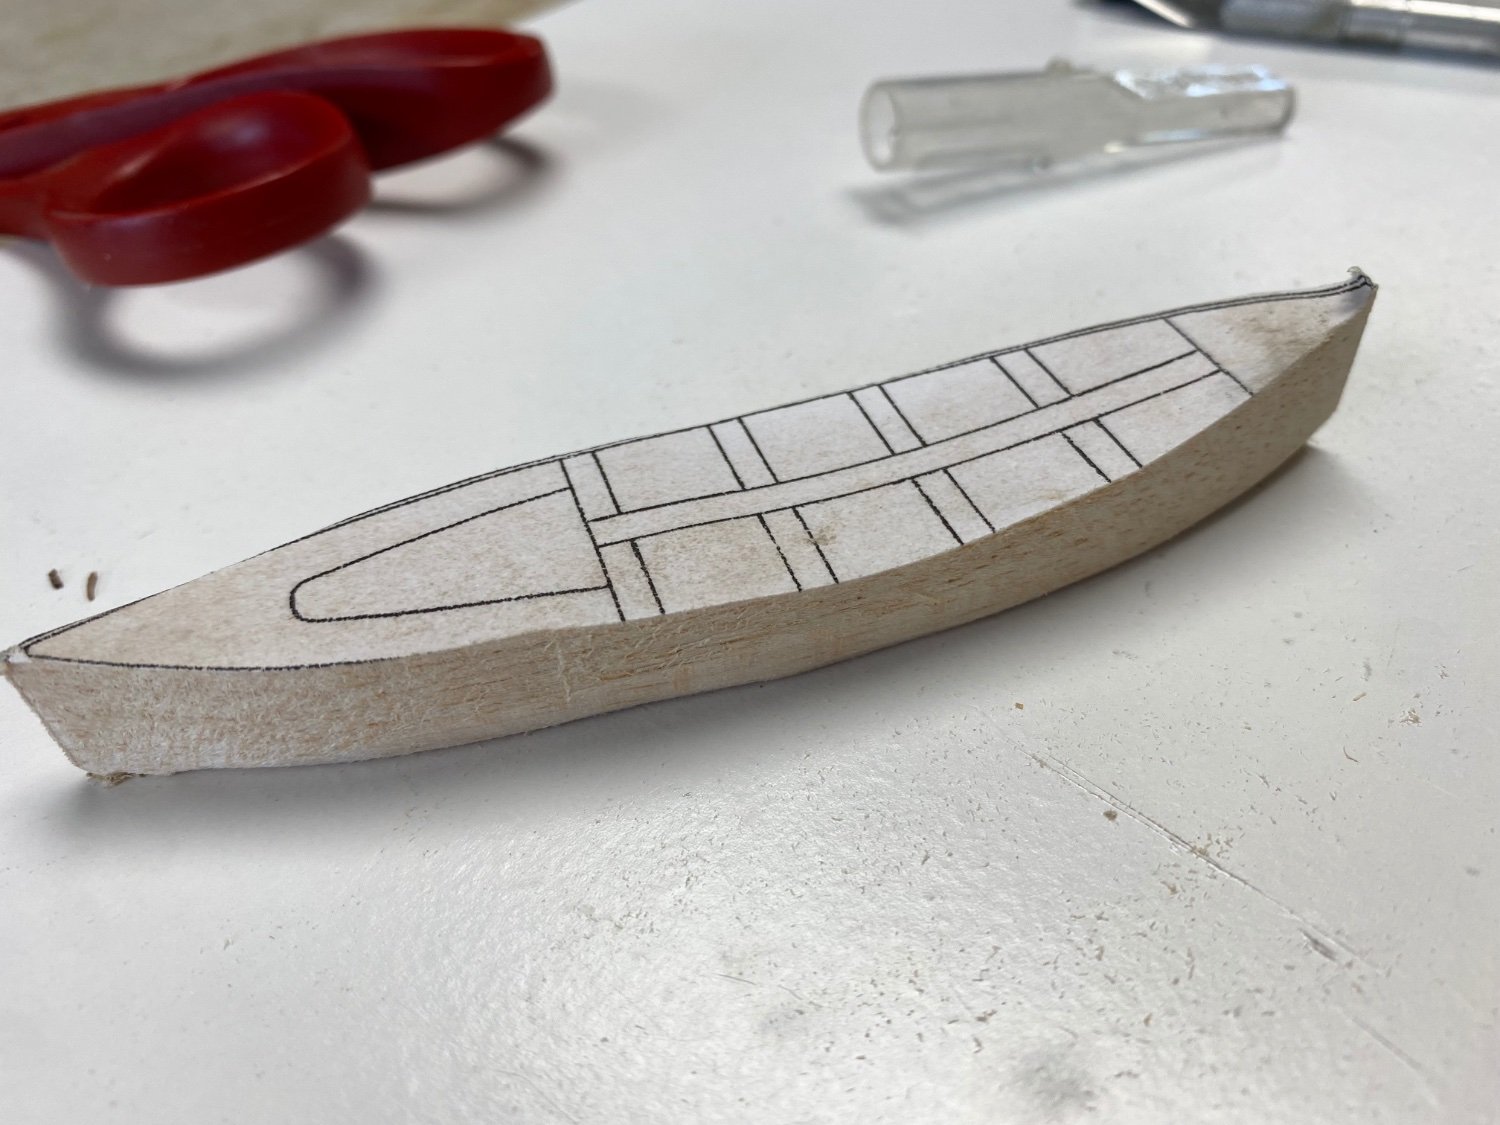
My next challenge were the ship's boats. Three of them. Today I stated picking out what to use for the mold. I had oak, mahogany and balsa. After much though, I figure that balsa would be easier for the carving so I cut a block of balsa, pasted the top and side plans of the first boat, a whaler. Then I proceeded to cut out the shapes and following is the results
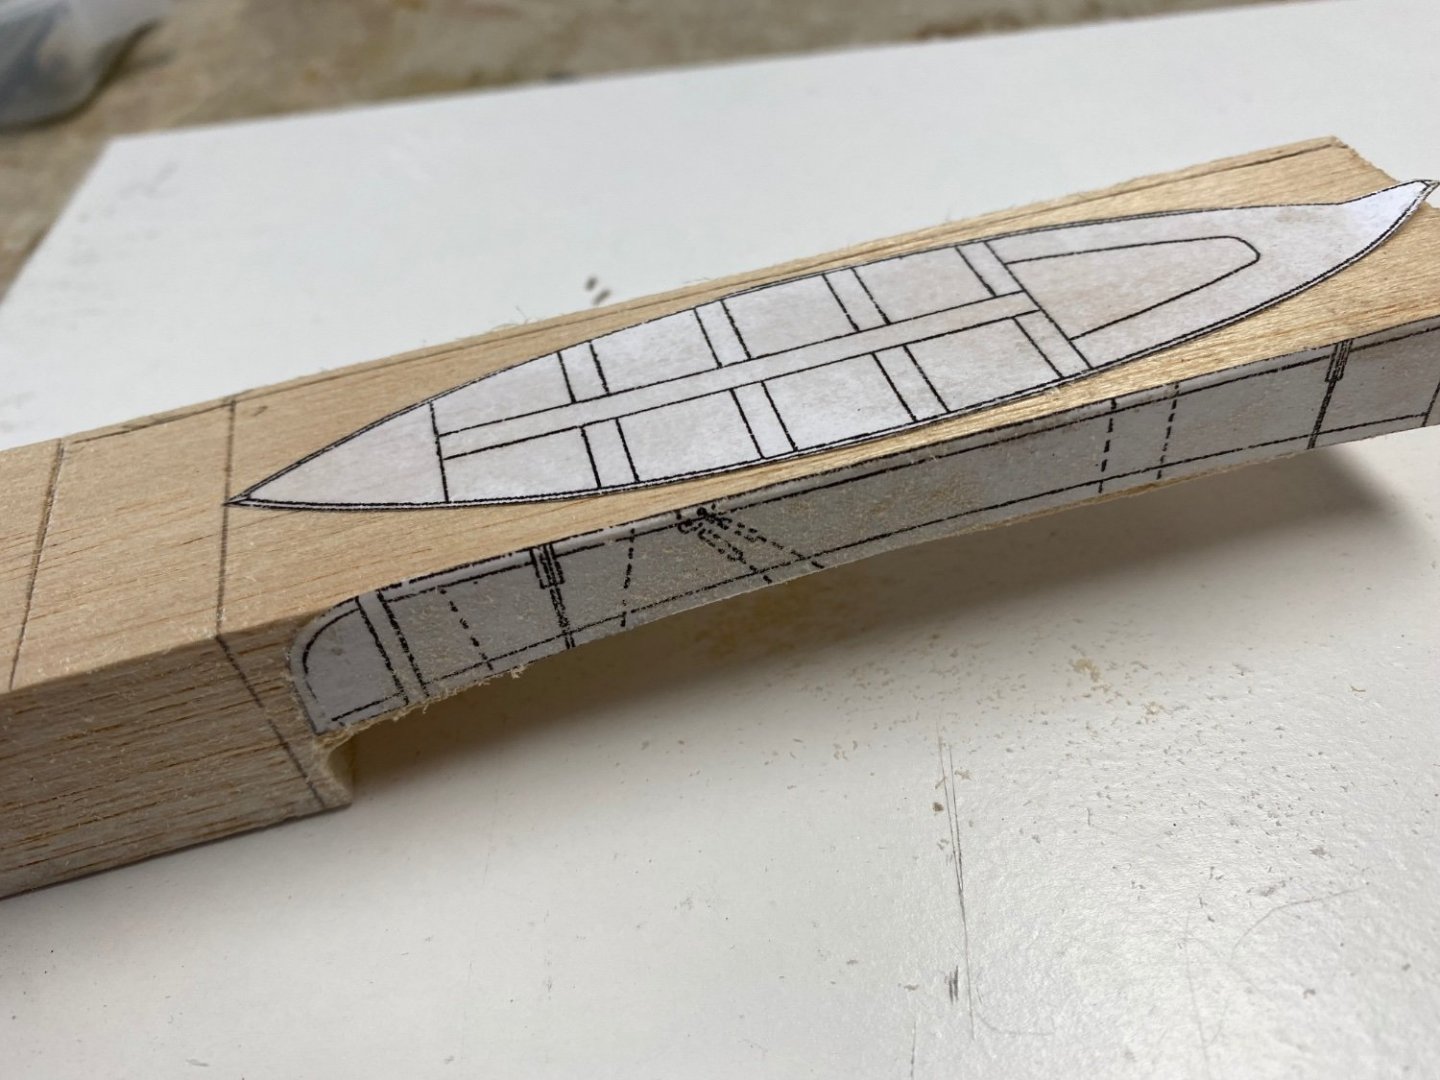


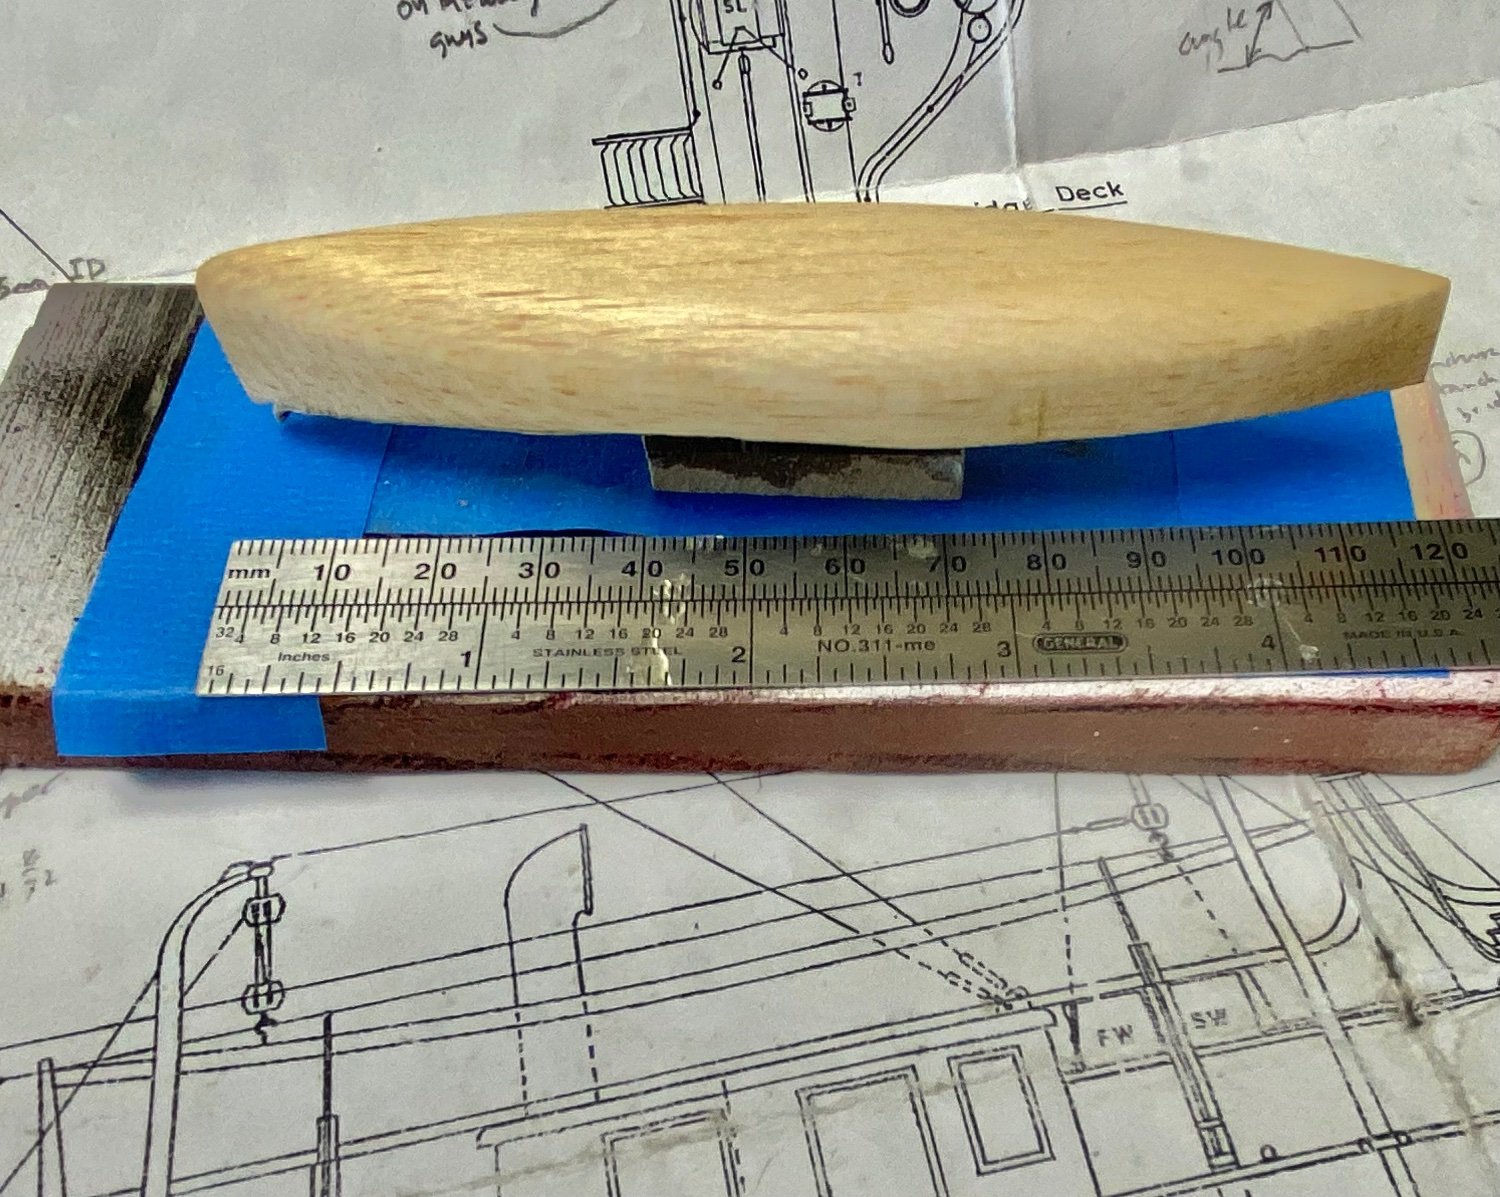
I sealed the mold with polyurethane and added a small tab to the bottom to allow holding the mold in the vise.
Now I have to wait for the Admiral (she is out of town) to get a used panty hose to make the first boat. I can't believe that I did all this in one morning while it took me close two weeks to complete the ladders. More to follow.
-
-
-
Francis, Thanks for the tip. Unfortunately I live in Florida quite far from Ontario. But your model looks awesome and I have wondered the same thing about the figures. I would love to know where you got them. My scale is 1/24 which is a little larger
I have very little information on the cockpit details. My plans only shows to big hand levers at each side of the helm. It also appears to have no partition into the engine room.
I have not done any work on this model yet, other than purchasing the hull. I am still completing my other project: Amapá, a Brazilian custom cruiser scratch built in 1/64 scale.
-
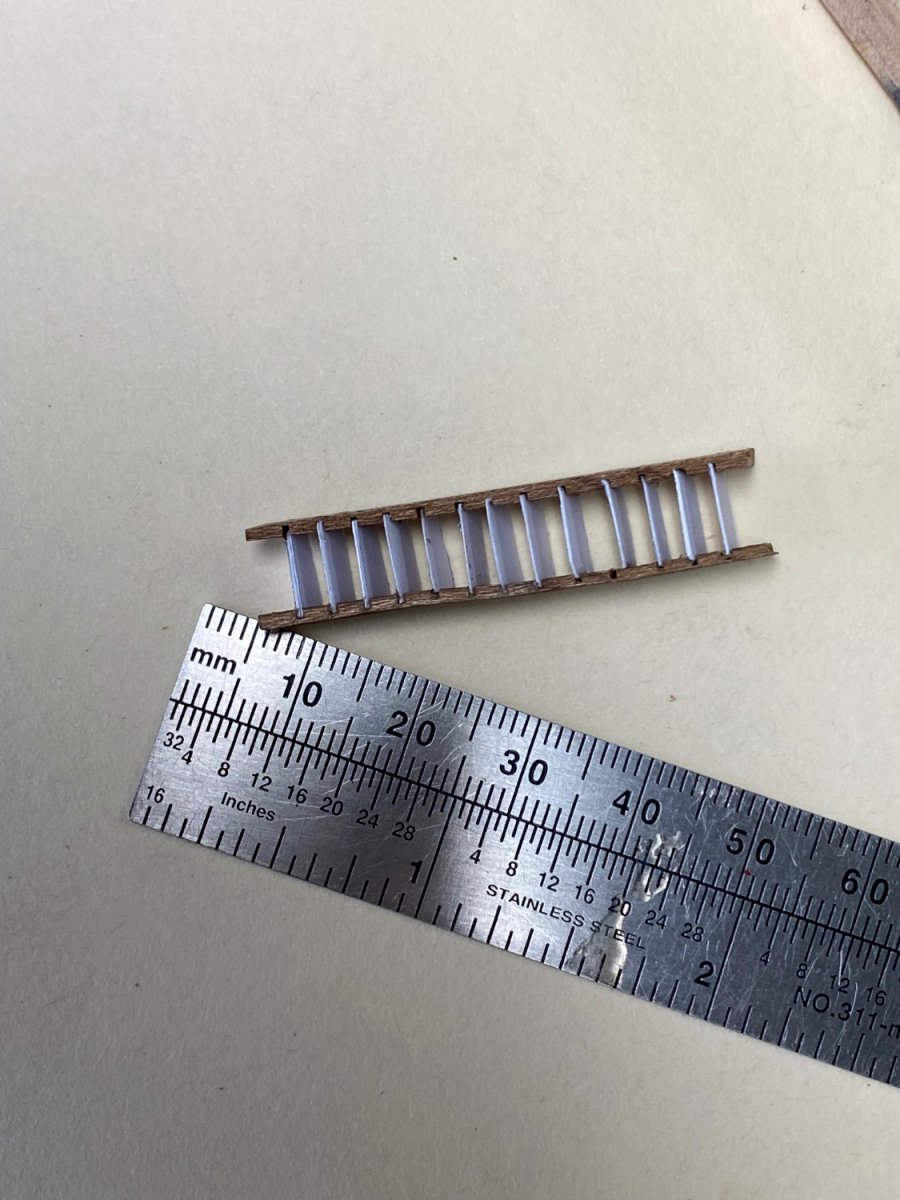
For the last two weeks I have been struggling with the ladders. After listening to Kevin Kenny's video I ordered a new tilting arbor saw that also permitted controlling the height of the blade. The saw that Kevin uses is a Byrnes and it is quite expensive so I went for the Microlux from Micromark. Unfortunately, the fence has to be relocated by hand and eyeball every time. Regardless, I managed to get the ladders built as shown in my previous posting. Once I tried in the model it looked awfully out of scale.
I decided to tinker around and build a double draftsman "T" fence.
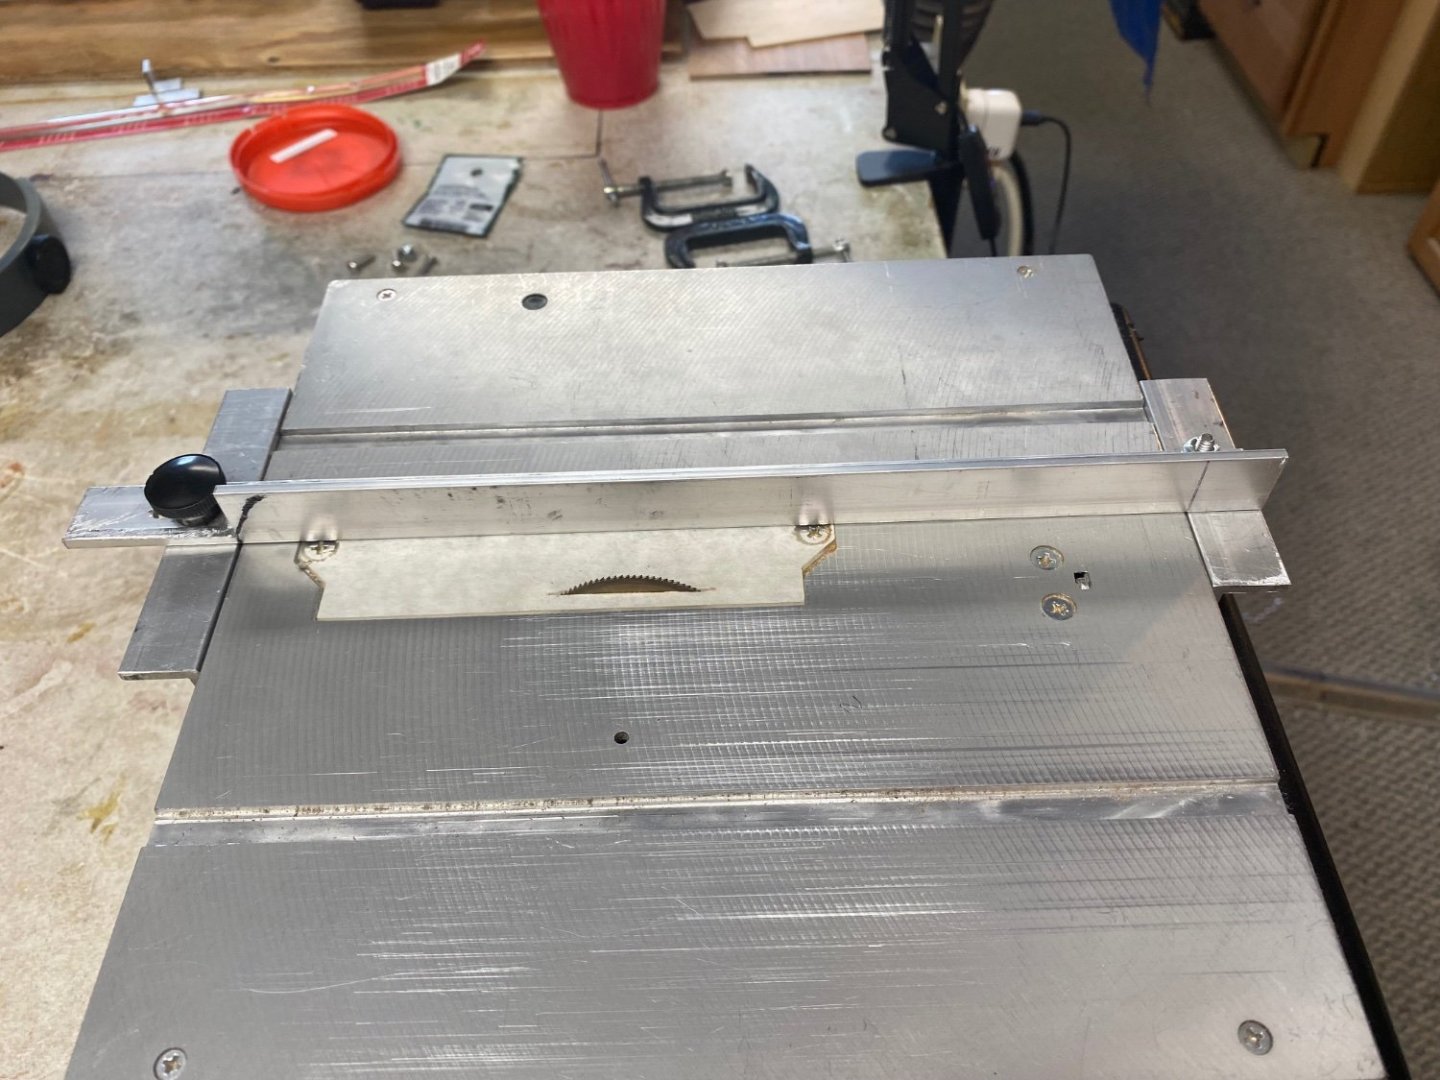
This one worked a little better but I still had trouble accurately cutting the groove while advancing the fence by hand. Then I went back online to Micromark and found they have a fence attachment called "accuriser".
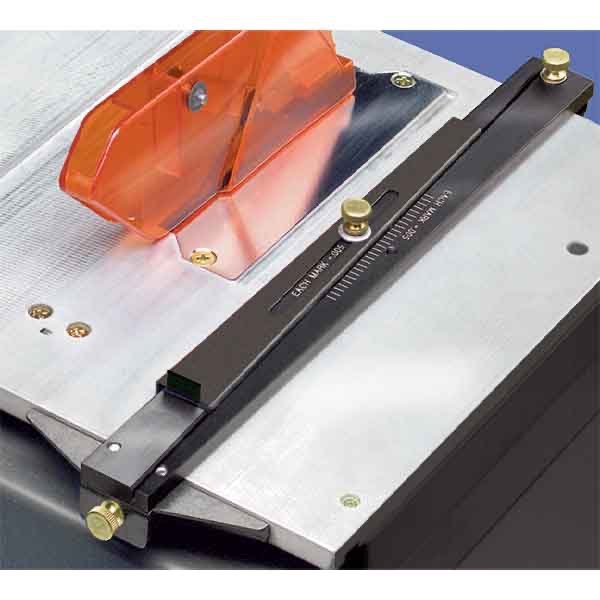
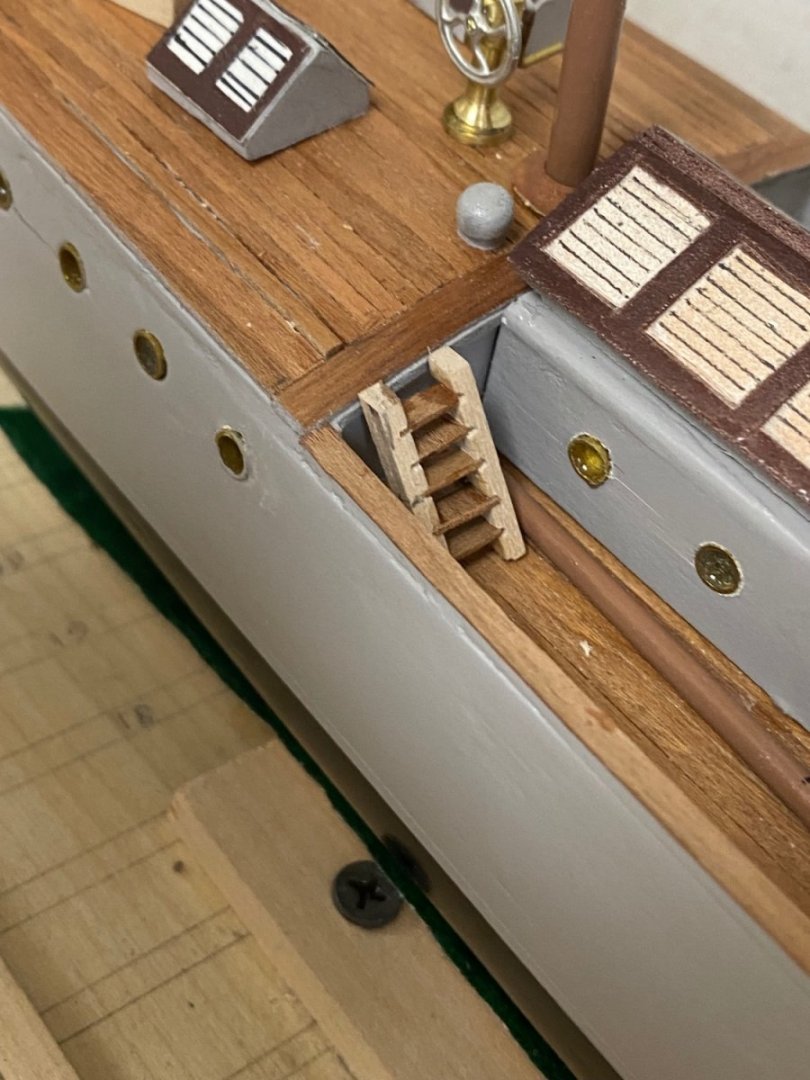
As you can see in the photo it is a sliding fence that holds parallel to the blade. Can be adjusted in 0.005" increments. It also has a draftsman T lock end. This did the job an I was able to cut the and groove the sides of the stairs closer to scale.
I used a jig to assemble the stair and proceeded to install the steps using a super thin walnut veneer.
All was going well until I decided to challenge the saw and try to get the sides thinner. The catastrophe stroke as the saw very cleanly broke all the steps. If you notice on the picture the grain of the veneer was running by the short sides. LOL. Back to the drawing board.
I redid all the stairs now using paper stock for the steps and this did the job.

I have to say that it still has a fews booboos but for it looks acceptable to me.
Next I will be tackling the masts rigging and build the ship's boats. I have been thinking about making a solid wood mold and use dope and tissue to make the hull. Something like papier-maché.
Thanks for watching.
-
Amazing. With my +/-0.5 mm tolerance I’ll never make it. I have struggling trying to make my ladders (1/64 scale) more to scale but haven’t got it right yet.
- Keith Black, mtaylor and Valeriy V
-
3
-
-
-
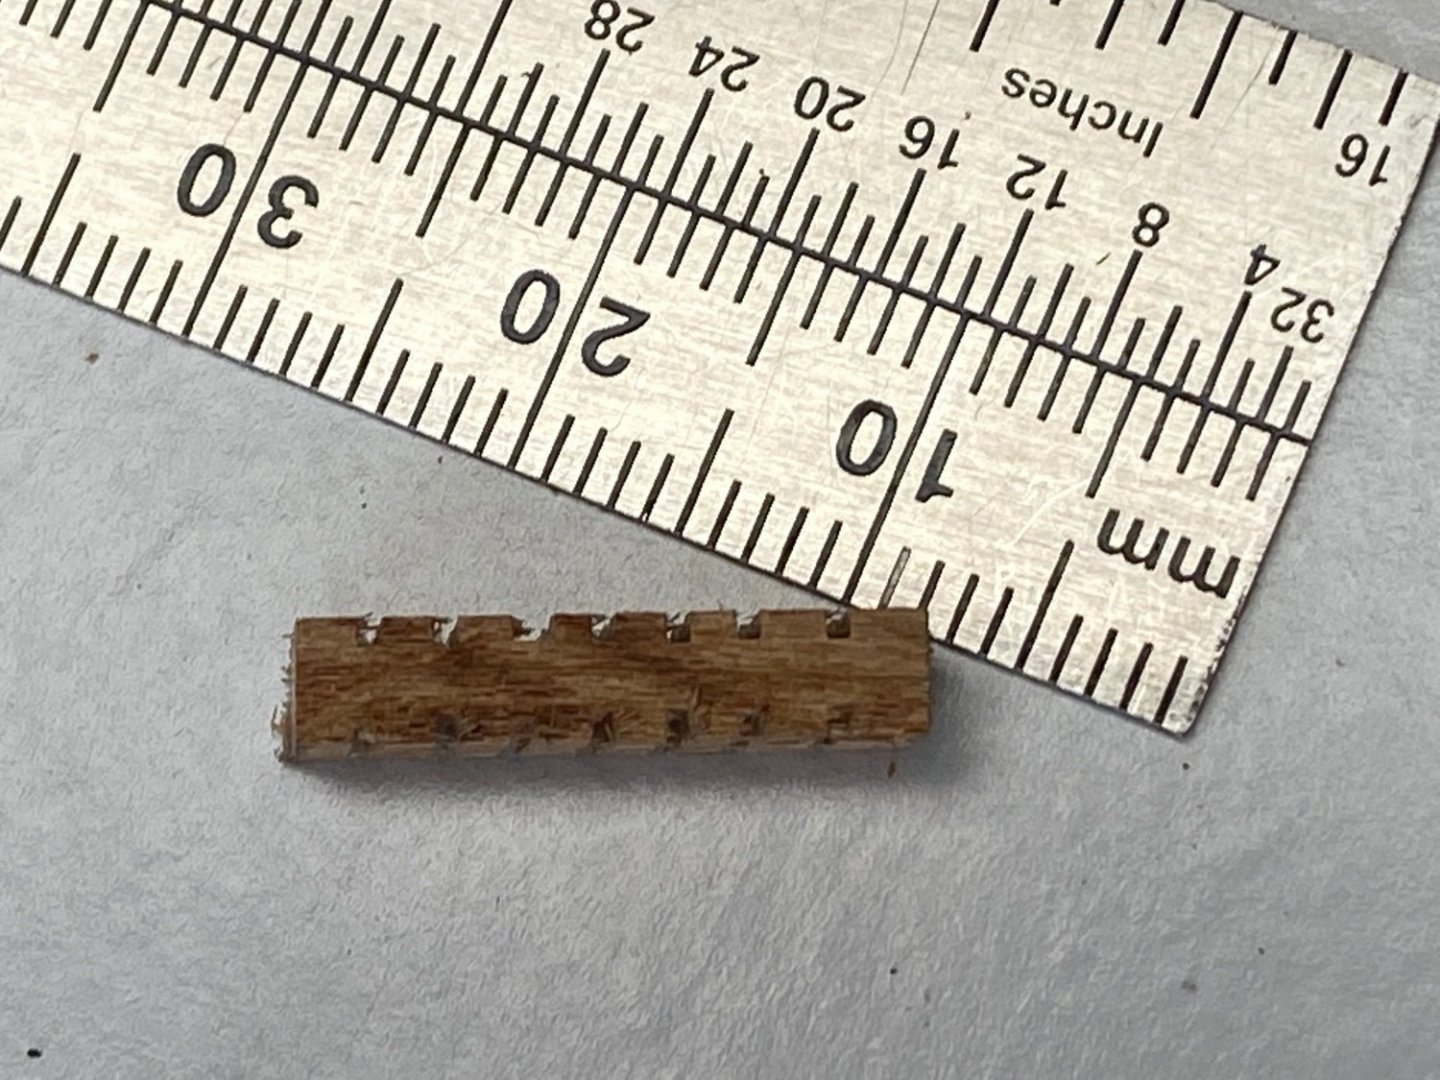
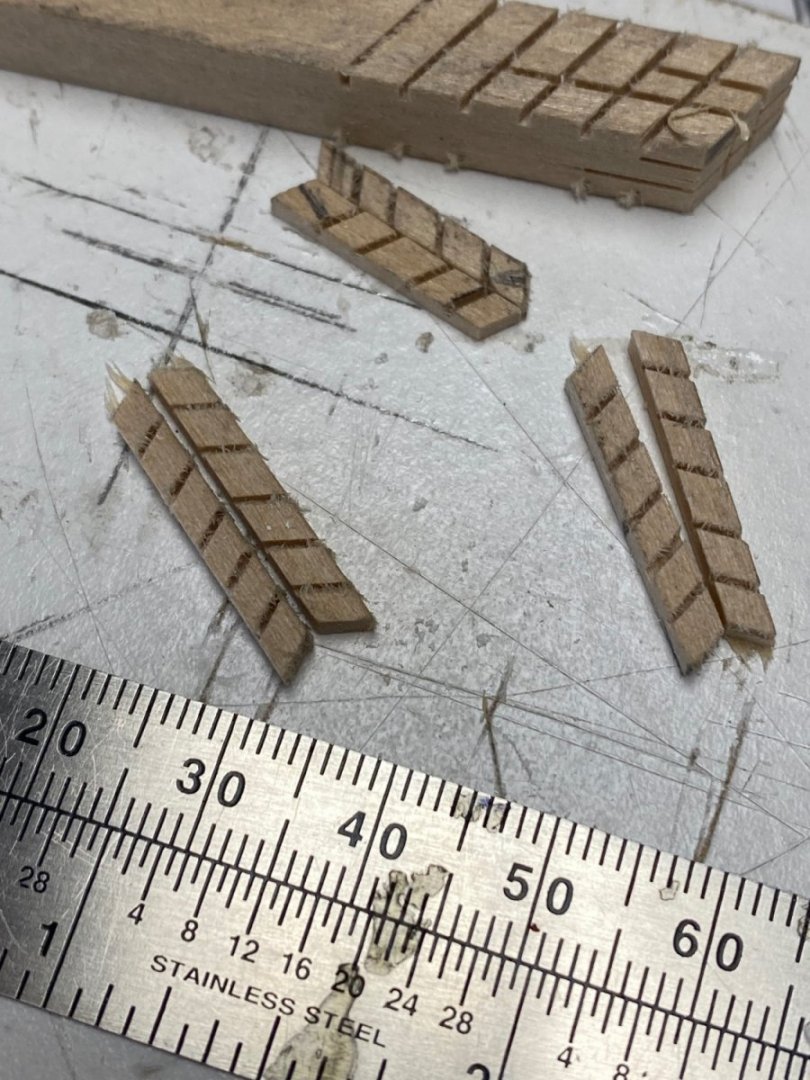
Progress continues. To fabricate the stairs I found that they were too small to use the same method I used on the Fifie. So I did a web research and found the videos by Kevin Kenny on the building of the steamer Naparima. HIs videos are excellent "do-it-yourself" guides. Using his methods I completed the sideboards for my midship ladders. The steps are minuscule and I will be installing them tomorrow but I was so excited about my success that I wanted to share it with the forum. On the top of the picture is the method used. I think that the secret lies in using large wood stock, cutting the grooves on both sides by reversing the miter guide and then slicing the sideboards. The result is a bit over-scaled but I have a limit on how small I can make stuff.
- GrandpaPhil, KeithAug, wefalck and 7 others
-
10
-
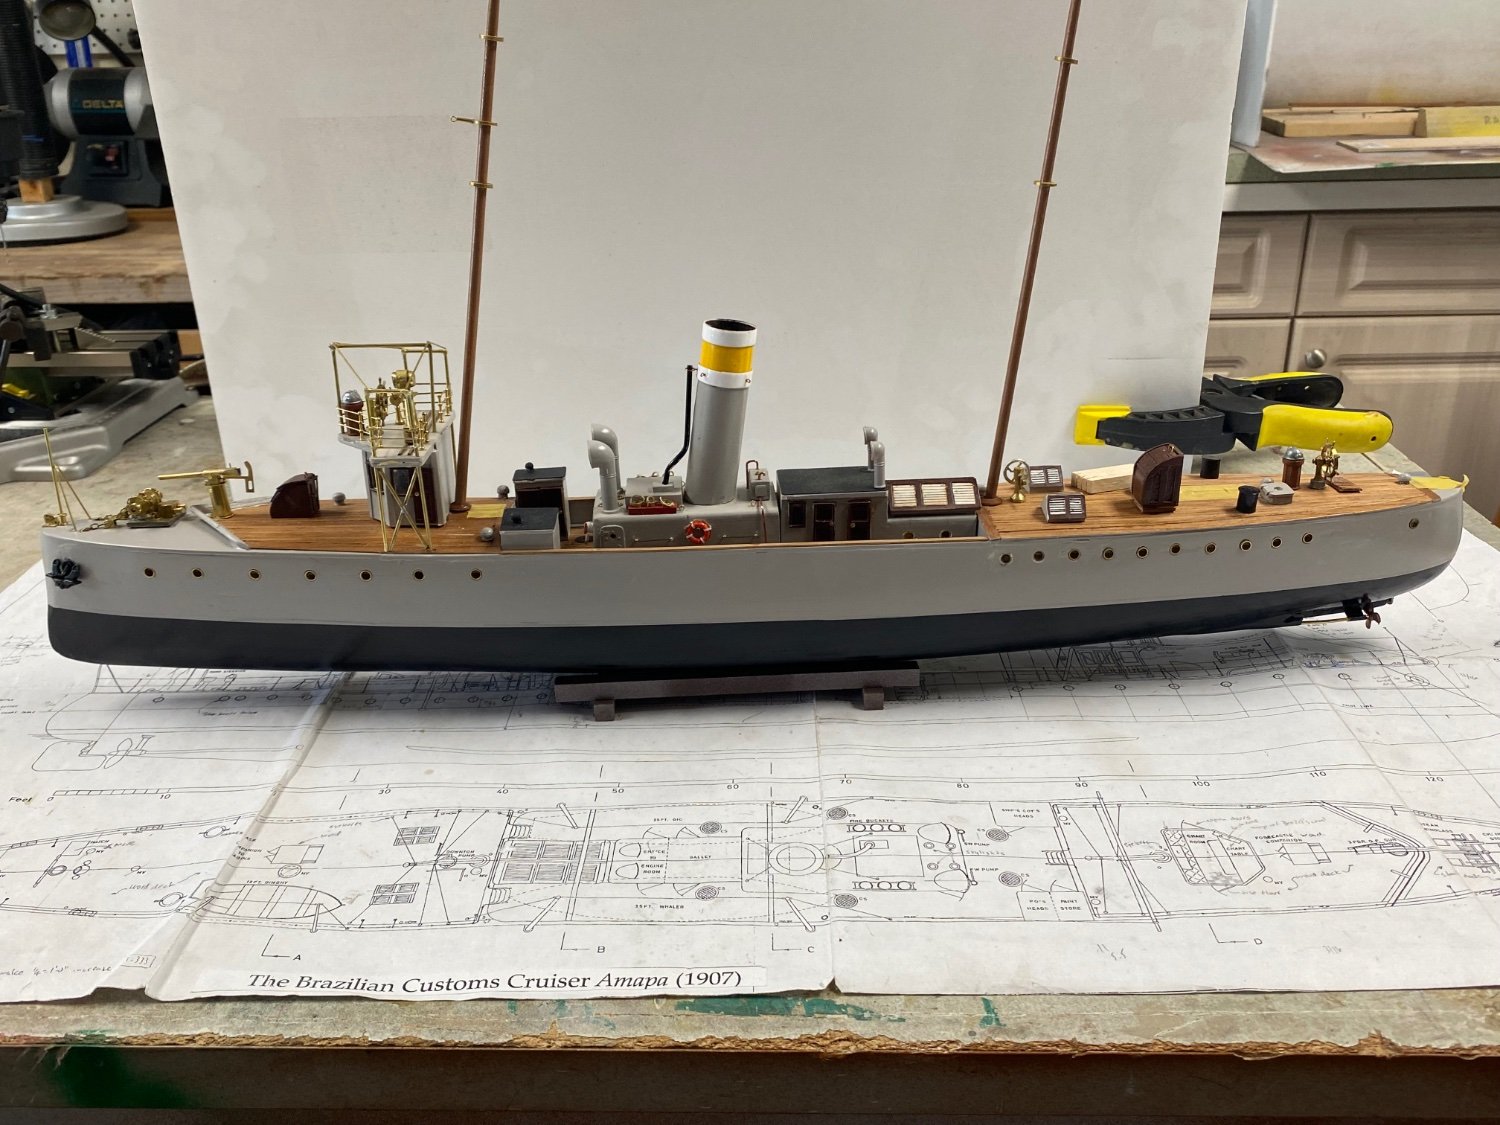
Well I am back. These last few weeks I have been busy on a "volunteer" project at my building. Now that is done, I am back at Amapá.
It is taking a considerable amount of time do some of the miniatures, specially, when I got to figure how to do it.
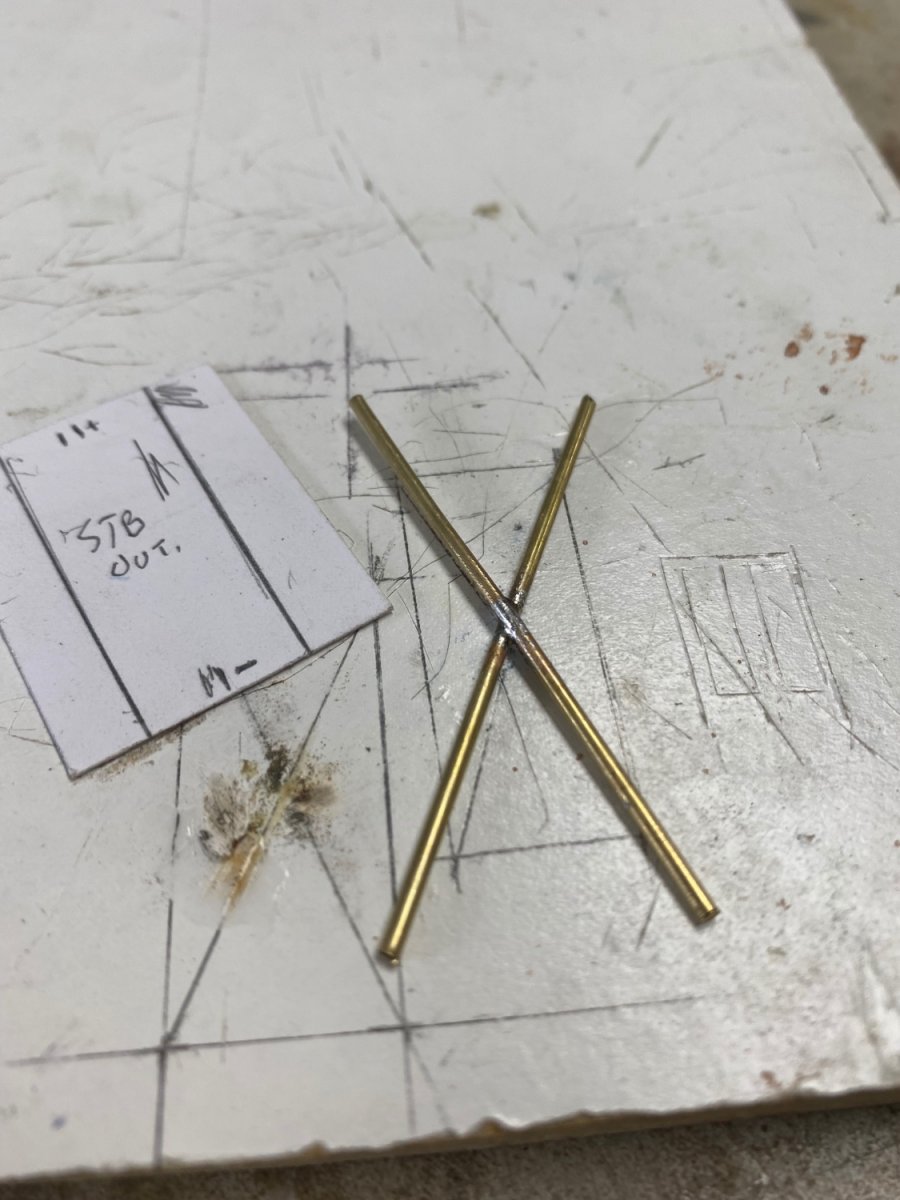
Having seen what people like Valerliy and Wefalk can do with soldering I have tried to emulate them. Following is my first attempt at the cross bracing for the bridge
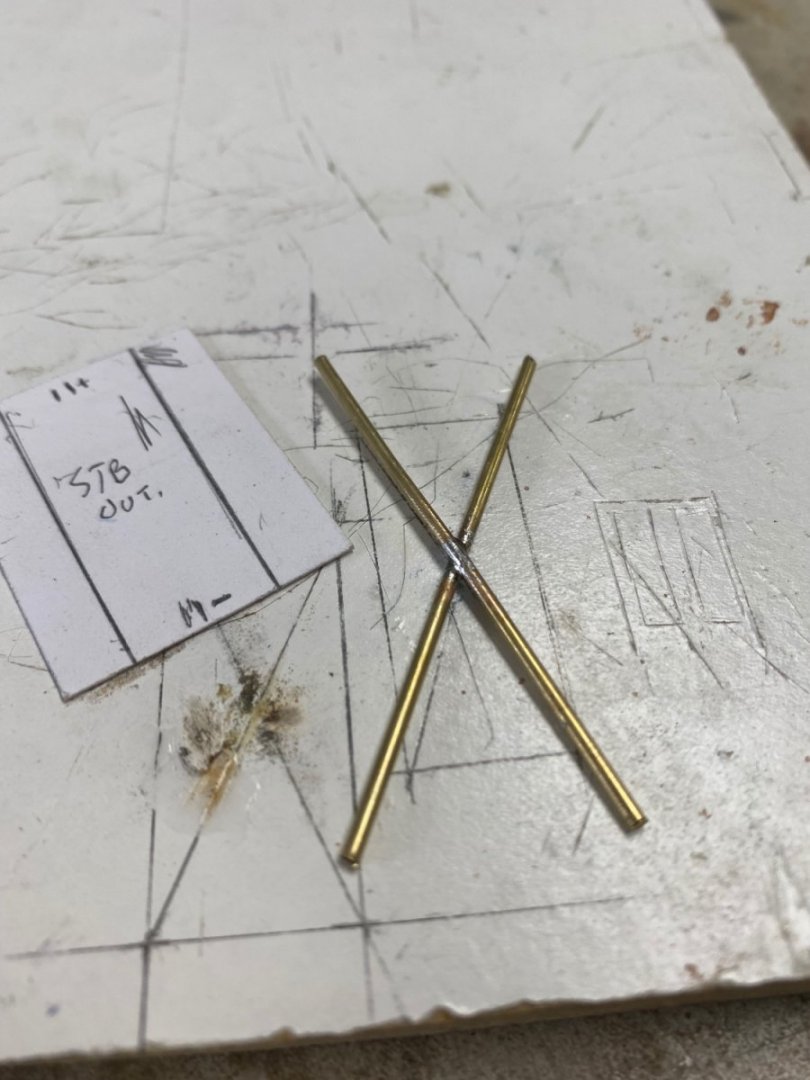
Not too Not bad but, I am not sure I can do a clean job while working directly on the model. My hands shake too much. Therefore ,I think I will leave soldering for the next project once I practice a little more. In the meantime AC glue is doing the work.
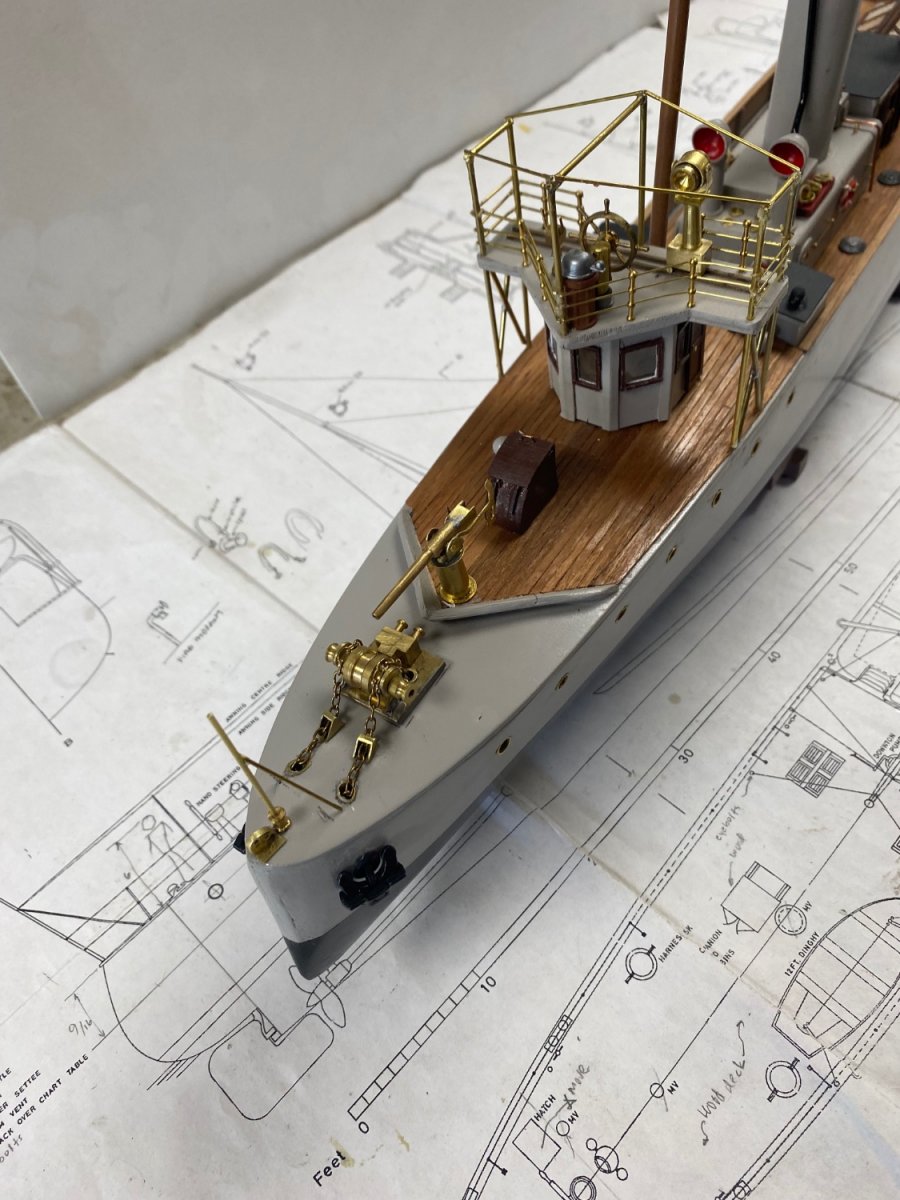
Next I fabricated the spider webs for the masts rigging.
.
Another fitting for the bow's stay ends.
And finally completed the bridge railings and awning frame and the forward jack staff.

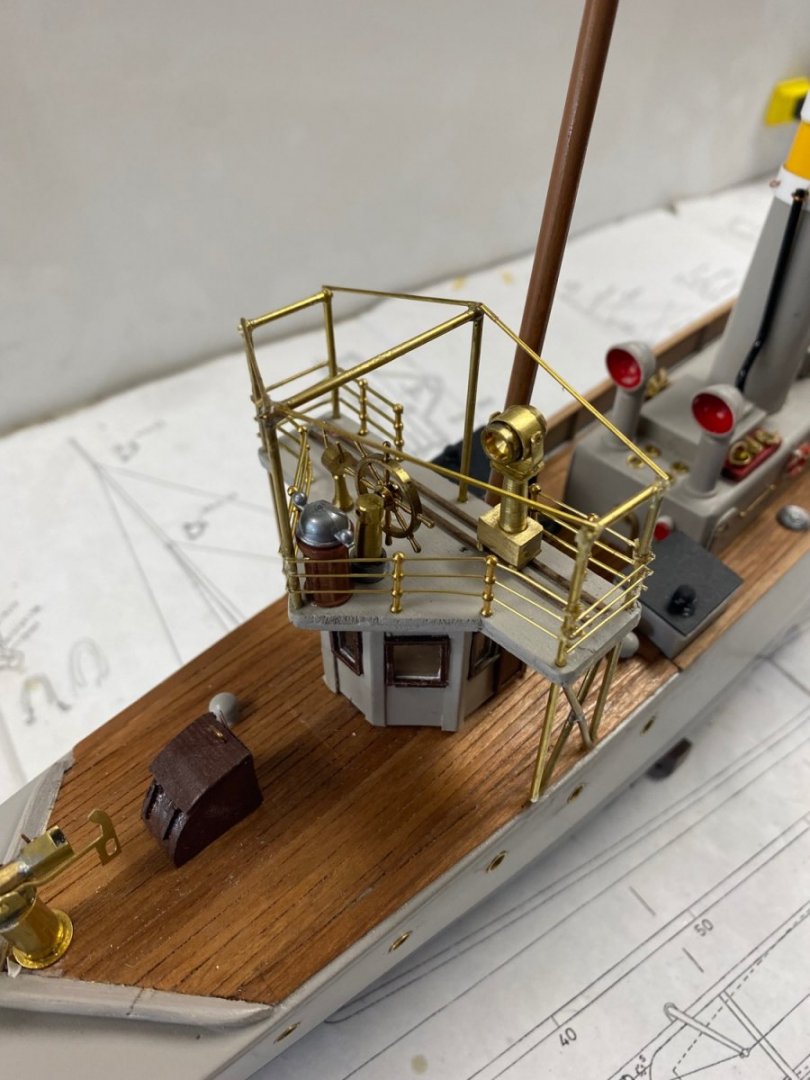

A few things are still left to do, specifically the the railings, the boats , the ladders and the rigging.
Thanks to all of you for your support and example. This model has been quite an education and, even though there are many mistakes in my work, I am satisfied and eager to complete it.
-
Again an excellent performance at micro scale. I will follow your conclusions when I get to build the boats for Amapa. Originally I planned to use some scale plastic boat hulls and build the interior structure on one of them. now I am going
to do two of them covered like yours and for the small one I will try to plank against a mold and detail the interior. Fingers crossed!
- Mirabell61, FriedClams, KeithAug and 2 others
-
5
-
Amazing what you can do at that scale.
- Keith Black, FriedClams, mtaylor and 1 other
-
4
-
Again magnificent work. Valeriy must have the most detailed plans for Variag. That coupled with incredible craftsmanship results in his museum quality plus work. Our hobby is proud of people like you.
- mikegr, FriedClams, Keith Black and 3 others
-
5
-
 1
1
-
Amazing challenge as usual. You are really a master at microscaling. I have similar boats to make for Amapa (at 1/64 scale). Following your steps,
The two large ones will be covered and I will do the little jolly boat using the paper for planking.
- FriedClams, mtaylor and Keith Black
-
3
-
-
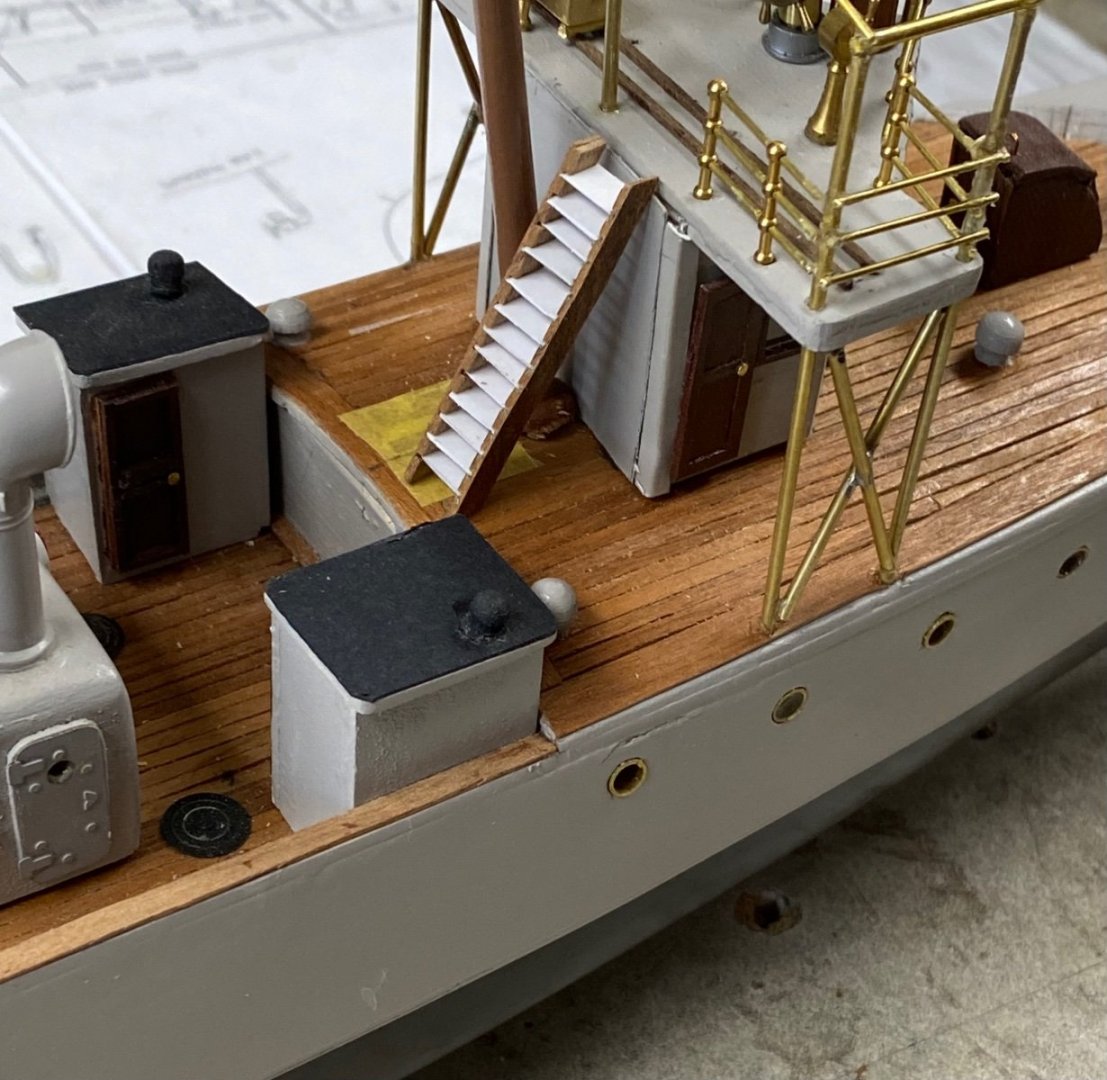
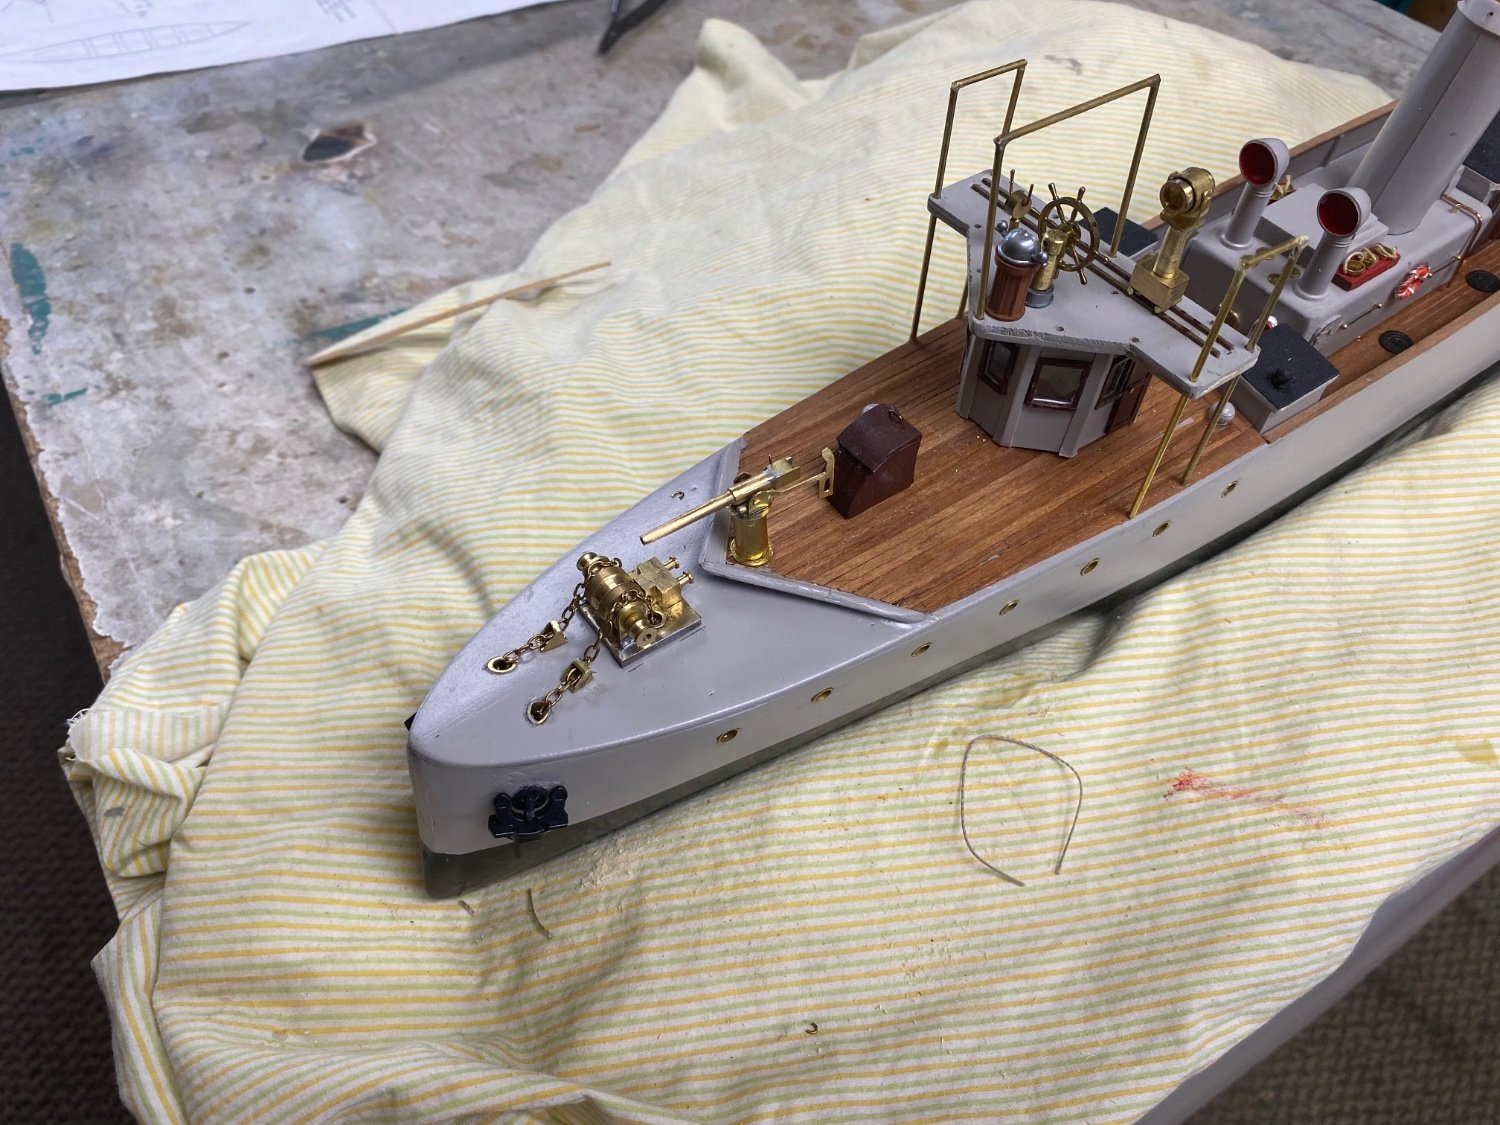
Here is the final product. The forward deck is done. The stanchions and railing and mooring bollards will come later after all the deck work is done.

The next challenge is the ladders. Two for the bridge and three for the midships.
Thanks for looking.
- BANYAN, mcb, GrandpaPhil and 5 others
-
8
-
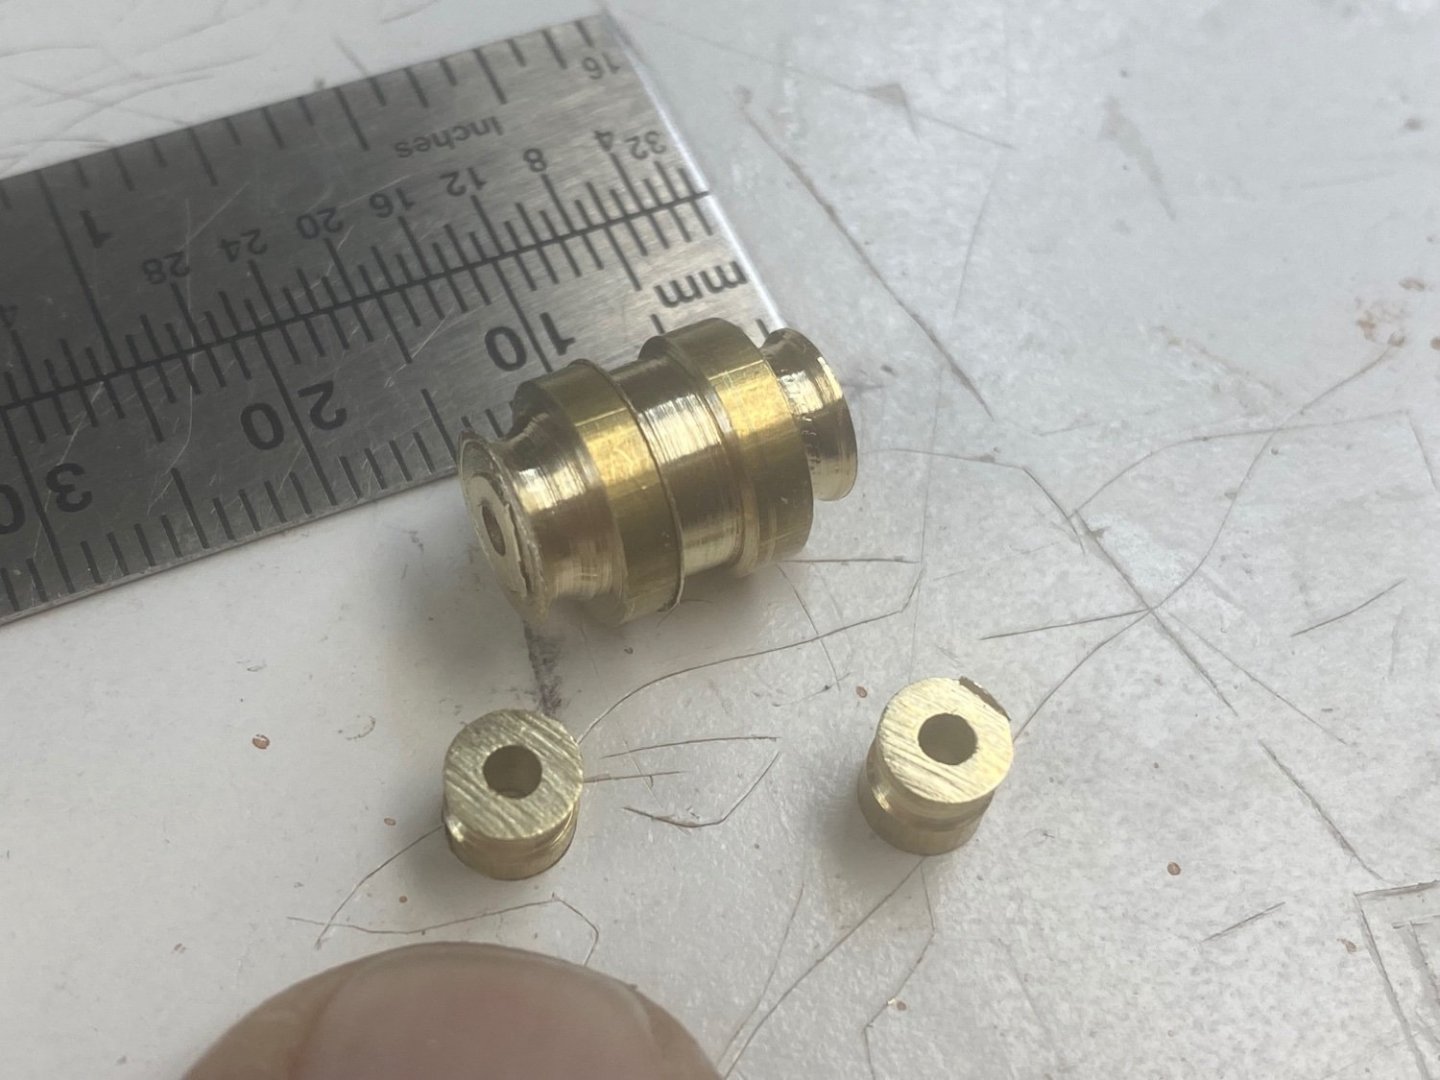
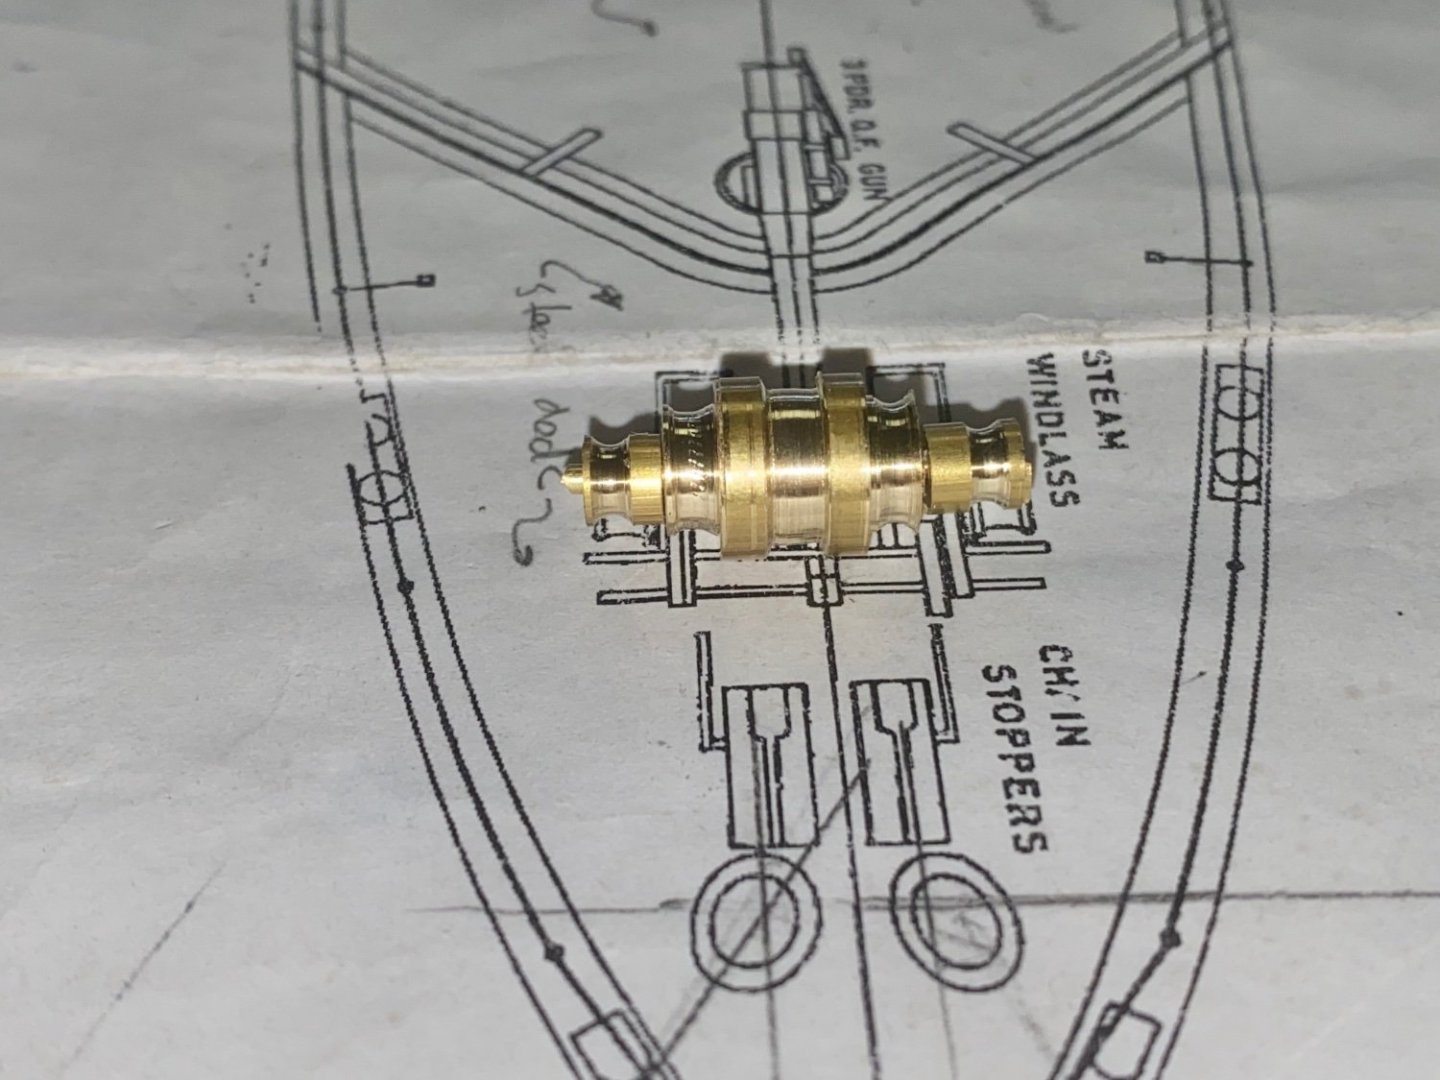
Things are looking good. The winch progresses.

The bollard looking things are actually the steam cylinders. At my work tolerance (.0.5mm) I am having trouble transferring dimensions to the very tiny pieces, thus, you may see a little bit of asymmetry in my work. But I am learning fast in this new world of scratch building.
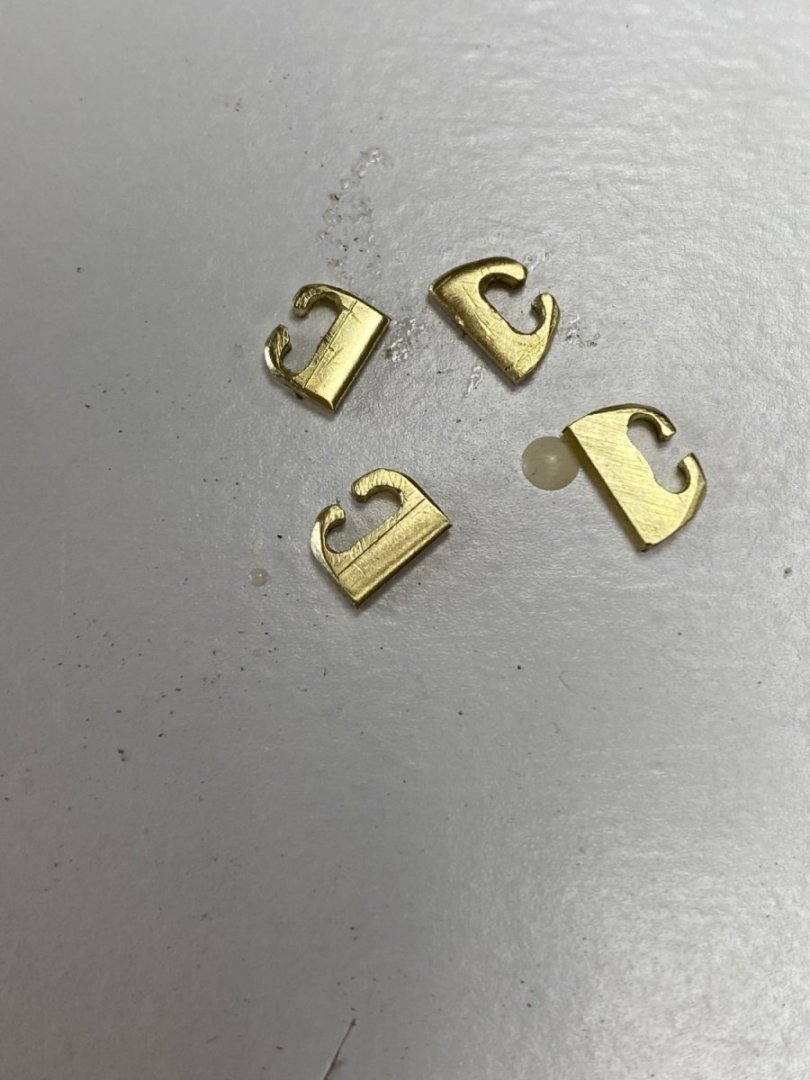
Following is my interpretation of the anchor chain stoppers.

Since this is my first scratch building I am learning as I go. The first lesson is that you have to think about how to build all the parts. No laser cut or etched pieces with numbers to match the locations. You have to figure out how to make each and install each piece in the right sequence. Sometimes you goof, and then, you go back and redo. Sometimes you figure that is your best, and you let it pass. Perhaps you will do better in the next project. I think that this is the challenge and, may I say, the fun of it. So, for you beginners, go on, try it. Watch our masters craftsmen and learn. It is all worth while.

-
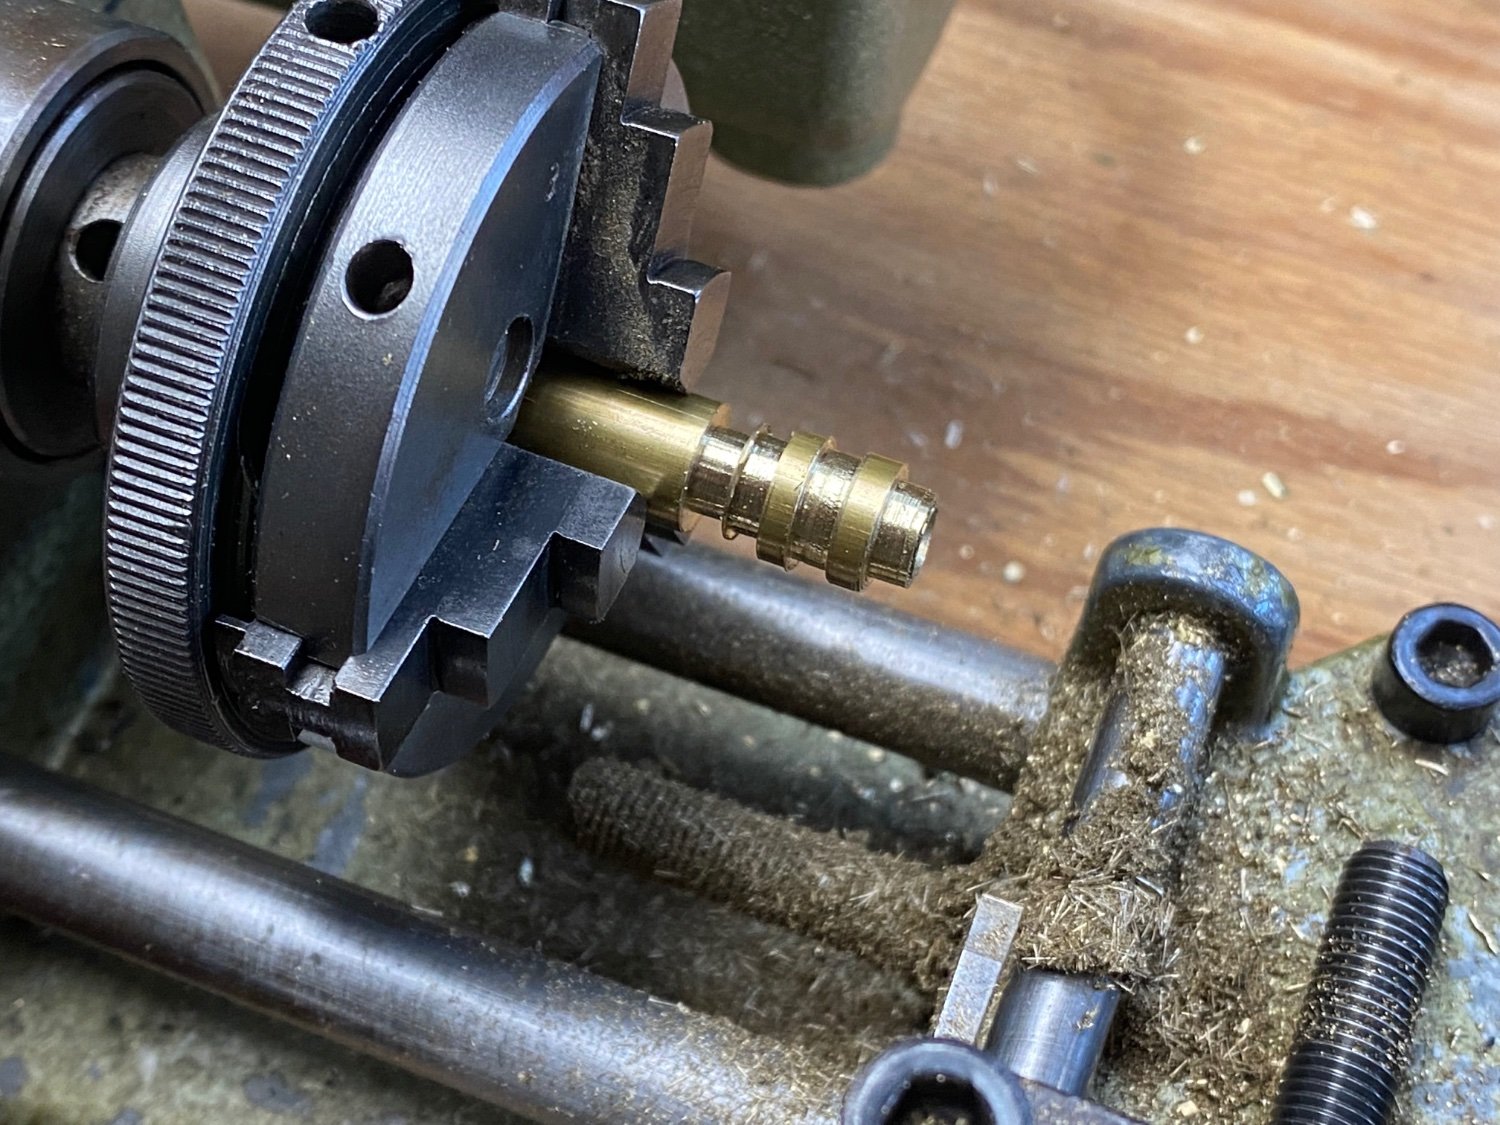
A little more progress. Doing what I like best which is lathe work. Being away from this for over 20 years. Re-learning how to sharpen tools. Here is the latest feat: the beginnings of the anchor winch.

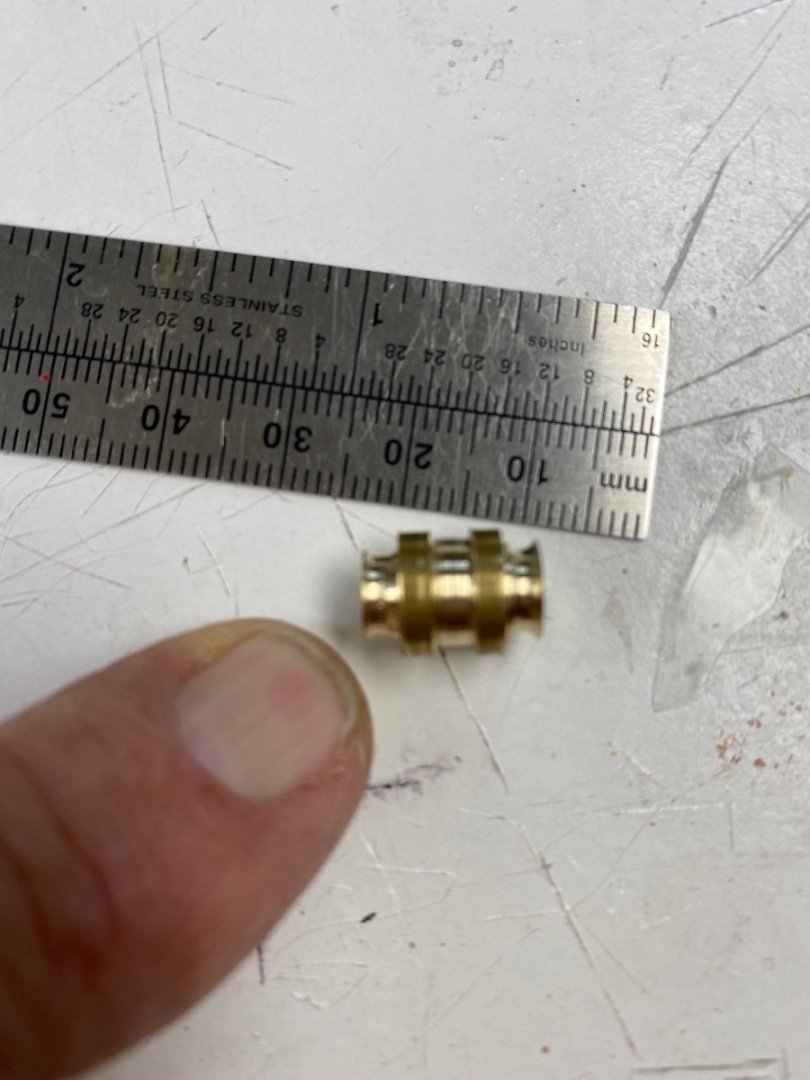
Next step is to fabricate the base with the steam power and trying to scratch some teethes on the driving gears.
-
Wefalk, you never stop to amaze me. I worry about parts less than 0.5 mm and, here you are, working at 0.05 mm. Your ship model looks more like a 1/16 scale. My hat is off to you.
- bruce d, FriedClams, Keith Black and 3 others
-
6


AMAPÁ 1907 by Ras Ambrioso - FINISHED - scale 1:64 - Brazilian Customs Cruiser
in - Build logs for subjects built 1901 - Present Day
Posted
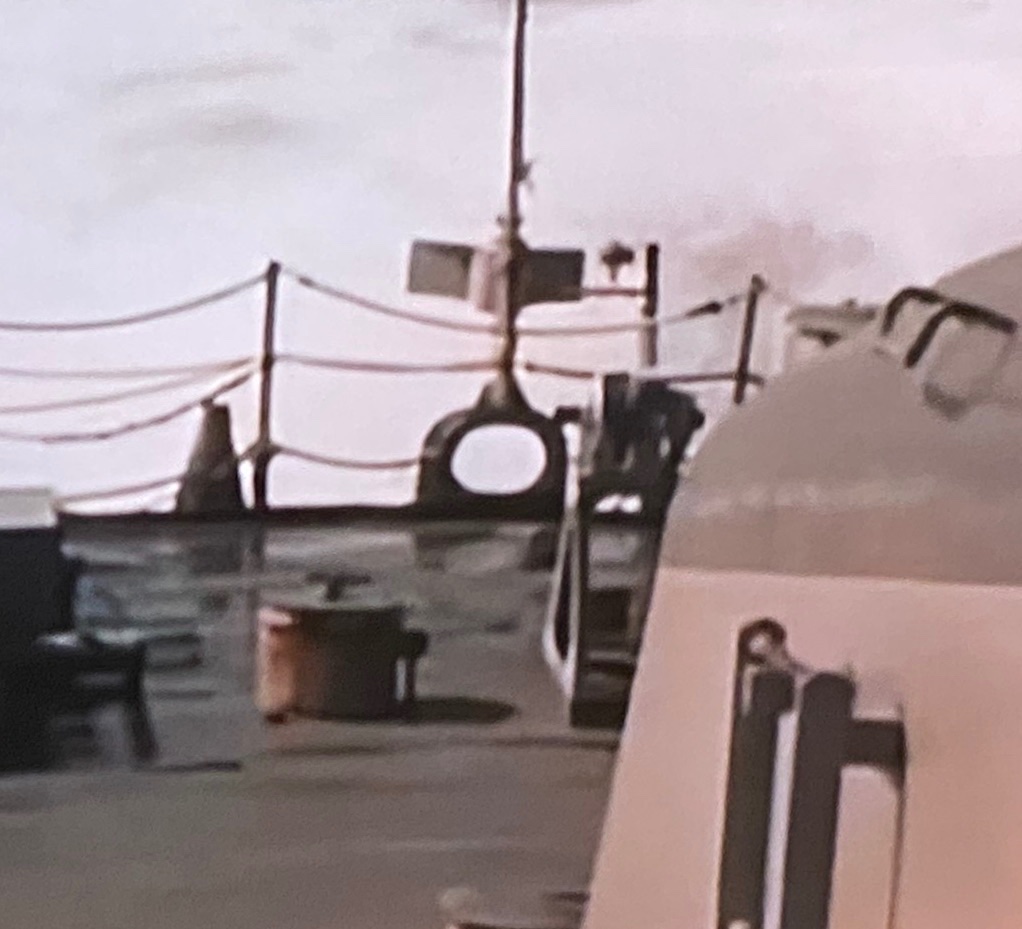
After I completed the fabrication of the ladders I was still trying to figure out how to transition the ladder handrails to the deck rails. The other night, while watching an old movie named "Away all Boats", I noted that the ladder handrails were independent of the deck rails as seen on the following screen shot.
I made a jig to bend the wires and decided, again, to try my hand at soldering. I have read a lot of articles and suddenly had an epiphany. What I was doing wrong was to heat the joint and then tried to melt the solder into the joint. One of the comments I read was to set the solder on the tip of the welding gun and then transfer it to the fluxed joint. Worked like a charm.
The jig: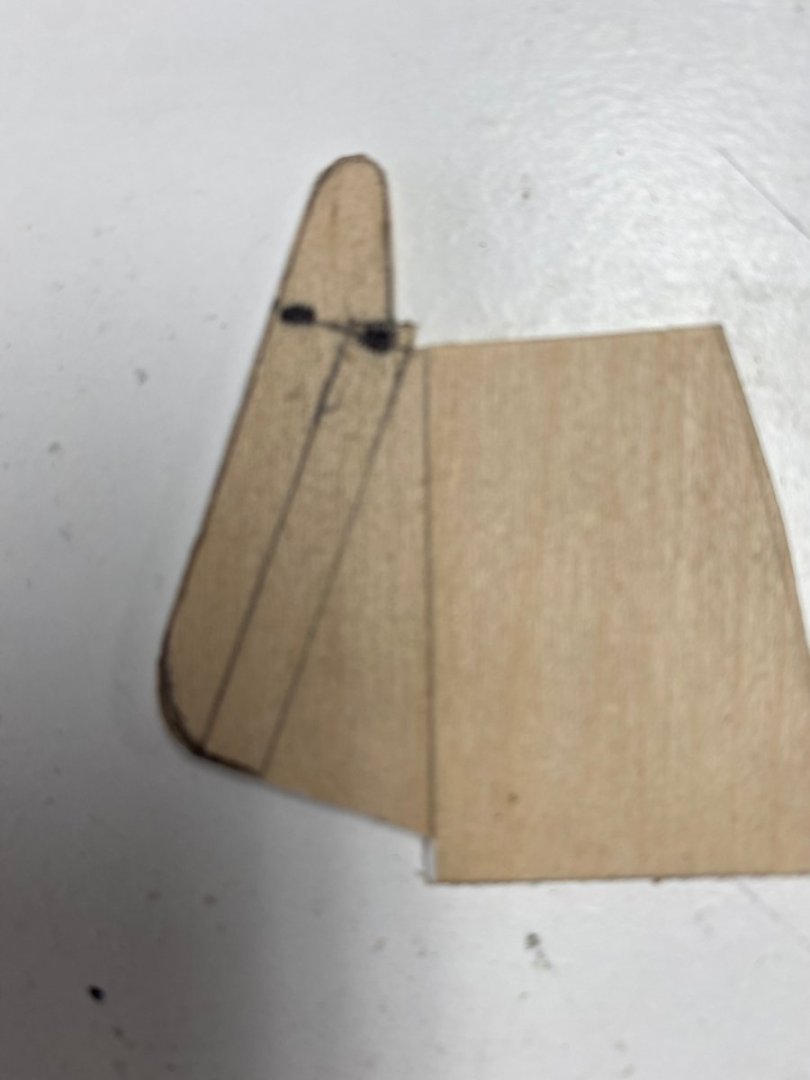
The finished product:
The same procedure was used to make the fantail flag staff.