


Kevin-the-lubber
-
Posts
1,233 -
Joined
-
Last visited
Content Type
Profiles
Forums
Gallery
Events
Everything posted by Kevin-the-lubber
-
 Yes, that's more or less me as well. It's particularly useful right now, when I'm also needing to experiment a lot with the printing. For instance I've found that 0.5mm locating pins (out of necessity, space is very limited) are perfectly printable but they break off too easily when removing supports. So I've just gone back through every item in the assembly, swapping to rectangular pins, which give them a lot more meat. Although this is fairly straightforward, down the line I'd know I need to design around that from the outset, but right now I appreciate how easy this it is in F360 to make a change like this. It may be that I continue using F360 in parallel to SW or Rhino, just as a tool that's good in some situations but not all.
 -
Afraid I can’t help you there Bill, light years away from that stage. What is making it so difficult with CA?
-
Having history has allowed me to design on the fly - not good practice, a complete break with my training and not always even sensible, but it is kind of handy when you’re not exactly sure how things are going to need to fit together or intersect. But I’ll be the first to admit you can instead pre-plan. History can be problematic in F360 as well and I know some people don’t use it. I think so long as I’m able to retrace my steps it’ll be fine.
-
Thanks Richard, sounds good. I guess I'll have to see, when I try it, what it's like not using a design history, how you can go back and tweak things if you need to.
-
Forgive the questions that would be answered by simply downloading and getting stuck in but I’m waiting until I have a clear desk before starting the time limited free trials. 1. Do both Rhino and SW have the design history function like that of F360? Can you easily re-order the sequence of commands like you can in F360? 2. I’ve read that Rhino can be a PITA for complex filleting - true or false? F360 can be hit or miss there too. 3. My biggest gripe with F360 is how it handles ‘failed’ commands I.e. when it can’t do what you’re asking of it; too often it locks up for a very long time and ultimately crashes. What happens in Rhino and SW? 4. How do Rhino and SW compare to F360 in terms of the graphical representation of the model? I have to say, I like F360 in this respect. 5. How do they compare in terms of processing speed? F360 can become very, very slow as the model becomes complex and the timeline grows. 6. Ive read that you can import / export between e.g. Rhino and F360. Does that mean you can move it in and out of each package for different stages, or does it become a mesh? I thoroughly dislike the import mesh function in F360, for me it’s a last resort. 7. Are there particular functions of either Rhino or SW that would be naturally important to ship modelling, that perform poorly? Things where, like in F360, you learn through experience to do it this way rather than that, even though the latter might be the more obvious path? For instance, projecting to a surface in F360 will often require that you edit the projected lines afterwards, in order to be able to surface them. (Sometimes the projections don’t join properly). Or using pattern - almost fatal to pattern in the sketch, fine on the model, so you learn to make the model of the pattern and project back to a sketch, if the sketch is what’s needed. At least that’s how I do it. 8. The discussion so far implies there’s very little forum-type help for Rhino. With F360, when I’ve got stuck I have usually been able to get free advice fairly easily from other users. What is that like for Rhino and SW?
-
I was being a bit tongue in cheek there, falsely implying that drawing one line is no more difficult than another. If only it was so. Though perversely, sometimes that's not a bad mindset to have, it sees you having a go at something you might otherwise shy away from. I have a careers worth of succeeding because I knew no better! It's funny how age and experience see you become less (over-)confident, isn't it, you'd think it would be the other way round. I think I'd treat any transposed drawings as no more than starting points, sometimes good, sometimes bad. Back in the day, the drawing office would sometimes give us full size plans and try to persuade us to just dot punch through the drawing. Never happened. I'm not so sure about the scale effect, even at 1:100 the eye picks up all but the smallest anomaly. And if I went on to model the Cutty Sark I'd probably go for slightly larger than 1:100, maybe 1:75, just to gain a few fractions of a millimetre on very small parts and detail and give the printing a better chance. Turns out my little bit of un-fairness is happening in either the slicer or printing. No hint of it in the soft model. Printing is the chief suspect, that it's developing a bit of a warp that gets corrected further up, and needs some strategic support.
-
I think I know what you mean. In my language, when modelling the side galleries I ended up using two arcs joined at a tangent for each profile of each segment, as you work up the gallery, 9 segments in all. This means the vertical 'curves' - sheer curves I guess - constantly change from where it meets the stern to where it means the hull, as well as having 9 different horizontal(-ish) curve profiles. And editing any curve is likely to have a knock-on effect. I think this is why I have a small section of 'un-fairness' despite taking pains to make the curves themselves smooth.
-
That almost had me laughing 😂. Two things, or comments, particularly made me dig my heels in on the Victory, bearing in mind this is my first foray into proper modelling. The first was probably on this or another forum many years ago, words to the effect that beginners are doomed to failure if they take on the 1:100 Victory as a first ship. The other was on an F360 forum when I was struggling with one part or another and showed a picture of what I was trying to do (the stern section). I could almost hear the incredulity in the voice of the old hand as he wrote "well... it's possible, but probably not what you want as your first project". They are both absolutely right of course, but at that the first point I'd just spent about £100 for the kit and I was damned if I was going to admit my error of judgement. By the time I got to the F360 comment, £100 was feeling like small change and whether it was my first or last project had become irrelevant, my course was set. That's not to say I will ultimately prove either commentators wrong of course, I have rather a long way to go yet. Fortunately or unfortunately I still don't understand enough about 3D to appreciate why Victory would be harder than, say, the Cutty Sark; after all they are all just lines on a screen, aren't they 😊.... But this time I will heed the advice and avoid the despondency of trying to bite off more than I can easily chew.
-
Well, I'll be coming to it as a beginner and, unless I've found it especially easy to pick up, I'm more likely to need time to work through the 'lesson' first in order to know what questions I really need to ask so as to avoid taking us down rabbit holes. So personally I'd prefer both (greedy!), a video followed by a Q&A. But that is just my wish list and I'll be happy to fit in to your preferences Richard. I'm not at all bothered by the choice of ship, but in learning the techniques and principles. They should be the same whether it's wood or steel (shouldn't they)? The areas where F360 (or I) seem to struggle most are compound curves to a specification i.e. lofting using dimension-bound multiple rails. It can clearly be done, that's apparent from the start-up splash screen alone, but, as it's so central to shipbuilding I'm keen for that to be a straightforward, predictable process rather than an exercise in frustration. I've only really used two 3D programmes, F360 and Tinkercad. Chalk and cheese in many ways but I'd still encourage new starters to explore Tinkercad, if nothing else it has the easiest ever learning curve, you'll have a bit of fun and come to understand what you need by way of a 'professional' 3D modelling programme. I have Freecad and Solid Edge (Siemens) but haven't used either. From forums, Freecad still seems to be a work in progress, Solid Edge just looked like another big learning curve. At some point I should also give that a fair test. I think what I'll do now is develop a couple of test pieces, the predator and maybe the stern section of the Victory hull from McKays drawings. That should test the capabilities well enough. It goes without saying that I think 3D + home printing is going to become a core part of modelling in future. I doubt it will entirely take over as there is such joy in making things by hand, but there comes a point where 'the machine' does it better. Fifty years ago I started out my working life as an apprentice sheetmetalworker. Our factory made big industrial machinery and I became very skilled at pattern development as everything in sheetmetalwork, rather obviously, starts out flat. Square to rounds, cones off cones, 'chine hull' shapes, you name it, I patterned it and made it. Five or six years later I saw my first CNC. It came complete with a man in a white coat, rather than blue overalls, who was paid a fortune to programme it. Within another five years us tradesmen were doing the programming and operation as part of the day job. For me the future was obvious. Pattern development is mostly just trigonometry (I even wrote a programme in Excel to get the pattern coordinates for a square to round by plugging in the basic dimensions). These days I doubt anyone other than in small, custom shops does pattern development by hand.
-
Cripes, I'd better get signed up to Rhino then.
-
3d printing process
Kevin-the-lubber replied to henrythestaffy's topic in 3D-Printing and Laser-Cutting.
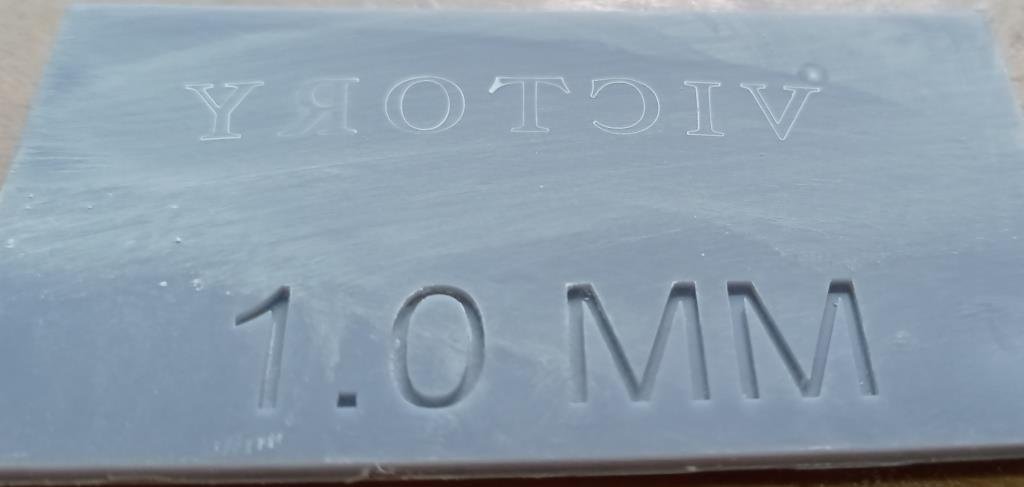
ps. Just while it's in my mind and in case you don't already know - today I've discovered the need for calibration of resin prints. I have what is now a complex kit with about 40 parts. 39 of them have to fit to the other 1, which is a 'main body'. All very precise, very tight tolerances, using tiny locating pins. And most of the 39 seem ever so slightly too big. Headscratching moment. A bit of research throws up that resin can shrink and you need to allow for this by scaling. Quick bit of measurement of the main body shows it's shrunk by about 1%. So tomorrow I'll try scaling up by the correct factor and if necessary do the same with the parts so that, hopefully, everything will fit as planned. -
That would be fantastic. Yes please!
-
3d printing process
Kevin-the-lubber replied to henrythestaffy's topic in 3D-Printing and Laser-Cutting.
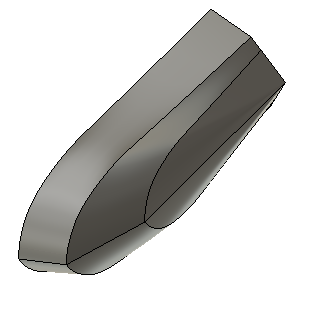
I ran my own experiment as well today, as I've been wanting to test out making spars and yards with a carbon fibre insert for stiffness. So, I printed this in 5 parts, a hollow centre section, two long hollow sections either side and two end caps (forget about these, not relevant here). I printed the centre section vertically, using supports and this came out fine. A little not fully cured resin in the tube but dimensionally true throughout the length. I printed the other two sections vertically but straight on the plate. Not good! They printed fine externally, no problems in that way but, due to the suction cup, the tube gradually closed up and is very gooey inside. You'll probably find the same with the cannons. Obviously this doesn't matter if you don't need an accurate tube but it's no good for my purposes. -
The type of hulls I'm going to be most interested in would be classic age of sail types i.e. plank on frame rather than chine, but a better description is that I'll need to be able to model compound curves with not a flat line in sight. You're selling it to me Richard, if it can do all that. I guess I'll just have to make the probably painful journey of learning the basics until it all falls into place.
-
This is the bit I’ve been waiting for, the comparison. For some strange reason I feel slightly defensive about F360, probably because I’ve cut my teeth on it, but so much of what you say, Egilman, is so true. I opened my now finished stern master file today, intending to make a simple tweak. Throughout the week it’s been in perfect condition, not a warning in sight. This evening, on opening, it presents me with a sea of red and yellow fails. How can that be? Surely software is still binary, it can either carry out the instruction or it can’t, it shouldn’t depend on whether it’s a Tuesday or Wednesday. So I face many, many hours getting it sorted again, 90% of that time being spent waiting for the programme to process the fixes. I know it’s something I’ve done, that it’s my fault, but I am fairly fed up with fighting it every step of the way. I don’t think it’s an exaggeration to say most of the hundreds and hundreds of hours I’ve spent on the stern have been spent just waiting. I’m sure this is true because when I make something without any issues, Ieven when it’s still a bit involved, I’m done and dusted in the same kind of time it’d take if I was drafting by hand. And you’re absolutely right about the lack of help messages and crashing. I want the software to simply refuse an illegitimate command, not spend 20 minutes thinking about it mysterious, heartsinking silence and then crash. I’m ranting, I’ll stop. I’m at a natural break point now. I can finalise all my F360 work into stl’s and change horses without losing too much ground. You’ve convinced me to give both Rhino and SW a go, invest to save. Hopefully, most of what I’ve learned on F360 will make Rhino or SW easier to learn. Richard, unless I’ve missed something Rhino doesn’t seem very expensive, think it’s about £100, quite bearable for me anyway. Though I’m still a bit nervous about it not being solid body.
-
Well done! Are you happy to share the file? I'm interested to see how you've got there. Quick tip for all those unconstrained sketches, in case you don't know it - 'Fix' is your friend, especially for splines. Open the sketch, select everything, hit 'fix', it all turns green and you get a padlock sign as a reward.
-
3d printing process
Kevin-the-lubber replied to henrythestaffy's topic in 3D-Printing and Laser-Cutting.
I agree about avoiding suction cups, hadn't considered that, less so about angling and supports. There is always a balancing act when using supports; they need to be strong enough to resist the separation force but you want the least surface imperfection possible. If I was printing a pyramid and didn't care about the lip arising from the over-cured initial layers, I would attach directly to the plate. I'd do so because the surface area of cured material attached to the plates will, by definition, always be greater than the new layer that has to be pulled off the FEP and adhesion failure is highly unlikely. If I wanted precision across the base, I'd put it on supports, accepting the resulting surface imperfection. I would angle the pyramid if doing so meant I could reduce the surface area of each layer, but remain conscious that there is going to be a 'fat' stage in the process when the surface area is at it's maximum and support to suit. If the surface area arising from tilting was going to be larger than a horizontal base I don't think you gain anything. If I was printing a perfect cube for instance, I wouldn't angle since by definition the smallest surface area will be a face. I think all of my print failures - certainly all the 'OMG' one's - have been due to supports breaking under tension, but (touch wood) I haven't ever had anything detach from a plate. All I'm really saying here is that I don't think angling is a 'must do' in it's own right, it can be a very important risk mitigator but you could actually increase the risk by angling as well. Coming back to the cannons, I will now use supports to avoid the suction cup issue but orientate for a balance between holding power and surface finish. I wouldn't angle unless I had to, for support purposes, because angling increases the surface area. (All of which is probably over-thinking things for 1:100 cannon barrels!). -
I think, for me, this would definitely be one to re-make in its entirety in 3D, just using the kit as a broad reference but this log, together with all the links to other exceptional SR builds and modellers, as the guide. I’ve been re-reading from the start…. you added each bolthead by hand…. good grief Marc, it’s extraordinary enough that you even did that, but to do it so well! It makes the Victory look simple!
- 2,699 replies
-
- 4
-

-
- heller
- soleil royal
- (and 9 more)
-
3d printing process
Kevin-the-lubber replied to henrythestaffy's topic in 3D-Printing and Laser-Cutting.
No Mark, Paul’s picture of the setup is upside down when it comes to the actual printing, so there will come a point when the barrel hole gets closed off and a small amount of liquid resin will become trapped. I doubt the curing light rays would reach that far up the barrel so, in principle it may remain wet forever. I don’t know if, at this scale, this is really much of any issue, but it’s why, when messing around, I’ve gone for a two part assembly, as it’s easy to hide the joint. -
The principle remains the same. https://forums.autodesk.com/t5/fusion-360-design-validate/introduction-to-loft-using-rail-curves-in-fusion/td-p/7296238 To be honest, I need to work through this methodology myself as I still struggle with multiple rails (I didn't use project intersect in the example and couldn't successfully use both rails as intended). Everything is fine when it just works and behaves exactly as expected. The problem is when it doesn't, invariably because it would cause the loft to intersect itself. That's about all F360 tells you, but is thin on fixing the apparent error. I fully understand the concept but it can be frustrating when the sketches themselves seem fine. I expect that, like everything else F360, I just need to read more and learn what I do wrong. However, that is what you would need to do for your hull, as you want an explicit shape at mid-level. So one rail for the deck, another for the 'waterline'. Does that make sense?
-
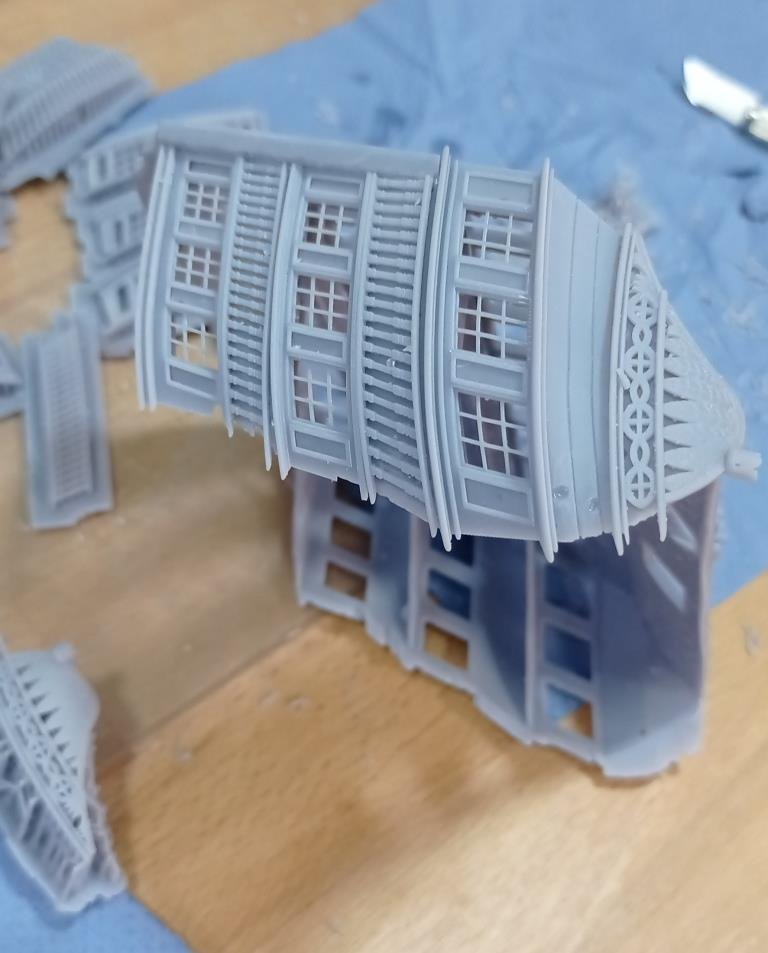
Coming along nicely. Everything fits +/- a bit of clearance adjustment. I keep breaking that thin wispy decor on the lower counter, that'll be one where I make plenty of spares. Looks like I lost a bit of fairness on the lower window bottom profile; now that one will be a pain to fix so I think I'll see whether it shows when painted and in situ.
-
Yes, I like that too. Unfortunately you only get it running horizontal to the print, whereas all the areas I can think of where it would make a nice feature - masts, the hull, the boats - would be better printed vertical, with this graining running 90 degrees out.
-
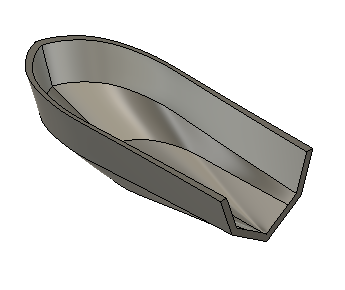
Just the basic lofting process here, sample file attached. (with so few steps I haven't bothered to name things....!) 1. Create sketch, select top 2. Draw one half of the deck shape using a fit point spline. This is going to be the guide rail for lofting so you only need the outer deck edge. Note, you need a continuous line, otherwise you’ll have problems when lofting, so run that spline point to point and use the handles to get a straight side shape. Don’t mirror, not needed. Close sketch 3. Construct an offset plane 30mm below the deck plane 4. Create a sketch on the new plane. Project the deck rail from the deck plane but don’t link. Offset the projected rail by (10mm in sample) to get the mid-level hull profile. Tip – trim the overshoots (T on the keyboard). This will break the offset constraint but that’s not a problem. Close sketch 5. Create a side view sketch using the front plane (this will be on the hull centreline). Draw a keel line, whatever you want. Make sketches 1 & 2 visible and join the bow point to mid-level bow point with a line. Draw another line to the keel line. Close in the top and stern end, to create a closed profile. Close the sketch 6. Construct an offset plane in the left view. Offset by 100mm. This is the stern plane. Draw a sketch joining the deck to mid-plane to keel. Ensure it’s a closed profile. 7. Loft the stern to side profiles using the deck rail as a guide. Mirror if you wish. chine hull v0.f3d
-
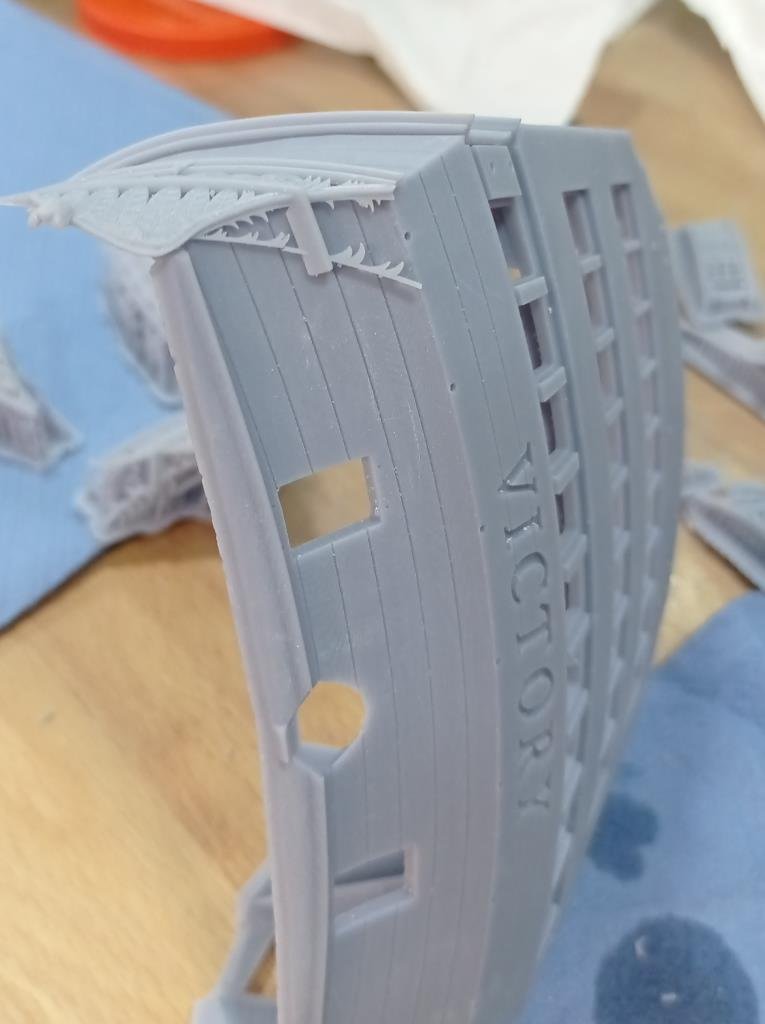
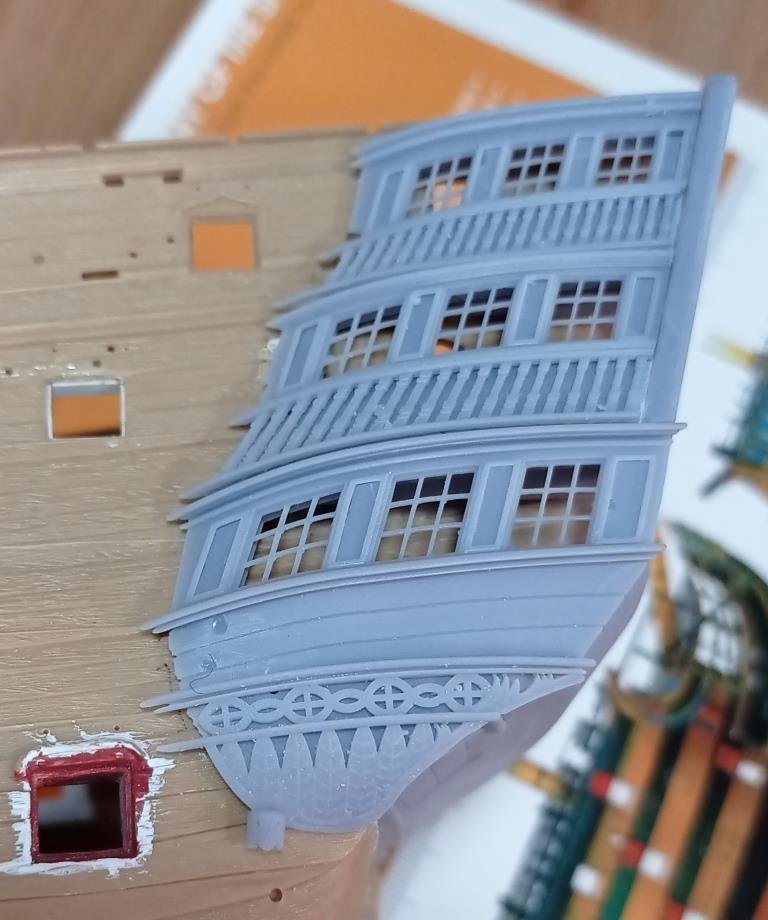
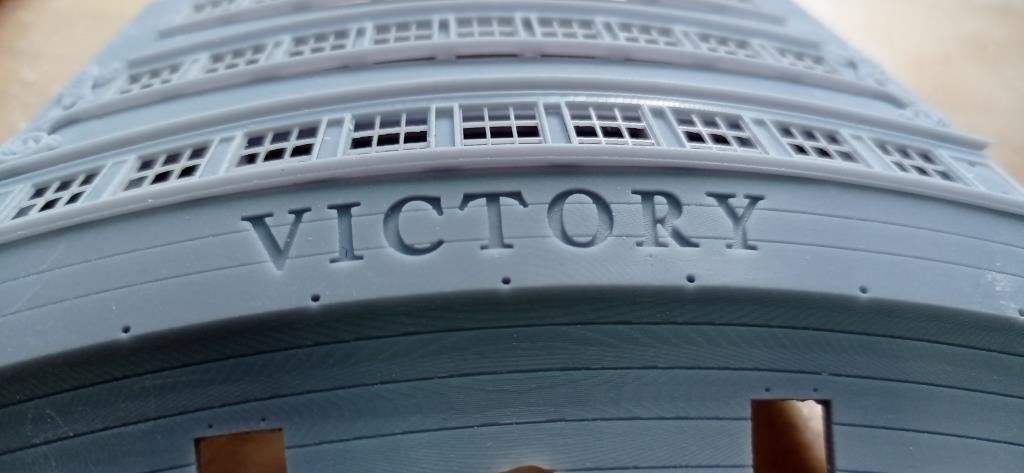
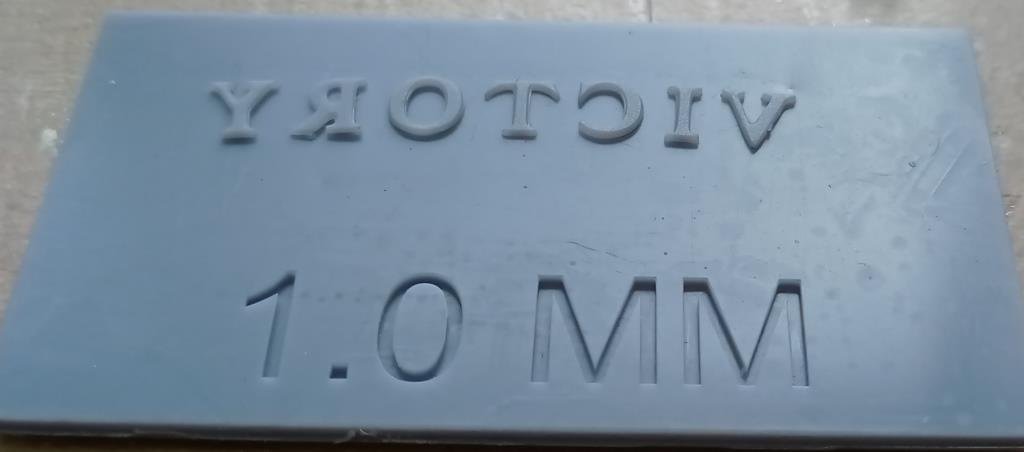
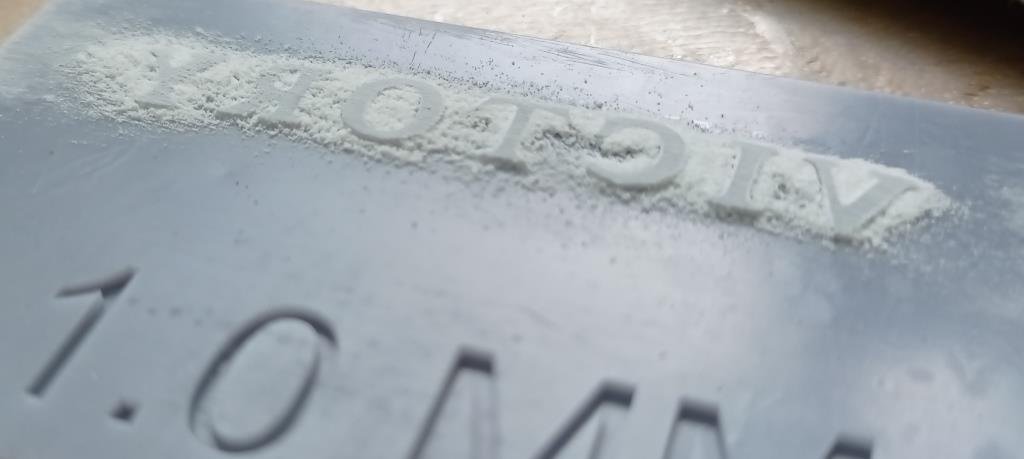
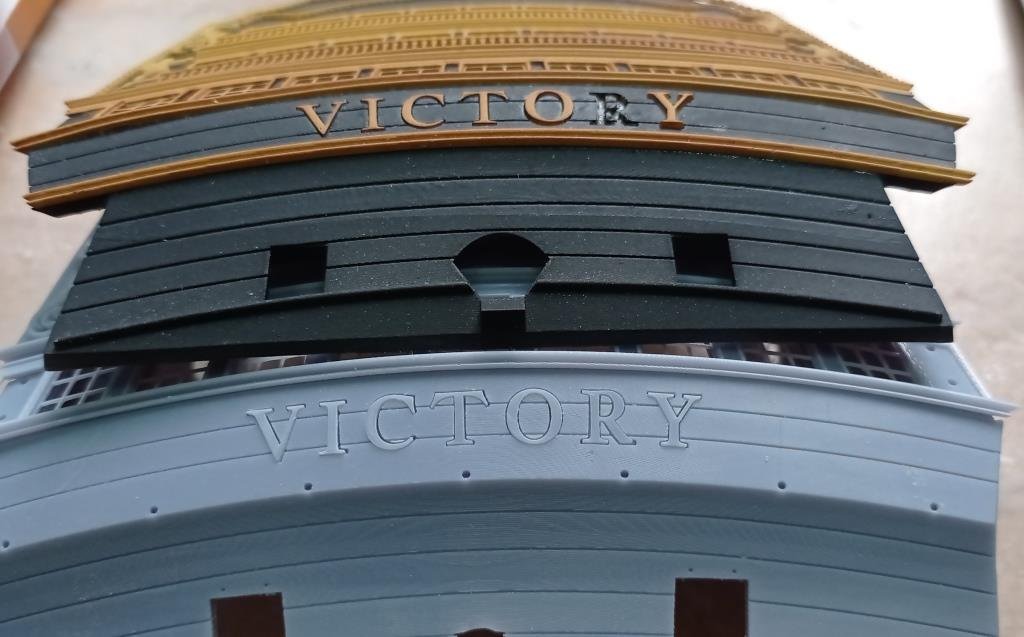
Small victories are always welcome.... forgive the pun. On the first mock-up some months back I couldn't get all the letters on the signboard to sit down in their sockets so that they all protruded by exactly the same amount. Turns out you get a lip on bottom of resin prints when these are flat on the print plate, as opposed to being on supports. You'd have to look carefully to notice it on bigger parts, but it's there. Supporting the letters isn't an option, some webs are probably only 0.2mm thick. So, easy solution: print the letters taller than needed, make a little reverse image sanding jig with the correct end depth and sand until flush. I must have increased the socket clearance on the upper counter at some point, as a solution. As there is now a little too much clearance I will either adjust this backwards for the final model or just increase the size of the letters by 0.1mm. I will also be making a reverse version of the jig, for when I airbrush; I learned too that you don't want to get any paint on the sides, you can easily add 0.2mm with that. These are very quick and easy operations. Getting the clearances right is everything on this project, because the tolerances are necessarily very fine. I don't want gaps where parts meet and in many areas the overlap is constrained to only 0.2mm, about the thickness of a sheet of paper, just enough to hide the join but no room for error. You'll notice a bulge on the middle windows; I reduced the clearance by 0.1mm since the mock-up, but this has changed it from clearance to interference fit. Again, 5 minutes to fix now that the whole kit is modelled. You may also notice the lower scroll and figurine, I've incorporated these into the middle window component as it 'fixes' their position, likewise I've incorporated the upper scroll into the serrated decor above the top window, but more on these will follow presently. With a little luck I'll be posting in technicolor by the end of the week!

-
3d printing process
Kevin-the-lubber replied to henrythestaffy's topic in 3D-Printing and Laser-Cutting.
Tell me about it! I’ve gone through a fair few FEP’s through bad judgement and still have cold sweats whenever I’m trying something marginal! I wouldn’t be anywhere near brave enough to have so few supports as you, Paul, at least not with 40 or 50 cannons on the plate. To be honest I’m not sure what benefit there is in angling these cannon (but am very open to being educated). Whether plumb vertical or angled, you’re going to have an annulus pulling on the FEP, in effect a suction cup, and the only gain I can see in angling would be to more naturally put a few supports up the hidden side of the barrel. Please do tell me if I’ve missed something though, FEP is expensive! In passing, I bought the large Anycubic wash and cure machine a couple of weeks ago and used it for the first time yesterday. What a joy, I’ve gone from a tedious, quite messy wash process to something quick, clean and easy. It’s also great for washing out the vats when changing resin - I’ve been using up some standard resin but wanted to switch to ABS for the current run.

