


Kevin-the-lubber
-
Posts
1,232 -
Joined
-
Last visited
Content Type
Profiles
Forums
Gallery
Events
Everything posted by Kevin-the-lubber
-
 13/12/21 I started looking at this kit 2 or 3 weeks ago, as an ‘in-between’ project while I take a break from the Victory. The kit is from 1976, it’s a bit brittle and there’s a lot of flash, some of it so heavy that I’ve needed to look at other logs in order to know what to trim off and what to leave. While I don’t want to get into 3D gymnastics on this kit, I’m re-making most of the deck furniture i.e. the windlass rotor, winch rotors, fife rails, sail lockers, cabins etc, as these are very quick and easy to model in F360 and equally easy to print. I wouldn’t say the end result is better than the kit part, detail-wise, just cleaner/crisper and I get to duck dealing with some joints.
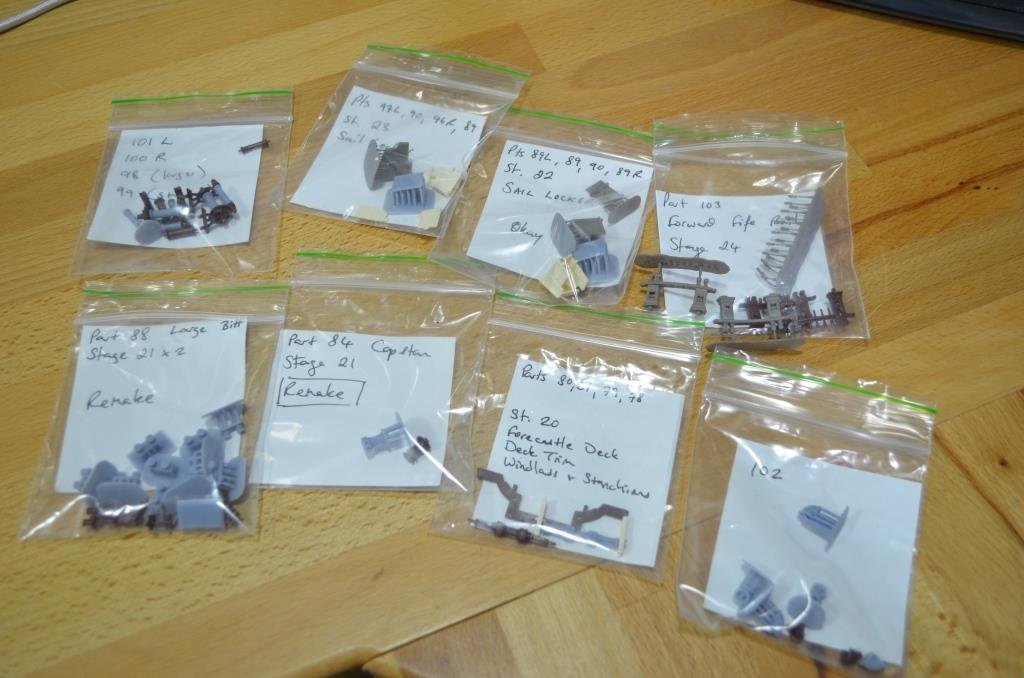
- 444 replies
-
- 5
-

-
- Cutty Sark
- Revell
- (and 2 more)
-
Well, that was what I was trying to achieve, a replacement deck - but I think, rather than hijack Bill's log I'd better start my own for the CS. I'll do that this evening and explain all.
-
A common complaint, I suspect, especially at this time of the year. I don't drink much but I swear modelling could drive me to it yet. I'll start a log soon-ish Bill, I suspect that for you it'll be somewhat deja vu as your log is my primary reference.
-
That’s a useful tip Bill, note to self to slightly enlarge the mast holes in the lower decks. I remember thinking, during dry fits, that this was a risky area and once painted likely to be even more so. Isopropyl alcohol is also good for dissolving acrylic paint, and doesn’t dissolve glue (but does make putty go soggy). I know this because I had to strip the entire deck of the CS yesterday evening after making a mess of inking in the plank lines through guessing where they should be where I could barely see them under the base coat - I’m doing the same as you, Vallejo old and new wood. But I have a plan… In passing, I’ve been experimenting, over the last two or three weeks, with re-making the deck in sections as a proxy for doing the whole victory hull and upper decks and learned that this would be extremely difficult to get right. Probably extremely expensive too, with all the trial and error. Getting ‘seamless’ joints in the printing is the problem and not even commercial hobby 3D printing outfits seem able to print a whole deck of this size. No doubt industrial businesses could, but at quite a cost. So at least I now know to let go of those thoughts and, as I feel ‘victory energy’ returning, where to direct that energy when I pick up on it again.
-
I just fish them out… not so difficult when, 8 years in, I still haven’t glued the hull together 🤪
-
Bill, I think your build will stand as a good reference for doing it well in a fast timeframe. It’s also the best step by step log I’ve come across. I was looking at where you’ve got to, a day or two back, and thinking ‘that’s a lot of ship’, compared to the CS for instance. I’ll watch with interest as you progress into the rigging.
-
Too true. Because there's so much flash I've separated most parts from the sprues, cataloguing as I go, so that I can try for fit and see what's what. It's not too bad once it's cleaned up but I've started resin-printing remakes of some of the deck furniture like the fife rails, windlass, bollards etc along the way. It just feels easier to do these quick and simple bits in resin rather than spend the day sanding. And now that I've primed the hull and deck it's much easier to see what needs attention in that area - as you say, the mis-alignment is a bit of a pain: even as I write I'm debating whether to sand off the 'bars' across the leading edge of the bow, which are totally misaligned, and use some evergreen to tidy that up. Already did that to the edging on the stern and it's an improvement.
-
Likewise, many thanks Richard. This may spur me on to spend some time to learn Rhino enough to make the move from F360 before my trial period runs out. Re' sound - I just had to change the audio source in VLC. No doubt if I could find the controls for source in media player the same would apply. One of those mysteries of software for which life is too short for solving!
-
Once scaled, the bars come out as 0.1mm - 0.15mm wide, presumably the same for thickness and the gaps between bars appear the same.. I'm afraid that's just too small. Any gap less than 0.3mm tends to become bridged by the resin which is what I expect to happen here. If it wasn't for the risk of damaging the FEP (or worse, the screen!) I'd give it a whirl but the chances of success are so small I'd best pass. Sorry! I guess this is why they're PE.
-
If you post a sketch and it looks feasible I’ll have a go and, if successful post them to you. I know from working on the 1/100 Victory that I can print bars at 0.3mm but I’ve concluded that this is just about my lower limit. Any smaller than that and the chances of a successful print, let alone being able to remove the supports, become too small. Maybe ask Flyhawk for some spares? You’re doing such a fine job of this model that you’re selling 1/700 to us and, if I was the manufacturer, I’d give you all the spares in the world!
-
You've made a nice job of that. My kit is from 1976 and, if yours was in similar shape, you've done well to get the parts looking as good as they do.
-
The same to you Bill, Ian, Marc et al, I’ve enjoyed the chatter on all the logs, learned a lot of useful things and, as ever, been amazed at what people do with these ships. I hope everyone has a great few days with some nice goodies under the tree.
-
I will be doing a build log presently but probably not until I've at least got the deck in, otherwise I'll start obsessing over trivial detail. I'm more tempted to go down the meccano route, I love making gizmo's and this is a good excuse to make my own toys. Ian, with that red paintwork and yellow wheels I assume it goes extremely fast, yes? 🙂
-
Thanks Bill, seen that and will incorporate it. I’m keeping this one fairly simple, no 3D gymnastics, just remaking those bits where it’s as easy to do so rather than fettle all the flash off the kit parts. I bet this was a great, great kit when first released, I love the ingenuity of the location pinning etc, but nowadays there are parts where it’s hard to tell where the part ends and the flash begins. I wonder if kit modelling is in decline, otherwise you’d think the kit manufacturers would stump up for new extrusion dies, after 60-odd years of wear and tear. They’ll need to watch out, within 5 or 10 years max someone will have redone the entire thing as a printed kit (not me though) and flash will be a thing of the past. Copper tube - makes sense. The only issue I’d see there is that copper is quite ductile though much more easily worked than, for instance, stainless. I haven’t yet revisited making new masts for her ladyship, but will do once I’ve reached a natural pause point on the CS. I saw you bought the Vallejo old and new wood set, think I’ll also give that a go and, if I get as nice a result as you, carry that over to the Vic.
-
That looks very nice Bill, I'll be wanting one of those presently. I've switched to the CS for a while, chalk and cheese in terms of headscratching compared to the Vic. Your spar tests above are surprising, it looks like wood is less bendy than carbon fibre.
-
Me too I'm afraid, at least probably. Wrongly thought it would spawn something into my calendar, apologies!
-
That’s thinner than a standard sheet of copy paper. Extraordinary. I imagine they deform at the slightest slip of the fingers.
-
I think you’re probably going to cover this, Richard, but the main thing for me would be fairing the hull, especially when there are a lot of stations. But in any case I’m interested in seeing how a pro goes about the development of a hull, from the methodology/workflow perspective, what you do that I don’t even know about, that makes it work. The next bit may be a bit arcane, and possibly in the ‘not essential’ box, but how you develop the lateral lofting rails (splines) in the sheer view, when you (typically) have the section profiles and a sheer view. In most of the drawings I’ve seen these are present, but I’m thinking these must be mathematically derived rather than arbitrary. I’ve forgotten most of my old pattern development skills now, but logic tells me the position of the lines on the section profiles is a product of sections relative to each other. As tracing plans alone leads to cumulative error (hence the fairing question), it would be handy to understand how to derive true lines if possible. The same applies to all lines on the plans actually, if there are tried and trusted ‘trade’ methods to resolve tracings of drawing lines (or photos) which would be a foot thick in real life, into their true dimensions. I hope that makes sense. Which reminds me, need to check the CS library this weekend.
-
I guess then that the rails themselves are at most 0.2mm thick. That is seriously small, no wonder it’s so challenging. Is the conning tower assembly resin printed or moulded? I don’t see any layer lines or evidence of supports and, assuming it’s moulded, those moulds must be a work of perfection in themselves. Fly hawk should hire you or pay you, you’re doing them proud.
-
That sounds very useful. Technically it's no longer available but I found it here https://knowledge.autodesk.com/support/fusion-360/downloads/caas/downloads/content/slicer-for-fusion-360.html
-
That looks pretty good, faired well too. It looks like you’ve done it as a surface, is that right, with a single loft bow to stern? I sometimes run into issues with rails when lofting, where F360 picks seemingly random points to link and creates interference. My eyesight isn’t good enough to see the dims on the drawing, at 1/24 how big will it be.
-
Yep, looks like it. Just split the body wherever you want and project the cut shapes to new sketches.
-
You have that printer very nicely calibrated. I also have an ender 3 but don't use it so much now, preferring resin. The Anet looks like a better design than the ender, do you prefer one over the other?
-
I don't know how you do this, Marc, at this scale. I know how I'd do it - get the printer to do the heavy lifting - but even then I doubt I could make something quite as lovely as that stove. ps. I need to ask, do you know all this stuff about paints before you even start? which ones to use, what looks good over that, etc? Me, I do a bit of dabbing and stand back in trepidation, having absolutely no idea what I'll get as an end result and always surprisingly pleased if it's even remotely liked I hoped for. And this is just when I'm redecorating the house. I more or less just close my eyes on model parts and hope for the best.
- 2,699 replies
-
- 5
-
-
- heller
- soleil royal
- (and 9 more)
