John Ruy
-
Posts
1,585 -
Joined
-
Last visited
Content Type
Profiles
Forums
Gallery
Events
Everything posted by John Ruy
-
 It’s a great hobby! It requires persistence, patience and continued learning and practice. I joined in 2020 and have learned so much. Nautical Research Guild is a great resource of information. Glad to have you aboard. Cheers 🍻
- 127 replies
-
- 1
-

-
- Bowdoin
- Arctic Exploration
- (and 3 more)
-
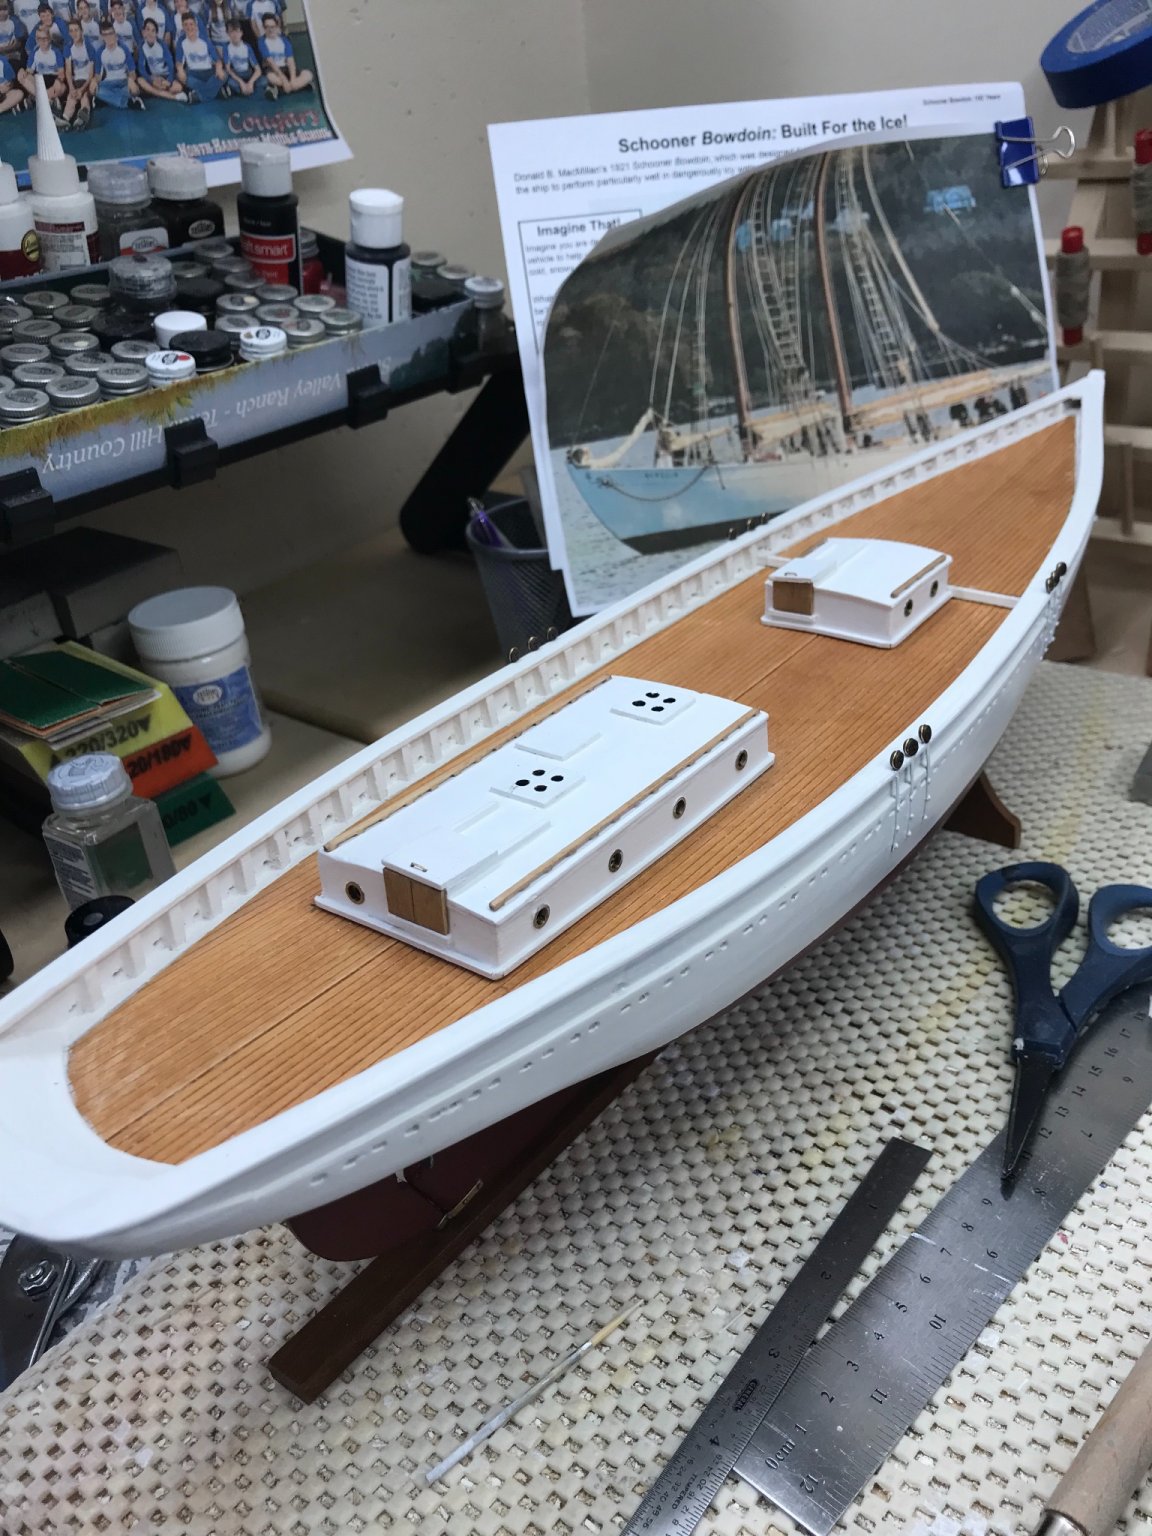
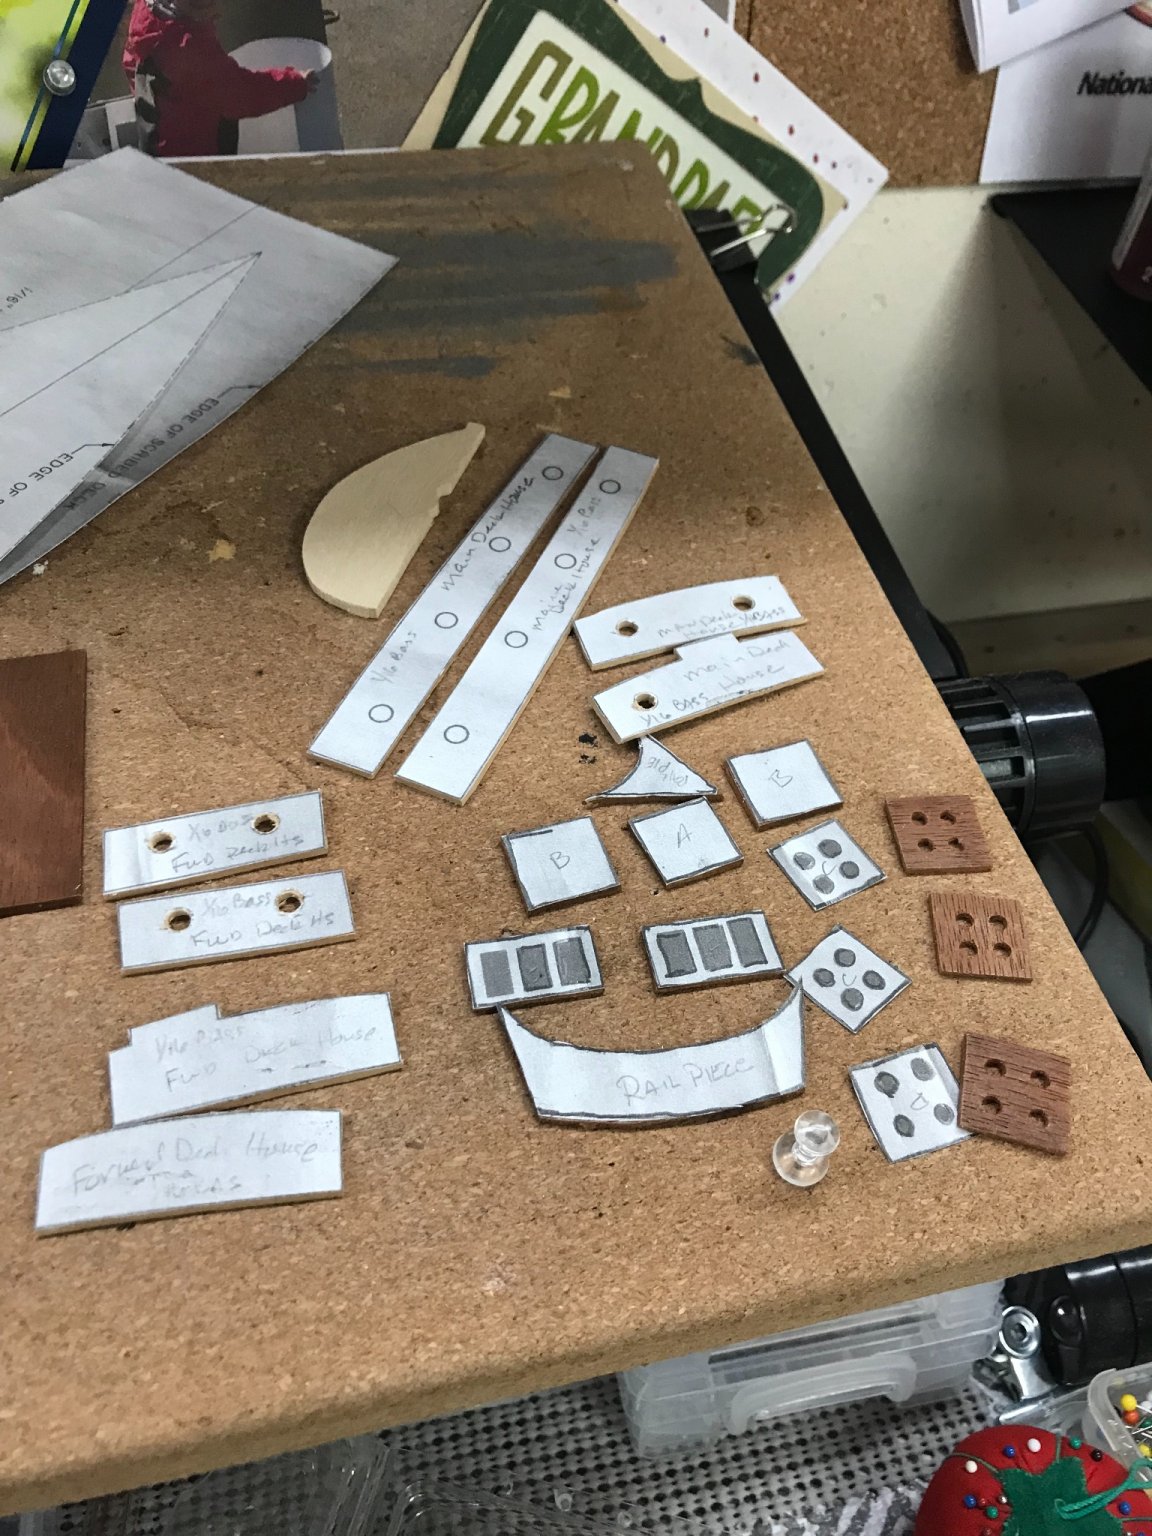
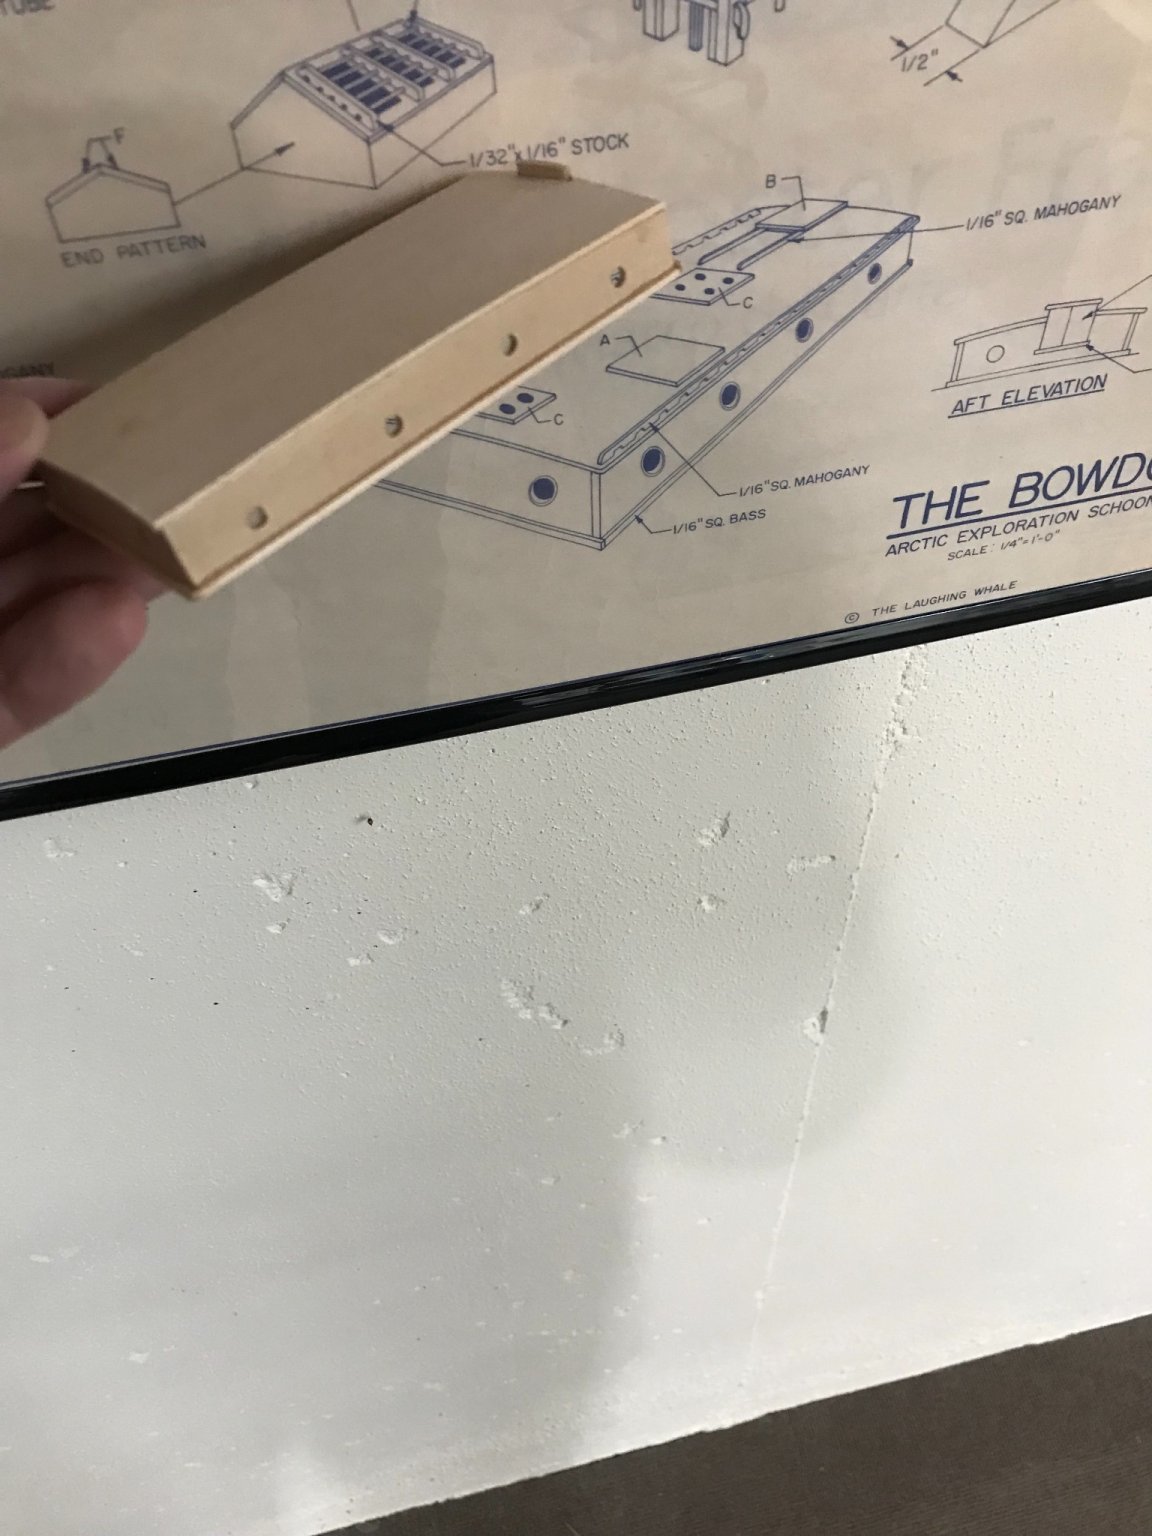
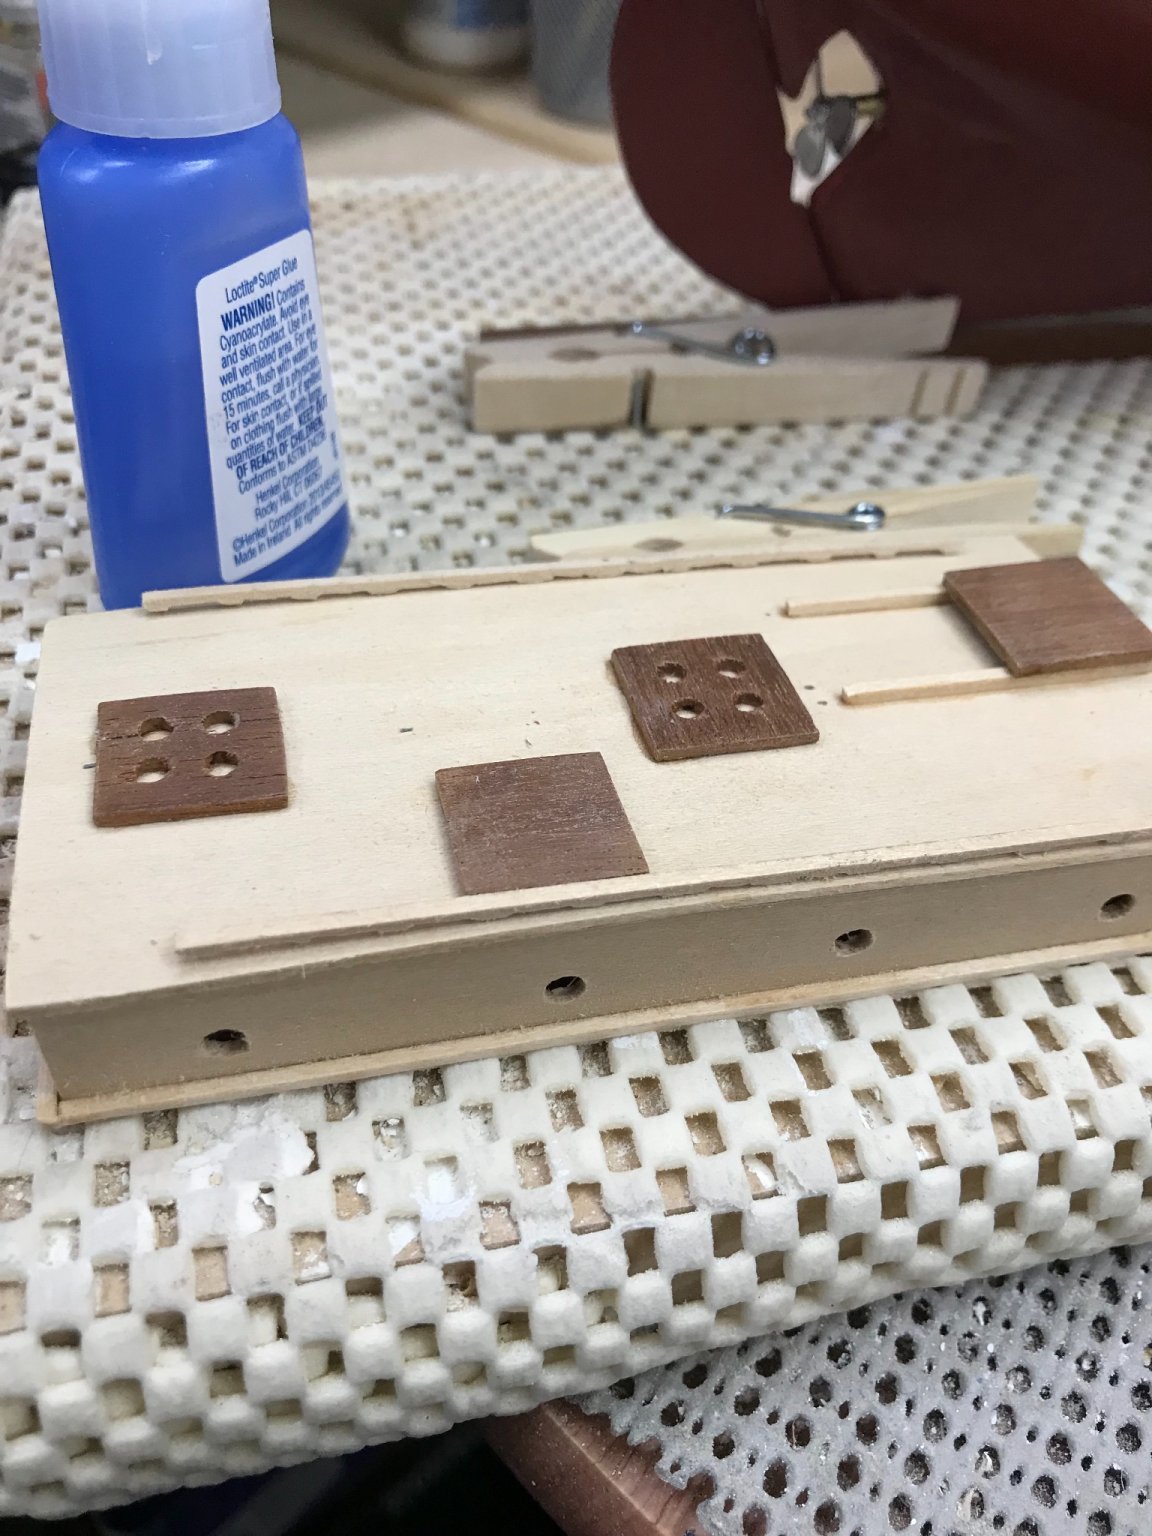
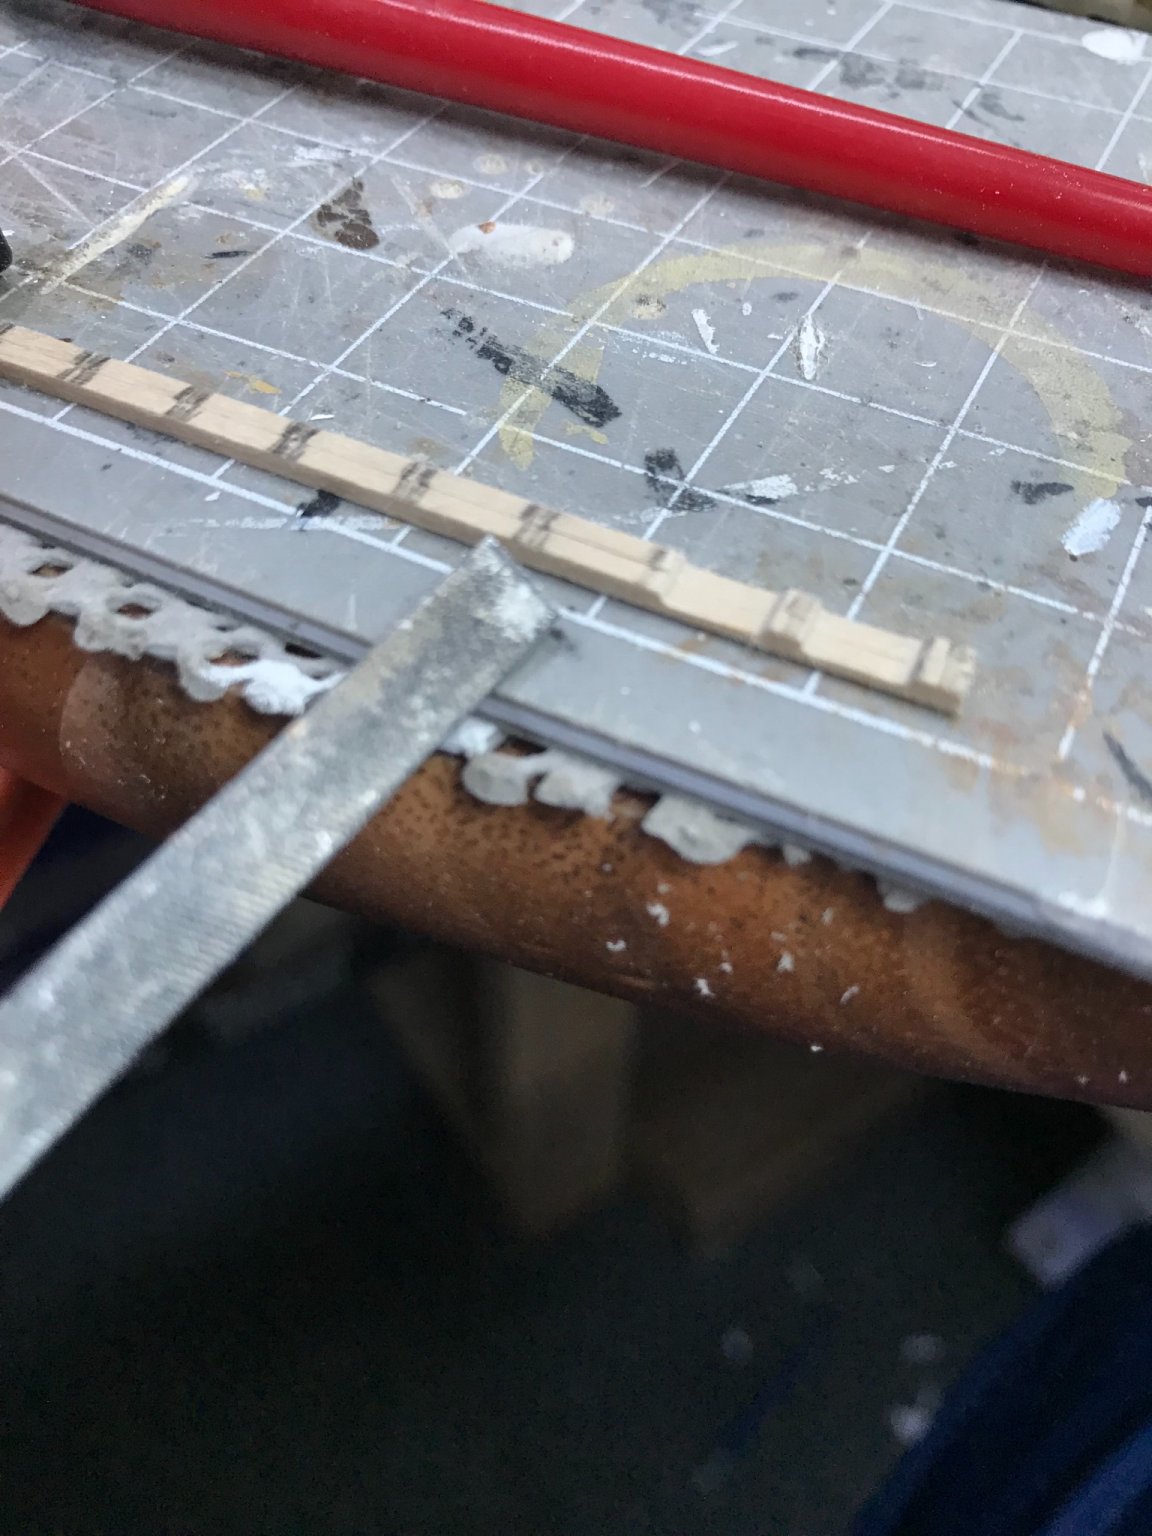
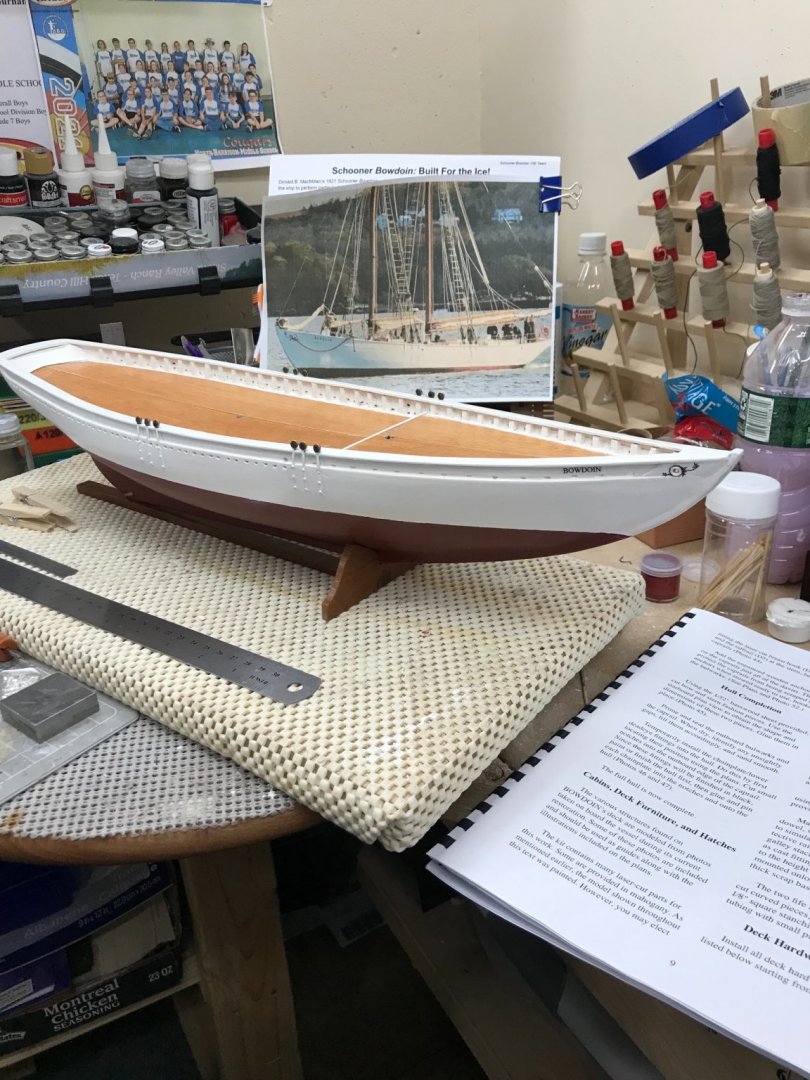
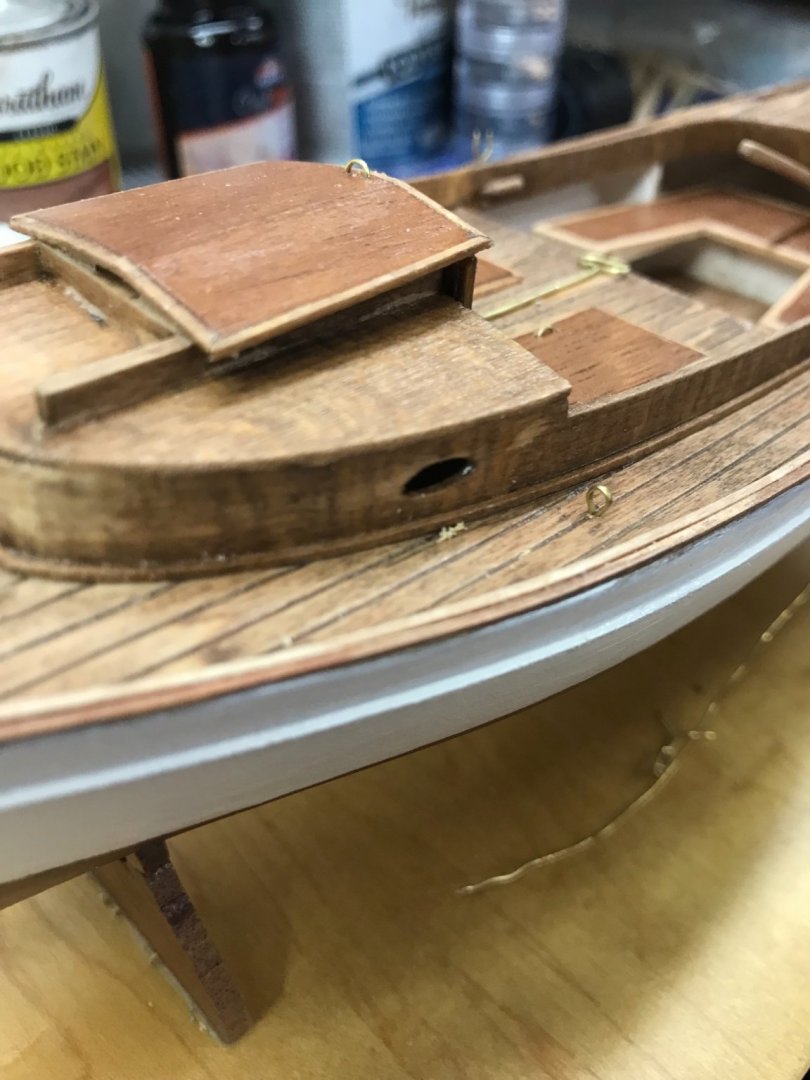
I have finally come to a point where I can start using those parts I cut out with templates back in July. No pre cut or laser cut parts in this kit. Hull complete and mounted… Main Deck House… Cut in railings with file… Two Main Deck House Railings… Ready for assembly and Paint… Thought I would leave the railings natural… One coat of paint, once this sets I will sand and fill any defects. 😆. still need the brass portholes and doors. Cheers 🍻


- 127 replies
-
- 10
-
-
- Bowdoin
- Arctic Exploration
- (and 3 more)
-
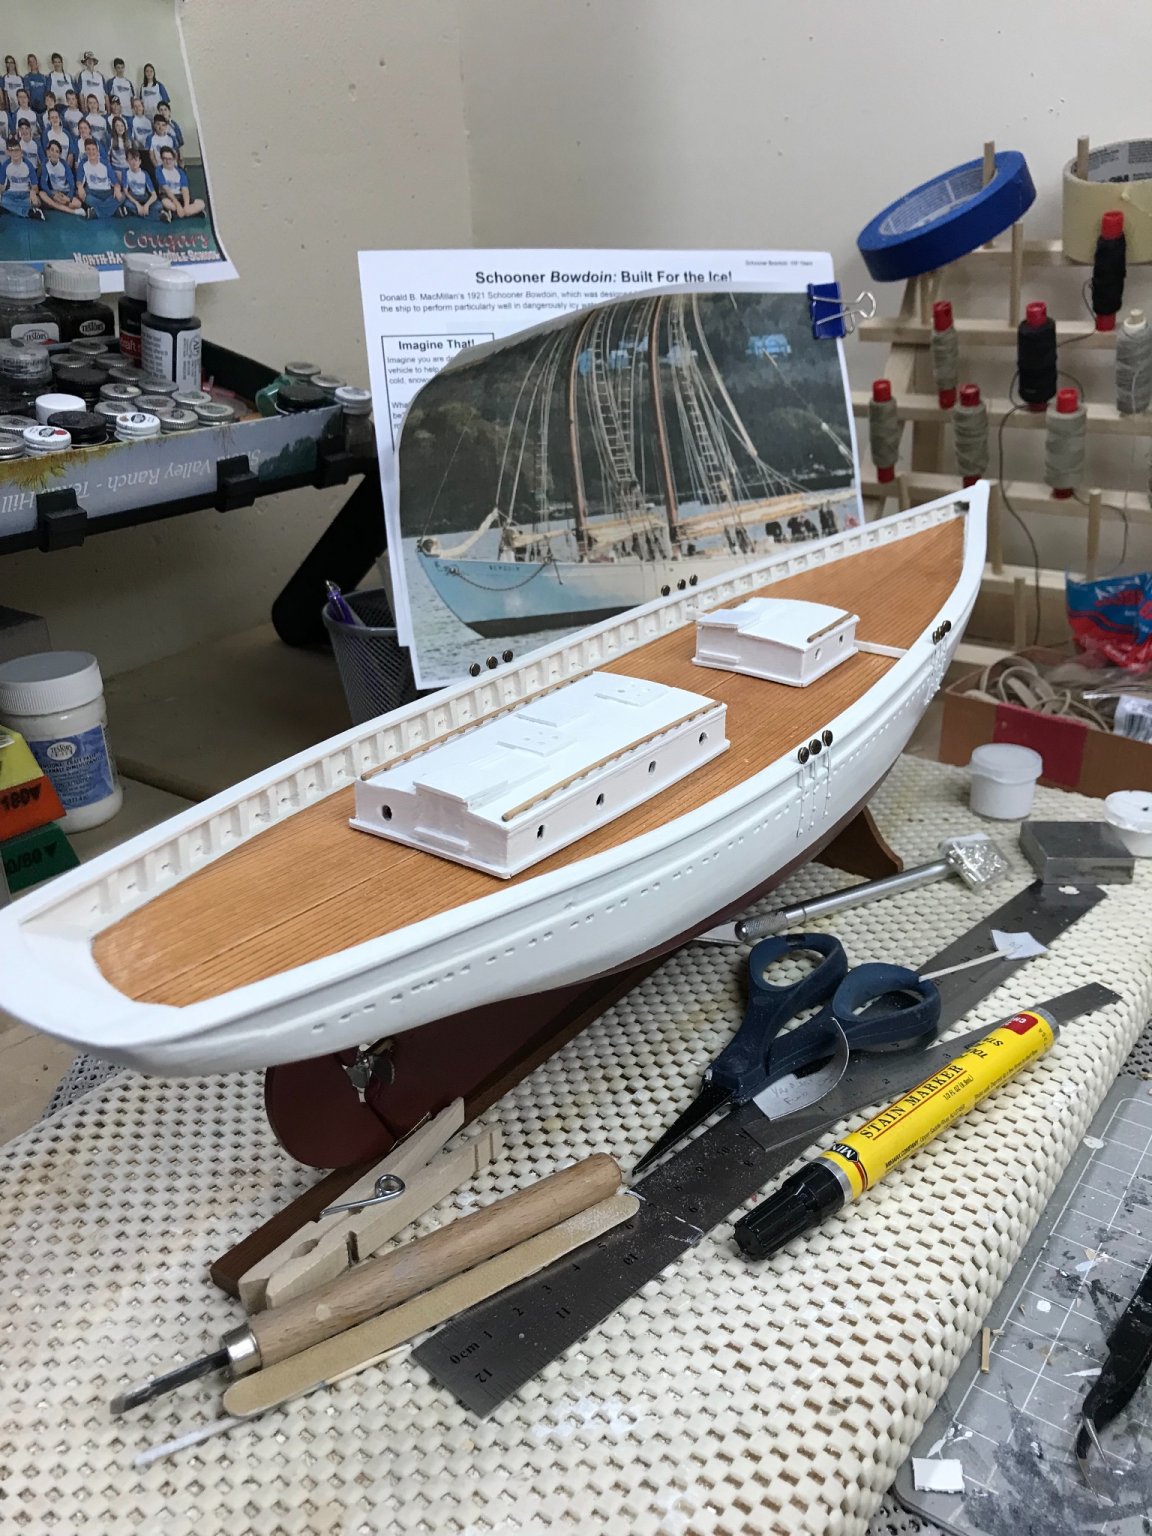
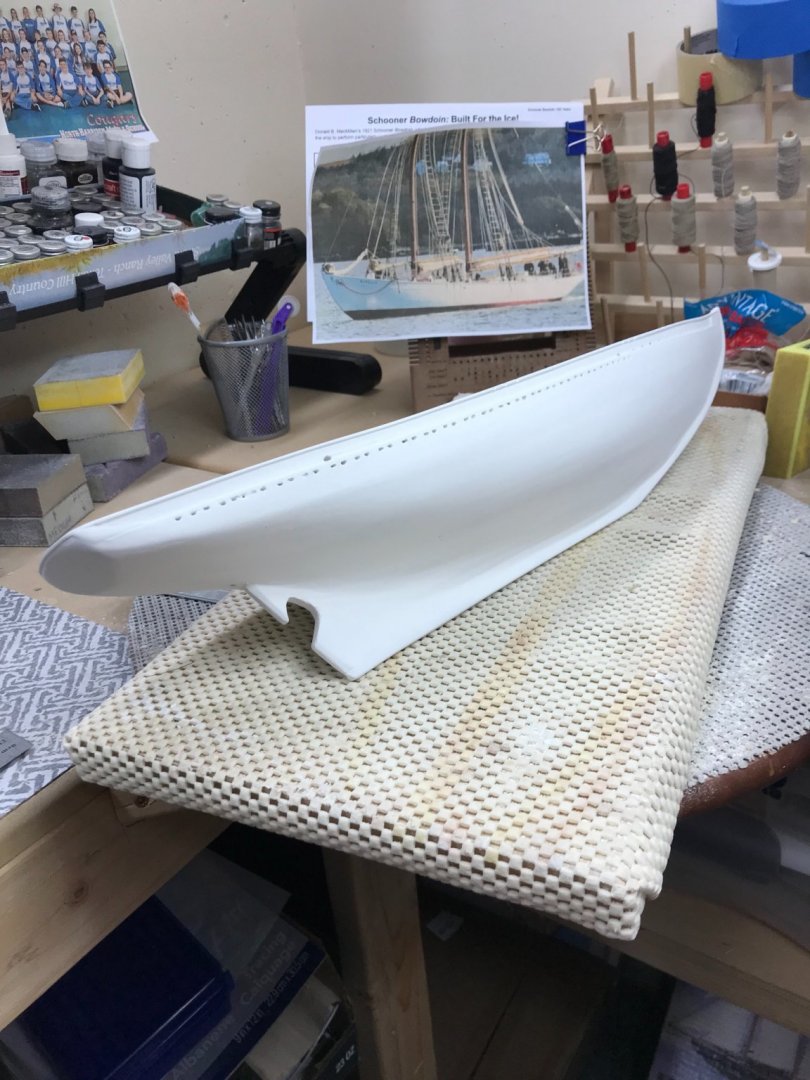
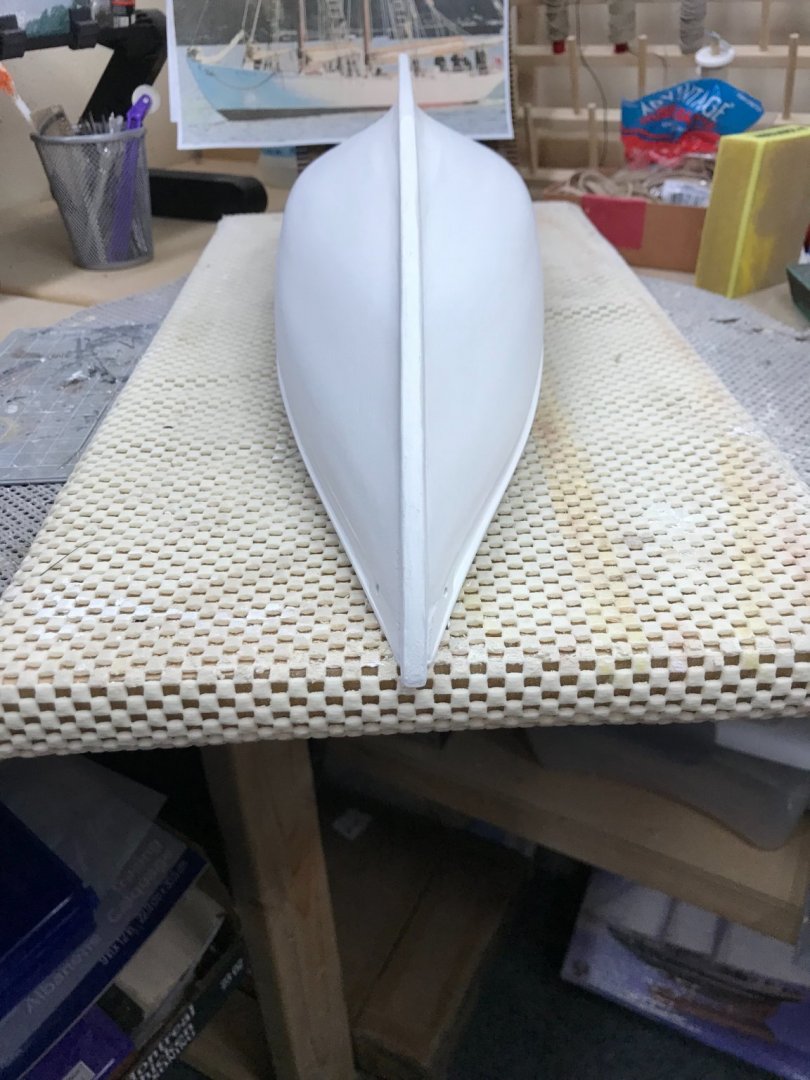
Hull details finished up… On to deck furnishings. 😎


- 127 replies
-
- 8
-
-
- Bowdoin
- Arctic Exploration
- (and 3 more)
-
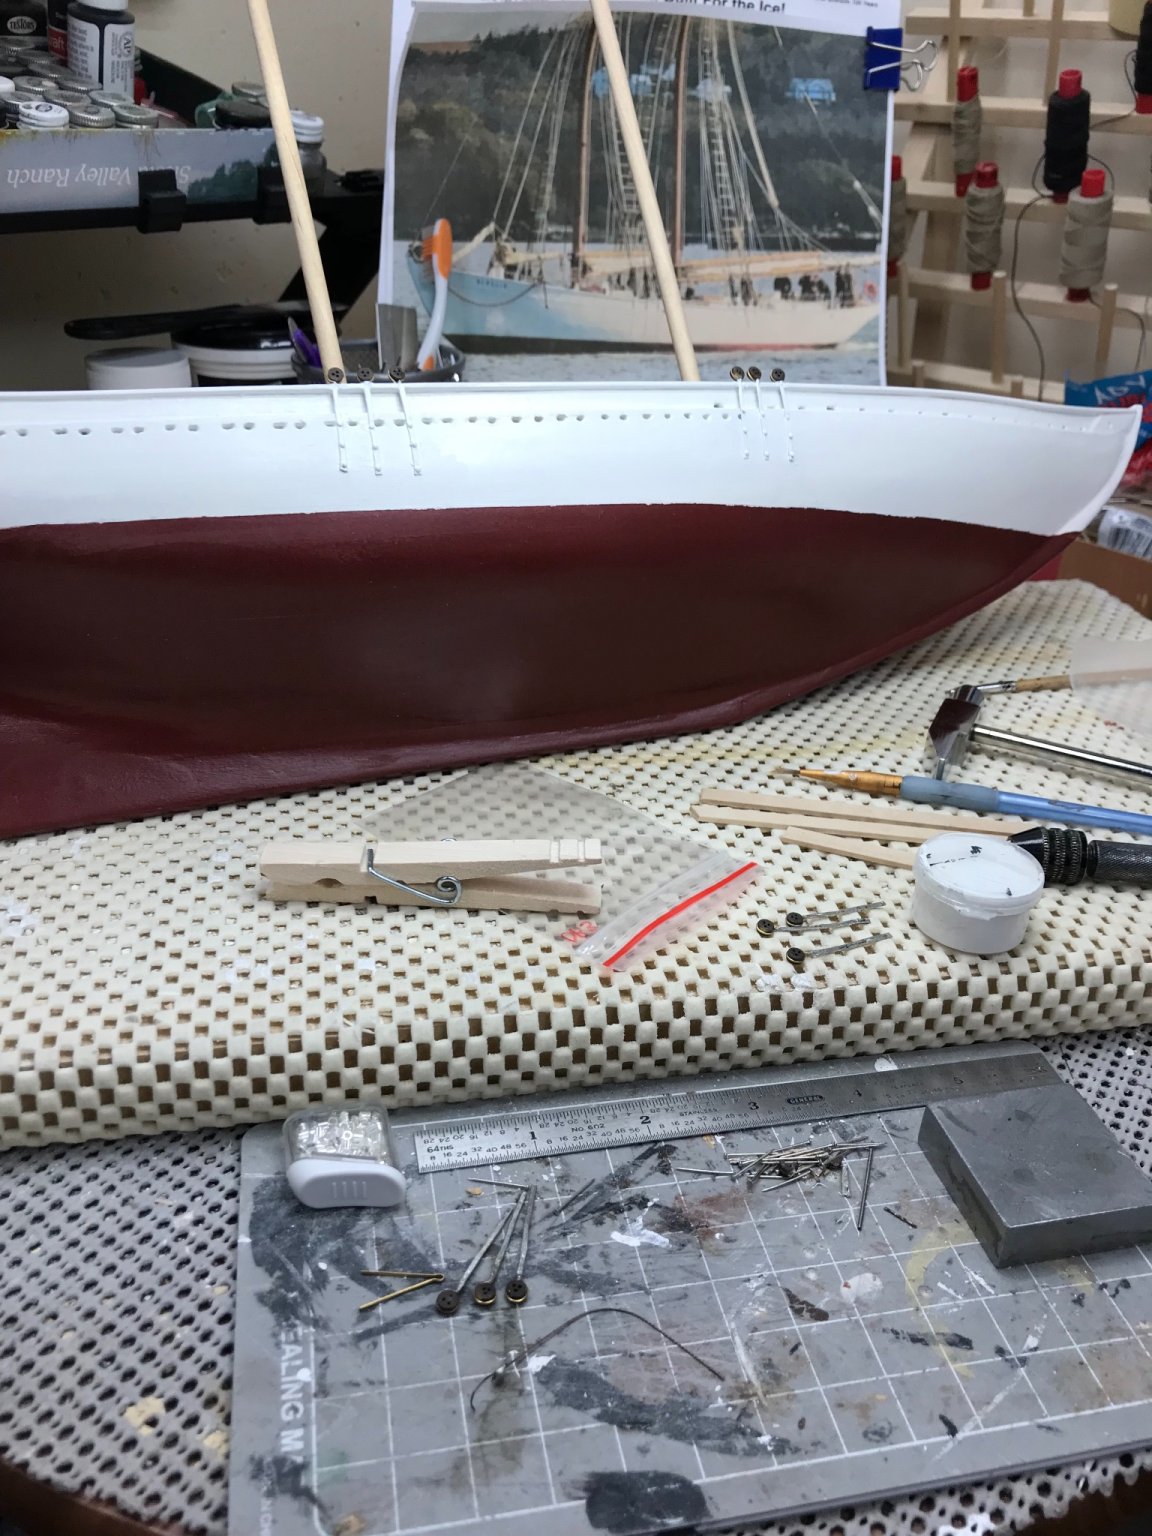
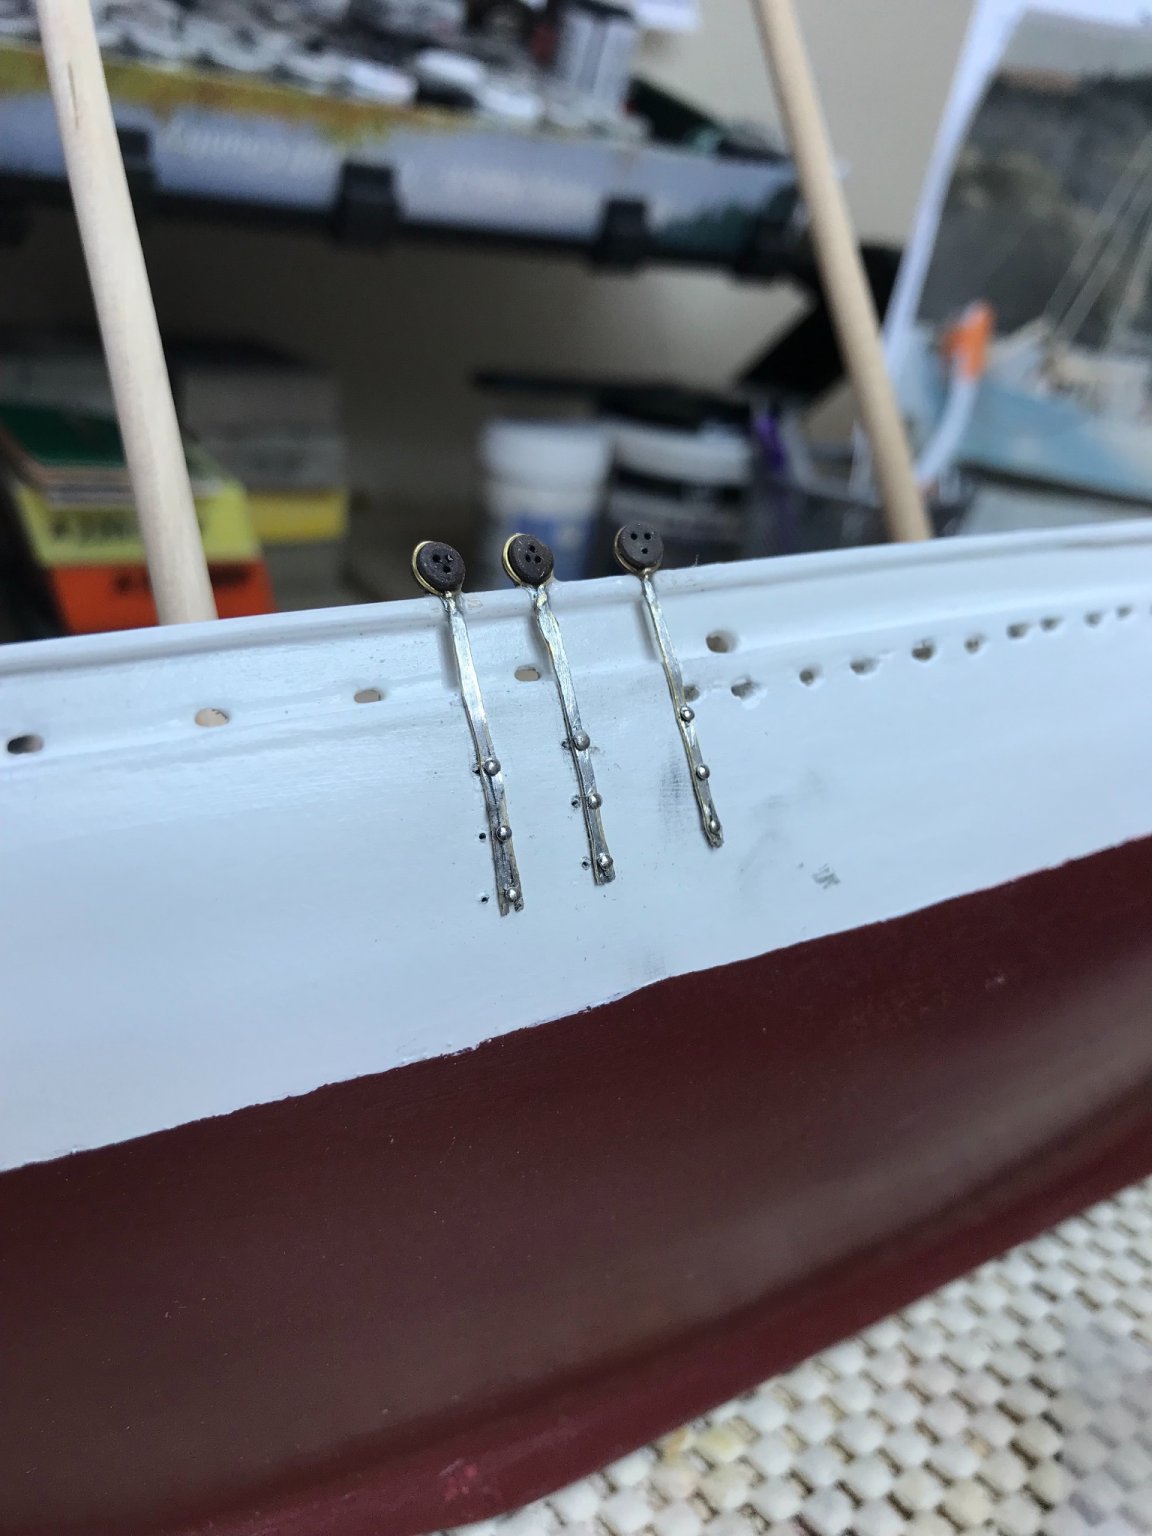
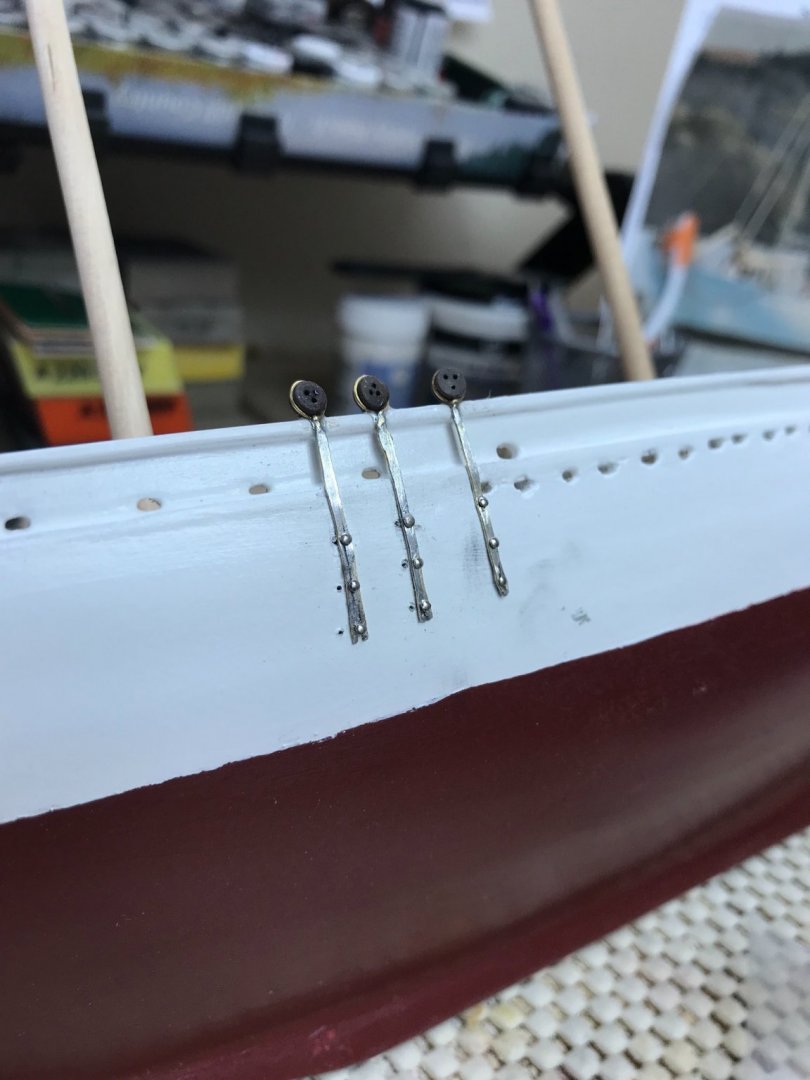
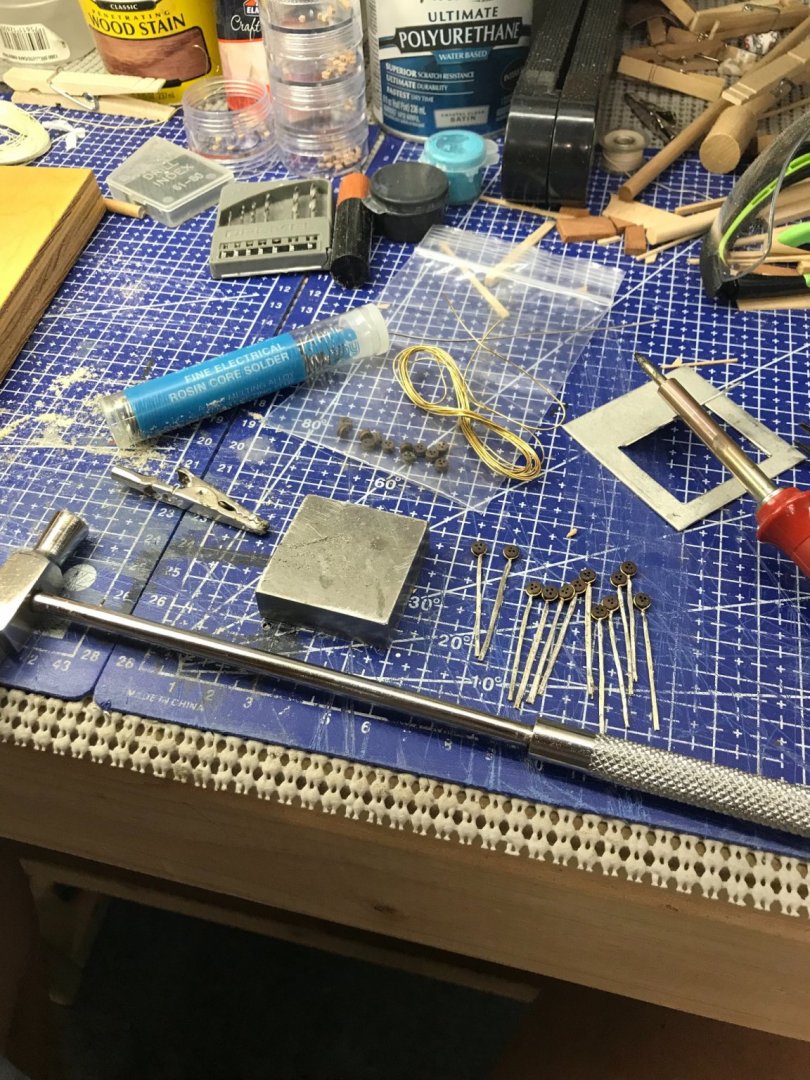
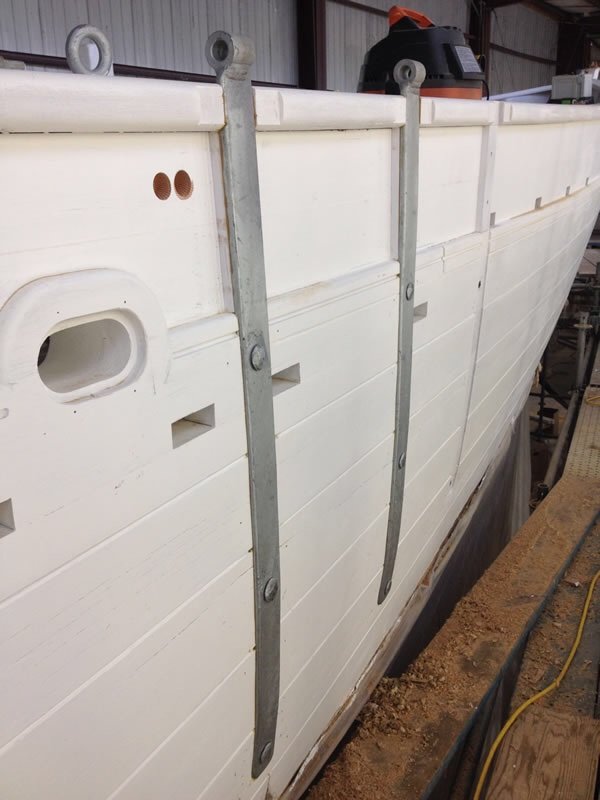
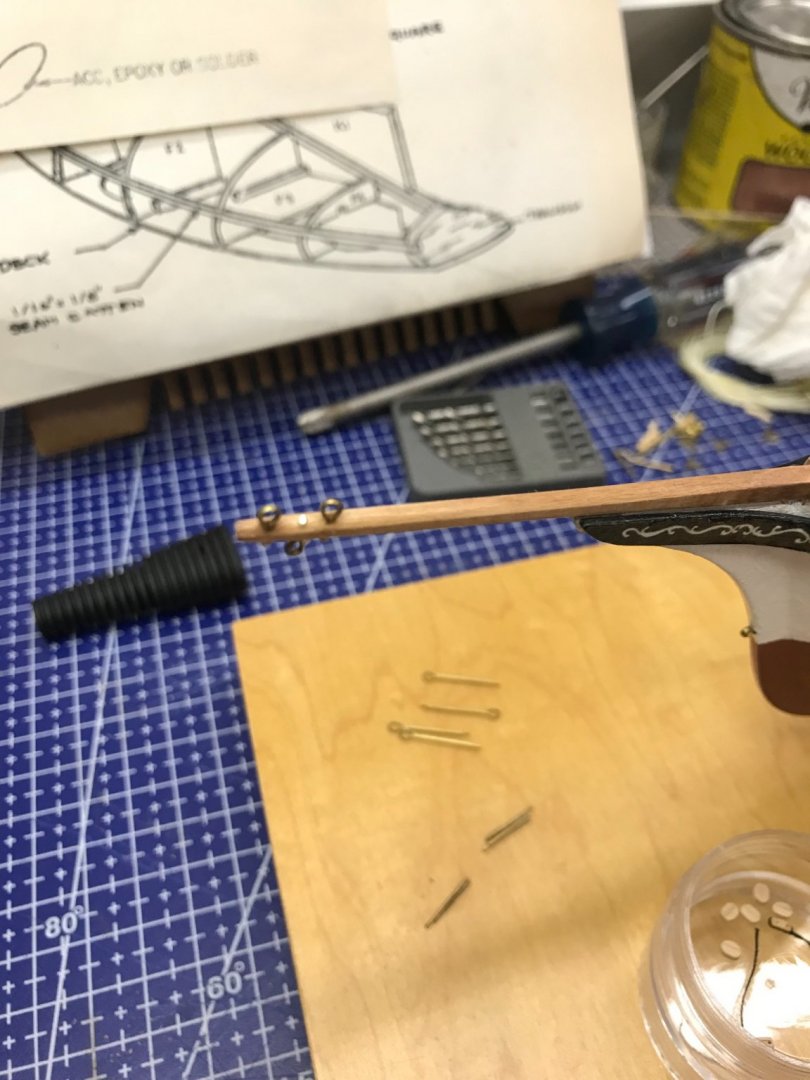
Chainplate and lower Deadeyes… Flatten file flat/square and drill holes for pins to mount the chainplate. Starboard chainplate installed with lower Deadeyes. Progress 🍻

- 127 replies
-
- 7
-
-
- Bowdoin
- Arctic Exploration
- (and 3 more)
-
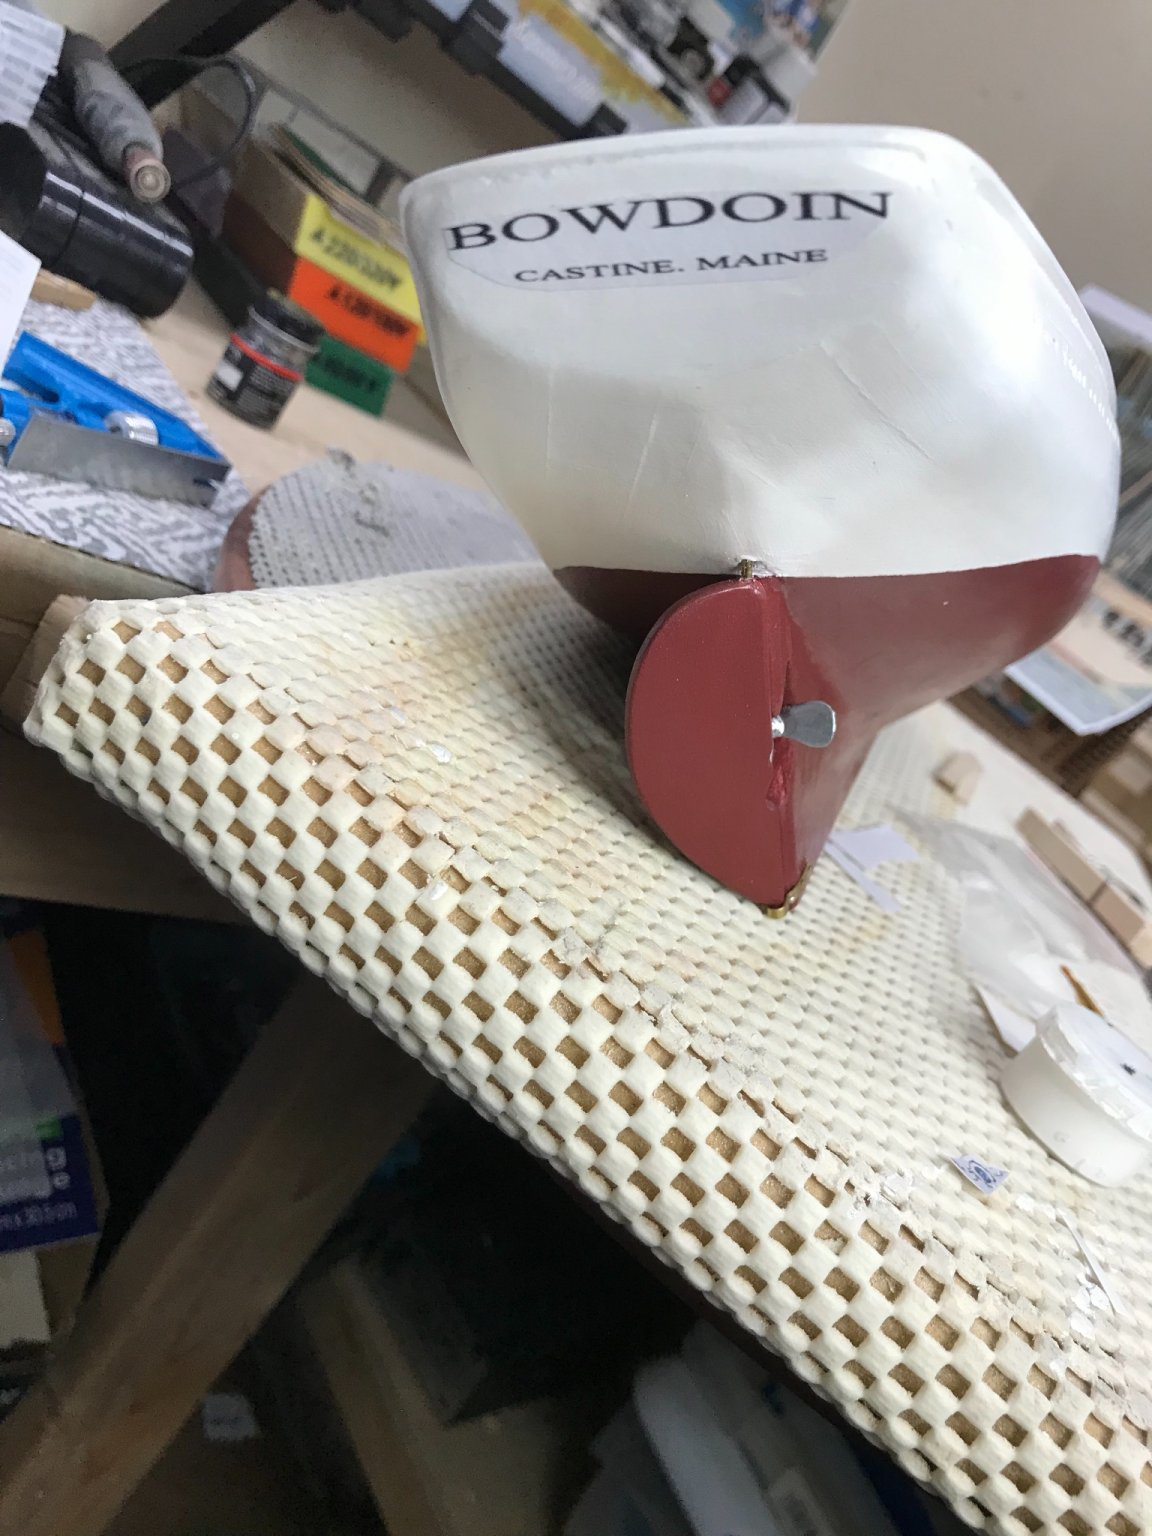
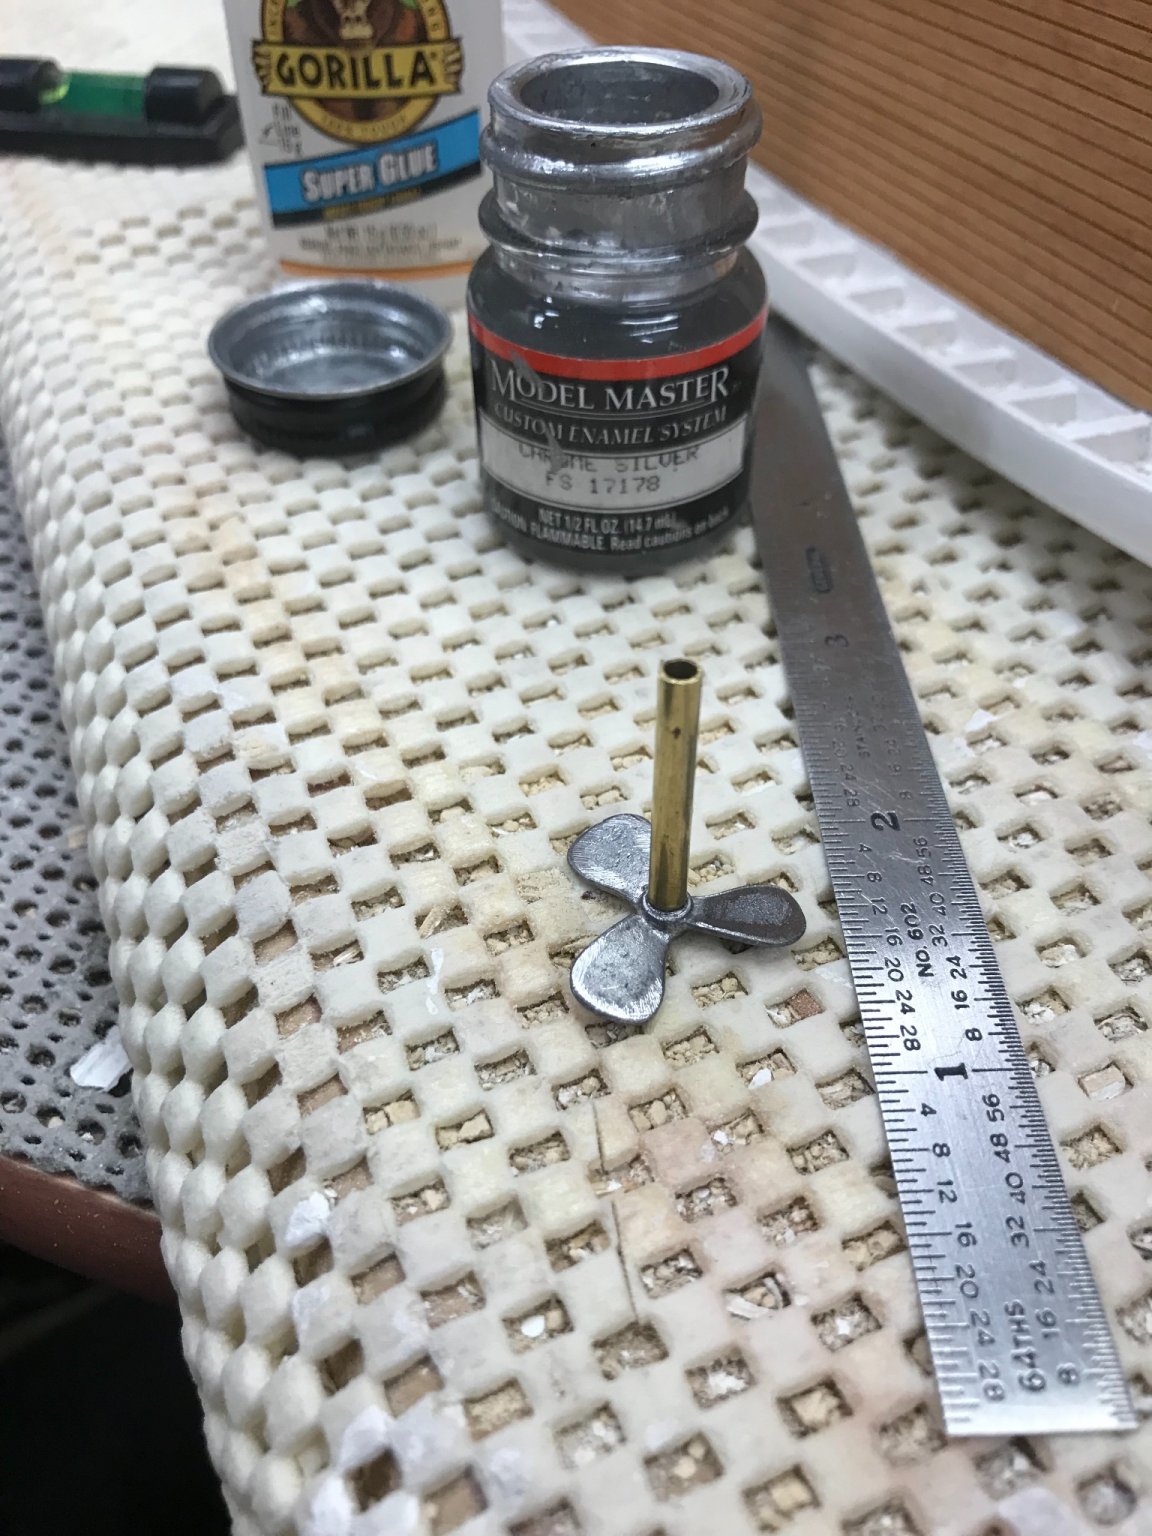
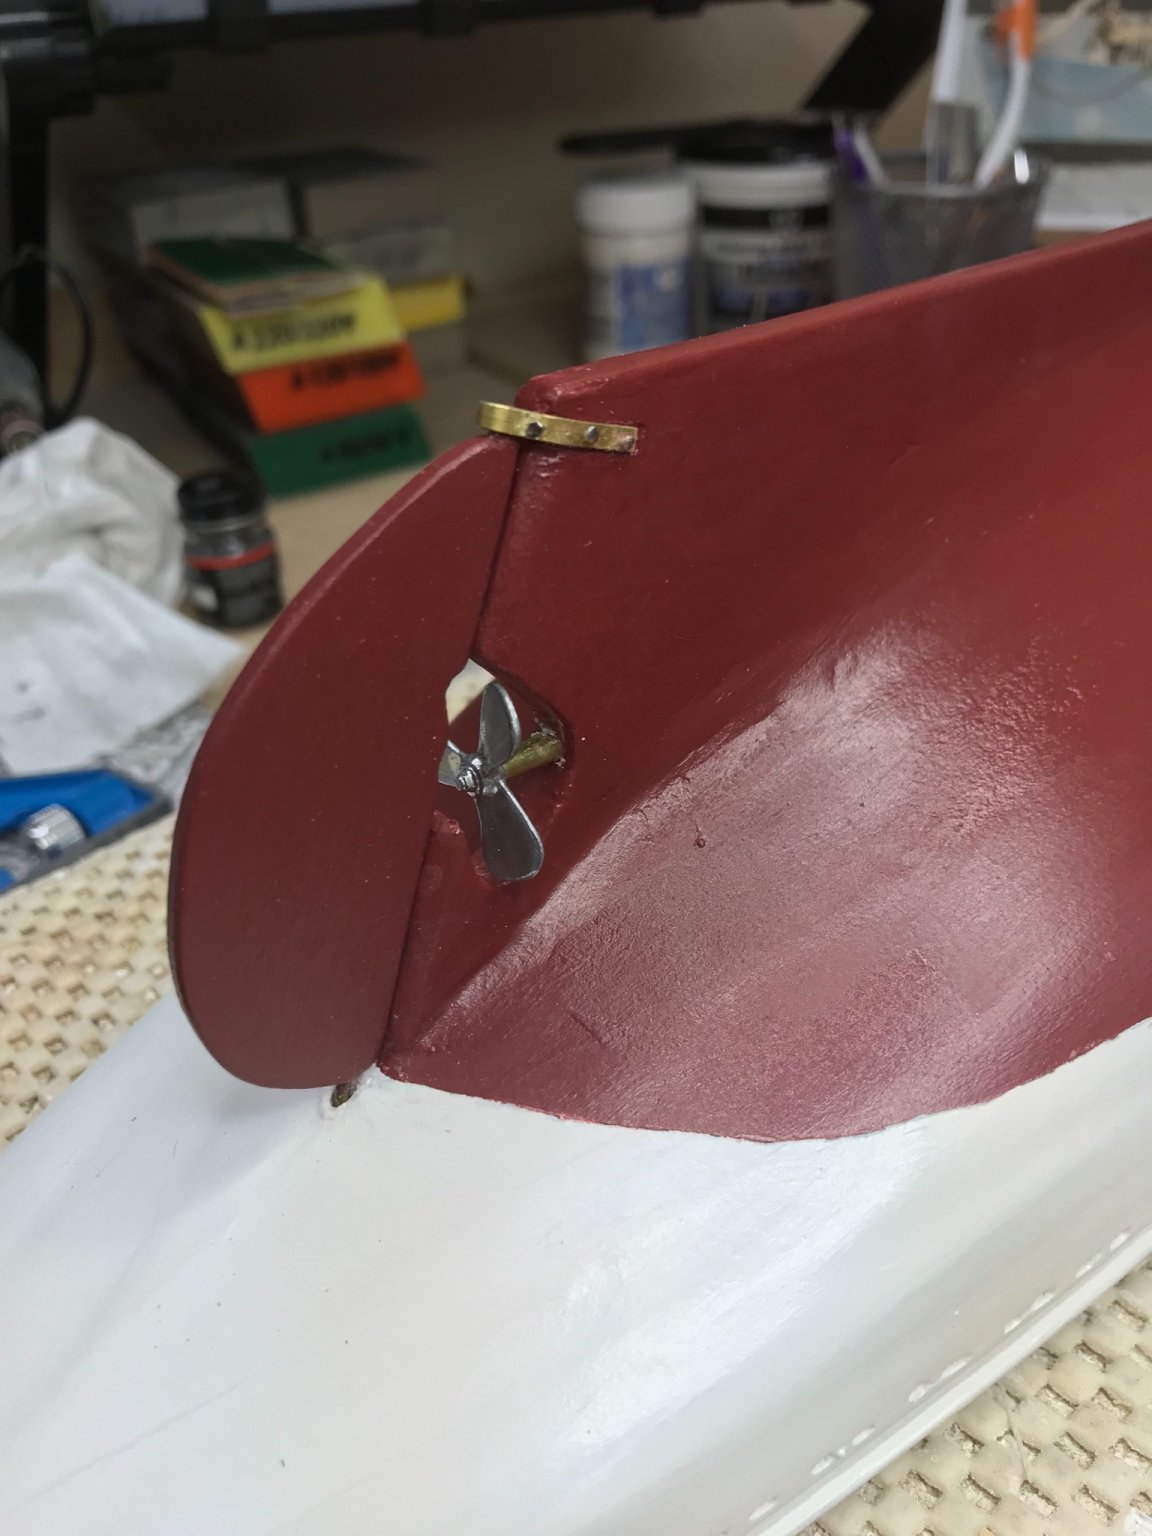
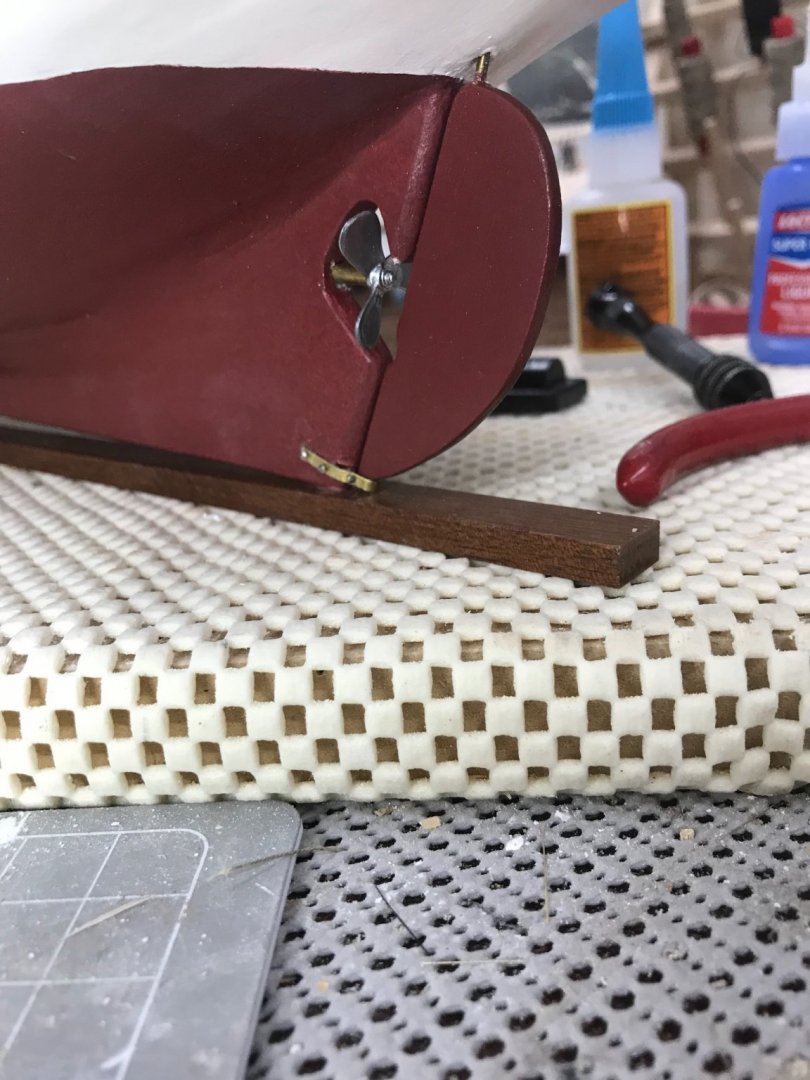
Rudder and Propeller… Onwards… Next up chainplate and lower deadeye fittings.


- 127 replies
-
- 7
-
-
- Bowdoin
- Arctic Exploration
- (and 3 more)
-
Wow! She is beautiful! Your work has been an inspiration. Looking forward to seeing your building of the Charles W Morgan. Congratulations on finishing. 👍
-
Update on the paint and sanding. Getting there… 🍻


- 127 replies
-
- 5
-
-
- Bowdoin
- Arctic Exploration
- (and 3 more)
-
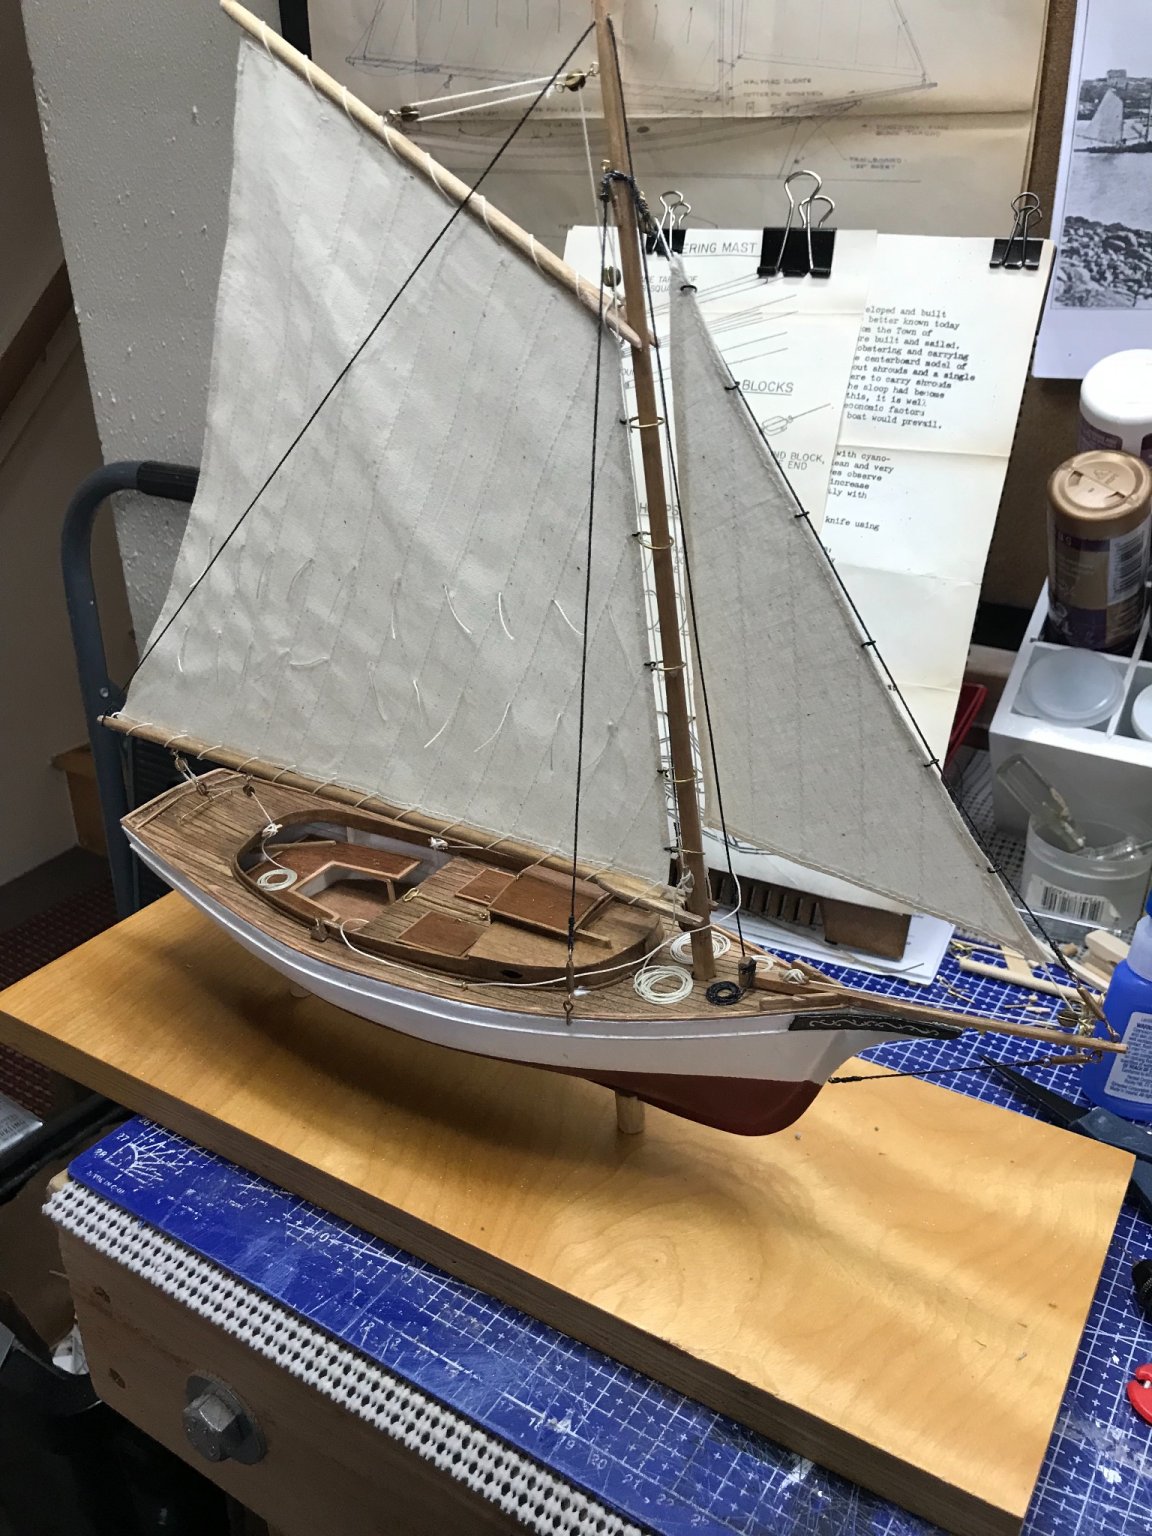
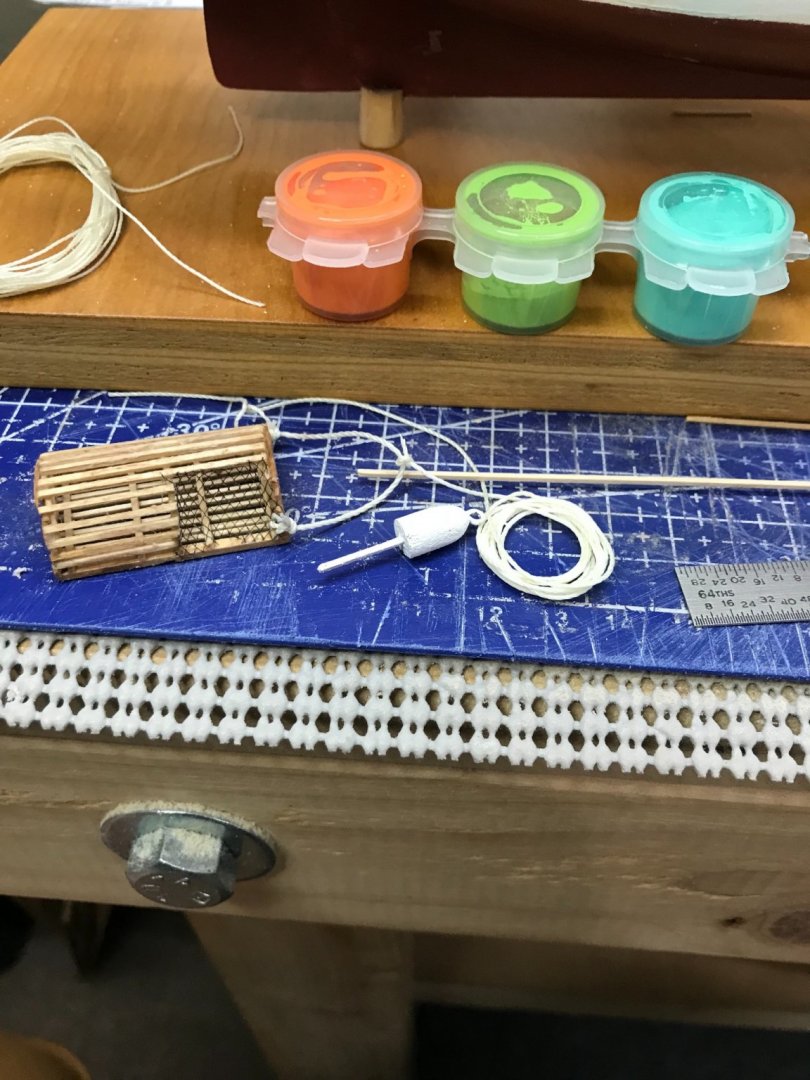
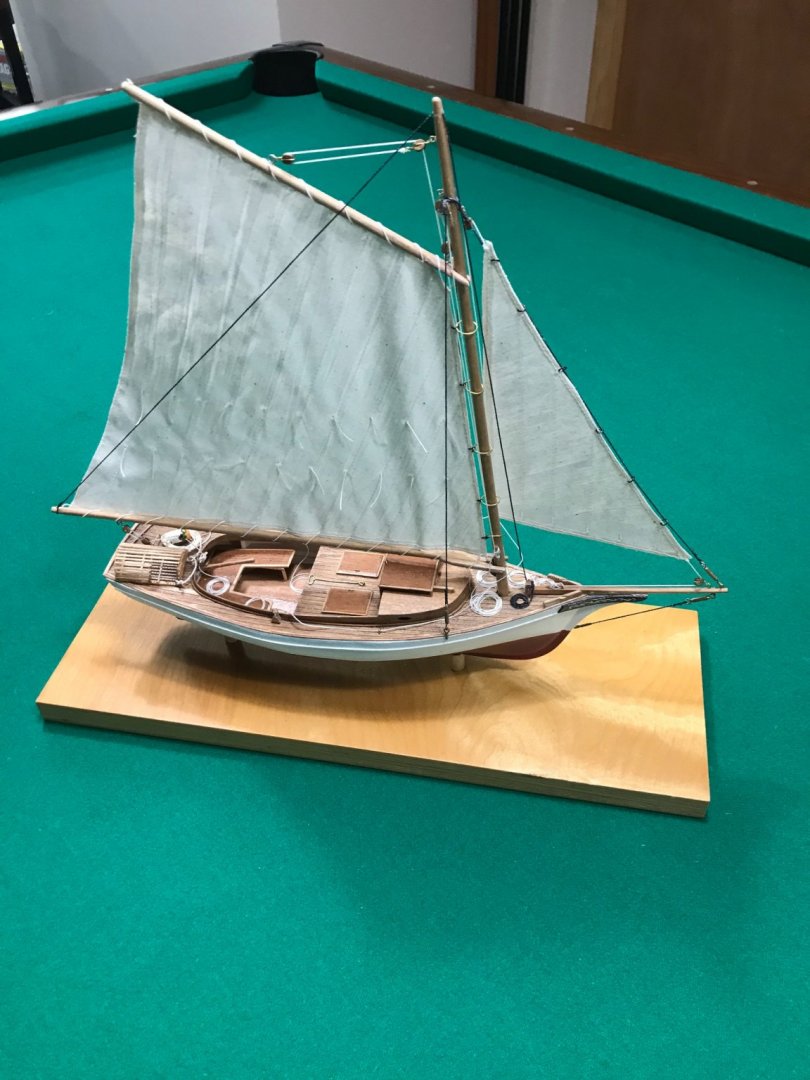
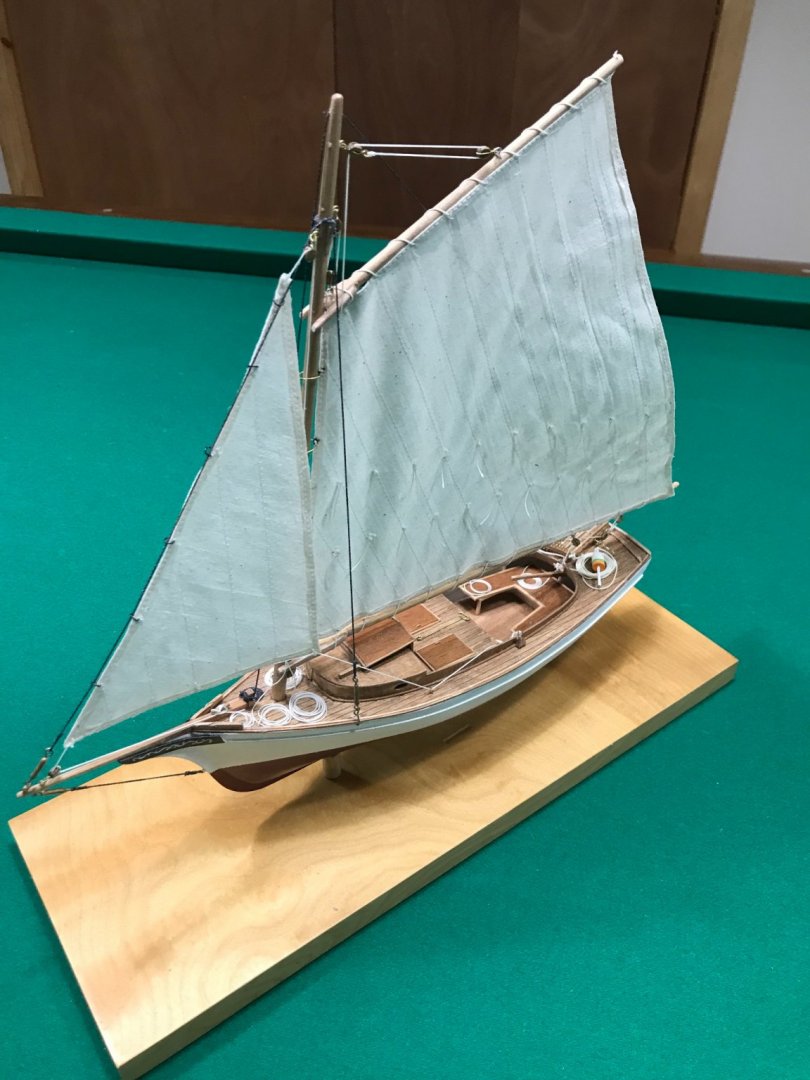
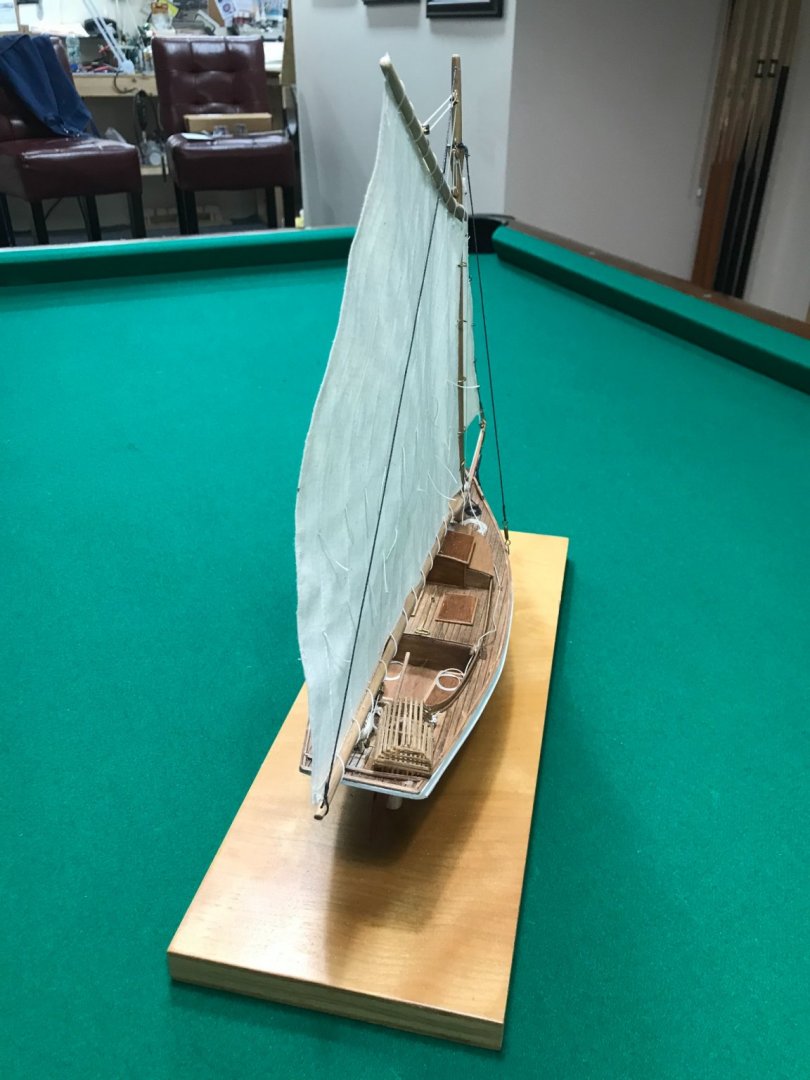
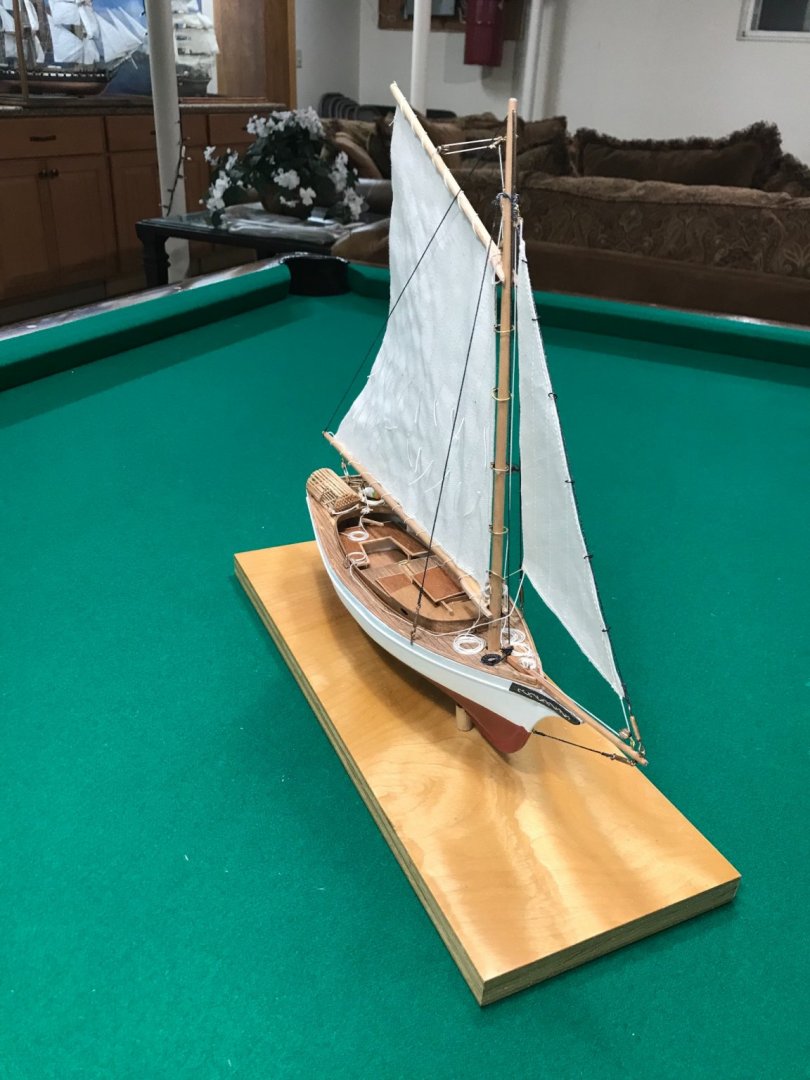
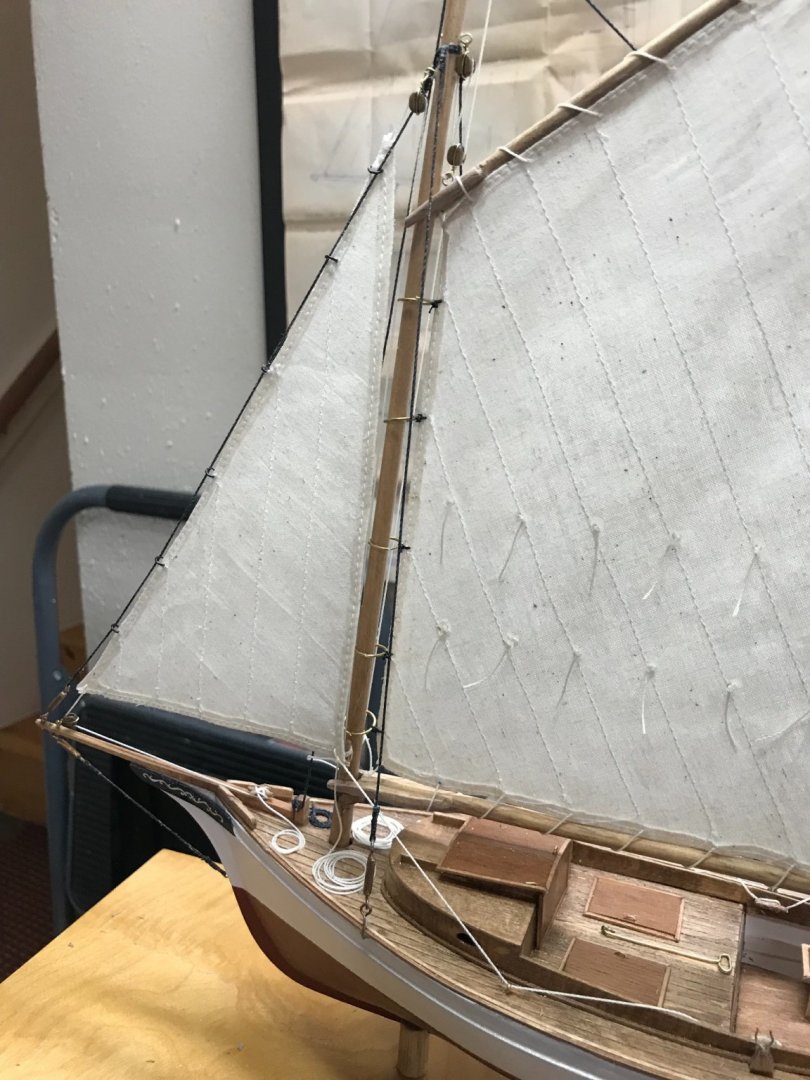
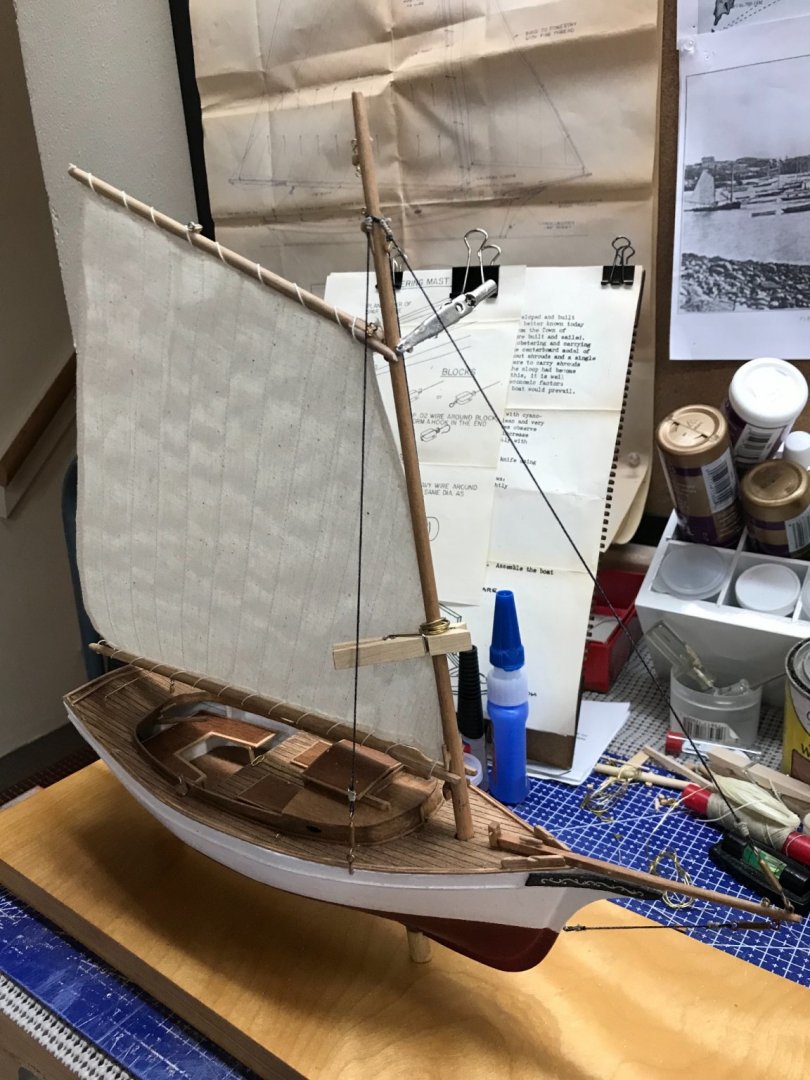
Peak and Throat Halyards corrected. Lobster Trap and Buoy completed. Done… FINISHED. 😎 This has been a fun and interesting kit to build. Another vintage Maine model rescued and completed from the resale world. I brought her back to Maine we’re she should be. Cheers 🍻
- 26 replies
-
- 3
-
-
- Maine
- Laughing Whale
- (and 2 more)
-
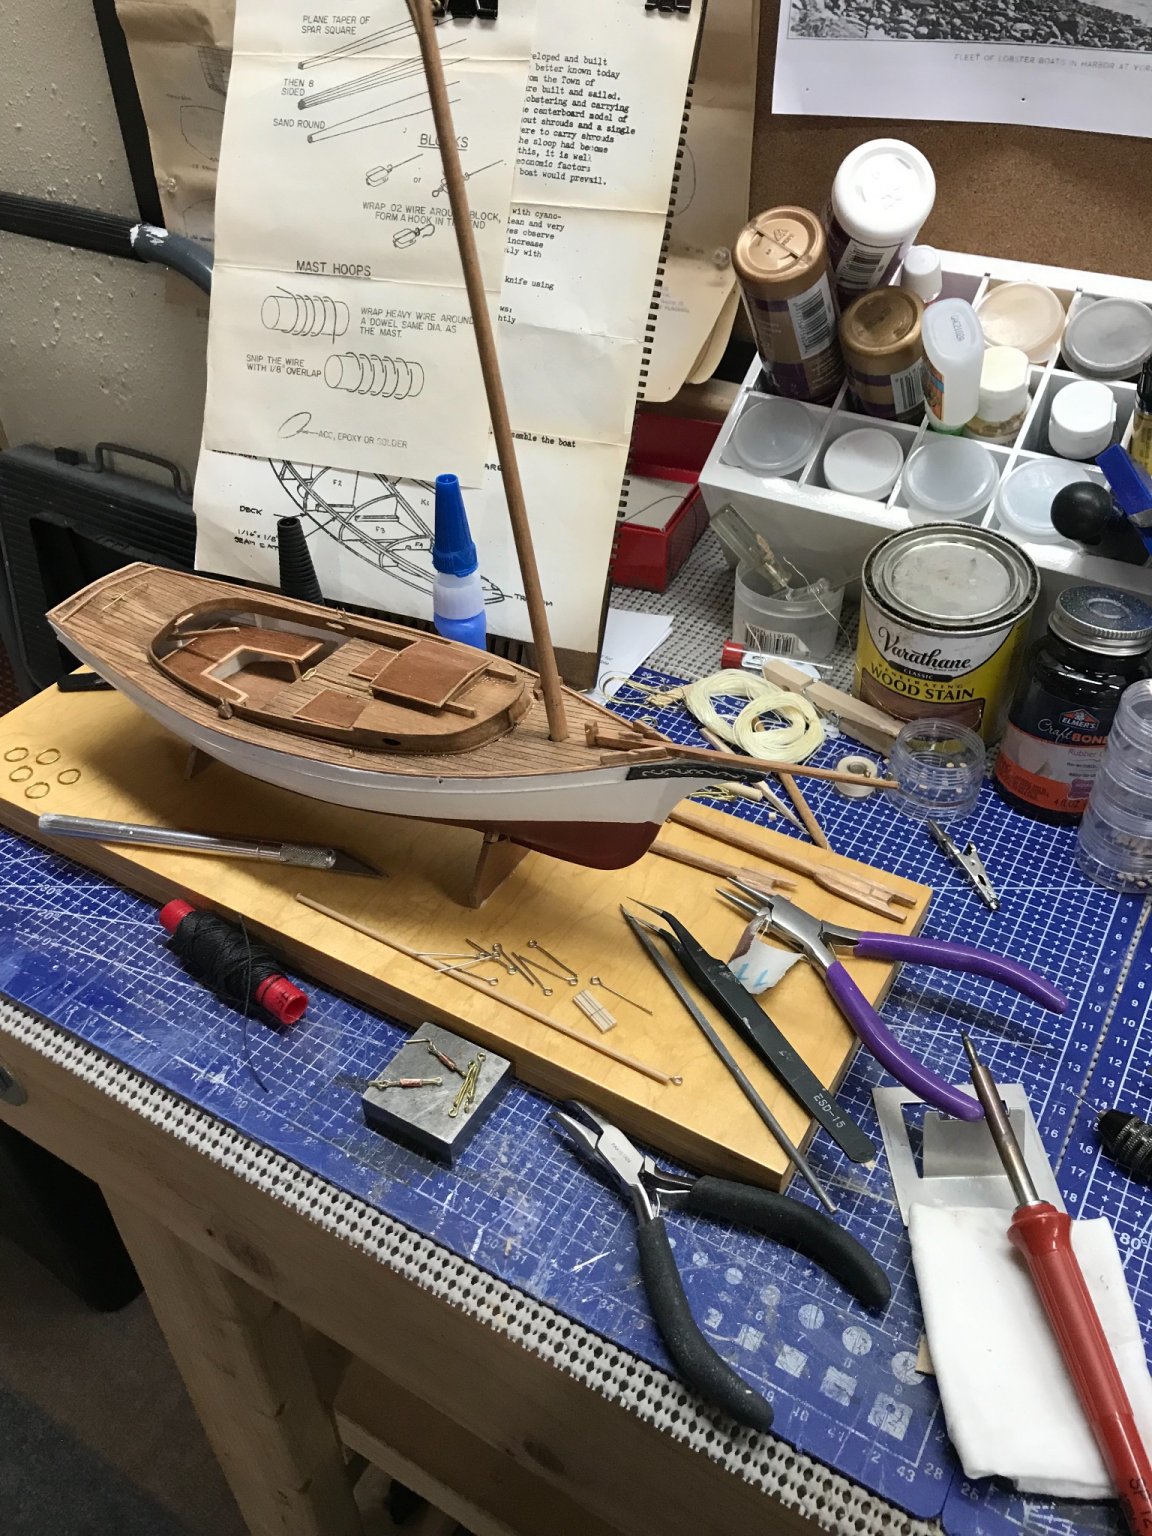
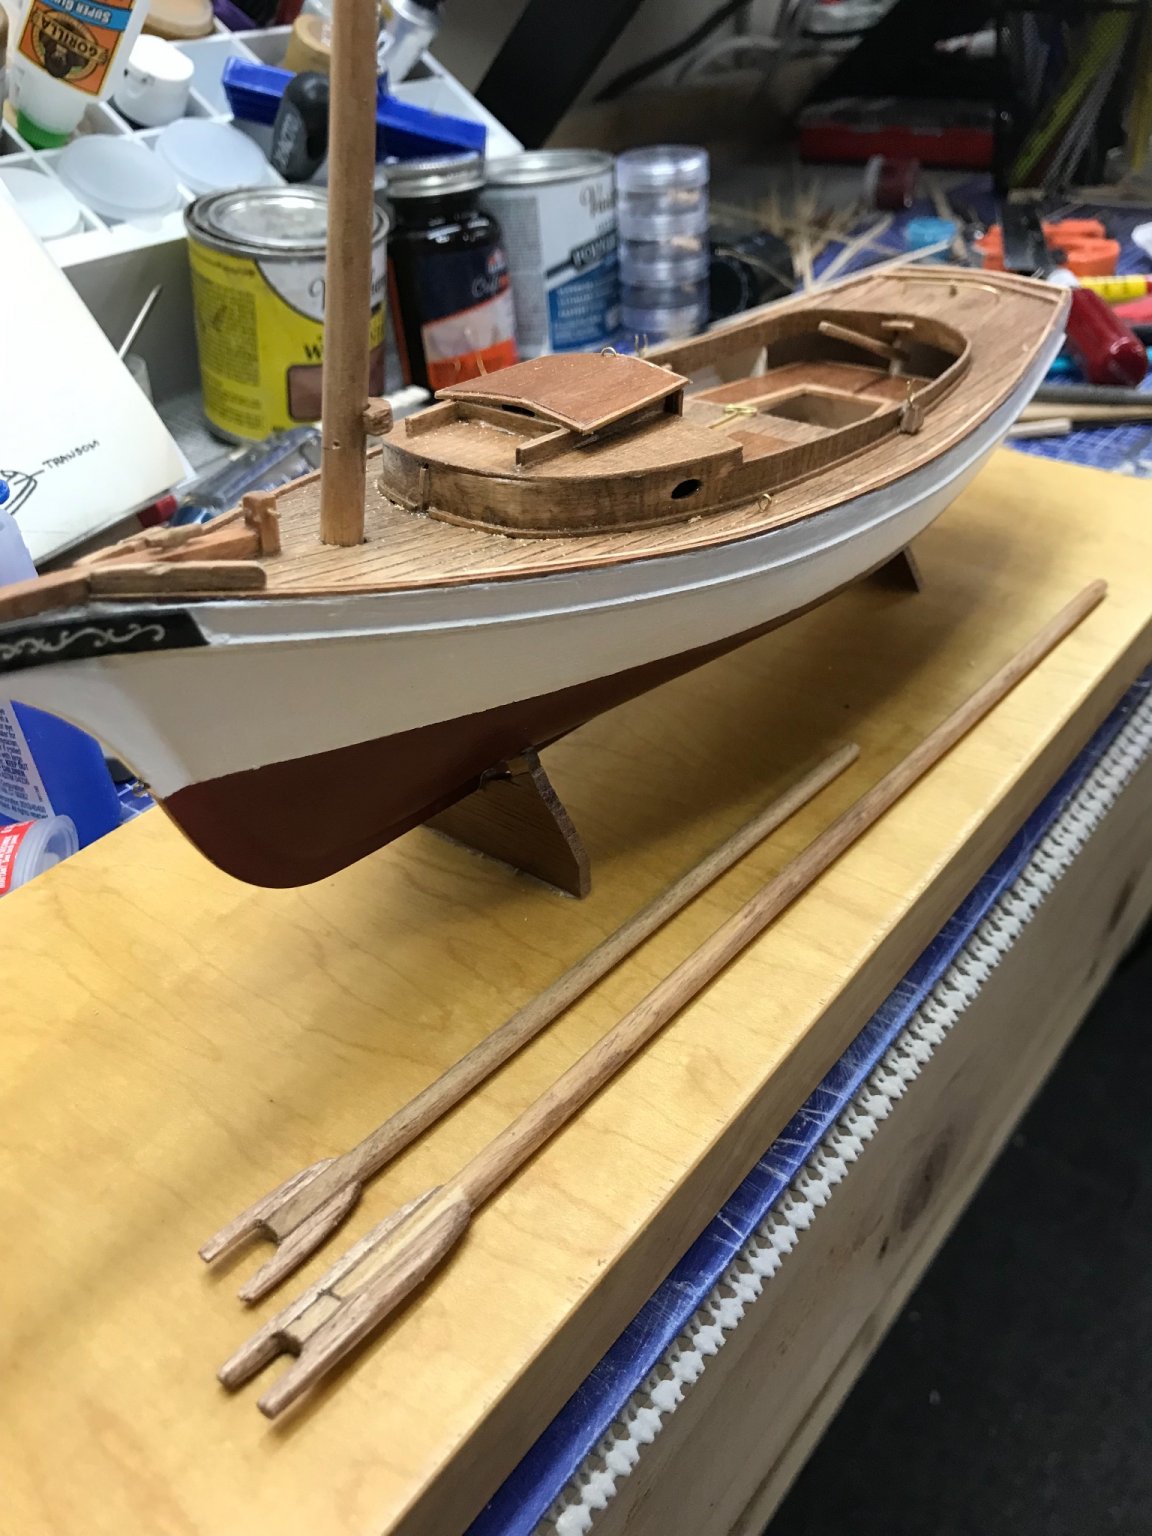
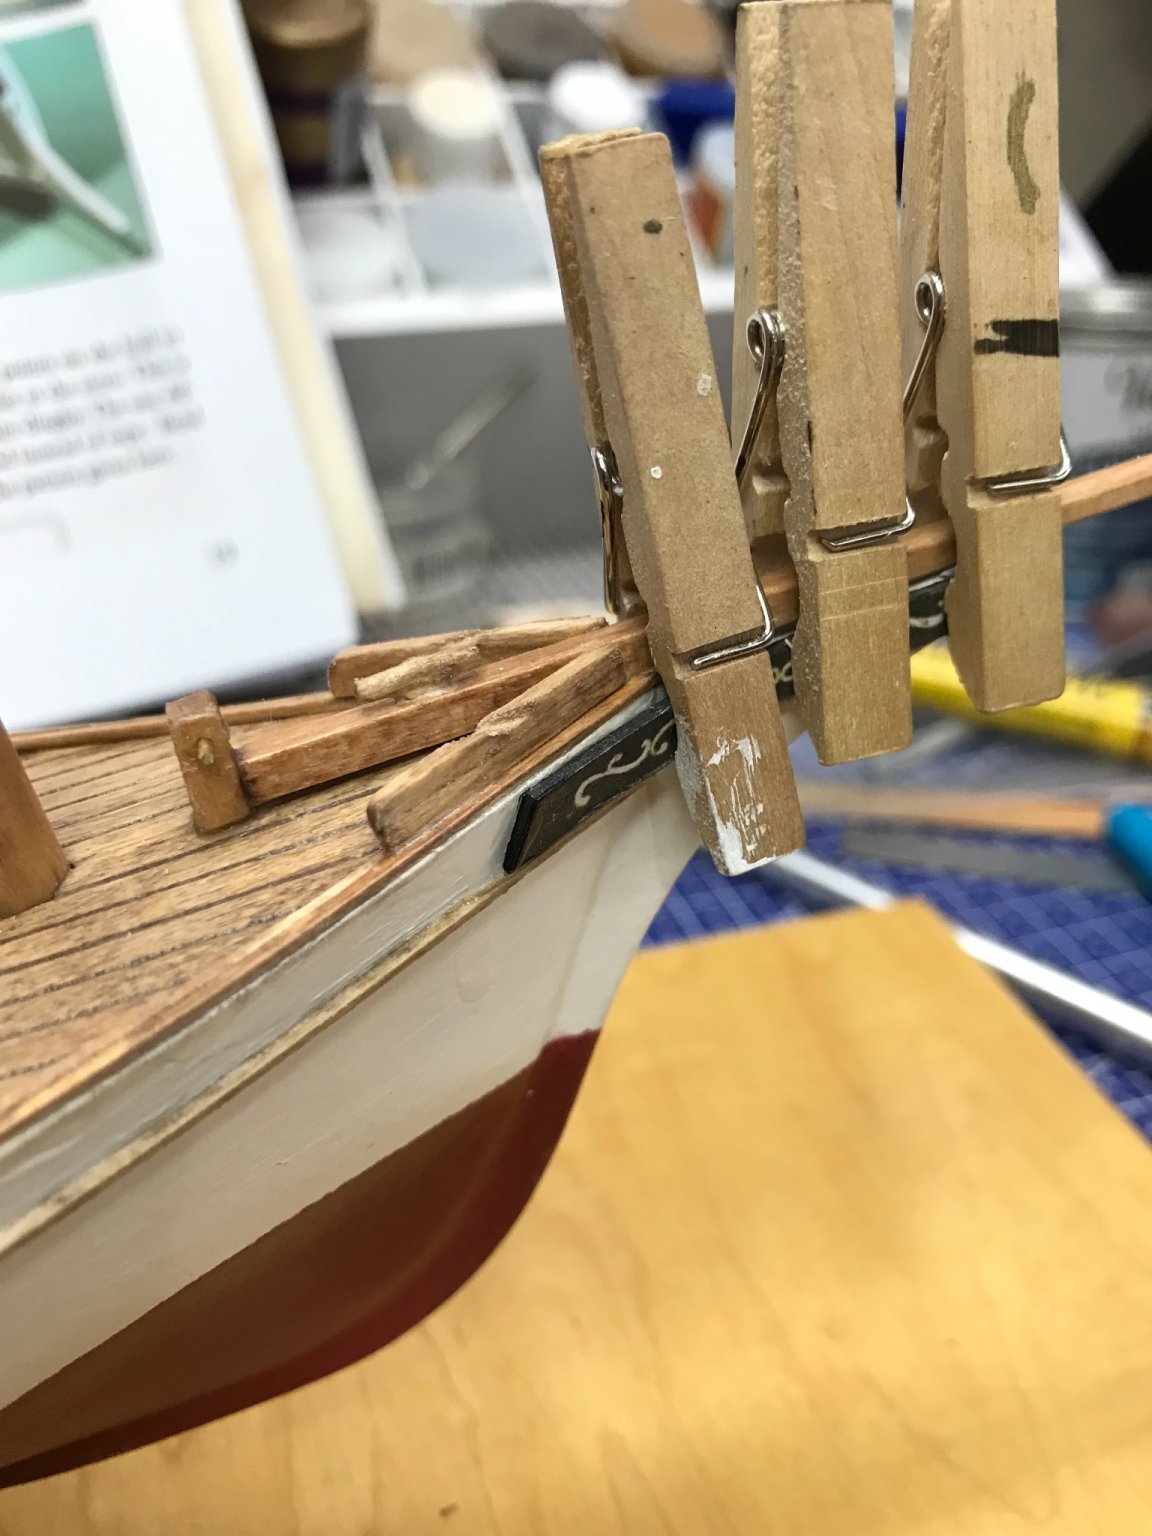
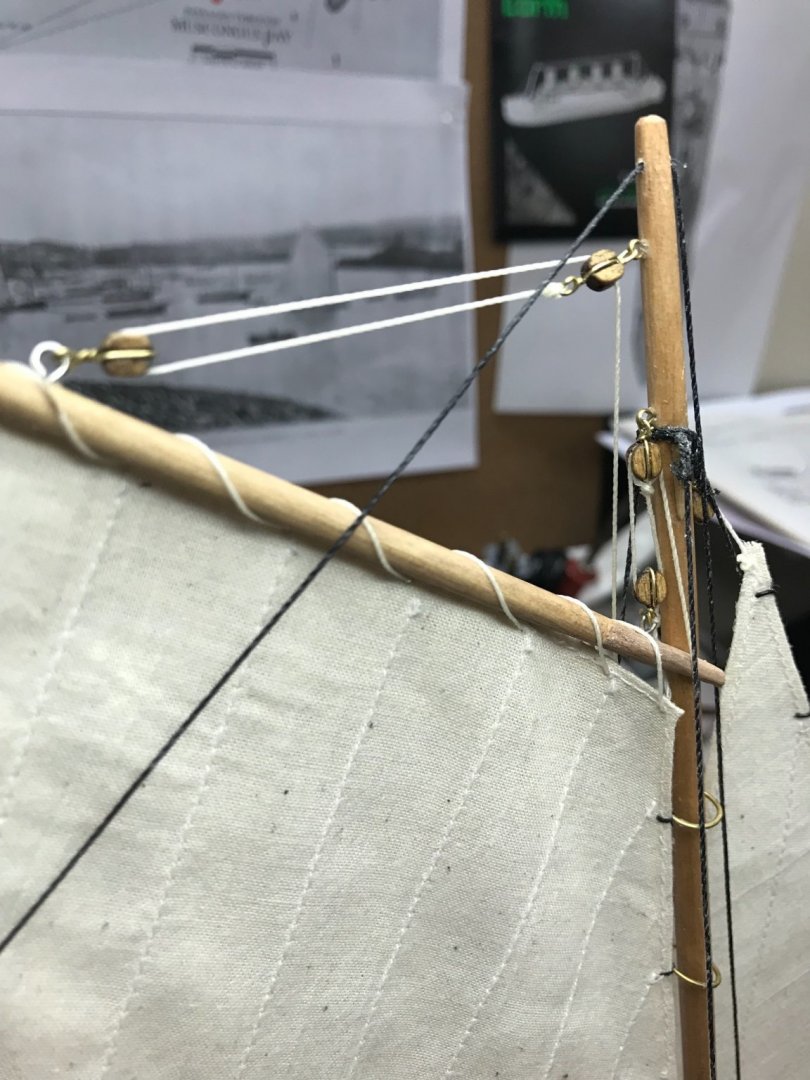
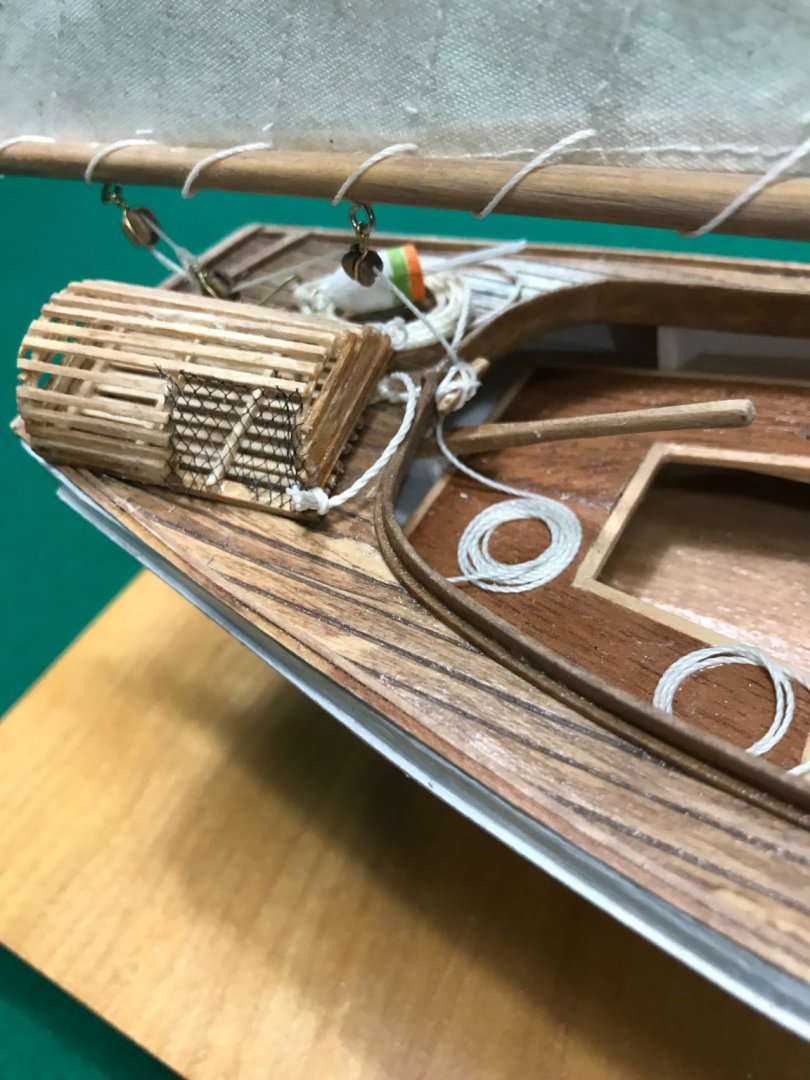
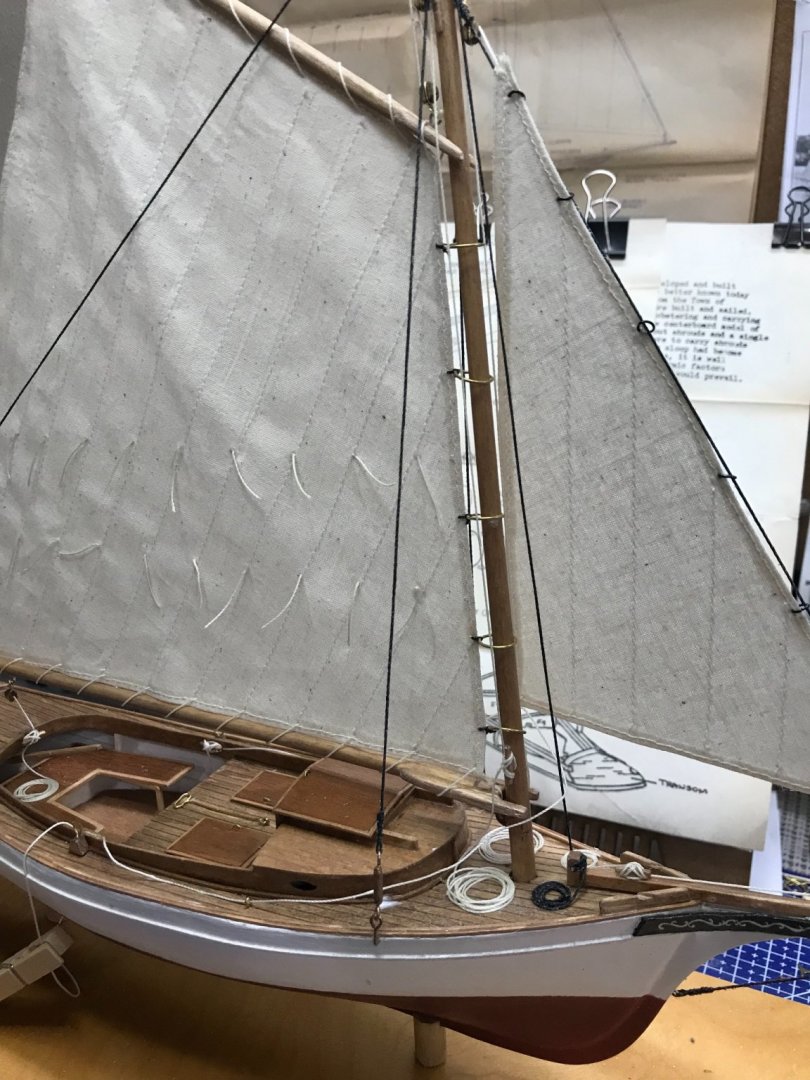
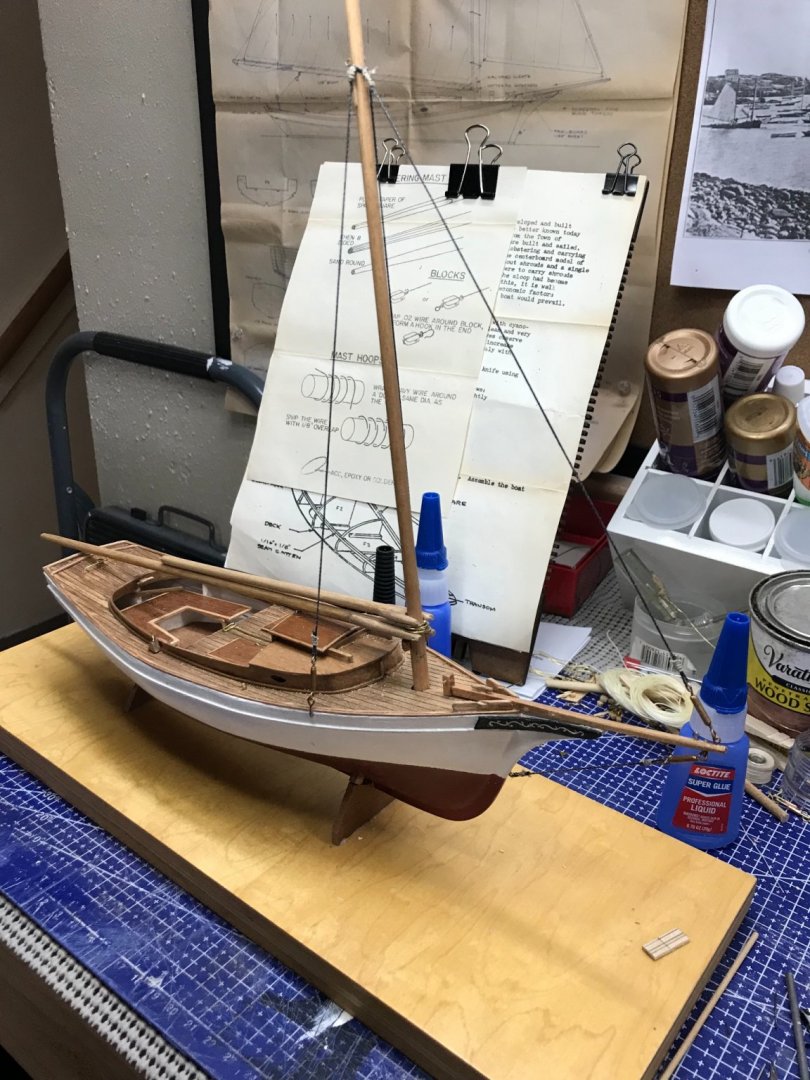
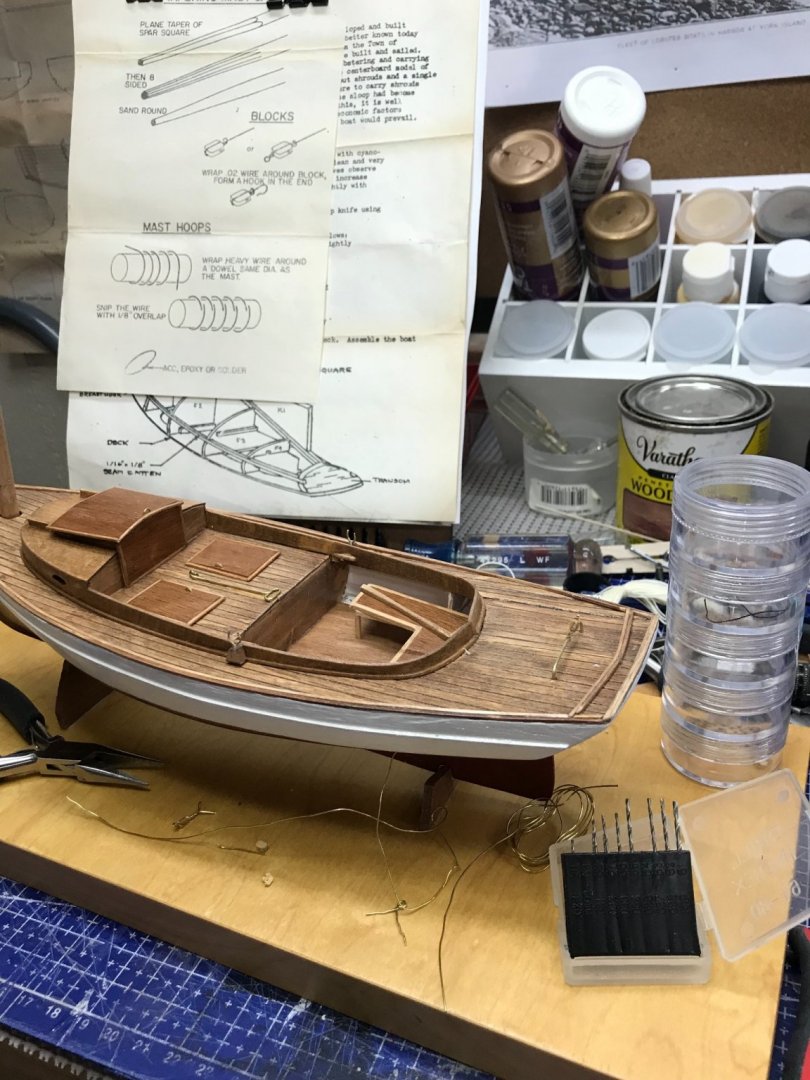
Running Rigging… Main Sheet… Throat Halyard belayed… Peak Halyard run incorrectly with the Throat Halyard. Oops 😬 I will have to correct this. Sometimes I discover my mistakes in the photos I post. 😳 Mast hoops completed… Downhaul for the Jib… Sheet lines for the Jib. Jib Halyard at the top of the mast. Topping Lift installed… Just fixing the Peak Halyard and she will be complete. Also, still need a lobster trap and buoy. She is a working boat. 😎


- 26 replies
-
- 3
-
-
- Maine
- Laughing Whale
- (and 2 more)
-
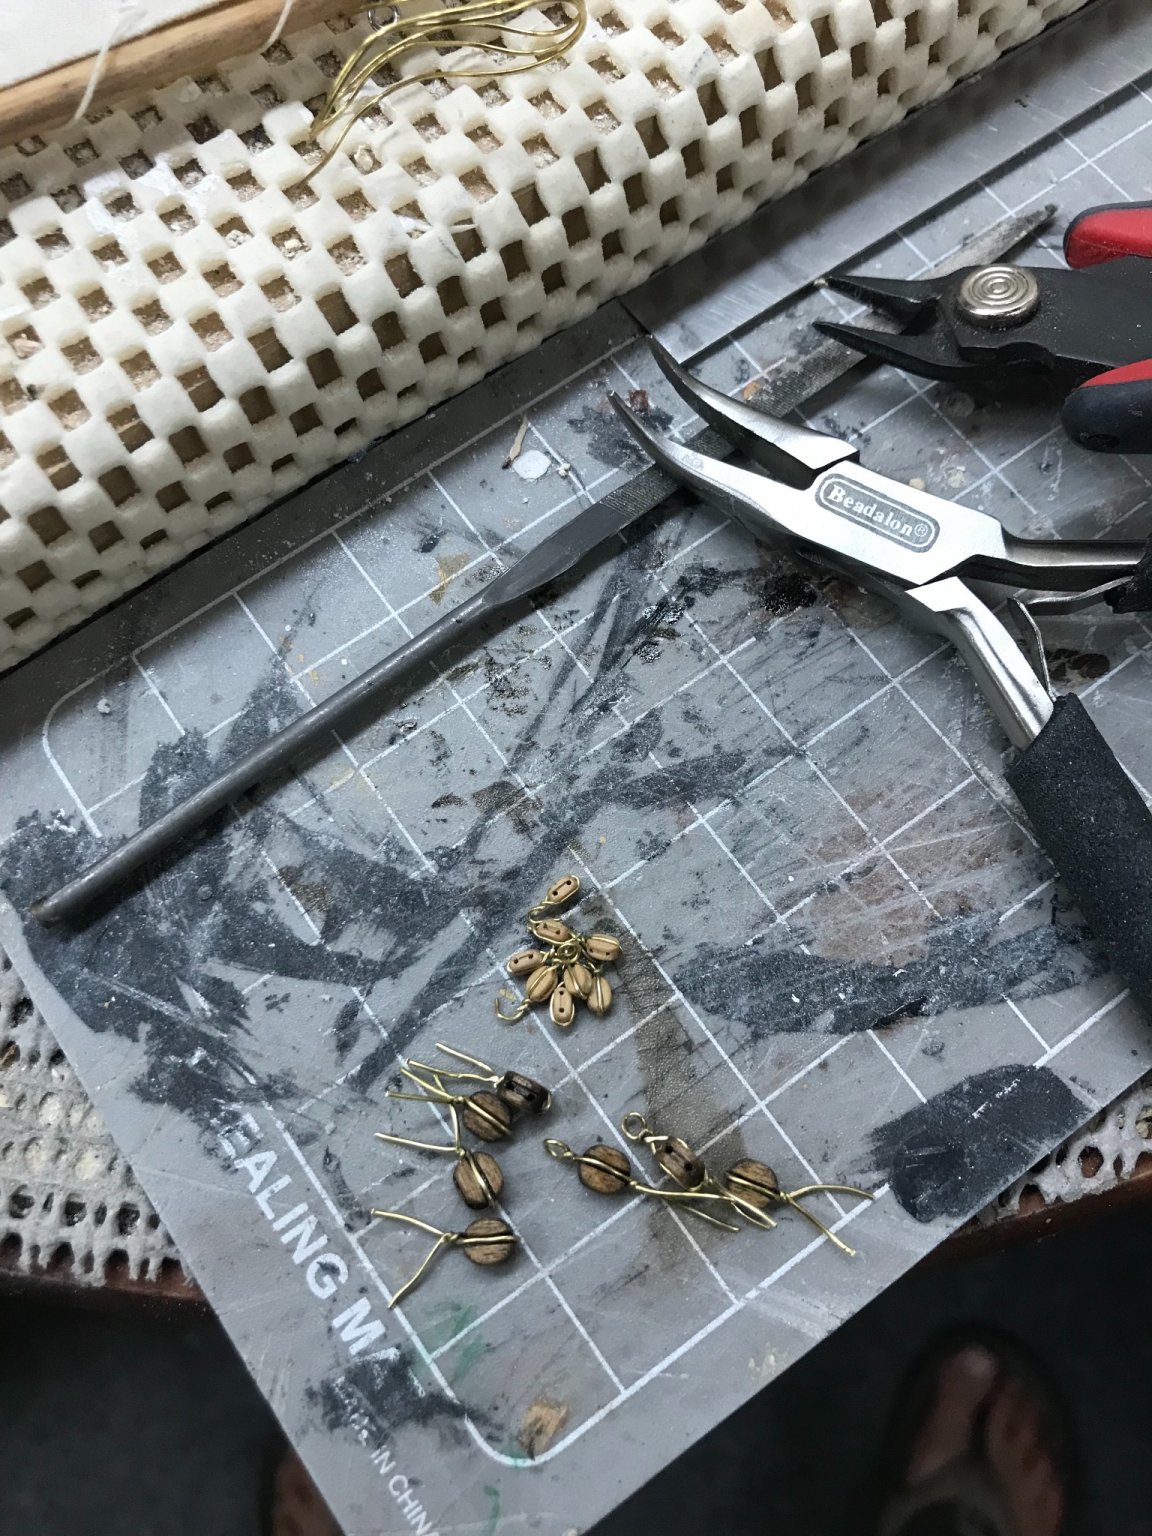
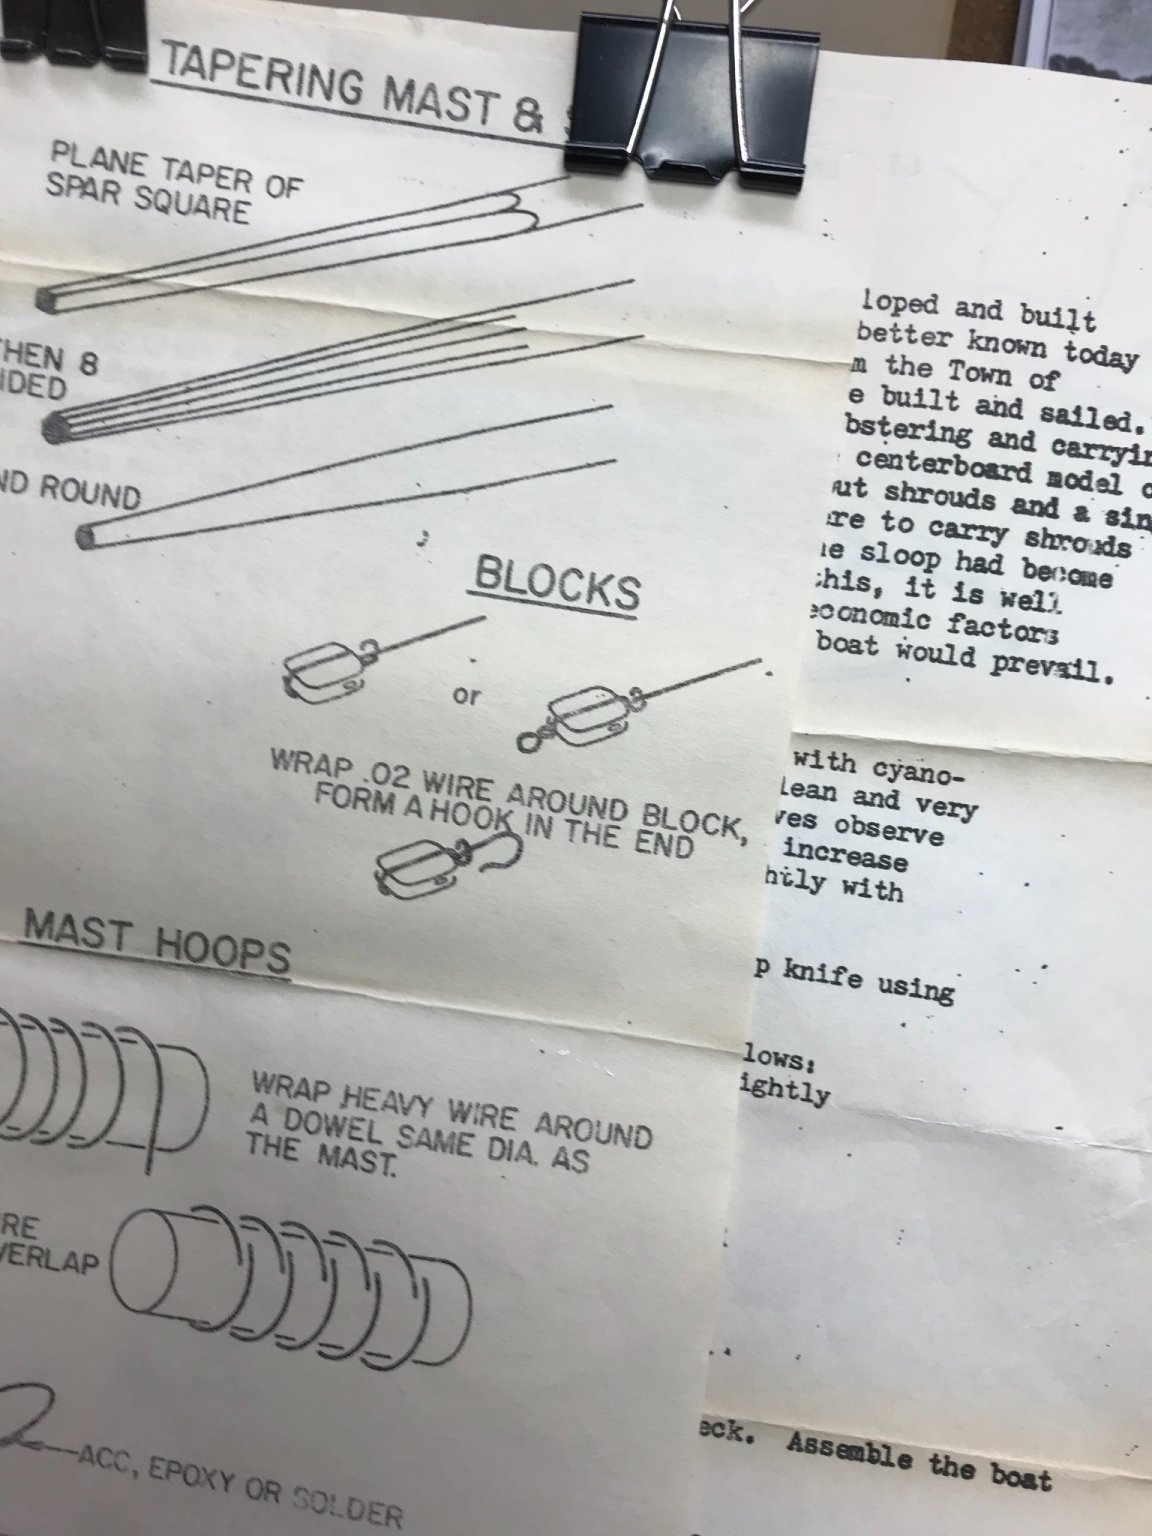
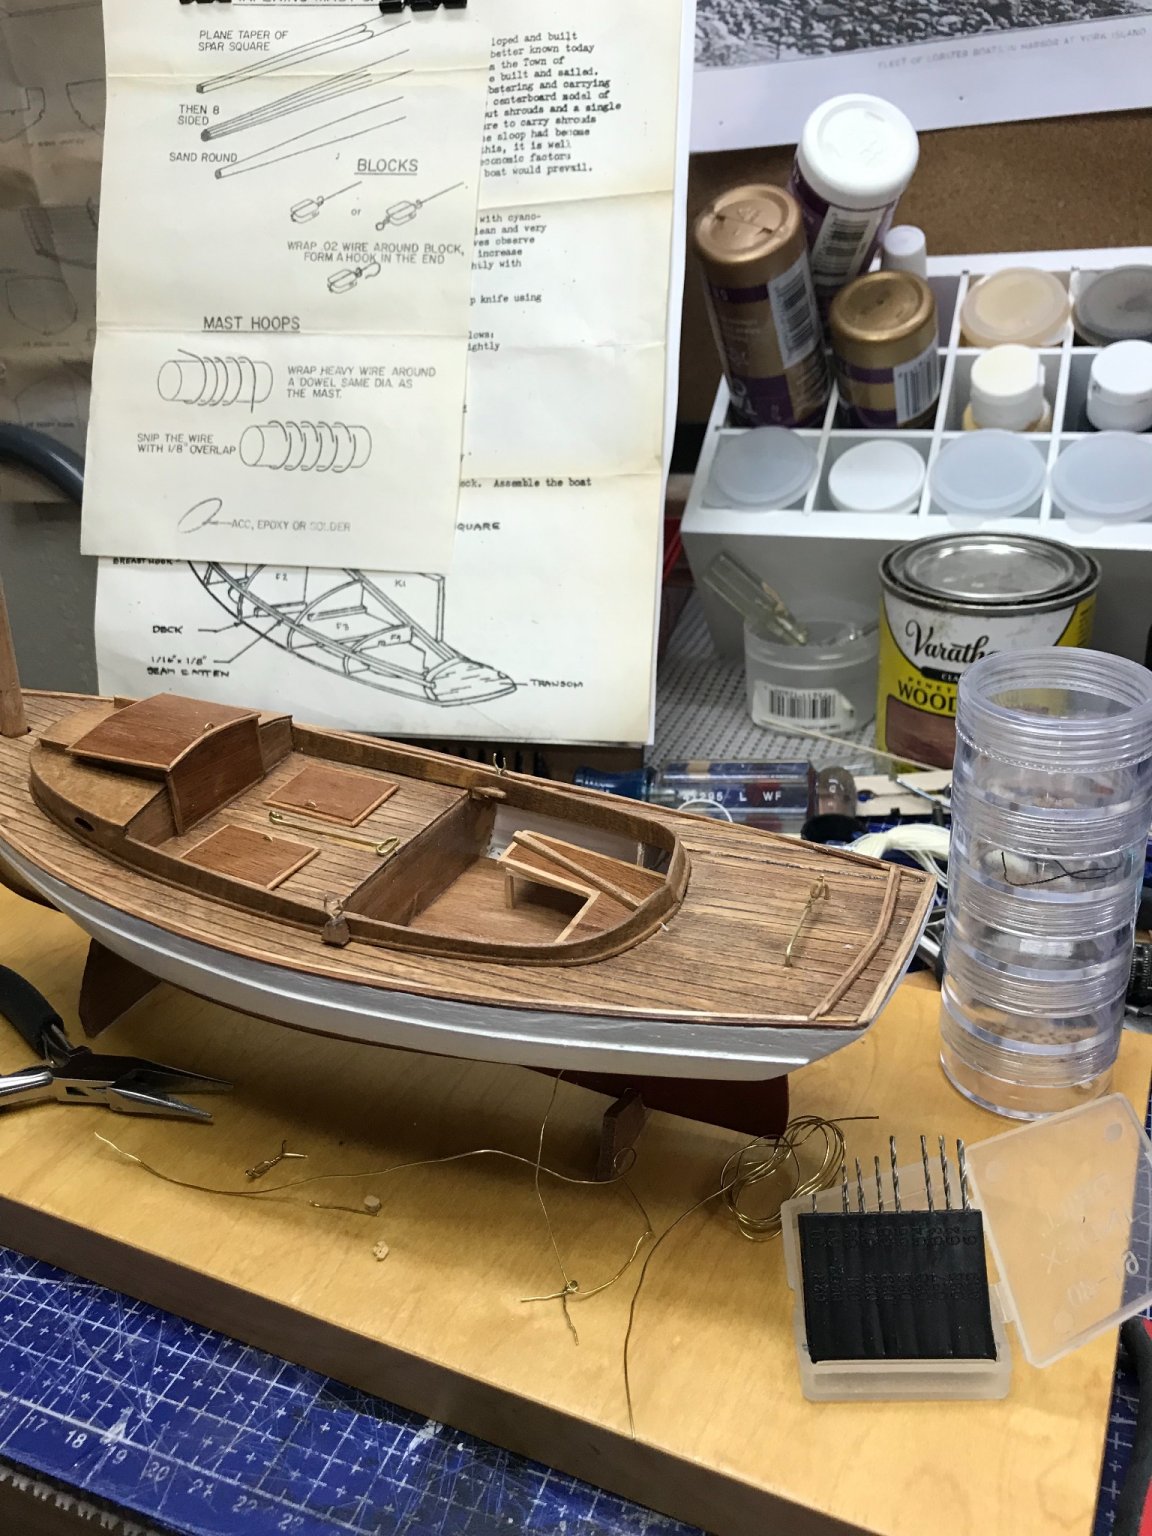
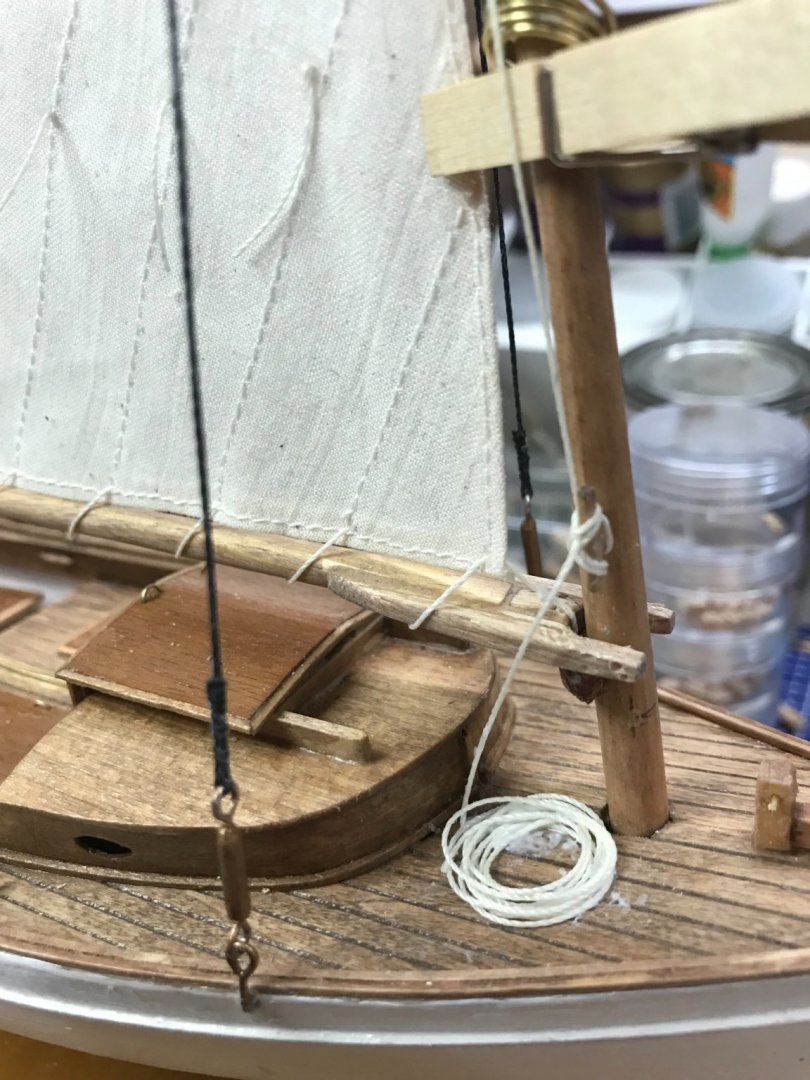
Redo of the Blocks and Standing Rigging. As I observed the Standing Rigging and Block installation, I was. It completely satisfied with the appearance and scale of the blocks and lashing ropes. I decided to upscale the blocks and redo the lashing ropes. If you scroll back to some previous photos, I think you will agree this is much better. I never know when my OCD will kick in LOL 😆 But I think it was worth the redo.


- 26 replies
-
- 3
-
-
- Maine
- Laughing Whale
- (and 2 more)
-
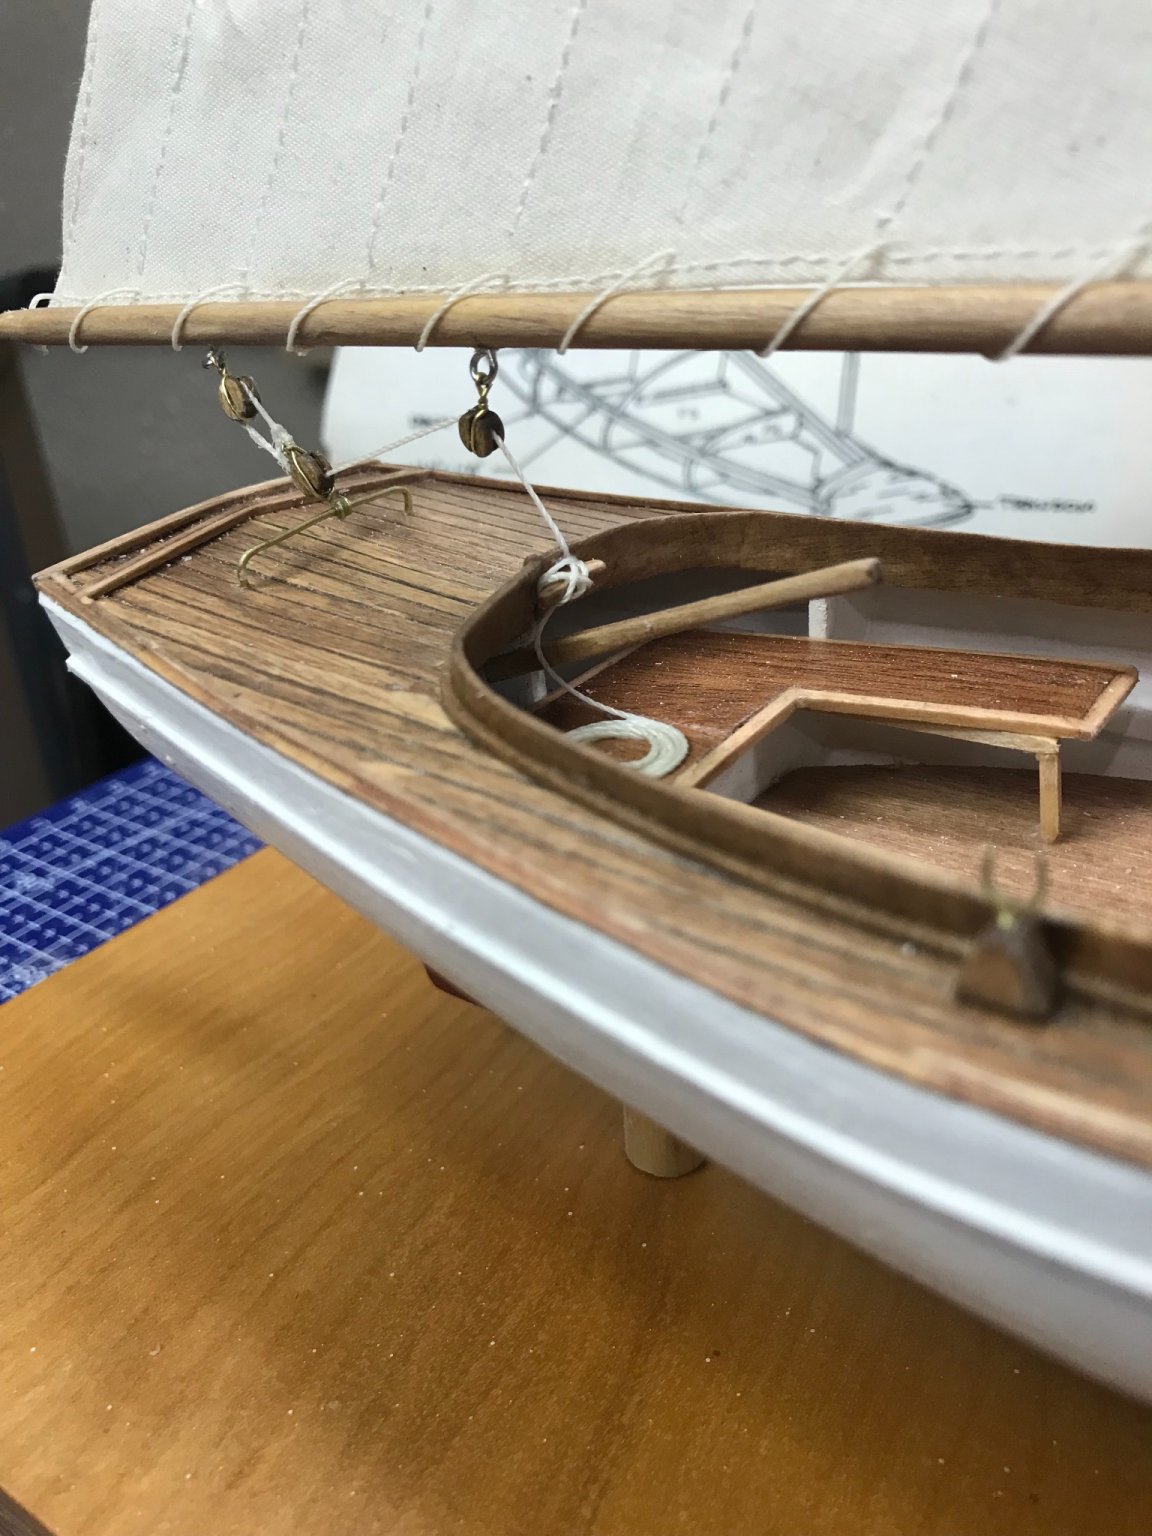
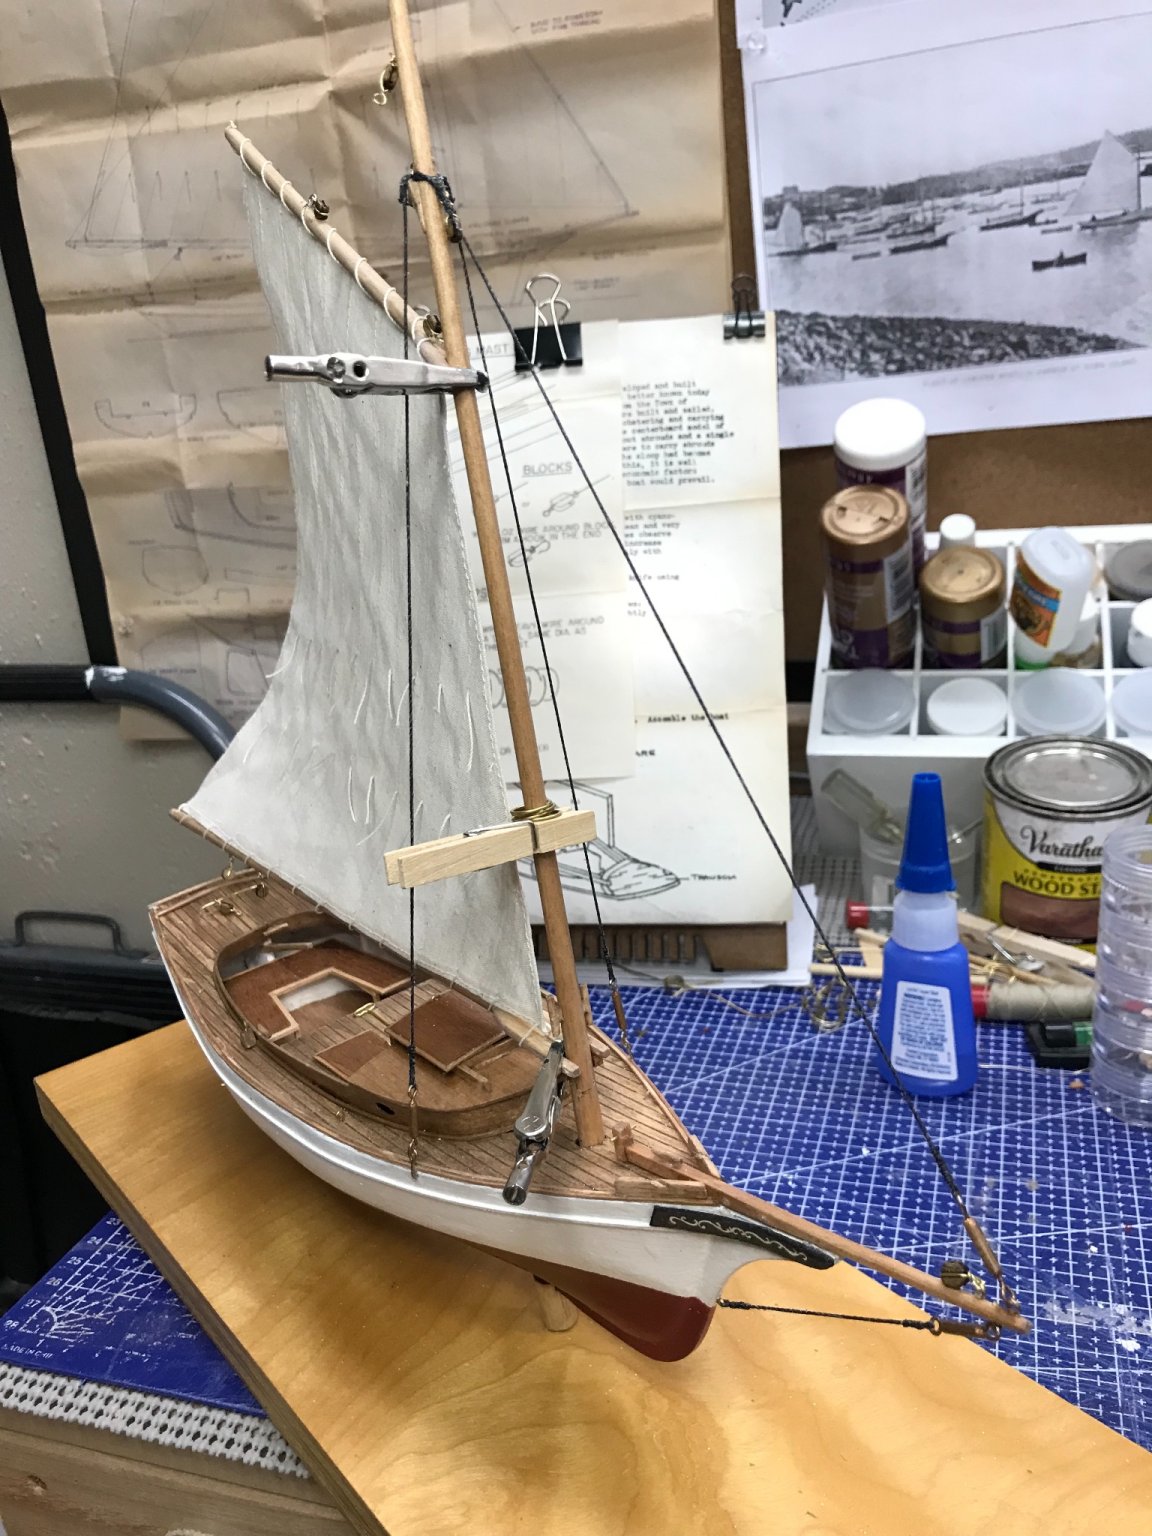
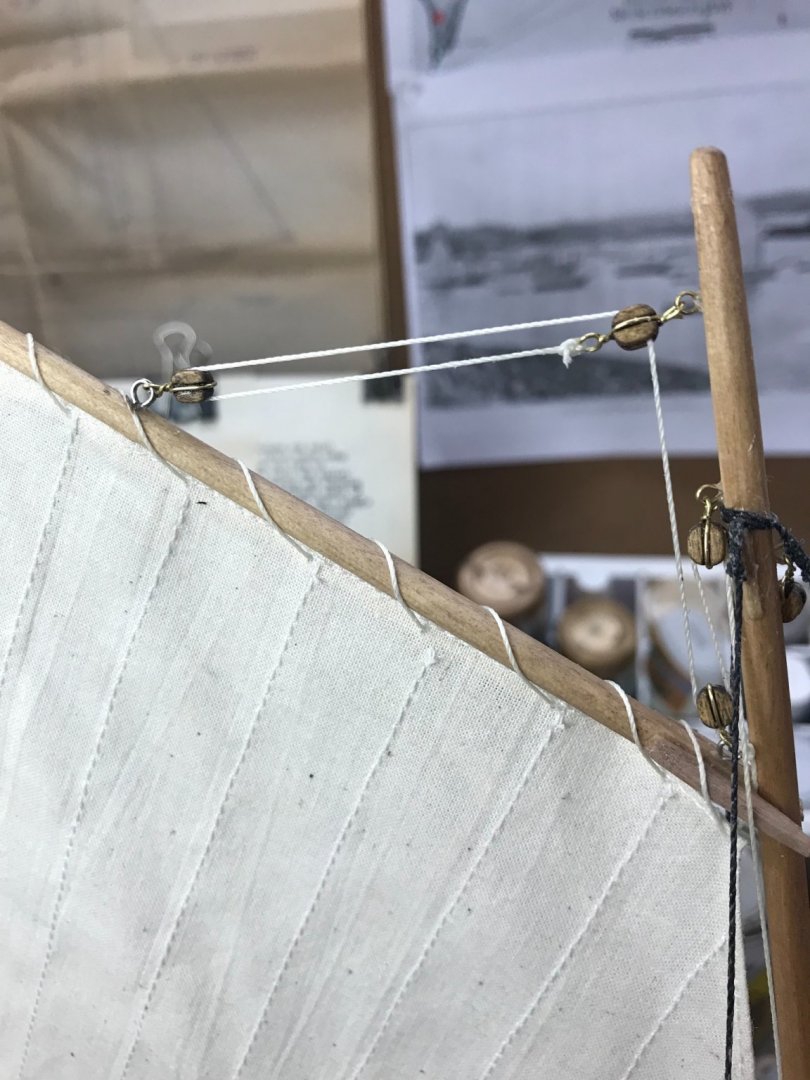
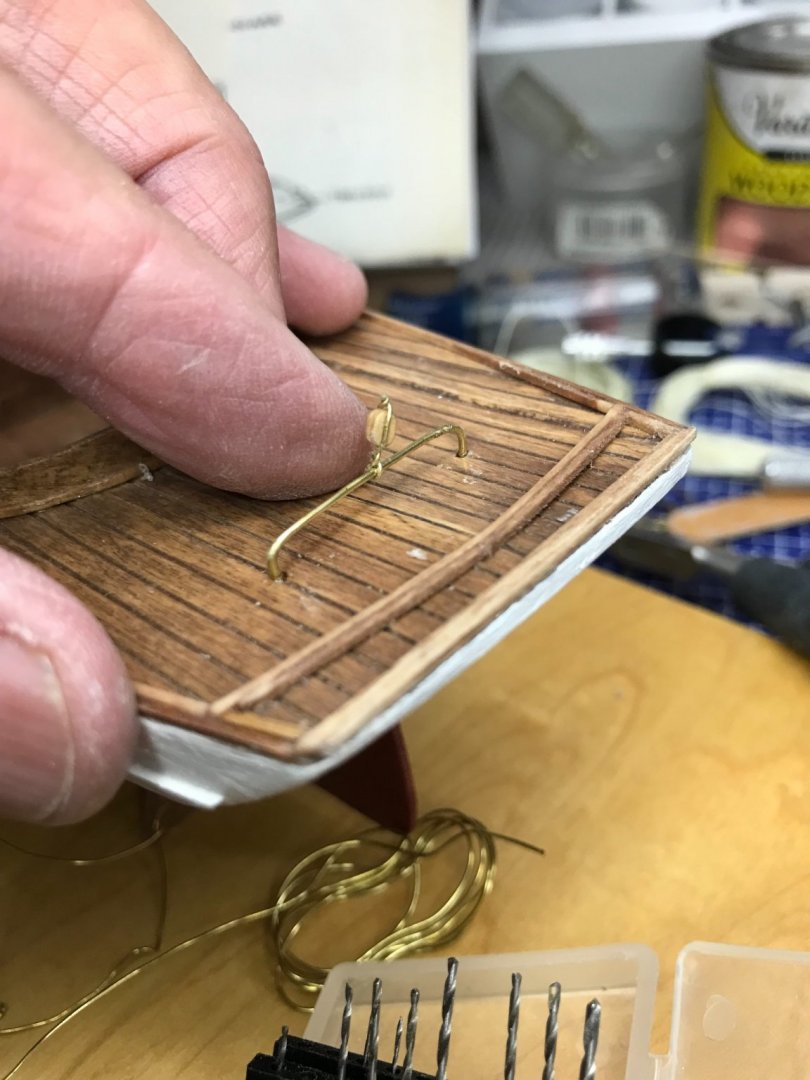
Strapping Blocks… Eyelets and blocks on the Boom and Gaff. Like making jewelry. 😆 Halyard Blocks completed on the Mast. Down haul block on the Bowsprit. Main Sail going on. 🍻

- 26 replies
-
- 2
-
-
- Maine
- Laughing Whale
- (and 2 more)
-
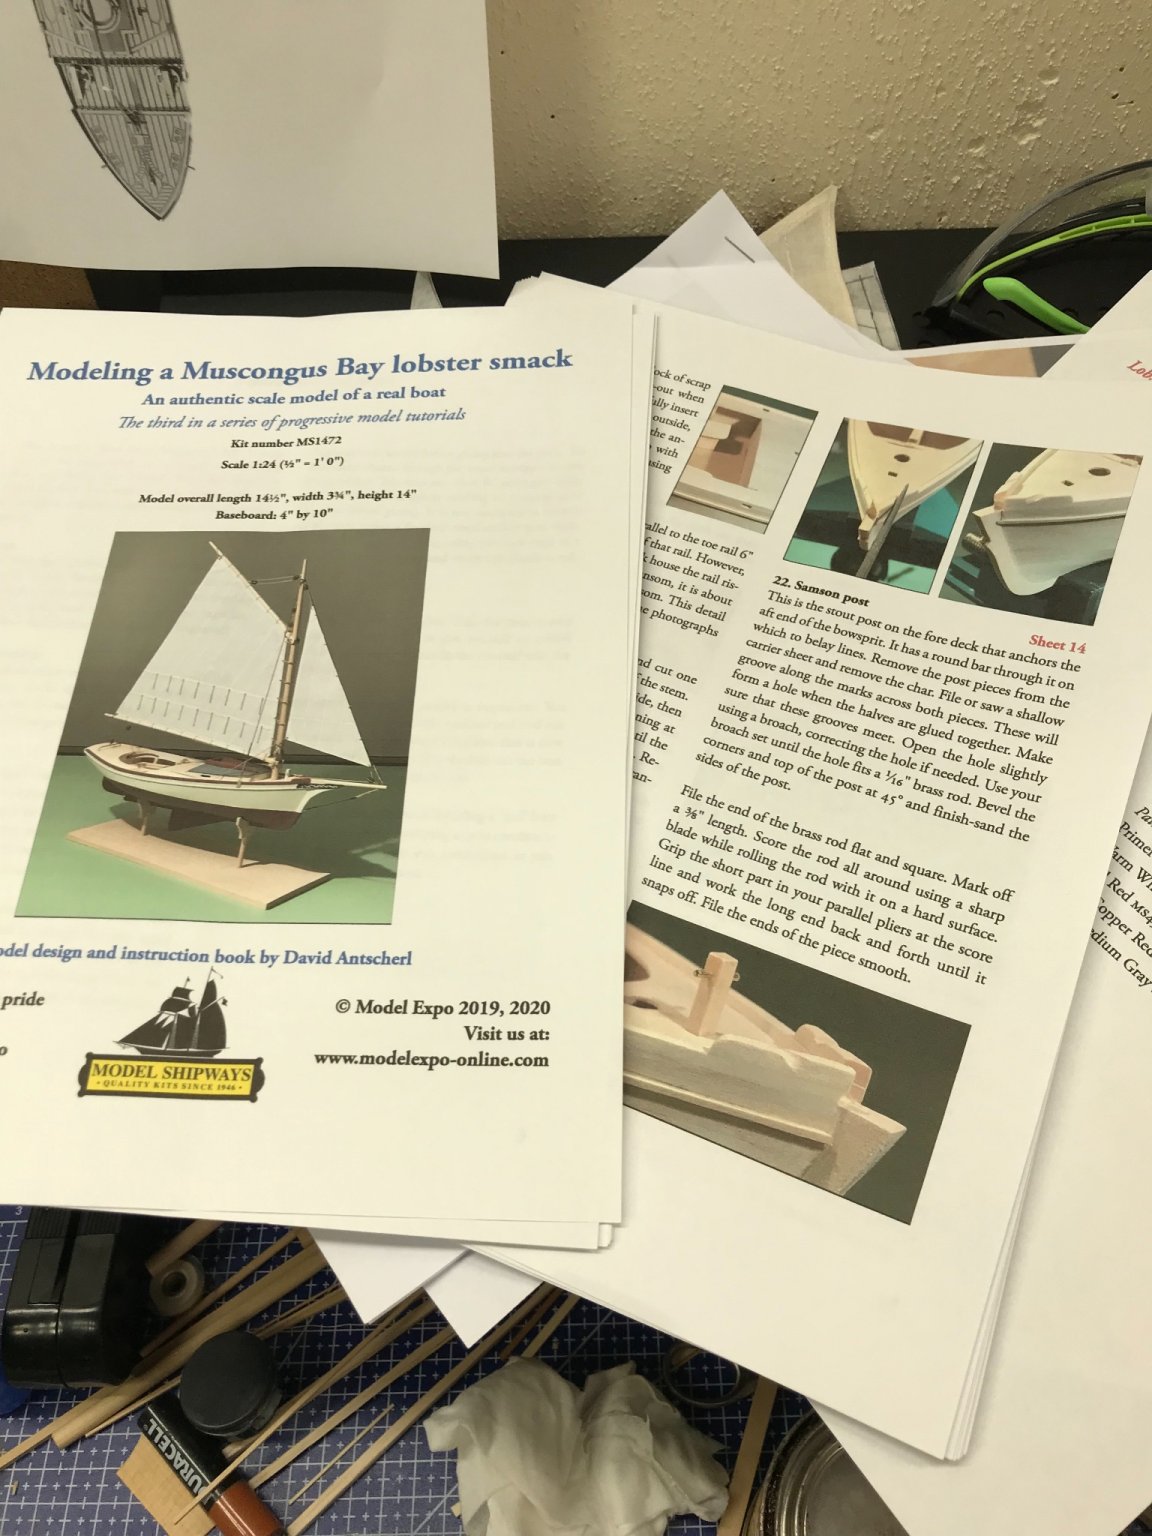
You will have fun… The instruction book is quite an education and very detailed. You will want to read it through and study each step along the way. Excellent kit. 👍 Thanks for your comments
- 104 replies
-
- 1
-
-
- model shipways
- new bedford whaleboat
- (and 1 more)
-
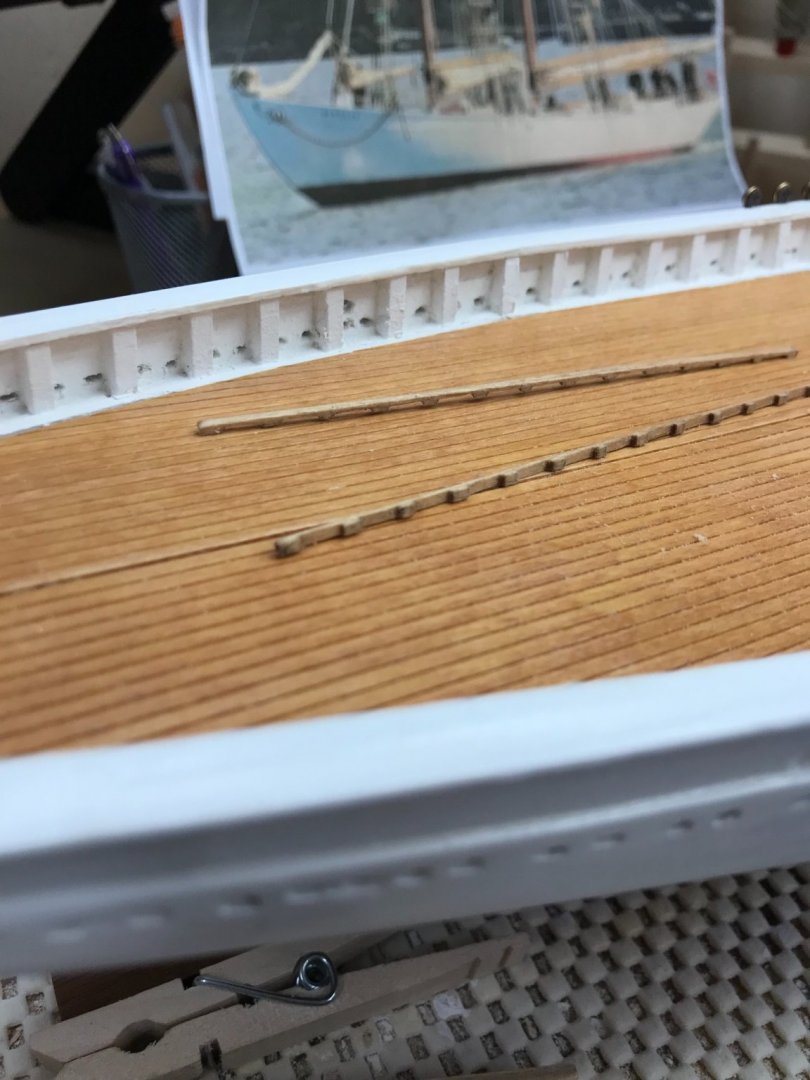
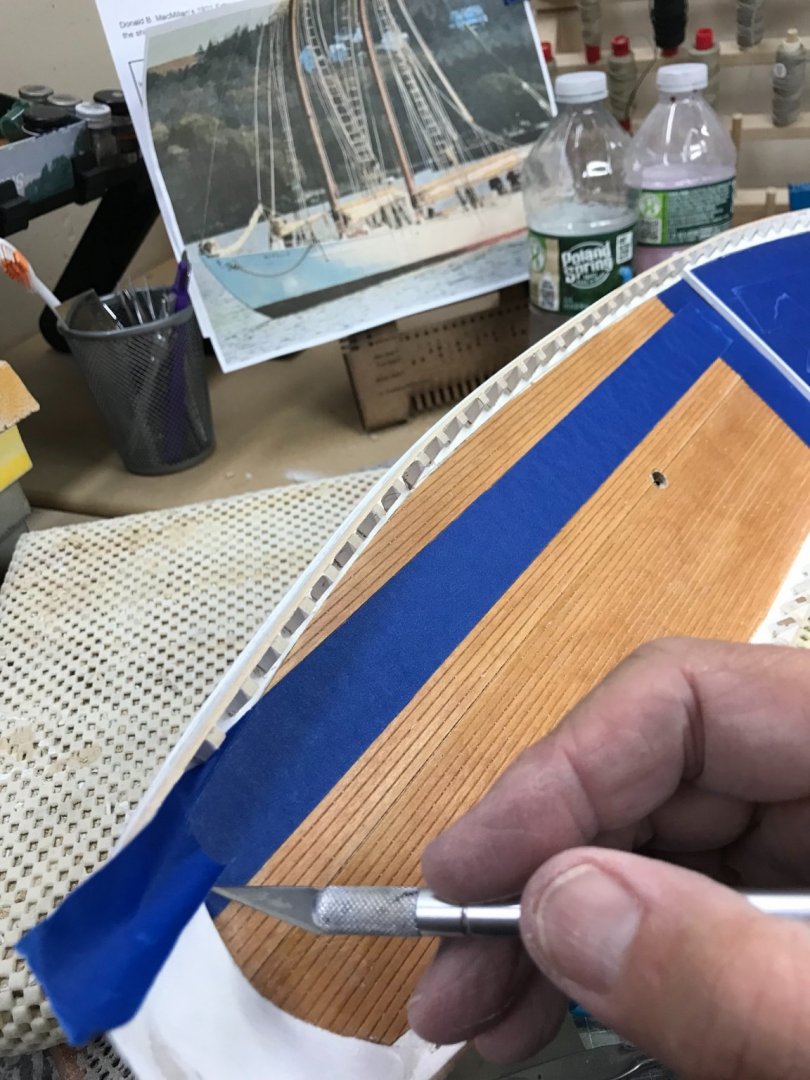
Scuppers continued… Back to those scuppers. still rough but the right number now. I will have to keep filling and layering. Paint to make them right. Onwards… 🍻

- 127 replies
-
- 6
-
-
- Bowdoin
- Arctic Exploration
- (and 3 more)
-
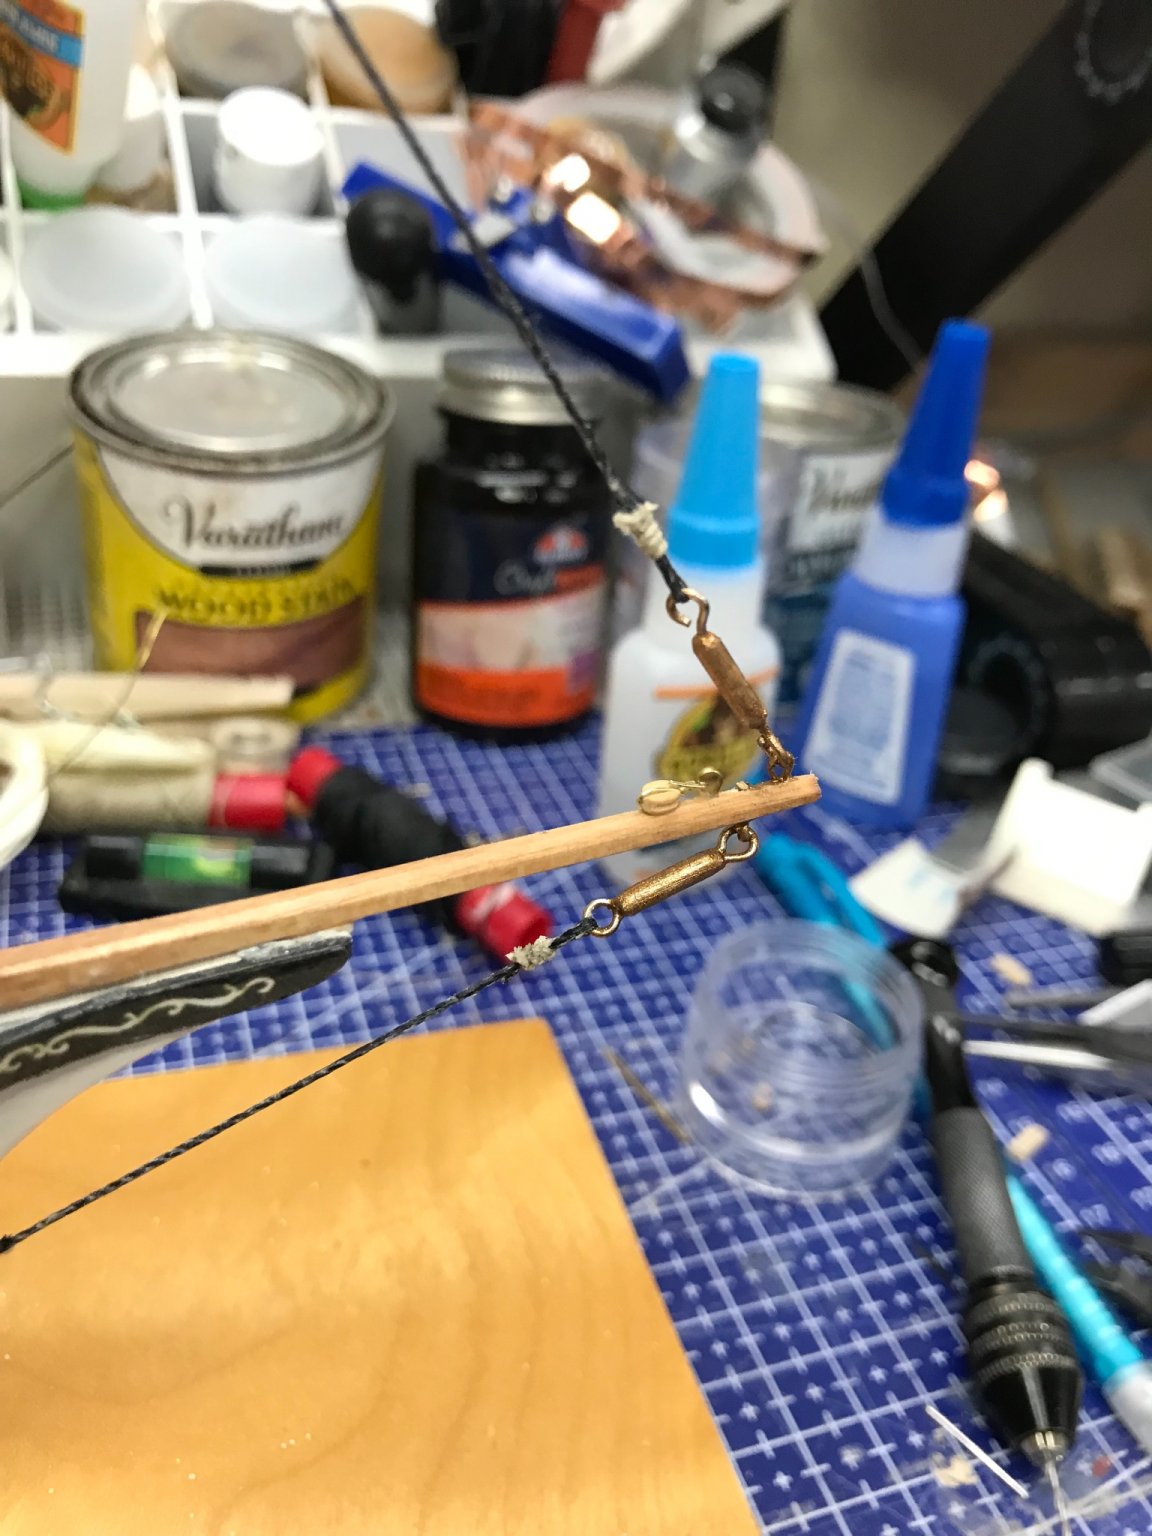
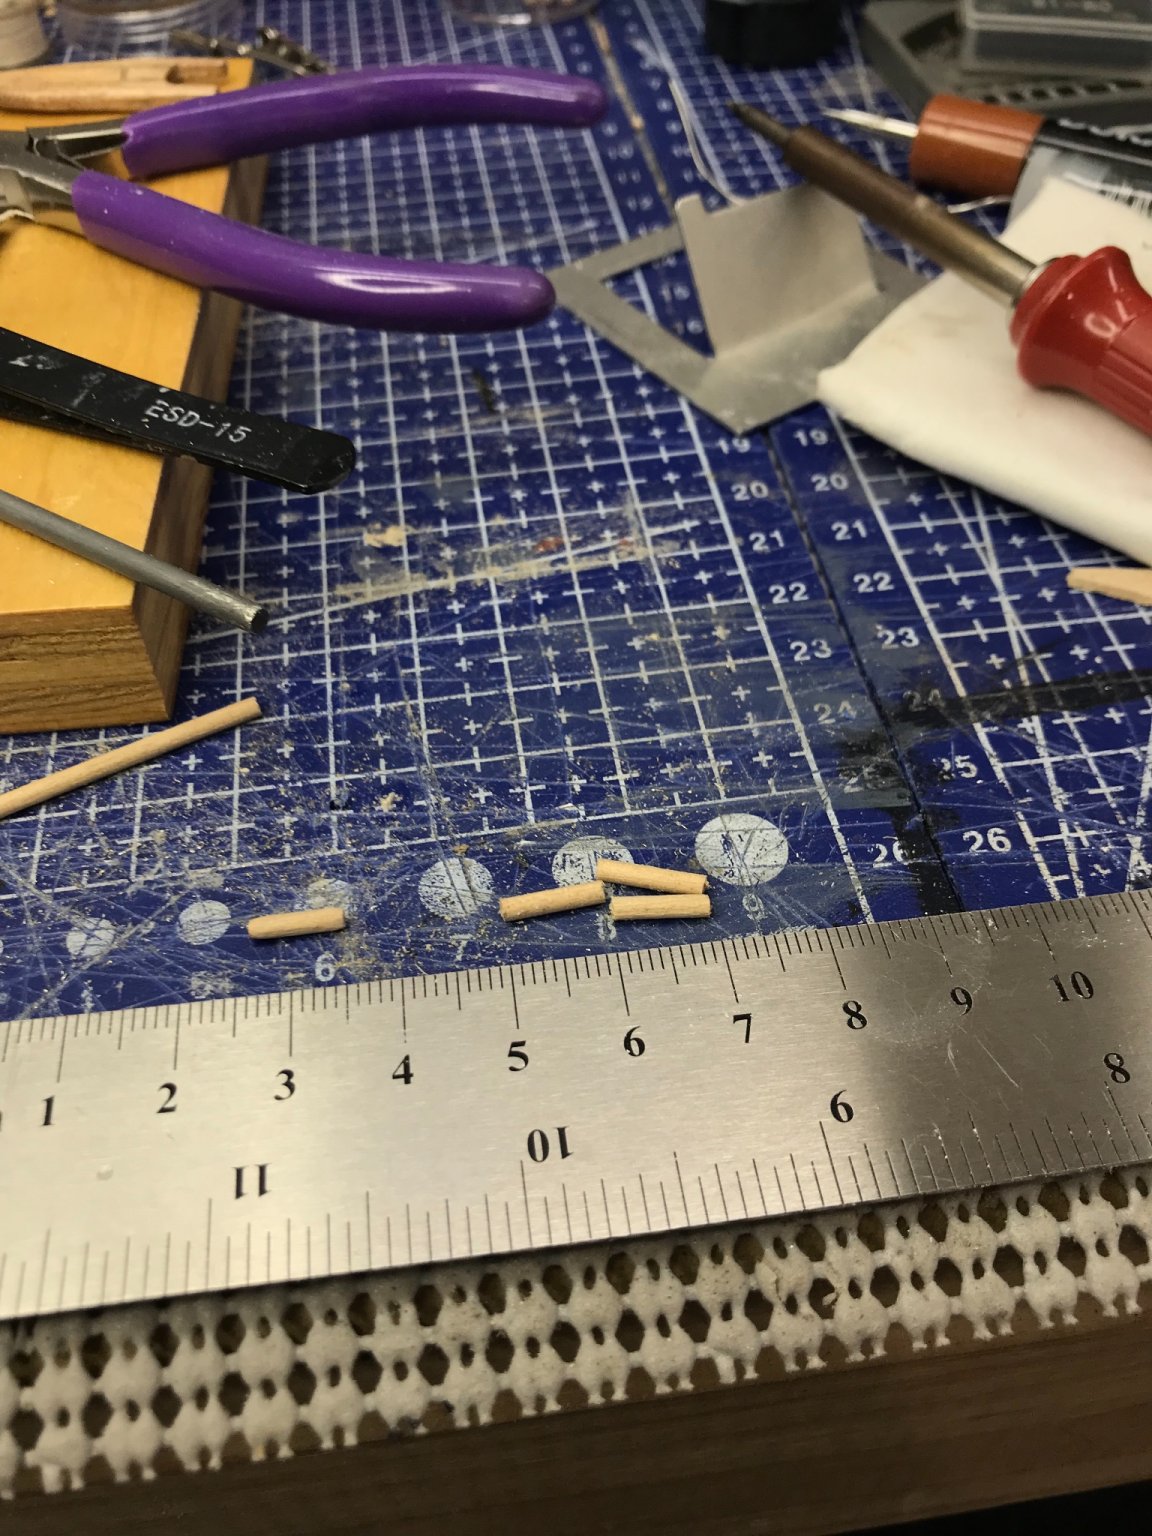
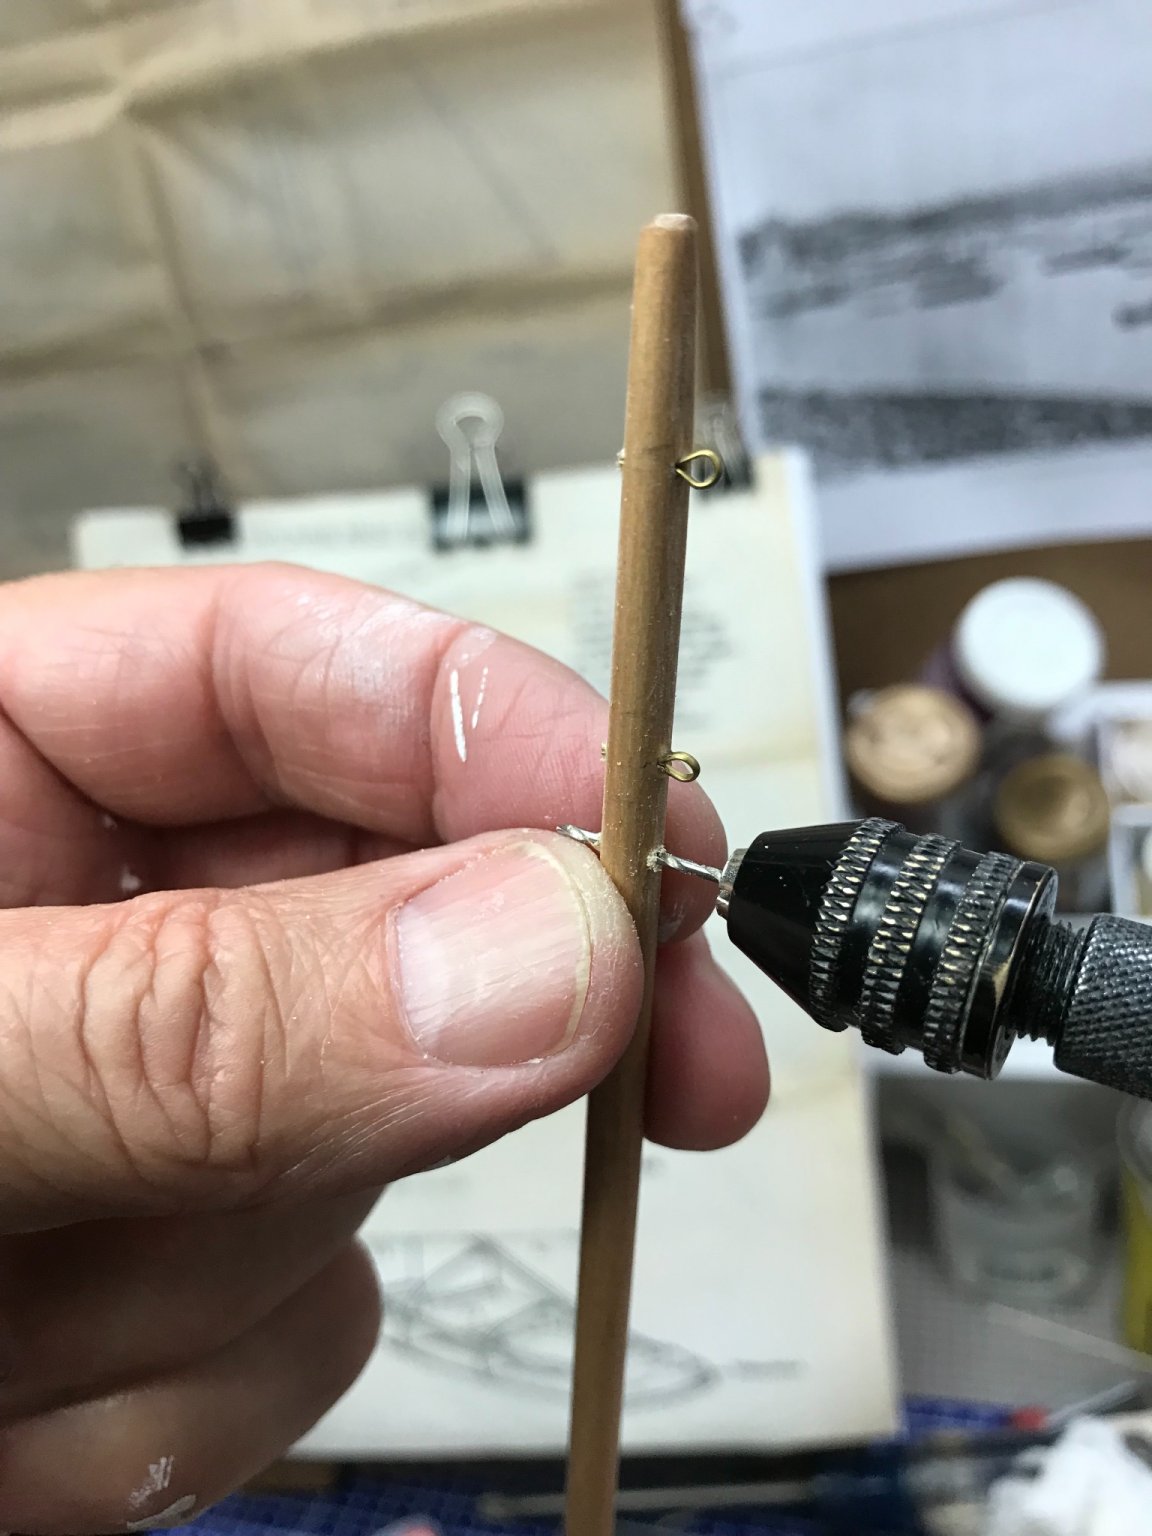
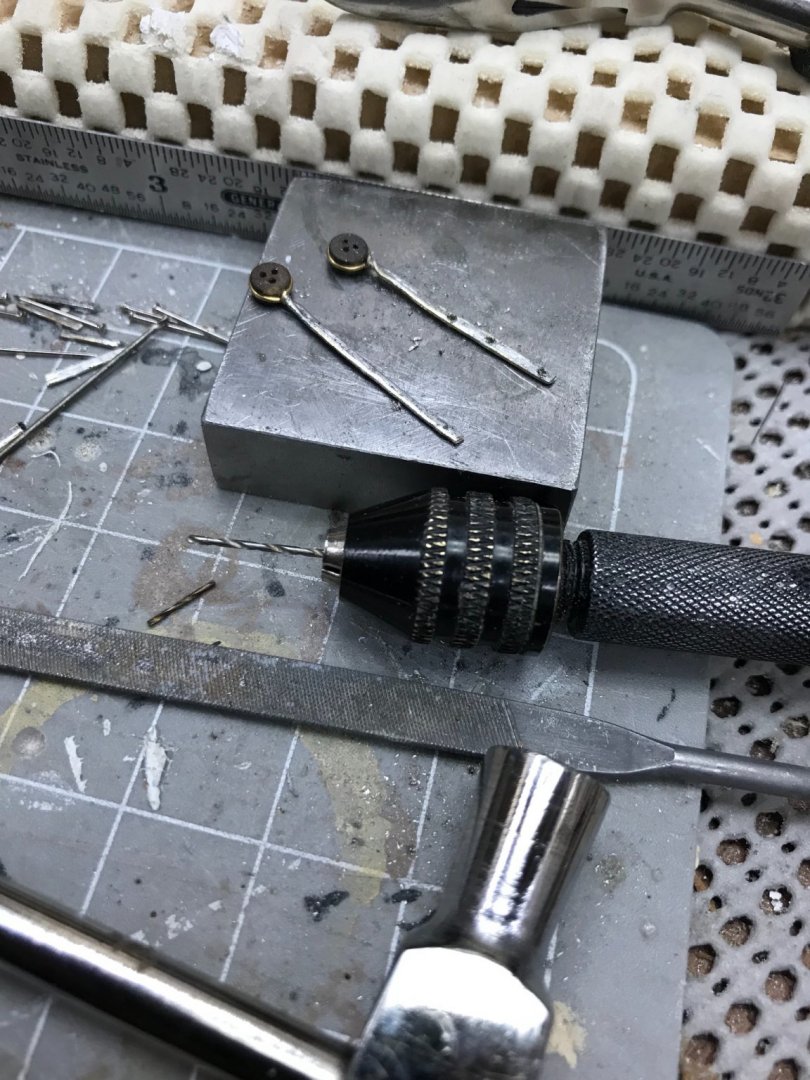
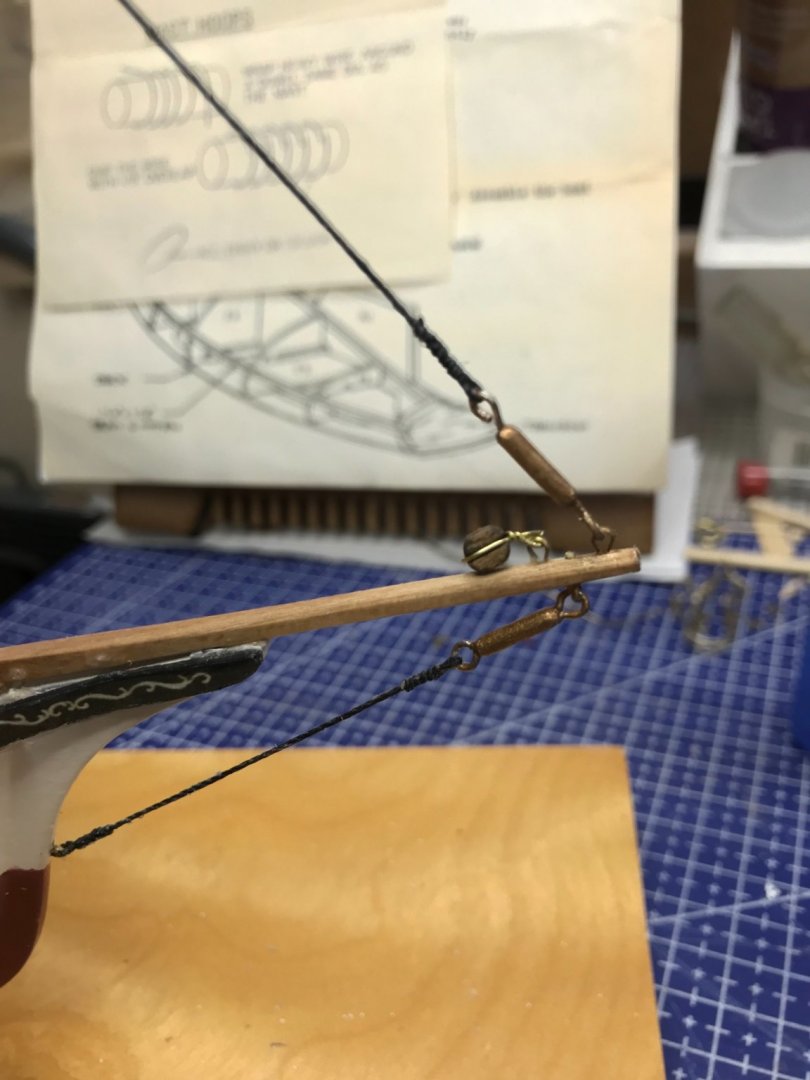
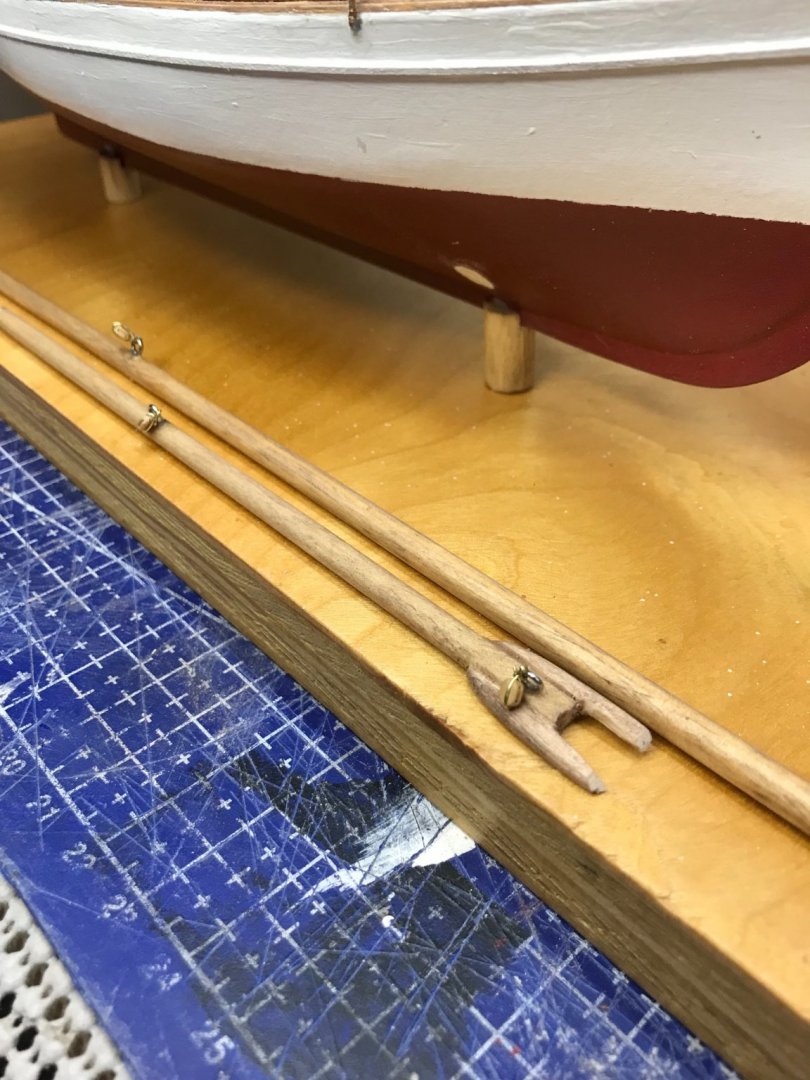
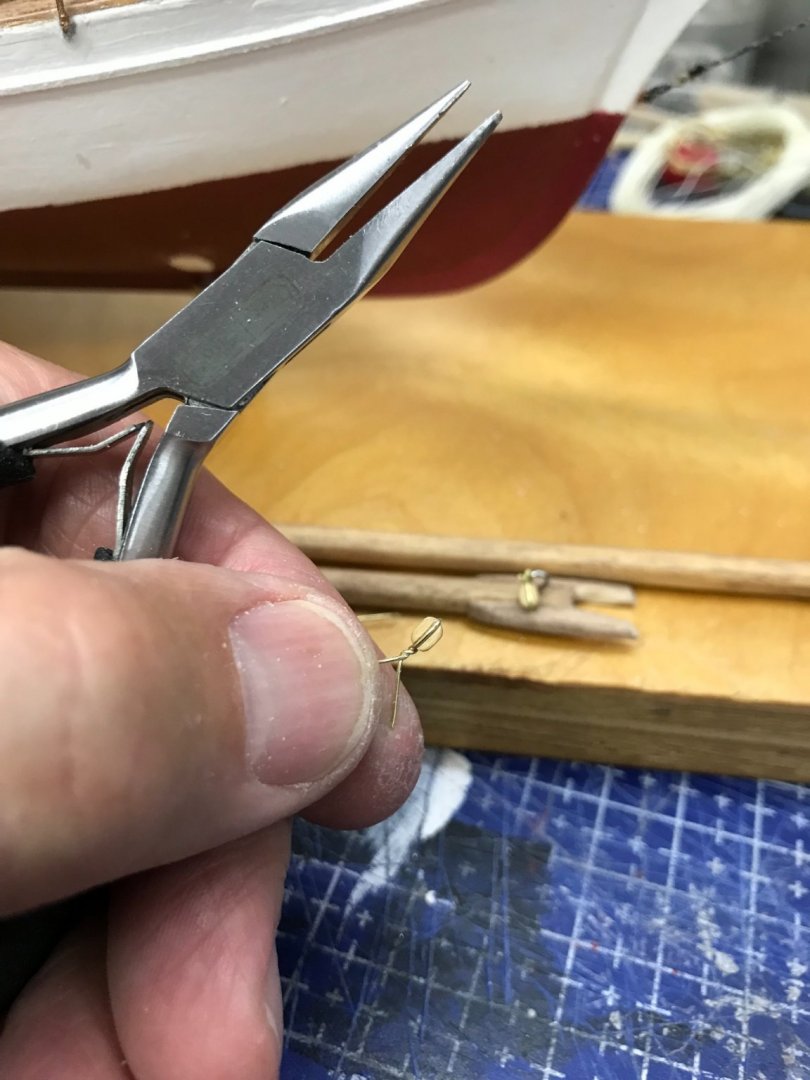
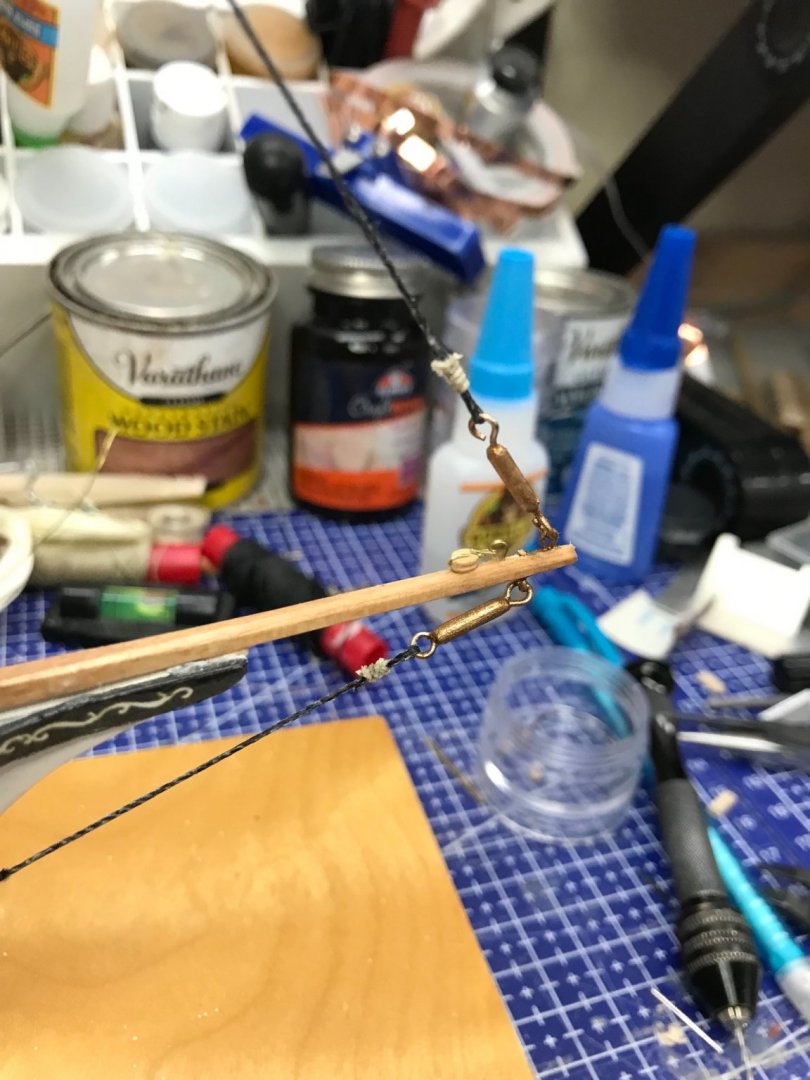
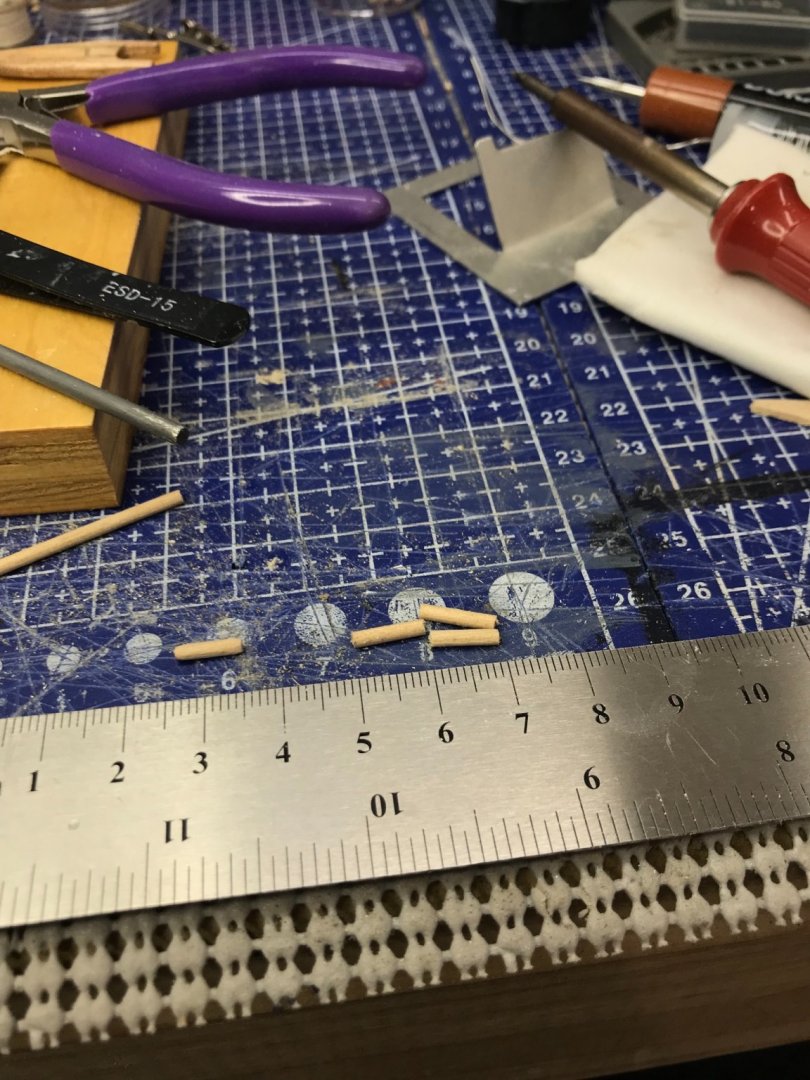
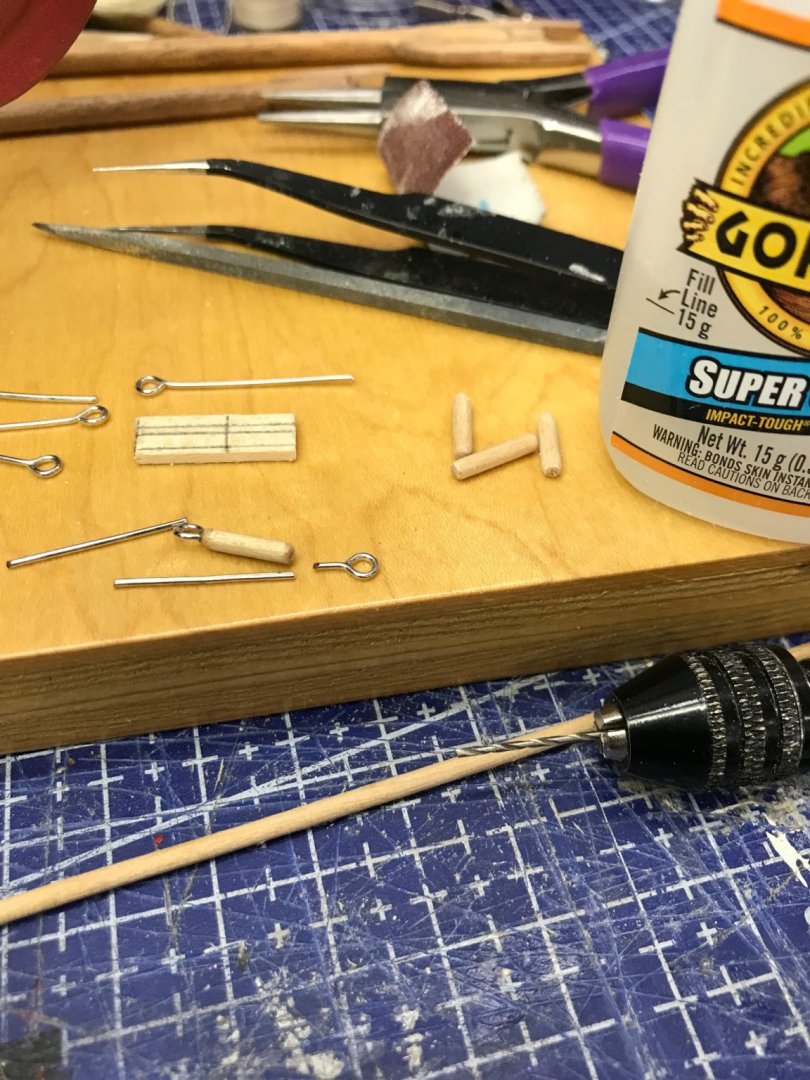
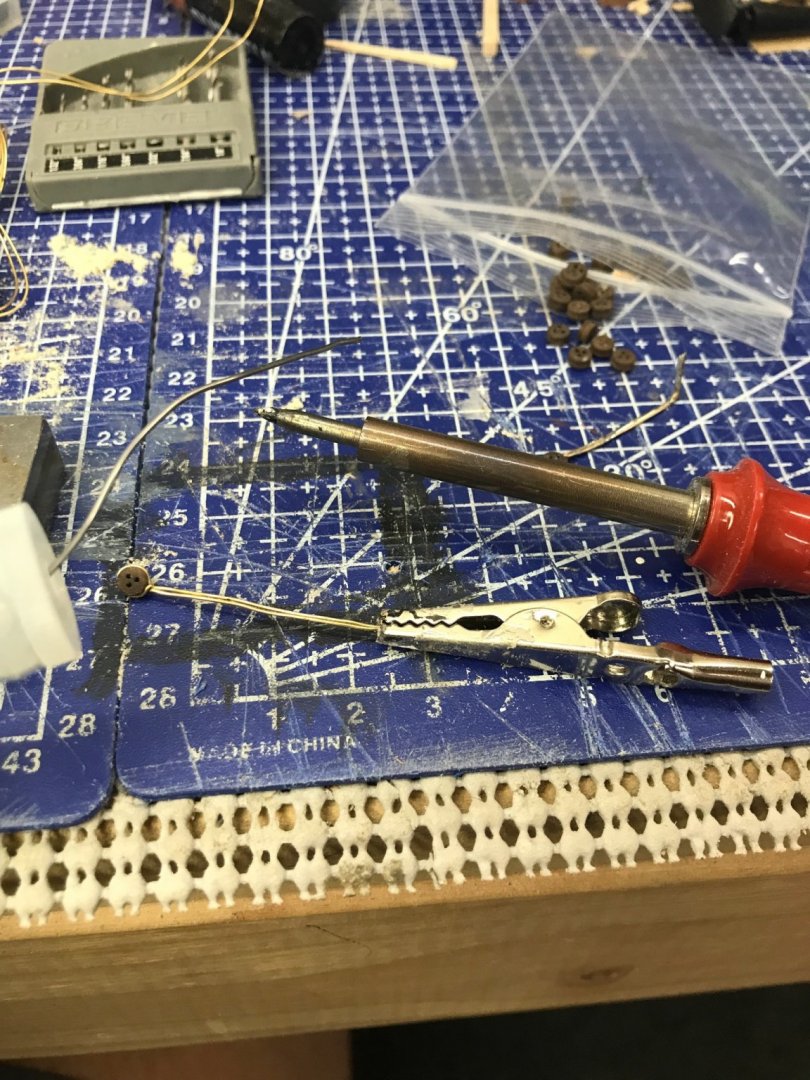
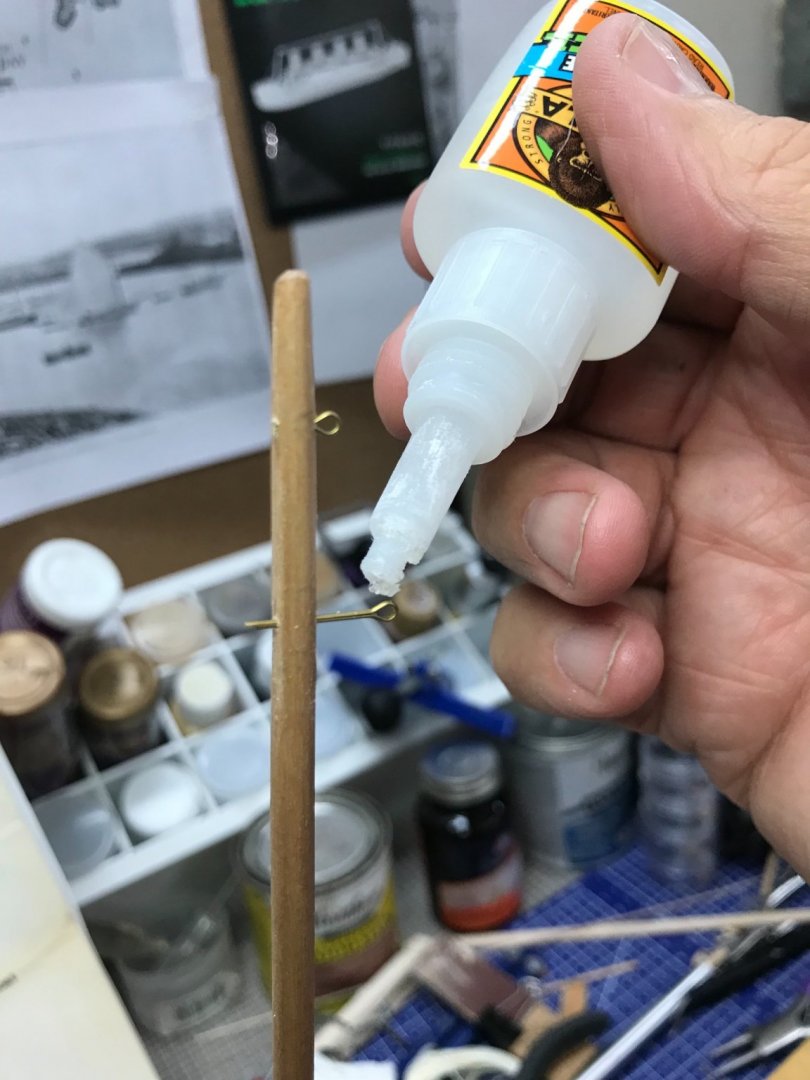
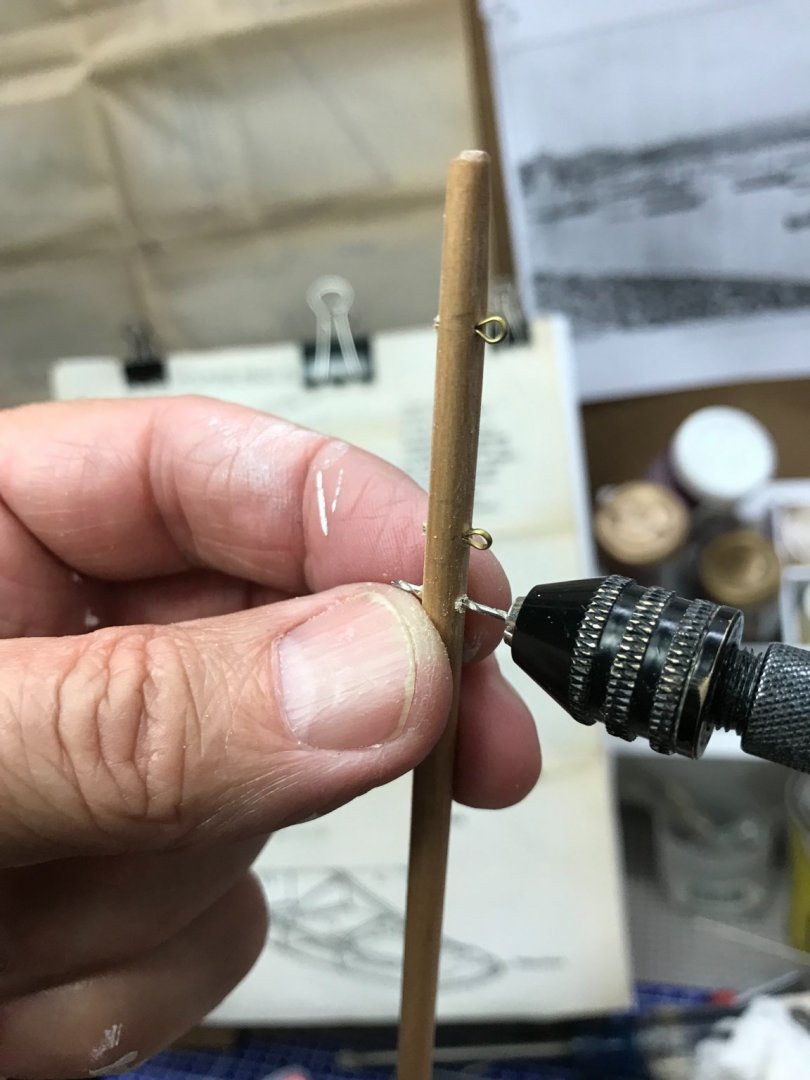
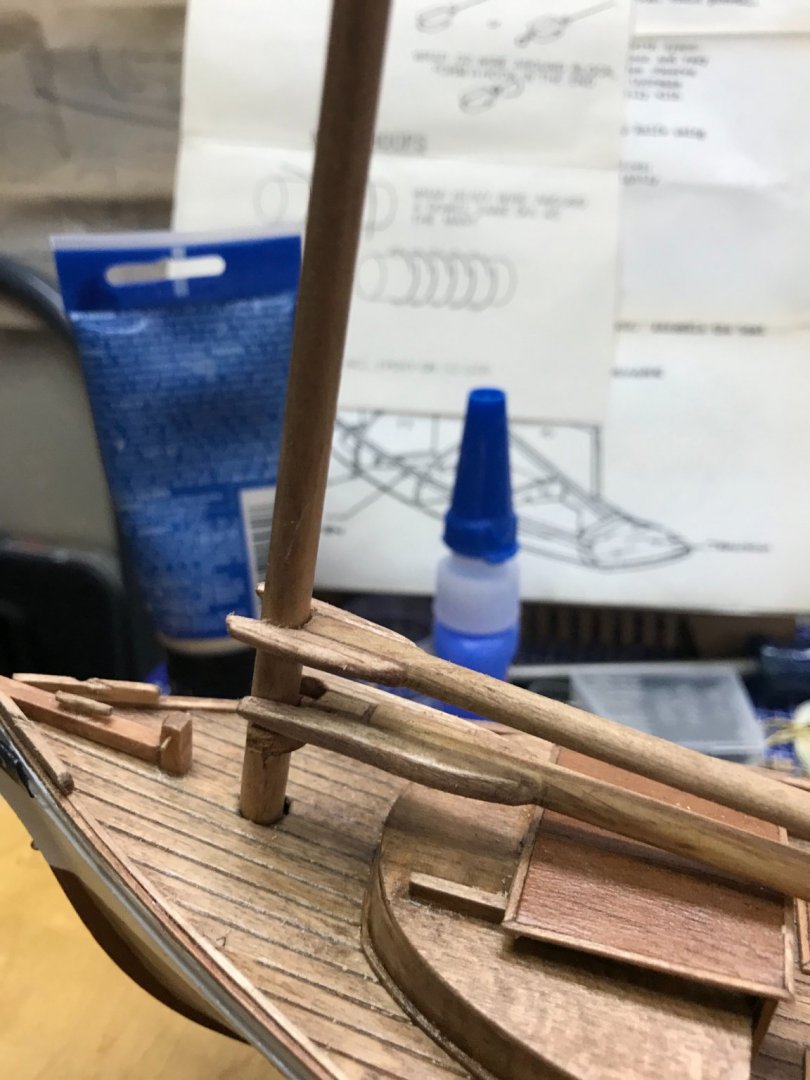
Standing rigging… The original kit did not include back stays or turnbuckles as does the Model Shipways instructions show. So, I will have to create my own turnbuckles for the bob, fore and back stays. I am using 1/16” dowel cut to 1 cm. Two other attempts using wire failed. Drilled out the ends and used gel super glue to attach the eyelets. Fore and Bob Stay, turnbuckles. 😎 Painted turnbuckles with Flat Brass Enamel. Standing rigging Complete.


- 26 replies
-
- 3
-
-
- Maine
- Laughing Whale
- (and 2 more)
-
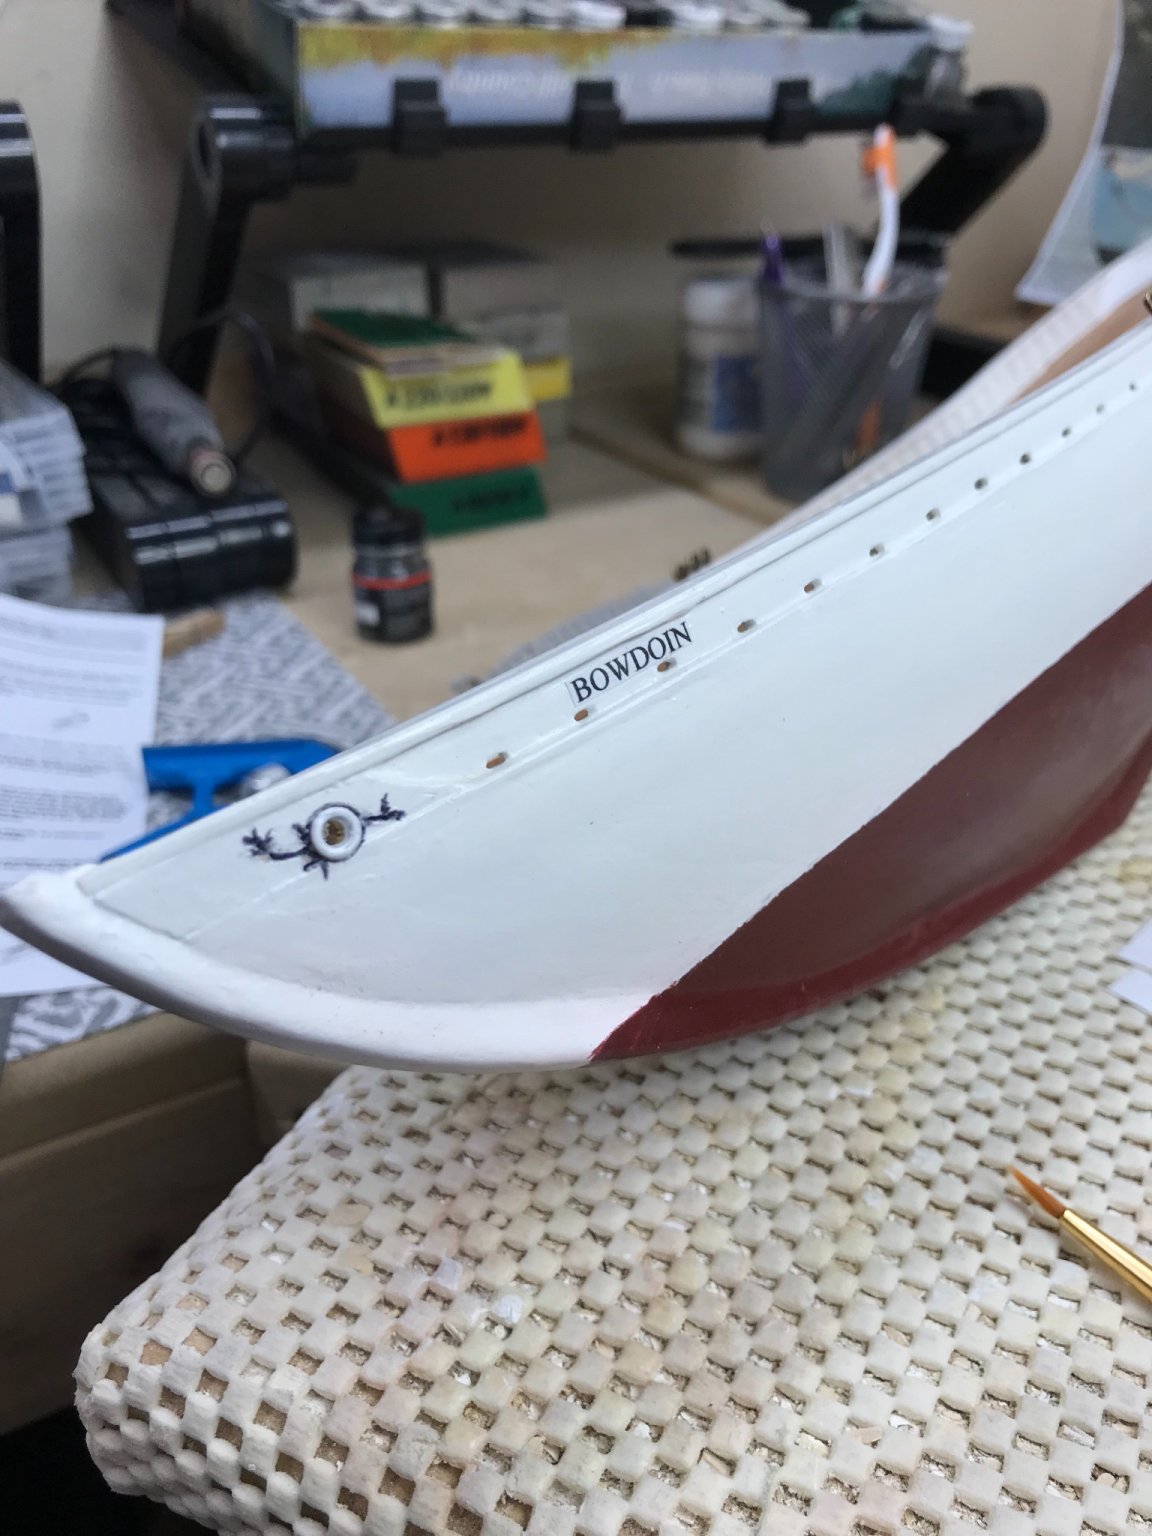
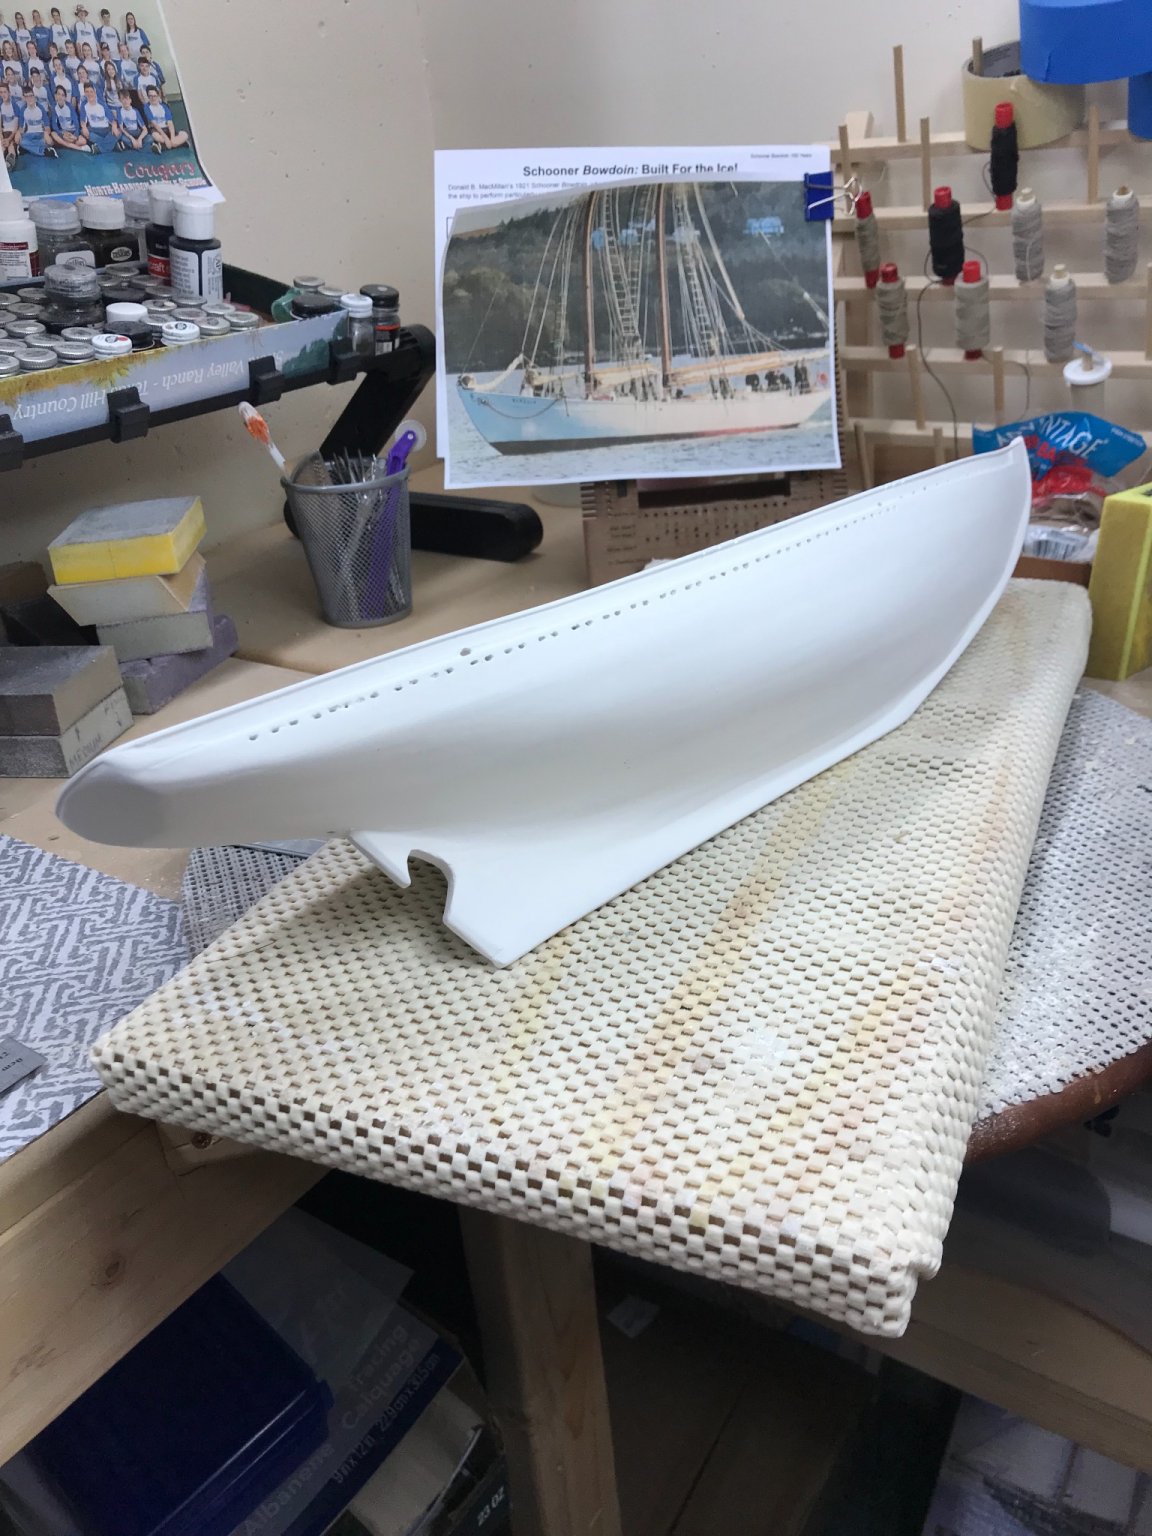
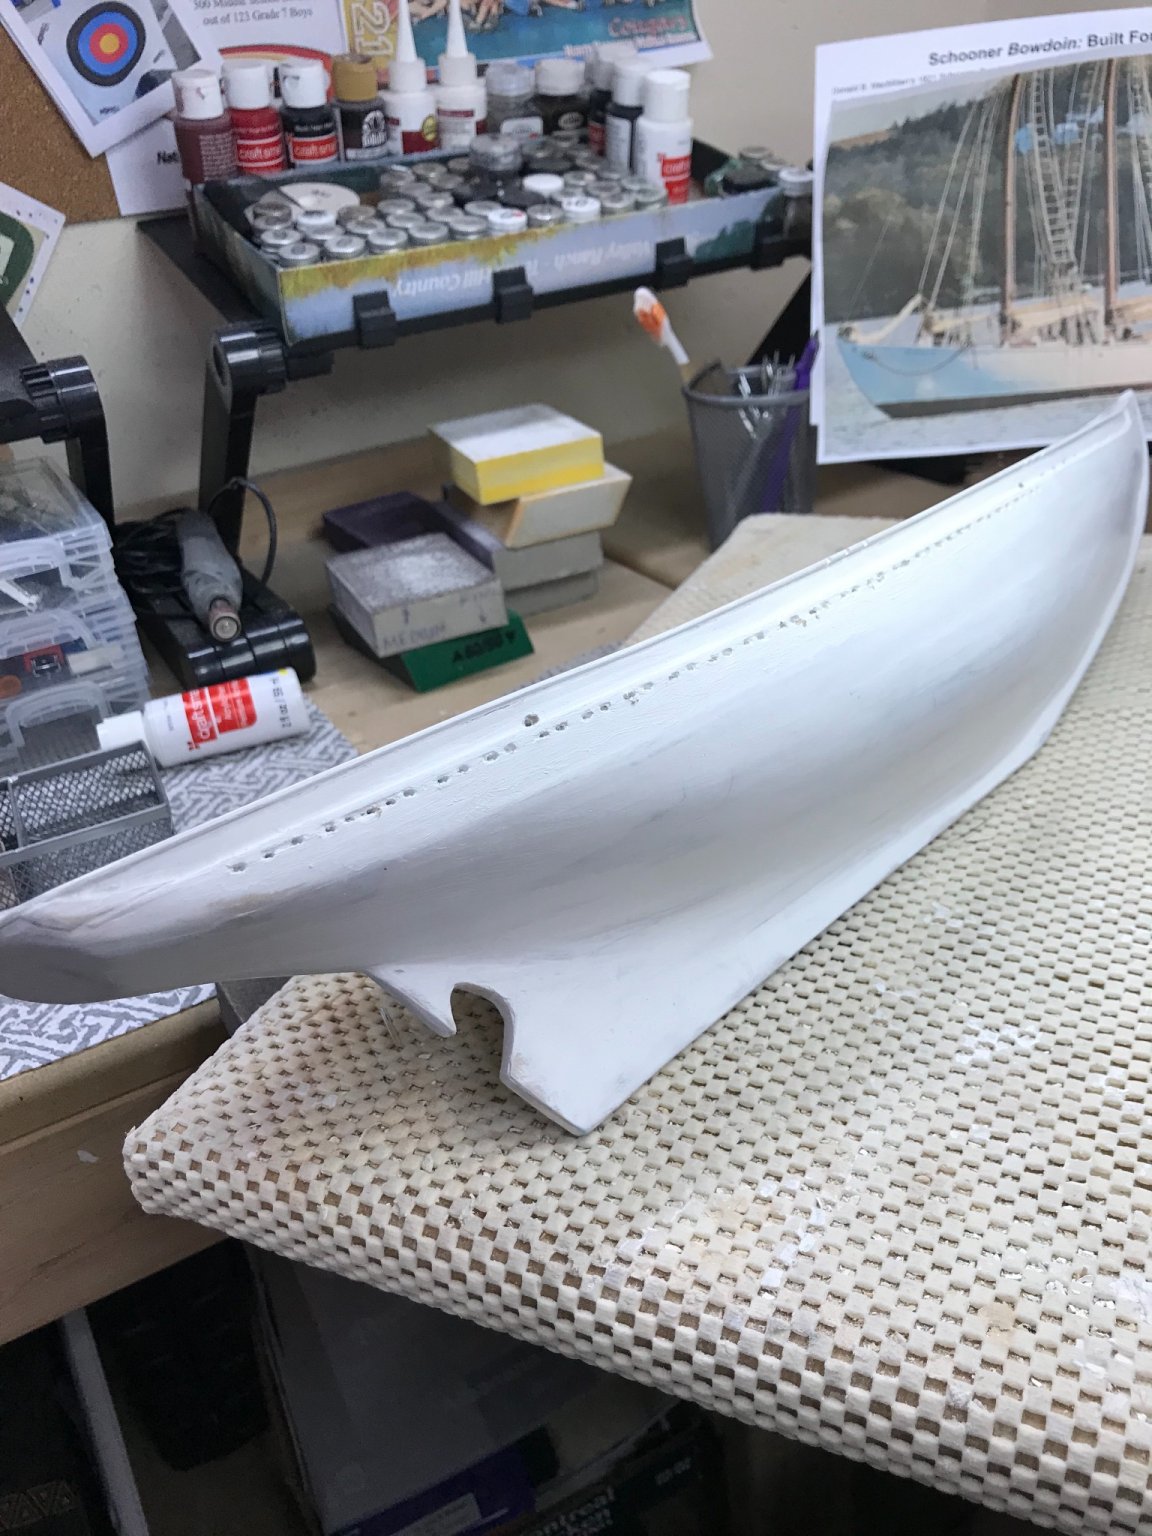
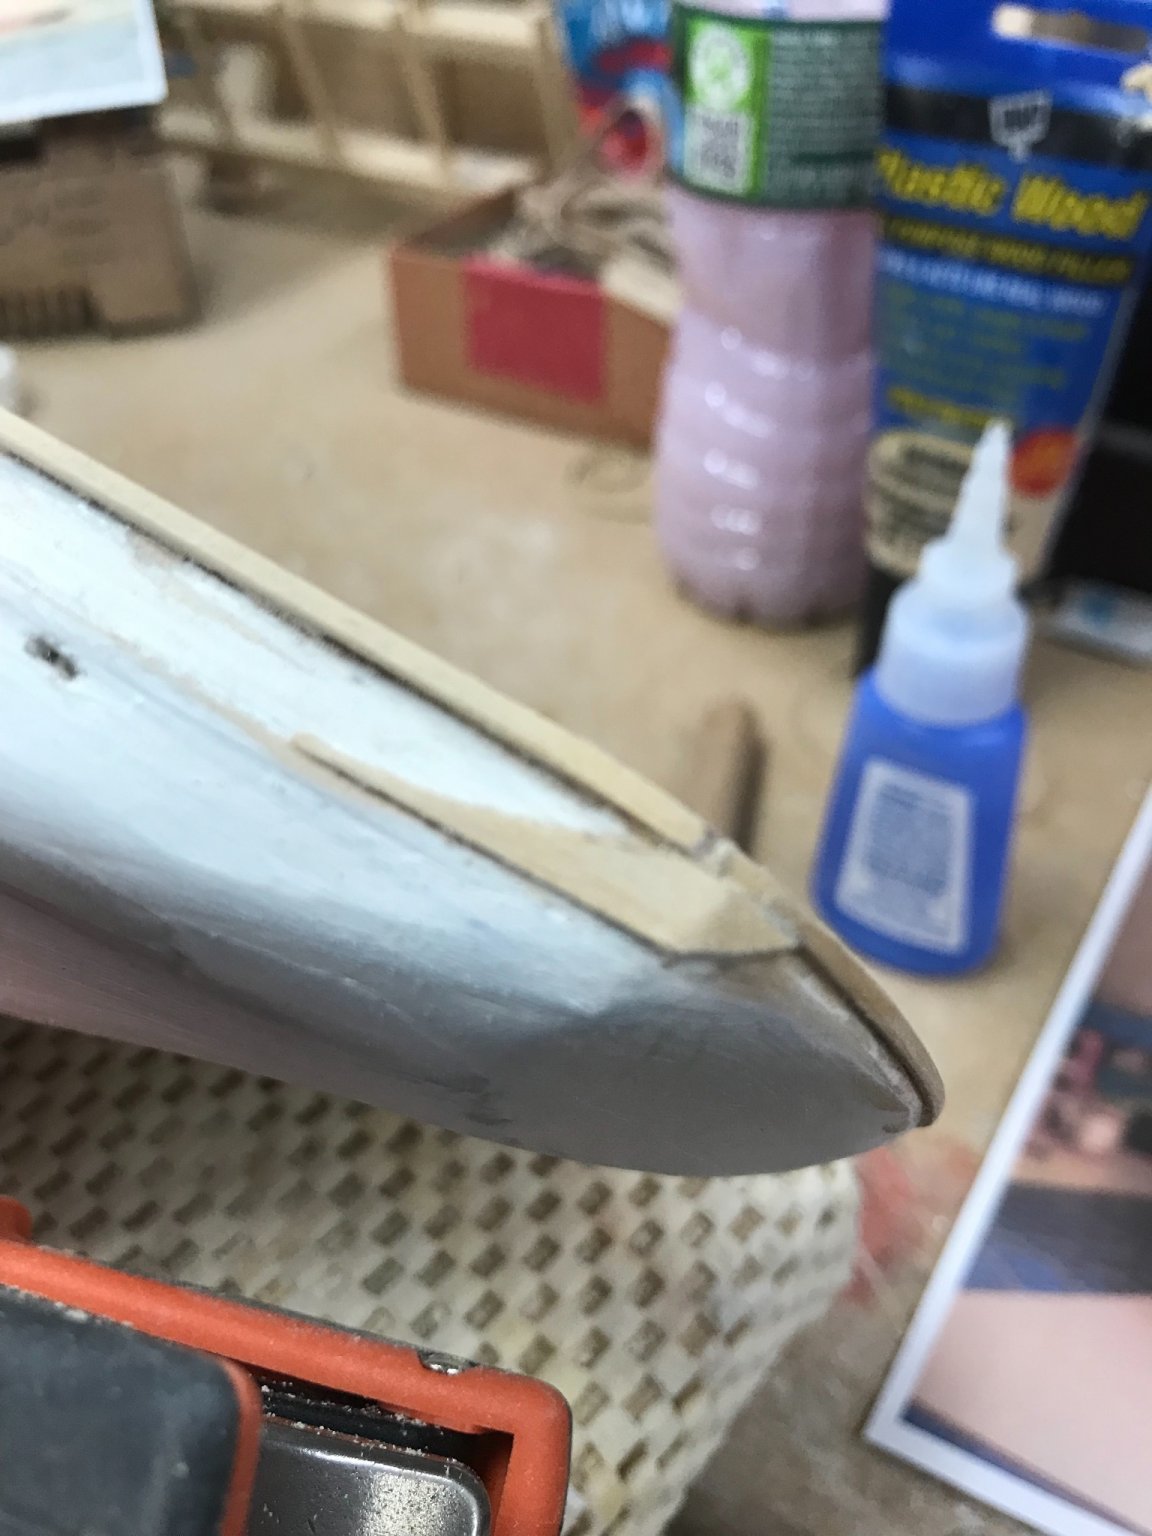
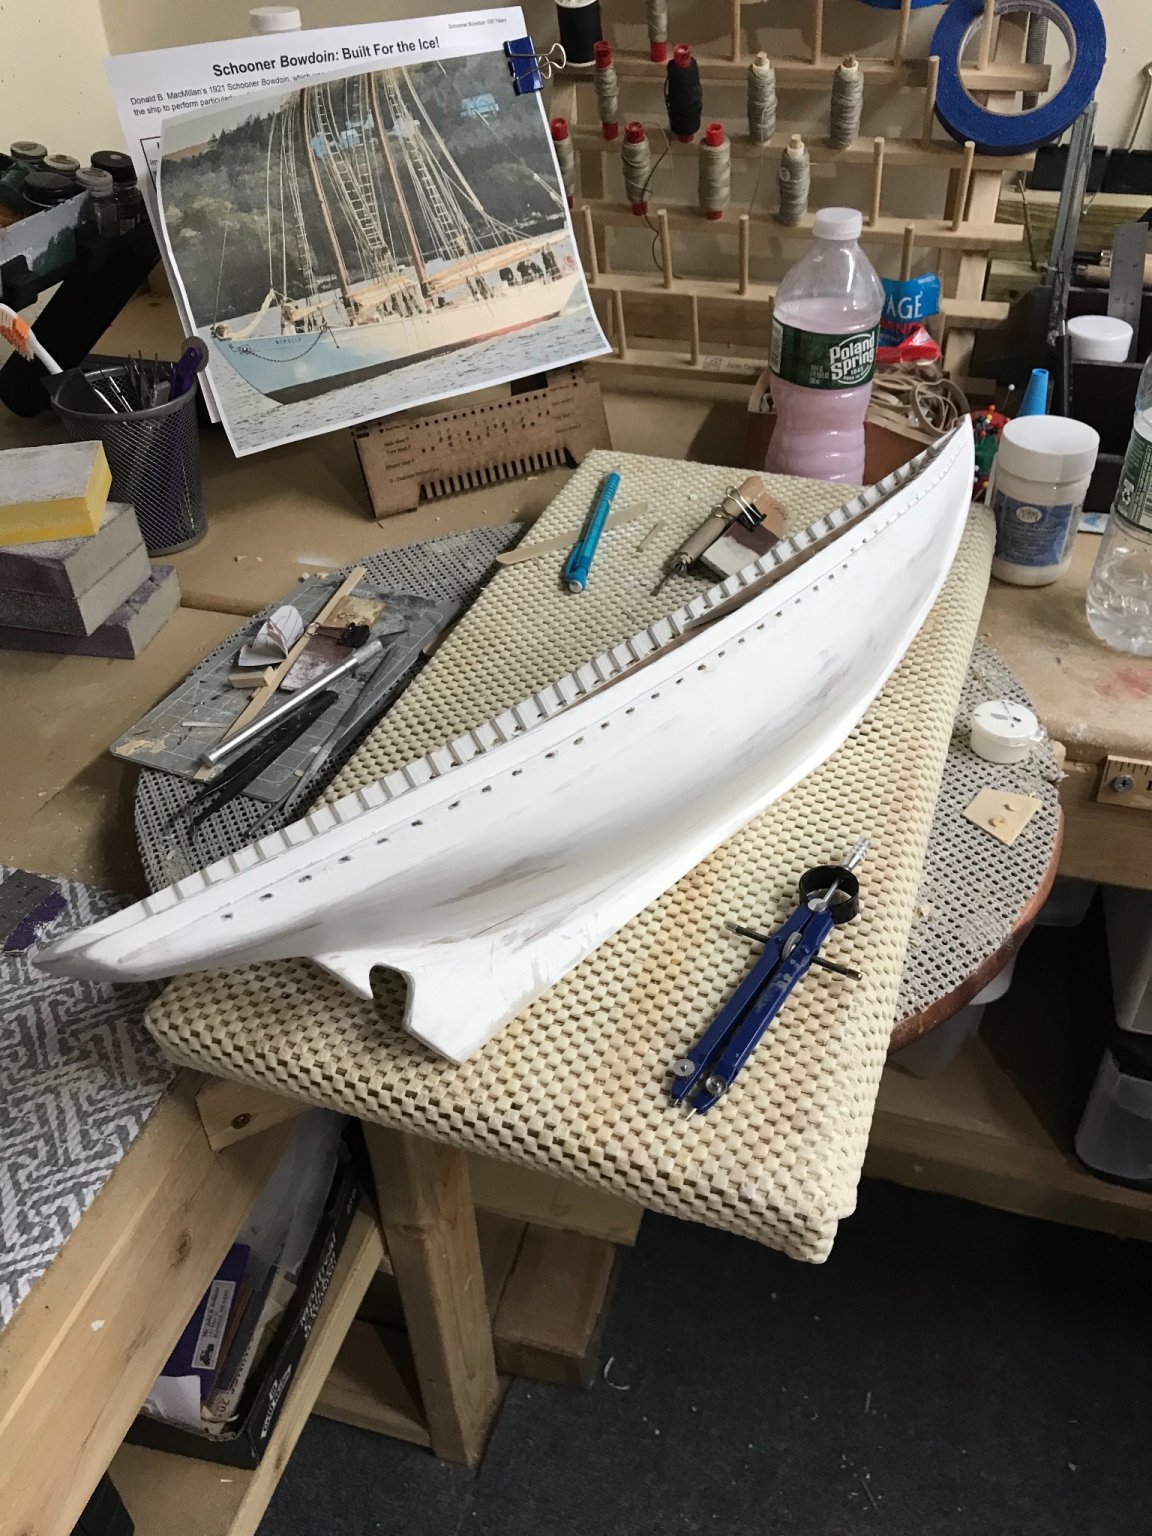
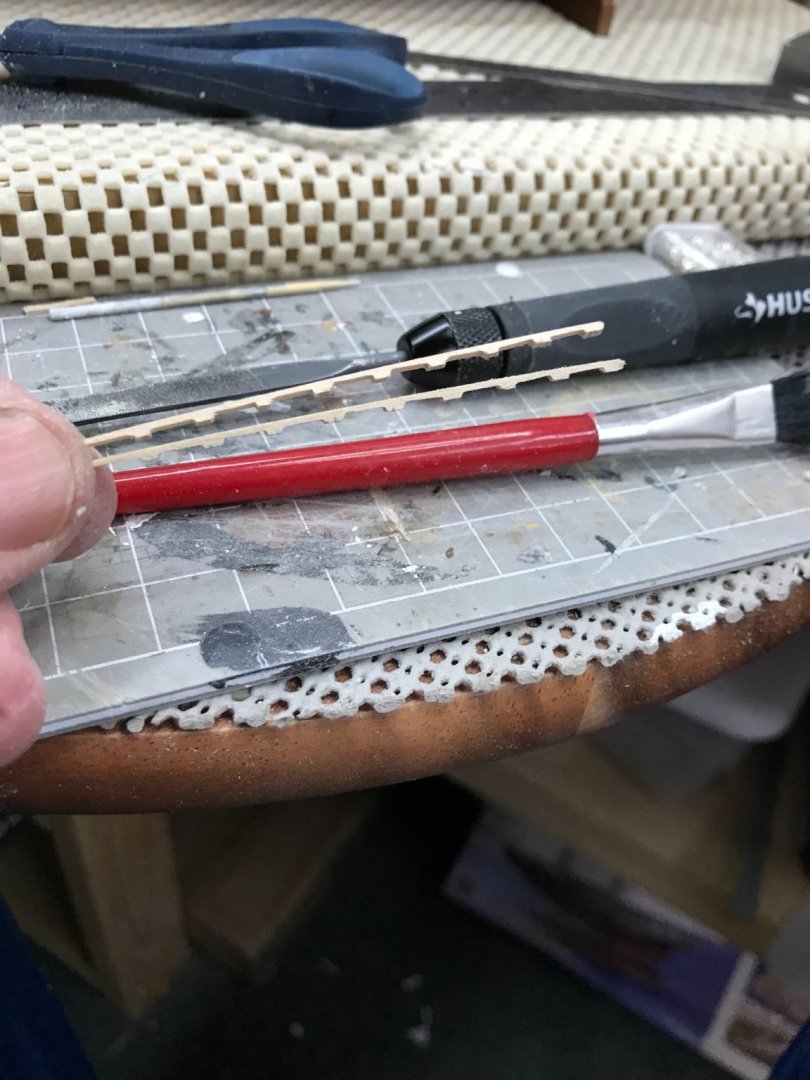
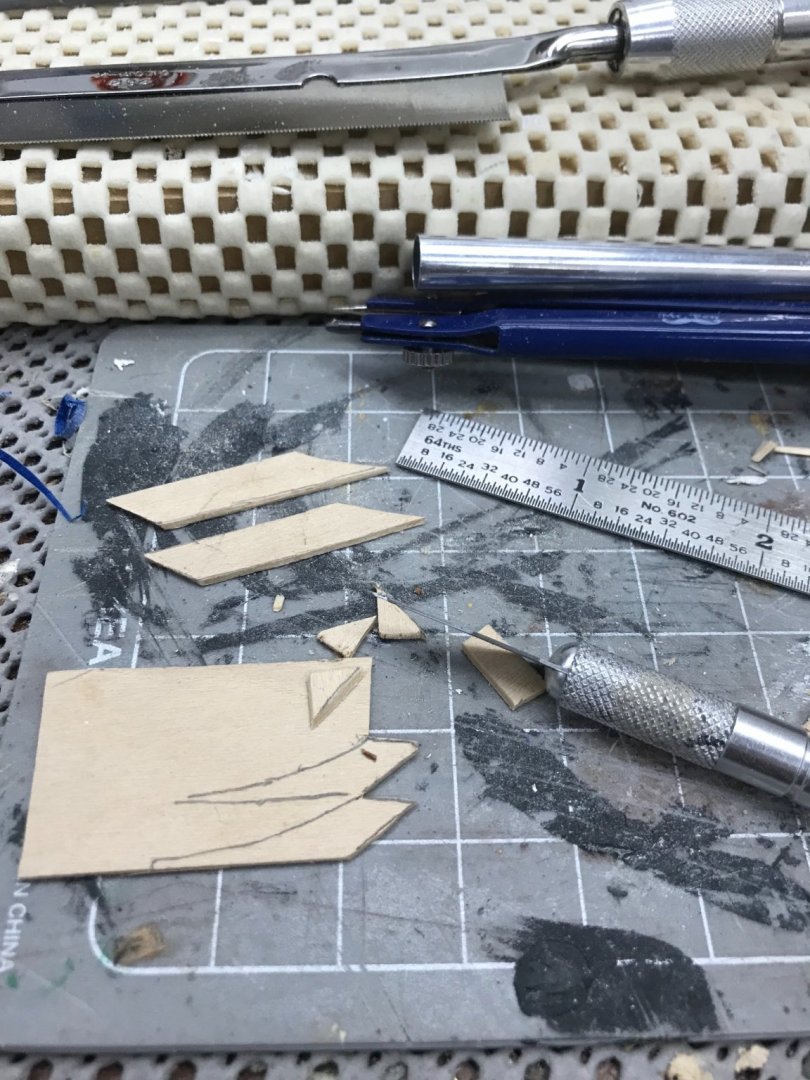
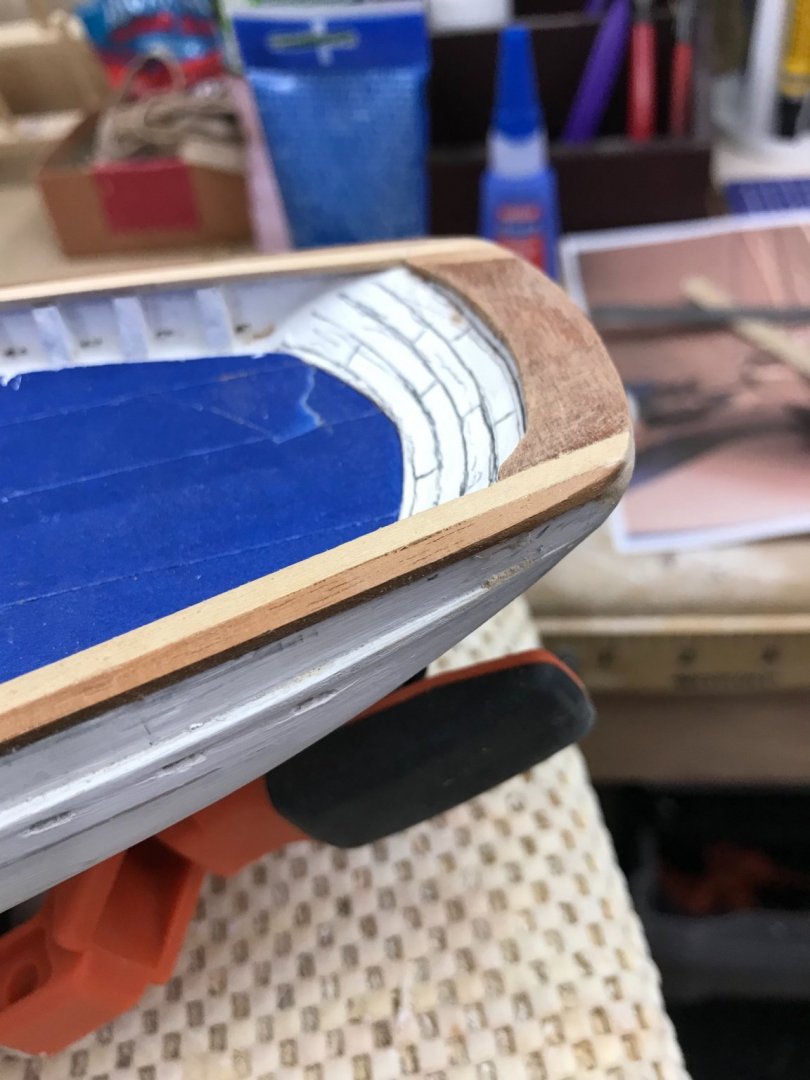
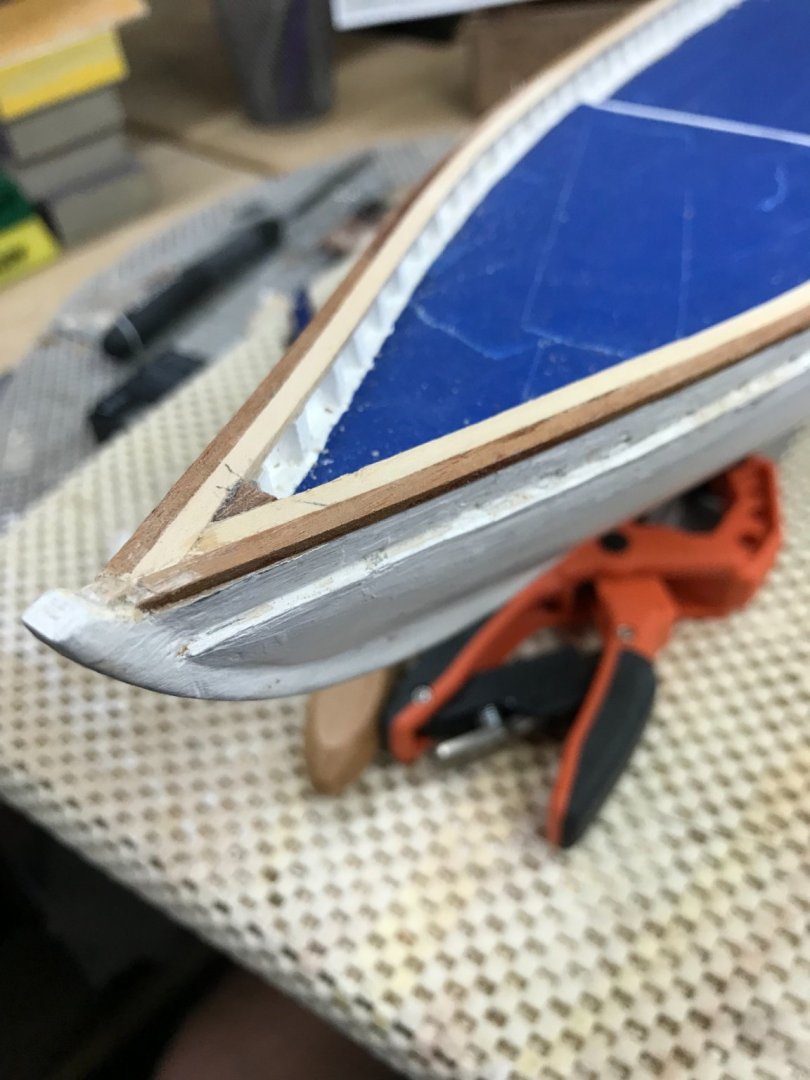
Hull details… Cutting out fashion pieces from 1/32” Bass Wood. Rounding the Rail… More work on the Stern… Stern Fashion Piece, roughed in. More sanding to do. 😆 Bow Fashion Piece… Starting to look like a schooner. 😎 Bowdoin restoration photo. (Chainplate) Stroping lower Deadeyes. Need 12 of these. 12 Deadeyes with chainplate completed. Masts temporarily placed to Mark up Shroud alignment. Good progress today. 🍻


- 127 replies
-
- 8
-
-
- Bowdoin
- Arctic Exploration
- (and 3 more)
-
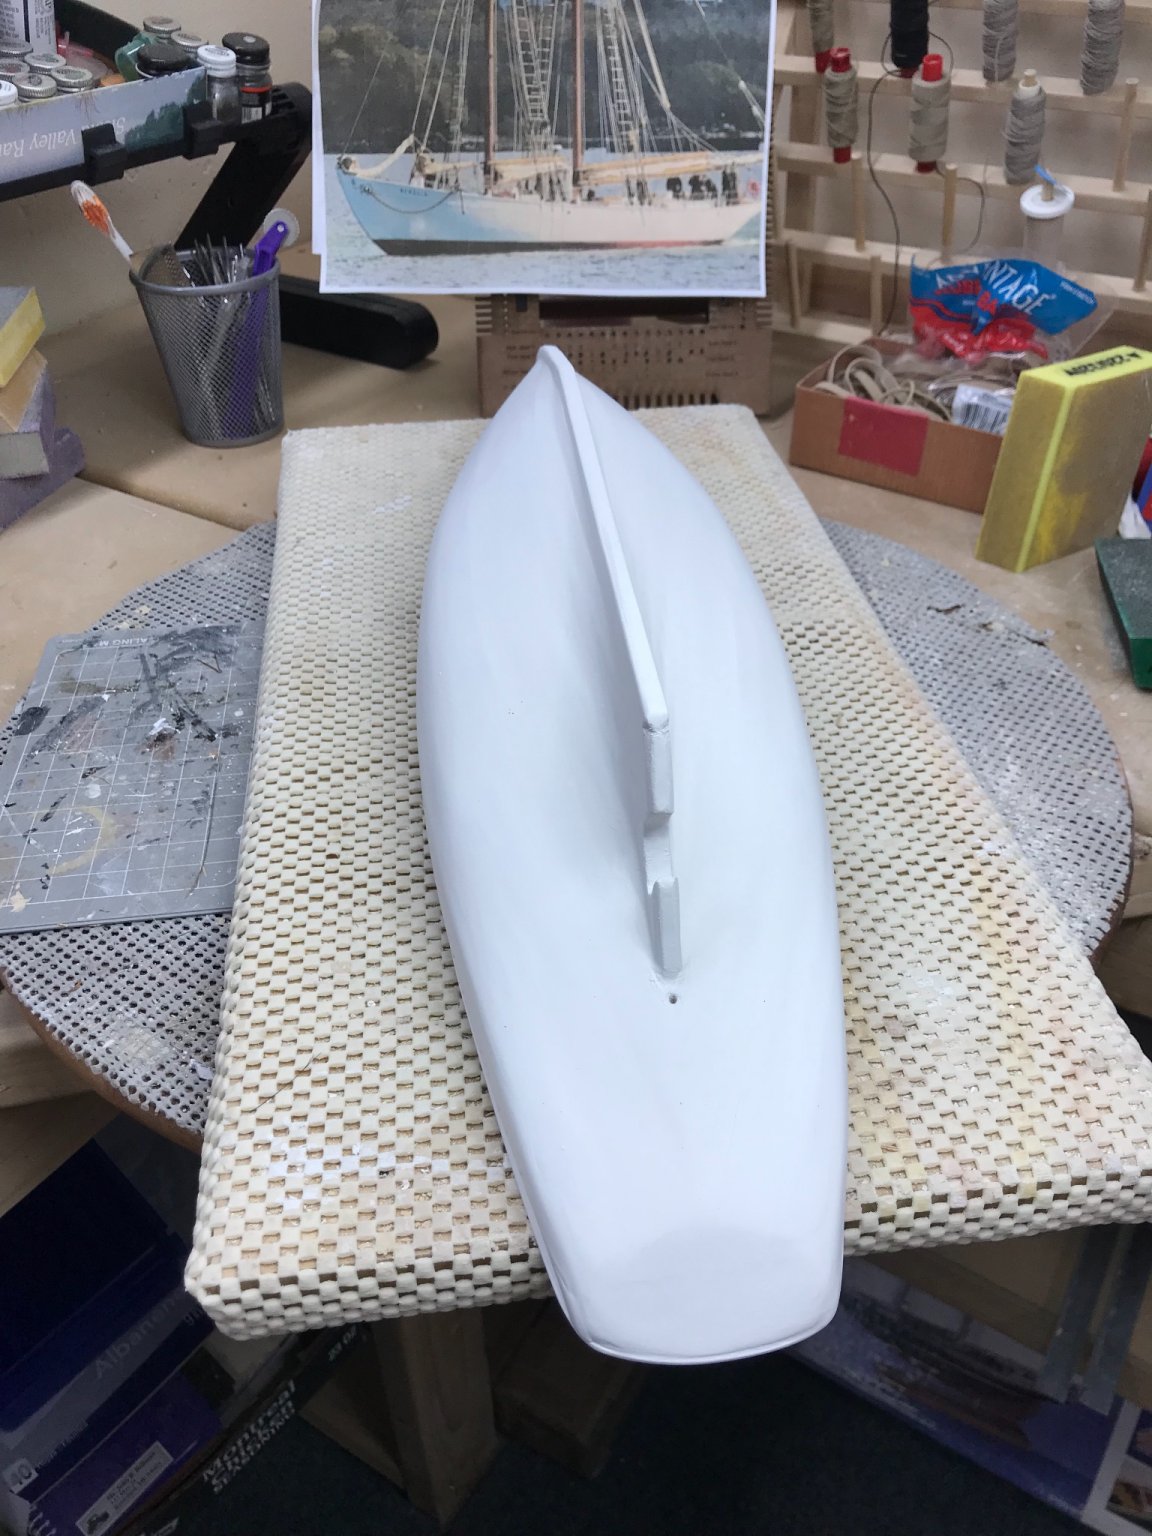
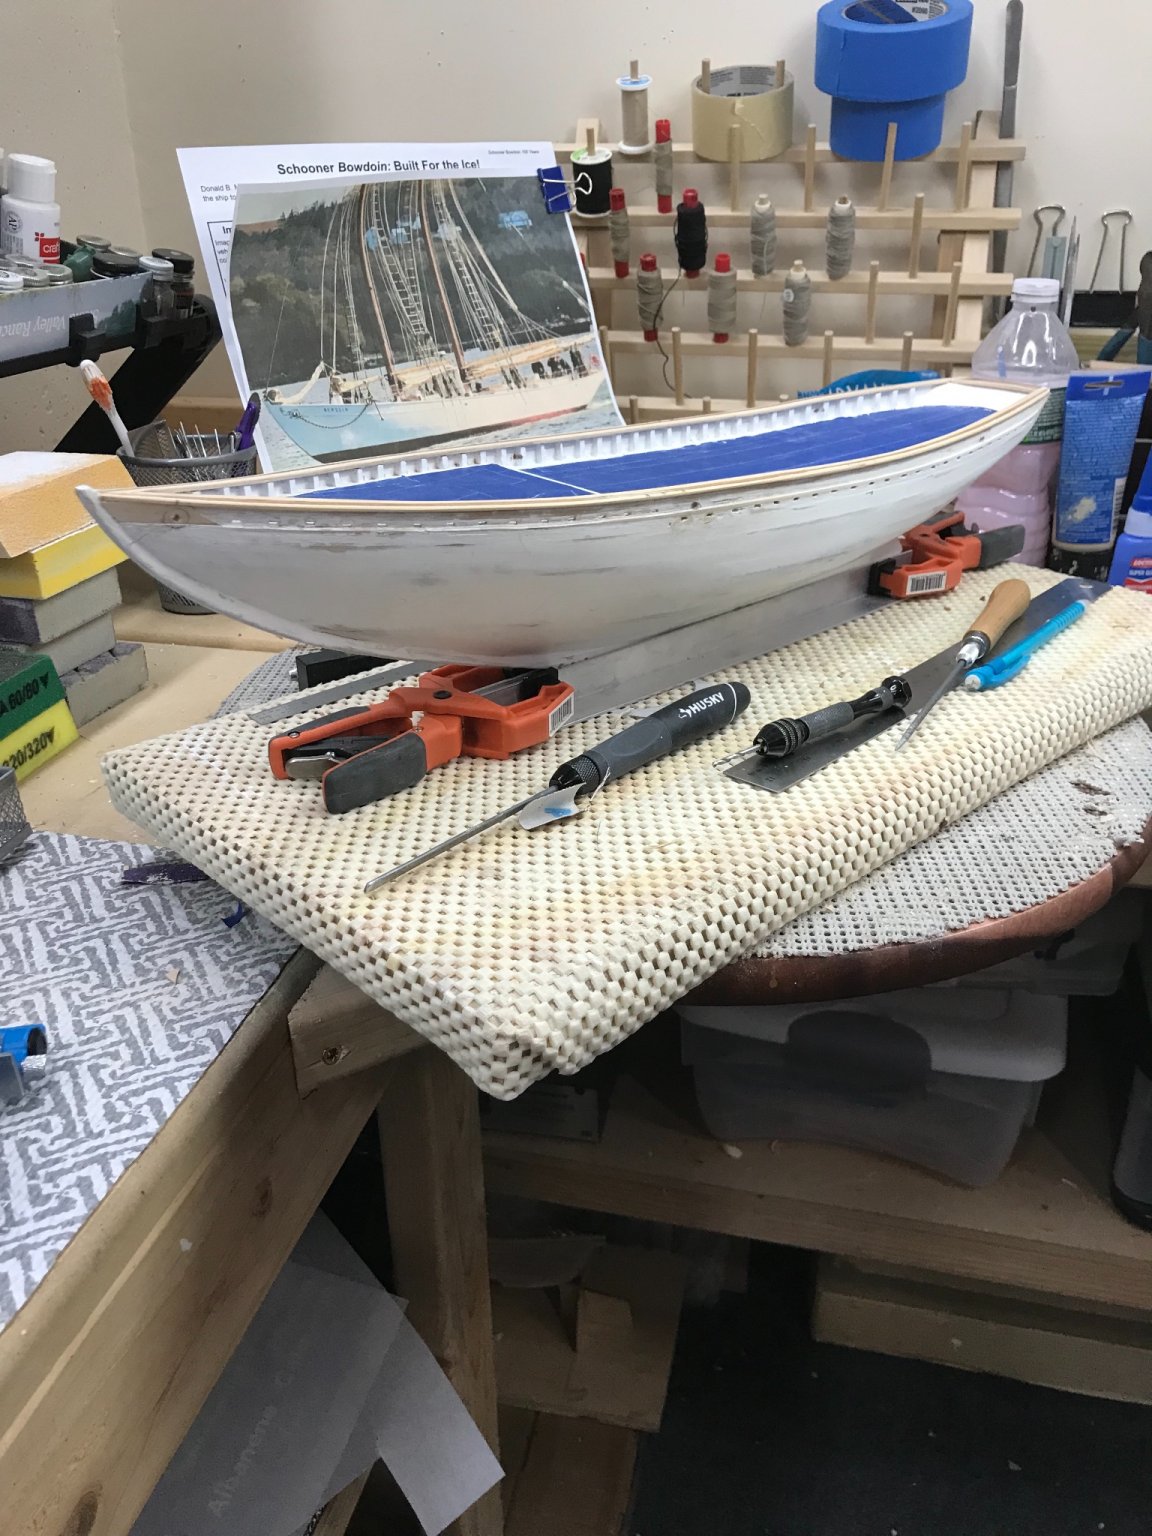
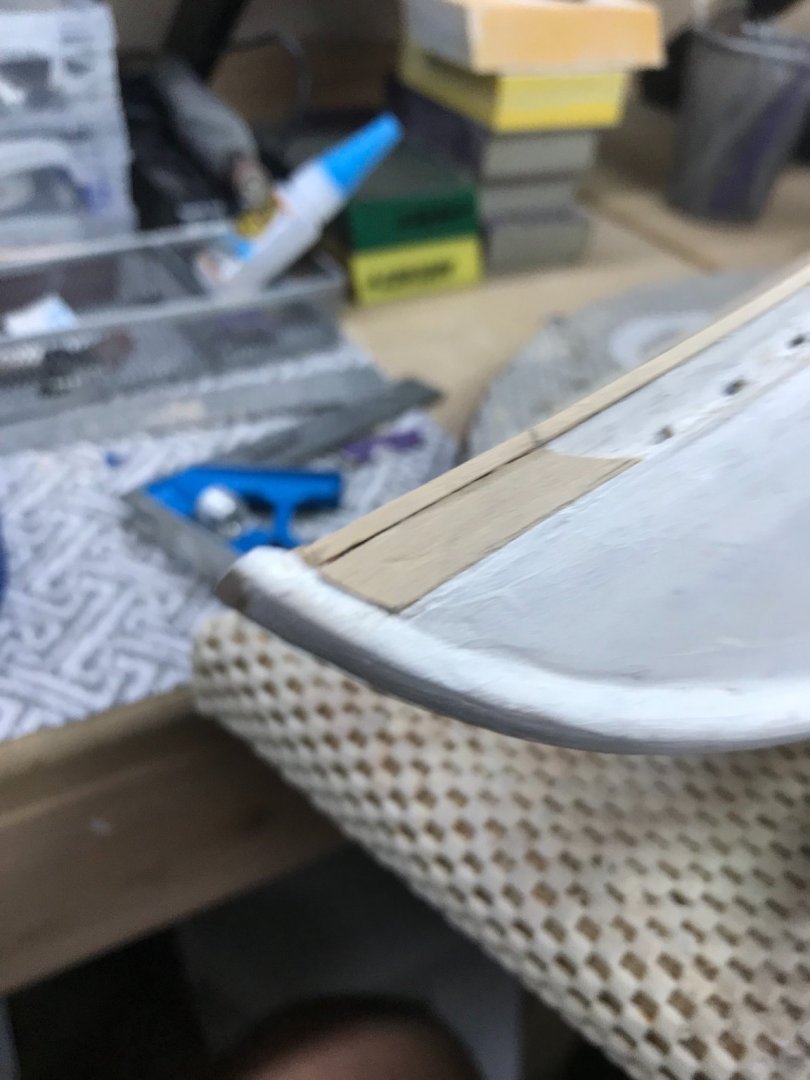
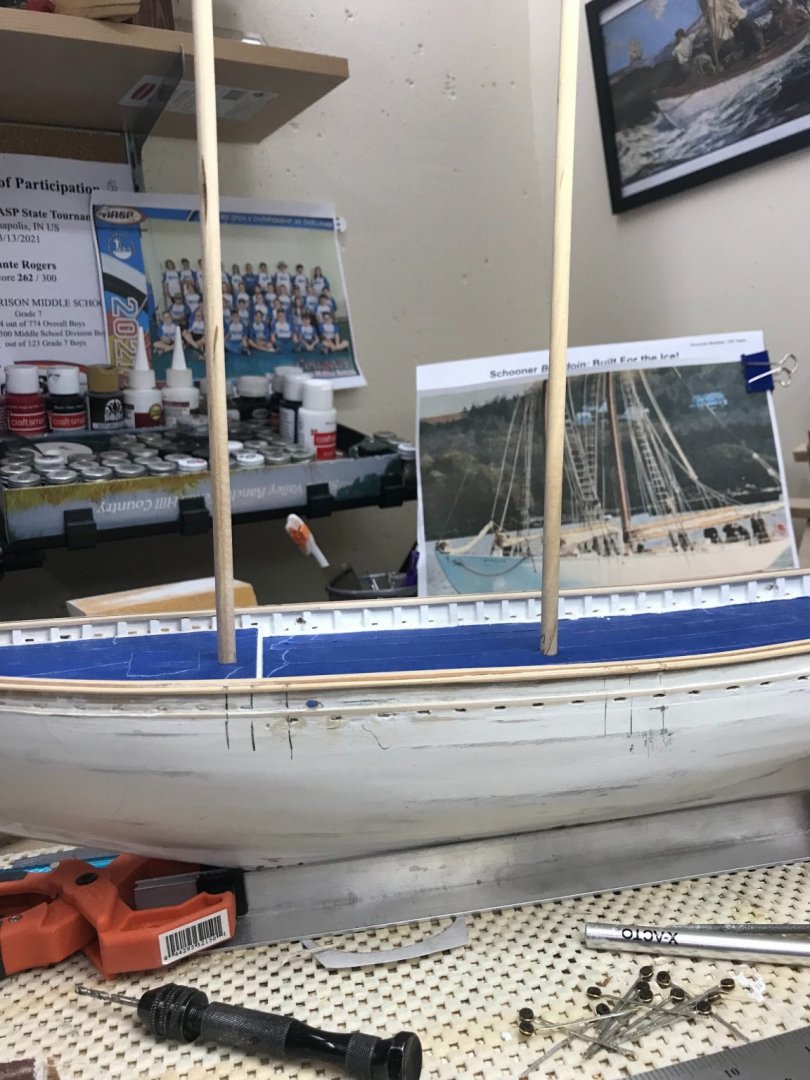
Top Rail… Masking off the decking… Ready to paint the inside of the bulwarks. Bulwarks painted Top Rail going in… Stern and bow pieces placed… Got more sanding to do! 😆
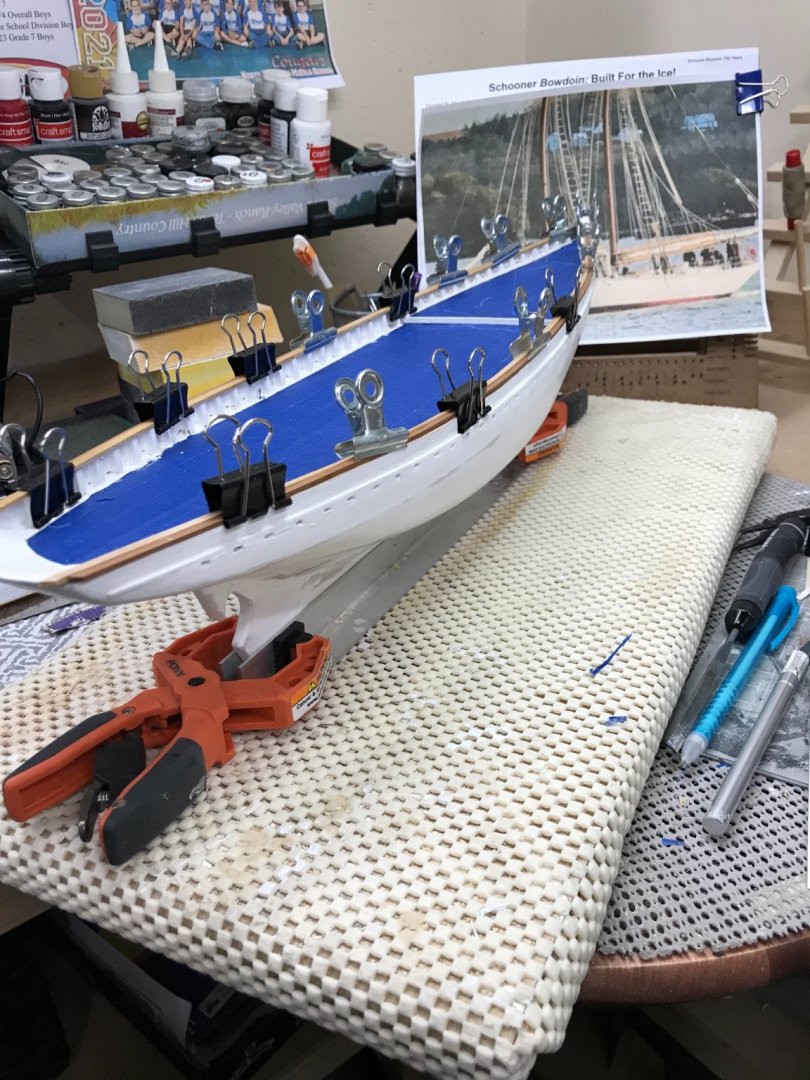
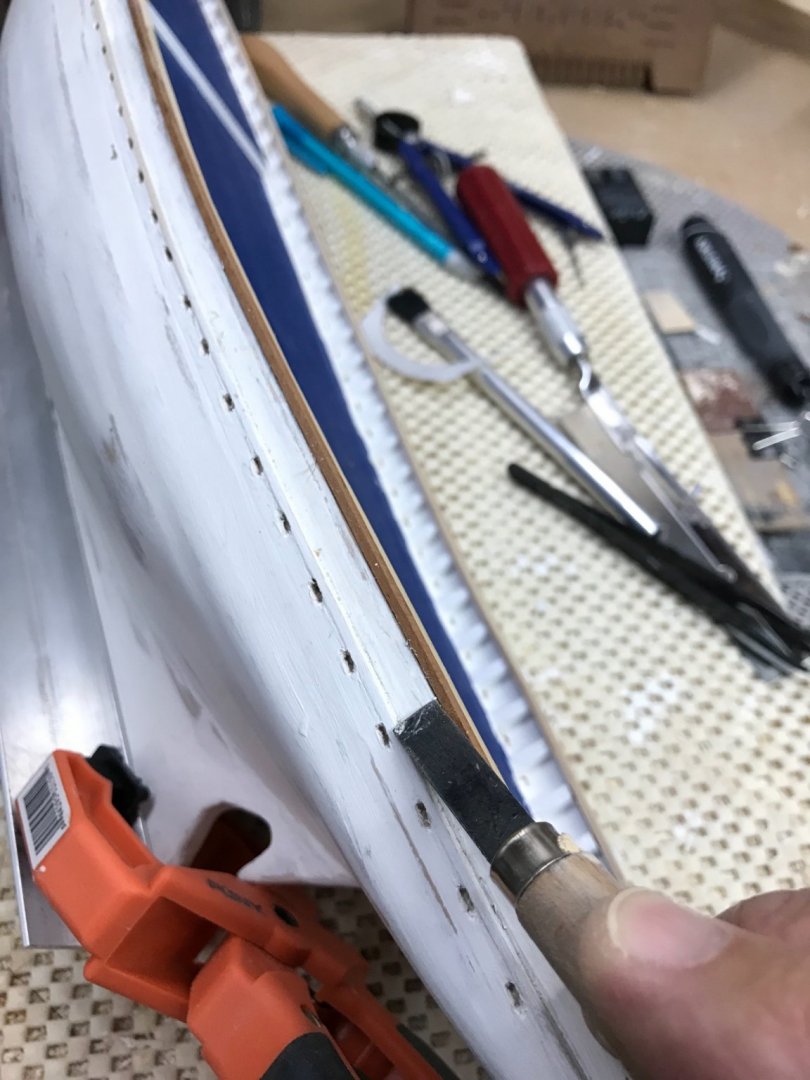

- 127 replies
-
- 5
-
-
- Bowdoin
- Arctic Exploration
- (and 3 more)
-
That’s how it goes when you pursue perfection. You are on that path… Looking good. A bit of OCD is in all of us. LOL 😆 GOOD JOB 👍
-
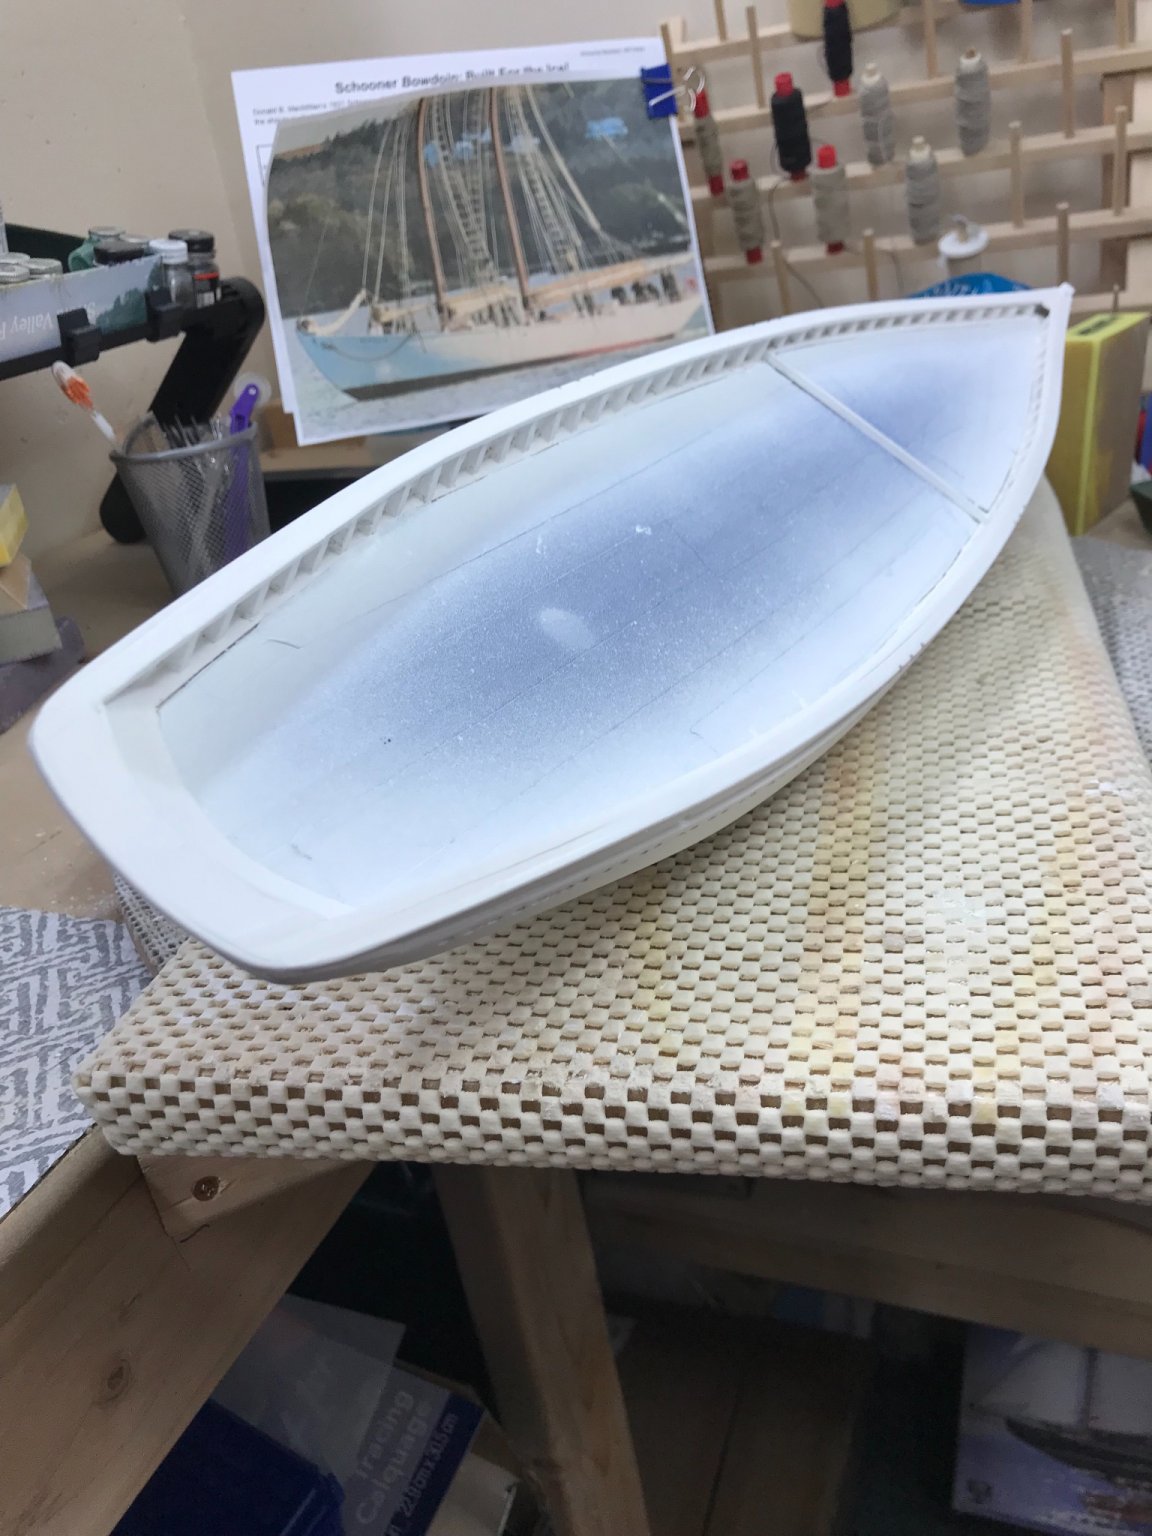
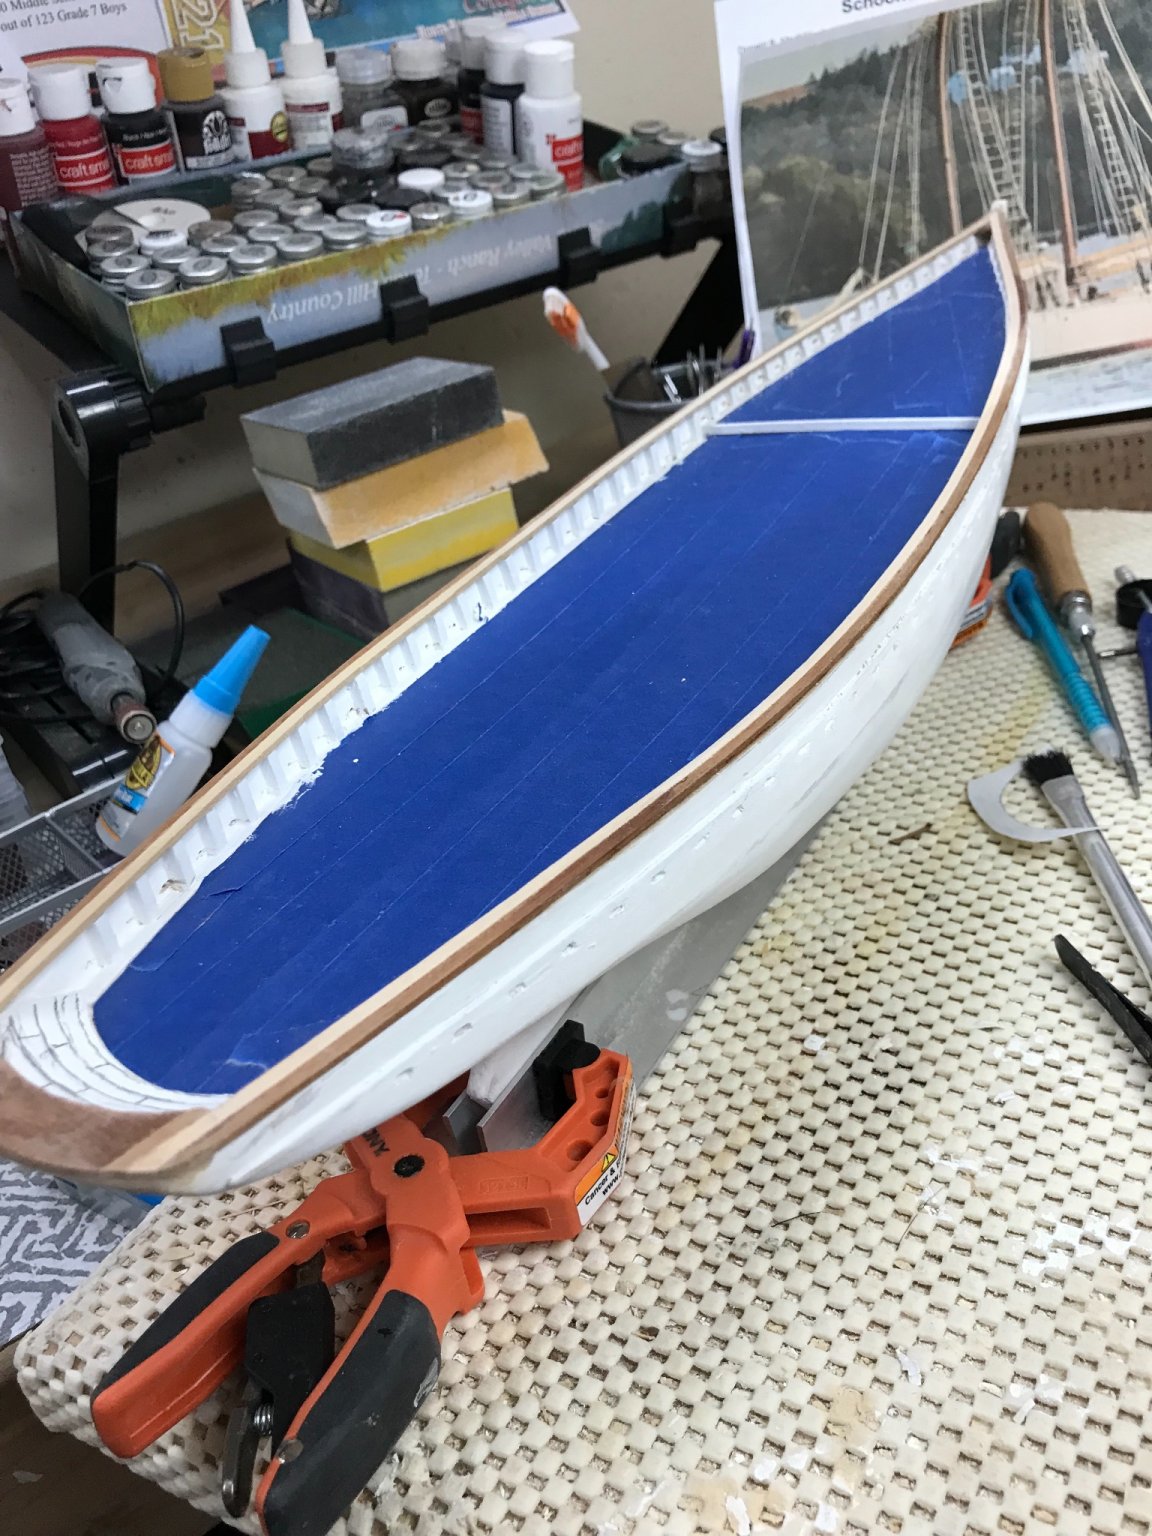
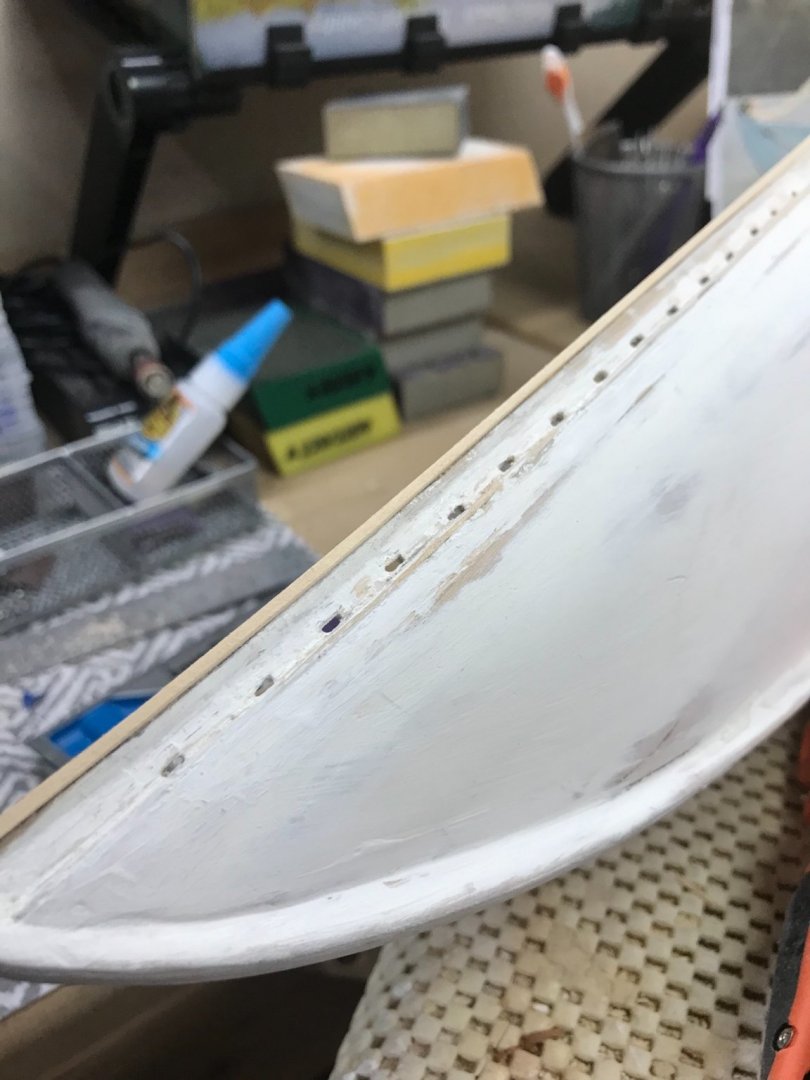
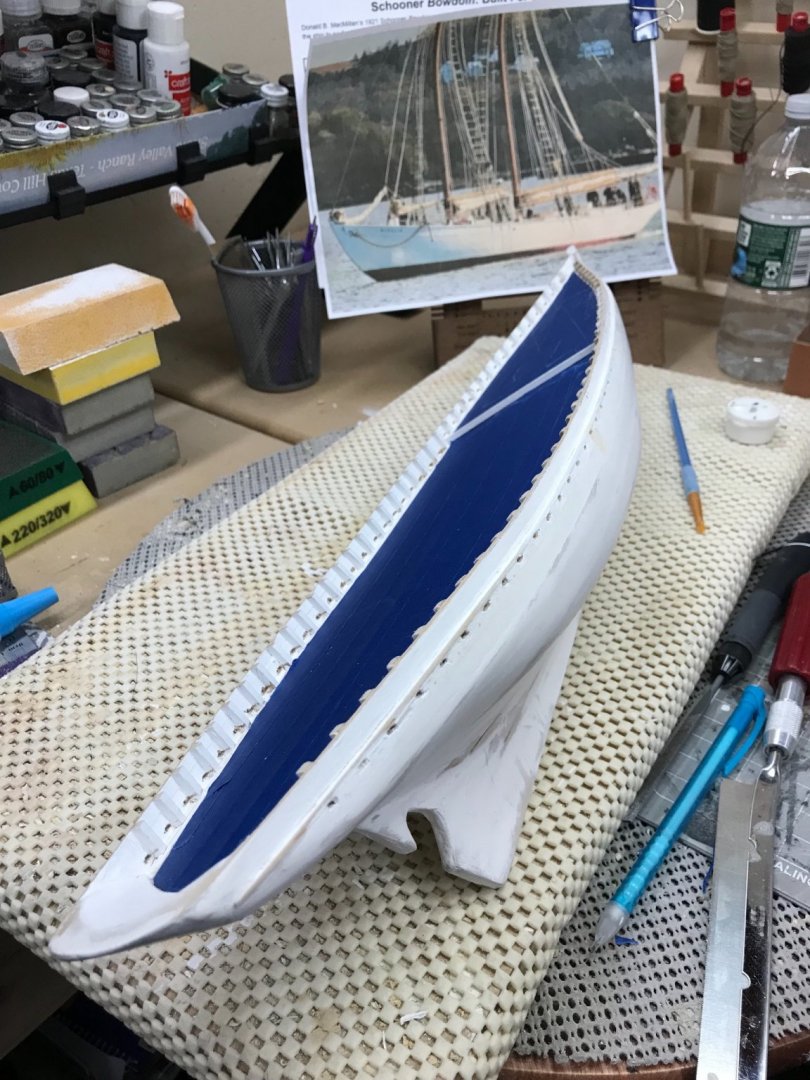
Bulwarks and Scuppers… Finally, I have a photo that I am not embarrassed 😳 to post. Who would have thought 1/32” x 1/16” holes in the bulwarks would be so difficult. 😣 I am not going to even count the repairs I have made to this hull trying to get to this point. 😩 Got say great experience gained. 😆 Continuing on to fairing out the bulwarks for top rails. Not to mention cleaning up those pesky little holes. (Scuppers) Cheers 🍻

- 127 replies
-
- 6
-
-
- Bowdoin
- Arctic Exploration
- (and 3 more)
-
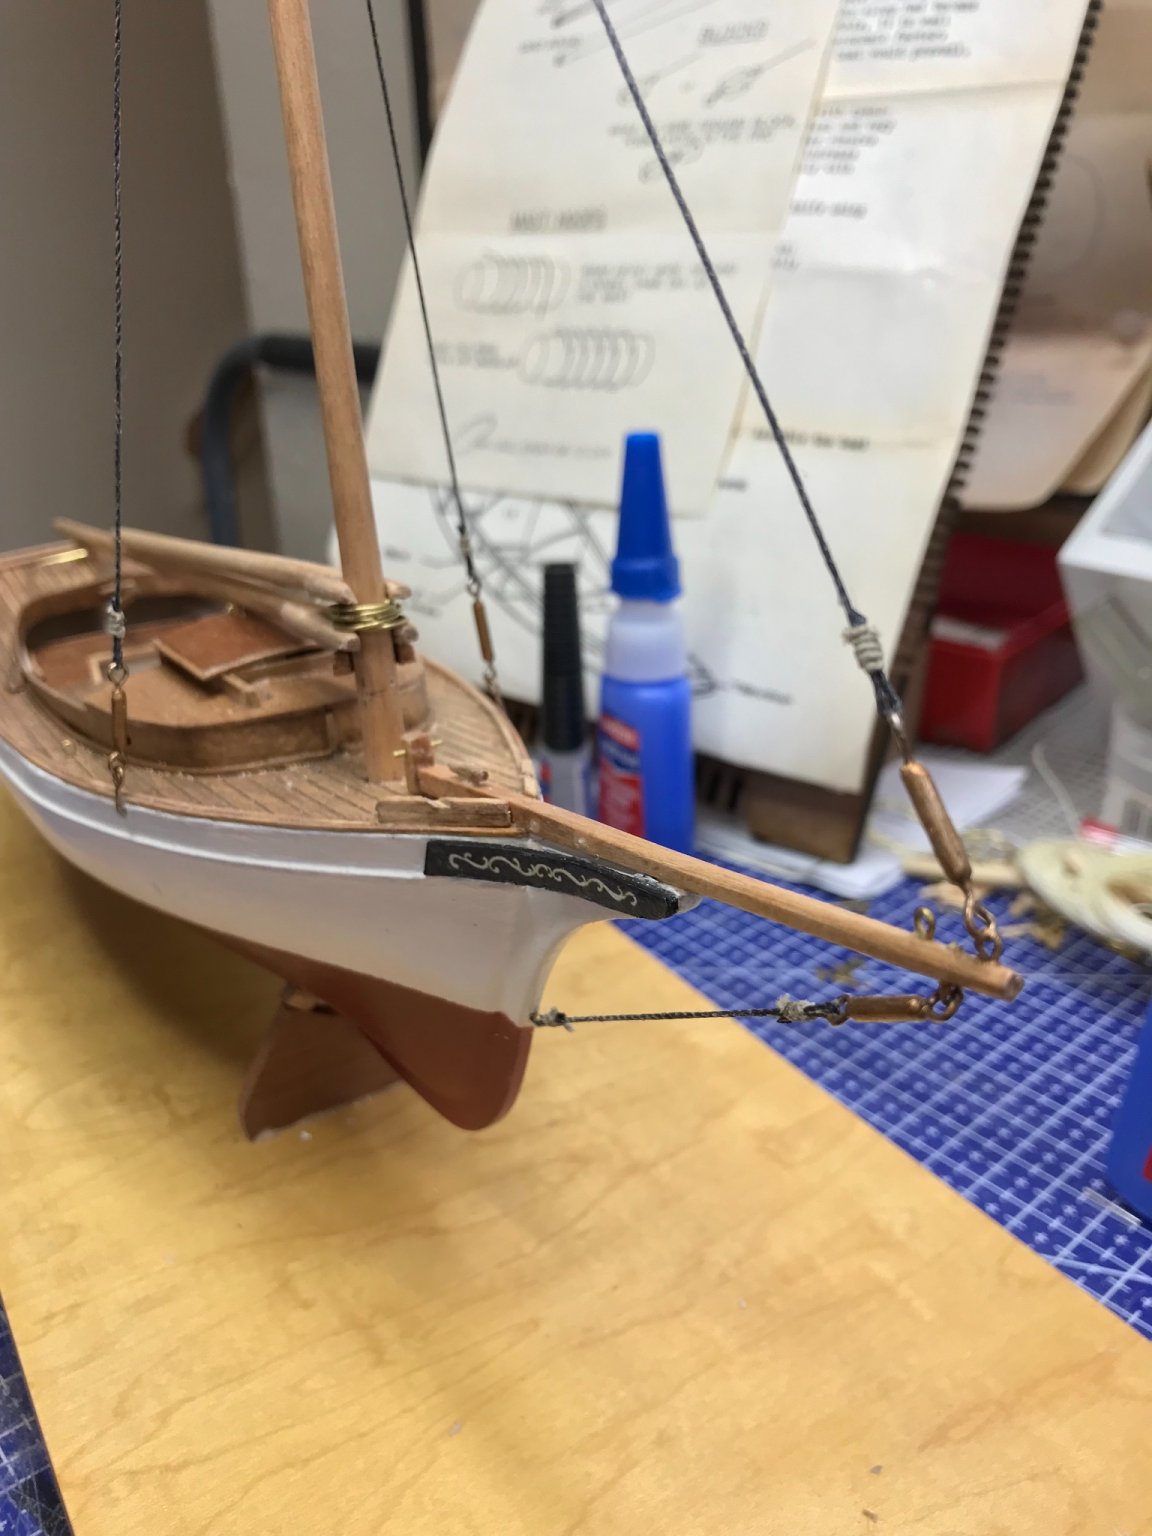
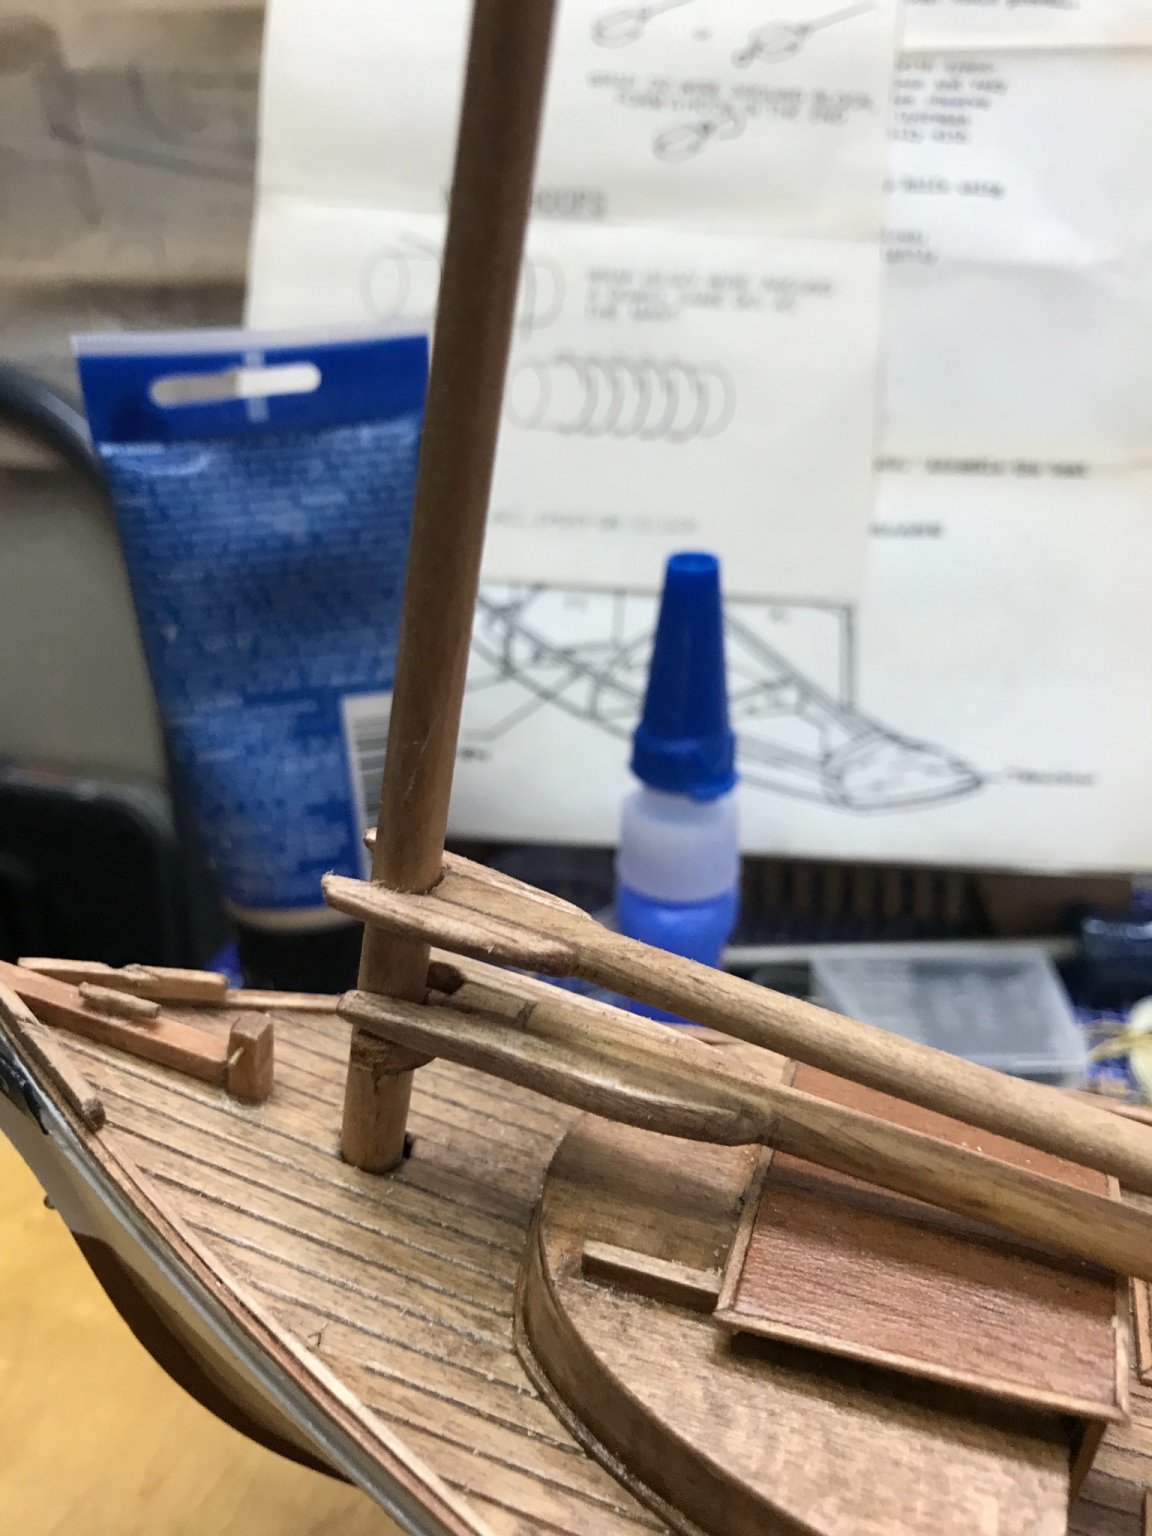
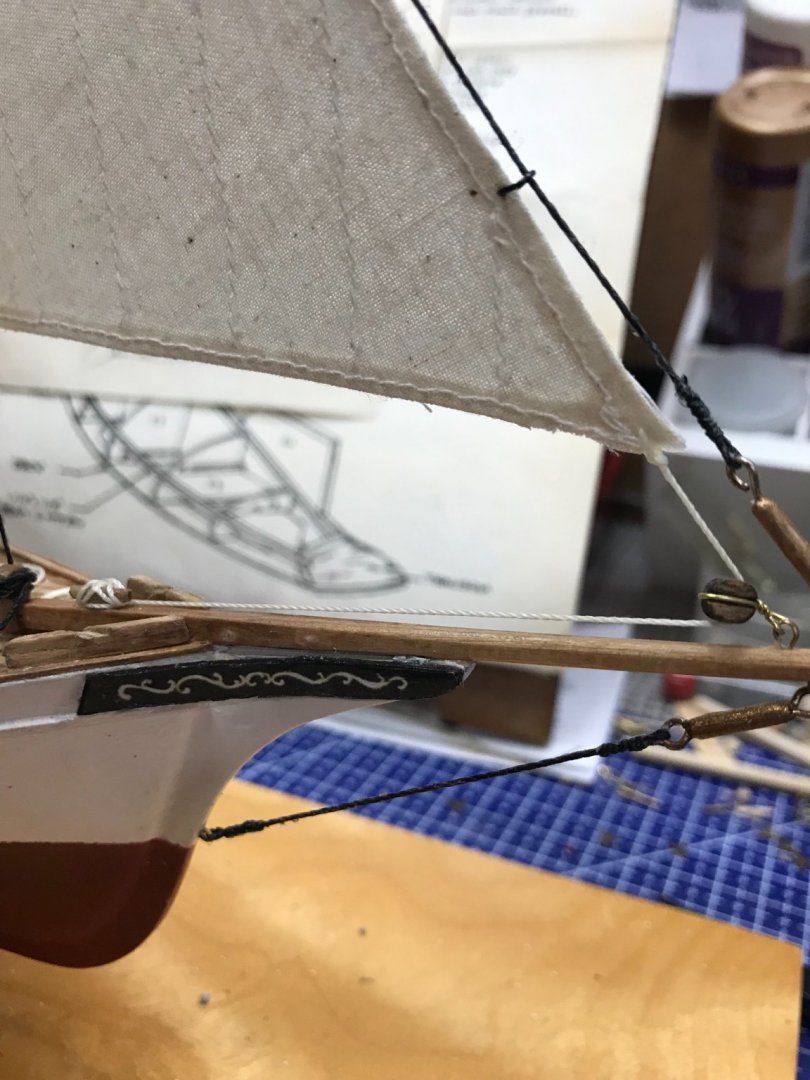
Fittings… Eyelets added to the Bowsprit. Cotter Pins are from the Laughing Whale Kit. Fare Leads on deck… Using CA glue to cement eyelets in place. Boom and Gaff ready for placement. She is coming along, Bowdoin is consuming my time with Hull and Bulwarks prep. I’ll be back here when it’s time to watch paint dry on the Bowdoin Hull. 😆 Cheers 🍻

- 26 replies
-
- 4
-
-
- Maine
- Laughing Whale
- (and 2 more)
-
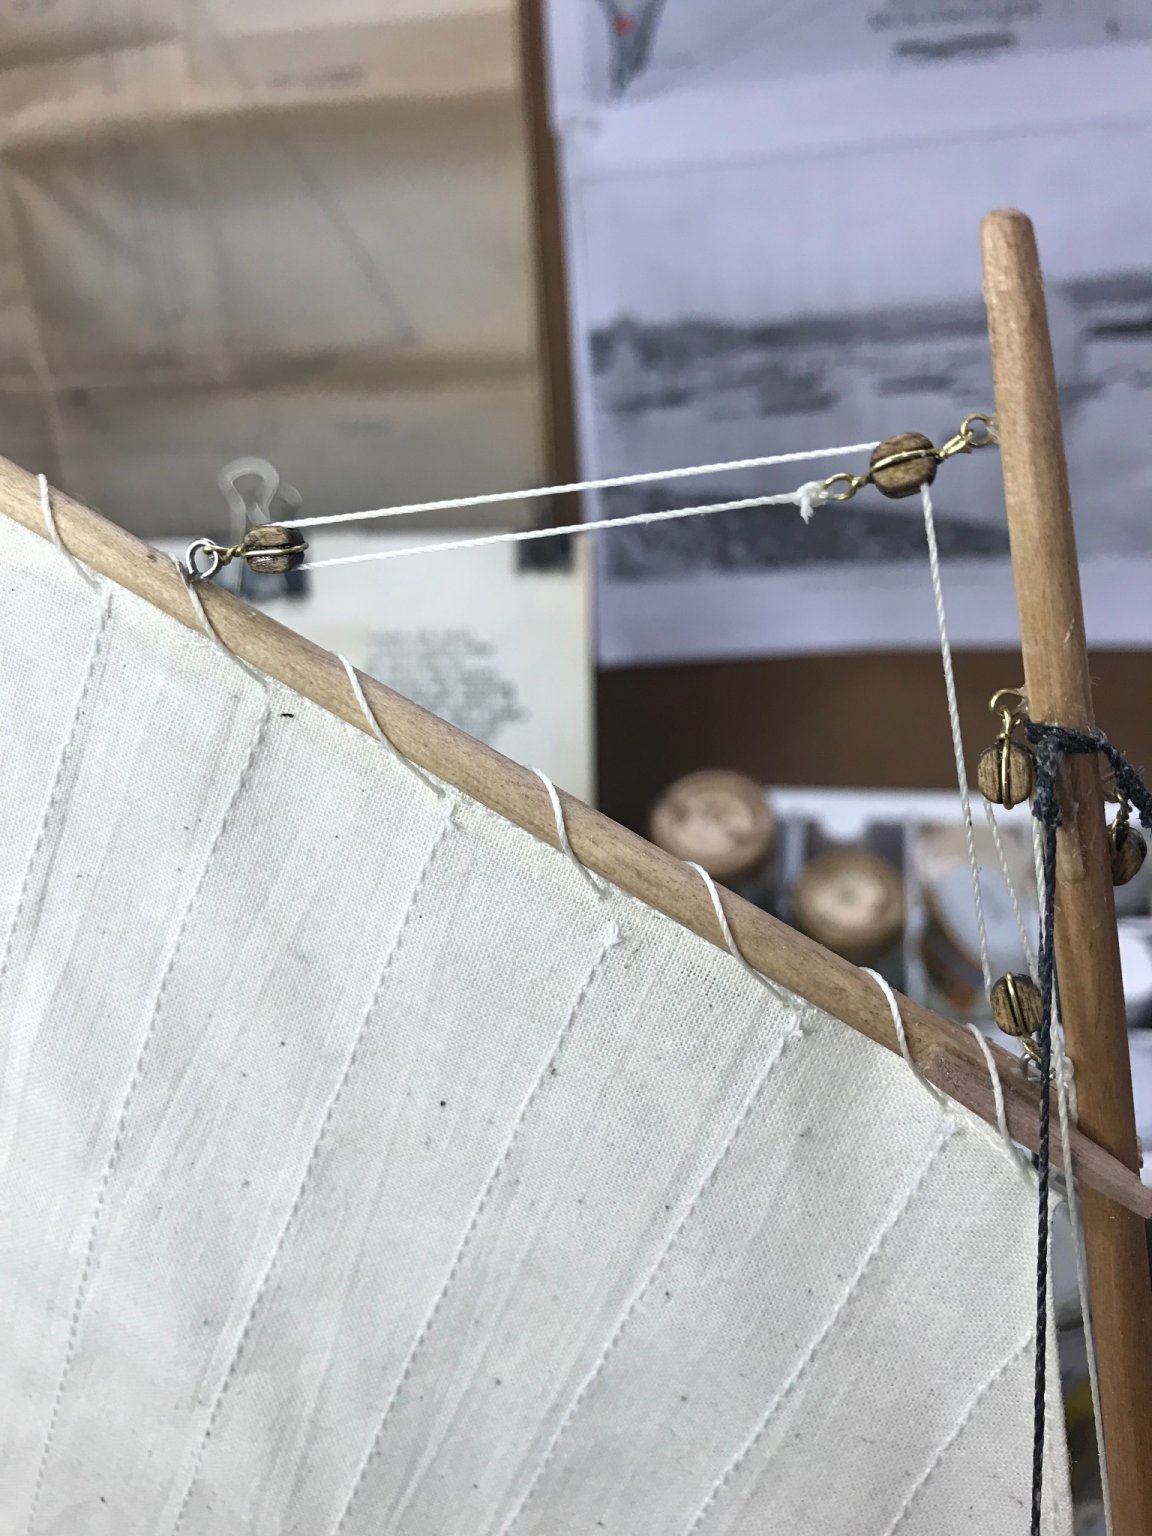
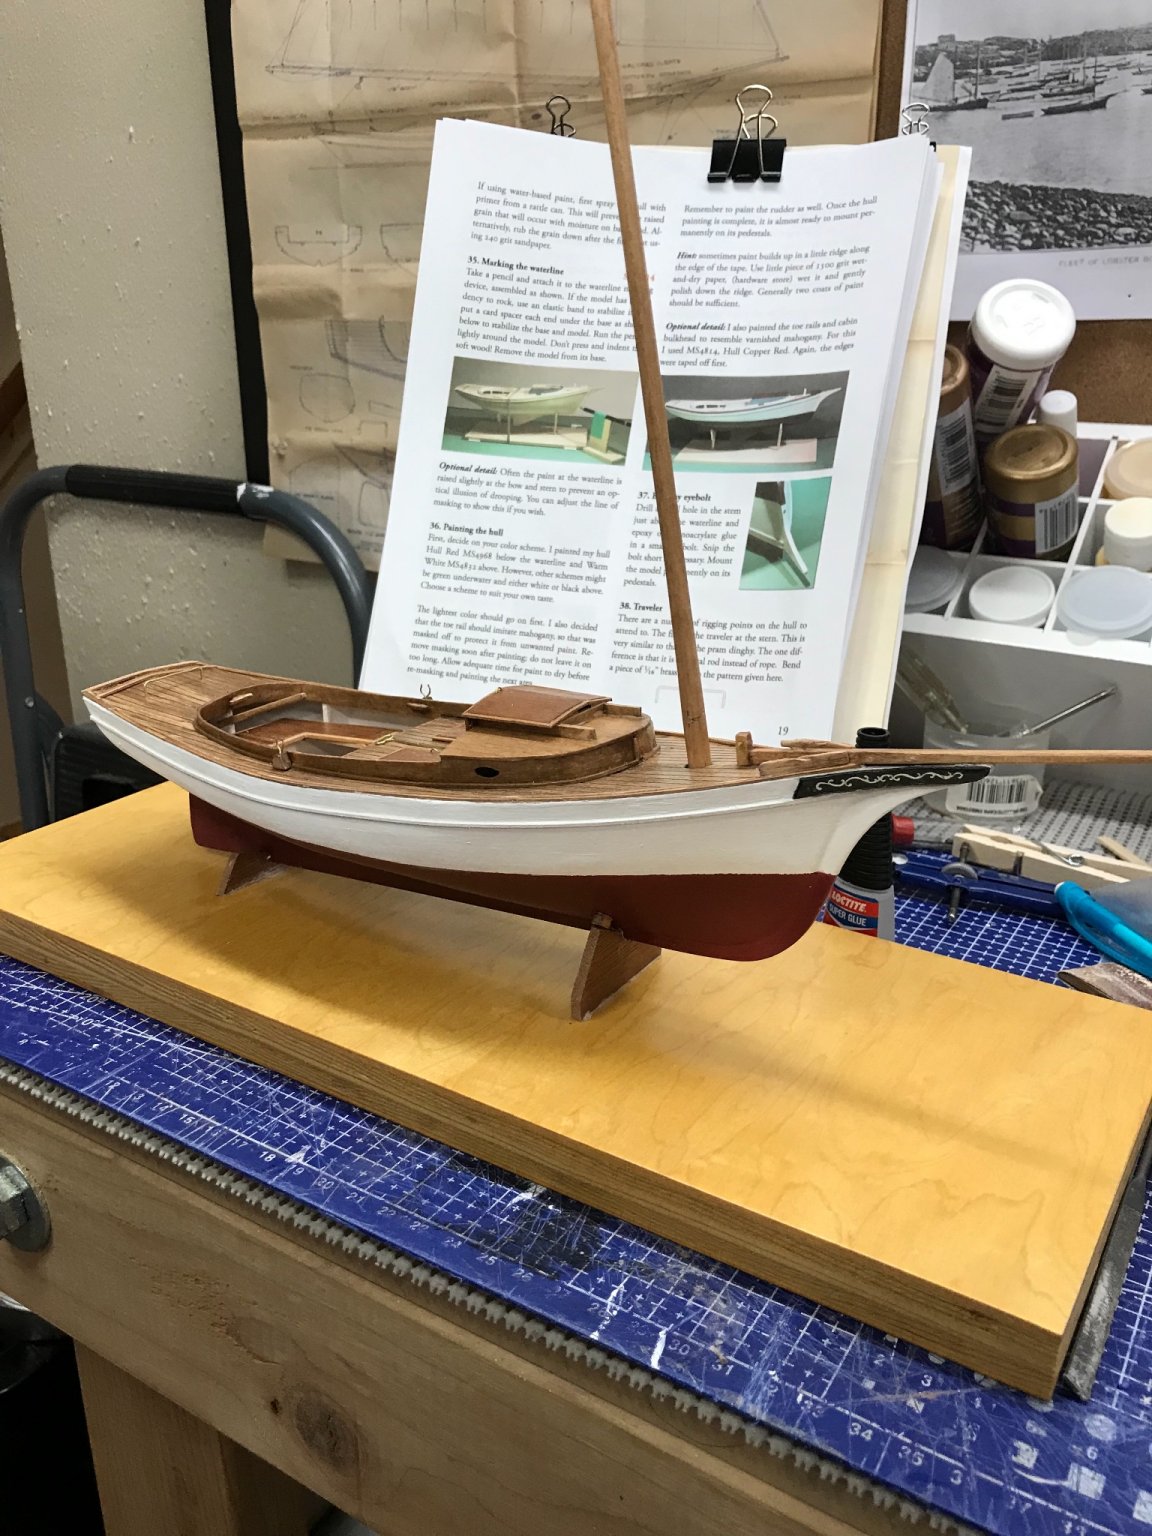
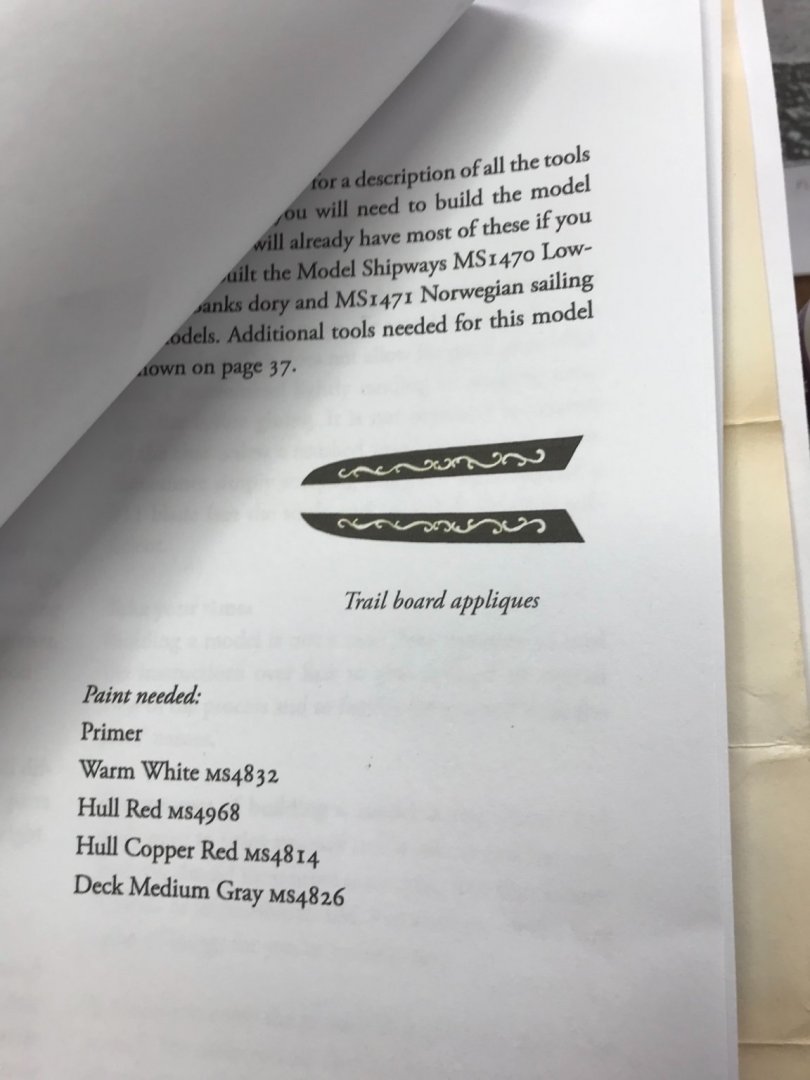
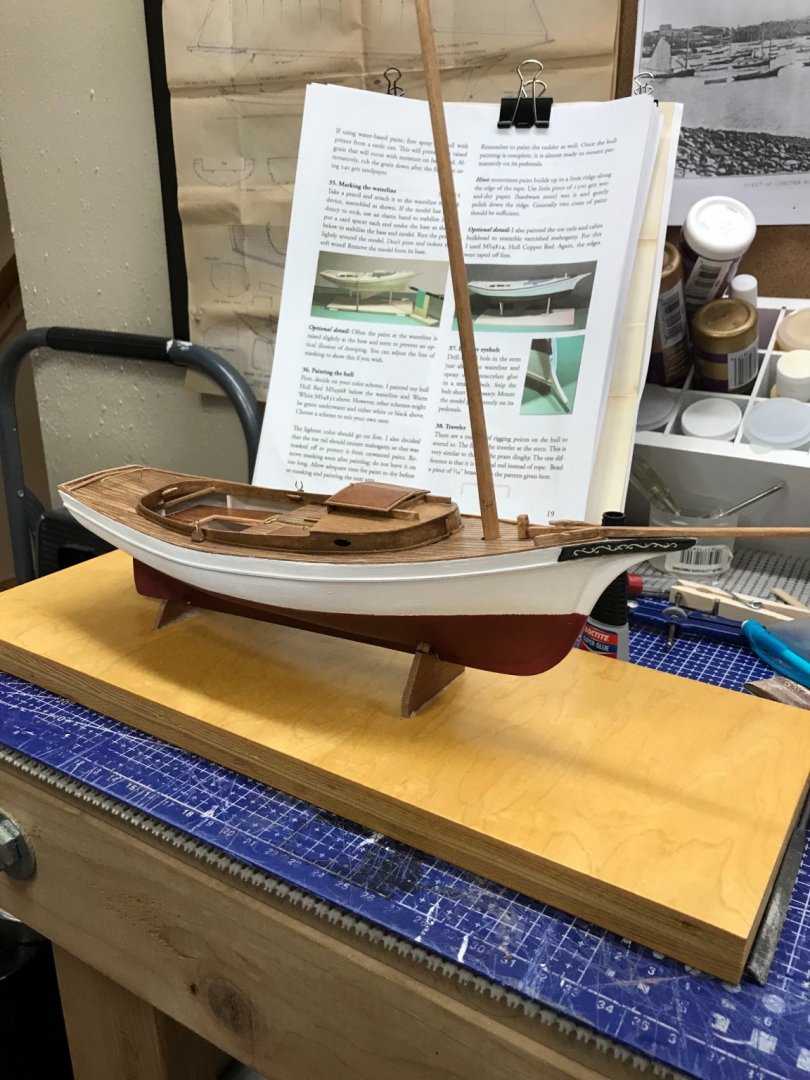
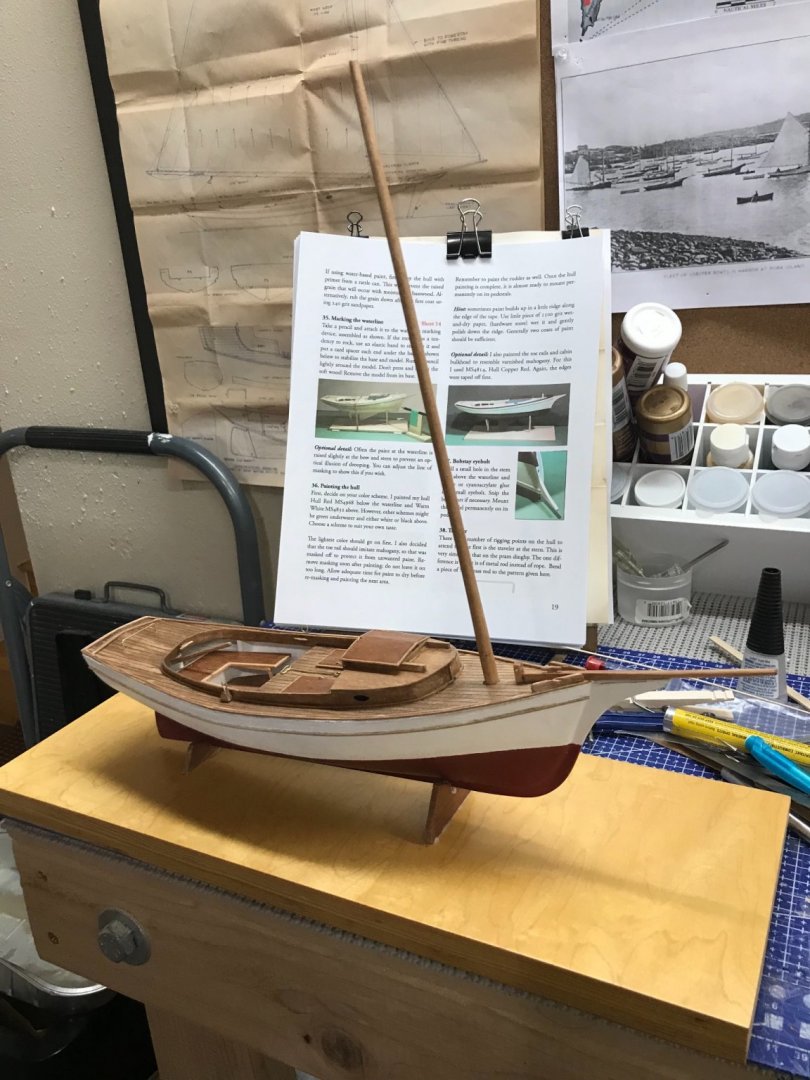
Trail Boards… Cut paper appliqué out of MS instructions. 😎 Applied them to 1/32” sheet, cut out and painted. Glued in place… Painted rub molding to match hull… Time for blocks… Easier said than done. 😝 Found some thinner wire and better blocks in my stash. Got her done…

- 26 replies
-
- 3
-
-
- Maine
- Laughing Whale
- (and 2 more)
-
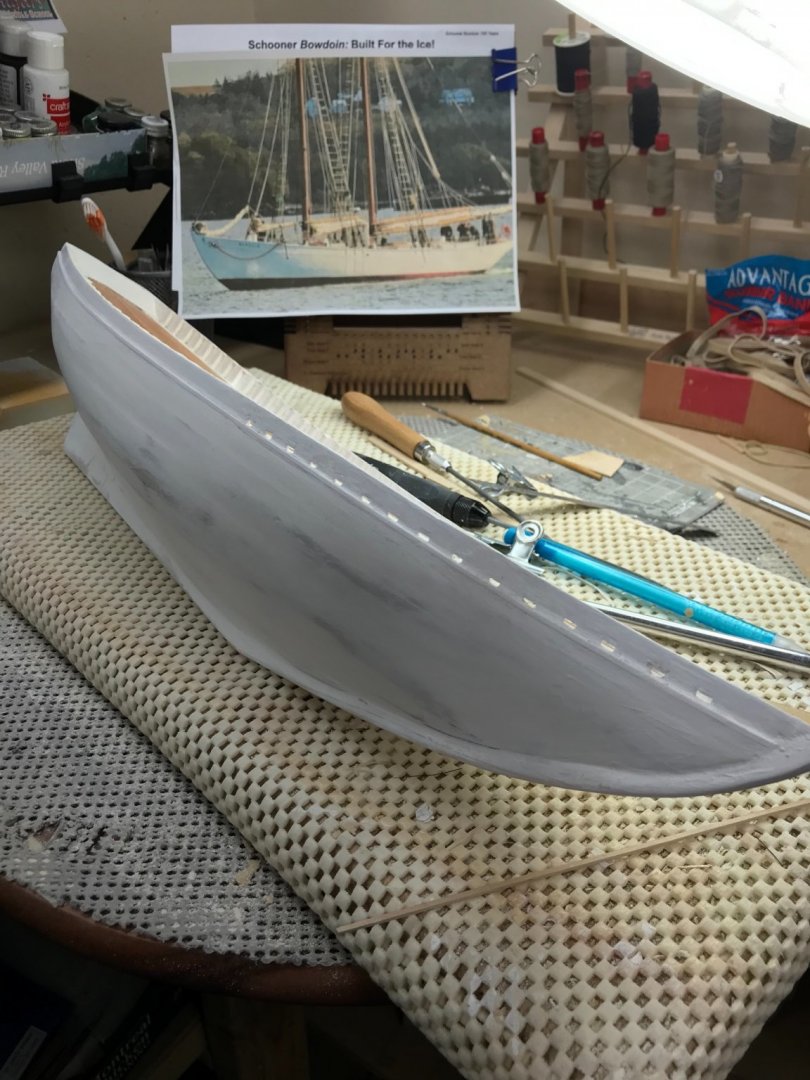
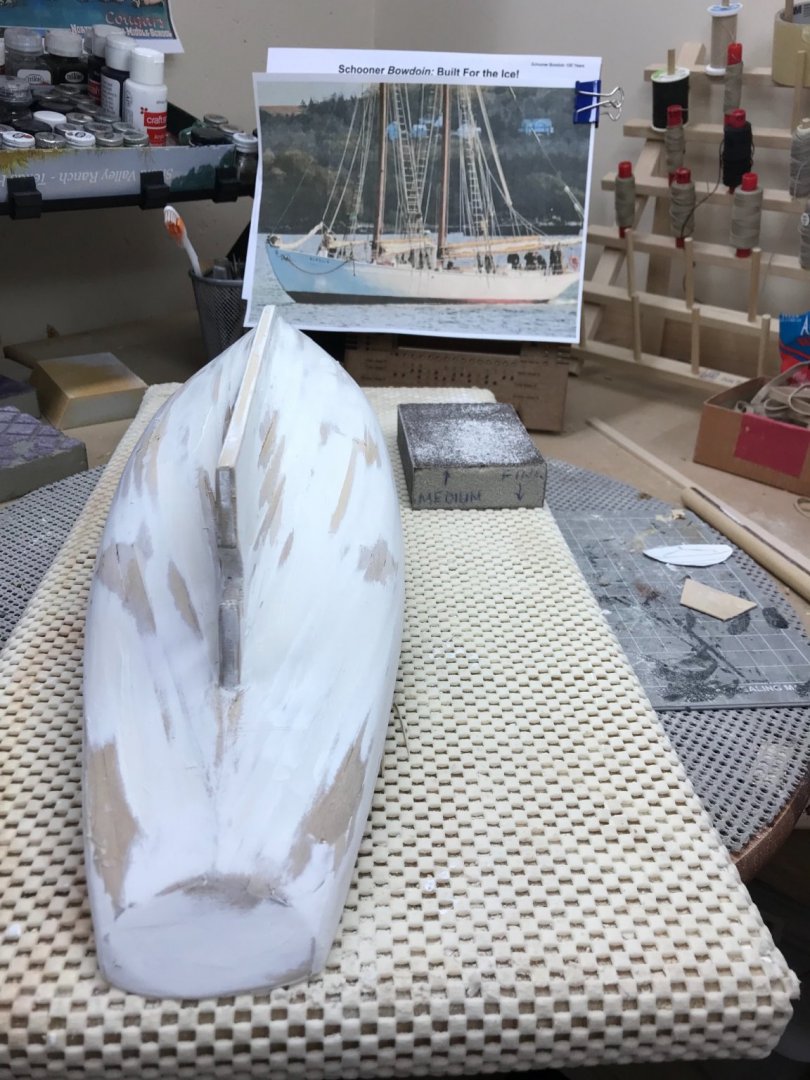
it’s getting there… Just a bit more fill for a few low spots…. 👍
- 127 replies
-
- 5
-
-
- Bowdoin
- Arctic Exploration
- (and 3 more)
-
You are correct… That’s why I always have another build to keep me busy, so I don’t “watch paint dry”. 😆 No Rush…
- 127 replies
-
- 1
-
-
- Bowdoin
- Arctic Exploration
- (and 3 more)
-
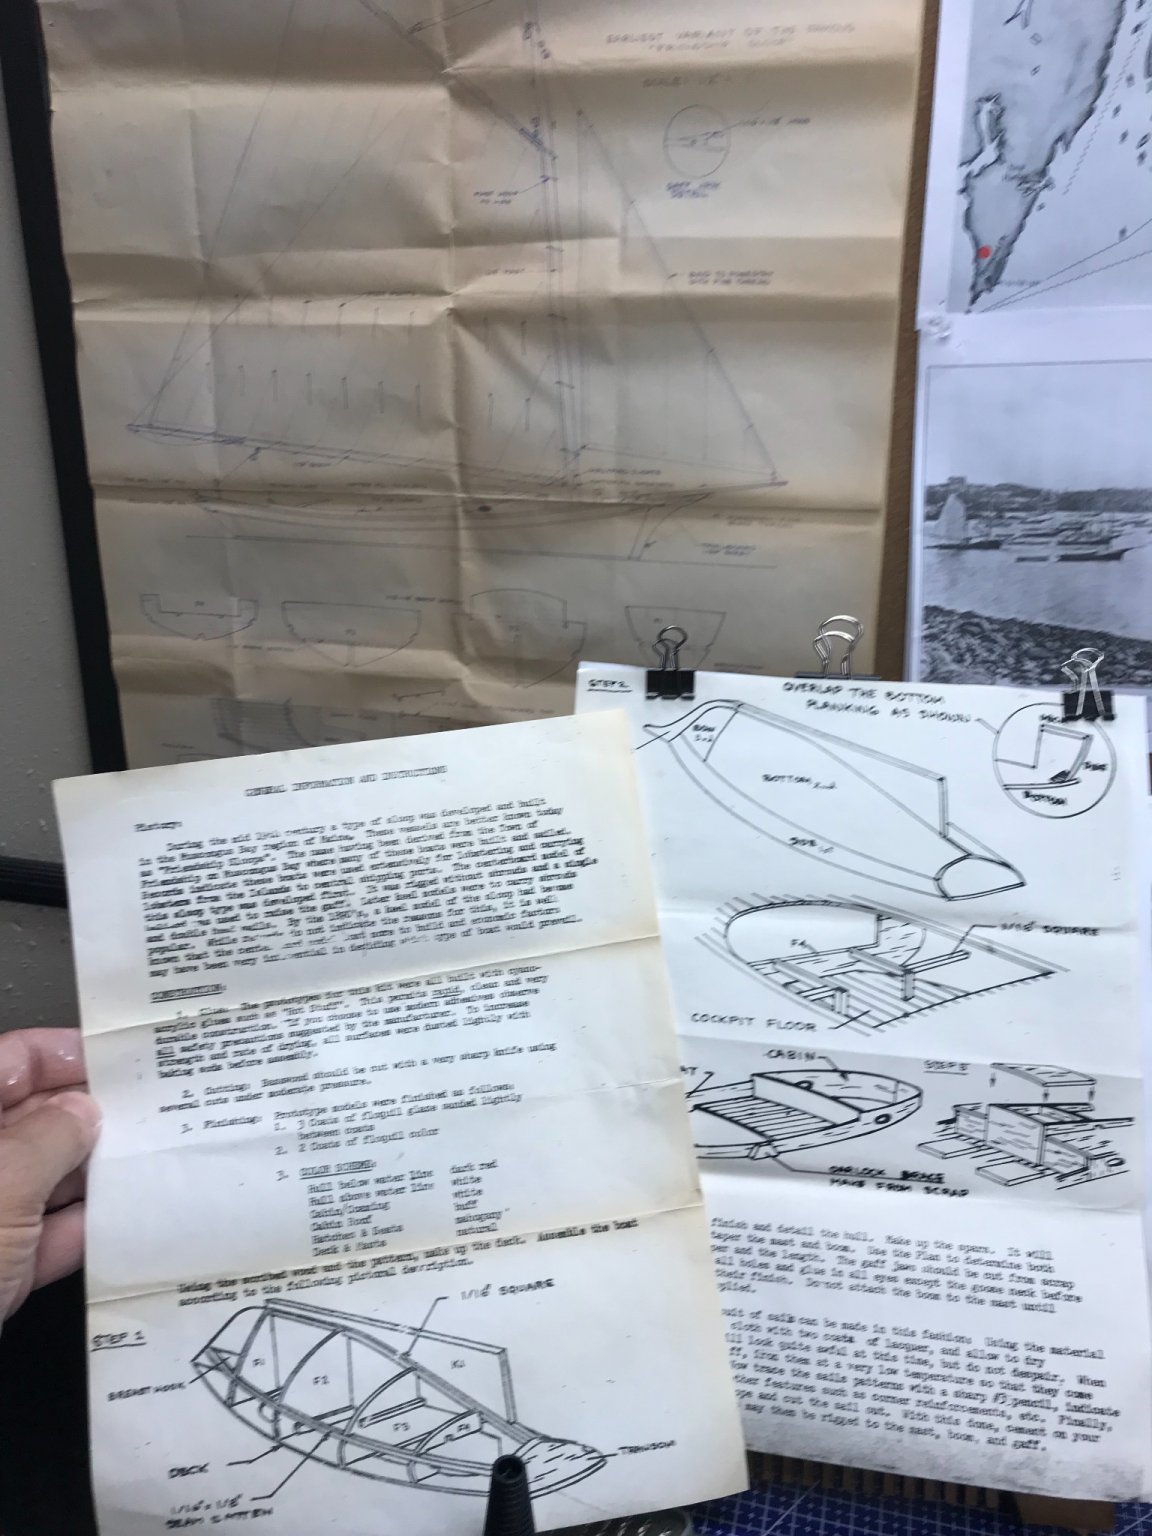
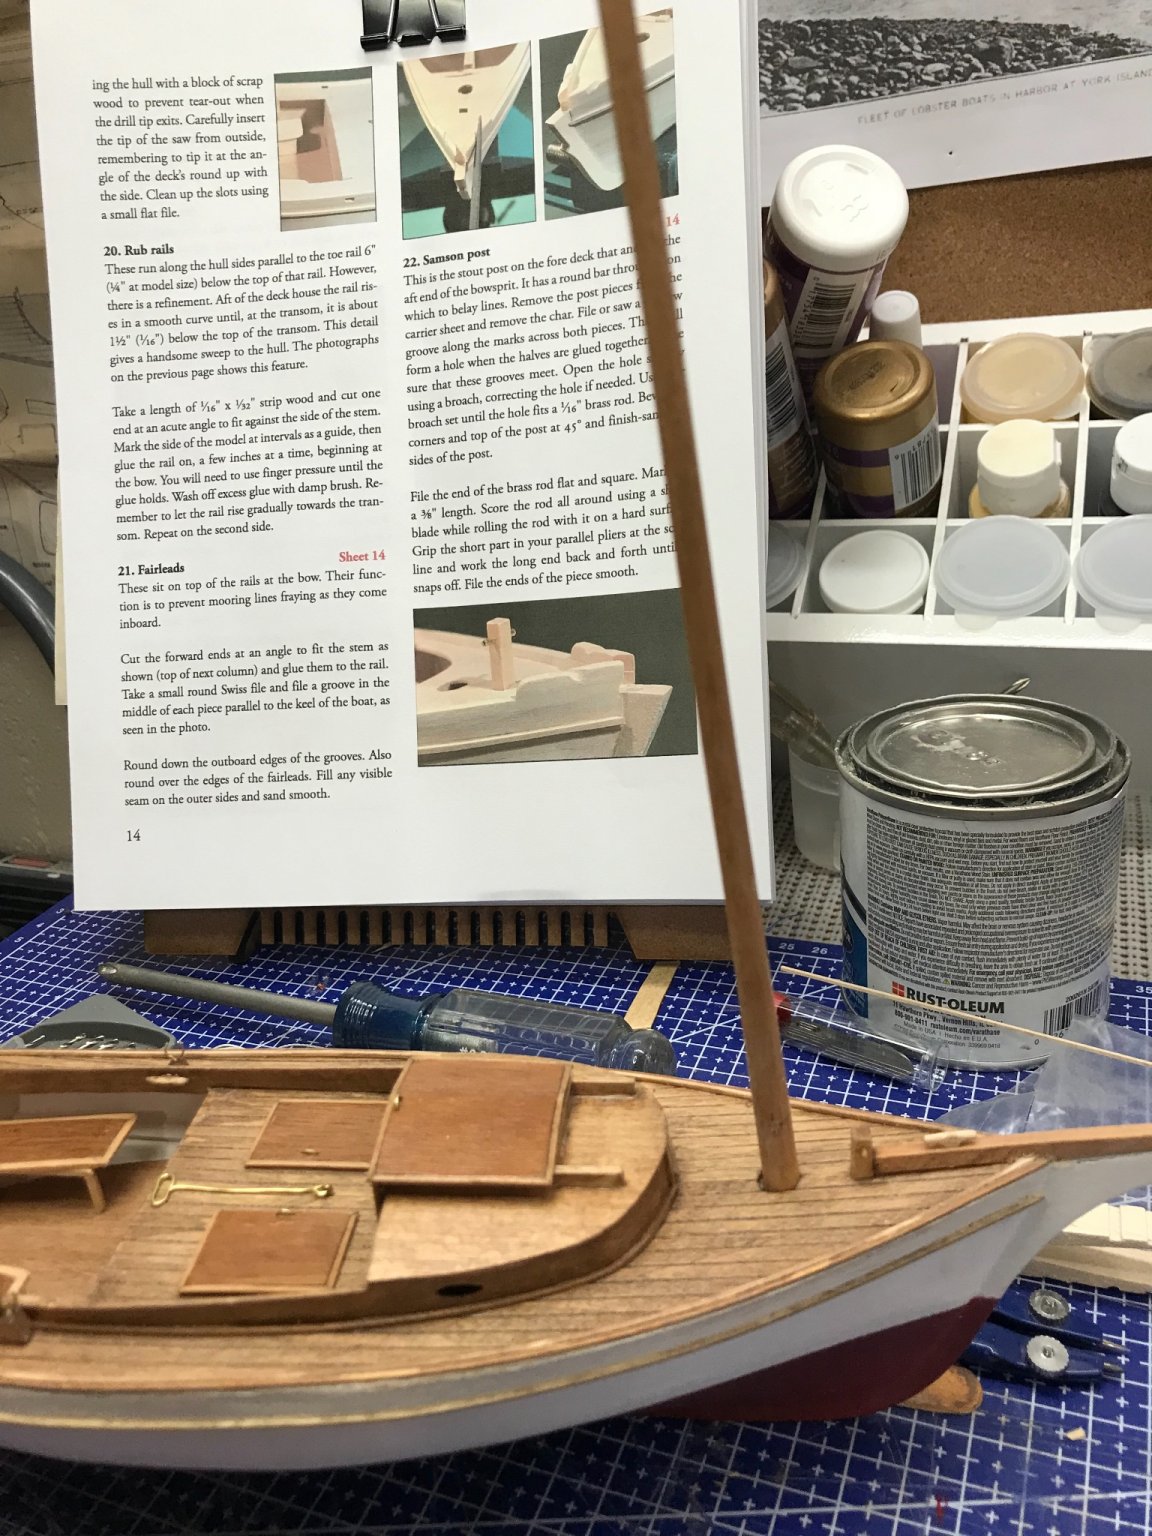
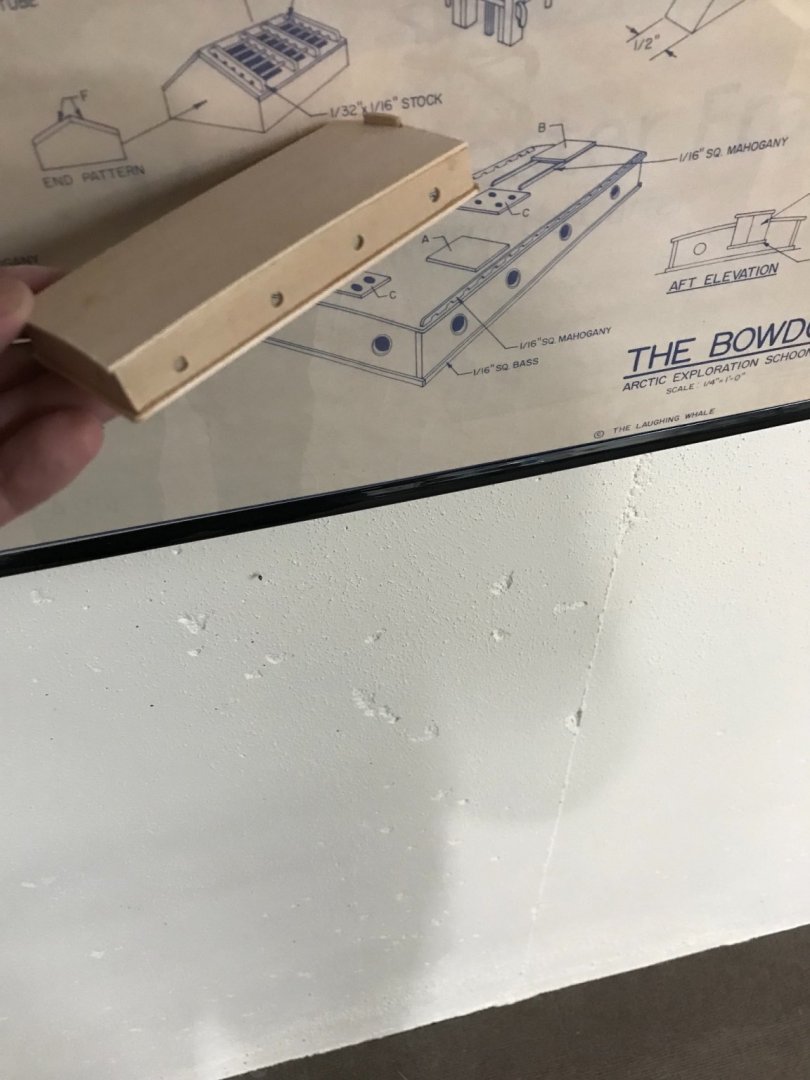
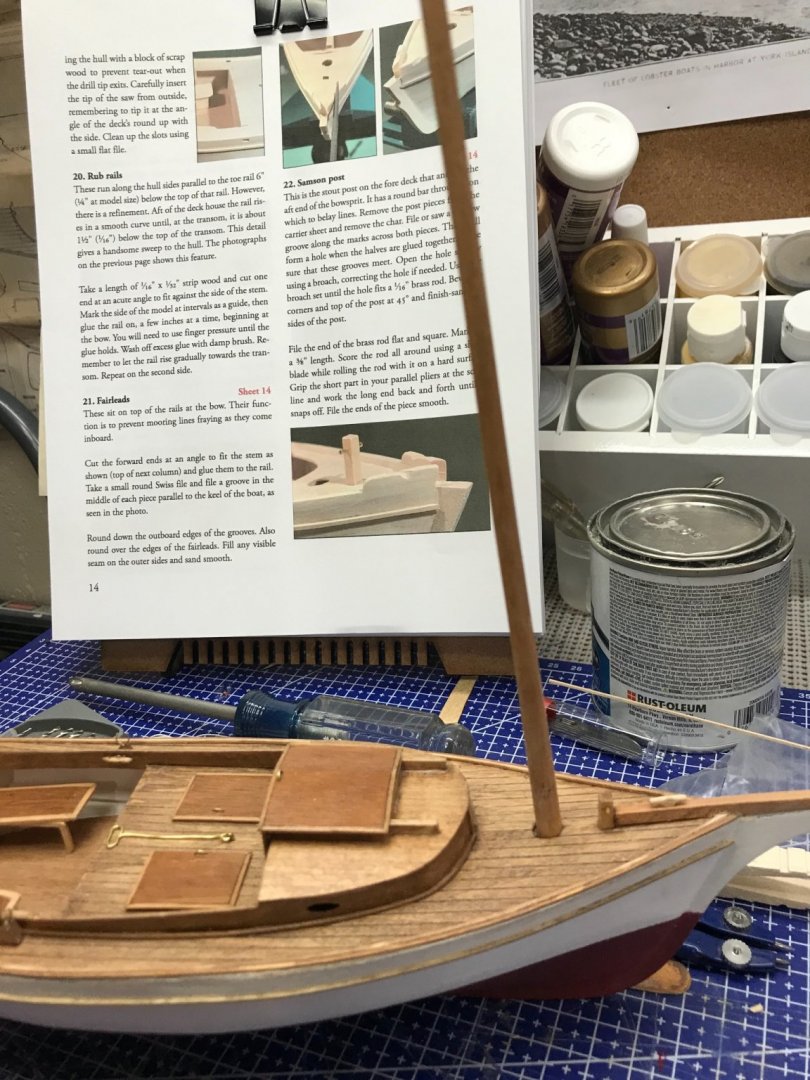
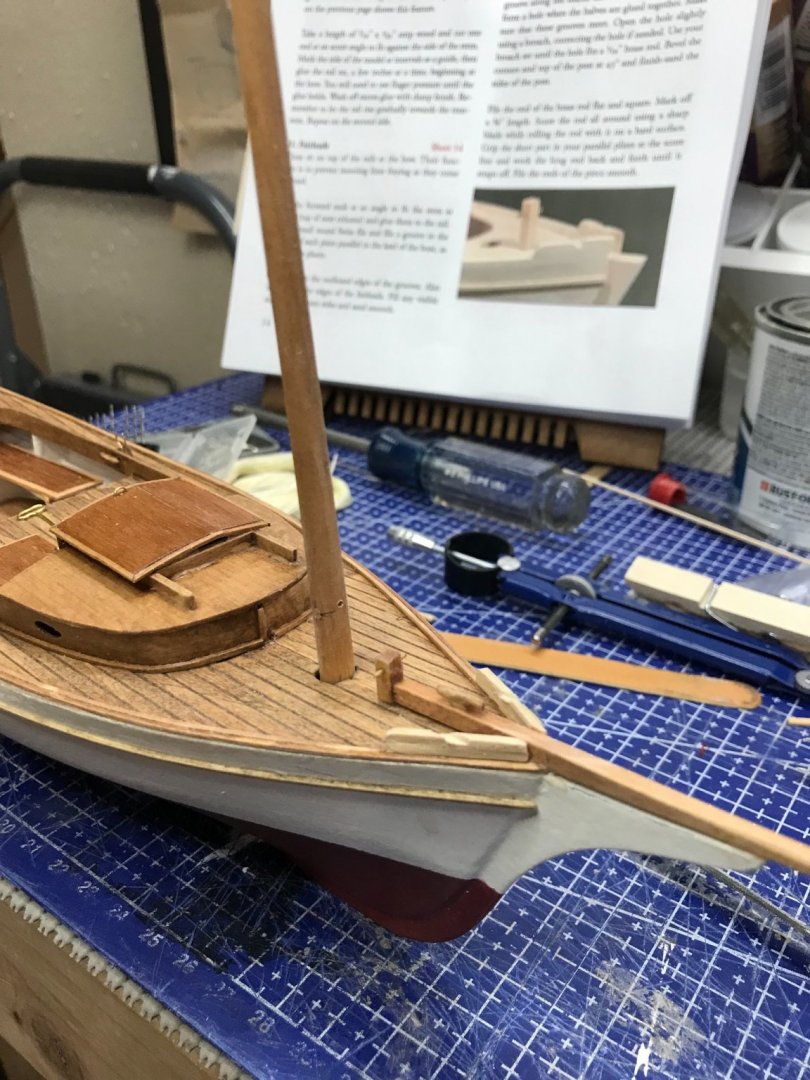
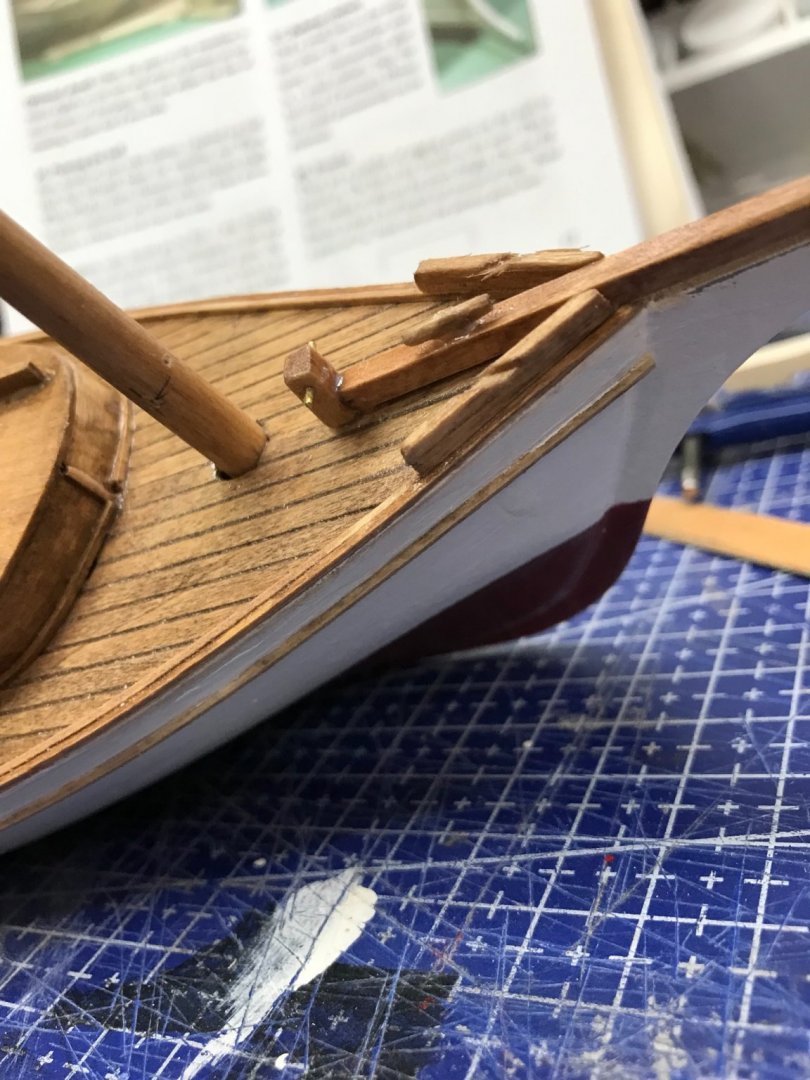
Went looking for better instructions, these vintage kits leave a lot to be desired on the instruction side. Just two pages and the blueprint. No detail, I have to pull that off the blueprint. Nice… I found this on the Model Expo site. Downloadable Instructions (34 pages) much better guide with more detail for Rigging. Rub Rails installed… Scratched out Fairleads for the bow. Stained and finished out… Mounted and ready to get serious 🧐 with rigging. Later… 😎


- 26 replies
-
- 3
-
-
- Maine
- Laughing Whale
- (and 2 more)