


Jamie Coleman
-
Posts
74 -
Joined
-
Last visited
Content Type
Profiles
Forums
Gallery
Events
Posts posted by Jamie Coleman
-
-
18 hours ago, Overworked724 said:On 12/31/2020 at 5:54 PM, Bill Gormley said:
1 - Should I address this or will it not really show up under a coat of paint? If it should be fixed first ... wood shim or better to use filler? Wood shim might be more supportive and you can sand it down.
2 - Are the sills supposed to be sanded to the same thickness as the frame? What I'm showing here is my sills are a little bit wider. I think the practicum addresses this. The lower part of the frames can be a bit wider. I think what he means here is the sill is further inboard than the frames. They should be in line with one another, but like Pat says, they can be thicker than the top of the rails. You can save this sanding until after you plank the hull if you want so there's more structure, which is what I'm doing.
3 - It's hard to see in the photo, but this is a shallow divot where I wasn't careful with my sanding stick. Should I fill and restore this divot (and others like it)? Not sure whether it will cause trouble later on when it comes time to plank the deck. Uniformity and symmetry are important. If there is a gap in the deck the planks will not lay true. I'd fill it with a shim or filler and ensure there is continuity between the frames...otherwise you will have a dip You can over build it, and then sand/file/chisel is back the the right shape, it's a lot easier than trying to make the perfect plug and glue it perfectly in place. Sometimes it's easier if you cut more of your base material away if you need to get a flat surface to glue.
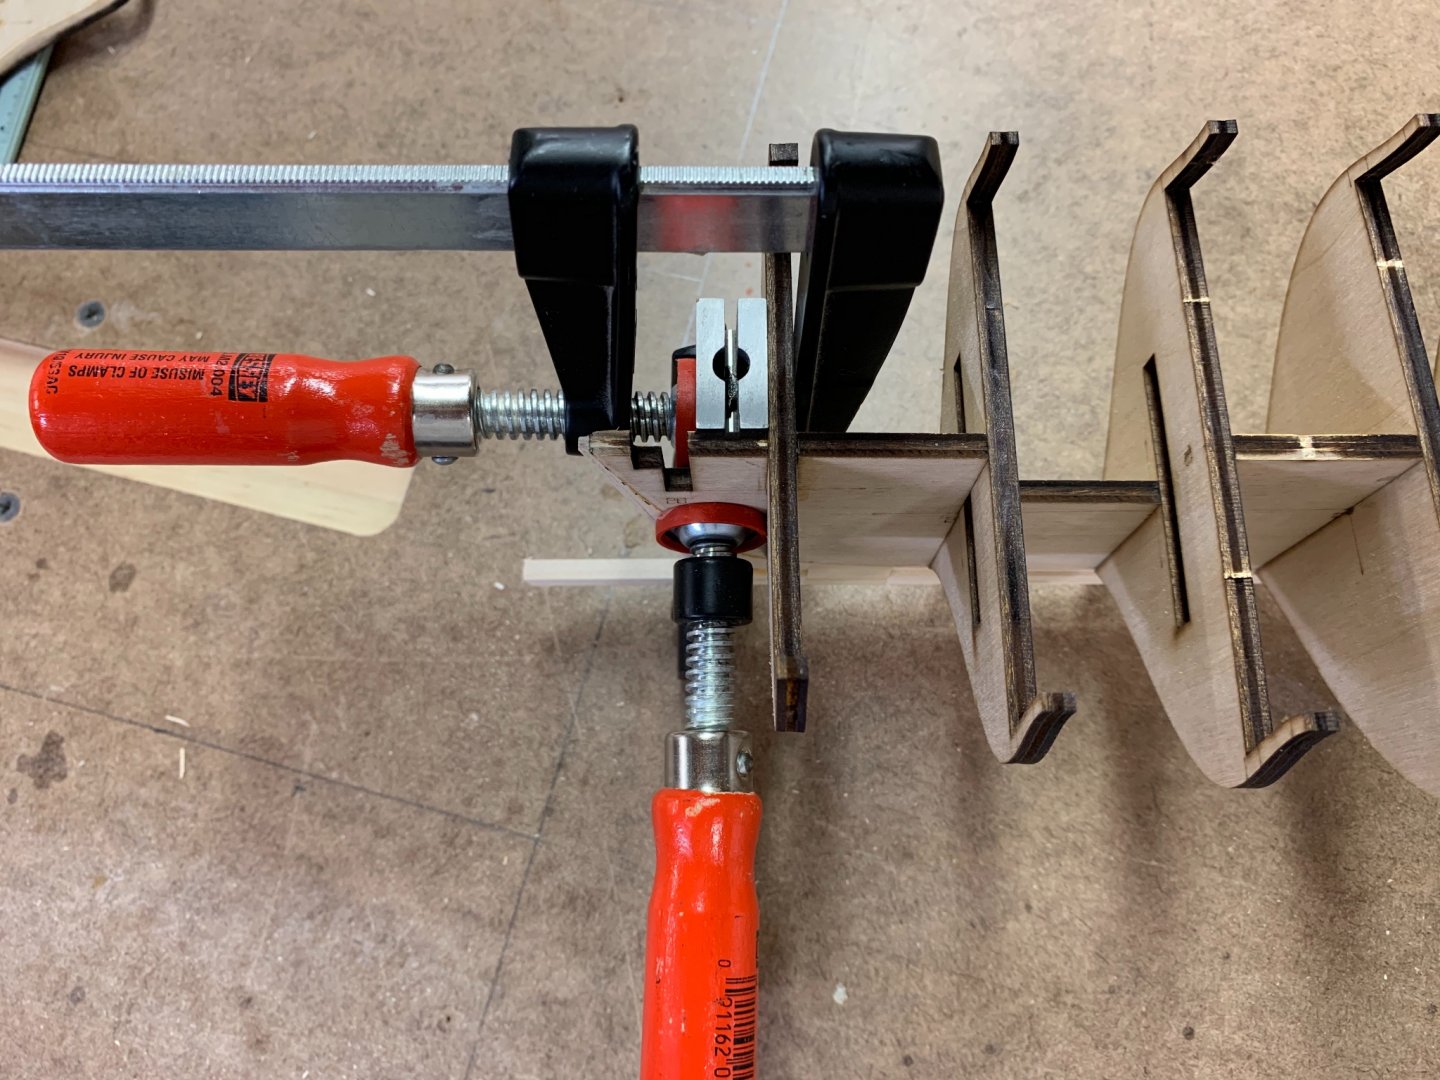
4 - What do you use to get nice straight cuts? I have been using a razor saw which cuts the wood easily enough ... but is there some basic technique or trick to get a straight cut? A chop saw or table saw...something automated rather than manual. For end cuts, you can make a little fence set up to use as a saw guide and get pretty square.
5 - I'm about ready to paint the gun ports red and I was planning to use either Tamiya or Life Color paint from my plastic modeling stash. Do I need to prepare or seal the wood first? I used Tamiya paints without issue. But I am woefully horrible at painting. I'd research this and come up with your best solution and ensure you are conformatble with it before throwing it on the ship...see my blog and the recent screw up I needed to address with regards to painting the bulkheads.... Others have more experience than me in painting, but I've found I can use less coats to cover if the wood is sealed/primed. I've liked using a sanding sealer on other projects (Zinsser has a wax free shellac based one that dries very quickly and the literature says it plays well with acrylics), but there are plenty of options, just make sure your primer/sealer is compatible with your top coat if you use one, oil and water play together funny.
Thanks for reading this far ... all input and feedback welcome!
Bill
Hope this helps, Bill. Happy New Year!!!
Hi Bill, added a few (far from expert) comments in myself, happy new year indeed.
-
Dang, that really looks clean. I’m sticking with the castings this go around, but that’s a really good idea to try next time.
-
I’m not a paint expert either, but I am reading that some polyurethanes and acrylic paints don’t play well together. If your poly goes up to where there will be black over it, you might want to look into a oil based primer after scuffing its down some.
-
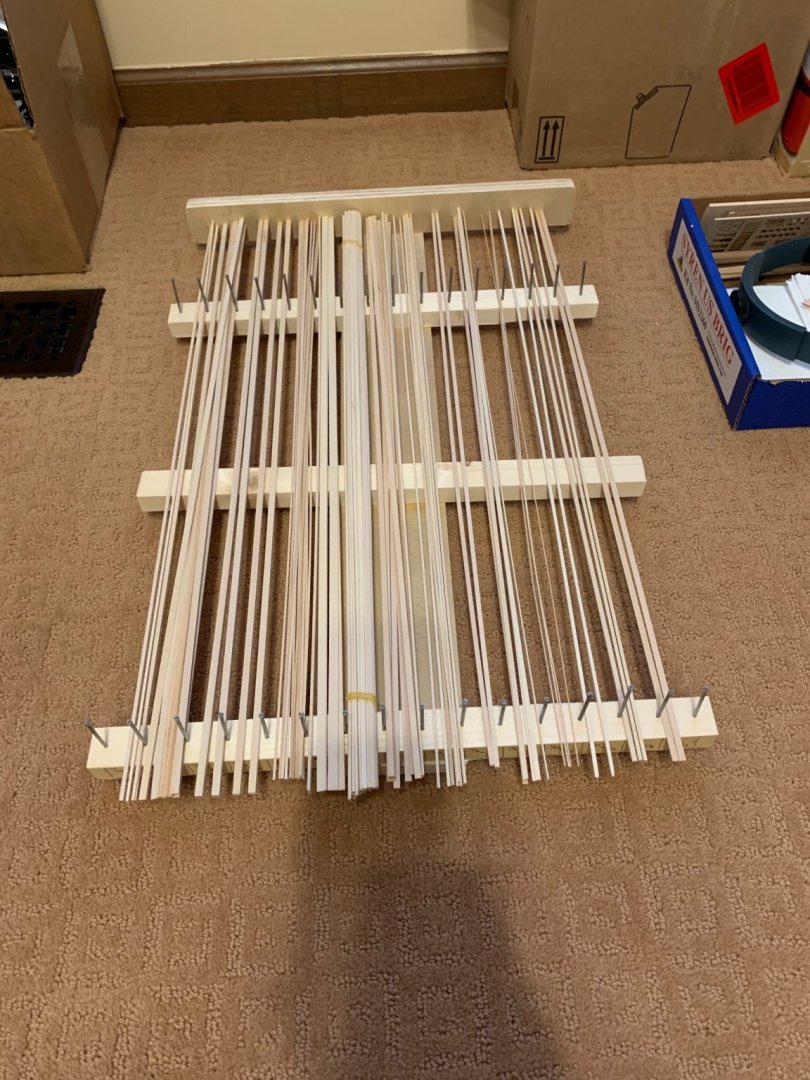
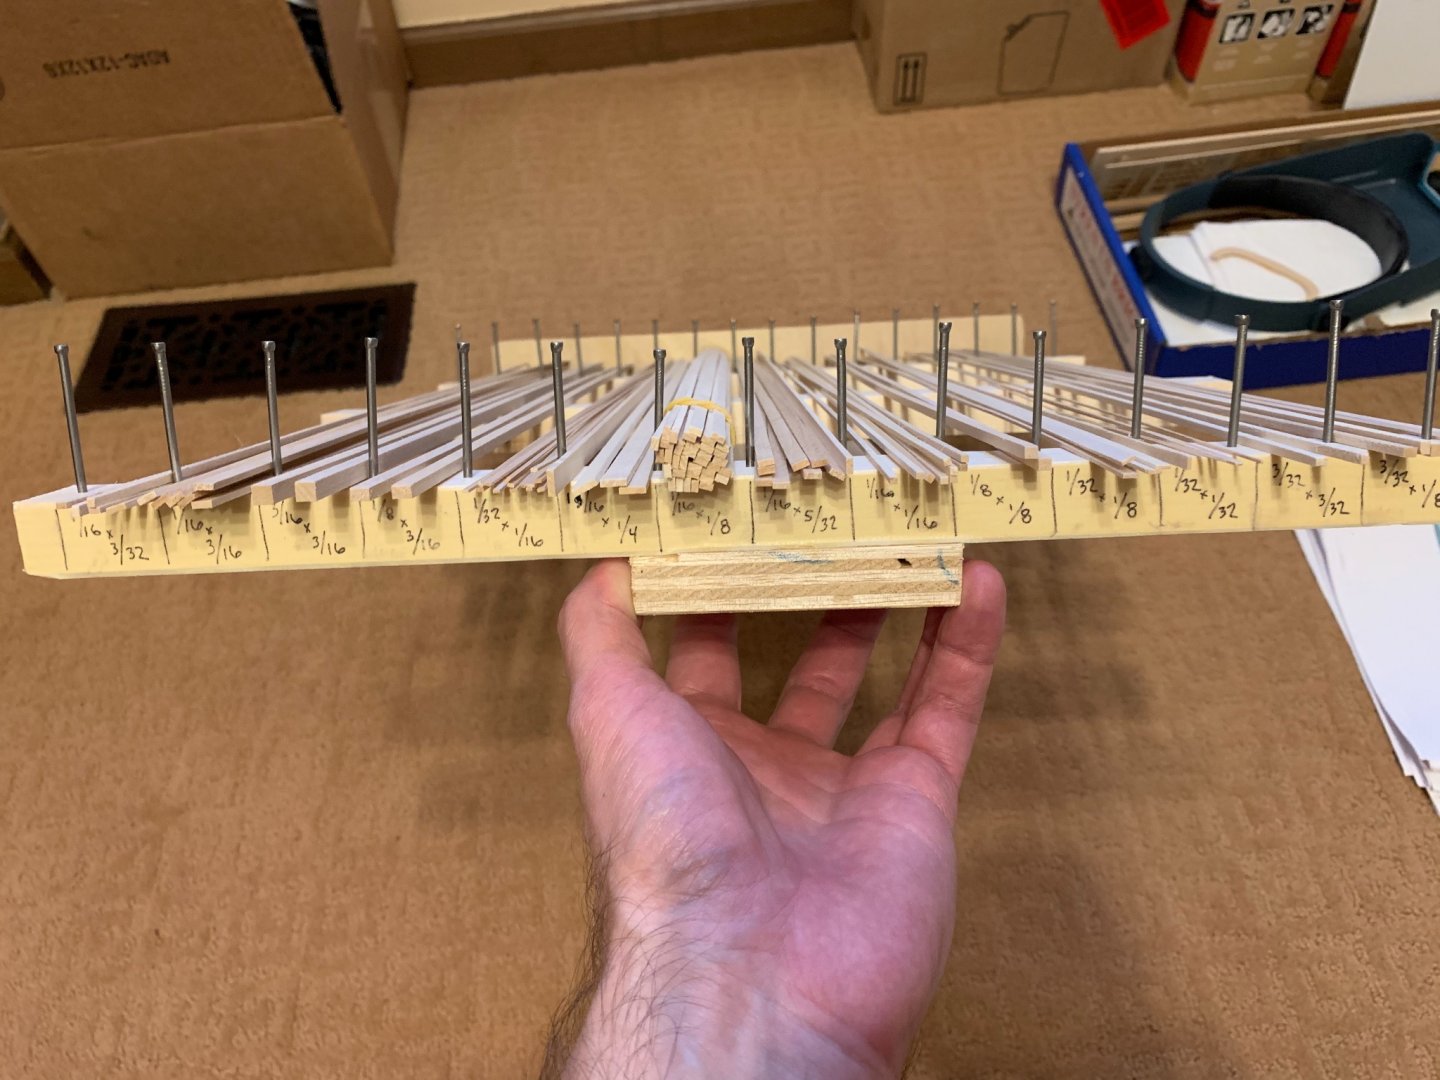
I got tired of measuring all my stock when I needed to find a size, so I finally put some organization in place, built up with some scrap from the lumber pile. Each size from the kit now has its own labeled slot.
- abelson, doxidad, GrandpaPhil and 5 others
-
 8
8
-
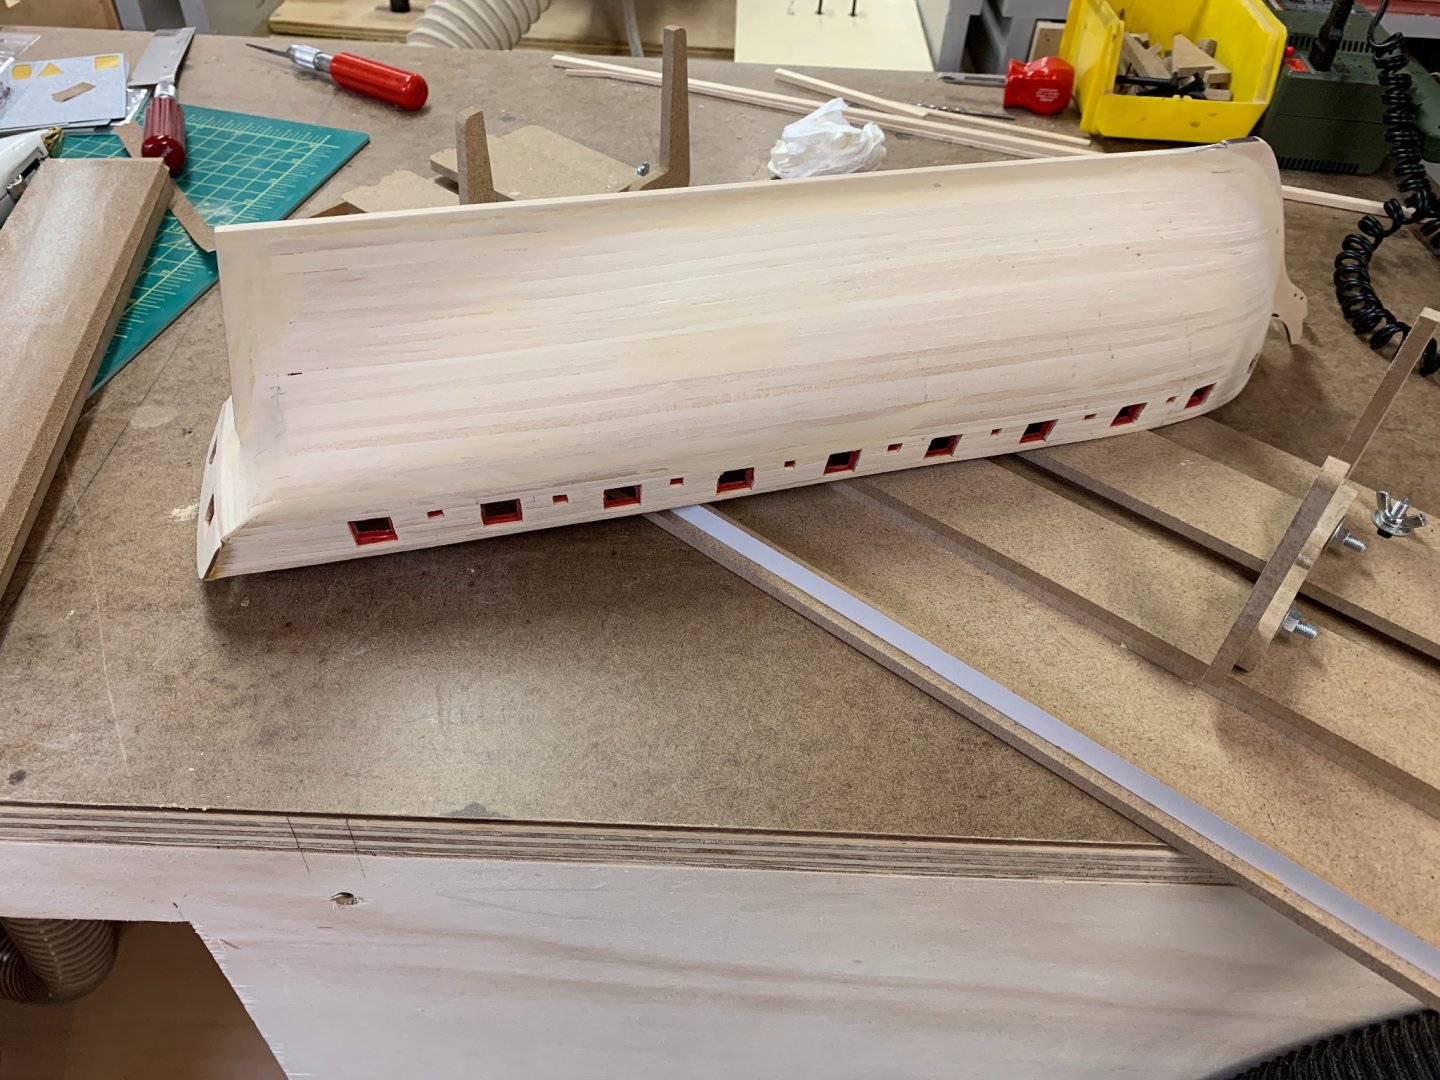
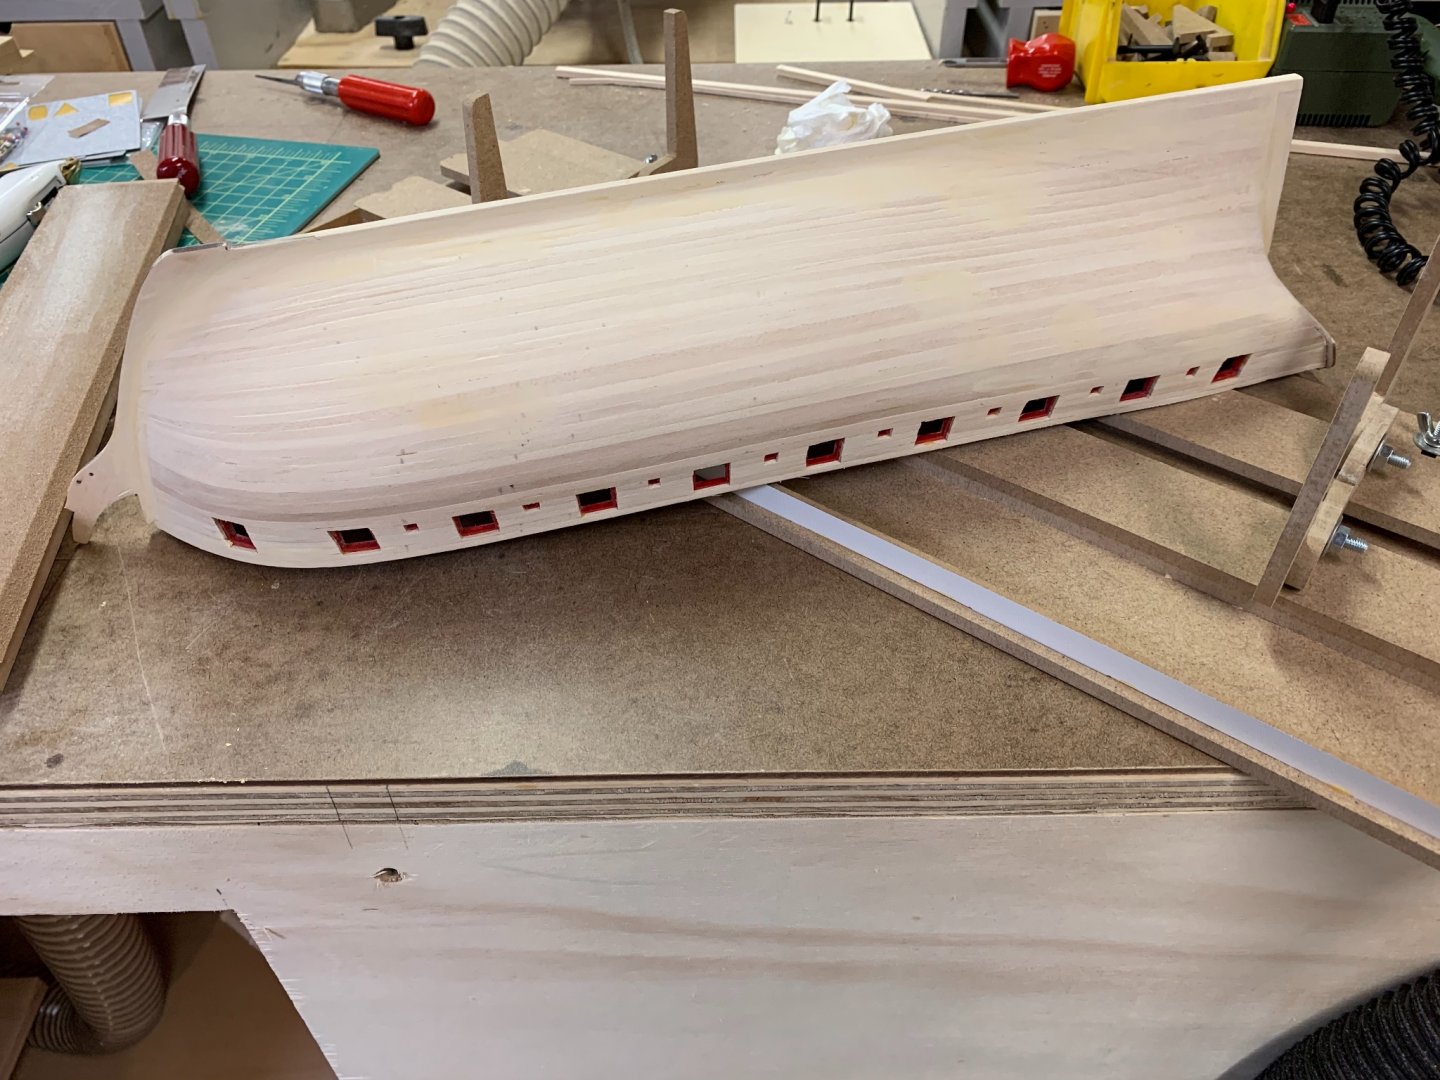
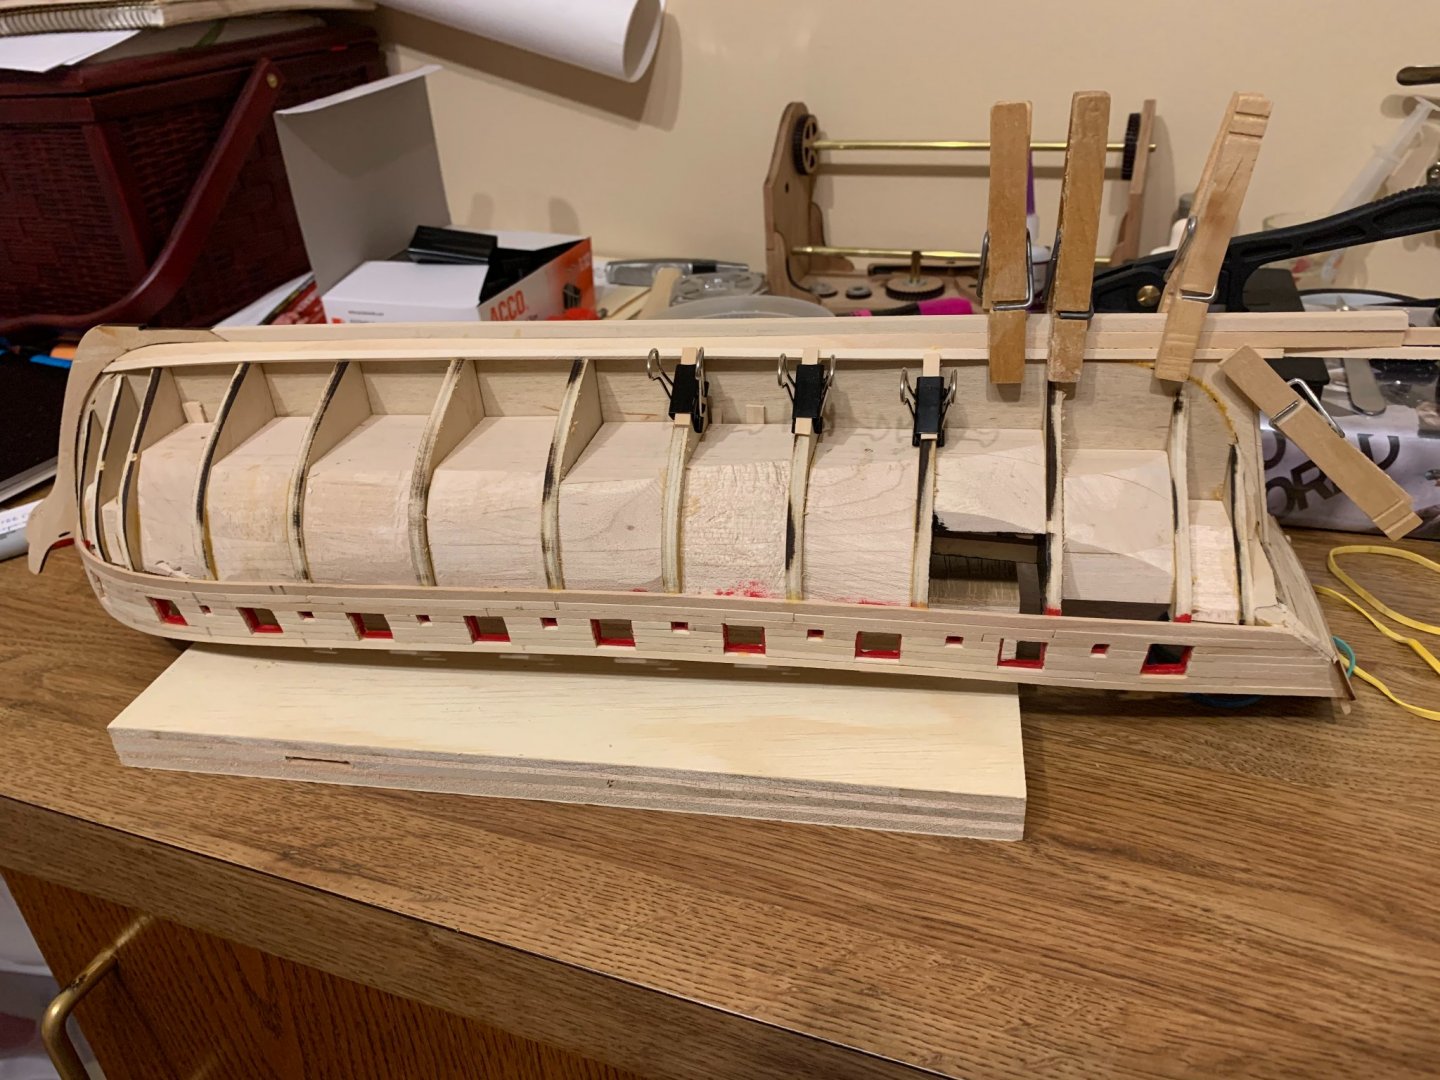
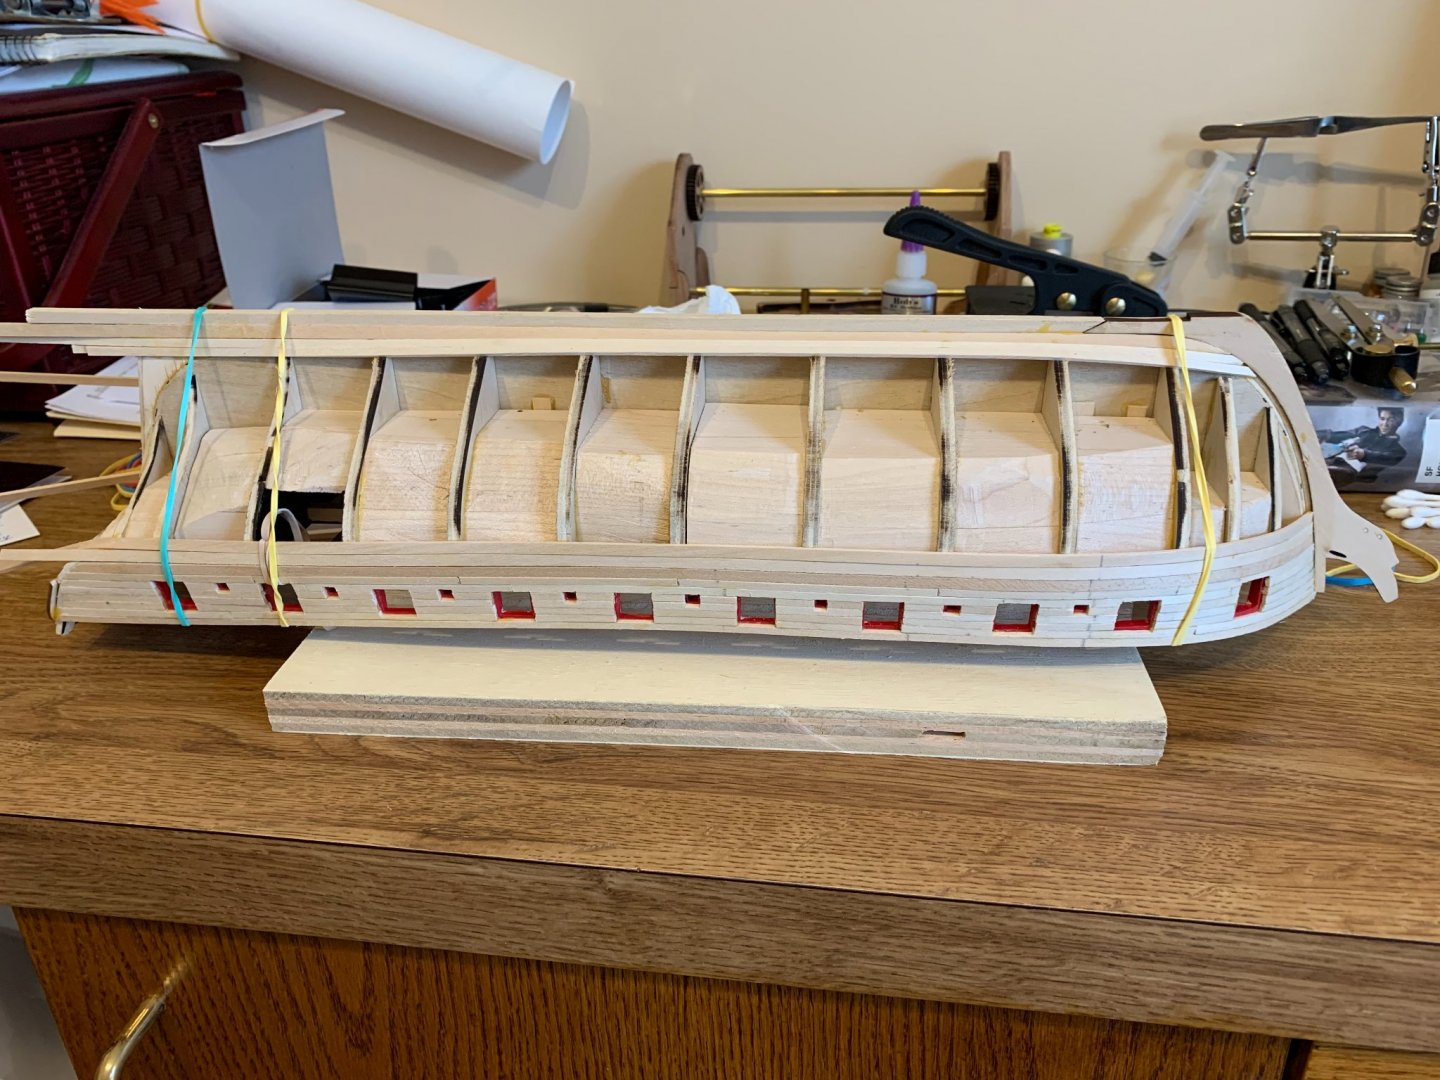
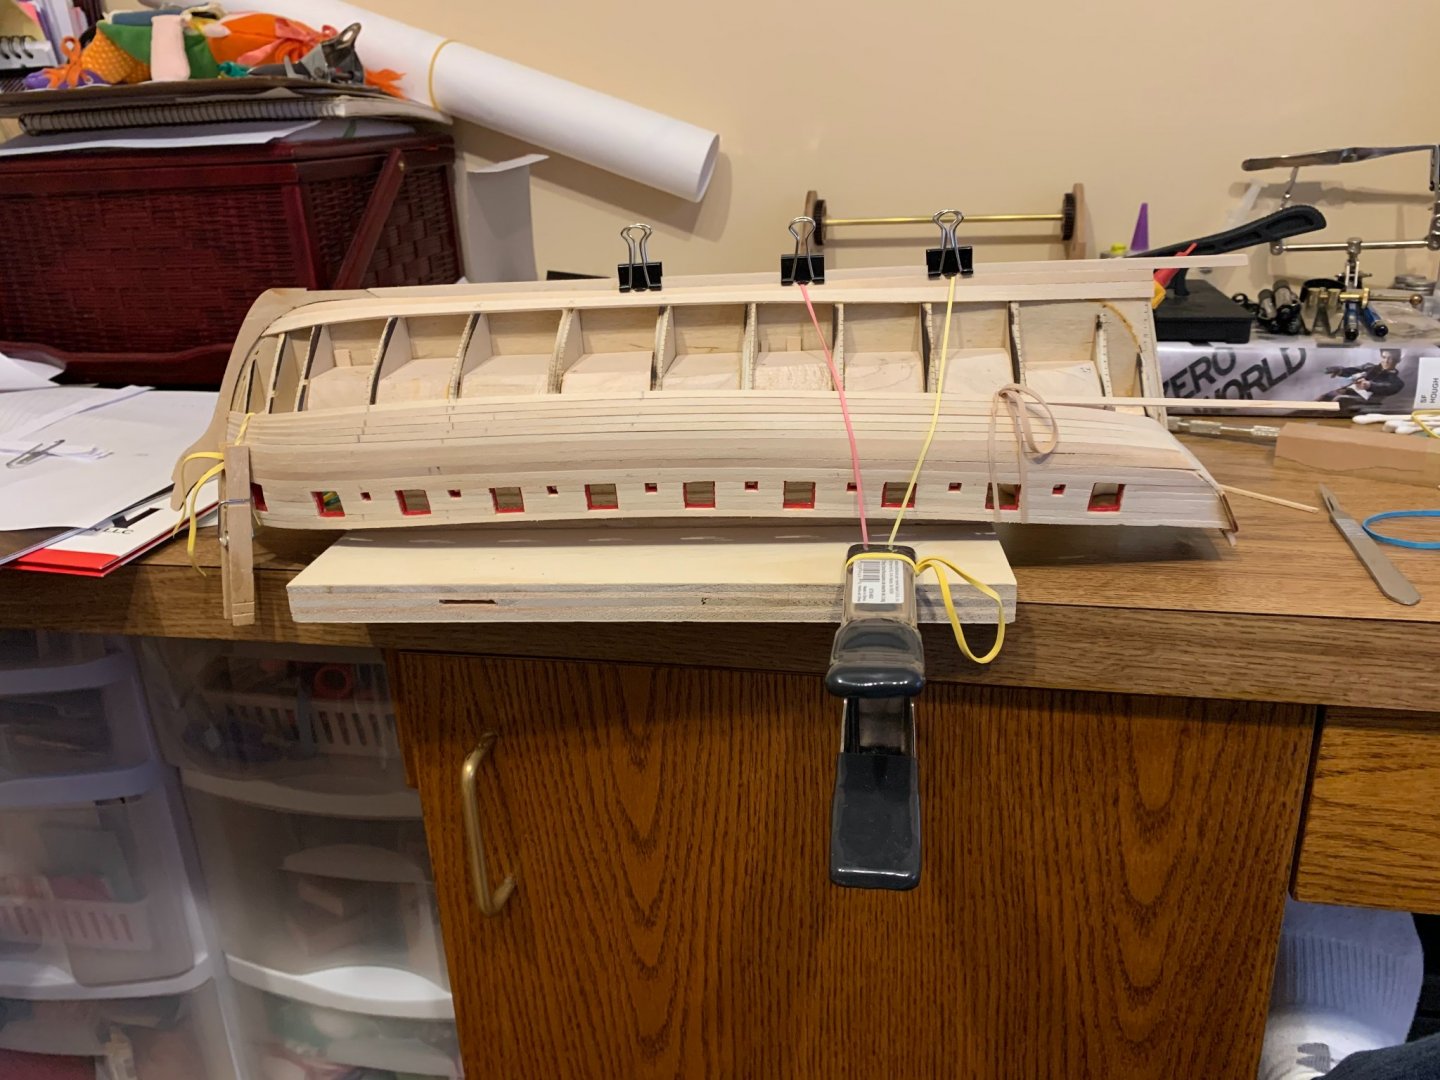
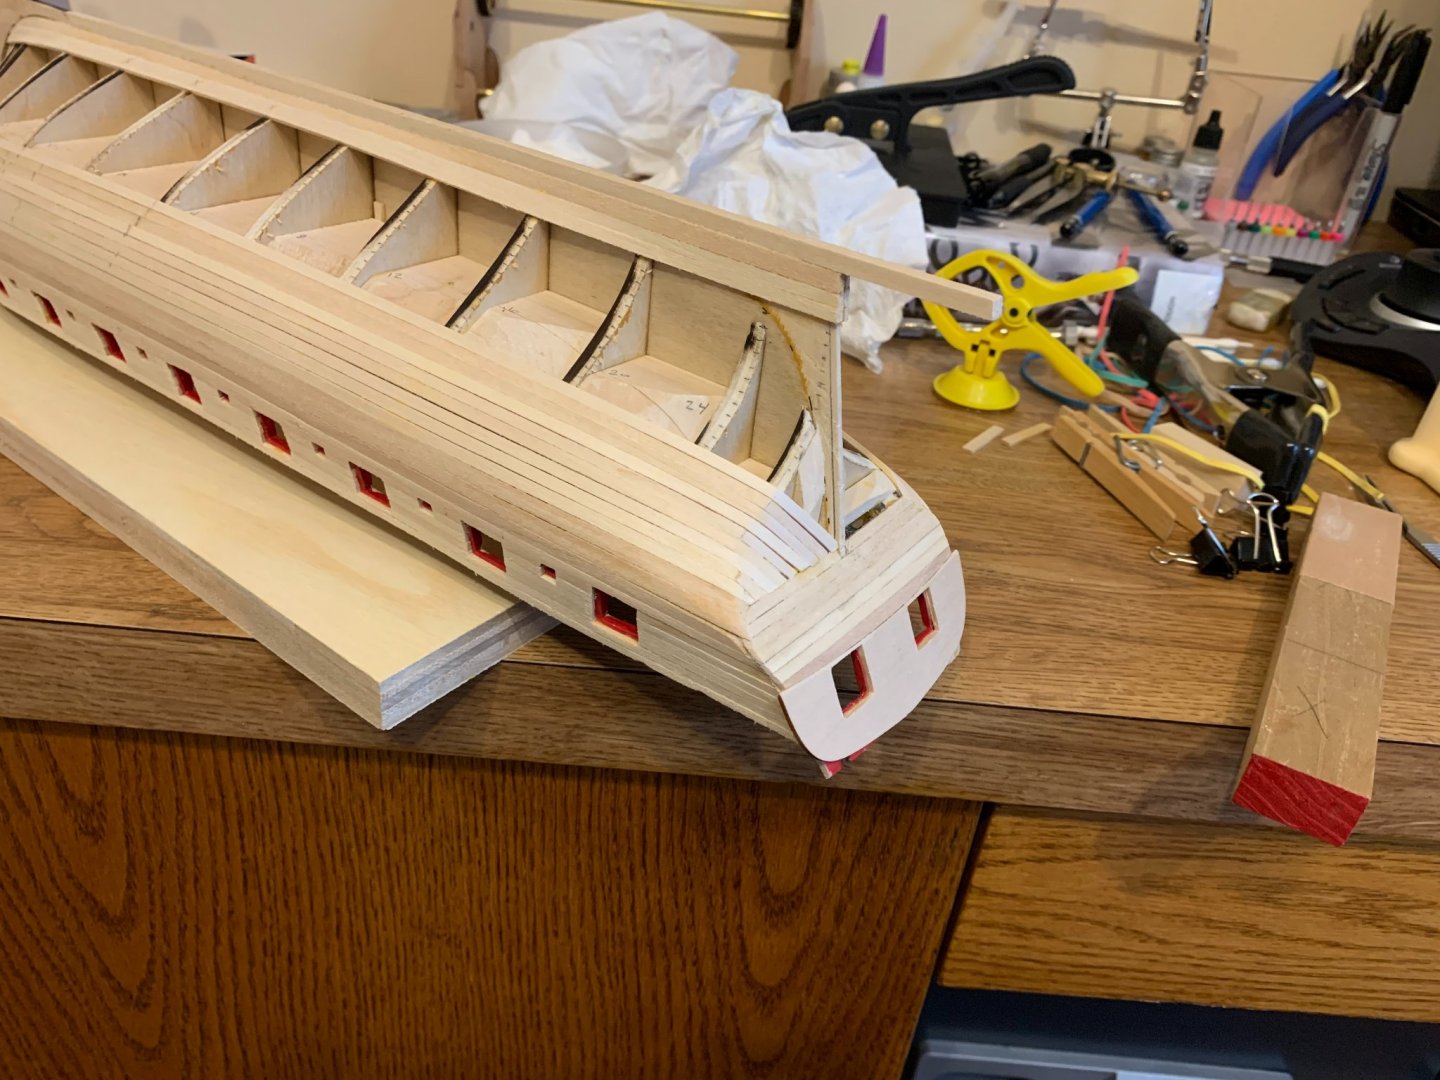
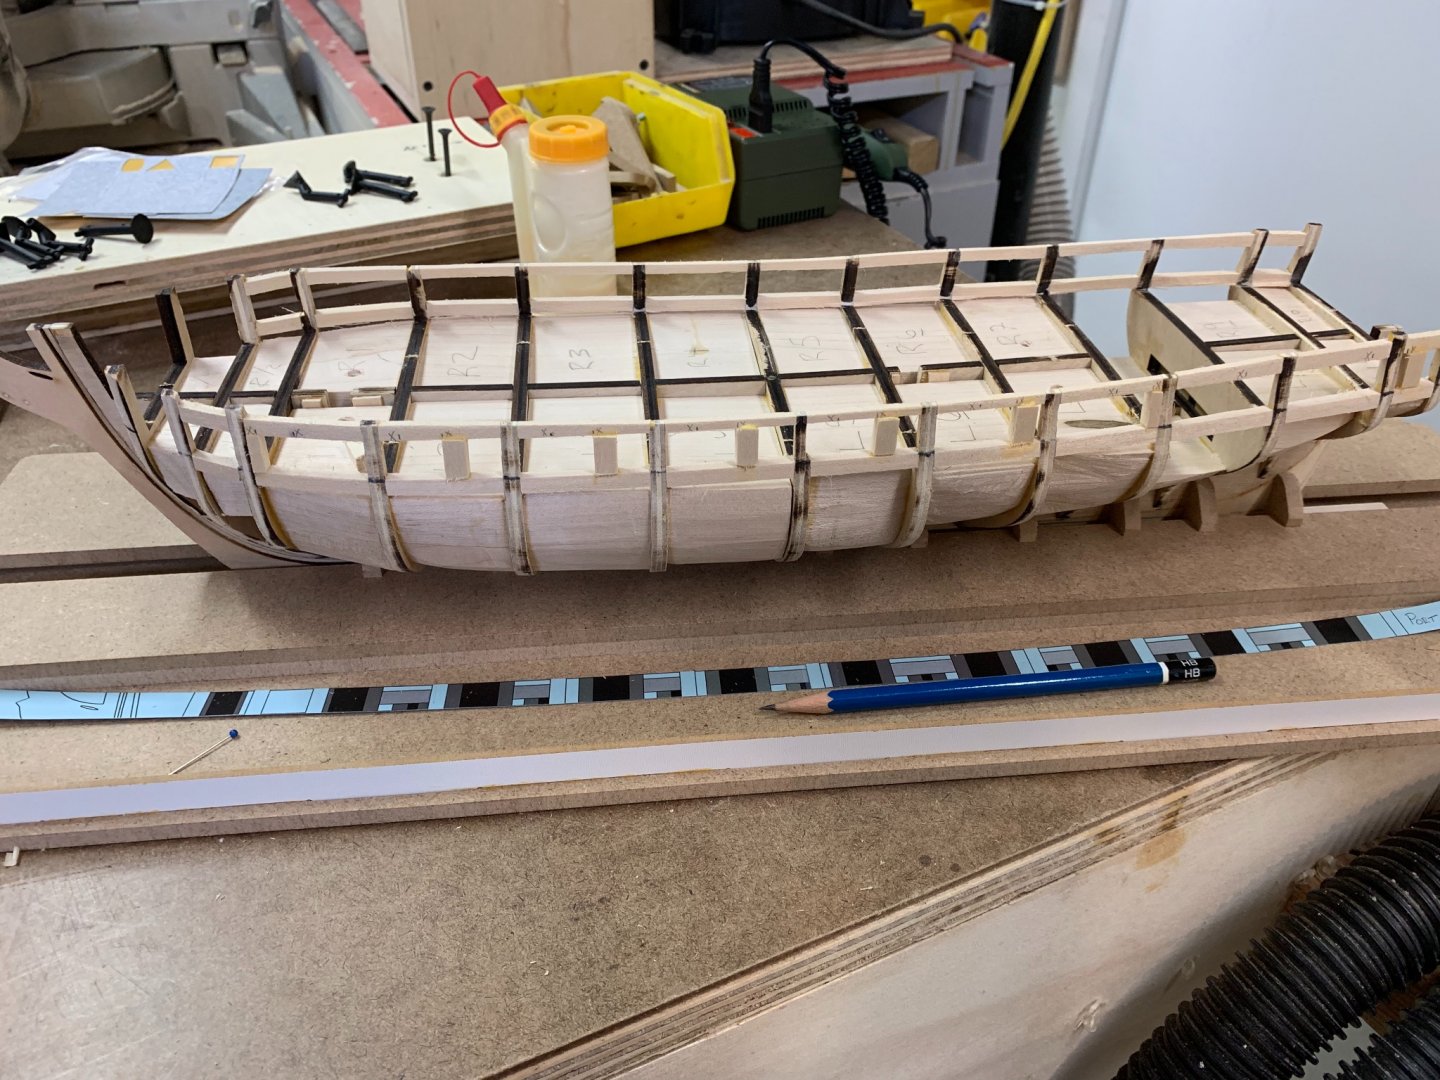
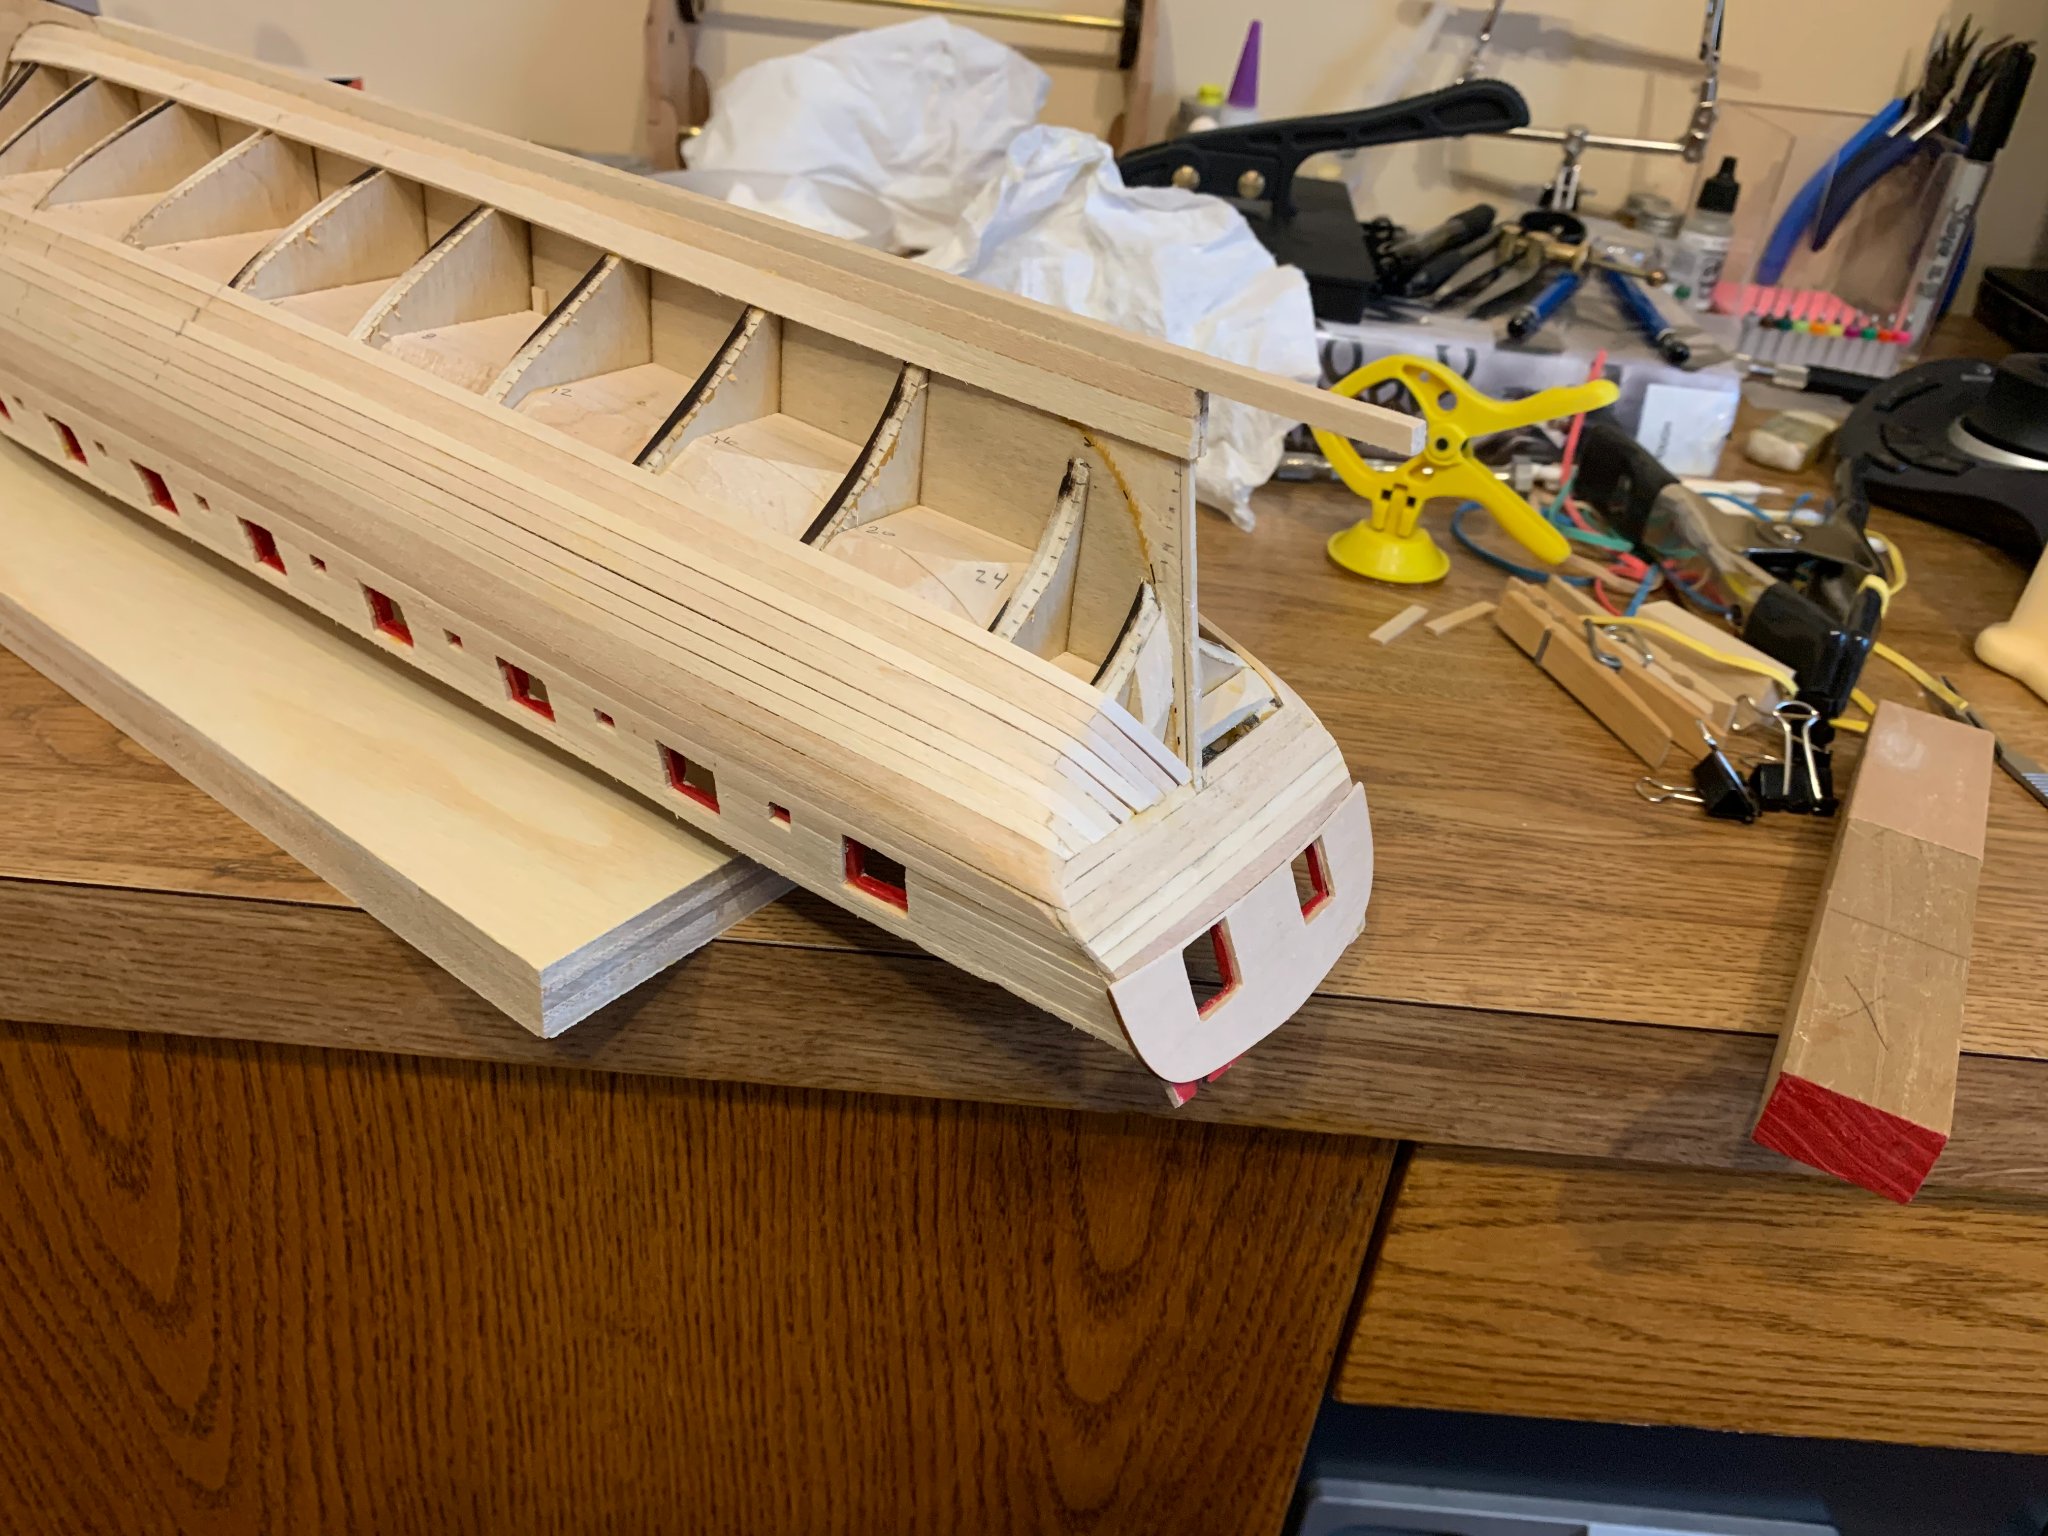
I’ve finished off the planking (except the second layer at the wales). I’ve filled and sanded a bit and it’s cleaning up. Needs a bit more filler and sanding before I move on to the wales and the stern.
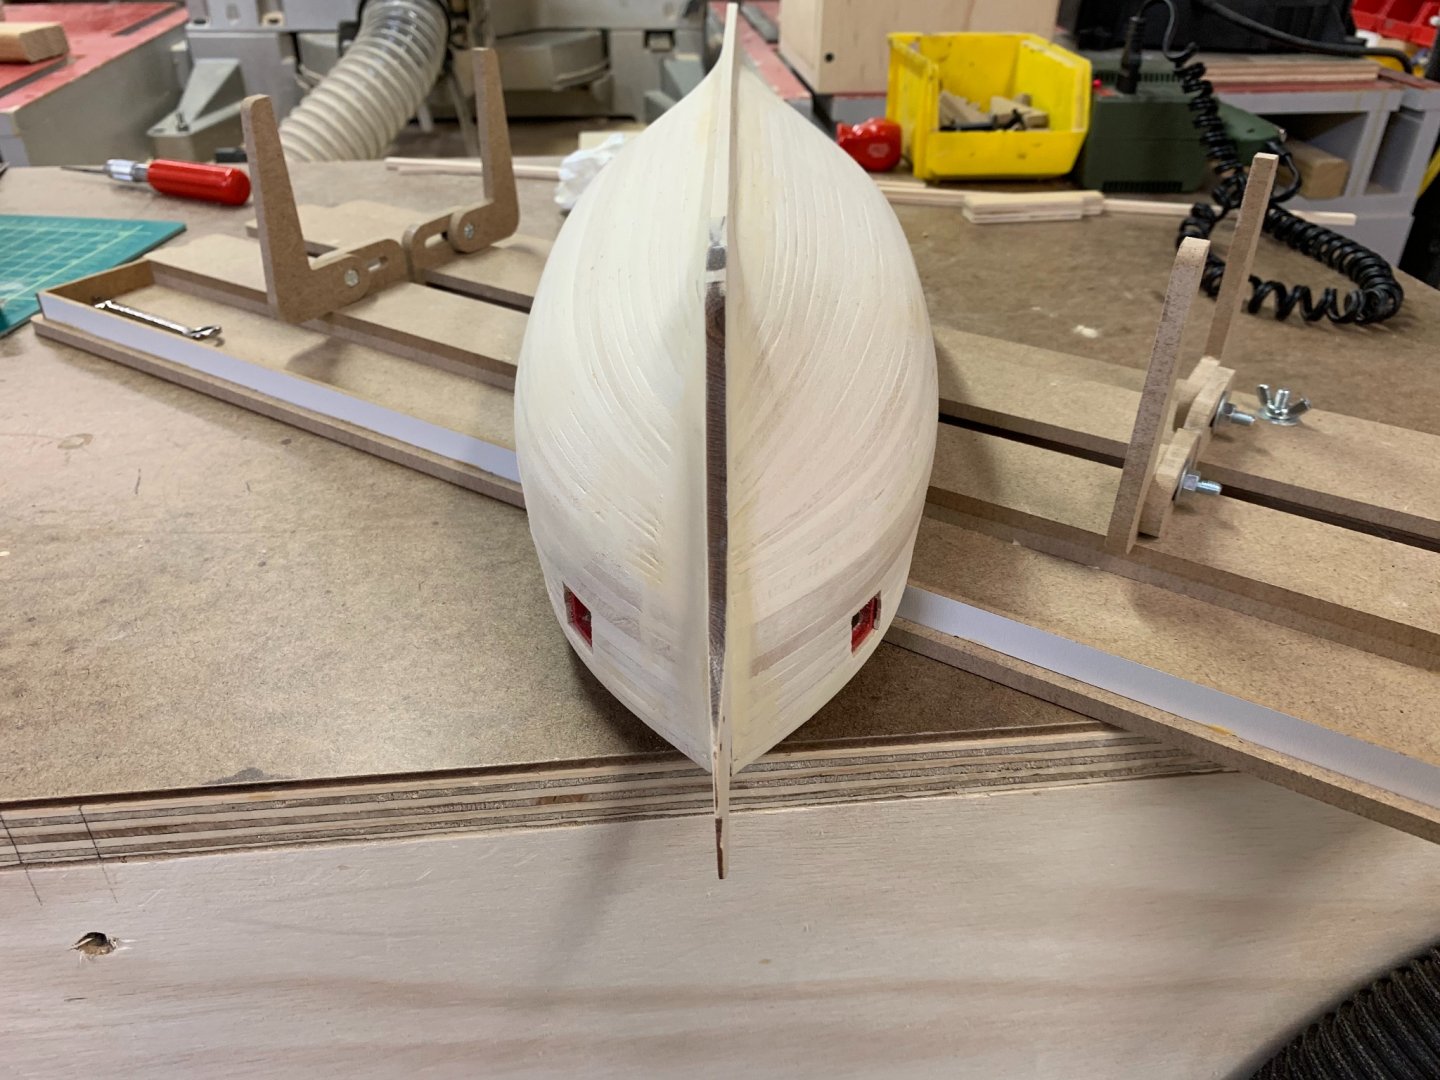
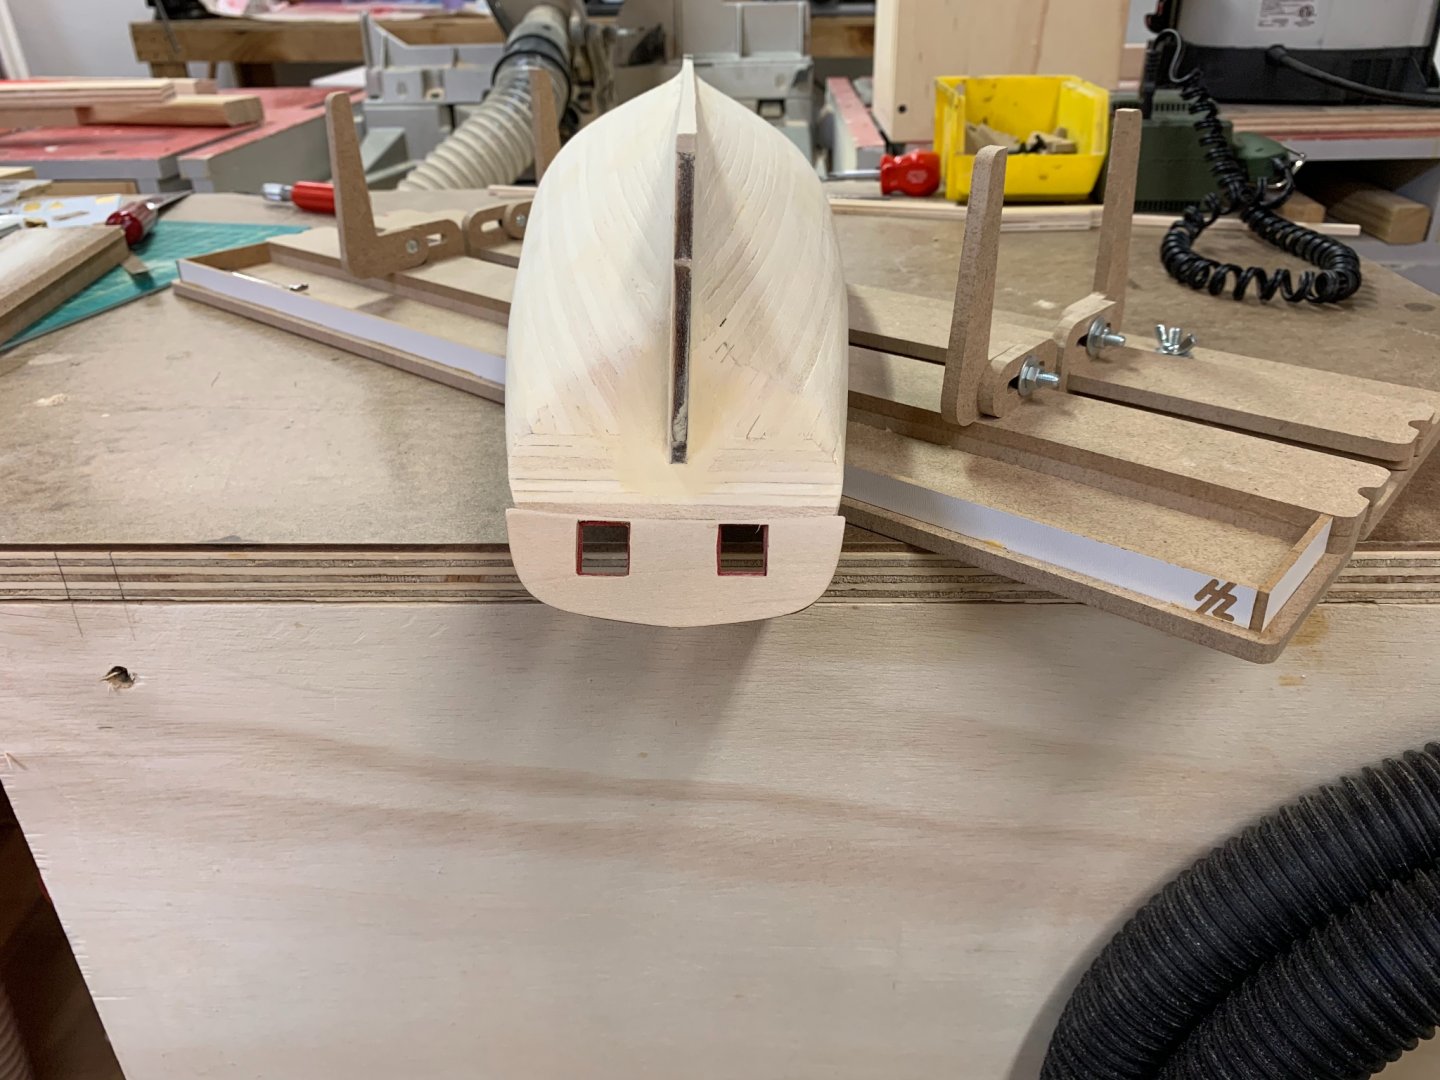
I was very relieved to put the stern piece on and cut the keel to length, that was just waiting to catch a shirt sleeve and wreck something.
Last ship I did, I was really focused on getting to the rigging (it was a solid hull model), but I feel like building the ship with bulkheads and planks has been a lot more rewarding.
- CiscoH, Overworked724, GrandpaPhil and 2 others
-
5
-
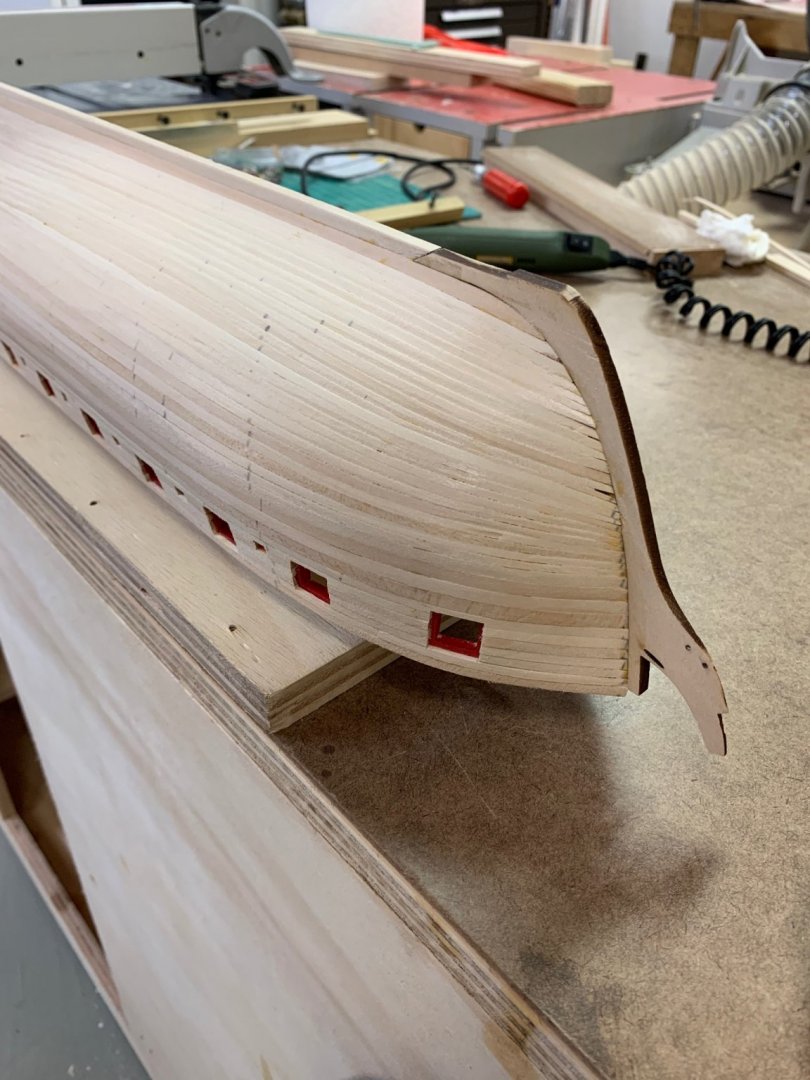
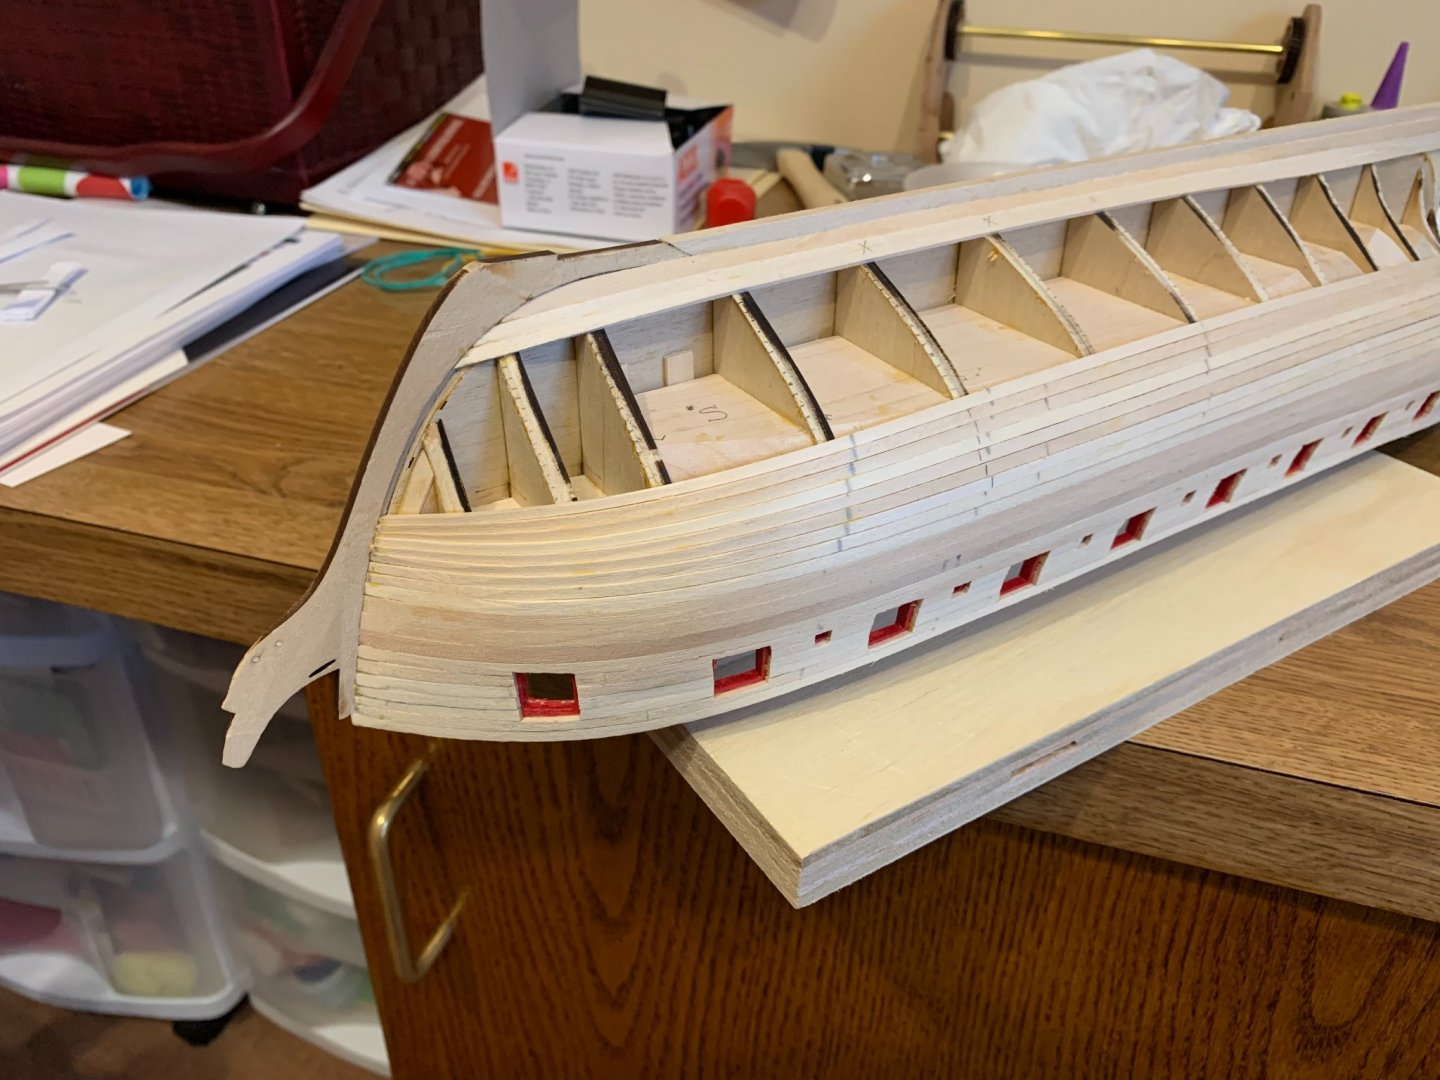
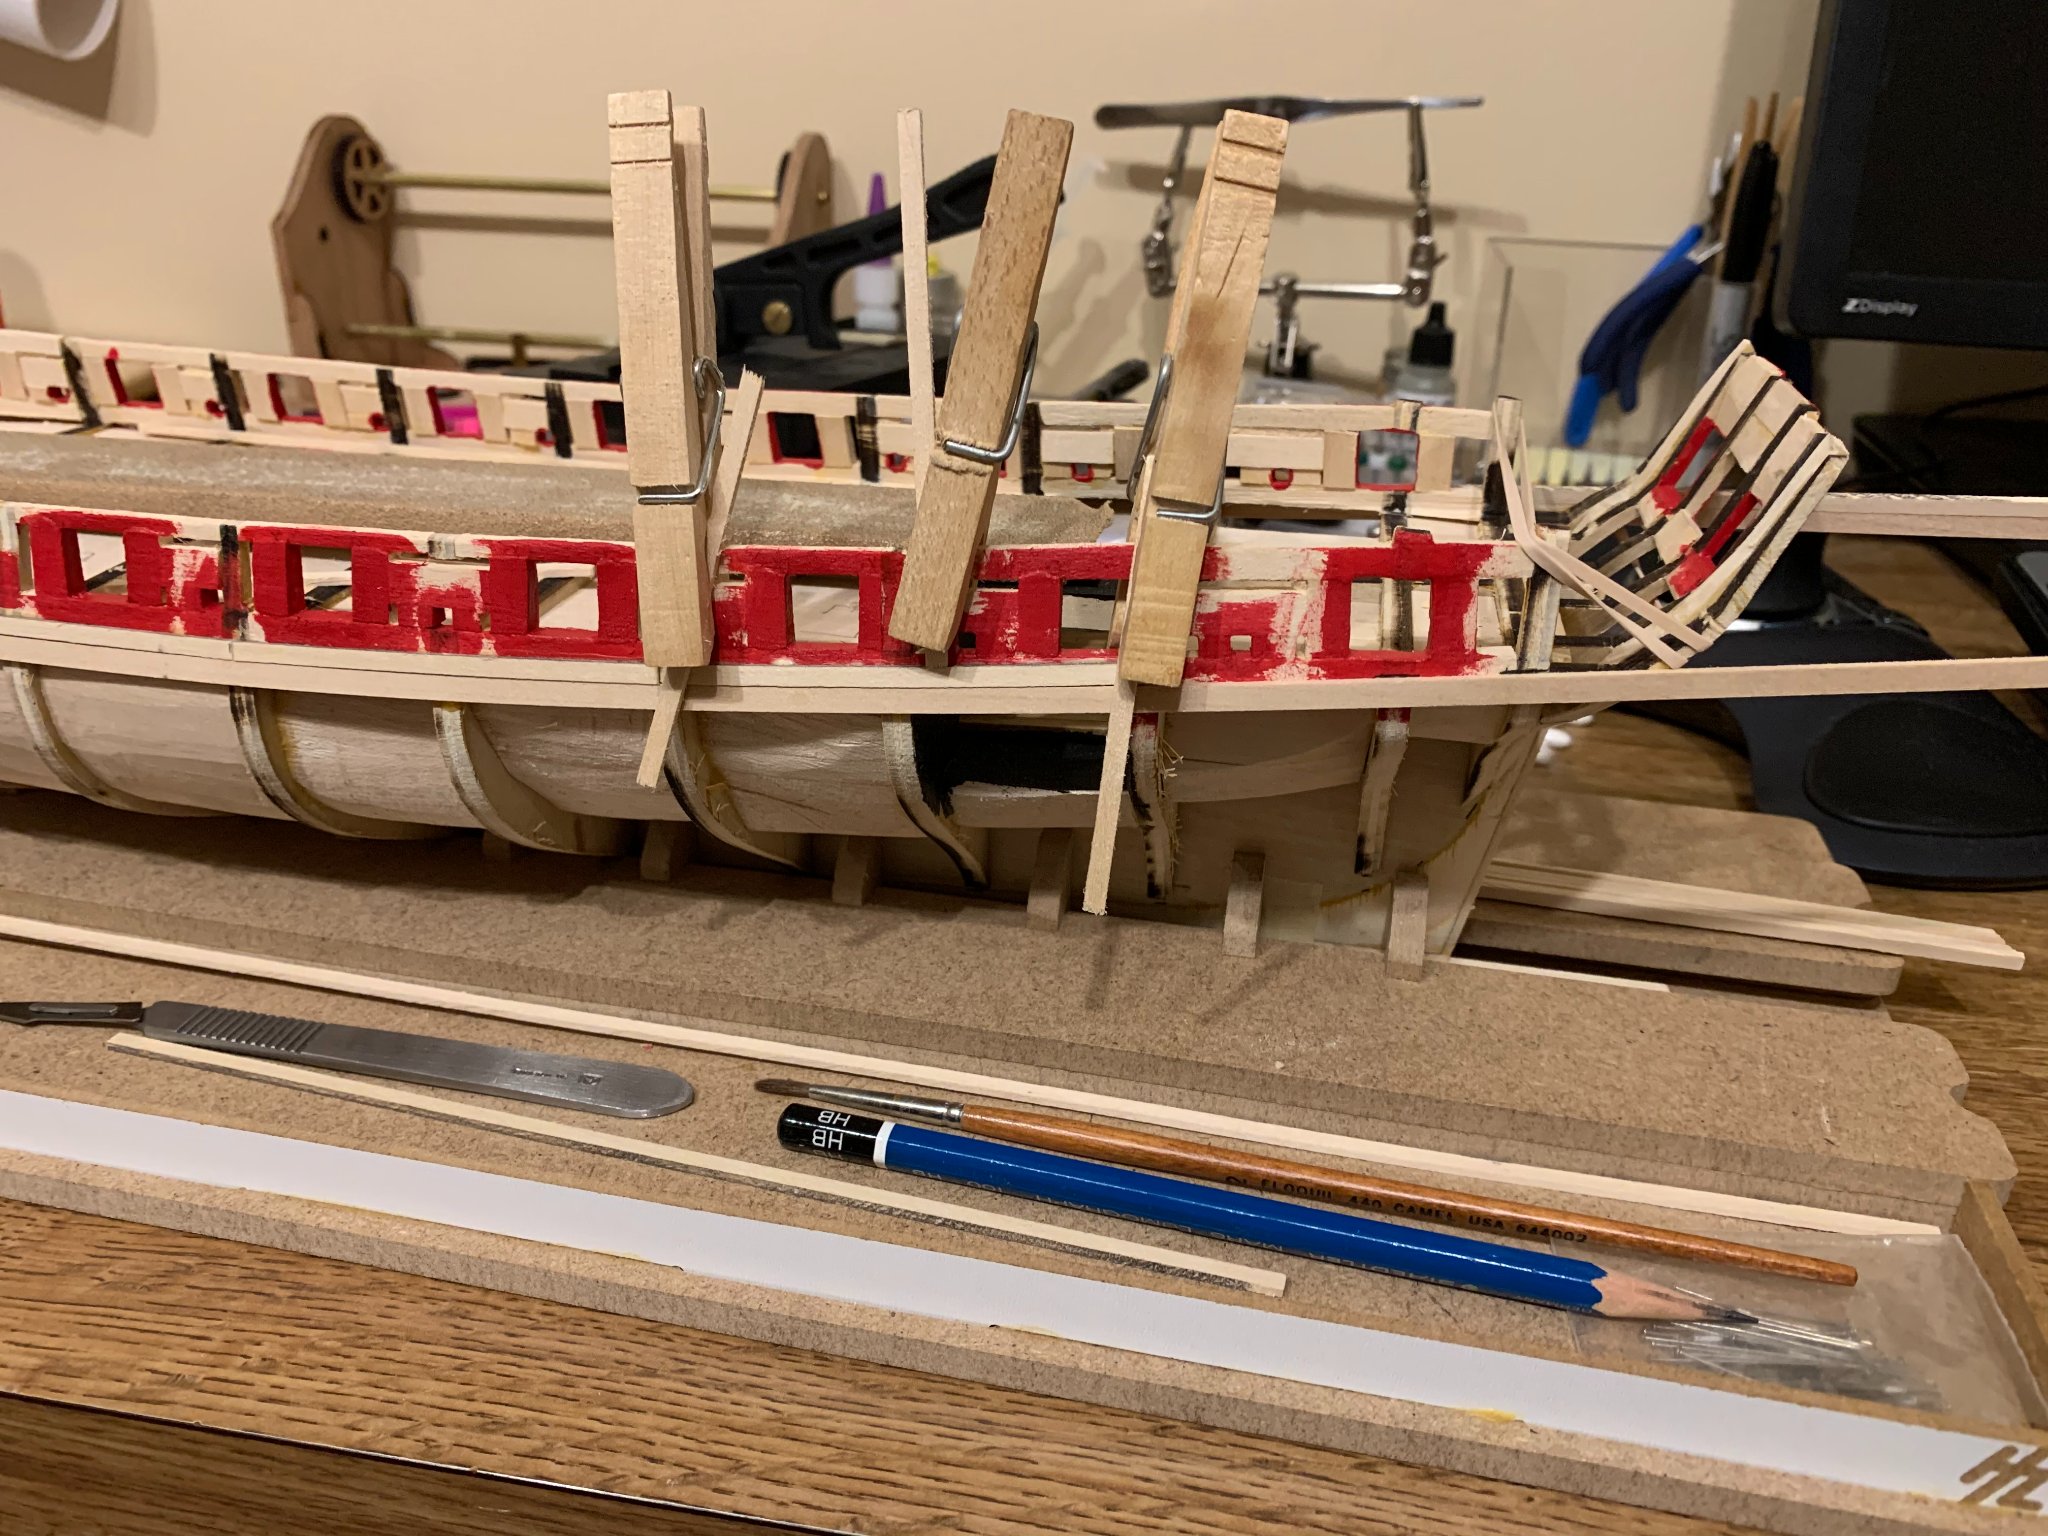
Well, port side planking is basically wrapped up. Definitely a tricky process, I ended up needing to taper a few planks quite differently than their surroundings to get the final plank to fit, and I’m going to need some filler at the stern, but overall pretty happy how it came out for a first time. I’m going to fill and sand both sides once the starboard side is complete.

-
10 minutes ago, drjeckl said:
I know it's patent pending, but could you share the ID/OD of the tubing you used? It looks like a great idea! And great work so far!
John
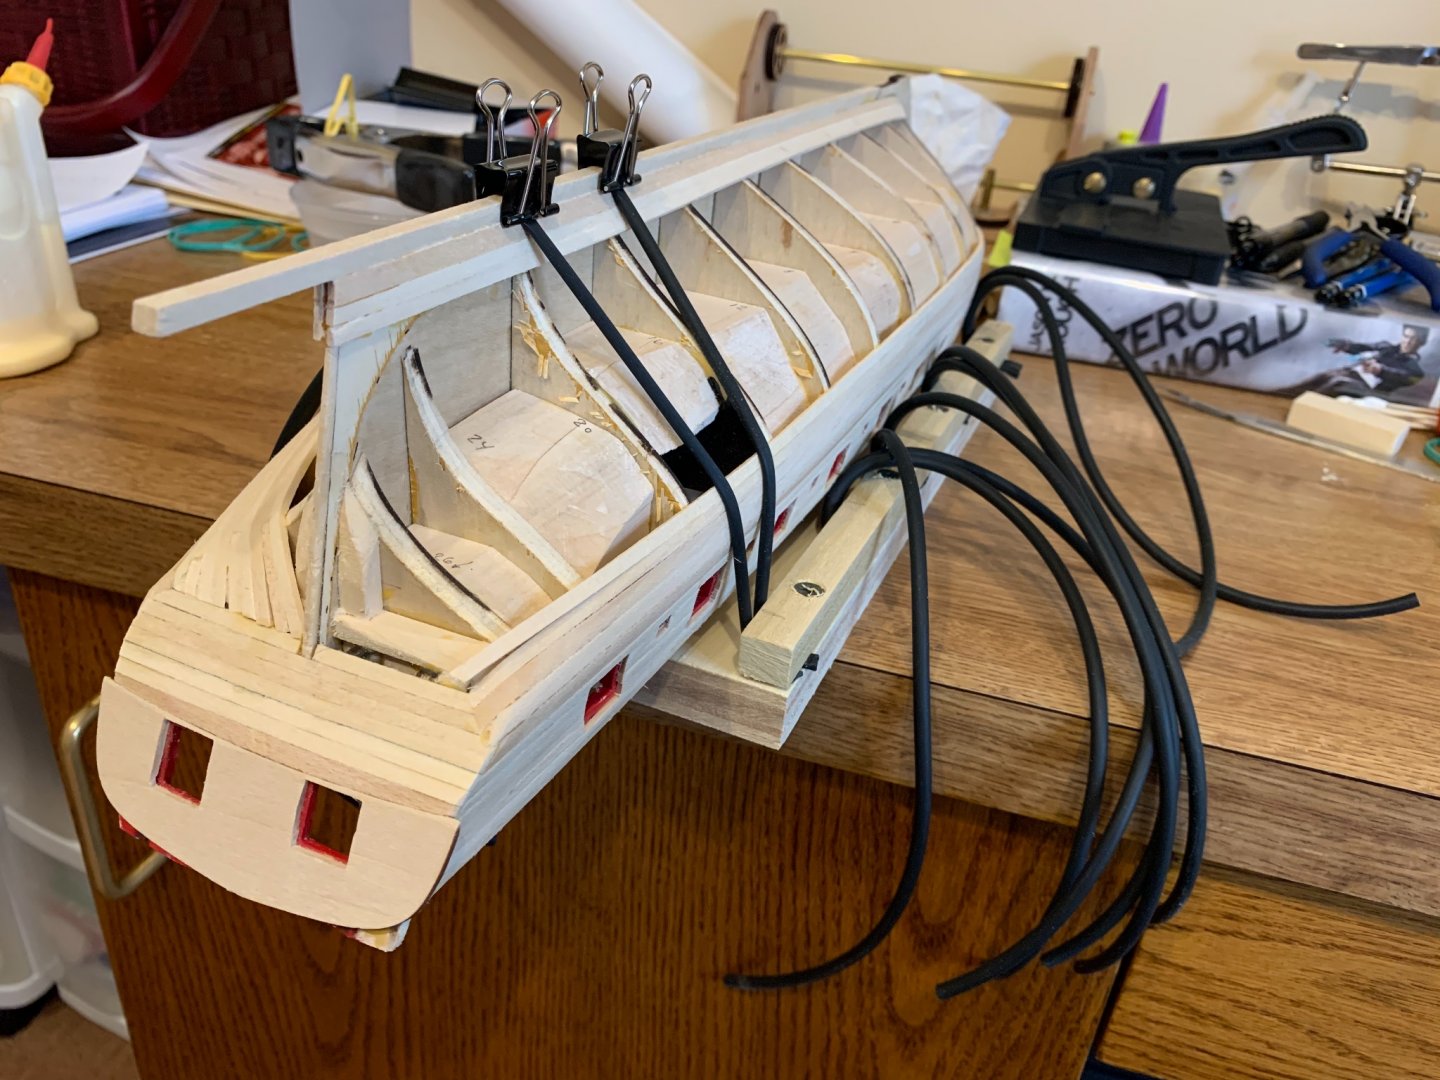
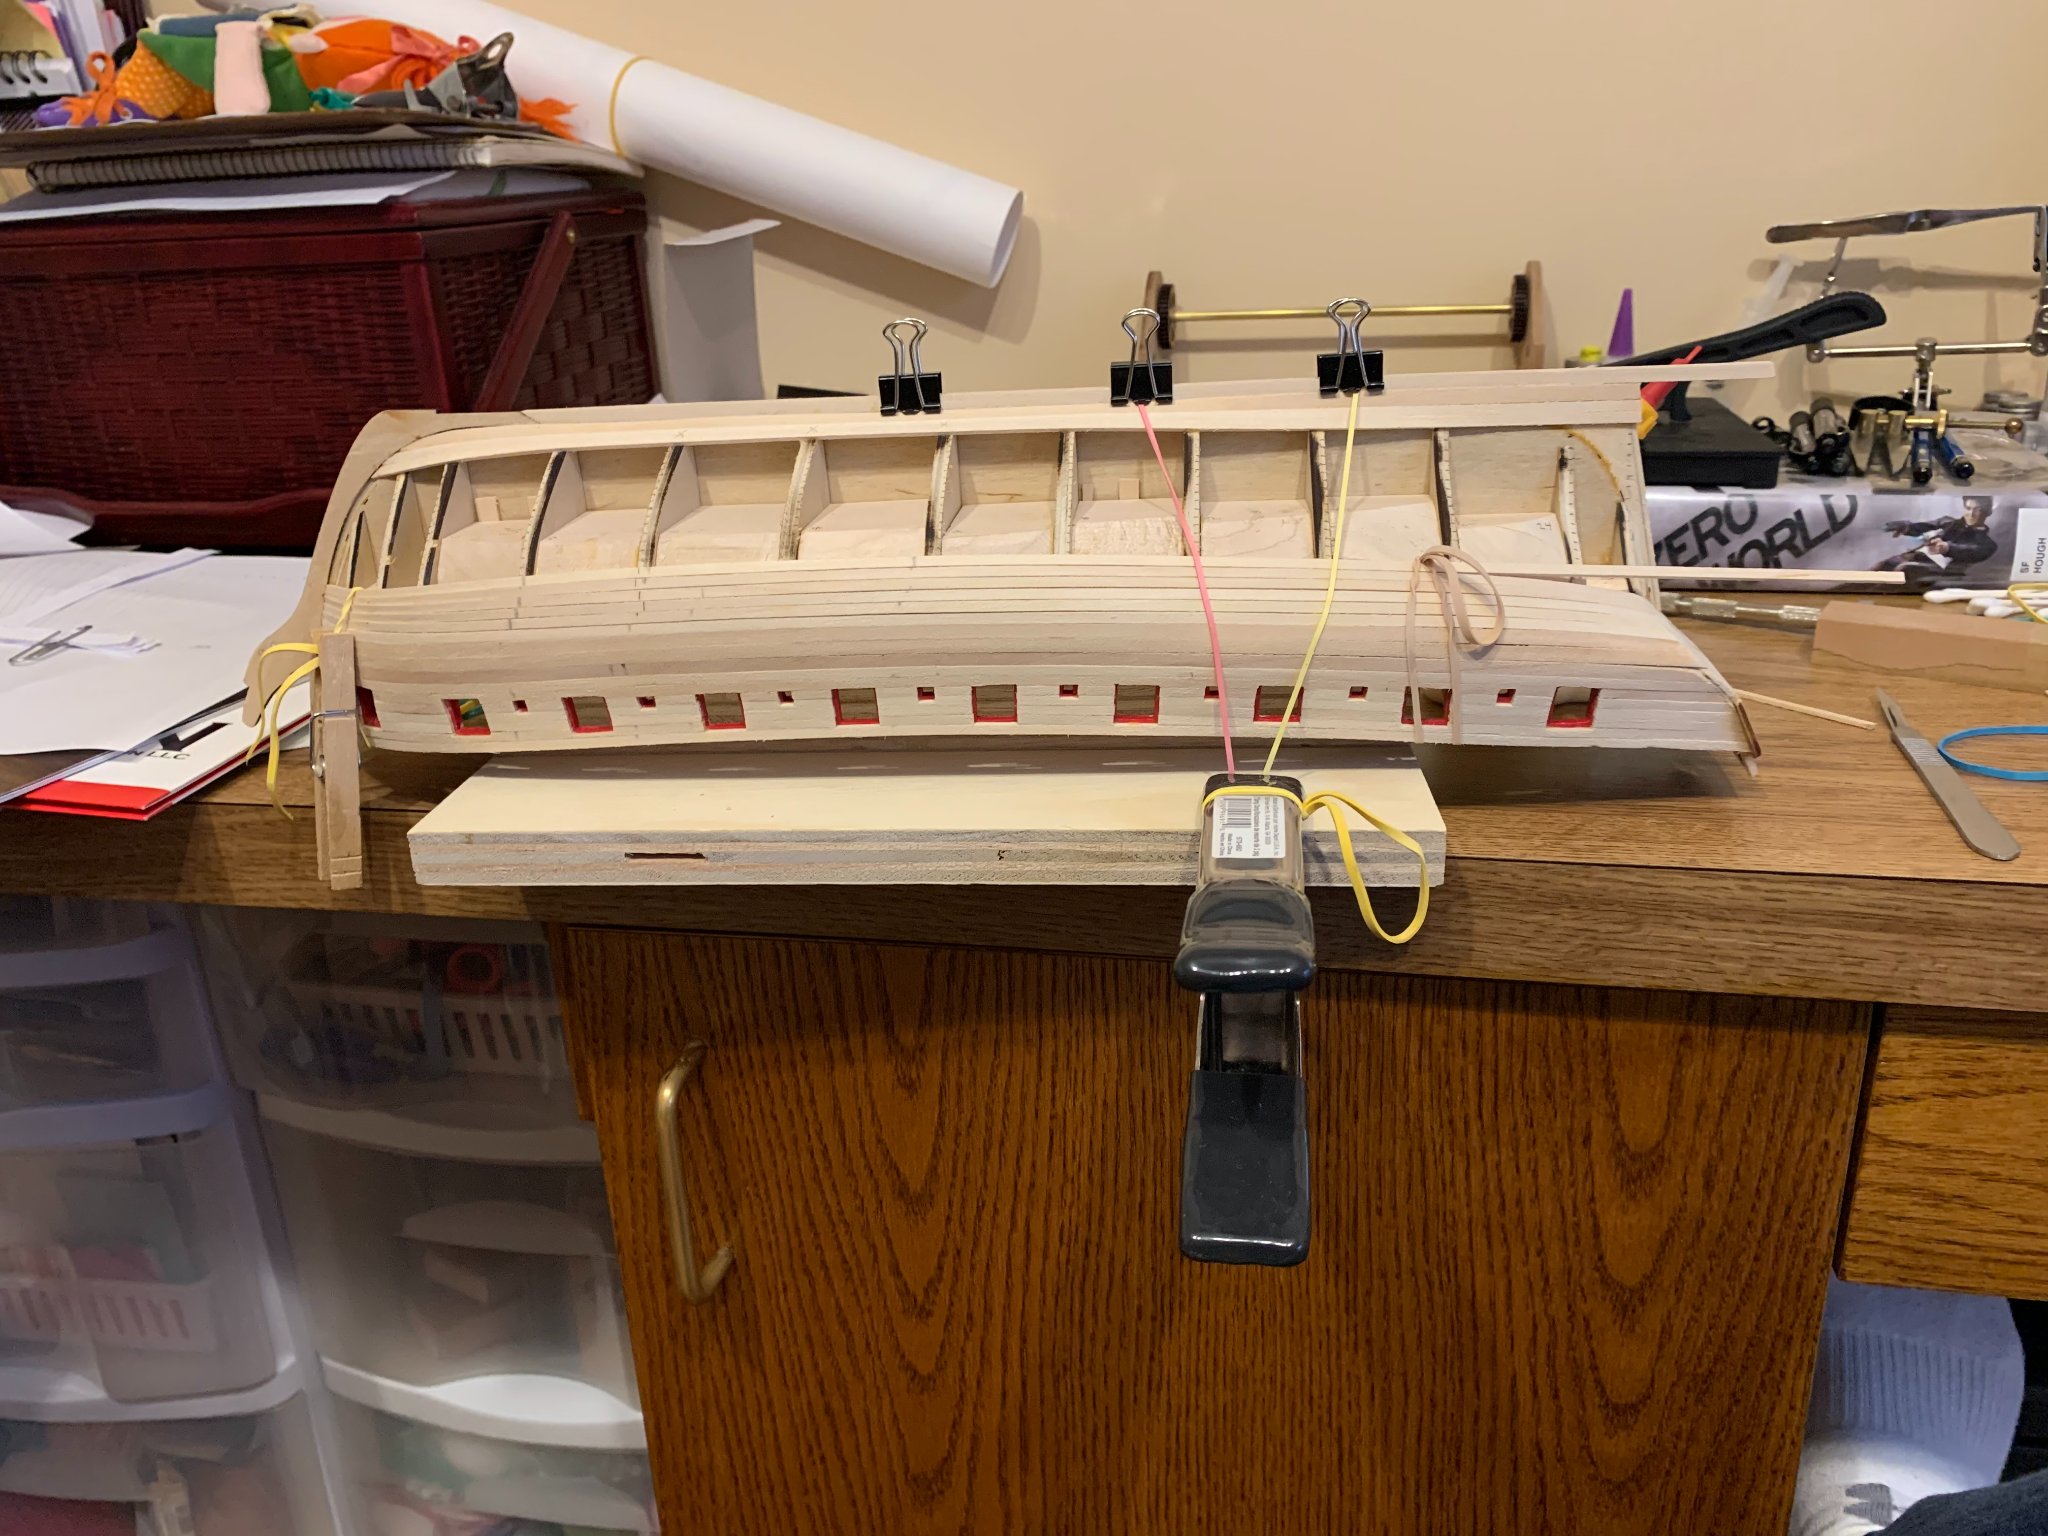
Thanks, and I sure can, it’s actually filched out of my scuba closet, 3/16 od, 1/8 id, I got it here, fantastic company to deal with:
https://www.divegearexpress.com/black-surgical-tubing-50-ft-15-m-roll
-
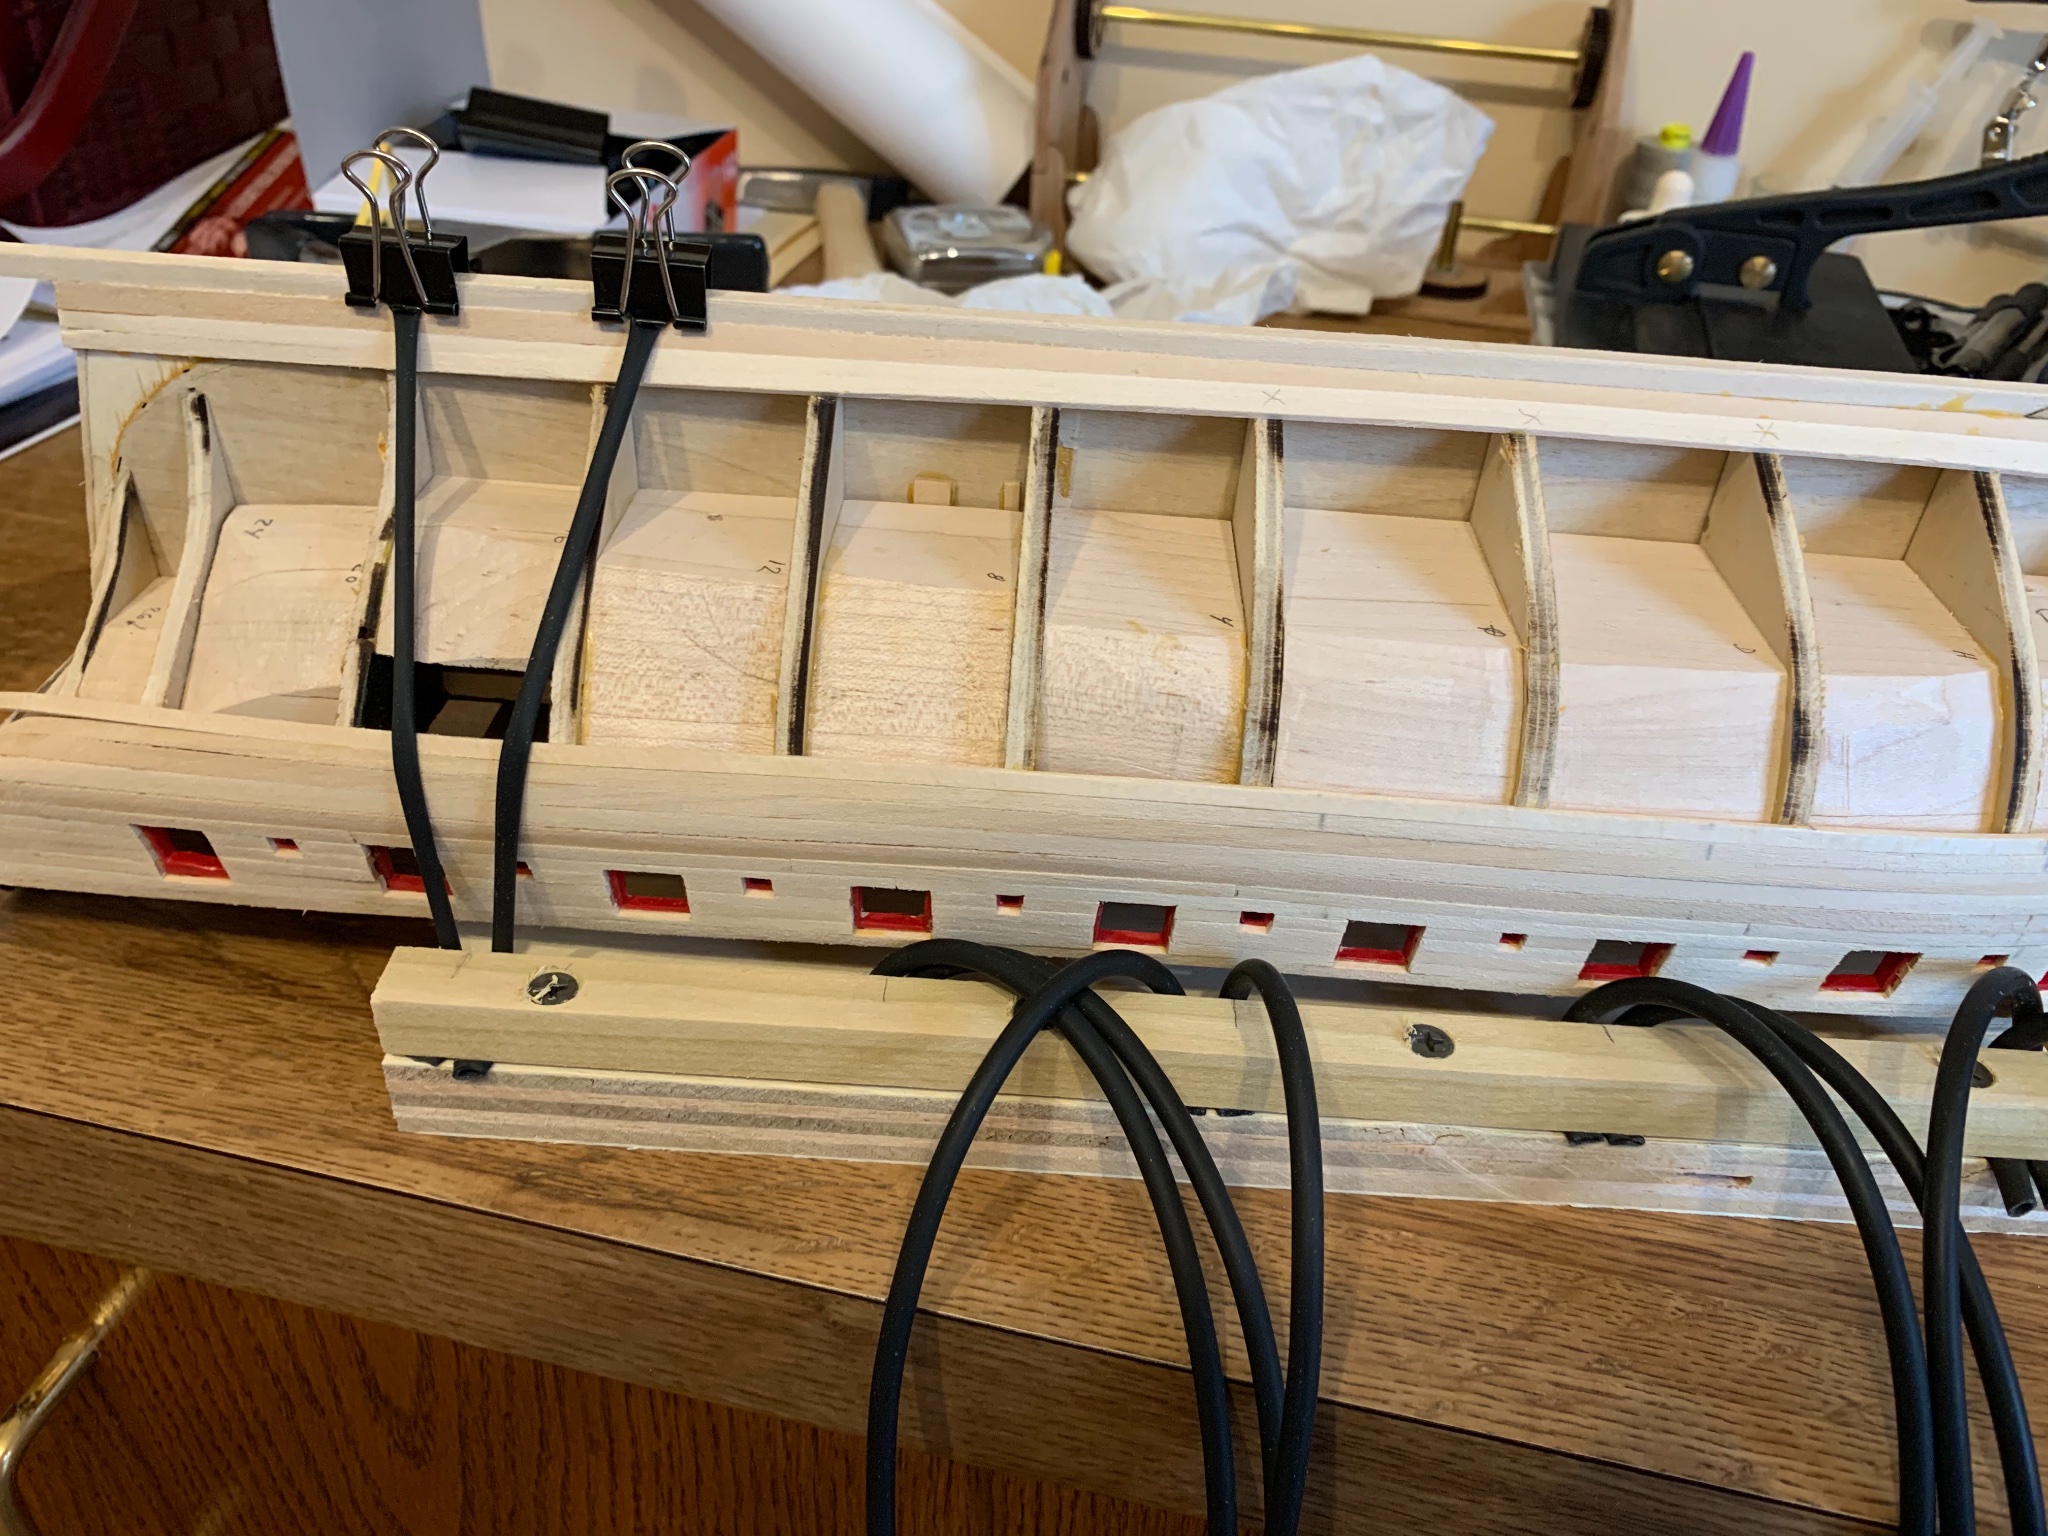
Patent pending, the Coleman Octopus is a success. Instead of clamps and rubber bands, I took a strip of wood and screwed it down over about 10 pieces of surgical tubing, now I can strap down a plank over pretty much every bulkhead at once. Probably a little overkill, but I think it’s going to work pretty nice.

- Overworked724, drjeckl and Matt D
-
3
-
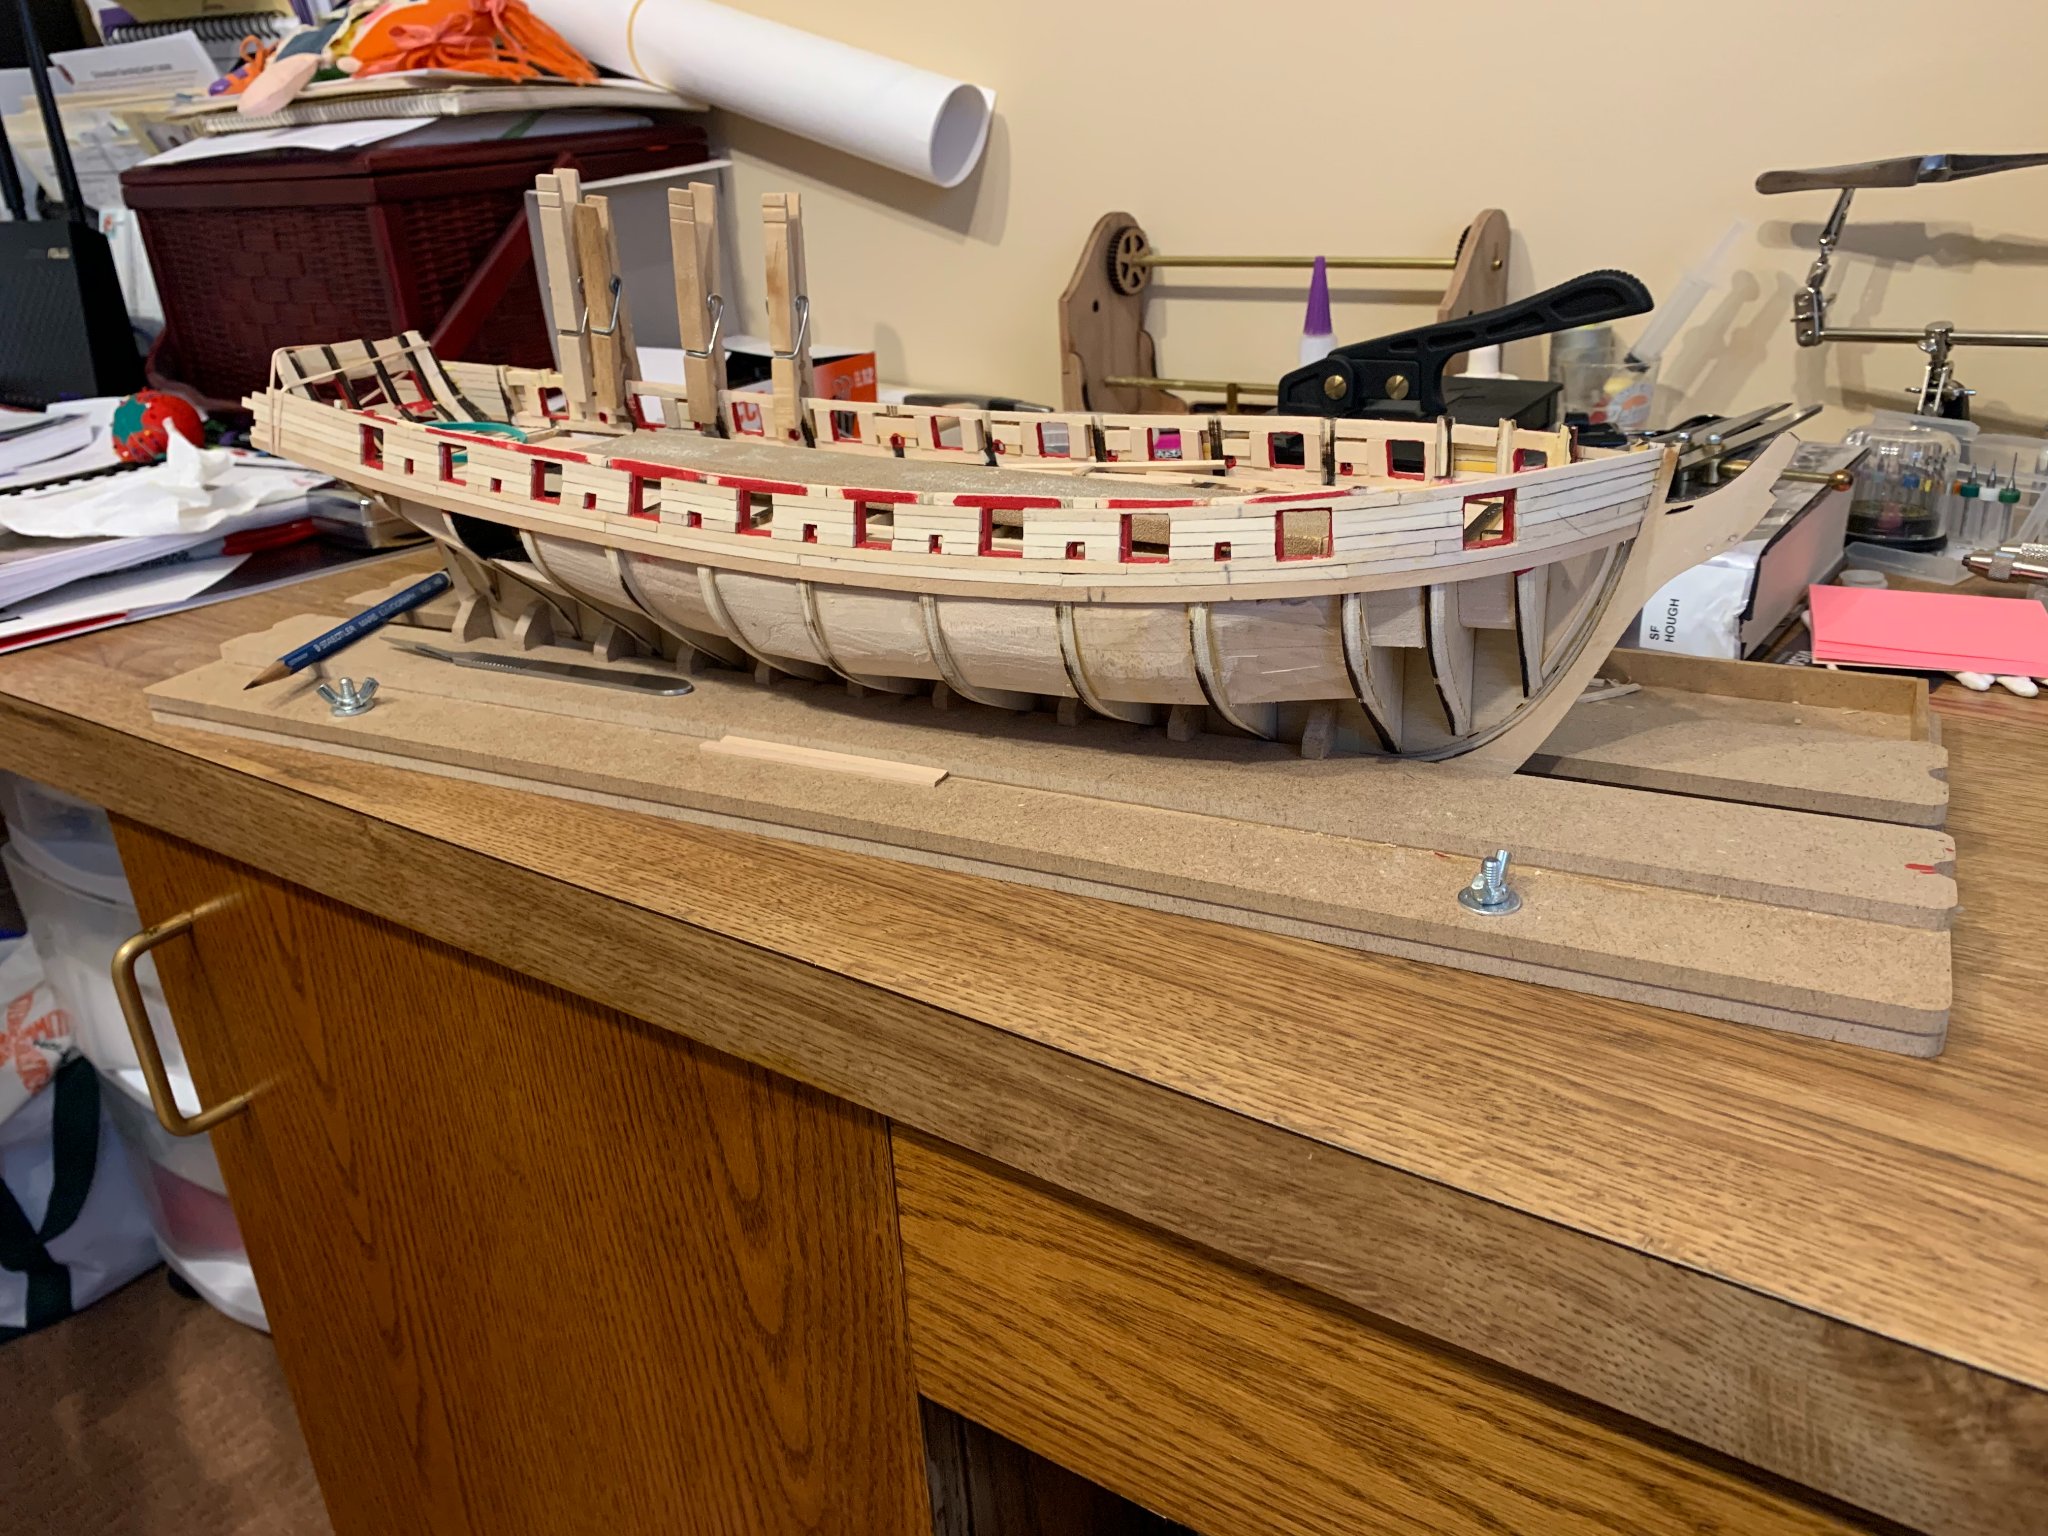
A bit more progress, starting to plank the tricky stuff. Got the garboard planks in, plus the rest of the non-tapered pieces.
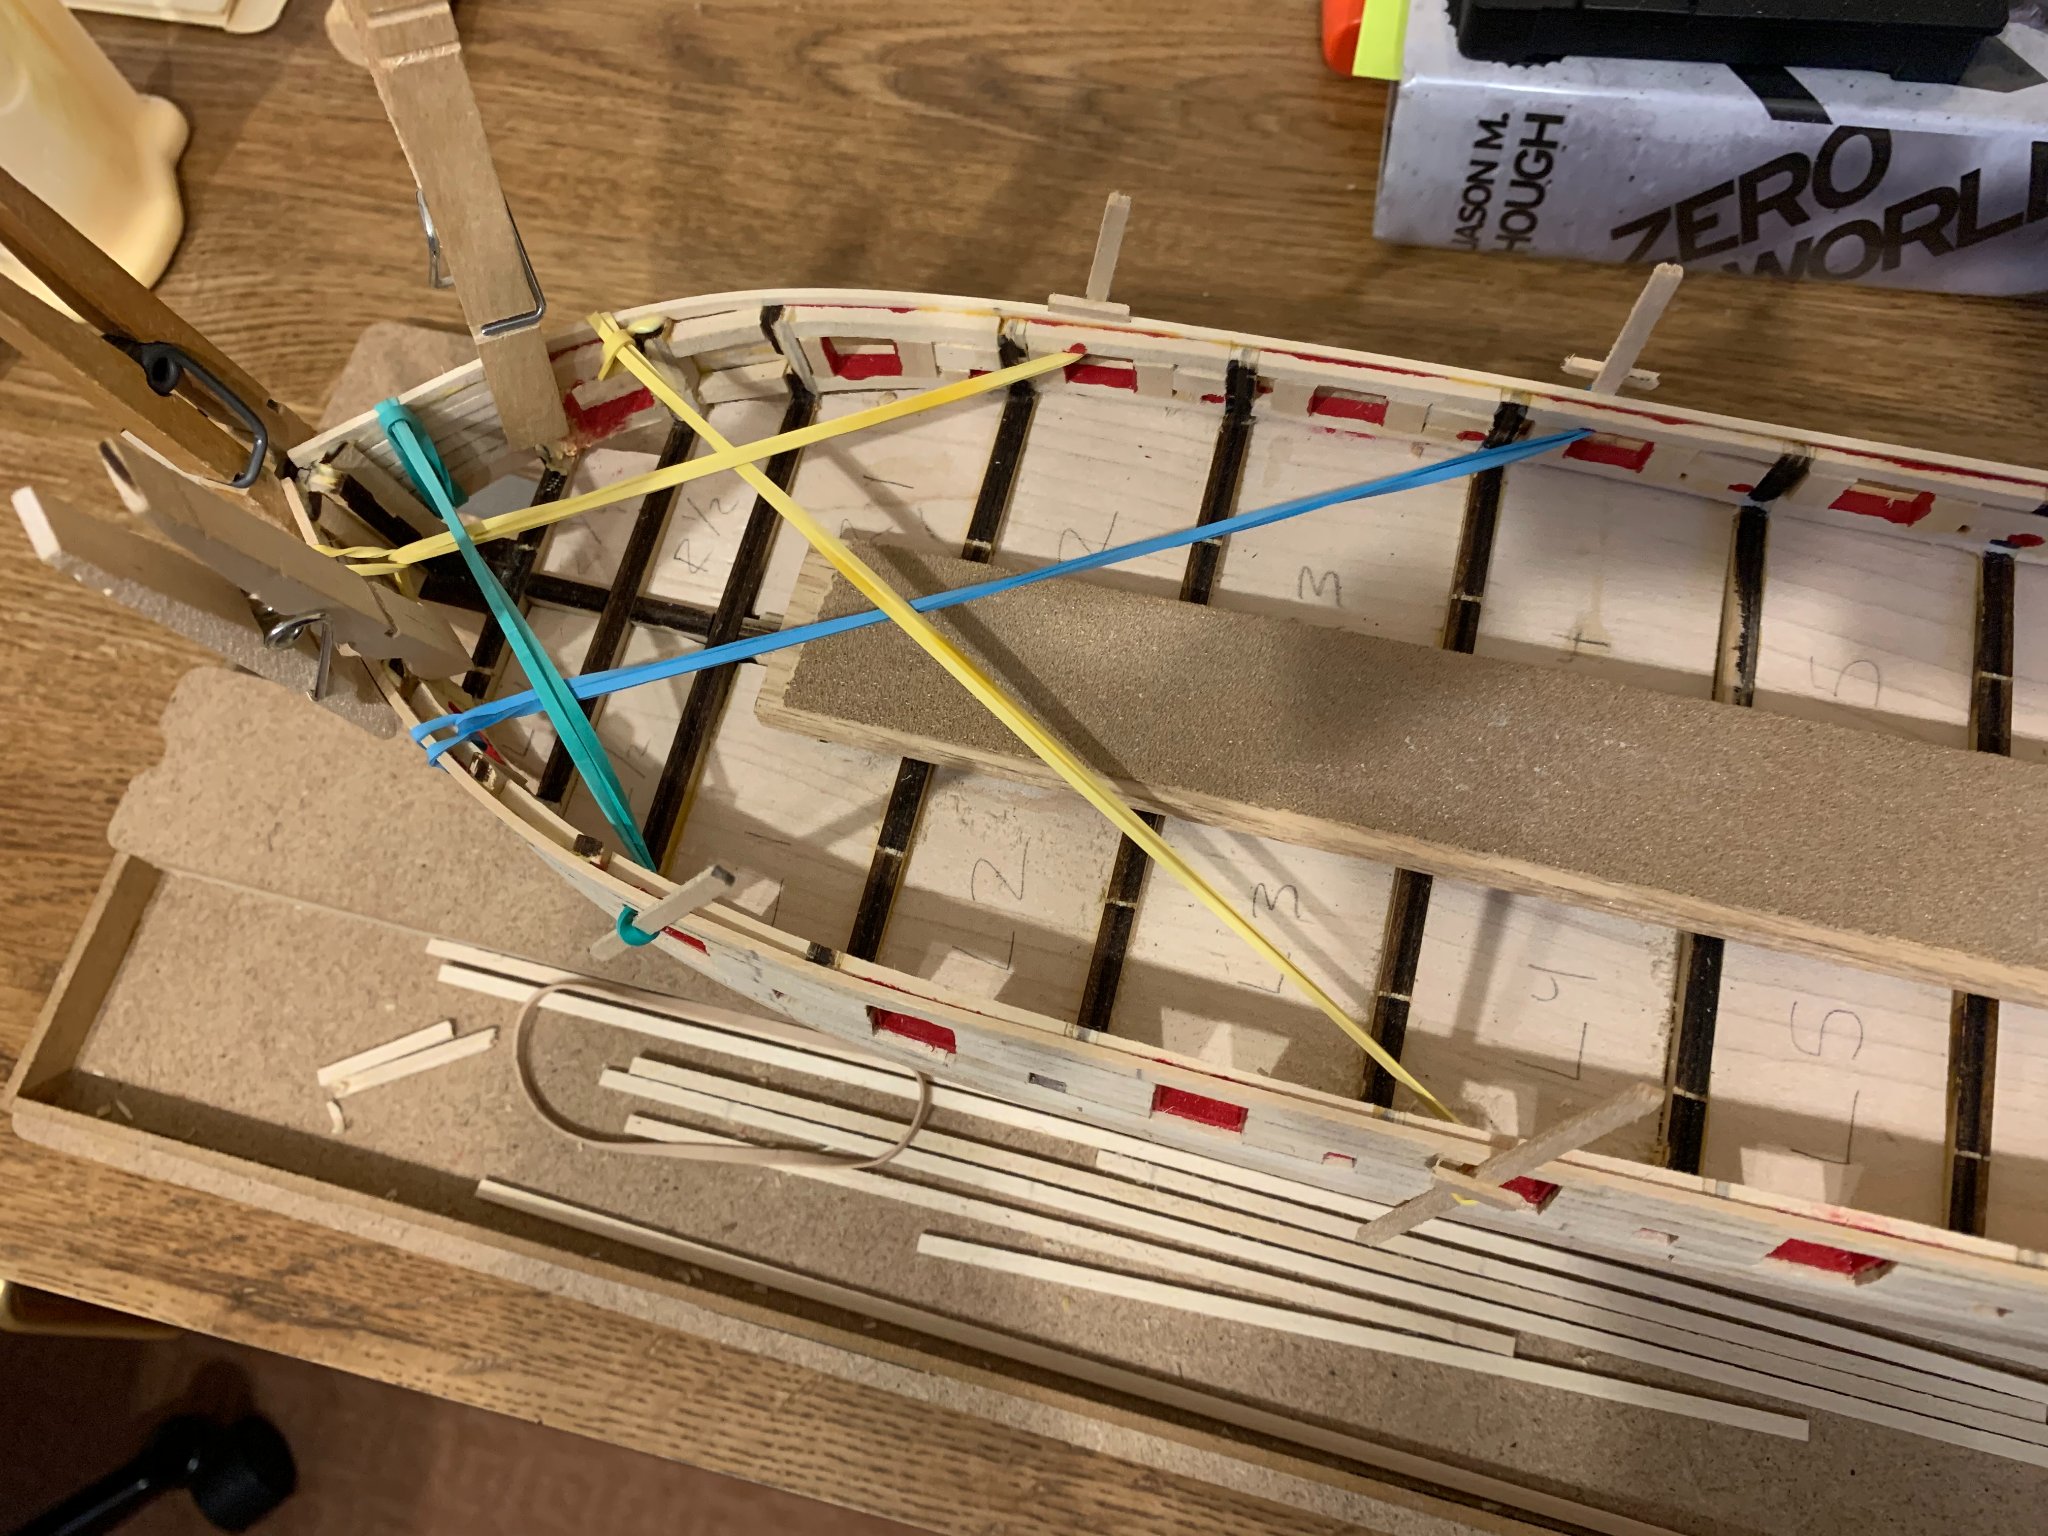
The I used strips of paper cut to fit the empty bulkhead areas and a planking fan to line out the bulkheads. 22 planks one side 22.5 the other, planning on 22 for both, I'm sure there'll enough gaps to take up a 1/2 plank. I'm using a lot of clamped down rubber band pieces to hold the planks in place while the glue dries, and I've been pretty happy with how that's working, kind of like a band clamp, but small and cheap. Noodling on some ideas on how to make a better fixture that executes the same idea.

So, got the first batch of planks on the starboard side, basically to the centerline. I'll move back over to the port side and get the same amount of planks. After that my plan is start down at the keel and work my way up wards so I have a better idea how much room I've got for that tricky remaining corner. Going to have to do some filing and sanding, but so far so good. Definitely spots I should have beveled a bit heavier to tighten the gaps, but as this section will be copper covered, I think I can fair it out.
In other news, I picked up a Lie Neilson violin makers plane, I was just not having a lot of success with a standard size block plane for the small work. This thing is tiny and perfect (well, low angle might have been nice, but I'm not doing a lot of end grain). I'm using it to taper the planks now, rather than cutting. Much like some others, I found the kit wood a bit fussy. Just start close to the end, take a few passes and keep slowly moving further back until it matches up with the lines on the bulkhead. Anyway, more to follow, thanks for watching.
-
16 hours ago, Justin P. said:
Just found your build! Apologies for the late welcome to what seems to have become the 2020 (and beyond) COVID Syren build group. Love your ships boat and plank shaping jig you put together, looks like you made it to fit the complex curvature of the bow... Ill shall remember that move.
Welcome aboard, no apologies necessary, seems every time I turn around I find another Syren that I've got to take a look at. This whole covid thing got me started on a ship that had sat idle for more than a decade, and finishing that got me going on this one.
For the jig, the camera angle makes it look like a compound curve, but in reality the nails are straight up and down, so just a single curve. It gave the wood enough bend to fit well at least above the wales without needing to fuss too much.
- Justin P. and Overworked724
-
2
-
-
She’s looking great! I’m glad you’re ahead of me, I’m definitely going to keep an eye on your decking. That looks like it’ll come out nice and even. Question for you, not a critique at all, is there a reason you put a joint at each bulkhead rather than one big piece?
- Overworked724 and Justin P.
-
2
-
2 hours ago, Ryland Craze said:
Your Syren is looking good. I like the red you are using. Is this artist acrylic paint?
Thank you. The paint’s from model expo, it was part of the acrylic kit they sell for the Syren, there was black, red, white and a primer. The red is their MS4835 Bright Red Trim. I think it’s a nice deep red color without being too bright. -
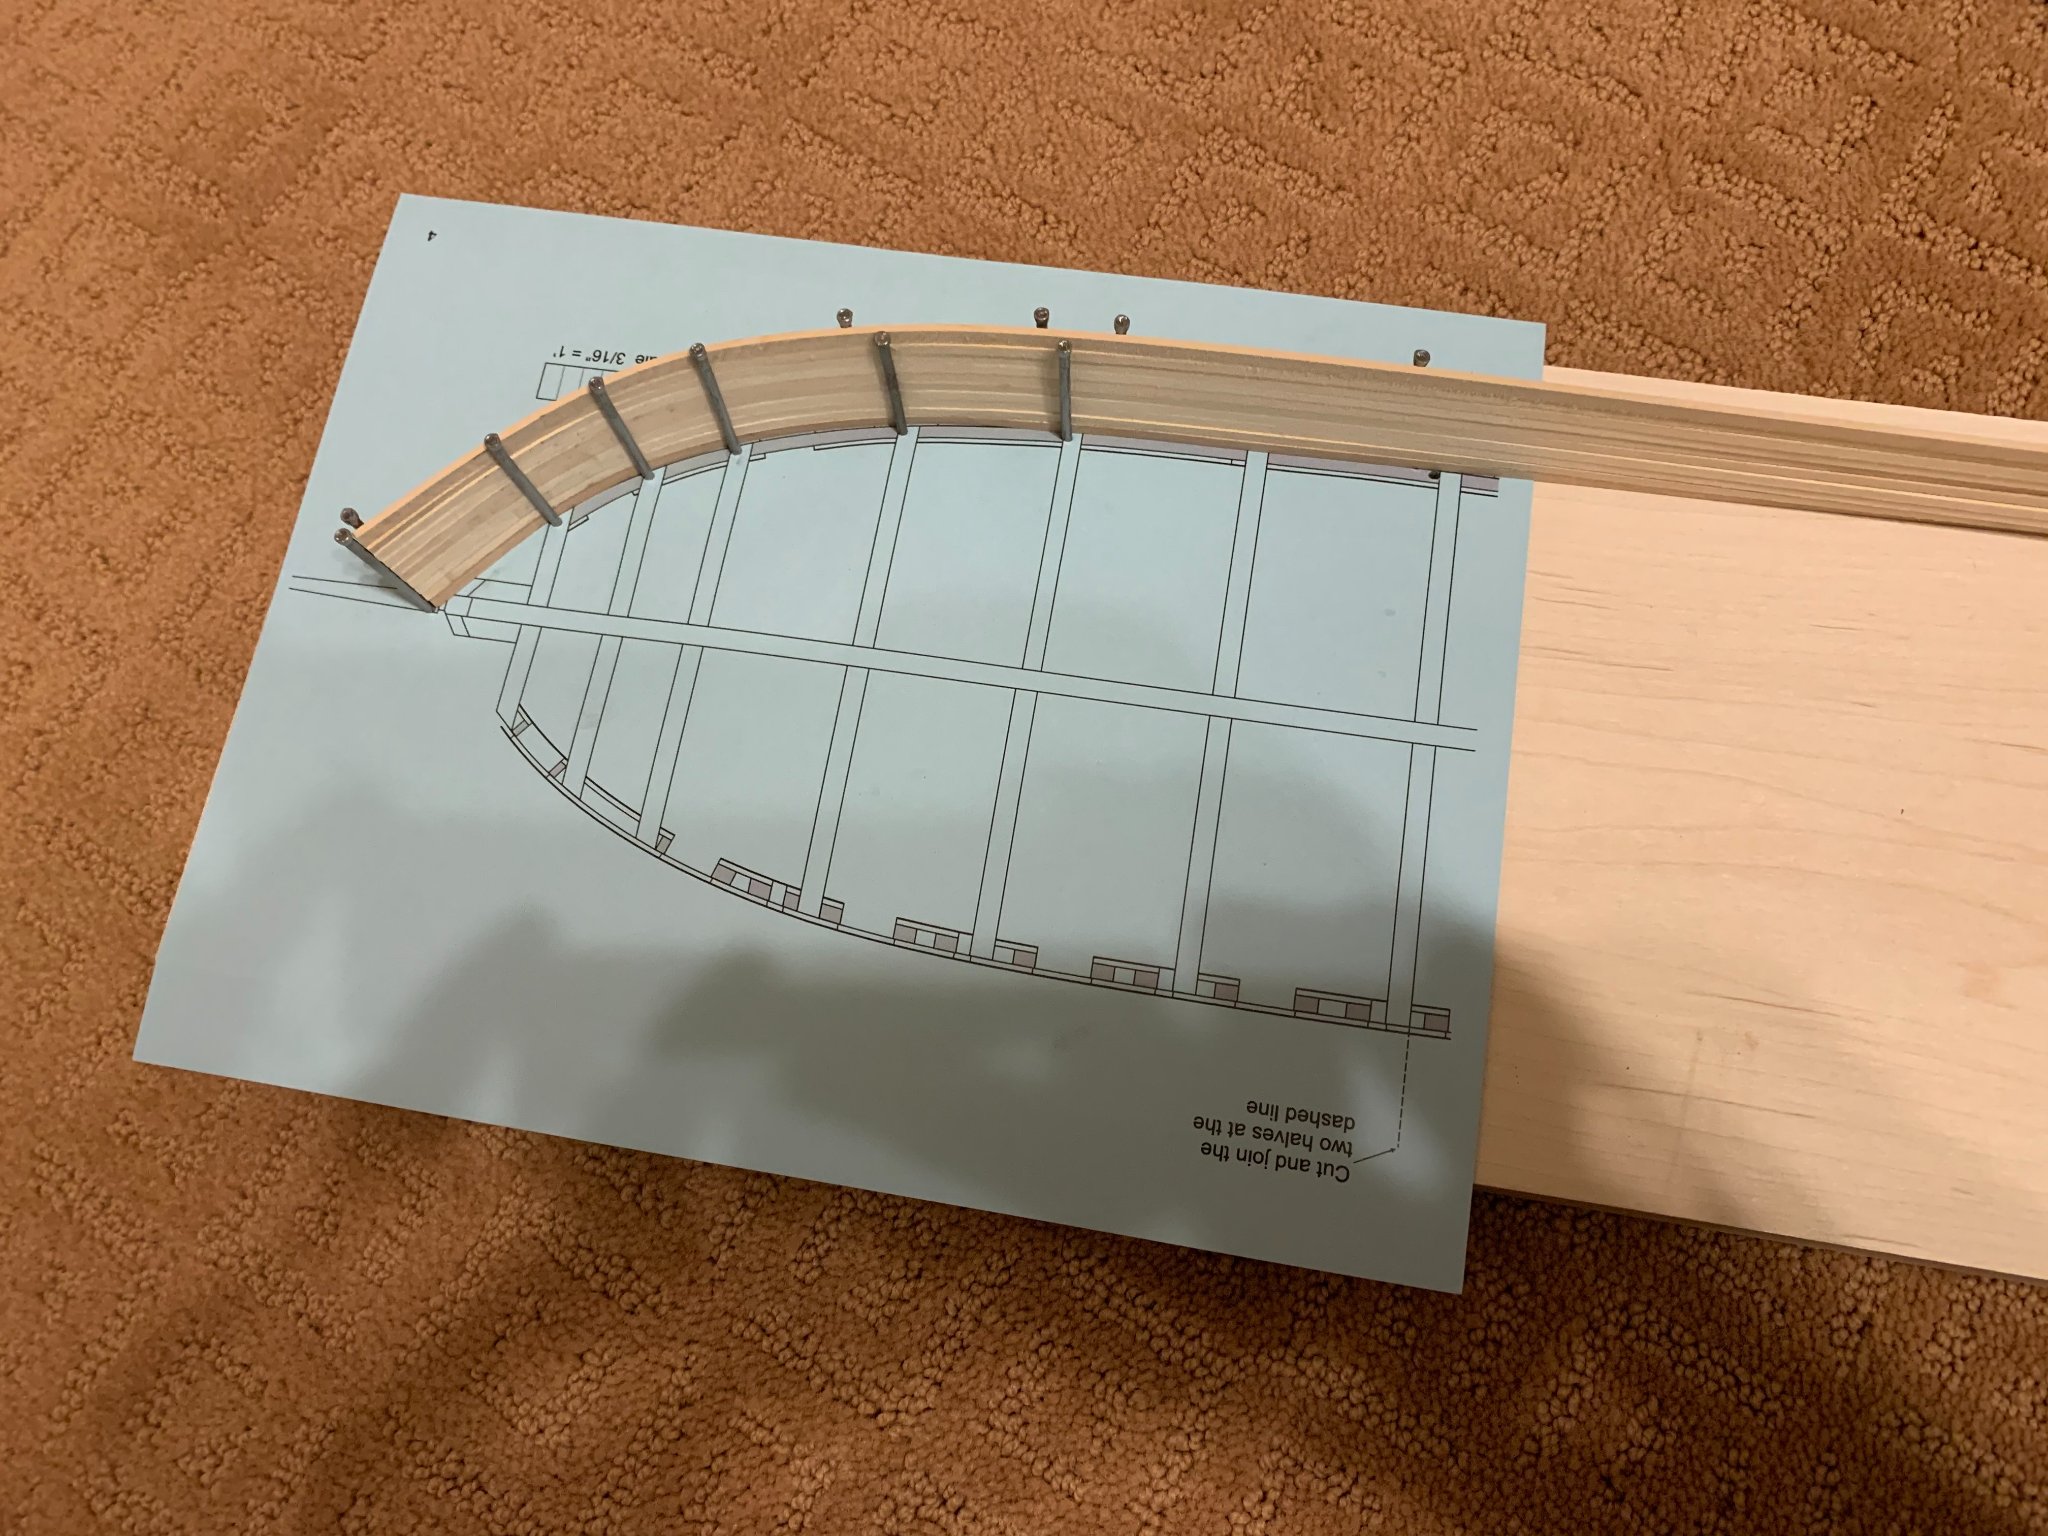
I made a jig to pre-shape the planking, and it'll hold about 8 planks at once, so I can soak and let them dry overnight. It ended up working very well, but as these were just plain steel nails, it did end up leaving a bit of a rust streak I'll have to sand out later.

I painted the ports and then laid down the first plank after laying it out with some battens and pins. Continued to plank from the wales up. Clothes pins were the clamp of choice here, but I did end up using rubber bands for the final bow planks, as the were high enough the rabbet wasn't holding it inboard.


- Ryland Craze, CiscoH, Overworked724 and 3 others
-
6
-
I've been doing quite a bit of work without getting a chance to post updates, the kids have been monopolizing the computer for school (and world of warcraft :-)
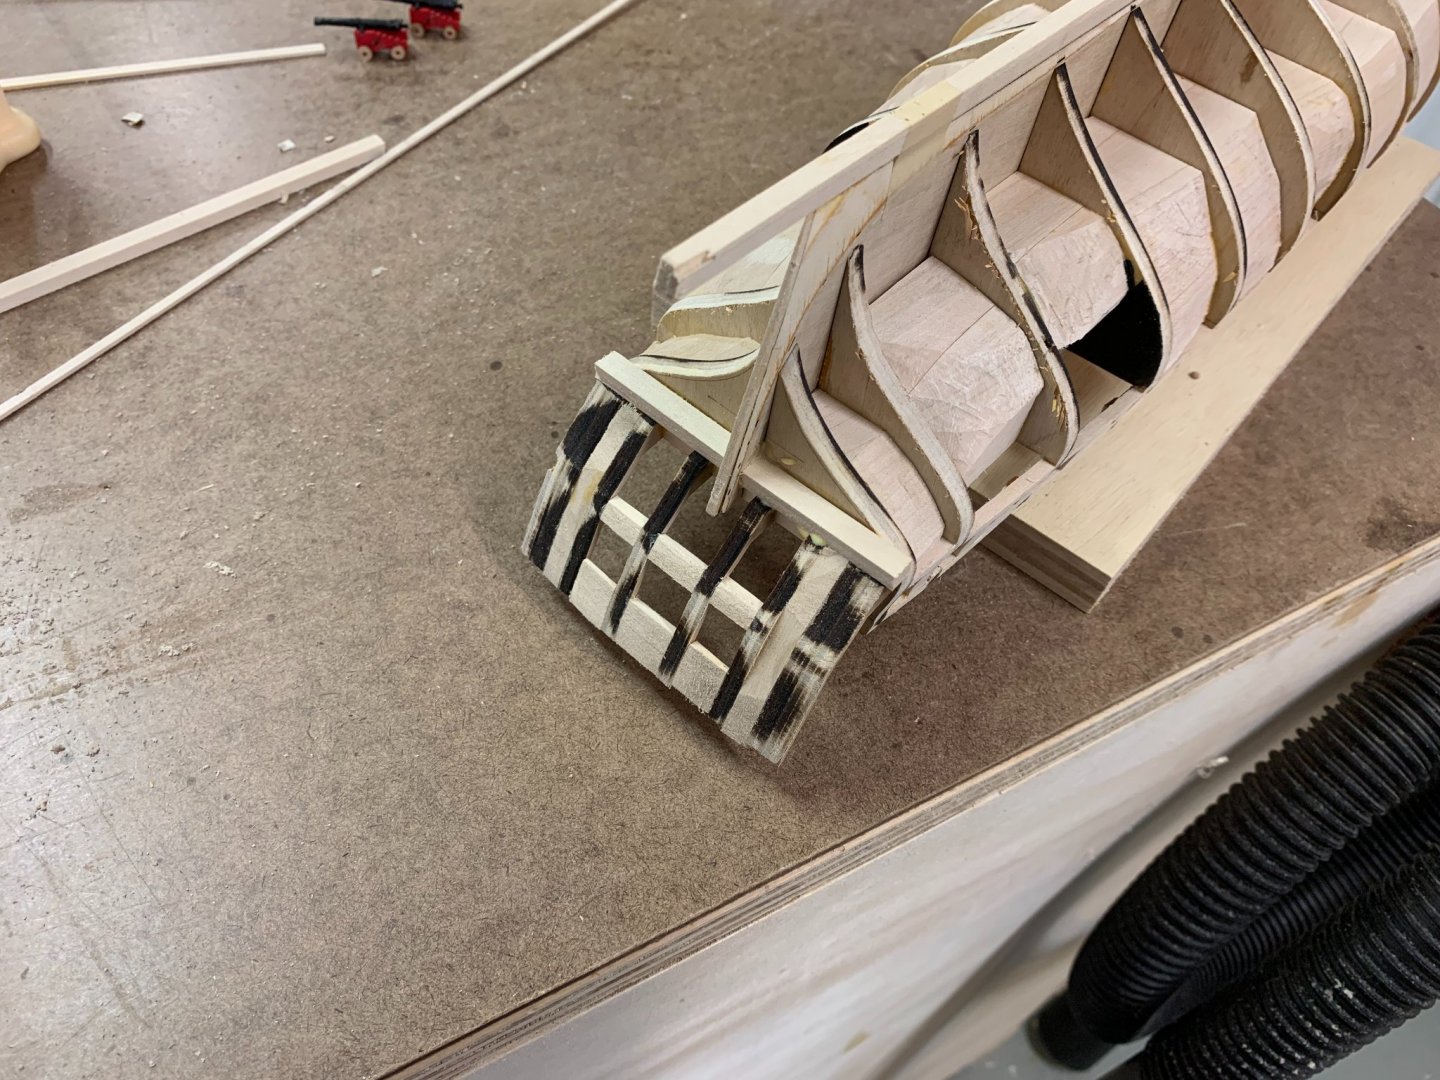
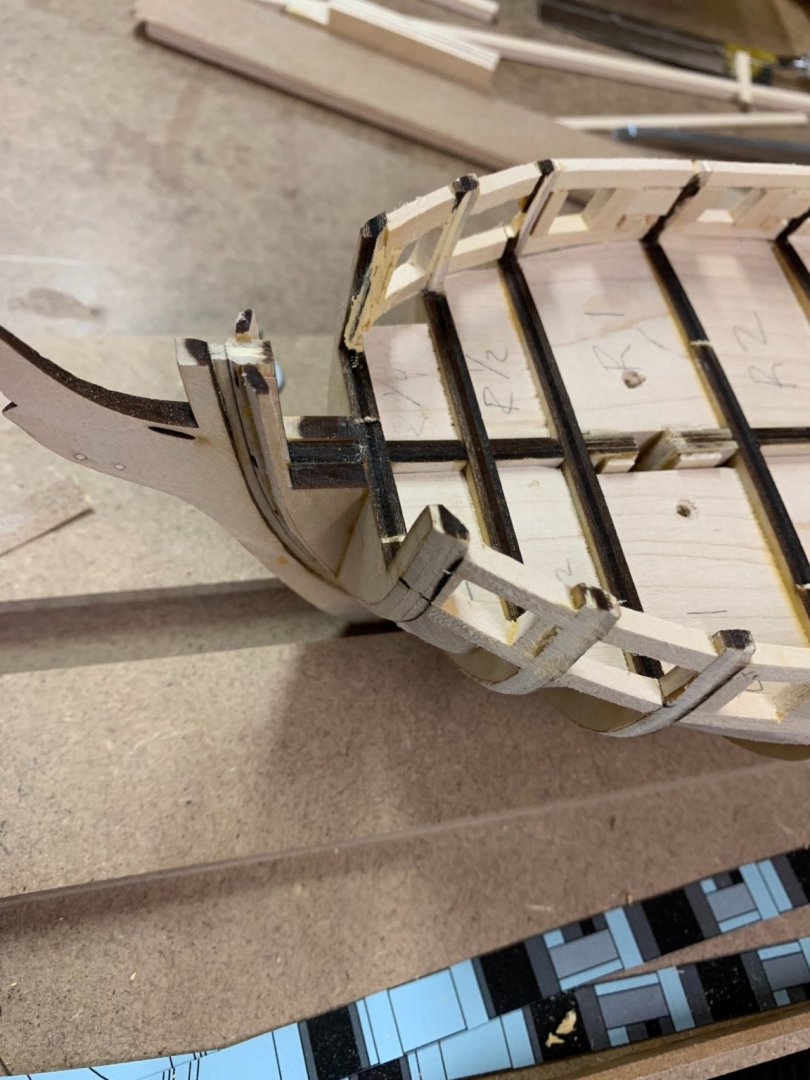
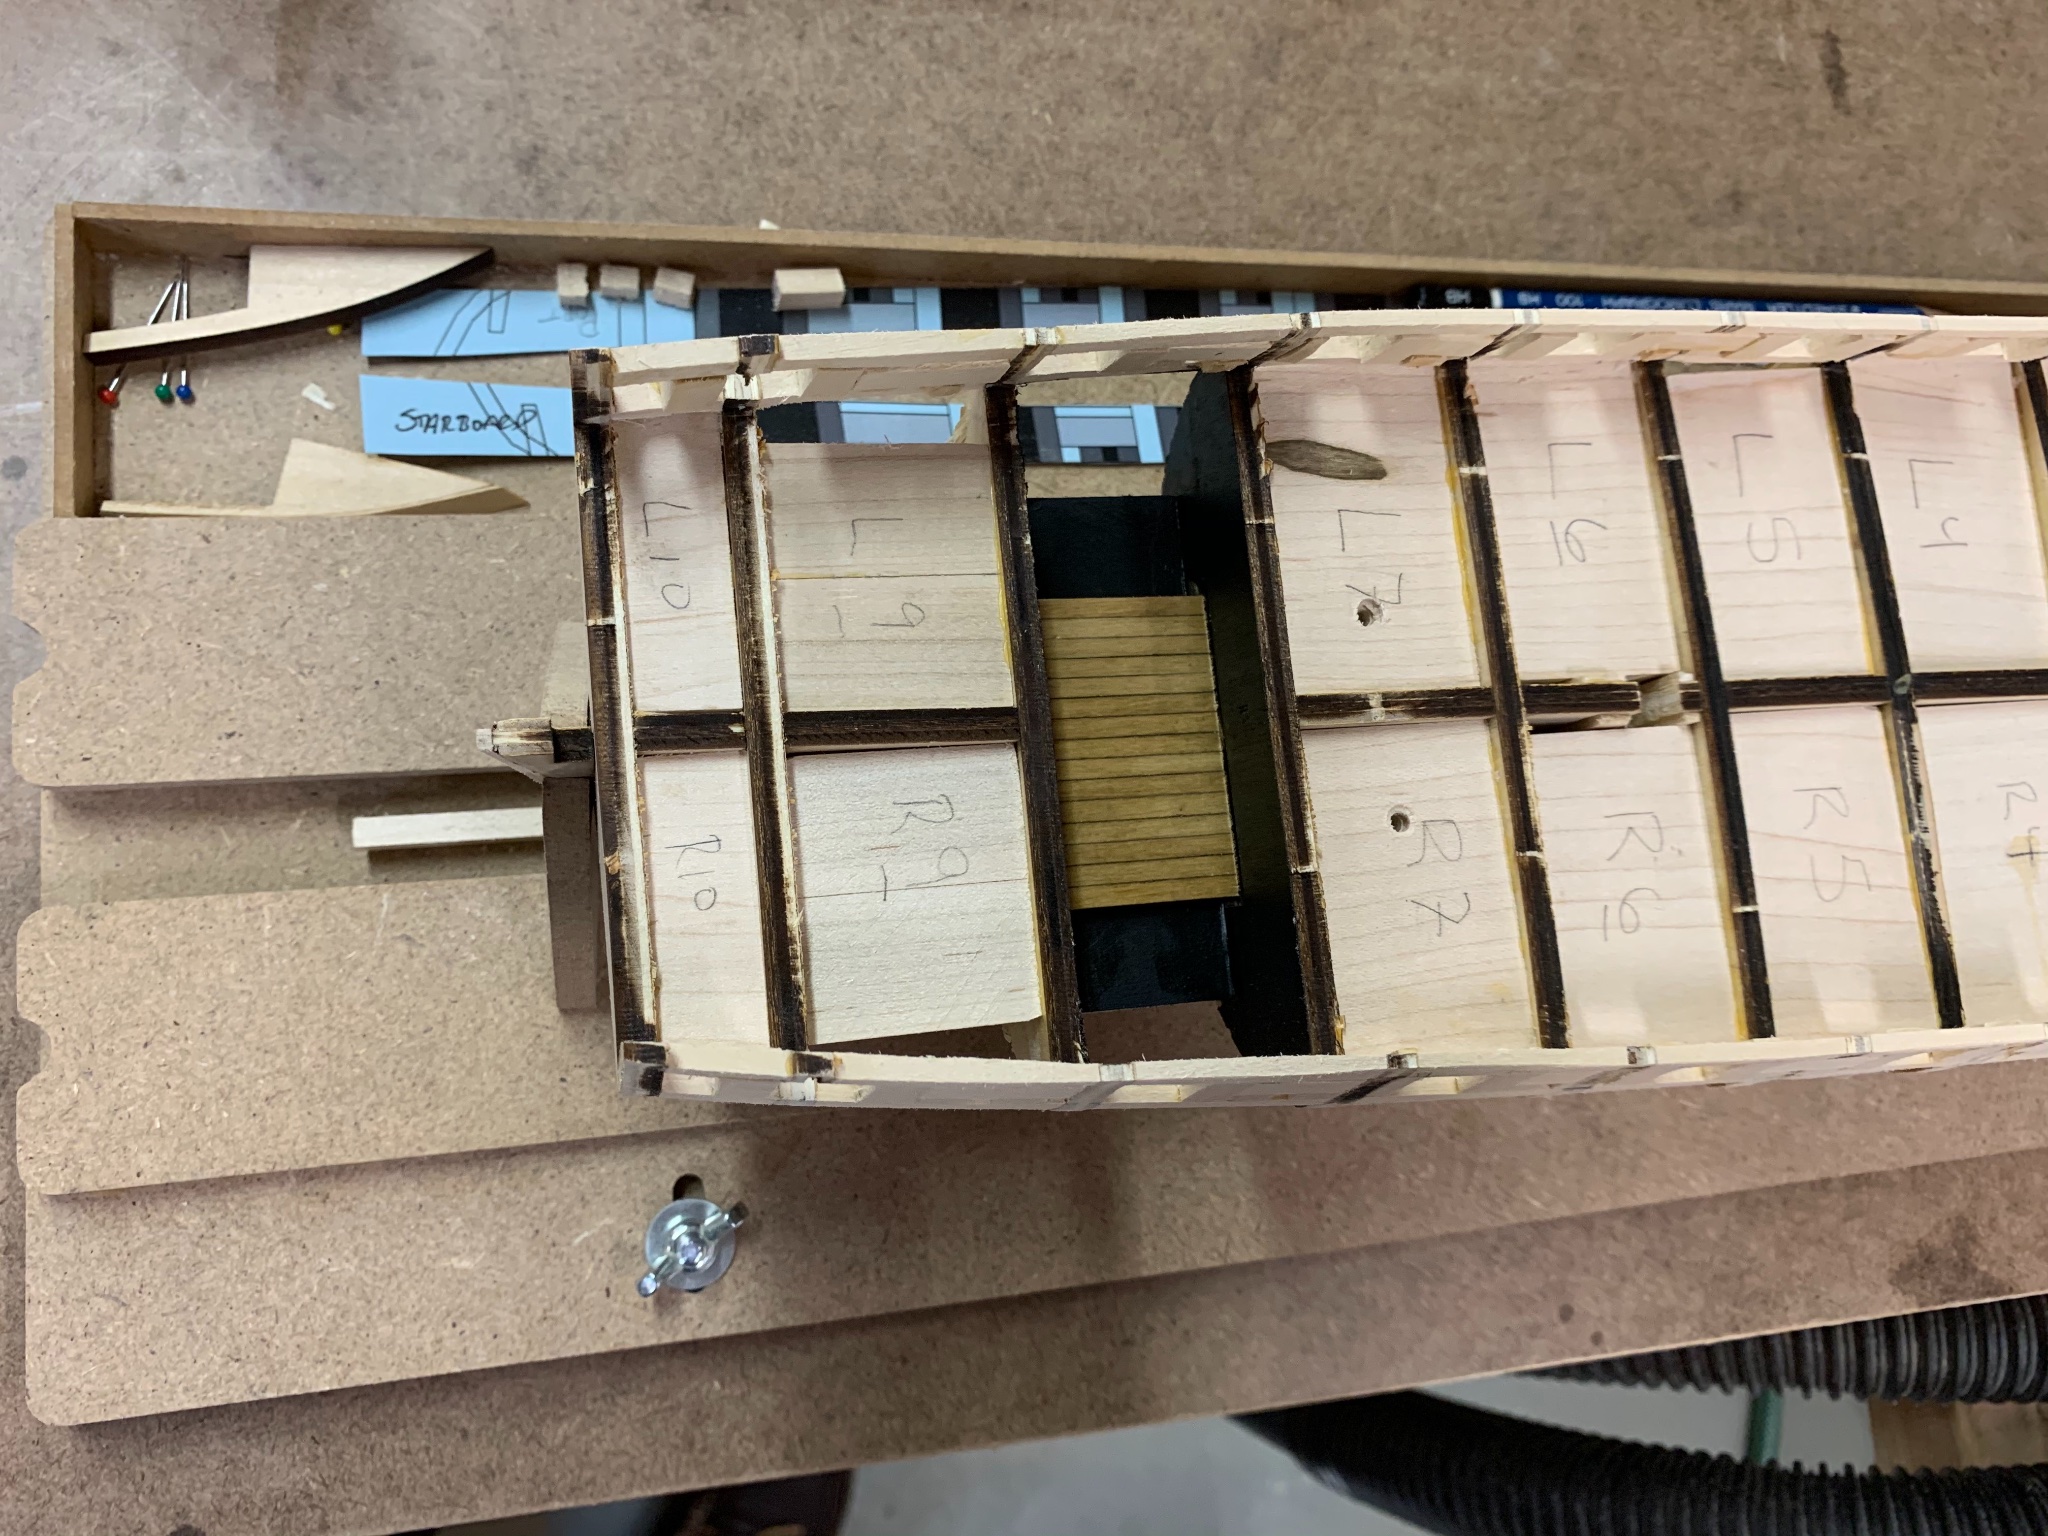
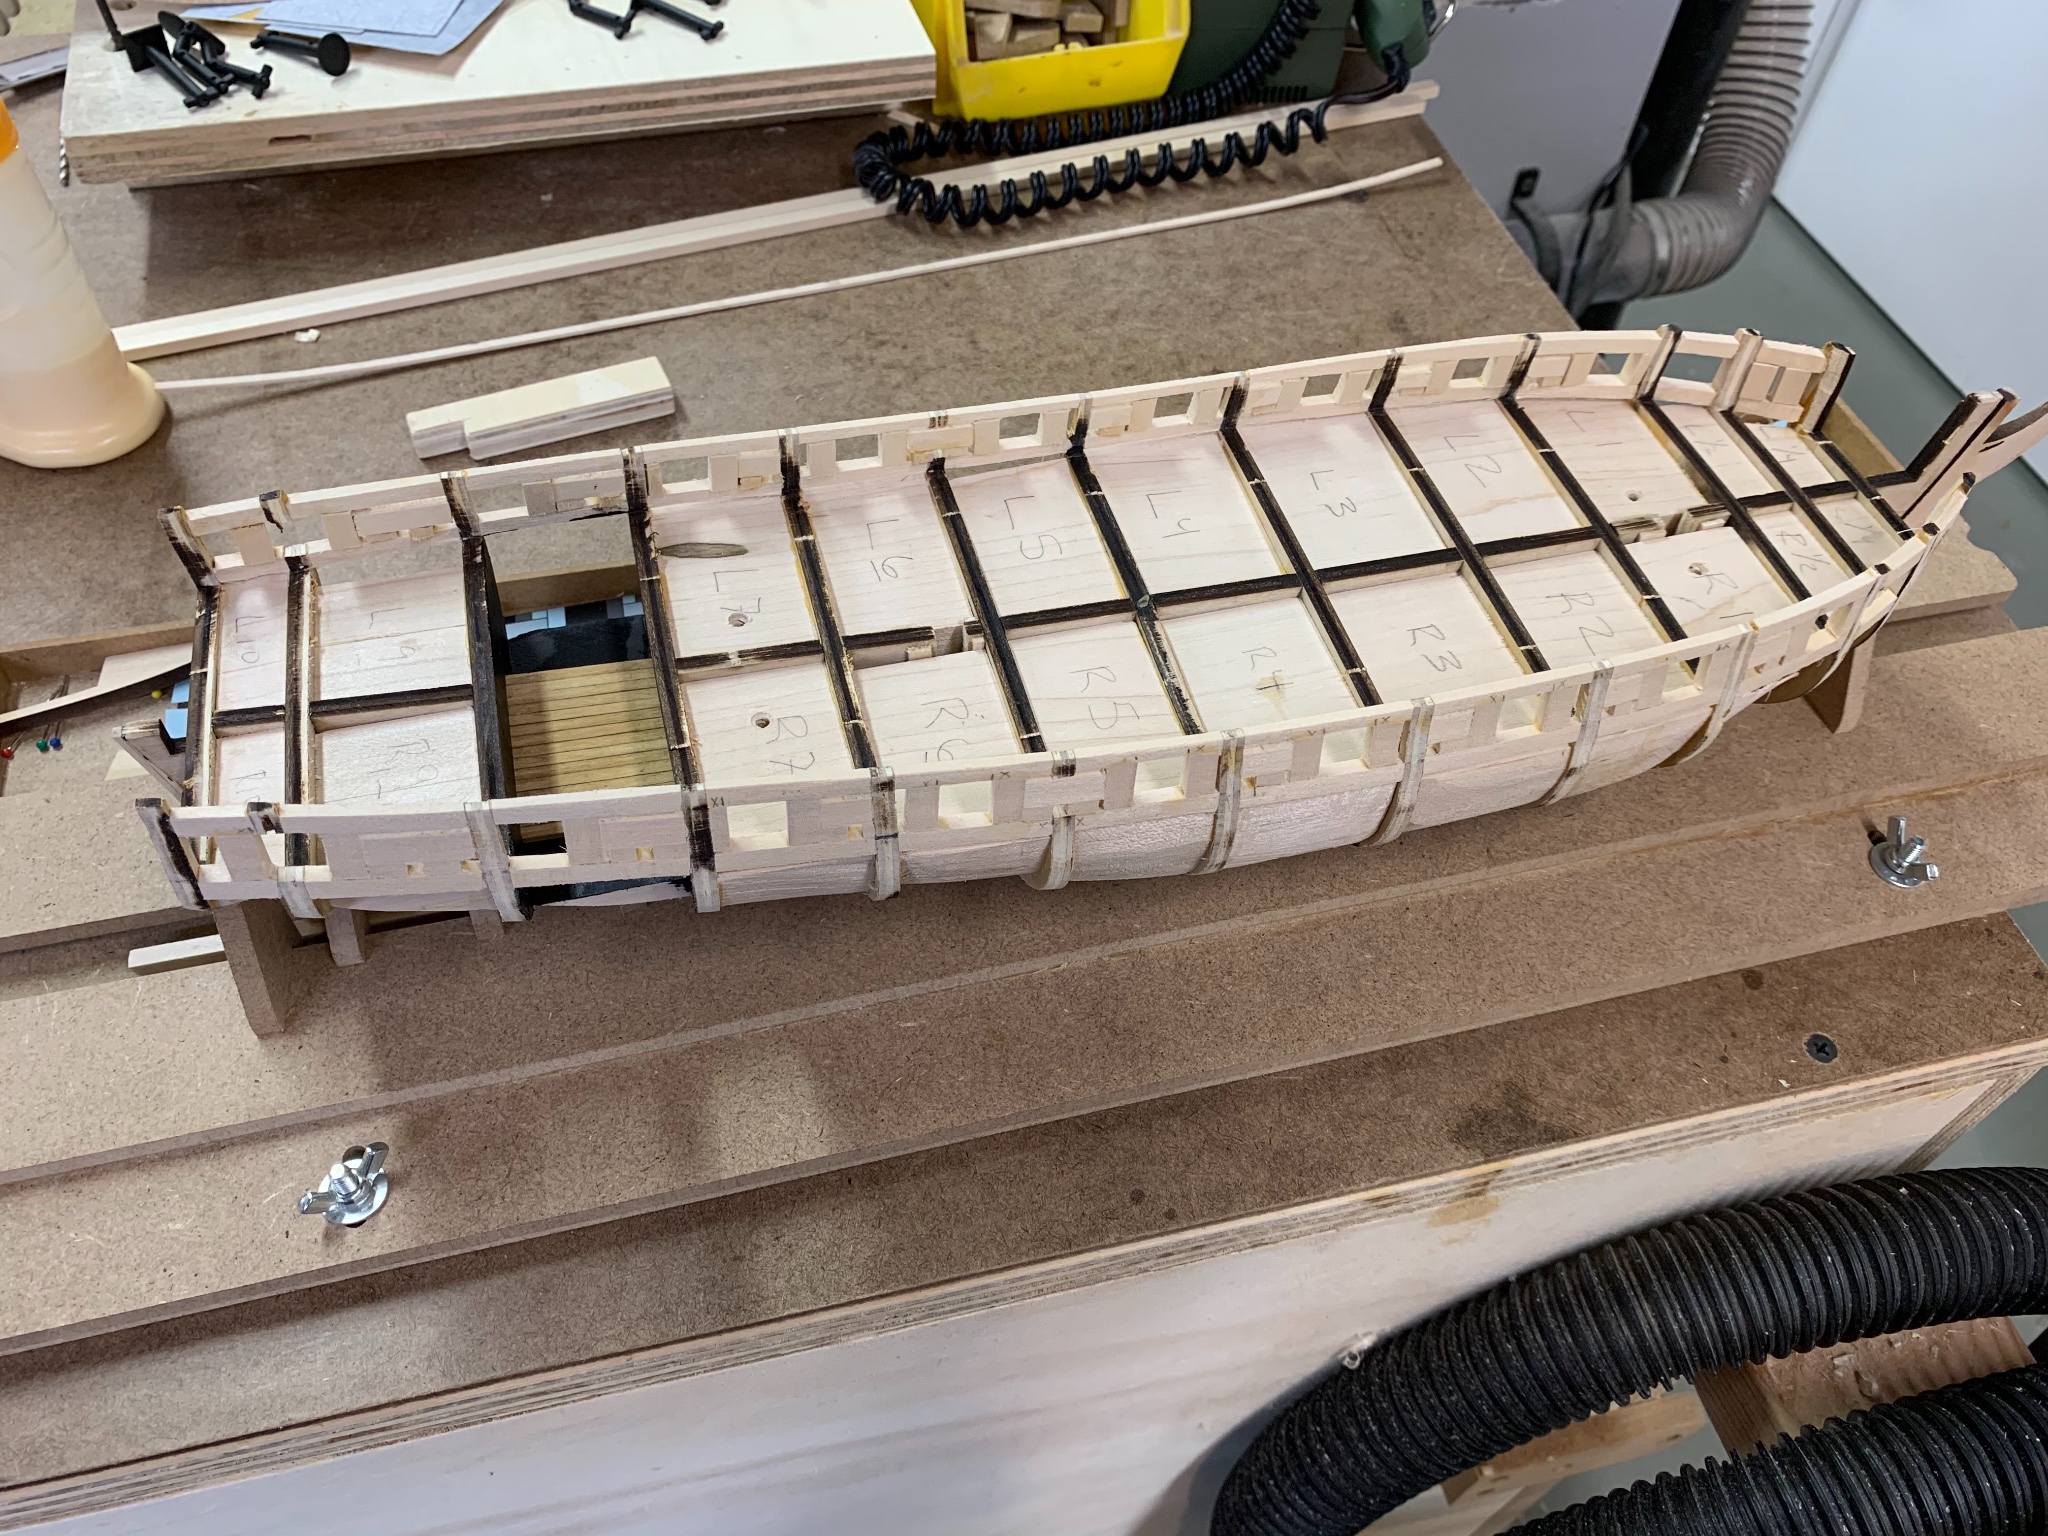
Anyway, I've done quite a bit, starting with some pictures of the stern framing and the framing for the deck accessway (opted to work on this while the stern was drying, just to keep making progress).
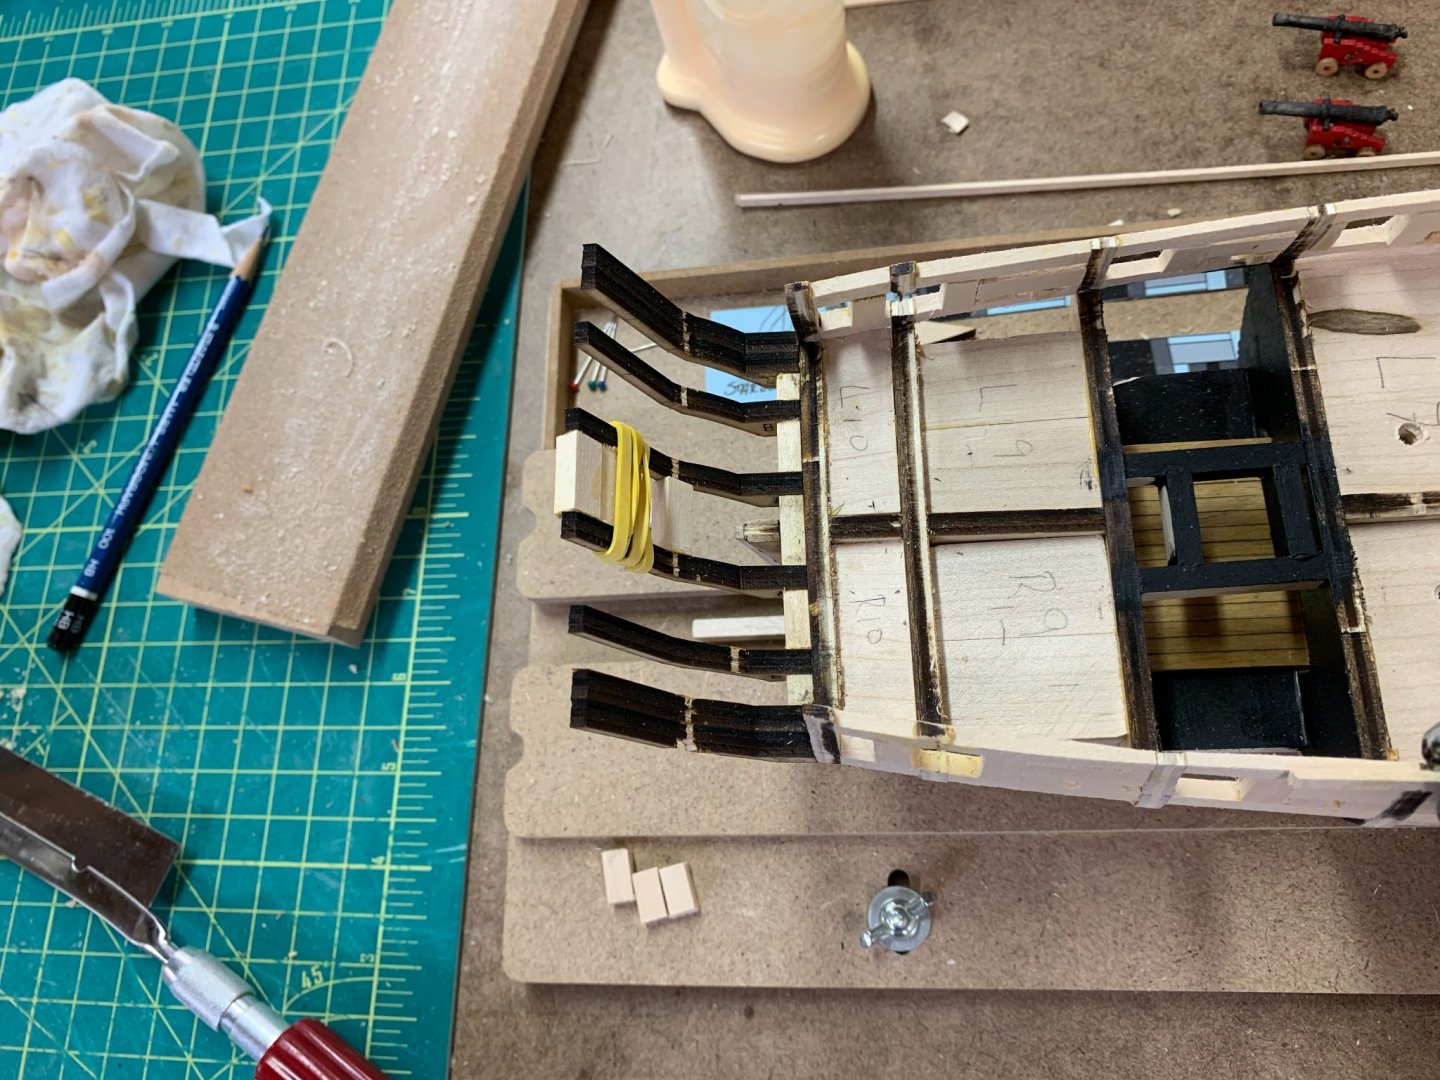
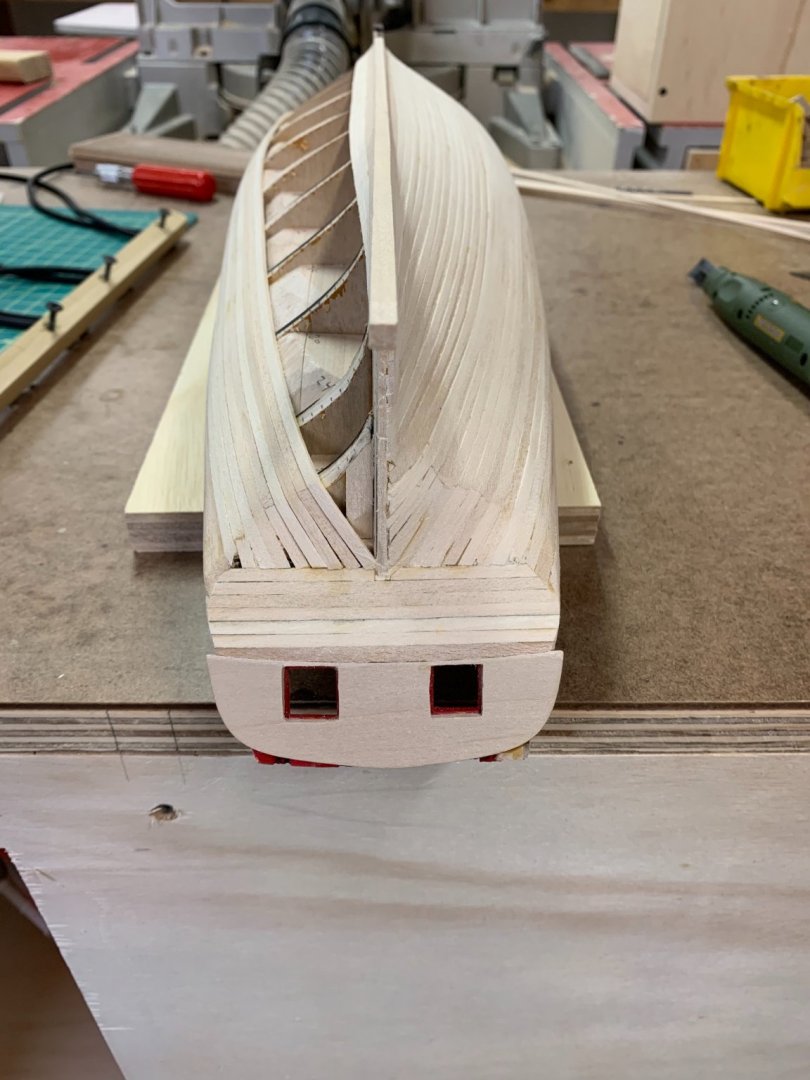
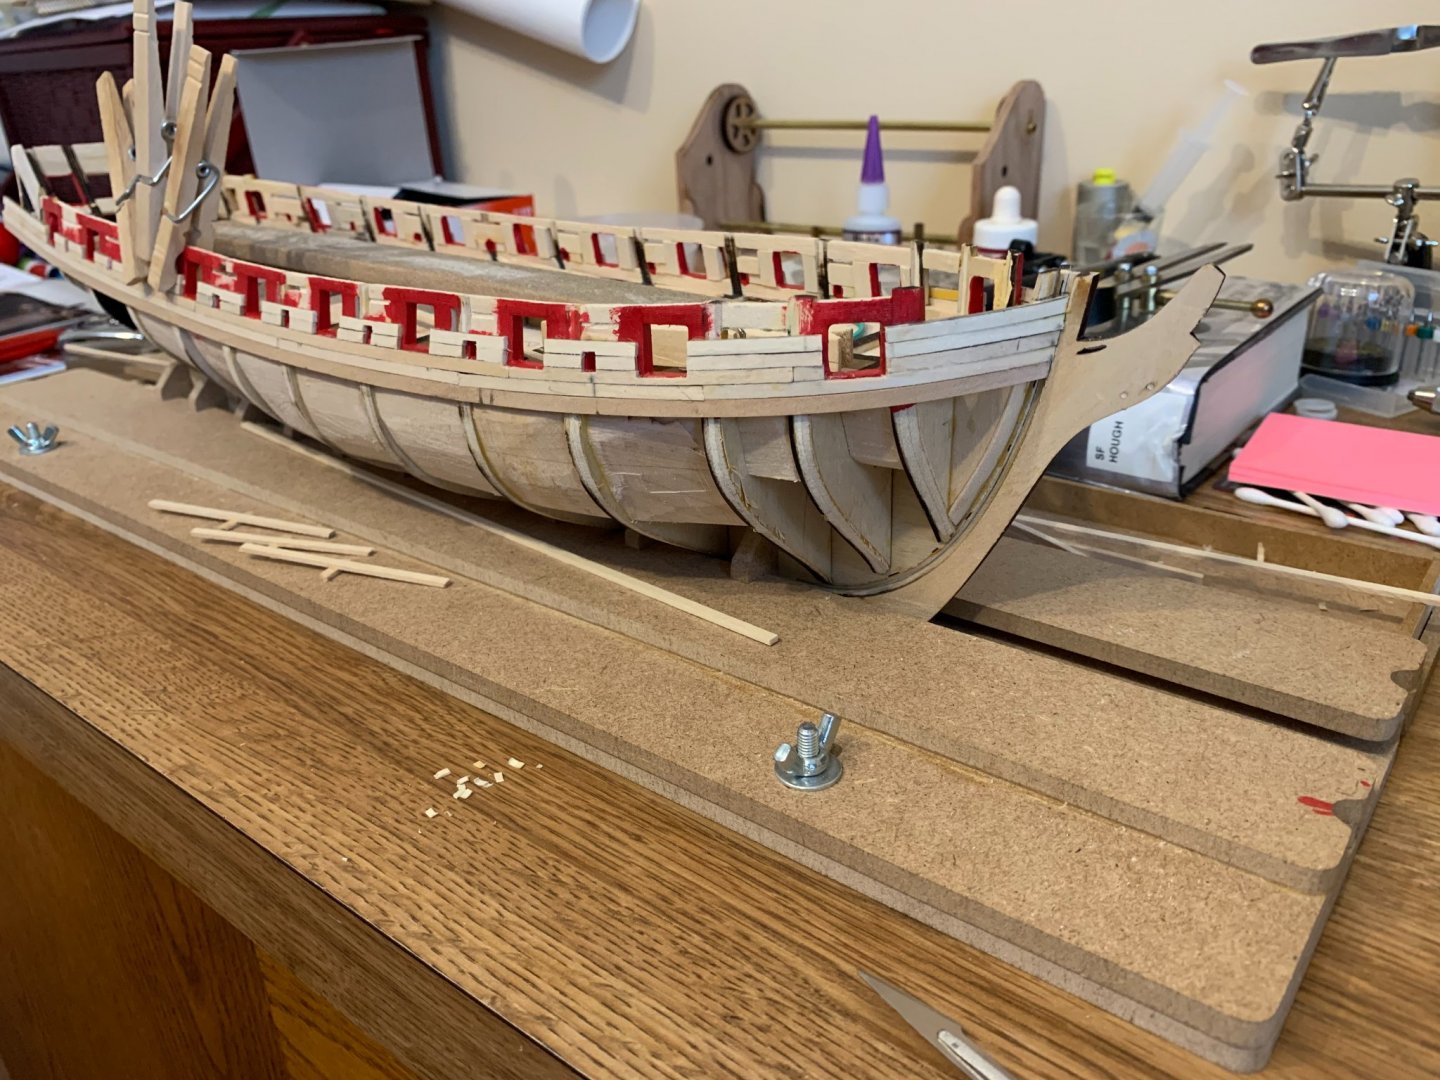
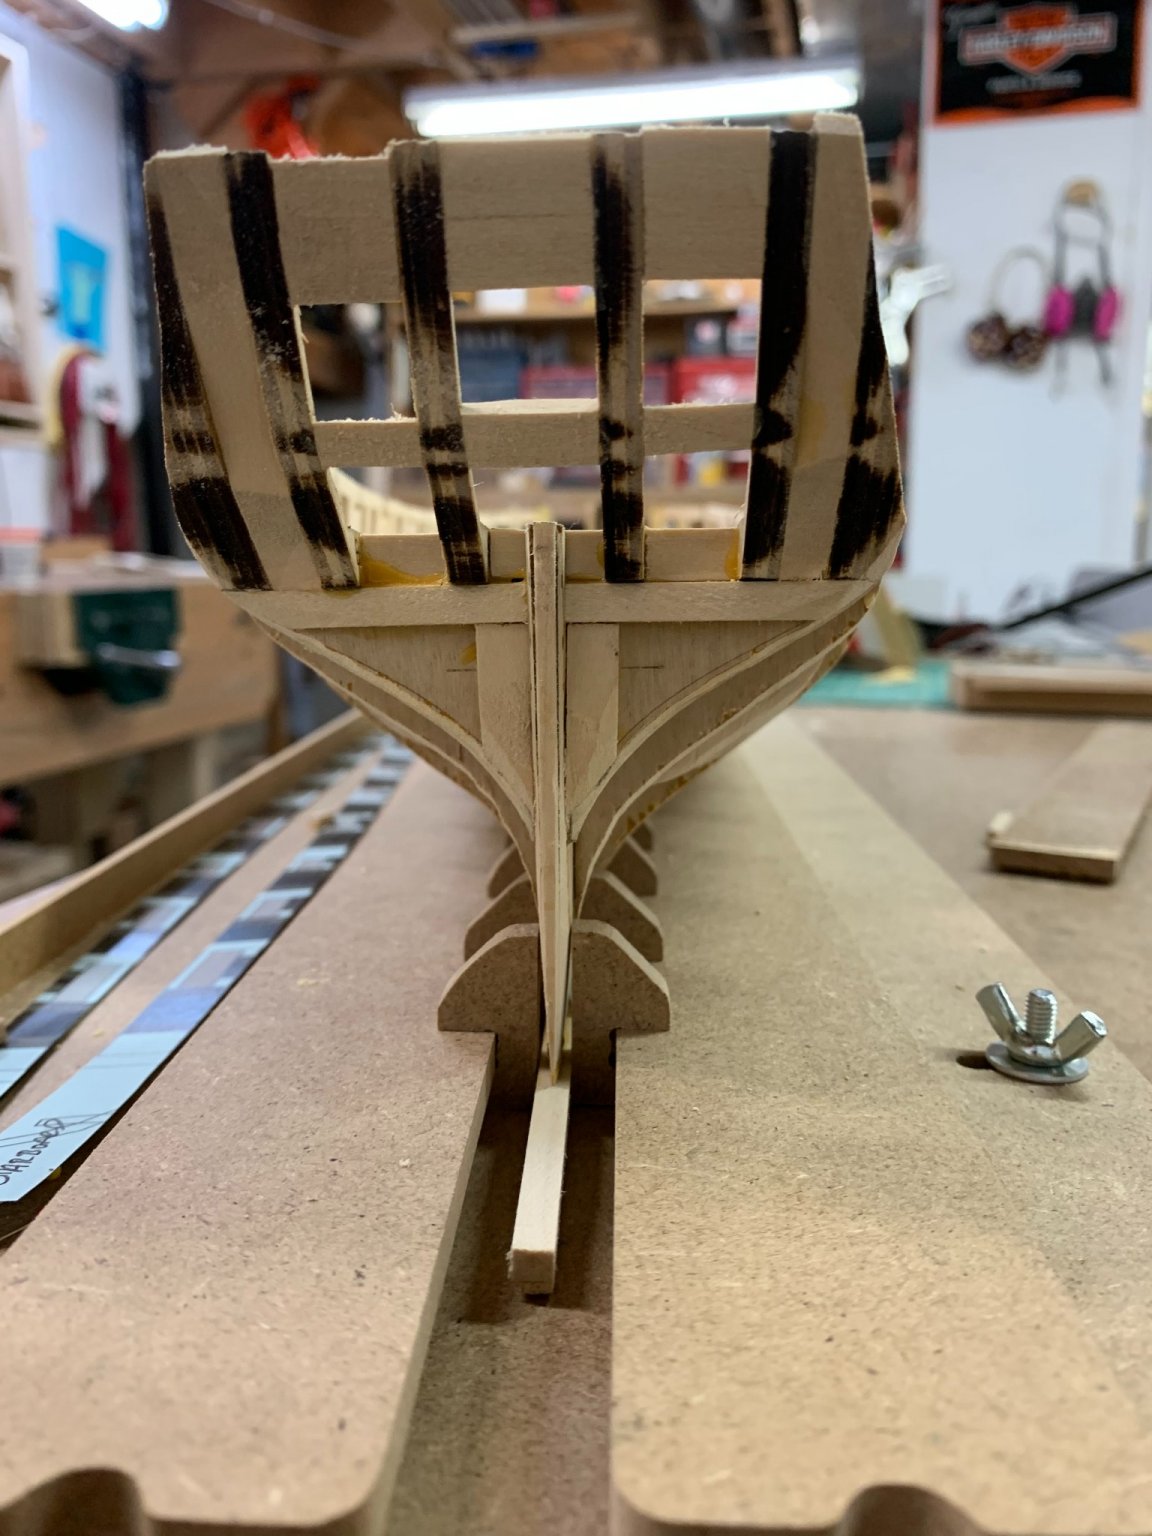
Framed the port openings and installed and faired the stern filler pieces next.

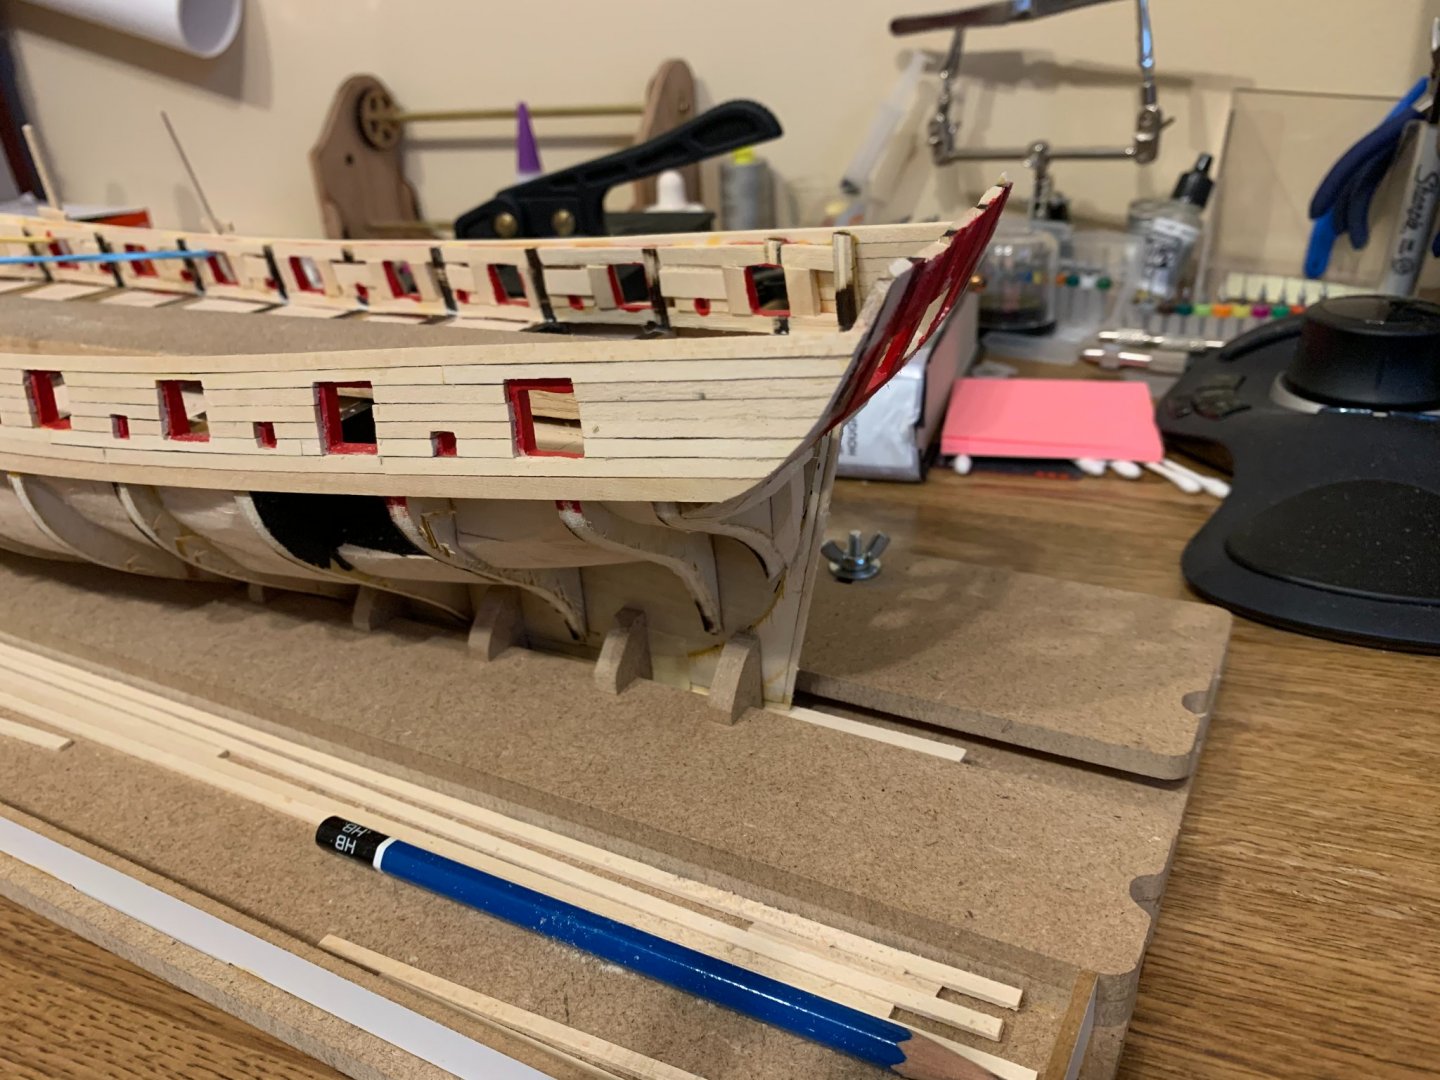
And I installed the bow filler pieces as well, I'd put off doing this so I could get them faired a bit more true to the final shape of the exterior after I'd finished framing all the gun ports and truing them up. You can see my interior side of the framing was left large, I'll clean all that up once the exterior is framed and gives it all a bit more structure.
- Justin P., JpR62 and Ryland Craze
-
3
-
2 hours ago, Overworked724 said:
Interesting building board! Did you make it or was it manufactured?
I cheated and bought one.
https://www.hobbyzone.pl/en/boat-building-tools/105-small-building-slip.html
I got it through hobbyworld. Stock situation wasn’t very good due to covid, and they were pretty poor at responding to emails, but in the end, one showed up, and it’s working pretty well.
9 hours ago, Overworked724 said:Looks great, Jamie! Coming along very nicely. The sanding never seems to stop, does it? 😃
So much sanding...
I've got to admit, I’ve been following along on your build and the sandpaper on a paint stir sized piece of wood has been the best tool for so much of the work.
- Justin P. and Overworked724
-
2
-
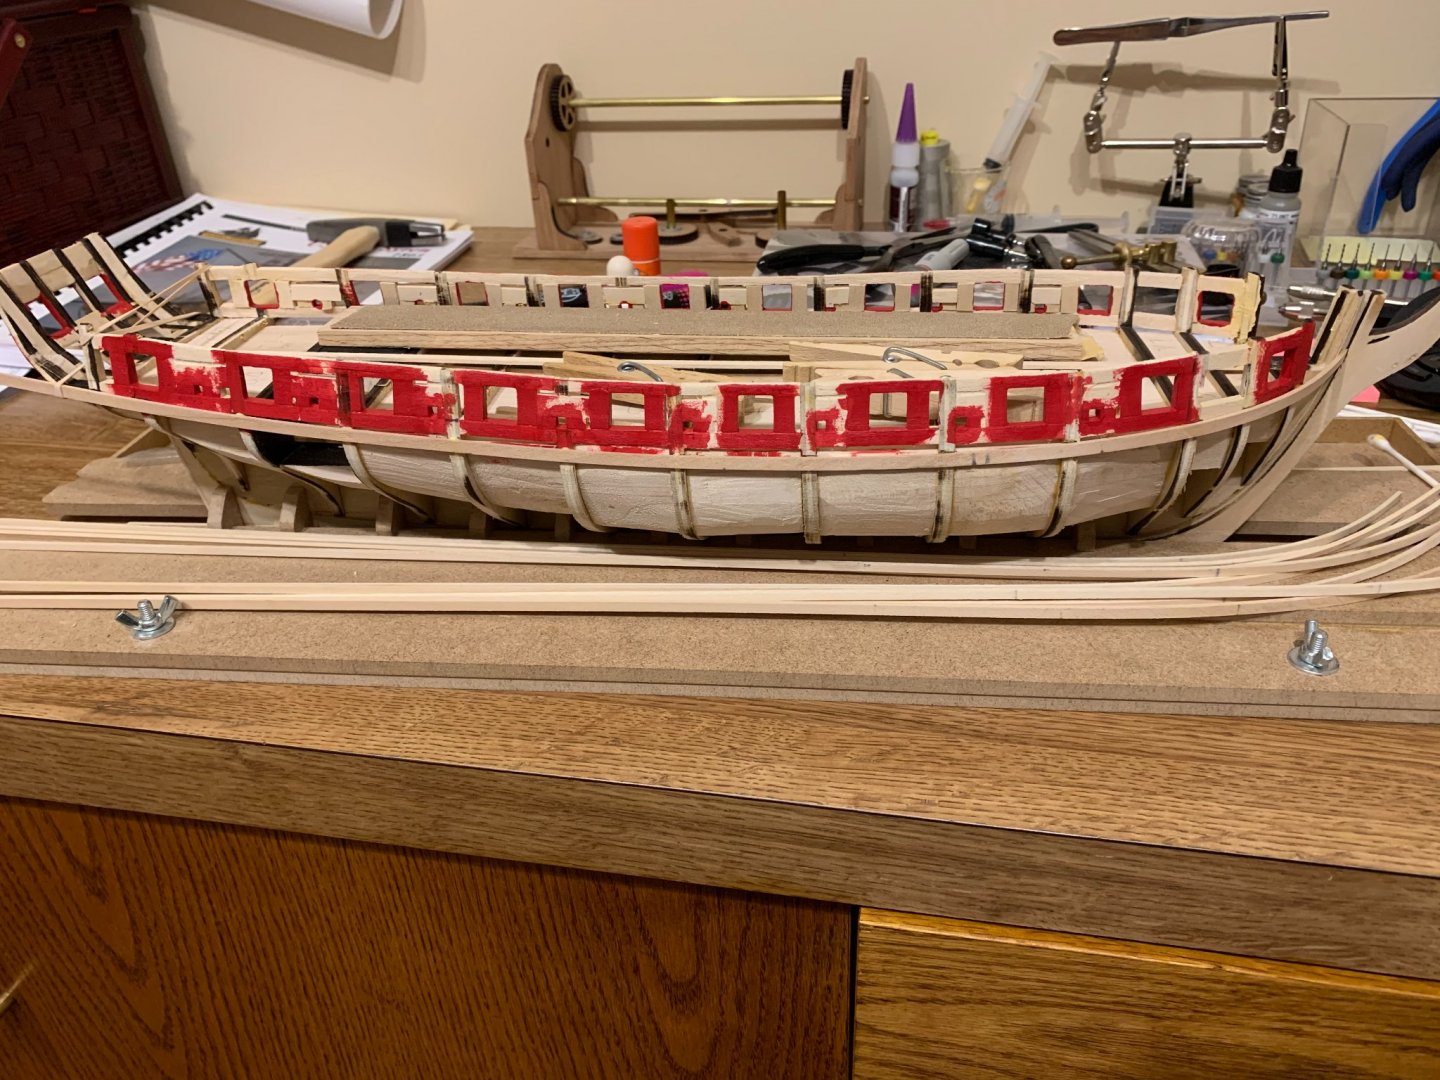
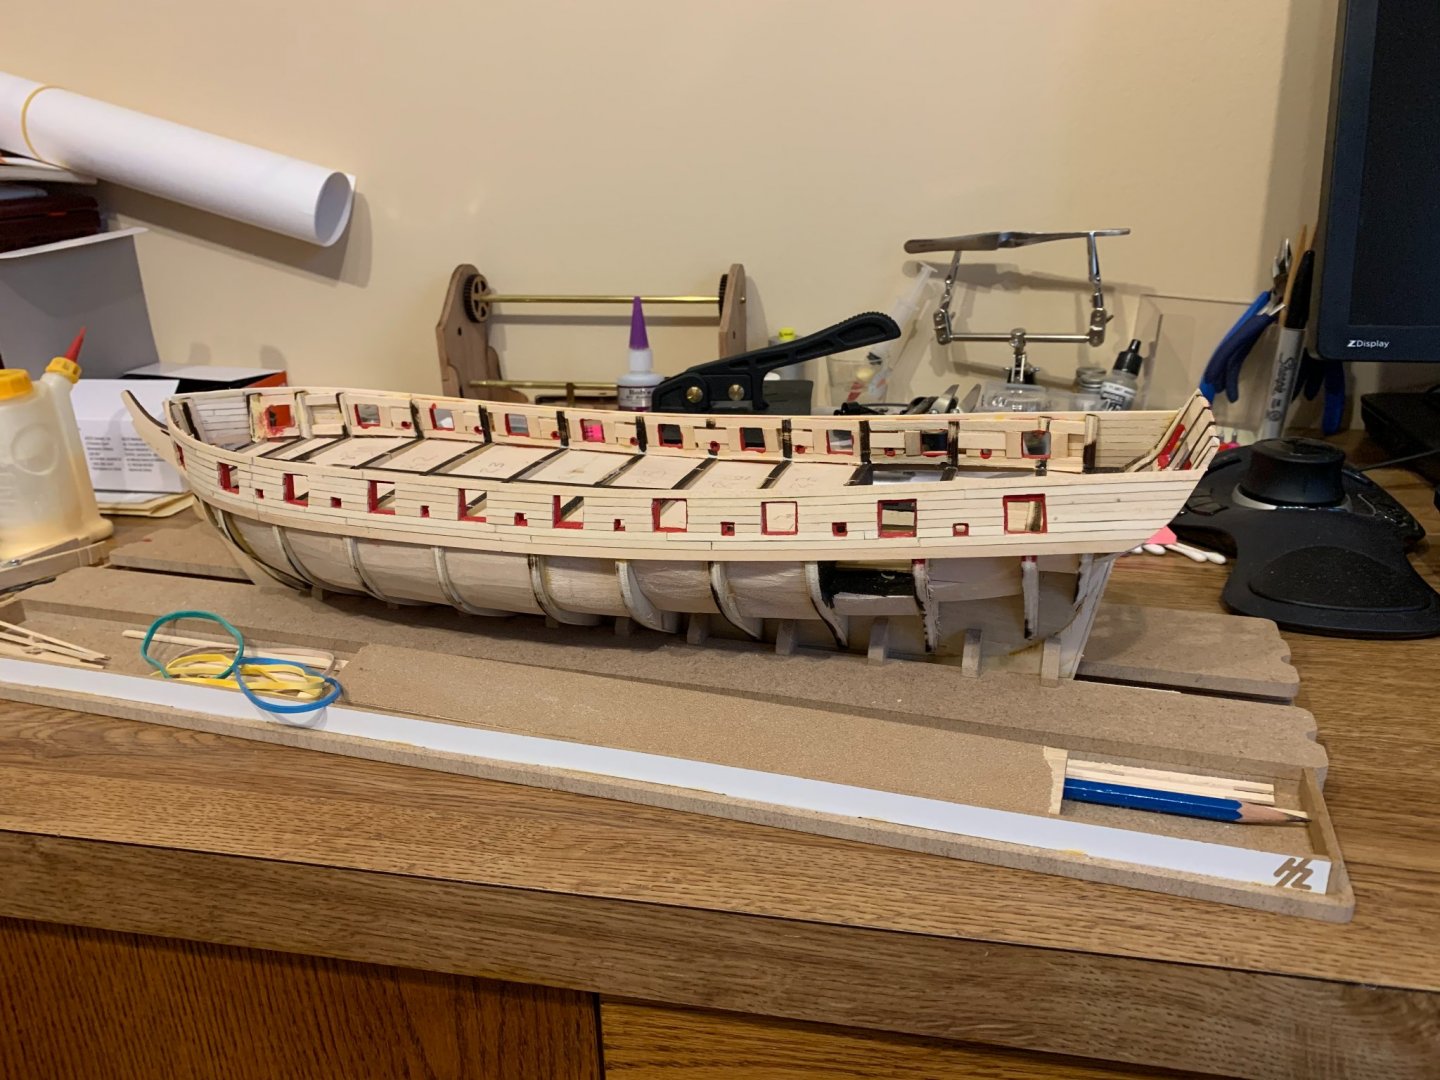
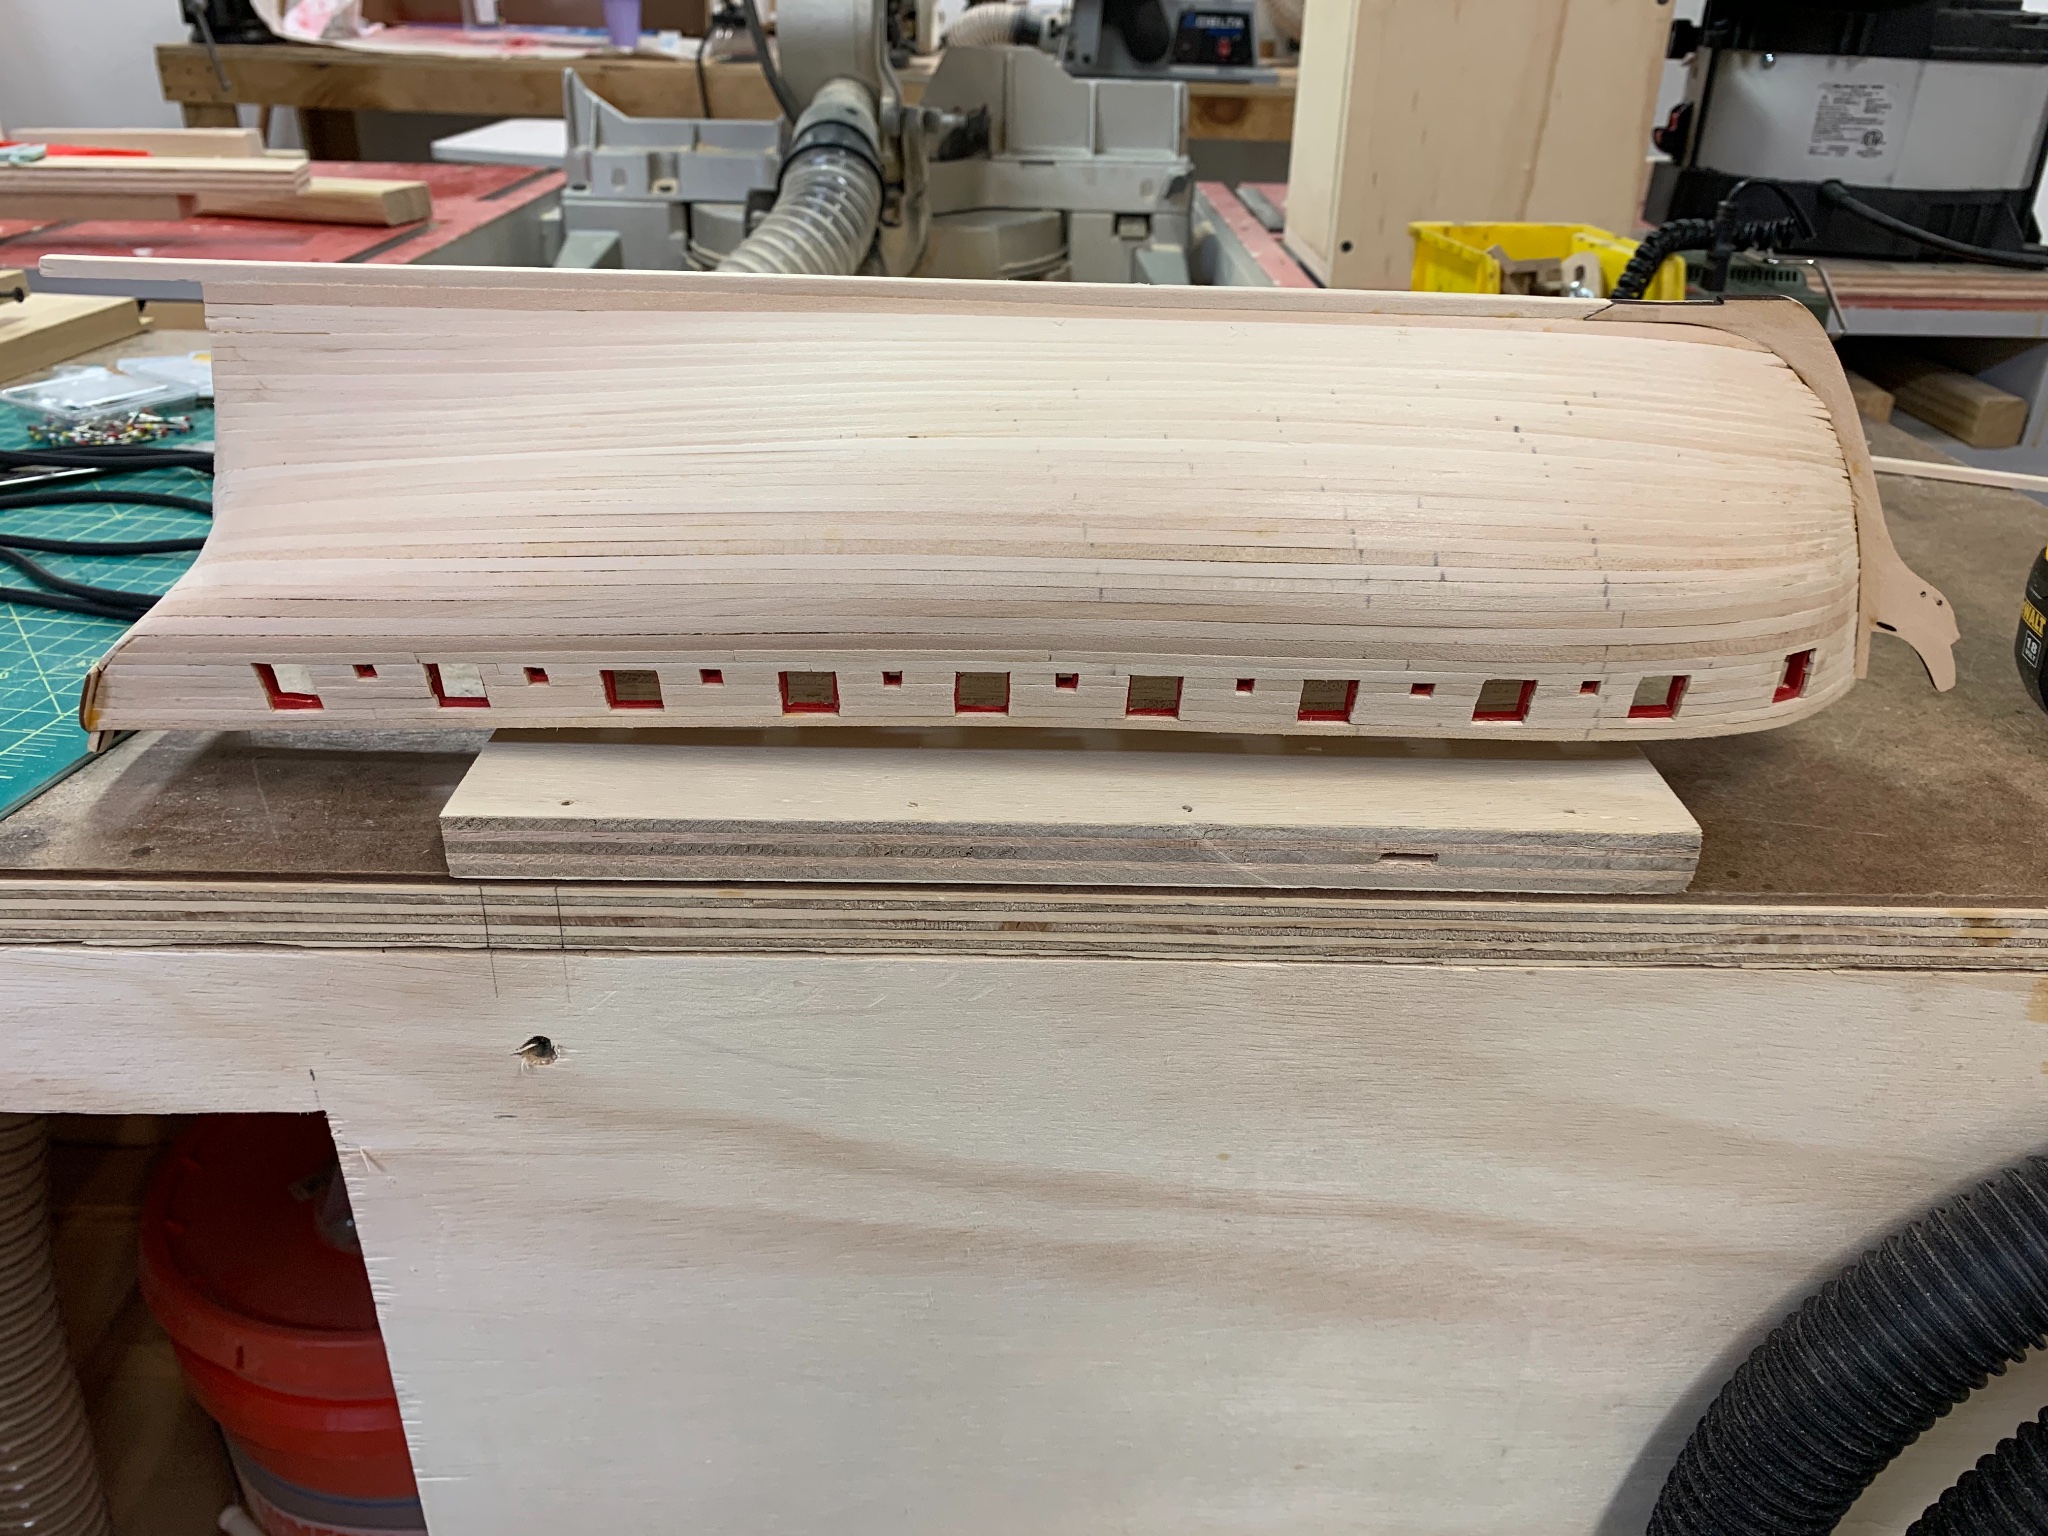
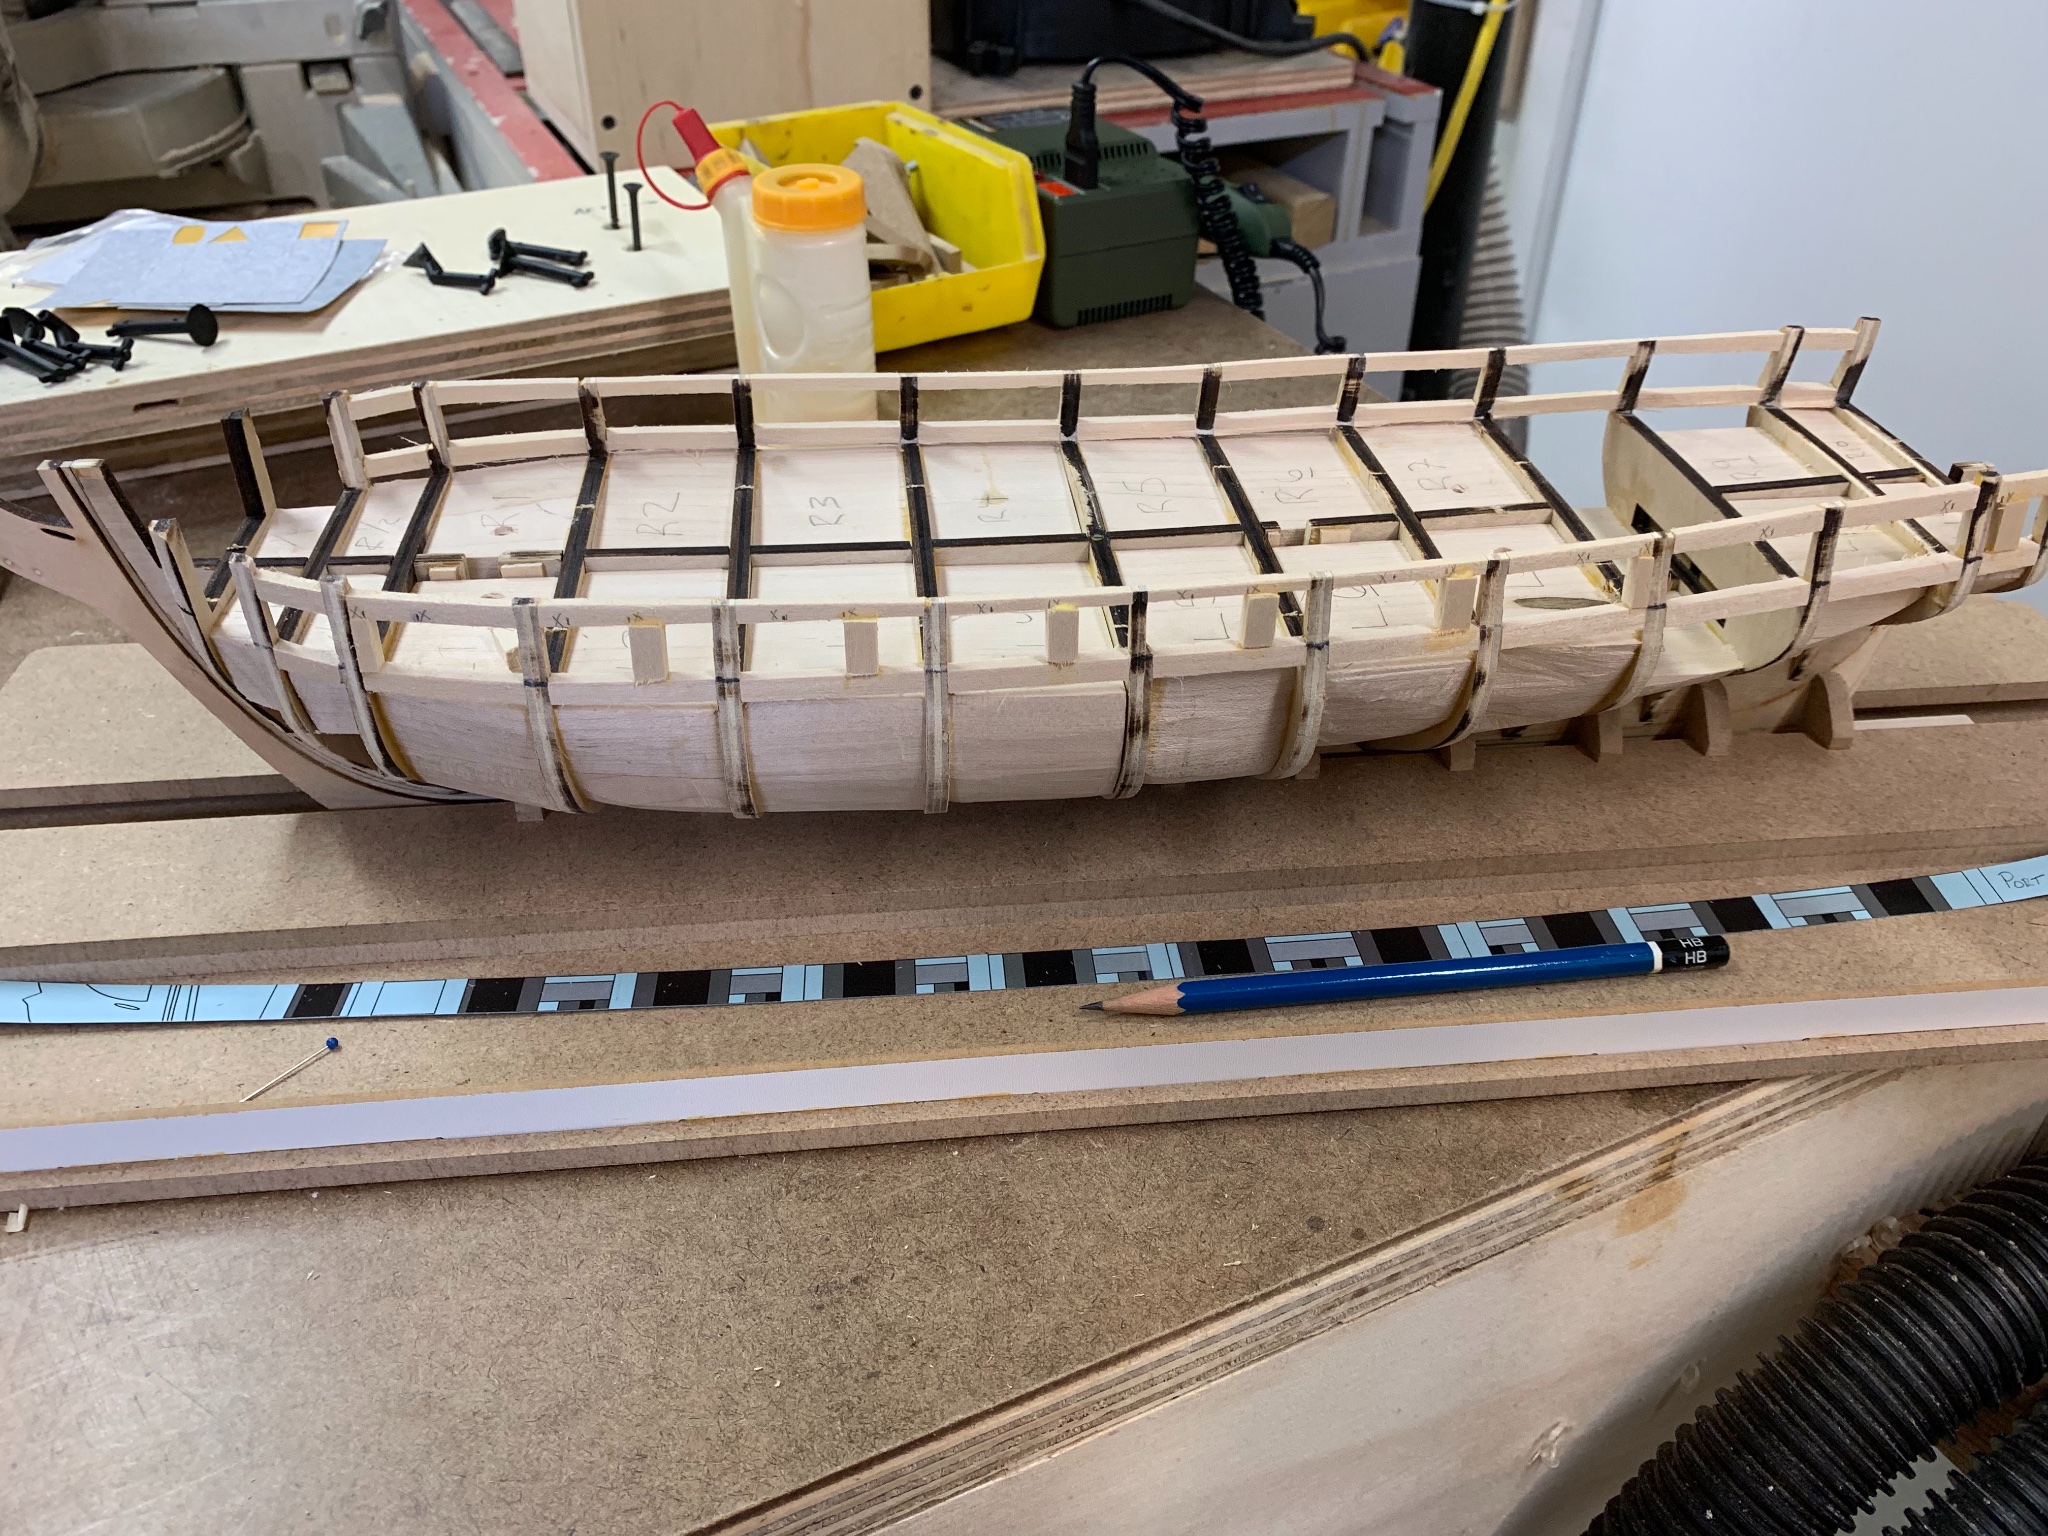
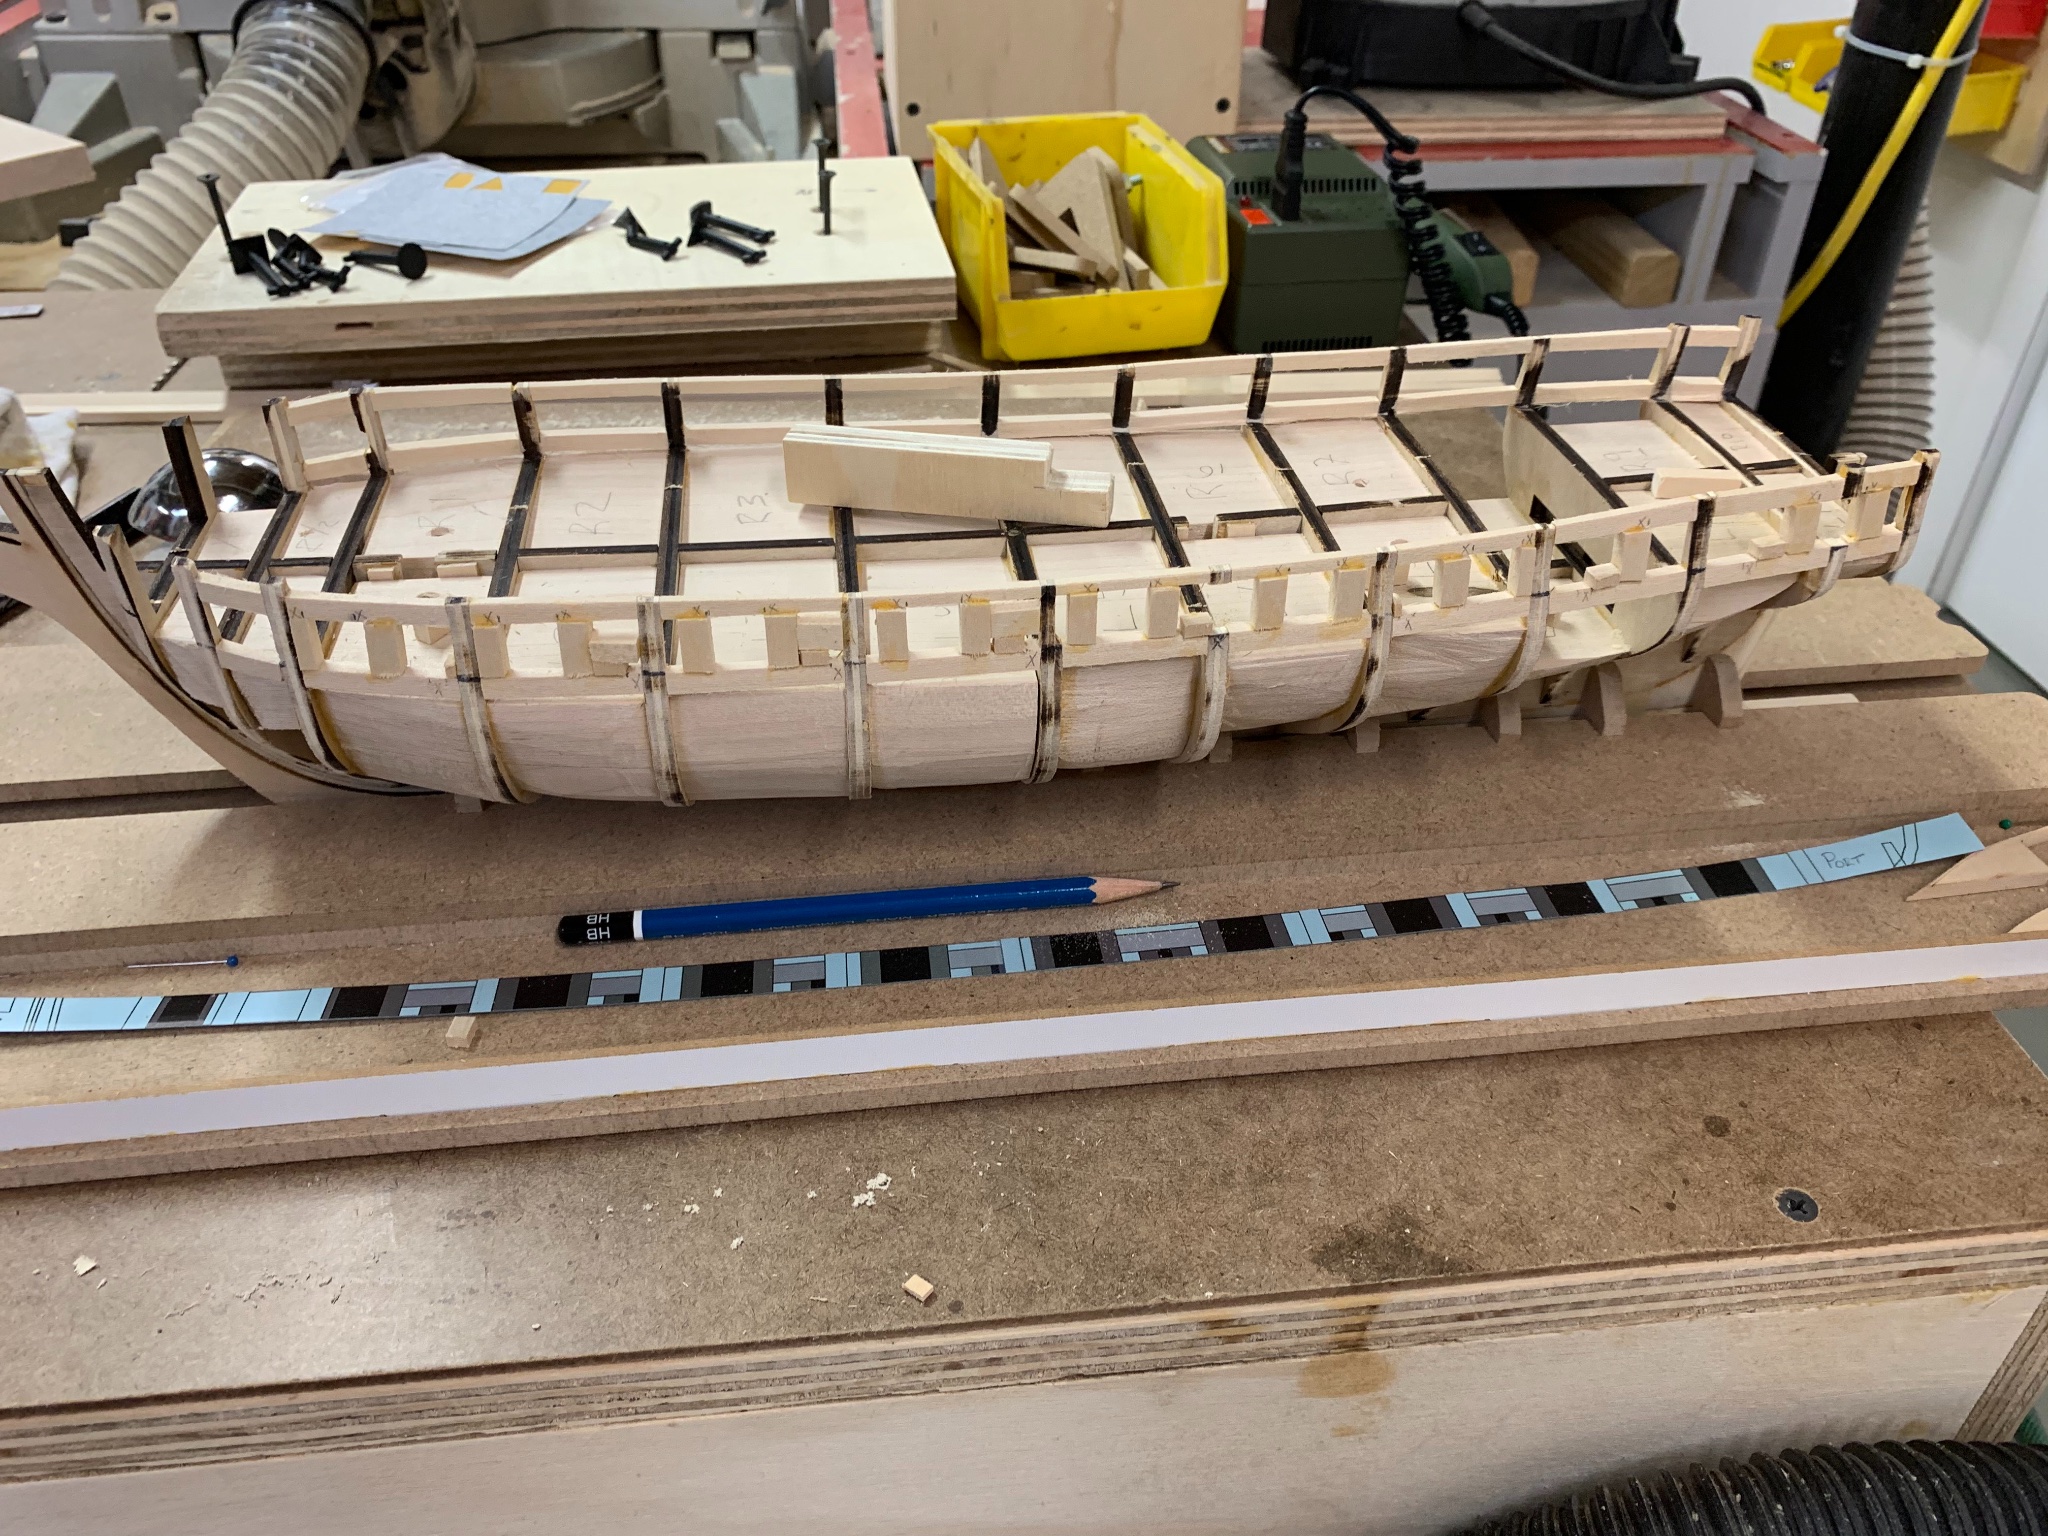
A bit more done, framed out the cannon and sweep ports, still need to do a bit more work fairing them back to the bulkheads.
I used a piece of 1/2” plywood (which is really 15/32”) as a spacer to maker sure the cannon ports were sized right, worked out well to keep things parallel too.

Also planked the lower level. I found if I used stain, but wiped it off immediately I got a nice color. Ran a pencil line on one side of each joint, overall I think it’s a good look. Not sure if it’ll matter in the end, but I also painted the below deck area black.
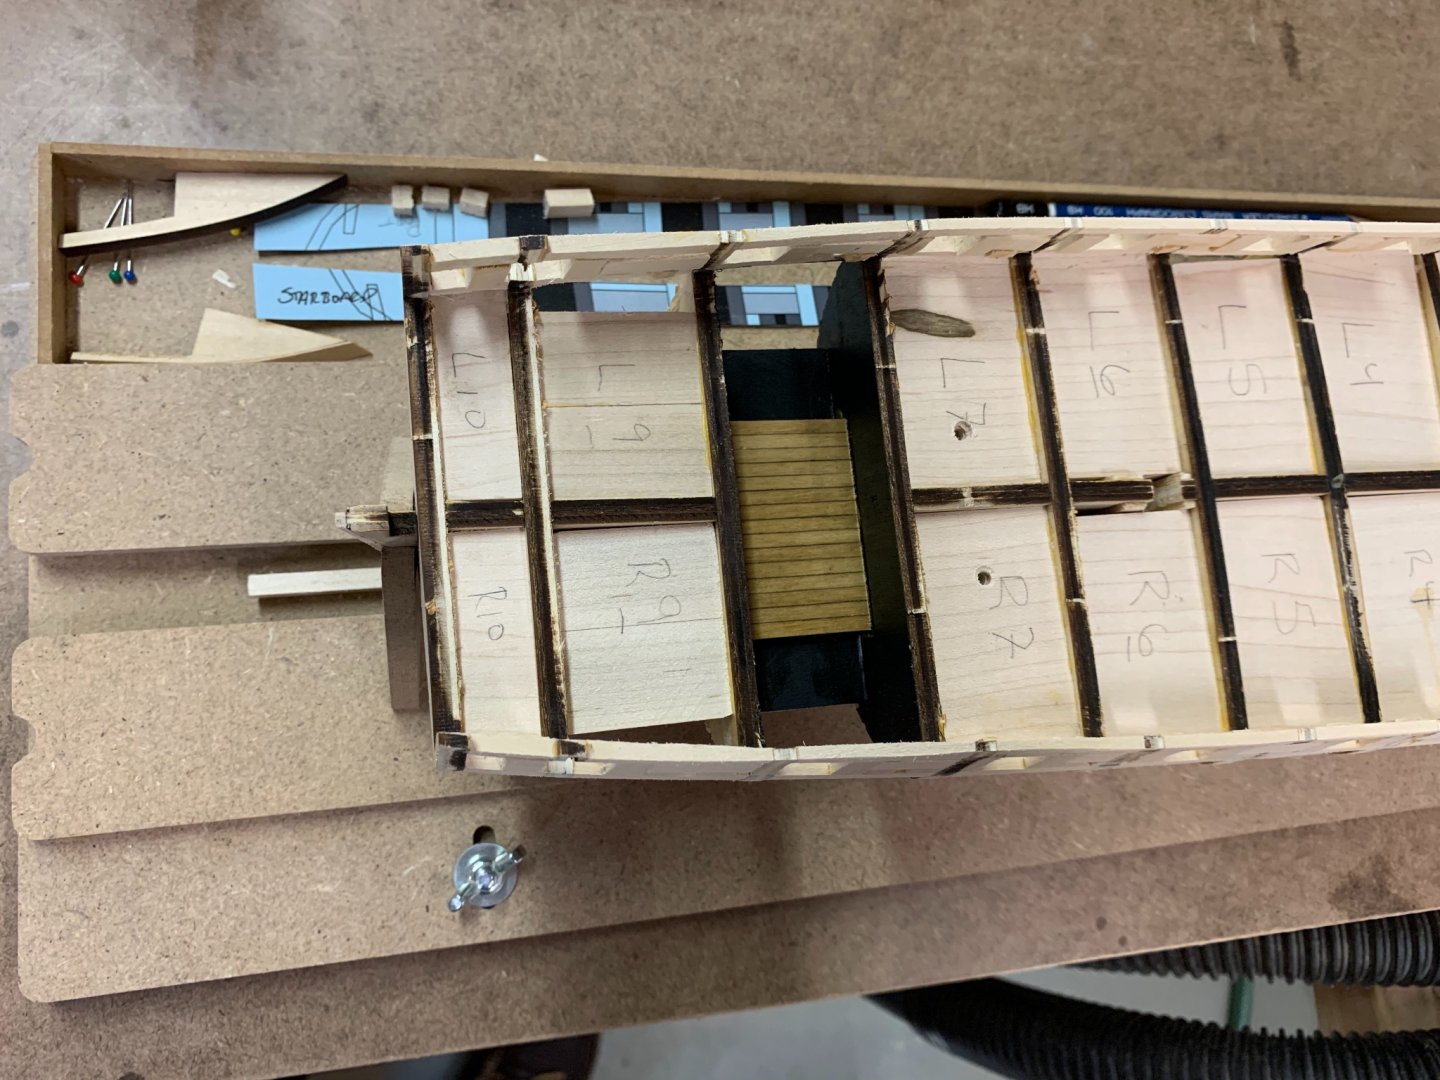

A bit more (lot more) sanding in my future, but moving onto the rear framing after.
- Overworked724, WalrusGuy and Justin P.
-
3
-
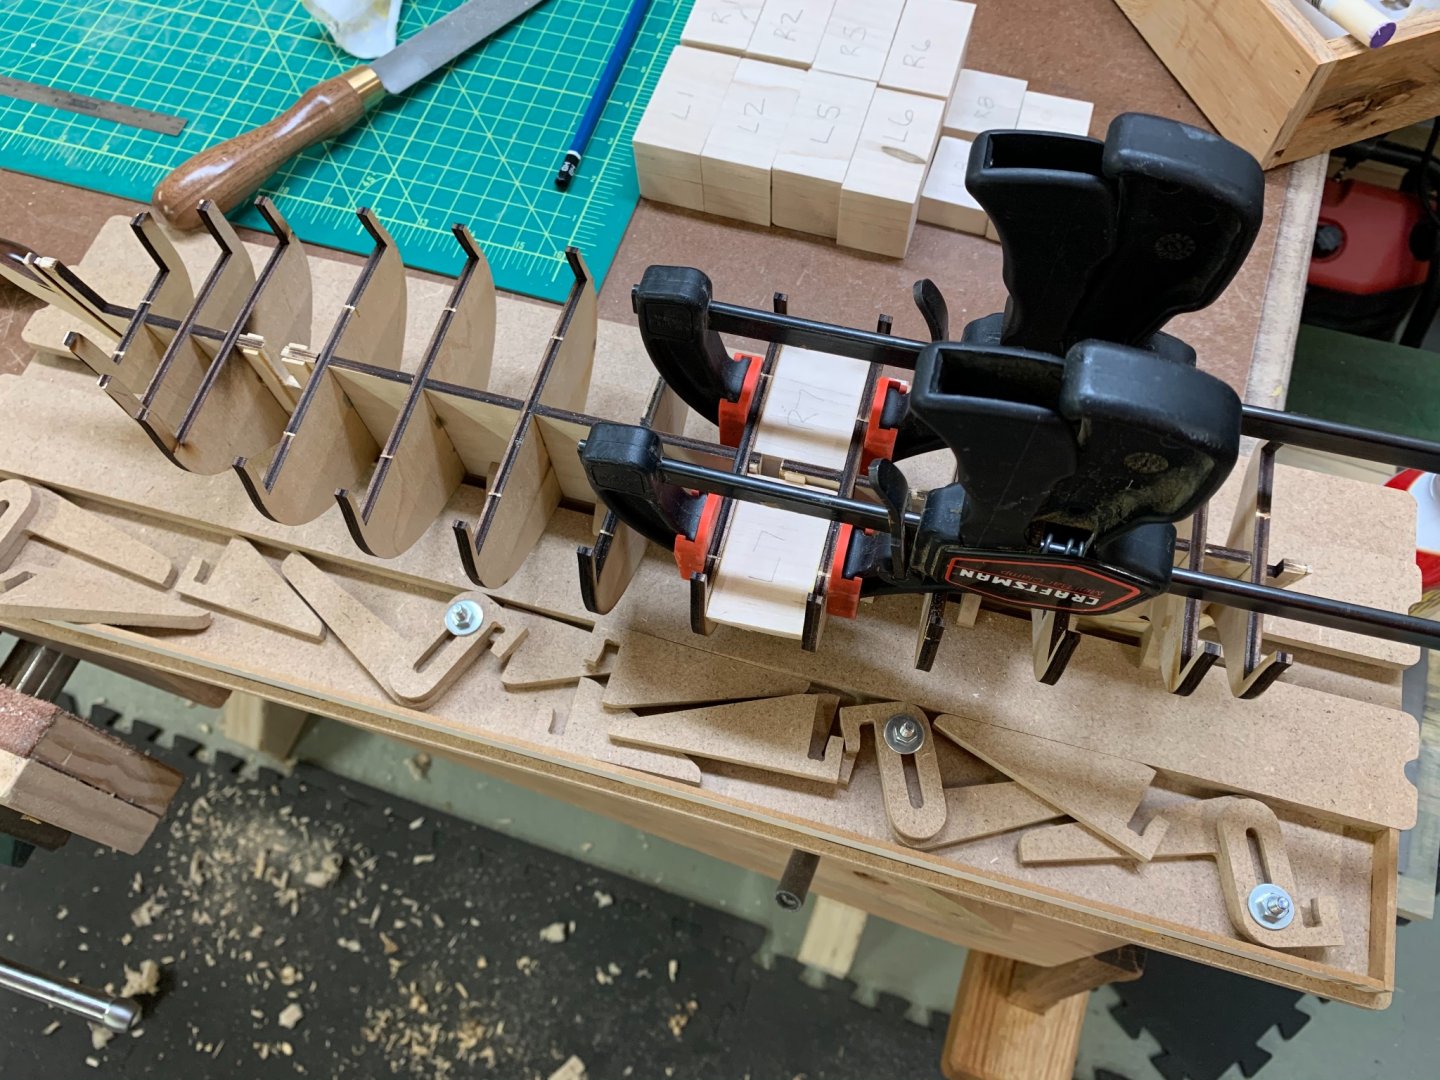
Well, it’s been a bit of a hiatus, my dishwasher sprung an undetected leak, and we’ve been dealing with reflooring the kitchen, and works picked up a bit as well. But, I have finally laid in the bulkheads. I did a bit of fairing just getting close to lines on the bulkheads, Fine tuning to come after it’s all blocked up and solid. I found I could just fit the base of my small double square in between and use it as a clamping jig to keep the bulkheads square to the keel.
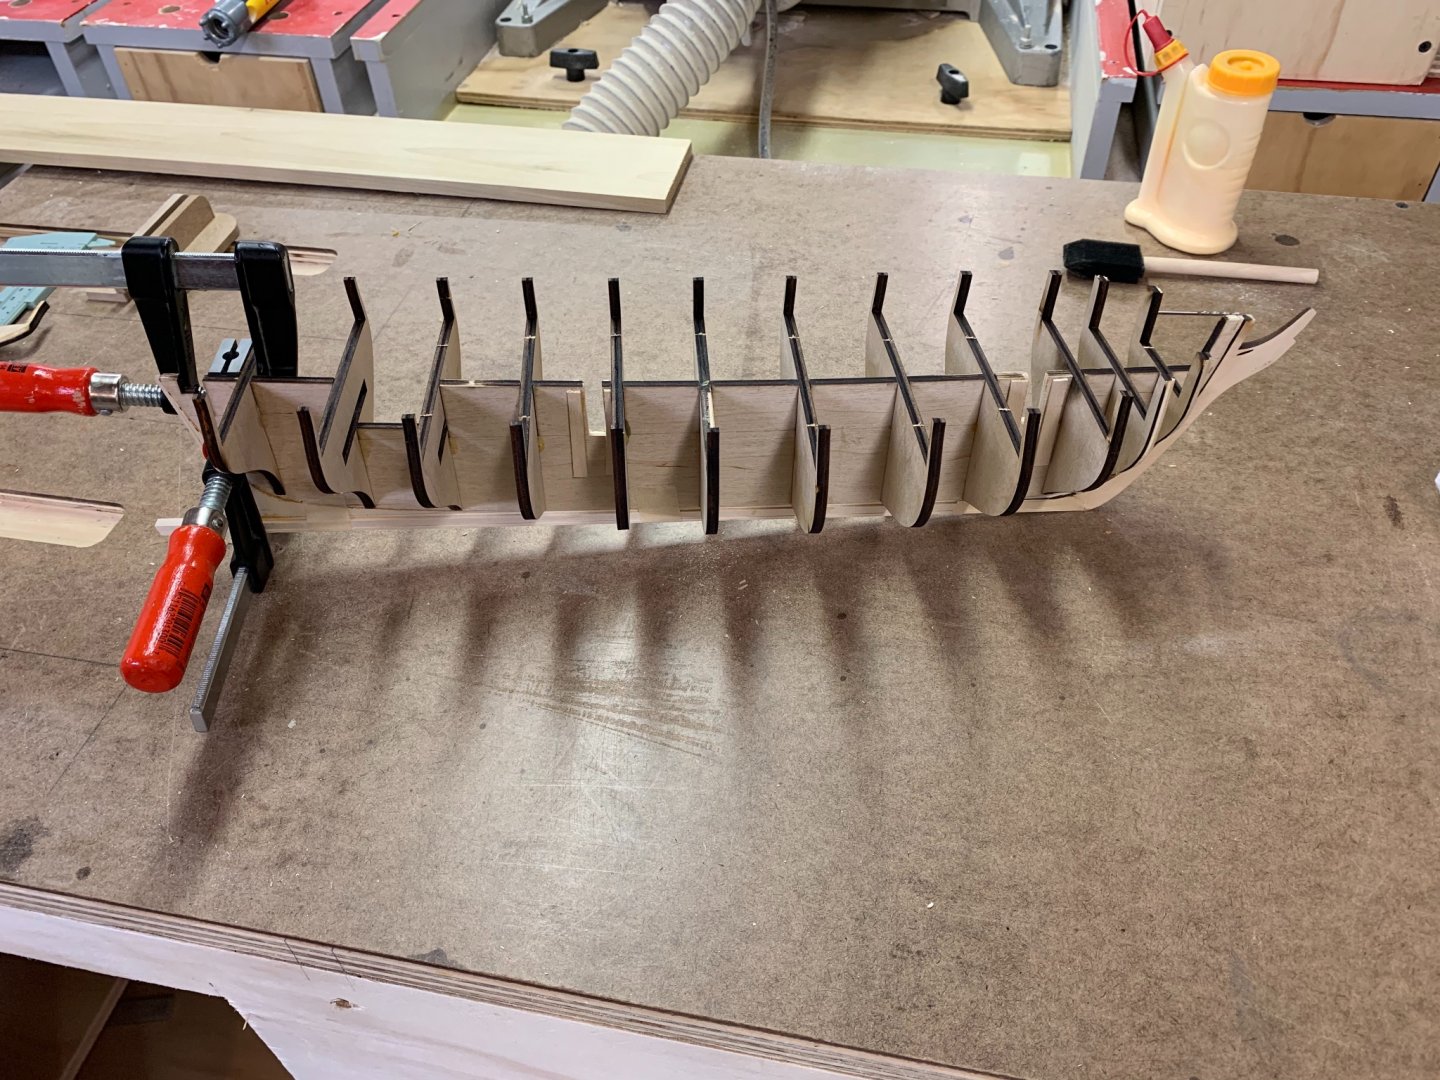
I also started to cut and fit blocking between the bulkheads.
- Overworked724 and JpR62
-
2
-
Absolutely gorgeous Steven. It’s not just one aspect that sets it apart, but your carvings, painting and work you put into researching the actual design. Bravo, good sir, bravo.
- EJ_L, Keith Black and mtaylor
-
3
-
She’s a beauty. The stern came out very nice after the sanding, gives me hope for when I can finally get back at it.
-
7 hours ago, Cathead said:
Remarkable rower, the Byzantine Red, idn'it, ay? Beautiful plumage!
That is one of the all time greatest skits, pure gold.
- Cathead, Louie da fly and mtaylor
-
3
-
-
Something I found on other woodworking projects, try to make one score line very shallow exactly along your straight edge, then go back and make it deeper in stages. Trying to take too big of a bite can cause the knife to wander and look ragged or even move the straight edge.
-
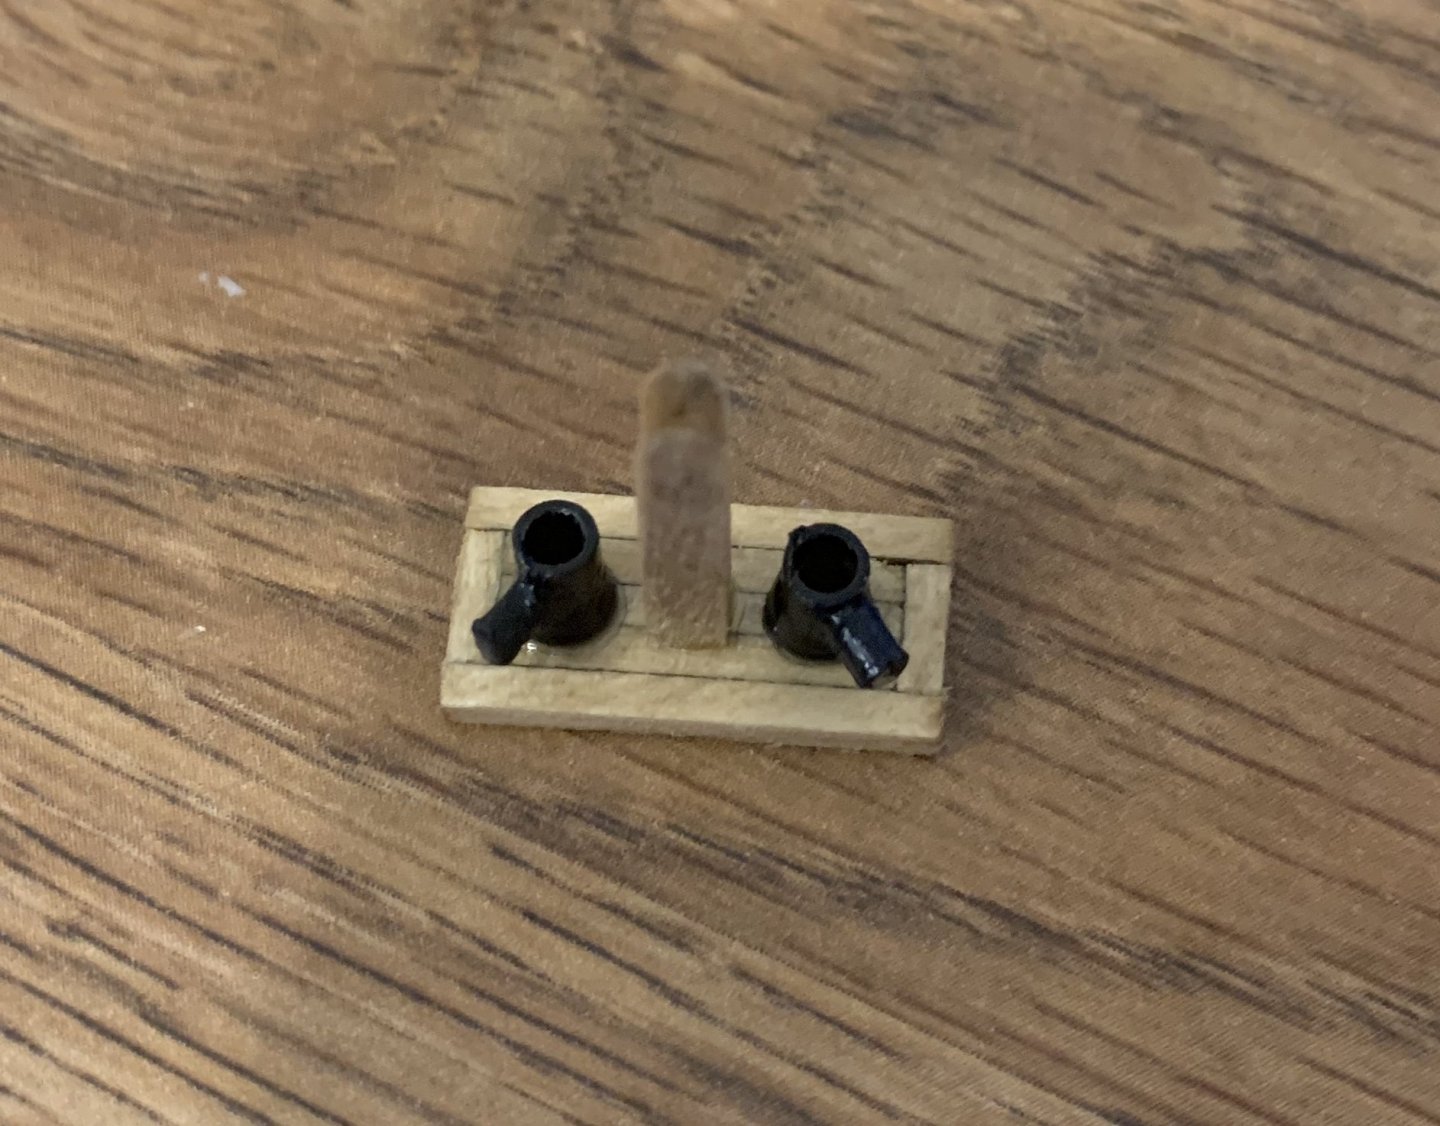
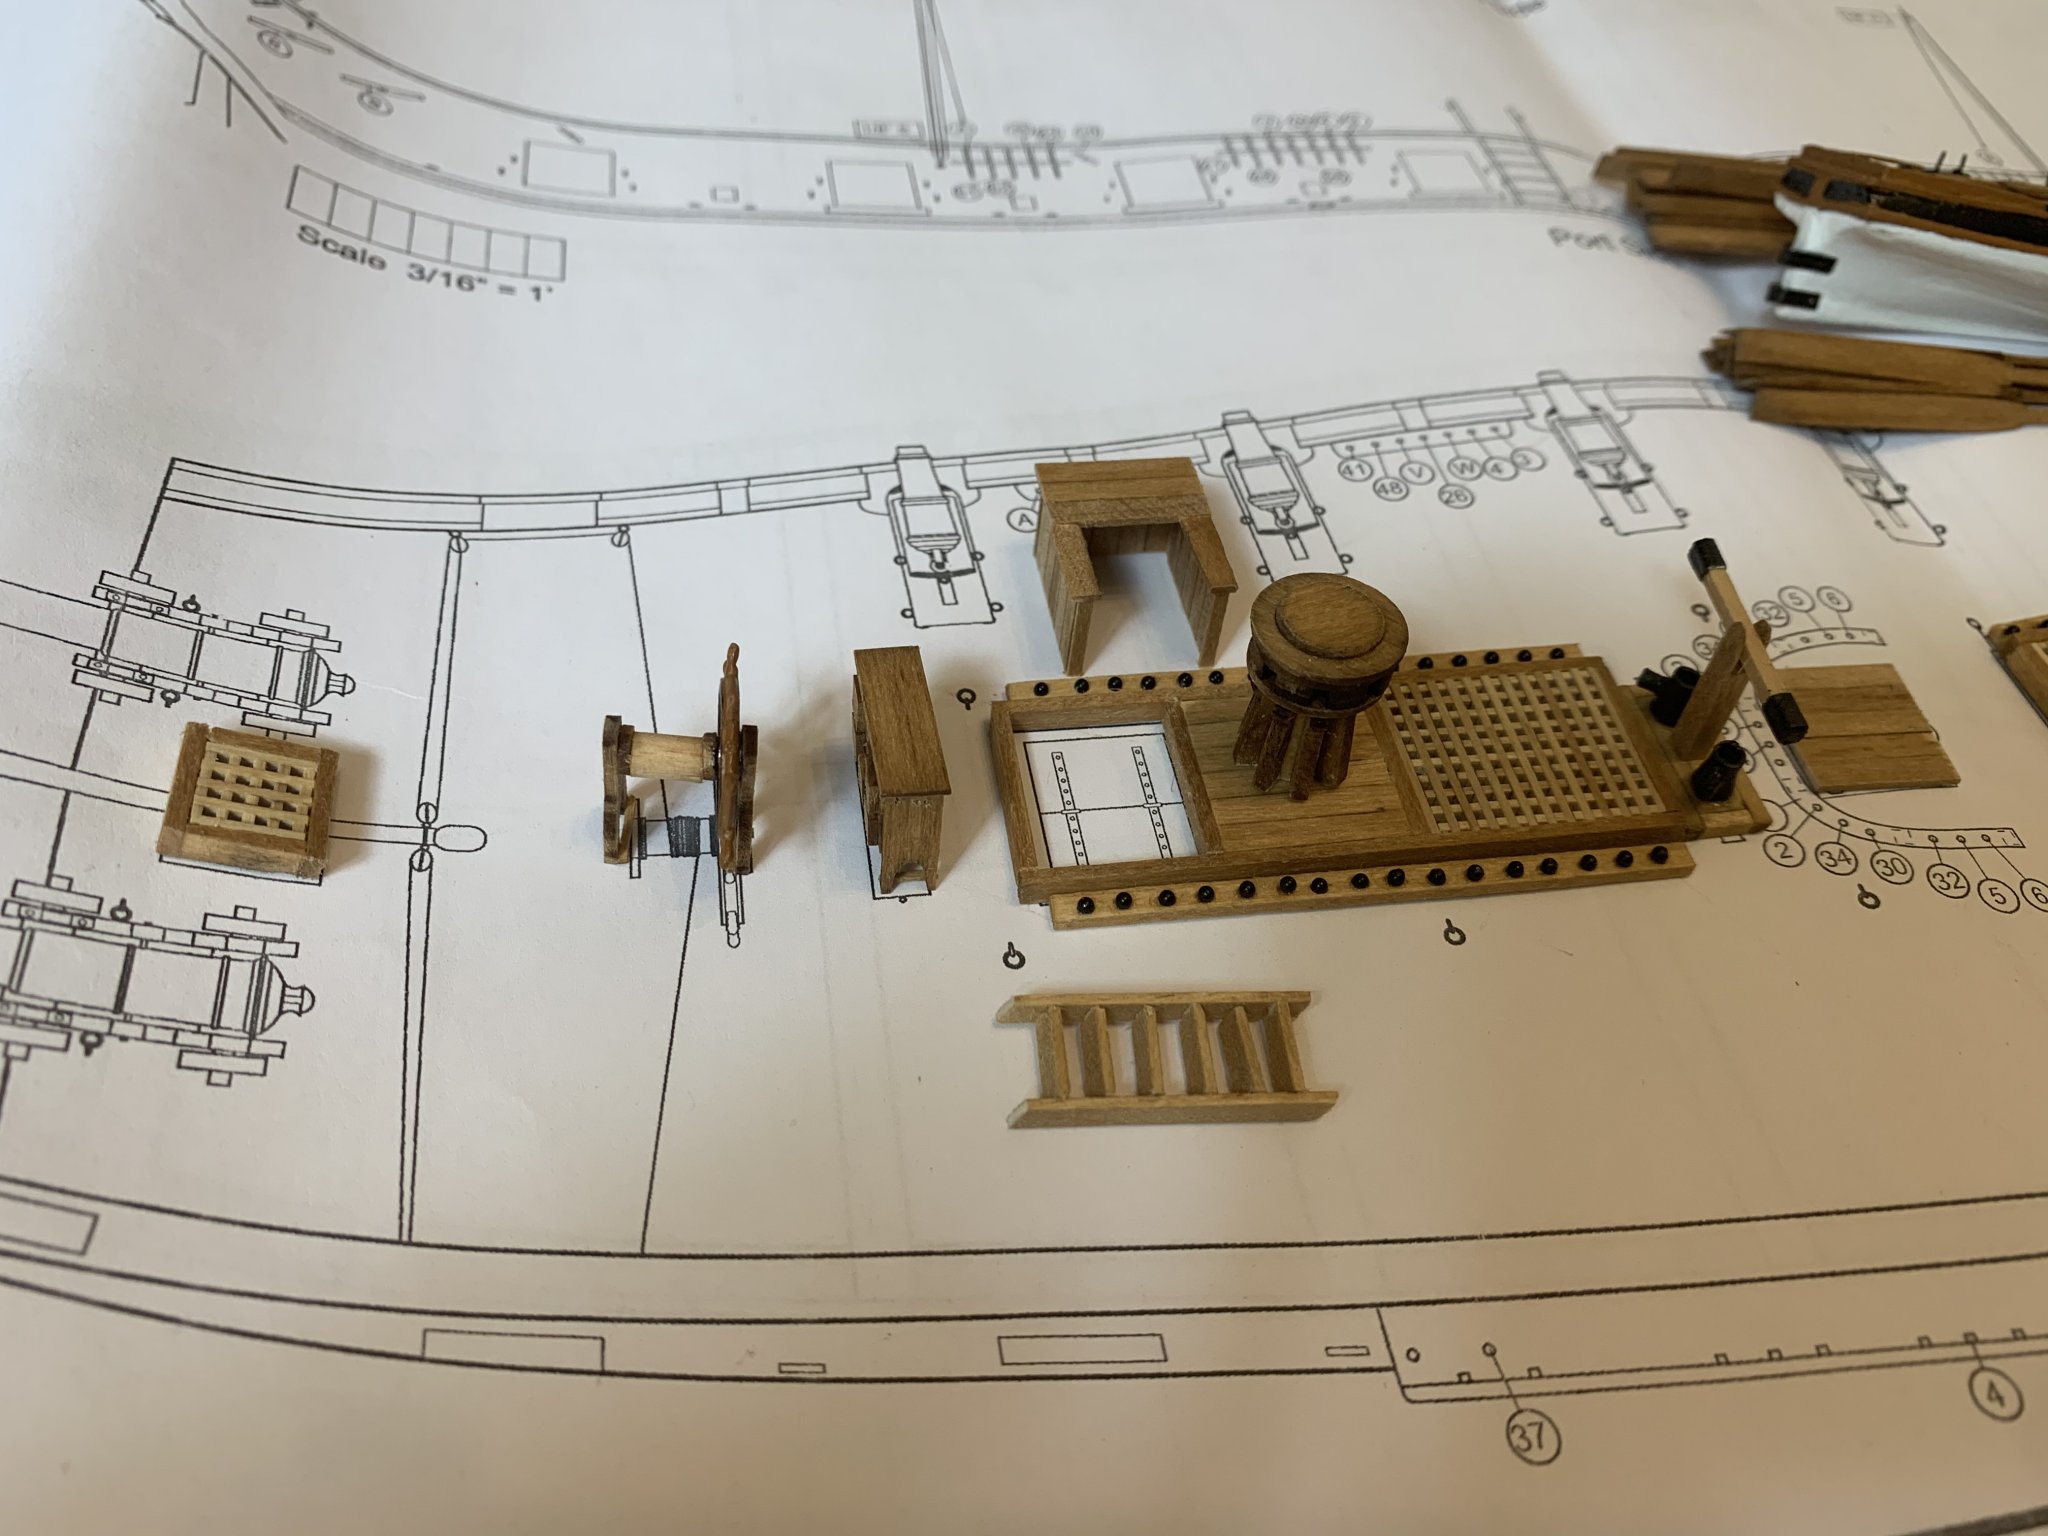
I’ve been working on deck items recently, and have a lot of them finished. Hatches, steering wheel, binnacle, capstan, galley vent, and a good start on the pump.

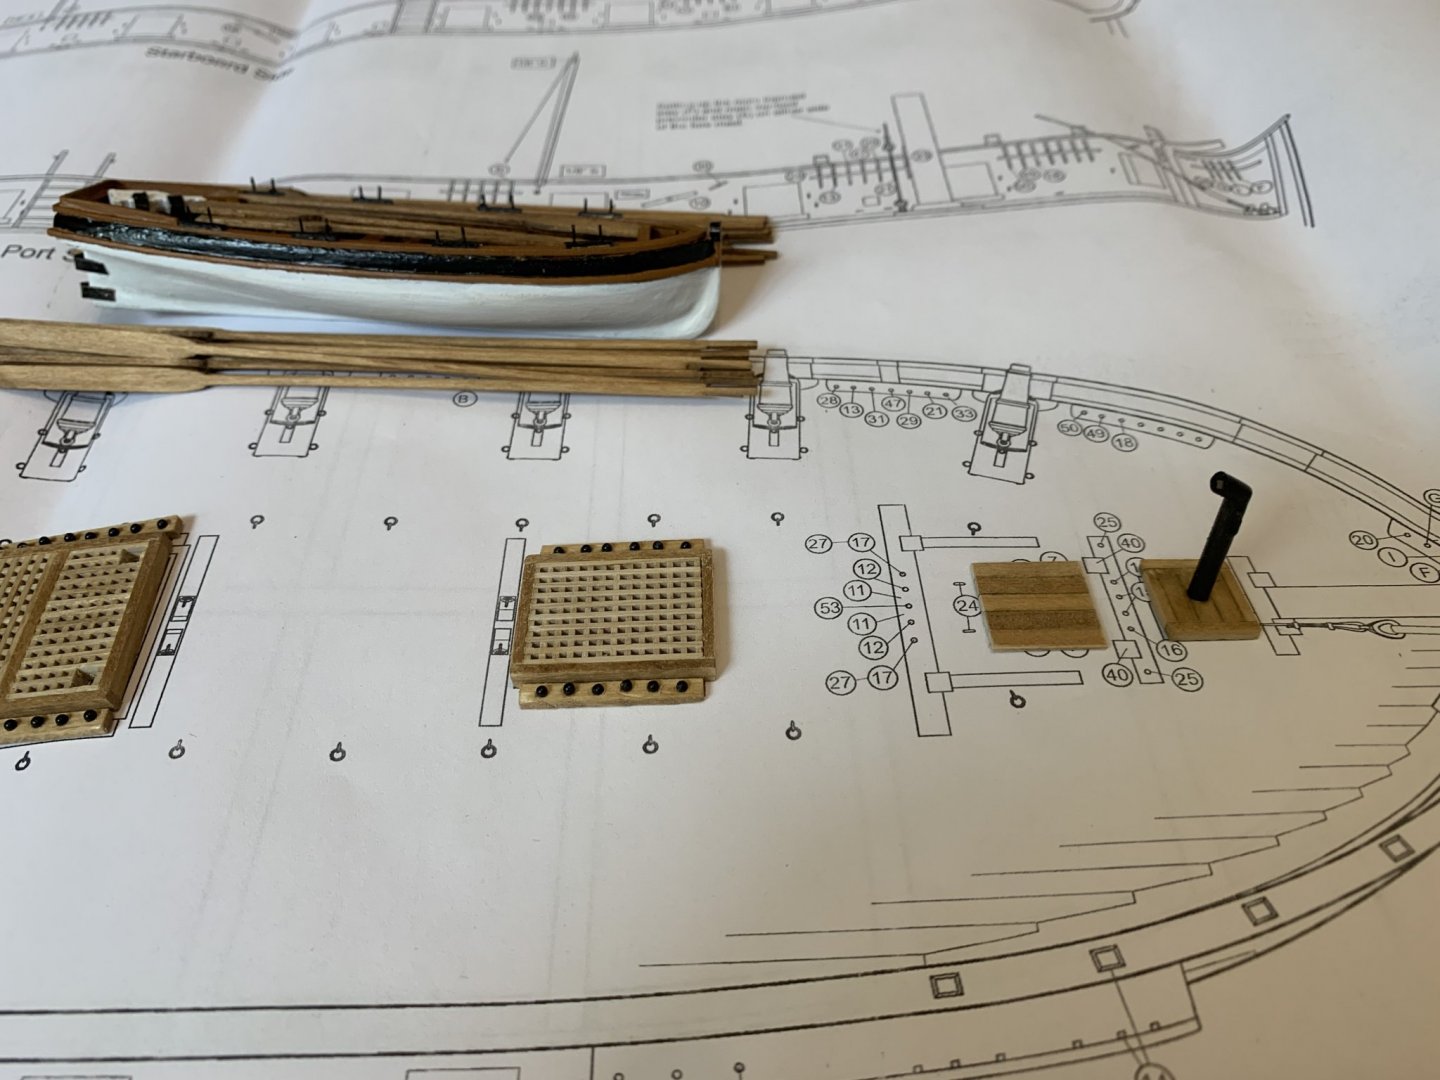
One thing I did different than the instructions, I was having a bear of a time hollowing out a dowel for the pump “buckets?”, so I used a piece of brass tubing instead, and that worked wonderfully.
Need to finish the pump and hang the ship’s bell, then next up are the fife rail and other bitts. Just taking my time on deck fittings, hobbyzone is supposed to be back to work in August, so my building slip should be here soon, if not I’ll next move onto the cannons and carronades.
- WalrusGuy, Charley54, Overworked724 and 1 other
-
4


Planking before or after transom install
in Building, Framing, Planking and plating a ships hull and deck
Posted
I’m working on the modelers central Matthew turner. In the instructions it calls out installing the transom before planking. This would require fitting both ends while planking. I’m thinking I could let them run wild at the rear, trim flush with the transom support, then add the transom at the end. Am I missing something that the transom adds at this stage?