HOLIDAY DONATION DRIVE - SUPPORT MSW - DO YOUR PART TO KEEP THIS GREAT FORUM GOING! (Only 44 donations so far out of 49,000 members - C'mon guys!)
×

Rik Thistle
-
Posts
864 -
Joined
-
Last visited
Content Type
Profiles
Forums
Gallery
Events
Everything posted by Rik Thistle
-
In the Shipping lanes Another, almost daily, treat to view, thanks. I take it you are building a rather large house extension to display all these beauties? 😉 Regards, Richard
-

New member: an Aussie in Yorkshire
Rik Thistle replied to Mike_H's topic in New member Introductions
Welcome Mike, from someone who lives just up the road. I did have the honour and pleasure of having a few beers iourside the Darwin Sailing Club many moons ago.... I think I should have stayed there 😉 As others have said, this a most friendly and helpful website, probably the best I've ever been on. All the best, Richard -
I think 'Darling Girl' has a much nicer ring to it than 'sea channel'. Your link ... http://glennmci.brinkster.net/mng/mng.html#sy1108 ... is more info I hadn't yet found ;-) ...very interesting, thanks. Regards, Richard
- 261 replies
-
- 2
-

-
- muirneag
- vanguard models
- (and 2 more)
-
I'd hazard a guess at 'Muirneag' being pronunced muir (as in the moorland) plus neeg. From Wikipedia (https://en.wikipedia.org/wiki/Muir) , Muir is the Scots Gaelic for 'sea'. And from https://osf.io/preprints/socarxiv/8b6tr/download ... you can get a .pdf of 'Gaelic Words in Caithness Scots'. I quickly scanned it but couldn't spot the initial Google Search extract which said It seems to suit the Gaelic word, neag / èag, a notch or a channel, with a diminutive ending common in Caithness. It may also be related to the Scots and English ... So combining the two Gaelic meanings we get 'sea channel', which I guess makes some sense? Could use of 'channel' mean the waters between Caithness and Orkney? Disclaimer: I don't speak Gaelic and have no knowledge of the Scottish fishing industry. Regards, Richard
- 261 replies
-
- 1
-
-
- muirneag
- vanguard models
- (and 2 more)
-
Hi Mike, Welcome from across the Pond. All the best, Richard
-
Painting a Waterline
Rik Thistle replied to mikiek's topic in Painting, finishing and weathering products and techniques
After painting the hull on my Fifie I've realised that 'gravity' also plays a role in making sure the paint tends to stay out of slight nooks and crannies under the masking tape ie turn the hull so that the masking tape is uppermost and allow gravity to pull the paint downwards and away from the masked line. This won't stop wicking or capilliary action under the masking tape but will help somewhat. Regards, Richard -
Patrick, I think your work looks amazing. The close up pics could be full sized real life!. I don't have any experience in the fishing industry but in the past few weeks reading the fishing boat 'builds' on here I feel I have a much greater appreciation of the practical designs of fishing vessels and the high skill levels the crew had. All the best, Richard
-
Cutting holes on a deck
Rik Thistle replied to Rik Thistle's topic in Modeling tools and Workshop Equipment
Ah, OK B.E. - thanks. Fiddly little cut outs - I didn't think of removing the timber knees locating pegs ;-\ ...doh. Micro chisel - yes, something like that was floating around in the back of my head but I couldn't quite grasp it. But now that you mention it I feel another tool set investment incoming. Thanks again, Richard -
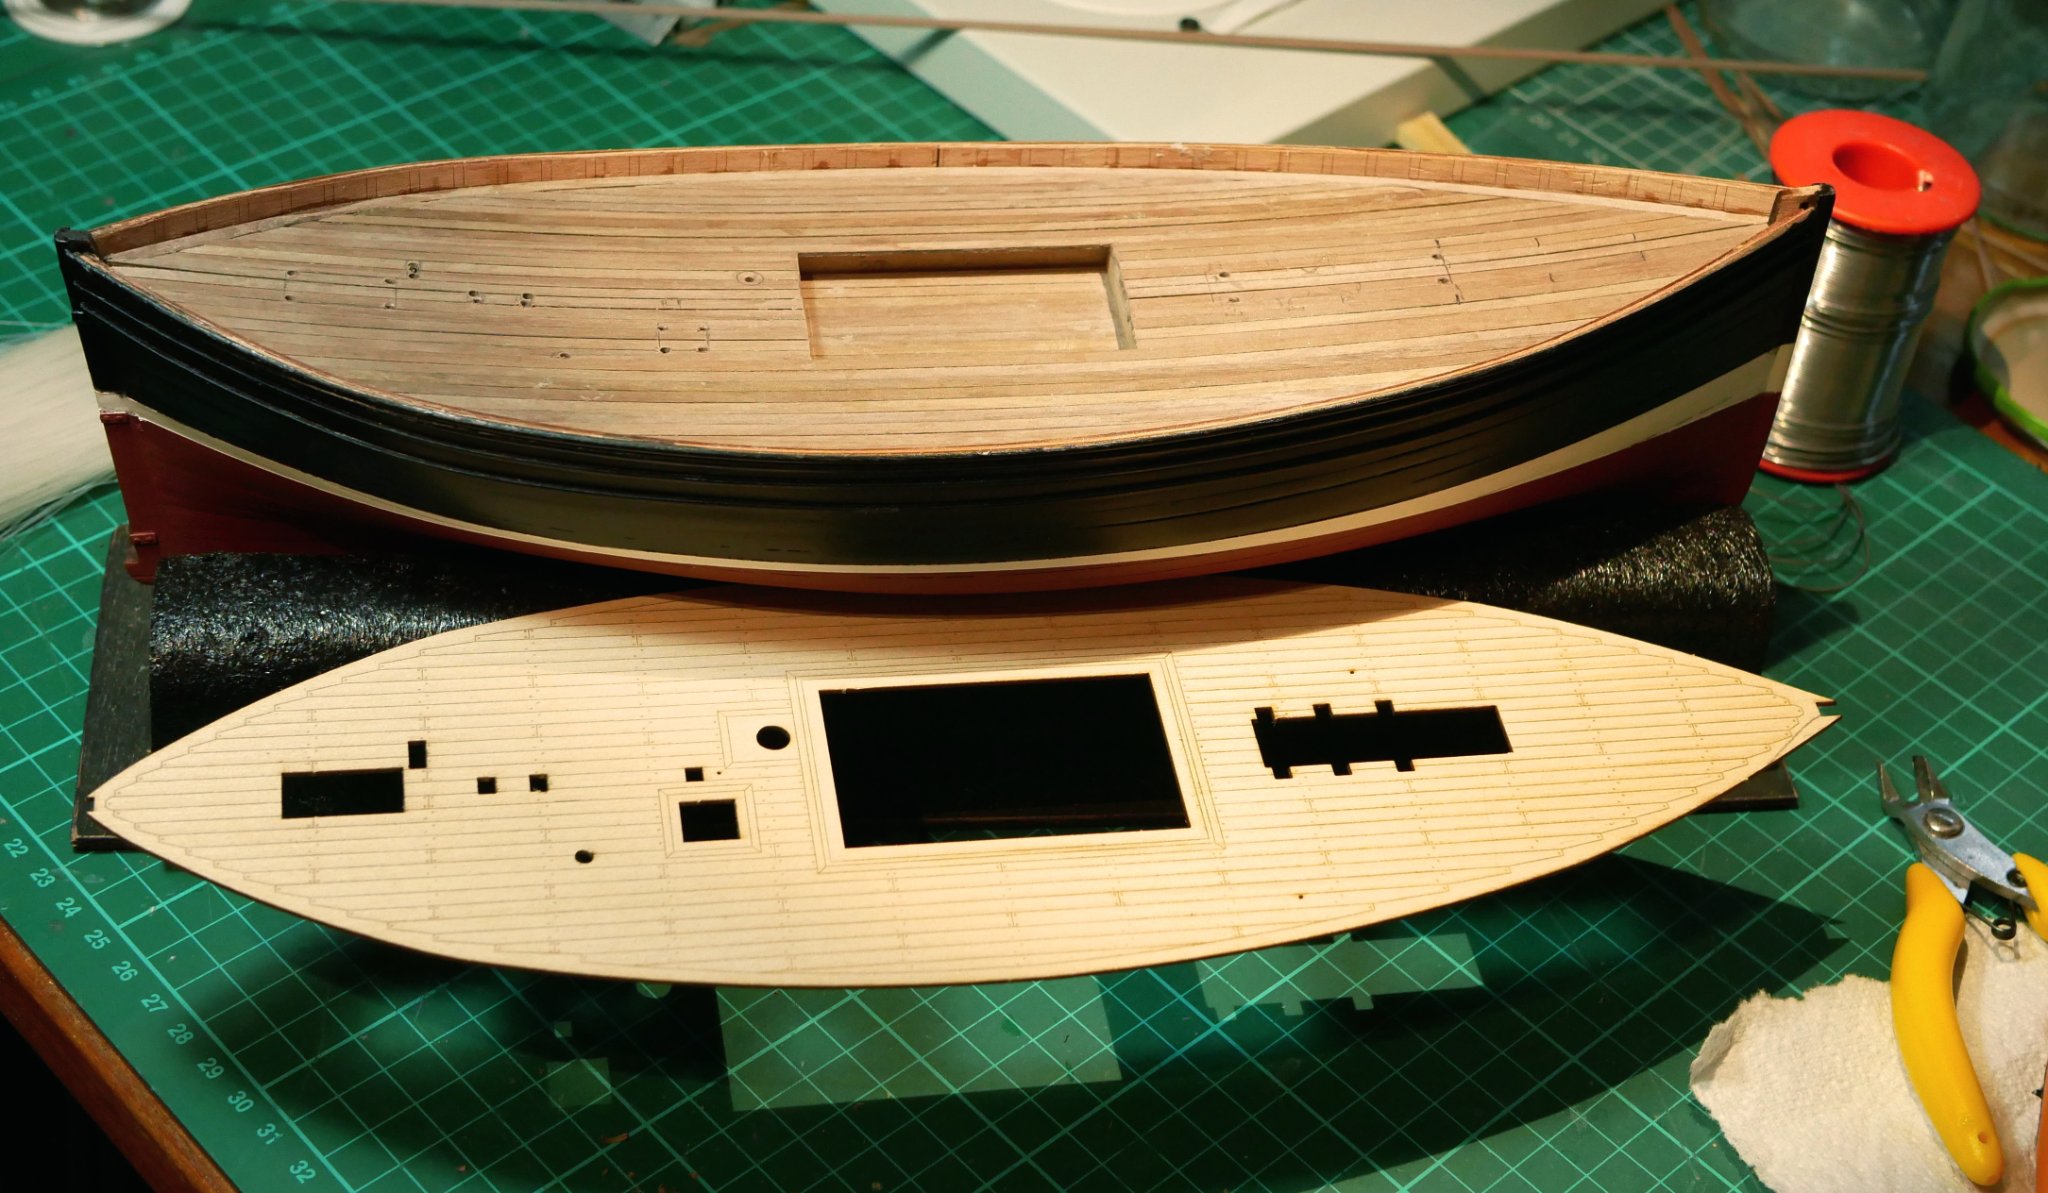
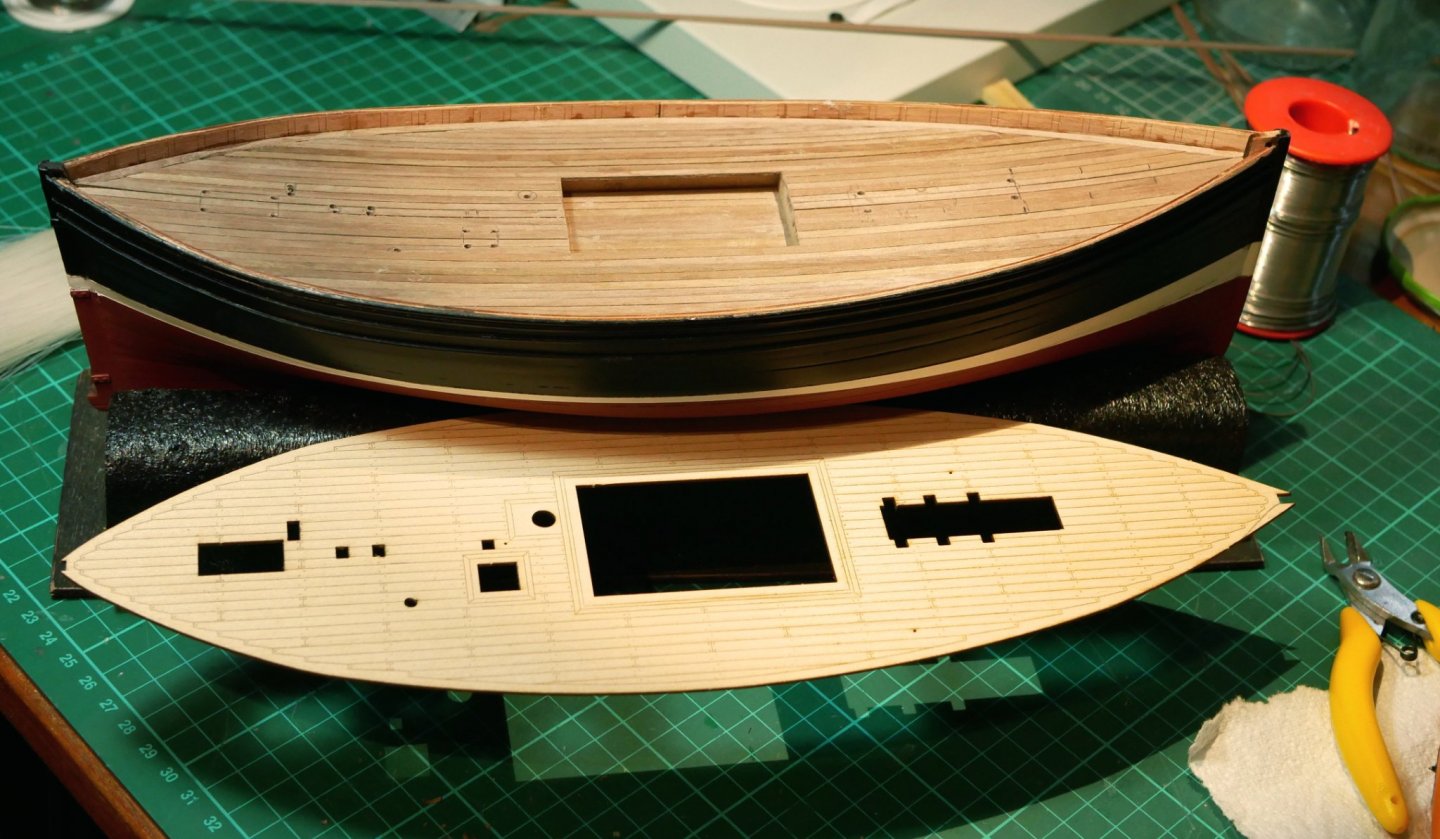
Hi all, A question.. I've deck planked Vanguard Models' Lady Eleanor Fifie and am wondering how best to cut similar holes to those shown on the supplied pre-formed deck (see below). I've managed to cut the main fish hatch by drilling a series of 1mm holes, using side cutters to 'join' the holes and then a Dremel cylindrical sander to clean up the hatch edges. However, the other openings are smaller and more fiddly. Ideally I'd like a plunge cutter with a 1/8" (4mm) blade, say, to do most of the heavy lifting but I don't think such a tool exists. I have a full sized oscillating multi tool (https://fein.com/en_uk/machines/oscillating-multi-tools/multimaster/multimaster-mm-300-plus-start-72297261240/ ) but it's relatively large, aggressive and it's smallest tool width appears to be 10mm. I know I can 'muck through' and cut the holes by drilling, cutting, filing etc but I'm always looking for the easiest way to do things but with an acceptable result. Anyone got any suggestions, Thanks, Richard
-
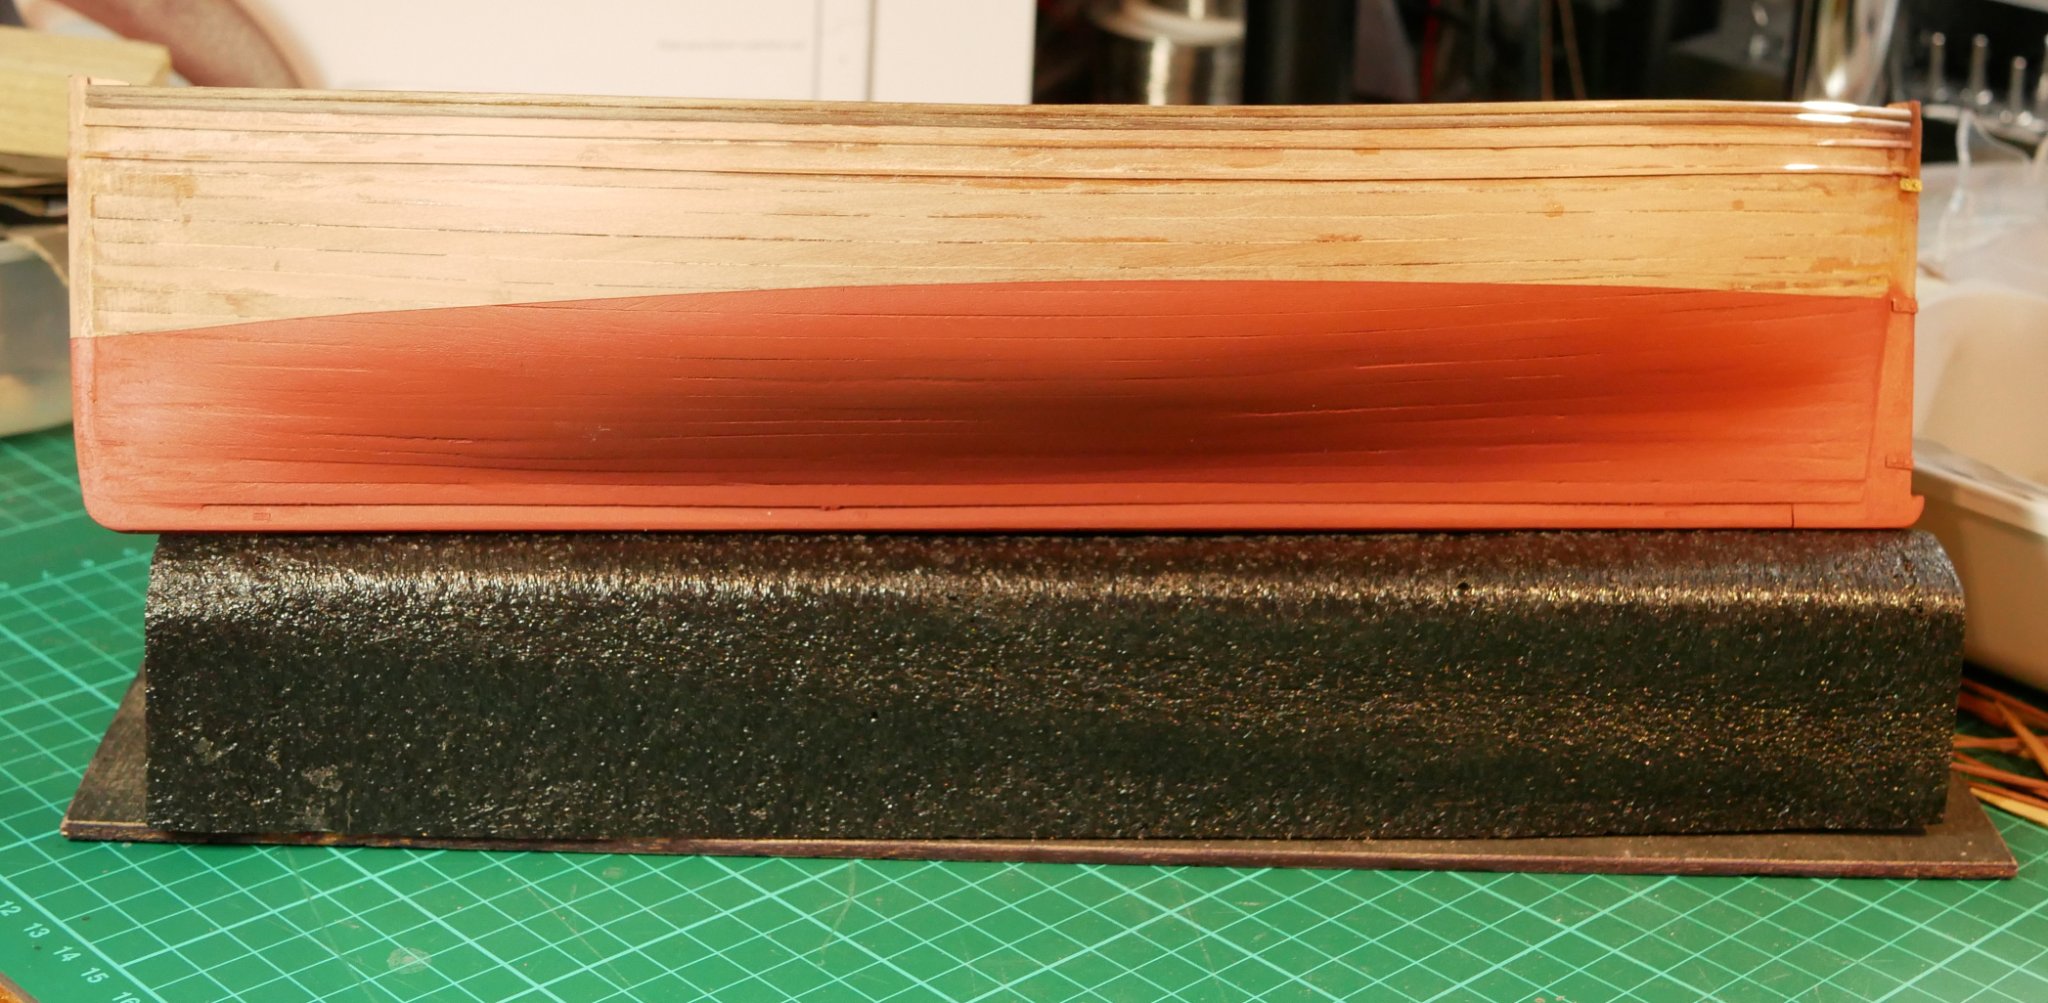
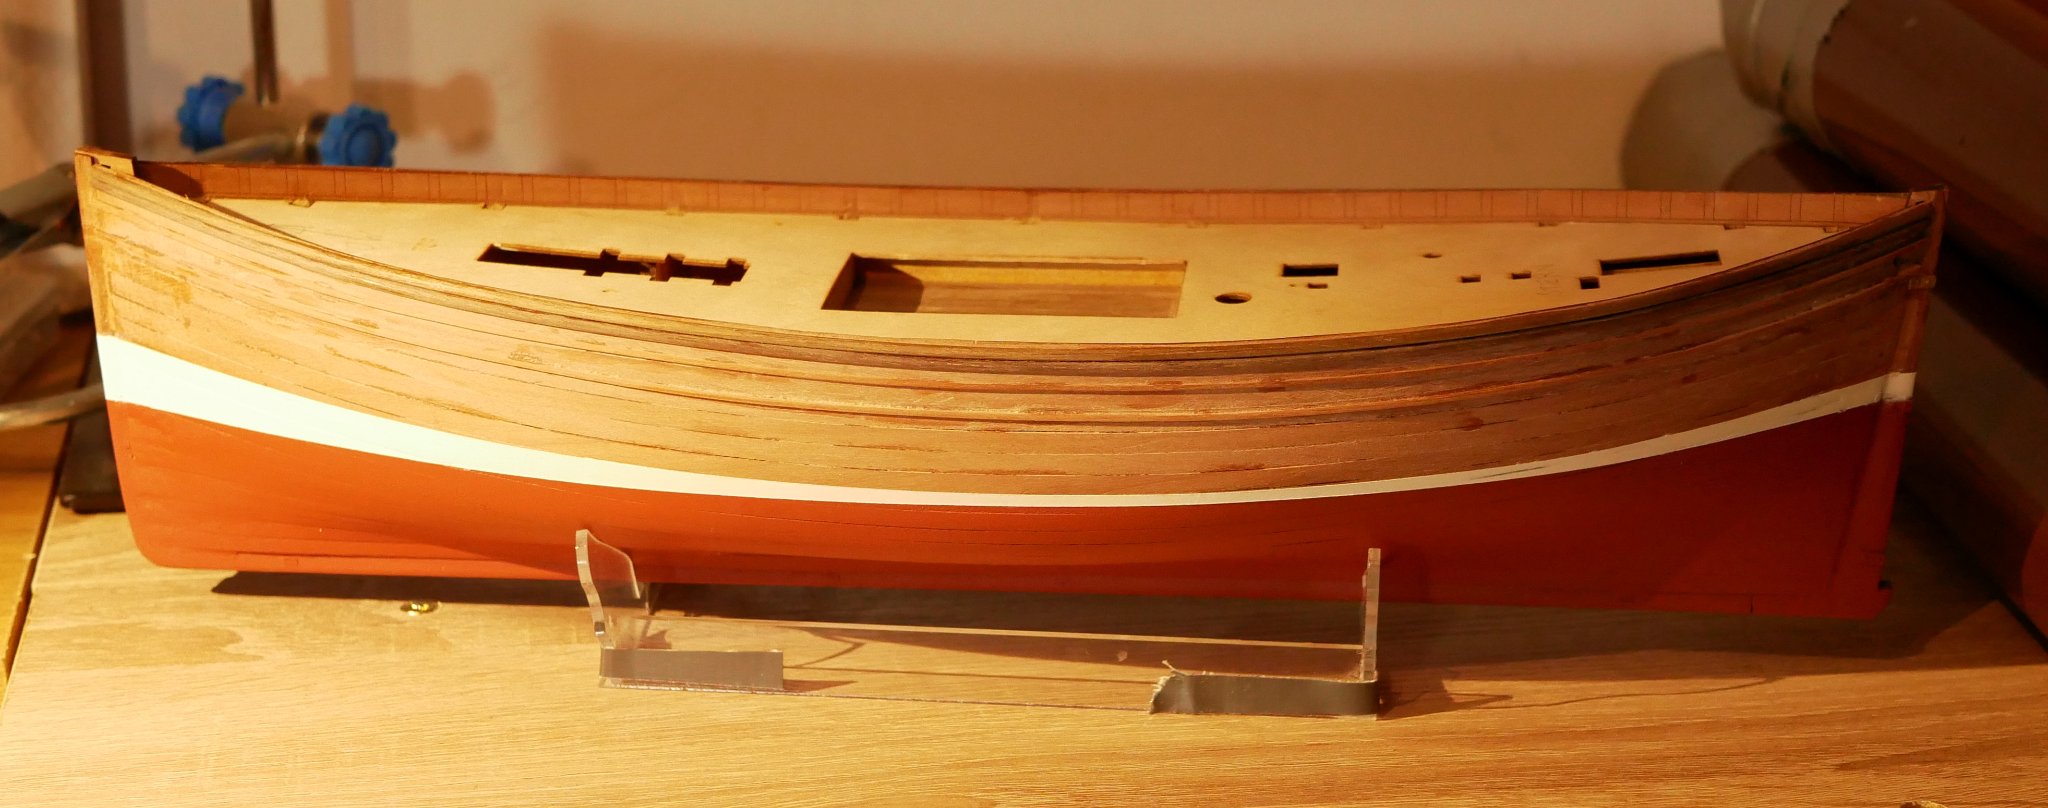
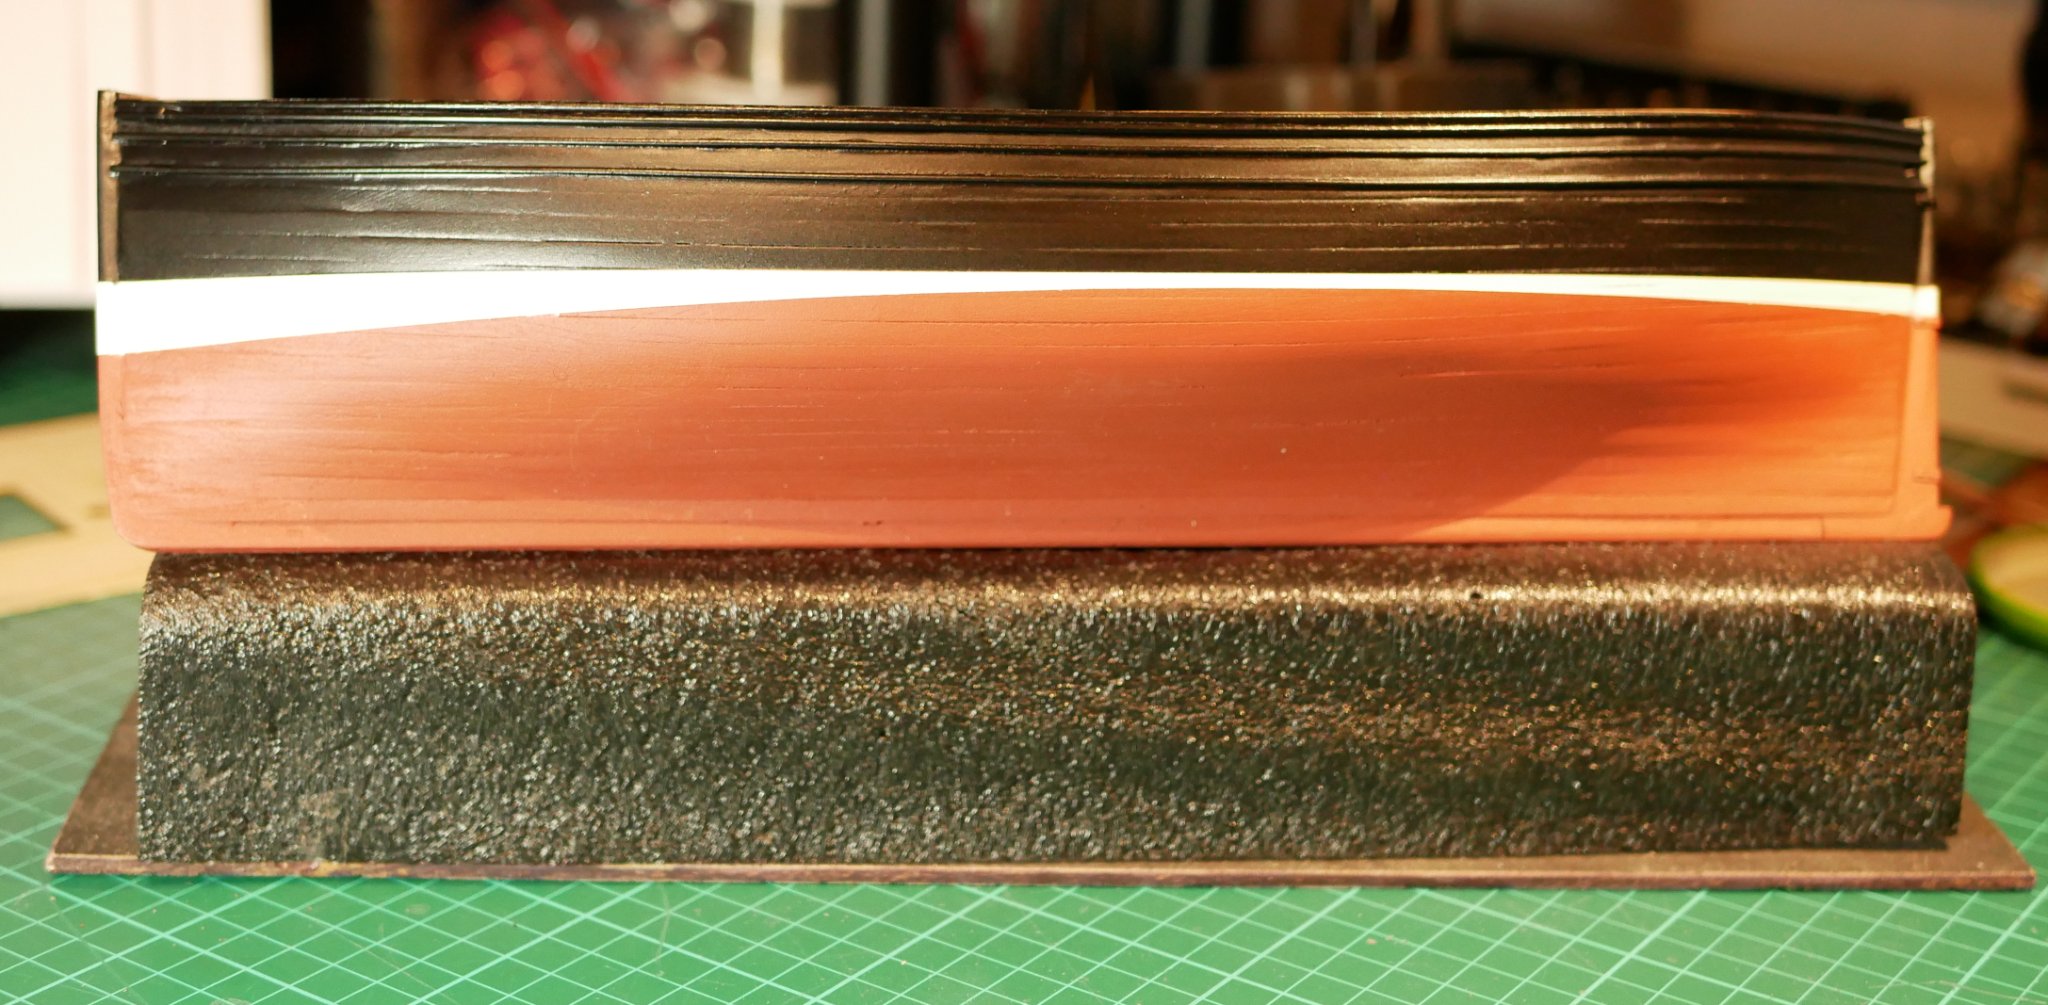
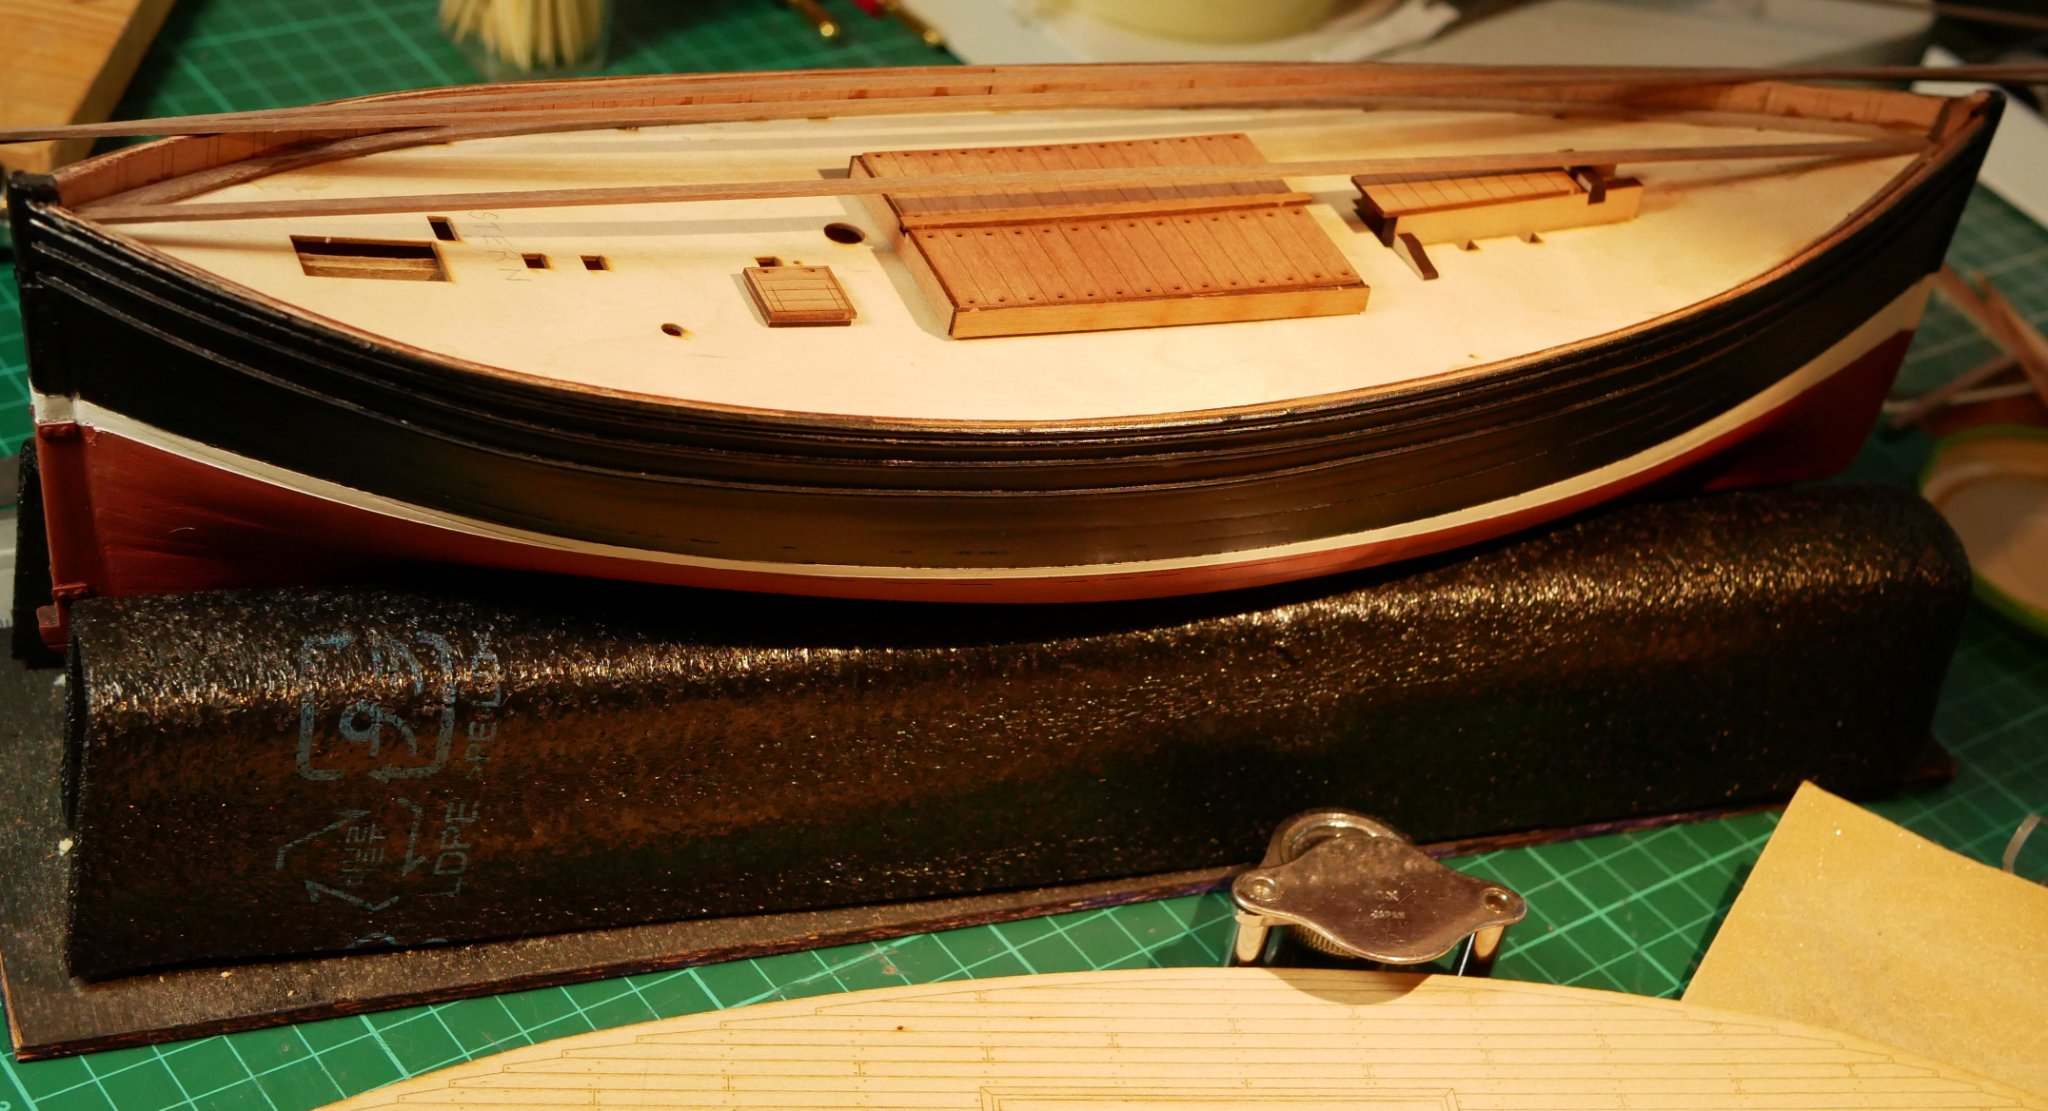
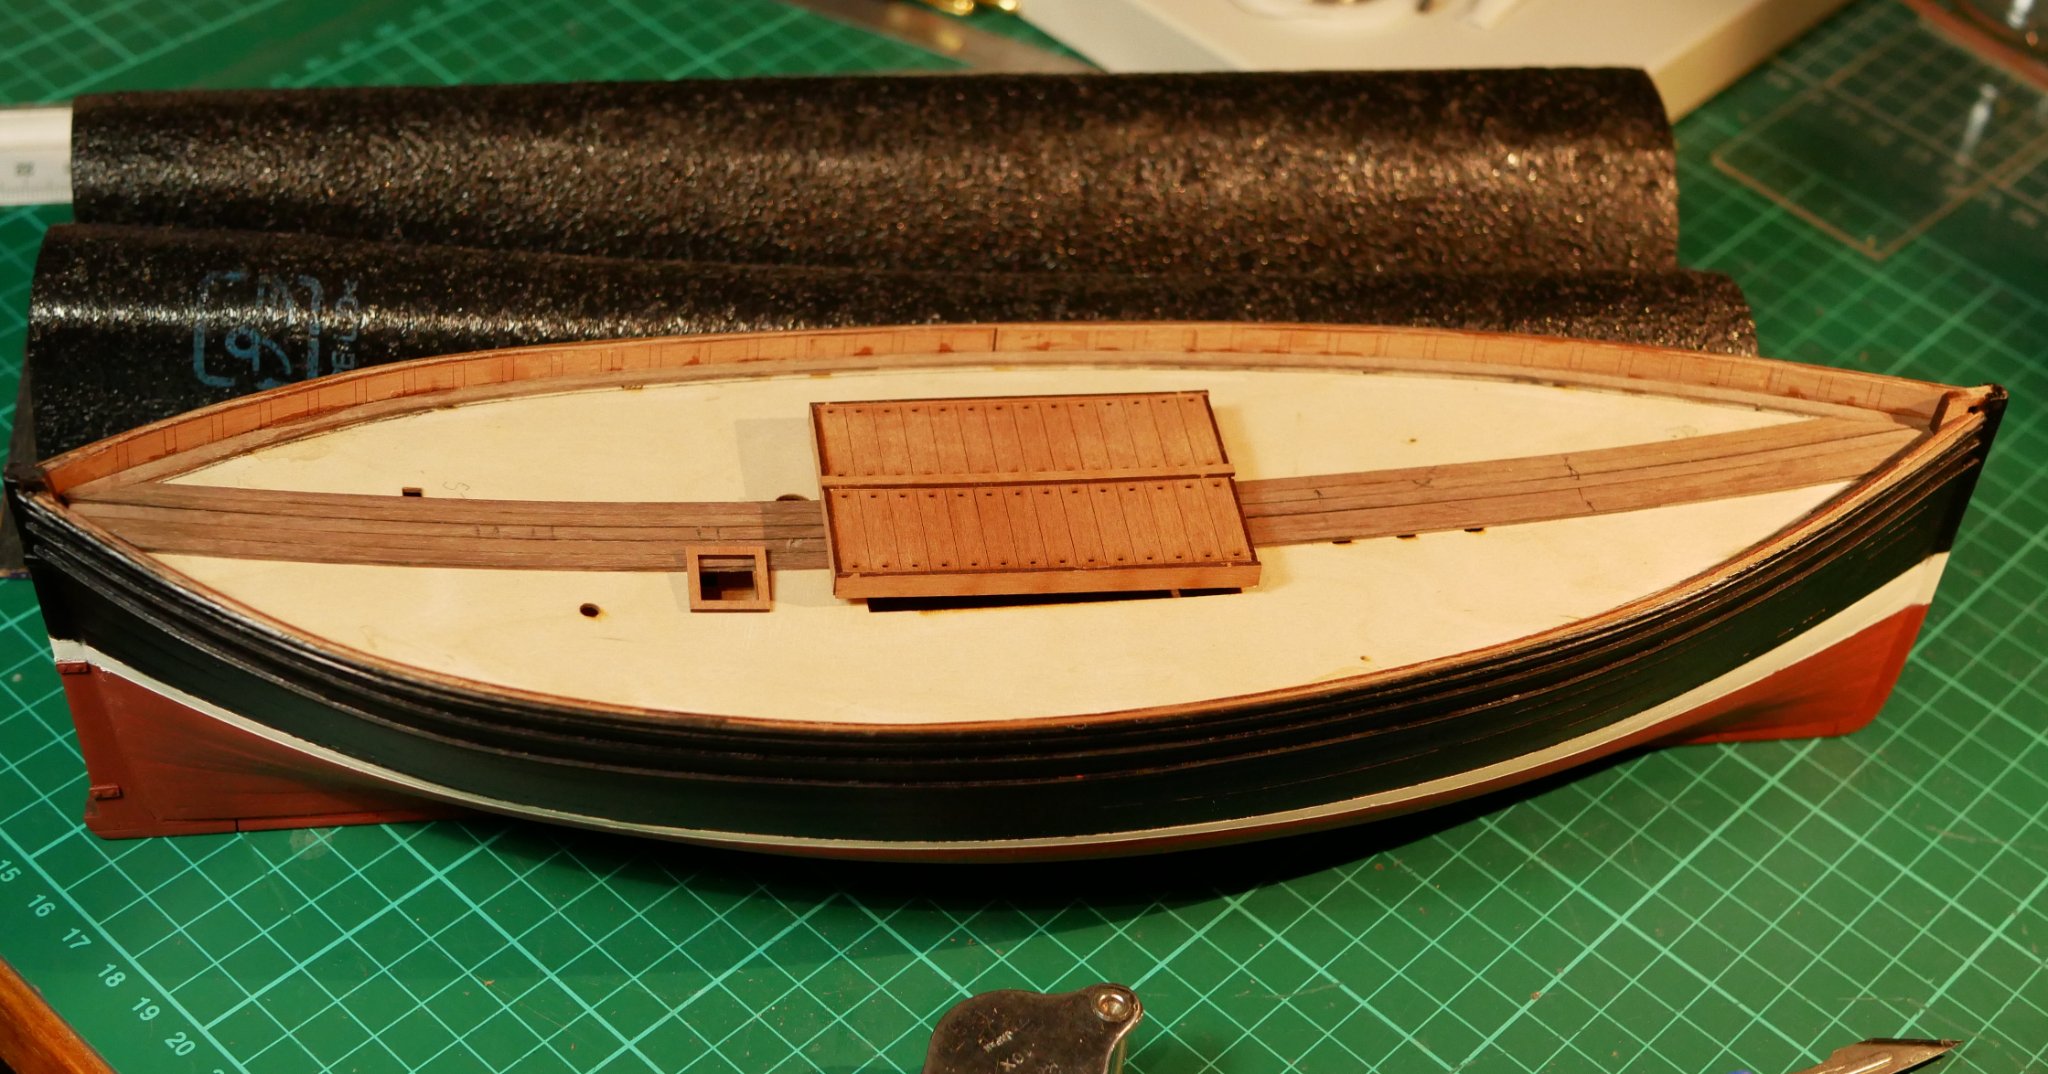
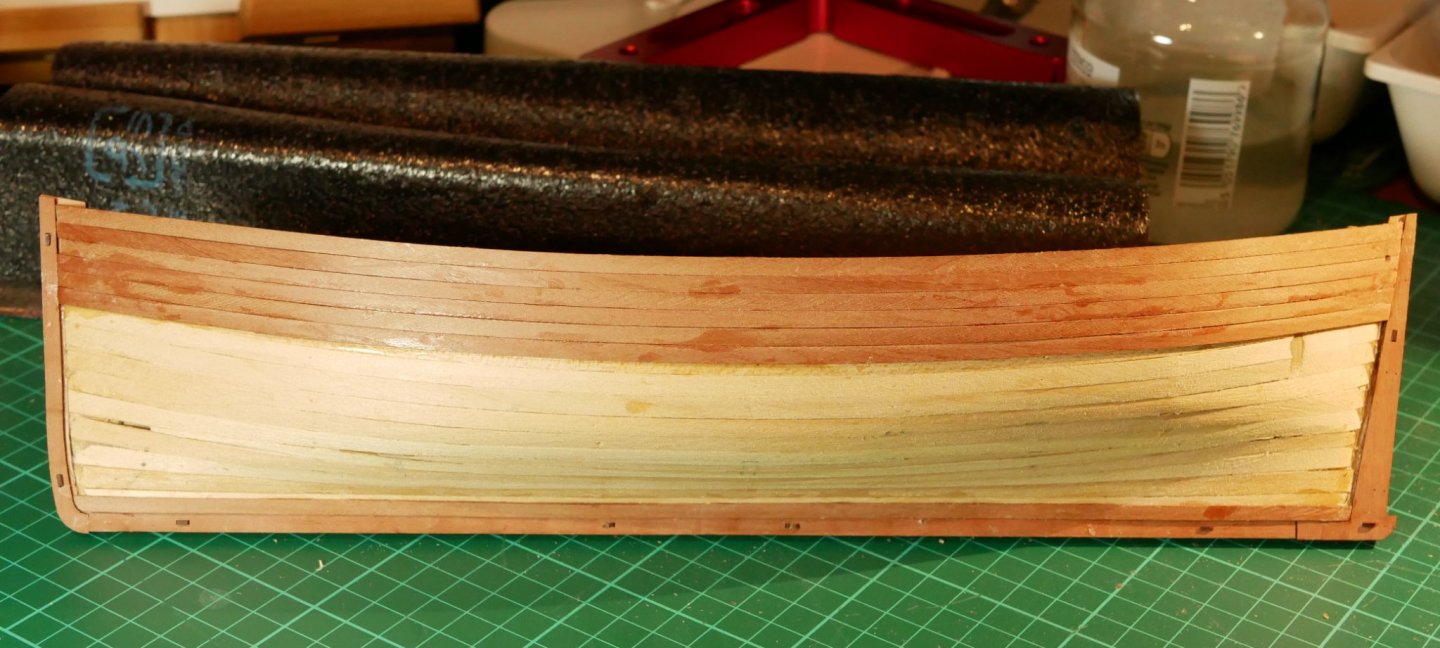
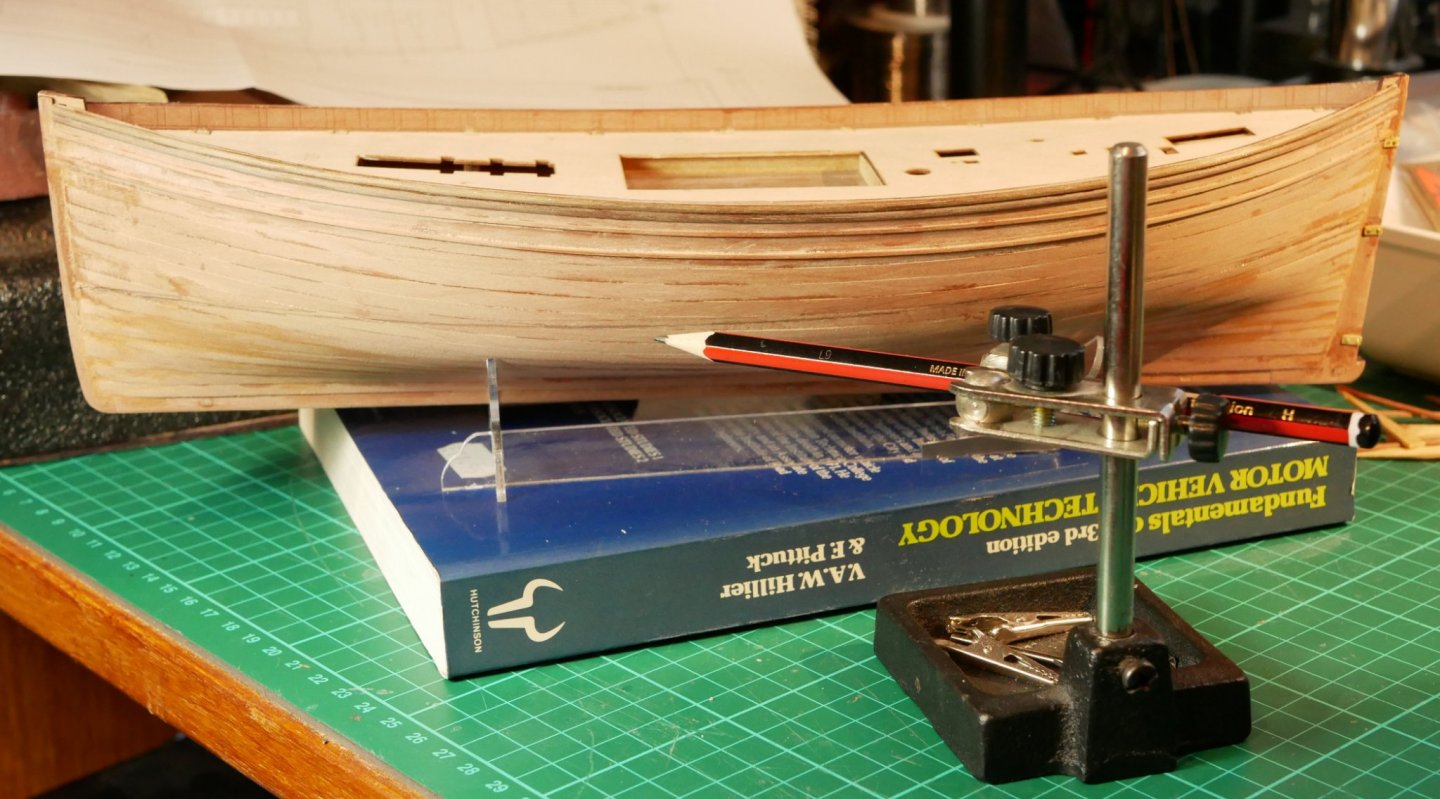
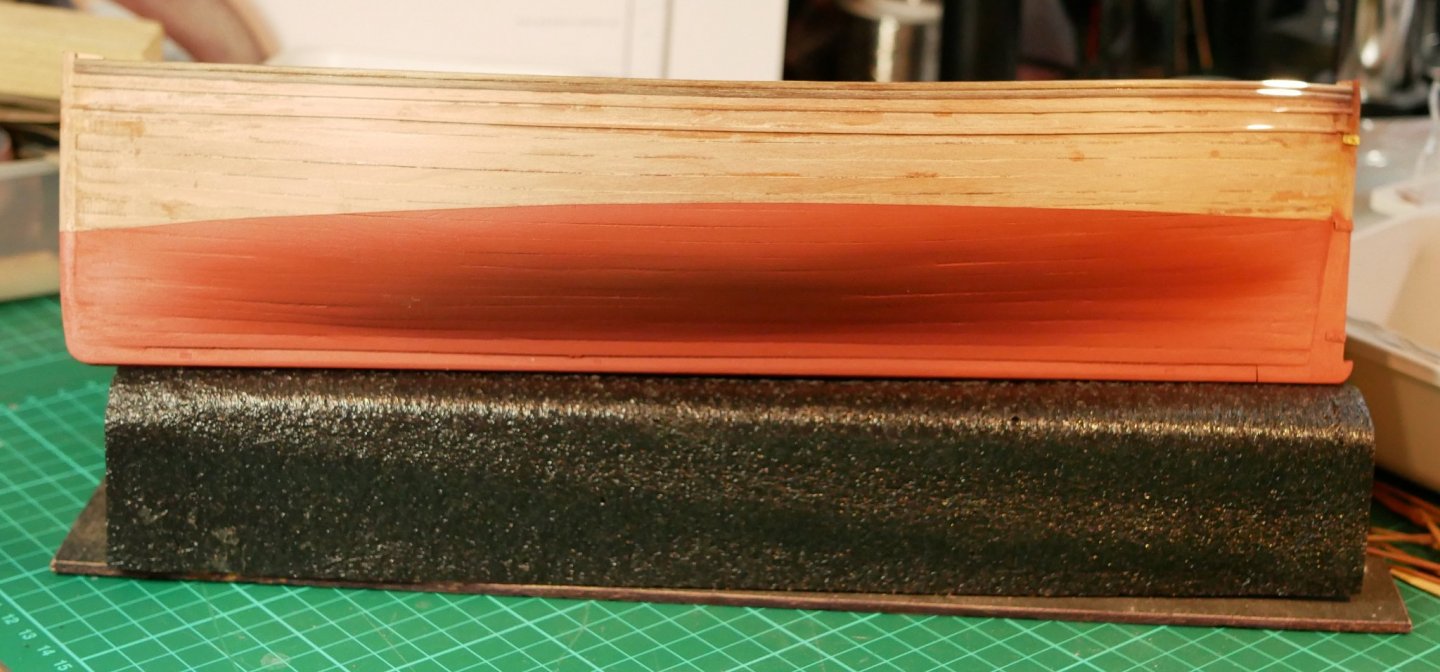
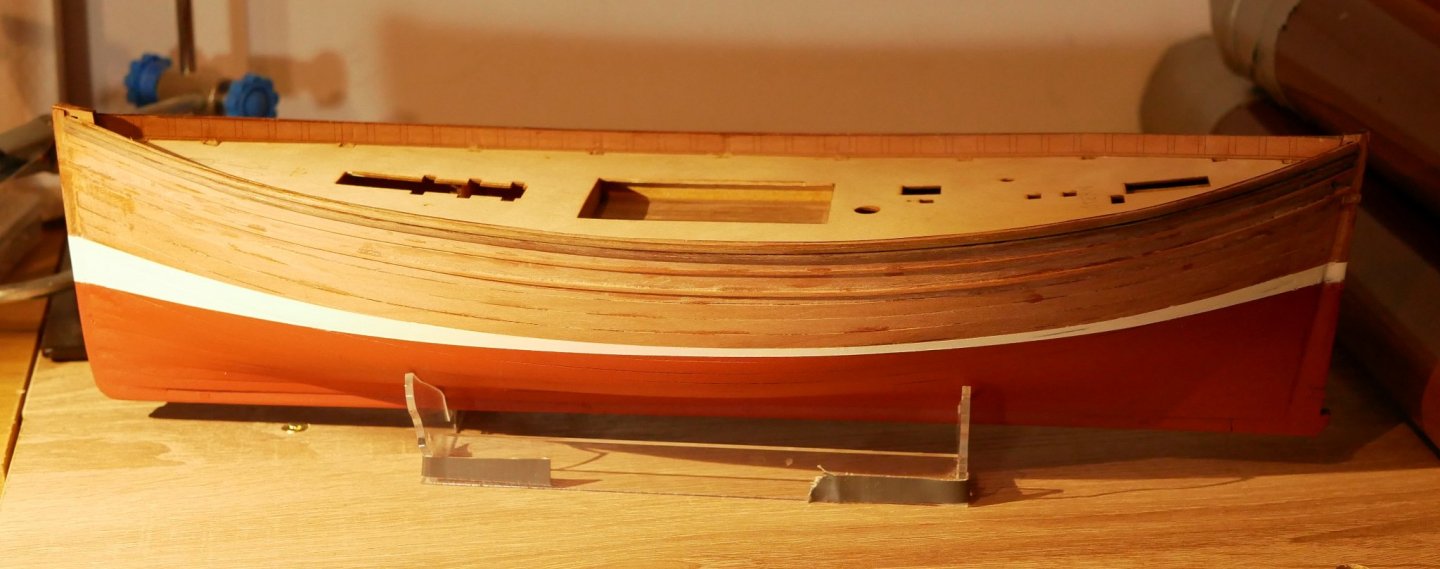
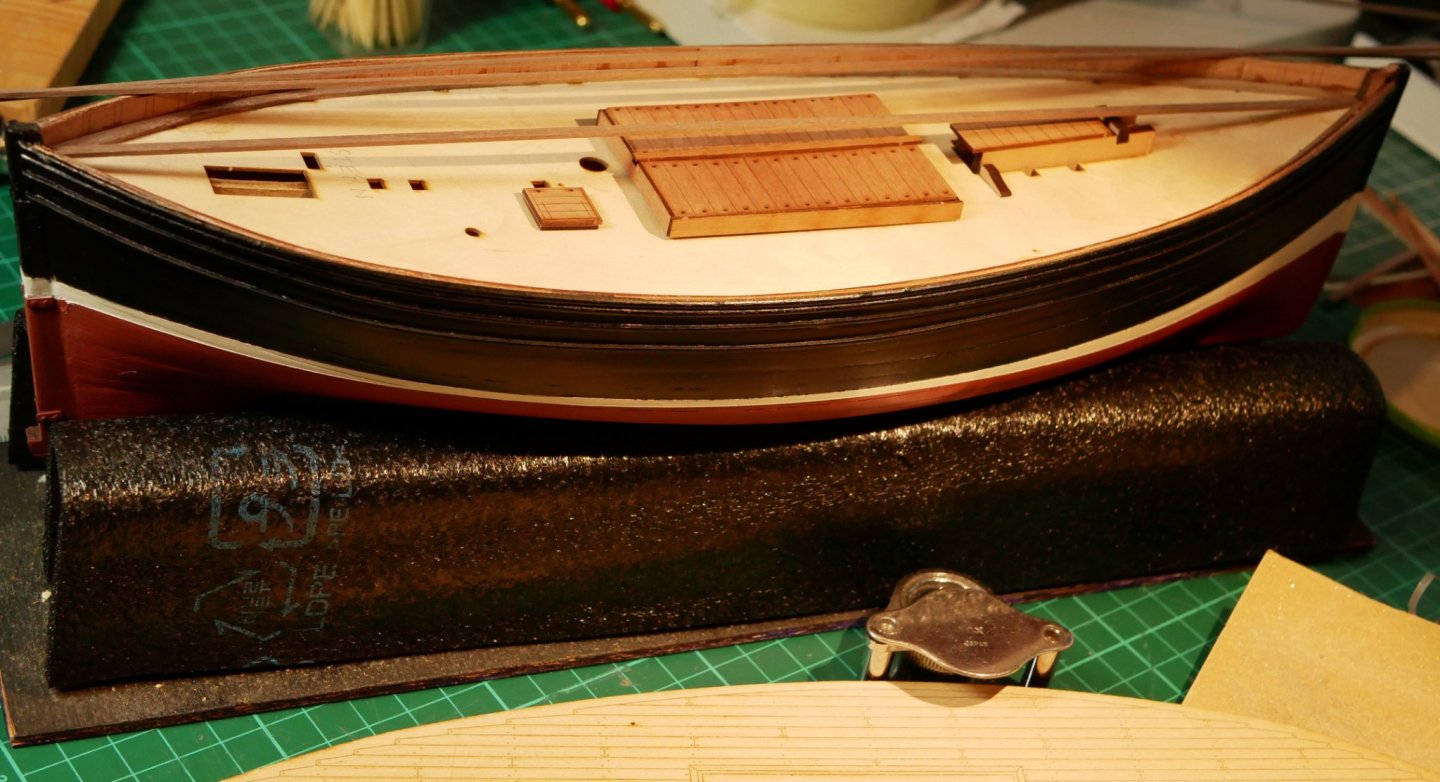
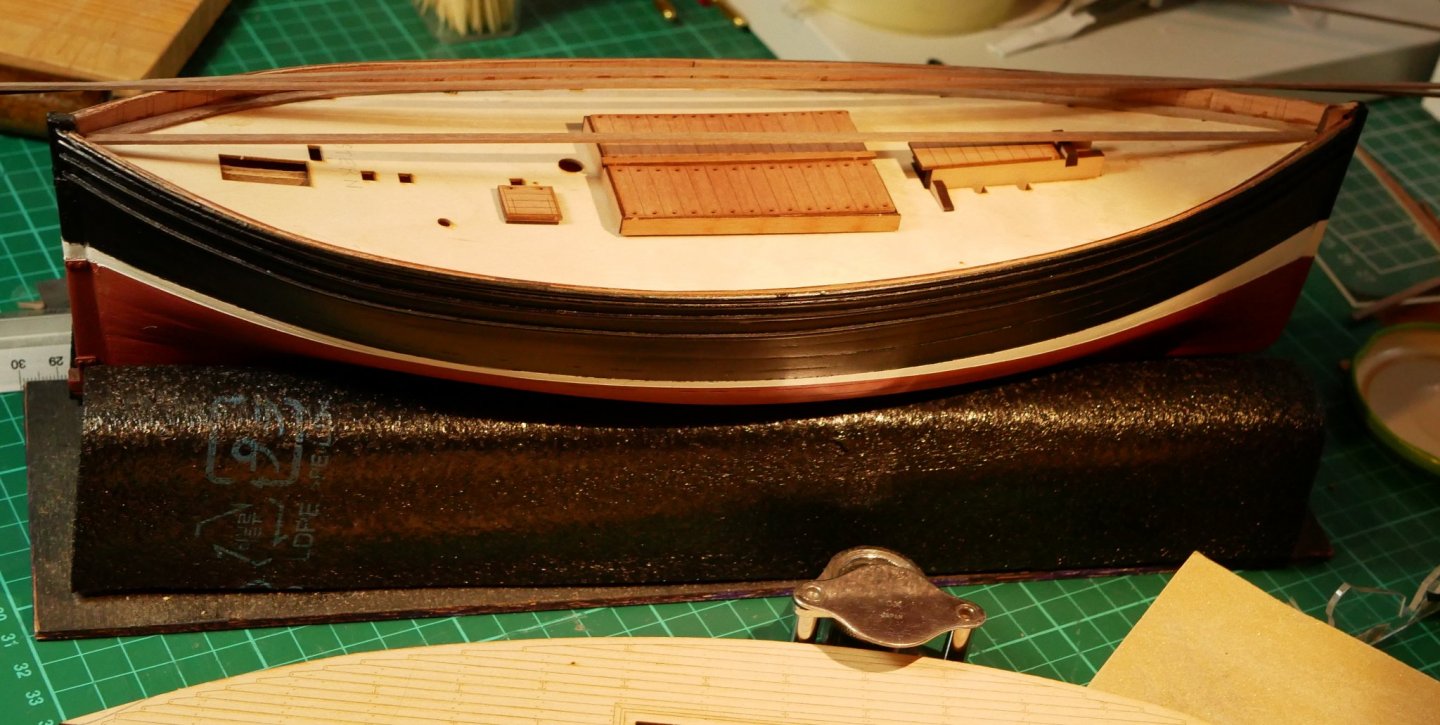
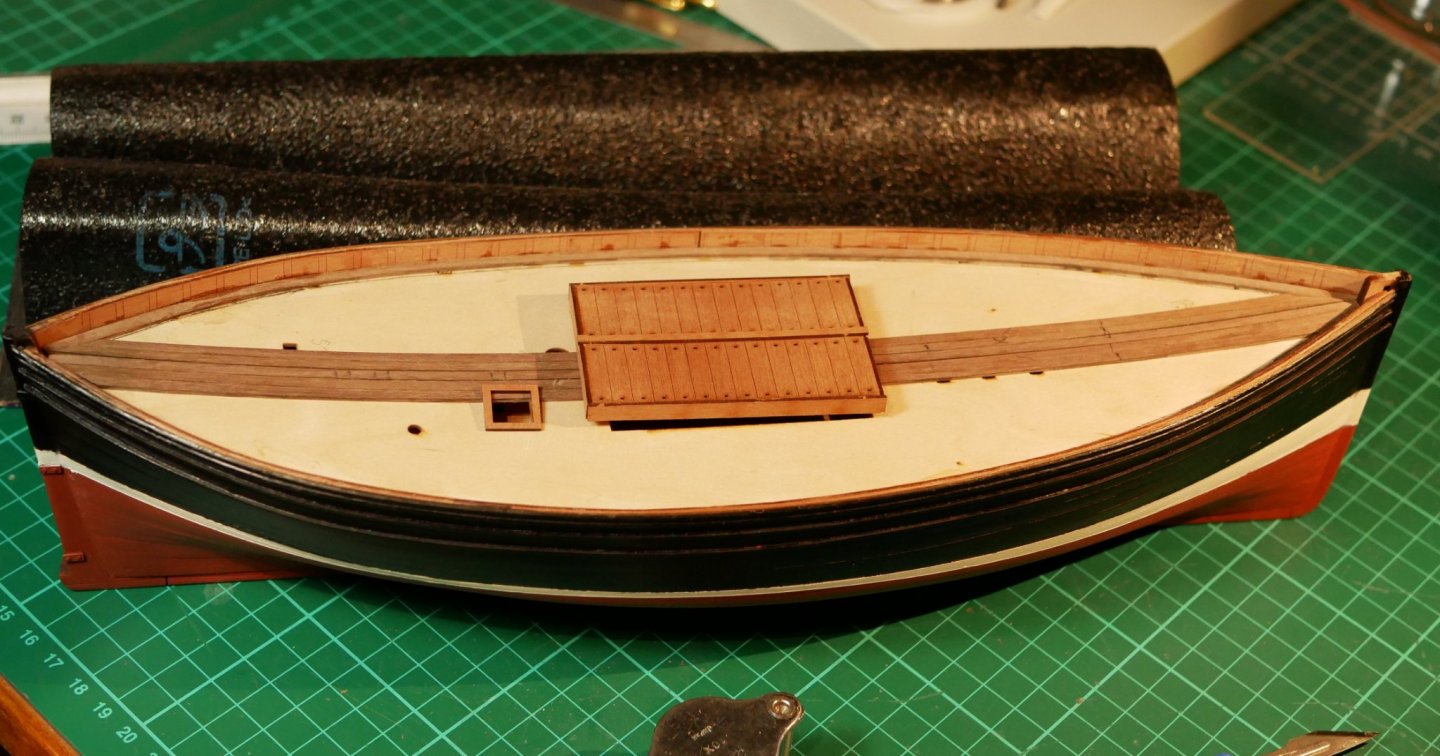
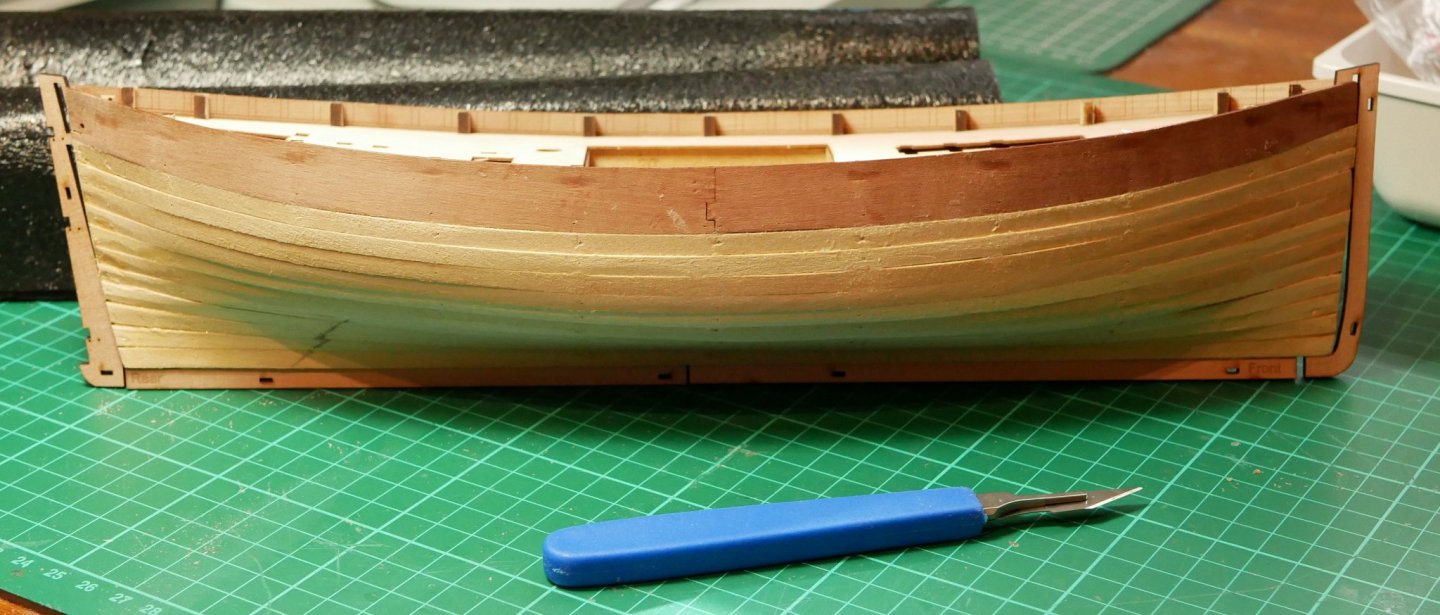
Hi all, I've been clearing books out of my study into a new set of bookshelves in the attic, so progress on the Fifie has been patchy. Anyway, 2nd layer of planking has been started and completed. The blotches below are after wiping the 2nd planking surface down with a damp rag after sanding. Now on to the painting and decking... Below, using a home made waterline marker... After masking with Tamiya tape and plastic sheet and ordinary masking tape, the PlastiKote Red Primer is on. I've also added the rudder fittings and assembled the rudder but will paint the rudder near completion of the boat when I am touching up hull paint imperfections. 24 hours later followed by Plastikote Matt White... And finally another 24 hours later Plastikote Satin Black.... I'm going for a hybrid Reaper look 😉 Checking the fit and positioning of some of the deck fittings...nothing glued on yet. And strips of grey wood (soon to be decking) being introduced to Fifie. First 4 planks of the grey wood are glued in place. I've marked in pencil where the hatches etc will be, and will also use Chris' deck as a template for cutting out planking that covers openings. I'm using continuous planks on the deck - I will later score them to simulate shorter lengths. Well, that's all for now, Cheers, Richard


- 49 replies
-
- 4
-
-
- Lady Eleanor
- Vanguard Models
- (and 1 more)
-
Yes, an interesting observation. The original paper has some images ... https://voxeu.org/article/speed-under-sail-during-early-industrial-revolution Not sure I see a difference between the two images in Figure 1? The observation ties in nicely with the post from Bruce D on Monday ... Captured Spanish Ships and Their Influence on the British Royal Navy in the 18th Century ...https://modelshipworld.com/topic/25968-captured-spanish-ships-and-their-influence-on-the-british-royal-navy-in-the-18th-century/?tab=comments#comment-756785 That post relates to a Thesis on how the British Navy eventually embodied superior French and Spanish design (from captured ships) in the 18th century. Although the British seamen were more experienced and better trained and could generally hold their own against somewhat better armed French and Spanish ships but with less experienced crew, the addition of better design elements into British ships tilted the balance very much in favour of the British. Combining better general design with faster sail power, then it's no wonder the British did rule the waves for a lengthy period. Richard
-
Mini Lathe recommendations?
Rik Thistle replied to jfinan's topic in Modeling tools and Workshop Equipment
Just for info, I found this interesting video of a clockmaker/joiner's workshop. He has Sherline and German lathes and a Sherline milling machine ..... I may have found this link after wandering through MSW and then YouTube, so apologies if it has been linked to before. Richard Edit: Now that I've watched the full video and I realise I have already watched it in the past, most likely through a link on here 🙂 -
Thanks Louie, turangi and Bob for the kind words. I do like the overall look of the Dallas, and it's now sitting calmly on a shelf in my study. Having completed the hull about 25yrs ago it wasn't a smooth re-start in mid-2020 since I had to relearn the manual and drawings. But after a couple of weeks 'most' of it came back to me. I've now moved on to Vanguard Models' Lady Eleanor Fifie....and after that another, more challenging VM ship is awaiting downstairs 😉 All the best, Richard
-
Hi all, A question on 'super glue'. I'm currently glueing the pear planking on to the hull (using Loctite Precision Max CA). The Fifie manual advises using "small spots of CA*" ...so the question is - how long can CA be exposed to air (once it leaves the bottle) sitting on the pear plank before I introduce that plank to the hull to make the bond? My current method is to CA about 1/2" (12.5mm) of one end first, and that is a quick and easy process. Once that end has set, I then dab CA along the length of the plank, which can take a few seconds, then start to push in (and clamp) the plank, from the already glued end .... and that can take another few seconds...and by the time I get to the far end the CA doesn't seem quite as 'sticky'. Maybe it is getting absorbed in to the plank? Or maybe I need a slightly slower setting CA? Bonus question - It's easy enough to clamp the top two pear planks and the 'garboard' plank at the keel since they are on flat surfaces, But the middle planks, sitting on the curves of the hull will be impossible to use a clamp on...should the clamp be my fingers (if I'm using CA)? Would I also use my fingers (for a longer time) if I was using PVA? Edit: Are Push Pins used to clamp mid-hull planks? 2nd Edit: Does 'CA' stand for Contact Adhesive rather than Cyanoacrylate Adhesive? Any advice greatly appreciated, Richard
-
New member from Johnstone, Nr Paisley, Scotland
Rik Thistle replied to Marshall54's topic in New member Introductions
Welcome to the Forum. I discovered this useful link the other day ... New to ship modelling? But what do you build first? . ... I'm currently building Vanguard Models Lady Eleanor Fifie, which is a Scottish fishing vessel. It's not too large and can be bought with/without sails. As others have said, this is a great website with lots of friendly advice. All the best, Richard -
Great James. Thanks for a quick response. Richard
-
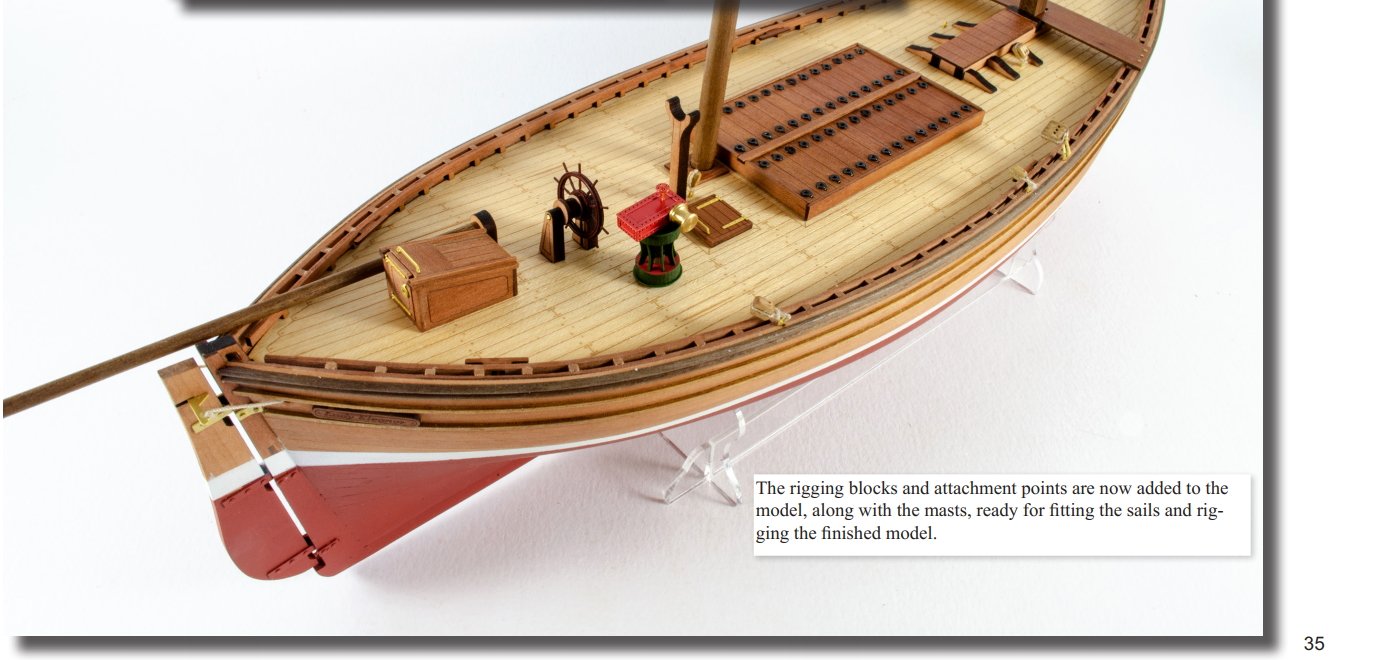
Hi all, I was reading through the manual and have a question. I wonder if anyone can advise? The manual, page 35, show the rudder with ropes now attached to it's steering bar. Are these ropes just tucked into the two 'bulwark holes', and with a dab of glue to hold them in place? Thanks, Richard

- 49 replies
-
- 1
-
-
- Lady Eleanor
- Vanguard Models
- (and 1 more)
-
B.E. thanks again for the advice and kind words and keeping an eye on me over your shoulder. It is very much appreciated. The quote above is very good info. I actually was wondering what width the planks should end up at the stem and stern. I had been staring at Pg 17 Pic 48 for ages trying to figure out how far I need to take the feathering of the planks. So you are reading my mind. And thanks for the Likes everyone. All the best, Richard
- 49 replies
-
- 2
-
-
- Lady Eleanor
- Vanguard Models
- (and 1 more)
-
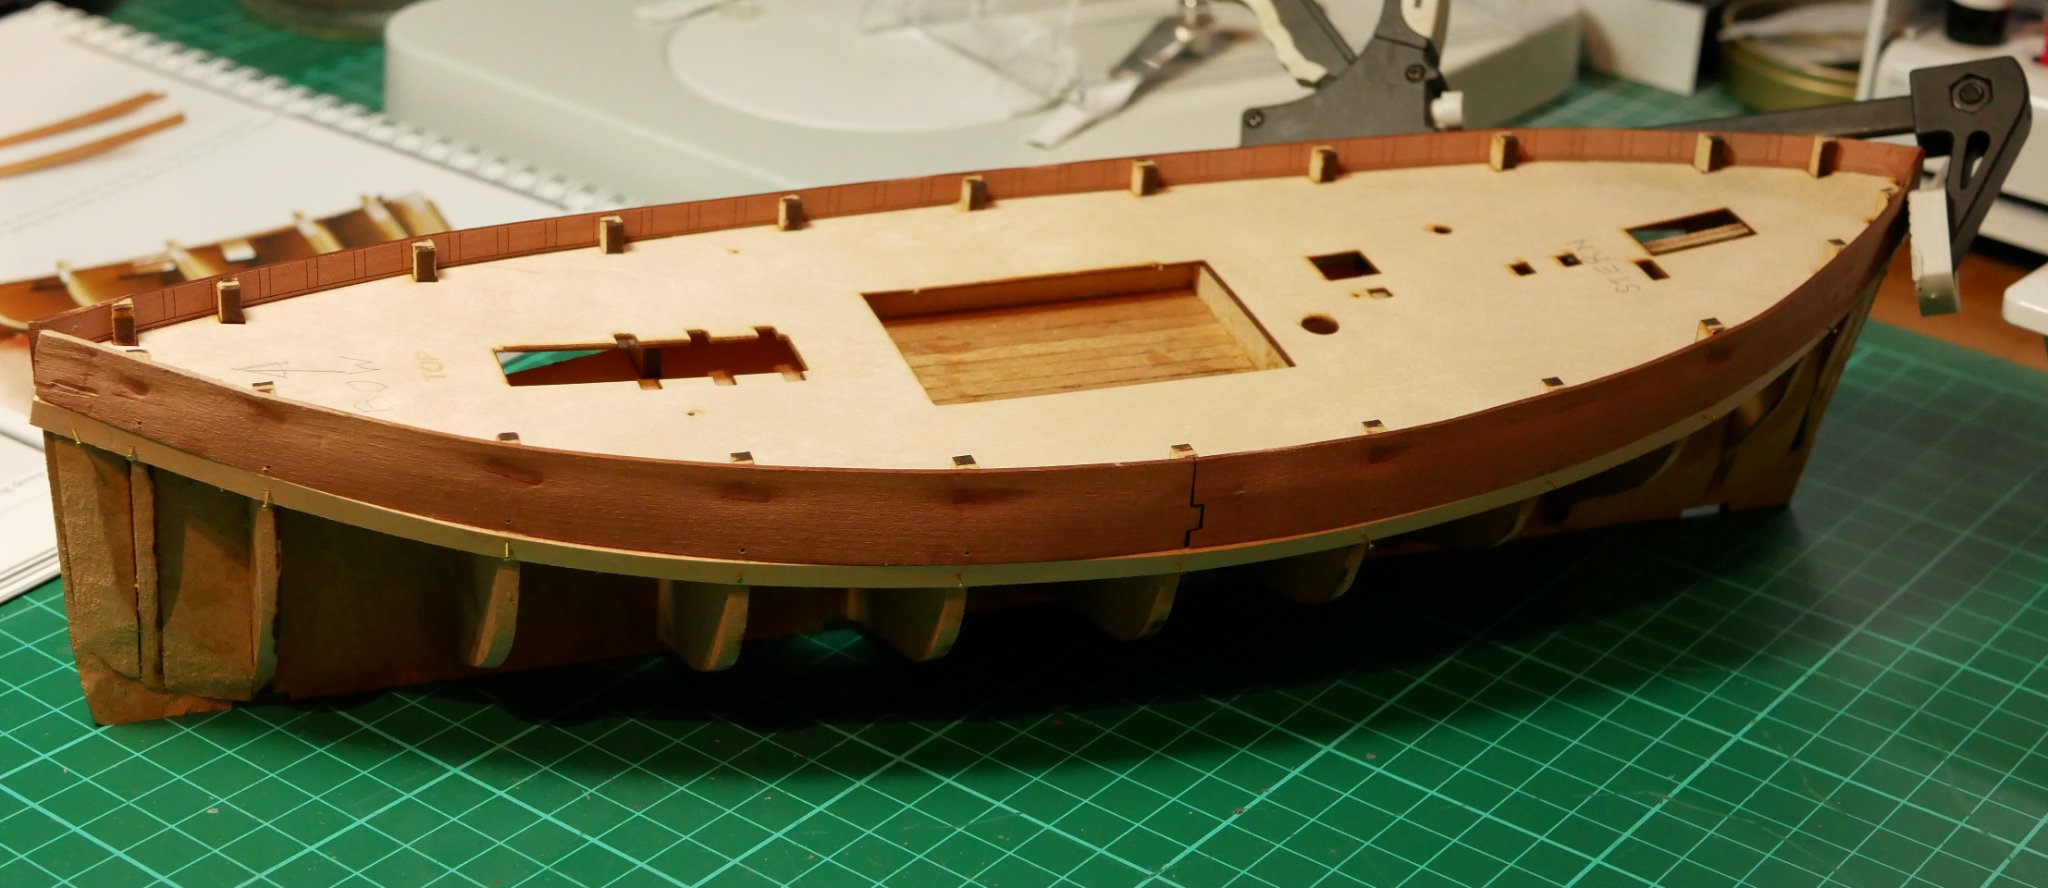
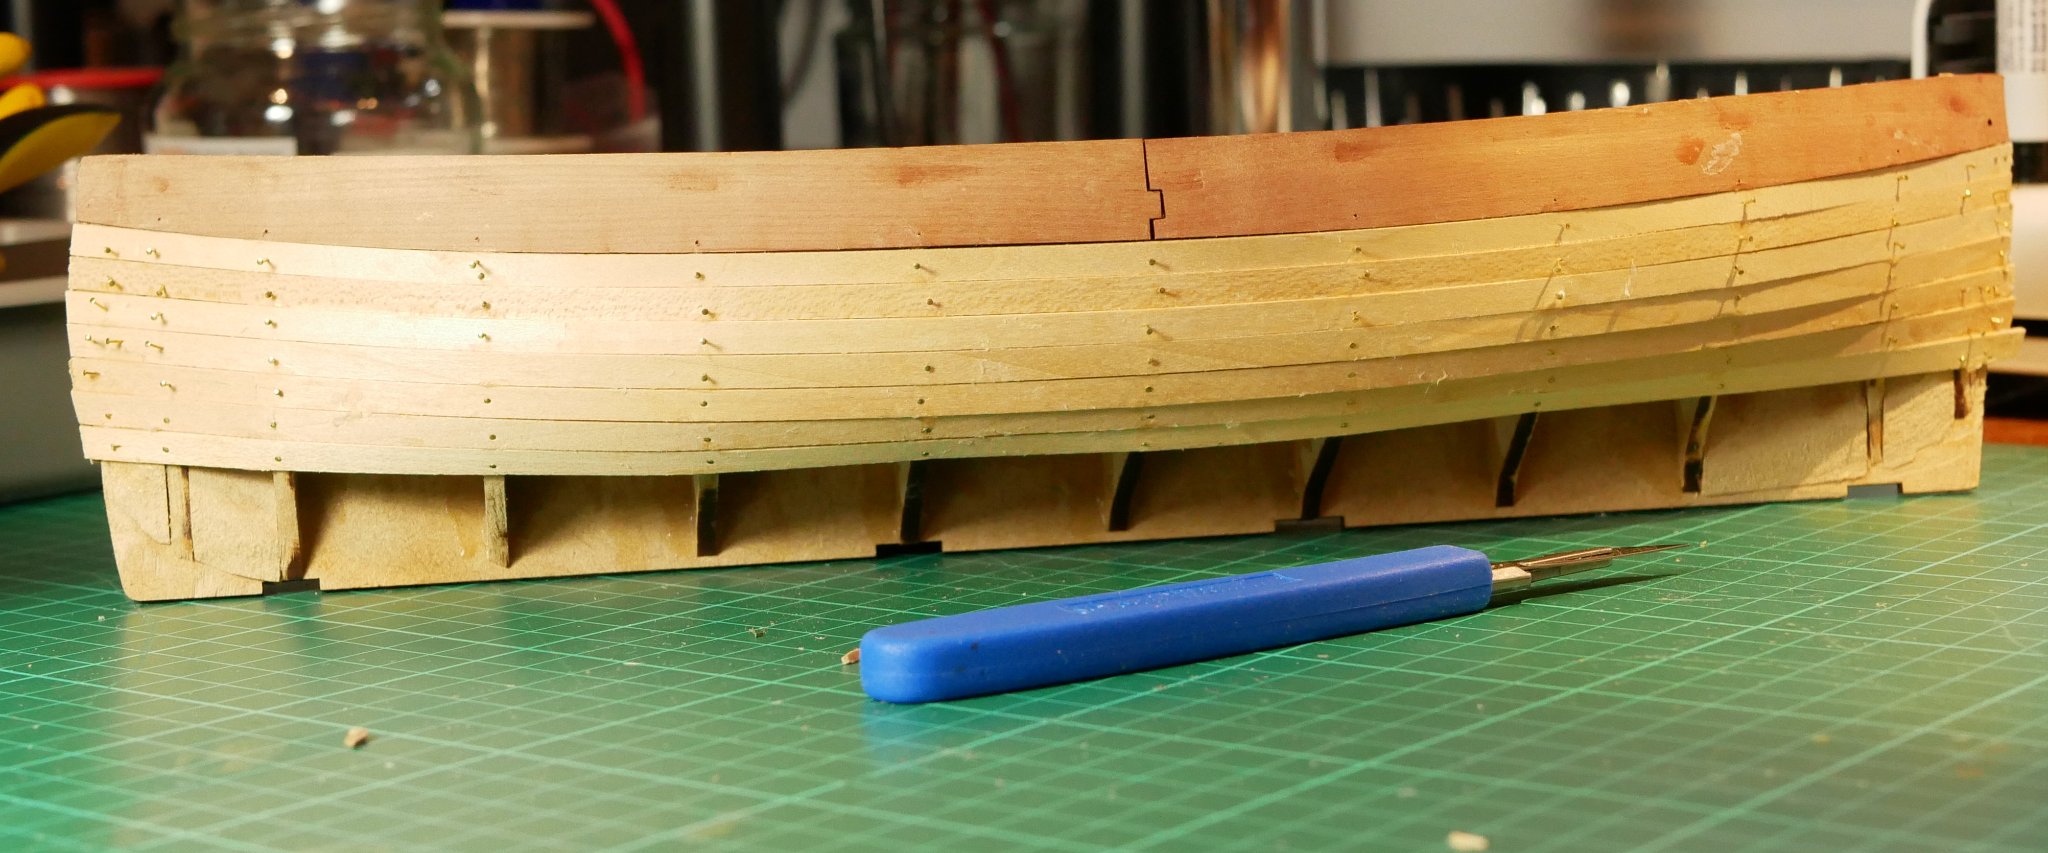
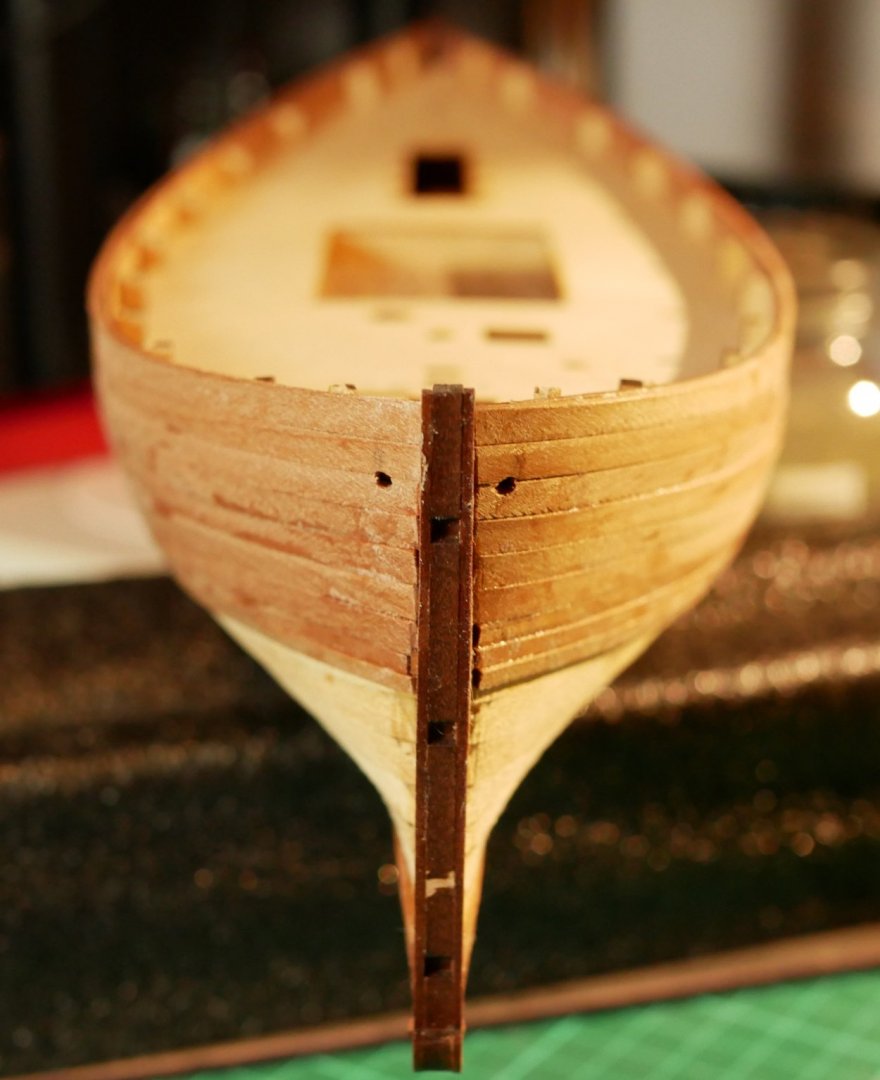
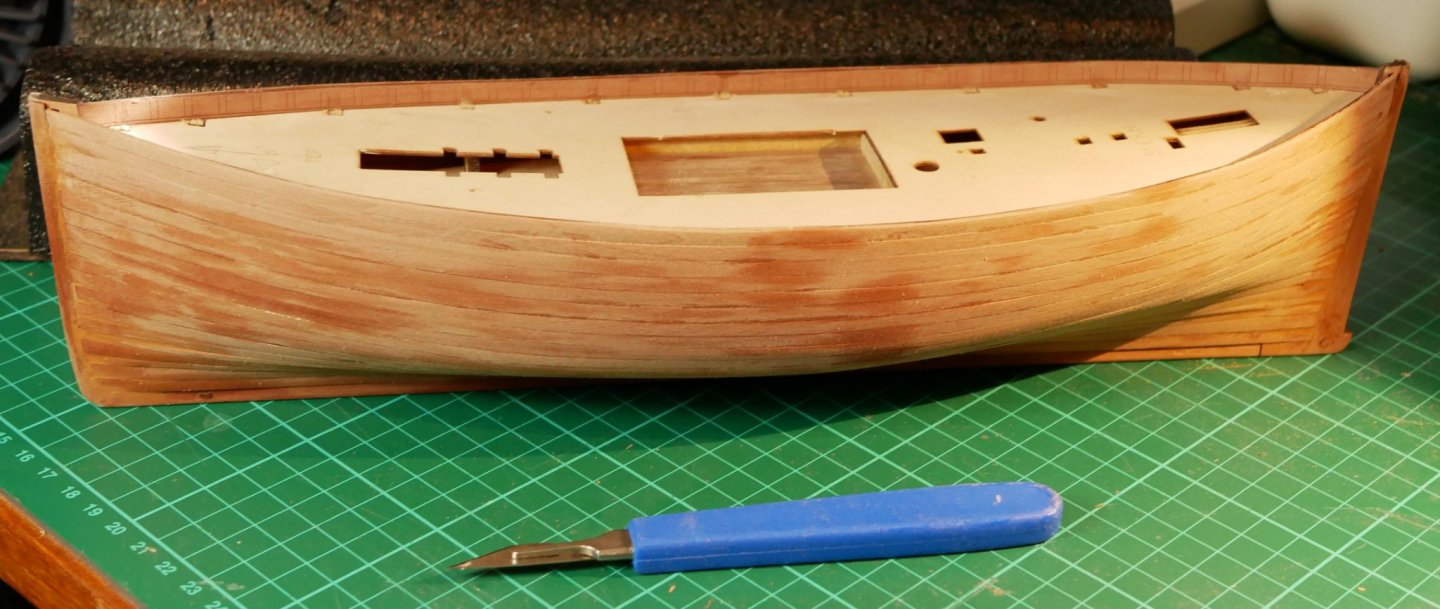
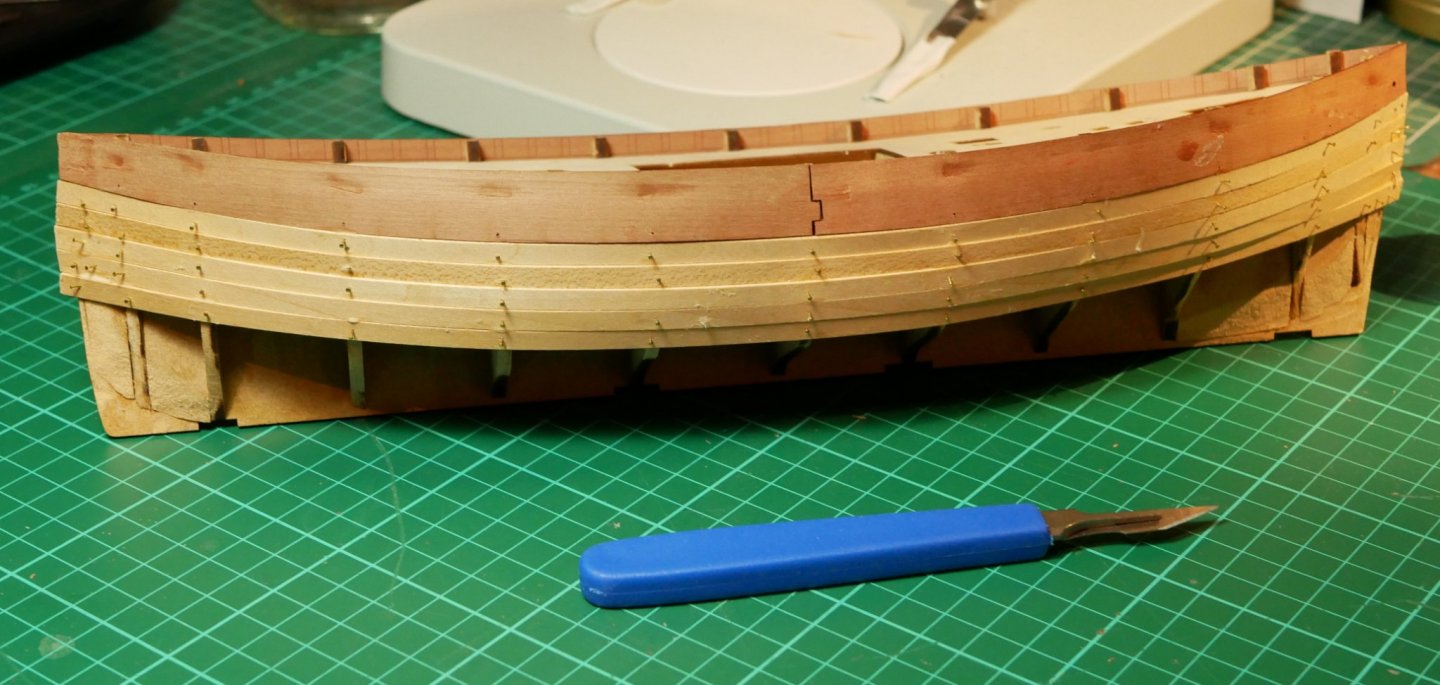
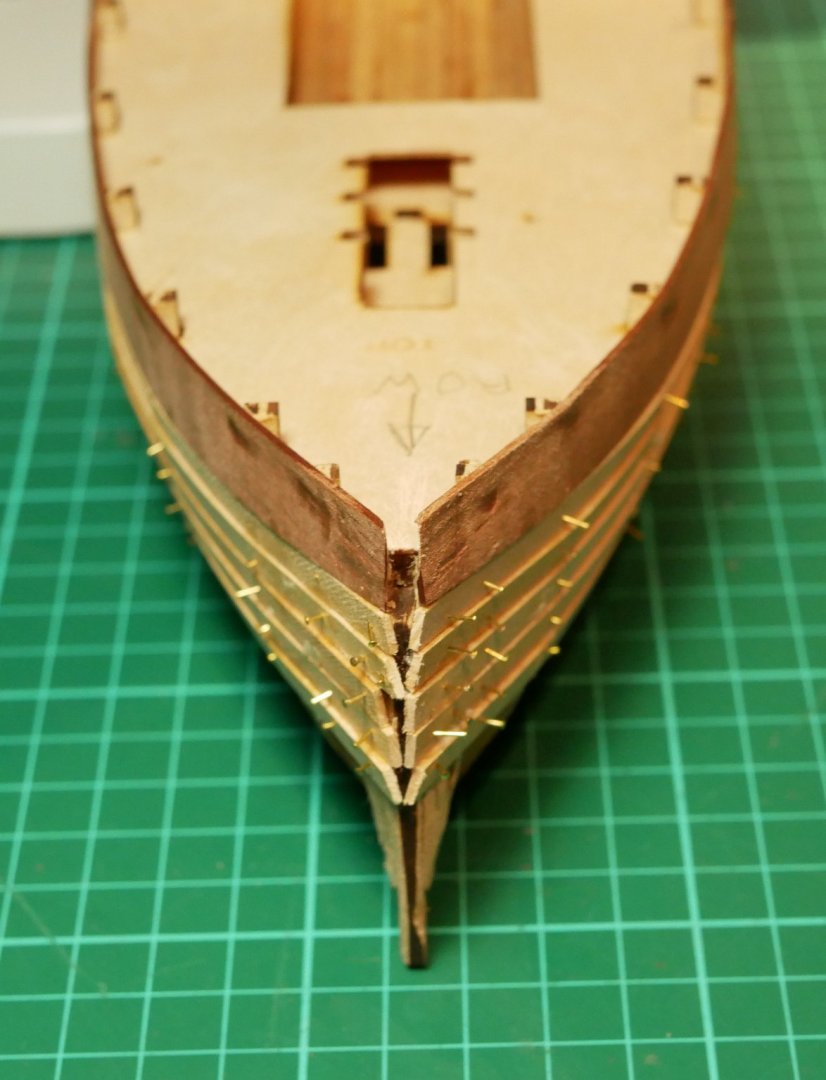
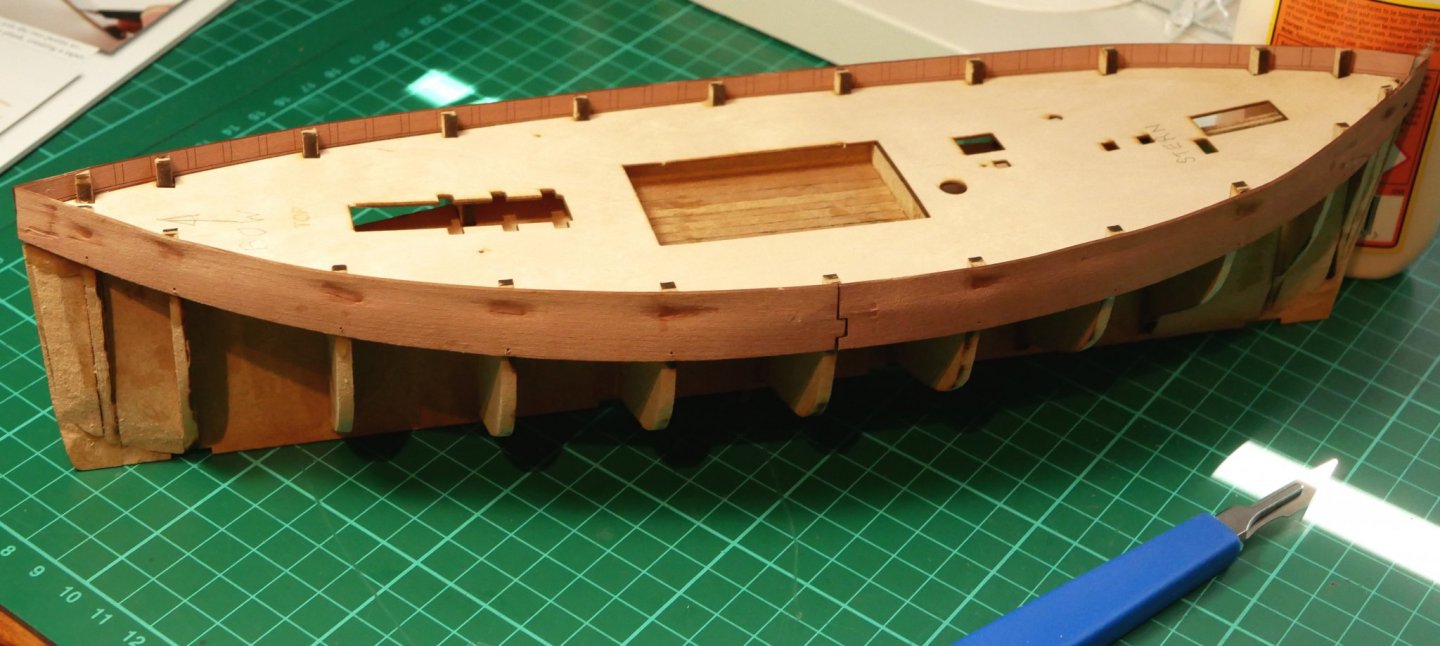
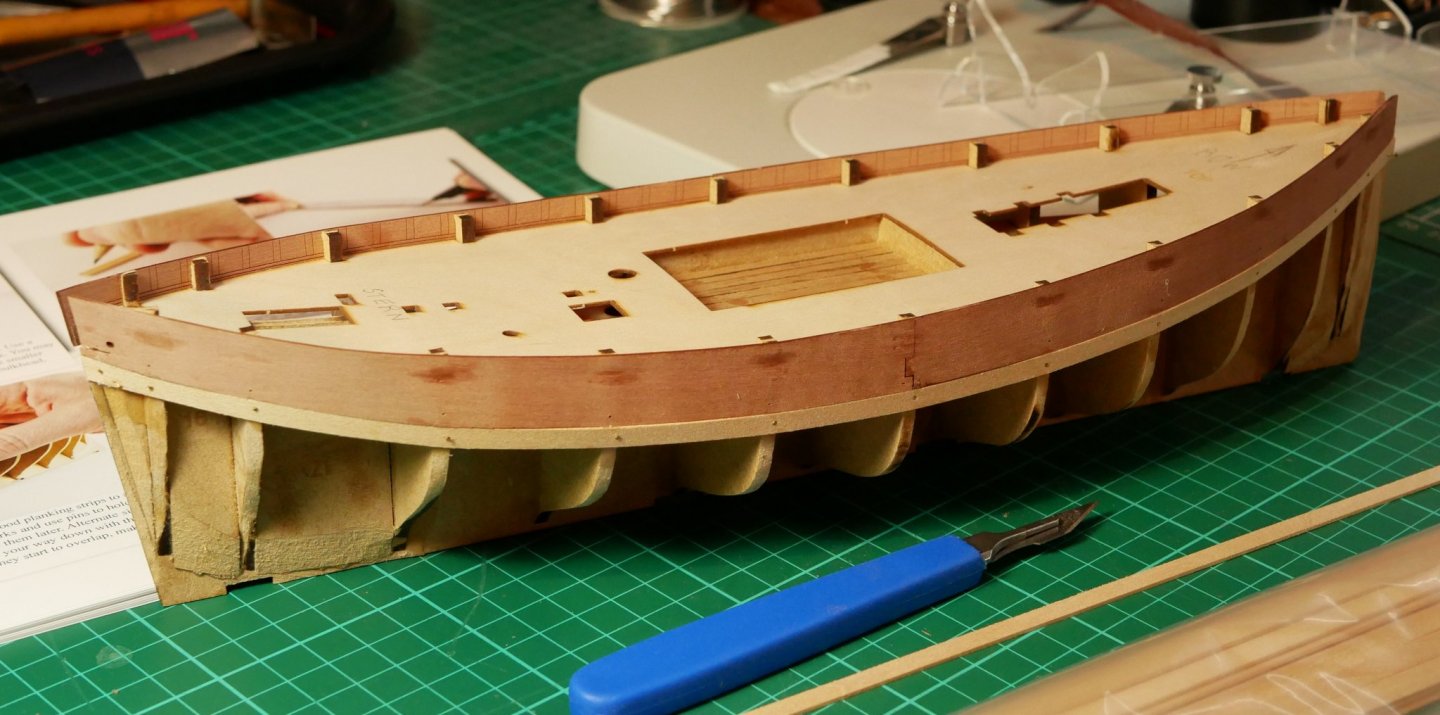
Hi all, Planking commences. First plank glued and nailed on. Five planks now in position. Some of the bulkheads did require a bit of extra sanding before the planks touched all the bulkheads An angry looking porcupine bow. I put on seven planks without any tapering. With 20:20 hindsight I should have tapered plank 7 a little, and maybe even plank 6. Garboard planks glued, nailed and clamped in position. Planking installed, followed by a quick scrape with a Stanley blade and then some sandpapering. More sanding is required but it's beginning to take shape. The keel sections were also dry fitted to see where the planking needs adjustment. I'll possibly add some filler before final sanding. That's all for now. See you soon, Richard


- 49 replies
-
- 6
-
-
- Lady Eleanor
- Vanguard Models
- (and 1 more)
-
Ah, OK...thanks B.E. I see the timberheads on page 28, Pics 96, 97 & 98. And the timberhead parts are narrower than my 3mm curved planks so I should be OK. I think I'll re-read the manual. I need to absorb it a bit better. Thanks again, Richard
- 195 replies
-
- 2
-
-
- lady eleanor
- vanguard models
- (and 1 more)
-
Hi BE, That's great info...no real confusion and thanks for the input. I did have to Google 'timberheads though...all part of the learning curve....they are the same as 'bulkhead ears'? So it kinda looks like I can 'legitimately' get away with just cutting the deck planks at an angle to suit where they meet the inserts between the timberheads. That is a lot simpler for me for me to do. And I don't need to order wider planks for the margins. Thought - the bulkhead ears are removed (Pg 22, Pics 73 & 74)...so I don't need inserts netween them...jut a long length of curved plank either side of the deck at the base of the bulwarks? I've just about fitted the last of the first planking on the Lady Eleanor (Pg 16, pic 45 in the Manual) . Next, filling in the gaps and sanding smooth. Quite enjoying it 😉 Richard
- 195 replies
-
- 1
-
-
- lady eleanor
- vanguard models
- (and 1 more)
-
Hi BE, On the 14th June you posted pics of your decking... I've ordered in planks to make my own decking on the Lady Eleanor. But now realise I should have also ordered margins planks which, as you noted, are a bit wider than the deck planks to allow the 'cut-outs'. I'll order them in the next few days. Anyway, Question - Can I ask how you made the cut-outs in the margin planks....I see you mention a chisel and a scalpel (IIRC). Would a No10A scalpel be sufficient or do I also need a good quality micro chisel? Thanks, Richard
- 195 replies
-
- 1
-
-
- lady eleanor
- vanguard models
- (and 1 more)
-
Suggested pinned items for New Member Introductions
Rik Thistle replied to Louie da fly's topic in New member Introductions
For some reason I had missed the above post...it's very useful. Thanks for the link. Richard -
“Haven't seen a U Boat around here, have you”? ML and schooner off the east coast of Canada. One of my favourites .... so far. Quite serene, and 'modern -v- older' ish. Regards, Richard
-
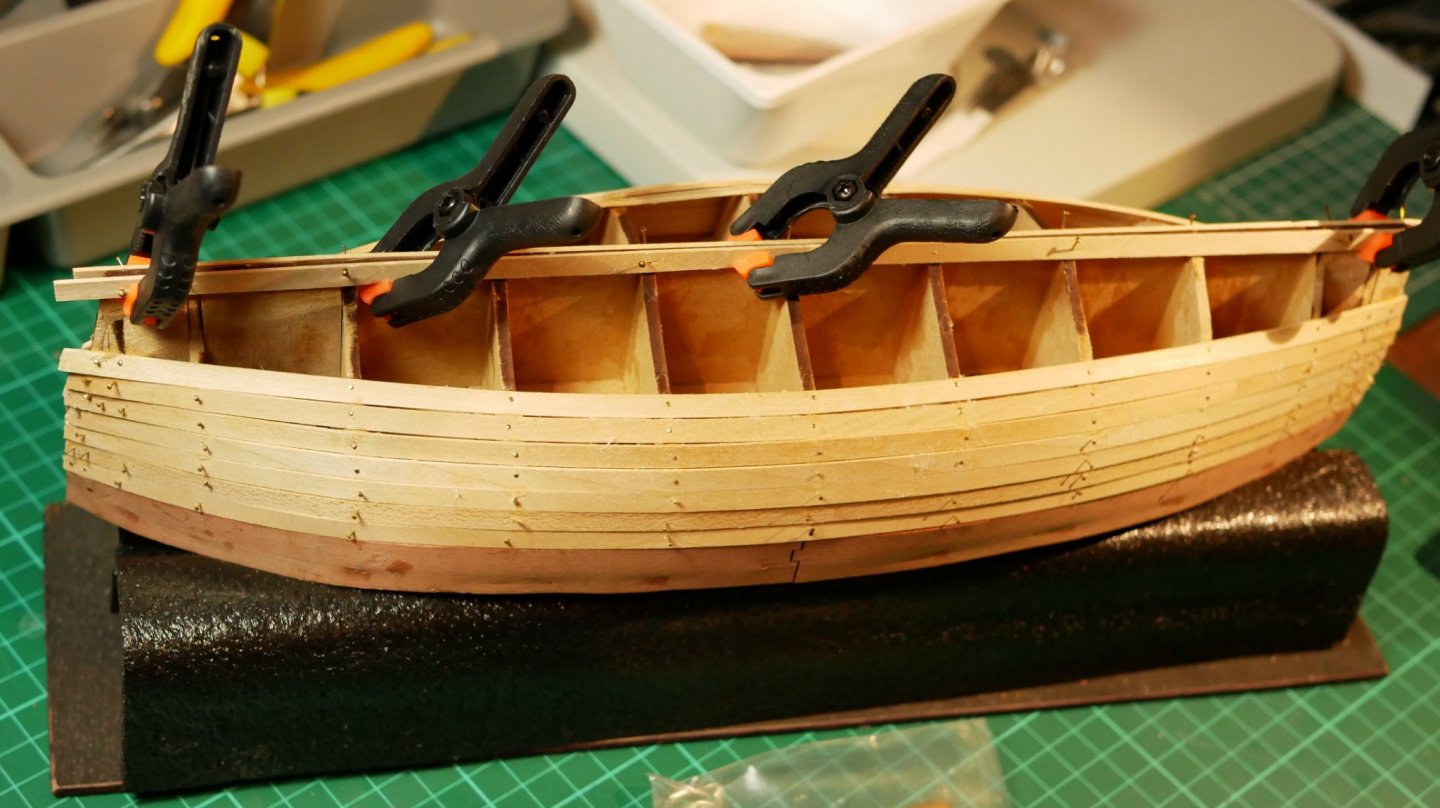
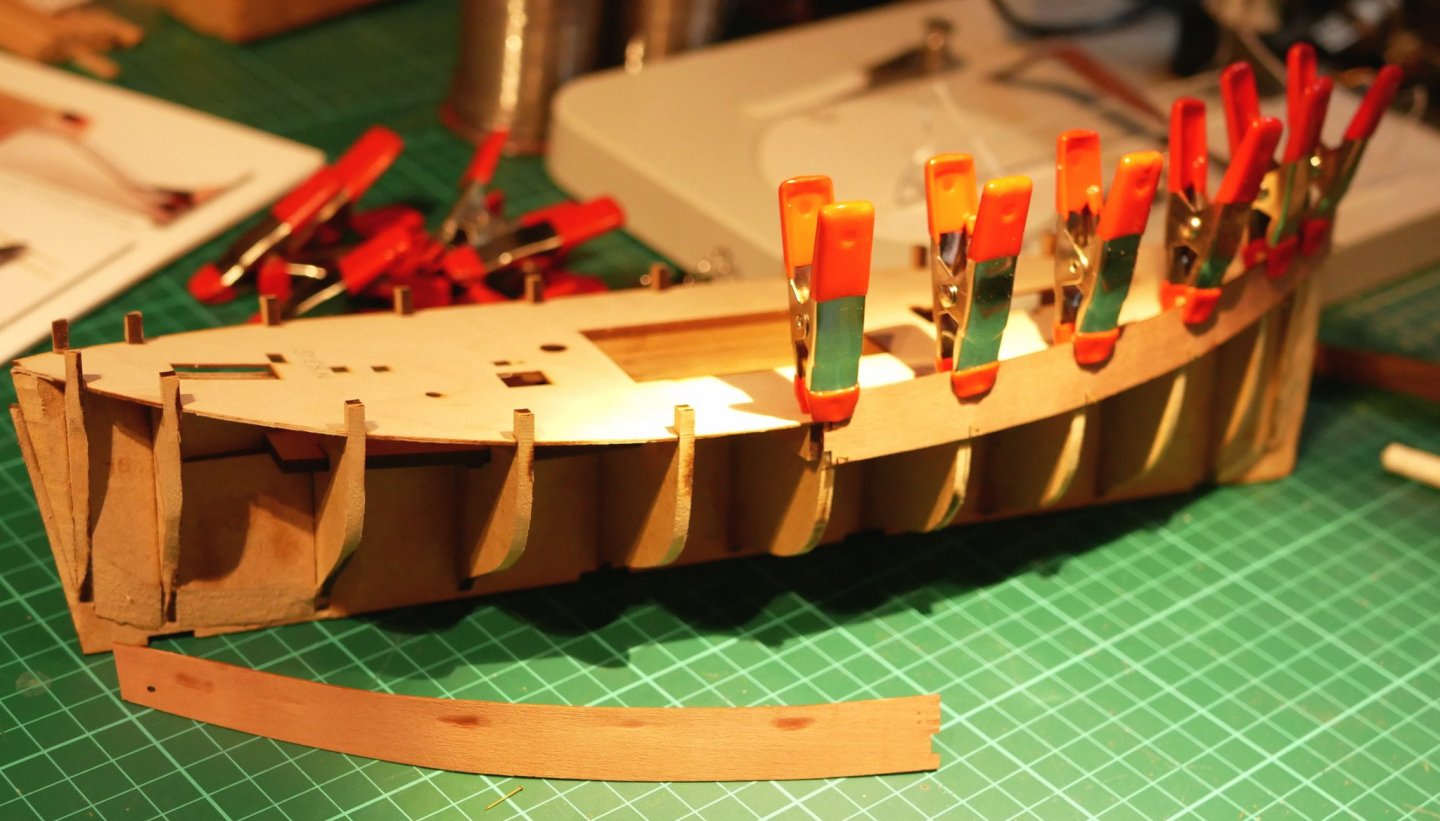
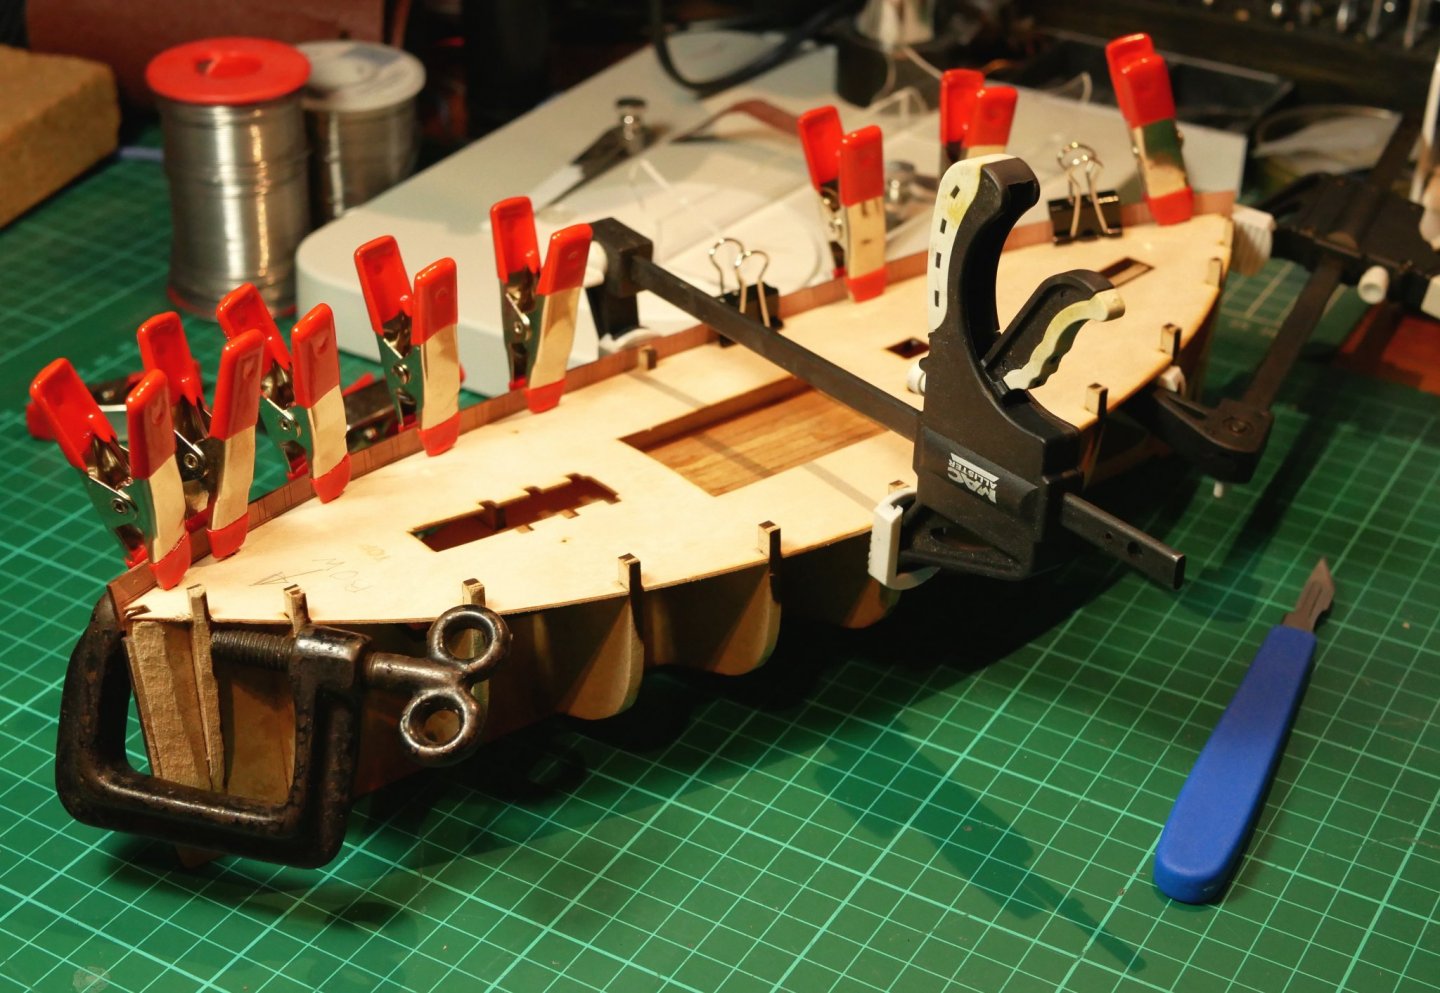
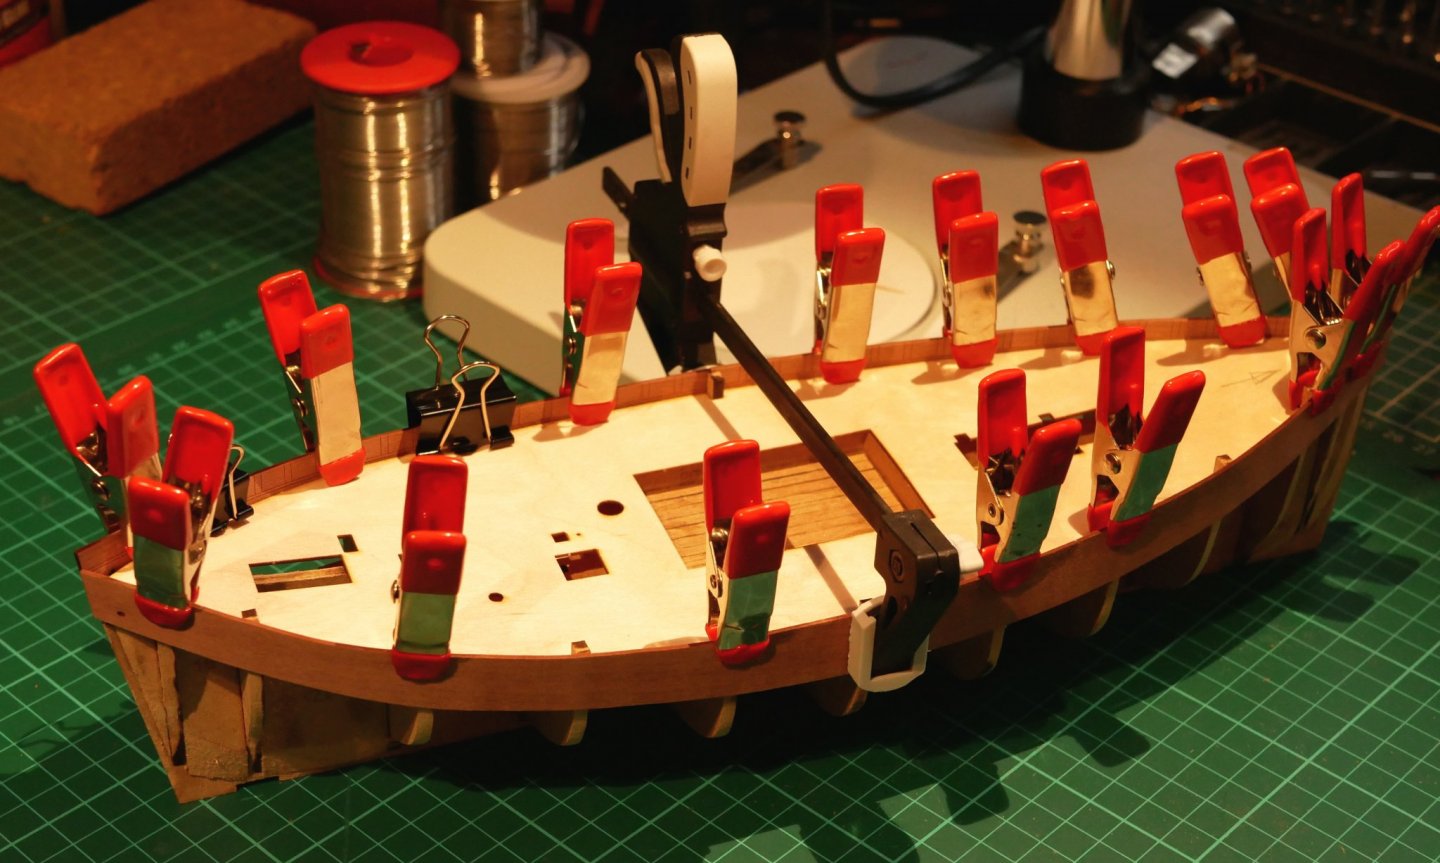
Hi all, Bulwarks on, and planking started. Below - After soaking the bulwarks in hot water for 15mins and clamping overnight, the bulwarks retained their curve. Unfortunately they also retain the clamping dents of the clamp jaws. I think these clamps are too strong or I should have used scrap bits of wood as load spreaders. Still, the final planking will cover up those marks. These are the new types of clamps I have ordered... Bulwarks now being glued in position... Both sides glued (PVA only) and partly clamped. Will be left overnight for the glue to set... Bulwarks glued in position.... First plank glued and nailed. I've driven the nail heads all the way in on the first plank ... I'll need to extract them for sanding though. 'Angling' partly driven in nails was not enough to force the plank hard against the glue covered bulkheads. I'll may try to angle the nails in a different direction on the following planks to generate sufficient driving force. That's all for now, Regards, Richard
- 49 replies
-
- 10
-
-
- Lady Eleanor
- Vanguard Models
- (and 1 more)